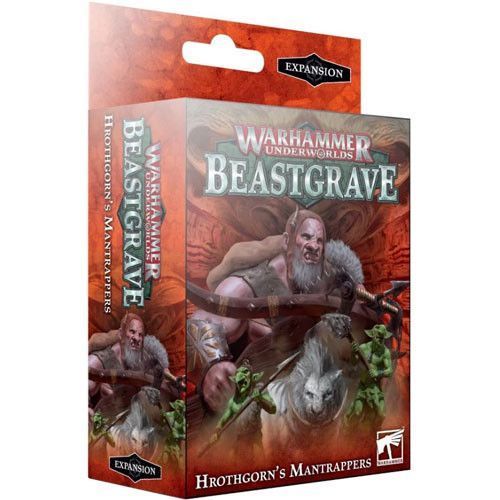
Warhammer Underworlds: Beastgrave – Hrothgorn's Mantrappers
Warhammer Underworlds: Beastgrave – Hrothgorn's Mantrappers Rulebook
Table of Contents
Table of Contents
Warband Warscroll: Hrothgorn's Mantrappers
Inspire
After an enemy fighter is slain by a melee Attack made by your leader (crown icon), Inspire each friendly fighter.
Everwinter Ambush
A beast of primordial snow and ice, Thrafnir is never more deadly than when striking from out of an enchanted blizzard.
When you deploy a friendly Thrafnir, you can place them in an empty hex in enemy territory that is not a starting hex and does not contain a feature token.
Ravenous Traps
Hrothgorn's sobriquet of 'Mantrapper' is well earned; he and his gnoblar crew have a knack for leaving cruel, iron-toothed snap-traps in truly lethal spots. They just mustn't forget where they put them...
At the start of the first Action step in the first battle round, place a friendly trap model in an empty hex in friendly territory.
If a fighter is placed in, is pushed into or enters a hex containing a friendly trap model, inflict 2 damage on that fighter and then remove the trap model from the battlefield.
More Traps
'Always more where they came from...'
Use this in your Power step if there are no friendly trap models on the battlefield. Place a friendly trap model in an empty hex adjacent to a friendly Gnoblar (Gnoblar icon, a toothed-disc symbol). Then push that Gnoblar 1 hex.
Surprising Competence
Hrothgorn's quick-fingered gnoblar toadies are handy for shifting around traps in a pinch. If they don't snip their own hands off – well, that's a bonus.
Use this immediately after a friendly Gnoblar (Gnoblar icon) Moves if that fighter is adjacent to a friendly trap model. Remove that trap model from the battlefield and place it in a different empty hex adjacent to that Gnoblar (Gnoblar icon). Then give that Gnoblar a Guard token.
Transcriber note: the Surprising Competence heading carries a bolt-in-diamond icon in the source, which is not named here because the source gives no legend for it. The warscroll is transcribed as printed; the February 2026 errata has not been checked against it.
Fighters
The five fighter stat cards below show each fighter's printed values. Icons carry no legend in the source, so each is described by its shape rather than named. Left column, top to bottom: a Move value, a green shield-with-figure Save value, a red Wounds value and an orange Bounty value. Weapon rows read left to right in the order printed. Each card's reverse face shows different values from its front and is unlabelled in the source.
Hrothgorn
Front face:
- Left column: Move 4; green shield-with-figure icon 1; Wounds 6; Bounty 3.
- Top right: paw-and-G faction emblem; crown icon (leader).
- Weapon row 1: crossed-weapons icon; ring icon 1; hook icon 2; starburst icon 3.
- Weapon row 2: bow-like icon; ring icon 3; crossed-box icon 3; starburst icon 1; arrow icon (outside the row).
Reverse face:
- Left column: Move 4; green shield-with-figure icon 2; Wounds 6; Bounty 3.
- Top right: paw-and-G faction emblem; crown icon (leader).
- Weapon row 1: crossed-weapons icon; ring icon 1; hook icon 3; starburst icon 3.
- Weapon row 2: bow-like icon; ring icon 3; crossed-box icon 4; starburst icon 1; arrow icon (outside the row).
Thrafnir
Front face:
- Left column: Move 5; green hooked-shield icon 2; Wounds 3; Bounty 1.
- Top right: paw-and-G faction emblem.
- Weapon row 1: crossed-weapons icon; ring icon 1; crossed-box icon 3; starburst icon 2.
Reverse face:
- Left column: Move 5; green hooked-shield icon 2; Wounds 3; Bounty 1.
- Top right: paw-and-G faction emblem.
- Weapon row 1: crossed-weapons icon; ring icon 1; crossed-box icon 3; starburst icon 2; small claw-like icon (outside the row).
Luggit and Thwak
Front face:
- Left column: Move 3; green hooked-shield icon 1; Wounds 3; Bounty 1.
- Top right: paw-and-G faction emblem; toothed-disc icon (Gnoblar icon).
- Weapon row 1: crossed-weapons icon; ring icon 1; hook icon 1; starburst icon 1.
Reverse face:
- Left column: Move 4; green hooked-shield icon 1; Wounds 3; Bounty 1.
- Top right: paw-and-G faction emblem; toothed-disc icon (Gnoblar icon).
- Weapon row 1: crossed-weapons icon; ring icon 1; crossed-box icon 3; starburst icon 1; shield icon (outside the row).
Bushwakka
Front face:
- Left column: Move 3; green hooked-shield icon 1; Wounds 2; Bounty 1.
- Top right: paw-and-G faction emblem; toothed-disc icon (Gnoblar icon).
- Weapon row 1: crossed-weapons icon; ring icon 1; crossed-box icon 1; starburst icon 1.
Reverse face:
- Left column: Move 4; green hooked-shield icon 2; Wounds 2; Bounty 1.
- Top right: paw-and-G faction emblem; toothed-disc icon (Gnoblar icon).
- Weapon row 1: crossed-weapons icon; ring icon 1; crossed-box icon 2; starburst icon 2; small dart-like icon (outside the row).
Quiv
Front face:
- Left column: Move 3; green hooked-shield icon 1; Wounds 2; Bounty 1.
- Top right: paw-and-G faction emblem; toothed-disc icon (Gnoblar icon).
- Weapon row 1: crossed-weapons icon; ring icon 1; crossed-box icon 2; starburst icon 1.
Reverse face:
- Left column: Move 4; green hooked-shield icon 2; Wounds 2; Bounty 1.
- Top right: paw-and-G faction emblem; toothed-disc icon (Gnoblar icon).
- Weapon row 1: crossed-weapons icon; ring icon 1; crossed-box icon 3; starburst icon 1.
Transcriber note: the fighter cards' weapon-ability and type icons are unlabelled in the source, and no fighter abilities are printed on the cards. This section gives the printed values only. The Trap model that the warscroll places is not a card and has no stat card in the source.