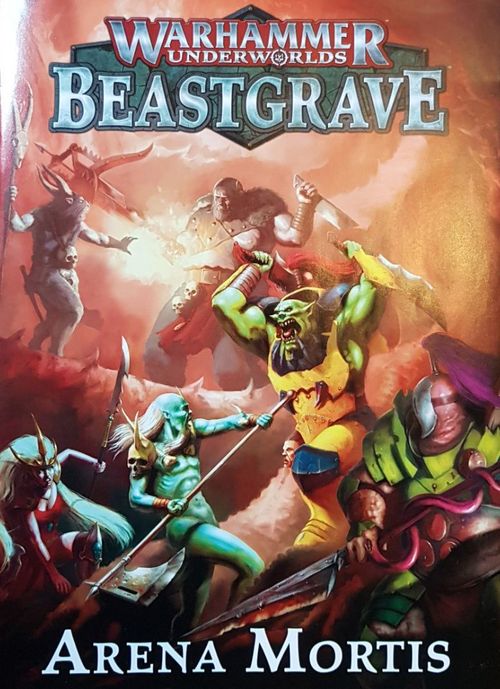
Warhammer Underworlds: Beastgrave – Arena Mortis
Warhammer Underworlds: Beastgrave – Arena Mortis Rulebook
Table of Contents
Table of Contents
Introduction
Arena Mortis is a fast-paced variant of Warhammer Underworlds designed for 3 to 6 players. Each player has a single fighter, chosen from any Warhammer Underworlds warband, and engages in brutal combat to survive the lethal maelstrom of the arena, while amassing the most glory points. Whichever player has the highest glory points total at the end of the game wins.
Contents
In addition to this rulebook, Arena Mortis contains the following components:
- 1 Darklens Shard token
- 1 Blood Spectralus token
- 1 Wasting Nexus token
- 1 Shadowprism token
- 1 Mirror of Future Glories token
- 1 Bone Iris token
- 6 initiative cards
- 20 gambit cards
- 20 upgrade cards
- 30 double-sided Wounds characteristic trackers
- 6 Raise counters
- 1 activation token
- 1 Sepulchral Warden fighter card
- 1 The Restless Dead gambit card
- 1 double-sided game board
Updated Cards
This game includes two updated cards from Warhammer Underworlds: Shadespire – the Sepulchral Warden fighter card and The Restless Dead gambit card. These cards replace their old versions and use the new Raise counters.
Other Items You Will Need to Play
In order to use the contents of this expansion you will need a Warhammer Underworlds Core Set.
The Law of the Arena
Where a rule from Arena Mortis contradicts a rule from Warhammer Underworlds, the rule in Arena Mortis takes precedence.
Before You Play
In games of Arena Mortis, each player has a one-fighter warband and two decks of cards. This section of the rules explains how to pick your fighter and build your decks.
Pick Your Fighter
Each player picks a single fighter from any warband they own. This fighter is considered to be the only model in a player's warband and has no other friendly fighters (either out of action or otherwise). In addition, other fighters cannot be added to a player's warband during the game.
Predators Unbound
Some fighters in Warhammer Underworlds cannot be set up unless another fighter is on the battlefield. When picking a fighter, ignore any ability that prevents that fighter from being used if another fighter is not present – you can pick that fighter following the rules above. For example, you could pick Gobbaluk or the Blue Horror as your fighter.
The Horrors
Players cannot pick the Brimstone Horrors to be their fighter in games of Arena Mortis. If a player picks the Blue Horror as their fighter, they also take the Brimstone Horrors. The Blue Horror uses the rules printed on its fighter card as normal.
Deck-building
Each player must construct two decks – a gambit deck and an upgrade deck. Objective decks are not used in games of Arena Mortis.
When building your decks, you must follow these restrictions:
- The upgrade deck must include at least 10 upgrade cards. It can include any number of additional upgrade cards.
- The gambit deck must include at least 10 gambit cards. It can include any number of additional gambit cards, but cannot include fewer cards than are in your upgrade deck.
- Neither deck can include more than one card with the same name: each card in the decks must be unique.
- You can only include cards that have the same warband symbol as your fighter card or the universal symbol.
More Cards!
In games of Arena Mortis, you can guarantee that your fighter will be given at least as many upgrades as there are rounds in the game, plus their starting upgrades. This means that if you take the minimum amount, you will often run out of upgrades! It's definitely worth adding more cards to your decks – 12 is a very suitable number for both, but as many as 14 or even 15 is equally viable in games with fewer players.
The Forsaken Cards
You cannot include any of the following cards in your decks:
- Infinite Riches (Nightvault #424)
- Quick Thinker (Shadespire #347)
- Time Trap (Shadespire #368)
How to Play
A game of Arena Mortis is played in the following sequence:
- Set Up – Determine game length; reveal your fighters; set up the initiative deck; determine the first player; place Mortis Lens token; shuffle decks and draw cards; place the fighters.
- Round 1 – Action phase, End phase.
- A further 4–7 rounds, based on the number of players (see below) – each round is an Action phase followed by an End phase.
- Final Round – Action phase, End phase.
- Victory.
Rounds
In games of Arena Mortis, a round is an action phase followed by an end phase. For the purposes of fighter cards, upgrade cards and gambit cards, it is always considered to be the second round.
Set Up
To set up a game of Arena Mortis, follow the steps below:
- Determine game length: A game of Arena Mortis has a set number of rounds, based on the number of players taking part. Use the table below to determine the number of rounds the game will have. Use a number of activation tokens equal to the number of rounds the game will have to help keep track of how many rounds there have been. Each time the last player takes their activation, they turn one of the tokens over.
| Player Total | Rounds |
|---|---|
| 3 | 9 |
| 4 | 8 |
| 5 | 7 |
| 6 | 6 |
-
Reveal your fighters: Each player places their chosen fighter's fighter card on the table in front of them. All fighters, with the exception of the Blue Horror, begin the game with their fighter card turned to the Inspired side.
-
Set up the initiative deck: Take the 'First Place' and 'Last Place' initiative cards, and then add extra initiative cards based on how many players are taking part in the game, as follows:
- 3 players = add the Second Place card
- 4 players = add the Second Place and Third Place cards
- 5 players = add the Second Place, Third Place and Fourth Place cards
- 6 players = add all the remaining initiative cards
-
Determine the first player: Shuffle the initiative deck and deal each player one initiative card, face down. Players should look at the card they receive but keep its contents hidden from their opponents. The player who was dealt the First Place card reveals it – they are the first player. This player sets up the battlefield – they take one game board from their collection, or the game board included with Arena Mortis, and place it with either side face up in the centre of the table. This single game board is the battlefield.
First Player and Last Player
As with the first player, the player that was dealt the Second Place initiative card is the second player, the player that was dealt the Third Place initiative card is the third player, and so on until the player that was dealt the Last Place initiative card – they are the last player.
Territories
There is only one game board in games of Arena Mortis and it counts as no one's territory, your territory and enemy territory.
-
Place Mortis Lens token: The first player takes all of the Mortis Lens tokens, shuffles them face down, and then picks one. They place that Mortis Lens token face up in an empty hex that is as close as possible to the centre of the battlefield, but not in a blocked hex, a lethal hex or a starting hex. Where there are multiple hexes that a player could pick from, the player can pick any of them.
-
Shuffle decks and draw cards: Once the Mortis Lens token has been placed, each player shuffles their gambit and upgrade decks separately and places each deck face down on the table in front of them. Then each player draws 3 cards from their gambit deck. These cards are a player's hand. Note that your hand will not contain any upgrades – these remain in your upgrade deck.
Division of Power
As there is no power deck in games of Arena Mortis, if a rule refers to the power deck or power cards, treat that rule as referring to the gambit deck or gambit cards instead. Similarly, as there is no objective deck in games of Arena Mortis, if a rule refers to the objective deck or objective cards, that rule has no effect.
- Place the fighters: Starting with the first player, each player takes it in turn to place their fighter on any empty starting hex on the board. Players do so in the order determined by the initiative cards – once the first player has placed their fighter, the player with the Second Place initiative card reveals that card and places their fighter, and so on until each player has placed their fighter. Each fighter must be set up in this way, even if that fighter is affected by a rule that says otherwise (for example, the Stalagsquig or the Blue Horror).
After a player places their fighter on the battlefield, they give that fighter a number of upgrades based on the Wounds characteristic of the face-up side on that fighter's fighter card:
- 1-2 Wounds = 3 upgrades
- 3-4 Wounds = 2 upgrades
- 5 Wounds = 1 upgrade
- 6+ Wounds = 0 upgrades
Give your fighter those upgrades in the order in which they were drawn using the rules detailed below.
Playing Upgrade Cards
If you are instructed to play, apply or give a fighter an upgrade card, draw the top card from your upgrade deck and give that upgrade to your fighter. If your fighter cannot be given that upgrade, or if that upgrade would result in that fighter being taken out of action, it is discarded.
Note that unlike normal games of Warhammer Underworlds, upgrade cards cannot be played in power steps or end phases, as they are not in the player's hand.
Finally, when you give your fighter an upgrade after placing them on the battlefield for the first time the game has not yet begun, so no player can take reactions.
The Rule of One
If you give an upgrade to a fighter and it has the same name as an enemy fighter's upgrade, the enemy fighter's upgrade is discarded.
The Mortis Curse
If a player takes, gains or scores 1 or more glory points as directed by a rule on one or more upgrades, they then discard those upgrades.
Action Phase
You are now ready to begin. Round 1 and subsequent rounds are made up of an action phase and an end phase. The final round is made up of an action phase and the final end phase.
At the start of each action phase the players determine a new initiative order, and then in that order each player takes one activation. When each player has taken one activation the action phase is over and the end phase begins.
Determine Initiative Order
One player takes all of the initiative cards, shuffles them face-down, and then deals one card face-down to each player.
Player Activations
Players take activations by playing through the following steps.
- Reveal Initiative Card
- Raise Fighter
- Upgrade Fighter
- First Power Step
- Take an Activation
- Second Power Step
Reveal Initiative Card: The players look at the face-down side of their initiative card and keep it secret until they have to reveal it. The first player then reveals their initiative card. Once the first player has taken their activation, the second player reveals their initiative card and takes their activation. Once the second player has taken their activation, the third player reveals their initiative card, and so on until the last player reveals their initiative card and takes their activation. The player that revealed their initiative card plays through the remainder of the sequence.
Raise Fighter: If your fighter is out of action, Raise that fighter. To Raise a fighter place them on the battlefield on an empty starting hex in your territory. Then place one Raise counter on that fighter's fighter card.
Upgrade Fighter: Give your fighter an upgrade (see page 5).
The Horrors
If the Brimstone Horrors are taken out of action, the next time that fighter's player takes an activation, they Raise the Blue Horror, not the Brimstone Horrors.
First Power Step: You can choose to play up to one gambit card from your hand in the first power step. Only the player whose activation is taking place can play gambit cards (apart from Reactions – see below).
Take an Activation: Take an activation following the rules in the Warhammer Underworlds rulebook. Note that the player action of discarding and then drawing an objective card cannot be taken.
Second Power Step: You can choose to play up to one gambit card from your hand in the second power step. Only the player whose activation is taking place can play gambit cards (apart from Reactions – see below).
Reactions
Reactions do not count towards the number of gambit cards that can be played in the power step and can be played when the situation described on the card matches what is happening in the game. If multiple players wish to react to the same window of opportunity, the player to the left of the player who was the last to reveal an initiative card has an opportunity to play a reaction first – if they do not wish to play a reaction, the next player clockwise from them has an opportunity to play a reaction, and so on until a reaction is played or all players have indicated that they do not wish to play a reaction.
Out of Action
When your fighter is taken out of action, the player whose warband took them out of action gains a glory point. Note that if your fighter is taken out of action by damage not caused by a warband, for example by a lethal hex, no player gains a glory point. If your warband takes your fighter out of action you do not gain a glory point. Take note of the Inglorious Death rule if a fighter is taken out of action during your activation!
When a fighter is taken out of action, any persistent effects that are only affecting that fighter end.
Headtaker
When your warband takes an enemy fighter out of action, if that fighter's player currently has the most glory points, or is tied with one or more players for the most glory points, take one of that player's spent or unspent glory point tokens and add it to yours.
An Inglorious Death
If your fighter is taken out of action during your activation you must pick one of your glory point tokens and return it to the stock of glory points tokens. If you have no glory points, this rule has no effect.
New Wound Characteristic Totals
The wounds characteristic trackers supplied with Arena Mortis are used to help players understand at a glance how badly injured fighters around the battlefield are.
When your fighter's Wounds characteristic changes, take a wounds characteristic tracker that matches the value of their new Wounds characteristic and place it in front of their fighter card, so that the bottom of the number points towards the board being played on.
In the example to the right, Hrothgorn Mantrapper is given the Great Fortitude upgrade. His player takes a wounds characteristic tracker with the number 7 and places it in front of Hrothgorn's fighter card, facing the board.
Action Phase Ends
Once each player has made one activation, the action phase ends and the end phase begins.
The End Phase
At the start of each end phase each player draws one gambit card from their gambit deck and adds it to their hand. Then the battlefield is cleared of all Charge, Move and Guard tokens. In addition, persisting ploys are discarded and any other persistent effects end. Then the end phase is over. When the end phase is over, begin a new round.
Subsequent Rounds
Subsequent rounds work in the same way as round 1 – simply play through another action phase (pg 6) and another end phase. Repeat this sequence until the final round.
Final Round
The action phase in the final round works in the same way as round 1 – simply play through another action phase. Once that action phase is over, the players play through the final end phase and then the game ends.
Final End Phase
In the final end phase, each player gains glory points from any fighter upgrades (if applicable) and then the winner is determined.
Winning the Game
After the final end phase, the player that has the most glory points (both spent and unspent) is declared the winner. If there is a tie, of those players whoever has a fighter still on the battlefield is the winner. If there is still a tie, of those players whoever has a fighter in the hex that contains the Mortis Lens is the winner. On any other result, the game is a draw.
The Mortis Lenses
A Mortis Lens is treated as being an objective token, but does not have a number associated with it. In addition, a Mortis Lens cannot be 'flipped' or removed from the battlefield. Finally, each Mortis Lens has the following additional rules:
The Darklens Shard
If a friendly fighter is holding this objective in any end phase, gain 1 glory point.
In addition, the first time during a round that a friendly fighter that is holding this objective is given an upgrade during the upgrade fighter step, roll one magic dice. On a [magic symbol – see note], give that fighter one additional upgrade.
The Blood Spectralus
If a friendly fighter is holding this objective in any end phase, gain 1 glory point.
In addition, +1 Damage to Attack actions made by fighters holding this objective.
The Shadowprism
If a friendly fighter is holding this objective in any end phase, gain 1 glory point.
In addition, a fighter holding this objective cannot be chosen as a target of, nor be dealt damage by, gambit cards.
The Wasting Nexus
If a friendly fighter is holding this objective in any end phase, gain 1 glory point.
During each End phase, after any persistent effects end, deal 1 damage to each surviving fighter that is not holding this objective. If that damage takes a player's fighter out of action, and they have 1 or more glory point tokens, they must pick one of their glory point tokens and return it to the supply.
The Mirror of Future Glories
If a friendly fighter is holding this objective in any end phase, gain 1 glory point.
In addition, +1 Dice to Attack actions made by fighters holding this objective.
The Bone Iris
If a friendly fighter is holding this objective in any end phase, gain 1 glory point.
In addition, while a fighter is holding this objective, they are on Guard.
Transcriber's note: The Darklens Shard's dice face is printed as a magic-dice symbol icon. At the scan resolution the icon is not legible enough to name it with certainty (the magic dice faces in the Beastgrave rulebook are "Channel" and "Focus"), so the face is left as "[magic symbol – see note]" rather than guessed. Check the physical rulebook page 8 for the exact face.
Initiative Cards
The six initiative cards are placed in the initiative deck as described in Set Up. Only the First Place and Last Place cards carry rules text; the Second, Third, Fourth and Fifth Place cards carry only their place name.
First Place
First Place: Rolls of [critical success symbol] are successes in this fighter's attack and defence rolls until the next time the First Place card is revealed.
After this fighter's activation, if this fighter is the only fighter on the battlefield, gain 1 glory point.
Second Place
No rules text.
Third Place
No rules text.
Fourth Place
No rules text.
Fifth Place
No rules text.
Last Place
After this fighter's activation, if they are on the battlefield, they are dealt 2 damage. If this would take this fighter out of action, they are dealt 1 damage instead.
If this would still take this fighter out of action, this card has no effect.
Transcriber's note: The First Place symbol is printed as an icon on the card and is not named in the text; it is shown as "[critical success symbol]" as the Beastgrave rulebook's critical success face on attack and defence dice. Check the physical card to confirm.