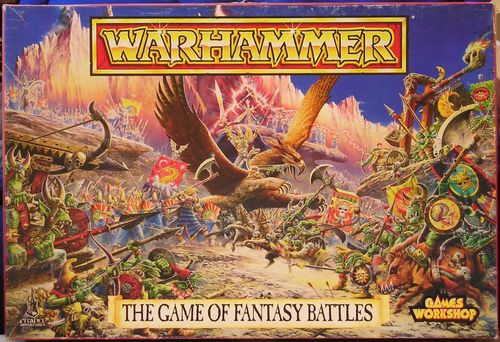
Warhammer: The Game of Fantasy Battles (Fourth Edition)
Warhammer: The Game of Fantasy Battles (Fourth Edition) Rulebook
Table of Contents
Table of Contents
- Introduction
- The Warhammer Box
- Starting the Game
- Characteristics
- Weapons and Armour
- Units of Warriors
- The Turn
- The Movement Phase
- Moving
- Shooting
- Hand-to-Hand Combat Phase
- Psychology
- Weapons
- Heroes and Wizards
- Monsters
- Flying and Aerial Combat
- Chariots
- Snotling Pump Wagon
- War Machines
- Standards and Musicians
- The General
- Buildings
- Daemons
- Magic
- Skirmishers
- Points Values
- Rules Playsheet
Introduction
Warhammer is the game of fantasy battles in which painted model armies clash in armed combat on a tabletop battlefield. As well as being a tremendously entertaining hobby, Warhammer challenges your generalship, painting abilities and modelling skills. Warhammer players include dedicated collectors, accomplished artists and cunning tabletop generals as well as those who just like to get together for an evening's gaming.
In addition to fighting battles, players choose, collect and gradually paint their armies. There are endless tactical options to think about and try out against your foes. You can create battlefield layouts on which to fight. There are many armies to choose from too: hordes of evil creatures like the cunning Skaven, the monstrous creatures of Chaos, or the savage Dark Elves. Pitted against them are the defenders of humanity: the glittering knights of Bretonnia and the dark armoured warriors of the Empire, with their sometime allies the Dwarfs and the Elves.
The Battle Bestiary describes the races of the Warhammer World, including stalwart Dwarfs, the ancient and valiant Elves, brutal green-skinned Orcs, and the unworldly Undead with their Skeleton legions and Zombies.
The Warhammer Box
The box contains the following plastic models, card cut-out pieces, and rulebooks.
- 20 High Elf Spearmen models
- 20 High Elf Bowmen models
- 32 Goblin Spearmen models
- 32 Goblin Bowmen models
- 5 Card cut out models
- 2 Card cut out and assemble buildings
- 12 Magic Item Cards
- 6 Card Movement Trays
- The Warhammer Rulebook
- The Warhammer Battle Bestiary
- The Battle of Maugthrond Pass
- 2 Summary Sheets for reference
- Card templates
- Dice
Movement Trays
It is time consuming and sometimes tricky to move a whole regiment of model troops, especially if it is a large regiment. To make movement easier many Warhammer gamers make their own movement trays using card or thin strips of wood. Six movement trays are provided in the box which are the right size for the Elves and Goblins. The two larger trays each take 20 Elves, while each of the smaller trays takes 16 Goblins. The trays have been designed with a slight edge all the way round once the models are in place. These trays are provided as a convenience. You do not have to use them if you do not want to, and even if you do use them you will often find it necessary for models to abandon them as they change formation or move through wooded territory.
Blu-tac or a similar adhesive putty is ideal for holding the models onto the movement trays during play. If you wish you may cut the movement trays into smaller sizes to facilitate differently sized regiments. Smaller movement trays, say with four models on, can be placed behind or next to each other, retaining much of the convenience of a larger tray but with more flexibility.
Card Models
Five stand up card models are included with the game. They allow you to immediately fight games using monsters, war machines and a chariot. Each is designed to fit snugly into one of the round black bases provided; it is not necessary to glue them in place.
Magic Item Cards
The twelve magic item cards provided in this box are used to represent magic in the Warhammer game. The rulebook tells you how to use the cards (see the section on Magic).
Rulebook, Battle Bestiary, and Scenario Book
The box contains three separate books. The rulebook contains all the rules explaining how to play Warhammer. The Battle Bestiary contains game details for a large number of warrior races and monsters such as Elves, Dwarfs, Goblins, Orcs and so forth. The scenario book is entitled the Battle for Maugthrond Pass, which describes a conflict to fight out using the models supplied.
Card Templates
Special templates are used to determine the effects of certain weapons. For example, the teardrop-shaped flame template is used to establish the range and effect of Dragon fire breath. The circular template with the hole is used to determine the effect of stone throwing machines of war, while the smaller templates are used for Skaven gas grenades amongst other things. The large man-shaped template shows the area covered by a Giant when it falls over. The use of each template is explained in the appropriate rules sections.
Dice
Three sorts of dice are supplied with the game. There are ten ordinary six sided dice marked 1 to 6. These are used extensively in the game to resolve combat, test psychological effects, and so on. We refer to these dice as D6. When the text tells you to roll a D6 it simply means roll a dice. When the text tells you to roll 2D6 it is instructing you to roll two dice and add the scores together, so when you roll 2D6 you could score between 2 and 12. In the same way, 3D6 is three dice added together, 4D6 is four dice added together, and so on. The dice supplied are sufficient to play a game of Warhammer, but for really big battles the more dice you have the better.
As well as the ten ordinary dice there are two special dice, the Artillery dice and the Scatter dice. The Artillery dice is numbered 2, 4, 6, 8, 10 and MISFIRE, and is used to determine the effects of cannons and stone throwers as described in the rules. The Scatter dice has four sides with arrows and two sides marked HIT. This dice is used to determine where shots from stone throwers land and can be used to establish a random direction. Note that the two sides marked HIT also have small arrows on them, enabling you to use this dice to establish a random direction of movement for Goblin Fanatics etc.
Rules Summary Sheet
Two rules summary sheets are provided which summarise the most important rules in the Warhammer game. After a while you will be able to play Warhammer using these summary sheets rather than the rulebook, although you will find it necessary to consult the rulebook occasionally for more detailed rules or for a full explanation.
What Else You Will Need
To play Warhammer you will need two or more players and a firm, level surface such as a tabletop or area of floor. You will also need at least one tape measure marked in feet and inches; all distances in Warhammer are given in imperial measurements. A ruler is useful too, and some paper and pens for marking down casualties and making notes where they are needed.
Other dice. A selection of other types of dice will come in useful too. For example, a four-sided dice (D4) is used to establish damage from some war machines. Eight sided (D8), ten sided (D10) and twelve sided (D12) will also occasionally be useful for randomising purposes. None are strictly necessary. A D4 can be represented by rolling an ordinary six sided dice and re-rolling results of 5 and 6 until you get a number between 1 and 4.
Starting the Game
The Warhammer game is very detailed and it would be a mammoth task to learn every rule before you begin to play. Fortunately this isn't really necessary. Read through the rulebook to familiarise yourself with the basic game mechanisms and then get stuck into your first battle, because the best way to learn is by playing.
The Battle
Battles are fought between two sides and each side is normally represented by a single player. You can involve several players on a side if you want, one player acting as overall commander while the rest help him to move troops and roll dice. In the game rules and descriptions that follow we assume that each side is represented by one player.
Before you are ready to fight a battle both sides must choose their forces. If the game is part of a pre-planned scenario (like the Battle for Maugthrond Pass) the forces are pre-determined by the scenario itself. However, if you want to fight a straightforward battle between two players you will need two armies.
To keep things fair every type of warrior and monster has its own points value. The better fighter a model is the higher its points value. If a model carries extra weapons, or wears armour, its points value is increased. If it rides a horse, giant wolf or war boar its points value is increased further. When fighting a battle both sides choose armies to the same total points value.
A reasonably sized battle is provided by 1000 points on each side, and such a game can be resolved within an evening. A larger 2000 point a side battle will take a little longer, but can still be fought in half a day or a long evening. 3000 points will give you a fairly big battle that will probably take a full day to fight. You can fight any size battle you like, from a few hundred points a side to many thousands if you have space and time.
The Warhammer Armies series of books each describe a particular army such as High Elves, Dwarfs, The Empire, and so on. Each book provides a description of the army, detailed special rules for using it, a painting guide with shield and banner designs, and an army list. The army list defines which troops the army may have and what weapons they can carry.
Setting Up
Before the opposing armies clash you need to prepare the floor or tabletop area for battle. Initially at least, a small playing area will suffice, say about 6 feet by 4 feet. This gives the troops room to manoeuvre and bring their weapons to bear.
The tabletop or floor is a flat and featureless plain, devoid of trees, buildings, slopes and other terrain. Part of the challenge and enjoyment of Warhammer is that you can create your own battlefield layouts. You can make trees and woods, hills, rivers and other features, but to begin with the buildings supplied in this boxed game will be enough. As a temporary measure you can improvise using twigs and roots for trees, books laid flat to represent hills, and small packing cartons become towers and houses.
The battlefield may be laid out in any way you and your opponent like. One popular method is for one player to lay the scenery out while the other player chooses which side he will fight from. This ensures that the scenery is laid out in a fairly even-handed manner, without conferring advantage to either side.
To help you set up your battlefield there is a terrain generator system which allows you to determine what types of scenery are present. Don't worry if you generate items of terrain you don't have, just re-roll until you get a result you can use. Many players like to draw up their own terrain generator charts based upon their collection of model scenic items. Rules for various types of terrain are given in full in the Section on Movement.
Begin with both players sitting on opposite sides of the table. Each player rolls a D6 to determine who starts to place scenery; the highest scoring player goes first. To generate a piece of scenery roll 2D6 and consult the Terrain Generator Chart. The player places the piece of scenery indicated somewhere on his own side of the table. If you place a river it must flow entirely through your table half. You may not place scenery on your opponent's side of the table unless it is a plain hill, in which case you can place it straddling the dividing line if you wish.
A further variation, and one which many players favour, is to set up the scenery and then roll randomly to determine who deploys on which table edge. This means you never know which edge you are going to start from when you are setting up the scenery, so both players are encouraged to set up a balanced battlefield.
Each player continues to lay down scenery by turns. When you have one river or stream on the tabletop any further river/stream results must be re-rolled. A player may place one type of scenery on top of another to produce, say, wooded hills or hillsides with walls.
When it is his turn to place a piece of scenery a player may choose to stop, and declare he is satisfied with the scenery as it is. The other player then has the option of generating and placing one more piece if he wishes. The battlefield is now complete.
If both players are in agreement scenery can now be moved around or removed if it is felt a better battle will result. For example, you might allow your opponent to remove a wood from his side of the table if he lets you reposition a hill.
Terrain Generator Chart
2D6 Dice Score 2 - A Deep River or Lake. Choose either a deep river or a lake. A river must be placed so that it flows onto the battlefield from one side and out from either the same or another side. It cannot spring from nowhere and it cannot simply end. A river may not extend over more than half the length of the table unless your opponent agrees that it may do so.
A deep river cannot be crossed anywhere along its length except at a ford or bridge. A river must always include at least one bridge or ford somewhere along its length. If it extends over more than half the length of the table it must include two crossing places one of which is chosen and positioned by the opposing player. A lake is impossible to cross.
3 - A Shallow River or Stream. Choose either a shallow river (which can be crossed at a quarter normal speed) or a stream (which may be crossed at half rate). The river or stream must enter and leave at a table edge. Rivers cannot extend over more than half of the table length without your opponent's consent, but this does not apply to streams.
If you place a river it must have at least one bridge or ford. If the river extends over more than half the table length it must include two crossing places one of which is chosen and positioned by the opposing player.
A stream may have a single crossing place along its length if you wish.
4 - Difficult Ground. Choose an area of difficult terrain such as a marsh, area of scrub, soft sand, boulder strewn ground, debris, shallow pit or area of loose rocks. Troops move across difficult ground at half their normal rate as described later.
5 - A Steep Hill. A steep hill is difficult to move over (troops move at half rate as described later), and may have cliffs on one or more sides. Cliffs are impossible to move over and act as a barrier to movement.
6 - A Wood. Woods slow troops down (by half their normal speed as described later) and they also act as a barrier to sight, preventing shooting.
7 - Hill or Wood. Choose either a hill or a wood.
8 - A Hill. Hills do not slow down troops but they provide excellent vantage points where you can position archers and stone throwers. Hills are also useful defence points in hand-to-hand combat as it is easier to win a combat if you are uphill of your opponent.
9 - Walls/Hedges or Fencing. Up to 12" of continuous walls, hedges, fences, ditches or other linear obstacles. Obstacles can be crossed but troops are slowed down when they do so (losing half of their movement). Walls and hedges are useful defensive positions as troops may be placed behind them where they will be protected from enemy attack.
10 - A House or Tower. A single house or tower which may have up to 6" of adjoining walls or hedges.
11 - A Village. A village is represented by several buildings (3 or 4 is enough). The village may have up to 12" of adjoining walls or hedges.
12 - Very Difficult Ground. Choose a feature that is very difficult to cross such as a steep sided quarry, swamp or sheer cliffs, a thick wood or patch of dense briars. Very difficult terrain may be crossed at a quarter of normal move rate as described later.
Remember the objective of setting up terrain is to provide an interesting and entertaining battle, not to impede movement to the extent where armies are unable to get to grips. If neither player is satisfied with the terrain once it has been generated then start again. The size of hills or woods is not defined, as players are assumed to use scenery they have made themselves. As a general rule no terrain feature may be bigger than 12" across, and even this would be large for a feature which is difficult or impossible to move over.
Rivers can be particularly problematic if one side is determined to play a wholly static, defensive game. Dwarfs often favour this kind of approach because they are rather slow and tend to favour long range shooting weapons like crossbows. This makes for a rather dull game, so a river is never placed over more than half the length of the table unless both players agree. Should the river extend over more than half the table length then the opposing player may place a bridge or ford as described on the chart. Even with this restriction in mind, deep rivers do not make for entertaining fast moving games and players may prefer to avoid using them altogether in favour of either shallow rivers or a lake.
Deploying for Battle
Once the battlefield is complete the armies can deploy. Each player may set his army up within 12" of his table edge and no closer than 12" to either side edge. If your table is not very wide you may wish to deploy closer to the side edges, say 6". This is up to you and your opponent to decide between you.
There are two equally good methods of deploying your troops. One is for both sides to make a map of the battlefield and indicate where each unit is to be placed. Units include not only units of troops, but also individual heroic characters, chariots, and monsters. Once both sides have completed their maps they are both revealed and the units are positioned as indicated.
This method allows you to try and out-think your opponent by making a good battle plan. It encourages you to consider what each unit is supposed to do during the game, where you are going to advance, where you will hold your ground, and so forth. The second method is for each side to place its units one at a time, until both armies have been deployed.
The advantage of this method is that it saves you the trouble of drawing a map. The drawback is that an army with more units will have an advantage as it will be able to save units to lay down once the opposing army is fully deployed.
If your game forms part of a published scenario such as the Battle for Maugthrond Pass, or a scenario you have invented yourself, then the terrain and deployment of troops are described in the scenario. This may allow troops to deploy at the sides, in prepared positions on the battlefield, or even behind the enemy lines if they discover a pass that brings them behind their foes.
Ending the Game
At the start of the game roll a dice to establish how many turns of daylight remain in which to fight the battle. Once both sides have completed the number of turns indicated the battle is over.
| D6 Roll | Turns of daylight remaining |
|---|---|
| 1-2 | 4 turns |
| 3-4 | 5 turns |
| 5-6 | 6 turns |
An alternative method is to agree an ending time for your battle and stick to it. For example if you have an evening to play your game you might agree to play until 9.30, or whatever time suits you best.
Once the battle is over both sides calculate their victory points to decide who has won. Refer to the chart below and add up the points gained by each side.
As with deployment, victory conditions may be varied to accommodate a specific scenario. For example, if your scenario involves capturing a tower you will receive victory points if you have occupied the tower before the game ends.
Who Has Won
The side which has the most victory points has won. The difference in victory points is a good indicator of how decisive the victory has been. A difference of just 1 or 2 points is a marginal win, a victory of 5 or 6 points is a resounding thrashing for your enemy. If both sides score the same points the result is a draw.
Victory Chart
| Achievement | Victory points |
|---|---|
| Each enemy unit either destroyed, fleeing or having fled from the table. | 1 victory point for each 100 points (or part), the unit cost. E.g., if the unit originally cost 325 points it is worth 4 victory points, if it costs 95 points it is worth 1 victory point. |
| Each full table quarter wholly occupied by your troops. | 1 victory point. Divide the table into four equal quarters through its middle. If a quarter is occupied by at least one of your units and no enemy then you can claim 1 extra victory point per quarter. |
| Enemy General slain, fleeing, or having fled the table. | 1 victory point in addition for any points for destroyed/fleeing unit. |
| Army Battle Standard captured | 1 victory point. |
Characteristics
In the Warhammer World there are many different types of warriors, from noble Knights to mighty Elven Lords armed with magical weapons. There are monsters too, some quite small like the green-skinned Goblins and others as huge as fire-breathing Dragons. To represent these creatures in the game we have nine categories which describe the various aspects of their physical or mental make up. These are called characteristics.
All characteristics are measured on a scale of 1 to 10. The higher a characteristic the better it is. The characteristics are:
Movement Allowance (M). Often simply called move, this shows the number of inches a creature can move on the tabletop under normal circumstances. For example, a Goblin with a move of 4 can move 4 inches.
Weapon Skill (WS). Defines how accomplished or skilled a warrior is with his weapons, or how determined and vicious a monster is. The higher the score the more likely the fighter is to hit a hand-to-hand combat opponent. An ordinary human has a weapon skill of 3. A battle-hardened Orc leader might have a weapon skill of 4, 5 or even higher.
Ballistic Skill (BS). Shows how good a warrior is with ranged weapons such as bows, crossbows or even thrown rocks. The higher this score is the easier a creature finds it to hit with missile attacks. Some monsters have natural weapons that can be used at range (they might be able to spit venom, for example) and their BS is used to determine whether they hit or not.
Strength (S). Shows how strong a creature is. An exceptionally puny creature might have a strength of 1; a mighty giant might have a strength of 6 or even higher. Most men have a strength of 3. Strength tells us how hard a creature can hit and thus how easily it can hurt an opponent it has struck.
Toughness (T). Toughness is a measure of a creature's ability to resist damage, or withstand physical damage and pain, and reflects such factors as the toughness of a creature's flesh, hide or skin, or the depth of its fur. The tougher a creature is the better it can withstand an enemy's blows.
Wounds (W). Shows how much damage a creature can take before it either dies or is so badly hurt it can't fight any more. Most humans and human-sized creatures have a wound characteristic value of only one. Large monsters are often able to withstand several wounds that would slay a smaller creature and so have a wound value of 2, 3, 4 or more.
Initiative (I). Indicates how fast a creature can react. Creatures with a low initiative score are slow and cumbersome; creatures with a high initiative score are much more quick and agile. In close combat initiative tells us the order in which creatures strike, since faster creatures will be able to attack before slower ones.
Attacks (A). Indicates the number of times a creature attacks during close combat. Most creatures attack only once, although some warriors of exceptional skill or monsters may be able to strike several times.
Leadership (Ld). A creature with a high leadership value is courageous, steadfast, and self-controlled. A creature with a low value is the opposite. Creatures with high leadership can lead others, inspiring them to greater feats of valour.
0 Level Characteristics
Some creatures have been given a '0' for certain characteristics which means they have no ability whatsoever in that field. This usually applies to creatures unable to use missile weapons, and so they have a BS of 0, but it might equally well apply to other characteristics too. For example, an ordinary horse has no Attacks (A).
Characteristic Profiles
Every creature in the Warhammer World has a characteristic profile which lists the value of its characteristics. In the Bestiary you will find profiles for many of the races and monsters of the Warhammer World. The examples below show the profiles for an Orc and Man.
| Troop Type | M | WS | BS | S | T | W | I | A | Ld |
|---|---|---|---|---|---|---|---|---|---|
| Man | 4 | 3 | 3 | 3 | 3 | 1 | 3 | 1 | 7 |
| Orc | 4 | 3 | 3 | 3 | 4 | 1 | 2 | 1 | 7 |
As you can see, an Orc and a Man are very similar in many respects. They both move at the same speed - 4", and they both have the same weapon skill and bow skill which means they are very evenly matched in combat. Both have the same strength value, so they can deliver blows with equal potency. When it comes to toughness the Orc wins over the Man - the Orc's value is 4 compared to 3. This is not a huge difference, but it makes the Orc better able to withstand blows and gives it the edge in hand-to-hand fighting.
Both creatures have 1 wound which is the normal value for man-sized creatures. The Orc loses out when it comes to initiative. This is not a terrible disadvantage, but it does mean that the Man will tend to strike his blows before the Orc once they get stuck into hand-to-hand fighting. Both races have the same leadership, 7, which is about average.
Weapons and Armour
Intelligent creatures such as Men, Orcs, Elves and so forth carry weapons and may wear armour. Some are armed with bows or other missile weapons enabling them to strike at a distance. Others are equipped with spears or swords to fight hand-to-hand. Later we will be describing special rules to reflect the differences between different weapons.
Most troops wear armour and carry shields to protect them from the savage blows of their enemies. Armour greatly affects a warrior's chance of survival and so influences the outcome of combat. The more heavily armoured troops are, the harder they are to kill. There is a disadvantage to wearing a great deal of armour however: because metal armour is so heavy troops wearing a great deal of it move more slowly than unarmoured troops.
Armour
To protect themselves, troops may wear armour and carry shields. If they ride horses these may be armoured too.
Shield. A shield is excellent for warding off blows and absorbing the shock of impacting spears. Many troops carry shields into battle.
Light Armour. Troops may wear a metal breastplate or a chainmail or scale armour coat. These are described as light armour because they offer slightly less protection than heavy armour and weigh less.
Heavy Armour. This is a completely enclosing suit of armour as worn by Knights of the Empire. It is made from metal plates and is very heavy and cumbersome. An enclosing suit of chain mail armour can also be classed as heavy armour, so the definition is not completely rigid.
Barding. Barding is armour made for a horse. It can be metal or it can take the form of a thick quilted coat with a linen covering bearing the knight's coat of arms.
Units of Warriors
On the battlefield troops don't fight as a disorganised mob of individuals, they fight in properly organised units with officers to lead them. Units march in disciplined ranks, and they are trained to manoeuvre as a solid block.
Generally speaking, a unit is made up of troops of the same type. For example, it may be a unit of Men armed with crossbows and wearing light armour. All the models in a unit will be of the same race, and will have the same weapons and armour. Although it's true that creatures of the same race vary (some are weaker, faster or braver than others), we assume that the differences average out over the unit as a whole.
Units are arranged on the battlefield in a formation which consists of one, two, three, or more ranks. Units can change their formation during the battle, but this takes up time and may slow the unit down. [Diagrams: a unit of 12 Goblins in 3 ranks; a unit of 16 Goblins in 4 ranks.]
Facing
Because troops move and fight in formation all the models in a unit are assumed to be facing directly forward. This is important because a model can only see things that are in front of it (the front zone). Also, troops cannot charge an enemy they cannot see, nor may they shoot weapons at them.
Cavalry
As well as units of warriors fighting on foot, the armies of the Warhammer World include troops riding horses, giant wolves and other creatures. Some heroic individuals even ride huge monsters such as griffons, wyverns and dragons. Big monsters and their riders are covered by special rules described in the Monsters section of this rulebook.
Horse-sized creatures and their riders are referred to as cavalry. Rules for cavalry are discussed throughout the game where appropriate. The difference between big monsters and cavalry is defined by the number of wounds the creature has on its characteristic profile. If a mount has 1 wound it is a cavalry model; if it has more than 1 wound it is a monster.
Cavalry models include troops riding horses, warhorses, elven steeds, giant wolves, war boars, spiders, Cold Ones, and any other mounts which have 1 wound on their characteristic profile.
A cavalry model is treated in all respects as a single model. Should the rider be slain the entire model is removed from the battle.
Cavalry models use the rider's leadership characteristics value for all tests that require it. When the model is attacked it is the rider's toughness and wounds which are used. The mount's toughness, wounds, and leadership are never used, but are included on its characteristic profile because such creatures sometimes appear on their own or pulling chariots.
The Turn
Battles are fought between two opposing sides: two armies pitting armed might and cunning against each other. The forces represented by the models are commanded by kings and generals, wizards and heroes. Their metal counterparts are commanded by you, the player.
In Warhammer Fantasy Battle we represent the howling maelstrom of action in turns, in a similar way to chess or draughts. Each player takes one complete turn, then his opponent takes a turn. The first player then takes another turn, followed by the second player again, and so on: each player taking a turn one after the other until the battle is over. To decide which side takes the first turn both players roll a D6. The player who rolls highest goes first.
Within the turn actions are performed in a fixed order, called the turn sequence. Each turn is divided up into phases during which the player moves all his units, shoots all his missiles, then resolves all hand-to-hand combat and so on.
The Turn Sequence
When it is your turn it is up to you to keep track of where you are in the turn sequence. If you forget, your opponent should be able to remind you. Each turn is divided into the following phases. These phases are always completed in the order given below, and all actions in that phase must be resolved before moving onto the next phase.
- Movement. During the movement phase you may move your troops as defined in the rules for movement.
- Shooting. During the shooting phase you may fire any missile weapons as described in the rules for shooting.
- Close Combat. During the close combat phase all troops in hand-to-hand combat may fight. Note that this is an exception to the normal turn sequence in that both sides fight, not just the side whose turn it is.
- Magic. In the magic phase all wizards may cast spells. Note that as with close combat this is an exception to the normal turn sequence in that both sides may cast spells, not just the player whose turn it is.
Improvising
Warhammer is a challenging and involving game, with many fantasy races, and endless possibilities. In a game of this size and level of complexity there are bound to be some situations where the rules seem unclear, or a particular situation lies outside the rules as they are written. This is inevitable, as we can't possibly give rules to cover every circumstance. Nor would we want to try, as that would restrict what you can and cannot do far too much. Warhammer players should feel free to invent and improvise, exploring the Warhammer World for themselves and taking the game far beyond the published rules if they wish.
When you come across a situation not covered fully by the rulebook, be prepared to interpret a rule or come up with a suitable rule for yourselves.
When a situation of contention arises players should agree on a fair and reasonable solution and get on with the game as quickly as possible. One way of resolving a dispute is to roll a D6 to see whose interpretation applies and get on with the battle. Afterwards sit down and discuss what happened and see if you can reach an agreement in case the situation arises again. Remember, you're playing to enjoy a challenging battle with friends, where the spirit of the game is more important than winning at any cost.
Exceptions
There are exceptions to the general turn sequence when things are worked out as they occur rather than in any strict order. Quite often the actions of one player will trigger some special weapon or the sudden appearance of a particular troop type. This is rather like stepping onto a land mine or sinking into quicksand: consequences resulting from movement which may be conveniently resolved there and then. Inevitably there will be the odd occasion when events can be worked out in one phase or another with little real difference.
The Movement Phase
During the movement phase, or move phase, you may move your forces on the battlefield. As with the turn sequence, the things that you can do within the movement phase are performed in a strict sequence.
- Declare Charges. If you want any of your troops to charge you must declare this at the very start of the movement phase.
- Rally Fleeing Troops. If any of your troops are fleeing you may attempt to rally them.
- Compulsory Moves. Move troops that are subject to a compulsory movement rule.
- Move Chargers. Move charging troops and resolve other movement resulting from the charge.
- Remaining Moves. Move the rest of your troops.
Declare Charges
At the start of your move phase the first thing you must do is declare which units will charge. Except in a few unusual circumstances explained later, you are never forced to charge. It is always your decision. However, charging is the only way troops are normally allowed to move into hand-to-hand combat. If you want to attack an enemy then you must charge him; you cannot simply move into hand-to-hand combat without declaring a charge. To make this very clear, opposing troops are normally kept at least 1" apart, and troops are not permitted to move closer unless they are charging.
To declare a charge you must indicate which of your units is charging, and which enemy unit it is going to charge. For example, you might wish to declare that your Goblin unit is charging the enemy's Elf archers. When troops charge they move at double their normal speed; this double move is called a charge move.
When you declare a charge you must be reasonably confident that the chargers will reach their target. You may not measure the distance before declaring the charge so you must judge for yourself whether your troops have enough move to reach their enemy. Obviously charging troops must have a clear run at their target. If there are models in the way, you cannot charge through them, and you must take account of any terrain that might slow you down.
Sometimes you may find yourself able to charge an enemy unit in the flank or rear. This is a particularly good tactic as an attack from an unexpected direction could throw the enemy into a panic and may give you an advantage in combat too. A charging unit's position at the start of the movement phase determines whether it can charge into the flank, the rear or the front of the enemy unit.
[Diagram: a target unit has a Front Zone, Left Flank, Right Flank and Rear Zone.]
If the charging unit is in the target's frontal zone it charges in the front. As units generally begin the game facing each other this is the usual situation. If the charging unit is charging from the flank zone it charges into the side; if charging from the rear zone it charges from the rear.
Often the position of a charging unit straddles two areas, in which case you must judge which area the unit is mostly in.
As you declare your charges your opponent declares how the charged unit responds. A charged unit has three response options: stand and shoot, hold, and flee.
Stand and Shoot. If the charged unit has missile weapons and the chargers are more than half their charge move away, then troops can shoot at the chargers as they advance. Work this out immediately; refer to the Shooting section for rules governing missile weapons.
Hold. A unit can stand fast and receive the charge, individual troopers bracing themselves for the inevitable impact. This is the usual response of troops who do not have missile weapons or who are too close to their enemy to use them.
Flee. Flee means just that: when your unit sees the enemy thundering down upon them they turn tail and run. This is a rather desperate option as once troops begin to run they tend to carry on, and may run away from the battlefield altogether whether you want them to or not.
As soon as a unit declares it is fleeing it is moved directly away from the charging enemy by 2D6" if its movement characteristic is 6" or less, or 3D6" if its move is more than 6". The fleeing unit is repositioned facing directly away from the chargers. Move the fleeing troops immediately the distance indicated by the dice roll. The full rules governing fleeing troops are covered later in the Hand-to-Hand Combat section.
Rallying
Having declared charges and charge responses, the player whose turn it is now has the opportunity to rally any of his troops that are currently fleeing. Troops are normally forced to flee when they are defeated in hand-to-hand combat, if they are frightened by large monsters, or if something else equally traumatic has happened to them. Fleeing troops are of no fighting value unless they can be rallied, which means the troops come to their senses and stop fleeing in readiness to fight once more.
Because fleeing usually results from hand-to-hand combat the rules for fleeing troops can be found in the Hand-to-Hand Combat section of this book. In the rally phase of his turn a player makes a test to determine whether his fleeing troops manage to rally. If the troops rally then they remain where they are but may immediately adopt a new fighting formation facing towards the enemy. If the fleeing troops fail their rally test and continue to flee then they are moved next with other compulsory movement.
Compulsory Moves
Generally speaking a player can move his troops how he wishes within the confines of the rules governing movement. However, sometimes troops go out of control for some reason, either because they are overcome by sheer terror, because they are compelled by strange magic, or because they are disorientated or confused. The player has no control over the movement of these troops and so these are referred to as compulsory moves.
The most common kind of compulsory move is fleeing. Fleeing troops always flee away from their enemy or towards their own base table edge, and they always move a randomly determined distance.
All compulsory movement is done now before other movement takes place. This gives troops moving in this way the opportunity to get in the way, block lines of advance and do all sorts of other annoying things.
Moving
After the compulsory moves have been made the rest of your forces can be moved, starting with charging units. As the rules governing the movement of charging troops and other troops are essentially the same, we will return to the specific rules for chargers later. The following rules affect all movement.
During their move phase units can move up to their movement rate in inches. For example, Men have a movement characteristic (M) of 4 and so may move up to 4", Elves, naturally faster and nimbler of foot, move up to 5". You do not have to move the full movement allowed or even at all if you prefer. Units which are charging or marching may move further (see below).
Because the weight of their gear impedes movement troops wearing armour will move more slowly. The table below indicates the reduction in move distance incurred through wearing armour.
| Armour | Reduction in Movement |
|---|---|
| Shield, Light Armour or Heavy Armour alone, or Shield and Light Armour | None |
| Shield and Heavy Armour | -1" |
| Cavalry mount with Barding Armour | -1" |
For example, a Man with no armour can move 4"; with a shield and wearing heavy armour he suffers a penalty of -1" and so can move 3".
A horse rider can normally move 8". If carrying a knight with heavy armour and shield, and the horse is wearing barding, then the knight moves 8" -1" for the rider's armour and shield, and -1" for the horse's barding, which equals a move of 6". A horse without barding carrying a warrior wearing heavy armour and shield would move 7".
Terrain
Troops only move their full movement distance over unobstructed ground. They will slow down if impeded by obstacles such as bush or woods. To simulate this terrain is divided into four types: open, difficult, very difficult and impassable.
Open terrain is clear ground that doesn't impede movement at all.
Difficult terrain includes the following:
- Brush, scrub and other clinging vegetation.
- Debris, wreckage, loose rocks, boulders.
- Fords, streams or shallow water.
- Marshes, bogs or thick mud.
- Soft sand.
- Stairs, steps or ladders.
- Steep or treacherous slopes. This can include hills if both players agree to it before the game, but otherwise hills are considered to be 'open' terrain.
- Woods or dense foliage.
Troops cross difficult ground at 1/2 their normal rate. So if your unit has a normal move of 4" it can only move 2" through a wood.
If troops move over open ground and difficult terrain during the same turn, then their movement over the open ground is at full rate and that over difficult ground is reduced exactly as normal. For example, a Man moves 2" across open ground and then enters a wood. He now has 2" of his move left. This is halved for the difficult terrain so he only moves a further 1" through the wood.
Very difficult terrain includes areas that are even more arduous to move through such as the following:
- Incredibly thick woods packed with briars and thorns.
- Almost sheer slopes that need to be climbed on hands and knees.
- Fast flowing but still fordable rivers.
Very difficult terrain reduces movement to 1/4 of the normal rate. Fractions are rounded up to the nearest 1/2" to prevent unnecessary complication.
Impassable terrain is terrain so difficult to move through that it cannot be crossed during the course of a battle. It includes terrain features such as rivers, lakes, impenetrable swamps and sheer cliffs. Troops must go round impassable terrain.
Players may decide before battle is joined whether certain terrain features will be difficult, very difficult or impassable during the course of the battle. The method of generating scenery already described can be used to determine whether scenery is difficult or very difficult, but players can always agree to make terrain feature more or less passable if both sides prefer to.
Obstacles
Obstacles are things like hedges, fences, walls and trenches that troops must clamber over to cross.
It takes a model half of its move to cross an obstacle. So if a model has a move of 4" it must surrender 2" to cross a hedge or a wall. If a model has insufficient move left to cross an obstacle it must halt in front of it. The model does not count as half way across if it has 1" remaining, for example. Where an entire unit of troops is attempting to cross an obstacle the penalty continues to apply while any of the models are crossing.
It is perfectly possible for part of a unit to end up on one side of a linear obstacle and another part to be on the far side. This is fine. Place the part of the unit which can cross on the far side of the obstacle and leave the part that could not cross on the other side. As long as the ranks on both sides are in contact with the obstacle this is perfectly acceptable. [Diagram: 1st rank has crossed the hedge; 2nd and 3rd ranks waiting to cross the hedge.]
When it moves from this position the ranks must be returned to base to base contact. The unit can still only move at half speed until all the ranks have crossed.
If a wall, hedge or fence has a gate in it then it is assumed to be open unless otherwise agreed, and troops may move through the gate as normal.
The penalties for difficult terrain types and obstacles are cumulative. If troops are moving at half rate of 2" across difficult terrain, then they must surrender half their remaining move, a further 1" in this case, to cross an obstacle.
Manoeuvre
Troops move and fight in a tight formation of one or more ranks. While they move they must maintain their formation, which means that individual models are not free to wander off on their own. The formation can move straight forward as a body perfectly easily, but if it wishes to change direction then it must make a manoeuvre.
There are three specific manoeuvres which enable a unit to turn about or rearrange its ranks, these are wheel, turn or change formation.
Wheel. To wheel you take the model on the edge of your formation and move it forwards in the direction you want to go. You do not need to move it the full movement distance if you don't want to. Having moved it to the new position you line the rest of the models up with it, leaving the model at the opposite end of the line to act as a pivot.
The entire unit counts as having moved as far as the outside model. Once you have wheeled you may use any movement the unit has left.
A unit can wheel several times during its move as long as it has movement left and is not charging.
Turn. A unit can only turn once during its move. To turn a unit of troops all the models remain in place, but are turned round through 90 or 180 degrees to face their side or rear. To make a turn a unit must surrender a quarter of its move; a unit with a move of 4" must give up 1" to turn for example. [Diagram: a unit of 15 models in 3 ranks turns 90 degrees to its right flank. The unit still has 15 models but is now 5 ranks deep.]
Change Formation. A unit can also change its formation by adding or reducing the number of ranks in which it is deployed. For example, a unit of 2 ranks may increase its depth to 3 ranks by moving models from the front two ranks to form a new third line. A unit must surrender half of its move to either add or deduct one rank. A unit may therefore add or deduct 2 ranks if it does not move at all.
Marching
Marching is a type of extra fast move that allows troops that are slightly removed from the main fighting zones to move more rapidly. This represents the swift movement of reserves by marching, and helps to ensure that units don't get stranded away from the fighting.
Marching troops move at double pace with weapons sheathed or shouldered. A unit on the march is not prepared for combat so marching is not suitable for use close to the enemy. No unit would approach the enemy with weapons unready.
Troops may only march if there are no enemy within 8" of them. If marching troops move to within 8" of enemy troops then they immediately halt and prepare their weapons for combat.
A unit on the march cannot change formation or turn as this would disrupt its movement. It can wheel as normal.
A marching unit cannot move through difficult or other obstructive terrain or cross obstacles. It must stop if it comes to these features.
A unit on the march cannot shoot missile weapons during the shooting phase. It is unprepared for combat and any weapons carried are not ready to be used.
War engines, chariots and other machines cannot march; they are far too cumbersome.
Fast Cavalry
Fast, lightly armoured cavalry can manoeuvre much more easily than slow, ponderous foot troops encumbered by weapons and armour. Therefore these riders are allowed more flexibility than other troops.
Mounted models with a saving throw of no greater than 5+ and a move rate of at least 6" over open ground are classed as fast cavalry. Fast cavalry can make any number of turns without penalty and may change formation once during their movement by any number of ranks. Their manoeuvrability is so great they can even do this while marching.
Snaking
A unit deployed in a long line with models lined up one behind the other can manoeuvre very easily. The lead model is not restricted by troops either side and so can choose a snaking path which twists about. This is called snaking. Trailing models are placed so that they follow the path of the lead model. This is a special type of movement unique to long lines of troops. It isn't a very practical formation for fighting, but it is very handy for threading your way through buildings and other obstacles.
[Diagram: a unit of Elf archers may shoot at a nominated enemy target; a unit of Goblin spearmen, a Goblin chariot or a Wyvern may be chosen.]
Charging
Chargers are moved when compulsory movement is finished, and before you move the rest of your troops. Make sure you have completed all of your charges before moving other troops. Chargers are moved at double their normal speed, but must make deductions for terrain and crossing obstacles the same as other troops. For example, mounted knights with a move of 6", once a deduction has been made for armour, may charge 12". If they are moving over difficult terrain they move at half rate, reducing their charge to 6".
Before you move the charging unit check that the enemy has declared his response and that troops electing to flee have been moved and troops electing to stand and shoot have done so. Measure the distance between the chargers and their target.
If you have estimated your move incorrectly you may find your troops can't move far enough to reach their intended target. If this is the case the charge has failed. The unit is moved its normal move distance rather than its double speed charge, directly towards the intended target then comes to a halt. Your troops have begun to charge, realised that it is impossible to cover the distance and their movement has petered out as they lose impetus and enthusiasm. A unit that fails its charge cannot shoot with missile weapons that turn.
A charging unit may wheel once in order to line itself up with the enemy. Apart from this wheel a charging unit cannot manoeuvre at all. This means that chargers can never turn, change formation or wheel more than once. This is because the chargers are running fast once the charge has begun, and are completely unable to execute delicate manoeuvres.
Charge Reactions
If your opponents stand and shoot it is possible that they may cause sufficient casualties to force a panic test. Panic tests and other special psychological tests are explained later in the Psychology section. This may result in your charge being brought to a halt before contact is made with the enemy. This is why it is important to work out standing and shooting before moving the chargers. If the chargers are out of missile range at the beginning of their charge, then work out missile casualties at the maximum range of the weapon.
If your opponents flee as you charge then they will move directly away from you either 2D6" or 3D6" depending on whether their movement rate is up to 6" or more than 6". It may be that fleeing troops have moved too far for the chargers to catch them, in which case the chargers move a normal move exactly as for any other failed charge.
If the fleeing troops have not moved far enough away to avoid their attackers then they are in deep trouble. Should chargers move into contact with fleeing troops then the entire fleeing unit is destroyed, run into the ground by its enemy. See the rules for fleeing troops in the Hand-to-Hand Combat section for more details.
If your opponent flees it can happen that a new enemy unit is revealed. For example, if two enemy units are placed so that one is directly behind another, then if the first unit flees the chargers will be faced by the second. If this fresh enemy unit is within the chargers' charge move then treat the situation exactly like a newly declared charge. However, the enemy unit may not stand and shoot because his frontage is covered by his own troops as they flee, therefore it is only possible to either flee or hold.
A charge can sometimes trigger extra movement from the enemy. For example, Goblin Fanatics will leap out of their units and attack as soon as enemy approach within 8". This happens out of the normal sequence: the charge is halted as soon as the chargers move within 8" and the Goblin Fanatics are moved and any damage they cause worked out straight away. It is up to the player to say that he has out of sequence movements or actions to perform at the appropriate moment.
Flank and Rear Attacks
Being attacked from an area you cannot see and thought was safe is a frightening thing for even the bravest of troops. With his field of vision narrowed by his position in the ranks, the average soldier has only a limited knowledge of what is going on in the battlefield. If the enemy has somehow got round behind him the battle may be lost. Confusion, doubt and terror will be sown in his mind. If he is in hand-to-hand combat already he may panic and flee, thinking all is lost and the enemy is at his unguarded back.
To represent this, troops who are attacked in the flank or rear while already fighting other enemy must take a panic test to see if their nerve breaks. This test is taken as soon as it has been established that the chargers are in range, but before moving any troops. Panic tests and other psychological tests are described fully in the section on Psychology. Even if troops do not break and flee as a result of a panic test, their ability to fight will be impaired if they are fighting enemy to their flanks or rear. This is represented by a special combat bonus which is discussed in the Hand-to-hand Combat section.
Shooting
Once movement is complete it is time to work out your shooting. Troops armed with bows, crossbows, or other missile weapons may shoot at any enemy targets they can see. You may also shoot any war machines such as stone throwers, bolt throwers, and cannons, although the rules for these are covered in a separate section of the rulebook.
There is no particular order in which shooting must be resolved. Nominate one of your units you want to shoot with and select the enemy target you wish to shoot at. For example, you might choose to shoot your Elven Archers at the Goblin Chariot or at a unit of Goblin spearmen. Once you have declared your target measure the range and resolve shooting using the rules below. Continue until you have shot with each unit or war machine.
Range
All missile weapons have a maximum range which is the greatest distance they can shoot. If your declared target lies beyond this maximum range because you have estimated the range wrongly, then your shots automatically miss. This is why you must pick your target before measuring the range.
For example: The goblin player is using short bows which have a range of 16". He declares he is opening fire on the nearest Elf unit. When he measures the distance he finds the Elves are 17" away. His hail of arrows falls short of the sneering Elves.
It often happens that some models in a firing unit will be in range and others will be out of range. If this is the case then only those who are in range can shoot and the remainder automatically miss.
| Weapon | Maximum Range |
|---|---|
| Short Bow | 16" |
| Bow | 24" |
| Long Bow | 30" |
| Crossbow | 30" |
| Repeating Crossbow | 24" |
| Sling | 18" |
| Javelin | 8" |
| Thrown axe, spear | 4" |
| Thrown knife, dart | 6" |
| Blowpipe | 12" |
| Handguns | 24" |
| Pistol | 6" |
These ranges are the maximum distances that the weapons can fire. Missiles lose power and accuracy long before they reach maximum range so ranges are divided into short and long. Short range is up to half the maximum range of a weapon. Long range is between half and maximum distance. As we shall see later, there are modifiers that make it more difficult for a weapon to hit at long range.
For example: Short range for a short bow is up to 8". A target at more than 8" counts as being at long range.
Who Can Shoot
The direction a model faces in is assumed to be the actual direction faced by the creature it represents. Common sense will tell you a model cannot fire in one direction while looking in another. To represent this a target must lie within a 90 degree arc projected from the front of a shooter. Where models are on square bases this can be imagined easily by projecting a line through the corners. [Diagram: firing arc. A model may shoot at a target within this arc.]
Models can only shoot at targets that they can see. Their sight, and therefore their shot, is blocked if there is anything in between them and their intended target. This includes interposing models as well as scenery. Because of this, only the models in the front rank of a unit can shoot, because the models behind them will not be able to see past their friends to the target.
Imagine a real battlefield with its contours, morning mists and haze of dust. Picture the woods and hedges that obscure vision, that sudden fall of ground that hides your enemy and the distances that blur friend with foe. Towering over our miniature battlefield we are unaware of all this but the troops represented by our models are not so lucky. Just as their real life counterparts cannot see through hills or hedges we must assume that our models cannot see behind corresponding scenic features.
As it is impossible to say exactly what your model scenery looks like, it is not practical to be definitive about which kinds of building or terrain block sight. You must be prepared to use your own judgement within the following guidelines. Perhaps the easiest way of checking whether a model can see another is to get down over the table and take a model's eye view, but remember you must be reasonable about this as in reality it would be much more difficult to see enemy troops than over a perfectly flat, mist free gaming table.
Hills, large boulders and buildings block sight over level ground. An interposing hill or house will block your sight and prevent models shooting through it.
Hedges and walls block sight over level ground. However, a model placed directly behind an obstacle (i.e. touching it) is assumed to have taken up a position where it can see and shoot over the obstacle, with head and shoulders clearly visible. Such a model can shoot but it can also be seen and shot at.
Woods block line of sight if the shooter and the target lie on either side of the wood. It is only possible to see through 2" of woodland, so if a model is within 2" of the edge he can see out and shoot and he can also be seen and shot at. If further inside the wood a model can neither be seen by models outside nor can he see them. If both target and shooter are inside the wood then missile range is reduced to the farthest you can see, which is 2".
Troops, friendly or unfriendly, block sight beyond them. It is not possible to shoot directly through one model to hit another.
Troops occupying elevated positions such as hills and the tops of buildings, can see over the heads of models, over the tops of lower hills, lower buildings, trees, and obstacles. Not only can such troops see and shoot, but they can also be seen and shot at because they are standing high up, exposing themselves to view. One of the most useful aspects of this is apparent when you have a unit deployed on a hillside: models in a rear rank higher up the slope can see over the heads of ranks in front of them and so can shoot. This can enable many more models to shoot than is possible over level ground where only the front rank is able to bring its weapons to bear.
Cover
Troops take advantage of cover to hide from enemy missile fire. This makes them harder to hit because they can duck back out of the way leaving arrows to splinter against a wall or tree. There are two sorts of cover: hard cover and soft cover.
Hard cover offers real physical protection as well as partially concealing the target from view. The corner of a building, a large rock, walls and wooden palisades are all hard cover. Troops positioned at windows and doors also count as being in hard cover. A model positioned at the corner of a building so that he is peeking round is behind hard cover. Models in trenches or pits are also counted as behind hard cover.
Soft cover partially shields a target from view but provides little actual protection against incoming missiles. You can hide behind a hedge but a crossbow bolt or an arrow will go straight through it. Hedges, wagons, carts and woodland all provide soft cover. Troops within woods automatically count as being in soft cover.
Shooting and Hand-to-Hand Combat
Troops engaged in hand-to-hand fighting are far too busy to use missile weapons and therefore may not shoot.
Other troops may wish to shoot at targets engaged in hand-to-hand combat. This is possible but not necessarily a good idea as you are likely to hit the wrong target and kill a friend rather than an enemy. Troops in hand-to-hand combat are taking part in a vast swirling melee, and under the circumstances it is virtually impossible to tell friend from foe or get a clear view of your target. You can shoot into combat if you wish but if you do so then hits must be divided equally between both sides. Odd hits can be allotted to either side in some random fashion such as by rolling a D6: a score of 1-3 = a hit on your side, while 4-6 = a hit on your enemy. On the whole, it is not a good idea to shoot into hand-to-hand combat.
Dividing Shots
A unit of troops always takes aim and shoots at a single target where possible, obeying the commands of their leader who is directing their fire. Therefore, where possible, all the unit must fire at a single target, such as a unit of enemy troops or a huge monster or chariot. This may occasionally mean you are obliged to fire at one target rather than another, because one target can be shot at by all your troops while another may be in sight of only a few. However, it is sometimes impossible for all your models to shoot at a single target because no one target is visible to all shooters. In this case you may divide your shooting between two enemy targets if you want to.
Hitting the Target
The chance of a shooter scoring a hit on his target depends on his ballistic skill, or BS. The higher the individual's BS, the greater his chance of hitting. To determine whether you hit you must roll a D6 for each model shooting. Count how many models in your unit are shooting, and roll that number of dice. It is easiest to roll all the dice at once, although you don't have to do so. If you have a lot of models shooting you may have to roll several batches of dice. The following table shows the minimum D6 score you will need to hit.
| BS | 1 | 2 | 3 | 4 | 5 | 6 | 7 | 8 | 9 | 10 |
|---|---|---|---|---|---|---|---|---|---|---|
| D6 score needed | 6 | 5 | 4 | 3 | 2 | 1 | 0 | -1 | -2 | -3 |
If you score at least the number required you have hit, if you score less you have missed.
For example: You fire with 5 Goblin archers. Goblins have BS 3, so you need a score of at least 4 to hit. You roll 5 dice and score 1, 2, 2, 4, and 6: 2 hits and 3 misses.
Of course, you cannot roll less than 1 on a D6, so troops with a BS of 6 or more will invariably hit. However, circumstances can make it harder to hit as described below, and this may increase the dice score required so that even troops with very high BS values can find it difficult to hit their target.
To Hit Modifiers
Shooting isn't simply a matter of pointing your weapon at the target and letting fly. Factors other than your ballistic skill affect your chance of hitting. Ones mentioned earlier include range and cover. There are other factors too, some of which make it easier to hit, and others that make it harder.
Factors that make it easier are added to your die roll. Factors that make it harder are subtracted from your die roll.
+1 Shooting at a large target. A large target is anything which in real life would stand over approximately 10 feet tall or which is especially bulky. Ogres and Trolls are large targets for example, while Men, Orcs, Elves and the vast majority of troops are not. Cavalry models are not considered to be large targets if they are just riding horses, wolves, boars or comparable beasts. Most war machines are large targets, and so are chariots.
-1 Shooting while moving. If the shooter moved during the movement phase then his chance of hitting is reduced. Even a simple turn or change of formation is enough to reduce his concentration and so counts as movement.
-1 Shooting at a charging enemy. If you are charged and elect to stand and shoot at your attacker then your chance of hitting is reduced. While the enemy thunder towards you your aim will be distracted and your shot hurried as you abandon your weapon to take up a sword.
-1 Shooting at long range. If your target lies at over half your maximum range you are less likely to hit. Sometimes you will find some of the shooters are within short range and some are at long range. If this is the case you must roll 2 batches of dice, one for each range band.
-1 Shooting at a character model. If your target is a single man-sized character model then this penalty applies. See the section on Heroes and Wizards for a complete explanation of rules for shooting at character models.
-1 Target is behind soft cover. If your target is behind soft cover then your chance of hitting is reduced.
-2 Target is behind hard cover. If your target is behind hard cover your chance of hitting is drastically reduced.
All modifiers are cumulative. So, for example, if you are shooting at long range at a target behind soft cover your chance of hitting is reduced by -2. This means that with a BS of 5 you would need to roll a 4 to hit instead of the 2 normally required.
For example: 10 Goblin archers open fire at a unit of Elves. The Goblins have a BS of 3 and their targets are 10" away. To make matters worse, the Elves are standing behind a hedge - soft cover! The bold Gobbo ladz are armed with short bows which means their targets are at long range (short range being 8" or less for these weapons). Because their BS is 3 the Gobbos need a 4 to hit but since their targets are in cover and at long range this means that they suffer a penalty of -2. So each archer needs to roll a 6 to hit as 6-2 = the 4 required. The player rolls 10 dice and manages to get two 6's - two hits!
Wounds
Not all hits will wound their target; some may glance off armour or clothing, while others may just graze their target causing no real harm. Some creatures are so tough that arrows do not easily pierce their flesh, or they are so resilient that they are able to ignore missiles sticking in their bodies. Once you have hit your foe, you must roll again to see if you wound him. To do this you must compare the weapon's strength value with the target's toughness value. The strength values of common missile weapons are given on the next page; the target's toughness 'T', is included on his profile.
Roll a D6 for each hit you have scored and consult the table below. Find the weapon's strength and look down that row. Then scan along to the column for your target's toughness. The number indicated is the minimum score on a D6 required to score a wound.
Wound Chart
Rows are the attacker's Strength; columns are the target's Toughness.
| Strength \ Toughness | 1 | 2 | 3 | 4 | 5 | 6 | 7 | 8 | 9 | 10 |
|---|---|---|---|---|---|---|---|---|---|---|
| 1 | 4 | 5 | 6 | 6 | N | N | N | N | N | N |
| 2 | 3 | 4 | 5 | 6 | 6 | N | N | N | N |
To use the chart first find your weapon's strength down the left hand side. Now cross reference this against your target's toughness along the top. Where the two lines meet is a number, which is the minimum score required on a D6 to score a wound. Roll a D6, if you score equal to or more than the score required you have wounded your target. If you score less then the hit has either rebounded from the creature's hide, entangled itself in clothing, or merely nicked his flesh causing no appreciable damage.
If you have scored several hits on an enemy unit then roll all the wound dice together to save time, so if you have 4 hits then roll 4 dice to wound. It is fastest to simply pick out the hit dice which have scored hits and roll them again to see if they cause wounds.
Where the table shows an 'N' this indicates that the target is simply too tough for you to hurt. N stands for no effect, or no chance.
Weapon Strength
The following examples show the strength of various missile weapons. They are included here as examples: the section on Weapons describes all missile and hand-to-hand fighting weapons in more detail.
| Weapon | Strength |
|---|---|
| Shortbow | 3 |
| Bow | 3 |
| Longbow | 3 |
| Repeating Crossbow | 3 |
| Sling | 3 |
| Crossbow | 4 |
| Hand Gun | 4 |
Continuing our example from above: The Goblin player, having scored 2 hits against the Elves consults the table. His ladz' short bows are S3. The Elves are toughness 3. He sees that he needs to roll 4 or better to wound an Elf. He rolls a 4 and a 2, wounding one Elf.
Armour
Models that are wounded still have a chance to avoid damage if they are wearing armour or carrying shields, or riding a horse or similar creature. These models have an armour saving roll. Roll a D6 for each wound your troops have suffered. If you roll greater than or equal to the armour saving throw of the model the wound has been absorbed or deflected by its armour.
| Armour Worn | Saving Throw | Saving Throw if Cavalry |
|---|---|---|
| None | None | 6+ |
| Shield or light armour | 6+ | 5+ |
| Shield and light armour, or heavy armour only | 5+ | 4+ |
| Shield and heavy armour | 4+ | 3+ |
| Riders with shield and heavy armour, riding armoured mounts | n/a | 2+ |
Cavalry models automatically have a saving throw of 6 even if the rider is wearing no armour. This represents the extra protection afforded by the horse or other mount. If the rider is wearing armour then his saving throw will be 1 better than it would be if he were on foot. For example, a Man wearing light armour and carrying a shield has a saving throw of 5+ on foot and 4+ when mounted.
Note that this bonus only applies to cavalry and not to big monsters with riders. Rules for big monsters and riders are discussed in the section on Monsters.
For example: A trooper carrying a shield and wearing light armour has a saving throw of 5+. This means he must roll a 5 or 6 to be saved by his armour. To continue our example from above, the Goblin archers have scored 1 wound on the Elf troops. Since the Elves are wearing light armour and have a shield their saving throw is 5+. The Elf player rolls a 2. Not surprisingly he has failed. If he had scored a 5 or 6 the arrow would have bounced off and the Elf would have been unharmed.
Saving Throw Modifiers
Some weapons are so powerful that they can punch right through armour, so armour provides less protection against them. Such weapons confer saving throw modifiers that are subtracted from the foe's armour saving throw. This is shown by the table below.
| Strength of Hit | Reduces Armour Saving Throw By |
|---|---|
| 3 or less | None |
| 4 | -1 |
| 5 | -2 |
| 6 | -3 |
| 7 | -4 |
| 8 | -5 |
| 9 | -6 |
| 10 | -7 |
For example: A crossbow has a strength of 4. A crossbowman hits a warrior in light armour with shield. Normally the warrior would need to roll 5 or 6 to make his save and avoid taking the wound but because of the crossbow's enormous hitting power 1 is subtracted from his dice roll. This means he must now roll 6 to save.
Remove Casualties
Most human-sized troops can only sustain 1 wound before they fall casualty. Some models can take several wounds before they become casualties, but these are the exceptions rather than the rule. The number of wounds a model can sustain before it falls casualty is indicated by its wounds value or 'W' on its profile.
Where troops have only a single wound casualties are removed as follows. If a unit of troops is hit and suffers wounds which it does not save then for each wound suffered one model is removed as a casualty. Casualties are not necessarily dead, they may be temporarily knocked-out, or simply too badly wounded to carry on fighting. For our purposes the result is the same so we can consider casualties as slain.
The player who has suffered the casualties must remove slain models from the unit. Although casualties would really fall amongst the front rank it is convenient to remove casualties from the rear of the unit. This keeps the formation neat and represents rear rankers stepping forwards to cover gaps in the line as they appear.
If models have more than one wound then casualties are removed as follows. Imagine that a unit of Minotaurs suffers 5 wounds from arrow fire. Minotaurs are big monsters and each model has 3 wounds. The arrows would fall randomly among the unit, possibly wounding several creatures, but for our purposes we shall remove whole models where possible. So, 5 wounds equals 1 model dead (3 wounds) with 2 wounds left over. The wounds left over are not enough to remove another model, so the player must make a note that 2 wounds have been suffered. If the unit takes another wound from some other attack, then another Minotaur model is removed. It is important to keep a record of wounds taken by units such as this.
In the case of cavalry models all shots are worked out against the rider. If the rider is slain the mount is removed as well. This is a convenient and practical way of representing cavalry, as it dispenses with the need for individual dismounted riders and loose mounts. Obviously some riders are slain, horses bolt and run away, and some mounts are killed throwing their riders to the ground. However, these things can be safely imagined while models are removed as a single piece. Note that this only applies to ordinary cavalry (mounts which have 1 wound on their profile) and not to large monsters which have riders. Large monsters have more than 1 wound on their profile and are covered by the rules for Monsters.
Panic Tests
It is extremely difficult for troops to keep their nerve while people all round them are falling to arrow fire. To simulate this any unit taking substantial casualties may be called upon to take a panic test. A panic test is a psychological test and it is described in the section on Psychology tests along with other effects such as fear, and so on.
Fast Dice Rolling
You will have gathered by now that it is necessary to roll quite a few dice to resolve shooting, whole handfuls at once in fact. This doesn't take as long as you might imagine because all the dice are rolled together. The most practical way of going about this is to take as many dice as you have troops shooting and roll them all at once. So, if you're shooting with 10 Goblin Archers roll 10 dice. Then pick out any dice which score a hit and re-roll them to wound. So, from our 10 dice to hit 4 might typically score hits, these are re-rolled and may score 2 wounds for example. Dice which score wounds are picked out and handed over to the opponent to take his saving throws. This same system applies when you work out hand-to-hand combat damage too, as described in the next section.
Hand-to-Hand Combat Phase
Once all the shooting has been resolved it is time to deal with the brutal cut and thrust of hand-to-hand combat or melee, as it's sometimes called. All units that are in contact with the enemy must fight. The hand-to-hand combat phase is an exception to the normal turn sequence in that both sides fight, regardless of which player's turn it is. Work out combats one at a time: resolve the fighting for all the troops involved in one combat before moving on to the next. A combat is usually a fight between one unit from each side, but it is possible that several units, monsters, and heroes may become involved.
[Diagram, Combats: three separate combats. One between two units and an Elf griffon rider on the left; a huge fight between two units of Elves, two units of Goblins and a Goblin chariot in the centre; and a combat between two opposing units, an Orc Wyvern rider and an Elf bolt thrower on the right. Work out each combat before progressing to the next.]
Who Strikes First
In the desperate hack and slay of close combat the advantage goes to the best and fastest warriors, or those who have gained the extra impetus of charging into combat that turn. To represent this, models strike blows in a strict order. Troops who have charged that turn automatically strike first. Otherwise, all blows are struck in strict order of initiative (I). Models with a higher initiative strike first followed by models with a lower initiative. This is important because if a model is slain before it has a chance to strike it obviously cannot fight back. Striking first is a big advantage, which is why it is better to charge your enemy rather than allow him to charge you.
If opposing troops have the same initiative then the side which won the combat in the previous turn may strike first, or if this doesn't apply you can roll a D6, and the player who scores highest goes first.
For example: A bunch of Orc boar riders charges a group of Elf spearmen. The Elves have an initiative of 6, while the Orcs only have initiative 2. The Orcs strike first because they charged. Next turn the Elves will go first because of their higher initiative.
Which Models Fight
A model can fight if its base is touching the base of an enemy model. Even models attacked in the side or rear may fight, and may be turned in the ranks to indicate they are doing so. If a model is touching more than one enemy it can choose which to attack. For example, if faced with an enemy hero and an ordinary enemy trooper you may decide to attack the trooper because you stand more chance of harming him, or could take the outside chance of fighting the hero.
In the case of cavalry mounts which have their own attacks, these are worked out in exactly the same way as normal. This means that some cavalry have two lots of attacks: the rider attacks and his mount attacks as well. For example, Warhorses and Giant Wolves have their own attack which they strike in the normal way.
Hitting the Enemy
The chance of hitting your enemy depends upon the attacker's weapon skill (WS) and the defender's weapon skill. To determine whether you score a hit roll a D6 for each model fighting. If you have more than one attack (A) with your troops then roll a D6 for each. For example, 10 Elves have 1 attack each so roll 10 dice, but 10 Minotaurs have 2 attacks each so roll 20 dice.
The score needed to score a hit on your enemy depends upon the relative weapon skills of the attacker and his foe. Compare the weapon skill of the attacker with the weapon skill of his opponent and consult the chart below to find the minimum D6 score needed to hit.
If you look at the chart you will see that if your model's weapon skill is greater than your foe's you hit him on 3+. Otherwise you hit on a 4+, unless his weapon skill is more than double yours in which case you require a 5+.
To Hit Chart
Rows are the attacker's Weapon Skill; columns are the opponent's Weapon Skill.
| Attacker \ Opponent | 1 | 2 | 3 | 4 | 5 | 6 | 7 | 8 | 9 | 10 |
|---|---|---|---|---|---|---|---|---|---|---|
| 1 | 4 | 4 | 5 | 5 | 5 | 5 | 5 | 5 | 5 | 5 |
| 2 | 3 | 4 | 4 | 4 | 5 | 5 | 5 | 5 | 5 |
Cavalry
When you are fighting cavalry all blows are struck against the rider using the rider's WS. The mount may fight using its own WS if it has its own attack.
Defended Obstacle
If you are attacking an enemy behind a wall or a hedge, inside a building, or behind some other defended obstacle you will require a 6 on a D6 to hit. It is very difficult indeed to hit enemy in these circumstances.
Fighting with Two Weapons
Some warriors carry a weapon in both hands so they may rain down even more attacks on their enemy. If a warrior carries a weapon in both hands he receives one extra attack from his left hand. It doesn't matter if his attack (A) value is 2 or more, a warrior receives only +1 attack from his extra weapon.
Wounds
Not all successful hits are going to harm your enemy; some may rebound from armour or bounce off tough hide, while others may cause only superficial damage that does not prevent the creature fighting. Once you have hit your foe you must roll again to see if your hits inflict wounds.
This procedure is exactly the same as described for shooting. Consult the table below, cross referencing the attacker's strength (S) with the defender's toughness (T). Both values appear on the profiles of the creatures fighting. The chart indicates the minimum score on a D6 required to cause a wound.
Where the table shows an 'N' this indicates that the target is simply too tough for you to hurt. N stands for no effect, or no chance.
Weapons Modifiers
Unlike shooting it is the strength value (S) of the attacker which is used rather than the strength of the weapon itself. However, some weapons confer a bonus on the attacker's strength. For example, charging knights with lances receive a +2 bonus on their strength. These bonuses are discussed together with other special rules in the section on Weapons.
Wound Chart
The chart is identical to the Wound Chart given in the Shooting section above (rows are the attacker's Strength; columns are the target's Toughness).
| Strength \ Toughness | 1 | 2 | 3 | 4 | 5 | 6 | 7 | 8 | 9 | 10 |
|---|---|---|---|---|---|---|---|---|---|---|
| 1 | 4 | 5 | 6 | 6 | N | N | N | N | N | N |
| 2 | 3 | 4 | 5 | 6 | 6 | N | N | N | N |
Armour
Models that are wounded still have a chance to avoid damage if they are wearing armour or carrying shields. This is exactly the same as described for shooting, and the same rules apply. For each wound suffered the player rolls a D6. If he rolls greater than or equal to the armour saving throw of his troops then that wound has been absorbed or deflected by the model's armour.
For example, an Elf wearing light armour has a saving throw of 6 so you will need to roll a 6 to save him. If he had a shield as well he would save on a 5 or 6, and so on. Re-read the section on armour and the description in the Shooting section if this is not completely clear.
Saving Throw Modifiers
Some creatures are so powerful that armour provides less protection against them. They can beat their way right through armour when they hit, either with a weapon or with their claws and teeth.
The higher a creature's strength the more easily it can pierce armour. If weapons give a strength bonus then this increases the strength of a hit and makes it easier to pierce armour. The chart below shows the reduction in the enemy's saving throw compared to the attacker's strength. This is exactly the same as for damage from shooting.
| Strength of Hit | Reduces Armour Saving Throw By |
|---|---|
| 3 or less | None |
| 4 | -1 |
| 5 | -2 |
| 6 | -3 |
| 7 | -4 |
| 8 | -5 |
| 9 | -6 |
| 10 | -7 |
Remove Casualties
Casualties are removed in exactly the same way as missile casualties. You may wish to re-read the Shooting section at this point. Remember that both sides fight in hand-to-hand combat, so models removed before they have a chance to strike cannot fight back. You will find it easiest and most practical to remove casualties from the rear ranks of units rather than from the front. Although it is the front rankers who are actually fighting, rear rankers would quickly step in to fill any gaps in the line, so it is preferable to remove these straight away. However, the rear rankers who step in to the front line cannot fight that turn; all they can do is step into the gap.
To remind you how many casualties have been suffered do not take the casualties off the table immediately, but place them behind the unit. There are two reasons for this which will become very clear as you play. Firstly, if you remove models from the back rank rather than the front you will have to bear in mind that some of the front rankers are actually rear rankers who cannot fight. Leaving casualties on the table will remind you how many casualties have been suffered and so how many models are left to fight.
Secondly, you need to know how many casualties have been suffered when it comes to working out which side has won the combat, and having all the casualties in place behind their units helps to make this clear.
Some models have several attacks, not just one. It is possible that a big creature, such as an Ogre or Minotaur, or a huge monster, like a Dragon, succeeds in inflicting, say, 3 or 4 wounds even though the model is only touching 1 or at most 2 enemy models. When this happens the number of casualties is still the full number of wounds caused, not just those models directly touching the attacker.
This is because combat is not the strictly organised linear affair that it appears. When the big creature attacks it slashes in one direction and then the next, stepping forward and aside to strike new victims as its enemies fall beneath its feet. This means that a monster or a powerful hero may be able to destroy many more enemies than he is touching.
Results
Once all the participants in a combat have fought you can determine which side has won. Begin by adding up all the wounds caused by each side. It does not matter which particular units suffered the wounds, just add them all up. Do not forget to add the wounds taken by big creatures which have not been removed as casualties.
The side which has caused the most wounds has won the combat. The other side has lost. If both have inflicted the same number of wounds then the result is a draw. However, a side can claim extra bonus points under certain circumstances, for example if it has a battle standard, if it is attacking the enemy in the flank, or if it is fighting from higher ground.
Each bonus point is added to the number of casualties you have inflicted. So for example, if both sides cause 3 wounds the result is a draw, but if one side had a battle standard it adds +1 to its score, beating the enemy by 4 points to 3. These bonus points can make all the difference between winning and losing the combat. The table below summarises the bonus points.
Once both sides have established their total points, including the number of casualties caused and bonus points, compare the values to discover which side has won the combat. The higher the winner's score compared to the loser's the bigger and more decisive the victory. An 8 point against 7 point victory is only a slight win for example, because the difference in scores is only one point. An 8 point against 2 point victory is extremely decisive as the difference in scores is a whopping six. This difference in scores is important because it is used when working out if a defeated enemy stands his ground or turns and flees.
Bonus Points Table
+1 Rank Bonus. If your formation is at least 4 models wide then you may claim a bonus of +1 for each complete rank of models behind the first. So, a formation 3 ranks deep would give you a +2 bonus, a 4 deep formation gives you a +3 bonus. The greatest bonus you can claim is +3 from 4 ranks; no bonus is given for deeper formations. If your side has several units fighting, then you may add the bonus from the deepest formation. You do not get a bonus from each unit, just the deepest unit in the combat.
+1 Standard. If any of your units has a standard flying in the front rank then you may add a +1 bonus. If you have several standards then you still only add +1, not +1 for each standard. Rules for standards are described later.
+1 Battle Standard. If the army's battle standard is fighting in the combat then you may add a further +1. This is in addition to the bonus from ordinary banners because it represents the great leader himself. Rules for standards are described later.
+1 High Ground. If you are fighting from a higher position than your enemy then you may add a +1 bonus. For example, if you are defending the crest of a hill. If there are several units involved, some higher than others, the bonus goes to the side which has troops on the highest ground. Note that this bonus only applies to troops occupying higher terrain, not to models which are simply bigger than their enemy; they have enough advantages already.
+1 Flank Attack. If you are fighting an enemy unit in the flank you may add a +1 bonus. You must have at least 5 models in the flanking unit to earn this bonus. A smaller unit may strike blows as normal but does not give the bonus. If both sides have troops attacking in the flank then the side with the most flanking units gets the bonus. The bonus is only applied once, regardless of how many flanking units are involved in the combat.
+2 Rear Attack. The same comments apply as for a flank attack but to units attacking in the rear.
For example: A unit of Elf archers is fighting a unit of Goblin spearmen. The Goblins inflict 3 wounds on the Elves, and the Elves inflict 4 wounds on the Goblins. However, the Goblin player has 4 complete ranks in his formation, and as each extra rank adds +1 to his score this gives him 3 + 3 = 6 points against the Elves' 4. The Elves have therefore lost the combat, even though they have caused more casualties; the vast numbers of Goblins pressing from the back have overwhelmed them. The Elves must therefore take a break test adding +2 to their dice score. Elves have a good leadership value (8) but with the extra +2 modifier on the dice the player will have to roll 6 or less to stand and fight. The player rolls 2D6 and scores 7, the +2 modifier brings his total to 9 which is greater than the unit's leadership so the Elves are broken.
Losers Take a Break Test
The side that loses a combat must take a test to determine if it stands and fights or turns tail and runs away. This is called a break test. You need to take a separate break test for every unit involved in the combat. Depending on which units pass and which fail their test some may break and flee, while others may stand their ground. Troops which are better led, braver, and more professional are more likely to stand firm, while wild, temperamental troops are far more likely to run for it.
Take the test as follows. Firstly say which unit you are testing for. Roll 2D6 and add the scores together. Now add the difference between the winner's and loser's combat score. If the total is greater than the unit's Leadership (Ld) value then the unit is broken. Broken units will turn tail and flee once all combat on the entire battlefield has been worked out. Until all combat has been worked out simply turn a few of the rear rank models round to remind you that the unit is broken.
Panic Tests for Breaks
Once all of the combats have been fought and all units that have been defeated have taken a break test, you must take a panic test for all your units which are within 12" of friendly units which have broken. This represents the spread of panic amongst the army as friendly units collapse and turn tail, leading to crumbling battlelines and possibly causing other units to flee as well. Panic is a special psychological effect, and the full rules for panic and other psychology are covered in the following section of the rules. However, it is worth bearing in mind at this stage that panic tests must be taken once all break tests are complete but before any fleeing troops are moved.
Fleeing Troops
Once you have completed all of the break tests resulting from combat that turn, and having taken any necessary panic tests, it is time for broken troops to flee. Fleeing troops turn directly away from their enemy and run as fast as they can. They abandon their formation and run from their enemy in complete rout, blindly scrambling over the ground in their efforts to avoid the enemy.
It is difficult to judge how far fleeing troops will run because they are no longer fighting as a unit but milling around in a frightened mob. To establish how far the fleeing unit moves roll dice. If the unit normally moves 6" or less roll 2D6. If the unit moves more than 6" roll 3D6. The result is the distance covered by the fleeing troops minus any penalty for terrain or obstacles. Move the fleeing unit directly away from its enemy so that it is 2D6" or 3D6" away from them and facing in the opposite direction.
A fleeing unit will be destroyed if it is caught by pursuers as described below. If it is not destroyed then the fleeing unit continues to move 2D6" or 3D6" towards the nearest table edge during its movement phase in an attempt to get away from the battlefield as quickly as possible. While it continues to flee the unit can do nothing else. It cannot fight nor shoot with missiles. Where able to do so, it will move round obstacles that block its path, including units of troops, but it will not move towards enemy troops unless it has no other choice.
If any models leave the table edge the unit is considered to have left the battlefield and is removed from play. The troopers have scattered beyond recovery or have found places to hide themselves until the battle is over.
If enemy troops charge a fleeing unit then the fleeing unit makes its 2D6"/3D6" flee roll as normal. The charging unit moves its standard charge distance. The charging enemy destroys the fleeing troops if it catches them.
A fleeing unit may test to rally at the very start of its movement phase. This represents the efforts of leaders and brave individuals to call a halt to the rout, bring the troops to their senses and restore order. This is called rallying and a unit that rallies successfully may reorder its ranks in preparation to fight once more.
To take a rally test roll 2D6. If the score is equal to or less than the unit's leadership (Ld) then the unit stops fleeing and has rallied. The unit must spend the remainder of the turn stationary and may not shoot or fight, but the player may rearrange its formation and turn it to face whichever direction he chooses.
A fleeing unit that has suffered many casualties will be unable to rally. A unit must still have at least 25% of its original number of models surviving to be able to attempt to rally. If a fleeing unit has less than 25% of its original strength left, the troops are too demoralised to rally. The unit continues to flee until it leaves the table or is destroyed.
Pursuit
If a unit wins a combat and all of the enemy it is fighting break and flee, then the victorious unit will normally pursue. The troops triumphantly surge forward, hacking at their retreating foes as their backs are turned, cutting them down as they run. Note that a unit may only pursue if all the troops it is fighting break; if one unit breaks and another stands and fights on then the victorious troops do not pursue. Like fleeing, pursuit is a hectic and uncontrolled affair, so dice are rolled to determine how far the pursuing unit moves.
Once fleeing troops have been moved victorious units may pursue. To find out how far they pursue roll 2D6 or 3D6 in exactly the same way as for fleeing troops. The pursuers are moved the distance indicated straight towards and through the fleeing troops if they move far enough. If the pursuers move further than the broken troops then the fleeing unit is completely destroyed; all the troops are cut down as they run. If the pursuers do not move far enough to catch the fleeing troops then no further casualties are caused. The pursuers are simply moved the distance indicated towards their broken enemy.
It sometimes happens that pursuers move far enough to hit a fresh enemy unit. The pursuers are carried forward against the enemy unit as they chase their fleeing enemy. This is considered to be a new charge, and the attacked unit must 'hold' as any attempt to flee or shoot amidst the confusion of running bodies is impossible. The resulting combat is worked out in the following turn. The pursuers are considered to be charging and so get all the usual benefits and bonuses as if they had charged that turn.
Assuming the pursuers do not encounter any fresh enemy they move as far as indicated by their dice roll and are ready to fight normally immediately. In their following turn they may charge, march or move normally exactly like any other unit. No penalty is imposed because of their pursuit move. Units do not continue to pursue during the rest of the game. Pursuit is a single extra move made as soon as your enemy break and flee.
A player may decide that he would sooner not pursue. Normally a unit must pursue if it is able to do so, but the player may attempt to halt the pursuit by making a test against the unit's leadership (Ld). This represents the unit's leader calling to his troops to hold, while their natural inclination is to run after the enemy and cut them down as they scatter. Roll 2D6, and if the score is equal to or less than the unit's leadership value then the test is passed and the unit may remain stationary instead of pursuing.
A unit does not have to pursue if it is defending a wall, a hedgerow, a house, or a comparable obstacle or fortification. As pursuing would force the unit to abandon its secure position there is a great incentive to stay where they are. In this situation, the player may decide to pursue if he wishes, but does not have to do so.
A unit which pursues its fleeing enemy off the table returns to the same point in its following movement phase. The unit may not move other than to position itself along the table edge.
Lapping Round
If a unit wins the combat it can bring models from the rear ranks and place them forward to increase the width of the formation allowing more models to fight. You can increase the width of the formation by up to 2 models on either flank.
If a unit wins the combat and its formation already extends to the enemy's flanks, then you may move models from the rear ranks round the sides of the enemy unit. You may move up to 2 models around each flank, assuming that there is room and that the flank is not blocked by another unit, a building, or other terrain. Once models have covered the enemy's flanks you can move around the rear should you win a further turn, extending your line and surrounding the enemy unit completely. These extra models are described as lapping round.
Models which are lapping round do not count as being within the unit's formation, so lapping round models in this way does not negate your usual rank bonus if this applies. If the unit is defeated in a subsequent turn of hand-to-hand fighting then any models lapping round are immediately returned to the rear rank. It is assumed they have been fought off.
Models which are lapping round do not count as making a flank or rear attack unless there are 5 or more models lapping round onto the sides or rear of a unit. Should this occur then the flank/rear attack combat bonus does apply. This will either be +1 for a flank attack or +2 for a rear attack.
Psychology
In the heat of battle troops often don't respond as you, their commander, might want them to. Faced with terrifying supernatural foes their courage may fail, or they may simply be too dim to understand the orders they have been given. The hatred engendered by age-long feuds can overwhelm military discipline and leave troops overcome by bloodlust against their ancestral foes. Certain warriors can be so overwhelmed by berserk fury that they will charge into battle regardless of any plan or order.
As commander of your army it is your duty to know about these things and take them into account in your plans. If you do not you may find that you are defeated before you even begin.
The psychology rules represent these factors in the game and call upon the player to make occasional tests to determine whether his troops are affected by adverse psychology. All psychology tests are made in the same way, so we'll describe the procedure first before we look at the individual psychological factors.
When taking psychology tests roll 2D6 and compare the result to your leadership (Ld) value. If the result is less than or equal to the unit's leadership score the test is passed and all is well. If the result is greater than the unit's leadership score then the test is failed.
Note that in the case of cavalry, chariots, and heroic individuals riding monsters it is the rider's leadership that is used and not the mount's or the monster's. If a chariot has several crew, use the highest value.
Panic
Panic is the most common psychological effect. When troops see their friends running away this will upset them. Some will lose their nerve, a few may bolt for it, causing others to follow and soon the whole unit is fleeing away from the battle in blind panic. Some troops are steadier than others as indicated by their leadership value. Troops with a high leadership are much less likely to panic than troops with a low leadership. A unit must take a panic test in the following circumstances.
- Test at the start of your turn if there is a fleeing friendly unit within 4". You do not have to take this test if your unit outnumbers the fleeing unit as the sight of a few rag-tag stragglers is insufficient to cause panic. For example, if you have a unit of 10 models and there is a fleeing unit of 15 models within 4" then you must test. However if there are only 5 fleeing models then no test is required. Note that it is the size of the fleeing unit which is important, not the number of fleeing models within 4".
- Test if a friendly unit within 12" is broken as a result of being defeated in hand-to-hand combat. It is best to work out all combats and establish all broken units before making panic tests for units nearby. You must also make this test if a friendly unit is completely eradicated in hand-to-hand fighting. Such a unit cannot be broken as it no longer exists, but the sight of its destruction amounts to the same thing. Only one panic test is required regardless of how many broken friendly units are within 12".
- Test if you are already fighting in combat and you are charged in the flank or rear by another enemy unit. If the enemy unit is smaller than 5 models then no test is required as there are too few to cause panic and the extra attackers are absorbed into the general carnage. Make this test as soon as chargers have declared their charge and if they are within charge range. If they are unable to reach the unit no test is required.
- Test if you sustain 25% of your number as shooting casualties in the shooting phase. For example if a unit of 12 troops takes 3 casualties it must test for panic. This represents the panicking effect of massive casualties from intense missile fire. Make this test as soon as the 25% barrier is crossed. This may result in a charging unit panicking if, for example, it is attacking a unit of bowmen which stands and shoots at it.
A unit which fails a panic test will flee in the same way as a unit broken in hand-to-hand combat or a unit fleeing from a charging enemy. If a unit panics at the start of the turn because of fleeing friends within 4" it may not attempt to rally that turn, but must flee during its movement phase. If engaged in hand-to-hand combat when it panics then the normal flee and pursuit rules apply: the fleeing unit may be pursued and destroyed in the same way as a unit which breaks following defeat in combat.
For example: At the start of their turn a unit of 10 Goblins is confronted by a fleeing unit of Goblin Wolf Riders within 4". There are 12 Wolf Riders so the Goblins must take a panic test. The player rolls 2D6 and scores a 3 and a 5 which adds up to 8. As the poor old Goblins only have a leadership of 5 they fail their test. The Goblin unit panics and must flee in its movement phase. As the Goblins have a normal move rate of 4" they flee 2D6" towards the nearest table edge, moving away from enemy where possible. [Diagram: panic test for fleeing friends within 4 inches at the start of your turn.]
For example: During the hand-to-hand combat phase a unit of Orcs is defeated and broken. All friendly units within 12" must take a panic test, which in this case includes a unit of Boar Riders and a unit of Goblins nearby. Panic tests are taken before the broken unit flees. The Boar Riders roll a total of 9 which is more than their leadership of 7 so they panic. The Goblins roll a remarkable 4, even less than their miserable leadership of 5 which means they bravely stand fast. Both the Orcs and the Boar riders will flee away from their enemy who may well pursue and attempt to destroy them. Note that a unit that panics and flees from hand-to-hand fighting does not lead to further panic tests; only units that are defeated and break in combat cause panic tests. [Diagram: panic test for broken units at the end of hand-to-hand combat.]
For example: A unit of 10 Elves is charged in the flank by a unit of 5 Wolf Riders while fighting a unit of Goblins to its front. The Elves take a panic test as soon as the Wolf Riders declare their charge and are found to be within range. The Elves roll a total of 10 which is more than their leadership of 8 so they panic and flee. The Elves flee 2D6" away from their enemy (their movement is less than 6" so they always flee 2D6"). The Goblins are already fighting the Elves and so may pursue. The Wolf Riders continue their charge to its maximum distance, in the same way as if their foe had decided to flee voluntarily. [Diagram: panic test for flank charge as soon as the charge is declared.]
Fear
Fear is a natural reaction to huge monsters or unnerving situations. Creatures that cause fear are indicated in the Bestiary section and include such large and disturbing monsters as Trolls as well as supernatural horrors such as Skeletons. A unit must take a fear test in the following situations:
- If a unit is charged by an enemy that it fears then it must make a test to overcome its fear. If successful then the unit can fight as normal. If the unit fails to overcome its fear then the unit will automatically flee if outnumbered by the charging enemy. If the enemy does not outnumber the unit it will fight as normal, but must roll 6's to score hits in the first turn of combat. Note that this test is taken once the enemy declares his charge and is found to be within his charge distance.
- If a unit wishes to charge an enemy that it fears then it must take a test to overcome its fear. If the test is failed the unit may not charge and must remain stationary for the turn.
A unit defeated in hand-to-hand combat is automatically broken without a break test if it is outnumbered by enemy that it fears. If the fear-causing enemy does not outnumber the unit then a break test is taken as normal. See the Hand-to-Hand Combat section for details of break tests and fleeing troops. Note that it makes no difference whether a fear test is passed or not, a unit defeated in hand-to-hand combat is automatically broken if it is defeated by an enemy that causes fear.
Terror
Some monsters are so huge and threatening that they are even more frightening than those described by the fear rules. These creatures cause terror. Troops confronted by monsters or situations that cause terror must test to see if they overcome their terror. Should they fail they will be completely overwhelmed with horror and reduced to gibbering wrecks. Troops only ever test for terror once in a battle. Once they have overcome their terror they are not affected again.
If a creature causes terror then it automatically causes fear as well, and all the rules described above apply. However, you never have to take a terror and a fear test from the same enemy or situation; just take a terror test: if you pass the terror test then you automatically pass the fear test too. As you only ever take one terror test in a battle, any subsequent encounters with terrifying monsters or situations will simply count as fear.
- A unit must test to overcome its terror if charged by or wishing to charge an enemy that causes terror.
- A unit must test for terror at the start of its turn if there is an enemy which causes terror within 8".
Remember that only a single test is ever made for terror by any unit during the whole game, whether it is made because of a charge or because the unit finds itself within 8" of a terror-causing monster.
A unit which fails its terror test will flee immediately, exactly as if it had failed its break test in hand-to-hand combat, or decided to flee from a charge.
Fear and Terror Liabilities
Obviously a large monster is less likely to suffer from fear or terror. There is no way a huge dragon is going to be scared of a troll, for example. These special liabilities also apply to any rider of a large monster too, so a dragon rider wouldn't be afraid of a creature that would cause fear or terror were he on foot. The following rules apply:
A creature that causes fear is not affected by enemy that cause fear. Faced with an enemy that causes terror, a fear-causing monster only suffers fear, not terror. For example, a troll causes fear and a dragon causes terror. The dragon is not at all worried by the troll, but the troll fears the dragon.
A creature that causes terror is not affected by fear or terror at all.
It sometimes happens that a unit of perfectly ordinary troops is led by a mighty hero or a monster which causes fear or terror. In this situation you must test for fear/terror if a charge will result in you fighting the hero or monster in question. In the case of terror you must also test if you are within 8" of the creature at the start of your turn, but not necessarily because you are within 8" of the unit. However, if you are charging a unit in the side or rear, so that you won't have to fight a monster in the front rank, then you do not have to test. Basically this is common sense: if you don't have to confront the beast then no test is required.
Stupidity
Many large and powerful creatures are unfortunately rather stupid. Even some otherwise quite intelligent creatures act stupidly now and again because they are confused or distracted, or perhaps because they are drugged or have been knocked insensible. The stupidity rules represent the sort of slow wittedness or dumb behaviour that most animals instinctively avoid, but which some especially stolid or stubborn beasts may be prone to.
Creatures which are stupid are indicated in the Bestiary, and include such monstrous creatures as trolls.
Stupid creatures must make a test at the start of their turn to see if they overcome their stupidity. Make a test for each unit of stupid troops. If you pass the test by rolling less than their leadership on 2D6 then all well and good: the creatures behave reasonably intelligently and the player may move and fight with them as normal. Nothing untoward has occurred beyond a bit of drooling and the odd vacant expression. If the test is failed then all is not well. The following rules apply until the start of the creatures' following turn when they must test once more to see if they are overcome by stupidity.
- If already in hand-to-hand combat half of the stupid creatures suddenly stop fighting. They stare around blankly and wonder where they are. If the unit has an odd number of models or if the stupid creature is fighting on its own then roll a D6. If the result is 4 or more the odd model fights; if not it stands around drooling. Note that only stupid creatures are affected. If a unit contains stupid creatures and other creatures (a unit of trolls led by a goblin chieftain for example) then the other creatures are not affected.
- If not in hand-to-hand combat the unit momentarily forgets what it is doing. Roll a D6 to determine how the unit moves this turn. This is compulsory movement and so occurs before other movement (see the Movement section). Any non-stupid creatures with the unit must also move as described; they are carried along by the movement of the rest of the unit and risk being trampled and squashed if they attempt to do otherwise.
| D6 | Result |
|---|---|
| 1-3 | Move the unit directly forwards at half normal speed. Any enemy troops encountered are automatically charged. If there are friends in the way both units blunder into each other and their ranks become confused, in which case both units are pinned in place for the rest of the turn and neither may move further. |
| 4-6 | The unit stands around in a confused and ineffective manner. It will do nothing for the remainder of the turn while the stupid creatures stare about them, squabble, or lie down for a bit of a rest. |
Creatures affected by stupidity are quite unaware of anything happening around them, such is their state of confusion. While overcome by stupidity they ignore all further psychology tests. This means that stupid creatures cannot be affected by panic, fear, etc, but they can still be broken in hand-to-hand combat by failing a break test exactly as normal. Fleeing troops are not affected by stupidity until they have rallied, after which they must take stupidity tests at the start of each subsequent turn.
It sometimes happens that a cavalry model will be riding a stupid creature. For example a Dark Elf riding a Cold One. If a rider's mount is stupid then he will have to test for stupidity at the start of his turn, but the rider's leadership characteristic is used rather than that of the mount. If the test is failed the rider is obliged to hang on while the creature behaves in whatever bizarre manner the rules dictate, but the rider can fight normally if he gets the opportunity.
Frenzy
Certain warriors can go into a fighting frenzy, a whirlwind of destruction or raging fury in which all concern for their personal safety is ignored in favour of a blood-letting, flesh-tearing attack. Many of these frenzied warriors are drugged or tranced, and have worked themselves up into a frenzy with loud chanting and screaming.
Frenzied troops will automatically go into a furious berserk state if there are enemy within charge reach at the start of their turn, and will remain frenzied until they are broken in hand-to-hand combat, or until there are no enemy within charge reach. If you wish you can try and restrain troops by making a restraining test to bring them under control at the start of your turn, but you don't have to do this unless you want to. If you want to restrain frenzied troops roll 2D6 against their leadership just like any other psychology test. If you roll equal to or less than the unit's leadership you are successful and the unit is not frenzied for that turn and not affected by the following rules.
- Frenzied troops must charge the enemy if they are within charge distance.
- Frenzied troops fight with double their normal number of attacks in hand-to-hand combat. Troops with 1 attack therefore have 2, troops with 2 attacks double up to 4 and so on.
- Frenzied troops always pursue fleeing enemy whether the player wants to or not. Unlike other troops they may not attempt to hold back as they are far too crazed with blood lust.
- While frenzied, troops are not affected by other psychology. They are immune to panic, fear, terror etc, and do not have to make these tests.
If frenzied troops are broken in hand-to-hand combat their frenzy is automatically ended. They flee exactly like other troops. Should they subsequently rally they may continue to fight but are not affected by frenzy for the remainder of the battle. Their exuberant, crazed frenzy has been beaten out of them and they continue to fight just like other troops.
Hatred
Hate is a powerful emotion and the history of the Warhammer World is full of hatred and rivalry, grudges borne over centuries, of racial animosity bordering on madness, and of irreconcilable feuds leaving generations of dead in their wake. Some races hate other races with such bitter conviction that they will fight almost to the death rather than flee from them. The following rules apply.
- Troops who hate their hand-to-hand adversaries take any break tests with a leadership value of 10. They do not reduce this value regardless of the combat results and how many casualties they have suffered. This means they will never break unless they roll 11 or more on 2D6.
- Troops fighting hand-to-hand combat with a hated foe may re-roll any misses when they first attack. This bonus only applies in the first turn of combat and represents the unit venting its hatred on the foe. After the first round of blood-mad hacking they lose some impetus and so fight as normal.
- Troops who hate their enemy must always pursue them if they flee. They cannot attempt to avoid pursuit by testing their leadership as other troops can.
Weapons
The game rules as described allow for differences in the strength and toughness of opponents, and for differences in their armour, but not for different kinds of weapons. Once you have mastered the basics of combat you may wish to introduce further detail by using the rules that follow. These describe the different kinds of hand-to-hand combat weapons used in the Warhammer World together with appropriate rules for each. Troops armed with a spear or halberd, for example, receive specific benefits in particular situations.
Some weapons confer both advantages and disadvantages, such as a double-handed axe or sword which give a huge strength bonus but always strikes after the enemy. You will soon realise that different weapons often imply different tactical options, and are suited to certain styles of play. For example, Bretonnian Knights armed with lances need to charge to use their weapons effectively so a player must be careful to manoeuvre them into position so that it is he, rather than his enemy, which charges.
On the other hand, spears are best suited to a defensive strategy where you know your troops are not going to benefit from charging because they are slower than the enemy. These weapons and more besides are described below together with any appropriate rules.
Weapons and Units
All the models in a unit of troops carry the same weapons, so it will be a unit of spearmen, or halberdiers, and so forth. It is acceptable to include the odd model which is differently armed for the sake of variety, but it is important that the overall appearance of the unit is not misleading. For example, if it is a unit of spearmen then most of the troops must carry spears. If a minority carry other weapons these are counted as spears regardless.
Many players like to mix models in a unit so that some are armed with swords, others spears, a few have double handed axes, and so on. This is particularly effective with Goblins and Skaven, where you wouldn't really expect much uniformity amongst the masses.
Mixed units may be attractive, but as far as the game is concerned they all count as being armed with swords, axes, clubs and other weapons which fall into the category of hand weapons. No special rules are applied to these units on account of their weaponry.
Hand Weapons
Hand weapons is the term used to describe all swords, axes, clubs, hammers and other similar weapons wielded in one hand. The difference between these weapons is slight and so they are all considered together. No special rules apply to hand weapons.
Double-Handed Weapons
This category includes all axes, swords, hammers and clubs which are so large that they have to be wielded with two hands. These are ferocious weapons. A blow from a double-handed axe can cut a foe clean in half and easily break armour apart. The disadvantage is that they are heavy to swing, and so the bearer may be slain by a more nimble foe before he has a chance to strike.
- Double-handed weapons require both hands to use. If the bearer has a shield he may not use it in hand-to-hand combat. It must be left on the ground or slung on his back during the fighting.
- Double-handed weapons are heavy to swing and leave the user vulnerable to a more lightly armed foe. Double-handed weapons always strike last regardless of which side charges or relative initiative levels. If both sides are armed in this way the side with the highest initiative strikes first.
- Double-handed weapons confer a +2 strength bonus on all hits. If the wielder's strength is 3 then all hits from a double-handed weapon will be at strength 5 for example. As the enemy's armour save is affected by the strength of the hit, this will be reduced too. In the case of a strength 5 hit the saving throw drops by -2, for example.
Flails
Flails are swung with both hands and consist of heavy weights, often spiked, attached to a pole or handle by means of heavy chains. It is extremely tiring swinging these heavy and cumbersome weapons.
- Troops using flails require both arms to swing them and cannot therefore use shields in hand-to-hand fighting. If they carry shields they are put aside or slung onto backs before the fighting begins.
- In the first turn of any hand-to-hand combat troops equipped with flails add +2 to their strength. So men with a strength of 3 will hit with a strength of 5, and any enemy saves are taken with the modifier for fighting high strength opponents.
- In subsequent turns the flail users begin to tire and so they do not receive any bonus.
Halberds
The halberd is a heavy bladed weapon mounted on a sturdy shaft. The steel blade has a point like a spear as well as a heavy cutting edge like an axe. It is held in both hands and used to chop as well as thrust, so it is a very adaptable and extremely effective weapon for infantry.
- Troops equipped with a halberd require both arms to wield it and cannot use shields in hand-to-hand fighting. If they carry shields it is assumed they are slung onto their backs or placed on the ground before the fighting begins.
- Halberds are heavy weapons and a mighty swing can cause considerable damage. Halberds therefore confer a +1 strength bonus on all hits. A man with a strength of 3 therefore hits with a strength of 4 if fighting with a halberd. The strength of a hit affects the armour save of the target, so this may be reduced as well. In the case of a human with a strength of 3 a halberd hit has a strength of 4 and -1 to save for instance.
Spears
Spears are useful weapons for both foot and horse, but they are used quite differently for each. A foot unit with spears is able to fend off enemy with a mass of spear points, making it an ideal defensive weapon. A cavalry unit armed with spears can employ them like lances to ride down enemy troops, spitting them as the horsemen ride into their ranks. The following rules reflect the advantages of foot and mounted soldiers equipped with a spear.
- Infantry armed with spears may fight with two ranks of troops because warriors in a second rank can thrust their weapons forward past those fighting in front. This enables models directly behind front rank fighters to fight as well. However, this advantage only holds so long as the spearmen do not move. If they charge their careful formation is affected and they may only fight in a single rank that turn. Spearmen fight in two ranks if the enemy charge them while they stand their ground. This means that a block of spearmen makes a very good defensive formation, but is less well suited to attack.
- Cavalry armed with a spear receive a +1 strength bonus when they charge. If the wielder's strength is 3, for example, his total strength will be 4 when he charges. Note that this bonus only applies when the cavalryman charges and it only applies for that turn. Any hits at a strength of 4 or more confer the extra modifier on the enemy's saving roll.
Lances
Cavalry armed with lances are the ultimate shock troops. When they smash into the enemy ranks their steel tipped lances rip through armour and flesh, smashing bones and flinging foes to the ground. Lances are only effective as they charge, thereafter the warrior either drops his lance and fights on with a sword, or else he continues to use the butt of the lance to punch at his foe. It is very important that lance-armed cavalry successfully charge the enemy rather than allowing themselves to be charged. The charging side always has an advantage, but in the case of lancers this is greater than for any other troops.
- Cavalry armed with lances receive a +2 strength bonus when they charge. If the wielder's strength is 3, for example, his total strength will be 5 when he charges. Note that this bonus only applies when the cavalryman charges and only for that turn. Any hits at a strength of 4 or more confer the extra modifier on the enemy's saving roll.
Missile Weapons
We have already looked at the rules for bows, crossbows and other missile weapons in the rules for Shooting, but we have gathered them here to be complete. Some of these weapons have special rules.
Bow. Bows are probably the most common of all missile weapons in the Warhammer World. They are carried by most races and almost every army. No particular special rules apply to the bow.
| Weapon | Range | Strength |
|---|---|---|
| Bow | 24" | 3 |
Short Bow. Some creatures are too small to carry full-sized bows so they carry a short bow, basically a small bow with a reduced range. Some cavalry also carry a shortened bow which they can shoot more easily from horseback than a larger bow. Otherwise it is exactly the same as a bow.
| Weapon | Range | Strength |
|---|---|---|
| Short Bow | 16" | 3 |
Long Bow. The long bow is a powerful bow favoured by experienced archers. It can fire an arrow substantially further than an ordinary bow. Other than its longer range no special rules apply to the long bow.
| Weapon | Range | Strength |
|---|---|---|
| Long Bow | 30" | 3 |
Crossbow. The crossbow is a more complex device than an ordinary bow. It is very difficult to draw back the string of a crossbow once it has been fired: the shooter must either brace the weapon against the ground with his feet while he heaves the string up, or he must employ some kind of mechanical device such as a windlass or lever. This means that a crossbow inhibits the movement of its users compared to a bow, but it is much more powerful and has a longer range.
| Weapon | Range | Strength |
|---|---|---|
| Crossbow | 30" | 4 |
- Troops may not move and fire a crossbow in the same turn. The weapon takes a long time to reload, so if the unit moves it may not shoot.
Repeating Crossbow. The repeating crossbow is a much lighter and less powerful type of crossbow that can be easily and quickly redrawn for firing. It has a magazine of bolts which allows a single bolt to drop into place ready for firing as the string is drawn. The repeating crossbow can fire a hail of shots in the time it takes to shoot one ordinary crossbow bolt.
| Weapon | Range | Strength |
|---|---|---|
| Repeating Crossbow | 24" | 3 |
- You have the option of firing a repeating crossbow either once or twice during the shooting phase. If you fire once work out hits and damage exactly as normal. If you fire twice then each shot suffers a -1 to hit penalty due to decreased accuracy. Repeating crossbows may choose to fire either once or twice if they stand and shoot against a charging enemy.
Javelin. The javelin is a light spear. It is too flimsy to use in hand-to-hand fighting but is perfectly balanced for throwing at the enemy. It is not a very common weapon in the Warhammer World because it has a very short range. There are a few other weapons which are even less common but which work in a similar way, for example throwing knives, darts, and throwing axes. Note that these last are different weapons to the axes used in hand-to-hand combat, and that ordinary axes cannot be thrown.
All of these weapons are thrown by hand and they all depend upon the skill and strength of the caster for their effect. For the sake of completeness we have included these other weapons on the chart below. All of them use the same rules as javelins although they may have different ranges.
| Weapon | Range | Strength |
|---|---|---|
| Javelin | 8" | As the thrower |
| Throwing Axe | 4" | As the thrower +1 |
| Dart | 6" | As the thrower |
| Throwing Knife | 6" | As the thrower |
- Javelins and other thrown weapons have such a short range there is no need for the usual -1 penalty for shooting at over half range, so ignore this penalty.
- Use the strength of the warrior throwing the javelin to work out damage from hits. The javelin has no strength of its own because its effectiveness depends on how hard it is thrown.
Note that in the case of throwing axes the strength is +1 on that of the thrower to represent the extra weight of the weapon.
Sling. The sling is another uncommon weapon, largely because it is no more powerful than a bow and has a shorter range. It is little more than a looped strip of cloth or leather into which a stone is placed. The sling is whirled about the slinger's head and the sling stone released towards the target. The one advantage of the sling is that you can vary the rate of fire by releasing the sling shot before you have worked up full impetus. This reduces the range but enables the slinger to shoot far faster.
- A unit of slingers may fire twice in their shooting phase if they do not move in their movement phase. Their range is reduced to half (9") if they fire twice. Note that slingers cannot fire twice when they stand and shoot against a charging enemy as there is insufficient time.
Hand Guns. The hand gun is a simple firearm consisting of a metal barrel mounted onto a wooden stock. The gunpowder charge is ignited by poking a length of burning cord, or match as it is called, into a small touch hole. Some of the more advanced versions have levers and springs which hold the burning match and triggers which release the firing mechanism and fire the gun.
Gunpowder technology is not especially advanced so hand guns are not very reliable weapons: the gun barrels tend to burst and the powder often fails to fire. The greatest advantage of the hand gun over the bow or other old fashioned weapons is that the lead shot can penetrate the thickest armour.
| Weapon | Range | Strength |
|---|---|---|
| Hand Gun | 24" | 4 |
- A hand gun takes a complete turn to load so you may only fire every other turn. For example, if you fire in your first turn you cannot fire in the second turn, but you can fire again in your third turn.
- You cannot move and fire a hand gun in the same turn, so if you move in your movement phase you are unable to fire that turn.
- Hand gunners can adopt a formation of two ranks in order to increase their fire rate. The first rank can shoot and then you may either move the front rank to the rear or you can move the rear rank through to the front. This means that the models in the new front rank will not have fired, and they are free to shoot in their next turn. This is the only movement possible when a unit fires.
- Hand guns are even better at penetrating armour than their strength value of 4 suggests. Therefore the enemy must deduct a further -1 from his armour save, so the save modifier is -2 rather than -1 as is normal for a strength 4 hit.
Pistol. A pistol is simply a small hand gun fired by a spring mechanism. Pistols can be fired in hand-to-hand combat at point blank range as well as at longer ranges. Because pistols take a long time to reload it is usual to carry two, so that one is always ready for firing while the other is being reloaded.
| Weapon | Range | Strength |
|---|---|---|
| Pistol | 6" | 4 |
- A pistol takes a complete turn to reload, so you may only fire every other turn. If you have two pistols then you can fire one every turn.
- A pistol can be used in hand-to-hand fighting as well as for shooting. A model with a sword or other weapon in one hand and a pistol in the other receives an extra attack. In hand-to-hand fighting work out pistol hits exactly like hits from a sword or other hand weapon. Successful hits are resolved with a strength of 4 regardless of the firer's strength. You don't have to reload a pistol in hand-to-hand fighting as it is assumed the pistols are also used as heavy clubs (many have weighted butts for this purpose) but after combat is over you cannot shoot with pistols if they were used in hand-to-hand fighting in the previous turn.
- Pistols are even better at penetrating armour than their strength value of 4 suggests. Therefore the enemy must deduct a further -1 from his armour save, so the save modifier is -2 rather than -1 as normal for a strength 4 hit.
Heroes and Wizards
The Warhammer World would not be what it is without the presence of potent individuals, great heroes, valiant champions, mighty wizards and rotten-hearted sorcerers. These characters add an entirely different aspect to the game either as valuable leaders of warriors, or powerful individuals able to fight against vast numbers of lesser mortals. These models are known as characters, whether they are warriors or wizards.
Heroes
Heroes are individual models that represent heroic leaders, people who are tougher, meaner and more powerful than the average warrior. Perhaps they are faster than a typical member of their race, maybe they are stronger, more skilled with weapons, or they could be natural leaders with the power to inspire others to greater deeds.
In reality an individual could have almost any combination of unique abilities, but on the tabletop we make three broad divisions which are quite sufficient for our purposes: Champions, Heroes, and Lords. In some cases they may be known by different names. Orc characters, for example, are called Bosses, Big Bosses and Warbosses.
Of course, these three types of valiant individual cannot really represent every nuance of distinction between mighty warriors, but it does enable us to fight with comparably powerful characters, whether they are goodly Knights or the most rotten-hearted Champion of evil.
Champions, Heroes and Lords have superior characteristic values as shown on the chart below (added to the profile of the ordinary troop of their race).
| M | WS | BS | S | T | W | I | A | Ld | |
|---|---|---|---|---|---|---|---|---|---|
| Champion | - | +1 | +1 | +1 | - | - | +1 | +1 | - |
| Hero | - | +2 | +2 | +1 | +1 | +1 | +2 | +2 | +1 |
| Lord | - |
For example, in the case of men the values are as shown below.
| M | WS | BS | S | T | W | I | A | Ld | |
|---|---|---|---|---|---|---|---|---|---|
| Man | 4 | 3 | 3 | 3 | 3 | 1 | 3 | 1 | 7 |
| Champion | 4 | 4 | 4 | 4 | 3 | 1 | 4 | 2 | 7 |
| Hero | 4 |
In the case of Orcs the values are as follows. Note that Orcs and Goblins have different names for the three types of character, but the values are exactly the same.
| M | WS | BS | S | T | W | I | A | Ld | |
|---|---|---|---|---|---|---|---|---|---|
| Orc | 4 | 3 | 3 | 3 | 4 | 1 | 2 | 1 | 7 |
| Orc Boss | 4 | 4 | 4 | 4 | 4 | 1 | 3 | 2 | 7 |
| Orc Big Boss | 4 |
As you can see from these examples the three types of character are quite different. Champions are brave fighters, with an extra attack in combat and superior weapon skills, but they are not especially good leaders. Champions are therefore useful individuals when it comes to bolstering the fighting power of a unit of troops, but they are not great war leaders. Heroes are more resilient and even better fighters: they will fight on if they suffer a wound and provide extra leadership. Lords are even better fighters and can take even more damage before they are slain, but their greatest value is their inspirational leadership and the extra confidence they instil in others. Although the leadership bonus may seem quite small in relation to the value of a typical warrior (9 compared to 7 for a human warrior for example) this is a BIG difference in game terms, as you will quickly discover.
Wizards
Wizards and magic are an important part of the Warhammer World. Magic is everywhere, and permeates all living beings and inanimate things, and its power is there to use for good or ill. In battle it can make all the difference between victory and defeat. In the lands of Men mighty rulers and noble lords employ and support their own wizards to protect them and fight in battle on their behalf. The Emperor himself encourages the study of magic so that he may have powerful battle wizards to help fight his wars.
In Ulthuan in the far west, the High Mages of the Elves practice the most potent of all sorceries. Even Orcs and Goblins, low minded as they are, have Shamans who can blast the enemy with raw magic. Of all the intelligent races of the Old World only the Dwarfs have no wizards. Their skills lie in the manufacture of fabulous magical artifacts and enscribing runes of power.
Although they fight in battle wizards tend to wear little or no armour, as large amounts of metal upsets their magic harmonics and inhibits the use of their powers. Instead they are likely to be protected by powerful spells and magic items.
There are four levels of wizard: Wizard, Wizard Champion, Master Wizard, and Wizard Lord. As with heroes these four types are not intended to represent every possible variation in an individual's abilities. They are useful categories that enable us to match comparable wizards against each other.
| M | WS | BS | S | T | W | I | A | Ld | |
|---|---|---|---|---|---|---|---|---|---|
| Wizard | - | - | - | - | +1 | - | +1 | - | - |
| Wizard Champion | - | - | - | +1 | +1 | +1 | +1 | - | - |
| Master Wizard | - |
For example, in the case of men the values are as shown below.
| M | WS | BS | S | T | W | I | A | Ld | |
|---|---|---|---|---|---|---|---|---|---|
| Man | 4 | 3 | 3 | 3 | 3 | 1 | 3 | 1 | 7 |
| Wizard | 4 | 3 | 3 | 3 | 4 | 1 | 3 | 1 | 7 |
| Wizard Champion | 4 |
[Transcriber's note: as printed, the Wizard row of the modifier table shows +1 under both T and I, while the example Wizard row for men shows Initiative 3 (no bonus). Both are reproduced as printed.]
Wizards do not normally wear armour as it interferes with their ability to cast spells, disrupting the magic fields they draw upon for power. Many wizards wear decorative vambraces, wrist bands, and smaller pieces of armour, but this is insufficient to warrant a saving throw or to affect their ability to cast spells.
A wizard mounted as a cavalry model may ride a horse with barding armour without affecting his own ability to cast spells. Otherwise a wizard wearing armour may not cast spells, not even spells that are bound within a magic item. This does not stop the wizard using other magic items however. The exception to this rule is Chaos Armour, which is saturated with magic, and does not therefore prevent a Chaos Sorcerer casting spells.
The complete rules for wizards, spell casting, and many magic items are covered by the separate Warhammer Magic game. A selection of magic items is included with Warhammer, including four with different spells. Refer to the Magic section of the rulebook for a description of how these work.
Special Characters
We have invented three types of hero and four types of wizard for convenience and to provide comparability between adversaries, but this does not mean there are no individuals whose abilities vary wildly from the values we have given for Champions, Heroes, Lords and Wizards. There are of course more than you can imagine.
Although we are not concerned with the rules for special characters here it is worth bearing in mind that they can be incorporated into your battles if you wish. For example there are the mighty leaders of nations such as the King of Bretonnia, the Emperor of the Empire, Orc Warlords, the Witch King of the Dark Elves, and many more. There are also important military leaders and high ranking nobles, such as Bretonnian Dukes and Elector Counts from the Empire. All of these special characters are individual and quite different, and so are represented by their unique characteristics. Some are therefore better fighters than others, but some are better leaders, while many carry specific magical weapons or ride large monsters.
The details and extra rules for special characters are not given here in the Warhammer game; there are simply too many and space does not permit it. Details of heroic individuals will be published in Warhammer supplements and White Dwarf magazine as appropriate.
Characters with Units
Champions are members of their unit and always fight as part of it, moving, attacking, fleeing, and pursuing alongside the rest of the unit. Champions are often extremely strong, tough or astute members of their unit, and comrades look up to them and take pride in their prowess. Nonetheless, the champion is a member of the unit like any other trooper. He might even be the unit's commander, although this is not necessarily the case as many units have a separate leader and champion. A champion fights with his unit for the entire battle and cannot leave it.
Except for champions, character models can fight on their own as individuals, although they are free to join units of ordinary troops and fight alongside them if you wish.
To join a unit a character has only to move so that he is touching it. Once he has joined the unit the model may be placed in its front rank if you wish. Note that the character will use up a proportion of his move to reach the unit. If the unit has not moved then it cannot now move further than the character, as its remaining movement has been wasted waiting for him.
A character who has joined a unit may leave again during any subsequent movement phase. He may not join and leave the same unit in a single turn, but he may leave one unit and join another if you wish. A character may not leave a unit while it is subject to some compulsory movement rule, so for example he cannot leave a unit which is fleeing, which has declared a charge, which has rallied that turn (because it cannot move) or which is engaged in hand-to-hand combat. If a unit declares a charge any characters which have already joined it must charge too and take part in the resulting combat. This means that once hand-to-hand fighting has begun a character will not be able to leave the unit he has joined until all the fighting is over and any compulsory movement such as fleeing and pursuit has been resolved.
Character and Unit Psychology
A unit accompanied by a character may use the character's leadership value for any leadership tests. This is a very important rule, as it provides units of poor troops with the leadership they need. This is especially true of Goblins which are all but useless without a proper character to lead them. Leadership is used for psychology tests, rally tests, and break tests in combat.
If a unit is joined by several characters use the highest leadership amongst them. While the character is with the unit he is considered to be part of the unit in all respects. If the unit is broken in combat and flees then he is broken and must flee with them at the same speed.
If the unit panics, or is forced to flee because of a fear or terror test, then the character is also forced to flee even if he is immune to fear or terror himself. If the unit is affected by frenzy or forced to pursue because of hatred, the character must move with the unit, but he does not benefit from the bonuses for frenzy unless he is affected by frenzy himself. This means a character does not go into a frenzy just because he is with a unit that can do so, although he can accompany them as they charge. If a unit is affected by stupidity the character must move as the unit moves, although he can always fight normally. Remember, a character cannot leave a unit when it turns stupid and stands still or moves stupidly; such a unit is bound by a compulsory movement rule and the character must therefore stay put. In reality he is trying to goad the stupid creatures into activity, or perhaps he is pinned down or hemmed in by the unthinking brutes and unable to move of his own volition.
If a character is liable to a psychological rule which doesn't apply to the unit he is with, he must make any appropriate tests on his own and will react on his own. This may cause the character to separate from the unit, for example if he is obliged to charge because of frenzy, compelled to pursue because of hatred, or forced to move or stand immobile due to stupidity.
Moving Characters
If a character is travelling on his own he is free to move as he wishes. He must take into account any penalties for crossing terrain and obstacles as normal, but he does not have to turn or wheel. So if a character wishes to move a fraction of his movement distance, turn, move a little more, turn again, and so on, he can do so without penalty. This doesn't mean the character can charge an enemy in the rear if he starts his move in front of it; he must still obey the normal rules regarding flank and rear charges.
If a character is travelling with a unit then his movement will be dictated by the unit as a whole. He simply moves along like an ordinary member of the unit. If the character moves more slowly than the unit then the whole unit will have to slow down so that he can keep up.
Shooting at Characters
If a character is travelling with a unit of at least five other models of comparable size to himself or larger, then he may not be picked out as a specific target by enemy bowmen or other shooters. In reality it is difficult amidst the confusion of battle to single out a target in this way, so any shots at the unit are worked out against the ordinary troopers and not the character. If the unit drops to less than five models then hits may be randomised in any suitable way. For example, in the case of two ordinary models and a character there is a 1 in 3 chance of hitting the character so roll a D6 for each hit scored. Any roll of 1, 2, 3 or 4 shows an ordinary model has been hit; a roll of 5 or 6 indicates the character is hit.
If a character model is within 5" of a unit of five or more models of comparable size to himself, then he may only be picked out as a target by enemy shooters if he is the closest target. This means that characters can move around behind the battlelines without attracting an unrealistic and unreasonable amount of missile fire.
Character models more than 5" from a friendly unit of five or more models can be shot at without restriction. Characters prone to jumping up and down in front of the enemy are asking for it, so it serves them right.
When you are deliberately shooting at a character model at any time there is always an additional -1 to hit penalty. This is because the normal chance of hitting assumes the target is massed up in ranks, or is pretty large to start with. This is not the case when you are shooting at a single man, especially if there are other potential targets to distract the shooter's attention.
Note that if a character rides a horse, or a large monster, then he is a larger target than he would be on foot and won't be able to hide among a unit of troops on foot. Such characters benefit from additional saving throws in the case of cavalry, or the chance of a monster being hit rather than its rider in the case of large monsters.
Stone Throwers and Cannon
Some weapons such as stone throwers have an area template that the firer is allowed to place anywhere he wishes. This allows the player to deliberately aim his shot on a character model. Cannons also allow you to choose exactly where to aim shots, and so can be aimed directly against characters.
In the case of weapons which can be aimed in this way, there is a special rule which allows characters to either jump out of the way, throw themselves to the ground, or somehow avoid destruction by their amazing luck or uncanny reactions. This is intended to prevent characters becoming targets for these weapons in a manner which is unrealistic, unfair and definitely unheroic. This rule applies to all weapons which are not restricted by the normal rules regarding targeting characters as already described.
A character model who has joined a unit may be lucky enough to avoid death from cannon shot, a boulder from a stone thrower, or a comparable missile, thanks to a warning shouted by a comrade. Possibly one of his companions shoves him out of the way, or pushes him to the ground. A trooper spots the fateful missile heading towards his leader, and shouts 'Look Out Sir!' or some such warning, and hopefully alerts the character in time for him to duck or adroitly avoid the hurtling missile. The missile slips past the character and hits the man standing beside or behind him.
If a character is with a unit and is hit by cannon fire, a stone thrower, etc, then roll a D6. On the roll of 6 the character fails to hear the warning and is hit by the missile. Work out damage as normal. On the roll of 1 to 5 the character is alerted to the danger and avoids the missile. The character is not hit and the missile strikes another model instead, so transfer the hit onto an adjacent model in the unit.
Hand to Hand Fighting
When a unit closes with its enemies in hand-to-hand fighting character models will inevitably find themselves confronted by enemy troops. When a model is fighting it can strike its blows against any enemy model whose base it is touching. In the case of troopers confronted by character models they will usually have the option of striking at a character or an ordinary enemy, as bases will inevitably overlap slightly as you move the models into combat.
Characters may sometimes come into direct combat against enemy characters, but the same choice applies to them: they may attack any enemy whose base they are touching. The exception to this is the Challenge, as described below.
Note that if a character has, say, 4 attacks and is only facing 2 enemy models then his attacks are worked out against the 2 models he is facing. However, if the character scores sufficient wounds to slay 3 or 4 models then the enemy loses 3 or 4 models, not just 2.
Don't be fooled by the fact that models are static and the battle lines rigid and straight; what we are representing is real combat. Heroes strike to their left and right, stepping forward to deliver fresh attacks, cutting down foes who step forwards to block a gap, and driving down those who confront them.
Challenges
During any hand-to-hand combat phase a character model can issue a challenge to single combat if the player wishes. In any one combat only a single character from each side may issue a challenge. Remember a combat can involve several units and characters. If several characters are involved from each side then the player must choose which one will issue the challenge.
If both players wish to make a challenge then each player selects one of his characters to take part. The challengers are moved together and fight as described below.
If only one side wishes to issue a challenge then his enemy has the option of accepting or declining the challenge. If he decides to accept then he must meet the challenger with one of his characters. If the challenge is declined then the declining player must retire his best character model from the combat. This will be the highest ranking character, but the challenging player may choose the character who is retired. The retiring character is removed to the rear ranks and may not fight that turn. The character may be returned to a fighting rank at the end of that hand-to-hand combat phase ready to fight in the following turn.
A character cannot issue a challenge unless there is an enemy character to fight; ordinary troopers or monsters cannot be challenged.
Once a challenge is accepted the two characters are moved so that they are opposite each other. When combat is worked out these two will fight together, no other models may attack them even if their bases are touching. If challengers are riding monsters or steeds which have their own attacks then these fight as well.
Characters Riding Monsters
Characters riding monsters are not affected by fear and terror in the same way as the creature they are riding. See the Psychology section for a detailed explanation of how this works. For example, a dragon causes terror and so is unaffected by fear or terror; it is a huge monster and is hardly likely to be upset by smaller less frightening creatures. A dragon rider is also immune to fear and terror. Perched on top of a huge dragon his courage is bolstered beyond the point where he has to worry about such things.
If a monster is subject to some inhibiting psychological effect, such as hatred or stupidity, then the appropriate tests must be made. However, all leadership tests can be made using the rider's leadership characteristic. This represents the rider's ability to control the beast and impose his own will over the creature's natural instincts. If the monster is affected by frenzy, stupidity, hatred, or whatever it will carry its rider along with it, but the rider himself is not affected by the psychological reaction. So, if a monster goes stupid and is unable to fight this does not affect the rider, who may fight on as normal.
The same rule applies to monsters pulling chariots: any psychological tests are taken using the best leadership value of the chariot crew.
Monsters
The Old World is a vast and untamed place where wild and monstrous creatures roam the dark forests and tall mountains. There are many monsters who are roughly human in appearance, though a little larger than a man, like orcs, trolls, and minotaurs, but there are also bigger and more bizarre monsters in abundance: griffons, dragons, manticores, and many more besides.
It is with these large monsters that this section of the rules is concerned. Large monsters may be ridden to battle by mighty heroes and wizards. Many of these beasts must be hand reared by their master if they are ever to accept a rider, so the great leaders of the Old World pay vast sums to adventurers who collect eggs or hatchlings from the nests of Griffons and other winged monsters.
Monsters in Combat
Large monsters may fight on their own as independent and powerful elements of the army. Some monsters develop loyalty and devotion to their masters and will fight for them willingly, while others may be placed under enchantments or simply driven forward towards the enemy in the hope that they will attack the right targets.
Large monsters fight as single models in the same way as heroes and wizards. Like heroes they do not have to manoeuvre to turn about, and so suffer no movement penalties for changing direction.
The biggest disadvantage of monsters is that they tend to have very low leadership values. This means they can be driven away or panicked very easily. They can also be picked out as targets because they are so big, and a +1 is added to a shooter's dice roll as they are more easy to hit.
Monster Mounts
This section describes rules for characters riding large monsters. Horses, wolves, war boars and other similar sized creatures that only have one wound are covered by the rules already described for cavalry. As you will recall a mounted knight is a cavalry model. If the knight is slain then the complete model is removed including the horse he is riding. To represent the value of the horse and to make cavalry appropriately resilient an extra +1 is added to the knight's saving throw, but otherwise no account is made of separate casualties for man and rider. This system is fine for these smaller creatures, but obviously wouldn't work for big monsters such as dragons which are far larger and much more difficult to kill than a horse or wolf.
If a creature has two or more wounds then it is classed as a large monster and the following rules are used for riders and mounts. These rules therefore apply to a hero riding a griffon, a wizard mounted on a wyvern, a dragon and its lordly rider, and so on. No additional +1 is added to the rider's saving throw, as the advantages of riding the monster are worked out in other ways.
Shooting at a Monster Mount
When you shoot at a character riding a large monster the usual target restrictions for shooting at characters apply. However, monsters are so big that the chances of their being able to shelter in a unit of smaller-sized troops are rather slim. This means that a character riding a big monster is easier to pick out as a target. Because the monster is a large target the enemy adds +1 to his to hit score. The normal -1 to hit that applies to characters on foot or as cavalry does not apply to characters riding monsters. The monster is simply so big that there is no doubt as to where the character is. You may wish to re-read the rules for shooting at characters in the Heroes and Wizards section.
When shooting at a large monster and its rider roll to hit as normal, adding +1 because the monster is a large target. Once you have established how many hits have been scored you must apportion them between the rider and the monster. For each hit scored roll a D6:
| D6 Score | Hit |
|---|---|
| 1, 2, 3, 4 | The Monster - roll to wound the monster as normal. |
| 5 or 6 | The Rider - roll to wound the rider as normal. |
Work out wounds separately on either the rider or his mount. Take any saving throws due to the target as normal. Most monsters do not have a saving throw as they have no armour, but some have scaly hide which confers a separate save. Riders may save for their armour, but remember they do not receive the additional +1 as do cavalry riding smaller creatures.
Hand-to-Hand Combat
In hand-to-hand combat the enemy is faced with a deadly monster and a potent hero, and so is subject to two lots of attacks. The monster attacks using its own characteristics, and the rider attacks separately using his characteristics. As the monster and rider are likely to have different initiative values they may strike their blows at different times. These attacks are worked out entirely normally, as if the rider and creature were two different models.
When it comes to attacking back, the enemy will be faced with two potential targets, the rider and the monster. The enemy may choose to fight either the rider or the monster, and can distribute their attacks between them in any way they like. The enemy player must say how many attacks are against the monster and how many are against the rider before he rolls any dice. Attacks are worked out exactly as normal, and the score required to hit will depend upon the relative values of the monster or the rider's weapon skill as with all hand-to-hand fighting.
Wounds for Mounts and Riders
Wounds must be recorded separately for the rider and his mount. If the mount is slain then the rider may continue to fight on foot if you have a model to represent him. If the rider is slain the monster will behave in an erratic fashion, possibly going wild and attacking its own side or running rampant among both armies. Remember that these big monsters are often hand-reared by their masters, and so are likely to go uncontrollably wild if their rider is slain. Roll a D6 and refer to the Monster Reaction Table to determine how the monster reacts for the rest of the game.
Monster Reaction Table
| D6 | Monster Reaction |
|---|---|
| 1 | The monster takes to the air if it has wings. If not, it makes for the nearest table edge as fast as it can and tries to leave the battlefield. The monster will avoid any troops or scenery blocking its way and will attempt to go round them to find an escape route. If attacked the monster will fight back, but it will not charge of its own volition unless it is forced to do so by a psychology rule. It will not use any breath or other range weapon unless it is shot at, in which case it may return fire. Once it has left the table the monster does not return. |
| 2 | The monster attacks the nearest troops, favouring enemy if there is a choice of two equally distant groups. It must charge if able to do so, and must move towards the nearest target as fast as possible if unable to charge. Once in hand-to-hand combat it will fight normally. It will use any breath or other range weapon to attack the nearest troops if able to do so. |
| 3 | The monster attacks the nearest enemy. It must charge if able to do so, and must move towards the nearest enemy as fast as possible if unable to charge. Once in hand-to-hand combat it will fight normally. The monster will use any breath or other range weapon to attack the nearest enemy troops if able to do so. |
| 4 | The monster moves randomly in its fury and confusion, angrily attacking anything in its path. Move the monster along with other compulsory movement in the move phase. Roll a scatter dice to determine the direction moved. If there are any troops, enemy or friends, within charge reach in the direction shown then the monster charges them. If no targets are within charge reach the monster moves as fast as it can towards them. It will use any breath or other range weapon to attack the nearest troops if able to do so. Once in hand-to-hand combat it will fight normally. |
| 5 | The monster remains where it is. If any enemy approach within charge range it will charge them. If in hand-to-hand combat the monster will fight normally. If the opportunity arises it will use any breath weapon to attack the nearest enemy. |
Flying and Aerial Combat
Some creatures in the Warhammer World have wings and can fly high above the battlefield, soaring quickly from one side of the battle to the other. This mobility is extremely useful, as it allows the creature concerned to choose its opponents, or to avoid a fight if it is seriously out-matched.
Representing creatures that can fly poses a few problems on the gaming table, as it is impractical to hold or suspend heavy models above the tabletop. The following rules are intended to capture the feel of fast moving aerial combat in a practical manner.
Fly
Models that can fly are moved during the movement phase exactly like other models except they have the option of taking to the air and flying rather than just walking or running. A flying model may take off, fly as far as it is able, and land again all in the same movement phase. Models do not normally end their movement in the air, they simply use their ability to fly to move further and to pass over obstacles or troops that may be in the way. It is possible to remain airborne however, and this is explained later.
Generally speaking, models that can fly can travel up to 24" through the air during their movement phase. If a model flies more slowly or more quickly this is noted in the Battle Bestiary. The model must move wholly in the air or wholly on land, it cannot mix the two in the same turn. A model may use this move to get itself into hand-to-hand combat if the player wishes, effectively charging its opponent from the air. Note that a flying charge is still only 24". The distance is not doubled as it is for a charge over land.
Flying models are moved without penalty for changing direction or any other reason. The model is simply moved as the player wishes up to the maximum distance allowed.
Combat
A model which can fly can make a flying charge into combat as explained above. The flying creature charges down onto its foes, slashing, biting or using whatever weapons it has at its disposal. In reality, the attacker would land somewhere in the middle of the troops it is charging, but to keep things orderly it is assumed all aerial attacks come from the front of the unit attacked unless it is already engaged to its front, in which case aerial attacks may be made from any direction. The flying model is positioned either to the unit's front, sides or rear as appropriate.
Hand-to-hand combat is conducted exactly as normal with a few exceptions:
- A flying creature which is beaten in hand-to-hand combat is driven off. The model is removed from the tabletop and may not return until it has missed a complete turn.
- If a hand-to-hand combat is either won or drawn a flying creature may leave at the end of the phase rather than stay and fight. The model is removed from the table and may not return until it has missed a complete turn.
Flying High
A model which can fly can take to the air and remain airborne if it wishes. The model is removed from the table during its movement phase and placed aside somewhere where it can be seen. The player points out that the model is flying high above the battlefield.
A model flying high in the air at the start of its turn can dive down anywhere onto the battlefield. It can attack an enemy unit if it wishes.
A model which is flying high above the battlefield cannot be shot at by troops on the ground, nor may it shoot at troops on the ground.
Aerial Combat
If both sides have creatures which can fly then it becomes more important to keep track of models which are flying high. All models that are currently flying high above the battlefield are kept aside so that they can be seen.
Any model which is already flying high at the start of its turn can attack any enemy model which is also flying high. The attacker nominates his target when he declares his other charges at the beginning of the movement phase and the two models fight hand-to-hand combat exactly as normal. Once the two creatures have fought they are separated again and are both free to move or attack once more in their following turns. Aerial combat is therefore much more fluid than combat on the ground. There is no winner or loser as such, and unless one combatant is slain both models are free to either move onto the battlefield or continue to fly high above it in their following turn.
Any model flying high at the start of its turn may shoot a bow or other missile weapon at any other model which is also flying high, unless it has already decided to attack in hand-to-hand combat. Shooting is worked out exactly as normal, at maximum range for the weapon used. It is assumed both shooter and target are moving at their maximum movement rate.
Wizards
Wizards often ride large ferocious winged monsters such as griffons and hippogriffs. When they are on the tabletop wizards may use their powers as normal, but when they fly high above the battlefield wizards can no longer cast spells on to the ground as they are too far away. By the same token spells cannot be cast against them by wizards on the ground. High flying models can cast spells against each other. All high flying models are considered to be within range of spells as they weave and soar around each other.
Chariots
Chariots make ideal transport and fighting machines for characters. They are also sufficiently powerful to stand up to large monsters and even units of troops. Most chariots have at least two crew members, one to control the team pulling the chariot and the other to fight. Chariots can be pulled by horses, but many of the races of the Warhammer World employ far more deadly creatures. Goblins harness wolves to their chariots, while Orcs favour brutal snorting war boars. The chariots of the Undead are pulled by cadaverous skeleton steeds, all bony or hung with tatters of rotting flesh. The rules that follow describe how you can employ chariots on the battlefield.
Moving Chariots
Chariots are always moved as individual models in the same way as powerful characters and large monsters. If you have several chariots then you can choose to move them together in a loose formation if you wish, but you do not have to do so. The only advantage of lumping your chariots together is that they will benefit from making all leadership tests on the best leadership value of the group in exactly the same way as any unit of troops led by a heroic character.
To count as grouped together in this way each chariot must be within 5" of another chariot in the same group forming a rough line or clump.
A chariot moves at the same speed as the creature that pulls it. Chariots can never make a march move, although they double their move when charging in the same way as other models. When you move a chariot model simply measure the distance and make your move. There is no need to turn or wheel, as the chariot is able to turn freely to face any direction you wish.
Chariots cannot move over obstacles or difficult terrain, except to cross a river at a bridge or a ford. A chariot compelled for some reason to move over terrain it cannot normally cross is likely to be damaged as its wheels strike rocks, its body becomes entangled in undergrowth, or it careers headlong through a wall. If forced by circumstance into difficult terrain or over an obstacle the chariot sustains D6 strength 6 hits. These are randomly distributed among the chariot, crew, and creatures in the same way as hits from shooting (see below for a description of how to do this). Chariots sometimes have to cross obstacles or difficult terrain for reasons beyond their control, for example if they are forced to flee from close combat.
Fighting Chariots
Chariots do not have a weapon skill, so when they fight in hand-to-hand combat the enemy compares his weapon skill against that of the crew. If the chariot has crewmen with different weapon skill levels then he always counts the highest. If the crewmen are slain and you wish to strike blows against the chariot, you may count its WS as 0.
Chariots comprise three distinct parts: the crew, the creatures pulling it, and the chariot itself. When enemy troops are shooting arrows or other missiles at the chariot, or when foes attack the chariot in hand-to-hand combat, any successful hits are randomly allocated between the crew, creatures, and chariot. This is shown on the chart below.
Roll a D6 for each hit scored and consult the chart for shooting or hand-to-hand fighting. The difference between the two charts reflects the difficulty of hitting crew with missiles from a distance, compared with the vulnerability of crew once they get stuck in to hand-to-hand combat and are exposing themselves to attack.
| D6 | Shooting | D6 | Hand-to-Hand |
|---|---|---|---|
| 1 | Crew | 1 | Chariot |
| 2-3 | Creature | 2-3 | Creature |
| 4-6 | Chariot | 4-6 | Crew |
Once you have allocated each hit, work out further damage exactly as you normally would to determine if wounds are caused. If the crew have identical characteristics then it is not necessary to establish who is hit, the player may remove any crew model as a casualty. Where the crew have different characteristics, if one is a hero for example, then it is necessary to further decide which has been hit. This can be done by rolling randomly using a D6 as appropriate (for example, if there are two crew 1-3 = the hero, 4-6 = the other crew member).
Chariots have their own toughness value, wounds, and other characteristics as indicated on their profile. In most cases this is as follows, although in some instances a chariot may be especially large with more wounds or greater toughness.
| M | WS | BS | S | T | W | I | A | Ld | |
|---|---|---|---|---|---|---|---|---|---|
| Chariot | - | - | - | 7 | 7 | 3 | 1 | - | - |
If some of the creatures pulling the chariot are slain then it will move proportionately slower. For example, a chariot pulled by two horses normally travels 8" but this is reduced to 4" with only one horse as half the horses have been slain. Obviously the more creatures there are to pull the chariot the smaller the proportional reduction in its movement should they be slain. Should all the creatures be slain then the chariot is brought to a halt.
A chariot can continue to fight so long as it has at least one crewman left. If all its crew are slain, and assuming it can still move, then the chariot will move randomly in its own movement phase. This is worked out along with other compulsory movement before any other moves take place. The chariot rampages 2D6" up to its maximum speed in a completely random direction. This can be established using the Scatter dice. If you roll a double then the creatures collapse with exhaustion before the chariot moves and the model can be removed from the battle. Otherwise the chariot model is moved the distance indicated. If the chariot collides with troops then it comes to a halt and a round of hand-to-hand combat follows just as if the chariot had charged.
If the chariot suffers a wound then this is recorded. Once the chariot has suffered its full complement of wounds it is destroyed and the model is removed from the battle. The creatures pulling the chariot are either killed in the wreckage or run away and take no further part in the conflict. Any surviving crew may continue to fight on foot if the player has models to represent them.
Chariot Attack
A chariot has three types of attack: attacks from its crew, attacks from the creatures if they have them, and attacks from the chariot itself. Of these the chariot is usually the most dangerous, causing considerable damage as it thunders into the enemy ranks. Chariots only attack when they charge because they need to move forward, trampling or knocking aside enemy, crushing them under their wheels or slicing them with their scythes.
When a chariot charges it automatically causes D6 hits, plus 1 for each scythe blade fitted to its wheels (this will normally be +2). These attacks are made first, before any attacks from either side. Note that no separate roll is made to score hits, the charging chariot automatically causes hits. The chart below summarizes this.
| Hits Inflicted | |
|---|---|
| Charging | D6 +1 per scythe |
| Otherwise | None |
All hits from the chariot are worked out using the strength value of the chariot itself, i.e. 7 in most cases. The main danger from a chariot comes during its charge, so it is vitally important for chariots not to allow themselves to be out manoeuvred and charged by the enemy. Chariots caught out in this way get no attacks and are likely to be overwhelmed.
Chariot crew may fight against enemy in contact with the chariot whether to its front, sides or rear. They strike blows in normal initiative order, and attack first during a charge, exactly like other warriors. All crew fight, including the driver.
The creatures pulling a chariot may fight if they have their own attacks. Wolves, for example, have their own attacks. Due to the restrictions of harness and reins, creatures can only attack enemy directly in front of them. Work out attacks in initiative order, and attack first during charges, exactly as normal.
Flee and Pursuit
Chariots flee and pursue exactly like ordinary troops. If broken in hand-to-hand combat and forced to flee they move 2D6" or 3D6" depending on their speed. If caught by pursuers they are destroyed. Similarly they pursue fleeing enemies at the same rate, and will destroy them if they are caught.
War Machines and Chariots
If firing at a chariot with a stone thrower, or other weapon which has a template, position the template as normal. Each part of the chariot is treated separately, so the horse/crew/chariot are potentially hit if these actual models are within the template area. Treat each crew member, horse, and the chariot body as separate targets, just like single models in an ordinary unit.
Snotling Pump Wagon
The Snotling Pump Wagon is very much like a chariot in that it consists of a wooden fighting platform, rather like a ramshackle wooden hut on wheels, and it moves under its own power. In the case of the Pump Wagon this power is provided not by horses, wolves or some other beast, but by the frantic pumping of Snotlings which drives a simple mechanism and keeps the Pump Wagon moving. The Pump Wagon is also equipped with a spiked roller at the front, which crushes and pierces any foes (and Snotling crew) unfortunate enough to fall beneath it.
The rules described for chariots apply to the Pump Wagon as well with a few exceptions which take into account its unusual construction and crew. As the Pump Wagon has no horses pulling it any hits must be distributed amongst the crew or machine only, as shown on the chart below.
| D6 | Shooting | D6 | Hand-to-Hand |
|---|---|---|---|
| 1-2 | Snotling | 1-2 | Pump Wagon |
| 3-6 | Pump Wagon | 3-6 | Snotling |
The Pump Wagon is heavily constructed and has the same basic profile as a chariot. This is shown here again for convenience. Like a chariot the Pump Wagon causes a great deal of damage as it charges but the effect is even more extreme due to the destructive power of the crunching roller at the front.
| M | WS | BS | S | T | W | I | A | Ld | |
|---|---|---|---|---|---|---|---|---|---|
| Pump Wagon | - | - | - | 7 | 7 | 3 | 1 | - | - |
| Hits Inflicted | |
|---|---|
| Charging | 2D6 |
| Otherwise | None |
The speed of a Pump Wagon tends to be somewhat unpredictable as its crew are continually squabbling over which of them is going to operate the pump. An enthusiastic Snotling will fight his way forward and pump like crazy for a while until he is completely exhausted when another will shove him aside and take over. This means the machine tends to go forward in fits and starts, sometimes quite quickly but at other times embarrassingly slowly.
Because the machine's speed is reliant upon the whim of its rather dim-witted crew, the player has little choice over its speed at all. To represent this the Pump Wagon has no fixed move rate. It automatically moves 2D6" and is moved along with compulsory movement before other troops can move.
The player can control the direction which the machine moves in, representing the efforts of its crew to steer the thing by leaning precariously to one side or the other, but he has no say over the speed. If the machine's speed is sufficient to bring it into contact with a target then it is considered to have charged. No formal declaration of charge is necessary. The target may make the usual response just as if it had been charged in the normal manner.
It sometimes happens that the Pump Wagon's move means it has to traverse terrain which it cannot cross. For example it might be forced into a river, bog or straight through a wall. In these situations the Pump Wagon sustains D6 strength 6 hits due to damage sustained as it crunches and smashes its way through.
It can also happen that a Pump Wagon is obliged to move into friendly troops, although this is rare as you can move the machine as you wish. A foolish general might surround his Pump Wagon with friendly units only to see the machine crunch through his own lines in the first turn. When this happens work out the effect just as if it were an enemy unit. Even the Snotlings will fight as they are far too excited to care what they are doing. The Pump Wagon does not abandon the fight until the combat is complete and one side broken or destroyed.
A Pump Wagon is dependent on its crew for mobility, so once its crew are all slain it cannot move. It does not rampage around like a chariot for example. The model may be removed once the crew are slain, as it is of no further value.
War Machines
War Machines are an important part of many armies in the Warhammer World. Gigantic cannons are amongst the most spectacular of these engines of war, but their manufacture is difficult and the secrets of gun casting and gunpowder manufacture are carefully guarded. Orcs and other less sophisticated races build gigantic stone throwers which lob boulders high into the air to come crashing down upon enemy formations or behind city walls. Bolt throwers are powerful giant crossbows which can send a spear-sized bolt clean through several ranks of enemy skewering each in turn. These are all relatively common war machines which can be found in several armies.
Stone Throwers
Stone throwers are powerful and destructive weapons that lob large boulders high into the air, sending them crashing through enemy ranks crushing limbs and armour alike. Many races of the Warhammer World use these devices. Not all are built in the same way by any means: some use a massive counterweight to catapult their missile into the air while others use torsion power like a giant crossbow. The bigger the engine, the larger the rock it can throw and the more damage it can do. The very largest stone throwers can hurl a projectile big enough to knock down buildings and even city walls.
Work out the results of stone throwing in the shooting phase. To work out damage you will need the round missile template with the hole in the centre. The stone is not as big as the template of course (that would require a very large engine indeed) but shatters on impact sending shards of sharp stone over a wide area.
Pivot the stone thrower on the spot so that it is pointing in the direction you wish to shoot. Now declare how far you wish to fire the rock. You must do this without measuring the distance to your target, so you must guess the range as accurately as you can. Once you have made your guess place the missile template directly over the spot where you have guessed.
For example: You are firing a stone thrower at a unit of High Elf Guards in front of you. You make your guess and declare that you are firing 28" directly towards the centre of the High Elf Guards. Having made your guess you take the template and measure 28" towards your target. If you have made a good guess the template will lie over your intended target. If not, don't worry; there's still a chance the stone may veer off course and hit something.
To decide if the missile lands where you have aimed it roll both the Scatter dice and the Artillery dice.
The Scatter dice is the dice marked with arrows on four sides and the word HIT on two sides. If you roll a HIT then the missile lands exactly where you have aimed it. If you roll an arrow then the missile veers in the direction shown by the arrow.
The Artillery dice is marked 2, 4, 6, 8, 10 and MISFIRE. If you roll a misfire then something has gone wrong; roll a D6 and consult the Misfire Table below. A misfire roll automatically cancels out the whole shot regardless of the Scatter dice result. If you roll a number on the Artillery dice then this is the distance in inches the missile veers off target as shown by the arrow on the Scatter dice. Move the template the distance indicated in the direction shown by the arrow. If you roll a HIT then the numbers are ignored; a number simply indicates that the shot has not misfired.
For example: You guess bang on and the template lies directly in the middle of your chosen target. You roll both dice. The Scatter dice shows a HIT! You have landed bang on target. The Artillery dice score is 4 - the number indicates that nothing is amiss and the shot lands exactly where you aimed it. If the Artillery dice had been a misfire then the whole shot would have been messed up as described on the Misfire Chart.
Misfire Chart for Stone Throwers
| D6 | Result |
|---|---|
| 1-2 | Destroyed! The engine cannot stand the strain placed upon it and breaks under tension as it is fired. Bits of wood and metal fly all around, the stone tumbles to the ground splintering the engine and throwing debris into the air. The engine is destroyed and its crew slain or injured. Remove the engine and its crew. |
| 3-4 | Disabled. The normal smooth running of the machine and its crew is disrupted by some accident or freak occurrence. A rope snaps and lashes about wildly, a crewman sets the machine up wrongly so that it pulls itself apart, or maybe a careless operator becomes entangled in the mechanism. The engine does not shoot this turn and cannot fire next turn either while the damage is repaired. To help you remember it is a good idea to turn the machine round to face away from the enemy. In addition, one of the crew is slain - caught by a snapping rope, entangled in the machinery, or thrown high into the air in lieu of the stone! |
| 5-6 | May Not Shoot. A minor fault prevents the machine shooting this turn. A crewman drops the stone as he lifts it into position, maybe a ratchet jams or a rope loosens. The machine is unharmed and may shoot as normal next turn. |
Damage
Once you have established where the stone lands damage can be worked out. Any model that lies directly under the hole is hit automatically - note that only one model can lie within the hole and if there is any doubt it is the model which is under the exact centre which is hit. Models whose bases lie under the rest of the template are hit on a D6 roll of 4+. You will have to use your judgement and common sense to decide exactly which models lie under the template; sometimes it is not easy to judge precisely. As a rule of thumb a model can be considered as a potential hit if at least half of its base area lies under the template, while models whose bases are only touched or grazed can be ignored.
[Diagram, "Splat!": the stone has landed in the middle of a unit. The model under the centre of the template is hit and 8 other models may be hit. 8 dice are rolled scoring, for example, 4 hits plus the original 1 making a total of 5 - not a bad shot.]
Once you have worked out which models are struck by your missile work out damage in the usual way. Roll for each target to see if you cause damage. Stone throwers have a strength of 7 or more, so they cause damage on the roll of a 2+ against most human or similarly sized targets. Refer to the damage chart for details. A damaging hit from a stone thrower causes either D3 or D6 wounds depending on its size, but as most creatures have only 1 wound it is not necessary to take this dice roll. It is, however, useful when attacking characters and big monsters. No saving throw is permitted for armour. When a big rock lands on you you are squashed regardless of what armour you may be wearing.
Profiles
Stone throwers vary in design; some are bigger than others, some are positively monstrous. Basically, however, there are two types: ordinary sized ones and big ones. Details are given below for typical examples.
| Maximum Range You May Guess | Strength | Wounds | Save | |
|---|---|---|---|---|
| Stone Thrower | 48" | 7 | D3 | None |
| Big Stone Thrower | 60" | 10 | D6 | None |
Being large, solid devices stone throwers are difficult to destroy. However, it's possible for them to become the target of other engines of war or they may be attacked by large monsters. Stone throwers therefore have a profile like a creature with a toughness value and a number of wounds which they can sustain before they are destroyed. As with other details these might vary in specific cases, but a typical engine has the values shown here. The move rate is the speed the stone thrower can move at with its full crew; if any crew are slain its speed is reduced proportionally. An engine cannot move and shoot in the same turn except to turn to face its target. Generally speaking, engines of war have such a long range that it is pointless moving them about.
| Move | Toughness | Wounds |
|---|---|---|
| As crew | 7 | 3 |
Loss of Crew
A stone thrower requires a full crew to work it properly: to carry stones, wind ropes, push the machine round to bear on its target, and so on. If one crewman is slain then the rest can just about get by without slowing up the machine noticeably. If two or more crewmen are slain then the remaining crew will be unable to cope, and the stone thrower will have to miss a whole turn before it can shoot again. This is in addition to any penalty imposed by a misfire result. Obviously the engine requires at least one crewman to work, and should they all be slain the machine is useless.
Stone Thrower Summary
- Declare target and guess range.
- Position template and roll Scatter and Artillery dice.
- If the Artillery dice is MISFIRE refer to Misfire Chart, otherwise...
- If the Scatter dice is a HIT the stone has struck home.
- If the Scatter dice is an arrow the stone has landed in the direction shown 2, 4, 6, 8 or 10" away from the aiming point as shown on the Artillery dice.
- The single model in the exact centre is hit. Remaining models under the template are hit on the D6 score of a 4+.
- Work out hits as normal. Models are allowed no saving throw from a stone thrower.
Cannons
Cannons are dangerous if sometimes unpredictable weapons whose manufacture is limited to a few groups of human and Dwarf experts. When they work cannons can shatter the most determined enemy, pouring shot into his massed formations, levelling his cities and toppling huge monsters. But cannons often go wrong. Weaknesses in the casting methods can leave minute cracks or other deficiencies which cause them to explode when fired. Gunpowder can fail to ignite or explode prematurely. Despite the occasional spectacular accident, cannons are extremely deadly weapons that have been instrumental in winning more than one battle on behalf of their users.
Cannons are fired in the shooting phase along with other missile weapons. To shoot your cannon first turn it on the spot so that it points towards your intended target. Now declare how far you wish to shoot - e.g. 24", 30", 32" etc. The ball travels the distance you have nominated, plus the score of the Artillery dice. Roll the Artillery dice, and add the score to the distance you have declared. The ball travels the total distance towards the target, and will land short, pass straight over, or hit depending on how accurately you have guessed the range and what effect the dice has. Remember the dice will always add at least 2" to your estimate, and can add up to 10", so you should aim a few inches short of your target.
Once you have established where the cannon ball hits place a small coin or other marker directly over the spot. The cannon ball does not stop where it hits the ground, but bounces straight forward and cuts a line through any targets in the way. To determine how far the ball bounces roll the Artillery dice again and mark the spot where the ball comes to land. Any models between the points where the ball strikes the ground and where it eventually comes to land are hit by the flying cannon ball. [Diagram: estimate the distance to the target and add the result of the artillery dice roll; this is where the cannon ball lands. Any model lying under the path of the bouncing ball takes a S10 hit and D4 or D6 wounds.]
Any model struck by a cannon ball takes a strength 10 hit resolved in the normal manner. If the cannon ball wounds its target then it causes not 1 wound but D4 or D6 depending on the size of the cannon. As most models have only one wound anyway it will not be necessary to roll this extra dice, but it is important when it comes to rolling for heroes, big monsters, and engines of war which can take several wounds. Wounds caused by cannon shot cannot be saved by armour. No saving throw is allowed.
For example: You are firing a cannon at a unit of Goblins in front of you. You make your guess and declare that you are "aiming 12" directly towards the middle of that Goblin unit." Having made your guess you roll the Artillery dice and score 4, which equals 4". This makes a total of 16". Measure 16" towards the Goblins and place a marker where the ball hits. If you have guessed well this will be just in front of them. The ball now bounces forward the score of the Artillery dice. This time you roll an 8 and the ball bounces straight through the Goblin unit hitting all the models in the way.
Misfires
You roll the Artillery dice twice when a cannon is fired, so you have two chances of rolling a Misfire result. However, the two results will be different. If you roll a misfire when you roll the first dice the cannon has literally misfired and may explode. If you roll a misfire on your bounce roll then this merely indicates the ball has stuck in the ground and does not bounce.
If you roll a misfire as you shoot the cannon then consult the chart below.
Cannon Misfire Chart
| D6 Roll | Result |
|---|---|
| 1-2 | Destroyed! The cannon explodes with a mighty crack. Shards of metal and wood fly in all directions leaving a hole in the ground and a cloud of black smoke. The cannon is destroyed and its crew slain or injured. Remove the cannon and its crew. |
| 3-4 | Malfunction. The powder fails to ignite and the cannon does not fire. The crew must remove the ball and powder before the cannon can shoot again - which takes another turn! The cannon therefore cannot fire either this turn or the next turn. It is a good idea to turn the cannon round to indicate this. |
| 5-6 | May Not Shoot. A minor fault prevents the cannon firing this turn, perhaps the fuse is not set properly or maybe the crewmen mishandle the loading procedure. The cannon is unharmed and may shoot as normal next turn. |
If you roll a misfire on your bounce roll then the cannon is unharmed, the Misfire result merely indicates that the cannon ball sticks in the ground where it hits. If the shot lands on top of a model then that particular model is hit as normal, but there is no further bounce damage.
Profiles
Cannons are hand forged by master craftsmen, and every cannon is different with little standardisation in the way of calibres or length. Individual cannon can be extremely large, but most are either large cannons, such as the Empire's Great Cannon, or smaller cannons. Details are given below for typical examples. The difference between the two sorts is range and damage. Bigger cannons carry a larger charge and so have a longer range and cause more damage.
| Maximum Range You May Guess | Strength | Wounds | Save | |
|---|---|---|---|---|
| Cannon | 48" | 10 | D4 | None |
| Great Cannon | 60" | 10 | D6 | None |
Cannons are cast from iron or bronze and are built into solid carriages. They are very difficult to destroy although the enemy may try to attack them with other engines of war, large monsters or magic for example. They therefore have a profile like a creature with a toughness value and a number of wounds which they can sustain before they are destroyed. As with other details these might vary in specific cases, but a typical cannon has a value as shown here. The move rate is the speed the cannon can be moved by a full human crew assuming it has wheels. A cannon which does not have wheels cannot be moved. If any crew are slain the cannon's speed is reduced proportionally.
A cannon cannot move and shoot in the same turn except to turn to face its target. Generally speaking cannons have such a long range that it is pointless moving them about.
| Move | Toughness | Wounds |
|---|---|---|
| As crew | 7 | 3 |
Loss of Crew
A cannon requires a full crew to work properly: to carry cannon balls, load gunpowder, push the machine round to bear on its target, and so on. If one crewman is slain then the rest can just about get by without reducing the rate of fire. If two or more crewmen are slain then the remaining crew will be unable to cope, so when it shoots the cannon must miss a whole turn before it can shoot again. This is in addition to any penalty imposed by a Misfire result. Obviously the cannon requires at least one crewman to work, and should they all be slain the machine becomes useless.
Summary of Cannon Fire
- Align cannon on target and declare the distance you are aiming.
- Roll the Artillery dice and add the score to the distance aimed. The cannon ball travels forward this distance before striking the ground.
- If you roll a misfire refer to the Misfire Chart.
- Mark the point where the cannon ball strikes the ground and roll the Artillery dice to establish the bounce distance. All models in the path of the bounce are hit.
- If you roll a misfire for the bounce the cannon ball has stuck in the ground and does not bounce.
- Work out the effect of hits normally. Models have no saving throw for a cannon hit.
Bolt Throwers
Bolt or dart throwers are large crossbows which shoot a spear-sized missile. They are so large that they are mounted on their own stand, often with wheels so they can be pivoted easily. A crew of two or more is required to wind back the powerful torsion arms and position the huge bolt ready for firing. On the whole these weapons are nowhere near as large or cumbersome as stone throwers and cannons.
Bolt throwers are fired in the shooting phase along with other missile weapons. To shoot your bolt thrower first turn it on the spot so that it points towards your intended victim. The bolt travels straight forward and (hopefully) hits the first target in its path. To determine if the bolt strikes its target roll a D6 to hit using the crew's BS in the same way as bow shots, crossbows, and other missile weapons. The basic score needed to hit is therefore shown on the standard Missile Fire Chart (below). The usual modifiers apply, see the Shooting section and the play sheets for details.
If you score a hit work out damage as described below. If you miss then the bolt hits the ground or sails into the air and comes down harmlessly somewhere else.
Missile Fire Chart
| BS | 1 | 2 | 3 | 4 | 5 | 6 | 7 | 8 | 9 | 10 |
|---|---|---|---|---|---|---|---|---|---|---|
| D6 Score to Hit | 6 | 5 | 4 | 3 | 2 | 1 | 0 | -1 | -2 | -3 |
Working Out Damage from Hits
A bolt thrower is a powerful weapon which can hurl its bolt through several ranks of troops, piercing each warrior in turn. If you hit then resolve damage against the target using the bolt thrower's full strength of 5. If the model is slain then the bolt hits the trooper in the second rank directly behind: resolve damage on the second model with a strength of 4. If the second rank trooper is slain then a model in the third rank is hit: resolve damage with a strength of 3. Continue to work out damage as the bolt pierces and slays a model in each rank, deducting -1 from the strength for each rank pierced. [Diagram: strength of attack 5, 4, 3, 2, 1 against ranks 1 to 5.]
A model damaged by a bolt thrower sustains not 1 but D4 wounds, which means that even large monsters can be hurt or even slain by a hit from a bolt thrower. Armour saves are not allowed for hits from a bolt thrower, because the missiles are so fast and deadly that any armour is pierced along with its wearer. Because saves are not taken a target with only 1 wound will be slain if it takes damage, there is therefore no need to roll the D4 to decide the number of wounds.
Profiles
The bolt thrower hurls a sharp tipped spear which causes considerable damage. The chart below shows its details.
| Range | Strength | Damage | Save |
|---|---|---|---|
| 48" | 5 -1 per rank | D4 | No save is allowed |
A bolt thrower is made from solid wood and iron. They have a profile like a creature with a toughness value and a number of wounds which they can sustain before they are destroyed.
The move rate is the speed the bolt thrower can be moved by its full crew assuming it has wheels. An engine which does not have wheels cannot be moved. If crew are slain the bolt thrower's speed is reduced proportionally. A bolt thrower cannot move and shoot in the same turn except to turn to face its target.
| Move | Toughness | Wounds |
|---|---|---|
| As crew | 7 | 3 |
Loss of Crew
A bolt thrower usually has a crew of two and if one crewman is slain then the remaining crewman can just about get by without slowing up the machine noticeably. Should a bolt thrower require a larger crew then the loss of extra crewmen will reduce its rate of fire to every second turn in the same way as for stone throwers and cannons.
Summary of Bolt Throwers
- Align bolt thrower on target and roll to hit.
- Resolve damage at strength 5. No save is allowed for a bolt thrower.
- If the target is slain roll damage against the second rank at strength 4.
- Continue rolling for damage until you fail to slay the target or run out of ranks. Deduct -1 from the strength for each rank already pierced.
Warpfire Thrower
The Skaven warpfire thrower is an invention of the Warlock Engineers of Clan Skryre. It hurls a blast of warpflame, a volatile mixture of inflammable chemicals and powdered warpstone combined with magic. The warpfire thrower is a powerful weapon and extremely deadly to both its foes and its crew. A single gout of warpflame can reduce a proud regiment of knights or foot soldiers to a charred mess in moments. Against creatures vulnerable to fire, such as Treemen and Mummies, the warpflame is particularly devastating. Unfortunately warpfire throwers can also misfire catastrophically, destroying themselves and their crew in a spectacular explosion, much to the discomfort of anyone nearby.
The warpfire thrower may not shoot and move during the same turn, so if you move during the movement phase you may not shoot that turn. Assuming it has not moved, the warpfire thrower may be fired in the shooting phase. You will need the small 2" across round missile template. The template is placed over a target up to the weapon's maximum range of 12" away. The crew must be able to see their target just as if they were firing a bow or crossbow. [Diagram: warpfire aimed here; Scatter and Artillery dice indicate the shot is 4" off target; move the template 4" as shown; warpfire lands here.]
To determine if the warpflame is on target roll the Scatter dice and Artillery dice together. A 'hit' result on the Scatter dice means the shot is on target; an arrow means the shot has missed and the template is moved in the direction indicated by the arrow by as many inches as the number shown on the Artillery dice. However, regardless of the Artillery dice roll the template is never moved more than half the measured range of the shot. For example, if the range is 10" the template is never moved further than 5". This rule prevents bizarre results such as the shot landing behind the Skaven. If the Artillery dice shows a Misfire result then something has gone horribly wrong, see below.
Damage
Once you have established where the warpflame lands, you can work out the damage. All models that lie under the template are hit. You will have to use your judgement and common sense to decide exactly which models lie under the template. As a rule of thumb, a model can be considered hit if at least half of its base area lies under the template, while models whose bases are only touched or grazed can be ignored.
Any model hit suffers a strength 5 hit from the warpflame. If the target is wounded by the warpflame then it takes not just 1 wound as normal, but D3 wounds (roll a D6: a score of 1-2 = 1, 3-4 = 2 and 5-6 = 3). Units that suffer casualties from a warpfire attack must take a panic test immediately. If the panic test is failed the unit will flee.
Misfire
If a misfire is rolled on the Artillery dice the warpfire thrower has suffered a dangerous mishap. Roll a D6 and consult the table below to find out what has happened.
Warpfire Misfire Chart
| D6 Roll | Result |
|---|---|
| 1-2 | The warpfire thrower's nozzle blocks and squirts burning fuel over its crew. Work out the effect as if the crew had been hit by their own warpfire thrower. |
| 3-4 | The fuel barrels catch fire! The model carrying the barrels runs helplessly 2D6" in a random direction before the barrels explode. The barrels explode with the same effect as a warpfire hit. Place the template over the running Skaven and work out damage as normal. |
| 5-6 | Kaboom! The warpfire thrower crew disappears in a lurid mushroom cloud of flame. Any models within 3" are hit by warpflame. Work out damage as if they had been struck by the warpfire thrower. |
Profile
| Maximum Range | Strength | Wounds | Save |
|---|---|---|---|
| 12" | 5 | D3 | -2 |
A warpfire thrower is a relatively small war machine and it is carried between its crew of two Skaven. For this reason it does not have its own toughness or wounds, but is destroyed if either crew member is slain. The warpfire thrower's crew may carry it at a rate of 4". This is 1" less than other Skaven due to the weight of the machine. The Skaven can therefore march move up to 8" where they are allowed to do so.
You can employ warpfire throwers in two different ways. A warpfire thrower can operate as part of a unit of ordinary Skaven troops, or it can fight in a unit together with other warpfire throwers.
A warpfire thrower may be allocated to a Skaven unit before the game. Any Skaven unit may have up to one warpfire thrower. The warpfire thrower counts as part of the unit, and will be affected by the unit's psychological reactions, break tests, and so forth, just like other members of the unit. The warpfire thrower does not have to form up with the unit it is part of, but it must stay within 6". The warpfire thrower will always stand and shoot at enemy who charge it, even if the rest of the unit flees.
Warpfire throwers can also be organised into a separate unit of warpfire throwers. A unit of warpfire throwers fights just like any other unit and may skirmish as described in the Skirmish rules.
If one of the Skaven crew is slain the warpfire thrower becomes useless. The remaining crew member cannot operate the warpfire thrower on his own. If the warpfire thrower is fighting as a unit together with other warpfire throwers the odd crewman should be left with the unit. This odd model can then be removed next time the unit suffers a casualty, without affecting another warpfire thrower. If the warpfire thrower is fighting as part of a unit of other Skaven then the odd crew member may be absorbed into the rank-and-file troops.
Warpfire Thrower Summary
- Position template and roll Scatter and Artillery dice.
- If the Artillery dice is a misfire refer to Misfire Chart, otherwise...
- If the Scatter dice is a hit the blast has struck home.
- If the Scatter dice is an arrow the blast has landed in the direction shown away from the aiming point. The distance the blast is off target is shown by the Artillery dice but is never greater than half the range to the original target.
- Any models under the template are hit.
Warplock Jezzail
The warplock jezzail is a fiendish invention of the Skaven Clan Skryre. It is a huge and long ranged firearm, more like a small cannon than an ordinary gun. It fires a special missile made from warpstone, the unstable magic rock which gives Skaven their power. When the warpstone strikes its target it explodes with devastating effect and a flash of pyrotechnic colour. The blast can punch through the shield, breast plate and body of an armoured knight from beyond the range of a crossbow, often shattering units of heavily armoured elite troops before they ever get into battle. Groups of jezzails are often placed in a prominent position such as on a hill or inside a tall building to volley the foe with fire as they try to manoeuvre into position.
Firing the Jezzail
The jezzail is fired in the shooting phase exactly like a crossbow, bow or other missile weapon. Like a crossbow the jezzail cannot move and shoot in the same turn, so if you move during the movement phase you will be unable to fire in the shooting phase. To shoot the jezzail first turn it to face its target (this doesn't count as moving). To determine if the warpstone shot hits its target roll to hit using the crew's BS as you would for a crossbow, bow, etc. As Skaven have a BS characteristic of 3 this means they will require a 4 to hit a target in the open at up to half range. If you score a hit work out damage as described below. If you miss then the shot sails into the air, strikes the ground, or comes down harmlessly somewhere and has no effect.
Profile
| Range | Strength | Damage | Save |
|---|---|---|---|
| 36" | 5 | D3 | -3 |
Wounds are worked out exactly as normal except that instead of inflicting 1 wound on its target the jezzail inflicts D3 wounds (roll a D6: 1-2 = 1, 3-4 = 2, 5-6 = 3). Jezzails also have an extra -1 saving throw, -3 instead of the usual -2 for a strength 5 attack. This reflects the penetrating power of the jezzail's shot and follows the same pattern as other firearms such as hand guns and pistols.
Jezzails have a crew of two Skaven who can carry their weapon at their normal move rate of 5". If one Skaven is killed the remaining one can continue to operate the jezzail but his move is reduced to half rate and all shots to hit suffer a -1 to hit penalty. The jezzail is destroyed if both crew are slain.
Jezzails operate in units of several jezzails. Jezzail units may fight as skirmishers. See the rule section on Skirmishing.
Jezzail Summary
- Align the jezzail on its target and roll to hit.
- Resolve damage at strength 5. Targets have a -3 save modifier.
Standards and Musicians
Many warriors carry a banner to war. The regiments of the Empire march under flags bearing the arms of their Electors and their Emperor. Bretonnians go to war before the glittering heraldic banners of their Lords and King. Orcs wave banners covered in glyphs proclaiming the might and power of their chieftains. The forces of Chaos fight beneath standards covered in dark runes and the emblems of the Chaos Gods.
Whatever the army, its standards are the focal point of each unit, they proclaim the unit's identity and defy their enemies by their presence. Standards also have a practical value: they are used to signal to the troops, direct the unit's movement, and provide a highly visible point around which formation changes and manoeuvres can be made. The following rules represent the boost to a unit's fighting prowess a standard instils.
Standards
A unit of troops may carry a standard which might take the form of a flag, banner, totemic idol, or similar device. The standard is carried by a standard bearer. The standard bearer is armed and armoured like the other models in the unit and fights in exactly the same way. Although the standard bearer has to carry a banner as well as fight, he is chosen from the meanest and most determined individuals in the unit, and this more than makes up for any disadvantage suffered because of the weight and inconvenience of the standard.
The standard bearer model is usually placed in the middle of the front rank of the unit, next to its leader model, musician and champion if it has them. This is not necessarily the rule, but it does look best. When a unit sustains casualties these are removed from amongst its fighting rank and the player may decide which of his models to remove. He will not wish to remove a standard bearer unless he has no other choice, i.e. if there are no other models left in a fighting rank to remove instead. This represents the fact that when a standard bearer is slain another warrior will pick up the standard, keeping the unit's flag flying during the battle.
If a unit has a standard in its front rank then it will be more determined than ever to fight hard and beat the foe. A unit which has a standard flying in its front rank may therefore add +1 to its combat score when deciding which side has won hand-to-hand combat. However, note that if a standard bearer model is slain it won't count towards working out the combat results. See the Hand-to-Hand Combat section for a complete description of how to work out which side has won the combat.
Capturing Standards
It is unusual for a standard bearer to be killed in combat because other fighting models may be removed in preference. However, should a standard bearer be slain the standard is captured by the enemy if they win the combat. If the enemy does not win the combat the standard is not captured, but is lost amongst the debris of battle, trampled underfoot, or torn apart in the struggle.
If a unit breaks and flees, then the enemy automatically captures its standard if they pursue. If they do not pursue then the standard is lost in the tide of battle. In either case the standard is removed from the unit. Note that standards are only lost if the unit is broken in hand-to-hand combat, not if the unit flees after it has panicked or because of a failed fear test.
Captured standards may be placed behind the unit which captured them and carried about as trophies. Trophies have no fighting value; they are merely used to indicate that the unit has captured its adversaries' flag. The player surrenders the model for the duration of the game and his jubilant enemy places it behind his unit to proclaim his victory. Any trophies that are lost may be recaptured along with the unit's own standard if it breaks and flees from combat. Captured trophies may therefore be recaptured by beating the unit that has them, thereby avenging their initial loss and restoring them to a proper place of honour.
Musicians
An army marches under its banners but it does so to the beat of drums and the call of blaring horns. A unit may include a musician model to accompany it into battle, either a horn blower or a drummer. Like standard bearers, musicians fight just like an ordinary member of their unit. Also as with standard bearers, the player will not wish to remove musicians as casualties unless there are no ordinary warriors left fighting. Unlike standard bearers, however, musicians are not removed automatically when a unit breaks and flees. Their instruments are somewhat lighter and less cumbersome than a weighty standard. Musicians cannot be captured as trophies.
A musician model is placed in the middle of the front rank of the unit, next to the unit's leader and standard bearer. His effect on the fighting ability of the unit is not as great as a standard bearer but is useful nonetheless. A unit which has a musician can attempt a special manoeuvre called the reform. The hornblower sounds his horn, or the drummer beats his drum, and the unit recognises the signal to reform.
Reform
A unit may attempt to reform during its movement phase so long as it is not in hand-to-hand combat and is otherwise free to move as it wishes. The player declares that he is sounding the reform and then takes a leadership test for the unit. Roll 2D6, and if the score is equal to or less than the unit's leadership value it has passed the test and may reform.
If the unit fails the test it becomes muddled and confused, and the unit may not move or shoot with missiles this turn. If the attempt to reform is successful the warriors regroup into a new formation. Arrange the unit into a new formation facing whichever direction you wish. A unit which reforms cannot move that turn, because it takes the entire movement phase to reform. Reforming troops cannot shoot with missile weapons that turn.
The General
Every army has a heroic character to command it. We refer to this character as the General, although this is only to distinguish him from other heroes. He might be an Orc Chieftain, a Bretonnian Duke, an Elector Count of the Empire, or whatever. Many armies are commanded by the ruler of their entire nation. The Emperor of the Empire and King of Bretonnia are mighty warriors who are ever ready to ride out at the head of their armies for example.
The general of your force is always the character with the highest leadership value. If several characters have the same value then choose one to be the general. He is in command of the whole army and, more than any other model, represents you personally. The general is an important character because he can inspire others to fight on where otherwise they might turn and flee.
Any unit within 12" of the general model may use the general's leadership value instead of its own when making a leadership based test. This means that a unit near the general can use his superior leadership when testing for fear, panic and other psychology, or for break tests in hand-to-hand combat. A unit which is fleeing may use the general's leadership when attempting to rally.
The Battle Standard
A general may be accompanied by a special standard bearer carrying either his personal banner or the battle standard of the army itself. This battle standard does not have to move along with the general but it is most useful when he is close by. An army's battle standard is usually carried by a heroic individual and all the rules for character models apply. Unlike with ordinary standard bearers the battle standard is not passed on if its bearer is slain. Should the battle standard bearer be slain then the battle standard may be captured in the same way as a unit banner. See the rules concerning Standards for details.
If the standard bearer joins a unit of troops and fights in the front rank then the unit receives an extra +1 combat bonus when working out which side has won the combat. This is in addition to the usual +1 for the unit's own standard. This is the only circumstance when an extra banner confers a further bonus. Normally troops fighting alongside their banners only receive +1 no matter how many banners are involved.
Any unit within 12" of the battle standard may retake a failed break test. The unit is only allowed to retake this test once. If the general is within 12" of the unit as well then it will also benefit from being able to use his leadership value. These two factors combined, the general's leadership and the opportunity to re-take a failed throw, mean that units near to the general and the battle standard will tend to hold their ground come what may.
Buildings
The Warhammer rules are extremely flexible, and allow you to fight out battles along underground tunnel complexes, through vast halls and inside caverns. You can enact swordfights within temples and palaces and full scale assaults against mighty fortresses. However, this goes somewhat beyond the scope of this rulebook where we are concerned with tabletop battles over fairly open territory. The following section therefore provides rules for using buildings on the battlefield, either isolated farmsteads, villages, towers and watchposts, or something else along these lines. Of course, if you want to build a whole city to fight over then it's up to you, the rules that follow certainly allow you to do so.
Buildings provide interesting features on the battlefield. Not only do they look attractive, but they are also important from a tactical point of view. Towers may overlook a wide part of the battlefield and provide an excellent vantage point for archers. Any troops deployed inside a building will be hard to winkle out, and so may be able to defend it against far larger numbers of enemy. But a good general knows that it is not always profitable to occupy buildings just because they are there, as it is easy to waste vital time taking a village that the enemy then simply ignores or circumvents. You must weigh the tactical considerations for yourself, and decide whether or not a particular building has any tactical value.
Moving Into and Around Buildings
Where it seems reasonable, troops may be moved into buildings but cavalry, big monsters, and large creatures cannot enter buildings that are too small for them. Giants and dragons are just too big to get into a cottage built for human inhabitants, for example.
Models may enter a building in their move phase by moving against a wall that has a doorway somewhere along its length. A unit may be divided so that some models are positioned inside a building, while the rest of the unit is placed adjacent to it. If the building has walls, hedges or outhouses, you may wish to arrange the unit to defend it. The unit's formation will inevitably become rather ragged in these situations, but it doesn't really matter so long as you keep the unit as much as possible in a single block with no gaps in its front line.
Models already within a building at the start of their turn can move out through any door in their move phase. If the unit is already divided between the building and surrounding land the troops must rejoin the rest of their unit. If the unit is wholly contained within the building it may deploy into a new formation ready to fight. Models cannot enter and leave a building during the same turn as this might enable them to move far too quickly.
The number of models you can get into your buildings will depend on the building's size. As a guide, allow as many models into the building as can fit into its ground area. If the building has several storeys then it will be able to hold more models. You can decide exactly how many models a building can hold before the game begins.
Some players like to make their buildings so that the roofs actually lift off, or the storeys divide, allowing you to place models inside. However, this is not always very practical, and you may find it easier to simply remove models from the table as they enter buildings and place them somewhere out of the way. Note down on a scrap of paper how many models are in the building if you wish.
Unless your buildings are really huge you will not need to move troops about inside. Models in the building can be assumed to be wherever you wish, and can shoot from windows or move out through doors as convenient. However, if your buildings are really huge, say bigger than 6" along any edge, then this leads to obviously unreasonable situations.
For example, if you have a building that is 48" long it would be silly to allow a model to move into the building at one end and then out the other side 48" distant in the next turn. Should you wish to employ buildings of such extreme dimensions then you will have to record movement inside them, noting down where troops are on a piece of paper every turn.
Shooting from Buildings
Models inside buildings can shoot missiles from arrow-slits, windows or doors. Up to two models may shoot from each opening. Models on flat roofs, parapets, balconies, or such-like can also shoot as normal. Troops in buildings do not all have to shoot at the same target, instead they may shoot as individuals, shooting from a particular window at targets they can see.
Models which have shot missiles from windows can be seen and may be shot at by enemy in their turn. There will be a -2 to hit modifier, as models inside buildings have the benefit of being behind the hard cover of walls.
Fighting Inside Buildings
Working out combat between troops inside buildings and enemy assaulting them can be quite tricky. It is easier if you think of attacking troops as fighting the building rather than the troops inside. Obviously this isn't literally the case but it does enable you to work out combat in a satisfactory manner. Attackers must therefore charge the building to begin combat, throwing themselves at the doors and through windows in an attempt to get inside. The attackers fight with any models whose bases touch the building, and the defenders fight with the number of models which occupy the same frontage.
When fighting in buildings the defenders count as fighting behind a defended obstacle. The enemy will therefore require a 6 to hit regardless of their weapon skill. When deciding which side has won count up casualties, but ignore the usual bonus for fighting in ranks, standards, flank attacks, and so forth.
When you are fighting in buildings none of these benefits are of any use to you because the combat is too muddled and brutal for rear ranks to have any effect; a standard must be lowered or put aside, and the walls of the building protect the occupiers' flanks. Astute players will realise that this means attackers stand little chance of shifting determined defenders unless they have some overwhelming advantage.
If attackers win the first round of hand-to-hand fighting they have fought their way inside, and the defenders lose the advantage of fighting from a defended obstacle in subsequent turns. If the defenders win their foes are pushed out of the house and retreated 2". The defenders may either follow up by moving out of the house and continuing the fighting next turn as normal or they can elect to stay put.
If a unit in a building is broken work out fleeing and pursuit as normal. Victorious troops can always elect to remain in the building rather than pursue. Troops in a building do not need to test their leadership to avoid pursuit.
Destroying Buildings
Large monsters and engines of war may be capable of destroying buildings. Buildings therefore have a toughness value and can sustain a number of wounds before they are destroyed. It is a bit confusing to refer to 'wounds' when talking about buildings so we shall call them damage points instead. Wounds and damage points are exactly the same thing.
If your buildings are very large it may not be appropriate to destroy them all at once. You may prefer to divide up large buildings into several portions each with its own damage points. For example, you might have a manor house with a main portion and two separate wings. This could conveniently be divided into three parts for recording damage points and probably for moving troops within it too.
The chart below lists types of building and suggests values for toughness and damage points. As most gamers make their own buildings you may prefer to tailor each building's values to its appearance. This is entirely up to you.
| Type of Building | Toughness | Damage Points |
|---|---|---|
| Mud or straw huts, light wooden shacks, outhouses | 7 | 2 |
| Timber or brick house, log cabin | 8 | 5 |
| Stone house | 9 | 5 |
| Stone tower or fortification | 10 | 10 |
| A heavily reinforced door | 6 | 1 |
| A fortress gate | 8 | 5 |
If a building sustains its full quota of damage points it collapses. Any models inside a collapsing building must make their basic armour saving roll or they are trapped and slain. Models which pass their armour save may be formed up outside the building.
We have included values for heavy doors and fortress gates, as you may wish to fight games which involve defenders locking shut the doors of their tower or castle while the attackers attempt to batter down their defences. Domestic doors are not sufficiently substantial to withstand a determined defender and so offer no resistance to attack.
Fire
Some creatures can breathe fire, such as dragons, and some war machines can project flames, such as a Skaven warpfire thrower. Buildings are vulnerable to fire because they are often made from wood and contain furnishings and floor coverings which are easily burned.
When attacking a building with a fire weapon, add the score of a D6 to the weapon's strength to represent the slightly unpredictable incinerating effect of the flames. Work out damage as normal.
If you roll a 6 when you roll for extra strength the building also catches fire. This is regardless of whether the hit also causes damage. A burning building sustains 1 extra damage point at the start of every turn from now on (i.e. at the start of each player's turn). Once all of its damage points are gone the building is destroyed.
Special Rules
Everybody who makes their own model buildings likes to include features which appeal to them: spiral stairways, terraces, balconies, aerial walkways spanning two towers, gatehouses, drawbridges and so on. We can't anticipate every variation of fantasy architecture that you might want to design, but this shouldn't stop you making models as varied and imaginative as you please.
You can always invent your own special rules to incorporate unusual buildings into your games. For example, a winding stairway might take a half turn to climb, or a turn if it is very long. A narrow passage might allow passage for only 4 models per turn, an aerial walkway might reduce movement to half rate with a 1 in 6 chance of falling if you move faster, and so forth.
Daemons
The Realm of Chaos is a strange and unfathomable alternative reality. It co-exists with our own universe, the world of physical matter, but only in a few enchanted places do the two worlds touch. One place where Chaos and the Warhammer World meet is the far north of the Old World. Here the raw power of Chaos and the physical matter of the material world intermix in a bizarre manner, twisting the landscape into strange and frightening shapes. It is impossible to be certain of the landscape in the Realm of Chaos because it changes all the time. Travellers who have wandered far north and lived to tell the tale have reported horrific visions of burning skies, of rivers of blood and plains of glass, and monsters beyond the worst nightmares of man. Worst of all are the servants of the Chaos Gods themselves: the Daemons.
There are countless types of Daemon and it would be impossible to catalogue them all. Some are numerous, but many unique. Some are huge, others no larger than a man's forefinger. Many owe no allegiance to any of the many Gods of Chaos, but the best known are the Daemons of the four Great Powers of Chaos: Khorne, Tzeentch, Nurgle and Slaanesh.
All Daemons are creatures of magic. Magic energy is the raw material of the Realm of Chaos just as physical matter is the raw material of the physical world. When they come into the physical world, Daemons can be hurt by ordinary weapons, but they are very hard to slay and it takes a brave man to face up to one of these monsters.
Daemons do not come into the Old World often. The everyday world of material things is like a barren desert to them, and they cannot survive for long outside the life-giving environment of the Realm of Chaos. It is rather like a man trying to live underwater, or a fish attempting to live on dry land.
When the power of Chaos grows strong, magical energy surges into the Warhammer World and saturates the skies with magic, enabling Daemons to pour down from the north and into the Old World. While this wave of magic power lasts armies of Chaos and hordes of Daemons threaten to overrun the lands of men and plunge the world into darkness forever.
Special Daemon Rules
Most daemons have special rules which apply to them, which are covered in the Battle Bestiary. In addition there are a few rules which cover all Daemons and which are explained here to avoid needless repetition. Most Daemons fight in units of several models in the same way as Men, Elves and other mortal troops. Greater Daemons are the largest and most powerful of their kind. They are huge monsters and fight on their own like huge monsters and characters.
Daemon Saving Throw
Daemons are not fashioned from physical matter but from the raw stuff of magic. The blood that flows through their veins is not mortal blood but the boiling ichor of Chaos, fiery with preternatural vigour, corrosive as acid, and deadly as the most potent poison. Their flesh too is unnatural, though it may appear ordinary. Many Daemons have iron hard skin or flesh that is tough as steel or solid as rock. Others have transmaterial bodies: their form is neither physical nor ethereal but somewhere inbetween so that it glows with magic energy.
Although their bodies are tough, Daemons are still vulnerable to normal weapons. The magic energy flowing through their veins acts like armour, protecting Daemons from blows which would otherwise slay them, absorbing the impact or deflecting sharp edges. This gives all Daemons a saving throw in the same way as armour. The saving throw varies from Daemon to Daemon but is usually 4+ on a D6. This save takes into account the Daemon's magical intangibility or 'daemonic aura' as this effect is called. This saving throw is reduced by high strength hits in the same way as physical armour.
Magic Weapons
Daemons are fashioned from magic energy and so they are vulnerable to magic weapons. Their normal daemon saving throw does not apply when attacked by magic swords or other magic weapons. The exception is the Bloodthirster of Khorne which has Chaos Armour and which is protected against magic weapons by powerful enchantments.
Flying
Some Daemons have wings and can fly. The Disc of Tzeentch can fly even though it has no wings. The rules for flying and aerial combat are described elsewhere in this rulebook.
Daemon Animosity
The Chaos Gods are great rivals, and in the Realm of Chaos they fight against each other all the time. Even rival Daemons of the same Chaos God sometimes fight to settle their differences or just for the entertainment of their fickle master. If you wish to field Daemons of just one Chaos God then this will not present any problems. However, if you wish to field Daemons of two or more Chaos Gods in the same army then you must take into account the rivalry between them. This can mean that your troops will sometimes attack each other rather than the enemy. This is called Daemon Animosity.
If you field Daemons from different Chaos Gods in the same army then you must be careful to avoid the effects of Daemon Animosity. This is easily done by keeping the rival Daemons apart. If you have Daemons of different Chaos Gods within 12" at the start of your turn you must make a test to see what they do. Roll a D6 for each unit of Daemons or each Greater Daemon concerned.
Daemon Animosity Table
| D6 Roll | Result |
|---|---|
| 1-2 | The Daemons recognise their rivals and bellow with rage as they charge towards their ancient enemies, covering the distance between them with a single bound and throwing themselves into combat. Move the Daemons directly towards their closest rivals and into close combat. They do this regardless of whether they are fighting other troops at the time, or whether they can normally cover the distance between the two groups of Daemons so fast. The rival Daemons will fight each other in the hand-to-hand combat phase, and will continue to fight each other in this way until the player rolls a 5 or 6 at the start of a subsequent turn. Daemons will not flee when fighting in this way and so no break test is necessary. When they cease fighting the two units are moved apart but may not move further that turn. If charged by enemy while fighting amongst themselves Daemons will ignore their attackers unless they are also Daemons, in which case they may fight as normal. |
| 3-4 | The Daemons see their rivals and begin to shout and scream in a threatening manner. The unit becomes rowdy and uncoordinated. The Daemons will not move or do anything else this turn, but otherwise they are unaffected. |
| 5-6 | Although they see their rivals the Daemons ignore them for the moment. The unit may continue as normal this turn. |
Magic
The Warhammer World is saturated with magic energy which blows through the world like a wind, scattering its power widely over the mountains and forests. The winds of magic cannot be seen by ordinary mortals, but wizards and certain magically inclined creatures can either see or feel the winds as they blow. Sometimes the magic winds blow strongly, and magic things course with energy. At other times a calm descends leaving magic listless and weak.
When the magic winds are at their height the Dwarf Runesmiths forge the mightiest enchanted weapons, nailing the raw magic in place with runes of power to produce blades and axes of incalculable potency. The Elves call upon the winds of magic to strengthen their race and preserve the western realm of Ulthuan from its certain doom. The High Magic of the Elves is the greatest in the world and their spells are the strongest of any living creatures. When the winds of magic howl over graveyards and tombs the dead stir and become restless and necromancers prepare their evil sorceries.
A Warhammer battle is as much about magic as the clash of arms in deadly combat. Of course, you do not have to include magic in your games if you prefer not to, although you will be depriving yourself of a large measure of enjoyment. The complete rules for casting spells are not included in this game because there are so many spells and magic items that there isn't enough space. The complete magic rules, together with spell cards for all the different sorts of wizard (Light, Gold, Jade, Celestial, Grey, Amethyst, Bright, and Amber), High Magic, Dark Magic, Orc Shaman Magic, Skaven Magic, and many new magic items, are included in the separate Warhammer Magic supplement. However, we have included a selection of magic in Warhammer to get you started.
We suggest that you take the magic item cards so that you can look at them while you are reading the following rules.
The Magic Phase
During the magic phase spells may be cast. Some magic items also enable characters to cast spells. The Warhammer Magic supplement describes many more magic items and further types of spell, but all work in fundamentally the same way.
Magic items which can cast spells are clearly marked 'SPELL'. If you look at the magic item cards you will find four cards marked in this way: the Horn of Urgok, the Claw, the Doomfire Ring and the Staff of Lightning. These items contain spells which can be cast in the magic phase.
Most magic items can be used by any heroic character, not just by wizards, but they cannot be used by ordinary troops. Some magic items can only be used by wizards, or by characters of a specific race. This is indicated on the card for the item.
As with the hand-to-hand combat phase both players participate in the magic phase. Both sides are allowed to cast spells using their spell cards. A spell can only be cast once per magic phase. Some spells can be cast every magic phase, others can only be used a limited number of times, as indicated on the card.
The player whose turn it is begins the magic phase by choosing one of his spell cards and casting it. The card is placed face up on the table and the player reads out the effect. Once the spell has been resolved his opponent chooses and casts one of his spells in the same way. After both sides have cast a spell it is the first side's turn again, then his opponent, and so on. Spell casting alternates in this way first one side, then the other, until neither side has any spells left to cast. As there are only four spell cards provided in the Warhammer game itself, spell casting will be relatively brief, but you can imagine how with many spells to play casting might alternate in this way for quite a time as wizards cast spells against each other and on the various fighting troops. Once all spells that the players wish to cast have been cast the magic phase is over.
Rules for the spells themselves are given on the cards which describe them. Note that in the case of the Staff of Lightning you must make a test when you use the item to see if its store of energy is used up by the blast. This means that although you know the staff will work at least once, you can never be too sure if it will work again, so you must be careful not to waste its magic against a weak or trivial target.
There is nothing to prevent a single hero or wizard model having several magic items or using them in the magic phase. If a model is slain then any magic items it has are assumed to be either destroyed or rendered inactive. Of course you might choose to invent a game where players strive to capture and recapture a magic item, and it passes from one side to the other as each tries to control it. This would make a very entertaining game, and obviously you would want the item to be taken from slain individuals and used by others. However, in the normal run of things magic items are assumed to leave the game with the death of their users.
Magic Items
We have already talked about magic items which contain spells. Other magic items are enchanted in various ways, and confer advantages or bonuses during combat or movement. For example, the Axe of Grom is enchanted so that when it strikes it causes double the amount of damage as an ordinary weapon, inflicting 2 wounds on the model struck instead of 1, and in addition the Axe cleaves straight through ordinary armour so no armour saving roll is permitted.
Magic items are allotted to individuals before the game and may be used by them at the appropriate times as described on the card itself. So, for example, the Golden Helm of Atrazar comes into effect every time the wearer suffers a wound. In most cases items can be used repeatedly over and over again, but some may have a limited use or it may be possible to use them only once.
All magic items have a points value indicated on the card. This indicates how much they are worth. The value of the item is added to the points value of the character carrying it. See the section on Points Values for more details of how to calculate each model's worth.
Magic Scrolls
Scrolls are a specific kind of magic item. A magic scroll contains an enchantment that is released when it is chanted by a wizard. Only a wizard may use a scroll. A scroll may only be used once, so when it has been used it is useless.
The two scrolls included with the Warhammer game contain the powerful counterspells Dispel and Destroy. Both are used to counter the effect of enemy magic, and are used to interrupt the normal spell casting sequence. If the enemy casts a spell and you wish to counter it then you must immediately declare you are using the Dispel or Destroy scroll. The enemy's spell is stopped until the results of the counterspell are resolved.
The Dispel scroll can be used to dispel any spell regardless of where it is cast or at whom. The Destroy scroll can only be used if the wizard carrying it is directly affected by the spell, i.e. if it is cast either at him or at the unit he is with.
Note that we have provided only one each of these scrolls, as to include more would have reduced the number of other magic items. If you wish to copy these scrolls to make more for your Warhammer games then please do so, there is no reason why a wizard shouldn't carry several scrolls. The total number of magic items a character can carry is limited as described in the section on Heroes and Wizards. Even the greatest wizard cannot carry more than 4 magic items in total, so it will always be a tough decision whether to carry scrolls or other items.
Warhammer Magic
The Warhammer Magic supplement contains many more magic items, and there is nothing to stop you inventing your own. Magic items make an interesting reason for having a battle in the first place. A magic item may be so valuable that armies may be mustered to capture it, or adventurers might delve deep into mines and tunnels in search of lost magic treasures.
Skirmishers
A skirmish is an encounter between small groups of warriors, often fighting in a loose or spread out formation. The rules in this section describe how you can represent these loose formations on the tabletop. This allows some units to operate as skirmishers during the battle, spreading out to cover a broad area for example. The same rules can also be used to fight out small battles or skirmishes between a handful of models if you wish.
Skirmishing Troops
Skirmishing troops do not move or fight in base-to-base formations as most units do. Instead they fight in a loose group with gaps between each model. This gives skirmishers the freedom to move over difficult terrain quickly, and enables them to take advantage of minor folds in the ground, scrub, and other small features to shelter from shooting enemy. This together with their speed makes it difficult to hit them with bows or other missile weapons. Conversely their scattered formation has no solidity, so if they are struck by an ordinary enemy unit they will be swept away almost regardless of their individual prowess.
Not all troops can fight as skirmishers. Those which can are indicated in the Warhammer Armies army list for their race.
The most common role for skirmishers is to form a screen in front of your army behind which other troops advance. With skirmishers in front of your army, enemy bowmen and other missile armed troops will be unable to shoot at your advancing units. Skirmishers are also able to make swift advances through woods, over steep hills, even across rivers, and occupy useful positions ahead of your main army. In this way skirmishers can deny tactically important features such as hills to the enemy, or they can occupy the edge of a wood where troops in normal formation would be slowed down.
Skirmishers are certainly useful, but they have their vulnerabilities too. They are easily driven aside by small units of fast cavalry and they have little hand-to-hand fighting ability.
Moving
Skirmishers move in a loose group or rough line. Models are positioned up to 2" apart so that they are not touching each other. Should the group be split as a result of casualties, or should individual models become divided from it for some reason, then the player must rectify this in his next movement phase.
Skirmishing models are moved as individuals in the same way as characters. Any model can be turned to face any direction as it moves and no penalty is incurred for this.
Skirmishers are uninhibited by their fellows and so have freedom to move around obstacles or rough ground. They therefore suffer no penalties for crossing obstacles or difficult ground.
Shooting
Skirmishers are difficult to hit with missiles as they are relatively small, individual targets able to take advantage of whatever cover is available. Any enemy shooting at them therefore suffers a -1 to hit penalty. This is, in effect, the -1 penalty normally applied for shooting at characters. A character cannot 'skirmish' and claim a -2 penalty.
It is not possible to shoot through the gaps between skirmishing models with bows or other missile weapons. This enables skirmishers to act as a shield for the units behind them, sheltering them from enemy missile men while they advance.
Hand-to-Hand Combat
If engaged in hand-to-hand fighting then only skirmishing models which are actually touching enemy models can fight. Any models which form part of the unit but which are not touching an enemy model may not fight.
Skirmishers may charge enemy troops exactly like ordinary units. Models are moved individually into contact with their foe. When skirmishers charge in it is usual for the player to form up into a line so that more models can fight. This is fine so long as individual models do not exceed their charge move. Any models unable to reach the enemy may be placed behind the fighting rank loosely to remind players that the unit is skirmishing.
Skirmishers lack a proper formation and are not therefore ideally suited to hand-to-hand fighting. Troops who are not fighting are unable to lend their weight to their friends by pushing forward or stepping in to replace fallen comrades. To represent this no combat bonus is added for rear ranks of skirmishers when it comes to deciding combat results. In effect skirmishers always count as one rank regardless of how many models have piled in behind.
Changing Formation
A unit may be deployed on the battlefield ready to skirmish if the player wishes. Alternatively units may adopt a loose skirmish formation during the battle, or they can adopt a proper base-to-base formation from skirmish order. Changing from a loose skirmish order to a proper base-to-base formation, and vice versa, takes an entire turn. This does not prevent the unit shooting, but it does prevent it moving other than to change its formation.
To change from a normal formation to skirmish order simply move the models apart up to their maximum move distance. Each model must be within 2" of the next.
To change from skirmishing order to a normal formation first estimate the middle of the group. Then place the unit's leader (or another distinctive model if the leader is slain) in the middle of the group facing any direction you wish. Lastly form up the unit about the leader so that he is in the middle of the front rank. You can form up into as many ranks as you wish, although your new formation must be more compact than before. For example, you cannot form up from a roughly circular band into a single long line stretching from one end of the table to the other.
Leadership
While skirmishing troops are scattered across a broad front their leader may not be able to see all his troops, while individual warriors may be unaware of what is happening to the unit as a whole. This is one of the disadvantages of skirmishing: troops are unable to benefit from the presence of standards or potent leaders, separated as they are by distance and cover. To represent this a skirmishing unit always tests its leadership on the leadership value of the troops even if they are accompanied by a leader with a higher leadership value. Even the leader tests on the lower value. In addition, skirmishers cannot test on the army general's leadership and do not benefit from battle standard re-rolls as do other troops. This means that skirmishing troops are bound to be more fragile than properly formed troops in combat, and if beaten they will be more likely to break and flee.
Points Values
Points values are a useful means of working out evenly matched armies. A game with 1000 points on each side will, theoretically at least, be an equal contest of skill and generalship. Of course, the battlefield terrain will affect your chances of victory, and some kinds of terrain favour one side above another, but on the whole it is better to have a points value system than not.
Creatures have a points value that reflects their fighting abilities on the battlefield. These values are based on the creature's relative profiles to an extent, and also on its special powers, limitations, inherent strengths and weaknesses. The value of an ordinary Man is 5, and this is the base value. All other points values are worked out relative to this. A Goblin is 2 1/2 points; weaker than a Man, a poorer fighter, more likely to run away, and inferior in most respects. Elves are valued at 8 points. They are more skilled with weapons than a Man, less likely to run from combat and very fast.
As well as giving a points value for every type of creature, values are included for weapons and armour. A creature's own points value includes a sword, club, axe or other hand weapon but does not include other weapons or armour. If a warrior is equipped with a spear he costs more points, and if he wears a mail shirt and carries a shield he costs more points still. The more equipment he has, the more points a warrior is worth.
Basic Points Values
Principal Races
| Troop | Points |
|---|---|
| Black Orc | 7 |
| Chaos Beastman | 10 |
| Chaos Centaur | 30 |
| Chaos Warrior | 21 |
| Dwarf | 8 |
| Dwarf Slayer | 11 |
| Dark Elf | 8 |
| Dark Elf Assassin | 38 |
| Dark Elf Witch Elf | 10 |
| Goblin | 2 1/2 |
| Goblin Fanatic | 30 |
| Halfling | 3 1/2 |
Monsters
| Monster | Points |
|---|---|
| Chaos Hound | 16 |
| Chimera | 250 |
| Cockatrice | 150 |
| Dragon | 450 |
| Great Dragon | 600 |
| Emperor Dragon | 750 |
| Dragon Ogre | 85 |
| Eagle | 75 |
| Giant | 200 |
| Giant Rat | 2 1/2 |
| Giant Scorpion | 50 |
| Gigantic Spider | 50 |
Undead
| Troop | Points |
|---|---|
| Liche | 350 |
| Vampire | 250 |
| Skeleton Warrior | 8 |
| Ghoul | 8 |
| Ghost | 35 |
| Zombie | 4 |
| Carrion | 45 |
| Mummy | 45 |
| Wight | 37 |
| Wraith | 75 |
Chaos Daemons
| Daemon | Points |
|---|---|
| Bloodthirster of Khorne | 800 |
| Bloodletters of Khorne | 20 |
| Flesh Hounds of Khorne | 35 |
| Juggernaut of Khorne | 70 |
| Keeper of Secrets of Slaanesh | 550 |
| Daemonettes of Slaanesh | 30 |
| Fiend of Slaanesh | 25 |
| Steed of Slaanesh | Double the value of rider + 5 |
| Great Unclean One of Nurgle | 550 |
| Plague Bearer of Nurgle | 20 |
| Beast of Nurgle | 75 |
| Nurglings |
Steeds
| Steed | Points |
|---|---|
| Chaos Steed | Double the value of rider +4 |
| Cold One | Double the value of rider +10 |
| Elven Steed | Double the value of rider +3 |
| Giant Spider | Double the value of rider +4 |
| Giant Wolf | Double the value of rider +4 |
| Horse | Double the value of rider |
| Skeletal Steed | Double the value of rider +2 |
| Warhorse | Double the value of rider +3 |
| War Boar | Double the value of rider +8 |
Machineries
| Machine | Points |
|---|---|
| Bolt Thrower | 30 + value of crew |
| Stone Thrower | 50 + value of crew |
| Chariot | 50 + the value of its crew + the value of the creatures pulling it as if they were being ridden. E.g. Horses add nothing, but Giant Wolves add +4 per wolf. |
| Snotling Pump Wagon | 40 |
| Skaven Warpfire Thrower | 70 |
| Skaven Jezzail | 30 |
| Cannon | 80 + value of its crew |
Hand-to-Hand Weapons
| Weapon | Points |
|---|---|
| A single sword, axe, mace or other hand weapon | Free |
| An additional sword, axe, etc | 1 |
| A double-handed weapon, including double-handed axe, and sword | 2 |
| Flail | 1 |
| Halberd | 2 |
| Spear | 1 |
| A lance for a mounted warrior | 2 |
Missile Weapons
| Weapon | Points |
|---|---|
| Bow | 2 |
| Short bow | 1 |
| Long bow | 3 |
| Crossbow | 3 |
| Repeating Crossbow | 4 |
| Javelin | 1 |
| Sling | 1 |
| Hand Gun | 3 |
| Pistol | 2 |
Armour
| Armour | Points |
|---|---|
| Shield | 1 |
| Light Armour | 2 |
| Heavy Armour | 3 |
| Barding for steed | 4 |
Remember that in the case of cavalry models the values of all equipment including armour is doubled. This means that barding always adds +8 points to the value of a cavalry model rather than +4. The +4 value is still used for horses pulling chariots.
Reduced costs for troops with a value of less than 5. Troops with a basic value of less than 5 points can buy their equipment at half cost. This is particularly useful for Goblins and Skaven. The reduction in costs for these troops reflects the fact that no amount of equipment is really going to bring them up to the same worth as more potent warriors. So a Goblin with light armour and short bow is worth 2 1/2 + 1 + 1/2 = 4 points. A Man with the same gear would cost 5 + 2 + 1 = 8 points.
Cavalry
The points value of a cavalry model depends on the rider's worth as well as the inherent fighting abilities of the steed. Due to his extra mobility a cavalry model is deemed to be worth double the points of the same model on foot, including the value of his armour and weapons. A man on a horse would cost 10 points against 5 for a man on foot, for example. If the man had a shield his value would be 6 on foot and 12 riding a horse.
Most steeds are worth extra points compared to a horse because they have their own attacks. A Warhorse is therefore worth an extra +3 points, a Giant Spider +4 points, and so on. These values are included in the list above. So, a man riding a Warhorse costs not 10 points but 10+3 = 13 points. This value does not include the cost of armour or weapons of course.
Heroes
The points values of heroes is not covered in full here, but will be covered in the complete army lists for each race in the Warhammer Armies books. However, the following values cover the main races.
| Race | Champion | Hero | Lord |
|---|---|---|---|
| Black Orc | 42 | 91 | 140 |
| Chaos Beastman | 60 | 130 | 200 |
| Chaos Centaur | 100 | 220 | 350 |
| Chaos Warrior | 91 | 193 | 305 |
| Dwarf | 48 | 104 | 160 |
| Dark Elf | 48 | 104 | 160 |
| Goblin | 15 |
Wizards
The true value of wizards is only fully realised with the addition of all the spells and magic items in the Warhammer Magic supplement. The values summarised below reflect the full potential of the wizard and may therefore seem rather expensive at first sight. As with heroes these values are only examples and complete points values are included in with the army lists in the appropriate Warhammer Armies volume.
| Race | Wizard | Wizard Champion | Master Wizard | Wizard Lord |
|---|---|---|---|---|
| Chaos Sorcerer | 84 | 166 | 240 | 356 |
| Beastman Shaman | 68 | 134 | 225 | 336 |
| Dark Elf | 59 | 121 | 219 | 328 |
| Goblin Shaman | 28 | 83 | 159 | 253 |
| High Elf | 59 | 121 | 219 | 328 |
Skaven Wizards have slightly unusual characteristic values. Their points values are therefore slightly different too.
| Warlock Engineer | Warlock Champion | Warlock Master | Grey Seer | |
|---|---|---|---|---|
| Skaven | 56 | 118 | 190 | 340 |
Heroes and Mounts
Heroes and wizards can ride a horse, warhorse, or other appropriate steed. The cost of the model is always the value of the hero or wizard plus the extra cost indicated for the mount. The value of the rider is not doubled as this would make mounted characters far too expensive. This means that a character can ride a horse for free, or a Warhorse for an extra +3 points. This may seem a little cheap but it is only right and proper that heroes get to ride where others might be obliged to go on foot.
To find the cost of a heroic character or wizard riding a monster simply add the two values together.
Points Variations
The points values described above are not exhaustive by any means. For one thing, every army has regiments of guards or other first-class troops who are better fighters than the ordinary rank and file troops. Such troops might be extraordinarily brave, particularly well disciplined, picked out from the biggest and sturdiest of their kind, especially fleet of foot, highly trained and drilled, expert marksmen, and so on. Depending on their expertise their characteristics may be better than ordinary members of their race, and their points value would have to be increased to reflect this. The Warhammer Armies lists give examples of troops which are better, sometimes far better, than ordinary warriors. A suitable points addition is made for this.
A good example of warriors whose prowess far exceeds that of their fellows is the Emperor's Reiksguard Knights, recruited from the noble youth of the Empire and subjected to the rigorous training of the Imperial army.
| M | WS | BS | S | T | W | I | A | Ld | Save | Pts | |
|---|---|---|---|---|---|---|---|---|---|---|---|
| Reiksguard Knight | 4 | 4 | 3 | 4 | 3 | 1 | 4 | 1 | 7 | 2+ | 39 |
| Warhorse | 8 | 3 | 0 | 3 | 3 | 1 | 3 |
The Reiksguard Knight is allotted a points value of 8 to take into account his improved characteristics. He is armed with a lance (+2), and wears heavy armour (+3) and carries a shield (+1). His Warhorse has barding armour (+4). This gives a total points value of 18 points, but because the Reiksguard Knight is a cavalry model this is doubled to 36, and because he is riding a Warhorse a further +3 is added. This gives a total points value of 39. Note that his movement characteristic does not take into account the reduction in speed due to armour, which reduces his actual movement rate to 6".
Rules Playsheet
The back pages of the rulebook carry a Warhammer Roster Sheet (a blank form for listing troops, characters and units, which may be photocopied for personal use) and a two-page Rules Playsheet summarising the rules. The playsheet's to-hit, to-wound and saving throw modifier tables are identical to those given above; the playsheet's remaining text is transcribed here as printed, including where it differs in wording from the main rules.
Turn Sequence
- Movement
- Shooting
- Hand-to-Hand
- Magic
Movement
The player whose turn it is may move his troops. Movement is conducted in the following order.
- Declare Charges
- Rally Fleeing Troops
- Compulsory Moves
- Move Chargers
- Remaining Moves
Charge and Reactions
Charge! A unit may charge at double its normal move rate. Measuring is not permitted before the charge is declared. If unable to reach its target the unit moves a normal move in the intended direction. Once a charge has been declared the enemy declares his reaction. A charging unit may not manoeuvre except that it may wheel once to bring it into line with its target.
Stand and Shoot. You may only stand and shoot if the chargers come from more than half their charge move away. Work out casualties immediately.
Hold. The unit stands and takes the charge. This is the usual reaction for troops not armed with missile weapons.
Flee! The unit turns tail and runs. The unit is immediately moved its standard flee distance (2D6" or 3D6") away from the chargers. Fleeing troops may not shoot.
Manoeuvres
Wheel. A unit may wheel as many times as you wish except in a charge, where the unit may wheel once to line itself up to the enemy. The distance moved is the longest distance covered by the model on the outer edge of the wheel.
Turn. A unit can turn once during its movement. All the models remain in place but turn either 90 degrees to their left or right, or 180 degrees to face the rear. A unit must surrender a quarter of its movement to turn.
Change Formation. A unit may add or reduce the number of ranks in which it is deployed by 1 by surrendering half its movement. A unit may add or reduce the number of ranks by 2 by surrendering all of its movement.
Terrain and Obstacles
Troops cross difficult ground at half rate. This includes woods and most scenery including steep hills. Ordinary hills are not considered to be difficult ground and may be moved over at normal rate.
Troops move across very difficult ground at a quarter of their normal rate. This includes sheer slopes and very thick woods. Very difficult ground is unusual in a game.
Obstacles. This includes fences, walls, hedges and other linear features. Troops must surrender half of their movement to pass over an obstacle.
Marching
Marching troops move at double pace with their weapons shouldered. A unit may not march if there are enemy within 8". If marching troops advance to within 8" of the enemy they must halt immediately and prepare for battle. A marching unit may not turn or change its formation, but it may wheel normally. A marching unit may not shoot with missile weapons. War engines, chariots and other machines may not march.
Fleeing Troops
Troops fleeing during their movement phase move towards the nearest table edge, avoiding enemy and obstructive terrain where possible. Troops with a movement rate of 6" or less move 2D6". Troops with a movement of more than 6" move 3D6". Fleeing units do not have a strict formation; they are arranged into a rough mass of models and moved as a single confused and tangled body.
Shooting
The player whose turn it is may shoot with any troops equipped with missile weapons. The player nominates each unit in turn and works out its missile fire.
| Weapon | Range | Strength | Notes |
|---|---|---|---|
| Short Bow | 16" | 3 | - |
| Bow | 24" | 3 | - |
| Long Bow | 30" | 3 | - |
| Crossbow | 30" | 4 | May not move and shoot |
| Repeating Crossbow | 24" | 3 | May shoot twice at -1 to hit |
| Hand Gun | 24" | 4 | May not move and fire. May not fire two turns in a row. Deduct -2 from enemy's save. |
| Javelin |
To Hit (BS 1 to 10 needs D6 of 6, 5, 4, 3, 2, 1, 0, -1, -2, -3):
- +1 Shooting at a Large Target
- -1 Shooting while moving
- -1 Shooting at a Charging enemy
- -1 Shooting at long range (over half range)
- -1 Shooting at a single character model
- -1 Target is behind soft cover, such as a hedge or wood
- -2 Target is behind hard cover, such as a wall or building
Saving Throw (score needed on a D6):
| Armour | Without shield | With shield | Mounted | Mounted with shield |
|---|---|---|---|---|
| None | None | 6 | 6 | 5 or 6 |
| Light | 6 | 5 or 6 | 5 or 6 | 4, 5 or 6 |
| Heavy | 5 or 6 | 4, 5 or 6 | 4, 5 or 6 | 3, 4, 5 or 6 |
Hand-to-Hand
All models whose base touches an enemy model's base may fight. A model may make as many attacks as shown on its profile (if a close combat weapon is carried in each hand, then the model may make as many attacks as shown with each weapon).
Order of Attack. Models which charged that turn fight first. Otherwise models attack in order of descending initiative.
Roll to Hit. Determine the D6 score required to hit using the 'to hit' chart. Roll a D6 for each attack. Pick out the dice which have scored hits.
Roll to Wound. Determine the D6 score required to wound using the wound chart. Roll a D6 for each hit scored. Pick out the dice which have scored wounds.
Roll to Save. If the opposing troops have a saving throw then these are taken before models are removed. Roll a D6 for each wound suffered. The score required for a successful save is shown on the saving throw chart.
Resolve Combat. Once all troops involved have fought determine which side has won. See Combat Results below.
To Hit. Compare the attacker's WS with the defender's WS to find the basic D6 roll needed to hit. (The chart is the To Hit Chart given earlier.) Defended Obstacle. If the enemy is behind a defended obstacle you require a 6 to hit.
Combat Results
Each side adds up the number of wounds it has caused and adds any of the following modifiers that apply. The side with the highest score has won.
- +1 Rank bonus. Add +1 for each full rank behind the first up to a maximum of +3.
- +1 Standard. If any units have standards.
- +1 Battle Standard. If the army's standard is fighting.
- +1 High Ground. If you are uphill of your enemy.
- +1 Flank Attack. If attacking an enemy in the flank.
- +2 Rear Attack. If attacking an enemy in the rear.
Break Test. The loser must take a break test for each unit involved in the combat. The test is taken on the unit's leadership minus the difference in the combat results score. Roll 2D6. If the result is equal to or less than the number required the unit has passed. If the score is more than that required the unit has failed and is broken. Broken units turn tail and flee directly away from their enemy once all combats have been resolved.
Friendly units within 12" of a unit which breaks must take a panic test to determine if they flee as well. These tests are taken once all combats have been resolved, but before any broken units flee.
Break and Flee
Troops who break and flee move 2D6" away from their enemy if they have a movement rate of 6" or less, or 3D6" if they have a movement rate of more than 6". Fleeing units are destroyed if caught by pursuers as described below.
Fleeing troops continue to move 2D6" or 3D6" in their own movement phase towards the nearest table edge. Fleeing troops can do nothing else. If they leave the table they are removed. They are automatically destroyed if charged again and caught.
A fleeing unit may attempt to rally at the start of its movement phase. Roll 2D6. If the score is equal to or less than the unit's leadership it has rallied, otherwise it continues to flee. A rallied unit may rearrange its formation but may do nothing else that turn. A unit must have at least 25% of its original number of models to rally.
Pursuit
Troops which win a combat must normally pursue their foes if they flee. Once fleeing troops have been moved the pursuers roll to see how far their pursuit takes them. Troops with a movement of 6" or less roll 2D6", troops with a movement of more than 6" move 3D6". If the pursuers move further than the fleeing troops then they have run down their enemies and the fleeing troops are destroyed. Pursuers are moved forward the full distance indicated.
If pursuers clash with fresh enemy then hand-to-hand combat is fought in the following turn as normal; the pursuers count as charging.
Troops may avoid pursuit by testing against their leadership. If the player rolls equal to or less than the unit's leadership it does not have to pursue.
Lapping Round
If a unit wins a combat it may move models from rear ranks to extend its front line by two models per rank.
If your line already extends beyond the enemy's front rank you may lap round the side of the enemy unit instead.
Psychology
Except for hatred, where no test is necessary, tests for psychology are taken against leadership. Roll 2D6; if you score equal to or less than the troops' leadership you have passed, if you roll more than the troops' leadership you have failed.
Panic.
- Test at the start of your turn if there are fleeing friends within 4".
- Test if a friendly unit within 12" is broken in hand-to-hand combat.
- Test if you are charged in the flank or rear whilst engaged in hand-to-hand combat.
- Test if you suffer 25% casualties from shooting in a single shooting phase.
A unit which fails a panic test will flee in the same way as a unit broken in hand-to-hand combat or a unit which flees when charged.
Fear.
- Test to overcome fear if charged by an enemy that causes fear. Make this test once the enemy declares his charge. If the tester fails to overcome fear then he must flee if outnumbered by the attackers. If not outnumbered, then a unit which fails its fear test may fight on, but requires a 6 to hit during the first turn of combat.
- Test if you wish to charge a feared enemy. If you fail the test then you may not charge and must remain stationary for the turn.
A unit defeated in hand-to-hand combat by an enemy that it fears is automatically broken without a break test if it is outnumbered.
Terror. Only one terror test is ever taken by a unit during the game; once it has been taken no further terror tests are required. Troops which fail their terror test will flee immediately exactly like troops broken in combat or fleeing from a charge.
- Test to overcome terror if charged by or wishing to charge an enemy that causes terror.
- Test if there is a terror causing enemy within 8" at the start of your turn.
Stupidity. Test at the start of each turn. If troops fail their test:
- If in hand-to-hand combat half the creatures stop fighting.
- If not in hand-to-hand combat roll a D6: 1-3 Move forward at half speed in shambolic manner; 4-6 Stand inactive or lie down for a bit.
Frenzy. Troops affected by frenzy must behave as follows; a leadership test may be taken to stop them if you wish.
- Frenzied troops must charge enemy within charge reach.
- Frenzied troops fight with double their number of attacks.
- Frenzied troops always pursue and may not test to avoid pursuit.
- Frenzied troops are immune to other psychology.
- If broken in combat their frenzy ends for the remainder of the game.
Hatred. Troops who hate their adversaries may take any break tests against an unmodified leadership value of 10. During the first turn of any hand-to-hand combat they may re-roll any misses when they attack.
General and Battle Standard
General. Any unit within 12" of the General may test using his leadership.
Battle Standard. Any unit within 12" of the battle standard may reroll a failed break test.