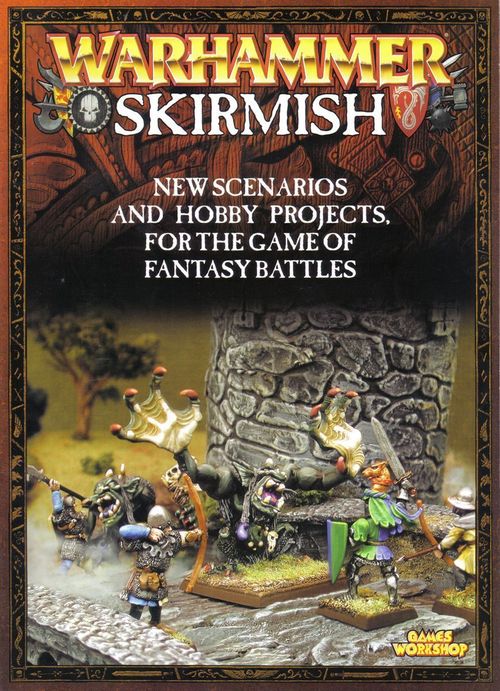
Warhammer: Skirmish
Rulebook PDF: Games Workshop · PDF
Warhammer: Skirmish Rulebook
Table of Contents
Table of Contents
- Using the Skirmish Rules
- Trolls Under the Bridge
- Rally Around the Flag
- Bones to Pick
- Bridging the Gap
- Cut the Bridges!
- Civil War
- Scale the Walls
- Storm the Barricades
- Baggage Train
- Town Raid
- Slave Train
- Desecrate the Monolith
- Gates of Iron
- Shadows in the Forest
- Assassin!
- Wizard Duel
- Lost Tomb of Hamon Ra
- Water Rights
- Ogres for Hire
- Bring Out Yer Dead
- Twilight of the Dead
- Slayer!
- Gotrek & Felix: Hold the Gates
- Egg Hunt
- Send in the Steam Tank
Using the Skirmish Rules
Warhammer Skirmish is a set of scenarios for small battles. Each scenario below is a self-contained game, and they can be played in any order or linked into a campaign.
Why Skirmish Rules
The Skirmish rules are modifications to the main Warhammer rules for small forces. They cover scaled-down actions such as running, climbing, hiding and causing critical hits.
Several main-game rules are not used in Skirmish: changing unit formation, being charged in the flank or rear, combat resolution, and Break tests. In Skirmish each model is considered its own unit and models may not join together in formations.
Because there are fewer models to track, Skirmish adds detail. When a model is wounded it rolls on the Injury table to see whether it is put Out of Action, Stunned, or just Knocked Down.
Selecting Forces
Some scenarios say exactly which models may be used. Otherwise a force of 100 to 200 points is typical, and the forces are usually small: typical Skirmish games have between 1 and 25 models per side (about 50 to 250 points).
- Unit size qualifications for troops do not apply to a Skirmish force. If the scenario does not limit selection, any mix of troops may be chosen.
- Carrion creatures and similar flyers are limited: unless the scenario says otherwise, no more than 15% of a player's total points may be spent on flying creatures.
- Ethereal creatures (those that can only be hit by magic weapons) may be taken only if the scenario allows them.
Rulings and House Rules
The Skirmish booklet suggests these house rulings where the main rules do not cover a situation. Players should agree them before the game.
- Mounted models: the first wound a cavalry model fails to save kills the mount, not the rider. There is no Injury roll for the mount; it is replaced with a dismounted version of the model. If the first wound on a cavalry model is a critical hit, it negates the armour save but does not affect the rider.
- Swarms: the individual creatures that make up a Swarm do not roll on the Injury table; the Swarm simply loses a wound each time it is hit. A Swarm has 5 wounds.
- Missile fire: by agreement between both players, the -1 to hit for shooting at individual targets is either ignored or applied only to targets beyond half range. If there is no agreement, the standard -1 applies.
- Poisoned attacks: a to-hit roll of 6 automatically wounds. The player may still roll a D6 to see whether a critical hit is caused, which negates the armour save and causes two wounds.
- Stupidity: if a lone Troll fails a Stupidity test in combat, it makes all its attacks on a 4+; otherwise it does nothing.
- Partly submerged models: a spell cast at a model that is half in water (for example a River Troll) affects it at half strength.
- Magic healing a model that is face down: the model stands up, recovered, immediately.
Don't Be Afraid of the Rules
The Skirmish booklet notes that situations will come up that the rulebook never explains. The players must make their own "on the spot" rulings, and agreeing them in advance is the best way to keep the game moving.
Fairness and Balance
The scenarios are suggestions, not hard-and-fast rules. Some are evocative rather than balanced, and some are much harder to win than others, or harder for particular armies or troop combinations. If a scenario cannot be won from one side, the advice is to swap sides and see whether the result changes.
Trolls Under the Bridge
Any Warhammer Army: Bretonnians, Trolls, Monsters. Advanced Scenario.
Or "Don't cross the bridge, if you can't pay the toll." A small Bretonnian escort guards a lady travelling along a road, and two River Trolls are waiting under the toll bridge.
Models Needed
Bretonnian forces:
- Sir DuClaw (60 points): sword, lance (4 points), heavy armour (4 points), shield (2 points), mounted on a barded warhorse (14 points), with the Questing Virtue (10 points, immune to panic).
- 3 Men-at-Arms with halberds and shields (7 points each).
- 3 Bowmen (8 points each).
- 1 Damsel of the Lady, Genevieve (60 points), mounted on a warhorse.
The Trolls:
- 2 River Trolls (60 points each).
Battlefield
Set up a battlefield of about 24" x 24", or mark off such an area on a larger surface. The important features are a road, a river cutting across the playing area, and a bridge within 6" of the southern board edge. See the map in the scenario.
Objectives
The Bretonnians must get off the northern board edge. They claim victory if both Sir DuClaw and Genevieve escape off the northern edge. The men-at-arms are expendable.
The Trolls want to put as many humans out of action as possible, and then drag them down to their watery caves. The Trolls may claim victory if they have eaten at least over half of the Bretonnian party's total.
If both sides or neither side meets its victory condition, the game is a draw.
Deployment
The Bretonnians set up first, on the road on the southern border, up to 6" from the table edge.
One Troll sets up on the bridge, exactly 6" from the nearest Bretonnian. The other Troll must start anywhere in the river more than 6" from the Bretonnians.
Who Goes First
The Bretonnian player goes first.
Special Rules
Fog: because of the swirling fog and limited visibility, all Movement values are counted as half. This applies to charging, running, shooting and so on.
Dumb Creatures of Habit: the Trolls under the bridge have become so practised at taking out wayfarers that when a Troll is within 6" of the bridge it may take Stupidity tests at double its normal Leadership (up to 8).
All Alone: Trolls are used to being alone, so they may ignore the All Alone rule.
Rout Tests: Trolls ignore all routing and fleeing. They will fight and claw to the end.
Immunity to routing: DuClaw and the Lady Genevieve are immune to routing. While at least one of them is alive, the men-at-arms are immune to routing. They still suffer from Fear and All Alone.
Enchantress Spell: Lady Genevieve must randomly select her spell, and also her Lore. Roll a D6 to determine the Lore: 1 Beasts; 2-3 Life; 4-5 Heavens; 6 Light.
Using Alternate Forces
The scenario can be played with any passers-by on the road: a party of Squires or mounted Knights, an Empire trade caravan (with carts and bodyguards), or a Dogs of War warband on its way to a paying mission.
The Trolls can be replaced with Stone Trolls guarding a mountain pass (perhaps ambushing Dwarf Miners), or with another monster such as a Hippogriff, Wyvern or Hydra waylaying travellers in the woods.
Part of a Larger Battle
This scenario can fit into part of a larger Warhammer battle or into an ongoing campaign. Play the small Skirmish game, and its result affects the later larger battles.
- If the Bretonnians win (guarding the bridge and killing at least one Troll), Sir DuClaw is rewarded by the grateful bride-to-be with a Potion of Strength made from Troll's blood. The potion must be drunk at the start of the Bretonnian turn, and it adds +3 Strength to Sir DuClaw for that round only.
- The Evil Side: either the Good side is short the number of points the Trolls have taken (representing those warriors never making it to battle), or any surviving Trolls may be added to the Evil side's forces for free.
Rally Around the Flag
Any Warhammer Army. Advanced Scenario.
Survivors of a recent battle try to reform and make it back to friendly territory, and the army's battle standard is the beacon they follow.
Models Needed
Each side may select up to 225 points, with these restrictions:
- Each side must select a Battle Standard Bearer with no more than 10 points of additional equipment. This is the only Character or Standard Bearer allowed.
- No Flyers are allowed, and no more than 50 points may be spent on "non-infantry" models.
- No War Machines, Chariots, or Monsters may be selected (they would not be overlooked on the battlefield).
Battlefield
The scenario requires a space at least 48" x 48".
Each player takes turns setting out a piece of terrain. These can be small stands of trees, sections of stone wall, ruins, or stacked piles of debris (counted as difficult ground or impassable; agree with your opponent ahead of time).
Objectives
Each side must try to gather or rally its troops and then exit from the opposite board edge, all the while trying to stop its opponent from doing the same thing.
The most important model to get to safety is the Battle Standard Bearer, but do not move him off the board too quickly, as he is also the most useful model for rallying your troops.
For each member of your force that has successfully made it off the far table edge (the Rallying Point), you score victory points equal to the points value of that model. To determine the winner at the end of the game, each side adds up its total victory points. A side that gets its Battle Standard Bearer off safely adds an extra 50 points.
- A difference of 0-10 points is a draw.
- A difference of 11-50 points is a minor victory.
- A difference of more than 50 points is a complete victory.
There is a time limit. The game is halted at the end of the 10th turn. If one side is destroyed or routs entirely, the opposition must still try to exit off the table by turn 10.
Deployment
Each side has a deployment zone that is exactly half of the playing area (24" x 48"). Each player rolls a D6 to decide who chooses a deployment zone first; the highest roll chooses first. Whichever side a player deploys on, his Rallying Point is off the opposite board edge.
Each side takes a turn placing three models at a time, starting with the player who chose table sides to go first. Each model must be placed in its player's deployment zone at least 3" apart from ANY other model (friend or foe).
The last three models a player puts on the tabletop may NOT include the Battle Standard Bearer. They are placed singly and may be placed anywhere on the table (including the enemy deployment zone), but not within 3" of any other models. This represents stragglers and the overall confusion of the battle.
Who Goes First
Each player rolls a D6. The highest roll moves first.
Special Rules
Rout Tests: the situation is desperate, and the piles of dead (both enemy and friend alike) are demoralizing. Under the normal Skirmish routing rules, when a player has lost 25% of his starting forces, he must make one Rout Test (a Leadership check) for his entire force at the start of every turn. If the test fails, the force routs and the game is over; if it is passed, the force fights on as normal.
In this scenario, however, once 25% of a player's force has been lost, EACH friendly model must take a separate Rout Test at the start of that player's turn. All models suffer a -2 Leadership penalty to their Rout Tests. Models which fail the test are moved 2D6" towards the player's starting board edge. If the routing model was in combat, treat it exactly as a Breaking from Combat situation in the Warhammer Rulebook (page 246).
Routing models may attempt to rally at the start of each turn (also at a -2 Leadership penalty). If the model passes this test, it is considered rallied and can be used as normal in that same turn. If it fails, it continues to rout and moves a further 2D6".
Exceptions to Psychology: the Battle Standard Bearer is immune to routing and to all Psychology tests. Furthermore, all friendly models within 12" of the standard do not suffer the -2 Leadership penalty on Rout tests, do not suffer from the All Alone rule, and may re-roll failed Rout (or Rally) tests once per turn. They may also use the leader's (in this case the Battle Standard Bearer's) Leadership value to take these tests.
Using Alternate Forces
This scenario is a large one, but it can be scaled down for a smaller game depending on the points available. If the game is below 150 points, consider these changes: replace the Battle Standard Bearer with an ordinary Standard Bearer, do not use the special Rout Test rules, or limit the range from the standard to 6". Players must agree these ahead of time.
Part of a Larger Battle
This scenario fits either before or after a larger battle.
- Before the battle: many battles last longer than one day, and this scenario represents the close of the first day's fighting. Any models that escape off their correct board edge may be used "for free" in the upcoming battle. For example, in a 2,000 point game a player may still take all 2,000 points plus each model that escaped (added to units as appropriate).
- After the battle: the scenario is played the same way, but instead of choosing their points, the players select troops from models that were slain in battle OR routed off the table. This applies to the additional troops only, not the Battle Standard Bearer, who automatically joins the fray even if he was slain in battle or there was none.
Bones to Pick
Ghouls, Any Warhammer Army, Solo play, Multi-player.
Survivors stagger back from a battle through the carrion-strewn field, while packs of Ghouls gather to feed.
Models Needed
Survivor forces:
- 50 points worth of Core troops on foot.
- No Heroes, but a single Champion is allowed.
Ghouls:
- 4 Ghouls at the start of the game. On each Ghoul player's turn, roll a D6: on a 1 nothing happens; on 2-3 the player gets 1 Ghoul; on 4 or 5 the player gets D3 Ghouls; on a 6 the player adds D6 Ghouls.
- Randomly determine which pile of dead each Ghoul starts at.
Battlefield
Set up a battlefield of about 24" x 24", or mark off such an area on a larger surface. In addition to a mutually agreed scattering of trees and the like, arrange six piles of battlefield debris. Each pile should be about 3" x 3" and can be made up of broken equipment, damaged war machines and bodies. Set up the piles at least 3" from each other and 6" from the southern edge.
Objectives
The Survivors are trying to make it off the northern table edge and back to friendly lines. If more models make it off the northern edge than are eaten, the Survivors may claim victory.
The Ghouls are trying to eat the Survivors. If more models are eaten by the Ghouls than escape off the northern edge, the Undead may claim victory.
The scenario continues until the last Survivor escapes or is pulled down and eaten.
Deployment
The Survivors must set up within 6" of the southern table edge and NOT within 3" of each other.
The Ghouls that are visible at the beginning of the game start in a single pack. Randomly determine which pile of debris they start on by numbering the piles 1-6 and rolling a D6.
Who Goes First
The Survivors get the first turn.
Special Rules
Injured: the Survivors are injured, worn out and cannot March or Run. They may still Charge.
Lonely: Ghouls are craven creatures and feel safer in large numbers. Ghouls will attempt to "Pack Up" and remain within 2" of at least one other Ghoul whenever possible. If at the start of its turn a Ghoul is more than 2" away from any other Ghoul, it must spend its movement phase moving towards one.
Cowards: the Ghouls always want to charge a Survivor, but must first test to see whether they can muster the courage. Announce the charge, measure to see if a Ghoul is within range of a Survivor, and then roll a D6. If the number of Ghouls in the pack (that is, within 2" of each other) is equal to or greater than the die roll, they attack the Survivors. If the Ghouls number less than the die roll, they tentatively move half the distance towards the foe, watching for a weakness.
Rout Tests: neither side takes Rout Tests or Psychology tests. The Survivors realize that they must get away from the battlefield or be pulled down and eaten by the growing swarms, and the Ghouls may be cowards, but they will not leave the feast.
Option: single or multi-player games: this scenario can be played with or without an opponent. A second player can control the Ghouls, or the Ghouls can be moved randomly using a scatter die. If the Ghouls have a choice of where to move or whom to attack, use a D6 to determine randomly where they go. You could even try a third player who starts on the opposite side and is attempting to flee off the southern edge.
Using Alternate Forces
Ghouls work brilliantly as battlefield scavengers. If you don't have any Ghouls, you might want to switch them with other models from your collection. Minotaurs, Trolls or Giant Spiders could wander out of the woods, or Chaos Wastes creatures attracted by the sounds of battle and the circling of carrion birds. Remember, the bigger the scavengers, the fewer of them there should be.
Part of a Larger Battle
To fit this scenario into a larger battle, have the outcome affect the points used in the next game.
- If the Scavengers win, they may take a free unit of Scavenger creatures (up to 100 points) in their next battle.
- If the Survivors win, they may add a unit of Core troops to their battle force for free (up to 100 points).
Bridging the Gap
Any Warhammer Army. Advanced Scenario.
Spring rains have swollen the river, and an army has been dispersed to cross it before regrouping to attack. The river is lightly defended at the crossings.
Models Needed
Attacking forces:
- 200 points of infantry (no flyers).
- 1 Hero may be selected.
- 1 Champion may be selected.
Defending forces:
- Up to 150 points of War Machines (upgrades may be taken). Any points not used for War Machines may be halved and used for troops.
- Up to 50 points worth of troops.
- Up to one Champion may be selected.
Battlefield
Use a space of about 36" x 30", with a river arranged across the width of the space. In the centre of the river is a ford about 6" wide. On the northern table edge there are four evenly spaced forests. On the southern table edge there are two hills. See the map in the scenario for details.
Objectives
The side with the most victory points at the end of the game wins.
The Attackers are trying to get across the table. They may do this by risking the dangerous ford or by building crude wooden bridges, or a combination of both. They gain the victory points cost of each model which makes it off the southern edge.
The Defenders are trying to prevent the Attackers crossing the river. They score 10 points for surviving each turn, because they delay the Attackers. These points keep stacking up as long as a Defender survives on the table.
The game ends when all of the Attackers have left the board, or when the last Defender is slain.
Deployment
The Attackers start on the northern table edge.
The Defenders start anywhere on the southern side of the river. No troops may be set up within 12" of the river.
Who Goes First
The Attackers get the first turn.
Special Rules
Crossing the Ford: a model may move up to half its movement to go across the ford, and every model crossing at the ford must roll a D6. On a 4+ the model has successfully negotiated the ford. On a 1-3 the model has slipped and fallen, and it is drowned or washed far downstream and is considered lost for this game.
Making Bridges: to cross the river the Attackers may build hastily improvised bridges. These involve hacking down a tree to bridge the river, or hacking down many trees and lashing them together with vines. Whichever type of bridge is selected, one model must be in base-to-base contact with a wooded area, and any other models grouped together helping must be within 1" of each other.
A model may move up to half its normal move rate and still help make bridges (no marching or charging). Log bridges are completed in the last phase (after Close Combat). For example, on Turn One the Attacker moves a model next to the woods to begin. After the Close Combat phase a die is put next to the models making the bridge to denote Turn One. Next turn, move it to the number two (if the workers are not disturbed by missile fire or counter-attacks). Once a bridge is under construction, none of the workers may move, and they still count as labour for that turn.
- Single Log Bridge: takes 1 model three turns. Helper models reduce the number of turns by 1 (although it always takes at least one turn). For example, three models together may make a single log bridge in one turn.
- Multi-Log Bridge: takes 1 model six turns. Helper models reduce the number of turns by 1 (although it always takes at least one turn). So four models working together may make a multi-log bridge in three turns. Note: the turn you start working on the bridge counts, so six models (none moving over their base movement rate) that start making a multi-log bridge in Turn One will finish construction at the end of the first turn.
Carrying Bridges: the rules for lugging logs are:
- Single Log: requires a minimum of two models to carry. While carrying the log the models move at half rate. Models carrying the log gain 1" of movement for every helper beyond the minimum, up to the maximum march rate of the slowest model.
- Multi-Log: requires a minimum of four models to carry. While carrying the log the models move at half rate. Models carrying the log gain 1" of movement for every two helpers beyond the minimum (a single extra helper will not help enough), up to the maximum march rate of the slowest model.
- Note: when carrying a bridge, a monstrous creature (Minotaur, Troll, Ogre, etc.) counts as two models.
Throwing the Bridge Across the Gap: this expends no extra movement, but once the models carrying a bridge have reached the river's edge, the player must roll a D6. On a 2-6 the player may place the log across both banks and move models across. On a 1, however, the bridge is heaved awkwardly and smashes end-first into the opposite bank of the river. The bridge may not be crossed, having been reduced to splinters, or worse, sitting entirely on the wrong side.
Crossing Bridges: once the gap has been successfully bridged, any remaining movement may be spent crossing the bridge. Multi-Log Bridges are no challenge to cross, but the Single Log variety is more difficult. Each model that moves onto, all the way across, or completes movement off a Single Log bridge must roll a D6. On a roll of 1 the model has lost its footing, fallen to the water below and is lost for the game. Monstrous creatures, cavalry, or anything with a base larger than 25mm square may only cross using a Multi-Log Bridge.
War Machines: some armies are not regularly allowed war machines in their army lists. For this scenario, any army NOT regularly allowed devices of mass destruction may choose either a single catapult (100 points) or up to two bolt throwers (75 points each) as Defenders. Full rules for these machines are in the Warhammer Rulebook (pages 120-125). Each machine is crewed by three regularly equipped troops of that army (for example Skeletons for Undead, Glade Guard for Wood Elves).
Using Alternate Forces
While this scenario is acceptable for any Warhammer army, here are some good match-ups:
- Beastmen attempting to invade further into the island home of the High Elves.
- A small incursion of Chaos Warriors and Marauders heading southwards to pillage the Empire.
- Dwarfs defending their territory against encroaching Undead hordes of a nearby Vampire Count.
Part of a Larger Battle
The nature of this scenario fits perfectly into a larger campaign: either slipping across a river to launch lightning raids, or starting a full-scale invasion. Here are some ways the Skirmish can affect a larger battle:
- If the Defenders win by less than 30 points: the only result is that in the larger battle the Attackers must set up first and go second. If the Defenders win by more than 30 points, the same applies, but also every unit in the Attackers' army must roll. On a 1 or 2, the Attacker cannot turn up on the battlefield until Turn Two.
- If the Attackers win by less than 30 points: the only result is that in the larger battle the Defender must set up first and the Attackers get the first turn. If the Attackers win by more than 30 points, the same applies, but also the Attackers may choose two units to be brought into the battle on Turn Two on either flank, or on Turn Four in the rear of the Defender. It is the Attacker's option.
Cut the Bridges!
Any Warhammer Army.
Rivers form natural boundaries between states and nations. The invaders must capture the bridges intact to allow quick passage of their army. If the Defenders can destroy their own bridge, it will allow valuable time to organize defences while the invaders search for another way across.
Models Needed
Defending forces:
- 100 points, including up to one Champion.
- No Heroes.
- No War Machines.
Attacking forces:
- 200 points, including up to one Champion and/or Hero.
- No more than 20 points of Magic Items.
Battlefield
Use a special table about 36" long and 30" wide. Arrange a river across the board as shown on the map, with the bridge set in the centre of the river. The bridge should be wide enough for three 20mm x 20mm based models to stand side by side.
Also create a small fordable area in the river 12" either east or west of the bridge. This is the only other place the river can be crossed.
Additional trees, walls and hedges are scattered about the table, but none within 12" of the southern bank of the river.
Objectives
Attackers: the main objective is to stop the Defenders from destroying the bridge. Failing that, the Attackers can still cause disruption by crossing the ford in strength.
- The Attackers win a major victory if they end the game with the bridge intact and more models on the northern bank than the Defenders.
- A minor victory is won if the bridge is destroyed but the Attackers still end the game with more models on the northern bank than the Defenders.
Defenders: the Attackers must be denied passage to the northern side of the river. Destroying the bridge is most essential, but keeping the enemy from crossing the ford will also buy the defences more time.
- The Defenders win a major victory if they end the game with the bridge destroyed and no Attackers on the northern bank.
- A minor victory is declared if the Attackers rout but the bridge is still intact.
The game lasts until either the Attackers rout, or all the Defenders are slain. At any time (especially important as part of a campaign) a player can voluntarily end the game by announcing a retreat.
Deployment
The Attackers start on the southern table edge.
The Defenders start on the northern table edge.
Who Goes First
The Attackers always get the first turn.
Special Rules
Stalwart Defender: the Defenders will guard the bridge with their lives and are immune to any Rout Tests.
Destroying the Bridge: the bridge has a sturdily built wooden frame and is not easy to destroy. Models are allowed to attack the bridge in hand-to-hand combat, so long as their bases are touching the bridge and the models themselves are still on the riverbank (a model cannot chop a bridge it is standing on). Hits are automatic, and players simply need to roll to wound.
- The bridge has a Toughness of 5 with 4 Wounds.
- The bridge is immune to critical hits.
- A maximum of three models may attack the bridge at a time.
- The bridge may only be attacked by a combatant not already engaged with a foe.
Dangerous Ford: although small, the stream is swollen and dangerous even at the ford. Any model attempting to cross at the ford must make a D6 roll. On a roll of 1 or 2 the model has lost its footing and is swept away by the strong current, taking no further part in this battle.
Using Alternate Forces
Cut the Bridges is a classic wargame scenario and can be played with any combination of armies. For instance:
- An Empire Militia attempts to slow the progress of the Orc Waaagh!.
- A Bretonnian Peasant force holds up the invading Vampire Count and his shambling followers.
- A Dwarf Ranger party harasses the scouting force of a large Chaos Army.
Part of a Larger Battle
This is an easy scenario to fit into a larger campaign or series of Skirmish battles.
- Defender victory: the Defenders have slowed the enemy army. In the follow-up Warhammer battle the Attackers must set up first and go second. As part of a continued campaign or series of games, play the Bridging the Gap scenario next to get across the river.
- Attacker victory: the Attackers have come upon the army unaware. The Defenders must set up for the battle first, but the Attackers get the first move. As part of a continued campaign or series of Skirmish games, try playing some games to represent what the attacking army would do after finding easy passage across the river. Try the Town Raid or Silence the Watch Tower (found in White Dwarf #269) scenario next.
Civil War
Any Warhammer Army. Great Introduction Game.
A rebel leader gathers his forces against the loyalists while they are away, and attacks them when they return to camp.
Models Needed
Loyalist:
- 200 points total.
- 1 Hero (no Wizards), with up to 25 points in Magic Items.
- Special and Core troops.
Rebels:
- 200 points total.
- 1 Hero (no Wizards), with up to 25 points in Magic Items.
- Core troops only.
Battlefield
Use a special table of 24" x 24", or mark off a similar space on a larger surface. Set up a cluster of tents and/or huts in the centre of the board to represent the Loyalist encampment. For scenic and tactical effect, additional trees or hedges should be scattered about the table.
Objectives
The objective is to kill the opposing leader while protecting your own leader. Once an army has slain the opposing army's leader, the opposing troops are assumed to either surrender or retreat and the game is over.
Deployment
The Loyalist Leader is returning from a scouting mission with some of his best troops. He starts at the southern end of the table with his troops within 12" of him.
The Rebel Leader has planned an ambush at the encampment. The Rebel forces are scattered on the outskirts of the camp, placed anywhere within 6" of it.
Who Goes First
The Loyalist Leader gets the first turn.
Special Rules
No Routing: neither side is subject to routing. As long as the leader is still alive, the troops will stay and fight until the bitter end.
He's in Trouble: there are even more Loyalist troops near the encampment. Starting on turn 4, roll a D6 at the start of each Loyalist turn. On a 4+, D3 of any Core troops come on the northern board edge to help their leader. These models are additional to the starting forces.
Using Alternate Forces
Strife and unrest are all too rampant in the Warhammer world, and this scenario can fit any army. For example:
- Two rival Orc wanna-be Warlords striving for brutal supremacy over the growing horde.
- The fragile politics of competing Empire Elector Counts boil over, and different factions vie for power.
- Different Skaven Clans backstab and usurp their way to the top.
Part of a Larger Battle
This scenario is a great way to introduce someone into the Warhammer world of tabletop miniature gaming. The set-up is fast, the rules are minimal, and it can be played if you have only one army and wish to divide it between two players.
It can also be used as part of a larger battle. A new leader emerges from the losing side and returns with another army to avenge his defeat, and the losing side's leader now has hatred towards his opponents. The victor will attract more troops who naturally flock to the winning side. In the next game the winner may add an additional 10% or 100 points, whichever is larger.
Scale the Walls
Any Warhammer Army.
Invading generals must take a fortress that is held by a garrison. Siege warfare is generally the only option for an invading army, and this scenario leads into a larger Warhammer siege battle.
Models Needed
Defending forces:
- Up to 100 points of Core troops, including up to one Champion.
- The Defenders may have a cauldron of boiling oil, or may be equipped with rocks.
Attacking forces:
- 200 points of Core troops, including up to one Champion or Hero.
- The Attackers are equipped with a log ram and four ladders.
Battlefield
This scenario requires a space of about 24" x 24". The main feature of the battlefield is either a gatehouse or a section of fortress wall. This is placed across the northern edge of the table, as shown in the map. The area in front of the walls is a cleared killing ground, so do not use any other terrain.
Objectives
The Attackers' objective is to conquer the fortress and slay all the Defenders.
The Defenders' objective is to hold the fortress and repel the attack, or to survive long enough to receive reinforcements or drive the Attackers away.
The game is won if one side completely destroys or routs the other side. If this does not happen, the Defenders win if they have more models on the walls at the end of the game than the Attackers.
This scenario will last seven turns, after which it is assumed that reinforcements arrive to help the Defenders.
Deployment
The Attackers deploy first, anywhere along the southern edge of the table, at least 16" from the wall or gatehouse. Once the Attackers are deployed, the Defender sets up the models on the wall, ready to repel the attack.
Who Goes First
The Defenders go first.
Special Rules
This scenario uses the Siege rules detailed in the Warhammer Rulebook on pages 247-260. These pages cover the rules for carrying and using all siege equipment.
Using Alternate Forces
Most races build fortresses and strongholds of some sort, so there are many ideas for this scenario. Any army would be applicable: a Slaanesh Chaos army assaulting the gates of a Khornate Chaos Champion, Dwarfs defending a mountain pass against an Orc horde, or a border dispute between the Empire and Bretonnia.
Alternative ways of playing include increasing the points value of the game, or including Special or Rare choices. Keeping the Attackers' points at twice the value of the Defenders is usually a good idea.
Part of a Larger Battle
This smaller version of a siege game is a good way to try the Siege rules and equipment before a full-scale battle. Perhaps this could be an army breaking through the outer ring of a town's defences, with a larger and more elaborate siege to follow. The Attackers will want to get through as quickly as possible, and the Defenders will want to inflict as many casualties as they can.
Storm the Barricades
Any Warhammer Army.
Two armies lie opposite each other on the eve of a major battle. The defenders are digging in, and the attackers arrive at night to stop them building earthworks that would funnel troops into a killing ground.
Models Needed
Attacking forces:
- Up to 125 points of Cavalry may be chosen. Choose models with the Scout or Skirmish ability.
- Up to 150 points of Core infantry may be chosen.
- No Heroes, but one Champion may be chosen.
Defending forces:
- Up to two finished 6" sections of earthworks (sharpened stakes, barricades and even pit traps). The Defenders set up the earthworks during deployment.
Battlefield
Use a space of about 36" x 36". Scatter trees and low hills about the table as shown on the map.
Objectives
The Attackers need to stop the building of the earthworks by driving off or slaying the workers. The Attackers can claim victory only if all the opposition are slain or are driven off by routing before the 8th turn.
The Defenders have a two-fold objective. First they need to complete at least 10" of defensive barricades. Secondly they need to hold off the Attackers for 8 turns. The Defenders claim victory if they still have models on the table at the end of the game, and there are at least 10" of new barricades (the starting barricades do not count). The game ends in a draw if the Defender survives but could not complete the full 10" of new obstacles.
The game lasts 8 full turns.
Deployment
The Attackers enter the board on the southern table edge.
Before placing troops, the Defender places their two 6" sections of earthworks. Half of the Defenders may start anywhere on the northern half of the table, while the rest must enter from the northern board edge.
Who Goes First
The Attackers get the first turn.
Special Rules
Night Attack: shooting range is reduced to half distance.
Barricades: the hastily constructed stakes, walls and overturned carts count as a Defended Obstacle for any troops that take up position behind them.
Cavalry and Stakes: a cavalry model attempting to attack across the barricades must take one test to avoid being impaled on the stakes. On a 4+ the model takes a Strength 4 hit (critical hits are not counted). This happens before combat can take place. It happens when the cavalry charges a model behind a Defended Obstacle, or when a cavalry model attempts to cross the barricades. A cavalry model that survives the test and the following round of combat does NOT have to take another test, unless it later tries to cross the obstacle or wins combat and charges another defended model.
Building Barricades: it takes a team of three one turn to make a 2" line of effective barricade. The team members must be in base-to-base contact. A team of two may just about cope, but will only complete 1" a turn.
- Troops building barricades may not move more than 2" or shoot while constructing.
- No construction can take place if any of the builders are in hand-to-hand combat.
- The new barricades must be built at least 6" away from the northern table edge.
Using Alternate Forces
This scenario can be played with a large variety of armies. For example:
- Bretonnian Mounted Squires attempting to clear the field against a strong patrol of Dwarf Rangers.
- Empire Pistoliers attempting to drive off Goblin work crews.
- Ilyrian Reavers trying a night raid against Lizardmen.
Part of a Larger Battle
This is how the game can affect a much larger battle:
- Defenders victory: the Defenders have managed to complete their earthworks. The Defenders may place up to four 6" sections of earthworks prior to the battle.
- Attackers victory: the Attackers have managed to sweep away the earthworks. The Attacker automatically wins the table side, and may set up second and go first.
Baggage Train
Any Warhammer Armies. Great Excuse for Conversions!
An Attacking force waylays a baggage train, either to loot its contents for riches or to deny its delivery to the enemy.
Models Needed
Defending forces:
- 3 Large Carts or other scratch-built wagons.
- Up to 125 points of caravan guards (no War Machines, Heroes or Champions).
- Only half of the force's total number of models may be mounted.
Attacking forces:
- Up to 150 points of models, including up to one War Machine or Hero (with equipment or Magic Items totalling up to 25 points).
Battlefield
The playing area should be about 24" x 36". The road should be about 4" wide and should travel the length of the table. A few tree stands, rocky outcroppings and hills are scattered about. Some of the hills have rocky or impassable sides that will slow or impede movement.
Objectives
The Defenders, who have the Baggage Train, must deliver it no matter what the cost. They must make it off the far side of the board with as many carts as possible. The Attackers want to stop the Baggage Train.
| Carts exiting the table | Result |
|---|---|
| All carts exit the table | Defender Solid Victory |
| Two carts exit the table | Defender Minor Victory |
| One cart exits the table | Attacker Minor Victory |
| No carts exit the table | Attacker Solid Victory |
The game lasts until one side routs or the entire Baggage Train makes it off the table.
Deployment
The Defenders start on one end of the road. The Baggage Train must start on the absolute edge of the road, and all other models must be within 6" of the road.
After the Defenders have set up, the Attackers set up anywhere on the table, but not within 6" of any Defenders, unless it is behind an impassable obstacle.
Who Goes First
The Attackers go first, but they may not charge during the first turn. This represents the hidden Attackers springing out of concealment and ambushing the caravan.
Special Rules
Rout Tests: the Defenders are fully aware of the vast importance of their mission. They have resolved themselves to a do-or-die situation. Therefore they do not suffer from All Alone, and will not take a Rout Test until they have sustained 50% casualties. The Attackers take Rout Tests as normal at 25%.
Moving the Baggage Train: regardless of the caravan's mode of transport (slaves pulling carts, pony-driven, or pushed by Rat Ogres), it moves up to 6" per turn on the road. It cannot run or march. Off-road the caravan moves at half rate (up to 3" per turn).
Shooting at the Baggage Train: roll to hit, then for each hit roll a D6: on a 1-4 the hit strikes the cart; on a 5-6 it strikes the beast. Each beast, whatever it is, has the following statistics: Weapon Skill 2, Toughness 3, 1 Wound and no armour save. Do not use the Injury chart for the beast; it is removed from the battle as soon as it is wounded.
Baggage Train in Hand-to-Hand: in combat, treat the baggage train as two separate targets: the cart itself, or the beast that pulls it. Any model in contact with both cart and beast may decide which to attack.
- The carts are automatically hit and have a Toughness of 5 with 3 Wounds.
- The cart has no offensive capabilities and causes NO impact hits.
- The Baggage Train is not pinned by hand-to-hand combat and may move out of combat. This represents the panicking beast surging forward.
Moving the Baggage Train Without Beasts: if the beast is killed, the Defenders may use models on foot to move the cart. At least three models are needed to attain half the normal speed for the models carrying it, with no marching. Two models may lug the cart at half speed -1". One model may not move a cart at all.
Using Alternate Armies
Any armies can play this scenario, and it is a great opportunity to make a themed baggage train. Imagine Dark Elves travelling with three carts of caged slaves, or a Skaven caravan of huge chunks of warpstone. Some conversions may need special rules. The booklet gives this example for warpstone-carrying Skaven:
- Movement: 5", but can move full rate across either road or grassy areas (no wheels).
- Stats: as per Skaven slave, but only one attack in hand-to-hand combat per base.
- Shooting: roll to hit. On a 1-4 the hit strikes the cart (Toughness 5, 3 Wounds); on a 5-6 it strikes a Skaven Slave (as per the Skaven army book).
- Movement by slaves pulling the cart: 3 slaves = 5" movement with no marching; 2 slaves = 4" movement; 1 slave cannot move it.
Part of a Larger Battle
When this scenario is played before a full Warhammer game, the points and make-up of the armies can be modified based on the outcome.
- Attackers win: the supplies in the caravan did not get to the battle quickly enough, and some of the Defender's troops are too weak to fight. The Defender's army loses 100 points of troops from its army list for each missing cart.
- Defenders win: the supplies in the caravan get through, which results in an extra 100 points of troops that may be used in the battle as the player wishes.
Alternatively, the baggage train can be made specific to the armies. For example, it could be the daylight travelling method of a Vampire Noble, or the Empire's entire gunpowder supply. The outcome of the raid then becomes more specific: the Vampire Lord does not make it to battle, or no gunpowder weapons may be used more than once.
Town Raid
Wolf Riders, Empire, Any Warhammer Army.
The Empire's frontier settlers must defend their village from a raid by Goblin Wolf Riders, with only a small garrison of border guards and local militia.
Models Needed
Empire forces (Defender):
- 100 points of Core troops.
- May include up to one Champion.
- 10 Livestock critters (models or tokens).
Goblin forces (Attacker):
- 18 Goblin Wolf Riders (up to 200 points, but only half may have bows).
- 1 Wolf Rider Boss (up to 25 points).
- 1 Goblin Big Boss on a Wolf (up to 70 points, with equipment).
Battlefield
Using a space of about 36" x 36", lay out a small cluster of buildings, fences and debris as per the map. The buildings were not built with defence in mind; they are the simple dwellings of farmers. There should be plenty of walls, fences, hedges and hastily thrown-up barricades that the militia can use as Defended Obstacles.
Objectives
The Attackers want to destroy the Defenders, disrupt their village, and grab any foodstuffs (livestock or perhaps even the Defenders, depending on who is doing the Attacking). The game ends after 6 turns, and points are awarded as follows:
- Each soldier killed: 1 point.
- Each livestock animal killed: 1 point.
- Each building totally destroyed: 5 points.
- Each building partially damaged at the end of the game: 1 point.
The Defenders want to protect their village and its people. Points are awarded after 6 turns as follows:
- Each enemy model destroyed: 1 point.
- Each building still standing: 5 points.
- Each livestock model or token that lives or escapes: 1 point.
Deployment
All Defender soldiers and militia must start on the northern half of the gaming area, and at least 6" apart from each other.
Livestock are placed alternately (Defender first) anywhere on the board at least 6" from the table edge and not within 6" of another livestock model.
The Wolf Riders must come on board from the southern table edge.
Who Goes First
The Attacker always gets the first turn.
Special Rules
Livestock: what good is a raid if you can't do a little burning and pillaging? The livestock have the following statistics:
| M | WS | BS | S | T | W | I | A | Ld | |
|---|---|---|---|---|---|---|---|---|---|
| Livestock | * | 1 | 0 | 2 | 3 | 1 | 2 | 0 | 0 |
- The movement of livestock is handled differently to reflect the terror that a sudden wolf raid can inspire.
- At the start of each Defender turn, each livestock animal must move. If there is an enemy within 6", the livestock must roll 2D6 and move that many inches away from the nearest enemy model in sight, in a controlled panic.
- If there are no enemy models within 6", the livestock rolls the scatter die and moves 2D6" in a random direction.
- Livestock that run off the table in any direction but south are considered saved for the Defender. Those that run off the southern edge are counted as slain, and their victory points go to the Attackers.
- Livestock have no attacks. Leadership and Ballistic Skill are not applicable and are not given.
- If an animal scatters into or through a foe, stop its movement 1" before it touches an enemy.
Buildings and Setting them on Fire: the Goblins are assumed to have torches to light the Defender's buildings on fire. Any enemy model that is touching a building and NOT already in combat may try to set it on fire on a roll of 4+.
- Each turn a building is on fire, it loses one structure point for each separate flame. Each building has 5 structure points.
- A friendly model NOT in combat may attempt to put out a single fire on a roll of 4+. This stops the building from burning, but does not add structure points back (those are lost for the game).
Rout Tests:
- Attacker: because of their speed and dispersal, the Goblin Wolf Riders do not have to make any Rout Tests until they have lost 50% of their number.
- Defender: the soldiers and militia know their peril, as they are so far out in the wilderness that running is certain death. They fight to the last, and do not suffer from All Alone or Rout Tests.
Using Alternate Forces
Even with the example of Orcs and Empire there are many combinations, from Boar riders against Handgunners, to reversing the attacking roles so that Empire Knights set upon an Orc village protected by a few Orc Boyz and Arrer Boyz. Use Squigs and Snotlings in the role of livestock.
Other armies that can fit the Attackers' role include Dark Elves, Skaven, Bretonnians, Chaos and more. For the Defenders you could try Bretonnians, Dwarfs, High Elves and more. The Town Raid scenario was intended to be fought by small numbers of infantry against a much faster attacking cavalry force.
Part of a Larger Battle
This Skirmish scenario fits into a larger campaign. Here are ways to continue this small game and have it affect a much larger battle.
- The Attackers: sustaining an army on the march into enemy territory is quite a challenge. It takes fast raids to disrupt the foe, as well as collecting food and prisoners (which are the same to Goblins). The success of the mission, by the number of victory points scored, will help determine what happens to the bulk of the army.
- 0-10 points: not enough. Further parties are sent out (or eaten, in the case of Goblins), and the Attacker player must lose 1D6 x 100 points of troops for the upcoming battle.
- 11-20 points: the army is sustained, and neither gains nor loses any of its troops for the battle.
- 21-30+ points: news of the successful raids into enemy territory spreads far and wide. 1D6 x 100 points of additional troops rally to the Attacker's banner for the next battle.
- The Defenders: extra supplies or manpower that are saved on the frontier can remain a thorn in the Attackers' side. Use the same victory point chart as above for the Defenders. Survivors may either trickle in to help the larger battle, or bad news causes more to desert from the borders.
Slave Train
Chaos Dwarfs, Dark Elves, Any Warhammer Army.
Prisoners taken after a battle are transported toward an unknown fate on a slave train, and the caravan is besieged by the captives' kinsmen, who fight desperately to free them.
Models Needed
Defending forces:
- Up to 150 points of troops, including up to one Champion.
- One Slave Train containing six Slaves, selected from the Attacker's Core unit choices. They are stripped of all equipment.
Attacking forces:
- Up to 150 points of troops, including up to one Champion.
The Slave Train
Each slave train has a Movement of 6" and a Toughness of 4 with 3 Wounds. The slave train is not a vehicle made for combat, so it may not charge, and the beasts pulling it will not fight back if the train is attacked. If the slave train is reduced to 0 Wounds, the beasts are slain and it may not move for the rest of the battle.
Due to the rough ground in the area, if the slave train leaves the road its movement is reduced to 3".
Cages: the cages have a Toughness of 3 with 1 Wound.
Battlefield
The playing area should be about 24" x 36". The road should be about 4" wide and should travel the length of the table. A few tree stands, rocky outcroppings and hills are scattered about the table. Each player takes turns placing terrain features until both players are satisfied with the set-up.
Objectives
The Defending (enslaving) force must protect the slave train and get as many slaves as possible off the eastern table edge and into friendly territory. The Attacker is trying to free as many slaves as possible and deliver them safely off the western table edge and into the cover of the woods.
- Each slave taken off a friendly board edge counts as three points.
- Each enemy model taken out of action counts as one point.
When all slaves have moved off a board edge, the game ends, and the player with the most points wins. If each side holds an equal number of points, the game is a draw.
Deployment
The Defending player sets up his force around the road, up to 6" in from the western table edge. The slave train must be set up on the road.
The Attacking player sets up around the road, up to 6" in from the eastern table edge.
Who Goes First
The Attackers go first.
Special Rules
Slave Train: the captured slaves are being transported back to the Defenders' encampment on a slave train. The rules for the train itself are given above.
Freeing and Capturing Slaves: to liberate slaves, the Attacking player must break open the cages that hold them captive. If a cage is broken, any captives inside may escape. Place them directly outside the cage. The slaves are weakened and exhausted after the rough treatment they have received, so they:
- are at half WS (rounded up);
- may not March;
- strike at -1 Strength, as they are weaponless.
Slaves that make it off the western table edge have managed to escape.
Using Alternate Forces
Many races take slaves, and some societies are based on the slave trade. Dark Elves, Skaven, Chaos Dwarfs, and Orcs and Goblins are all capable forces to run the Defenders. The Empire, Bretonnians, High Elves, Wood Elves, Dwarfs and Dogs of War would make appropriate Attackers, as they value the lives of their comrades (or the gold they are being paid for the job).
Part of a Larger Battle
This scenario is particularly appropriate between battles in a longer campaign. The winner of the previous battle should be the Defender in this scenario, and the loser should play the Attacker in an attempt to recapture their comrades.
- If the Attackers win: in the next battle one Core unit of the player's choice will contain the rescued slaves. This unit will suffer Hatred against the enemy.
- If the Defenders win: in the next battle one Core unit (not numbering more than 30 Unit Strength) will cause Fear against the enemy. In addition, the brute labour provided by the captives will free up an additional D6 x 10 points for use by the Slaver's army.
Desecrate the Monolith
Chaos vs. Chaos. Chaos Warhammer Armies. Plus building a Chaos Monolith.
Chaos Warriors have fooled a rival Chaos warband into a decoy battle, leaving their monolith lightly guarded by Cultists. A small force of Chaos Warriors must get close enough to strike a powerful blow against the monolith.
Models Needed
Attacking forces:
- 4 Chaos Warriors with heavy armour, shield and hand weapon (60 points).
Defender's forces:
- 16 Cultists, each armed with a hand weapon (80 points).
Battlefield
A 36" x 36" area is needed to play. Place the monolith in the very centre of the table. For the rest of the board, place a scattering of rocky areas and twisted trees to represent the Chaos Wastes.
Objectives
The invading Chaos Warriors' objective is to make it through the mass of deranged Cultists and desecrate the monolith. Once it is sullied, the Chaos Warriors may claim victory, and the remaining Cultists flee.
The Cultists' objective is to protect the monolith and slay the Chaos Warriors before they can destroy it. The Cultists win when all the Chaos Warriors are killed.
This must be done quickly, before the end of Turn 8, when the monolith grows too powerful to destroy.
Deployment
The Chaos Warriors have arrived and split up to surround the monolith during the height of a ritual. To represent the scattered nature of the Cultists during their ceremony at the monolith, roll a D6 for each Cultist:
- On a roll of 1-4, set the Cultist up within 6" of the monolith on the correlating side (the map is divided into four sides).
- On a roll of 5 or 6, place the Cultist anywhere you wish within 12" of the monolith.
Next, place each Chaos Warrior anywhere along each of the four table edges, so they surround the monolith.
Who Goes First
The Chaos Warriors always get the first move.
Special Rules
No Routing!: both sides are fanatically devoted to the completion of their goals and will fight to the absolute death. Neither side is subject to Rout Tests in this scenario.
Cultists are Frail: the Cultists survive on what they can scrounge in the wastes. They are not the fittest or strongest of foes, and rely on strength in numbers. When you roll to damage a Cultist, add +1 to the damage roll.
Cultist profile: M4, WS3, BS3, S3, T3, W1, I3, A1, Ld6.
Arcane Bolt: the Cultists can tap into the power of the monolith once during each of their shooting phases. Count how many Cultists are in base-to-base contact with the monolith (and not engaged in combat), and consult this chart to generate the "To Hit" roll of the bolt:
| Cultists in contact | To Hit roll needed |
|---|---|
| 2 Cultists | 6+ |
| 3-4 Cultists | 5+ |
| 5 Cultists | 4+ |
| 6 Cultists | 3+ |
| 7 Cultists | 2+ |
If you successfully summon a bolt, direct it at any Chaos Warrior on the board, even if they are in close combat. That Chaos Warrior sustains an automatic Strength 6 hit with no saving throw. If there are Cultists in base-to-base contact with the Chaos Warrior that was struck, they too are affected by the bolt.
The more Cultists you devote to summoning the bolt, the higher the chance of it appearing. However, such power has a cost. If a bolt is summoned, roll a D6 against each Cultist in contact with the monolith, applying the same "To Hit" roll used to blast the Chaos Warrior. For each roll that succeeds, remove a Cultist touching the monolith from play, as they have been completely drained by the hungering power of the monolith.
Desecrating the Monolith: the powers of Chaos are fickle, but proud. A Chaos Warrior must be in base-to-base contact with the monolith in order to attack it. A Chaos Warrior will desecrate the monolith if he rolls a 3 or higher against it on a D6 (one roll per model in combat). This represents a blow powerful enough to permanently mar the monolith and offend its patron power.
Using Alternate Forces
Try this scenario using rival powers, Daemons, Marauder tribes, Beastmen or any other Chaos combination.
Part of a Larger Battle
Generate two army lists for a Chaos vs. Chaos game of Warhammer, and play this scenario twice so that each player gets a chance to destroy the other's monolith. Before the larger battle takes place, any player whose monolith was defiled must substitute one random hero from his army list with a Chaos Spawn. Such is the anger of their patron god!
Gates of Iron
Dwarfs, Skaven, Night Goblins. Tunnel Fighting!
A horde tries to overcome the guard of a Dwarf tunnel before its magically protected door can be sealed.
Models Needed
Dwarfs:
- 6 Ironbreakers (78 points) and an Ironbeard Champion (25 points).
Skaven:
- Up to 100 points of Core troops to start with.
- Endless reinforcements of Core troops (recycled each round).
- Special Round 3 reinforcements (see Special Rules).
Battlefield
The playing area should be a long corridor about 48" long by about 6" wide. At regularly spaced intervals the hallway is supported with buttresses, which narrow the passageway by an inch on each side. The door should be 6" in from the western tunnel end.
Objectives
The Dwarfs must shut the door and ensure the Skaven are not allowed to reopen it.
The Skaven must end the game with an open door, allowing their superior numbers free entry to swarm into the halls above.
The game lasts until the door is shut with no Skaven on the western side of it, or until all the Dwarfs are slain.
Deployment
The Dwarfs must start with all their models within 12" of the eastern exit. They have heard some disturbing sounds and have advanced to investigate.
The Skaven pour up from the depths from the eastern edge of the tunnel.
Who Goes First
The Skaven get the first turn.
Special Rules
Narrow Confines: due to the tight spaces that models must negotiate in the narrow confines of the tunnels, the following blocking rules apply.
- It is not possible to manoeuvre or pass by within 1" of an enemy model. In other words, there is a "zone of control" within an inch of each model that an enemy may not pass through. This represents how, in the tightly packed spaces, you cannot simply run by an enemy without being attacked.
- The only exception occurs when the enemy model is engaged in combat and outnumbered by at least three attacks to one. For example, a lone Ironbreaker (who has 1 Attack) can block any enemy Skaven models from passing within 1", until the Ironbreaker is engaged in combat by either 3 Skaven Clanrats (their one attack each, adding up to three) or some enemy combination that equals three attacks (a Rat Ogre, for instance). With that amount of outnumbering attacks, the defending model has far too much to do to worry about who is passing nearby.
Closing the Iron Door: the deepest tunnel is protected by a massive Iron Door. This mechanical marvel is so large and heavy that it takes a full 5 turns to close. Each turn it moves 20% of the distance to the closed position.
- To start the process, the switch can be thrown during either side's movement phase. The door starts to swing shut in the same movement phase as it was pulled.
- No force is powerful enough to stop the rune-encrusted doors from shutting, but if the lever is pulled back it will reverse the process. Whether opening or closing, the lever may be pulled only by models not engaged in combat or within 1" of an enemy (unless that enemy model is engaged by at least 3 to 1 attacking odds).
Reinforcements: the Attackers gain reinforcements every round to represent the full weight of their army rushing up from the tunnels. Any models already taken out of action may re-enter from the eastern board edge. Also, in turn 3 a force of 150 points may enter as well. This may be Rat Ogres, Warpfire Throwers, or anything from the army book.
Alternate Armies
Skaven and Night Goblins have historically plagued the Dwarfen Realm, but a raiding force of Hobgoblins, Chaos Dwarfs, or gold-crazed Dogs of War could be used.
Part of a Larger Battle
- Attackers: gaining access from below will cause all kinds of havoc, so in a larger battle this is represented by the Attacker bringing up to four units from the flanks.
- Defenders: if the Dwarfs can hold the tunnel, the element of surprise will have been lost. To represent this, the Dwarfs are better prepared and may have an additional 200 points for their force in the larger battle.
Shadows in the Forest
Wood Elves, Orcs, Any Warhammer Army. Deep Forest Skirmish Action!
Small but well-concealed Wood Elf forces attempt to discourage outsiders from advancing into the forest of Loren, in one of the countless border skirmishes on its edges.
Models Needed
Wood Elves:
- 6 Wood Elf Waywatchers (120 points).
Da Boyz (Orcs):
- 19 Orc Boyz, each with 2 hand weapons and light armour.
- One Orc Big Boss with up to 25 points of equipment.
Battlefield
The playing area should be 36" x 36". The entire area is considered to be covered with dense woods, so stands of trees should be placed liberally throughout the board for a deep forest feel.
There should be a rough pathway marked off through the middle of the field to represent a seldom-travelled path.
Objectives
For total victory, the Waywatchers must eliminate or rout the Attackers before any of their foul numbers get off the northern table edge and deeper into the sacred Wood.
To claim victory, the Attackers need at least 25% of their starting number to make it off the northern table edge by the 8th turn.
The game lasts 8 turns. The game ends in a draw if some Attackers make it off the northern edge but not enough to claim an Attacker victory.
Deployment
At the beginning of the game, each Wood Elf Waywatcher is considered to be hidden. Mark on a separate piece of paper where each one is, but do NOT set up the models. Because of their special silken cloaks with foliage woven into them, the Waywatchers may be placed ANYWHERE, even out in the relatively open areas.
The Orcs start anywhere within 6" of the southern table edge and within 6" of the not-so-beaten path.
Who Goes First
The Attackers go first in this scenario.
Special Rules
Rout Tests: the Wood Elves are immune to routing.
Did You See That Tree Move?: the Wood Elves begin the game hidden from sight. They may shoot from these hidden locations but may not move. They will only be spotted if an Attacker is within 6" of them at the end of the Attacker movement phase. After being spotted, the Wood Elves cannot hide again.
Movement: the trees and foliage are so thick that, unless they are on the road, all Attacker movement suffers a -1" penalty (so -2" for running or charging).
Shooting: due to the density of the forest, all shooting is subject to penalties. The Attackers may only target objects up to 12" away, and suffer a -1 penalty (thick cover) in addition to normal minuses. The Waywatchers' range is limited to 18", but they never suffer penalties to shoot for ANY reason.
It's a Trap!: the Wood Elves of the Loren Forest do not take kindly to intruders. If there are any Attackers on the road at the end of their movement phase, roll a D6 for each one. On a roll of 1 or 2, the unwitting invader has sprung a trap. Roll a D6 and consult the chart:
- 1-2 Spikes: the Waywatchers have scattered pieces of long thorn on the forest floor, with half-buried spikes in the ground around them. These inflict D6 Strength 3 hits on a single Attacker.
- 3-4 Snares: the Attacker is caught in a snare, preventing it from doing anything until the end of its next turn. Treat the model as Stunned.
- 5 Camouflaged Pit: the ground gives way and the Attacker is greeted by a deep pit lined with sharp stakes. The model takes 2D6 Strength 3 hits.
- 6 The Impaler: a huge concealed spike springs from the ground and shoots into the Attacker, inflicting a single Strength 7 hit that causes D6 wounds.
Using Alternate Forces
The rumours of wealth deep in the Forest are enough to attract all kinds of outsiders, from Bretonnian parties to Dwarfen Miners. But all must face the nearly invisible guardians of the Wood. Attackers may choose up to 225 points of any troops, including no more than one Hero.
Part of a Larger Battle
Follow up this skirmish with a full-scale battle.
- Attackers win: the least guarded path into the forest has been found. The Attackers go first and may bring up to two units in on the flanks of the Wood Elves.
- Wood Elves win: the Wood Elves may set up a heavily wooded battlefield and may set up second and go first.
Assassin!
Skaven or Dark Elf Assassins vs. Any Warhammer Army.
Both sides struggle to secure an advantage. The more nefarious races send trained Assassins into the night to make sure the foe's mightiest Heroes and Wizards never reach the battle.
Models Needed
Defending forces:
- 1 General with a hand weapon and shield (up to 200 points).
- Up to 150 points of Core troops.
Attacking forces:
- 1 Skaven or Dark Elf Assassin (up to 125 points).
- Up to 50 points of either Gutter Runners (Skaven) or Shades (Dark Elves).
Battlefield
Mark off an area about 24" x 24". The outlying edges of the square table will be overgrown with dense stands of trees, bushes and boulders. The exact centre of the table should contain the General's tent. Other smaller tents (up to 12) should be arranged around the General's tent, creating paths and walkways. These tents may not be placed closer than 7" to the forest edge.
Objectives
The Assassin's goal is to swiftly kill the General and make it back off any table edge. Once the Assassin has done his deed, a small distracting party of Assassins-in-training will rush out to cause a diversion and allow their leader to escape.
- The Assassin player scores a Minor victory if the General is slain.
- The Assassin player scores a Major victory if the General is slain AND the Assassin escapes.
The Defending player must safeguard their leader and destroy the deadly intruder.
- A Minor victory is declared if the General survives.
- A Major victory is declared if the General survives AND the Assassin is pulled down and slain.
The game lasts until the Assassin's forces are slain or escape off the board.
Deployment
The Defending player places any two troop models as sentries anywhere on the board. They will be facing a random direction (see the Sentries rules below). The rest of the remaining Defending troops are resting in their tents (up to three per tent) until the camp has sounded the Alarm.
The Assassin deploys next, at any table edge they choose, most likely behind some sort of obstacle. The additional troops may not come on board until the alarm is sounded.
Who Goes First
The Assassin goes first in this scenario.
Special Rules
This scenario uses the special Sentries rules, detailed below.
Sentries: until the Alarm is sounded, sentries move D6-3" per turn. Roll separately for each sentry to determine how far it moves. If the distance is a negative number, the attacking player is allowed to move the sentry model. For example, a roll of 1 gives a move of -2", so the attacker moves the sentry 2" in any direction.
- After moving each sentry, roll the scatter dice and turn the model to face the direction indicated.
- If a sentry is moved by the Attacker and happens to amble off the table, the model is dispatched by a waiting Attacker and does not return.
Spotting: to determine the distance a sentry can see in the dark, roll 2D6 for each model at the end of the Defender's turn. This is the number of inches a sentry can see. If there is an Assassin within that distance and in line of sight (a 90-degree arc), roll a further D6 and consult the chart:
- An Assassin in the open (not within 2" of any obstacle) will be spotted on a D6 roll of 2 or more.
- An Assassin in partial cover (within 2" of an obstacle) will be spotted on a D6 roll of 4 or more.
- An Assassin in cover or hiding will be spotted on a D6 roll of 6.
Sounding the Alarm: the alarm is sounded when:
- a sentry spots an Assassin;
- the General is attacked;
- the Assassin attacks and fails to immediately kill a trooper.
What happens when the Alarm sounds: the additional Attacking forces may come into the playing area from any table edge. They may charge if available targets are in range. Next, the sentries may move and attack freely. Finally, all the sleeping troops awake.
Waking Up: once the shouting begins, the other troops wake up. As the soldiers and their General were sleeping, they are without their armour but use a shield. They are dazed as well: all characteristics, except Toughness and Wounds, are halved for one turn.
Knife in the Dark: assuming that he has not yet been spotted, an Assassin may sneak into any tent to slay his foes. There are two types of tent.
- Troop tent: these are the tents for the soldiers. Each tent has as even a number of troops inside as possible. If the Assassin wants to attempt to slay the occupants, roll a D6. On a 4-6 the Assassin can successfully slit everyone's throat without drawing attention. On a 1-3 the soldiers all wake up and the alarm is sounded. The number rolled also represents the number of survivors in that tent.
- General's tent: no one gets to be a Warlord without being a bit cautious. The General always wakes up the instant the Assassin charges. Count the General as Waking Up for the first round of combat.
Using Alternate Forces
While Dark Elves and Skaven are the two armies that have Assassins, it is possible to imagine a Dogs of War desperado with a stiletto, a Wood Elf Wardancer sneaking into an evil-doers camp, or any other combination you can dream up. As no other race has such trained Assassins as Dark Elves and Skaven, the Knife in the Dark special rules should not be used by other races. They will fight normally.
Part of a Larger Battle
This scenario makes a perfect lead-in to a larger game of Warhammer. The result affects the larger game:
- General Slain: if the Assassin makes a clean kill and manages to make it to safety, the opposing army will not be able to field a full complement of Characters.
- General Lives: if the General makes it through the night, the troops will be inspired, and any unit within 18" may use his Leadership during the next battle.
- Assassin Escapes: the Attacker gets a free Assassin in their larger battle.
- Assassin Dies: the Defenders have the satisfaction of knowing there are no Assassins in their opponent's army.
Wizard Duel
Any Magic-using Warhammer Army.
A Wizard sends a small band of warriors to gather spell components, and finds other Wizards in the area with needs of their own.
Models Needed
Both sides:
- 1 to 3 Wizards totalling 200 points (no Lord-level Wizards), with no Magic Items.
- 50 points of Core troops.
Battlefield
As the main focus of the game is the field, terrain should be sparse. Spread a few clumps of trees, rocks and bushes over a 36" x 36" area. Sparse, but not barren.
Objectives
The Wizard and his force must gather the three different spell components and get them off their table edge first. The game lasts until one side has been destroyed, or until one side wins by leaving the appropriate table edge with the correct components.
Deployment
Players each roll a die. The high roll chooses whether to set up the entire force along any board edge first or second.
Who Goes First
Each player rolls a D6. The high roll moves first.
Special Rules
Searching for Spell Components: only Wizards are allowed to search for components (they all look like normal roots and weeds to the rest of us). A Wizard may begin searching for components once they are 12" away from their starting table edge. Searching happens in the Shooting phase, and a model may not shoot and search in the same turn.
To search, roll a D6. On a 4+ you've found something. Roll a further D6 on the Search Results chart:
- 1: Find a Dragonroot branch. Excellent!
- 2: Find a cluster of Flaming Sword weeds. Take 'em!
- 3: Find a Shimmery Firebeetle shell. Good job!
- 4: Find a pretty flower. Smells nice, but useless for your needs! This is not what you came here for!
- 5: Ugh! Better leave that where it lies.
- 6: Find a VERY large and annoyed badger. Suffer an immediate Strength 2 hit!
Models may not stand in place and search the exact same location. To search in the next turn, the model must move at least 2" from its previous location during the movement phase.
Carrying Spell Components: once you find something, write the name of what you have found on a small scrap of paper and place it next to the model to represent the component. This stays with a model as it moves and remains on the table when a model is taken out of action. You may carry as many spell components per model as you wish.
- Spell components may be handed off to non-Wizard models, so long as neither model is in combat. This is a free action, but the models must be in base-to-base contact.
- If a model panics and routs off the board, the valuables are considered lost.
- Any Wizard who has a spell component gains +1 to all dice rolls involving power dice and dispel dice.
- Components may be recovered from dead models on a 4+. Otherwise they are destroyed.
Panic Tests: all Wizard models may ignore Rout Tests, but the rest of the troops must follow the same special rules. When a force loses 25% of its starting numbers, make a Rout Test for each model separately, at the start of each turn. Models that turn tail and run will move directly towards their home board edge, skirting around enemy models as they need.
Using Alternate Forces
This scenario is useful for any army that can have Wizards, and it can also work for armies that have only occasional need of Wizard-gathered substances, such as Dwarf Runepriests. Think of two Beastmen wizards searching for the ingredients of a ritual against a force of Gors, or a Necromancer searching for a rare relic guarded by a Lady protected by two Knights of the Realm.
Part of a Larger Battle
When you play this game before a full-scale Warhammer battle, apply the following results:
- The winner: gets +1 power die each turn, as well as an Enchanted Item, Arcane Item or Talisman of up to 50 points for free to use in the upcoming battle.
- The loser: gets one less power die per turn, due to the lack of Winds of Magic they may tap into.
Lost Tomb of Hamon Ra
Khemri and Any Army. Tomb Raiding! Bloody fight to the finish!
An expedition in search of an ancient artifact reaches a tomb, where the Tomb Kings of Khemri defend their sacred ground.
Models Needed
Khemri forces:
- 1 Liche Priest (45 points).
- 1 Tomb Lord (95 points).
- 2 Scorpion Swarms (100 points). Ignore injury rolls for Swarms.
- 2 Tomb Guards (22 points).
- 15 Skeletons with hand weapons (summoned by scroll).
Explorers' forces:
- 200 points (no Wizards allowed).
- Must include 1 Hero.
- No Monstrous Creatures, Cavalry, War Machines or Flyers.
Battlefield
Use a special table about 24" x 24". The entire table is the main chamber of an ancient tomb. On one side of the chamber there is an open doorway, through which the Explorers enter. The floor is sand or sandstone. Dais and pillars stand along the sides of the chamber.
Objectives
The Explorers are here to capture the Crown of Hamon Ra. These warriors must leave the room with the Crown by the only exit from the tomb.
The Khemri Undead have but one goal: to destroy the tomb raiders before they escape with the blessed Crown of Hamon Ra.
There is no turn limit (time matters not to the Undead).
Deployment
The Undead set up first. The Tomb Lord and Liche Priest start on the table edge directly opposite the doorway. The Tomb Guards start at the exit door. The Scorpions will enter from the exit door at the start of Turn 2.
The Explorers set up anywhere in the chamber, but the Hero must start in front of the dais with the crown.
Who Goes First
The Khemri force gets the first turn.
Special Rules
Djerdra's Summoning of the Vengeful Dead: the Liche Priest has three special scrolls of Djerdra's Summoning of the Vengeful Dead.
- A scroll may be read at the start of the Khemri player's turn and may not be dispelled (limit one scroll per turn).
- The 5 summoned Skeletons enter as a group from the board edge of the Khemri player's choice. They emerge from the sandstone.
- They are NOT allowed to charge in the turn they appear.
Rout Tests: both sides are desperate, and neither will rout. Explorers will not rout from fear, but they still may fail fear tests and require 6s to hit, or fail to charge (as appropriate).
Leaving the Tomb: any Explorers may leave the board via the doorway at any time. If they do, they may not return.
Using Alternate Forces
Any army can be used as the Explorers' forces.
Part of a Larger Battle
- If the Khemri win: the opposing player loses either 10% or 200 points of his army in your next game, whichever is lower.
- If the Explorers win: the Khemri player does not take the Crown of Hamon Ra, and loses either 10% or 200 points of his army in your next game, whichever is lower.
Water Rights
Monsters! Any Warhammer Army.
The tombs of Khemri hold treasures to lure all races to that haunted land. In the desert, water can be more valuable than gold, as the baking sun can kill a body in little time, and the few scattered watering holes are seldom unguarded.
Models Needed
Defending forces:
- 4 Giant Scorpions.
Attacking forces:
- Up to 200 points of troops, including up to one Hero and up to one Champion.
Battlefield
This scenario requires a space of about 24" x 24". The main feature of the battlefield is an oasis, placed in the centre of the table. The oasis should be no larger than 8" x 8". Small groups of palm trees and rock clusters can then be placed about the board.
Objectives
The Attackers are travelling at night and need to reach the oasis before the sun comes up, or they die of thirst. The Scorpions are well used to stalking prey lured in by the life-sustaining oasis.
- If at the end of the game there are 25% or more of the starting number of Attacker models remaining, the Attacker wins.
- If there are fewer than 25% of the Attacker's models remaining, the Defender wins and the feasting can begin.
The Attackers need to get to the oasis and drink, and they need to do it before the scorching sun rises. The game therefore ends after eight turns, at sunrise.
Deployment
The Attackers start on the northern table edge, up to 6" in. The Giant Scorpions are then placed around the southern edge of the oasis, touching it where possible.
Who Goes First
The Attackers go first.
Special Rules
Giant Scorpions: these enormous monsters are usually found lurking in the cool sand below the surface, often near an isolated desert oasis.
| M | WS | BS | S | T | W | I | A | Ld | |
|---|---|---|---|---|---|---|---|---|---|
| Giant Scorpion | 6 | 4 | 0 | 4 | 4 | 3 | 5 | 3 | 7 |
Giant Scorpions have the following special rules: Cause Fear; Poisoned Attacks; Chitinous Hide (4+ armour save).
Dying of Thirst: the Attacking forces have been stumbling through the desert for many days and are all on the verge of dying of thirst. The Attackers' force may not march. At the start of each of the Attacker's turns (starting with the first), roll a D6 for each model in the force. On a roll of 1 the model has succumbed to the baking heat of the desert, and you need to remove the model as a casualty. Once a model moves in contact with the oasis, the effects of the Dying of Thirst special rule are ignored for that model.
Rout Tests: the Attackers are desperate for the cool water of the oasis and will automatically pass any Rout Test they are forced to take. The Scorpions will not rout either.
Using Alternate Forces
The Giant Scorpions are the most characterful choice of guardians for the oasis, but you could also use a number of other desert alternatives. Try the battle by replacing the 4 Giant Scorpions with equal points worth of Scorpion Swarms or Skeletons. You could even use a monster like a Cockatrice, Manticore or small Dragon, remembering to adjust the points of the Attacking forces accordingly.
Part of a Larger Battle
- If the Attackers win: they can send a signal to their larger army, which can resupply and continue on. This can be represented on the tabletop by allowing the entire army to move D6" forward after deployment, showing their renewed vigour.
- If the Defenders win: the larger attacking army is forced to slow down, as thirst and heat are terribly draining. This can be represented on the tabletop by restricting the march movements of the army: each unit must roll a 3+ before it can march.
Ogres for Hire
Ogres and Any Warhammer Army. Perfect for multi-player back-stabbing!
Both armies have fought three battles and neither has the upper hand. A scout reports a band of Ogre mercenaries in the area, and a trusted lieutenant is sent to make a deal.
Models Needed
Defending forces:
- 200 points of infantry or cavalry.
- One Hero must be included.
Attacking forces:
- 200 points of infantry or cavalry.
- One Hero must be included.
Mercenary forces:
- 4 Ogres (180 points).
Battlefield
Use a space at least 24" x 24". Arrange trees, walls and hedges scattered about the table.
Objectives
Both sides are seeking to destroy the other, either by slaying them all or causing them to rout. If you can do it without the Ogres' help, go for it! There is no turn limit.
Deployment
The Defenders start on the northern table edge, up to 6" in from the edge.
The Attackers start on the southern table edge, up to 6" in from the edge.
The Ogres are set up by both players, who take turns placing Ogres on the board at least 8" away from any other model.
Who Goes First
Each player rolls a D6, with the highest roll going first.
Special Rules
Tilean Speech: the only language in common between the armies and the Ogre Mercenaries is a debased form of Tilean. Unfortunately, only the Heroes are fluent enough to understand and be understood by the Ogres.
Mercenaries: a Hero in base-to-base contact with an Ogre can attempt to purchase its services. At the start of hand-to-hand combat, roll a D6.
- On a 4+, the Ogre agrees and can be used from that point on as part of your forces (at least until it Switches Sides; see below).
- On a 3, the Ogre has become confused and takes a moment to work out what has been said. It makes no attacks, and the attempt is tried again next round.
- On a 1 or 2, the Ogre has misinterpreted what you have said as a comment about its mother, and it immediately fights a round of hand-to-hand combat.
Unemployed: for any Ogre that is unemployed, roll off to see who moves it after each player has completed their turn. The Ogre moves 6", but does not necessarily attack. If the Ogre comes within 3" of a model, roll a D6 to determine its reaction. On a 1-2 it attacks; on a 3-6 it ignores that model.
Switches Sides: anytime an Ogre attacks a Hero, make an immediate Mercenary roll again. The Ogres' allegiance can change like the wind!
Using Alternative Forces
What army couldn't use a little more muscle? Try these:
- A beleaguered Dwarf army trying to hold out against a Night Goblin attack.
- An Empire army fends off a Dogs of War horde that has banded together looking for easy loot.
- A Dark Elf army looks for any advantage against its High Elf brethren.
Part of a Larger Battle
The winner of the scenario has gained the trust of a band of Ogres, and may hire out a unit at half its regular points cost for the next battle only. Just wait until you see your opponent's face as a unit of ten Ogres crashes forward!
Bring Out Yer Dead
Necromancers, Skeletons and Zombies.
Two young Necromancers, still learning their craft, duel for supremacy over a local graveyard.
Models Needed
- 2 Necromancers.
- 12 Zombies.
- 12 Skeletons.
Battlefield
Use a special table about 24" x 24". Set up a graveyard in the middle of the table and scatter a few other graves about the board. The more graves the better, as this is where the Undead will appear when the Necromancers cast their diabolic spells of raising.
Feel free to add other pieces of graveyard scenery, dead trees or mausoleums to set the gloomy scene.
Objectives
Each player is attempting to add the other Necromancer to their Undead forces. This can be accomplished by killing the opposing Necromancer.
The game ends when one Necromancer dies. The winner is the last Necromancer left standing.
Deployment
Each player sets up their Necromancer along a table edge, opposite one another. They can be placed up to 4" away from the middle of their table edge.
Who Goes First
Both players roll a D6. The highest roll goes first.
Special Rules
Raise the Dead: as it is a battle for the mastery of the dead, there is only one spell that the Necromancers will cast. Because the Necromancers are still learning their craft and are not at full power, use the following rules.
- In the Magic phase the Necromancers get three Casting dice or two Dispel dice (depending on whose turn it is). Use the standard magic rules for casting and dispelling found on pages 134-139.
- If the Necromancer is in combat, he can only cast the Raise the Dead spell.
- Raise the Dead: Casting Power 3+. This spell raises D3 Undead models.
- Shambling Horror: Casting Power 7+. This spell raises D6+1 Undead models.
- Summon Undead Horde: Casting Power 12+. This spell raises D6+3 Undead models.
- Once you successfully cast the spell and determine how many Undead you have summoned, place each one at a separate gravestone. You cannot raise more than one Undead model at a gravestone in the same turn.
Crumble to Dust: as novices, the Necromancers are still mastering their powers and have trouble controlling the Undead from afar. At the beginning of the player's turn, each Undead model under that Necromancer's control must take a test, as there is a chance that it will crumble. Roll a D6 and consult the chart:
- Models within 6": crumble on a roll of 6+.
- Models 7"-12": crumble on a roll of 5+.
- Models over 12": crumble on a roll of 4+.
If an Undead model crumbles, immediately remove it from the board.
Note: to keep things flowing smoothly on the board, one player should use only Zombie models while the other uses Skeleton models. However, all raised dead use the Skeleton stats found in the Vampire Counts rulebook. If all the Undead models are being used, then no more can be summoned.
Using Alternate Forces
Given the specific nature of this scenario, it is tough to run it with different forces. The booklet recommends trying it as a multi-player game with three or even four competing Necromancers and a larger number of Skeletons and Zombies.
Part of a Larger Battle
This is an ideal introduction to a battle between two Vampire Counts armies. The results could affect the battles in a number of ways:
- The winning side adds +1 Skeleton or Zombie to every successful casting of the spell Invocation of Nehek.
- The losing side cannot cast the most powerful version of Invocation of Nehek.
- The winning side can upgrade one Necromancer to level two for free.
Twilight of the Dead
Zombies (and plenty of 'em) against any army.
A small group of soldiers carrying news of the Undead threat is stopped by shambling Zombies, and makes its stand in the ruin of a farmhouse until dawn.
Models Needed
Empire forces:
- 1 Count's Champion with Great Weapon (12 points).
- 1 Marksman with Repeater Handgun (28 points).
- 3 Empire Handgunners (24 points).
- 3 Empire Swordsmen (21 points).
The Zombies:
- 24 Brain-crazed Zombies.
Battlefield
A 24" x 24" area with a ruined house in the approximate centre. Make sure the house has a few doors, a second floor, and maybe a ruined wall or two. The house is not a defensive bastion, merely a burned-out shell that provides a bit of refuge against the living dead.
Within the house, designate an area as the door to the cellar. This only needs to be a 1" square (use a plastic door, paper, whatever). Also place a small well about 6" away from the house. This can be represented by a small 1" square if you don't have a proper terrain piece.
Fill the rest of the table with a few trees, rocks, a hill or whatever you have. Be careful, however, not to overcrowd the table.
Objectives
The Empire player must survive until dawn (the end of the 10th turn), when the Zombies will seek shelter elsewhere.
The Zombie player must eat every Empire model on the board before dawn. The game lasts 10 turns.
Deployment
Any two Empire models may set up within the house. The rest of the models may set up anywhere on the board that is at least 4" away from the house.
The Zombies deploy in 4 groups of 4, with the remainder used for reinforcements. Roll a D6 and use the chart below to determine where the groups of 4 show up:
- 1-4: place the Zombies anywhere along the table edge marked with that number on the map.
- 5: the well has gone bad! Place the Zombies within 1" of the well.
- 6: someone's in my cellar! Place the Zombies within 1" of the cellar door.
Who Goes First
Zombies are quite slow, so the Empire player goes first.
Special Rules
Zombies are Dead: these Zombies can take a serious beating, because they really don't feel it, but they are a bit squishy and rotting. Modify the injury chart as follows:
- 1-3: Knocked Down.
- 4-6: Out of Action.
Running: the Empire soldiers know their survival depends upon running! They can make a run move at any time, even if there are Zombies within 8".
Zombie Reinforcements: in the 5th turn and every turn thereafter, deploy 4 Zombies individually.
- There can only be 24 Zombies in play at any time. If you wish to deploy 4 more Zombies and there are already 24 in play, simply remove any 4 from play and re-deploy them as fresh Zombies.
Undead Senses: Zombies can charge a model they cannot see but which is within 4" of them, on a roll of 4+ (instead of taking an initiative test). They can smell human brains through the wall.
Brain-feast: whenever an Empire soldier is killed, EVERY Zombie within 2" of him must test to see if it resists its hunger for brains. Roll a D6 for each Zombie.
- On a 5+ it is unaffected.
- On a 1-4, that Zombie must remain where it is until it spends an entire Zombie turn in place feasting on the remains of the victim.
Any Zombie attacked while it feasts will fight normally. Don't mess with Zombies when they're eating!
Using Alternate Forces
You can substitute suitable replacements for the Empire soldiers in this scenario by taking forces of equal point values (about 85 points total) from any Warhammer army.
Part of a Larger Battle
This could tie into a Warhammer game as a precursor to a battle. If the Empire player manages to hold out for the entire night, the Empire army will undoubtedly be ready for the evil magics of the Undead thanks to their news. To represent this, the Empire player may have up to two Dispel Scrolls at no points cost.
If the Empire player loses, the massed ranks of the Undead will continue to swell as the Empire army awaits news from its scouts. The Undead player may add a free unit of 20 Zombies with Musician and Standard Bearer to their army.
Slayer!
Slayers! Monsters. Fast and furious!
A small band of Dwarf Slayers converges on a large monster out in the wilds.
Models Needed
Monster forces:
- 1 Giant (205 points).
Dwarf forces:
- 6 Dwarf Slayers (66 points).
Battlefield
Use a special table at least 24" x 24". As monsters tend to stay out of civilised areas, most battles will take place in the mountains or in dark forests. You can suitably modify the board to represent these areas of the Old World.
Objectives
The Dwarf Slayers must defeat the monster or find death in battle. Anything less will not do! Any Dwarf Slayers killed in battle can rest knowing their Slayer Oath has been fulfilled.
- If ALL of the Dwarf Slayers still on the board are knocked unconscious and are still so at the start of the Giant's turn, then the Giant wins.
- If the monster is killed, the surviving Dwarf Slayers lament their good luck and battle prowess by drowning their sorrows in mugs of Bugman's ale.
Deployment
The Giant begins in the centre of the board.
The Dwarfs are placed randomly. Roll 2D6 and the scatter die. Take the result and place the Slayer model that many inches away from the monster.
Who Goes First
The Giant gets the chance to move and strike a blow!
Special Rules
Giant Attacks: when encountering scattered foes, the Giant attacks a little differently than it would against an organized unit. To represent this, roll the Giant's attack on the chart below:
| D6 | Result |
|---|---|
| 1-2 | Swing with club: D3 models within 4" are automatically hit at Strength 5. The Giant player can pick who is hit. |
| 3-4 | Thump with club: 1 model in base-to-base contact with the Giant (the Giant's choice) is automatically hit at Strength 7. Add +3 to the injury roll. |
| 5 | Pick up and throw: 1 model within 4" (Giant's choice) is picked up and thrown at a random model within 6" of the Giant. Roll to hit using the Giant's Ballistic Skill. If the enemy model is struck, both receive a Strength 4 hit and count as knocked down, in addition to any other Injury Chart roll. If the throw misses, the model that is thrown lands 6" away from the Giant and suffers the injury as stated before. |
| 6 | Stuff in pants: 1 random model within 4" is automatically grabbed and stuffed into the Giant's pants. The model counts as Out of Action. |
Yelling Helps!: this game is more fun if the players controlling the Dwarf Slayers yell suitable oaths and slurs against the monster, while the players controlling the monster make the suitable monster reactions to the Slayers.
Using Alternate Forces
If you'd like to take on other monsters, use the following formula to work out how many Slayers you will need:
- Take 1 Dwarf Slayer for every 40 points spent on the monsters of your choice. (Multiple opponents dynamically affect the game.)
- Round up in favour of the Slayers, so 219 points of monsters would equal 6 Dwarf Slayers.
Part of a Larger Battle
The Slayer scenario can be used as a pre-battle before a full-fledged Warhammer game. For example, you could use it to have the Dwarf Slayers track down a group of Rat Ogres. Whatever models survive the battle can show up in the following battle.
This can be used in just about any game versus monstrous mounts (Dragons, Manticores, Griffons), Giants, Trolls, Minotaurs or other suitably large creatures that would attract the attention of a Dwarf Slayer.
You could also decide that if the Slayers successfully kill the Giant in this scenario, any survivors are automatically upgraded to "Giant Slayers" in the next battle, without having to spend the points cost for the upgrade.
Gotrek & Felix: Hold the Gates
(In)famous Slayer Hero & Poet Sidekick.
Gotrek Gurnisson and Felix Jaeger defend a small fort from a tribe of foul Goblins.
Models Needed
Defending forces:
- Gotrek and Felix.
- 10 Empire Free Company models to represent the Settlers (5 points each).
Attacking forces:
- 6 Goblin Wolf Riders with hand weapon and shield (11 points each).
- 8 Goblins with spear and shield (3 points each).
Battlefield
This scenario uses an area of 24" x 24". The table is dominated by Fort Diehl, a rundown set of walls and shacks, with a 4" wide gate on the northern side. The Fort is 16" x 12" and is placed in the middle of the southern table edge. There is no other scenery in this bleak land.
Objectives
As a Dwarf Slayer, Gotrek continually seeks his death in combat. Few can stand against his mighty axe backed by his formidable frame and fighting skills. Gotrek, assisted by Felix, seeks to clear the board of any and all enemies.
Gotrek must hold the gates, preventing any Wolf Riders from escaping past him and threatening the citizens within. Inside, Felix must dispatch as many Goblins on foot as he can, protecting Gotrek's back as well as any of the Citizens taking refuge inside Fort Diehl.
The Goblin Wolf Riders must break past Gotrek and slaughter as many of the human settlers as possible with the assistance of the Goblins on foot that have already infiltrated the fort.
If either Felix or Gotrek is killed, or more than 50% of the Settlers are slain, the Goblins win.
This scenario lasts for ten turns, after which you can tally up the dead.
Deployment
Gotrek stands in front of the gate. Felix stands inside the fort, and the Settlers cower in the south-west corner inside the fort.
The 8 Goblins start in the south-east corner inside the fort.
The Goblin Wolf Riders start in three different locations: 1 in the middle of the southern board edge, 1 in the south-east corner of the battlefield, and the remaining 4 on the northern table edge.
Who Goes First
The Attackers go first.
Special Rules
Gotrek and Felix: the stat lines, special rules and magic items for Gotrek and Felix are given in the Warhammer Annual 2002, and on the Games Workshop website (follow the links through the Warhammer pages to the Dwarfs page).
Wave after Wave: to represent the waves of Goblins attacking the Fort, the Goblin player may bring any models killed in combat back onto the board in their next turn.
- Wolf Riders reintroduced this way are placed on the northern table edge and may charge in the turn they were placed.
- Goblins replaced in this way start off inside the walls of the fort in the south-east corner.
The Fort Walls: though run-down, the walls of Fort Diehl cannot be scaled by any of the models. The only way in or out is through the gate, and through Gotrek Gurnisson.
Last Stand: the Settlers will not charge or move out of their position unless attacked, and will move to assist other Settlers. Otherwise, they stay in their corner.
Using Alternate Forces
Gotrek and Felix are classic icons of the Warhammer world, so it seems strange to recommend using two other characters worth just under 500 points. You could, however, replace the Goblins with Dark Elves, Chaos Marauders, or even Skeletons and Black Knights. Just remember to keep the total points value for the Attacking force close to that in this battle.
Keep an eye on the Warhammer Skirmish section of the Games Workshop website for more Gotrek and Felix scenarios.
Part of a Larger Battle
Gotrek and Felix can be included as a Rare choice in Empire, Bretonnian, Dwarf and Dogs of War armies, so it is best to use this scenario to lead into a battle using one of these armies.
Egg Hunt
Monsters. Any Warhammer Army. Great for multi-player bashes.
Thieving egg hunters try to steal the eggs from a nest, and a protective monster returns to its roost.
Models Needed
The Monsters:
- Any ferocious monster from the Warhammer world (a Griffon, a Wyvern or the like), and two more of the same monster to represent its young hatchlings.
- D3 eggs per nest.
Nest Raiders forces:
- Up to 200 points of troops, led by a Hero.
- May include a single Level 1 Wizard.
- Up to 25 points may be spent on equipment or Magic Items.
Battlefield
A 48" x 48" area is ideal for this type of game. The nest should be in the dead centre of the table, on top of a two-layer hill. At the foot of one end of the hill there should be impassable rocks; at the other end, fallen logs. There should be two groups of trees, one set in either corner, as shown on the map.
Objectives
The objective for the monsters is to stop the Nest Raiders from escaping off the board with any eggs.
Each Nest Raiding gang is vying to get an egg from the nest and take it off the table via any table edge. In multi-player games the winner must get the most eggs off any edge.
Deployment
The "Mother" monster does not start the game on the board. She enters play sometime after the nest has been violated. Roll as soon as a Raider has touched the nest. On a 4+ the Mother may enter from any table edge. If the Mother doesn't enter that turn, roll at the end of each player's turn.
The Hatchlings start in the nest.
The Nest Raiders must start the game on any table edge.
Who Goes First
The Nest Raiders go first, as they're the ones doing the raiding, and the Mother monster isn't on the table yet.
Special Rules
Young Monsters: the statistics of the Hatchlings are all equal to half the corresponding statistic of their Mother. In the case of fractions, round down. The Hatchlings will NOT move from the nest at any point in the game.
Raiding the Nest: to grab an egg, all that is needed is to have one model get inside the nest. Once the model has crawled into the nest, it is assumed to have grabbed an egg. Each model may only carry one egg at a time.
Hungry Hatchlings: the Hatchlings are absolutely starved (why else would their Mother leave them alone?), and will eat just about anything that looks tasty. Any Raider trying to get an egg must first contend with the Hatchlings. Raiders are NOT pinned in combat and may still move and snatch an egg, but if they choose to do this they may not strike at the Hatchlings (roll one attack on the Raider as he runs by).
Options: single and multi-player: this scenario does not have to be limited to two players (one playing the Raiders and one playing the Monsters). Any number of players can compete for the few eggs, each attempting to get eggs off the table. A single player can also play with the Mother and Hatchlings controlled by the rules below. For an all-out free-for-all, you can combine the rules for controlling the monsters with a multi-player game.
- Single player: once the Mother comes onto the board, she starts in the centre of one of the table edges. Determine which table edge by rolling a D6, re-rolling on a 5-6. The Mother, if not engaged in combat, moves D6" towards the nearest model. If she comes into base-to-base contact, she is considered to have charged and strikes first. If someone is in possession of the egg, the Mother, unless in combat, moves 2D6" towards that model, with the same stipulation about charging.
- Multi-player: if there are more than two players you may wish to add another nest with another D3 eggs. You also have the option of stealing the egg from someone who has already retrieved it. Simply wound them in combat (any result), and the model who caused the wound steals the egg.
Using Alternate Forces
This scenario is really useful for just about any Warhammer army and a wide variety of monsters. Suggestions include:
- An Empire Warband trying to steal Griffon Eggs.
- An Orc Warband trying to steal Wyvern Eggs.
- A Goblin mob hunting Giant Spider Eggs.
- High Elves or Wood Elves looking for Great Eagle Eggs.
- A Necromancer and Undead looking for Manticore Eggs.
- A Bretonnian noble party seeking Hippogriff Eggs.
- Dark Elves looking for Hydra Eggs.
Part of a Larger Battle
This scenario can be used as the precursor to a full-scale Warhammer battle.
- If the Raiders succeed in retrieving the egg, the reward is enough to cover a Dogs of War or Regiment of Renown unit joining their army in the next game, regardless of the normal ally rules and without having to spend points. In a multi-player game, the player that wins receives this bonus, and everyone else is out of luck.
- If the monsters defend their nest by eliminating all of the Nest Raiders, the army the Raiders came from loses the points used in this scenario.
Send in the Steam Tank
Empire Steam Tank, Orcs, Any Warhammer Army.
The city streets lie in ruin, and the last of the rearguard must leave the town to the invaders. The Ammunition Depot must not fall to the pillaging force, so a Steam Tank rides back into the Orc-infested town.
Models Needed
Steam Tank and crew:
- One Conqueror-style Steam Tank (300 points).
- 3 Rearguard troops (up to 25 points; Core troops, no cavalry).
Orcs:
- 100 points of Core troops (no cavalry, champions or archers).
Battlefield
The playing area should be 48" x 48" or larger. There should be only one clear way for the Tank to get to the Depot. The other ways should be too narrow or filled with rubble and debris, and so on. (See the map for a suggested layout.)
Objectives
The Steam Tank must destroy the Ammunition Depot.
The Orcs must destroy the Steam Tank OR slay the rearguards and the Steam Tank Engineer.
Deployment
The Tank and its guards deploy at one end of the city, at the opposite corner from the Ammunition Depot.
The Orcs may deploy anywhere at least 12" away from the Tank or any of its guards. No more than 6 can be in a single location within 2" of each other.
At least 6 Orcs must be designated "hidden" and not within 12" of another model, and deployed in heavy cover. Hidden models are not deployed as normal at the beginning of the game. Mark on a sheet of paper where each of your hidden models starts. When the Tank comes within 6" of one, that model ambushes the Steam Tank!
Who Goes First
The Steam Tank rolls into town and gets the first turn.
Special Rules
Burnaboms: the Orcs all have "Burnaboms", crude explosives made of old jars, volatile liquids and a burning rag. They can be thrown 6" in an attempt to hit the nigh impenetrable hulk.
- Once the Orc is 6" from the Tank, it must pass a Leadership test to overcome the fear of being run over. If the test is failed, the Orc may do nothing but cower in fear.
- If passed, the bomb is thrown. Roll to hit as normal. If you hit, roll for location:
- 6: Hit the Air Intake. This causes a single point of damage to the Tank, but more importantly the oil fumes and thick smoke are choking the Engine. The Engineer and all four of the crew are forced to exit the Tank and are placed within 2" of the right side of the Tank (to fix the problem with the vent). The Steam Tank does not move while crew are outside.
- 1-5: the bomb shatters harmlessly upon the metal hull of the Steam Tank.
- If the crew is forced out of the Tank, they may re-enter after clearing out the Intake Vent. At the beginning of the Steam Tank's next turn, roll a D6. On the first turn outside the Tank, the crew will clear the vent on a roll of 4+. On the second turn they'll clear it on a 3+, and so on. As soon as the vent is clear, the crew can rush back inside the Tank. Movement is at half rate (half the normal distance per Steam Point) that turn (firing as normal).
Raze the Depot: to destroy the Ammunition Depot the Tank must hit it and cause two wounds. The Depot has a Toughness of 6 and 2 Wounds. Keep in mind that the Steam Tank has only 3 cannonball shots. The Steam Cannon generates its own ammo, but its lesser strength will make destroying the Depot tougher!
Piles of Rubble: if there is a pile of rubble blocking one of the roads, the Tank (being the behemoth that it is) can try to plough right through it. Roll a D6. On a 1, the Steam Tank is stuck! At the beginning of each subsequent Empire turn, roll a 4+ to free the Tank from the rubble. If freed, the Tank moves at half rate for that turn as the pressure builds back up, and then returns to normal speed next turn.
Using Alternate Armies
Ransackers can be any army, though the bomb description may change. Skaven might use some sort of warpfire liquid, and Lizardmen may use some rare jungle foliage pods that release spores upon contact. Use your imagination!
Part of a Larger Battle
- If the Steam Tank accomplishes its mission: the Empire army may take the mechanical marvel in their next game for no points cost. The Tank simply stays to fight!
- If the Orcs succeed: they will fix the Tank up (as best they can) and actually use it in a subsequent battle. As they will not have the Empire's experience, it will break down on a D6 roll of 1 every turn.