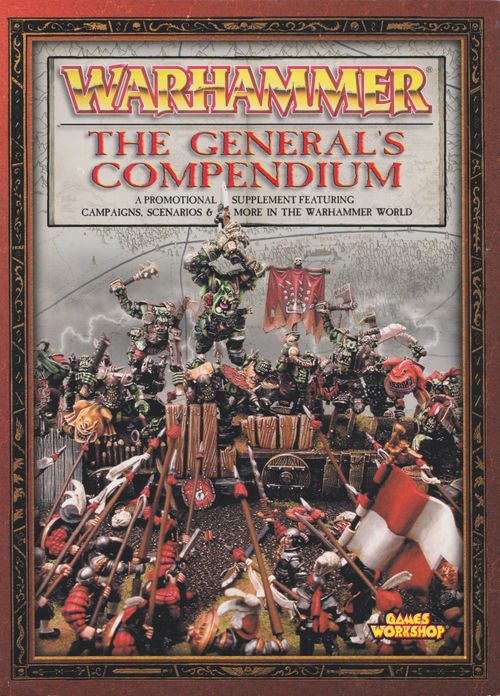
Warhammer (Sixth Edition): The General's Compendium
Rulebook PDF: Games Workshop · PDF
Warhammer (Sixth Edition): The General's Compendium Rulebook
Table of Contents
Table of Contents
- Preface to Campaigns
- Chapter 1: Linked Campaigns
- Ladder Campaigns
- Simple Ladder Campaigns
- Simple Ladder Campaign 1: Incursion
- Simple Ladder Campaign 2: Magical Quest
- Weighted Ladder Campaigns
- Weighted Ladder Campaign 1: Guerrilla Tactics
- Alternative Victory Conditions for Simple Ladder Campaigns
- Weighted Ladder Campaign 2: Storm the Defenses
- Climactic Ladder Campaigns
- Climactic Ladder Campaign 1: With the Help of Cutthroats
- Climactic Ladder Campaign 2: Two-Day Battle
- What's With All These Skirmish Games?
- Tree Campaigns
- Tree Campaign: Territorial Dispute
- Territorial Dispute Scenarios
- Territorial Dispute Campaign Results
- Scouts and Pickets (Skirmish Battle)
- Hold the Line
- Desperation Defense
- Waaagh! Grom and the Defense of Nuln
- Grom the Paunch of Misty Mountain
- Scenario 1: Toll House on the Bridge Road
- Scenery Showcase: Bridges of the Warhammer World
- Scenario 2: Delay Tactics
- Scenario 3: The Bridge on the River Reik
- Rafts and the River
- Using Alternate Armies
- Ladder Campaigns
- Chapter 2: Map-Based Campaigns
- What Is a Map-Based Campaign?
- The Campaign Organizer
- Starting the Campaign
- Selecting an HQ Territory
- Banners
- Setting Up Your Campaign & Battles
- How Campaign Turns Work
- Scenery Workshop: Making Razed Battlefield Terrain
- Map Sections
- Allies
- Army-Specific Rules
- Bonuses and Penalties to Banner Size
- Loss of HQ Territories
- Expanded Living Off the Land
- Victory Conditions
- Terrain Generation
- Guidelines for Creating Your Own Map
- Chapter 3: Campaigning in the Land of the Border Princes
- Being of the History, Politics, Peoples, and Geography of the Region Known as the Border Princes
- Playing the Border Prince Campaign
- Battle in the Barrows
- Scenery Workshop: Making Barrows and a Border Prince Fort
- Strategy Tips
- Army-Specific Rules (Border Princes)
- Terrain Generation in the Border Princes
- Victory Conditions (Border Princes)
- Options for the Border Prince Campaign
- Chapter 4: Games Mastered Campaigns
- What Is a Games Master?
- Finding a Games Master
- So What's Your Story?
- Ambitious Warlords
- Beginning Your Plan
- And It Takes Place Where?
- Putting It on a Map
- How Your Campaign Works
- More Decisions for the Games Master
- 3D Map Showcase: Making Your Own Corner of the Warhammer World
- Running a Campaign in Real Time
- Movement
- Casualties/Troop Recovery
- Fleeing from Combat
- Uneven Battles
- Scouting Enemy Banners
- Types of Specialized Army Banners
- Baggage Trains
- Scattered
- Economics and Supplies
- Standing Forces
- Placing New Landmarks & Reinforcements
- Attacking & Sacking a Landmark
- Random Events
- Magic
- Scenarios
- Out of the Ordinary Models That Can Be Used During the Course of a Long Campaign
- Starting Forces
- Experience and Veteran Abilities
- Advice for the Games Master
- Chapter 5: Competitive Gaming
- Chapter 6: Hostile Terrain
- Chapter 7: Allies & Multi-Player Games
- Chapter 8: Boats in Warhammer
- Avast, Ye Scurvy Dogs
- Anchor's Aweigh!
- That's No Boat, 'Tis a Ship!
- Types of Ships
- The Size of Things
- Basic Ship Rules
- Ship Speed
- Maneuvering Ships
- Sailing Ships
- Rowed Ships
- Steamships
- Moving by Magic
- Shooting from a Ship
- That Sinking Feeling
- Drop Anchor!
- Adrift
- Boats Moving Off the Table
- Running Aground
- Docking and Beaching
- Ramming
- Boarding Actions
- Additional Rules
- What Evils Lurk in the Briny Deep?
- Those Boats Don't Look Friendly
- Booty Quest
- Dangerous Coast
- River Raid
- Chapter 9: Sieges, Raids & City Sacking
Preface to Campaigns
What Warhammer general of any renown hasn't heard the siren call of campaigns: the elusive beckoning to get involved in a series of games that tracks battle after battle, each outcome affecting the war as a whole? A small skirmish erupts into a full-fledged battle. Supply lines are cut. Alliances are forged and shattered. Glorious deeds await heroes that dare attempt them. But alas, campaigns are all too often will-o'-the-wisps. Like phantoms in an Albion fog, they form and disappear. Without direction and organization, campaigns can bog down or become mired in endless details. Warhammer players need a solid plan and an exciting story to keep campaigns going and maintain the interest and excitement of those involved.
In fact, at heart, campaigns are all about story. The narrative continuity that is established over a series of games is what makes Warhammer campaigns so exciting. If one-off games of Warhammer are like short stories, campaigns are like novels that describe conquest, glory, heroic last stands, diabolical subterfuge, base treachery, and humiliating defeat. It's great fun to see your army and heroes develop, your realm expand, and your grudges against particular armies intensify to white-hot seething levels with every betrayal, battle, or mere mention of their existence. The best campaigns, like the best books, tell stories that spark the imagination. However, unlike books, campaigns are stories told by players who act as both author and character, provide motivation for their heroes and rank-and-file soldiers, and ultimately determine their success or failure. The General's Compendium will give you some of the tools you need to run fantastic campaigns, to bring your gaming beyond the simple one-off battle and into the realm of epic sagas in which mighty heroes struggle against powerful foes or fall in battle in ignominious defeat.
Types of Campaigns
Throughout the next four chapters of this tome, you will find out about the many styles you can use for your own campaigns, as well as specific examples that will allow you to get started with a minimum of planning and effort. We start with ladder campaigns, simple series of scenarios in which the outcome of one game can affect the circumstances of the next. Once you get a few ladder campaigns under your belt, you can try a more involved tree campaign, in which the scenarios you play are not predetermined but dictated by who has won and who has lost. If, say, you fail to take the city gates in the first game, you won't be able to try and sack the wealthy city in the second, and will have to play a different scenario to gain access to your foe's town.
From linked games, we move on to the more complicated map-based campaigns. Map-based campaigns offer a wide range of complexity and require different levels of player involvement. Your map can be simply a geographic tracking system on which markers representing Warhammer armies are moved about. When enemy troops come into contact, a game of Warhammer is played to determine who has taken the battlefield and who must retreat. More complexity can be added to such campaigns by adding rules for supply centers, troop recruitment, empire management, and special territories that impose penalties and bonuses in battle or require special scenarios to be played. Still more complexity and fun can be introduced by adding a Referee or Games Master to oversee the proceedings of a map-based campaign. The Games Master can help keep track of troop movements (even secret ones, so you don't know the locations of your enemies' armies), create ad hoc rules when players want to try innovative strategies, and introduce occurrences like monsters rampaging through the countryside. Again, the style and complexity of the campaign you play is entirely up to you.
Commitment Level
Before we get too deep into the details of how to run a Warhammer campaign, let's take a moment to discuss commitment level. Campaigns can be as simple as a few linked games that could be played out with only two players over the course of a single day, or as complex as a Games Mastered map-based campaign that involves half a dozen players and can take several months (or even years!) to complete. You and your fellow gamers need to determine the level that's right for you before you begin. After all, if it has taken you over a year to collect and paint your army, it's probably not a good idea to commit to an ambitious campaign that will require you to double the size of your force over the next few months. However, a more structured campaign that follows the course of your existing army over a series of battles (say a heroic defense of your homeland, a raid into a nearby kingdom, or a quest to clear the dark forest of foes) will be more to your liking.
We suggest starting small, but it's tough advice to take. Who wants to conquer the tiny hamlet at the crossroads when whole worlds beckon? Try a few linked games and see how you like them, particularly if you're new to Warhammer or have never played a campaign before. If you set your sights on a campaign with an easily manageable size, you'll finish it. Everyone will have fun, and you'll be left wanting more. You can always play a second campaign (and a third and fourth...) when you've finished the first. If you aim too high and your campaign is too large or involved, it will bog down, and your players will lose interest.
On the other hand, if you love to paint models and create scenery and are looking for some inspiration, why not jump in and try a more complex campaign? A campaign can be a great motivation to finish up those last Core units that just wouldn't paint themselves; to crank out old terrain standards like hills, forests, or fences; or to try some truly nutter-level hobby projects like an underground labyrinth, an entire Warhammer cityscape, or a giant sea monster. Though elaborate campaigns will take a lot of time to prepare and play, there's almost nothing as rewarding to a tabletop gamer as crushing one's foes on a spectacular, custom-built table designed specifically for the grand finale scenario after months of campaign battles and strategy. Good luck and good campaigning!
Chapter 1: Linked Campaigns
Ever wonder what happens after the Pitched Battle? Wanted to see how your troops fare in subsequent conflicts after an initial engagement? Linked campaigns, in which a series of games is played, may be the answer. This chapter explains how to play the simplest type of campaign, fun for new recruits and veterans alike.
This first chapter of The General's Compendium discusses what is generally the simplest type of Warhammer campaign, linked battles. In a linked campaign, two players (sometimes more) play a series of battles to determine the overall victor of the war. Players use the same army type but may vary their army composition from battle to battle. Thus, if a player starts a campaign with Lizardmen, he will play Lizardmen throughout. However, he may change his choices of troops and characters from game to game, and depending on the scenario conditions, he may be required to make such changes.
In ladder campaigns, the scenarios the players will use are predetermined; that is, after the first game is completed, the second game (or the next rung on the ladder) is played. Often, the outcome of the first game will affect how the second game is played. For instance, the winner of the first scenario could bring additional troops to the second battle, choose the table side on which he wants to deploy, or take advantage of special rules to give him an advantage. Alternatively, the loser of the first game may be at a disadvantage in the second. Perhaps he has fewer numbers, must set up in a disadvantageous position, or must face opposing troops behind defended obstacles. Overall victory and loss of a ladder campaign can be determined in a number of ways. Each scenario could be worth a certain number of Victory Points, or perhaps overall victory is determined only by who wins the final scenario. Ladder campaigns are great options for players who are just starting to play Warhammer and for those who have never played a campaign before. The rules are generally easy to learn, and you can play ladder campaigns with the models and terrain you most likely already have in your collection. Ladder campaigns are also a great option for veteran Warhammer gamers who plan to spend their time playing some tabletop battles and want an exciting alternative to a one-off game. The first part of this chapter explains a few different ways to set up a ladder campaign and gives a few examples of each type.
A slightly more complex type of linked campaign is a tree campaign, so called because, instead of following a straight path like the series of scenarios in a ladder campaign, the series of games you play follows a twisting path through a flow chart that resembles the branches of a tree. Victory and loss in one game will determine which scenario is played next.
For instance, imagine a situation in which an Undead horde led by Baron Giles de Mortrier, a Vampire from Mousillon, marches forth to attack a neighboring Bretonnian fief. In the first battle, the noble Knights of Bretonnia ride forth to intercept de Mortrier's forces and protect their borders. For the first game, the gamers would play the Breakthrough scenario (from the Warhammer rulebook, pp. 201-202), with the Vampire Counts player as the Attacker trying to punch through the Bretonnian lines. If the Vampire Counts win, they can move on to attack the Bretonnian fief in a Siege scenario (Warhammer rulebook, pp. 259-260). However, if the Bretonnians win, they will pursue the defeated Undead and try to cut off their retreat and destroy them utterly in a Flank Attack (Warhammer rulebook, pp. 205-206).
More complexity can be added to such campaigns by imposing penalties and/or bonuses on the loser and/or winner, respectively, or by allowing the winner of one game a choice of scenarios to play for the next. For instance, in the example above, if the Bretonnians won the first scenario, Breakthrough, the controlling player could choose between Flank Attack or Ambush (Warhammer rulebook, pp. 209-210) for the second game. If the Vampire Counts win the Breakthrough scenario, they could choose between a Siege scenario or the Desperation Defense scenario (see p. 16 of this book).
Trees that offer the victor his choice of the next scenario add another level of strategy to the campaign. The winner of one scenario must consider the relative strengths and weaknesses of the armies in the campaign and choose the next scenario so that he has an advantage. For instance, the Vampire Counts player might decide that, as he has no artillery, a Siege would be difficult for his army to win, so instead he might choose to play Desperation Defense. As in ladder campaigns, the overall victor of a tree campaign can be decided in many ways. Each game played can be worth a certain number of Victory Points, or the winner of the final, climactic game could be the winner of the entire campaign.
Ladder Campaigns
Here, we discuss the three basic types of ladder campaigns, simple, weighted, and climactic, and give examples of each.
Simple Ladder Campaigns
In a simple ladder campaign, the participants command two forces and play a series of two or more games linked together by a narrative or story. Perhaps one force is invading the lands of another; two armies are seeking to control an area of tactical significance; or enemy warbands are questing after the same long-lost magic item. Any number of games can be played in a simple ladder campaign, and any scenarios can be selected as long as they constitute an interesting narrative thread.
Determining victory in a simple ladder campaign is... simple! The winner of each game is decided per scenario rules, and each game is worth 1 overall Victory Point, which we'll call a Campaign Victory Point to distinguish it from the Victory Points described on p. 198 of the Warhammer rulebook. In the event of a draw, both players receive 1/2 of a Campaign Victory Point. Thus, in a four-rung simple ladder campaign, if a Beasts of Chaos player won scenarios 1 and 3, and scenario 2 was a draw, the score would be 2 1/2 to 1 1/2 in the Beasts of Chaos player's favor. Two examples of simple ladder campaigns follow.
Simple Ladder Campaign 1: Incursion
This three-rung campaign represents the type of aggression that occurs all too often in the Warhammer world. One army advances on the lands of another, intending to plunder, to expand its borders, or simply to destroy a hated foe. The Attacking army must first break through the Defenders' perimeter, then fight off a few dedicated and powerful officers who have stayed behind as a delaying ploy, and finally meet and defeat the main army of Defenders. Armies may be of any size, and the size may vary from battle to battle. The winner of each battle earns 1 Campaign Victory Point. Remember that both players must begin and end using the same army type, but their army compositions may vary from battle to battle.
- Game 1: Breakthrough (Warhammer rulebook, pp. 201-202)
- Game 2: Sheer Heroism (Warhammer rulebook, p. 213)
- Game 3: Pitched Battle (Warhammer rulebook, pp. 199-200)
Simple Ladder Campaign 2: Magical Quest
In this simple ladder campaign, two powerful Wizards, along with their retinues and apprentices, have heard rumors that an artifact of great mystical power has been discovered in the area and are advancing to collect the item for themselves. In the first scenario, a Skirmish battle occurs in which apprentices of both Wizards, along with a small bodyguard, seek out clues, spell components, and other omens and signs to help them in their quest for the artifact. In the second battle, the vanguards of the two forces clash as the Wizard's armies march toward the reported location of the artifact. In the final battle, both armies vie for control of a mystical cave in which it is believed the item has been hidden. In Games 2 and 3, both armies are led by a Wizard Lord. The size of the Skirmish game is dictated by the scenario rules. Armies in Games 2 and 3 can be 2,000 points or larger. Remember that the winner of each battle earns 1 Campaign Victory Point.
- Game 1: Wizard Duel (Warhammer: Skirmish, p. 34)
- Game 2: Meeting Engagement (Warhammer rulebook, pp. 203-204)
- Game 3: Capture (Warhammer rulebook, pp. 207-208)
Weighted Ladder Campaigns
Weighted ladder campaigns add a small degree of complexity to simple ladder campaigns. In order to help the campaign build to an exciting finish, like any good story should, the number of potential Campaign Victory Points that can be earned increases from battle to battle. Thus, the initial Skirmishes, while significant, are not as important as the final battles. In the event of ties, opposing players split the number of Campaign Victory Points available for the scenario in question. Generally, the points values of the armies involved will increase in size as the campaign progresses.
Weighted Ladder Campaign 1: Guerrilla Tactics
In this ladder campaign, the Attacking army does not want to risk a full-scale frontal assault on the enemy. Instead, the Attackers strive to hinder the daily operations of their foes, cut off or steal supplies, and lie in ambush to weaken the enemy.
- Game 1: Baggage Train (Warhammer Skirmish, pp. 24-25. Army sizes are determined by scenario rules. This battle is worth 1 Campaign Victory Point.)
- Game 2: Raid (The General's Compendium, p. 168. A 2,000-point Attacking force faces 1,500 points of Defenders. This battle is worth 2 Campaign Victory Points.)
- Game 3: Ambush (Warhammer rulebook, p. 209. A 2,000-point Attacking force faces 1,500 points of Defenders. This battle is worth 3 Campaign Victory Points.)
Alternative Victory Conditions for Simple Ladder Campaigns
Instead of using the Campaign Victory Point system, players may opt to use the traditional Victory Point system described on p. 198 of the Warhammer rulebook. As long as all the scenarios in your linked campaign are decided by the traditional Victory Point system, you can use this alternative. Simply determine victory and loss as you normally would and keep track of the Victory Points scored in each game of your linked campaign. When all campaign games are complete, add up each player's Victory Point total from all the campaign games played. The player with the highest total is the winner.
Weighted Ladder Campaign 2: Storm the Defenses
In this ladder campaign, the Attackers are working their way through the defenses of an enemy population center. The Attackers' ultimate goal is to sack the city beyond [the rest of this sentence is cut off in the scan].
- Game 1: Storm the Barricades (Warhammer: Skirmish, p. 20. Army sizes are determined by scenario rules. This battle is worth 1 Campaign Victory Point.)
- Game 2: Scale the Walls (Warhammer: Skirmish, p. 18. Army sizes are determined by scenario rules. This battle is worth 2 Campaign Victory Points.)
- Game 3: Siege (Warhammer rulebook, pp. 259-260. A 1,500-point Attacking force faces 750 points of Defenders. This battle is worth 3 Campaign Victory Points.)
- Game 4: Battle in the Streets (The General's Compendium, p. 172. Both sides consist of 2,000 points of troops. This battle is worth 5 Campaign Victory Points.)
Climactic Ladder Campaigns
In a climactic ladder campaign, a series of small battles leads up to a climactic grand finale. While winning the earlier games in a climactic ladder campaign will give your army certain advantages and/or your opponent disadvantages, in the end, victory is decided only by who wins the final game. Thus, it is possible to win three out of four games but still lose the campaign. There are two basic types of climactic ladder campaigns: one in which the early battles affect only the final battle, and another in which each battle affects the next game in the campaign series. The first ladder campaign below, With the Help of Cutthroats, is an example of the former. The Two-Day Battle example, as well as the Waaagh! Grom and the Defense of Nuln ladder campaign detailed at the end of the chapter, are examples of the latter type.
Climactic Ladder Campaign 1: With the Help of Cutthroats
In this campaign, two relatively poorly supplied armies are seeking to gain an edge on the enemy by hiring local mercenaries to join them in the climactic battle.
In Game 1, the armies strive to hire some Ogre mercenaries, and in Game 2, the armies fight to secure the funds needed to hire other mercenary allies. After these battles, the armies march to war, and the winner of Game 3 may claim victory in the campaign.
- Game 1: Ogres for Hire (Warhammer Skirmish, p. 35. Play the scenario as written. The winner may hire a band of Ogres at half their regular points cost for Game 3.)
- Game 2: Capture (Warhammer rulebook, pp. 207-208. Each side has 1,500 points. The objective is a broken-down, abandoned merchant's cart containing enough loot to hire 250 points of Dogs of War.)
- Game 3: Meeting Engagement (Warhammer rulebook, pp. 203-204. Both armies begin with 1,750 points. The army that won Game 1 may include a band of half-priced Ogres, which must be paid for from the 1,750-point allotment. The army that won Game 2 will have an additional 250 points to spend on Dogs of War, for a total force of 2,000 points.)
Climactic Ladder Campaign 2: Two-Day Battle
Two forces are struggling to control a pivotal strategic point and must hold the battlefield at all costs. After the initial Pitched Battle, a Skirmish battle, Rally Around the Flag, is played, and then another Pitched Battle. The results of each battle will influence the circumstances of the subsequent game (for specific rules see the Part of a Larger Battle section of the Rally Around the Flag scenario in Warhammer: Skirmish). Remember, the victor of Game 3 will be the winner of the campaign.
- Game 1: Pitched Battle (Warhammer rulebook, pp. 199-200. Both sides have 1,500 points and must include a Battle Standard Bearer.)
- Game 2: Rally Around the Flag (Warhammer: Skirmish, pp. 10-11. Play the Skirmish per the scenario rules, with the restrictions on which troop types you can select listed in the After the Battle section of the scenario rules.)
- Game 3: Pitched Battle (Warhammer rulebook, pp. 199-200. Both sides have 2,000 points plus any bonus models that escaped off the board in the Rally Around the Flag scenario. See the Before the Battle section in the Rally Around the Flag scenario rules for details.)
What's With All These Skirmish Games?
Most of the campaign examples listed in this chapter include one or two Skirmish games. Why? Well, we wanted to reflect the fact that major campaigns often begin with small battles in which scouts first come into contact or small vanguards test each other's resolve before the generals commit their main forces. Plus, we love Warhammer: Skirmish games. They test a set of tactical skills that are different from those used when commanding a 2,000-point army. Even those who have mastered the art of the Pitched Battle may find a whole new set of challenges with Warhammer on the small scale. Players who want to become versatile and masterful tacticians must learn how to succeed with a force of any size, from a scouting party that's 10 models strong to a massive war host of 500 models (and everything in between).
If you've never played a Skirmish game before, linked campaigns can be a great opportunity to give them a try. Before you start, make sure to check out the rules on pp. 242-246 of the Warhammer rulebook, then dive in head first! The rules are simple, and the gameplay is fast. If it turns out that you don't enjoy Skirmish games, then, of course, you don't have to include them in your campaigns. You can easily design campaigns that include no Skirmish games, or swap a Skirmish scenario included in the campaign examples listed in this chapter for regular Warhammer scenarios. For instance, in the Magical Quest campaign, you could easily drop the Wizard Duel Skirmish scenario in favor of a traditional Warhammer game between two 500-point forces led by level-one Wizards. Similarly, the Baggage Train Skirmish scenario in the Guerrilla Tactics campaign could easily be replaced by an Ambush scenario with 500 points of Attackers facing 750 points of Defenders.
Still, we recommend including a Skirmish game in your linked games. The small battles that precede the larger games help generate a sense of gradually escalating hostilities and of two forces committing increasing numbers of troops to the campaign.
Tree Campaigns
Tree campaigns add a bit of complexity to ladder campaigns. Instead of a predetermined series of linked scenarios, gamers play out a series of games that follow possible paths along a flow chart or tree. The route the campaign follows through the tree is determined by wins and losses. Let us consider, by way of example, a very simple tree campaign.
- Game 1: Pitched Battle. Attacker Victory leads to Game 2: Rear Guard. Defender Victory leads to Game 2: Last Stand.
In this tree campaign, players first play a Pitched Battle. If the Attacker wins the Pitched Battle, the next scenario played would be Rear Guard. If the Defender wins Game 1, the next scenario would be Last Stand.
Much like their ladder campaign counterparts, tree campaigns can be simple (each game is worth 1 Campaign Victory Point), weighted (each game is worth increasing numbers of Campaign Victory Points as the campaign progresses), or climactic (victory is determined only by who wins the final scenario). Tree campaigns offer a fourth alternative as well: victor's choice (described in the introduction to this chapter, and its tree is presented on the opposite page).
Victor's choice tree campaigns work the same way, but the winner of each game may choose which of two scenarios is played next. The example below shows the Breakthrough scenario from the Warhammer rulebook as the first game of a victor's choice tree.
- Game 1: Breakthrough. Attacker Victory leads to a choice between Desperation Defense or Siege. Defender Victory leads to a choice between Flank Attack or Ambush.
Thus, the winner of the first scenario, Breakthrough, has a choice between two scenarios for the next game. As discussed above, victor's choice tree campaigns add an additional strategic element to linked campaigns. After a victory, a player must weigh his army's strengths and weaknesses against those of his opponent's force and, based on his assessment, choose a scenario in which he believes his army will have the advantage.
The sample tree campaign that follows, Territorial Dispute, is both weighted AND victor's choice, and will hopefully inspire you to map out some tree campaigns of your own. By combining the weighted campaigns with a victor's choice tree, even more options become possible. Should the victor choose a scenario that is difficult for his army but awards more Victory Points, or should he play it safe with an easier scenario that awards fewer? Territorial Dispute includes many classic scenarios from the Warhammer rulebook and introduces three new ones as well.
Tree Campaign: Territorial Dispute
The Warhammer World is rife with danger, from territorial disputes along contested borders to marauding armies seeking plunder and destruction. This tree campaign tracks the gradual escalation of battles as one army struggles to claim some of its neighbor's territory along the border. This classic series of battles has, in one form or another, taken place countless times across the war-ravaged countryside of the Old World, as well as in Lustria, the Southlands, Araby, and elsewhere. This campaign could represent a series of battles between an Empire province and an invading Chaos Horde, between the Lizardmen of the jungle lands and the Tomb Kings of Khemri, between the Skaven and the Dogs of War in Tilea, or really between any two armies.
Before this tree campaign begins, players must decide who will be the Aggressor and who will be the Homeland Force. The Aggressor is the army making a foray into the territory of its neighbor to try and wrest control of the borderlands. The Homeland Force, of course, is trying to defend its lands and discourage future invasion of its territory. Armies may be of any size in this campaign (except in Scenario A: Scouts and Pickets, in which the size is predetermined). However, the campaign will seem more climactic if each game is larger and thus more important. Strive for a situation in which the armies in Game 3 are about 50% larger than they were in Game 2. Of course, as with all linked games, each player must use the same army type in all campaign battles but may vary the army composition from game to game.
The winner of each game earns the number of Campaign Victory Points listed in parentheses in the tree chart. Only those scenarios that have more than one number listed in the chart allow for ties (e.g., Rear Guard 2, 1/1). In these scenarios, the first number indicates the number of Campaign Victory Points earned by the victor; the second two indicate the number of Victory Points earned by both players in the event of a draw. If a scenario that does not allow for ties directs you to the Victory Points rules on p. 198 of the Warhammer rulebook to determine the game, use the Victory Points Chart as normal but disregard results of Draw (D). Treat such results as Minor Victories (MV) instead.
The printed Tree Campaign Chart for Territorial Dispute is rotated on the page; its branches are set out below in print order. Scouts and Pickets is Game A and is played first.
- A. Scouts and Pickets (1): Homeland Victory leads to B. Defend the Pass (2) and C. Breakthrough (2); Aggressor Victory leads to D. Storm the Watchtower (2) and E. Raid (2, 1/1).
- B. Defend the Pass (2): Homeland Victory leads to a choice of G. Ambush (3) or F. Desperation Defense (4). Aggressor Victory leads to a choice of I. Siege (4, 2/2) or H. Sheer Heroism (2, 1/1).
- C. Breakthrough (2): Homeland Victory leads to a choice of K. Flank Attack (3, 1/1) or J. Desperation Defense (4). Aggressor Victory leads to a choice of M. Siege (4, 2/2) or L. Pitched Battle (2, 1/1).
- D. Storm the Watchtower (2): Homeland Victory leads to a choice of N. Last Stand (3, 1/1) or O. Meeting Engagement (3, 1/1). Aggressor Victory leads to a choice of P. Siege (4, 2/2) or Q. Hold the Line (3).
- E. Raid (2, 1/1): Homeland Victory leads to a choice of R. Rear Guard (2, 1/1) or S. Capture (3, 1/1). Aggressor Victory leads to a choice of T. Siege (4, 2/2) or U. Hold the Line (3).
Where the rotated chart and the scenario descriptions below give different Victory Point values (N. Last Stand and the Siege scenarios), the values in the scenario descriptions are used here, as they read more clearly in the scan.
Territorial Dispute Scenarios
The following brief descriptions explain the situation behind each scenario and a few specifics about how to play the scenarios listed in the Territorial Dispute tree.
- A. Scouts and Pickets (The General's Compendium, p. 14; 1 Campaign Victory Point). In this Skirmish scenario, the Homeland Force takes the role of the Pickets. The Aggressors take the role of the Scouts.
- B. Defend the Pass (The General's Compendium, p. 159; 2 Campaign Victory Points). After slaying the enemy Scouts, the Homeland Force has time to set up defenses near a key pass leading into its lands. The Homeland Forces are the Defenders. The Aggressors are the Attackers.
- C. Breakthrough (Warhammer rulebook, pp. 201-202; 2 Campaign Victory Points). After destroying the Aggressor's Scouts, the Homeland Force has mustered a formidable army. The Aggressors must break through the Homeland Force's battle lines to get to the choice lands beyond. As such, the Aggressors are the Attackers, and the Homeland Forces are the Defenders.
- D. Storm the Watchtower (The General's Compendium, p. 152; 2 Campaign Victory Points). The Aggressor's Scouts have destroyed the enemy Pickets and have alerted their commanders to key strategic points of the Homeland Force's defenses. The Aggressors take the role of the Attackers trying to destroy or control one of the Homeland Force's watchtowers.
- E. Raid (The General's Compendium, p. 168; 2, 1/1 Campaign Victory Points). After defeating the Pickets, the Scouts inform their commanders of the location of a vulnerable Homeland town, which the Aggressors then plan to raid. The Aggressors are the Attackers, and the Homeland Forces are the Defenders. Should the game end in a tie, each player earns 1 Campaign Victory Point, and, as the Homeland Force is more familiar with the territory, the controlling player may select the next scenario to be played (either Rear Guard or Capture).
- F. Desperation Defense (The General's Compendium, p. 16; 4 Campaign Victory Points). After twice defeating the Aggressors, the Homeland Force sends the bulk of its army to wipe out the Aggressors once and for all.
- G. Ambush (Warhammer rulebook, p. 209; 3 Campaign Victory Points). The Aggressors have been weakened by two defeats. A small Homeland Force now waits in Ambush to try to destroy the Aggressors as they retreat.
- H. Sheer Heroism (Warhammer rulebook, p. 213; 2, 1/1 Campaign Victory Points). After being defeated while Defending the Pass, the remaining officers of the Homeland Force attempt to defend their lands against the overwhelming numbers of the Aggressor. The Aggressors are the Attackers, and the Homeland officers are the Defenders.
- I. Siege (Warhammer rulebook, pp. 259-260; 4, 2/2 Campaign Victory Points). The Aggressors are now moving on toward the Homeland Force's population centers and intend to lay siege to a fortified settlement. Play a Siege scenario with the Aggressors as the Assault force and the Homeland Force as the Defenders.
- J. Desperation Defense (The General's Compendium, p. 16; 4 Campaign Victory Points). After twice defeating the Aggressors, the Homeland Force sends the bulk of its army to wipe out the Aggressors once and for all.
- K. Flank Attack (Warhammer rulebook, pp. 205-206; 3, 1/1 Campaign Victory Points). The Homeland Force, taking advantage of its recent victories over the Aggressors, now attempts to outflank the would-be invaders and cause massive casualties to discourage future invasions.
- L. Pitched Battle (Warhammer rulebook, pp. 199-200; 2, 1/1 Campaign Victory Points). The battles of this Territorial Dispute have been indecisive thus far. The two armies meet on the field of battle to decide who controls the borderlands.
- M. Siege (Warhammer rulebook, pp. 259-260; 4, 2/2 Campaign Victory Points). The Aggressors are now moving on toward the Homeland Force's population centers and intend to lay siege to a fortified settlement. Play a Siege scenario with the Aggressors as the Assault force and the Homeland Force as the Defenders.
- N. Last Stand (Warhammer rulebook, p. 210; 3, 1/1 Campaign Victory Points). The Aggressors have been weakened by their failed attempt to take the watchtower. The small remaining force of Aggressors now faces enemies on all sides. Play the Last Stand scenario with the Aggressor as the Defender and the Homeland Force as the Attacker.
- O. Meeting Engagement (Warhammer rulebook, pp. 203-204; 3, 1/1 Campaign Victory Points). The outcome of the Territorial Dispute is in question after a win and a loss for each side. The two armies march forth to decide once and for all who controls the borderlands.
- P. Siege (Warhammer rulebook, pp. 259-260; 4, 2/2 Campaign Victory Points). The Aggressors are now moving on toward the Homeland Force's population centers and intend to lay siege to a fortified settlement. Play a Siege scenario with the Aggressors as the Assault force and the Homeland Force as the Defenders.
- Q. Hold the Line (The General's Compendium, p. 15; 3 Campaign Victory Points). The Aggressors have established a foothold in the Homeland and are now trying to shore up the defenses on their new border. The Homeland Force must punch through the Aggressors' battle line to reclaim the land.
- R. Rear Guard (Warhammer rulebook, pp. 211-212; 2, 1/1 Campaign Victory Points). After failing to raid the Homeland Force's town successfully, the weakened Aggressor attempts to retreat to its own lands to regroup. A brave group of Aggressors remains behind to slow the pursuit of the Homeland Force. The Aggressors are the Defenders; the Homeland Forces are the Attackers.
- S. Capture (Warhammer rulebook, pp. 207-208; 3, 1/1 Campaign Victory Points). After driving off the Aggressors after their unsuccessful raid attempt, the Homeland Force is trying to keep a strategic feature (an important mountain pass, a bridge, or the like) out of enemy hands. Whoever controls the objective will have the deciding advantage in the Territorial Dispute.
- T. Siege (Warhammer rulebook, pp. 259-260; 4, 2/2 Campaign Victory Points). The Aggressors are now moving on toward the Homeland Force's population centers and intend to lay siege to a fortified settlement. Play a Siege scenario with the Aggressors as the Assault force and the Homeland Force as the Defenders.
- U. Hold the Line (The General's Compendium, p. 15; 3 Campaign Victory Points). The Aggressors have established a foothold in the Homeland and are now trying to shore up the defenses on their new border. The Homeland Force must punch through the Aggressors' battle line to reclaim the land.
Territorial Dispute Campaign Results
Once all three games have been played, tally up the number of Campaign Victory Points earned and consult the results below.
- Homeland Force wins by 4+. The Aggressors have been utterly defeated and driven from the land. The few survivors of the invading force will return home with tales of the fierce defenders of the Homeland Force that will deter any future invasions for years to come. The Homeland Force returns home to brag about its devastating victory over an ambitious but ultimately weak would-be invader.
- Homeland Force wins by 2-3. Although, early in the campaign, the Aggressors managed to make some headway into the lands of their neighbors, the Homeland Force has stalwartly defended its borders and can return home safe in the knowledge that its lands are free. The Aggressors will think twice before seeking to expand their borders again.
- Homeland Force or Aggressors win by 1 or Draw. The campaign was a close run thing. If either side won by a single Campaign Victory Point, it has a slight advantage over the enemy: a small gain in territory for the Aggressors or reasonably well established defenses along the border for the Homeland Force. The campaign was far from decisive, however, and future hostilities along the border will likely continue as the territory is still very much in dispute.
- Aggressors win by 2-4. The Aggressors' borders have expanded, and they can look forward to a prosperous year living off the fat of the enemy's land. The Homeland Force must retreat, defeated but not completely beaten, and prepare to take back its lands in some future year.
- Aggressors win by 5+. The Aggressors have completely defeated the borderlands of the Homeland Force and have a firm foothold in the lands of the enemy. The Homeland Force, weakened after many defeats, must retreat and accept the fact that it has lost to what is clearly a superior military force. The Aggressors may use their newly acquired lands as a launching point for future conquests of the Homeland Force's territory.
Scouts and Pickets (Skirmish Battle)
[Illustration of the battlefield and Scout Deployment Zone omitted.]
Overview. As a precursor to invasion, the Aggressor's Scouts have been reconnoitering the borderlands of a neighboring nation and have gained valuable intelligence about the enemy's numbers, positions, and defenses. Unfortunately for the Scouts, they have been spotted by some Homeland Force's Pickets, who have doggedly pursued the Scouts to prevent them from reporting back to their commanders. The outnumbered Pickets now lie in ambush and wait to spring a trap on the unsuspecting Scouts. If the Pickets can destroy the enemy Scouts and prevent them from rejoining their army, the Homeland Force will have more time to respond to the enemy threat and prepare its defenses. If the Scouts survive the trap, they can return to their commanders with their intelligence (or, in the case of Orcs, "Da skinny on da spyin'-about"), and the Aggressors will have an advantage when the full-scale invasion is launched.
Models Needed.
- Aggressors' Scouts*: up to 175 points of Core choices.
- Homeland Force's Pickets*: up to 125 points of Core choices.
* No model may have an armor save better than 5+. No magic items may be selected. Models that can normally Skirmish and/or have the Scouts special rule may be purchased for 1 point less than their normal cost. Each side may include a single unit Champion.
Battlefield. Though outnumbered, the Pickets have chosen the site of their attack wisely and have set a trap in ideal terrain. Mark off a 36" x 36" area. The Pickets player may then set up as much natural terrain (no buildings, walls, or fences) as he wishes within 6" of the board edges. The rest of the board is devoid of terrain.
Objectives. Both sides know exactly what is at stake and are determined to destroy their enemies. The side that destroys or routs the other will be the winner of the scenario.
Deployment. The Scouts deploy first in a 12" square in the center of the table. The Pickets set up next within 6" of the board edges. Any number of Pickets may begin the game in Hiding (see Warhammer rulebook, p. 243) if the controlling player wishes.
Who Goes First? As the Pickets are springing a trap, they get the 1st turn.
Special Rules. Skirmish. This battle is a Skirmish game. All the Skirmish rules on pp. 242-246 of the Warhammer rulebook apply.
Part of a Larger Battle. If this scenario is being played as part of the Territorial Dispute Tree Campaign, the winner of this scenario may select the next scenario that will be played; see Tree Campaign Chart on p. 11. If this scenario is not being played as part of a Territorial Dispute campaign but is being played prior to a game of Warhammer, the winner of this scenario may select the side of the board on which his forces will be deployed and may choose whether to go first or second. Note that this rule does NOT apply in the Territorial Dispute Tree Campaign.
Hold the Line
Overview. After successfully invading the Homeland Force's territory, the Aggressor now attempts to hold its new expanded border against the Homeland Force, which is trying to regain its lost land.
Armies. Both armies are chosen from the Warhammer Armies lists to agreed points values. The Aggressors have 50% more points than the Homeland Force. For example, a 1,500-point Homeland Force would face 2,250 points worth of Aggressors.
Battlefield. Set up the terrain in any mutually agreeable manner.
Deployment.
- Both players roll a D6. The higher-scoring player may select the side of the table on which he will deploy his forces.
- The Aggressor player begins deploying first by placing one unit in his Deployment Zone.
- Taking it in turns, players deploy one unit at a time in their respective Deployment Zones.
- All war machines in a player's army are deployed at the same time (though they can be deployed in different parts of the battlefield).
- Champions are deployed with their units. All other characters are deployed after all other units, all at the same time.
- Scouts are not deployed with the rest of the units. Instead, these units are placed on the table after all units in both armies have been deployed, as described in the rules for Scouts. [The final lines of this step are faint in the scan; the wording here is reconstructed from the surrounding rules.]
Who Goes First? The Homeland Force player may choose whether to take the 1st or 2nd turn.
Length of Game. The game lasts 6 turns.
Victory Conditions. The Aggressor must keep the Homeland Force out of its newly expanded territory, while the Homeland Force must try to reclaim some of its lands by breaking through the Aggressor's battle line. The Homeland Force wins if it ends the game with two or more units of Unit Strength 10 or more on the Aggressor's half of the board. Any other result is an Aggressor victory.
Desperation Defense
Overview. After defeating the Aggressors in the early battles, the Homeland Force is now mustering its entire army to slaughter the enemy to the man.
Armies. Both armies are chosen from the Warhammer Armies lists to an agreed points value.
Battlefield. Set up the terrain in any mutually agreeable manner.
Deployment.
- Both players roll a D6. The higher-scoring player may select the side of the table on which he will deploy his forces.
- Both players roll another D6. The higher-scoring player may choose whether to start deploying first or second.
- Taking it in turns, each player deploys one unit at a time, at least 24" from the opposing Deployment Zone.
- All war machines in a player's army are deployed at the same time (though they can be deployed in different parts of the battlefield).
- Champions are deployed with their units. All other characters are deployed after all other units, all at the same time.
- Scouts are not deployed with the rest of the units. Instead, they are placed on the table after all units in both armies have been deployed, as described in the rules for Scouts.
[Deployment diagram omitted. Journal excerpt printed on the page is flavour text and is not transcribed.]
Who Goes First? Both players roll a D6. The player who finished deployment first (not including Scouts) may add +1 to his die roll. The higher-scoring player may choose whether to take the 1st or 2nd turn.
Length of Game. The game lasts 9 turns.
Special Rules.
Countless Numbers. The Homeland Force seems infinitely vast, particularly to the Aggressors. However, not all of its troops are available for deployment at the initial turn of the game and will arrive only after hostilities begin. To represent the huge size of the Homeland Force, the Homeland player may "recycle" some of his units after they are destroyed, are fleeing, or have fled off the table. Recycled units are brought back into play to represent the almost limitless supply of reinforcements.
Any Core or Special choice (and NOT Rare choices or characters) that is wiped out or has fled off the board may be recycled and will move onto the board at its initial strength via the Homeland Force Movement Phase. Such units may not charge but may move, shoot, cast spells, and otherwise act normally on the turn they enter the board. These units begin their move off the board, and as such they are not within 8" of the enemy and thus may march as they enter play (unless, of course, they are troops such as Chariots or Skeletons that cannot normally do so).
Core and Special units that are both fleeing and at less than half of their initial Unit Strength may be removed from the battlefield at the Attacking player's discretion immediately after they have fled, so that they can be recycled at the start of the Attacker Movement Phase as described above.
Victory Conditions. If the Aggressor has any troops left on the board that aren't fleeing at the end of 9 turns, he is victorious. If all the Aggressors have been killed, have fled off the board, and/or are fleeing at the end of the game, the Homeland Force wins.
Waaagh! Grom and the Defense of Nuln
[The boxed background story at the head of this campaign is flavour fiction and is not transcribed.]
Grom's initial assault on Nuln is where our campaign begins. Can the forces of Nuln, weakened by a [word unclear in the scan] Emperor, hold out against the seemingly unstoppable Waaagh! Grom, or will, as history records, the Goblins take and burn the capital of the Empire yet again?
The ladder campaign begins with a scenario in which disguised Goblins attempt to sneak past some Road Wardens of the Empire to scout out the lands around Nuln. The remaining two battles are focused on the great bridge over the River Reik, which will provide the Orc forces access to Nuln and the western regions of the Empire. A ladder explaining the order of the scenarios follows.
- Scenario 1: Toll House on the Bridge Road
- Scenario 2: Delay Tactics
- Scenario 3: The Bridge on the River Reik
Campaign Rules. Grom will not participate in the first Skirmish but must lead the Orcs & Goblins in Scenario 2 and, if he survives, Scenario 3 as well. The forces of Nuln are not selected from the standard Empire list but from the Artillery Train of Nuln list on p. 78 of Warhammer Armies: Empire. As Nuln is home to the Imperial Gunnery School, where the guns are cast and artillerymen learn the arts of ballistics, the city has a vast battery of war machines to bring to bear against its enemies.
[The "Later History of Grom the Paunch" text at the head of the page is flavour fiction and is not transcribed.]
Grom the Paunch of Misty Mountain
| M | WS | BS | S | T | W | Ld | |
|---|---|---|---|---|---|---|---|
| Grom | 4 | 5 | 3 | 4 | 4 | 3 | 8 |
| Niblit | 4 | 3 | 2 | 3 | 3 | 1 | 6 |
| Chariot | - | - | - | 5 | 4 | 3 | |
| Wolf | 9 | 3 | - | 3 |
The Orc & Goblin army will be led by Grom the Paunch in Scenarios 2 and (if he survives) 3 of this ladder campaign. Grom acts as the General of the Orc & Goblin army and is accompanied by his Goblin assistant Niblit, who also carries the army's battle banner. Niblit replaces the normal battle standard bearer option in the army list. Grom and Niblit ride in a massive Chariot pulled by three Wolves. Grom wields his mighty axe Elf-Biter in battle. Your army must include at least one unit of common Goblins if it is led by Grom. Grom is the most famous of the many Goblin Warlords and also the fattest. He takes up a Lord choice and a Hero choice as well. He must be fielded exactly as presented here, and no extra equipment or magic items can be bought for him. The cost of his magic items, Chariot, and Niblit is included in his total cost.
Points: 335 (195 for Grom, 75 for Niblit, and 65 for the Chariot)
Weapons: Grom carries Elf-Biter, also called the Axe of Grom. Niblit is armed with a hand weapon.
Armor: Grom wears light armor.
Mount: Grom and Niblit ride a Wolf Chariot.
Special Rules
Regenerate. Ever since his famous meal of raw Troll meat, Grom has been able to Regenerate Wounds (see p. 113 of the Warhammer rulebook).
Grom's Chariot. Grom's Chariot is a normal Wolf Chariot with one extra Wolf, for a total of three instead of the usual two.
Goblin General. Grom would never follow anyone else. Thus, he must be your General, regardless of the Leadership of any other characters. In addition, because you must take Grom in this campaign, you must also include at least one unit of common Goblins in your army.
Battle Standard Bearer. Niblit is Grom's trusty banner waver and carries the army banner with him at all times. Obviously, you cannot take another Battle Standard Bearer in the army.
Lucky Banner. Niblit carries this old and tattered banner to battle as a good luck sign. Actually, it really is good luck. Each Close Combat Phase, both Grom and Niblit can each reroll one of their rolls to hit or one of their rolls to wound. These rerolls cannot be used to reroll the Chariot's impact hits, the Wolves' attacks, etc.
Magic
The Axe of Grom/Elf-Biter. This large and foreboding axe requires both hands to use, but blows struck by it are almost always fatal. Attacks made with the Axe of Grom count as being made with the Killing Blow special ability. In addition, no armor saves may be made against Wounds from the axe. Against Elves, Grom's Axe will cause a Killing Blow on a 5+ instead of the normal 6+.
[Photograph of the custom-converted Grom model omitted.]
Scenario 1: Toll House on the Bridge Road
(Skirmish battle. Several words in the Deployment paragraph are blurred in the scan; the wording there is reconstructed and bracketed.)
In this Skirmish scenario, a group of myopic Road Wardens is occupying a small toll house near a small bridge along one of the roads that lead to the great bridge over the Reik. The Road Wardens' primary mission is to guard the road and prevent invaders from entering the territory around the capital of the Empire. However, the Wardens have grown a bit lackadaisical in their duty. A group of Goblins have donned disguises to try to sneak past the Road Wardens and scout out the territory. Such is the fat Warlord's cunning that he wishes to preserve the element of surprise before launching the all-out assault. The more Goblins that are able to sneak through, the more territory they will be able to scout, and thus, the more troops they will be able to field in Scenario 2.
Models Needed.
- Empire Road Wardens: 6 Free Companies; 6 Archers.
- Disguised Goblins: 20 Goblins, armed with hand weapons and shields (Goblin models are fine, but a few models converted with disguises are even better.); 1 Goblin Big Boss armed with hand weapon and shield.
Battlefield. Use a 2' x 2' board for this scenario. Running diagonally across the board from one corner to the opposite corner is a small river, a tributary of the Reik. Along the opposite diagonal is one route that eventually leads to the great bridge at Nuln. A small bridge spans the river, and a toll house houses the Road Wardens who collect the toll to cross the bridge. The rest of the battlefield is [unclear] but with a few trees, small hills, or rocky outcroppings, all in a dirt color to the tabletop.
Objectives. The Goblins disguise themselves as old ladies, children, or beggars. A shameful ruse, but for creatures who eat a [unclear] roasted Squig, shame is not an issue. The Goblins must cross the bridge, pay the toll, and exit the board via the road in the western corner. They must also avoid being detected by the Road Wardens. The Road Wardens, bored with their humdrum duty, must attempt to see through the disguises and prevent them from escaping off the western corner. The Goblins win if they get eight or more of their models off the table via the west corner, and the Empire wins if it prevents the Goblins from achieving this goal.
Deployment. The Goblins are deployed [on] the bridge or on the east side of the river. The six Free Companies, known hereafter as the Toll Takers, are deployed [posted] at either corner of the western end of the bridge. The six Archers are deployed in the toll house and may [take up] position when hostilities begin. The rest of the Empire troops are deployed anywhere on the western side of the river.
Who Goes First? The Goblins get the 1st turn.
Special Rules. Skirmish. This battle is a Skirmish game. All the Skirmish rules on pp. 242-246 of the Warhammer rulebook apply.
Dereliction of Duty. The Road Wardens are not particularly mindful of their duties as guards. While the Toll Takers are half-heartedly minding the bridge, many of the Road Wardens are wandering around and not paying much attention to the passers-by. During the Empire Compulsory Movement Phase, roll a scatter die for each Road Warden, except those in the toll house and the Toll Takers. Move each model D6" in the direction indicated. Road Wardens will stop if they touch the riverbank, board edge, or another piece of terrain as they move. Aside from these compulsory moves, no Road Warden may move until the alarm is sounded. However, their sense of duty returns with the utmost urgency as soon as the alarm is sounded.
Sneakin'. The Goblins must try to sneak past the Empire troops and exit the board via the western table corner. Before the alarm is sounded, the Goblin player may move up to four Goblins into base contact with the Toll Takers each turn. Other Goblins may move around on the eastern side of the river and on the bridge. However, they may not enter the western side of the table until they have paid the toll, because doing so would cause the alarm to sound immediately. At the end of each Goblin Movement Phase, roll 2D6 for each Goblin in base contact with one of the Toll Takers. On a result of 2 or 3, the Toll Takers have seen through the Goblins' ruse and will sound the alarm. Those Goblins in base contact with the Toll Takers will immediately enter hand-to-hand combat with them (though no one will count as charging, and attacks are made in initiative order).
Alarm. Until the alarm sounds, the Goblins may move normally after they have paid their toll and may attempt to move off the board by the western corner. Once the alarm has sounded, all models on both sides may move and attack normally. No model may attack before the alarm is sounded.
Using Alternate Forces. Select up to 80 points of Core infantry troops to represent the Road Wardens. Select up to 80 points of Core infantry, which may include either a unit champion or a hero, to represent the disguised enemies.
Part of a Larger Battle. If you're playing this scenario as part of the Waaagh! Grom and the Defense of Nuln Campaign, keep track of the number of Goblins who escape off the western corner. This number will determine the size of the Orc & Goblin horde in Scenario 2.
[Battlefield diagram omitted.]
Scenery Showcase: Bridges of the Warhammer World
These pictures detail the scenery used for the Delay Tactics and The Bridge on the River Reik scenarios. Also shown are additional shots of the table used in the Toll House on the Bridge Road Skirmish scenario. [The photographs on the two pages of this showcase are omitted.]
Scenario 2: Delay Tactics
Overview. Aside from being the capital of the Empire at the time of this campaign, Nuln is and has long been the focus of the entire economy of the southern Reikland. The city forms a natural meeting point for traders moving east to west, and the city's great bridge allows travelers to cross the River Reik easily. North of Nuln, the river is far too wide to bridge. The bridge on the River Reik is the largest in the Empire and one of the great engineering marvels of the Old World. It facilitates the commerce of the Empire as well as the movement of its military. As such, Nuln is a site of enormous tactical importance.
If Grom's army manages to take the bridge before the drawbridge at its center is raised, the Orcs & Goblins will have unrestricted access not only to the city of Nuln but to the western reaches of the Empire and the rich lands beyond. As Grom's forces gather in their masses to the east of the River Reik, a greenskin vanguard led by Grom himself advances to secure the bridge. Meanwhile, the Nuln army has deployed a small tactical force on the east end of the bridge to delay Grom's advance, while the city's engineers rush to raise the massive drawbridge. Can the small force hold off the Orcs & Goblins long enough for the drawbridge to be raised, or will Grom storm forward quickly enough to use the bridge to advance on the city?
Armies. The Empire force is chosen from the Artillery Train of Nuln army list on p. 78 of Warhammer Armies: Empire, to a value of 1,250 points. The Orc & Goblin force is chosen from the standard list in Warhammer Armies: Orcs & Goblins and must be led by Grom the Paunch. The size of the Orc & Goblin army is determined by the results of Scenario 1:
- 0-2 Goblins escaped the board in Scenario 1: 2,100 points.
- 3-7 Goblins escaped: 2,200 points.
- 8-12 Goblins escaped: 2,400 points.
- 13+ Goblins escaped: 2,500 points (or 2,300 points if you're playing this scenario as a stand-alone game).
Neither side may take any flyers.
Battlefield. The battlefield, which measures roughly 4' x 8', represents the eastern end of the great bridge on the River Reik. Half the board represents the eastern shore of the River Reik, where the waters are very deep. The river is thus Impassable Terrain in this scenario. The rest of the battlefield is largely empty, but you should add a few trees, rocky outcroppings, or other small terrain features.
Deployment.
- First, the Nuln Artillery Train sets up its forces on the bridge within 18" of the western board edge.
- The Orc & Goblin player sets up his forces next, in his Deployment Zone within 12" of the eastern board edge.
- Scouts are not deployed with the rest of the units. Instead, they are placed on the table after all units in both armies have been deployed, as described in the rules for Scouts.
Who Goes First? The Empire player takes the 1st turn.
Length of Game. The game lasts until one side is completely wiped out (no models left on the board).
Special Rules.
Desperate Situation. The Nuln troops are expecting to die and are thus immune to Panic.
Delay Tactics. The longer the brave men of Nuln can delay Grom's forces, the more time the Empire army will have to raise the drawbridge. Keep track of how many turns the game lasts. If the Nuln player can delay Grom's forces long enough, he will have a decided advantage in the next scenario. If the Orcs & Goblins can wipe out the forces of the Empire in a short time, the greenskins will be better able to advance on the city of Nuln.
Bridge. The bridge on the River Reik is an enormous and sturdy construction. No attacks on the bridge, be they magical or mundane in nature, will have any effect. Regardless of how you construct your bridge model, treat it as though it were flat. It does not act as a hill, and troops may not fire over models in front of them while on the bridge, nor do they gain the +1 combat resolution bonus for fighting on High Ground.
Victory Conditions. Grom's forces will likely kill the Nuln troops to the man in this scenario. However, the Empire player can still claim victory if he manages to delay the Orcs & Goblins for 6 or more turns or if, against the odds, he manages to wipe out the Orc & Goblin army. Play should continue even if the Empire has secured victory, because the length of the game will determine how the Orcs & Goblins deploy in the next game. The game is a tie if the Empire player manages to delay the Orcs & Goblins for 5 turns. The Orcs & Goblins win if they wipe out the Nuln force in 4 or fewer turns.
[Deployment diagram omitted.]
Scenario 3: The Bridge on the River Reik
Overview. Grom's forces now mass to attack Nuln. The greenskin army now crosses via the bridge and by rafts on the water. If the Orcs & Goblins defeat the Defenders on the western shore, they will sack Nuln and win the campaign.
Armies. The Empire force is chosen from the Artillery Train of Nuln army list on p. 78 of Warhammer Armies: Empire, to a value of 2,000 points. The Orc & Goblin force is chosen from the standard list in Warhammer Armies: Orcs & Goblins, to a value of 2,500 points. If Grom survived Scenario 2, he will lead the Orc & Goblin force; otherwise any Goblin character may lead the greenskins. The Orc & Goblin player may also purchase rafts on which his troops can cross the river (see special rules below). Neither side may take any flyers.
Battlefield. The battlefield is essentially the same as in Scenario 2, but the eastern and western sides are reversed, as the game takes place on the opposite end of the bridge.
Deployment.
- Before the game begins, consult the following chart to determine how the number of turns played in Scenario 2 will affect deployment and army size.
- The winner of Scenario 2 may decide whether to begin deploying first or second. Dice off if Scenario 2 was a tie.
- A number of Orc & Goblin units (see chart) may be deployed on the bridge within 18" of the eastern table edge. Any Orc & Goblin unit, model, or character may also be deployed on rafts touching the eastern board edge on the river. Giants and River Trolls may be deployed in the water itself, with the back edge of their base or unit touching the eastern board edge. Empire troops may be deployed anywhere on the western river bank.
- Players take it in turns to deploy one unit at a time.
- All war machines are deployed at the same time, though they can be deployed in different parts of the table.
- Champions are deployed with their units. All other characters are deployed after all other units, all at the same time.
- Scouts and other units with special deployment rules are deployed with the rest of the forces and may not take advantage of their special rules for deployment.
Number of Turns Played in Scenario 2 (Deployment and Army Size Chart). The printed chart is faded in the scan. The legible rows are given below in print order; the row labels and parts of the text could not be read and are marked as illegible rather than reconstructed.
- Row 1 (turns label illegible): Grom's forces quickly overwhelmed the defending troops [part illegible] ... to cross the bridge and make [part illegible] ... the assault on Nuln. The Orc & Goblin player may deploy as many troops as he wishes on the bridge (or as many as will fit in the bridge Deployment Zone) [part illegible], and he may take three rafts for no points. More rafts can be purchased as normal.
- Row 2 (turns label illegible): The Orc & Goblin player may deploy as many troops as he wishes on the bridge (or as many as will fit in the bridge Deployment Zone).
- Row 3 (turns label illegible): The Empire managed to raise the drawbridge just as enemy troops reached the center of the bridge. A few [Orc & Goblin] troops were able to make it across just as the drawbridge was raised. The Orc & Goblin player may deploy [a few] additional units along with Grom the Paunch [and his bodyguard, if he survived the last scenario] on the bridge.
- Row 4 (turns label illegible): The drawbridge was raised ahead of the main force of Orcs & Goblins. Only one unit along with Grom the Paunch (if he survived the last scenario) may be deployed on the bridge.
- Row 5 (turns label illegible): The drawbridge was raised well ahead of the Orc charge. [Part illegible] Grom the Paunch himself (if he survived Scenario 2) may be deployed on the bridge.
- Row 6 (turns label illegible): The drawbridge was raised well ahead of the Orc charge. [Part illegible] may be deployed on the bridge.
[A footnote at the foot of the chart is illegible in the scan.]
Who Goes First? The player who won Scenario 2 may choose whether to go first or second. Dice off if Scenario 2 was a tie.
Length of Game. The game lasts 8 turns.
Special Rules.
Rafts and the River. The Orcs & Goblins must cross the river via the bridge or on rafts, and all the rules for Rafts and the River apply to this scenario (see p. 24).
Bridge. The bridge on the River Reik is an enormous and sturdy construction. No attacks on the bridge, be they magical or mundane in nature, will have any effect. Regardless of how you construct your bridge model, treat it as though it were flat. It does not act as a hill, and troops may not fire over models in front of them while on the bridge, nor do they gain the +1 combat resolution bonus for fighting on High Ground.
Victory Conditions. At the end of the game, each model or unit in Grom's army on the western shore is worth its current points value in Victory Points. Units that are fleeing and units still on rafts touching the west bank do not count towards this total. No other Victory Points are used. The Orc & Goblin player wins if he can score a number of Victory Points equal to a third or more of his starting points value. Any other result is a victory for the Artillery Train of Nuln. The victor in this final scenario is the winner of the campaign.
Rafts and the River
- Rafts cost 10 points a piece. Each raft can carry one unit, one Chariot, or one war machine. Characters, except those mounted in Chariots, may squeeze on any raft with a unit. Giants are very tall and strong, and River Trolls are in their natural element; thus, both may move through the river without penalty. Giants and River Trolls may take advantage of soft cover from missile fire when in the water.
- Rafts bearing war machines may be anchored at the start of the game at the Orc & Goblin player's discretion. If anchored, the raft cannot move at all at any point in the game. Alternatively, rafts bearing war machines may move like a normal raft, in which case the war machine cannot shoot until it reaches the western shore.
- At the start of the Orc & Goblin Compulsory Movement Phase, roll a D6 for each raft that is not anchored and apply the corresponding result listed below. A raft that carries a character model may reroll the result, but you must abide by the second roll.
- 1: The unit has lost control of the raft (Grom's forces are notoriously bad sailors; see Later History of Grom the Paunch) and will drift 2D6" downstream (toward the northern table edge). If any raft drifts off the board, the troops on it are lost and may no longer participate in the game.
- 2: The raft moves up to 4" in a direction nominated by the Orc & Goblin player.
- 3-5: The raft moves up to 8" in a direction nominated by the Orc & Goblin player.
- 6: The raft moves up to 8+D3" in a direction nominated by the Orc & Goblin player.
- Units on rafts are immune to Animosity. They are too busy fighting to control the rafts to fight with one another.
- Aside from the movement of rafts, all troops that must make compulsory moves (e.g. Night Goblin Fanatics when within 8" of enemy, Loose Squigs, and troops subject to Frenzy) do not do so while on rafts. As soon as such troops reach dry land, their normal movement rules apply.
- If a unit on a raft should Panic, it does not flee. Rather, the unit immediately drifts 2D6" toward the northern table edge. If it rallies, the raft will move as normal during the Compulsory Movement Phase. Otherwise, it will continue to drift downstream 2D6".
- If a unit on a raft fails a Stupidity test, ignore the normal results. The unit drifts downstream 2D6".
- If a raft carrying a unit is destroyed, the members of the unit must try to swim for it. If a raft carrying a war machine or Chariot is destroyed, the war machine or Chariot is lost, though the crew may attempt to swim. Swimming models immediately abandon standards. Swimming units and models move during the Compulsory Movement Phase and cannot charge. Roll a D6 for each swimming unit and consult the chart below. Subtract 1 from the die roll if the unit has an armor save of 4+ or better.
- 1: The unit treads water and does not move this turn. Half of the unit drowns (round down). Remove the models as casualties.
- 2: The unit may swim D6" but loses a quarter of its numbers (round down). Remove the models as casualties.
- 3-6: The unit may swim D6" and takes no casualties.
- Swimming units immediately adopt a Skirmish formation and may take advantage of soft cover from missile fire. Once one or more members of the unit are in base contact with the shoreline, the entire unit may wade and moves as if in Very Difficult Terrain.
- Character models always swim D6" (do not roll on the chart above), may take advantage of soft cover from missile fire when in the water, and may swim to and climb aboard other rafts if they end their move in base contact with one.
- Raft-borne troops with missile weapons may fire and do not suffer the penalty for moving. Raft-borne war machines may not fire unless the raft was anchored at the beginning of the game or until they land and reform on the shoreline.
- When raft-borne troops approach the west bank, roll for their movement as normal. The Orc & Goblin player may declare a charge against troops proximate to the shoreline if he wishes. Measure the distance to the shoreline. Any remaining movement distance may be used to move the models off the raft and onto the shore and perhaps into contact with enemy troops (if a charge was declared). If the charged Empire unit is lined up exactly on the shoreline, the Orcs & Goblins may fight a combat while on the raft; however, the Orcs & Goblins will gain no advantage for charging from the raft, and any Empire unit so charged acts as though it was the one that charged instead. Units may pursue and wrap around from a raft as normal. If a unit on a raft breaks or panics while in combat, do not make a flee move as normal. Instead, the raft drifts D3" from the shoreline and 2D6" downstream. Under these circumstances, Empire troops will not pursue raft-borne troops into the river and will hold on the shoreline.
- Raft-borne troops may be attacked with missile weapons and spells. Most missile weapons (e.g. bows, crossbows, and handguns) and Magic Missiles (e.g. Fireballs and Dark Hands of Death) will affect only the troops on the raft. However, Cannon, as well as spells and artillery that use templates, may damage or destroy the raft itself. Rafts are always hit by templates that touch them (do not roll to see if the raft is hit). If any raft-borne troops are hit by a cannonball, the raft will also be hit. Cannonballs will skip on the water and thus bounce normally. Rafts have a Toughness of 6 and 3 Wounds. Rafts may not be attacked in close combat.
- Units on the shore may move, flee, and pursue into the river as normal (though Empire troops will not pursue raft-borne troops that have fled). With the exception of Giants and River Trolls, who may move normally in the river per the scenario rules, units in the river are considered to be in Very Difficult Terrain until they are back on dry land.
Using Alternate Armies
You can play the Waaagh! Grom and the Defense of Nuln campaign with other armies as well. Obviously, you will have to change the special character used in the geographical setting, but otherwise all the scenarios will work with any other armies. Imagine playing out these games with a Horde of Chaos led by Crom the Conqueror laying siege to Praag, a Dark Elf army led by Malus Darkblade attacking a city in Ulthuan, or a Skaven force led by Grey Seer Thanquol storming a Dwarfen stronghold. Any two armies can participate in this ladder campaign.
Chapter 2: Map-Based Campaigns
Looking to rule the lands beyond the horizon? Want to crush the known world under your heel? A map-based campaign may be the answer. Map-based campaigns are more complex than linked campaigns and are a good intermediate step in your campaigning career. But beware: the crown of a warlord never rests easy.
This chapter explains the mechanics of running a map-based campaign and suggests ideas, hobby projects, and battlefield scenery for the Warhammer games you will play over the course of such a campaign. Chapter 3 details a ready-to-play map-based campaign set in the Border Princes, a rugged land of petty fiefs, cutthroat brigands, and colonizing forces of all kinds. You can enjoy this campaign with a minimum of preparation time. However, you may want to design your own map-based campaign for your gaming group's own madcap schemes, and the guidelines included in this chapter will show you how.
What Is a Map-Based Campaign?
Like a ladder or tree campaign, a map-based campaign enables you to play linked games of Warhammer, but adds the challenges of competing against additional players, defending and expanding your realm, and fighting to control key tactical areas on a map. By controlling increasing amounts of territory, forming alliances, and most importantly, defeating enemy armies, players strive to dominate the corner of the world delineated on the map. The ability to see The Big Picture makes map-based campaigning an attractive option for many players.
All map-based campaigns involve some type of map, which is divided into sections, each representing a particular geographic region, an important landmark, a tactical feature, or simply a number of square miles. The sizes and shapes of the map sections will differ from campaign to campaign. Some maps will use hexagons or squares to designate the various sections. Other maps, like the one included with this book for the Border Princes campaign, use irregular map sections, which vary in size and shape to create interesting tactical options and challenges.
A map-based campaign can be nothing more than a geographical tracking system for organizing a series of Warhammer games. However, most players prefer to play in an evocative, narrative-driven world with a personality of its own. By naming your map sections, banners, and realms, you add character to your world and make it a more enjoyable place in which to set your games. Imagine being able to boast that Irkfang Grobnutz's Green Tide defeated Tungsten Ironthorne's Ironclad Miners at the Battle of Thunder River. The tales of such heroics will be recounted around the campfire or a pint of Bugman's finest for many a year!
[Caption to the photograph of a map-based campaign in progress:] Here, a map-based campaign is shown in progress. Each player's realm consists of several map sections. The number of map sections each player controls determines the overall size of his armed forces, which are broken up into divisions called banners. Each banner represents a Warhammer army. Banners are maneuvered around the map to defend and expand the realms. When banners of two different realms come into contact in the same map section, a Warhammer battle is fought to determine who will control the territory in question.
The Campaign Organizer
Before the campaign begins, you may find it useful to appoint one player the campaign organizer. This individual is not a referee or Games Master per se, but simply the person to whom players can submit their moves and who updates and maintains the campaign map. Any rules disputes must be resolved between the players. The campaign organizer should not have any authority over rules disagreements.
You need not appoint a campaign organizer if your group meets regularly and if you anticipate each Campaign Turn lasting a fixed period of time. However, most map-based campaigns, even those run by clubs with a regular meeting schedule, will run much more smoothly with a campaign organizer to make sure turns are executed properly.
Note that, if the campaign organizer is also a participant in the campaign, he must write his orders each turn BEFORE he reads any orders from other players.
Games Master Option. Of course, if you wish, your map-based campaign can be organized and run by a Games Master who does not participate as a player in the campaign. The Games Master can be simply a campaign organizer or can play a creative role in the campaign by introducing random events and making ad hoc rules. See Chapter 4 for many more details about how to run a map-based campaign with a Games Master.
Starting the Campaign
You will need:
- Your map. You may use the map of the Border Princes provided with this book or create your own.
- Control counters to designate which realm controls which map sections.
- HQ counters to indicate where each realm's headquarters is located.
- Fortification counters to indicate which map sections have been fortified.
- Razed counters to indicate which map sections have been razed.
- Banner markers to indicate where your armies are located on the map.
- Copies of the Order Card on p. 30 of this book, or some scrap paper.
You can make your own counters out of colored construction paper. Download copies from www.games-workshop.com/generalscompendium and print them out. Banners can be represented as colored pins, coins, or counters, or, better yet, you can use models from your army collection. Some players in campaigns at the GW Studio were enthusiastic enough to make their own specialty markers from the excellent Warmaster range and other assortments of bitz (see sidebar), and that effort went a long way to adding to the fun.
[Sidebar, "Making 3D Banners from Warmaster Miniatures": its captions are partly obscured in the scan. The legible fragments read: "You can also paint up some bitz from the Warmaster character blister packs to represent your banners"; the Warmaster range "adds character" and "appeal to any map-based campaign"; and the models shown were used in one of the studio's campaigns to represent a High Elf banner and an Orc & Goblin banner. The remaining caption text is illegible and is not reproduced.]
Selecting an HQ Territory
To start the campaign, each player must select a single map section in which his or her realm will begin. This map section, called an HQ territory, represents a small capital city, a camp for an enormous Orc Waaagh, a series of Chaos Warp gates, a great Necropolis that spawns Undead Warriors, an army base camp, or something of the kind. Each player rolls 2D6 (dice off to settle any ties) to determine the order in which players select where their realms will begin (highest score picks first). Where you can place your HQ is determined by how many gamers you have in your campaign. If the players have created their own map for the campaign and it is particularly large or small, you may want to adjust the HQ set up rules. Otherwise, the following guidelines will work for most maps and are certainly to be used when gaming on the Border Princes map included with this book.
- For campaigns with five or more participants, each player takes it in turn to choose a map section on the edge of the map.
- For campaigns with four participants, players may select a map section anywhere on the map at least one map section away from the edge.
- For campaigns with two or three participants, players may select a map section anywhere on the map at least two map sections away from the edge.
No matter the number of participants, players may not select a riverbank, marsh, road, bridge, or special map section as their HQ territory, nor may they select an HQ territory adjacent to another HQ territory. Place a control counter, an HQ counter, and a single banner in each player's HQ territory.
The first tactical decisions of the campaign will be made when you select your HQ territory. Should you choose a map section close to rivers or roads to speed up the movement of your banners, or should you choose a map section closer to one controlled by a player with whom you're likely to form an alliance? Selecting an HQ territory close to one or more special map sections may give your realm an edge as the campaign progresses. We also recommend making your selection based on the character and background of your army of choice. For instance, a player with a Dwarf army should select an HQ territory in the mountains. The army-specific rules (see pp. 40-41) will also encourage players to select appropriate HQ territories. For instance, Dwarfs, unlike most armies, are not penalized for moving through the mountains. Thus, Dwarf players may want to select a mountainous map section as their HQ territory, because the topography of their realm will help defend it from invasion.
Banner Table
| # of Players | # of Banners (Round Down) |
|---|---|
| 2 | One additional banner for every six map sections |
| 3 | One additional banner for every five map sections |
| 4 | One additional banner for every four map sections |
| 5+ | One additional banner for every three map sections |
[Two map photographs with captions, printed beneath the Banner Table. Caption 1: Dave's realm consists of six map sections (yellow highlights). To determine how many banners his realm can support, he checks the Banner Table. As he is playing in a campaign with five participants, he may field three banners: his starting banner plus two additional banners for controlling six map sections (six map sections divided by three equals two banners). Caption 2: In the same campaign, John's realm includes eleven map sections (blue highlights). His larger realm can field four banners: his starting banner plus three additional banners for controlling eleven map sections (eleven map sections divided by three equals three banners, after rounding down).]
Banners
Each realm supports a large armed force. This force is broken up into fighting divisions called banners, each of which is represented on the map with some type of marker that stands for a Warhammer army. Throughout the campaign, troops are moved, reassigned, killed, and transferred from region to region. New recruits are hired, and existing armies are bolstered by new additions to their forces. As such, each banner's composition will not be the same from battle to battle. Each banner represents a Warhammer army: a fighting force with a fixed number of points. Even if a banner takes heavy casualties or is completely wiped out in battle, it will (usually) retreat, regroup, and gain new reinforcements and reassignment, and will have a [number unclear in scan] of points to field in the next battle. This means it is not necessary to keep complete army lists for each banner on the map, nor is it necessary to keep track of casualties and losses for each banner.
Remember, though, that any army can be defeated. If a realm's forces lose too many battles, you will lose banners, and your realm will not be able to support a large number of banners. The number of banners your realm may field will change over the course of the campaign. Also, if your banner is Massacred in a tabletop battle (see p. 198 of the Warhammer rulebook) it will become Scattered. Scattered banners are described later in this chapter.
At the beginning of the campaign, players must agree on the starting value of each banner. This size will remain the same throughout the campaign. Players should take into account the number of troops they have at their disposal and the number of battles they wish to dedicate to playing the many battles they will have to fight over the course of the campaign. Generally, players should decide to field armies of 1,500 to [3,000 or 4,000; the final digit is unclear in the scan] points. Remember that the size of banners, once determined at the outset of the campaign, will remain consistent for the duration.
Each campaign begins with a single banner and will add additional banners as it gains more territory. Consult the Banner Table to determine the number of banners a realm may field at a given turn. Remember that the Banner Table lists the number of additional banners you may field beyond your starting banner. Thus, in a three-player campaign, a realm with ten map sections could field three banners: the starting banner plus two additional banners for the territories controlled.
Realms can always field a minimum of one banner as long as they control at least a single map section. If, at the end of a campaign turn, a realm does not control any map sections, it is utterly annihilated and the controlling player no longer participates in the campaign.
It's a good idea to give your banners characterful names, such as Captain Maximilian von Schadel's Defenders of the Reik or Rattush's Screaming Vermin Horde. Such names add color to the campaign, and you should feel free to heap scorn on anyone who can come up with names no more evocative than "Banner 2."
Setting Up Your Campaign & Battles
Play is divided into Campaign Turns, during which all players get a chance to move their banners on the map. When opposing banners meet in a map territory, the action switches to the tabletop, and a full-scale Warhammer battle is fought. It is this dynamic between broad map-based moves and tabletop wargaming that decides the outcome of the overall action of the map-based campaign. Therein also lies one of the many hurdles any campaign must overcome: the map-based moves are quick and easy, but setting up and playing an entire Warhammer game will probably take the better part of an evening. Thus, it is essential to establish some agreement about how often you will make map moves and how long in real time you will pause in between them to allow campaign participants to play the Warhammer battles. Each gaming group, club, or store is different, but generally you will find a few days to 2 weeks is enough. In our epic struggles in the US Studio, we played a Campaign Turn each Thursday and had the following week to finish up any necessary battles. This period was long enough for tabletop battles to be arranged and played, but short enough for us to maintain interest in the campaign.
It may be possible to get a few Campaign Turns completed in a short amount of real time as long as there are no battles to be fought. This situation occurs most often during the opening moves of the campaign, when most players will be busy grabbing up territory and no battles will need to be scheduled. After each realm gains a foothold, battles invariably ensue, and you'll need to allow more time in between Campaign Turns so that the players can complete their battles. If no battles present themselves after banners are moved, your group may well decide to complete additional map turns until you are halted by a battle.
How Campaign Turns Work
Each Campaign Turn is organized into the following phases:
- Write Orders
- Execute Orders
- Fight Battles
- Retreat/Scatter
- End of Turn
Orders
In each Campaign Turn, banners may be given one of the orders listed below. You can use the Banner Orders Card included below to submit your orders to the campaign organizer, or simply write them on a scrap of paper. Possible orders include the following:
- Raze and Hold
- Raze and Move
- Move
- Fortify
- Recover
- Hold
Some armies may have special rules for movement. Players should indicate any unusual orders when they write their orders (e.g., when an Orc & Goblin banner moves, it may use its special Forced March ability).
Submitting Orders
All players move simultaneously and must write complete orders at the start of each Campaign Turn. Players may either secretly write their orders at the table and flip them over simultaneously, or submit their written orders to the campaign organizer before each Campaign Turn. The campaign organizer can set a deadline for submitting orders ahead of time, and perhaps even use e-mail to receive the players' orders. Remember that if the campaign organizer is also playing, he must write his orders before reading any from other players. If a player fails to submit orders by the deadline, all of his banners act as though they received Hold orders. After all orders are turned in, they are then executed in the following order:
- Raze
- Move
- Fortify
- Recover
The results of these orders are described below.
Raze
A banner given Raze orders will burn crops and settlements, salt the earth, loot all useful property, and generally ruin the map section for armies who might seek to control it. When a banner is given Raze orders, place a Razed counter in the map section. Depending on the banner's orders, it will either Hold after razing, or attempt to Move. If the banner attempts to Move after razing, roll a D6. On a result of 3+, the banner may Move as normal after making any Difficult Terrain Tests (see rules under the Move section) or any other special tests required. On a result of 1-2, the Raze order has taken too long to execute, and the banner may not Move this turn.
Razed map sections may be controlled as normal but do not add to the number of banners that a realm may field. For example, a realm composed of 12 map sections in a 6-person campaign can normally control 5 banners. However, if 1 of those map sections is Razed, only 11 of the map sections count toward banner support. Thus, the realm may control only 4 banners.
When a special map section is Razed, none of its special rules apply (unless noted otherwise in the special map section's description), and, of course, the special map section does not count toward the number of banners that a realm may field. When a Razed special map section is Recovered, all of its special rules apply as normal.
Banners may Raze a map section only if they have been given orders to do so.
Order Card. [The Order Card is a printable form, reproduced in the book with permission to photocopy for personal use. For each banner it has a line for the Banner Name and a "will (circle one)" choice of: Move into map section, or Hold in map section; Recover map section, or Raze map section; Fortify map section, and hold or try to move into map section. The printed footer notes that the form is also available from www.games-workshop.com/generalscompendium.]
Strategic Example of Razing
[Four photographs with captions illustrating a Razing move. The captions are too small and faded to read reliably in the scan and are not reproduced.]
Move
In general, you may move a banner into a single adjacent map section. Banners may be moved into any adjacent map section, no matter how small its border (even corner-to-corner map sections are considered adjacent). If there are no enemy banners in the map section, you may place a control marker therein to indicate that you now control the map section. Some armies have special rules for movement (see Army-Specific Rules on pp. 40-41). Mountains, rivers, and special terrain features may also restrict movement. Remember that banners may Move only if they have received orders to do so.
Difficult Terrain. Rivers, marshes, and mountains can impede the movement of armies. When a banner attempts to move into a map section that contains a mountain or marsh feature, or to cross a river (i.e., move from one bank of a river to the opposite bank without the help of a bridge), the controlling player must make a Difficult Terrain Test by rolling a D6. A result of 1 or 2 indicates that the banner is halted and cannot move, as troops have failed to find a safe ford, route, or passage. Treat the banner as though it had been given Hold orders instead. The banner may attempt to move again in the next Campaign Turn. With results of 3-6, the banner may move as normal. Some special rules (discussed later) may apply to movement through Difficult Terrain.
Don't Pass in the Night. When enemy banners are in adjacent map sections and both receive orders to Move into the enemy banner's map section, the Don't Pass in the Night rule applies. To avoid the unlikely situation of banners passing each other and exchanging map sections without conflict, both players roll a D6. The higher-scoring player's banner may move as normal; the lower-scoring player's banner remains stationary. A battle is fought for control of the map section occupied by the lower-scoring player's banner.
It is assumed that the higher-scoring player's banner has moved slightly faster than its enemy, gets the jump on its foes, and is able to execute troop movements. The general of the lower-scoring player's banner, after hearing the reports of enemy movement from his scouts, changes the orders he received and prepares for battle in his current position.
An exception to this rule is made when the higher-scoring player fails a Difficult Terrain Test and cannot move. In this case, the lower-scoring player moves, and a battle for control of the higher-scoring player's map section is fought. If both players fail a Difficult Terrain Test, neither banner moves, and no battle is fought.
Living off the Land. Each map section can support only one banner, as your troops need food, lodging, campgrounds, and supplies, which they will take from the countryside and local settlements. Thus, it is not possible for more than one friendly banner (i.e., more than one banner from the same realm or from allied realms) to occupy a single map section.
The only time two banners can occupy a single map section is when two enemy banners are fighting a battle.
For more details on how this rule can affect the movement of banners in complicated circumstances, see the Expanded Living off the Land rules on p. 43. We recommend waiting until you have digested the rest of the map-based campaigns chapter before you read these rules. The situations described by these rules come up infrequently; thus, it is not necessary to understand them completely to begin play.
Scenery Workshop: Making Razed Battlefield Terrain
[Two step-by-step hobby guides for building razed terrain (a "Razed Farmhouse" and a razed woodland), with photographs and step captions. This is hobby material rather than rules. The captions are too small and blurred in the scan to be transcribed reliably, so they are not reproduced.]
[Photographs of battles fought in Fortified map sections, with captions too small to read reliably in the scan, are omitted.]
Simultaneous Movement. After orders are submitted, all movement occurs simultaneously. Thus, it is possible for one of your banners to vacate a particular map section, which will then be occupied by another banner from your realm or one from another player's army (see the diagrams on the right for an explanation). Just remember not to break the Don't Pass in the Night rule (see p. 31). Again, any banners that find themselves in the same map section after movement is completed will fight a battle.
Failed Moves. Remember that each map section can only support a single banner at a time, and that all movement that would bring more than one friendly banner into a single map section is forbidden. If a banner cannot execute its movement orders (because of a failed Difficult Terrain Test or because of the Don't Pass in the Night rule), then other banners cannot move into what was to be the vacated map section. Such banners act as though they had been given Hold orders instead.
Fortify. If a banner is given Fortify orders and is not brought to battle, then it spends time increasing the defensive capacity of its map section. Fortification could include scouting out the high ground, conscripting local villagers into service, and/or building hasty defensive positions like walls and barricades, or even a watchtower. Place a Fortify counter in the map section when a banner given Fortify orders is not brought to battle. Banners attacked in a Fortified map section may add 200 points of additional troops to their army list. In addition, armies in Fortified map sections may take advantage of Defended Obstacles (see below). Any map section (even ridges, riverbanks, and special map sections) may be Fortified, unless specified otherwise. It is possible for a banner to Fortify a map section controlled by an ally. Razed map sections cannot be Fortified unless they have been Recovered first. Mark the fact that the map section is Fortified on the map with a counter.
Fortification bonuses are lost when the fortifying banner moves away from the Fortified map section, and/or when control of the map section changes. Remove the Fortify counter when any of these things occur. When Fortified defenses are not maintained and supervised, temporary walls will collapse, trenches will fill with rain and mud, and the local population will make off with useful items for firewood and building supplies.
Banners may not Fortify a map section if they are fighting a battle. If a banner given Fortify orders is brought to battle, it acts as though it was given Hold orders instead. Remember that banners may only Fortify a map section if they have been given orders to do so.
Defended Obstacles. When a banner is defending a Fortified map section in battle, generate and place terrain as normal. After all terrain features have been placed and Deployment Zones have been chosen, but before any troops are placed, the Defending player may remove any one piece of terrain from anywhere on the board. Usually, this piece will be a terrain feature that benefits his opponent. In addition, the Defending player may roll once on the Defended Obstacles Table to generate an additional terrain feature, which he may place anywhere on the table.
Figure A. Here, two Dwarf banners receive orders to move. Banner A moves into an uncontrolled map section, while banner B moves into the map section that banner A occupied.
Figure B. In this picture, the Empire banner backs away from the Dwarf banner. The Empire banner moves back from map section G7, and the Dwarf banner moves into it and takes control of G7. No battle is fought.
Figure C. In the turn after the one shown in Figure B, the Empire banner was given Hold orders instead of Move orders. The Dwarf banner was given orders to Move into G6, where the Empire banner is located. The Empire banner stays put, and the Dwarf banner moves in to attack. A battle must be fought for control of map section G6.
Figure D. In this example, both Dwarf and Empire banners were given orders to move into an uncontrolled map section. Both banners move into the map section, and a battle will be fought to determine control.
Figure E. This example illustrates the Don't Pass in the Night rule. Here, a Dwarf and Empire banner begin the turn in adjacent map sections. Both receive orders to move into the adjacent map section to attack the enemy banner. Do NOT move the banners such that they swap positions. Per the Don't Pass in the Night rule, both players roll a D6. The Empire player rolls a 4, but the Dwarf player rolls a 6. The higher-scoring Dwarfs get the jump on the forces of the Empire and move into the Empire's map section. The Empire banner remains stationary. A battle for control of the Empire's map section is fought.
Figure F. Here's an example of what could happen should one of your banners fail to execute its Move orders. Banner A was given orders to move into the marsh map section, and banner B was given orders to move into the map section occupied by banner A. On the Difficult Terrain Test for banner A to enter the marsh map section, the player rolls a 1 and fails the test. Banner A's move therefore fails, and it is treated as though it had been given Hold orders. Banner B cannot move, because the map section it wishes to enter is still occupied by banner A, and banner A remains stationary.
[Scenery Workshop panel: step-by-step hobby guide for making earthworks and a Fortified map section, with photographs and step captions. Hobby material rather than rules; the captions are too small to read reliably in the scan and are not reproduced.]
Defended Obstacles Table (D6)
| D6 | Obstacle |
|---|---|
| 1 | A large hill |
| 2 | A wall, fence, earthworks, or hedge 6-12" in length |
| 3 | A hill with an impassable slope |
| 4 | A building no larger than two stories and with a footprint no larger than 8" x 8" |
| 5 | A large hill with fences or artillery emplacements atop it |
| 6 | A watchtower |
Recover. Banners occupying Razed map sections may attempt to Recover them by rebuilding destroyed structures and settlements, transporting farmers and laborers back into the area, and generally trying to repair all the damage that had been done. If a banner is given Recover orders and is not brought to battle by an enemy banner, roll a D6. On a result of 4+, the map section Recovers. For each subsequent turn the banner attempts to Recover the map section, the controlling player may add 1 to the die roll. A roll of 1 before modification always fails. Once a map section Recovers, remove the Razed counter; the map section will now contribute to a realm's supplies and may be Fortified as normal. Banners may not attempt to Recover a map section if they are fighting a battle. Banners may attempt to Recover a map section only if they have been given orders to do so.
Hold. A banner given Hold orders remains in place and does nothing. A banner may wish to Hold to defend a particular map section, to occupy a Fortified map section, or to hold ground when the controlling player sees no tactical advantage in moving the banner. When a banner has not been given orders during a Campaign Turn, it will Hold by default.
Battle
After orders are executed, banners that find themselves in a map section with another banner will fight a battle. All battles must be fought with the normal Warhammer rules before orders are due for the next Campaign Turn. Unless the battle takes place in a special map section that has special scenario rules, all battles are Pitched Battles (see pp. 199-200 of the Warhammer rulebook). The winner keeps his banner in the map section and places one of his control markers therein. The loser must Retreat into an adjacent map section that he or one of his allies controls (see Retreat/Scattered below). If the losing banner was Massacred in the Warhammer game (see the Victory Points rules on p. 198 of the Warhammer rulebook), it is too disorganized to make an orderly Retreat and will be Scattered instead. In the event of a draw, each player must move his banner into an adjacent map section that he or one of his allies controls, and the map section in which the battle was fought does not exchange hands (i.e., the map section remains neutral if no one controlled it prior to the Campaign Turn, or remains in the original controlling player's possession).
Supporting Banners. All battles are fought between two banners only. Because of the Living off the Land rule, it is impossible to bring more than one banner to bear on a single enemy banner at a time. However, it is possible for friendly banners in map sections adjacent to the one in which the battle is being fought to support their friends in battle. A banner may increase its points size by 200 points for every friendly banner supporting it. Thus, a 2,250-point banner supported by two friendly banners to 2,650 points for the duration of the battle only. A banner may only support a single combat. In cases where several combats are going on in adjacent territories, the controlling player must choose which one his banner will support. A banner may not offer support if it is fighting a battle of its own. Both banners involved in a battle may receive support from any number of adjacent banners. Supporting banners do not need to receive orders to offer support to friendly banners, and may take other actions during the Campaign Turn (i.e., they may have Moved, Fortified, Held, or Recovered). Remember that each banner may only support one adjacent banner, and banners involved in battles themselves may not offer support at all.
Most often, banners will be supported by other banners from their own realms. However, it is possible for allies to support one another (see Allies). When this occurs, the allied players have two options:
- The player whose banner is engaged in battle chooses 200 points of additional troops from his own army.
- The allied player may bring 200 points worth of Core troops from his own forces, which he will command himself to lend support to the allied banner. With the second option, interesting battles involving three or more armies and three or more players may be fought.
Retreat/Scattered
After battles are completed, banners that were not lost or tied must Retreat into an adjacent friendly map section (one that the banner's realm or one of its allies controls). No Difficult Terrain Test is required to Retreat. If a Retreating banner has no friendly adjacent map section in which to Retreat, or if the banner was Massacred in the Warhammer battle (see p. 198 of the Warhammer rulebook), the banner is Scattered. Scattered banners are removed from the board until the end of the Campaign Turn. If the realm remains large enough to support the Scattered banner, then the controlling player may reform the banner in the HQ territory. It is assumed that the Scattered troops fall back on other banners, that personnel throughout the realm's forces are reassigned, and that a new banner is formed in the HQ territory from surplus troops. If the realm is no longer large enough to support the Scattered banner, then it is dissolved and remains out of play.
If all of the adjacent friendly map sections are occupied by a friendly banner (a banner from the Retreating banner's realm or an allied banner), that banner must be displaced into another friendly adjacent map section. It is possible for several banners to be displaced in this way.
Note that all Retreating, just like movement, occurs simultaneously. Thus, two or more Retreating banners may attempt to Retreat to the same map section. When only one map section is available for two or more Retreating banners, one banner Retreats as normal; the other banner or banners are Scattered.
Examples of Retreating After a Battle
Figure A. The Dwarf banner has been defeated by the Empire banner and must Retreat into one of the two friendly map sections adjacent to the one in which the battle was fought.
Figure B. The Dwarf banner has been defeated and must Retreat, but the only available friendly map section into which it may Retreat is occupied by another Dwarf banner, which was lending support to the battle. The defeated banner Retreats into this section (yellow arrow), and the supporting banner is displaced into another friendly map section (one of the sections indicated by blue arrows).
Figure C. The Dwarf banner has been defeated but has no friendly map sections into which to Retreat. As you can see, all adjacent map sections are controlled by the Empire, Orcs & Goblins, or High Elves. Thus, the Dwarf banner is Scattered and is removed from play until the End of the Campaign Turn Phase.
Figure D. Two Dwarf banners are defeated but have only one adjacent friendly map section in which to Retreat. One of the Dwarf banners Retreats as normal; the other is Scattered.
Newly formed banners, and banners that were Scattered and reformed, are deployed at the End of Campaign Turn Phase in the HQ territory. If the HQ territory is occupied and/or more than one new or reformed banner has to be deployed, banners may also be deployed in map sections adjacent to the HQ. If both the HQ territory and some or all of the adjacent map sections are occupied by friendly banners and/or controlled by enemy realms, players may not be able to deploy some or any of their new or reformed banners in a given turn. When these map sections become unoccupied and/or become friendly in a subsequent turn, new and reformed banners may then be deployed in them during the End of Campaign Turn Phase. Note that no new or reformed banners may be deployed at all if the controlling player's HQ territory is controlled by another player (see Loss of HQ Territories on p. 42).
End of Campaign Turn
After all actions in the turn have been resolved, each player counts the number of map sections in his control and consults the Banner Table (see p. 28). A realm may have expanded enough to add an additional banner (or even two or more during a spectacular turn). Similarly, other realms may have lost map sections, thus necessitating the dissolution of one or more banners. Scattered banners are dissolved first. Otherwise, the controlling player may choose which banner(s) to dissolve and remove from play. Scattered banners that do not need to be dissolved may be reformed during the End of Campaign Turn Phase.
Map Sections
The following rules apply to movement in and occupation of the map sections. Remember that movement into mountainous or marsh map sections, and across rivers, requires a Difficult Terrain Test (see p. 31). Note that this list is not exhaustive. For map-based campaigns that you design, you could add rules for dunes, volcanoes, icy plains, and the like (see Chapter 6 for ideas).
Plains. Banners can move into plains map sections without penalty. Plains map sections can contain farms, small towns, hills, and the like. These small terrain features do not affect movement. Special map sections should be considered plains unless specified otherwise in their description.
Forests. Forested map sections are treated as plains for purposes of movement. However, certain armies, such as Wood Elves, may be able to take advantage of special rules in wooded areas. Use more trees than you normally would when generating terrain for battles fought in these areas.
Bridges. Bridges constitute small map sections unto themselves and allow armies to cross rivers without making a Difficult Terrain Test. If Razed, bridges are useless, and a Difficult Terrain Test must be made as normal to cross the river. When bridge map sections are Razed, make sure to position occupying banners in the map section such that it's clear which side of the river they're on, as a Difficult Terrain Test will be required to cross the river into map sections on the opposite side. Razed bridges may be Recovered (i.e., the bridge will be rebuilt by your troops) just like any other map section. As bridges tend to be areas of high tactical significance, most players will make an effort to defend them well (or destroy them).
Roads. There are no special rules for roads. However, in campaigns that use irregularly shaped map sections, road sections tend to be very long and thus facilitate rapid movement of banners.
Rivers and Riverbanks. In campaigns that use irregularly shaped map sections, riverbanks tend to be very long, and thus facilitate rapid movement, as troops may march along the clear beaches or take barges and other small craft to sail up and down the shores. Crossing the river (i.e., moving an army from one bank to the opposite bank) necessitates a Difficult Terrain Test.
Mountains. You must make a Difficult Terrain Test for each of your banners attempting to enter a map section that contains mountains. Note that no test is required when a banner exits a mountainous map section (unless the banner is leaving one mountainous map section and entering another).
Marshes. Marsh map sections contain soggy ground through which it is difficult to maneuver armies. Marshes can often be found where two or more rivers join. You must make a Difficult Terrain Test for each of your banners attempting to enter a map section that contains a marsh. Note that no test is required when a banner exits a marsh map section (unless the banner is leaving one marsh map section and entering another).
HQ Map Sections. Map sections containing HQs follow the usual rules for the appropriate type of terrain (e.g., HQs in mountains follow the rules for mountainous map sections, etc.). However, banners that control HQ territories always count as being Fortified when fighting in the map section containing the HQ. In addition, the controlling player may roll three times on the Defended Obstacles Table, instead of the usual one for fighting in a Fortified map section. Additional Fortification of HQ territories has no effect. Simply mark your HQ territory with an appropriate counter or impressive 3D model. The HQ counter pictured above can be downloaded from the Games Workshop web site.
Special Map Sections. Each campaign will have a few special map sections with a particular settlement, structure, or point of interest. These map sections could bestow advantages or disadvantages on the armies that control and/or attack them, such as adding [word unclear in scan] troops, necessitating special tests, providing defensive positions, and the like. Several examples of special map sections are included in the Border Princes campaign chapter, and guidelines for designing your own special map sections can be found on p. 46. Unless noted otherwise, special map sections should be treated as plains for purposes of movement.
Allies
In the Warhammer world, alliances are almost always fickle affairs. Nonetheless, they can be useful tools for furthering your realm's expansion. At best, alliances are marriages of convenience; at worst, they are weapons with which to manipulate an ostensibly friendly neighbor and lure him into a vulnerable position. As one young [word unclear] of Salzenmund once quipped while learning the [word unclear] of diplomacy, "Alliances are better honored in the breach than the observance." Even so, long-term alliances, even between neighboring realms, have been known to occur. For instance, the Empire has maintained tentative alliances, or at least states of peaceful coexistence, with Kislev and Tilea for many years.
Players may declare an alliance at any time, and allies must inform the rest of the campaign players (and the Games Master, if there is one) that they have formed a pact. Players may ally with as many players as they wish, as long as the number of alliances is permitted by the Allies Table on p. 109. Like mathematical quantities, allegiances are not necessarily transitive (which is a fancy-pants way of saying, "Dwarfs ally with the Empire, and the Empire allies with Orcs, then Dwarfs are not necessarily allied with Orcs"). In fact, the Allies Table (see p. 109) may prevent a three-way alliance from existing, depending on which armies are involved. Of course, where the Allies Table allows, three or more players may choose to ally with one another.
There is no fixed length of time an alliance must last, although crafty players may want to put their treaty in writing and specify a minimum amount of time. In fact, even with a written agreement, allies can stab one another in the back at any time. Having it on paper does [word unclear] make the betrayed player great propaganda and damning evidence against the turncoat, however.
Once an alliance is in place, allies may take advantage of the following rules.
- Banners may move through their allies' map sections without control of the map sections changing hands.
- Banners may defend their allies' map sections by fighting battles therein. If a banner is victorious in an ally's map section, the losing enemy banner must Retreat or Scatter as normal, and control of the map section does not change hands (i.e., the victorious banner's ally maintains control of the map section).
- Banners may Retreat into allied map sections without being Scattered. When banners Retreat in this manner, control of the map section does not change hands.
- Banners may support adjacent allied banners in battle.
Alliances may be broken by employing one of the following methods:
- Announcement. During the End of Campaign Turn, a player can announce that an alliance is broken (though only a foolish Bretonnian would honor an alliance and miss the chance to stab a former friend in the back). During the next Campaign Turn, the rules for allies will cease to apply for the two realms in question.
- Invasion. A banner can end an alliance by taking control of one or more of an ally's map sections. The backstabbing player's decision to do so must be noted in his orders. Otherwise, the campaign organizer should assume that banners moving through allied map sections do not intend to take control of those sections.
- Raze. A banner can end an alliance by Razing an ally's map section that it occupies. By Razing the map section in this way, the banner also takes control of the section.
- Withdraw of Support. The final and most insidious way to break an alliance is to do so in the midst of battle. When one of your banners is supporting an allied banner in battle, and you have opted to command 200 points of your own Core troops to lend support to your soon-to-be-former ally, you may withdraw support in the middle of the game. This trick can be particularly devastating, as, say, a flank formerly believed to be held by stalwart allies not only becomes vulnerable, but becomes the site of a surprise attack.
To withdraw support in the midst of battle, wait until it is your and your soon-to-be-former ally's turn. The surprise withdrawal of support will occur during the Movement Phase when all charges have been declared, but no chargers have been moved yet. You must then announce that your troops are withdrawing support. None of your troops may do anything during your erstwhile ally's turn, after which your troops will act (i.e., move, use magic, shoot, etc.) on your former opponent's turn. Your former ally must follow through on any charges he declared, but remaining moves may be made to respond to the new threat your troops pose to his forces.
The withdrawal of support is particularly devastating when the opponent of your former ally coordinates with your attack. It is permissible to organize your back stab with this player beforehand (e.g., "On Turn 3, I'll announce that I'm withdrawing support and try to take out his war machines.") or by winks, nods, and whispers as the game develops.
Army-Specific Rules
Every army in the Warhammer world deploys, moves, and fights differently, even on a grand scale. The following rules explain how these differences are represented in a map-based campaign. The following rules apply to all map-based campaigns. Additional army-specific rules may apply to some armies in particular campaigns. For instance, campaigns set in Khemri may add army-specific water consumption rules, to which Tomb Kings, Vampire Counts, and Daemon banners are immune. Or perhaps a campaign set in a completely wild and unsettled region would add army-specific rules for supplies, subsistence, and baggage. See the Border Princes Campaign detailed in Chapter 3 for other examples.
Beasts of Chaos. Beasts of Chaos are accustomed to living in the wilderness and dealing with harsh terrain. As such, they may reroll any failed Difficult Terrain Tests.
Bretonnians. Bretonnian Knights value honor and chivalry above all else. They may only break an alliance by announcing their intention to do so, and not by invading, Razing, or withdrawing support. In addition, if an ally of a Bretonnian realm breaks an alliance with the Bretonnians by any of these dishonorable means, the Knights of the Bretonnian realm (not the commoners) will Hate all the turncoat troops, and the Bretonnian realm may not enter into alliances with the traitor subsequently.
Chaos Dwarfs. Chaos Dwarf banners may move into mountainous map sections without making a Difficult Terrain Test. As Chaos Dwarfs make their homes in the mountains, they are accustomed to the steep terrain and have no trouble finding safe passes.
Dark Elves. Dark Elves are masters of torture and sacrifice, practices they engage in both for religious reasons and for pure sadistic pleasure. When a Dark Elf banner Fortifies a map section, instead of taking 200 points of additional troops and making a roll on the Defended Obstacles Table, the banner may opt to sacrifice the indigenous populace instead. The banner gains no additional troops from the Fortified map section. Instead, the army gains D3+1 rerolls that the controlling player may use to reroll any D6 result in the game. Khaine smiles on those who shed blood in his name. Dark Elf banners may also choose to Fortify a map section as other banners do.
Dogs of War. Dogs of War are ruthless mercenaries with little care for whom they fight, as long as their pockets are full. Dogs of War may ally with any other army in map-based campaigns (see Allies). In addition, Dogs of War armies are expert at hiring and conscripting troops from the local populace. As such, their standard banner size is 100 points larger than that of other realms in the campaign. Thus, in a campaign in which the standard banner size is 2,000 points, Dogs of War banners would be 2,100 points (before bonuses and penalties apply).
Dwarfs. Dwarf banners may move into mountainous map sections without making a Difficult Terrain Test. Steep mountains are where Dwarfs traditionally make their homes, and so they are at ease in such environments and have no trouble finding safe passage.
Empire. The Engineers of the Empire are experts at making battlefield defenses and equipment. When defending a Fortified map section, Empire troops may add 250 points of additional troops (instead of the normal 200-point bonus). Also, the Empire player may make an additional roll on the Defended Obstacles Table and place the object so nominated where he wishes. Ordinarily, an Empire banner will place two objects instead of one on a Fortified battlefield under its control. However, special circumstances could apply. For instance, an Empire banner will roll for and place four objects instead of three on a battlefield in an HQ territory that it controls. Other special rules may apply in Fortified special map sections. Whatever the case, always assume that Empire banners fighting in map sections that they have Fortified will always have an additional defended obstacle.
High Elves. High Elves are masters of quick deployment and precise tactics. High Elves automatically win Don't Pass in the Night rolls. If a situation arises in which two enemy High Elf banners are trying to attack one another, both banners make Don't Pass in the Night rolls as normal.
Hordes of Chaos (Daemonic). Daemons, like the winds of Chaos, are highly unstable. Instead of deploying new or reformed Scattered banners in the HQ territory (or map sections adjacent to the HQ), Daemon banners appear in a random territory. When a new or reformed banner is to be deployed, the Chaos player must nominate six adjacent map sections in his realm (or fewer map sections if he controls fewer than six map sections) and roll a D6 to determine where the banner appears.
Hordes of Chaos (Mortal). Many Chaos armies are more concerned with destruction, raiding, and murder than they are with controlling and maintaining a successful realm. Whenever a mortal Chaos army is victorious in battle, it may attempt to press the attack and follow into the map section where the defeated banner Retreated. Roll a D6 for each Chaos banner attempting to press the attack. On a roll of 5+, the banner may press the attack, but must make a successful Difficult Terrain Test to do so if the terrain requires it. If the Chaos banner manages to press the attack, both banners must Hold the next Campaign Turn and will fight a battle per the regular Warhammer and map-based campaign rules. Adjacent banners may support as normal (remember that movement happens before battles), and any other bonuses and penalties apply. Chaos banners may not press the attack against banners that have been Scattered.
[Diagrams (Figures A-D) of the Hordes of Chaos (Mortal) press-the-attack rule and photographs on this page are omitted; their captions are partly illegible in the scan.]
Lizardmen. Lizardmen banners may cross rivers without making Difficult Terrain Tests. Skinks are excellent swimmers and have no trouble navigating inland waterways and finding safe fords [part of this sentence is unclear in the scan] their larger brethren.
Orcs and Goblins. Though Elves and Skaven are faster than the greenskins, most Warbosses care little for the health and well-being of the individuals in their army, and think nothing of driving them through day-and-night treks. Each turn, a SINGLE banner from an Orc & Goblin realm may make a Forced March to move through two map sections. The controlling player must note which single banner will be attempting a Forced March when he submits orders. Each time a Forced March order is submitted, the Orc & Goblin player must roll on the chart below and apply the results. Note that both moves of the Forced March may be subject to Difficult Terrain Tests if the terrain warrants. If a Difficult Terrain Test is failed before the first leg of a Forced March, the banner cannot move at all, regardless of the result rolled on the Forced March Table. If a Difficult Terrain Test is failed before the second leg of a Forced March, the banner moves only one square and then stops, regardless of the result rolled on the Forced March Table.
Forced Marching. Orc & Goblin banners will fight battles only in the map section where they end their move. They cannot be brought to battle as they move through the first of two map sections during a successful Forced March. Also, Don't Pass in the Night rolls apply only to the final leg of a Forced March. Note that an Orc & Goblin banner may take control of two map sections in a single Campaign Turn by executing a Forced March. A Forced Marching banner cannot return to the map section where it began the turn. While it may be tactically sound to do so under certain circumstances, Orc Warbosses get frustrated if they don't feel as though they're "makin' 'eadway."
Forced March Table (D6)
| Roll | Result |
|---|---|
| 1 | Mutiny. The troops refuse to obey the general's orders to march through the night. This banner does not move at all this turn and acts as though it had received Hold orders instead. |
| 2-4 | Fatigue. The banner presses on as best it can, but exhaustion overtakes the troops. The banner can move into one map section only. |
| 5-6 | Forced March. The banner completes a Forced March. Move the banner two map sections. |
Skaven. The Skaven are always expanding their Under-Empire, and a Skaven player may opt to move one or more of his banners through the underground tunnels. Should the Skaven player take this option, he must submit Move Underground orders for the banner in question. Instead of specifying a particular map section, the Skaven player should simply specify that he is moving underground. The banner is removed from the map and placed aside. The banner does nothing else in the turn it is given Move Underground orders, and nothing else in the subsequent turn. On the 3rd turn, the Skaven player rolls a D6. If the result is 3+, the controlling player may place the banner in ANY Razed section on the map. This map section could be one in the Skaven realm; an occupied enemy one, in which case a battle would be fought for control; or an unoccupied enemy map section, in which case the Skaven player would assume control of it. However, if the result is 1-2, or if there are no Razed map sections at the start of the 3rd turn, the banner returns to the map section where it began its underground movement or to the Skaven HQ (Skaven player's discretion), and acts as though it received Hold orders instead.
Tomb Kings. The relentless nature of the Tomb Kings makes it difficult to pursue and destroy their banners. As such, Tomb King banners are seldom Scattered. If Massacred, Tomb Kings banners may Retreat as normal and are not Scattered. In addition, to avoid being Scattered when there are no friendly map sections into which to Retreat, Tomb Kings banners may Retreat into unoccupied enemy or uncontrolled map sections, and will immediately assume control of the map section. Tomb Kings may only make this special Retreat move if there are no adjacent friendly map sections available for Retreat. If there are no adjacent friendly map sections AND no unoccupied enemy map sections into which the Tomb Kings may Retreat, then the banner is Scattered as normal.
Vampire Counts. Vampire Counts can raise the corpses of their enemies to bolster their ranks. Each time a Vampire Count banner is victorious, it may add 250 points to its size in the next turn. This bonus is lost if the banner is dissolved prior to the start of the next turn, or if the banner does not fight a battle in the next turn. (Thereafter, the extra troops are distributed throughout the banners of the realm.) Place a marker on the banner when it is eligible for this bonus, and remove it when the next turn is over.
Wood Elves. When Wood Elf banners fight a battle in a forest map section, they may add 100 additional points of troops to their banner size. As Wood Elves are experts at moving, fighting, and hiding in the woods, they are always able to bring a greater number of forces to bear in their favorite environment.
Bonuses and Penalties to Banner Size
Note that when banners increase or decrease in size as a result of Fortification, supporting adjacent banners, rules for special map sections, army-specific rules, or any other reason, the army you field must still obey normal army list restrictions for number of characters, minimum number of Core choices, and maximum number of Special and Rare choices. In short, you must field a "legal" army list for the points value you are allowed to bring for each battle.
Remember that supporting troops from allied banners that are controlled by other players are Core-only troops. These allied troops do NOT count toward the minimum number of Core units the main banner must field.
As you have probably figured out, tactical maneuvers in map-based campaigns can result in some uneven battles. If an unsupported banner attacks an enemy banner in a Fortified map section, the attacking banner will be outnumbered by 200 points. If the defending banner is supported, the attacking banner could be outnumbered by 400, 600, or more points. These numbers can be further adjusted by army-specific rules and/or special map section rules. These inequalities in banner size are integral to map-based campaigns, and players need to take these bonuses and penalties into account when making strategic decisions. The most cunning generals always try to fight battles only when they have a numerical advantage.
Let's consider the many bonuses and penalties that could apply to armies involved in a battle. Take a look at the figures and captions below. Note that in this sample campaign, each banner represents a 2,000-point army.
[Figures A and B are worked examples of banner size bonuses and penalties, with photographs of their battlefields. Their captions are only partly legible in the scan. The legible parts describe a Chaos banner attacking a Dwarf map section that has been Fortified, with the Dwarf player moving two banners into supporting positions, and a Dwarf banner holding its position to take advantage of the Fortifications. The worked numbers are given in the text below.]
A Beastlord surveys the destroyed territory of his enemies.
In this example, the Chaos player would field only 2,000 points of troops in the battle to come. The Dwarf player, however, could field 2,600 points of troops (i.e., 2,000-point starting size, plus 200 points for fighting in a Fortified map section, plus 200 points each from two supporting banners). The Chaos player will either come to the conclusion that this attack was ill-advised, or he will make a mighty offering to Khorne, the dark god of battles and bloodshed, and hope for the best. As you can see, it pays to pick your fights in a map-based campaign.
Note that, as both armies are between 2,000 and 2,999 points, both would include up to four characters (one of which could be a Lord), at least three Core choices, up to four Special choices, and up to two Rare choices.
Loss of HQ Territories
Obviously, the HQ territory is of critical importance to each realm, and players must ensure that their HQs do not fall into enemy hands. When a player loses control of his HQ territory, he may neither reform Scattered banners nor form new banners until he retakes his HQ territory. If ever a player has no banners on the map and no HQ territory in which to reform them, his forces have been destroyed and dispersed, and he may no longer participate in the campaign. When a player loses control of his HQ territory, he has three Campaign Turns in which to regain control of it. If he fails to do so, his forces will disperse and he may no longer participate in the campaign.
When you lose your HQ territory, it's a good time to make some allies who can come to your aid fast!
Expanded Living Off the Land
The Expanded Living off the Land section details the ramifications of how the Living off the Land rule can affect the movement of your troops. As the situations described in this section come up infrequently, you may wish to skip this section if you're reading the rules for the first time. Later, you can come back and read this section when you have a better feel for the rules.
It is possible for two or more friendly banners to be given orders to move into the same map section. Perhaps allied players did not coordinate their efforts well and both hastily drafted orders to move two banners into the same map section. Or perhaps a cunning player deliberately wrote orders to move two banners into the same map section if, say, a Difficult Terrain Test was required to enter that map section, and the player wanted to improve his odds of completing the move successfully. After making any Difficult Terrain Tests, whenever two or more friendly banners attempt to move into the same map section, roll a D6 for each moving banner. The banner with the highest result may move; lower-scoring banners remain stationary and act as though they had been given Hold orders instead.
Similarly, three or more enemy banners (three or more banners from three or more unallied realms) cannot occupy the same map section (no battles between three or more armies are possible). Whenever orders are written that would bring three or more enemy banners into the same map section, and after making any Difficult Terrain Tests and Don't Pass in the Night rolls, roll a D6 for each MOVING banner. If the target map section is unoccupied, the two highest-scoring banners move as normal; lower-scoring banners remain stationary and act as though they had been given Hold orders instead (see Figure B). If the target map section is occupied, only the banner with the highest result may move; lower-scoring banners act as though they had been given Hold orders instead (see Figure C).
Figure B. A Chaos banner, a Dwarf banner, and an Empire banner are all moving into the same unoccupied map section. None of the banners are allied. The Empire player rolls a 1; the Chaos player rolls [unclear in scan]. The higher-scoring Chaos and Dwarf banners move into the target map section, and the Empire banner, which scored lowest, remains stationary and acts as though it received Hold orders instead.
Figure C. At the start of the turn, the Wood Elves occupy territory 1; the Dwarfs territory 2; Chaos territory 5; and the Empire territory 4. None of the banners are allied. The Elves are given orders to move into territory 2. All other banners are given orders to move into territory 1. First, the Elf and Dwarf players make a Don't Pass in the Night roll. The Dwarfs win, and the Wood Elves must remain stationary. The Empire, Chaos, and Dwarf players must now dice off to see which banner will move. The Empire player scores highest and moves into territory 1 to attack the Elves. The Chaos and Dwarf banners remain stationary and act as though they received Hold orders instead.
[Photographs of the mountainous map section in Figure B and the situation in Figure C are omitted. The caption of the mountain example (Figure B's companion) is only partly legible in the scan: a Chaos banner has taken control of a mountainous map section, and the Empire player has ordered both of his banners in the area to move into it. Each Empire banner makes a Difficult Terrain Test; the banner that fails remains stationary, and the banner that passes moves to attack.]
Figure D. Here is the same situation shown in Figure C, except that the Wood Elf banner has failed the Don't Pass in the Night roll. The Dwarfs remain stationary, and the Empire and Chaos banners move into their target map section and will fight a battle for control of it.
The Expanded Living Off the Land Rules Summarized
In sum, any movement that would bring two or more friendly banners into the same map section is prohibited. Any movement that would bring three or more enemy banners (three or more banners from three or more unallied realms) into the same map section is also prohibited. The only time two banners can occupy the same map section is when a battle is to be fought between them. Three or more banners can never occupy the same map section under any circumstances.
Victory Conditions
The Victory Conditions for each campaign must be set before the campaign begins. Campaigns without clear victory conditions seem directionless and will not generate sufficient interest over the long haul to keep the campaign moving at a good pace.
Standard Victory Conditions. Pick a number of Campaign Turns, after which it is assumed some event brings the age of expansion to an end: the Second Coming of Sigmar is at hand, the hurricane season comes to Lustria, a twin-tailed comet streaks across the sky and signals the end of the world, or what have you. We recommend 15-25 turns. The number of turns you should play depends on the size of your map and the number of participants in the campaign. Large maps and/or few players will both require more turns to reach a satisfying conclusion. A good rule of thumb is to count the number of sections on your map and divide by 4. The resulting quotient is approximately the number of Campaign Turns you should play before the campaign ends. The player who controls the most map sections at the end of play is the winner. Razed map sections don't count, and all special map sections count as five regular map sections.
Optional Victory Conditions. There are many other ways to determine the winner of a map-based campaign. The winner could be determined by who is the first player to control 40% of the sections on the map or by total conquest of all map sections. Below are a few suggested victory conditions. As always, feel free to tailor these rules to the needs of your particular map-based campaign.
- Play out a campaign per the Standard Victory Conditions. However, instead of using a fixed number of Campaign Turns, play until a specified real-world date. Most map-based campaigns will take at least 3 months to complete, but you may want to add more time if your players have busy schedules.
- Play until one player controls a predetermined number of map sections. That player is declared the winner. For instance, the first player to control 30 map sections wins the campaign. By controlling a certain amount of territory, the victorious realm is so powerful that the surrounding kingdoms supplicate themselves to the new emperor or skulk off to find easier pickings. To determine the number of map sections a single realm must control to win the game, count the number of sections on the map and divide this number by half the number of players in your campaign. The quotient is the number of map sections that need to be controlled for a player to win. For instance, with a map with 80 sections in 5-player campaign, 32 map sections would need to be controlled to win the campaign [i.e., 80 map sections / (5 players / 2) = 32 map sections]. If you like, special map sections can count as five regular map sections (just remember to count them as five sections when you add up the number of sections on your map in the first place).
- Play until one player controls all the map sections on the map and/or has knocked all the other players out of the campaign by taking over their HQ territories. This total-conquest style of play is really for just the most insane of groups, as it will take quite a while to play. Also, as players lose their HQ territories, they will be knocked out of the campaign and won't be able to participate. We recommend this style of play only on the smallest of maps and only for the most dedicated of players with a lot of time on their hands. Don't say we didn't warn you.
Tiebreakers. Ties for first are possible, depending on the style of campaign you choose to play. Ties should be broken by a final battle to control the realm. This battle should be a Pitched Battle between two standard-sized banners for the campaign in question. Generally, no penalties or bonuses to banner size (e.g., army-specific rules, support, Fortification, etc.) will apply, though some campaigns, like the Border Prince Campaign, may impose special tiebreaker battle rules or scenarios. Just like the campaign victory conditions, tiebreaker conditions should be set BEFORE the campaign begins.
[Photographs of players and a sample map are omitted. Caption of the map photograph: "This picture illustrates that the Empire player has won as much as he can control three special map sections (highlighted)."]
Terrain Generation
To generate terrain for your battlefields, use one of the charts on pp. 222-228 of the Warhammer rulebook and choose the one appropriate to the campaign setting. Before the campaign begins, the participants may wish to modify these charts to reflect the terrain one would likely find in the different map sections (e.g., hills and impassable terrain in mountainous map sections and water features in riverbanks). See p. 59 of this book to see how these charts were modified for the different map sections of the Border Prince Campaign.
Special Map Sections. Special map sections may have different needs for terrain features and/or objectives prescribed by specific scenarios. They could be a warpstone mine, a treacherous forest, or any number of other evocative objectives. Most of these special map sections should list out exact terrain, but if there are no special instructions, generate terrain as normal. You can find more about making your special map sections on the following page, and there are several examples in the Border Prince campaign chapter.
Guidelines for Creating Your Own Map
Creating your own map for use in your campaign can be a challenge for any hobbyist. You can select an area of the Warhammer world and expand it, as we have done for the Border Princes campaign, or make up an entirely new or alternate area. The latter option may be a good choice if the players in your group intend to field armies from distant realms that might not otherwise meet under normal circumstances. For instance, the Lizardmen of Lustria would not be likely to travel to the Undead realm of Khemri. However, these armies might explore an uncharted island in the middle of the Great Ocean, or some remote area in the Southlands. Perhaps a group of exploring nations are seeking to establish colonies in Cathay or Araby.
You can also tailor the campaign to suit the armies the campaign participants intend to field. For instance, a group of Empire players could stage a civil war, with each province attempting to play kingmaker and put its own nominee on the throne. Or, if the campaign participants field Empire, Dogs of War, and Skaven, an interesting age of colonization and conquest could be played out in Tilea. A group of players with High Elves, Dark Elves, and Chaos armies could run a campaign in which Ulthuan is invaded. The Warhammer world offers many opportunities for interesting settings, and you can choose to "re-create" a specific historical event, or just explore some of the lesser-known areas.
Whatever you choose to set your campaign, try to keep scale in mind when designing your map. Even a large Warhammer army of 500 models would be very hard-pressed to take over, say, all of Bretonnia. Try to limit your map to a manageable area, as we did for the campaign map included in this book. It depicts a small corner of the Border Princes. Limiting the map to an area roughly this size will make the scale of your battles seem appropriate for the amount of terrain involved.
Be sure to include a variety of geographical features in your map. Make sure there are rivers, roads, mountains, and forests, as well as special map sections, difficult terrain, and marshes, for interesting tactical challenges to be met during play, and special map sections will add interesting goals for your banners. If you have chosen to set your campaign in an established area of the Warhammer world, don't be afraid to add geographical features like small mountains and minor rivers that might not appear on the map on pp. 158 and 159 in the Warhammer rulebook. That map illustrates only the largest geographical features of an entire continent and does not represent every hill and foothill. You may want to research the area you have chosen in the appropriate army books or Warhammer books from the Black Library to add additional colorful details. If you choose to create a campaign map in an "anything goes" area of the Warhammer world, anything goes.
You can choose to divide your map in a number of ways: a grid, or irregular shapes like the ones on the map included with this book. Regardless of the type of map you use, the players will need to agree beforehand which map sections are mountainous and forested, and so on. A given map section could contain mountains, woods, and a river, and you must determine beforehand how armies can move between these sections. If you choose to use irregular shapes like the ones on the Border Princes map, try to vary the shape of your terrain features. Roads and riverbanks should be long and thin to facilitate rapid movement of troops across the map. High mountain map sections might be small to reflect the difficulty of crossing steep terrain. Small, irregularly shaped map sections could represent rocky or wooded areas that limit the routes by which banners can move through them.
[The painting workshop shown on this page (Steps 1 to 3 for hand-painting a campaign map in watercolor and pencil, with photographs) is hobby material rather than rules. Its step captions are too small to read reliably in the scan and are not reproduced.]
Special map sections. Nominate a few map sections to be special ones. Special sections should be at least two sections away from the map edge and at least two away from one another. By concentrating map sections toward the center of the map, you will encourage all the players to move troops toward the center. Arranging your map in this way avoids the phenomenon of players who start on the opposite sides of the map never playing a game of Warhammer with one another. Try to have roughly 1 special section for every 15 sections on your map. You can have a greater number if the victory conditions you have set involve controlling a certain number of these map sections, but keep in mind that these sections should be designed to add flavor and character, not to make the campaign unbalanced. Try to keep the rules you create for the special sections simple. These rules could include some of the following ideas:
- The map section contains a fortress. Battles fought in this map section should be Sieges rather than Pitched Battles (the controlling player is the Defender in the Siege scenario).
- The map section contains a rich gold or warpstone mine, which allows banners in the controlling player's wealthy realm to field additional Rare or Special choices.
- The map section contains an unusual landmark or geographical feature. A special scenario is played rather than a Pitched Battle.
- The map section is home to some troops or a large monster. In battles fought in this map section, the indigenous troops will move and fight independently (use the scatter and artillery dice to determine direction and range), or may be recruited or controlled by the armies on the field (see the rules for the Geistenmund Hills in the Border Prince campaign for an example).
- The treasures contained in one map section allow the player to purchase 50 points of "free" magic items for each banner in his army.
For convenience, we suggest putting a number on each of your map sections. This step is not strictly necessary, but will avoid a great deal of confusion when you write orders (e.g., the banner of Barak Varr will move into the mountainous map section to the northeast of its current position). The Border Prince map is numbered to facilitate issuing orders.
[Sidebar, "Need Inspiration": suggests Warhammer Armies books and rulebooks, Black Library novels, and other Games Workshop publications, old and current, as sources for background, and includes a row of book and card illustrations. The Border Prince campaign drew on the older Warhammer army books and the Warhammer Armies and Black Library novels named there. The sidebar is a list of sources and is not reproduced beyond this note.]
[Map template with a caption: "The Warhammer Armies books contain maps that can provide great inspiration for your campaign."]
Chapter 3: Campaigning in the Land of the Border Princes
This chapter provides a ready-to-play map-based campaign, completely compatible with the rules detailed in the previous section. Also included in this book is a map of the Border Princes for use with this chapter. The following rules can also serve as a model for a map-based campaign of your own design.
[The page facing the chapter opening is a full-page scenery photograph, omitted. The map of the Border Princes is a printed full-page illustration with place names; it is not reproduced here.]
[Map caption (partly illegible in the scan): an illustration of the Border Princes region; its legible lines read "Rikbaard Schmied, a mad ..." and refer to the scholar's remarks on the cities of the region.]
[Quotation box: "Men of Estalia or the Empire will confidently assure you that there are no cities in the region and that even the grandest of the so-called princes are merely upstart brigands. Those whose notion of a city is formed by the knowledge of Magritta or Altdorf are justified in saying that no such place exists in the Border Princes, but there are walled towns in the region much greater in size than Arjijil, which the people, who know no better, think of as great cities. Such places are sometimes little more than huge fortresses, to which the entire population of a region might retire in time of invasion. Each one has its own prince, and each one has its own tiny empire, for even such small cities as these must rely on the produce of a legion of farmers." Attributed to Orfeo the Minstrel, explaining the Border Princes to Alkadi Nasreen, Caliph of Arjijil, as quoted in Plague Daemon by Brian Craig.]
Being of the History, Politics, Peoples, and Geography of the Region Known as the Border Princes
To the south of the Empire lies a rugged wilderness region known as the Border Princes. Surrounded by Black Fire Pass, the Worlds Edge Mountains, the Badlands, the Blood River, the Black Gulf, and Tilea, the land of the Border Princes hosts scores of petty fiefs and minor principalities. Most Old Worlders think of the Border Princes as a lawless territory of brigands and cutthroats that is, thankfully, isolated from the civilized lands of the Empire and Bretonnia. Although in some areas of the Border Princes central government is decidedly lawless and violence is common, the area has seen countless small wars and border skirmishes at times when the raiders attack or the princes seek to expand their lands. These conflicts, coupled with the constant incursions of Orcs and Goblins, Chaos cultists, and rapacious mercenaries employed by ambitious feudal lords, have left the population of the area largely mistrustful and suspicious, particularly of foreigners. Given all of these dangers, the Old World's merchants and travelers are well advised to keep both their swords and their purses close at hand.
[Two paragraphs of the history of the Border Princes are heavily faded in the scan. Only legible words are given; gaps are marked.]
The feudal organization of the Border Princes was [...] soon after the [...] of Araby. [...] King Louis the [...] of Bretonnia, as well as the Elector Counts of the Empire, dispatched a vast army of Knights that eventually [...] Jaffar's forces from Estalia, [...] and then pursued them by land, [...] the forces of the Old World defeated [...] after a long war.
[...] of the crusaders [...] reached the Old World over the course of the war in Araby, and in spite of its successes there, a large army of Bretonnian [...] was soon mustered. Led by Baron Tybalt du [...], the second group of crusaders began the [...] overland route to Araby. Following Black Fire Pass [...] the Black Mountains, the second force was soon [...] by the Orc and Goblin tribes that inhabited the area. [...] battles slowed the progress of the Baron's forces, and [...] took them almost a year to reach the Dwarfen port of [...], where Tybalt learned that the first group of [...] had already defeated Jaffar at Al Haikk. Not to be [...] the good Baron decided that, as Araby had [...] been defeated, he would instead conquer the [...] realm that his forces had just traversed. After [...] beat the greenskin tribes back over the Blood River [...] the Border Princes was born.
Life in the land of the Border Princes remains much as it has for a millennium. The descendants of Baron Tybalt's army still rule many of the fiefs that make up the region. Orcs and Goblins and the occasional Chaos warband continue to harass the human settlers there, and border skirmishes between neighboring principalities, which are fiercely protective of their independence, break out frequently. As much of the land is not ideal for agriculture, many local lords cast covetous eyes toward the prosperous fortress-city of Malko, surrounded as it is by rich farmlands. In the foothills of the Black Mountains, the nomadic herdsmen known as Zani still tend to a hardy breed of cattle known as aurochs, a rough species that is unique to the region. The Zani will sometimes come down from the hills to raid the farmlands below when the thorny vegetation on which the aurochs feed grows thin, but the herdsmen are invariably driven off by the doughty defenders of the fiefs. Of course, the lawless reputation of the Border Princes is not completely undeserved. Renegades and fugitives still flee south to escape the long arm of Old World law, and brigand camps punctuate the landscape.
Many see the Border Princes as an area to be traveled through rather than a final destination in itself. Most of the inhabitants live hand to mouth, which means they have little in the way of trade goods that would attract foreign merchants. Nonetheless, the Old Dwarf Road through Black Fire Pass is the safest route across the Black Mountains, and many traders and treasure hunters heading south to Araby or Khemri have passed through the land of the Border Princes. The Old Silk Road has long been a trade route for the Tileans, the Dwarfs of the Worlds Edge Mountains, and exotic people of the eastern empire of Cathay. A few lords of the Border Principalities have attempted to levy taxes and tolls on those who would cross their lands, but these attempts to garner additional revenues have met with only limited success. As such, the Border Princes remain a crossroads of sorts for all types of travelers.
Communication in the Border Princes can be difficult, as it is a polyglot land. While most of the population speaks or can at least understand the Reikspiel dialect of Old Worlder, many other languages are common as well: Bretonnian, Tilean, Araban, Cathayan, and, of course, the languages of the Dwarfs, Elves, and the other races who travel through the region. Linguists and translators can often make a handsome living in the Border Princes from the merchants and statesmen who require their services.
Today, a new age of colonization has dawned in the Border Princes. Hoping to take advantage of what is often perceived to be virgin land, settlers of many of the known races have established colonies in the area, and armies have arrived to defend them and set about the difficult task of empire-building. Will you join the colonists, beat your plowshares into swords, and seek fame and fortune in this new age of imperialism?
Playing the Border Prince Campaign
The rules and descriptions below detail one example of a map-based campaign that you can play. This chapter adds specific regional rules to the general map-based campaign rules presented in the previous chapter. As such, all of the rules for map-based campaigns in the previous chapter apply. This Border Prince campaign can also serve as a model for designing your own map-based campaigns.
Banner Size. The size of banners for the Border Prince campaign is set at 2,250 points. This value can be increased or decreased in the usual ways (e.g., army-specific rules, support, Fortification, special map section bonuses, etc.).
Special Map Sections. The following special map sections appear on the Border Prince map. The following descriptions explain the special rules that apply to these map sections, the armies that control them, and any battles that are fought in them.
Geistenmund Hills
The Geistenmund Hills are home to ancient barrows where some long-forgotten people were purportedly laid to rest. Centuries ago, Necromancers exiled from Bretonnia settled the region and used their magics to raise the dead from the barrows. Eventually, the lords of the Border Princes enlisted the aid of the local Dwarfs to seal the barrows with powerful runes, wards, and stone arches. These protections have grown old, however, and occasionally someone will destroy the runes to free the restless dead. To this day, odd ululations can be heard from the hills on the darkest nights, and mists from the river shroud the area in constant fog.
In this foreboding landscape, rumors of hauntings are enough to deter most from entering the area, and even armies on the march generally give the area a wide berth. When a banner is given orders to Move into the Geistenmund Hills, roll a D6. On a roll of 3+, the banner may move normally. On a roll of 1-2, the troops are too frightened to enter and act as though they were given Hold orders instead. Tomb Kings, Vampire Counts, and Daemon banners are immune to this effect.
In addition, any battles that take place in the Geistenmund Hills map section are not Pitched Battles. Instead, they are fought according to the Battle in the Barrows scenario.
The terrain in the Geistenmund Hills is hilly (who'd have guessed it?), but the slopes are small and gradual. As such, the area is considered a plains map section. The vast number of barrows in the area makes a complete purge of the Undead who reside there impossible. All of the special rules for this map section apply even when the section has been Razed. However, when Razed, the Geistenmund Hills will not count toward the number of banners that a realm can support.
[Step-by-step hobby guide for building the barrow terrain piece, with photographs. Hobby material rather than rules; step captions are not reproduced.]
Battle in the Barrows
"Let the barrow-men go on as accursed to enter the hills to the south. Tell them to stay clear of Thunder River. I would not have it on my conscience that he ventured into the Geistenmund Hills unarmed." Lord of the Fenmarsh of Alendorf, from Trollslayer by William King
Overview. Two armies meet among the barrows and burial mounds at twilight in the Geistenmund Hills, an oft-avoided region of the Border Princes that is rumored to be haunted. As the generals complete their orders for the day, strange sounds are heard emanating from the barrows. Can the rumors be true? Do the dead walk the Geistenmund Hills?
Armies. Armies are chosen from the Warhammer Army lists to a value of 2,250 points. This value may be increased or decreased by support, Fortification, army-specific campaign rules, and/or other relevant campaign rules.
Battlefield. There are four barrows or burial mounds on the battlefield. The center of each barrow should be located [distance unclear in scan] from each corner of the table. In the center of the table is a large terrain piece: a stone circle, a steep hill, or a bog. There is no other terrain on the table.
Deployment. Armies deploy per the rules for a Pitched Battle. See pp. 199-200 of the Warhammer rulebook.
Who Goes First? Both players roll a D6. The player who finished his deployment first (not including Scouts) may add +1 to his die roll. The higher-scoring player may choose to go first or second.
Length of Game. The game lasts 6 turns or until one player concedes.
Special Rules.
The Barrows. At the start of each player turn, roll a D6. On a result of 4+, the Undead have come to life and left their resting places. Roll on the table below. Note that the Undead will not come to life in two consecutive turns.
- 1-2: A unit of 2D6+2 Barrow Zombies emerges from one randomly determined burial mound.
- 3-4: A unit of 2D6 Barrow Skeletons armed with hand weapons and shields emerges from one randomly determined burial mound.
- 5: A unit of D3+4 Barrow Ghouls leaves their hiding places in the center terrain piece.
- 6: Eruption of the Dead. A unit of 2D3+3 Barrow Skeletons armed with hand weapons and shields emerges from one randomly determined barrow. Also, a unit of 2D3+4 Barrow Zombies emerges from the barrow in the opposite corner. Finally, a unit of D4+4 Barrow Ghouls emerges from hiding near the center terrain piece.
Deploying the Barrow Undead. When the Barrow Undead emerge, the player whose turn it is deploys them within 6" of their scenery piece. The new unit can do nothing on the turn it appears other than deploy.
Moving the Barrow Undead. After their initial deployment turn, unengaged Barrow Undead units will move their full movement distance (Ghouls will March) toward the closest unit (not including Barrow Undead units) during the Compulsory Movement Phase of each player turn (effectively, they move twice each turn, once each player turn). Barrow Undead will charge if within range. Remember that the Barrow Undead can do nothing, including moving or charging, on the turn they emerge from the barrows.
Controlling the Barrow Undead. During the Compulsory Movement Phase, Tomb Kings and Vampire Counts players may attempt to control the Barrow Undead units on the board. For each Barrow Undead unit on the board, the general of the Tomb Kings or Vampire Counts banner must make a Leadership test at -2. If successful, the player may move the Barrow Undead unit as he wishes and may charge them into combat if in range. If two Undead banners are fighting the battle and both generals successfully test to control a particular unit, then dice off to determine who controls the unit that turn. Control of the Barrow Undead lasts 1 turn only. Remember that the Barrow Undead can do nothing on the turn they emerge from the barrows other than deploy.
Victory Conditions. Unless one player concedes, use the Victory Points chart on p. 198 of the Warhammer rulebook to determine the winner of the battle. Players receive no Victory Points for destroying Barrow Undead units or for Barrow Ghoul units fleeing or having fled off the board at the end of the game. However, players DO receive Victory Points for enemy units and characters that are destroyed or reduced to half strength by the Barrow Undead. Players also receive Victory Points for all enemy units and characters that are fleeing or have fled off the table at the end of the game, regardless of whether the Barrow Undead or the player's own army caused these enemies to flee.
[Deployment diagram omitted.]
Scenery Workshop: Making Barrows and a Border Prince Fort
[Two step-by-step hobby guides, "Making More Advanced Barrow Mounds" and "Border Prince Fort" (a representation of the fortified town of Malko), with photographs, step captions, and parts lists. This is hobby material rather than rules; the captions are too small and faded in the scan to be transcribed reliably, so they are not reproduced.]
The Camp of the Iron Claw Orcs
The Camp of the Iron Claw Orcs is a rocky, inhospitable region that hosts a seasonal campsite for the local greenskins. Temporary shelters and huts are abandoned one month only to be reinhabited the next. The area is largely infertile, and only Orcs & Goblins would find the landscape a pleasant place to build. Nonetheless, the area has, on occasion, become a tactically important stretch of rock and has seen its share of battles.
The Camp of the Iron Claw Orcs is rocky and barren, but is considered a plains section for purposes of movement.
Whenever banners fight a battle in the map section that contains the Camp of the Iron Claw Orcs, each player should roll a D6, consult the chart below, and apply the results. Do not make this roll if the territory has been Razed. When the territory has been Razed, the local greenskins make for more hospitable campgrounds and will neither help nor hinder banners in this map section. If and when the territory Recovers, the Orcs & Goblins return, and you should make this roll as normal.
- 1-2: The banner encounters few of the local greenskins. The banner is not affected in any way.
- 3-5: The banner encounters a small band of Orcs & Goblins. Orc & Goblin banners may recruit them and add 2D6x10 points of troops to their numbers for the upcoming battle only. Non-greenskin banners suffer from ambushes and small skirmishes that precede the main battle, and lose 2D6x10 points beforehand.
- 6: The banner encounters a large warband of Orcs & Goblins, perhaps a small Waaagh in the making. Orc & Goblin banners may recruit 2D6x25 points of troops for the upcoming battle only. All other banners lose 2D6x25 points of troops in the encounter.
Whenever a battle is fought in the Camp of the Iron Claw Orcs, generate terrain with the chart on p. 223 of the Warhammer rulebook as normal. In addition, place D3+1 Orc huts in a cluster in the center of the board.
[Hut-building workshop with photographs, omitted as hobby material.]
Malko
The fortress-town of Malko is a large settlement by the standards of the Border Princes. Though its palisades are makeshift and often poorly maintained, they have repelled many a would-be conqueror. If a banner from the realm that controls Malko is attacked in this map section, the banner will withdraw into the fortress rather than meet the enemy on the field; play the Siege of Malko scenario instead of a Pitched Battle. Note: as Malko is already a Fortified town, it cannot be Fortified farther (i.e., the additional points for playing in a Fortified map section are already incorporated in the Armies section of the scenario). Note also that the map section containing the town of Malko is a plains section.
Siege of Malko
Overview. The Defenders have taken refuge in the fortress-town of Malko, and the Attackers are laying siege to it. Except where noted below, the scenario follows the rules for the Siege scenario on p. 259 of the Warhammer rulebook.
Armies. Armies are chosen from the Warhammer Army lists to a value of 2,250 points for the Attackers and [points value unclear in scan] points for the Defenders (half the points of the Attackers, plus 200 for fighting in a Fortified city). This value may be increased or decreased by support, army-specific rules, and/or other campaign rules. Remember that as Malko is already a Fortified city, it cannot be Fortified further. Also, both sides are allowed to buy siege equipment as explained in the Rules of Siege section of the Warhammer rulebook.
Battlefield, Deployment, Who Goes First?, Length of Game. Per the Siege scenario in the Warhammer rulebook, p. 259.
Special Rules. All the Siege rules are in effect for this scenario.
Victory Conditions. See the Victory or Defeat section of the Siege scenario in the Warhammer rulebook.
Tor Anrok
The ancient tower of Tor Anrok was once the home and stronghold of the House of Lothain, a noble family of High Elves who could trace its bloodline back to Tiranoc in Ulthuan. Although the Elves abandoned the tower long ago, most of the structure stands to this day. Due to the clever Elven design, the tower is very difficult to see from the surrounding areas, so much so that legend has it that Tor Anrok can only be seen one night a month, and even then, only when moonlight strikes it. Either these legends exaggerate, or the Elven magics that once obscured the tower have faded, for the tower can indeed be seen by the sharp-eyed and by those who know where to look for it. The tower itself provides an excellent defensive position. It is hard to see and therefore attack; however, it is also an outstanding vantage point from which to observe the surrounding lands. The map section containing Tor Anrok is a plains section.
Banner types can take advantage of Tor Anrok to survey the surrounding land and determine the troop movements of the enemy. Realms that control the map section containing Tor Anrok can take advantage of the following three rules:
- Watchtower. Banners that begin the Campaign Turn in the Tor Anrok map section, and sections adjacent to it, always win Don't Pass in the Night rolls, even against High Elf banners.
- Command Post. In battle, players controlling banners that began the Campaign Turn in the Tor Anrok map section or a section adjacent to it may choose which side of the table to deploy their forces on, whether to deploy first or second, and whether to take the first or second turn.
- Wizard's Tower. In battles fought in the map section containing Tor Anrok (but not adjacent sections), the player who controls the map section may place an Elven tower in his Deployment Zone. A single Wizard may be deployed on the tower. No other troops may be deployed there, as they would disturb the magical ley lines that give the Wizard his power. A Wizard casting spells from the tower doubles the range of his spells because of the inherent magical energy imbued in the tower's walls and design. Also, Wizards in the tower casting Magic Missiles or spells that require line of sight can see ANY target within the spell's increased range.
In addition to these three rules, Elves of any type can bolster the magical efficacy of their banners by studying the ancient Elven carvings of Tor Anrok. As long as a Wood Elf, Dark Elf, or High Elf realm controls the map section containing Tor Anrok, one Wizard in each of that realm's banners may take one more spell than his level would normally allow. Note that this bonus does not increase the Wizard's level, but simply gives the Wizard an additional spell to choose from on the battlefield.
The Elven design of Tor Anrok has stood the test of time, and the tower is nearly impossible to destroy. Controlling players may still take advantage of the Watchtower and Command Post special rules, even if the territory has been Razed. None of the other special rules apply when the territory is Razed, however.
[Photograph of a High Elf tower model, with a caption naming its builder and the novel that inspired it, omitted.]
Town of Aldium
In the Border Princes, the closest thing to an international trading city like Marienburg is the town of Aldium. Because of its proximity to the Old Silk Road and the fortress of Malko, Aldium sees a good deal of foreign trade, a good deal, that is, for such a remote area. This traffic brings a number of specialist mercenaries, caravan guards, and other well-trained soldiers into the town. Just outside of Aldium lies a small colony of artists, intellectuals, Tilean engineers, outcast alchemists from the Empire, tinkers, mechanics, and craftsmen of all kinds. This intellectual and free-spirited community is very accepting of all kinds of eccentrics: religious zealots, discredited wizards, experimental animal husbandmen, and the odd mystic creature or two. While the work that goes on in Aldium would almost never be allowed in nations where Witch Hunters hold sway, the remoteness of the Border Princes can sometimes breed an atmosphere of tolerance and permissiveness.
If you control the map section containing the town of Aldium, you may add an additional Special OR Rare choice to every banner in your realm. For instance, a 2,250-point Empire army, which can normally field four Special choices, could field five Special choices if the Empire controlled this map section; similarly, a 2,250-point Hordes of Chaos army, which can normally field two Rare choices, could field three Rare choices if the Chaos realm controlled this map section. This extra Special OR Rare choice must be paid for from your normal allotment of points and does not affect the minimum number of Core choices you must field.
The Warrens
In the southern foothills of the Black Mountains lies a region of unusual rock formations known as the Warrens. The rocks form a virtual labyrinth of natural corridors, walls, and chambers, which are perfect hiding places for ambushers and cutthroats. A famous group of mercenaries called the Carrion Band is rumored to make its home there.
Because of the rugged and rocky landscape of the Warrens, banners must make a Difficult Terrain Test to enter this map section, just as they would to enter a mountainous map section. Any battle fought in the Warrens will not be a Pitched Battle, but instead will be fought according to the Rock Labyrinth scenario. Razing the map section chases off any ne'er-do-wells living there, which means that human armies cannot conscript the local cutthroats (see the Armies entry of the Rock Labyrinth scenario). However, rock does not burn. Thus, a successful Difficult Terrain Test is always required to enter the Warrens, even when it is Razed, and the Rock Labyrinth scenario, rather than a Pitched Battle, is always used in the Warrens. When the territory Recovers, the brigands return and may be drafted as normal.
Rock Labyrinth
[Photographs of the Rock Labyrinth battlefield and an ambush are omitted.]
Overview. Two armies meet in the Warrens, a rugged area in the foothills of the Black Mountains, which is home to a labyrinthine series of rock formations. Maneuvering and fighting in the Warrens is difficult, and ambushers may strike from around every corner.
Armies. Armies are chosen from the Warhammer Army lists to a value of 2,250 points. This value may be increased or decreased by support, Fortification, army-specific rules, campaign rules, and/or other relevant campaign rules. Empire, Bretonnian, and Dogs of War realms that control the Warrens may add an additional 100 points to their banner size when fighting in this map section, as the army conscripts some of the local rogues into service. However, the army may not draft these mercenaries if the map section has been Razed.
Battlefield. The table should be covered by rock formations that divide the battlefield into a maze. All of the rocks are very large and are thus Impassable Terrain. Rock structures should be set up at least 5" apart to allow units to pass between, but there should be no straight paths from one side of the board to the other.
Deployment. Armies deploy per the rules for a Pitched Battle (see pp. 199-200 of the Warhammer rulebook). One unit in each army may be deployed as Ambushers (see Special Rules).
Who Goes First? Both players roll a die. The player who finished his deployment first (not including Scouts and Ambushers) may add +1 to his die roll. The higher-scoring player may choose to go first or second.
Length of Game. The game lasts 7 turns or until one player concedes.
Special Rules.
Skirmishers. In addition to any Skirmishers normally allowed by the army lists, any two units (except war machines) in each player's army may adopt a Skirmish formation for the duration of the battle.
Ambushers. Players may hold a single Skirmishing unit (no characters; may include a unit champion) in reserve for an ambush later in the battle. The unit is not deployed at the start of the game. At the start of each player's 2nd turn, he places a marker (a die or small coin will do) anywhere on the battlefield to indicate where he would like the Ambushers to appear. The player then rolls the scatter and artillery dice at the start of his 3rd turn. If a hit is rolled, the marker remains in place. Otherwise, move the marker as indicated by the dice. The marker cannot fall on top of Impassable Terrain (if it does, move the marker to the closest point off of the Impassable Terrain). The Ambushers emerge from their hiding places within 4" of the marker and may move, charge, shoot, and fight as normal.
Victory Conditions. Unless one player concedes, use the Victory Points chart to determine the winner of the battle.
Strategy Tips
The special map sections play a big part in determining the winner of the campaign. Most are as valuable as five regular map sections, and Malko counts as ten. As you craft your overall strategy for the campaign, make sure you take the special map sections into account. You can try to take control of these special territories to benefit your own realm, or simply to deprive your opponents of taking them. For instance, the Geistenmund Hills are a highly defensible area for Tomb Kings and Vampire Counts banners. If you are playing one of these armies, you may want to position your banners to take control of the Geistenmund Hills. Similarly, if you are playing against one of these armies, you may want to take and hold the Hills, simply to prevent your opponent from doing so. The same applies for Orc & Goblin players (as well as their opponents) and controlling the Camp of the Iron Claw Orcs. Capturing Tor Anrok will help all armies, particularly Elves, and human armies will benefit from possessing the Warrens. Of course, the town of Malko is the big prize, as it counts as ten regular map sections in the final tally. Even realms of medium size can win the campaign if they include this valuable, all-important map section.
Army-Specific Rules (Border Princes)
The harsh landscape, remote location, and feudal politics of the Border Princes influence the way some armies move and fight there. Although some armies can adjust to "the Border Prince way" of doing things and even gain an advantage by doing so, many others have difficulty adapting to clambering through rocky terrain, enduring cold winters, and surviving far away from familiar territory. Thus, the following special army-specific rules apply to this campaign. These rules do not supersede the army-specific rules listed in Chapter 2 but apply in addition to them.
Beasts of Chaos. Beastmen thrive in wilderness regions like the Border Princes and can move boldly and quickly when no human settlements are nearby. As a result, each turn, one banner in the Beasts of Chaos force may attempt a Forced March through two Forest map sections. See the Orc & Goblin special rules on p. 41 for more specifics about Forced March. The banner moves just like a Forced Marching Orc & Goblin banner and must roll on the Forced March Table.
Chaos Dwarfs and Dwarfs. Both Dwarfs and their chaotic counterparts covet the mineral deposits found throughout the Border Princes and can create high-quality weapons, armor, and artillery from the ores they mine there. Whenever a Dwarf or Chaos Dwarf banner is attacked in a Fortified map section, they may add [30 or 300; the figure is unclear in the scan] points to their banner size, rather than the usual 200 points. This bonus accounts for the ready availability of quality armor and weapons in these territories, and not necessarily an increased number of troops or defenses.
Bretonnians. Bretonnian armies are assumed to be part of the forces of one of the many fiefs of the Border Princes. As such, Bretonnian Border Prince forces can use their knowledge of the local landscape to gain a tactical advantage in battle. No matter the scenario or other rules, Bretonnian players may always select their Deployment Zone after terrain is generated. This rule applies even in map sections such as those surrounding Tor Anrok when another army would otherwise be able to take advantage of the Command Post rule. The Bretonnians' intimacy with the local landscape makes them formidable opponents indeed.
Hordes of Chaos (Daemon or Mortal). In the Empire, Witch Hunters, Priests, and a populace grown weary of the constant threat of mutation remain ever watchful for signs of Chaos. In the Border Princes, the powers of Chaos have a comparatively free rein. The Chaos player may sacrifice 50 points from his army list to send agents of corruption into the enemy camps to try to convert soldiers to worship of the dark powers. After the armies have deployed but before the battle begins, the Chaos player may nominate one unit in his opponent's army to be the target of the agents of corruption. The controlling player must make a Leadership test for the nominated unit. Chaos units, characters, and units that are Immune to Psychology are immune to the effects of agents of corruption. If the Leadership test is passed, the agents of corruption have been discovered and executed, and the unit suffers no ill effects. If the Leadership test is failed, apply one of the results below, according to the Chaos god the agents serve:
- Chaos Undivided. Desertion (i.e., conversion to Chaos) depletes the ranks of the unit. Roll a D6 for each model in the unit (not for the characters). On a result of 1 or 2, that model is removed from play.
- Nurgle. Disease weakens the unit. All the members of the unit (except characters) suffer -1 Toughness for the duration of the battle.
- Slaanesh. Enrapturing visions of last night's passion distract members of the unit. The unit is subject to Stupidity for the duration of the battle.
- Khorne. Khornate cultists infiltrate the enemy camp and claim blood and skulls for their deity. Roll 2D6 attacks on the unit at WS4 and S4 with no saves of any kind. Characters are immune to these attacks. These attacks will not cause Panic, as the attacks actually took place hours before the battle began.
- Tzeentch. At the start of each of the unit's turns, make a Leadership test for the unit. If failed, some of the members fall victim to the horrible warping power of Chaos. Roll a D6 for each member of the unit (except characters). On a result of 1, the model collapses as tentacles erupt from its arms, blood shoots from its eyes, or flames burst from its pores. Remove the model from play. If the Leadership test is passed, the unit resists the power of Chaos and suffers no ill effects that turn. If the unit loses 25% or more of its numbers to mutation in any 1 turn, it must make a Panic test or flee. This effect may be dispelled just like a spell that Remains in Play after the 2nd turn of the game (effective casting value is 5).
[Photograph of Skaven alarmed to find that one of their own has been horribly warped by the powers of Chaos, omitted.]
Terrain Generation in the Border Princes
To generate terrain for battles in plains map sections in the land of the Border Princes, roll on the terrain generator table on p. 223 of the Warhammer rulebook. For battles in the other map sections, modify the results as follows:
- Mountainous map sections: ignore results of Fen or Ruin on the chart and place a Hill instead.
- Forested map sections: ignore results of Crag, Cairn, or Rocky Ridge on the chart and place a Wood instead.
- Riverbank or bridge map sections: ignore results of Cairn, Ruin, Ravine, and Rocky Ridge on the chart and place a River or Stream instead. Subsequent rolls of Cairn, Ruin, Ravine, or Rocky Ridge indicate that there is a bridge crossing the River or Stream.
- Marsh map sections: ignore results of Cairn or Ruin and place a patch of Difficult (swampy) Terrain instead. Also ignore results of Ravine and Rocky Ridge and place a Stream instead.
- Road map sections: ignore results of Crag, Ravine, and Rocky Ridge and leave the area empty.
[Battlefield photograph caption: "The terrain generator chart on p. 223 of the Warhammer rulebook was used to determine which terrain pieces would be used on this battlefield."]
Victory Conditions (Border Princes)
The Border Prince campaign lasts 20 turns for games with five or more players, and 25 turns for games with four or fewer players. At the end of play, a brutal winter, raging blizzards, deep snows, and a late spring bring an end to the age of warfare. The realm that controls the most land will be able to take advantage of the momentary peace to secure borders, tax the people, manufacture weapons, and build a large army. As such, when spring finally comes, the realm's dominance of the land will be all but complete.
At the end of play, count up the number of map sections controlled by each player. Malko counts as ten map sections; all other special map sections count as five. Razed map sections (even Razed special map sections) don't count. The player with the highest total is the winner.
If the winner controls 50 or more map sections, he is the undisputed victor in the war of conquest. All other realms in the Border Princes submit to his enlightened rule, and the land formerly divided by small fiefs and principalities experiences a new age of unity and centralized authority. All pay tribute to the warlord, for his power is great.
If the winner controls 35-49 map sections, his control of the region is all but complete. Certainly, pockets of resistance will need to be suppressed when spring eventually arrives, but almost everyone acknowledges the power and authority of the warlord. With only a bit of luck and a few small battles to secure the land, the prosperity of the new realm is all but assured.
If the winner controls 34 or fewer map sections, his control over the region is tentative. He will need to form some alliances with other feudal lords in the area to secure his power and unify the land. Should two or more aspiring commanders ally to take up arms against him when spring finally comes, the balance of power could shift quickly.
If there is a tie for first, ownership of the land is still under dispute, and armies are given orders to march, even as the last freezing winds of winter blow down from the Black Mountains. The fate of the area will be decided once and for all. The two first-place finishers should play a Tiebreaker Battle to determine the overall winner.
Tiebreaker Battle. Count up the number of map sections controlled by each of the first-place players, but this time, count Malko and all other special sections as one section only. The player with the higher total may choose the map section in which the battle will be fought (if this total is tied as well, dice off to determine who chooses). He may choose to defend one of his own map sections or to attack one of the map sections controlled by the other first-place finisher. Both players nominate one of their banners to fight the battle. Place these banners in the nominated map section (though a banner may take advantage of any pre-existing Fortifications if it has not moved). A battle is fought in the map section as normal, with all the applicable penalties and bonuses (e.g., Fortifications, support, army-specific rules, and special map section rules). Most often, the battle will be a Pitched Battle, but it could be a particular scenario if the battle is being fought in a special map section. The winner of this tiebreaker battle is the winner of the campaign.
[Photograph of two players at a campaign table, with a caption (partly legible): "...territories, the Dwarfs have clearly beaten the Goblins." Omitted.]
[The journal excerpt on this page is flavour fiction and is not transcribed.]
Options for the Border Prince Campaign
Of course, you are not limited to playing the Border Prince campaign exactly as it has been described here. What follows is a list of possible variations that you may wish to try:
- You can vary the standard banner sizes from 2,250 to some other size. Note that if you want to play very small games of Warhammer, say less than 1,500 or more than 3,000, you may want to vary the points values of [part unclear in scan] banner size. For instance, supporting banners normally add 200 points to the fighting banner's size; you may want to alter the amount such that supporting banners add 10%. Thus, if you are playing in a campaign with 4,000-point banners, supporting banners would add 400 points. Similarly, in a campaign with 800-point banners, support would add 80 points. By extending this logic further, Fortification would add 10%; Dogs of War armies could add an additional 5% to their size; and so on.
- You can alter the Victory Conditions of the Border Prince campaign to any of the optional Victory Conditions listed in Chapter 2.
- You can set aside the rules for the special map sections and play a campaign without any special sections. Alternatively, you could rename the special map sections and make up your own rules for them, as described in Guidelines for Creating Your Own Map in Chapter 2.
- You can play the Border Prince campaign as written but also add a Game Master to introduce random events, special scenarios, ad hoc rules, and the like. This type of campaign can be fun if you want to try creative strategies, like having your troops build a bridge over a river or a special Dwarfen steam-driven zeppelin. The Game Master will create special rules, impose special tests, and so on for the special strategies different players attempt, and generally act as an impartial judge for all the proceedings. However, such a campaign will by no means be "fair," and players interested in a more competitive campaign are advised to steer clear of this style of play. See Chapter 4 for more details on Games Mastered campaigns.
- Play "blind." This type of campaign requires a neutral Game Master. Each player has his own copy of the map, on which he keeps track of his own realm and banners. Only the Game Master has access to the master map that denotes all the players' realms and banners. Play continues in this fashion until banners come within two map sections of each other, at which time the Game Master reveals only the location of proximate banners.
- Establish alliances before the campaign begins and state that the alliances can never be broken. This type of campaign could be played to suggest that the forces of good have allied to combat the forces of evil or Chaos (e.g., High Elves, Empire, and Dwarfs vs. Hordes of Chaos, Dark Elves, and Tomb Kings). Establishing permanent alliances can also make for a convenient long-term campaign. When one player is unavailable, his allies can submit orders for his banners in his stead. Thus, this style of campaign is ideal for players with busy schedules and a lot of real-life commitments.
[Photograph of Chaos warriors and a caption omitted.]
Chapter 4: Games Mastered Campaigns
There comes a time when many tabletop generals want to delve deep into the character and history of the Warhammer world and may want to try out experimental rules and creative strategies. Games Mastered campaigns, the most involved and complex type of gaming endeavors, may be interesting options for such veteran players to explore. These epic campaigns reward creative strategies, allow for troop types and attack styles that aren't included in the standard rules or any of the previous campaign chapters, and encourage gamers to create unique terrain and custom models to use as their realms expand. Some of the rules and guidelines discussed in this chapter could be incorporated into almost any kind of campaign (and we encourage you to experiment with them). However, campaigns officiated by a Games Master allow for the maximum amount of freedom, improvisation, and creativity.
This chapter, unlike the previous campaign chapters in The General's Compendium, does not contain hard and fast rules to follow. Instead, it suggests some guidelines for running an advanced campaign, one that will most likely be facilitated by a neutral Games Master, and provides lots of charts that may be incorporated into your campaign. You may choose to use all the rules discussed in this chapter, some of them, or none at all.
What Is a Games Master?
A Games Master, or GM for short, could be called an umpire, campaign organizer, or omnipotent judge. Some power-mad GMs may even wish to be addressed as Mighty Potentate or Overlord of the World. The point is that a Games Master is a non-playing referee who runs a campaign.
To reproduce the feeling of being in a "real" Warhammer general's shoes, Games Mastered campaigns keep the players somewhat in the dark. You can't know everything that is going on in the Warhammer world. You don't know where your enemies are (or even who they are in some cases!), what strength the enemy has, or exactly what the enemies' plans are. To keep the players guessing, a GM will need to coordinate what is going on and determine what information should be passed to different players.
Finding a Games Master
If you are lucky, then your gaming group will have a natural candidate for Games Master. GMs tend to be the ones who are always coming up with elaborate scenarios, what-ifs, and extra background for your games. If, however, your group is excited about a campaign but no one wants to be the Games Master, then you have a dilemma. It's possible to take a few elements presented in this chapter and incorporate them into a map-based campaign with no one "in charge" of running it. Or someone could be voted, as Games Master, especially when the campaign will be short and another will quickly follow. However, there are many elements detailed in this chapter that you should be leery about adding into your campaign without a GM.
Remember as a final warning to all GMs who want to play and run the campaign: it is hard to be an impartial judge when you are worried about the doings of your own army!
[Photographs of a Games Master's table and of a tunneling machine model, with captions, omitted.]
So What's Your Story?
A campaign is really about developing a story. Good stories have a beginning, a middle, and an end, and it is a good idea to set down a campaign narrative to set all of that up. With the rich background of the Warhammer world, it is easy to dream up a huge number of great gaming situations. That can be a campaign's first downfall: there are simply too many cool things to do, and you can't fit them all in. Campaigns without a theme or ending in mind have a tendency to drag on indefinitely, which causes excitement to wane and players to drop out. It is better to have a campaign end with everyone wanting more than the campaign has to offer. Maintain focus by having a clear goal, like linking all your cities with roads and bridges, clearing the woods of all evil doers, slaying the rival king, or being the first player to control a certain area of the map. It is possible to have different players with different objectives, but make sure all of the objectives fit in the narrative of the campaign.
[Caption to a photograph of a Warhammer rulebook and army books: "When seeking inspiration for your own campaign storylines, look to the background and pictures of the Warhammer rulebook and individual army books. Think about interesting plots, terrain, and gaming situations."]
Ambitious Warlords
There is some common sense advice here: don't bite off more than you can chew! If you have 100 models in your campaign, how are you going to play out historic battles that involved tens of thousands of troops on each side? It's possible to break these larger battles down to their component parts, but such games work better in linked campaigns in which each battle leads up to a larger one. There is nothing wrong with an ambitious goal, but it must mesh with your players, armies, and terrain. Our Grandiosity Meter, below, allows you to cross-reference your own plans. For instance, a goal of running a campaign involving many battles in the turbulent Border Princes ranks low to medium on the Grandiosity Meter. Those lands are in constant warfare, with small fiefs and duchies rising and falling constantly.
Grandiosity Meter. How vast are your campaign goals?
Realism Range. How detailed do you want to make your campaign, and at what level of realism in the Warhammer world are you aiming? Will you re-create historical events in the Warhammer world's past, such as the ravages of the infamous Vampire Count Konrad von Carstein? Or are you more interested in developing your own heroes and your own small corner of the Warhammer world, like the notorious defense of Splatzburgh by the minor Empire Earl of Splatz (if you don't recognize the Earl, that's 'cuz we made him up!)?
[Grandiosity Meter and Realism Range chart, with the following legible examples on the two axes. Grandiosity, high on both ends of the scale: the very large, highly detailed Siege of Praag is one of the Warhammer world's most famous battles. Realism, low: a campaign in which Chaos, Wood Elf, and Lizardmen armies fight over territory near a tropical island is not very likely and must be explained by the narrative. Realism, high: armies fighting for a territory in the Drakwald forest is not very grandiose but has happened often.]
If you've never run a Games Mastered campaign before, it's a good idea to stay away from a very grandiose, world-shaking narrative. Stick to a more humble plot, as it's usually better to play and finish two or three smaller campaigns than to fail to finish one! You can always link a couple of campaigns together for a cataclysmic ending.
Beginning Your Plan
When setting the time, place, and relative scale of your campaign, some of the most important things to keep in mind are the number of players, the types of armies, and the hobby proclivities of your players.
Number of Players. Asking how many players can join a campaign is like asking how many players can join a game of Warhammer. The answer is, of course, an almost unlimited number, but the nature of the campaign will change based on the number of players. It will be nearly impossible to pull off the level of detail a determined band of three players can achieve in a mega 20-person campaign. The larger the scope and looser the rules of your campaign, the easier it is to add players.
Types of Armies. Choosing a storyline will dictate the goals of each army in a campaign. If you have four players interested in joining a campaign and three of them have Elven armies, your theme would do well to center around something Elvish. Perhaps there is an Elvish civil war, or a quest to recover a long-lost Elven magic item imbued with mighty powers. For a particularly disparate group of armies, it is sometimes best to place the campaign storyline in an area prone to expeditionary forces, like the constantly changing Border Princes, or perhaps an isle off Lustria that is rich in gold.
Hobby Proclivities of the Players. Gear the campaign towards what your players do best. If your gaming group has only desert terrain, it might be smart to set the campaign in that climate. If one player collects and paints slowly and has only a tiny army, pair him with an ally or make him a subcommander. Campaigns inspire those involved to do more hobby activities, like painting more units, converting a few new character models, and creating themed terrain, but it is too much to ask for all the players to join in at the highest level. A campaign that hits the ground running in terms of army and terrain, with plenty of room for expansion, is the perfect answer. In this way, players can add to armies and build terrain as an ongoing process in the campaign, instead of starting off already behind.
[Caption strip under a photograph of a campaign: "...the Goblin force is suffering damage to cave-ins and the occasional failed Animosity squabbles. The Goblins finally emerged into the lower shafts of the Dwarfen mines. The shock and surprise of the Dwarf player was followed by the comment, 'I didn't see any rules for underground movement!' It's true, there was nothing about moving underground in the small rules packet that the GM handed out, but the Night Goblin player thought of it, asked the GM, and helped work out a progress chart (based on Leadership and Animosity tests). The underground battles that followed were classic. This is a great example of new rules being implemented as and when appropriate."]
And It Takes Place Where?
Once you've started to work out exactly who is playing and which armies they will use, it is essential to find a location for your campaign. The setting can guide all that is to follow (like terrain, Random Events, and end goals to win the campaign, and more). By putting a finger on the map and saying, "Here," the Games Master can jump start his players' imaginations and his own. The Warhammer world is a very large place, and quite a lot is going on.
Putting It on a Map
A map of some form is essential for tracking the movement of armies and the location of forts and cities. If using a GM, it is time for some decisions. How visible are the different realms to each other? Will the players share a single map, or does each player get his own version that shows only the troops and locations he controls and/or has explored? There are countless ways to settle this issue; they all boil down to how you want to run your campaign and how much time you have to put into it.
Map possibilities were well explored in Chapters 2 and 3, and using a 3D map, as seen on the next two pages, is an interesting option as well.
What kind of scale you want to cover is every bit as important as which location you choose. Many players and clubs are irresistibly pulled towards using the entire Warhammer world map as the basis for their campaign. This massive whole-world scale is perfect for traditional board games re-creating world conquest, but when you plan to solve every battle by playing a game of Warhammer with suitable terrain and models, the whole-world map scale quickly becomes ridiculous.
Conquering a dark and loathsome border area in the Empire may not seem as glorious as grinding the entire Old World from Bretonnia to the Worlds Edge Mountains under your heel. However, even global domination has to start somewhere. With a more reasonable scale, you can actually field all the armies and terrain you'll need. After the campaign's over, you have lots of the Warhammer world still to conquer.
How Your Campaign Works
Each GM or group of players will have to lay out and decide how the campaign will work. Is movement in turns or simultaneous, will weather be a factor, are the armies balanced, or does one side have an edge to start out with? It is worth getting the feel for the level of detail and type of commitment everyone is up for before laying down the ground rules.
Before we dive into rules options, one last warning. One of the joys of an advanced campaign is that it can break free of the chains of rules and really let players get creative. But the truth is that in order for a campaign to run well, there must be some established rules for normal game play. Players don't mind being surprised by an extraordinary situation that fits the themes of your campaign or a particular army, but an inexplicable turn that doesn't match up will drain the fun and credibility. The moral? Set perimeters and violate them only when necessary.
More Decisions for the Games Master
Setting up a campaign from scratch is no easy job, and there are many decisions to make. It is possible to turn the elements into a complex game in their own right. Groups will want to steer clear of such a situation and focus on the strategies and elements that will make their games of Warhammer more fun. With that in mind, the following is a list of elements a group or GM must establish before starting a campaign. It is by no means a definitive list, and the topics are discussed in the sections that follow:
- Tracking
- Defining a Player's Realm
- Battles
- Turn Sequence / Real Time Plan
- Movement
- Terrain
- Uneven Battles
- Scouting
- Types of Army Banners
- Baggage Trains
- Scattered
- Troop Recovery / Injuries / Prisoners
- Economics / Supplies
- Landmarks
- Random Events
- Magic
- Starting Forces / Positions
- Record Keeping
- Rules Packets / Newsletters
[The printed list's left-hand column is partly unreadable in the scan, so the entries above are the legible items.]
In order to help the prospective Games Master get started, we will offer some ideas, suggestions, and rules that we've tried. It will be up to each Games Master to pick and choose the elements he wants, skip the parts he doesn't want, and convert or add anything he'd like to add.
For instance, if your campaign is set in the Worlds Edge Mountains and is concerned with Dwarfs protecting one of their ancient holds from encroaching evil armies, it will more than likely need to have underground passages, hidden entranceways, and a schematic of the inner-mountain kingdom.
[Photograph of an Empire player sending forth his forces, with the caption: "An Empire player sends forth his forces. Enemies can see the army banners, and they all look similar, but the composition of each will vary greatly. Only the Empire general knows which forces each army banner contains."]
Map Tracking
Once you've decided where the campaign will take place, what kinds of things are you going to track on the map? What gets labeled on the map, and what doesn't? There are no guidelines every campaign must set. It may be plausible to draw each hill, mark down every stream, or to create an unbelievable level of detail, but we've found that sticking to some basics has brought us the most success. Large and/or important terrain features are a must: things like forests, rivers, swamps, as well as major infrastructure like roads and bridges. If a region is very famous or well known for phenomena like flooding in the spring or giant spider infestations, it is very characterful to note this information down. It may come into play later in the campaign. The important thing to remember is not to get bogged down laying out every gaming table on the map; it just won't work. However, if you label generalities, like patches of bog or scrubby plain, it will be enough direction to know what regional flavor should a battle occur in that zone. Then you just have to worry about tracking what each player is most interested in.
Defining a Player's Realm
In addition to terrain features, you must track each player's realm. What is in each realm? Again, it is possible to track the movement of every individual character, explore different types of industry, and get every detail, but we suggest a smaller stable of elements. Campaigns focus around a player's population centers, fortifications, and their armies, and so we've listed them below.
- Landmarks. This generic term describes any of the structures that a player may have in his realm, including a capital, Supply Centers, watchtowers, and fortresses.
- Armies are represented by banners on the map. Each army should be distinguishable from the others, as each may be composed differently. You don't want to confuse a banner that has lots of elite war machines with a banner that doesn't!
- Terrain features may need to be added based on your campaign setting (e.g., water will require ports and ships) or theme.
Army Banners and Size
As in map-based campaigns, each player has control of a certain number of banners. These armies are moved about the map. Should they meet an enemy, a Warhammer battle ensues. Unlike banners in map-based campaigns, however, these armies are not interchangeable. Armies may be composed differently, made to different points sizes, and will gain and lose troops, characters, and war machines based on further recruitment and battles. All of this information will need to be tracked. Each player will want to keep a roster of the exact points and contents of each banner (see p. 84 for an example), and if there is one, a GM would do well to keep an eye on the proceedings.
We suggest a minimum and a maximum size for armies. Too small a banner won't be an effective fighting force and wouldn't be large enough to register on the map, while too large a banner would strain supplies. You may choose to adjust the numbers, but generally, banners should have a minimum of 1,000 points and a maximum of 2,500. There is no limit to the number of banners, and nothing to say that two or more large banners could not travel together to create a very imposing strike force. This variation also means scouting (see rules on p. 74) can become a fun and strategic part of the campaign, as you won't know the size or composition of your foe's armies. After all, finding out ahead of time if you are confronted by a 3,000-point army or a 5,000-point force will make the difference between fighting and fleeing!
Note that it is up to each player to create his own army banners. The normal army book restrictions of Core/Special/Rare certainly apply when players purchase their starting forces (see Starting Forces on p. 84), and the same rules apply when buying reinforcements each round (see the Cost Chart on p. 76). However, over the course of many battles and after several seasons of recruiting, reforming, and consolidating army banners, it is possible to have a non-standard mix of Core, Special, and Rare choices both in each individual banner and in the overall army composition of the realm as a whole (i.e., all the banners combined).
3D Map Showcase: Making Your Own Corner of the Warhammer World
Here we show you some details from one of our own 3D map campaigns. Such tables are fun and easy to build, but we warn you, they are very tough to store!
Here is the 3D map board we built to play one of our campaigns here in the US Studio. This board measured about 4' x 4' and was the right size for our eight-player campaign.
Modeling Challenges. Building a 3D map is definitely a lot of fun and helps you visualize the campaign. The counters and markers were made up from a variety of odds and ends, including Warmaster models, old Epic-scale and Mighty Empires miniatures from the archive, and a liberal amount of green putty!
[The showcase's remaining photographs and captions (close-ups of a river bridge, a Watchtower, a Supply Center, the Empire capital, the forbidding Undead capital, a human city, and parts of the modeling process) are omitted. Their captions are too small to read reliably in the scan.]
[Photographs of the 3D map's terrain and models, with captions. Caption text reads, in part: "To the right is an army banner for the 3D map from a Vampire Counts army. Its ... can be used to represent other ... banners ... The number of troops, it's a good practice to keep your banner representations similar to their actual composition. This banner was chosen because the army contained mostly infantry." Captions are partly illegible in the scan and are not reproduced beyond this note.]
Turn Sequence. Having a Games Master means that many unscripted events can take place during a campaign. However, having a clearly defined Turn Sequence that all the players understand is an essential framework. Knowing how turns work, when armies move, when battles happen, and when reinforcements can be added helps shape players' strategies. At any time, a Games Master can alter events, but that is the exception, not the rule.
In an attempt to limit bookkeeping, we divided the game play into two sections: the Campaign Turn and the Season's End Phase. In a Campaign Turn, players move army banners on the map, fight battles of Warhammer on the tabletop, and record casualties. In general, 4 Campaign Turns make up a season. The Season's End Phase is a chance to catch up on all the economics, purchasing, and redeployment. This phase basically represents each realm having a chance to collect the harvest (be it food, mined ore, or magical power), allocate new resources and troops, do any grand-scale campaign elements the Games Master has planned (like Random Events or Campaign Magic), and then start another series of Campaign Turns. Some GMs may want to incorporate weather and actual differences between the seasons (for movement, tabletop rules, etc.), but these elements are not essential (or practical if you are playing in the Khemri deserts).
Many Games Masters will find it convenient to have a standard time table of 4 Campaign Turns equalling a season, but it could be split differently to represent your campaign climate. Kislev, for example, has a very long winter, but this is represented by a very short amount of Campaign Turns, as it is hard for armies to march!
Kislev Steppes. The number of Campaign Turns per season:
| Season | Campaign Turns |
|---|---|
| Summer | 6 |
| Fall/Autumn | 4 |
| Winter | 2 |
| Spring | 4 |
In addition, all Supply Centers produce at half rate (1 Supply Point instead of 2) in the winter.
Priority. At the beginning of the campaign and at the end of each Season's End Phase, each player rolls 2D6 (reroll ties). The player with the highest score will move his army banners first. Other players will move in order of descending die rolls. Priority rolls last an entire campaign season. This shifting changes things up and doesn't advantage the same players all the time.
[Photograph of players at a campaign table, omitted.]
Campaign Turn
Each individual player will do the following in his Movement Phase:
- Make any forage rolls needed.
- Move army banners.
- Scout enemy banners within range.
Once all players have moved, it is time for the:
- Combat support move (if needed).
Next, any non-allied army banners that are touching need to:
- Schedule and play a Warhammer battle.
- Make an after-battle roll for troop and character casualties.
The Campaign Turn is then over. Repeat this process until Season's End (normally 4 Campaign Turns).
Season's End Phase
- Collect Supply Points from each Supply Center.
- Each player rolls a Random Event, if applicable (see p. 78).
- Each player may cast Campaign Magic, if applicable (see p. 80).
- Spend Supply Points and update roster.
- Place new banners and landmarks.
- Reroll priority for next series of Campaign Turns.
[The "Campaign Turn Example" box at the foot of this page is a worked example of three players' turns. Its text is faded in the scan and mostly unreadable, so it is not transcribed. The legible fragments show a Chaos player with three banners moving toward a Supply Center; a Dwarf player with a banner that is building and constructing landmarks; an Empire player with two banners attacking a Chaos Supply Center; and a note that the Warhammer battle matches are then set up and their results applied. The example's final paragraph begins "NEXT, the Warhammer game matches are set up for which the results are applied..."]
Running a Campaign in Real Time
Getting your campaign organized and running smoothly in real time is one of the toughest challenges. Some players want battles every night and can game every night, while other players of the campaign must schedule around countless real-life obligations. Finding the right pace to advance the campaign is the best answer.
Gaming groups are scheduled around a routine, such as a night every week, while some groups are more relaxed and get in games when they can. At the beginning of a campaign, there is often a flurry of activity, but many times, such an approach leads to a fizzle-out factor. A slow and steady pace is often best. One of the most successful campaigns plodded along for well over a year. There were a few peaks when the storyline heated up and major battles ensued, as well as valleys during holidays or when key players were distracted by real life.
There are two real elements to running the campaign: the map part and the tabletop part. The map part includes inviting the players to move their armies, rolling Random Events and other grand strategies. The tabletop part, however, is where the real action takes place and where overall strategy is rewarded or punished. A Games Master runs the map part; that is, he gets everyone's moves, resolves the realm activities sorted out, and when battles need to be fought, a GM then takes a battle roll for the tabletop battles, sets up the scenario and terrain, and double-checks the after-battle casualties.
There will be times when the map action is slow and several Campaign Turns can go by with little or no tabletop activity. The advantage of having a Games Master is that he may keep track on the overall ebb and flow of a campaign. For instance, there often comes a time in a campaign when a few players are highly involved with games and battles, while other players are left by the wayside. At such times, it is a good idea to mix in some Random Events and small story-driven scenarios to keep everyone alert and in the action.
Staying in Touch. If you've never run a campaign before, you'll probably take a while to get into the flow. Some groups gather to do their moves at the same time, while Games Masters may work with each player one at a time on their map moves. We've found that communicating by e-mail with the Games Master can keep everyone up to date electronically.
[Gaming log example: three dated entries (Monday, Wednesday, and Friday) from a campaign group's sessions, with a note of the moves, battles, and Random Events of each session. The entries are partly illegible in the scan and are not transcribed; the legible fragments mention a battle with Dark Elf raiders attacking an Empire Supply Center, a turn in which no battles needed to be fought, a Random Event in which Giant Spiders came out of the woods to attack a watchtower, and a battle to fend off the enormous arachnids.]
[Photograph caption: "Old battlefields make great Supply Centers for the forces of the Undead."]
Great Campaign Themes
Having trouble getting your ideas for setting up a campaign jumpstarted? Here are some classic Warhammer campaign themes that may inspire you.
- Empire Building. The borders of the Empire are dark and dangerous places. Can the forces of civilization (multiple Empire players, perhaps with a Dwarfen or Wood Elf ally) carve out more of the wilderness, or will the forces of evil (Beastmen, Orcs & Goblins, and Skaven) band together and drive the borders back?
- Bloodmoon. A centuries-old plan is put into action as multiple Vampire Counts launch a coordinated attack. From Mousillon, Sylvania, Blood Keep, and the Silver Pinnacle, armies of the dead march against the Old World. Multiple Vampire players represent each bloodline. Defenders most likely include Bretonnia and the Empire, struggling to prevent their nations from becoming larders. The Wood Elves could be caught in the middle, and the Dwarfs have a particular grudge to settle with the mistress of the Silver Pinnacle.
- Stake Your Claim. A race to build a realm of your own in the war-ravaged lands of the Border Princes. You can even use the map from Chapter 3.
- Trouble in Tilea. A campaign between mercenary armies (lots of Dogs of War, but there could also be other armies fighting for pay) and a variety of Skaven clans in Tilea. Both the mercenary side and the Skaven side would have loads of opportunities for alliances and treachery, with no sides being fully trusted. Watch your back!
- Quest Campaign. A classic fantasy quest is underway, with one side (good or evil) marching out to claim the item while other forces must defend. The item in question can be a complete circuit of magical standing stones, the broken and separate pieces of a mighty magical weapon, a lost spell book of vast power, or any number of other options. Only the Games Master knows where the object lies, but there are plenty of clues and red herrings too!
- Lost Isle of Kroakatoa. A legendary jungle island off the coast of Lustria has long been rumored to hold the secrets to vast power left by the Old Ones. The island long ago disappeared off all maps. However, after many ominous signs (falling stars, troubled readings, the bones, and areas of boiling seas), reports filter back of a newly risen volcanic isle already verdant with jungle life! Every Warhammer race that can muster an expeditionary force sends one to plunder the potential wealth of Kroakatoa.
Movement
How far armies can move depends on how large your map is, how many players you have, and how long you want your campaign to last. Players must agree, or a GM must decide, how far army banners may move. To give you some ideas on which to base your decision, here are some tips we've learned from our campaign.
We've kept army movement relatively simple by sticking to two rates: a regular army speed and an all-cavalry army speed. We kept the ratio at (or just under) 1 to 2 for infantry speed versus cavalry. For instance, when using grids, hexes, or territories for managing movement, infantry could move two spaces while cavalry could move four. On our large 3D map game, infantry could move 5", and cavalry could move 9". If your campaign will take place on a very large map, you might want to increase these basic numbers, or decrease them if you have a small map or many players. Some Games Masters will want to add more flavor and variations by adding racial rules, terrain penalties, and specialized army banners.
Some GMs (or players) will be tempted to work out exact distance and mileage, and will spend effort on quantifying the exact length of a turn. That's fine, but the important thing is that all the players understand how far they (and their enemies) can move. Once an army banner touches another, both banners are pinned and may not move any further (see Battles).
Movement Variations. In our own world, movement is aided by roadways, vehicles, maps, and more, but it hasn't always been so. In Roman times, soldiers could march 10-20 miles a day, with distances of up to 80 miles being recorded during heroic forced marches along their roads. It is hard to glean exactly how far any particular force could march day in and day out, but our abstract method of assigning general movement for all banners certainly works and makes for great game play.
On the tabletop, Dwarfs are far slower than Elves, but both army banners move at the same rate. It is possible to add some movement variation for each race, but in the end, we assumed the steadfast determination and sturdiness of Dwarfs would equal Elven speed and agility in the long haul. Regardless of what your group (or GM) decides, the rules for movement should be announced clearly at the start of the campaign.
It is possible, with a Games Master, for banners to put on a burst of speed. In times of great need, a banner might be able to achieve (at a cost) extra movement. An Orc Waaagh! that was building up impetus could certainly roll forward with a short burst of greater speed (although it would probably sustain at least a few casualties as the weak fell or were eaten on the march).
Terrain. The landscape can take a toll on marching, and features like woods and swamps can reduce the movement of most banners by 50%. A Games Master should analyze the playing area to determine which terrain sections will cause movement penalties, and write down the information so that, later in the campaign, the movement penalties are still the same. We used the following movement reductions:
- Woods/Swamp: 50%
- Very Hilly/Rocky: 25%
- Streams: normal
- Mountain Pass: 25%
- Mountain Path: 50%
- Deep Woods: In addition to the 50% Woods reduction, each banner must roll a D6. On a 1, it cannot move.
- River: Large rivers are traversable only at fords or bridges. At fords, the player must roll a D6. On a 1, the banner cannot pass. If the river is swollen from storms, the banner must make a Dangerous Terrain Test.
We also gave army banners a bonus if they traveled their entire movement by road (about +25% distance).
Dangerous Terrain Test (2D6).
| Roll | Result |
|---|---|
| 2 | Entire banner lost. |
| 3 | Lose [D3 x 100 points; figure partly unclear in scan]. |
| 4-5 | May not move at all. |
| 6-9 | Move at half rate. |
| 10-12 | No penalty. |
Random Events or a Games Master may impose movement restrictions on an area. Spring mud slides would slow down banners, and sandstorms could cause banners to move in a random direction. The Dangerous Terrain Test can be imposed when a hazardous move is attempted, like navigating a mountain pass in winter.
Some Warhammer races are more adept at moving and surviving in certain terrain types. For instance, Wood Elf and Beastmen banners suffer no movement penalty for traveling through [word unclear in scan].
[Start of this section is cut off in the scan.] Dwarfs, Chaos Dwarfs, and Night Goblins [word unclear] at mountain travels and suffer only [word unclear] penalties there. A Lizardmen army banner composed of all Aquatic creatures could cross a [word unclear] [sentence cut off] when there are no lords [rest unclear].
Battles. When two enemy banners meet, it is time for the armies to take to the tabletop for a game of Warhammer. The heart of any gaming campaign is the tabletop battle, and every game could simply be a Pitched Battle. However, circumstances can reflect the General's strategy, the approach each army took into contact, and more. A Games Master can try to devise a whole new scenario for every battle. While this is an admirable goal, it may be too difficult for even a Games Master with limited time. A happy medium is to have a standard scenario with a few factors that can alter set-up, deployment, and terrain. There are certainly times when a special scenario will be required, such as sneak attacks, ambushes, multiple banners joining in from different directions, particular terrain, or specific circumstances. See the scenarios on p. 81 for more information.
Backstabbing may occur at any time, however. If a player moves one of his banners next to another player's banner and assumes it is friendly, there is nothing to stop the other player from attacking. Thus, players should be wary of their allies and watch their backs at all times.
After-Battle Actions. After the Warhammer game is played out and a victor is decided (or the game ends in a tie), what happens next? The winner may claim the battlefield, while the loser is generally driven backwards. However, the Games Master may decide to move the loser in a different direction, based on the game, terrain, or an ongoing storyline. Again, the length of this retreat move depends on your map size. In our games, a defeated army was driven back a single hex space or 2" on the 3D map.
After a particularly large clash (over 2,000 points per side) or a deadly battle (over 50% casualties before recovery), the Games Master may want banners to move at a half rate (and half support range) in the next turn. This reduced rate of movement represents the troubles of reorganizing, caring for the wounded, and burying the dead. The Undead are excluded from this after-battle malaise, as they have no earthly concerns for pain or ritual (heck, they're dead!).
After a major battle is fought and the losing side is pushed back, one or both banners may make a move to start the combat afresh on the next turn. Thus, long-term strategies become important. If you aren't convinced your banner(s) can win in combat, having other supporting banners close by and defensive structures like watchtowers or fortresses to fall back to is vital. Otherwise, it is possible for a victorious banner to keep attacking a banner it beat the previous turn.
Combat Support Range. Banners proximate to engaged banners can provide support by moving out of their map section to join the fight. Perhaps they heard the battle, or a banner that was not brought to battle and was within Combat Support range could make a Combat Support move to join the battle. The Combat Support range could just as easily be a hex or territory if your campaign is using that type of map. A banner joining a combat by using its Combat Support move must make a roll on the Support Arrival chart to determine exactly when it will arrive. Ideally, the supporting army will enter combat from friendly lines, but the Games Master can alter the location of their arrival to the enemy rear or flanks if that reflects the supporting banner's logical course. It is possible for additional players and sides to join the fight. All unengaged banners in range may move.
Support Arrival (D6).
| Roll | Result |
|---|---|
| 1 | The supporting army is unexpectedly delayed and can only come to the battle in the 4th turn. |
| 2-3 | The supporting army arrives in sections. During Turn 2, half of the supporting army (half the units and half the characters) may enter the board. The other half of the supporting army will enter the game on the following turn. |
| 4 | The entire supporting army arrives at the beginning of Turn 2. |
| 5 | The supporting army may start the game in a friendly Deployment Zone. |
| 6 | [Row partly illegible in the scan.] |
[A note beneath the table is partly illegible in the scan. It appears to state that, with results 1-5, the supporting army can enter the board from any friendly board edge, and that its troops may not charge on the turn they enter. Treat this note as unconfirmed.]
[Battlefield photograph and caption: "The Empire player has finished his move. The Orc player moves his banner into combat with army A. Player 1 has two nearby banners. Army B is in Combat Support range, while army C is not. Player 1 must now decide if he wants army B to join the combat. If so, he must roll on the Support Arrival chart to determine when help arrives."]
Casualties/Troop Recovery
As armies clash on the tabletop, the losses will mount. Not all of those who fall in combat are dead. Some injured troops will recover, and some stragglers may return. Each banner is also constantly recruiting to bolster the ranks and replace those slain in battle.
After each tabletop battle, players must make a single roll for their entire army's recovery and apply that result to their losses. Losses are any models that are removed as casualties (in hand-to-hand fighting or through Magic or shooting), or that are run down after breaking. Units that flee off the table or are fleeing at the end of the game are not considered casualties (although they will, of course, count as Victory Points in most scenarios). Champions, Standards, and Musicians that are casualties may each be recovered on a D6 roll of 4+. When applying the results of casualties, round up if you won the game and down if you lost. It is vitally important that losses are recorded on a player's roster sheet. Don't forget details like lost Champions!
Rank & File Recovery (2D6).
| Roll | Result |
|---|---|
| 2 | No Recovery |
| 3 | 1 in 4 Recovery |
| 4-6 | 1 in 3 Recovery |
| 7-9 | 1 in 2 Recovery |
| 10-11 | 2 in 3 Recovery |
| 12 | Full Recovery |
Rank & File Modifiers. +1 if you won the battle; +1 for each captured Baggage Train; -1 if you lost the battle.
Recovery Example. A player with a unit of 20 that lost 8 models during the battle rolls a 6 for recovery. Thus, 1 in 3 models will recover. Of the 8 losses, 3 models would be recovered if the player won (rounding up), and only 2 would recover if that player lost (rounding down).
Character Recovery. Make a special roll for each individual hero slain or destroyed on the battlefield. The character in question may have been hacked down, but by skill, sheer luck, or happenstance, the hero managed to escape death. After all, they are heroes, and there is a certain fantasy element to uphold.
Character Recovery (2D6).
| Roll | Result |
|---|---|
| 2-5 | Dead, dead, dead! |
| 6 | Stunned. If the battle was lost, the character is captured on a D6 roll of 1-3; otherwise, Full Recovery. |
| 7-9 | Recovery. Roll a D6. On a 1, roll on the Character Injury Chart. On a 2-6, treat as Full Recovery. |
| 10-11 | Full Recovery. The character regains his banner. |
| 12 | Full Recovery, but the character now suffers from Hatred of the enemy that laid him low. |
Character Injury Chart (2D6).
| Roll | Result |
|---|---|
| 2 | Severe Injury. The controlling player may choose to lose an arm (-2 WS, no great weapons or shields) or a leg (halve Move). |
| 3 | Battered! Character suffers permanent -1 Toughness. |
| 4 | Head Wound. The character now suffers Stupidity. |
| 5 | Loss of an eye! -2 Ballistic Skill. |
| 6-8 | Beaten Down! Character is at half attacks for the next 2 Campaign Turns, after which he will be fully recovered. |
| 9 | Old War Wound. -2 to the character's Initiative. |
| 10 | Leg Injury. -1 Move characteristic. |
| 11 | Lost Hand. Replace the hand with a hook (counts as an additional hand weapon). The character may not carry great weapons but may still take a shield. |
| 12 | Impressive Scars. The character now causes Fear! |
Prisoners. Generally speaking, only character models may be taken prisoner. We have occasionally played with rules for taking prisoners from rank and file models. Doing so unnecessarily complicates the campaign, and many armies would rather execute all but the most powerful heroes, which does make a comment on the brutal nature of the Warhammer world (or maybe just on our cutthroat players?). Still, it is hard to imagine a Dwarf ever hoping to rehabilitate a Chaos Warrior, or Dark Elves showing mercy to their fair cousins. In campaigns where prisoners seem like a reasonable option, say, a gentlemen's war between a Bretonnian and a Wood Elf force, or an Empire civil war, it is possible to say that 50% of all troops that are caught after breaking are prisoners. These models must travel with the Baggage Train, where they could inspire some excellent rescue scenarios. In most campaigns, however, it's easier to rule that only character models may be captured.
Characters as Prisoners. Taking characters as prisoners is a very exciting concept. Who wouldn't want to parade the mightiest warriors and spell casters of a fallen army? What great secrets of battle might enemy officers reveal? It is common practice to capture enemy Heroes, Wizards, and Generals. These characters are carted along anywhere the capturing army banner goes, and the controlling player has several options. A prisoner may be taken to a secure dungeon or tower in a capital, carted along in a banner's Baggage Train, sold or traded back for profit, or executed. Be warned, however: characters are naturally favored individuals, and any attempt to harm them in any way may precipitate unforeseen events that almost invariably lead to a bizarre escape. If you elect to slay a captured character, make a roll on the Execution Chart.
[Photographs of two Warhammer miniatures, omitted.]
Execution Chart (2D6). (The ranges of the rows are printed in the left margin of the scan and are read here in order; the first range is partly clipped.)
| Roll | Result |
|---|---|
| 2 | Disaster! Not only does the character escape with all of his original equipment, but he does so in spectacular fashion. Any other characters who are friendly to the escapee and who are also held by the banner are likewise freed. Furthermore, each escapee may choose to slay a single unit, capture one of the enemy characters, or steal a magic item. |
| 3-4 | The character overpowers his guards and escapes by means of heroic subterfuge, amazing swordplay, and unrivaled bravado. What guts! What prowess! The character may immediately join the nearest friendly force or landmark. The character's equipment is lost. |
| 5-6 | The character escapes through bribery, dressing up as an old washer woman, or some other disgraceful (but effective) method. In D6 turns, the character will reappear out of the wilds at the owning player's capital. He may then be reactivated to his former post. All of his previous equipment is lost. |
| 7-8 | Portents of ill omen cause the execution to be stayed at the last moment. The character must remain a prisoner, and no more execution attempts may be made until next turn. |
| 9-10 | The character fails to come up with a convincing plan and is slain outright by the cruel captors. |
| 11-12 | The character is slain as with the previous result, but somehow it is more dynamic and bloody, or maybe it just hurts more as the roll was so high. After all, you can only be so dead. |
Fleeing from Combat
It's true that a campaign is all about great and meaningful Warhammer battles, but there may be times when a player wishes an army to avoid combat with the enemy. Avoiding an oncoming foe is not a sign of cowardice, and there is a chance that such a decision can prevent annihilation. Still, desperate times sometimes call for desperate moves. Here are the rules for banners that wish to flee.
Fleeing means just what it sounds like: the army attempts to head away from the oncoming enemy. Make a Leadership test based on the best character's Leadership (if no characters are present, use the highest Leadership of any Core troops). If the test is passed, add +1 to a roll on the Flee Chart to determine the results of the Flee action. A banner may only flee once per Campaign Turn. If a banner is charged on multiple sides, it will be up to the Games Master to decide if fleeing is possible without Scattering (see p. 75).
Fleeing Chart (D6).
| Roll | Result |
|---|---|
| 1 | Failure and Disaster. Roll a D6 for each unit and character. On a 4+, it is destroyed immediately with no recovery possible. Units and characters that survive are Scattered (see p. 75). The Baggage Train is captured. Move the Fleeing banner half its normal move away from the charging enemy banner. |
| 2-3 | Caught! The Fleeing player may choose to play a Rear Guard scenario (see Warhammer rulebook, pp. 211-212) or treat this result like Failure and Disaster above. |
| 4-5 | Narrow Escape. The army just avoids the clutches of the oncoming enemy but loses D6 x 50 points from the banner. Move the Fleeing banner half its normal move away from the charging enemy banner. |
| 6 | Precision Retreat. With well-drilled precision, the banner retreats from the oncoming enemy. Move the Fleeing banner a full move away from the charging enemy banner. |
[Diagram caption: Army A charges Army B. Army B rolls on the Fleeing Chart. The caption's final lines (partly illegible in the scan) say that Army B must sacrifice D6 x 50 points from its points total, and that the banner moves away from the charge.]
Uneven Battles
Some of the best parts about such open-ended campaigns are the wide variety of battles: heroic defenses, sieges, raids, scouting clashes, and more. Invariably, many games are between different sized forces, due to superior map maneuvering, allies, and the like. It is a wise general who leads his armies to battle only when he has numerical superiority! Woe to any heavily favored Goliath who is taken out by a smaller underdog army, as the humiliating story of the upset will pass into legend.
While uneven battles can make for some excellent games, at some point, such battles can make for some horrible mismatches. Any game in which one side outnumbers the other by a ratio of greater than 4 to 1 goes beyond simple outnumbering and enters the realm of about-to-be-crushed. This rule of thumb, of course, does not apply to outnumbered forces in strong defensive positions like watchtowers, forts, or natural defensive positions (or, you can still apply the rule of thumb, but count such well-protected Defenders at double their actual points value). Unless there is a specific scenario (e.g., can the outnumbered force burn the bridge in time, or can a suicide mission take out a particular enemy character?), the game may not be an enjoyable one to play out. Use the chart below rather than waste your playing time on a lopsided game with nothing to be gained. See Advice for the Games Master (on p. 85) for short but sage advice on using omnipotent GM powers to avoid pitfalls.
Sure Destruction (D6). [The header line of this chart is partly illegible in the scan.]
| Roll | Result |
|---|---|
| 1 | Hard-won victory! The underdog loses his force, and the larger opponent loses an equal number of points. The battlefield belongs to the victor. |
| 2-3 | The underdog loses half his force, and the rest is Scattered. The larger opponent must lose an equal number of points. |
| 4 | The underdog is destroyed but takes out D3 x 100 points of the larger opponent. |
| 5-6 | The underdog is destroyed, and the larger opponent rules the battlefield with no loss. |
Scouting Enemy Banners
Only an unwise or foolhardy General would commit his troops without first trying to ascertain exactly what kind of threat the enemy presented. Each army banner has some method of scouting out nearby enemies: sending out mounted patrols, mustering pickets, or even using magic to reconnoiter the foe. Players may scout enemy banners at any point in their own Movement Phase. For instance, a banner can take half of its movement to get into scouting range of an enemy, scout, and then finish moving.
Each banner has a scouting radius equal to half its regular movement. Any enemy banners inside that radius will be scouted when a scouting action is declared. It is possible that ambushes, nefarious activities, or hidden troops will be detected. The scouting player should make a roll on the Scouting Enemy Banners chart to determine the level of success or failure of the reconnaissance.
Note that if a Games Master is planning on using scouting banners (below) or experience (see p. 85), some banners may have a longer or shorter scouting range.
Scouting Enemy Banners (2D6).
| Roll | Result |
|---|---|
| 2 | Your scouts are captured and destroyed, but not before they are brainwashed into revealing the exact composition and plans of your own force. |
| 3-4 | Your scouts come back with wild rumors and speculations (a GM can have fun with this one). |
| 5 | Your scouts are driven off or unreliable. Either way, you learn nothing. |
| 6-8 | Your scouts get close but get cold feet or are driven off by enemy pickets. You learn the approximate size of the enemy force (about 75% accurate). |
| 9-10 | Your scouts come back with an accurate points size, as well as a few details about the exact makeup of your enemy's forces. |
| 11 | Your scouts come back with a complete account (full access to enemy's army list). |
| 12 | Your scouts come back with a complete, detailed account of the enemy army AND their plans. If a battle ensues this turn, you may choose table side and whether to go first or second. Your opponent may not use any special deployment rules like Scouts or Ambush. |
Scouting Banners. Scouting banners are specifically designed to search out new terrain, scout enemy armies, and undertake other reconnaissance missions.
- Size: The banner cannot be larger than 500 points.
- Special Rules: All banners may scout, but a banner designed to do so gets an extra scouting range (25% greater range than a regular army banner). Scouting banners do not need a Baggage Train, add +1 when fleeing combat, can move freely through woods and swamps, and may roll twice on the Scouting Enemy Banners chart and take the most accurate result.
- Restrictions: No heavily armored troops or "unsuitable" troops (e.g., Steam Tanks, Knights, and Boar Riders). Most players may take only one scouting banner. The Games Master may allow races that are better at guerrilla-type tactics, like Wood Elves or Beasts of Chaos, to have more than one scouting banner.
Advice on Scouting. To add a level of fun, a cunning Games Master will have players make their rolls for scouting enemy banners, and rather than simply reading aloud the result, the Games Master will tell the player what the scouts report back. This style of play encourages more player involvement in interpreting the scouting reports, sending multiple scouts, and further developing scouting skills.
Example. A large Empire banner of 2,000 points is approaching the Skaven realm. The Skaven player sends forth a small banner of 1,000 points to scout. The Skaven player rolls a 7. The Games Master rearranged the numbers (but not the percentages) so that the roll of 7 was equivalent to a 7 on the actual chart, and reports wild rumors. [The remainder of this example, which describes the Games Master's report to the Skaven player and the Skaven scouts' view of the Empire force, is partly illegible in the scan and is not transcribed.]
Types of Specialized Army Banners
Although we've only mentioned basic army banners thus far, it is possible to devise and make rules for a variety of types of banners, each with a different function and role. Specialized banners could be formed for many reasons: a particular role in fighting, increased speed, the need to get through terrain, and others. Following are some examples of specialized banners a group or GM may allow. Feel free to add and improvise your own to fit your campaign needs. Your best guide is common sense, as it would be impossible to list out every army's possibilities and troop classifications. A Games Master can set limits for special banners and police player rosters to ensure that specialized forces include only suitable troop types. For instance, a Scouting banner can't contain a Stegadon (too big and loud!).
Defensive Banners are composed specifically for defending or holding ground.
- Size: Per campaign limits.
- Special Rules: The army always has at least three defended obstacles on the battlefield, may start the campaign with twice the number of war machines normally allowed by the army list, and may move at only half rate.
- Restrictions: No more than one unit of cavalry is allowed, and no monsters may be taken (troops like Trolls and Giants are too hungry to keep in one spot for long).
These are just a few examples, and the campaign's theme, army types, and terrain could well suggest other options for your campaign. Special mountaineer regiments or expert tunneler banners would fit a Skaven/Dwarf war, while the Empire could well design banners steeped in woodcraft to combat Beastmen. A few special banners can really add flavor, but be careful: if every banner is bogged down by special rules, the game will crawl along.
Baggage Trains
The adage that armies march on their stomachs has a lot of truth to it. So where are the camp stores and other supplies? The Baggage Train is used to describe the inevitable personnel and wagons that accompany an army. Having a Baggage Train is not only useful, it is essential. Without meals, supplies, and extra hands to deal with non-military matters, an army is forced to forage and sort out its own daily affairs. Any banner must have a Baggage Train at the start of its turn and make a roll on the Foraging Table.
[Photograph of an ambush on a large Empire Baggage Train, omitted.]
Foraging Table (2D6).
| Roll | Result |
|---|---|
| 2 | Sutler. Food and water are not to be found. The banner must choose between 50% casualties (by number of models, not points) or becoming Scattered (see below). |
| 3 | The banner can meet its needs but must lose D6 x 50 points of troops. They were lost in the wilderness, foraging, attacked by wild beasts, or something of the kind. Also, the banner moves at half speed this turn. |
| 4-5 | The banner can find all its needs to sustain itself, but movement is reduced to half for this turn. |
| 6-9 | The land provides! Food and water are abundant. [Remainder of this entry partly unclear in the scan: it appears to say that the banner is not acquiring what it needs, and that the roll has no effect this turn.] |
| 10-11 | [Row label and text partly unclear in the scan.] |
| 12 | A Baggage Train is acquired or pressed into the service of the foraging banner. |
[Row labels in the scan are small; the labels above follow the printed order of entries.]
Baggage Train Options. The majority of Baggage Trains for every Warhammer race contain cooks, servants, supplies, and other sundry camp followers. Once you get away from generalities, though, each army's Baggage Train is very different, and it is easy to ascertain much about a force based on its Baggage. Empire Baggage Trains are neat and well organized, often run by aged veterans too old for active fighting but unwilling to give up on professional soldiery. Empire camps are often additionally blessed with such figures as blacksmiths, huntsmen, and trappers. In contrast, an Orc & Goblin Baggage Train is a mismatch of broken-down carts, quarrelsome Snotlings, and piles of loot (and what greenskins think of as loot is often a mind-boggling assortment of shiny objects, battered helms, bones, and prisoners to be eaten later). The kinds of Orcs & Goblins that crew "da bag-uge" are runts, Snotlings, and injured or maimed greenskins that no one has gotten 'round ta gnawin' on yet.
Captured Baggage. In games where Victory Points determine the outcome, captured Baggage Carts count for 150 points. Captured carts may be added to the capturing banner's roster and must be represented in each battle. While troops don't gain extra sustenance from captured Baggage, they can now afford to lose one of their carts with no penalties. At the end of a long campaign, some very successful armies may well have half a dozen or more enemy Baggage Trains added to their own!
Extra Baggage Train Options. Games Masters can allow players to purchase extra Baggage Trains (at 150 points each) during the Season's End Phase. In our campaigns, some daring players created their own upgrades for their Baggage Trains based on their army's theme or cool models from their collections. It was up to the Games Master to stamp all such creations as legal and to assign them a points value.
[Photograph of a Dwarfen Baggage Train upgraded with a steam engine, with a caption: "Here, we see a Dwarfen Baggage Train upgraded with a steam engine. Not only is the engine steam-powered, but it is armored as well!" Omitted.]
Free Baggage Train. A banner that gets a free Baggage Train has, on the battlefield, a single cart wagon pulled by a suitable animal (e.g., a pony, mule, old nag, or sickly wolf), crewed by three Core troopers from the army. Statistics of the Baggage Train are as follows:
| M | WS | BS | S | T | W | I | A | Ld | |
|---|---|---|---|---|---|---|---|---|---|
| Cart | - | - | - | - | 5 | 3 | - | - | - |
| Animal | - | - | - | 3 | 1 | 2 | - | - | - |
[The two rows above are read from the scan, and the row labels are inferred from the layout.]
For purposes of missile fire, treat the Baggage Train as if it were a war machine, except that the steed is hit on a roll of 1. The cart may be towed by the crewmen at normal Move rate. Crewmen will line up in front of the Baggage Train to hold. The cart and animal offer no attacks. The Baggage Train is captured if the crew is killed or broken (if it is otherwise destroyed), and the unattended Baggage is not lost to any enemy unit. The forces may manage to recapture the cart, just as they recapture a standard, before the game ends.
Scattered
Occasionally, due to a loss in battle, a lack of food, or some heinous magic, a banner will totally lose its ability to function. This doesn't mean that the banner is destroyed (an even worse fate). However, it does mean that all the surviving elements are broken up and scattered to the four winds. The banner is removed from the map, as it is too disparate to track. The entire banner will reform in D6 turns at the nearest friendly landmark, as the stragglers slowly work their way back towards friendly confines. After the banner is declared Scattered, make the roll to determine how many turns it will take to reach the nearest landmark. When the turn comes for the banner to reform, the landmark must still be present (not destroyed). If it has been destroyed, the Scattered banner is likewise destroyed.
If the Scattered banner reforms, roll a D6 for each Scattered unit, character, monster, and war machine. On a roll of 3-6, the model or models in question reform, but on a 1 or 2, they are permanently destroyed (overcome by the enemy or eaten by something horrible somewhere in the wild).
Economics and Supplies
While most campaigns primarily involve building, maneuvering, and fighting with armies, some amount of economy and empire building seems fun and appropriate. After all, expanding your army and preventing your foes from doing the same with their forces is the path to glorious overall victory.
Our system for tallying growth involves Supply Points. These are generic points used to represent food, precious metals, crops, livestock, civilian birthrates, influxes of new troops, and more. Some Warhammer armies may replace the above earthly examples with slave labor, influxes of magical power, warpstone, boons from the gods, and the like.
Supply Points can be harvested from Supply Centers. What is a Supply Center? It really depends on your army. Most players, regardless of army types, can count villages, farmsteads, dedicated hunting communities, docks, logging operations, or mines as Supply Centers. There is quite a difference between a Night Goblin Mushroom cavern and a Bretonnian peasant's farm, but in campaign terms, they both count as Supply Centers. It should be up to each player to decide what exactly each of their Supply Centers is. After all, what good is a farm for the living dead? Vampire Counts and Tomb Kings armies will need an old battlefield or graveyard to supply and sustain themselves.
Each Supply Center, barring battles, hostile magic, or Random Events, will produce 2 Supply Points in each Season's End Phase (see Turn Sequence on p. 68).
What Can You Buy? While campaigns can be expanded to include nearly anything you wish, in general, players will want to add reinforcements to their armies, new defensive structures (watchtowers, walls around cities, and forts), and new settlements (towns and cities). Setting the standard cost of these things is vastly important and will play a large part in how well the campaign runs. If you make items too attainable, then players will expand at will and will soon be amassing armies well beyond what they can actually field on the tabletop. Making acquisitions too expensive makes for a short campaign in which battlefield losses cannot be replaced and survival is a struggle even without battles.
Cost Chart.
| Landmark | Supply Point Cost |
|---|---|
| Watchtower | 2 |
| Fortress | 4 |
| Supply Center | 4 |
| Upgrade to a Town* | 2 |
| Upgrade to a City* | 6 |
* A Supply Center can be upgraded to a town, which, in turn, can be upgraded to a city.
| Troops & Characters | |
|---|---|
| Reinforcements | One Supply Point will buy 300 points of new troops (see rules on the next page). |
| Character models | Once the campaign begins, characters cost triple their normal points cost, and only one may be purchased at a time. Unless there are special circumstances, an army is limited to one Lord (or General) and one Wizard Lord. |
Above is a basic listing of campaign costs. Players or Games Masters may want to modify this chart upward or downward, based on their number of players, map size, amount of time, and mayhem they are looking for the campaign to achieve.
Landmarks. A landmark is a generic term that encompasses any of the number of structures a player may build. A list of landmarks follows.
- Watchtower: A lone tower.
- Fortress: A castle (4 towers, 1 gatehouse, and 3 walls or the equivalent).
- Supply Center: Type depends on army/player, but is generally a small community.
- Town: A large community.
- City: The same as a town, but larger and more sprawling.
- Capital: A city that seats the ruling authority for the land (be it King, Warlord, or council).
All landmarks come with Standing Forces, that is, small garrisons of troops (see the opposite page for full rules on Standing Forces).
Landmark Limitations. Regardless of enemy attacks or random monster invasions, it is not easy to expand your realm at will. Travel and sanitation are medieval (at best), and the majority of the Warhammer world is still wild and untamed. A capital can support three Supply Centers; a city can support two; and a town can support one. Thus, a realm with one capital and one town can have up to four Supply Centers. Remember, capitals, towns, and cities do not generate Supply Points themselves, but do allow for more Supply Centers to be built and controlled.
Upgrades. The only way to develop towns and cities is to build up existing Supply Centers. For instance, a town is created when a player invests additional points into a Supply Center (i.e., spends Supply Points). The advantage of having a town is that you may support an additional Supply Center. The bad news is that towns don't supply any revenue, and you've given up a Supply Center to upgrade to a town in the first place. This makes growth very slow, even for players constantly adding troops to replace losses.
Standing Forces
Each landmark can muster a small force in times of need. These models do not need to be paid for additionally (they come as part of the landmark), are not marked by banners on the map, and cannot be moved away from their landmark. Standing Forces cannot leave their area and join in a Combat Support move. A player can add points to the Standing Force, and for extra security, one or more army banners may be stationed at the landmark. It is a bold Attacker to take on both an enemy banner and the Standing Forces of a landmark! The points and limitations for each landmark are below:
- Capital: 500 points of troops, of which up to 250 points may be Special or Rare.
- Supply Center: 250 points of Core troops.
- Town: 500 points of Core troops.
- City: [8]00 points of troops, of which up to 200 may be Special or Rare. [The first digit of this figure is clipped in the scan.]
- Watchtower: 400 points of Core troops (and up to one war machine).
- Fortress: 500 points of Core troops (and up to two war machines).
Players must purchase and track their Standing Forces (including casualties and recoveries). Players should update their rosters and record what additional troops have been added.
[Photograph of a player building up a Supply Center early in the game, with a caption: "...build up a Supply Center early in the game. Supply Points will definitely help in the long run." Omitted.]
Placing New Landmarks & Reinforcements
After the movement, battles, and losses of the Campaign Turns comes the Season's End Phase, during which new Supply Points are collected and spent (assuming the supplies survive the Random Events and Magic Phases). How are new landmarks, upgrades, and army reinforcements placed on the map?
New landmarks may be placed anywhere within a regular army banner's move of an existing capital, town, or city (no matter whether you are using inches, hexes, or territories). Alternatively, Games Masters may trace out realm boundaries (e.g., on the south side of the river, or anywhere in the great forest), and landmarks may be placed therein.
Upgrades, like making a town into a city, are literally built right on top of the previous site; just make the map marker or 3D model suitably bigger!
Army reinforcements may be used to make up a new banner, to bolster a Standing Force, or to add to an existing banner (the minimum and maximum sizes on p. 65 will apply). When adding new banners to the map, up to one banner may be formed at any friendly landmark. An unlimited number of banners may be formed at the capital, however. Existing banners receiving reinforcements may only do so when within a single turn's move of any landmark.
Attacking & Sacking a Landmark
Not surprisingly, when an enemy attacks a landmark, the battle will be fought around the important area. In the case of a watchtower or a fortress, the game will be a siege, and the Games Master will pick the Siege scenario from the Warhammer rulebook or, if appropriate, one of the scenarios from Chapter 9 of this book. Exactly what the Supply Center is will greatly affect the battle, but the mechanics of a Raid scenario can be easily applied. In our campaigns, attacks on Supply Centers took many forms: daring farm raids, an invasion against a fishing dock, and the desecration of a holy temple. Cities and capitals are hard to take, but scenarios from City Sacking (again, see Chapter 9) may be used, or at least help players or Games Masters create their own scenarios.
When a landmark is sacked, that is, destroyed by an enemy, it offers up half its cost in Supply Points and an extra Baggage Train (to represent the ill-gotten loot) to the destroying banner. The extra Supply Points may be immediately added to the coffers of the victorious army.
Random Events
You never know exactly what might happen in the Warhammer world. As such, we have included some Random Events. These events are generic and can apply to any area or army. A Games Master who is running a campaign in a specific region might want to add results or make up a new series of charts. After all, nothing would bring a campaign set in the desert to life like giant scorpions, sandstorms, and the discovery of mysterious pyramid tombs (doubtlessly full of useful magic items and untold riches).
So the actual gaming doesn't get bogged down in unusual happenings, we suggest a roll for Random Events at regular intervals (see Turn Sequence). However, a Games Master will better be able to get a pulse on the campaign and add in enough "randomness" as required. You could have separate charts reflecting the different seasons, which could include a list of Winter Events (e.g., wolf attacks and rivers freezing over) or Rainy Season Events (e.g., monsoons or the dreaded Stegadon mating season!).
Many of the Random Events will require decisions and perhaps even battles, which will require further tracking and bookkeeping. We strongly suggest writing it all down. If there is a chance that it could become important later, then chances are that it will, as the campaign progresses. You'll forget it if you don't record it. A player who doesn't have the time or resources to explore a hidden temple may want to come back to the area at a later date. Also, there will invariably be the need for special scenarios and playing conditions that, if you've got one, a Games Master can direct.
Random Events Table (2D6).
| Roll | Result |
|---|---|
| 2 | Roll on the Catastrophic Events Chart. |
| 3 | What was the plan? Any banners more than 6" away from the General may not make a regular move in the next turn. |
| 4 | Spoiled Food. Lose one Baggage Train from a randomly determined banner. |
| 5 | Confusing Orders. One randomly determined banner will use its entire next turn to move half its maximum move distance in a random direction. |
| 6 | Portents of Ill Fortune. Your army wastes time pondering the meanings of omens and will automatically make the last move for the remainder of the season's Campaign Turns. |
| 7 | Weather. Roll on the Weather chart. |
| 8 | Trading & Craftsmen. Roll on the Trading & Craftsmen chart. |
| 9 | Scouts for your realm have found something. Roll on the Explorers Find Something chart. |
| 10 | Bumper Harvest! Immediately add a Supply Point to your coffers due to a fantastic surge of production. |
| 11 | Allies. For the remainder of this season, you may take an army banner of up to 1,000 points of any appropriate ally. |
| 12 | Roll on the Glorious Tidings chart. |
Catastrophic Events (2D6).
| Roll | Result |
|---|---|
| 2 | Plague. The player who rolled this hideous result suffers the following. Each banner loses D3 x 100 points. One random Supply Center is also wiped out. |
| 3 | Rebellion/Revolt. A 2D6 x 100-point force assembles at your capital for battle. As long as this force remains undefeated, all your banners must move directly towards the capital in subsequent turns. The rebel force is of the same type as the controlling army (e.g., an Orc & Goblin realm would face Orc & Goblin rebels). |
| 4-9 | Monster Invasion. Roll on the Monster Invasion chart. |
| 10 | Winds of Magic Flux. For the remainder of the Campaign Season, your Wizards get half their normal number of Power dice. |
| 11 | Crops Go Bad. All Supplies in your realm are cut in half (rounding down). |
| 12 | Skaven Tunnel. A force of Skaven has been tunneling, and one of their many gnawed tunnels has popped up in your territory (determine where randomly). A Skaven banner of [2D6 x 100 points; figure partly illegible in the scan] attacks the nearest landmark. |
Monster Invasion (D6).
| Roll | Result |
|---|---|
| 1 | Dragon! Until the Dragon is killed by a banner of a realm, it will [word unclear in scan] damage each round. Roll D6 each Campaign Turn: 1 - Supply Center destroyed; 2 - Attack on a random watchtower; on a D6 roll of 4+, the landmark is destroyed; 3 - Banner attacked, subtract D6 x 100 points; 4 - Banner attacked, subtract D3 x 100 points; 5 - Banner attacked, subtract D3 x 50 points; 6 - Ominous flyby over capital, no effect. |
| 2 | Flock of Harpies. Random razing. Halve one Supply Center's yield for this Season. |
| 3 | A random monster attacks a random location. 1 - Griffon; 2 - Hippogriff; 3 - Cockatrice; 4 - Chaos Spawn; 5 - Wolf Packs; 6 - Marauding Ogres. |
| 4 | A group of 3D6 Trolls attacks a Supply Center. |
| 5 | A group of 2D6 Giant Spiders attacks a settlement or banner not more than 500 points. |
| 6 | Swarms. A Supply Center is beset by 2D6 nasty swarms. Roll on the Weather chart. |
Weather (2D6).
| Roll | Result |
|---|---|
| 2 | Flooding. One Supply Center is reduced to half production in the next Season's End Phase, due to torrential downpours. All banners nearby can only move half in the upcoming turn. |
| 3-4 | Harsh Conditions. Wind, cold, heat, or rain. All movement is halved for entire board. |
| 5 | Ground Fog. All Combat Support Ranges are reduced by half due to the terrible fog. Lasts for the next turn only. |
| 6-10 | Normal Weather Conditions. No effect. |
| 11 | Beautiful Weather. The extraordinary weather conditions facilitate production. The player who rolled the result may collect 1 extra Supply Point in the next Season's End Phase. |
| 12 | Perfect Conditions. Each player that has a Supply Center that would be affected may immediately add one Supply Point. |
[Some words in the Weather entries are blurred in the scan; the wording above is the closest legible reading.]
Trading & Craftsmen (D6).
| Roll | Result |
|---|---|
| 1 | Some shifty traders have swindled you! Roll the results. (Sub-table, D6:) 1 - Lose 1 Supply Point immediately. 2 - Tired of shoddy equipment (or actually enlarged by their poor supplies), one unit deserts. Lose a random banner selected by the controlling player. 3 - Poor breeds. Subtract 1" permanently from the move of one cavalry unit. 4 - Faulty armor. One unit equipped with armor must lose it permanently. 5 - No wheels. All wheels are defective and cannot move in the next Campaign Turn as they are replaced. This affects battlefield movement only and will work in war machines with wheels, Chariots, Baggage Trains, and the like. 6 - Phony magic. Lose one magic item from your army now. |
| 2 | Skilled Artisan. The townsfolk are apt at the amazingly pretty and aesthetic sculptures. This result doesn't help you at all. |
| 3 | New Weapons. Up to two units may be equipped with, and trained to use, weapons not normally on their list of options. Your choices must be approved by the Games Master. |
| 4 | Advanced Animal Husbandry. An especially talented breeder of animals has perfected a steam [partly unclear]. Two cavalry units gain +1 Movement, up to a maximum move of 10. |
| 5 | Skilled Armorer. Two units in any banner gain heavy armor, or, if heavy armor is not normally an option for the unit. |
| 6 | A great influx of trade boosts the local economy. You may immediately add 400 points of additional troops to an army banner or Standing Force. |
Explorers Find Something! (2D6).
| Roll | Result |
|---|---|
| 2 | Your forces catch the trail of an apparent double agent. It is too late, however, as much information has already been given to your worst foe. The Games Master should give the player's arch enemy (GM's discretion) information on banner sizes, magic items, plans, and secrets. |
| 3 | Reports filter back of ancient ruins or perhaps a battlefield from long ago. Mark your map appropriately. |
| 4 | A mercenary force has encamped locally. They may or may not be hostile. Roll 3D6 x 100 to determine points size. |
| 5 | A wayward merchant convoy passes through and is moderately protected (500 points of mercenaries). You may attack the convoy, ignore it, or guide it to safety. |
| 6 | Shortcuts. One single friendly army banner may move an extra hex, territory, or 2" in the next Campaign Turn. |
| 7 | Any hidden enemies approaching your realm must be revealed. |
| 8 | An overlooked village provides extra militia. Up to 200 points of Core troops may be added to any Standing Force anywhere in your realm. |
| 9 | A fantastic location has been found. You may purchase an additional Supply Center for half cost immediately. |
| 10 | A great spy network has worked wonders, and you may see the army lists for all army banners within 6" of any one banner of your own. |
| 11 | Fantastic Defensive Position. Your scouts have found a natural watchtower area (high ground, cliffs, rifts, whatever). Add a new defended area anywhere in your realm for free. |
| 12 | Ancient Power Stone. Your Wizards generate an extra power die so long as the stone remains in your possession. Mark where it is located on the map. |
Glorious Tidings (2D6).
| Roll | Result |
|---|---|
| 2 | Hidden Passageway. You have discovered a secret way (e.g., an unknown mountain pass, underground tunnel, or hidden ford) that only your army banners know about. |
| 3 | Extra Settlement! You may immediately upgrade any Supply Center into a town for free. |
| 4 | Immediately add +1 Supply Point per Supply Center to your overstuffed coffers. |
| 5 | An egg that somehow came into your possession hatched and reached maturity. You may add a monster mount to any character in your force. Your choice must be appropriate for your army (Empire may choose a Griffon, Orcs a Wyvern, etc.). |
| 6 | Somehow you have established a spy in the midst of an enemy capital of your choice. Every time you want a report, the spy must make a Leadership test (Ld8) to reveal the doings and plans of that particular realm. A failed test is the last report! |
| 7 | Hard Training. Add +1 WS to any one Core unit in any banner. |
| 8 | Any appropriate town or city may add protecting walls to its borders for free. |
| 9 | Your leader is inspiring! You may add +1 Leadership to one General (maximum of Ld 10), or you may extend the General's Leadership range from 12" to 18". |
| 10 | Lucky Season. You may have one free reroll per battle until the next Season's End Phase. |
| 11 | New Army! Add reinforcements or a whole new army of up to 1,000 points anywhere in your realm. |
| 12 | Consult the Army-Specific Glorious Tidings chart and apply the appropriate result for the army in question. |
Army-Specific Glorious Tidings.
- Beasts of Chaos. A massive Minotaur emerges from the Dark Woods to join your forces. Use the following stats:
| M | WS | BS | S | T | W | I | A | Ld | |
|---|---|---|---|---|---|---|---|---|---|
| Minotaur | 6 | 7 | 3 | 5 | 5 | 5 | 6 | 6 | 10 |
- Bretonnians. Will of the Lady. Until the next Season's End Phase, all Bretonnian units may reroll failed Psychology tests.
- Chaos Dwarfs. The slaves discover a rich vein of ore. Add 2 Supply Points to your coffers.
- Dark Elves. A Sea Monster responds to your magic and takes up residence in nearby water. The monster can attack enemy boats or any models within 2" of suitable water.
- Dogs of War. Wealthy merchants pay handsomely for your protection. Add 2 Supply Points to your coffers.
- Dwarfs. Ingenious Invention. The Dwarfs may either come up with some new crazed steam-powered device, or add 6" more range to all war machines of a single type in the realm's army (e.g., all Flame Cannon).
- Empire. Rigorous recruiting efforts yield 500 points of free troops. Deploy these new troops in any way you see fit, anywhere in your realm that reinforcements may be added.
- High Elves. A young Elven Prince reaches maturity. Create a new Hero worth up to 200 points and add him to one of your banners.
- Hordes of Chaos. Boon of Chaos! As long as the army wins its battles, any prisoners captured until the next Season's End Phase are automatically corrupted by Chaos and will join the Chaos army's ranks for upcoming battles.
- Lizardmen. Salamander Spawning. Each banner in the army gains one Salamander Hunting Pack for free.
- Orcs & Goblins. A Giant of enormous size joins any army banner. He has an extra point of Toughness and 3 extra Wounds!
- Skaven. The Skaven may either develop a new and devilish type of warp-powered device, or infect one enemy Supply Center with Plague. The Supply Center and up to 500 points of Standing Force are destroyed.
- Tomb Kings. Ancient artifacts, which were looted from the tombs long ago, have been recovered. Distribute 200 points worth of magic items to your banners as you see fit.
- Vampire Counts. An ancient battlefield rich in human remains is discovered. Immediately recruit D6 x 100 points worth of troops, and any three units may take either a weapon or armor upgrade (thus you may take Skeletons with pikes or heavy armor, for instance).
- Wood Elves. The Treemen, fearing an enemy invasion that could decimate the forest, dispatch D3 of their number to join one of your banners.
[Photograph of an undermanned Skaven expedition, with a Gutter Runner sneaking past Empire sentries, omitted.]
Magic
In a campaign, magic on the battlefield operates per the normal Warhammer rules. However, during each Season's End Phase, more powerful spells can be attempted. Imagine a Wizard Lord hunched over in his dark tower somewhere in the capital, attempting to scry the land for enemies, sending out tendrils of magical power to seek out other Sorcerers and engage them in mental duels, or even toiling away at the enchantments to make a magic item for one of your heroes.
Wizard Lords who remain in the capital for an entire season and don't participate in any battles may attempt some mighty feat of magic. Thus players have a dilemma, as they must decide whether to send out their most powerful Wizard to deal death and destruction on the battlefield, or to sequester the mage in the safety of the capital for some larger purpose. Neither option is a sure thing, but it adds some more fun and variety to the campaign proceedings.
During each Season's End Phase, at the appropriate time (see Turn Sequence on p. 68), any Wizard Lord that remained in the player's capital for the entire season and participated in no battles can cast a Season's End Spell. A Wizard who may cast but chooses not to may add +1 to his roll at the end of the next Season's End. This bonus is cumulative.
Miscast of Epic Proportions (D6).
| Roll | Result |
|---|---|
| 1 | The Wizard is slain in a burst of magical energy. |
| 2-3 | The Wizard loses a Wound permanently. |
| 4-5 | The Wizard is in a coma and may not move or cast spells until after the next Season's End Phase. |
| 6 | The Wizard is plagued by some disfigurement (e.g., hunched back, shriveled constitution, rapid age). His Move statistic is halved permanently. |
Season's End Spell (2D6). Roll on the table below.
| Roll | Result |
|---|---|
| 2 | Roll on the Miscast of Epic Proportions chart. |
| 3 | Lightning Storm. The capital is shaken by an electrical storm of unusual hue and color. Take D3 x 50 points of damage to the Standing Force and any other banner in the capital. |
| 4 | Power Drain. A vortex of power drains the Wizard Lord of any sorcerous energy. The Wizard will generate only half his normal number of power dice for the next Campaign Turn while he recovers. |
| 5 | Shrouding Mists encircle a single city-sized area on the map, selected by the controlling Wizard. Any models in the area may not move or attack until the fog lifts. At the start of each Campaign Turn after the first, roll a D6. On a 4+, the Mist dissipates. |
| 6 | Scrying. The Wizard may choose a city-sized region and gaze at it with magical sight. All hidden troops and banner sizes are revealed, and there may even be hints and clues picked up about secret plots being planned in that area. |
| 7 | Flood/Drain River. The Wizard takes control of a single river. Using magical power, the Wizard can lower water to allow any friendly troops to ford the river without testing, or the Wizard may flood the river and make it impassable, even at normally fordable areas. This effect lasts D3 Campaign Turns. |
| 8 | Prosper/Curse. The Wizard may use his powers to immediately add or subtract D3 Supply Points to or from any realm. |
| 9 | Swarms! The Wizard summons appropriate hordes of tiny creatures (e.g., a Skaven Grey Seer would summon rat swarms). Either D6 Swarms may be added for free to any banner on the map, or a single enemy landmark may be beset by the creatures, inflicting D3 x 100 points of damage to the Standing Force there. |
| 10 | Forge Magic Item. The season has been spent constructing and enchanting a magic item. As shown on the chart below, the more expensive the magic item, the longer it will take to complete. |
| 11 | Wizard Duel! Select any enemy Wizard anywhere on the map and roll a D6. On a roll of 3+, the enemy Wizard may not cast for the next D3 Campaign Turns (he may dispel normally). On a roll of 6, the model also permanently loses a Wound. |
| 12 | Choose any of the previous results. |
| 13+ | Cataclysmic Force! This spell may be cast against any enemy landmark, with the results below. |
Forge Magic Item.
| Item Cost | Result |
|---|---|
| 0-25 points | Finished now. |
| 26-50 points | Finished in D4+1 more Campaign Turns. |
| 51+ points | Finished in D6+1 more Campaign Turns. |
The Wizard must remain in the capital to complete the magic item. It is possible to leave a partially finished item if more pressing needs arise. Both player and Games Master should jot down the item and the number of turns needed for later completion.
Cataclysmic Force.
| Landmark | Result |
|---|---|
| Supply Center | Destroyed. |
| Watchtower | Destroyed. |
| Fortress | One wall section collapses, and D6 x 100 points of damage is done to the Standing Force. It will take 4 uninterrupted turns to fix the wall. |
| Town | Any surrounding wall collapses, and the Standing Force suffers a D3 x 100 point loss. |
| City | Half of any surrounding wall collapses, and the Standing Force suffers a D3 x 100 point loss. |
| Capital | Capitals are immune to this spell. |
[Two of the numbers in the Cataclysmic Force table are small in the scan; the values above are the closest legible readings.]
Scenarios
Players or Games Masters who are willing to do a bit of digging up existing scenarios, or even creating their own battles, will become the instant favorites of their gaming group. The more the games and battles are tailored to your campaign and players, the more the commitment to the gaming will grow!
Finding Scenarios. Why do all the work yourself? Remember, there are many scenarios that have already been published. From the generic to the very specific, here is a list of resources for scenarios.
- Warhammer rulebook. Nine scenarios are included in the book, and one more siege scenario is in the Appendix.
- Warhammer: Skirmish. Scenarios are included in this book, and many more are available in the Skirmish rules.
- White Dwarf. Almost every issue of White Dwarf magazine contains a new scenario. Check out your back issues for scenarios appropriate to your campaign.
- The General's Compendium. Dozens of new scenarios are included in this book. Particularly useful for GM campaigns are the scenarios for sieges and City Sacking, as well as the Hostile Terrain scenarios.
- Games Workshop Web Site. There are a lot more scenarios online for you to use! The Skirmish section contains additional scenarios, and many more army-specific scenarios are included in each army section.
Creating your own scenarios. Sometimes a player suggests a type of action that will require a whole new scenario. For instance, a cunning Dwarf player has built a fortress at a vital position among the mountain passes, and a Skaven player has suddenly been hemmed in. After scouting out the area, the Skaven player learns that the Dwarfen defenses are well manned. The Dwarf player has all the defensive bonuses of a castle, and a few hundred points of troops to boot! The Skaven player has no time to wait for a larger army, and must attack now. In an attempt to break the stalemate, the Skaven player talks to the Games Master about a risky proposition:
Sabotage the Dwarfen Wells. Such a ploy could work but would not affect the Dwarfs. Short on time, the idea was put on hold for some later date.
Ravage the Dwarfen Hero. Always a good Skaven idea, but it would not likely affect the stronghold.
Sabotaging the Fortress. Clan Skryre could build a device, but that would require funds and time, two things the Skaven are short of.
Sabotage the Front Gate. A huge advantage could be gained if the Skaven army attacked at just the moment the front gate was damaged! Clan Eshin is known for its sneaky nature, and the Skaven player had a Clan Eshin-themed scenario in mind as well. The Skaven player decided on the plan and informed the Games Master. The Games Master introduced the scenario at right.
Sabotage the Gate (Skirmish)
Overview. The Skaven have launched a sneaky assault to damage the gate mechanism of a Dwarfen stronghold. If this mechanism is damaged and the gate cannot be closed, the subsequent Skaven assault on the fortress will have a much greater chance of succeeding.
Models Needed.
- Skaven: Any 20 models from the members of Clan Eshin that are in the nearby army banner. Any relevant characters from the army banner may join the Skaven as well.
- Dwarfs: Any 10 models from a randomly determined single unit garrisoned in the castle (either part of the Standing Force or part of any banner in the fortress) are standing sentry on the front walls. After the alarm is sounded, more models may be brought on from the fortress garrison and/or any banner stationed therein.
The Battlefield. The battlefield takes place at the front gate of the Dwarfen fortress and the courtyard beyond.
Objectives. The Skaven must damage the control valves that run the gears that open and close the front gate within 8 turns. The Dwarfs must sound the alarm and prevent the Skaven from destroying the mechanism. The controls are just inside the front gate.
Deployment. Half of the Skaven may start at the base of the gate. The rest are deployed 12" outside from the gate. The Dwarfs may be placed along the gatehouse and in or on the two towers. Dwarf models must be at least 2" away from each other. One Dwarf may stand at the control panels. Dwarf reinforcements enter 12" from the gate.
Who Goes First? The Skaven go first.
Special Rules.
Grappling Hooks. All Skaven have access to Grappling Hooks for free in this scenario.
The Alarm. Any time a Skaven model is moved, roll a D6 to determine whether it was spotted. It is dark, but the Dwarfs are vigilant. On a roll of 1, the Skaven is seen, and the alarm is sounded. If a Skaven charges a Dwarf and fails to kill him in the 1st round of combat, the alarm goes off automatically. If a Dwarf is slain by a missile attack, the alarm goes off on a D6 roll of 4+ (otherwise no one sees the dying Dwarf!).
Once the alarm goes off, the Dwarf models standing sentry are free to attack. In addition, in each subsequent Dwarf turn, D6 Dwarfs from any unit in the castle may join the battle by entering from the reinforcements area 12" away from the front gate.
Damaging the Control Valves. The Skaven must cause 2 Wounds to the control valves to win the scenario. The control valves have a Toughness of 5 and are automatically hit in hand-to-hand combat.
Part of a Larger Battle. Regardless of the success or failure of the Skaven sabotage mission, this game will be followed up immediately by a Siege. If the Sabotage Mission works, the front gate of the fortress must remain open throughout the Siege game. Otherwise, play a Siege scenario as normal (see Warhammer rulebook, pp. 259-260).
Scenario Ideas & Advice
Many of the scenarios that have cropped up in our campaigns were very small skirmish battles, and some were well thought out and some were improvised. Ideas that were tried include the following:
- [Secret passages in the city]
- [Escape from prisoners]
- [Ambush of a Baggage Train]
- [Raid on bridges]
- Assassins sent to take out enemy characters
- Attempts to sabotage enemy war machines
- Ambushes in the Deep Woods
- Invasions by boat
[The box's advice text and some of its left-hand entries are partly illegible in the scan and are bracketed above.]
Out of the Ordinary Models That Can Be Used During the Course of a Long Campaign
Here are some special models that could be used in a Games Mastered campaign. While these models are unusual and may require conversion or your own special rules, they're fun to create and bring to battle. And no, they aren't official in non-campaign games!
[Photographs of converted models (a Nurgle Chariot for Beasts of Chaos, a converted Rat Ogre for Skaven, and others), with captions that credit the modelers, are omitted.]
Mad Cap Mushroom Brewing Squad
[Photographs of the Mad Cap Mushroom Brewing Squad, a Night Goblin Baggage Train addition, and a Goblin Spider Rider unit are omitted.]
Mad Cap Mushroom Brewing Squad. [Statistics line partly illegible in the scan.] The Mad Cap Mushroom Brewing Squad consists of a large vat, lots of Mad Cap mushrooms, special ingredients (every brewer has his own secret formula), and crew. The crew are Night Goblins, but invariably a few Snotlings are lurking around (often willingly, as some of the secret ingredients!). At the start of any battle in which the Mad Cap Mushroom Brewing Squad is deployed on the battlefield, the controlling player may add Fanatics to his force. Once the number of Fanatics is determined, the Fanatics may be added to the army list and assigned to units as normal. Note that the limit of three Fanatics per unit still holds. In terms of fighting in combat and receiving missile fire, the Mad Cap Mushroom Brewing Squad acts as a war machine, with one important exception. Should an enemy approach [part unclear], the crew may opt to drink its wares and become Fanatics themselves. As the brew is done, roll a D6 -1 to determine their Strength. Treat results of 0 as S1.
Cost: 225 points per model. [Limit line partly illegible; it appears to read "Limit 1 per army banner" or similar.]
Dwarfen Expert Engineers
Dwarfs seem to have a gift with architecture, working with stone and building things. An Expert Engineer's unit is trained to perform these crafts in the battlefield. [Photographs of an Expert Engineers unit building a wall and a stone wall section, with captions, omitted. One caption reads, in part, that the stone wall was built on cavalry bases as "an exact 2" in length, exactly the correct size for an Engineer team to build in a given turn."]
Dwarfen Expert Engineers. Limit 5 teams per Dwarf player. Same statistics as Miners. On the battlefield, Expert Engineers can construct walls (2" sections per team of two models). [The remainder of this box is partly illegible in the scan. Its legible fragments describe the Engineers as experts at building walls, bridges, and fortifications, and at undergrounds and traps and sabotage missions; the Games Master must determine the specifics.] Cost: 50 points per team.
Starting Forces
Deciding what resources and army size each player in a campaign should start with will immediately set the tone. Few forces will mean the action will start slowly, with most players choosing to build up their realms. Starting with many army points can lead to a short and bloody campaign that opens with massive attacks.
For established players on a reasonably uncrowded map, each player's realm starts with:
- A Capital
- A Supply Center
- A Watchtower
- A single Lord-level character to represent the overall General of the player's realm
- An additional 2,500 points to spend on troops and characters (to be divided by each player per the normal army list restrictions)
Characters are initially purchased at their usual rate. Thereafter, character models will cost extra (see Cost Chart on p. 76). Essentially, each player makes a standard 2,500-point army and in addition gets a Lord-level character, a capital, a watchtower, and a Supply Center. Thus, each army could include two Lord-level characters, the overall General, and another Lord (usually a Wizard Lord), which is included in the 2,500-point army. Most Games Masters will want to prohibit Lord-level characters from being purchased without special approval once the campaign is underway.
Any Games Master should feel free to adjust the size of the starting forces based on map size, the number of players, the types of armies involved, and the theme of the campaign. For instance, in a campaign with two or more of the same army, the like forces could merge their capitals into a single enormous city (just double the number of Supply Centers the multi-player realm is allowed to take). By combining their forces, the players create a very powerful realm to start with, and will encourage otherwise disparate foes to band together against the larger enemy. A Games Master may also alter some of the players' starting forces to fit a theme. A great example is a Dwarf player with a force double the points size of any other player; however, all combined, the evil armies will vastly outnumber the Dwarfs. The other gamers are not necessarily allied with each other, but will certainly help each other out by fighting their common enemy. The theme of Dwarfs stubbornly holding onto their kingdom against hopeless odds sounds like a fun idea around which to base a campaign, and is a typical Warhammer situation.
Starting Positions. How each player picks or is assigned his starting area is normally up to the Games Master. Again, the decision comes down to the kind of campaign you are running. After all, if your campaign is set up around Chaos armies storming down from the North, all Chaos players will have to start the games with their realms located in the North. You might make an exception for a Beasts of Chaos force emerging out of the forests, but for the most part, your storyline has already set up the starting positions. More open campaigns, such as one in which many different races attempt to control the water holes in a desert region, could have players dicing off to determine the order in which they choose the sites for their realms.
Record Keeping. As a player or Games Master, you must take careful notes to keep track of the composition and casualties of army banners and Standing Forces, Supply Points, Character Injuries, weather, and Season's End Phase results. Players are responsible for having their roster of different banners, characters, and Standing Forces updated at all times. Although small, at the top right is an example of a campaign roster sheet.
[Sample campaign roster sheet ("Grod's Stuntysticka's Roster of Doom") and a sample newsletter ("Not so quiet on the Ostland front"), both shown as illustrations, are omitted.]
Starter Packets and Newsletters. There are two different types of paperwork that a Games Master can use to help organize his campaign: Starter Packets and Newsletters.
With a Starter Packet, the Games Master hands each of his players a packet containing all the information players need to "get started" in the campaign: the background story of the military and political situation, a map, some quick notes on what each player's realm needs to provide (like starting forces, names of characters, etc.), a list of some of the basic rules (e.g., movement, battles, casualties, and turn sequence), and the like. The Starter Packet does not need to be lengthy. In fact, the shorter the better.
Newsletters can take many forms, but they are really a way of passing on news, celebrating some of the battles and events in the campaign, and having some fun. It is not necessary for the Games Master to do all the work, but he should try to ensure that each player's news is passed on to the other players.
Newsletters can take the form of diaries, war logs, or newspaper gazettes. Not only are these fun reading once the action is over, but during particularly long campaigns, they can serve as reminders of who attacked whom, which characters have been pointed out for special revenge, and exactly how different battles went.
Experience and Veteran Abilities
One of the joys of a campaign is watching your realm, strategies, and armies develop. Building up a characterful and/or elite unit with special abilities or equipment is also lots of fun. Here are a few equipment and experience options that can be used. There are no set rules for Veteran abilities in the campaign rules, so the following options are suggestions a Games Master might consider.
Veteran Points. Veteran Points can be used for units and characters. Perhaps regiments gain 1 Veteran Point for every battle they survived or won, with additional Veteran Points for slaying enemy units and characters. The trouble with this system is that it is another thing to track.
Achievements. Some Games Masters just keep an eye out for heroic achievements by a unit during the course of a battle. For instance, a unit that holds a bridge or a mountain pass against overwhelming odds could be rewarded with a Veteran rule. Games Masters can either pick and choose an appropriate ability, or they can have the player roll on the chart once the unit has gained the required Veteran Points. In moderation, the extra abilities and notoriety can lend fun and excitement to the games.
Veteran Abilities (2D6). [The table is partly illegible in the scan. Its legible entries are given below, and bracketed words could not be read with confidence.]
- 2: The unit has learned the secret of fighting [armored] foes! All wounds caused by this unit are made with an additional -1 save modifier to the enemies' armor save.
- 3: [Entry partly unclear.] The unit is determined and now [...] use the [...].
- 4: [Name unclear.] The unit may reroll missed to-hit rolls in the turn in which the unit charged.
- 5: [Entry partly unclear.] For this particular success, the unit has acquired a [...] reputation. The unit now causes Fear.
- 6: Killers! The unit may pick on single [...] and the [...] suffers [...].
- 7: The unit has developed an expertise with its [weapons] and is now +1 WS or +1 BS. The player [chooses].
- 8: [Name unclear.] The unit may reroll a single die each round (to hit, to wound, or armor save roll).
- 9: The unit has seen it all and is now immune to [...].
- 10: [Entry partly unclear.] If armed with missile weapons, the unit may [...] enemy charges and does so without the usual [...] penalties.
- 11: [Name unclear.] The unit has become increasingly proficient at getting extra attacks from the back ranks. If armed with spears, an additional rank can fight. For spearmen, this rule enables the unit to fight with two ranks when charging and three ranks in other circumstances. If armed with weapons other than spears, half of the rear rank (rounding down) gains a single attack.
War Machines. Where appropriate, a victorious army may attempt to salvage enemy war machines. Roll a D6 for each one that was captured (not destroyed). On a result of 6, the weapon may be claimed and crewed. Note that by "where appropriate" we mean the GM makes the decision! This is a gut call, but the GM should consider the following types of questions. What self-respecting Wood Elf army would ever stoop to using a Goblin Doom Diver? It is, however, possible to imagine that Goblins could figure out how to work a Cannon. Each captured war machine will only fire D6 times (due to lack of ammo, lack of trained maintenance crew, malfunction, or the like).
[Photograph of Empire militia running in fear from an emerging Skaven tunneling device, omitted.]
Advice for the Games Master
We've tried to fill this chapter with as much good advice as we can pack in. The truth, however, is that every time you start a campaign, there are always elements that the GM or players have to make up on the spot. How much does it cost to put a defensive wall around a town? How long does it take to chop down trees and make rafts? How can a Chaos player persuade more Empire citizens to join his nefarious cults? Can a Champion ever progress and become a full-fledged Hero? Remember to write down your new rules so you can duplicate them later (or at least see where you went wrong). Good luck!
Using Your Omnipotent Power. A Games Master is really in a unique position to keep a campaign on track and interesting. Sometimes a GM would do well to cause a little interference for "the good of the campaign." Say, for instance, that one player's army starts far outstripping all the other players, a situation that produces too many lopsided battles and threatens to end everyone's good time prematurely. There are many ways a dominant army can be beaten down a little bit. Introduce a new player who is the arch-enemy of the dominant force, a third-party mercenary army that could be controlled by the GM, a bad series of Random Events, or some horrible natural disaster. There is nothing wrong with a little steering or guidance from a Games Master. However, too much will disillusion players, as they'll think their fate isn't in their own hands (which it should be). Always give players a chance to help decide their realm's destiny.
Taking the Loot! At the start of almost all of our campaigns, one of the most commonly asked questions was: "If I kill an enemy, can I take his magic items?" This question is problematic, as a flat answer of "no" isn't very interesting, and a "yes" answer can lead to many, many problems. Here is a handy way of solving the problem. Most of the time, when a character is slain, all of his magic items are lost. If a character is captured with all his items, the victorious player rolls a D6 for each item. On a result of 6, that item is claimed. Otherwise, it is hidden, broken, or lost. [The rule for a particular exception is partly illegible in the scan.]
Our best advice really is to keep it fun. After all, everyone set off on a campaign to spend more time playing and thinking about Warhammer, not necessarily to spend a lot of time working out rules. However, should you come up with some excellent new rules or further clarifications, by all means send 'em in to us. We're always looking to add and share more campaign rules and advice. Keep a lookout for updates on the Games Workshop web site and the pages of White Dwarf magazine.
Chapter 5: Competitive Gaming
While campaigns test a number of strategic and tactical skills, many players are driven by age-old competitive instincts to find out simply who is the better tabletop general. Who has better tactics? Who, at the end of the day, has built the better army? This chapter discusses several ways to test your mettle on the field of honor and settle once and for all who is the better Warhammer player.
Individual Challenges
A one-off game is not enough to determine who is the better tabletop general between two opponents. One self-destructing war machine, a panicking unit here or there, or just plain bad dice can sometimes defeat even the best Warhammer general. To determine once and for all who is the greater general, we came up with not only the perfect way to throw down the gauntlet, but also an ironclad method of proving who is mightier. Enter the Deathmatch Challenge.
(The Games Workshop web site includes a Challenge Certificate in printable PDF form for challenging your e-mail-enabled friends. You can just print it out and hand-deliver this ominous message of doom.)
Deathmatch Challenges
Sooner or later, everyone runs into one of those opponents who needs to be taken down a peg. Maybe he beat your trial army. Maybe he was lipping off to the rest of your gaming club. Maybe he's never let you forget that one game in which he destroyed your army to the model. How about those opponents who have been playing for years and think they know it all? Well, they can talk the talk, but can they walk the walk and prove their boasts on the tabletop? A Deathmatch Challenge is a series of one-against-one, relatively straight-up games designed to determine which player is the champ and which is the chump. This three-game series is designed to minimize the effect that dumb luck can play in a single game of Warhammer. A single beating can be chalked up to the winds of ill fortune, but three such losses constitute a trend!
The Challenge. When the stakes are high and honor is on the line, there needs to be some ritual and pomp and circumstance! Think of the elaborate Super Bowl build-up, the fanfare of the World Cup, or the final competition in any sport or game. To provide an official air and encourage some good smack-talk, the challenge includes the following Challenge Certificate:
DEATHMATCH CHALLENGE. Hear ye, hear ye, I, __________, hereby CHALLENGE __________, and your so-called army to a full-fledged DEATHMATCH.
You have 1 full week after today (//__) to accept the challenge and schedule round one. Your other options are to offer real-world excuses about why you can't schedule the battle, or you can slink away like a yellow-bellied Snotling, leaving your pride behind you as you creep back under the pond scum that will hide you.
Games Workshop grants permission to photocopy this form.
Deathmatch Rules. So, with quaking knees, your foe is ready to stand up to you. Here are the rules to get you under way. First off, you must use the same army for all three games. You may switch your points and troop types around from game to game (which can be an effective ploy), but you cannot switch army types. In other words, if you play Scenario 1 with your Orc & Goblin army, you can't play Scenarios 2 and 3 with anything but Orcs & Goblins. Second, you must complete all three games or forfeit maximum points. Why put this rule in? Some players, sure of their might of arms, will enter the Deathmatch ill-prepared, and after losing their first two games, these players face the last game with no chance of winning. It is still possible to earn honor in such a case, so never give up!
Deathmatch Terrain. As the scenarios suggest, the battlefields for all three games must be set up by a method that is agreeable to both players.
Scenarios and Points Totals.
- Scenario 1. Play a Pitched Battle exactly as written in the Warhammer rulebook (pp. 199-200), with 2,000 points per side and no variations.
- Scenario 2. Play a Pitched Battle as described in the Warhammer rulebook (pp. 199-200) with 2,000 points per side, but deploy the troops of both armies according to the Hidden Set up rules after terrain is placed and board sides are chosen (see below). Once both sides have completed their Hidden Set up, players reveal their armies to each other and then place any Scouts according to the rules for Scouts. To determine who goes first, roll a D6. The higher-scoring player may choose whether to go first or second (note that with the Hidden Set up rules, there is no bonus for finishing deployment first).
- Scenario 3. Play a Pitched Battle as described in the Warhammer rulebook (pp. 199-200) with 2,500 points per side, but use the following additional Victory Point conditions. Table quarters are worth 200 Victory Points each, instead of the usual 100. If a General is slain, is fleeing, or has fled off the table at the end of the game, the opposing player may claim 200 Victory Points, instead of the usual 100, in addition to the Victory Points earned for destroying a unit.
Hidden Set Up
There are many ways to do a Hidden Set up, and you should choose the one that is easiest for you. The important aspect of a Hidden Set up, of course, is that the enemy knows neither where you are placing your troops nor which troops you are bringing to the battle. The element of surprise is a powerful ally. The following are some of the easiest ways to achieve a Hidden Set up.
Screen Down the Middle. After the terrain has been placed and board sides have been chosen, assemble a barrier. As shown in the photographs, the gamers have set up a barrier of handy boxes down the middle of the gaming board. If any terrain pieces need to be placed in the area, they can mark their spots with coins and place the terrain later. Note that when this method is used, the players can still see one another, but they cannot see the troops on the enemy side.
Map Method. The map method is a quick and easy way to do a Hidden Set up. After the terrain has been placed and board sides have been chosen, each player makes a hastily sketched map of the gaming board. On his map, he marks out where each of his units will be placed. After both players have finished their maps, the armies deploy their troops as they are shown on the map. After deployment is complete, players exchange maps to ensure that their opponent has followed the plan in the drawing. If, by odd chance, one player forgets to draw a unit on the map, his opponent may deploy the unit instead (the unit must be deployed facing the enemy and may not be deployed in Difficult Terrain).
Counters. Give each unit in your army a number, and then mark the same numbers on chits of paper or other tokens. Place these counters on the table exactly where you'd like your unit to be deployed. A cunning player will also add a few "dummy" counters, that is, counters with numbers that do not match up with any of his units and are just there to mislead his foe.
Special Rigging. If you have a permanent gaming table or a fixed club facility, it's easy to rig up a sort of laundry line from which you can hang an old sheet or some other material to span the gaming table. This solution is only practical if you have a permanent gaming space.
[Photographs illustrating the Screen, Map, Counters, and Special Rigging methods are omitted.]
Scoring a Deathmatch
Each player should use the Deathmatch Scorecard (also available as a download) to track his Victory Points after each game. Once Scenario 3 is completed, each player should add up (and double-check) his Victory Point total, and then deduct his opponent's total from his own. A player can be tied (the same score), ahead of his opponent (a number in the positive), or behind his foe (a number in the negative).
But just how close was it? Some players may state that having but a single point more than their foe is a clear victory. However, after playtesting, we think that the breakdowns listed at the bottom of the page provide a more accurate description of the outcome of the Deathmatch.
Deathmatch Challenge Score Sheet. [The score sheet is a printed form with blanks for "The army of ___ versus the army of ___", Scenario 1, 2, and 3 results (Player One and Player Two Victory Points), Total Victory Points, a RESULTS box with Winner, Loser, and Difference in Victory Points, and instructions. Its instructions read: "To determine Victory Points for Scenarios 1 and 2, use the standard measures found in your Warhammer rulebook on p. 198. Scenario 3 uses most of the same measures but adds some additional bonuses. To determine the difference in Victory Points, deduct your foe's Victory Points total from your own." Games Workshop permission to photocopy is noted on the form.]
If You Have a Score in the Positive:
- 0-150 pts. A well-matched slugfest! This Deathmatch reflects the classic situation of an irresistible force meeting an immovable object. There can be no talk of mastery here, only talks of a rematch.
- 151-300 pts. You have the slightest of advantages. In a protracted war, your upper hand would teeter on a knife's edge, and by no means can you declare victory.
- 301-400 pts. A hard-fought, minor victory. Your side has won, but the costs are heavy. If all your battles extracted such a high toll from the lives of your troops, your future as a general would be in doubt.
- 401-500 pts. A brutally fought, costly win, which is closer to a Pyrrhic victory than a heroic one. However, enough distance between your opponent's might of arms and your own has been established to declare victory.
- 501-1,000 pts. A victory. You have beaten your opponent and won the Deathmatch.
- 1,001-3,000 pts. A solid victory. Let none dispute where the battlefield honors have fallen.
- 3,001-6,000 pts. A glorious and triumphant victory. Your foes are crushed, and your reign as warrior king shall be unquestioned. The tales of your deeds on the fields of battle will be long remembered.
- 6,001+ pts. Massacre! You have achieved ultimate victory and will suffer no rival. All must bow to your vast superiority and immeasurable strength.
If You Have a Score in the Negative:
- 0-150 pts. A well-matched slugfest! This Deathmatch reflects the classic situation of an irresistible force meeting an immovable object. There can be no talk of mastery here, only talks of a rematch.
- 151-300 pts. You've lost the edge. While you and your foe are almost neck and neck, he has a slight advantage against you. However, even the haughtiest of enemies must give your battlefield deeds begrudging respect.
- 301-400 pts. A well-fought loss. Although defeated, you have still proven yourself to be a mighty and worthy foe.
- 401-500 pts. A minor loss. Your side has lost, but you still retain your pride.
- 501-1,000 pts. A loss. Your standard is mournfully lowered. You shall not discuss the "might-have-been," and must admit defeat.
- 1,001-3,000 pts. A rout. You have been soundly beaten and driven from the battlefields.
- 3,001-6,000 pts. A shameful rout. You have been swept off the fields of glory like so much debris. Your opponent has clearly mastered you.
- 6,001+ pts. Massacred! You have experienced total defeat. Even if luck had been with you, you would still have lost. The less said, the better.
The Grudgematch
Challenges flying around like a hail of Elven arrows, the celebratory victory dances of the triumphant, and the inevitable moping denials of the losing side: it's obvious that some players, even once they've completed all three games of a Deathmatch, will still feel as though both their valor and their tabletop genius have been erroneously measured. To deal with deadlocked scores in the Deathmatch and the fiercest of rivalries, we came up with the Grudgematch.
Be warned. The Grudgematch is not for everyone, and certainly not for the light of heart. This contest is a much more arduous version of the Deathmatch, because you play more games and your generalship is tested further. It is the more conclusive test of who is better. If you still want to show who is the better of the tabletop, there is no better way to prove it.
The Rules for Playing a Grudgematch. The same army type must be used throughout the Grudgematch, but the army list can be tailored to suit each game (note that this is an exception). A player may give up at any time, but by doing so, he awards his opponent the maximum points score for the remaining games. The scenarios and scoring are as follows:
- Scenario 1. Play the Overwhelmed scenario.
- Scenario 2. Replay Scenario 1. Players reverse roles, i.e., the Attacker becomes the Defender and vice versa. Each player plays with the same army type he used in Scenario 1.
- Scenario 3. Play a Pitched Battle exactly as written in the Warhammer rulebook (pp. 199-200), with 2,000 points per side and no variations.
- Scenario 4. Replay Scenario 3 with the exact same army lists and terrain, but players switch sides and act as general of their opponent's army.
- Scenario 5. The Fields of Valor. Play a Pitched Battle as described in the Warhammer rulebook (pp. 199-200) with 2,500 points per side and the following additional rules: see Victory Conditions below.
Who Goes First? The player who has accumulated the most Victory Points in the Grudgematch thus far gets the honor of going first.
Length of Game. The games last 8 turns (remember that this game is a good old-fashioned slugfest).
Victory Conditions. Calculate Victory Points as normal, but table quarters are worth 200 Victory Points each instead of the usual 100. If a General is slain, is fleeing, or has fled the table at the end of the game, the opposing player may claim 250 Victory Points, instead of the usual 100, in addition to Victory Points earned for destroying an enemy unit.
Grudgematch Challenge. [Challenge certificate, printed as a form.] Hear ye, hear ye, I, __________, hereby CHALLENGE __________, and your so-called army to a full-fledged GRUDGEMATCH.
You have 1 full week after today (//__) to accept the challenge and schedule round one. Your other options are to offer real-world excuses about why you can't schedule the battle, or you can slink away like a yellow-bellied Snotling, leaving your pride behind you as you creep back under the pond scum that will hide you.
Games Workshop grants permission to photocopy this form.
Overwhelmed
(Scenario for Deathmatch and Grudgematch play.)
Armies. The Attacker has 2,500 points, and the Defender has exactly half that total, or 1,250 points.
Battlefield. Set up the tabletop exactly as shown in the map. [The map shows a 12" and 18" grid of Attacker and Defender Deployment Zones.]
Deployment.
- The Defender sets up first in the Deployment Zone shown on the map.
- The Attacker deploys next in either or both of the Attacker Deployment Zones. The Attacking player may divide his army as he sees fit, although units may not be split up.
- Scouts and other units with special deployment rules must deploy in their Deployment Zones and may not take advantage of their special deployment rules.
Who Goes First? The Attacker takes the 1st turn.
Length of Game. The game lasts 5 turns.
Victory Conditions. Calculate Victory Points per the normal rules detailed on p. 198 of the Warhammer rulebook, but do not count board quarters.
Switching Sides
Switching armies is not a new thing to many tabletop players, but there are still plenty of gamers who have never given it a try. Quite simply, you will use your opponent's army, while he assumes control of your own forces. It is a big challenge to face your own army on the tabletop. Certainly, no one knows your own army's strengths and weaknesses like you do, which gives you a unique perspective on how to fight it. However, this advantage is offset by the fact that your opponent is in the same situation. As an added challenge, both of you are playing a force that you're unaccustomed to commanding.
This game is very telling, because it really challenges your abilities as a general. Any tournament veteran or competitive player has heard words to the effect of "Anyone could win with that army," or "He didn't beat me; his army list did." Winning the full set, that is, winning with your own army and against it, is an awesome achievement of tabletop generalship.
There are two factors to worry about when switching armies. First off, you will be using someone else's models, and that should always warrant an extra degree of care. Remember to tell an opponent anything he may need to know about your force: which standards can come loose if you hold the models the wrong way, and which models tend to overbalance and fall. Don't challenge someone to a Grudgematch if you aren't comfortable with that player handling your army. Next, it is important to have a clear army list. You may be able to decipher your own notes and scrawls, but chances are your foe won't be able to.
[Two photographs of players swapping armies, with a caption stating that in Scenario 3 one player plays his High Elves against the other, and that in Scenario 4 the second player commands the first player's High Elves while the first commands a Beastmen horde. Names in the caption are omitted.]
Scoring a Grudgematch
Each player should use the Grudgematch Scorecard (also available as a download) to track his Victory Points after each game. Once all five games are completed, each player should add up (and double-check) his Victory Point total, and then deduct his opponent's total from his own. A player can be tied (the same score), ahead of his opponent (a number in the positive), or behind his foe (a number in the negative). The charts below explain the extent of your victory or the shameful depths of your defeat.
[The Grudgematch Challenge Score Sheet is a printed form with blanks for each army, Scenario 1-5 results for each player, Total Victory Points, a RESULTS box with Winner, Loser, and Difference in Victory Points, and the instructions: "To determine Victory Points for Scenarios 1-4, use the standard measures found in your Warhammer rulebook on p. 198. Scenario 5 uses most of the same measures but has some additional bonuses." and "To determine the difference in Victory Points, deduct your foe's Victory Points total from your own."]
If You Have a Score in the Positive:
- 0-300 pts. You've put the grudge in Grudgematch! This challenge resulted in a deadlock tie, after which neither player may claim superiority. Aim for a rematch!
- 301-700 pts. You have the slightest of advantages. You can call it a win, but you know it was a close call. A minimum of bragging rights have been earned.
- 701-1,000 pts. You have won the battlefields, and the costs have been horrific. You may boast, but the win was a close call. [One word of this entry is unclear in the scan.]
- 1,001-2,000 pts. Victory. You have won a rock-solid victory and proven that you have the [word unclear in the scan].
- 2,001-3,500 pts. Triumphant Victory. You have won the battlefields and beaten your foe decisively.
- 3,501-6,500 pts. Smashing Victory! You stand heaped among the corpses of your defeated foes. Your opponent should know his place now.
- 6,501+ pts. Massacre! You wield fear and domination and leave only devastation in your wake. There is no doubt who is the novice and who is the master.
If You Have a Score in the Negative:
- 0-300 pts. You've put the grudge in Grudgematch! This challenge resulted in a deadlock tie, after which neither player may claim superiority. Aim for a rematch!
- 301-700 pts. A slight disadvantage. If all the battles were close, then your foe may indeed have a slight edge on you. If you lost one game by a large margin, you can still claim it was all luck!
- 701-1,000 pts. A well-earned loss. Alas, you must admit defeat, but your hard fighting has caused your opponent to reap a bitter harvest.
- 1,001-2,000 pts. A loss. You were overmatched, but yours is not an entirely hopeless cause.
- 2,001-3,500 pts. Beat down! Your army has been handed a beat down of saga-like proportions.
- 3,501-6,500 pts. Crushing loss! You have been trampled over on the fields of battle and left in ruin and rout.
- 6,501+ pts. Massacre! Nothing went your way, and you now suffer ignoble and total defeat. If any of your troops had been left alive, practice and revenge would become your bywords.
The Next Step in Competitive Gaming: Tournaments
After you've tried a Deathmatch or two, and maybe a Grudgematch, you may want to test your Warhammer talents against a group of experienced players in a tournament. Most Warhammer tournaments are competitive affairs that pit groups of players and their armies against each other in a series of games. Tournaments can be round-robin-style affairs at an informal club in which several players meet at a store or someone's house for a day of gaming, or as large and formal as Games Workshop Grand Tournaments, where hundreds of gamers compete for ultimate victory.
There are many ways to determine who wins a tournament. Some of the usual factors are win/loss records or Victory Point totals. Games Workshop's Rogue Trader Tournaments and Grand Tournaments add in points for hobby-related skills, awarded for painting abilities and army appearance, as well as points for sportsmanship.
How games are arranged and how opponents are determined in each round of battles are defining parts of Warhammer tournaments. Some events arrange opponents randomly. Some use a round-robin-style system so that each player plays all the others. Some match themed armies (like good versus evil). Some use a Swiss system to ensure that top winners always play other winners with equally high scores.
Your best bet for finding a Warhammer tournament is to check your local supplier of Games Workshop games and miniatures. Many of these shops aren't just retail stores, but hotbeds of gaming activity where you can meet other gamers, post challenges, find out about local clubs, and hear about upcoming events. Activity-oriented shops often run their own Rogue Trader Tournaments (RTTs). RTTs are official events that are run by shops or large clubs around the United States and Canada. The tournaments are held at stores, conventions, and sometimes specially booked event halls. If your local store doesn't run tournaments, why not offer to help organize one with the management? Most store owners would be overjoyed to have someone organize an event that will bring more customers into their shop.
Grand Tournaments are run by Games Workshop and are weekend-long affairs that take place in various large cities.
[Photographs of a tournament table and a large fantasy battle illustration are omitted.]
Grand Tournaments range from big to absolutely massive in size (some with more than 400 players). Even if you aren't playing in a regular event, you may want to stop by and check it out. GTs are spectacular events with many marquee tabletop armies and painters showing off their talents. Unfortunately, there just aren't enough tournaments in your area, or none at all? Why not put on your own event? Below you'll find some quick and easy suggestions about starting your own tournament, collected from a host of event veterans here at Games Workshop.
Start Small. Run a single-day event for your gaming club (if you are part of one) and keep it simple, the very best being bragging rights for the group!
Keep in mind that your biggest challenges will probably be getting enough players (you'll need at least four), finding enough room, and gathering enough terrain.
Terrain. A good idea that many clubs have discovered is to have everyone get together for an evening of terrain building before the big event. One word of warning: if everyone starts building wildly different terrain types in slightly different scales, you will have a horrible-looking playing field. It is best to agree on what you will build and how it should look before you glue and terrain materials start flying!
Game Length. While players are gaming, they will have a great time, and as such, the organizer should try to minimize any standing around or milling about. Stick to reasonable game lengths and stick to your schedule as much as possible. We've found that 2 to 2 1/2 hours is ideal for games ranging from 1,500 to 2,500 points. If your tournament is longer than two or three games, make time to eat and drink. Even horrible dice rolling is somewhat tempered by being well fed and supplied with your favorite beverage.
Scenarios. It is fun to try some different scenarios and terrain, but don't go overboard at first. Players want to play Warhammer, not interpret elaborate, multi-part scenarios! For your first attempts, stick to the basics. Once you've mastered the terrain gathering, organizing, and timing, try mixing in some new scenarios. Make sure you playtest them several times first!
Themes. Themed tournaments are really fun, but make sure you've mastered the basics before you attempt one. Themed tournaments include special rules or scenarios to link all the games together. For instance, all the games could take place during a blizzard: players would fight on snow terrain, and games would include special ice storm rules like the ones described in Chapter 6. The Warhammer world is full of evocative places, and it should be easy to come up with dozens of ideas for potential settings, special terrain features, and scenario rules. A themed tournament could also be as simple as a two-on-two allies event (for which we suggest using the allies rules in Chapter 7). A list of possible tournament themes follows.
Tournament Theme Suggestions:
- Play each game on special tables with unique terrain and custom scenarios.
- Siege tournament (allow a bit more time for each game).
- Weather rules that affect moving, shooting, or combat.
- Special magic rules (e.g., increase or decrease the number of Power and Dispel dice generated each turn, or increase or decrease the number of spells each Wizard may use in each game).
- Allies in the tournament (e.g., two-player-on-two-player games: each player may bring a Core regiment of allied troops up to a predetermined points value; or each player must bring one Dogs of War regiment as a Rare choice).
- Historical tournament. Each game re-enacts a battle in a major war in the history of the Warhammer world.
- Story. Each game is a battle in a single war for which the tournament organizers have written a background story. At the end of the tournament, winners are declared as normal, but a winning side (the good or evil side) is also declared.
[Photographs of a club event and a campaign journal excerpt are omitted. The journal excerpt is flavour text.]
Chapter 6: Hostile Terrain
Choosing your battlefield well and making sound use of terrain are signs of superlative generalship. At times, the landscape of the Warhammer world can be as destructive as one's enemy. These rules and guidelines for hostile terrain can be incorporated into one-off games, competitive challenges or tournaments, and campaigns. The rules are easy to learn for beginners but also offer tactical challenges to veteran players.
Explore Your World
This chapter describes dangerous and unusual battlefields and how they can affect your games. These rules can be added to almost any kind of Warhammer battle and will have a particular appeal to players and terrain builders looking for new and unique challenges.
How did all of these ideas come about? While our regular gaming group was discussing the finer points of Warhammer and our upcoming campaign in the wilds of the Empire province of Ostland, the talk turned to the Deep Woods.
The Empire is full of vast tracts of forest punctuated by small clearings where the cities and civilized areas are located. Aside from these populous areas, the lands of the Empire are largely forests full of predators and agents of Chaos. Even the interconnecting roadways are dangerous because of lurking brigands or worse. Why, then, do most Warhammer battles, ostensibly set in the Empire, take place in clearings? Empire forces involved in a border dispute with the knightly Bretonnians might well choose to fight in clearings. However, a cunning Beastlord would always prefer to fight in the dark heart of the forest. What kind of battle conditions would exist if an Empire army dared to march into the tangled inner sanctum of the Beastmen? This discussion led us to consider different types of battlefield terrain, to generate rules that would reflect the difficulty of maneuvering and surviving in such places, and to create fun alternatives to the standard arrangement of two hills, a house, and a copse of trees.
Exotic Locales
We don't have space to nail down every imaginable battlefield, but the following formula and subsequent examples should give players a template from which they can devise their own unusual battlefields.
- What Is It? A thorough description of the grounds and the types of lands in which hostile terrain might be found is always a good place to start.
- Battlefield Rules. How will the terrain and/or climate affect the game? What are some options that spring to mind when envisioning this type of battlefield?
- Scenarios. At least one scenario in the special setting.
In this chapter, you will find rules for battlefields in the Deep Woods, Frozen Lands, Dry Desert, Volcanic Regions, and Chaotic Landscapes.
The Deep Woods
A copse of trees is a common addition to Warhammer battlefields, but what if your game took you to the eaves of an immense forest, like the dark and treacherous Drakwald? Our normal Warhammer battlefield is all open space with a few patches of forest on it. Imagine just the opposite: an entire 4' x 6' gaming table that was all forest except for the odd foot path or road. There are innumerable forests in the Warhammer world where just such a battlefield would be the norm. The Wood Elf realm of Loren has seen plenty of warfare, and if the grim roads through the Forest of Shadows could speak, they would tell of countless Beastmen ambushes.
[Photographs of a forest battlefield and a sample forest base, with captions, are omitted.]
Gaming in the Deep Woods
Fighting a battle in the midst of a massive forest opens up an enormous number of options and gaming possibilities. Here are some rules and situations you may wish to incorporate into your battles.
Adopting Loose Formations. This special rule accounts for units breaking formation in order to gain speed in a forest. Without this special movement option, a normal unit moving through a forest would move at half speed (per the Difficult Terrain rules) or quarter speed (per the Very Difficult Terrain rules). In addition, such a unit could not march through the forest. Thus, a human with a Movement of 4" would be capable of moving only 2" or 1" a turn, depending on whether the forest had been classified as Difficult or Very Difficult Terrain, respectively. Under the standard rules, then, all-forest games are more of a chore than a challenge. Therefore, the loose formation was born.
A player who wants one or more of his units to adopt a loose formation may declare his decision to do so in the Movement Phase. The unit may now spread out (up to 1" apart) and will have an easier time moving through difficult terrain. Units in loose formation may move through Difficult and Very Difficult Terrain in the same manner as Skirmishers (i.e., they have no movement penalty and the ability to move at double pace).
Units in loose formation do not receive a rank bonus in combat, do not take away an enemy's rank bonus if attacking in the flank, and may not add the normal +1 bonus to Combat Results for having a standard. Units in loose formation may not use the General's 12" Leadership range and, unlike Skirmishers, may not charge in a 360° arc. Instead, units in loose formation maintain regular unit facing and have a standard 90° charge arc.
In order for a unit in loose formation to reform into regular ranks, the controlling player must declare his intention to do so at the beginning of the Movement Phase. It takes the entire turn to reform, and units changing formation may not shoot. Units may not change formation while engaged in hand-to-hand combat.
Advice on Fighting Wood Elves and Beastmen in the Woods (a sidebar). There is a reason that Beastmen and Wood Elves have never been driven out of their forest homes! With their ability to move freely through woods, these armies have a decided advantage in these battles. [The rest of this sidebar's advice is partly illegible in the scan. Its legible fragments refer to the difficulty of maneuvering quickly through the woods, to the ability of such armies to maintain ranks (or Unit Strength in the case of Beastmen), and to using ambushes and Hidden Set up in a forest battle against a Wood Elf or Beastmen force.]
Under the Canopy
Some forests are actually easier to maneuver in once you pass their borders. The high canopy of the tall trees cuts off light at the ground level, which reduces the tangle of undergrowth that blocks line of sight and impedes movement. When a scenario uses this rule, the following changes are made:
- Missile fire is reduced to half range when both shooter and target are in the same woods (i.e., Under the Canopy). If shooting from the woods at a target outside of the woods, say one on a road or in a clearing, remember that the undergrowth is thicker at the edges of the forest where more light can reach the ground, and the usual rule that allows only a 2" line of sight through woods applies. Likewise, a model shooting from a clearing or from a road may only see and penetrate up to 2" into the woods.
- When shooting Under the Canopy, that is, when a shooter in the woods fires at a target in the same woods, the shooter suffers a -1 penalty to hit to represent the plethora of cover available.
- When you're using the Under the Canopy rules, a unit or character that wishes to charge may see more than the usual 2" in a wood, so long as both the charger and the target are in the woods. However, in order to charge a unit in a clearing or on a road, the charger must be within 2" of the edge of the woods to peer out. If a unit in a clearing wants to charge into the forest, the target must be within 2" of the edge to be seen.
Hidden Set Up in the Forest
With all the cover, dark nooks, and twisted tree boughs, the forest offers a perfect site from which to launch an ambush. Any army that is allowed to use Hidden Set up (per the scenario rules in play) can take advantage of the following rules. Instead of deploying as usual, a player using the Hidden Set up rules may place a lone counter for each unit, war machine, or independent character that would otherwise be placed on the board (remember to label or number the counters so they correspond to the correct unit later!). Additionally, the player may set up another six counters marked D. These are "dummy" counters and represent the enemy hearing normal noises, like snapped branches and the creaking of trees. Make sure to place the counters face down, so that your opponent can't see which ones represent units and which represent dummies.
- Until revealed, counters may move 6" or march 12".
- Counters must be revealed (that is, replaced with the actual unit) if an enemy approaches within 8" of them.
- It is possible to charge counters, but you may not shoot at them or target them with spells.
Break Out from the Forest
A beleaguered force tries to push through an ambush to get out of the forest to safety.
Overview. The force attempting the Break Out is trying to get as many of its units as possible through the forest and off the opposite (southern) board edge. The Ambushing side's objective is to slay as many foes as possible and to prevent them from escaping off the southern board edge.
Armies. Both armies are chosen from the Warhammer Army lists to an agreed points total.
Battlefield. The battlefield is entirely covered in forest, save for a road (no less than 5" wide) and three clearings (approximately 12" x 12"). A few scattered boulders lie on the forest floor.
Deployment. The Ambushing Force deploys all its counters first. Then the Break Out Force deploys. Finally, the Ambushing Force player may rearrange or redeploy up to three counters.
Who Goes First? The Break Out Force goes first.
Length of Game. The scenario lasts for 8 turns or until one side is entirely wiped out or routed off the table.
Special Rules. This scenario is played with the Adopting Loose Formations and Under the Canopy rules. In addition, the Ambushing side may use the Hidden Set up rules to deploy its counters/units anywhere in the marked zone.
Victory Conditions. Use the Victory Points rules from the Warhammer rulebook (p. 198) to determine which side has won. The Break Out Force commander may also add double the Victory Point value of any of his units that escape off the southern board edge (though not by fleeing) to his total number of Victory Points.
[Battlefield diagram omitted.]
Death in the Dark Woods
Two armies march almost on top of each other in the dark heart of a deep forest. Battle and bloodshed ensue.
Don't travel the dark woods, except at need. If forced to enter, make haste and speed. Stick to the path and travel by day. Beware the Beast and to Sigmar pray. — Children's rhyme from the Reikland region
Overview. Two armies are trying to slay one another and claim the battlefield.
Armies. Both armies are chosen from the Warhammer Army lists to an agreed points total.
Battlefield. The battlefield is entirely covered in forest, save a single wide clearing in the center that may have long ago been a small hamlet or meadow dwelling of woodsmen. A few roads lead to the outer clearing.
Deployment. All players roll a D6. The higher-scoring player may choose which side of the table to deploy on. Players take it in turns to place units as normal. After all units have been placed (including Scouts), each side may move any single unit to represent the armies attempting to outmaneuver the other and the disjointed approach of the armies through the forest.
Who Goes First? Both players roll a D6. The higher-scoring player may choose to go first or second.
Length of Game. The scenario lasts for 8 turns or until one side is entirely wiped out or has fled the table.
Special Rules. This scenario is played with the Adopting Loose Formations and Under the Canopy rules.
Victory Conditions. Use the Victory Points rules from the Warhammer rulebook (p. 198) to determine which side has won. When counting board quarters in this game, do NOT include the clearing area. The clearing, in effect, is a fifth territory worth a bonus 300 points to the army that can claim it. To determine who controls the fifth territory, add up the combined Unit Strength of all non-fleeing models in the clearing for each army. The side with the higher sum controls the fifth territory. The other table quarters, outside the clearing area, are controlled as normal.
[Battlefield diagram omitted.]
Scenery Workshop: Forest Bases
[Step-by-step hobby guides for building a forest base with a lift-off canopy and for making tree trunks and foam canopy pieces, with photographs and step captions. Hobby material rather than rules; the step captions are not reproduced.]
Scenery Workshop: Terrain Showcase
[Photographs of terrain built for the Hostile Terrain chapter (crystal formations, rock piles, pine-tree stands, ice and frozen-river sections, volcanic rock, and lava channels), each with a short hobby caption, omitted. Hobby material rather than rules.]
The Frozen Lands
In the far north are vast steppes of snow and ice, and in the lands of Kislev and the northern parts of the Empire, the winters are long and cold. Days are short, and if there is any sun, it is pale and ineffectual. All too often, the slate-grey clouds are low and heavy with oncoming snow.
A battle set in northern winter climes can include snow-covered woods and fields, frozen rivers, sudden blizzards, and biting cold that can freeze even the magical joints of the Undead!
[Photographs of a frozen river battlefield and ice holes, with captions, are omitted.]
Gaming in the Deep Winter
Whether your scenario is set in the lands of the Ice Queen or you are simply playing out a scenario in the midst of a deep winter storm, here are some additional rules to add some chill to your games.
On Thin Ice. Many armies choose not to march to war in the depths of winter. However, when an especially bitter spell of weather freezes a mighty river, the natural barrier becomes an ice bridge for invasion! Often, a river doesn't quite freeze completely. Sometimes, a few channels of running water remain, or a partial thaw has made for some patches of thin ice. Roll a D6 for each unit, character, monster, or war machine that is attempting to move across a patch of frozen ice. On a roll of 1, an incident has occurred. Roll on the Ice Chart below and apply the results.
Ice Chart (D6).
| Roll | Result |
|---|---|
| 1 | With a frightening rush, the unit/model falls through the ice! Each model must roll an armor save. If the save is made, the model is pulled down by its weight and lost. If failed, the model has gained its footing and remains in place. War machines and Chariots automatically go under and are lost. |
| 2 | A narrow, deep crack opens up in the ice, and D6 models must make an Initiative test to avoid falling in (6's always fail). Models that fail their test are lost for the game. War machines automatically go under and are lost. |
| 3 | The unit/model hears a loud creaking sound and stops moving to avoid falling through the ice. The unit may not move this turn but may fire and cast magic as normal. |
| 4 | Slippery! The ground turns to mush, and the unit is reduced to half movement rate (including half distance for marching or charging). |
| 5-6 | An ominous cracking sound makes everyone nervous, but the ice holds. The unit may act normally. |
Snow Drifts. Areas that are subject to Snow Drifts are hard to cross. Units traveling through Snow Drifts are reduced to half speed (although they may march as normal). For instance, if a unit of Goblin Wolf Riders (normal Movement of 9") were to attempt to charge over a 6" wide strip of land marked as a Snow Drift, the unit would take 12" of its movement to lope through the deep snow. The Wolf Riders would then have 6" of movement left to make contact with the enemy. While in a Snow Drift, models may take advantage of soft cover (-1 to hit targets in a Snow Drift with missile fire).
Raging Winter Weather! When this rule is in play, a fierce winter storm rages on the battlefield. At the start of each player's turn (before anything else occurs), each player should roll 2D6 and consult the Winter Storm Chart to see what the wild weather is doing that turn. Unless stated otherwise, all effects from the winter storm last only until the start of the next turn, when a new Winter Storm effect is rolled.
Winter Storm Chart (2D6).
| Roll | Result |
|---|---|
| 2 | Intense Blizzard! Nothing may move or shoot this turn. Combats are fought as normal, but any unit that breaks is automatically destroyed as it scatters into the white-out! |
| 3 | Blinding Snow! Any troops wishing to move (including charges) must pass a Leadership test. If the test is failed, the unit/model will make a full move in a random direction (roll the scatter die). Units/models that pass the test may move as normal. |
| 4 | Hail of Ice! Great shards of ice are hurled downward from the skies! Roll a D6 for each unit on the board. On a roll of 1, that unit takes D6 S4 hits. |
| 5 | Bitterly Cold! So severe is the sudden temperature drop that, on a roll of 4+, models suffer -1 WS and BS as their hands go numb. Roll for each unit or lone character. |
| 6 | Snow Squalls! Whole sheets of snow whirl in the air. Line of sight is reduced to 12" (for shooting and charging). |
| 7-8 | Huddled in the Cold. The howling wind, swirling snow, and ominous sky so unnerve the troops that any unit wishing to charge, move, or shoot this turn must first pass a Leadership test. Failed tests result in the unit huddling together and doing nothing this turn! Units that are Immune to Psychology may ignore this result. |
| 9 | Gun Malfunction! Cold, wet clouds of moisture prevent any black powder weapon or war machine (e.g., handguns, Cannon, and Organ Guns) from firing this turn. |
| 10 | Great Gusts of Wind! Roll a scatter die to determine the wind direction. All missile fire that is going in the same direction as the wind (within 90 degrees, the same as a normal charge arc) may add 50% more range. All other shots are at half range and suffer -1 to hit. |
| 11 | Momentary Calm. On the horizon, a single sun beam slants through the roiling grey clouds. No effect. |
| 12 | Snow Drifts! Roll a D6 for each quarter of the battlefield. On a roll of 4+, that whole area is now subject to the Snow Drifts rule. This effect lasts for the rest of the game! |
Battle over the Frozen River!
The bitter winter has left the river nearly completely frozen, and the time for invasion is ripe!
Overview. The Attacking force is trying to force a passage across the frozen river to the opposite bank. The Defender is trying to inflict massive casualties and prevent the Attacker from gaining a foothold on the southern bank.
Armies. Both armies are chosen from the Warhammer Army lists to an agreed points total.
Battlefield. The battlefield is split by a mighty river, as per the map. The entire area is covered in snow, which doesn't have any effect on the game but explains why it is so hard to discern where the hard-packed ice is and where the thin ice is potentially dangerous.
Deployment. The Attacker must set up his entire force first, after which the Defender may set up his army. Note that parts of the Defender Deployment Zone are actually covered by the frozen river.
Who Goes First? The Attacker goes first.
Length of Game. The scenario lasts for 6 turns or until one side is entirely wiped out or has fled off the table.
Special Rules. This scenario is played with the On Thin Ice and Raging Winter Weather! rules.
Victory Conditions. The Attacking force must cross the river successfully to win the game. If the Attacker ends the game with 10% or more of his total points on the southern bank (and not fleeing) and/or off the southern table edge, the Attacker wins. Any other result is a Defender victory.
[Battlefield map omitted.]
Winter Clash
Two forces brave the elements and meet in a bitter fight to the finish. In the dead of winter, there can be no retreat!
[Opening narrative of this scenario is flavour text and is not transcribed.]
Overview. Each force has thrown together a last-ditch offensive to break its opponent despite the horrible weather conditions. Both sides are looking to inflict maximum casualties.
Armies. Both armies are chosen from the Warhammer Army lists to an agreed points total.
Battlefield. The battlefield is dotted with a few snow-covered hills, small clumps of pine trees, and rock piles. The entire center of the battlefield (as marked on the map) is covered in Snow Drifts.
Deployment. Pitched Battle. See Warhammer rulebook (pp. 199-200).
Who Goes First? Both players roll a D6. The higher-scoring player may choose to go first or second.
Length of Game. The scenario lasts for 6 turns or until one side is entirely wiped out or has fled off the table.
Special Rules. This scenario is played with the Snow Drifts and Raging Winter Weather! rules. In addition, because weather conditions are so severe, each unit may reroll a single failed Psychology or Break test each round, to represent the combatants realizing that fleeing in such dire conditions means certain death. Remember that you can never reroll a reroll (e.g., you couldn't reroll a failed test with this rule and then with the Army Battle Standard rule).
Determining Victory. Use the standard Victory Points rules from the Warhammer rulebook (p. 198) to determine which side has won.
Scenery Workshop: Quick & Easy Desert Terrain
[Photographs and captions of quick desert terrain (a sand-and-foam dune base, a dried-mud texture, a rock outcrop with sand, and an oasis) are omitted. Hobby material rather than rules.]
Dry Desert
The Dark Lands, the Plain of Bones, Araby, and the haunted sands of Khemri: all these lands have vast areas of parched desert. Many armies must march across these areas to get to their destinations, and more still are lured by the promise of long-buried wealth underneath the pyramids and tombs of ancient rulers.
In addition to being great thematic places to set your Warhammer games, desert terrain is fast and easy to build and will look superb on your tabletop.
Gaming in the Desert
Should your gaming path take you into the vast deserts of the Warhammer world, here are some rules that you can use to add to your games and campaigns.
Dying of Thirst. Areas of dunes, endless plains of sand, the dry cracked earth of the Badlands, and all deserts are nearly devoid of drinking water! The Dying of Thirst rule represents how an army will stagger when its water supplies are running low. At the start of each turn, roll a D6 for each unit in your force. On a roll of 1, some of the models have succumbed to the baking heat and collapsed due to lack of liquid. The unit immediately takes D6 S2 hits with no armor saves allowed.
Once a unit moves into contact with water (be it an oasis, river, enemy baggage train, or pond), it no longer suffers from the effects of Dying of Thirst.
Desperate Measures. An oasis in the desert is invaluable property, and every soldier knows that to be driven away from the life-giving water is almost a guaranteed death sentence under the merciless sun. All units within 6" of an oasis are Stubborn.
Sandstorm! The constant sun and lack of moisture makes for an atmosphere full of dust and sand. When the hot dry winds reach storm levels, vast clouds of flying sand are kicked up in a hellish swirl. In a Sandstorm!, all missile weapons and war machines fire at half their normal range, and all shots are taken with a -1 penalty to hit. If a unit wishes to charge an enemy that is over half its charge distance away, the unit must first make a Leadership test. If failed, the unit succumbs to the blinding and distorting effects of the sandstorm and may not move this turn.
Also, due to the blinding sands, any unit or model that breaks an enemy unit and wishes to Pursue may do so but rolls one less die than normal. For example, a unit of Silver Helms, which normally pursues 3D6", would pursue only 2D6" because of the Sandstorm! Fleeing troops are so desperate to get away, however, that they make their Flee moves normally.
The Dead Don't Drink! All models in a Tomb Kings army, most units in a Vampire Counts army (but not living ones like Ghouls), and immortal models like Daemons do not need to drink water. Therefore, these troops do not suffer from the Dying of Thirst rule or get any benefits from the Desperate Measures rule. In a campaign, a cunning Undead General will make full use of the fact that his armies don't need water. All other players should be wary of being lured out into the desert, for the sands tell no tales.
The Oasis Is Ours!
Two armies battle over control of a lone oasis, the only source of life-giving water for countless miles of pitiless desert!
Overview. Both sides are trying to seize control of the oasis.
Armies. Both armies are chosen from the Warhammer Army lists to an agreed points total.
Battlefield. The battlefield is relatively bare. An oasis, a small pond ringed by palm trees, lies smack dab in the middle. The only other terrain features are a few sand dunes (low hills).
Deployment. Players roll a D6. The higher-scoring player may choose the table side on which he will deploy, and deploys first. Each player then takes it in turn to place a unit. All units are deployed. All war machines are deployed at the same time, as are characters.
Who Goes First? Both players roll a D6. The higher-scoring player may choose to go first or second.
Length of Game. The scenario lasts for 6 turns or until one side is entirely wiped out or has fled off the table.
Special Rules. This scenario is played with the Dying of Thirst and Desperate Measures special rules.
Victory Conditions. Victory in this game is decided solely by which side controls the oasis at the end of the battle. At the end of the battle, each player should count up the number of non-fleeing models under his control within 6" of the water's edge. Models with more than 1 Wound, like characters or monsters, count as one model each, as do all war machines (although each crew model is counted as well). The player with the higher total is the victor and will score a minor victory if he has five or fewer more models within 6" of the oasis than the loser, and a major victory if he has more than five.
[Battlefield map omitted.]
Battle Amid the Dunes
During an intense sandstorm, two armies stumble across each other in a series of rolling dunes.
"No I beg of you, master. Do not take the caravan into the deserts of Khemri." said Salib, the highly agitated caravan guide. "Mind your tales, Salib," cursed Giles de Moussant. "I will not be a people as superstitious as you lot. We have ample supplies. What can go wrong?" Last words of Bretonnian tradesman Giles de Moussant.
Overview. Both sides are trying to drive the enemy from the field and claim the area as their own.
Armies. Both armies are chosen from the Warhammer Army lists to an agreed points total.
Battlefield. The desert battlefield is covered with nothing but sand (and low rolling hills) and a few rocky outcroppings.
Deployment. Players roll a D6. The higher-scoring player may choose the table side on which he will deploy, and deploys first. Each player then takes it in turn to place a unit. All units are deployed. All war machines are deployed at the same time, as are characters.
Who Goes First? Both players roll a D6. The higher-scoring player may choose to go first or second.
Game Length. The scenario lasts for 6 turns or until one side is entirely wiped out or has routed off the table.
Special Rules. This scenario is played with the Sandstorm! rules.
Victory Conditions. Use the Victory Points rules from the Warhammer rulebook (p. 198) to determine which side has won. The points awarded for claiming board quarters should be doubled to 200 points each, to reflect the importance of controlling the sand-covered battlefield.
[Battlefield map omitted.]
Volcanic Regions
There are active volcanoes in the Warhammer world. The Dark Lands are especially known for volcanic activity. Enormous peaks spew clouds of black, oily smoke to darken the skies. Glowing streams of red-hot lava ooze down the mountainsides or collect in pools fed from the earth's core. Off the coasts of Lustria, whole new islands occasionally grow out of the boiling seas. The verdant jungle is fertile and overtakes such islands with remarkable alacrity, but the ominous rumbles and occasional clouds of smoke that vent upward from the volcano warn that ruinous fire and ash could wipe the island clean in moments.
Still, despite the inherent dangers, many are drawn to such regions. The great upheavals of earth bring to light vast riches: gems, sulphur, oil, tar, and the minerals that so many races covet, such as gold, silver, iron, and copper. Often, when a long-abandoned stronghold or temple is discovered, the mysterious disappearance of its previous inhabitants is never explained. The nearby peak is often never suspected, as its deadly nature has been disguised by time and weather, which erode the conical shape. After many generations, green things begin to grow up the slopes. Still, even a sleeping volcano can come alive with deadly speed.
[Photograph of a Dark Elf unit that can survive the poisonous fumes and attempt a charge across the molten inferno, with caption, omitted.]
Gaming in Volcanic Regions
A campaign set in a region with a smoking volcano is always an exciting backdrop! Volcanic areas also make for different terrain and exciting one-off games. Without further adieu, here are the special rules.
Lava Streams. Although many times thicker than water, lava is still a fluid. Like rushing water, flows of lava will always seek the lowest level along the path of least resistance. Lava tends to collect into streams or channels and flows downhill from the volcano's peak to the plains below. Some lava channels have been known to stretch for miles.
Crossing over a lava channel is a risky proposition. When lava meets a cooler substance, it will start to harden and form a crust. Nearly everything is cooler than lava. Thus, as it flows downhill, lava churns up cooler earth and rock, and the very air acts to cool the flow. A fast-moving stream will break up this cooler crust, but it is possible to cross a flow by leaping from the slowly melting rocks that have been churned up to the chunks of cooling crust. If a model is lucky, it will cross with calloused feet or smoldering boot leather. Should the model lose its footing, it will sink into the lava flow.
When a model crosses a lava channel, roll a D6. On a roll of 1, the model sustains a S4 hit with a -2 save modifier. There is no movement penalty to cross the lava stream.
Falling Ash. When a volcano erupts, the clouds of falling ash can pile up in great drifts several feet high. Even long after the initial eruption, the constant smoke and heat of the lava can send burning materials skyward. The great ash flakes obscure vision at a distance and can make breathing difficult. When Falling Ash is in effect, all shots at over half range are subjected to a -2 modifier instead of the usual -1.
Noxious Clouds. The great earthly disturbances that can cause a volcano to blow will also produce great clouds of noxious fumes. These poison gas clouds can drift down from the volcano's peak or even belch forth from fissures in the ground. Before play begins, number the table quarters 1-4. If the Noxious Clouds rules are in effect, roll a D6 at the start of each player's turn. If the result is a 1, then a poison gas cloud has appeared on the battlefield. The player whose turn it is rolls a D6 and consults the Noxious Cloud chart below.
Noxious Cloud (D6).
| Roll | Result |
|---|---|
| 1-4 | A cloud appears in the board quarter corresponding to the number on the die. To determine where the cloud appears, place the cloud (or 5" template) in the middle of the table quarter. It will scatter 2D6" from this location. |
| 5 | Give the cloud template to your foe. He may place the Noxious Cloud wherever he likes, but it will scatter 2D6" from this location. |
| 6 | The player whose turn it is may place the Noxious Cloud anywhere on the battlefield, but it will scatter 2D6" from this location. |
Models touched by Noxious Clouds take a S3 hit with no armor save. Clouds stay on the board (until they drift off a board edge) and move 2D6" in a random direction at the start of each turn.
[Battlefield photograph omitted.]
Across Fields of Fire
A battle with no quarter offered takes place in the eerie glow of fiery channels of molten lava.
When da red fire mountain starts ta glow, pack da camp, it's time ta go! What passes for a wise Orc proverb.
Overview. Both sides are trying to smite the enemy and cause as many casualties as possible.
Armies. Both armies are chosen from the Warhammer Army lists to an agreed points total.
Battlefield. The battlefield is criss-crossed with several channels of lava. The lava is still moving, but at a very slow pace. Some areas have cooled, and there are even makeshift bridges over the streams.
Deployment. Players roll a D6. The higher-scoring player may choose the side on which he will deploy, and deploys one unit first. Players then take it in turns to place their units on the board. All war machines are deployed at the same time, as are all characters.
Who Goes First? Both players roll a D6. The higher-scoring player may choose to go first or second.
Length of Game. The scenario lasts for 6 turns or until one side is entirely wiped out or has routed off the table.
Special Rules. This scenario is played with the Lava Streams and Falling Ash rules.
Victory Conditions. Use the Victory Points rules from the Warhammer rulebook (p. 198) to determine which side has won. However, no points are awarded for controlling table quarters.
[Battlefield map omitted.]
Silent Death
Armies are fighting for survival in the shadow of a smoking volcano. Each army must worry not only about their foes but also the Noxious Clouds that hover over the battlefield.
Overview. Armies are fighting for survival in the shadow of a smoking volcano.
Armies. Both armies are chosen from the Warhammer Army lists to an agreed points total.
Battlefield. The battlefield is full of craggy rocks, and the very ground is rent with great fissures.
Deployment. Players roll a D6. The higher-scoring player may choose the side on which he will deploy, and then deploys one unit. Players then take it in turns to place their units. All war machines are deployed at the same time, as are all characters.
Who Goes First? Both players roll a D6. The higher-scoring player may choose to go first or second.
Length of Game. The scenario lasts for 6 turns or until one side is entirely wiped out or has routed off the table.
Special Rules. This scenario uses the Noxious Clouds rule.
Victory Conditions. To determine which side has won, each player should total the POINTS VALUE of all of his surviving models, and add to this total the NUMBER OF models that are still on board and not fleeing. The largest sum wins!
[Photograph of a noxious cloud template, with a caption in which a Nurgle-themed remark is partly illegible, omitted. Note: the template can be made or bought, and the caption advises that Nurgle players should not construe the advice in the wrong manner.]
Chaotic Landscapes
Few, if any, survive traveling through the Realm of Chaos, a place past the boundaries of sanity where time has no meaning and eternal battle is waged for the uncaring gods. However, elements of the Realms of Chaos can, at times, be sustained in mortal lands. Chaotic influences have been known to seep into the Northern Wastes or some hidden area of the Old World altered temporarily by a great power. Foul monsters and Daemons wander freely in these areas, and the taint of Chaos can corrupt the very earth, trees, and skies.
Gaming in Chaotic Landscapes
It would have been impossible in a chapter entitled Hostile Terrain not to mention the lands of Chaos! Following are some rules you can use when gaming in these hellish regions. While all terrain types beckon players or Games Masters to invent their own rules, no landscape calls so loudly as the Realm of Chaos.
Monoliths. In many places throughout the twisting landscapes, mighty structures have been erected to honor a Chaos patron. These Monoliths often act as a lightning rod for power. For those gifted with magical sight, the Monoliths seethe with coils of energy. Monoliths have a Toughness of 7 and 6 Wounds. Monoliths count as Large Targets and are automatically hit in hand-to-hand combat. Many Monoliths are imbued with awesome abilities. Where permitted by the scenario, Chaos players may include a Monolith in their Deployment Zone for free. In games in which Monoliths are permitted, Chaos players should roll on the chart or simply pick the Monoliths associated with their patron's power (see the results numbered 6-9 on the chart).
Monolith Powers (2D6).
| Roll | Result |
|---|---|
| 2 | The Monolith may Regenerate. |
| 3 | Lightning Bolts! The Monolith may fire D3 S5 lightning bolts each turn. The range is determined randomly each round by rolling 3D6. The resulting score is the number of inches the Monolith may be fired. |
| 4 | Not Fully Materialized! At the start of each turn, the Monolith will scatter D6" as it phases in and out of the real world. If it scatters off the table, place the Monolith in the center of the board in the following turn. |
| 5 | Covered in Tentacles. The Monolith may make D3+1 S5 attacks against any models within 3". Count the Monolith as WS5. Opponents attempting to wound the Monolith in close combat must now roll to hit as well. |
| 6 | Pulsating Beauty. The Monolith shimmers in an intoxicating dance of light. Any model in base-to-base contact with it must make a Leadership test at -2 or will be unable to fight that round. Followers of Slaanesh may always select this result. |
| 7 | Stream of Corruption. The Monolith has the Stream of Corruption vomit ability (see Warhammer Armies: Hordes of Chaos, p. 49). Followers of Nurgle may always select this result. |
| 8 | Aura of Butchery. Any friendly model within 12" of the Monolith may reroll one failed to-wound roll each turn. Followers of Khorne may always select this result. |
| 9 | Winds of Change. The Monolith can bend the Winds of Magic. All friendly spellcasters gain an additional spell. Followers of Tzeentch may always select this result. |
| 10 | The Monolith casts a Terror. [Wording partly unclear in scan.] |
| 11 | Hungry! The Monolith is covered with many gaping maws and screaming mouths. The Monolith makes D6 S4 attacks in hand-to-hand combat. |
| 12 | The player may choose any of the powers above and then may roll for a second power. Reroll if the second roll produces the same result. |
Eldritch Pools. These pools can take many forms: black stagnant water, a slime-covered puddle, or even viscous liquid the color of blood. As they are steeped in magic, the pools act as a conduit for creatures of Chaos and unusual occurrences. The pools can be waded through and should be treated as Difficult Terrain. During each player's turn, before the Movement Phase, roll on the chart below if any models (friend or foe) are within 6" of the pool.
Eldritch Pool (2D6).
| Roll | Result |
|---|---|
| 2-3 | Tentacles explode outward from the pool, and the nearest unit or model takes D6 S5 hits to represent the slimy appendages attempting to pull creatures into the murk below. |
| 4-5 | A cloud of flies bursts out of the filthy waters. For the next full turn, all models will suffer -1 on all their rolls to hit. Followers of Nurgle are immune to this effect and fight as normal. |
| 6-8 | The pool bubbles ominously, but there is no effect. |
| 9 | The pool shimmers and changes colors and hues. Any Wizard on the battlefield may reroll any one failed attempt to cast a spell in the upcoming turn. |
| 10 | Any models in the pool are imbued with a new-found power and blood lust. Such models add +1 Strength for the rest of the game and are now subject to Frenzy. |
| 11 | Siren Call of Doom! All models within 6" must make a Leadership test or drown themselves in the water. Make one test per unit in range. |
| 12 | A Spawn emerges from the pool and is under control of the player who has the most models within 6" of the pool. |
Shifting Terrain. Great gusts of the winds of magic can cause entire battlefields to shift, disappear, and reform elsewhere. Roll a D6 at the start of each player's turn. On a roll of 1, the entire battlefield warps and shifts. Each piece of terrain scatters 2D6". Should a solid piece of terrain (say a boulder or a small hill) shift on top of a model or unit, disaster can ensue. Make an Initiative test for each model. A roll equal to or under the model's Initiative means that it has leapt aside safely to the model beside the terrain. If the test is failed, the model takes a S5 hit. If the model survives, it is placed beside the terrain. If a model is in or on a piece of terrain and it disappears, no harm befalls the model. The only chance of danger is when such an object rematerializes.
Spawn Infestation. The battlefield is littered with the champions of yesterday's favor. The center of each board quarter contains D2 Spawn. Each board quarter contains Spawn of a different power (Tzeentch, Khorne, Nurgle, and Slaanesh). The Spawn go first at the start of each turn (i.e., Spawn's turn, then player 1's turn, then player 2's turn, then Spawn's turn...). Each individual Spawn uses the scatter die to determine its direction, but if the Spawn should pass within 2" of any unit, it will redirect to charge and attack.
Past the Edge of Reason
Two opposing armies meet on a battlefield where the forces of Chaos have taken over.
Overview. Both sides are trying to smite the enemy and cause as many casualties as possible.
Armies. Both armies are chosen from the Warhammer Army lists to an agreed points total.
Battlefield. The battlefield is relatively barren, with only a few hills and scattered piles of rocky outcroppings. There is a single Eldritch Pool (measuring approximately 8" x 8") in the center of the battlefield.
Deployment and Who Goes First? Players roll a D6. The higher-scoring player may choose the side on which he will deploy and whether to go second or to begin setting up and so go first. Deployment is otherwise standard.
Length of Game. The scenario lasts for 6 turns or until one side is entirely wiped out or has fled off the table.
Special Rules. This scenario is played with the Eldritch Pool and the Spawn Infestation rules. Any Chaos player may also use the Monolith rule. The Monolith must be placed in the Chaos player's Deployment Zone.
Victory Conditions. Use the Victory Points rules from the Warhammer rulebook (p. 198) to determine which side has won. Players get 60 Victory Points for each of the Spawn from the Spawn Infestation that they destroy. Additionally, any player that destroys an enemy Chaos Monolith gains an additional 300 Victory Points.
[Battlefield photograph omitted.]
Unfinished Business
As suspected, there are more hostile terrain types than we have room to discuss. We've not touched on things like quicksand, single-file paths, and snakes of a strong girth, or tidal plateaus, nor have we explored altitude and avalanche rules, or underground games, which also drew some interest from the Skaven and greenskin players. The Dwarf players in particular were disappointed that we did not include mountain rules and terrain with high monster-infested areas.
All those players out there who want additional battlefields to try out should keep an eye on White Dwarf and the web site. In the meantime, however, you'll just have to have a go at inventing your own scenarios and rules.
Chapter 7: Allies & Multi-Player Games
This chapter discusses some general rules for playing Warhammer with allied armies, and provides eight multi-player scenarios. In addition to inspiring great one-off battles, these rules and guidelines could be easily incorporated into all kinds of campaigns, tournaments, and club-based games.
[The opening vignette (a Wood Elf rider's message to a Dwarf commander outside Nuln's west gate) is flavour fiction and is not transcribed.]
Playing Warhammer with allied armies can be a fun alternative to the standard one-on-one battle. These games can introduce new tactical challenges to your battles and to the process of army composition. One army's strengths can make up for another's weaknesses, and two armies' fighting styles can work in concert to good effect. For instance, the speed and shooting ability of a Wood Elf force can complement the stalwart resolve and powerful hand-to-hand strength of Dwarfs. But be warned, though: your allied opponents will be able to combine their troops in similar ways and will try to maximize their armies' strengths and minimize their weaknesses. Imagine the battle that could be fought with Wood Elves and Dwarfs facing off against Skaven and Dark Elves. The complementary forces of Wood Elves and Dwarfs would face off against the shooting ability and quality troops of the Dark Elves, which would mesh well with the expendable numbers of the rat hordes. Skaven and Dark Elves would also have the advantage of a very speedy force.
The real fun of playing multi-player games is imagining the camaraderie between the allied armies or the forced, begrudging acceptance that goes with an alliance like the one between Wood Elves and Dwarfs. Saving a friend's bacon can be very satisfying, and it's reassuring to know that an ally has your back. Plus, trouncing two or more players just gives you that many more bragging rights (or excuses if your side got trounced).
Multi-player games can be a practical option when you have an odd number of players and want to do a two-against-one game, or when you have too few tables to accommodate all the players who show up at your local store, gaming club, or friend's house. Multi-player games can also be a good option for those just starting an army who want to see how their small force of 1,000 points or so might fare in a larger game. By allying with another army or two, armies in progress can test their mettle in a big battle. Of course, deploying hundreds upon hundreds of painted models from multiple armies on the same table is an inspiring sight for any gamer or hobbyist. What player hasn't wanted to see 10,000 points or more deployed against an equally huge allied force or to take command of several allied armies at the same time?
This chapter details three special rules, Alliances, Command Structure, and Enmity, which apply to the scenarios described in this chapter, and also provides a number of multi-player scenarios for you to try. In addition, the Alliances rules explain who can ally with whom in map-based campaigns. Games Masters can also use any of these special rules in any multi-player games you come up with on your own, but all players should agree to them beforehand.
Two-Player Option. The following rules and scenarios were written under the assumption that each army involved is controlled by a different player. However, unless specified otherwise, players could play most of these scenarios by each controlling multiple armies. Other combinations are also possible, e.g., one player controls two armies in battle against two players each controlling one army each.
Alliances
The following Alliances rules are used in the scenarios described in this chapter and in map-based campaigns. These rules can also be used for any multi-player or multi-army scenario you create yourself.
The Allies Chart indicates which armies may ally with one another. Simply cross-reference the two armies in question to see whether they may ally. If the Allies Chart indicates "yes" (y), the two armies may always ally. These armies are ideologically similar enough that they have little trouble accepting the sensibilities of the other, and throughout the history of the Warhammer world, these forces have often cooperated. If the Allies Chart indicates "no" (n), the two armies may never ally. These armies often have a long history of warfare and hostility, are ideologically disparate, or both. Whether their differences are caused by centuries of bloodshed and violence or by radically different values, cultural goals, or political views, these armies will never trust one another enough to ally.
[ALLIES CHART: a matrix of the fifteen armies (Beasts of Chaos, Bretonnians, Chaos Dwarfs, Dark Elves, Dogs of War, Dwarfs, Empire, High Elves, Hordes of Chaos (Daemon), Hordes of Chaos (Mortal), Lizardmen, Orcs & Goblins, Skaven, Tomb Kings, Vampire Counts, and Wood Elves) against one another, with "y", "n", "m" and symbol entries in each cell. The matrix and its footnotes are not reproduced: at the scan's resolution the individual cell symbols and the small-print footnotes cannot be read reliably enough to transcribe without error. The legible footnote fragments refer to the Dogs of War, which may ally with any army, and to Orcs & Goblins, which may ally with Dogs of War armies as long as they don't include Dwarf regiments; a Dogs of War army containing Raiders could not ally with Chaos, Chaos Dwarfs, Skaven, Vampire Counts, or Tomb Kings because those armies cannot hire that regiment. Consult the printed page directly.]
If the Allies Chart indicates "maybe" (m), the armies might ally, depending on the circumstances. These armies might have had an uneasy, on-again-off-again allegiance over the centuries, punctuated by periods of war. Armies such as Dwarfs and High Elves may not trust each other completely, but will fight together in the face of a common enemy, such as an Orc menace or a Chaos invasion. Dwarfs and High Elves would never ally to fight Wood Elves, however. Similarly, armies listed as "maybe" may have little or no history of hostility but may be so ideologically different that they will be hesitant to ally. Lizardmen are the prime example here. Though there has been little contact between Lizardmen and most of the races of the Old World, the Lizardmen seem alien and strange to most Old Worlders. As such, trust is difficult. The Lizardmen might ally with, say, an Empire army if they were faced with long-time adversaries like the Vampire Counts or the Skaven; however, long-term alliances between two such races are unlikely. Any short-term alliance between them will likely end as soon as the common foe is defeated.
In any case, armies listed as "maybe" will suffer from Enmity in the multi-player scenarios detailed in this chapter, as explained later in this chapter.
Alliances and Strategic Army Composition
Alliances in multi-player games open up interesting strategic opportunities and challenges for army composition. There are two basic approaches to creating the "perfect" alliance, which we'll call mini-maxing and domination, both of which offer endless variations.
"Mini-maxing" is a short-hand term for "minimizing weaknesses and maximizing strengths." This approach to building an alliance emphasizes the use of two or more armies that complement one another's abilities and liabilities. For instance, a mobile and shooty Elven army would mesh nicely with the rock-hard, but slow-footed, close combat troops of a Dwarfen force. Similarly, a Mortal Chaos army with its expensive, quality troops would be complemented nicely by a horde of Skaven that would provide a lot of inexpensive, expendable troops. Mini-maxing strategies include:
- Fast/Slow. Mix mobile troops from one army (e.g., cavalry, Fast Cavalry, Elves, Skaven, Skinks) with slow combat experts or slow missile troops from another (e.g., Elves and Dwarfs, Dark Elves and Vampire Counts, Wood Elves and artillery-heavy Empire).
- Expensive/Cheap. Augment quality, high-point troops from one army with weaker, low-point troops from another army that can bring a lot of numbers to bear (e.g., Hordes of Chaos and Skaven, Beasts of Chaos and Goblins, Dwarfs and Empire).
- Shooty/Fighty. Marry missile experts from one army to combat experts from another (e.g., Elves and Dwarfs, Dark Elves and Hordes of Chaos, missile-heavy Tomb Kings and Vampire Counts).
- Magic/Other Experts. Combine an army with magical expertise with another army that can dominate another aspect of the game, like shooting, close combat, or providing a lot of numbers of troops (e.g., High Elf mages with Empire artillery, Tzeentch Wizards with Khornate combat experts, Tomb Kings spellcasters with Orc & Goblin numbers).
The domination approach is the opposite of the mini-maxing approach. Instead of trying to complement two or more armies' strengths and weaknesses, allies strive simply to maximize their strengths to dominate one or more phases of the game. By doing so, the allies may leave themselves vulnerable to one form of attack, but hope to dominate one aspect of the game to such an extent that their liabilities are not a factor in the final outcome. Domination strategies include:
- Mobility. Allied armies include a lot of fast troops that can completely outmaneuver the enemy. Where available, Fast Cavalry is chosen for one or more armies (e.g., High Elves and Wood Elves, Dark Elves and Tomb Kings with Chariots and Horsemen, Bretonnians and Empire with cavalry).
- Masters of Missiles. Allied armies include a lot of shooty troops and/or artillery (e.g., Dwarfs and Empire, Tomb Kings and Orcs & Goblins, High Elves and Wood Elves).
- Combat Experts. Allied armies include a lot of close combat experts (e.g., Hordes of Chaos and Beasts of Chaos, Vampire Counts and Orcs & Goblins, Bretonnians and Dwarfs).
- Magical Dominance. The allied armies can combine powerful wizards and still take a greater than usual number of spellcasters (e.g., Tzeentch and Tomb Kings, Lizardmen and High Elves, Skaven with a Grey Seer and Dark Elves). This approach can be risky, because magic can be unpredictable.
Both mini-maxing and domination are simply basic strategies for building armies in an alliance. In practice, army composition and battlefield tactics in alliances can be much more complex. In addition, the examples provided in this section list only two armies in each alliance. The possible combinations with three or more armies provide a great number of options. Imagine, for instance, a four-way alliance that strives for domination of the Movement Phase by including cavalry-heavy Empire, Bretonnian, and High Elf armies, but also includes one artillery-heavy Dwarfen army. Such an alliance would likely easily outmaneuver the enemy, but would have artillery and stalwart Dwarfen infantry to support the fast-moving cavalry.
Alliances in Map-Based Campaigns
In campaigns officiated by a neutral Games Master, he or she will determine which pairs of armies marked "m" on the Allies Chart may ally. Try to arrange map-based campaigns such that each player has the opportunity to ally with at least one other player. One can be more liberal in interpreting a listing of "m" on the Allies Chart for campaigns in which players have only one potential ally, and that ally is listed as "maybe." For instance, consider a campaign involving Chaos Dwarfs, Bretonnians, Wood Elves, Orcs & Goblins, and Skaven. The Orcs & Goblins, Skaven, and Chaos Dwarfs may ally freely with one another. The Bretonnians and Wood Elves are listed as "maybe," and they only might ally with one another under normal circumstances. Due to occasional conflicts between Bretonnians and the Wood Elves of Athel Loren, there is a certain mistrust between these two peoples. This mistrust is fueled by the fact that the King of Bretonnia claims sovereignty over the Forest of Loren, a fact that most Wood Elves ignore, but some resent. In the context of this hypothetical campaign, however, the Bretonnians and Wood Elves would almost certainly set aside their differences to fight against the greenskins. Let good judgment and your knowledge of the Warhammer world help you decide whether a possible alliance is likely in the context of your campaign. Campaigns are different from isolated games of Warhammer. In a one-off game, you can always make up a story of an "unholy alliance" in which two armies listed as "n" could in fact ally. Perhaps an Empire army, representing a Sylvanian militia for a particular game, could ally with a von Carstein Vampire Counts army to fight against an enormous Chaos Horde. Such an unholy alliance may be necessary when an odd number of players show up at your local game club one night. In campaigns, however, the narrative setting of the Warhammer world and the story of empire expansion are more important. As such, campaign players should only ally as allowed by the Allies Chart and the Games Master's interpretation thereof.
Of the special rules detailed in this chapter, only Alliances should apply to map-based campaigns. Command Structure and Enmity apply only to the scenarios included in this chapter and, potentially, to other multi-player or multi-army scenarios you create for your own games.
[Illustration omitted.]
Command Structure
The Command Structure special rule reflects how allied Generals (each with his own army) lead the many troops under their command. Each army in an alliance has its own General, who commands his own army per the regular Warhammer rules. The rules and advantages for a General of a particular army cannot be applied to other armies in the alliance; e.g., the General of a Hordes of Chaos army cannot lend his Leadership to an allied unit of Goblins within 12" (unless the Chaos General is also the Marshal; see below).
The Marshal is the overall commander of the allied force. Although the Marshal serves as the General of his own army, he also has powers of command broader than those of a General. The Marshal is a character of great stature and mighty will and power. Before a large multi-army battle begins, the players from each alliance should roll on the Marshal Table to determine how the Marshal will be nominated. Armies that designate their General randomly, such as High Elves, and players who may choose their General because they have two or more characters with the same Leadership value in the army must determine which character will be their General before rolling on the Marshal Table.
The title of Marshal may be appropriate for the Empire or Bretonnia, but other alliances will come up with other titles for their commander. Orcs acting as Marshal would likely be called "Da Great Big Warboss." Dwarf Lords and their allies would likely follow a High King, and Lizardmen might take their orders from a High Slann of the Second Generation, Chosen of the Old Ones, or Great Oldblood of the Blessed Spawning. Feel free to come up with whatever honorific you want, but for rules purposes, all of these great leaders are considered Marshals.
Before the battle, roll a D6 and consult the Marshal Table to find how the Marshal will be determined.
Marshal Table (D6).
- 1-2 Duel. Before the battle begins, the Generals fight a non-lethal duel to decide who is the Marshal. Place the Generals 15" away from one another. The General with the higher Initiative gets the 1st turn (dice off in the event of ties). Play until one General falls. No Panic, Fear, or Break tests are required, as the combat is non-lethal. The dueling Generals may use any missile weapons, mounts, monstrous mounts, magic spells, and magic items in the duel, except One Use Only magic items, which may not be used. Note that the "Wounds" received during the duel are not actual Wounds and have no effect on the main battle (nor do "instant death" magic results, Killing Blow, and similar effects). When three or more armies are allied and a duel must be fought, set up a single-elimination duel tournament between the Generals to determine the Marshal (dice off to determine who gets a "bye" if there are an odd number of players in any given round). Note that, if players prefer, the duel can be imagined as something other than a literal non-lethal combat, like a rigorous assessment of the other General's combat prowess. Generally, though, it's more fun to play the duel as a small mini-scenario that precedes the main battle.
- 3 Leadership. The General with the highest Leadership is the Marshal (fight a duel to settle any ties).
- 4 Points. The General with the highest points value (all equipment, magic items, mounts, and special abilities costs included) is the Marshal.
- 5 Politics. The Marshal is a political appointee and not necessarily the best man (or Orc or Slann or whatever) for the job. Randomly determine which General is the Marshal with a die roll.
- 6 Size. In games where the allied forces differ in points size, the General of the largest army is the Marshal. If allied forces are equal in size, reroll on this table and ignore future results of 6.
Enmity
Some armies do not fully trust their allies and may hesitate to follow the orders of a foreign or unfamiliar Marshal. Using the Allies Chart on p. 109, cross-reference each force in an alliance against all the other armies in the alliance. Pairs of armies listed as "maybe" (m) feel Enmity toward one another and suffer from the following penalties:
- Units and models within 6" of a unit or model toward which they feel Enmity suffer from -1 Ld.
- Units or models may not take advantage of the Marshal if they suffer from Enmity toward the Marshal. They may not use his Leadership to make Leadership-based tests. The Marshal may not join units that feel Enmity toward him or towards whom he feels Enmity. The Marshal does not add +1 to the resolution of combats involving a unit or units that feel Enmity toward him. Units subject to Enmity of the Marshal may not reroll failed Rally tests as a result of the Marshal being within 18".
- Units that are Immune to Psychology and Frenzied units are not subject to Enmity.
By way of example, let us consider an alliance of Dwarfs, High Elves, and Empire led by a Dwarf Marshal. The Empire and Dwarf allies cross-reference as "yes" (y) on the Allies Chart and thus have no trouble with Enmity. Both Dwarf and Empire troops can take advantage of the Marshal's special rules. However, Dwarfs and High Elves cross-reference as "maybe" (m) on the Allies Chart and thus feel Enmity toward one another. High Elf models within 6" of each other unit cannot take advantage of the Dwarf Marshal's special rules, and Dwarf and High Elf models within 6" of each other will suffer from -1 Ld (though troops like Dwarf Slayers, who are Immune to Psychology, will never suffer from Enmity, though they can still inspire Enmity in others).
Cunning players can minimize the effects of Enmity by keeping begrudgingly allied armies like Dwarfs and High Elves as far away from each other as possible. For instance, it would be a good idea for the members of the alliance discussed above to deploy the Dwarfs on one flank, the High Elves on the other, and the Empire troops in the center to keep some distance between the antagonistic allies.
[Photograph of a Dwarf Slayer unit and a battle caption ("...the Dwarf Slayer... some battles will find the two forces allied with one another in spite of their antagonism") omitted.]
The Marshal
The Marshal of an allied force is an inspirational figure to the allied troops he commands. The following rules apply to the Marshal in scenarios that use the Command Structure special rule:
- Any friendly unit within 18" of the Marshal model may use his Leadership value instead of its own when making a Leadership-based test (e.g., Break, Rally, and Psychology tests). If a unit is within 18" of the Marshal and also within 12" of its own General, the unit may use the higher of the two Leadership values to make its test.
- The Marshal may join any friendly unit that can normally include characters.
- The Marshal adds +1 to the combat resolution of all friendly troops within 18".
- Any friendly unit within 18" of the Marshal model may reroll failed Rally tests.
- If the enemy Marshal is slain, is fleeing, or has fled off the table at the end of the game, the opposing player may add an additional 100 Victory Points to his total in addition to the 100 Victory Points for destroying an army General, and to the Victory Points for destroying a unit.
- The Marshal is the General of his own army, and all standard rules for Generals apply to the Marshal's command of his own army, except where the Marshal's powers are superior to those of the General (e.g., the rule that states that units within 12" of the Marshal may use his Leadership to make Leadership-based tests supersedes the rule that states that units within 12" of the General may use his Leadership).
Multi-Player Scenarios
This section includes eight multi-player scenarios, as well as a description of how to modify the standard scenarios in the Warhammer rulebook for multi-player games. All of the following scenarios use the Alliances, Command Structure, and Enmity special rules. Other special rules may apply to some scenarios.
Points Sizes
In the following scenarios, the attacking and defending alliances are generally of equal points value. However, the armies that make up each alliance may differ in points value. For instance, in a 4,000-point game, Dwarfs and Empire are allied against Hordes of Chaos and Skaven. The Chaos force could be made up of 3,000 points, in which case 1,000 points of troops would make up the Skaven horde. Both Dwarf and Empire armies could consist of 2,000 points. Whatever the value of the individual armies, they must be chosen from the Warhammer army lists and must be "legal" armies for their individual points size (i.e., the number of characters, Core, Special, and Rare choices each army can/must take is determined only by the points size of that army; the points size of an army's ally or allies has no effect on an individual army's composition).
Table Sizes
Although many of us are accustomed to playing Warhammer on 4' x 6' gaming tables, the following scenarios were designed for tables measuring 4' x 8' or larger. If you'd like to play these scenarios on a smaller table, you will want to decrease some of the measurements shown on the maps (for instance, decrease the depth of Deployment Zones by 6" or so) and place less terrain than usual. Generally, however, the scenarios will run more smoothly and will better convey the effect of a large battle when played on a larger table.
For really huge games, you can also try setting up your models on the ground and having a gigantic "floor war." You'll need to be careful if there are small children or pets around. Foot of Gork spells aside, stepping on your opponent's meticulously painted models (or your own) is the ultimate gamer faux pas. However, a floor war can be a great option if you don't have a large table available or if you want to play a really huge game with eight or more armies.
Weak Flank
In a few of the multi-player scenarios, you will be instructed to divide each alliance's Deployment Zone into a number of sections equal to the number of armies in the alliance. Each section will be of equal size regardless of the relative points values of the armies. Each army will be deployed in its own section of the Deployment Zone. Where the points values of an alliance's armies differ, this method of deployment can result in a "weak flank," which will add tactical interest to the multi-player game. This feature is intended to not adjust the size of the sections of the Deployment Zones in proportion to the relative points sizes of the allied armies.
[Photographs of gaming tables and a floor-based battle, with captions, omitted. One caption notes that huge games will require multiple tables pushed together.]
[A journal excerpt on this page is flavour text and is not transcribed.]
Multi-Player Scenario 1: Pitched Battle
(Two or more players, three or more armies)
Overview. Alliances converge on the battlefield. Their goals are simple: wipe out the enemy, support their allies, and take the field.
Armies. Two or more armies are divided into two groups (alliances). Both alliances are built to an agreed points total, although the armies in each alliance may differ in points value. All armies are chosen from the Warhammer army lists and must be "legal" armies for their individual points size.
Battlefield. Set up the terrain in any mutually agreeable manner.
Deployment. Both alliances roll a D6. The alliance whose roll is higher may choose the side of the table on which they will deploy their forces. Divide each alliance's Deployment Zone into a number of sections equal to the number of armies in the alliance; each section should be of equal size, regardless of the points values of the armies. Each army will be deployed in its own section of the Deployment Zone. The map shows how the Deployment Zones would be divided in a three-on-two player game.
The players roll a D6. The highest-scoring player deploys one of his units in one section of his alliance's Deployment Zone. In order of descending die rolls, each player takes it in turn to deploy one of his units in a section of his alliance's Deployment Zone.
All war machines in a player's army are deployed at the same time, though they can be deployed in different parts of his section of his alliance's Deployment Zone. Champions are deployed with their units. Other characters in the army are deployed at the same time, after all other units. The Marshal may deploy anywhere in his alliance's Deployment Zone that he wishes. Players needn't deploy in his own army's section. Scouts are deployed after all units of all participating armies have been deployed, as described in the rules for Scouts.
[Deployment map omitted.]
Who Goes First? Both alliances roll a D6. The alliance that finished its deployment first (not including Scouts) may add +1 to its die roll. The alliance that scores higher may choose whether to go first or second. Once the game begins, each alliance fights as one army with its own Command Structure.
Length of Game. The game lasts 6 turns or until one alliance concedes defeat.
Special Rules. Alliances, Command Structure, Enmity.
Optional Rule. Instead of each player controlling one army, players may divide their forces anyway they see fit (e.g., one player controls all the cavalry models in the alliance; one controls all artillery, missile troops, and spell casters; one controls all infantry). This optional rule can also be applied to some of the scenarios in this chapter, but not Pincer Attack, Twist in the Chain of Command, or Communication Breakdown.
Victory Conditions. The Victory Points rules on p. 198 of the Warhammer rulebook are used to determine the winner. Remember that the Marshal is worth 100 Victory Points above and beyond the 100 Victory Points for destroying a General, and his Victory Points value as a unit.
Multi-Player Scenario 2: Communication Breakdown
(Four players, four armies)
[The opening vignette of this scenario (a Duke and his messenger boy) is flavour fiction and is not transcribed.]
Overview. Two alliances comprising two armies each are converging on the battlefield. Because the armies are arriving from all four points of the compass, each pair of allies has had little time to coordinate a battle plan. The allies must rely on a system of signal flags, cues from army musicians, magical telepathy, or just plain intuition to communicate with one another. Each alliance must try to communicate from across the battlefield and win the day.
Armies. Two alliances, each consisting of two armies, are built to an agreed points value. However, the two armies in each alliance may differ in points value. All four armies are chosen from the Warhammer army lists and must be "legal" armies for their individual points size.
Battlefield. Lay out the terrain in any mutually agreeable manner.
Deployment.
- Both alliances roll a D6. The side that scores highest chooses a pair of Deployment Zones. Allied armies will be deployed on opposite sides of the board.
- Both alliances roll another D6. The higher-scoring alliance chooses whether to start deploying first or second.
- Alliances take it in turns to deploy all of their remaining units, except Scouts. All war machines in each player's army are deployed at the same time, though they can be deployed in different parts of his Deployment Zone.
- Champions are deployed with their units. All other characters in the army are deployed after all other units, all at the same time. Characters may start the battle with units if you wish. The Marshal must deploy with his own army.
- Scouts are deployed after all units of all participating armies have been deployed, as described in the rules for Scouts.
Who Goes First? Both alliances roll a D6. The alliance that finished its deployment first (not including Scouts) may add +1 to its die roll. The alliance that scores higher may choose whether to go first or second. Once the game begins, each alliance fights as one army with its own Command Structure.
Length of Game. The game lasts 6 turns.
Special Rules. Alliances, Command Structure, Enmity, Limited Communication, Spies, Mixed Signals.
Limited Communication. Before the battle, the allied commanders had little time to communicate and formulate a plan of attack. As such, before the battle, allied players may not communicate any plans, suggestions, ideas, or hypotheses (in short, anything of a tactical or strategic nature) to one another. After deployment and once the battle begins, allied players have three opportunities over the course of the game to discuss tactics or strategy in 2-minute periods. These 2-minute periods represent what little communication can be achieved on a hectic battlefield, in the form of flags, drumbeats, carrier pigeons, and the like. Allied players may nominate when they will confer for 2 minutes, and discussion of when the 2-minute conference should or should not be taken is permissible at any time. The conference may be whispered or held out of earshot of the opposing players. The 2-minute period should be timed by the allied players' opponents or, even better, by a third party. The allied players may discuss anything they wish in the 2-minute period, but all discussion must stop when time is called.
Spies. During the course of one of their opponents' 2-minute conferences, the members of the opposing alliance may yell "SPIES!" and interrupt the conference. This interruption represents spies intercepting messages, an observant officer decoding a system of signals in the midst of battle, or something similar. The conferring players may choose either to continue their conference while their opponents wait, or to stop talking immediately and waste one of their three conferences.
Mixed Signals. If some unscrupulous or absent-minded players violate the Limited Communication rule and actually do communicate some tactical information to one another outside one of the permitted 2-minute conferences, their opponents may invoke the Mixed Signals rule. Assume that these "illegal" signals were sent in desperation. Perhaps an old code book was used, the message was poorly disguised and thus easily interpreted by the enemy; or the message was made in haste and thus subject to misinterpretation. When the Mixed Signals rule is invoked, the opponents of the communicating alliance may immediately turn D3 of their foes' units to represent the confusion in the ranks caused by poorly thought out or misunderstood signaling. These units could be turned to face away from the enemy, positioned such that their flanks are exposed to an enemy unit in charge position, or formed into single-rank formation. Just one use of the Mixed Signals rule can easily win the game, so be very sure not to violate the Limited Communication rule!
Victory Conditions. The Victory Points rules on p. 198 of the Warhammer rulebook are used to determine the winner. Remember that the Marshal is worth 100 Victory Points above and beyond the 100 Victory Points for destroying a General and his Victory Points value as a unit. In addition, each alliance that violates the Limited Communication rule loses 100 Victory Points from the alliance's total.
Multi-Player Scenario 3: Vanguard
(Two or more players, four or more armies)
Overview. One army of an alliance has been sent forth as a Vanguard and has secured a crucial missive from an informant or spy. This letter could contain military intelligence, arcane knowledge of vital importance, or the enemy's state secrets. The Vanguard must deliver the message to the Marshal, who is currently leading his alliance's Main Force. Enemy officers have learned about the spy and have dispatched forces to intercept their foes.
Armies. Defenders: The Defending alliance includes the Vanguard, which consists of one army, and the Main Force, which consists of one or more armies. When the points values of the Defending armies differ, the army with the lowest points value must be the Vanguard. The Main Force comprises the remaining armies and the Marshal.
Attackers: The Attacking alliance consists of two or more armies and must prevent the Vanguard from joining with the Main Force. The Attacking alliance has 25% more points with which to select its forces than the Defenders (e.g., if the Defending alliance consisted of armies totaling 4,000 points, the Attacking alliance would have 5,000 points of troops).
All armies are chosen from the Warhammer army lists and must be "legal" armies for their individual points size.
Battlefield. Lay out the terrain in any mutually agreeable manner.
Deployment.
- The Vanguard, the smallest army in the Defending alliance, is deployed first in Deployment Zone A. If the Marshal is the General of the Vanguard, he is not deployed with his army and will instead join the Main Force. Before deploying his army, the player controlling the Vanguard must nominate one unit to be the messengers carrying the letter, and must secretly write down the name of the unit.
- One of the Attacking armies (roll randomly to determine which) is deployed in Deployment Zone B. No other armies are deployed at the start of the game.
- Scouts must be deployed in their army's Deployment Zones and may not take advantage of the special deployment rules for Scouts.
Who Goes First? The Defenders (the Vanguard) have the 1st turn. Once the game begins, each alliance fights as one army with its own Command Structure.
Length of Game. The game lasts until one alliance concedes defeat, until one alliance meets its Victory Conditions, or for 7 turns, whichever comes first.
Special Rules. Alliances, Command Structure, Enmity, Delayed Deployment.
Delayed Deployment. The armies of both alliances, the two that begin the game on the table, are rushing to join their allies on the field of battle. At the start of each alliance's 2nd turn, roll a D6 for each army that has yet to deploy. On a roll of 3+, the armies from the Attacking alliance may move on from Edge C, and armies from the Defending alliance may move on from Edge D. At the start each alliance's 3rd turn, armies may enter the board on a roll of 2+. Any remaining armies will automatically deploy on Turn 4.
To move a unit from a Delayed Deploying army onto the board, measure from the designated part of the table edge (see map for locations). Units may not charge on the same turn that they move onto the table, but do not count as starting their move within 8" of the enemy and thus may march. The controlling player does not have to move all units from a Delayed Deploying army onto the board at the same time. Units that are left off the table can move on in subsequent Movement Phases at the controlling player's discretion. If you are playing a very large game with many armies in each alliance, limited table space may necessitate keeping some units off until subsequent turns.
If the Defending alliance's Marshal is the General of the Vanguard force, he will deploy with the first Delayed Deploying army of the Defending alliance. Otherwise, he deploys with his own army.
Victory Conditions. The messenger unit from the Vanguard force must deliver the package to the Marshal leading the Main Force. The Defending alliance wins if at least one member of the messenger unit gets into base-to-base contact with the Marshal (or the Marshal's unit if he is associated with one). The Attacking alliance wins if it kills the Defending Marshal, if it wipes out the messenger unit, or if the Vanguard has not rejoined the Marshal by the end of Turn 7.
[Deployment map omitted.]
Multi-Player Scenario 4: Twist in the Chain of Command
(Four players, four armies)
Overview. In an enormous conflict, some troops of both alliances have been separated from their usual chain of command. As hostilities heat up the next day, many find themselves under the command of unfamiliar officers.
Armies. Two alliances, each consisting of two armies, are built to an agreed points value. The armies in each alliance may differ in points value. All armies are chosen from the Warhammer army lists and must be "legal" armies for their individual points size.
Battlefield. Lay out the terrain in any mutually agreeable manner.
Deployment.
- Before the battle begins, each player must randomly designate D3+1 units as the ones separated from their commanders after yesterday's conflict. These units cannot be any Core, Special, or Rare choice, but not Characters. Units so designated will be deployed and commanded by the allied player.
- Roll a D6 for each alliance. The alliance that scores higher is considered the Attacker, and the Attacking alliance will choose the side of the table on which they deploy their forces.
- All players roll a D6 (reroll any ties). The highest-scoring player deploys one of the units under his command in the Deployment Zone on his alliance's side of the board (Deployment Zone A or B if attacking; Deployment Zone C or D if defending; see map). In order of descending die rolls, each player takes it in turn to deploy one of the units in his section of his alliance's Deployment Zone. Remember that each alliance will also deploy D3+1 allied units in his Deployment Zone.
- All war machines under a player's command are deployed at the same time, though they can be placed in different areas of his Deployment Zone.
- Champions are deployed with their units. All other characters in the army are deployed after all other units, all at the same time. The Marshal must deploy with his army (which will be missing D3+1 of its own units and bolstered by D3+1 allied units).
- Scouts are deployed after all units of all participating armies have been deployed, as described in the rules for Scouts.
Who Goes First? Roll a D6 for both alliances. The alliance that finished its deployment first (not including Scouts) may add +1 to its die roll. The controlling players of the alliance that scored higher may choose whether to go first or second. Once the game begins, each alliance fights as one army with its own Command Structure.
Length of Game. The game lasts 6 turns.
Special Rules. Alliances, Command Structure, Enmity.
Optional Deployment. Play the scenario as written, except that allied armies set up in opposite corners (i.e., the Attackers set up in Deployment Zones A and D, and the Defenders set up in Deployment Zones B and C, or vice versa).
Victory Conditions. The Victory Points rules on p. 198 of the Warhammer rulebook are used to determine the winner. Remember that the Marshal is worth 100 Victory Points above and beyond the 100 Victory Points for destroying a General and his Victory Points value as a unit.
[Deployment map omitted.]
Multi-Player Scenario 5: Pincer Attack
(Two or more players, four or more armies)
Overview. In this scenario, two groups from the Attacking alliance converge on the Defenders from different directions. If the Attackers time their assault well, the Defenders could well be fighting a battle on both flanks. If their timing is poor, the Defenders will be able to destroy them one army at a time.
Armies. Two alliances, each consisting of two or more armies, are built to an agreed points value. The armies in each alliance may differ in points value. All armies are chosen from the Warhammer army lists and must be "legal" armies for their individual points size.
Battlefield. Lay out the terrain in any mutually agreeable manner.
Deployment.
- The Attacking players must first decide which armies will set up in Deployment Zone A and which will set up in Deployment Zone B. The Attackers may not split any army in two to deploy in both Attacker Deployment Zones. Insofar as it is possible, an equal number of armies must be deployed in each Deployment Zone (e.g., if the Attacking alliance consists of five armies, two armies would deploy in one Deployment Zone and three in the other; not one and four). The Marshal may deploy in either Deployment Zone, regardless of where his own army is deployed. The players of the Attacking alliance must secretly write down which armies will deploy in each Deployment Zone. No models are placed at this time.
- Divide the Defending alliance's Deployment Zone into a number of sections equal to the number of armies in the alliance; each section should be of equal size, regardless of the relative points values of the armies. Each Defending army must be deployed in its own section of the Deployment Zone. The map shows how the Deployment Zone would be divided if the Defending alliance consisted of two armies.
- The members of the Defending alliance then set up each army in one section of their Deployment Zone. The Marshal may deploy anywhere in the Deployment Zone.
- The Attackers then reveal their written deployment orders and deploy their armies in the appropriate Deployment Zones.
Who Goes First? The Attacking alliance goes first. Once the game begins, each alliance fights as one army with its own Command Structure.
Length of Game. The game lasts 6 turns.
Special Rules. Alliances, Command Structure, Enmity.
Victory Conditions. The Victory Points rules on p. 198 of the Warhammer rulebook are used to determine the winner. Remember that the Marshal is worth 100 Victory Points above and beyond the 100 Victory Points for destroying a General and his Victory Points value as a unit.
[The Pincer Attack scenario requires two or more allies to deploy from the corners of the tabletop while their adversary remains in the center of the table across the opposite side. Map omitted.]
Converting Standard Scenarios to Multi-Player Scenarios
Many of the standard scenarios in the Warhammer rulebook can be easily converted into multi-player scenarios. Add the Alliances, Command Structure, and Enmity special rules to these scenarios, along with the modifications and any additional special rules described below.
Breakthrough. Play this scenario as you normally would, but divide the Attacker and Defender Deployment Zones as described for a Multi-Player Pitched Battle.
Meeting Engagement. Play this scenario as you normally would, except for table size and Order of March. Because of the deployment rules unique to this scenario, alliances need both sufficient space and a careful plan to deploy their armies successfully. We recommend playing this multi-player scenario on a table no smaller than 4' x 10'. Players will also have to coordinate their movement carefully to ensure that all of their units fit inside their Deployment Zone.
Even though two or more armies may march in the same column, each one will remain discreet within that column. For example, an Empire army could march in front of an army of Wood Elves, which could march in front of a rearguard army of High Elves. Allied players must decide the order in which their armies are positioned in the column of march. Thus, with the example above, the order of march (and thus the order of deployment) would be:
- Empire units in Order of March
- Empire characters
- Empire Scouts
- Wood Elf units in Order of March
- Wood Elf characters
- Wood Elf Scouts
- High Elf units in Order of March
- High Elf characters
- High Elf Scouts
This scenario can be highly challenging, as the first units to deploy must be careful not to block allied units from deploying. Should a situation arise in which there is simply no room left in the Deployment Zone for the last unit(s) to deploy, these units may move onto the board in the second (or subsequent) turn of the game. Begin measuring the move from any point on the board edge inside the Deployment Zone.
Flank Attack. The Attacking alliance must consist of two or more armies, the smallest of which is the flanking force (if all armies in the Attacking alliance are of the same size, the Attacking players may decide which army will be the flanking force). The Marshal of the Attacking alliance can join the main force or the flanking force, regardless of which group his own army is in. Each alliance's Deployment Zone is divided into a number of sections as described for a Multi-Player Pitched Battle.
Capture. There are two ways to vary this scenario for a multi-player game. (i) Play this scenario as you normally would, but divide the Attacker and Defender Deployment Zones as described for a Multi-Player Pitched Battle. (ii) For a four-player game, play this scenario as you normally would, but deploy the armies as shown in the map for Multi-Player Scenario 2: Communication Breakdown.
Ambush. Play the scenario as you normally would. However, the Attacking alliance must consist of two or more armies, and the Defending alliance contains one or more armies. Each army in the Attacking alliance must be deployed in one of the two Attacker Deployment Zones; you may not split any army in two to deploy in both. Insofar as it is possible, an equal number of armies must be deployed in each Deployment Zone (e.g., if the Attacking alliance consists of five armies, two armies would deploy in one Deployment Zone and three in the other; not one and four). The Marshal may deploy in either Deployment Zone, regardless of where his own army is deployed.
Last Stand. No changes.
Rear Guard. Play this scenario as you normally would, but divide the Defending alliance's Deployment Zone as described for a Multi-Player Pitched Battle.
Sheer Heroism. Play this scenario as you normally would, but divide the Attacker's Deployment Zone as described for a Multi-Player Pitched Battle. The Defenders may set up as they wish in their own Deployment Zone.
Multi-Player Scenario 6: Two Battlefields
(Four players, four or more armies)
[The opening exchange between the two generals is flavour text and is not transcribed.]
Overview. Both Attacking and Defending alliances are divided into two forces, the Main Force and the Flanking Force. Each force consists of one or more armies. The Attacking Flanking Force must break through the Defending Flanking Force and join its allies on the main field of battle. The Defenders must prevent the Attackers from doing so and try to hold their tactically important territory.
This scenario begins on two separate gaming tables. Units from the Flanking Table may be able to join the battle on the Main Table later in the game.
Armies. This scenario involves two alliances, each consisting of two or more armies. The Attacking alliance has 25% more points with which to select its forces than the Defenders (e.g., if the Defending alliance consisted of armies totaling 4,000 points, the Attacking alliance would have 5,000 points of troops). The armies in each alliance may differ in points value. All armies are chosen from the Warhammer army lists and must be "legal" armies for their individual points size.
Battlefields. This scenario begins on two separate gaming tables, the Flanking Table and the Main Table. The Flanking Table should be slightly smaller than the Main Table. Lay out the terrain on both tables in any mutually agreeable manner.
Deployment.
- Before the battle begins, both alliances must divide up their forces between those that will fight on the Flanking Table and those that will fight on the Main Table. The Defending alliance must deploy 30-50% of the points cost of its forces on the Flanking Table. The Attacking alliance must deploy at least 50% of the points cost of its forces on the Flanking Table. The remaining troops will be deployed on the Main Table.
Note that the armies of the Attacking and Defending alliances may be mixed and matched to make up the Flanking Table Forces and the Main Table Forces. One player from each alliance will command the Flanking Table Forces; the other player will command the Main Table Forces. Thus, it is possible for each player to command troops from two or more armies. Units themselves may not be split between the two tables.
- Both players commanding the Flanking Forces roll a D6, and both players commanding the Main Forces roll a D6. The higher-scoring player on each table may choose his Deployment Zone.
- Both players commanding the Flanking Forces roll a D6, and both players commanding the Main Forces roll a D6. The higher-scoring player on each table may choose to begin deploying first or second.
- On each table, players take it in turns to deploy one unit at a time in their respective Deployment Zones.
- All war machines in a player's force are deployed at the same time, though they can be deployed in different areas of his Deployment Zone.
- Champions are deployed with their units. All other characters are deployed after all other units, all at the same time. The Defending Marshal must be deployed on the Main Table. The Attacking Marshal may be deployed on either table.
- Scouts must be deployed with their armies in the Deployment Zones and cannot take advantage of the special rules for Scouts.
Who Goes First? The Attacking alliance goes first. Once the game begins, each alliance fights as one army with its own Command Structure.
Length of Game. The game lasts 8 turns.
Special Rules. Alliances, Command Structure, Enmity, Two Battlefields.
Two Battlefields. Playing this scenario on two battlefields requires a bit of coordination but won't be complicated as long as each player turn is synchronized between the tables. When one table completes a player turn, the players should alert the other table that they are finished and wait a few minutes for the other table to finish that player turn before moving on to the next player turn (e.g., only when both tables complete Defender Turn 2 should both tables move on to Attacker Turn 3). Attacking units on the Flanking Table attempt to exit the board via the Defender's table edge (Board Edge A or B, per the controlling player's choice) on their turn. The Defending Flanking Force must try to prevent them from doing so. After Attacking units have left the Flanking Table, they may enter the Main Table by Board Edge A or B (per the controlling player's choice) on their next turn. If the entire Defending Flanking Force is wiped out and/or has fled off the Flanking Table, then all of the remaining Attacking Flanking units may enter the Main Table on the next Attacker turn by Board Edge A or B (per the controlling player's choice). If the Attacking Flanking force is wiped out and/or has fled off the table, then all of the remaining Defending Flanking units may enter the Main Table on the next Defender turn on Board Edge A or B (again, per the controlling player's choice). Units that flee off the Flanking Table are lost as normal and may not enter the Main Table. Units may not charge on the same turn that they move onto the Main Table, but do not count as starting their move within 8" of the enemy and thus may march (unless they are models that cannot normally march, e.g., Chariots).
Victory Conditions. At the end of the battle, each Attacking unit in the Defender's Main Table Deployment Zone is worth its points value in Victory Points. Units that are fleeing, monsters, and characters do not count towards this total. No other Victory Points are used. The Attacking alliance wins if it can score a number of Victory Points equal to a third or more of its starting points value (rounding fractions down). For example, a 5,000-point Attacking alliance must have 1,666 points or more of units in the Defender's Main Table Deployment Zone to win.
[Photograph of a two-table game, with the captions naming the tables A and B, omitted.]
Multi-Player Scenario 7: Construction
(Two or more players, three or more armies)
Overview. In this scenario, one army of the Defending alliance is finishing up a major construction project. This project could be an important tactical feature like a bridge, tower, wall, or large earthworks, or a sacred monument for which troops would readily lay down their lives: a Temple of Sigmar, a tomb for a beloved commander, or a Lizardmen ziggurat. The allies of the army completing the project must defend it while construction is finished. The Attacking alliance must prevent completion of the project by attacking the builders and tearing down the structure.
Armies. Two alliances are built to an agreed points value. The Attacking alliance consists of one or more armies; the Defending alliance consists of two or more armies, one of which is designated the Construction Force. The armies in each alliance may differ in points value. All armies are chosen from the Warhammer army lists and must be "legal" armies for their individual points size.
Construction. One army in the Defending alliance is designated the Construction Force. Core infantry units in the Construction Force must be deployed in Skirmish formation. As long as these units remain in Skirmish formation and are on or within 12" of the construction project, they may continue to build as long as they do not shoot, cast spells, or engage in combat. These troops are the only ones trained as builders, and only they may complete the project. The Construction Force may include characters and Special and Rare choices, which will fight as normal but cannot contribute to the construction effort. During the Construction Force's Movement Phase, Core infantry units in Skirmish formation can Reform into regular ranks (unless they are a troop type that normally does not do so) but cannot contribute to the construction effort until they Reform back into Skirmish formation.
At the end of each Defender turn, add up the total Unit Strength of all units that contributed to construction that turn. For every full 10 points of Unit Strength contributing to construction (round down), 1/3 of a Damage Point is generated (see rules for buildings on pp. 129-130 of the Warhammer rulebook). The construction project has Toughness 8 and begins the game with 10 Damage Points. The project is completed when it reaches 14 Damage Points. The structure may never have more than 14 Damage Points.
The Attacking force may attack the construction with missiles, spells, and/or close combat attacks. Assume the construction project is a Large Target for purposes of shooting. Hand-to-hand attacks hit automatically.
Battlefield. The members of the Defending alliance should place a piece of terrain representing the construction project (roughly 8" x 8") in their Deployment Zone. The rest of the battlefield may contain sparse terrain (e.g., a hill, a copse of trees, and a rocky outcropping), but no terrain may be placed within 18" of the construction project.
Deployment.
- All players roll a D6. The highest-scoring player deploys one of his units in his alliance's Deployment Zone. In order of descending die rolls, each player takes it in turn to deploy one of his units in his alliance's Deployment Zone. Note that Core infantry units in the Construction Force must set up in Skirmish formation (see the Construction special rule below).
- All war machines in a player's army are deployed at the same time, though they can be deployed in different areas of his section of his alliance's Deployment Zone.
- Champions are deployed with their units. All other characters in the army are deployed after all other units, all at the same time. Characters may begin the game in units if the controlling player wishes.
- Scouts are deployed after all units of all participating armies have been deployed, as described in the rules for Scouts.
Who Goes First? The Attacking alliance gets the 1st turn. Once the game begins, each alliance fights as one army with its own Command Structure.
Length of Game. The game lasts 6 turns.
Special Rules. Alliances, Command Structure, Enmity, Construction.
Victory Conditions. The Defending alliance wins if the construction project has 14 Damage Points at the end of 6 turns. The Attacking alliance wins if the construction project has less than 14 Damage Points at the end of 6 turns or if the construction project is reduced to 0 Damage Points at any point during the game.
[Deployment diagram omitted.]
Construction Projects: Example of Construction
[Photographs of a Lizardmen Construction Force building a temple, with a caption noting that Krox's ... (partly illegible), and of Beastmen erecting a sacred beaststone, omitted.]
An attacking Empire army is trying to prevent an Orc & Goblin Construction Force, which has allied with a Beasts of Chaos army, from completing a monument to Gork. In the first turn of the game, the Empire forces concentrate their fire on the Beasts of Chaos, which leaves the Orcs & Goblins free to concentrate on construction.
The Orc & Goblin Construction Force has dedicated three units of 22 Goblins each to the construction effort. Their combined Unit Strength is 66. Thus, each turn, as long as the Goblins don't shoot, cast spells, or fight in combat, they may generate Damage Points: Unit Strength of 66 divided by 10 equals 6.6, or 6 after rounding down; 6 times 1/3 Damage Point equals 2 Damage Points. As the construction started with 10 Damage Points, it would have 12 Damage Points at the end of the 1st turn.
In the next turn, the Empire player successfully fires a Great Cannon at the construction and rolls 4 points of damage. The construction now has 8 Damage Points. The Empire player also shoots a number of the Goblins and kills several. Now there are only 58 that can contribute to construction. In the Goblin turn, the 58 Goblins could add only 1 2/3 Damage Points (i.e., Unit Strength of 58 divided by 10 equals 5.8, or 5 after rounding down; 5 times 1/3 Damage Point equals 1 2/3 Damage Points). The structure would then have 9 2/3 Damage Points at the end of the Orc & Goblin turn.
(Note: the scan's text reads "1/5" in one place of this example; the arithmetic of the example itself gives 1/3, which is what is transcribed above.)
Multi-Player Scenario 8: A Traitor in Our Midst
(Eight or more players, eight or more armies, 20,000+ points)
Overview. In this enormous game, two alliances of massive size strive to capture and hold the battlefield. The armies of each alliance must work together to fight so many enemies, but the alliance is uneasy, as there are rumors of an army of traitors.
This type of very large game could be played appropriately in a large store or club and will make for a spirited afternoon of gaming. With a game of this size, we heartily recommend planning on a lunch or dinner break with plenty of beverages and chairs to ease the weary generals.
Armies. Two alliances consist of four or more armies each. Both alliances are built to an agreed points size of no less than 10,000 points each. The armies in each alliance may differ in value, but each must be at least 2,000 points in size. All armies are chosen from the Warhammer army lists and must be "legal" armies for their individual points size.
Battlefield. The battlefield should be at least 4' wide. The minimum length of the table is determined by the number of armies, and we reckon a minimum of 3' per army. For example, if you had four armies on one side of the alliance, you would need a table at least 12' in length. A larger table would be great (and if you have all that room, you are one lucky gamer and should invite us over to play).
Deployment.
- Roll a D6 for each alliance. The members of the higher-scoring alliance may choose the side of the table on which they will deploy their forces.
- All players roll 2D6 and reroll any ties. The lowest-scoring player deploys his entire army anywhere in his section of his side's Deployment Zone. Then, in ascending order, the remaining players deploy their entire armies. Thus, one side of four players may be all set up when the other side is only half finished deploying. That's the luck of the dice and perfectly acceptable in this scenario.
- Scouts are deployed after all units of all participating armies have been deployed. Every player with Scouts (no matter how many units) should roll 2D6. Again, start the deployment with the lowest-scoring player and work upwards.
Who Goes First? Both alliances roll a D6. The members of the higher-scoring alliance may choose whether to take the 1st or 2nd turn.
Length of Game. The game lasts at least 7 turns (see Victory Conditions) or until one alliance concedes defeat.
Special Rules. Alliances, Command Structure, Enmity, Possible Turncoat.
Possible Turncoat. After Turn 2 is over, a Random Traitor Cup must be prepared. You will need to fill this cup with two Loyalist counters per player (four per side), and ONE Traitor counter for the entire group. Thus, in a game of eight players (four per side), there would be 16 Loyalist counters and 1 Traitor counter in the cup. The "counters" can be anything that is of equal size. Black dice could represent Loyalist counters, and a single red die could represent the mark of the Traitor. You could also cut out chits of paper or use the same sized coins (with one marked with paint to represent the Traitor). Before Turn 3 begins, each player reaches into the Random Traitor Cup (without looking) and draws one counter. Dice off to see who draws first. Each person may look at his own counter but may NOT show it to anyone else.
The Traitor (if there is one) MUST announce his foul turncoat ways at the end of his Turn 3, 4, or 5. This is done by yelling, "I'm the Traitor," or any similar catchy phrase that will get the point across. Every one of your former allies will groan and complain, so you might as well have some fun with it. After all, it isn't your fault you're the Traitor!
The turncoat in question now switches sides and plays for the other alliance. As the Traitor makes his declaration at the end of one of his turns, he will take 2 turns in a row (i.e., after he finishes 1 turn on side A, the Traitor makes the announcement of his treachery and then immediately takes another turn with side B). This is the advantage of surprise! Note that the rules for Alliances do not prevent a "good" army from turning Traitor and joining an "evil" alliance (or vice versa). The turncoat army will, however, be subject to Enmity with his new allies if any of them are listed as "maybe" or "no" on the Allies Chart. The Traitor army may take advantage of the Marshal of the newly joined alliance unless Enmity prevents it from doing so. If the Traitor was controlling the Marshal of his original side, then all the Marshal bonuses for that character model are lost once his treachery is announced, and the betrayed side must complete the game without the benefit of a Marshal. Traitor units/models that were in combat with units/models that are now allies immediately cease fighting and must reform.
Advice for the Traitor. You may choose to "go Traitor" anytime at the END of Turns 3-5. Pick the one that would be most advantageous! Also, take advantage of the opportunities you get to sow distrust among your soon-to-be-former allies. A few whispers like, "I think Jim is acting kinda weird," will do the trick nicely. Have fun with it. It's not often that you get a chance like this to mess with people's heads!
Victory Conditions. The winning side is determined by the Victory Points chart on p. 198 of the Warhammer rulebook, with a few additions and changes. Board quarters are worth 500 points each (because they are big board quarters!), enemy Generals are worth 250 points (instead of the usual 100), and the alliance that was betrayed may add 1,000 points to its total.
[Photographs of players at a large battle, and of a Traitor cup with a caption, omitted. The caption reads, in part: "Sure, you could just use an unadorned bag or cup for your counters, but what is the fun of that?"]
Chapter 8: Boats in Warhammer
Right now, off the coasts of Bretonnia, a convoy of trading vessels is being waylaid by brigands and cutthroats. Even as you read this, a flotilla of Orcs is churning down the Stir River to launch an invasion deep inside the Empire. Batten down the hatches. It's time to take Warhammer into the water. These rules for ship combat can be used to play one-off Warhammer sea battles, or can be incorporated into a map-based or Games Mastered campaign that includes rivers, seas, oceans, islands, or coastal territories.
Avast, Ye Scurvy Dogs
Whether you are sailing the vast expanse of the Great Ocean, hugging the rocky coastlines of the Tilean Sea, or traveling along any of the mighty rivers of the Empire, it is clear that bodies of water abound in the Warhammer world. But when was the last time you used water on your Warhammer table as anything but an obstacle or a way to mark your gaming board edge? This chapter is all about getting your feet wet with some nautical gaming. Included here are several different types of boat-based scenarios to play. This chapter is not intended to be a full-blown Warhammer naval battles rule set, but you will find simple and fun rules for moving boats, shooting at boats, fighting on boats, and the inevitable sinking of boats! You will also find information on ship-building, types of watery battlefields, and even using sea monsters. There are plenty of examples throughout the chapter.
[Diagram of a sailing ship labelled with its parts (sail, mast, rigging, crew, deck, hull, and rudder). Its caption, partly illegible in the scan, begins "Here is an Estalian sailing ship with a full crew".]
Listen Up, Matey. Hear and heed this warning, landlubbers! This chapter includes some very basic rules and scenarios for playing some fun naval battles. The rules contained herein are not the official ones for Warhammer boats and will not come close to clarifying all the possible ship types, combat variations, or complexities of naval warfare. This chapter is not intended to show you how to re-create vast fleet battles on the high seas!
For many players, boats in Warhammer games are uncharted waters and will provide even more possibilities to the already limitless Warhammer world. We just want to warn you: if you are a sea-soaked naval warfare buff who knows the difference between starboard and larboard (or port) and can identify the scupper, mizzen mast, and topgallant, then these rules will not be as in-depth as you might desire. But for those whose imaginations perk up when they hear about daring river raids, landing behind enemy lines, and desperate boarding actions, this chapter will have its desired effect and launch another Warhammer gamer out into the great blue of gaming possibilities.
Sadly, you will not find the definitive rulings on Tzeentch hover-ships, immense Orc hulks, or triple-decked, ornately decorated Bretonnian galleons. However, no matter how elaborate your ship model, you will find some rules here that will allow you to play with it on your watery tabletop.
Anchor's Aweigh!
When adding naval elements to your games, it is vital to remember that the basic mechanics of Warhammer remain in effect. Ships move in the Movement Phase, shoot in the Shooting Phase, and complete boarding actions in the Combat Phase. Several of the scenarios presented later in this chapter include both water and land elements.
For small detailed ship games with 20 or fewer models per side, use the Skirmish rules described in the Warhammer rulebook (pp. 242-246) regardless of whether models are on land or at sea. For games with more than 20 models per side, the usual Warhammer rules apply. However, on board a ship, all models are considered units of one model each and do not move or fight in formation. Generally speaking, treat each shipboard model as you would an independent character in a regular game of Warhammer.
That's No Boat, 'Tis a Ship!
Technically, a ship is a vessel that carries other boats (e.g., lifeboats, gigs, jolly boats, and longboats), whereas a boat does not. However, in this chapter, we use the terms largely interchangeably. Because there are so many different races in the Warhammer world, and so many possible ship types, to avoid confusion the following rules categorize them by size and method of propulsion (e.g., sail, oars, and steam).
[Photograph of a small-scale naval battle with captions, omitted.]
Types of Ships
For our purposes, there are four ways to move a boat: sails, oars, steam, and magic. These classifications define the four types of ships. Some lucky ships may have more than one way to move (e.g., oars and sails), and players controlling such vessels must state at the beginning of the turn which they will use.
Under Sail. This category describes any ship that uses the wind to move. A sail, often made of a thick cloth like canvas, is rigged to catch the right amount of wind. Determining which combination of sails to use and how to trim them is a critical art. Spreading too much sail can snap a mast or spar; too little, and the ship will stall. The speed and relative direction of the wind largely determine a sailing ship's maximum possible velocity.
Oars. Compared to moving by sail, propulsion by oars is very easy to understand. Power is generated by oars, long poles with blade-shaped endings that are pulled through the water in unison by oarsmen. For some Warhammer nations, like the Empire, these oarsmen are professional sailors doing their duty. Other races, like Orcs, Chaos Dwarfs, and Dark Elves, inevitably use slaves chained to the oars to propel their vessels. The cries of "pull lads" and "put yer backs into it" can be translated into many languages!
Under Steam. Steam technology is not widespread in the Warhammer world, but a few races, particularly the Dwarfs, have been known to make use of it. Basically, steamships use an engine that converts heat into pressurized steam, which in turn drives a paddle wheel or propeller. Though steamships don't rely on the fickle winds, steamships can suffer from technical malfunctions and a slew of boiler problems.
Magic. Some races of the Warhammer world use magic to propel their ships through the water. Some of these ships take advantage of magical winds to fill their sails. Other magical ships are enchanted constructions that have been imbued with certain powers. For example, a ship commanded by a Vampire Count, a so-called Ghost Ship, moves and sails as though it is running on a prevailing wind, yet the actual sails have long since rotted to stringy nothingness. Specific rules relate to each of these unique magical ships and the peculiar wizardry that powers them.
[Photographs of a model Goblin oar-powered craft and of a large model ship in a store display, with captions, omitted.]
The Size of Things
Before we detail the rules for moving ships under different types of power, it is worth talking about ship size. Size functions to determine a ship's best possible speed, its maneuverability, its durability, and the number of war machines and crew members it may carry. For instance, a small ship that is sail-powered is more maneuverable than a larger sailing ship. However, the larger sail-driven ship can obviously carry a larger crew and more war machines. Many larger ships have multiple decks that can carry greater numbers of warriors and weaponry. If the battle comes down to a boarding action, size definitely can matter!
There are loads of exceptions to the above generalities; some well-designed large ships are very maneuverable, for instance. However, for easier game play, our broad categories work well and result in lots of fast and fun gaming. The chart below outlines the general guidelines for ship size, including the ship's length in inches, the maximum and minimum crew size, and the limitations on how many war machines ships of each size may carry. These classifications are necessary to determine how a ship moves, how many crew it takes to get the ship in motion, how much damage the ship can take, how powerful the ship is in a ram, and more.
Ship Size Chart.
| Ship Size | Length | Crew (min/max)* | War Machines |
|---|---|---|---|
| Dinghy | Up to 3" | 1/6 | None |
| Small | 4-10" | 5/25 | Up to 1 |
| Medium | 11-18" | 8/40 per deck | Up to 2 per deck |
| Large | 18"+ | 10/50 per deck | Up to 3 per deck |
*Crew minimums and maximums are given in Unit Strength, not number of models.
Note that these rules are general guidelines designed to help players incorporate boats into their Warhammer games. Other ship designs are, of course, possible. However, unless players agree or the Games Master of a campaign rules otherwise, games and scenarios would do best to stick to the guidelines above.
In full-scale combat, it could be imagined that even small or medium Orc ships would be crammed to the seams with more fighters and crew than the above list suggests. Also, a fully armed man-o'-war could well field dozens of Cannon on a medium to large ship. However, such large crews and batteries make for some complicated gaming and would certainly require more of a discussion of seamanship than space allows.
Note that cavalry models generally cannot be part of a ship's crew, although they may be ferried in a transport ship. Large creatures like Ogres take up a lot more room, but can also pull hard on the oars.
[Step-by-step hobby guide for building a foamcore ship, with photographs, omitted.]
Basic Ship Rules
Crew. Regardless of size or movement type, a ship must have models that act as crew in order to move. The crew are the sailors responsible for operating the ship. Each turn, the controlling player must nominate a number of models equal to or greater than the minimum crew size to operate the ship and do nothing else. For instance, a dinghy has a minimum crew of one. If a dinghy contained four models, three could shoot missile weapons or cast magic while one manned the boat. Don't confuse the ship's crew with the crews of war machines, which are separate. Models cannot operate a war machine and a ship at the same time.
Note on crew: Any sensible model may act as part of the crew, and there are no special "ship's crew" entries for army lists. For instance, an Orc & Goblin player with an oar-driven ship could nominate Night Goblins, Common Goblins, Savage Orcs, and so on as crew, but Squigs would not be a sensible option for a variety of reasons (they are wild creatures with no arms, and they would probably just eat the oars anyway!)
At any time, a ship that has less than its minimum number of crew suffers the penalties as follows:
- Ships with less than their minimum crew may move at only half speed.
- Ships with less than half their minimum crew (round down) may not move at all and are Adrift (see p. 142).
Crew models designated as crew in a given turn cannot shoot, fight, or cast spells: they are too busy to make the ship move. Thus, each turn, it is vitally important to nominate which models are acting as crew and which are not.
Ship Speed
Ships of each type and size have different rules for their maximum speed (and some have rules for minimum speed under certain circumstances). A more specific discussion of ship speed rules may be found on the following pages.
Maneuvering Ships
A unit on land may wheel, turn left or right, and make about-face maneuvers. At sea, a ship may only turn up to a certain angle (normally 45°). There are rules governing how each ship turns, how often it may turn, and how far it must travel between each maneuver. Ships, particularly large ones, have a lot of mass and do not make the kinds of quick turns and sharp angles that models on land can.
Along with your tape measure, you will need a ship-turning template that indicates 45° and 90° angles (you can make your own with a compass and protractor, download one at our web site, or photocopy the one on the inside back cover of this very book). Place the middle of the template along the turning side of the ship, parallel to the ship's central axis. The ship may turn each time its side is parallel to the edge of the template. For ships that can turn 90° sharply, place one edge of the template against the ship's side (other than the middle).
Hull. The hull is the body of the ship, and putting holes in it is the surest way to make it sink! All hulls have a high Toughness and lots of Damage Points. Once a hull is reduced to zero Damage Points, it will sink (see p. 139 for Sinking rules). The only special rule for hulls is Dinghies Are Small.
Ships use the term Damage Points instead of Wounds, much like the Buildings rules in the Warhammer rulebook. Each ship and each area will have its own Toughness and Damage Points according to the ship's size.
Dinghies Are Small. Dinghies are small craft, and it isn't possible to target specific areas on them. When shooting at a dinghy and a successful hit is scored, roll on the Dinghy Chart (at right).
Dinghy Chart (D6).
| Roll | Result |
|---|---|
| 1-3 | Hull |
| 4-5 | Crew |
| 6 | Specialty Target. If sail-driven, the hit falls between mast and sail; if oar-driven, the oars are hit. |
Any attack of S7 or higher that wounds a dinghy's hull automatically destroys the boat. If the dinghy is destroyed in this fashion, all of its crew are slain, and any characters in the tiny boat suffer a single S5 hit and are tossed into the water (see Swimming on p. 139).
Crew. Shots at crew are always made at a -1 penalty to account for the soft cover of masts and gunwales, as well as the fact that the crew are in Skirmish formation. Additional factors (e.g., shooting at over half range or scenario situations like fog) can add further penalties. Casualties may be taken from any model that is on board and visible to the shooter (at the owner's discretion). To avoid shots from war machines, characters within 2" of other models may use the "Look Out, Sir" rule as though they were in a unit.
Specialty Targets. Each type of ship (sail, oar, steam, and magic) has different specialty areas. These Specialty Targets can be things like sails, rudders, steam engines, paddle wheels, and the like. If the Specialty Target can be seen by the shooter, it may be targeted. ONLY ONE SPECIALTY TARGET MAY BE HIT PER SHOT. This is an important concept, as it is possible for Cannons or template weapons to hit multiple areas (see further explanation on p. 139). If the Specialty Target is hit, roll on the appropriate Specialty Target Chart found later in this chapter. A successful hit does NOT necessarily mean that you have hit the intended target. With the rolling pitch, the sea spray in the air, and the churning foam at the waterline, it is easy to see how a bolt or cannonball would miss its intended target.
Shooting at Ships
When a player wants his models to shoot at ships, he must nominate exactly where his troops are aiming. The general categories that may be targeted are the Hull, the Crew, and Specialty Targets. Each type of ship and each area will have its own Toughness and Damage Points according to the ship's size.
[Diagrams of the ship-turning template positions omitted.]
Water & Ship Showcase: Making Watery Battlefields for Ship-to-Ship Combat
[Photographs and captions of a water-and-ship showcase (a blue cloth battlefield with ships, plumes and water effects, shark fins, and a Tomb Kings boat), with miscellaneous hobby notes, are omitted. The captions on this page are hobby material rather than rules. Their legible fragments describe making a seascape from a blue cloth, using modeling putty and round bases for plumes and water effects, and using a plastic shark fin on a round base for "Predators of the Sea".]
[Two photographs of ship battles (an Orc boarding party against an Empire vessel, and a Dwarf-era sea creature attacking a raft) with captions, omitted. The captions are hobby and scenario illustrations, and their text is too faded to transcribe reliably.]
Sailing Ships
Sail-powered boats are among the most common ships in the Warhammer world. The direction of the wind is pivotal to sailing ships, and good captains keep one eye on the enemy and the other on the weather. Even the worst imaginable shift in the wind can be turned into an advantage by an old sea dog!
Crew. Remember that each sailing ship requires a minimum number of crew to steer the ship, trim the sails, and carry out the captain's orders (see p. 130).
Speed. All sailing ships move up to D6+8" each turn but are subject to the Sailing Special Rules.
Maneuvering Under Sail
Changing course while under sail is a little tricky, even more so for larger ships.
Turning Radius. A single turn consists of pivoting the ship up to 45° and no more.
Move Before Turn. Sailing ships cannot turn on a dime. Therefore, before doing any maneuvering, a ship must first move a minimum distance. The minimum distance a ship must move before and between any turns is listed on the Turning Chart below.
Number of Turns. Some ships are more maneuverable than others. Smaller craft have an easier time of turning (they aren't trying to redirect all that mass!). Note that the limitations count per 10" of movement (or fraction thereof). Thus, should a ship move over 10", it may use a second allotment of maneuvers. For example, if a medium ship moved 14" in 1 turn, it could start off by moving 2", turn up to 45°, move another 2", turn again up to 45°, move 6" in a straight line (at which time it has moved 10" and is eligible for another set of maneuvers and could make two more turns), turn a third time, move 2", turn a fourth time, move 2". The smaller the ship, the more turns it may make.
Turning Chart.
| Ship Size | Move Before Turn | Turns per 10" of Movement |
|---|---|---|
| Dinghy | 1" | 4 |
| Small | 1" | 4 |
| Medium | 2" | 2 |
| Large | 4" | 2 |
Sailing Special Rules
Wind Direction. For our purposes, boats are always positioned with the wind at one of three relative directions: bow on, abeam, or astern. During a sea battle, it is important to mark down the direction of the wind if there are any sailing ships in play (wind direction rules follow on the next page). Sailing ships can move faster when the wind is astern, and there are movement penalties when ships turn into the wind (bow on).
Wind-Aided Movement. When a sailing ship begins its turn with the wind astern, it may move an additional D6" (i.e., 2D6+8" instead of the usual D6+8"). A sailing ship that does not begin the turn with the wind astern may maneuver to take better advantage of the wind. Determine maximum movement as normal by rolling D6+8". If the ship maneuvers in such a way that the wind is astern before the ship moves more than half its maximum movement for that turn, the ship may add an additional D3" of movement to the end of its move.
Sailing into the Wind. Any sailing ship that starts its turn facing into the wind (bow on) moves up to 8" instead of D6+8". Any ship that turns into the wind (bow on) loses D6" from its remaining movement (if any) and may not make any other maneuvers that turn.
Determining Wind Direction
As the captain of any sail-powered ship will tell you, keeping an eye on which direction the wind is blowing is the key to victory. The wind can be a fickle friend and is apt to change just when you most need it at your back. Charts for determining wind direction follow on the next page.
[Diagrams of a ship's bow-on, abeam, and astern positions, and of a ship turning into the wind, omitted.]
Wind Direction at the Start of the Game. Unless scenario rules dictate otherwise, nominate a table edge as north, roll a D6, and note down the results before play begins.
- The wind is blowing from the northern table edge.
- The wind is blowing from the southern table edge.
- The wind is blowing from the western table edge.
- The wind is blowing from the eastern table edge.
- Both players roll a D6. The higher-scoring player may choose the direction of the wind.
- The wind conditions are unusual. Roll another D6. If the result is 1-3, the winds are light: deduct 2" from the maximum movement of all sail-powered ships. If the result is 4-6, the winds are strong: add 2" to the maximum movement of all sail-powered ships. Roll again for wind direction. If this result is rolled again, the results are cumulative. Continue rolling until a wind direction is established.
Wind Direction During the Game. At the start of each game turn after the 1st, roll 2D6 to determine whether wind conditions change.
- 2: The wind dies down. Deduct 4" from the movement of all sail-powered ships. This result lasts this turn only, and then conditions return to normal.
- 3: The wind changes direction 180°.
- 4: The wind changes direction 90° in a clockwise direction.
- 5-10: The wind direction stays the same.
- 11: The wind changes direction 90° in a counter-clockwise direction.
- 12: Gusts. Add 4" to the maximum movement of all sail-powered ships. This result lasts this turn only, and then conditions return to normal.
Damage & Specialty Target Areas
The following areas of a sailing ship may be targeted by missile fire: Crew, Hull, and Specialty Targets. Crew models take damage per the normal Warhammer or Skirmish rules (depending on the size of the battle). When the hull is successfully hit, use the following chart to determine the effect.
Hull Damage Chart.
| Ship Type | Toughness | Damage Points |
|---|---|---|
| Dinghy | 7* | 3* |
| Small | 8 | 6 |
| Medium | 8 | 10 |
| Large | 8 | 16 |
* See Dinghies Are Small on p. 131. Any ship's hull that is reduced to 0 Damage Points will begin to sink. See Sinking on p. 139.
The following Specialty Targets, if visible to a shooter, may be attacked: war machines, masts, sails & rigging, and rudders. Their statistics and Specialty Target charts follow. The descriptions and charts explain how much damage each area may sustain, as well as how difficult it is to hit.
War Machines. The normal rules for shooting at war machines apply (see Warhammer rulebook, p. 118). Note that shooters suffer from a -1 to hit penalty when firing at war machines due to the cover afforded by the gunwales and rigging.
Rudder. All rudders have T8 and 1 Damage Point. The chart represents how hard it is to hit the rudder.
Rudder Chart (D6).
| Roll | Result |
|---|---|
| 1-3 | The hit initially looked like a good 'un, but the missile has gone wide and is now sinking harmlessly to the bottom. |
| 4-5 | The shot hits the hull instead. Roll to wound as normal. |
| 6 | A hit on the rudder! Roll to wound as normal! |
A ship without a rudder cannot steer or make turns for the rest of the game and is at the mercy of the tide and wind.
Mast. Each mast has Damage Points determined by the size of the ship (see chart below). Before determining damage, roll on the Mast Chart.
Mast and Sails Statistics.
| Ship Size | Mast Toughness | Mast Damage Points | Sails & Rigging Toughness | Sails & Rigging Damage Points |
|---|---|---|---|---|
| Dinghy | 6* | 2* | 5* | 4* |
| Small | 8 | 4 | 5 | 6 |
| Medium | 8 | 6 | 5 | 8 |
| Large | 8 | 8 | 5 | 10 |
* Dinghies do not use the Specialty Targeting rules, but instead use the Dinghies Are Small rule on p. 131.
Sails and Rigging. Sails count as Large Targets. The high number of Damage Points that sails can take represents not how tough the material is, but how easily missiles will tear a hole in the sails and keep going. It takes a well-placed shot to tear up vital sail cloth and rigging! The Sail Chart can be found on the top of the next page. Any non-flaming missile under S5 will cause damage only on a roll of 6 to wound. Most arrows and handgun bullets just tear tiny holes in the sails. Flaming shots and higher-strength missiles wound as normal.
Mast Chart (D6).
| Roll | Result |
|---|---|
| 1-2 | The shot strikes a glancing blow, but no damage is sustained. |
| 3-4 | Roll to wound as normal, but halve all Damage Points caused (round up). |
| 5 | A hit! Roll to wound as normal. |
| 6 | The shot hits the mast square on. Roll to wound as normal. In addition, on a roll of 4+, the shot also causes a single Damage Point to the rigging and sails. |
A ship with no masts cannot use sails for movement. When a two-masted ship loses a mast, it is reduced to half speed.
Sails & Rigging Chart (D6).
| Roll | Result |
|---|---|
| 1 | The shot hits the sail but tears through so quickly and with such a tiny hole that no appreciable damage is sustained. |
| 2 | Roll to wound as normal, but halve all Damage Points caused (round up). |
| 3-5 | The shot rips into the sail and rigging. Roll to wound as normal. |
| 6 | Roll to wound as normal. If at least 1 Damage Point is caused, roll another D6. On a 4+, a yard or spar is knocked down and strikes D3 crew on the deck below with a S4 hit. On a roll of 6, you may also make an additional roll on this chart, as you've hit a vital area. |
If the sails are destroyed, the ship cannot move at all under sail. If the ship does not have another means of propulsion (e.g., oars), then it is Adrift.
Free Turns. Sailing ships are not given free turns; see the Turning Chart above. (Note: the scan's free-turn rules appear under the oar-driven section below.)
Rowed Ships
The rules for oar-driven ships are relatively straightforward.
Crew. Remember that each rowboat or ship requires a minimum number of crew to steer and power the vessel (see p. 130).
Speed. All oar-driven ships can move up to 5" a turn, but can gain more speed with the special rules for Lots of Rowers and Burst of Speed.
Oar-Driven Special Rules
Lots of Rowers. Extra rowers can make a ship rip through the water. If a ship has double its minimum number of rowers, it may move faster than normal (see chart below).
Burst of Speed. Before moving an oar-powered ship, the controlling player may call for a burst of frenzied rowing in order to go very quickly in a straight line, either to ram an enemy or to get out of a tight spot. During this Burst of Speed, only one turn may be made. See the chart below to determine the bonus movement afforded by the Burst of Speed. The Burst of Speed bonus may be combined with a Lots of Rowers bonus if there is enough crew. After a Burst of Speed, the controlling player must wait for 3 complete turns to pass before calling for another. The rowers are exhausted and need time to rest and recuperate.
Lots of Rowers & Burst of Speed Distance Charts.
| Ship Type | Lots of Rowers Bonus | Burst of Speed Bonus |
|---|---|---|
| Dinghy | 1" | 1" |
| Small | D3" | D6" |
| Medium | D3+1" | D6+1" |
| Large | D6" | D6+2" |
Must Move First. If an oar-driven ship moved more than 5" in the previous turn, it must move in the same direction a minimal distance before attempting a turn (see chart below). Thus, oar-driven ships cannot move backwards after a turn in which they moved more than 5". If an oar-driven ship went 5" or less in the previous turn, it does not have to move a minimal distance before turning.
Must Move First and Free Turns Chart.
| Ship Size | Must Move First | Number of Free Turns* |
|---|---|---|
| Dinghy | 0" | 2 |
| Small | 1" | 1 |
| Medium | 1" | 1 |
| Large | 2" | 1 |
* Free turns cost no movement to make and may be up to 45°. Additional turns cost 2" of movement.
Free Turns. Oar-driven ships get a number of free turns each round. These turns may be up to 45°. Any additional turns cost oar-driven ships 2" of movement. Except for the Must Move First rule, oar-driven ships do not need to travel any distance between turns.
No Wind Effects. With the possible exception of special scenario rules for things like hurricanes, the wind has no effect on oar-driven ships.
Damage & Specialty Target Areas
Enemies may target the Hull, Crew, or Specialty Target areas of an oar-driven boat with missile fire. Crew models take damage per the normal Warhammer or Skirmish rules (depending on the size of the battle). The Specialty Target areas are war machines (see Warhammer rulebook, p. 118), rudders (same as sail-driven rudders on p. 135), and oars (see chart below).
Hull and Oar Statistics.
| Ship Size | Hull Toughness | Hull Damage Points | Oar Toughness | Oar Damage Points |
|---|---|---|---|---|
| Dinghy | 7* | 3* | 4* | 1 per oar |
| Small | 8 | 6 | 5 | 1 per oar |
| Medium | 8 | 10 | 5 | 1 per oar |
| Large | 8 | 16 | 5 | 1 per oar |
* Dinghies do not use the Specialty Targeting rules but instead use the Dinghies Are Small rule on p. 131.
Oars Chart (D6).
| Roll | Result |
|---|---|
| 1 | The missile fails to hit anything and crashes harmlessly into the water. |
| 2 | The shot hits the hull instead. Roll to damage the hull as normal. |
| 3-5 | The shot hits the oar and rolls to wound as normal. |
| 6 | The shot hits the oar. The roll to wound is successful, and the shot not only destroys an oar, but the splinters cause D6 S3 hits to the nearest rowers as well. |
Each ship has a minimum number of rowers (see crew minimums on p. 130). If damage takes the number of oars below that number, the ship is reduced to half speed just as if it had lost the crew. If the number of oars is reduced below half the minimum number of rowers, the boat can no longer use oars as a mode of transportation and is Adrift if it has no other means of locomotion. Should a shot that can hit multiple targets (e.g., one from a Bolt Thrower, Cannon, or template weapon) hit multiple oars, make a separate roll on the above chart for each oar that is damaged.
Maneuvering by Oars
Turning Radius. A single turn consists of pivoting the ship up to 45° and no more.
Can Move Backwards. Ships powered by oars may choose to go forwards or backwards. Only one direction per turn may be chosen.
Steamships
Crew. Remember that, like all other types of ships, steamships require a minimum number of crew to operate the boilers, steer the ship, and navigate (see p. 130).
Speed. As long as steamships have the required number of crew, the ship generates steam. Each turn, the controlling player may use up to 3 Steam Points before taking any distances and going Full Throttle.
Each Steam Point spent can do the following:
- Move the ship forward up to 2".
- Move the ship backward up to 2".
- Pivot on the spot up to 45°.
Additionally, a steamship captain can choose to throw caution to the wind, stoke the boiler, and go Full Throttle, spending additional Steam Points.
Note: Dinghies may not be steam-driven.
Steam Special Rules
Full Throttle. After spending 3 Steam Points and moving the vessel accordingly, a reckless or desperate captain can push his vessel and call for more power. The boiler stamps. The pressure gauges pass the red line, and nervous engineers develop sudden twitches! After moving with the original 3 Steam Points, the Captain declares how many additional points he wants to spend (between 1 and 4). Roll 2D6, add 1 to the result for each additional Steam Point spent, consult the chart below, and apply the results before doing any additional movement.
Full Throttle Chart (2D6).
| Roll | Result |
|---|---|
| 3-8 | The boiler shakes, shudders, and thumps but produces the correct amount of steam. |
| 9-10 | With a resounding whoosh, the boiler shuts down. The steamship moves only 1" further this turn. Otherwise, there are no ill effects. |
| 11-12 | Loss of pressure! One of the pipes has sprung a leak. A crew member can fix the problem, but the ship moves no further this turn. Next turn, only 1 steam point will be generated. |
| 13 | Boiler Malfunction. The boiler shuts down, and the ship moves no further this turn. At the start of the controlling player's next turn, roll a D6. On a roll of 4+, the boiler generates only 1 steam point for that turn. It will generate steam points normally thereafter. If the boiler doesn't start, the ship is Adrift, and a subsequent attempt to start the boiler must be made at the start of each following turn. |
| 14 | Blown Valves! For the rest of the game, the ship will only generate 2 steam points each turn and cannot be pushed to Full Throttle. |
| 15+ | Explosion! With a thunderous roar, an explosion rips the engine room apart and momentarily lifts the ship itself off the water! In an instant, the ship goes down with all hands! |
Maneuvering by Steam. Turning Radius. Slight turns of up to 45° won't slow a steamship down. Steamships may make one such turn per Steam Point spent. For example, a steamship spends 1 Steam Point to move forward 2". During that move, the ship may turn up to 45°. If the ship spends another Steam Point to move, it may make another corresponding turn of up to 45°. Additional pivots up to 45° can be made, but it will cost an additional Steam Point.
Steamships share some rules with oar-driven ships: Can Move Backwards, Must Move First, and No Wind Effects.
Damage & Specialty Target Areas (Steamships)
Enemies may target the Hull, Crew, or Specialty Target areas. The Specialty Target areas are war machines (see Warhammer rulebook, p. 118), rudders (see p. 135), paddle wheels (see below), engine blocks (see below), and propellers (see below).
Hull and Paddle Wheel Statistics.
| Ship Size | Hull Toughness | Hull Damage Points | Paddle Wheel Toughness | Paddle Wheel Damage Points |
|---|---|---|---|---|
| Small | 8 | 6 | - | 5 |
| Medium | 8 | 10 | 8 | - |
| Large | 8 | 16 | 8 | 8 |
Paddle Wheels. Some ships use their steam to turn great paddle wheels for propulsion. See statistics above.
Paddle Wheel Chart (D6).
| Roll | Result |
|---|---|
| 1 | The shot fails to cause any damage and skids harmlessly into the water below. |
| 2 | The shot hits the hull instead. Roll to wound the hull as normal. |
| 3-5 | The shot strikes the paddle wheel. Roll to wound as normal. |
| 6 | The shot strikes the paddle wheel. If a wound is caused, the resulting explosion sends shrapnel into the crew on deck. The crew takes D3 S4 hits. |
If the paddle wheel is reduced to half of its original Damage Points or below, reduce the ship's movement by half. If the paddle wheel is destroyed, the ship must either use another type of power (e.g., oars), or it is Adrift.
Engine Block. The engine room is vital to generate the steam that makes the ship move. Most engines will be at least partially enclosed by the hull and thus are difficult to damage. All engine blocks (regardless of ship size) are Toughness 10 with 1 Damage Point.
Engine Chart (D6).
| Roll | Result |
|---|---|
| 1 | The shot bounces off harmlessly in a ricochet of sparks. |
| 2 | The shot hits the hull instead. Roll to wound the hull as normal. |
| 3-5 | The shot strikes the engine block. Roll to wound as normal. |
| 6 | The shot strikes the engine block. If any damage is done, the whole ship shudders. No steam whatsoever may be generated next turn. |
If the engine is reduced to half its Damage Points or below, the controlling player must roll a 4+ on a D6 before moving each turn. Otherwise, the engine cuts out. The ship cannot move and is Adrift. Should the engine be destroyed, the ship cannot generate steam and must use another means of locomotion or will be Adrift.
Propeller. Propellers have the same statistics and use the same charts as a rudder (p. 135). However, if the propeller is destroyed, no steam-driven movement is allowed. The ship must use another means of locomotion or will be Adrift (p. 142) at the mercy of the tides and wind.
[Photograph of an Empire General, with the caption "The Empire General believed that the river was protecting his flank until an ominous and unfamiliar boat came gliding out of the fog", omitted.]
Moving by Magic
Ships can be enchanted in many different ways, too many to list here. As such, we provide you with one example, the Ghost Ship. Players who wish to design their own magic ships can use the Ghost Ship rules as a guide for designing their own boat rules.
The Ghost Ship is a basic sailing ship, unless noted otherwise below. However, real wind does not power the ship. The wind that moves the ship is magically generated by either a powerful Vampire Count or a Master Necromancer on board the vessel.
Crew. The crewmen aboard a Ghost Ship don't need to do anything to sail the ship, although many Undead crews continue to go through the motions of rigging sails that have long since rotted away, in a disturbing pantomime of living sailors. The Vampire Count or Master Necromancer simply moves the ship by power of will and magic. Thus, the crew minimum for a Ghost Ship is always 1, the Vampire or Necromancer, regardless of ship size.
Speed. As magical wind is needed to power the Ghost Ship, the vessel does not move in the Movement Phase. Rather, it moves in the Magic Phase. The ship itself acts as a magic item with a Bound Spell called Magical Wind (Power Level 10). The ship will move D6+8". The spell may be dispelled each round, in which case the ship will move D6" less for each successful dispel (but never reduced to below zero). Each new Undead game turn, however, the ship returns inexorably to its D6+8" move rate anew.
Maneuvering a Ghost Ship
A Ghost Ship is a dilapidated vessel, and its best sailing days are long over. Many Ghost Ships were once sunken wrecks reanimated by the Vampire or Necromancer who now commands them.
Turning Radius. A Ghost Ship may make up to two 45° turns at any time during its movement.
Special Rules for the Ghost Ship
A ship sailing on magical wind is NOT affected by the real wind. No bonuses or penalties apply, and the Ghost Ship is not affected by movement bonuses or penalties like a regular sailing ship (e.g., sailing with the wind astern).
Damage & Specialty Target Areas (Ghost Ship)
Enemies may target the Hull, Crew, or Specialty Target areas. The Specialty Target areas are war machines (see Warhammer rulebook, p. 118), rudders (same as sail-driven rudders on p. 135), and masts (same as sail-driven masts on p. 135). Sails cannot be targeted, as technically there are none, just fluttering wisps of canvas. However, if the mast is shot down, the Magical Wind will no longer power the ship, and the ship will be Adrift (p. 142). In addition, should the Vampire or Necromancer controlling the vessel be slain, he will no longer maintain the magics powering the ship. The ship will age hundreds of years in seconds and begin to sink (see Sinking, p. 139).
Rumors of Magical Ships and Sea Monsters
[Sidebar of rumors, omitted from the rules text. It records a set of sailors' tales: a river of huge Sea Dragons with towers built onto their backs, reported by raiders out of Marienburg; ships of Chaos that hover above the waves, reported by Norscan raiders; and submersible boats said to have sunk trade convoys in a dispute with the Dwarfs. Each rumor is flagged in the book as a tall tale, and the closing line reads: "Everyone agrees that sailors are a superstitious lot, but who knows what lurks past the horizon?"]
Shooting from a Ship
Shooting from a ship works the same way it does on land. The ship may move in the water, but the shooters do not count as moving unless they change position on deck. War machines may pivot as normal.
A Note on War Machines in General
While the crew and warriors on board can take damage from arrows and handgun shots, it is war machines that are the largest shooting threat to the ships themselves. Here are some general rules to keep in mind.
Cannon. A cannon fires much like it does on land, and cannonballs will bounce or skip on the water. All things under the bounce of a cannonball are hit, or, in the case of a Specialty Target area, have the chance of being hit. A cannonball hitting a ship's deck can hit the hull and possibly take out additional crew, and possibly one Specialty Target. It is possible to hit more than one Specialty Target or a ship's hull twice (once on the way in and once on the way out). Targets must roll on their Specialty Target charts to determine the effect and see if you really hit it! See example below.
[Diagram of a cannon shot striking a ship's hull, a crewman, a mast, and a cannon, omitted. The caption reads: "Cannon shot impacts the ship's hull, a crewman, mast and cannon. The shooter will make a damage roll for the hull, the crewman, and ONE of the two Specialty Targets charts (mast or cannon) at the shooter's choice."]
Template Weapons. Any template weapon (e.g., a Flame Cannon or Stone Thrower) hits any target that is under the template (although no more than one Specialty Target). Note that, if a template hits a Specialty Target like a mast or rudder, you must still roll on the appropriate chart to determine the effect and see if you really hit it.
Skewering. If Bolt Throwers wound their first target, the shot may penetrate in a straight line and hit a subsequent target up to 2" away, just as a Bolt Thrower shot can penetrate a unit's ranks. The second (and third and fourth) target will be hit with a reduced Strength per the normal rules.
Outfitting Ships with War Machines
Each naval commander is free to equip his ship with any war machines that his army may regularly field. For instance, a Dwarf ironclad could certainly be equipped with a Flame Cannon. War machines may be purchased at the normal points cost listed in the Army book. Remember that each ship may only carry a certain number of war machines. This number is determined by ship size (p. 130).
In addition to army-specific weapons, players may take the following generic war machines on any ship:
- Stone Thrower: 110 points
- Bolt Thrower: 75 points
- Cannon: 150 points
Full rules can be found in the Warhammer rulebook on pp. 120-125. Each war machine will be crewed by three suitable Core troopers from the army in question.
That Sinking Feeling
If you put enough holes in the hull of even the largest ship, you will eventually cause it to sink. The onrush of water may cause timbers to break, which can result in even more catastrophic damage! When a ship's hull reaches zero Damage Points, the ship begins to sink! Roll on the chart below.
Sinking (D6).
| Roll | Result |
|---|---|
| 1-2 | With a terrifying suddenness, the boat dives beneath the waves and is gone! All hands are lost! |
| 3-4 | The boat tilts to one side and goes down. All models can make a normal move (no marching) to leap off the boat and into the water. If they fail to get off or are trapped on a lower deck, the models are lost. The boat will go down in D3 turns (make the D3 roll immediately). The crew must make a Leadership test to remain on board and make any further actions (like shooting war machines). Otherwise, crewmen will run and fling themselves overboard. See the Swimming rules below. In the meantime, the ship cannot move of its own accord and is Adrift. |
| 5-10 | [Entry not legible in the scan; the chart text for this range is missing from the page image.] |
| 11-12 | One of your crewmen with some carpentry skills has patched up the most recent hole. The hull now has 1 Damage Point, and the ship is no longer sinking. The ship suffers a -2" movement penalty, because it has taken on so much water. |
Swimming
There are many situations in which models may jump or be knocked into the water and forced to swim. The following rules apply for normal swimming.
Each model may swim D3+1", but on a roll of 1 the model is in peril of Drowning (see below). Subtract 1" from any swimming distance for models that have better than a 5+ armor save.
Drowning. An unmodified roll of 1 on the Swimming Test indicates that the model has gone down. Characters, as well as unit Champions, are special individuals and so may get a chance to resurface heroically. Roll a further D6. On a 2+, the model has not drowned but surfaces and splutters on to next turn. On an additional roll of 1, the hero really has sunk and is removed from play. Even Undead are still removed from play on a Swimming roll of 1. Assume the current takes the model and sinks it out of action.
Climbing Back Aboard. A swimming model may try to climb aboard any ship it reaches. See the Climbing rules in the Warhammer rulebook on p. 244. The model may reroll a failed Initiative test if the ship is friendly.
Models may split their move between swimming and moving on land. For instance, a model uses half its movement to reach the water. Make a Swimming test and move the model half the distance indicated to complete the remaining half of the model's move.
High Seas Showcase: Different Ships of the Warhammer World
[Photographs and captions of the Vampire Counts ship built by the hobbyist (with notes on its construction from foamcore, balsa, and plastic bits), and of other ships for other armies, are omitted. The caption text is hobby material, not rules.]
[Showcase of further ship models: a Lizardmen Saurus-crewed creature, an Orc Battle Barge (a sail, oars, and a Goblin-powered paddle wheel), a Skaven Warship (with a warpstone-powered engine), an Empire War Galley, and a Bretonnian Buccaneer. Their captions are hobby notes and are not reproduced.]
Drop Anchor!
Stopping a boat is not the easiest matter, especially if it is a large ship that had been previously going very fast. A ship may only drop anchor if it traveled less than half its maximum move last turn. A ship that has dropped anchor will stay in place and is not subject to the Adrift rule. Weighing anchor (an old salt's term for raising the anchor) will keep two additional crewmen busy (two more than the usual minimum) and will take an entire turn. On the following turn, the ship may move as normal.
Adrift
Drifting occurs when a ship does not use any method of propulsion and is "dead in the water." When a ship drifts, it moves D3" in the direction of the wind (or current, if you are playing a river scenario).
There are many reasons a ship may be Adrift. Its method of propulsion may have been destroyed (e.g., its sails or mast shot away), the number of crew could be below half the minimum complement, or the crew could be too busy fighting or shooting ranged weapons to sail the ship properly.
[Photograph of a Chaos ship preparing to ram a Bretonnian ship before a boarding action, omitted.]
Boats Moving Off the Table
A large naval game will require a lot of playing space, but there may come a time when a ship sails off the table. In this situation, the ship does not fall off the edge of the world. As long as the ship retains the power to move, the vessel may be brought back onto the table anywhere within 6" of the point at which it left. A dinghy or small ship may return to the table in the following turn after sailing off, but a medium or large ship must spend a full turn off the board. Ships returning to the table may not fire any missile weapons on the turn that they are brought back onto the board.
Running Aground
Some scenarios will present loads of opportunities for reckless players or unskilled captains to wreck their own boats! There are sand bars, hidden reefs, and rocky projectiles underneath that murky water!
Should a ship run aground per scenario rules, the hull takes a single hit at a Strength of D6+4. If the roll to wound is successful, consult the following chart to determine how many Damage Points are inflicted. Note that the amount of damage increases if the ship traveled further than 6" that turn before it ran aground.
Number of Damage Points Inflicted (Running Aground).
| Ship Size | 0-6" Traveled | 6"+ Traveled |
|---|---|---|
| Dinghy | 1 | 1 |
| Small | D3 | D3+1 |
| Medium | D6 | D6+1 |
| Large | D6+1 | 2D6 |
Additionally, any ship that takes damage also risks becoming stuck. Roll a D6. On a result of 1-3, the ship is wedged in place and may not move. At the start of each of the controlling player's turns, roll another D6. On a result of 6, the ship can Shove off (see p. 143).
Docking and Beaching
Ships of all sizes may stop at a dock. However, to do so without a collision and damage (see Running Aground), ships must be moving at under half speed. It takes a full turn to dock. Dinghies and small ships (but not small steamships) may also land on shore on the mud or sand of a gentle bank.
Ramming
Any ship may ram another vessel. Captains using this ploy are hoping to puncture the enemy's hull and possibly even cause the enemy ship to sink.
A ship attempting to ram can do no more than a single turn of 45° or less on its course towards the enemy ship. The two factors that determine whether damage is caused are distance traveled (the build-up of momentum!) and the size of the ship.
For every inch traveled before striking the target, the ramming ship may add +1 to the Base Strength of its ramming attack (to a maximum of 10).
Base Strength of Ram.
| Ship Size | Base Strength of Ram |
|---|---|
| Dinghy | 1 |
| Small | 2 |
| Medium | 3 |
| Large | 5 |
Thus, a large ship that traveled 4" to hit its target would be striking at S9!
If the ram wounds successfully, determine how many Damage Points are caused to the target's hull.
Number of Damage Points Inflicted (Ramming).
| Ship Size | 0-6" Traveled | 6"+ Traveled |
|---|---|---|
| Dinghy | 1 | 1 |
| Small | D3 | D3+1 |
| Medium | D6 | D6+1 |
| Large | D6+1 | 2D6 |
Crushing Your Own Ship. The ship doing the ramming also places itself in great danger. If the ships are the same size, or the ship being rammed is smaller, the ramming vessel only takes a hit on a roll of 4+. If the ramming ship is smaller, it will take damage on a roll of 2+. If the ramming ship takes a hit, use the same Strength value generated by the ram to see if any damage is caused. Should the roll to wound succeed, the collision causes D3 Damage Points to the ramming ship's hull.
Rams. Any ramming ship that has a specially fitted ram on its prow may reroll a failed to-wound roll. Additionally, the ramming ship will take a hit itself only on a roll of 6, regardless of relative sizes of the ships.
Getting Stuck In. Anytime a player makes a ram that successfully wounds an enemy ship, the two vessels are Grappled together. To free a ship, its crew must attempt to Cut Loose and Shove off (see next page).
Boarding Actions
War machine fire can immobilize a ship or even sink it, but more often than not, the way to take out a boat is to sail close enough so that your warriors can leap aboard the enemy craft. This dangerous maneuver is called a boarding action, and any ship that is touching an enemy vessel may attempt such an attack! In these hotly contested combats, enemy decks may be swept clear of foes, and captured ships can be manned by your own loyal soldiers to rejoin the fight on a different side.
Getting Ships in Contact
For game purposes, there are two ways in which you can come into contact with an enemy ship for a boarding action: Headlong or Alongside.
Headlong. When the bow of one player's ship makes contact with an enemy vessel's bow or stern, or approaches the enemy's side from a right angle, it is said to have made Headlong contact. This position makes for an ideal ram, but the crew will have less room to board from the bow of its ship.
Alongside. Any contact that is not Headlong is said to be Alongside and generally indicates that the sides of both ships are touching. When ships make Alongside contact, realign both boats after all movement is complete to maximize the amount of hull-to-hull contact without changing the point at which the ship's first made contact. This realignment is done in much the same way that two land-based units will realign in a regular game of Warhammer. Clipping (see p. 266 of the Warhammer rulebook) is just as weedy at sea as it is on land!
[Diagram of a Headlong boarding action (A) and an Alongside boarding action (B), omitted. A second diagram shows an Attacker coming in at an Alongside angle but making contact with a portion of the ship; the gap between the ships is eliminated by pushing the models together.]
Grappling. As an Attacking ship nears its target, whether in a Headlong or Alongside fashion, grappling hooks and gaffs are thrown to tie the ships together. Only when the Attacking ship approaches Alongside are the ships realigned to maximize the hull-to-hull contact at the point of impact. As soon as the ships touch, they are Grappled. Ships that are Grappled are lashed together and may not move or sail away unless they meet at least one of the qualifiers below to Cut Loose.
Cut Loose. Cutting loose or disengaging Grappled ships involves lots of rope cutting and casting off all the hooks and gaffs connecting the ships together. In order to Cut Loose, a ship must meet one of the following three conditions.
- After its models have won a round of combat, a player may Cut Loose on a D6 roll of 4+.
- A larger ship may attempt to Cut Loose from a smaller one as long as there are at least two models who are neither engaged in combat nor part of the minimum crew complement. These two models will Cut Loose successfully on a D6 roll of 2+.
- If all the foes on the enemy ship have been slain, the ship may automatically Cut Loose.
Once a ship has successfully Cut Loose, it will Shove off.
Shove Off. After a ship Cuts Loose, the crew Shoves off with poles and gaffs, and the ship moves up to 4" in any direction nominated by the controlling player. Additionally, when this particular maneuver is mentioned by a member of the opposite sex (not during a game), it generally indicates that he or she doesn't like you. (This sentence is printed as a joke in the book and is transcribed as printed.)
Prepare for Boarding! When the ships are Grappled (and perhaps realigned if they made contact Alongside), both players are allowed to readjust their onboard models up to 2" to prepare for the upcoming boarding action. Defenders reposition models first. This extra movement allows players to get their toughest fighters up front or to move yellow-bellied cowards a little further away.
(The grapples cannot pull the target ship in any direction other than straight toward the attacking vessel.)
Fighting the Boarding Action
Boarding actions are resolved in the Combat Phase. It is possible that boarding actions occur on the water while regular combats are being resolved on land. However, the swirling melee of a hand-to-hand boarding action works a bit differently than land-based combat. The following rules reflect the confusing, swirling brawl of a boarding action.
Boarding actions are resolved in the following combat order. Note that each model may only make one type of hand-to-hand attack (e.g., if it Spikes the Hull, it cannot Leap Aboard and attack; if it is involved in Deck Fighting, it cannot make an Assisting Attack).
- Stand and Shoot
- Jabbing 'Cross Decks
- Leaping Aboard
- Deck Fighting
- Assisting Attacks
- Blocking Actions
- Spiking the Hull
- Combat Resolution
- Losers Take a Break Test
Stand and Shoot. Any ship that is about to be boarded may Stand and Shoot with any models lined up on the gunwales on the side facing the attacking ship. These models may fire even if they just moved into position as part of a Prepare for Boarding Action move, unless the models are armed with Move-or-Fire weapons like crossbows. Models that are Standing and Shooting suffer the usual -1 to hit penalty for firing at charging opponents and the -1 penalty for firing at models in Skirmish formation, but they will not suffer a move or fire penalty if they moved as part of a Prepare for Boarding Action. No other modifiers apply, though the target model must be in weapon range. Models may only Stand and Shoot in the 1st turn of a boarding action, though unengaged models may fire as normal in subsequent rounds.
Deck Fighting. Enemy models in base contact on the decks of ships fight a round of combat as normal.
Assisting Attacks. All unengaged models (i.e., models not in base-to-base contact) whose bases are within 1" of an enemy model's base on the same ship may make an Assisting Attack. This extra attack is not as formidable as a base-to-base attack. A model making an Assisting Attack may make only 1 Attack, regardless of how many attacks are on the model's profile or how it is armed. Weapon bonuses (e.g., +2 Strength for great weapons) do not apply. Assisting Attacks are made after Deck Fighting attacks. Thus, some models that began the turn within 1" of an enemy model may lose the chance to make an Assisting Attack if that enemy model was slain in regular Deck Fighting. Models may not make a regular attack and an Assisting Attack in the same turn. Assisting Attacks cannot be made to contribute to a Blocking Action, which takes place last and is fought in the space between the ships, on swinging ratlines, or atop the gunwales.
Jabbing 'Cross Decks. Any models that are lined up on the gunwale nearest the enemy vessel may strike at any enemy model within 1". The Difference in Deck Heights modifier applies (see below). Attackers strike first in the 1st round; afterwards, Jabbing 'Cross Decks is fought by order of Initiative.
Leaping Aboard. Attacking models may attempt to leap aboard an enemy ship if they are adjacent to an enemy hull with only their own ship's gunwales intervening. In the 1st turn only, models attempting to leap across to the enemy ship must make a Boarding Test. Roll a D6 for each model attempting the leap. On a result of 1, the model has mistimed his jump and falls between the boats and is lost (with a splash and a sickening crunch!). Character models may reroll, but the second die roll counts. On a 1, remove the model as a casualty. These losses don't count towards Combat Resolution.
Models that pass their Boarding Test, and models attempting to board in subsequent rounds after the first, may be placed on the enemy ship if there is sufficient room and if they land by jumping straight across without making base contact with an enemy. Once on the enemy ship, the boarder may move up to its normal rate (not double) and may try to make base contact with an enemy model. If the boarder makes base contact, it counts as charging.
If a model attempting to Leap Aboard an enemy ship cannot do so because the landing area is filled with enemy warriors, the boarding model is Blocked and must fight the enemy in a Blocking Action (see below).
Spears, Pikes, Shurikens, and Pistols. Models armed with these weapons may make an Assisting Attack within 2" of an enemy model instead of 1" as normal for Assisting Attacks.
Blocking Actions. When a model fails to Leap Aboard because there is an enemy model (or models) in the way, or the Leaping Aboard model would land in base contact with an enemy model, the Leaping Aboard model is Blocked, and the models will fight a Blocking Action. A Blocking Action is fought between the ships, from gunwale to gunwale. All attacks are made simultaneously regardless of Initiative order, who charged, and weapon rules (e.g., great weapons strike last). If the attacking model causes a Wound and is not himself wounded, he is placed on the enemy ship where the wounded model last stood. If the defending model was wounded but not slain (because you are playing with the Skirmish rules and the defending model was not taken Out of Action, or because the defending model has more than 1 Wound on its profile), move the defending model backward just enough to allow space for the attacking model. If the attacking model sustains a wound, either he will fall (in which case his crumpled body drops into the ocean and becomes shark food), or he must remain on his ship (because he was Knocked Down or Stunned, if you're playing with Skirmish rules, or because he has more than 1 Wound on his profile). A wounded attacking model may never move on to the enemy ship on the turn he was wounded.
A defending model that wounds an attacker and does not sustain a Wound itself may choose to move onto the attacking ship and take the place of the attacking model, which (if the attacker still lives) must be moved back just enough to allow space for the defender.
If neither side causes a Wound, then all models fighting in a Blocking Action must remain on the edges of their ships and will continue to fight the Blocking Action in the next turn.
It is possible for one blocking model to take on two attackers or vice versa. The Defending player may choose how to arrange the fights if there are options.
Spiking the Hull. Models may attack the hull in base contact with the enemy ship if no enemy model is within 1". Hand-to-hand attacks hit automatically, but only the strongest models will be able to damage the hull's Toughness. Psychological effects like those caused by Fear or Terror that can cause units to Break automatically do not apply to boarding actions. Damage Points caused to the hull by models that Spiked the Hull are counted in the Combat Resolution step, below (see the note there).
Difference in Deck Heights
There are advantages for attacking from a taller ship. When one deck is more than 2" taller than the enemy deck, the models on the taller ship may add +1 to all to-hit rolls made in Jabbing 'Cross Decks, Leaping Aboard, and Blocking Actions (but not Assisting Attacks). No bonus applies when enemy decks are roughly the same height (i.e., within 2").
Combat Resolution
On a boat, there is nowhere to run. Thus, breaking and fleeing are not as common as they are on land. The following rules apply to combat on board ships.
Add the Number of Wounds. After all phases of the boarding action are complete, add up the number of Wounds caused by each side. Remember to include Wounds caused by models that performed a Stand and Shoot action in the 1st round of a boarding action, but do not include Damage Points caused to the hull by models that Spiked the Hull. In addition, add any of the following modifiers that apply.
- +1 For Greater Crew Unit Strength. Count the Unit Strength of all surviving crew members of each ship, including crew members who have boarded the enemy's ship. The crew with the higher Unit Strength may add +1 to its combat resolution score.
- +1 If Crew Unit Strength More Than Doubles That of the Enemy. If the Unit Strength of one crew more than doubles that of the enemy crew, the stronger crew may add an additional +1 (for a total of +2) to its combat resolution score.
For combat at sea, there are no modifiers for Standards, High Ground, Extra Ranks, Rear or Flank Attacks, and so on. Musicians, however, still count as tie-breakers should the combat be even.
Compare the Numbers. After the Wounds and possible bonuses are tallied, compare the combat resolution scores as you would normally to determine who has won the round.
Losers Take a Break Test. When a crew loses a round of boarding action combat, it takes a Break Test against its unmodified Leadership value. If there is a surviving character model on board, the crew may use his Leadership. Otherwise, use the highest Leadership score of any of the surviving crew models. Psychological effects like those caused by Fear or Terror that can cause units to Break automatically do not apply to boarding actions.
If the losers fail the Break Test, they do not break and run as normal. However, they are Shaken and may break at a later time if they lose a subsequent round of boarding action combat.
Shaken. Once crews are Shaken, they will take Break Tests as normal (so, for instance, at -2 if they lost the Combat Resolution by 2). If the Shaken crew fails a further break test, they will Abandon Ship instead of Fleeing.
Abandon Ship. When a crew with models on board an enemy ship breaks, the models automatically retreat to their own ship but will continue to fight as normal in subsequent rounds if the enemy continues combat (instead of Cutting Loose and Shoving off). When a crew with no models on board an enemy ship breaks, all crew are slain, jump in the water, hide in the hold, or something similar. Effectively, these models are out of the game and should be removed as casualties.
Example: Blocking Actions
Fighting a boarding action can be a little confusing. There is a lot going on, and sometimes an example is helpful. Here a small Orc boat (Da Toof) attempts to board a medium Bretonnian vessel (Le Croissant).
Da Toof has hit Le Croissant at an Alongside angle, and the players have pushed the boats together (the Orcs didn't ram, as they want the ship afloat in case they can take it here). Both sides have already done Prepare for Boarding Action and Stand & Fire (no hits due to the negative modifiers).
Step 1: All of the greenskins choose to Leap Aboard (cuz Jabbing 'Cross Decks is for sissies). As you can see in Figure A, all the available landing spots are blocked, so it is time to fight out Blocking Actions.
Combat occurs simultaneously; thus, we resolved each combat by starting left and moving right. The decks are even, so there was no height bonus for either side. The Troll (who passed its Stupidity test) started it off by killing its man. Next, the Orc Big Boss likewise killed the man in front of it, but the Night Goblins didn't fare as well. The only Night Goblin to hit and wound was itself wounded. Elsewhere the Bretonnian crew managed to wound another Night Goblin, but the Bretonnian player chose NOT to cross over to the Goblin boat and certain death! In total, the greenskins had caused three casualties (+3) and had a crew that was more than double the Unit Strength of the Bretonnians (+2) for a total of 5. The Bretonnians caused two casualties (+2) and thus lost the round of combat.
With an unmodified Ld of 7, the Bretonnians rolled an 8 for their Break Test and so were now Shaken. Even worse, they had decks filled with invaders (see Figure B, which shows the situation at the end of the turn). During the Bretonnian turn, it will take a heroic counter-charge and some lucky dice for the valiant crew of Le Croissant not to lose again.
[Figures A and B and photographs of the boarding action are omitted.]
Additional Rules
As stated in the introduction to this chapter, these rules are guidelines and are not intended to be the definitive Warhammer rules for ship combat. As such, players will encounter situations not covered by the rules listed here and will be forced to improvise. Use the Skirmish rules as a guide for things like Climbing, Jumping down, and Falling that might come up in your games. Here are some additional rules that might help to cover some of these unusual situations. When in doubt, both players may make a case as to how to resolve the situation, and either seek out a third party to make a ruling, or roll a die to decide which player's interpretation will resolve the situation.
Leadership at Sea. The General (or Admiral) of the force may extend his Leadership up to 12" just as though he were on land. Measure the distance from the hull of the General's ship to the hull of the ship in question, rather than from the General model to the crew models themselves. In addition, any character model can act as the Skipper or Captain of a ship he is on, and may extend his Leadership to that ship's crew in the same way that a character model may extend his Leadership to an associated land-based unit.
Spells at Sea. In general, spells like Fireballs that do damage should be targeted at a specific area of the ship (e.g., hull, crew, or Specialty Target) just like missile weapons. Spells like Guardian Light or Drain Life that affect units will affect crew on the same deck instead.
Boats on Fire. Flaming missiles are permitted in some scenarios. Any section of a boat (e.g., the hull or a Specialty Target) may be set on fire by any flaming missile or spell like Fiery Blast. If the flaming attack hits and wounds the area, roll a D6 to determine if the target has been set alight. On a roll of 4+, the area is on fire. At the end of each Shooting Phase, an area on fire will lose D3 Damage Points on a D6 roll of 4+. Crewmen who are not otherwise engaged may attempt to put out a fire in a single location. Roll a D6 at the end of a turn in which crew did nothing but fight the fire. A single crewman will put out the flames on a roll of 6. Each additional crewman who assists in fighting the fire reduces the roll needed by one. Thus, three crewmen fighting the fire would extinguish the flames on a roll of 4+. A roll of 1 is always a failure.
Additional flaming attacks may cause more damage to an area that is already on fire. However, these attacks will NOT affect the fire (by making it more intense or more likely to wound) in any way.
Launching Dinghies. Large ships can carry two dinghies, and medium ships can carry one. Dinghies may come in handy for rowing ashore, scouting out small islands, or getting into places where larger ships cannot go (e.g., shallows or rocky coastlines). Launching a dinghy takes two crew who may do nothing else that turn. The larger ship cannot move more than 5" on the turn the dinghy is launched. It takes an entire turn to lower a dinghy, which may not move on the turn it is launched (but it may Shove off).
Psychology on Boats. Failed Psychology tests that would require a unit (or crew) to flee work differently on boats. Instead of fleeing from a failed Panic or Terror test, the crew will cower and run to the far side of the ship and fail to do their duty. The trembling crew will continue to do nothing until they Rally. A ship with no active crew is Adrift. Note: crew who fail Fear tests still need 6's to hit their opponents, but will not Break automatically when defeated by a Feared opponent.
What Evils Lurk in the Briny Deep?
Hordes of loathsome creatures live in the oceans (and, to a lesser extent, the rivers) of the Warhammer world. Here are some descriptions and rules for some of these creatures.
[Opening vignette (the Imperial war galley Graf Gustav and Lord Ushrivel's fleet off the Arabian coast) is flavour fiction and is not transcribed.]
Great Tentacled Beast. Whether this creature is the Great Kraken of legend is up for debate. Regardless, when one of these slimy creatures takes a liking to your ship, it spells doom. When a Great Tentacled Beast attacks, roll a D6 to determine how many tentacles burst forth out of the depths to do battle. No one knows for sure how many appendages a Great Tentacled Beast has. It's possible that other tentacles are plucking creatures off the bottom or entangling some other aquatic creature at the same time that tentacles are attacking the ship. Each tentacle has the following statistics:
| M | WS | BS | S | T | W | I | A | Ld |
|---|---|---|---|---|---|---|---|---|
| 0 | 3 | - | 6 | 4 | 3 | 4 | 2 | - |
When a Great Tentacled Beast moves within 6" of a ship, roll a D6 and consult the chart below.
Great Tentacled Beast (D6).
| Roll | Result |
|---|---|
| 1 | The ship shudders as the Beast's tentacles grasp and tear at the rudder. If the ship moves before the tentacles are slain, it will move at half speed and will turn 45° in a random direction (roll D6; 1-3 turns left, 4-6 turns right). If the tentacles destroy the rudder, they will attack the crew next. |
| 2-5 | The tentacles burst out on either side of the ship and go after the crew. Each time a single tentacle hits with both of its attacks, the victim is automatically snatched and dragged overboard to his death. The tentacles will attack until destroyed. |
| 6 | Luck is with you. The Beast is either just curious, or perhaps its horrible hungers have been sated. A single round of probing attacks is made against a random location (randomize between hull, crew, and all the available Specialty Targets), and then the tentacles disappear for the time being. Thank the gods that the Beast has decided to move on and leave your ship and crew alone. |
Spiny Sea Serpent. There are many varieties of these wicked creatures, but the Spiny variety haunts the bottoms of many desolate and craggy coastlines of the Warhammer world. Its profile is as follows:
| M | WS | BS | S | T | W | I | A | Ld |
|---|---|---|---|---|---|---|---|---|
| 12 | 6 | 0 | 6 | 6 | 3 | 5 | 8 | - |
Large Targets. A Spiny Sea Serpent is a Large Target, but any of its coils that are still in the water receive the benefit of soft cover from missile fire.
Scaly Skin. The mollusk-covered hide and iron-hard plates that cover the Spiny Sea Serpent give it a 3+ armor save.
Black Slime. The Spiny Sea Serpent can vomit forth a spray of corrosive liquid that can burn skin and even melt armor. Black Slime is a breath weapon (see p. 114 of the Warhammer rulebook). Hits are resolved at S4 with a -3 save modifier.
Terror. Not surprisingly, Spiny Sea Serpents cause Terror.
Sharks. While not really monsters, these voracious fish are a terror to any model in the water. Anytime there is a swimmer in Shark-infested waters, roll a D6. On a roll of 1, a single base of Sharks appears and attacks a random swimmer. If there are a lot of swimmers in the water, it may be difficult to randomize the roll, and you may have to randomize board quarters, unit types, or whatever first, working down to find your victim. Once a base of Sharks appears, it will always move to attack the nearest model (it helps to make "dum-dum...dum-dum...dum-dum" sound effects). Sharks move and attack in each player turn and will always move to attack the nearest model. Sharks are swarms with the following profile:
| M | WS | BS | S | T | W | I | A | Ld |
|---|---|---|---|---|---|---|---|---|
| 12 | 5 | - | 5 | 4 | 5 | 3 | 3 | - |
Sharks don't disappear once they surface, as long as there are still swimmers in play. After eating a victim, the base will make a direct line for the next closest model in the water. Each turn there are swimmers in the water, roll another D6 for another base of Sharks to appear out of the deep. A feeding frenzy can start in no time. Sharks always benefit from soft cover from missile fire. When no swimmers are in the water, all Shark bases dive deep and are removed from play until swimmers are again in the water and a 1 is rolled.
Other Monsters. Just because you're playing Warhammer in an all-water environment doesn't mean you should forget all the other great monsters that you already know. Imagine flights of Harpies, River Trolls, Giants wading off the Albion coast, and more.
A Note on River Trolls. In addition to their regular rules (from Warhammer Armies: Orcs & Goblins), River Trolls can swim [distance partly unclear in scan] and will never drown. When River Trolls in the water want to climb up a ship to board it, they may do so on a roll of 4+, not the normal Initiative Test. Their claws are so strong that they can pull themselves upward and be on the deck slaughtering crew in no time.
Those Boats Don't Look Friendly
The Defenders thought their flanks were well guarded by the river. They were wrong.
Overview. Both sides are looking to slay their foes and control the battlefield at the end of the game.
Armies. The Defending army gets 25% more troops than the Attacker. For instance, if the Attackers have 2,000 points, then the Defenders may take 2,500. The Attacker also gets up to three small ships. Small ships can carry a crew of Unit Strength 25.
Battlefield. Set up the battlefield on a 4' x 6' table as shown on the map. Along the western edge runs a river 18"-24" wide. A few copses of trees and boulder piles dot the landscape.
Deployment. The Defender sets up his entire force first. The Defender must deploy an equal number of units in the eastern and western halves of his Deployment Zone. All the Defender units must be facing the southern board edge. The Attacker sets up his force last, but does not deploy his ships or their crews yet.
Who Goes First? The Attacker goes first after making the Free Move.
Length of Game. The game lasts 6 turns or until one side is entirely wiped out or has fled the table.
Special Rules.
Free Move. The boats get a Free Move before play starts. They may enter from anywhere along the western board edge.
Beaching. Small ships may beach themselves at the waterline. Troops on board may disembark with whatever percentage of movement left that the ship did not make (e.g., if a ship moves half its maximum distance, models may move half their move on the shore).
Victory Conditions. Use the Victory Points rules from the Warhammer rulebook (p. 198) to determine which side has won. Count each board quarter as double (i.e., 200 points instead of 100, as is normally the case).
[Battlefield map omitted.]
Booty Quest
Two or more rival fleets converge on a small set of islands rumored to have buried treasures on them.
Overview. All forces are trying to capture the buried booty and destroy enemy boats.
Armies. Each player may have 300 points of troops and war machines, including up to one hero-level character (ignore other army list restrictions). Players may choose to field either one medium ship and a dinghy, or two small ships. If more than four players are involved, then the players should ally and form two equal sides.
Battlefield. The battlefield, which is 4' x 8' or larger, is entirely covered in water, save for two islands measuring approximately 8" x 12" as shown on the map.
Deployment and Who Goes First. Dice off to decide who goes first. The highest-scoring player may deploy his ships in the center of any table edge. The remaining players deploy in order of descending die rolls, but may not enter from a board edge that has already been chosen.
Length of Game. The game lasts until all ships are sunk or Adrift, or until the booty is found and taken off the board.
Special Rules.
Shark-Infested. The waters are Shark-Infested. See rules for Sharks.
Buried Booty. The first time a model reaches the center of an island (on foot, obviously), it may dig. On a D6 roll of 4+, the model finds the buried treasure. It takes two crewmen to carry the loot. It is possible to find booty on both islands or on neither. Only one test per island may ever be made.
Steady Wind. In this area, the wind is steady and always blowing from the western table edge. There is no need to roll for direction.
Victory Conditions. Any ship that escapes off the western table edge with booty scores 5 Victory Points. Each ship that sinks another earns 1 Victory Point. (No, you can't scuttle your own boat and get a point. Shame on you for thinking it.) The player (or side) with the highest Victory Point total at the end of the game wins.
[Battlefield map omitted.]
Dangerous Coast
Two small fleets engage along a dangerous rocky coast. And there are rumors of Sea Monsters!
Overview. Both forces are trying to sink the other, survive along the dangerous coast, and exit the board via the table edge opposite their Deployment Zone.
Armies. Each player may have 500 points of troops and war machines, including up to one hero-level character (ignore other army list restrictions). Players may choose either three small ships or one medium ship and two dinghies.
Battlefield. The battlefield, which is 4' x 8' or larger, is entirely covered in water, save for a dozen rocky projectiles spread maze-like throughout the southern half of the table. There are gaps between the rocks, but it will be a tight squeeze. The entire northern half of the board is clear.
Deployment and Who Goes First. Both players roll a D6. The higher-scoring player may choose to go first or second. The lower-scoring player may pick his Deployment Zone (see map).
Length of Game. The game lasts until all ships are sunk or Adrift, or until the last ship that can move has sailed off the opposite table edge.
Special Rules. The Great Tentacled Beast Is Out There! At the start of each player turn, roll a D6. On a result of 1, immense tentacles burst from the depths and attack a random ship. Use the rules of the Great Tentacled Beast on p. 147.
Victory Conditions. Any ship that escapes off the table edge opposite its Deployment Zone earns 2 Victory Points. Sinking an enemy dinghy is worth 1 Victory Point. Sinking a small enemy vessel is worth 2 Victory Points.
[Battlefield map omitted.]
River Raid
A large force arrives by boat to raid a small river town. The Defenders try to protect their lands until help arrives.
Overview. The Attackers are trying to raid the enemy village, grab loot, and destroy buildings. The Defenders are trying to hold out and protect their property.
Armies. The Attacker has 2,500 points and up to one large ship, one medium ship, three small ships, and two dinghies. The Defender has 1,250 points, a tower, and a single small ship.
Battlefield. Set up the battlefield on a 4' x 8' table as shown.
Deployment and Who Goes First. The Defender sets up his entire force first. The tower must be deployed as shown on the map, but the Defender may place his five buildings and troops anywhere on land. The Defender's one ship must be deployed anywhere on the river bank. The Attacker does not deploy before the game, but gets the 1st turn and must enter the board anywhere along the Attacker Entrance Edges.
Length of Game. The game lasts 8 turns.
Special Rules. Raid. All the rules for burning and looting can be found in the Raid section of this book, pp. 166-167.
Torches/Flaming Arrows. Upgrade any unit to carry torches or flaming arrows for 15 points per unit.
Tower/War Machines. The Defender may spend points on any of the tower upgrades or war machine options listed on p. 155 of this book.
Banks. Large and medium ships will run aground if they get within 3" of the river banks. Smaller ships may beach.
Victory Conditions. Attackers get 1 Victory Point for every building that is destroyed or on fire at the end of the game. Defenders get 1 Victory Point for every building that is still standing and NOT on fire at the end of Turn 8. Attackers get 2 Victory Points for each piece of loot they have in their possession at the end of the game. Defenders get a 1/2 Victory Point for every house that has NOT been looted.
[Battlefield map omitted.]
Chapter 9: Sieges, Raids & City Sacking
Nothing is more satisfying to an aspiring conqueror than burning the enemy's cities, salting his fields, and plundering his wealth. These expanded rules and scenarios can make for great one-off games, tense linked battles, or the apocalyptic culmination of a campaign. This chapter explains different levels of frantic combat, from adding small elements of siege to a regular Warhammer game to fighting elaborate city battles.
Defensive Thinking!
All lands are fraught with peril, and all nations, even those bent on destruction and conquest, build some defenses. Each Warhammer race makes use of a variety of strongholds, from vast impregnable castles to hastily constructed border fortresses, or even more humble watchtowers. The gaming challenges and possibilities that arise over the attack of these defensive edifices are often overlooked. And of course, not all sieges end when the enemy breaches the outer walls. In fact, that's often when the best part of the game is just getting started! But we're getting ahead of ourselves...
Playing a Siege
A siege is like an ordinary game of Warhammer, only a little more advanced, as one side has some serious defenses. These defenses could include a complete castle, a wall that surrounds the city, or a lone tower. Small elements of a siege-style game can be incorporated into regular battles as well by adding terrain such as defended obstacles, fortified bridges, entrenchments, natural environments like cliffs, and more. Regardless of their form, defenses protect friendly troops and block Attackers.
The rules for how to conduct a siege can be found in Appendix Four, Rules of Siege, in the Warhammer rulebook. The rules cover types of defenses like walls, gates, and towers in general terms, and explain how to move your units inside (or atop) the structures. The rules also cover assaulting the walls (and this is the good part), which involves the Attackers battering the walls down, scaling them with ladders and grappling hooks, or employing engines of war like Siege Towers. All of these methods are subject to counterattack by the desperate Defenders, and so a cunning General often conceals his real plans by employing a number of feints, ruses, and diversions. The Defenders' side has many advantages: walls for protection, boiling oil and rocks to drop on invaders, and platforms from which to fire missile weapons. However, the Defenders are far fewer in number, as the normal siege game stakes the Attackers with double the points of the besieged. So, like we said in the beginning, a siege is like an ordinary game of Warhammer but adds in new dynamics and tough army-building decisions. You have to balance your ladders, boiling oil, and battering rams with your existing points allocation!
What Are You Waiting For?
Many players balk at the idea of playing a siege. Some are daunted by the game rules, or the terrain needed. Others have tried a standard siege, but have stopped there and not pressed the fight into the city or tried any of the endless varieties of play to be had. The following sections deal with dispelling myths, adding new scenarios, and detailing how to make the most out of a siege game. Give it a try, and have fun storming the castle!
Sieges in Campaigns
There are many references to campaigns in The General's Compendium. Siege battles, in addition to being brilliant and fun one-off games, can be a very important part of an ongoing campaign. After all, warlords and conquerors will surround their massive fortresses and watchtowers to ward off would-be Attackers. Devious Attackers may skirt around such impressive structures for a time and raid and destroy softer targets like towns or supply centers instead. Eventually, Attackers will find that even humble villages will build defensive walls or towers and garrison troops. [The remaining lines of this box are partly illegible in the scan. The legible fragments refer to putting down one's foes once and for all, and to eradicating a foe in a head-to-head encounter, and are not reproduced.]
[The box also shows three illustrations with captions: a Dwarf-built watchtower guarding the road up to their capital; a Goblin watchtower protecting the flank; and a Wood Elf tower, with a note on the Orc and Goblin player. The caption text is partly illegible in the scan.]
Siege Size. Most players immediately conjure up images of massive games involving high castle walls being assaulted by a veritable sea of Attackers. A game of this magnitude probably requires at least several evenings of play to reach a conclusion. This level of battle is an inspirational achievement, and every player should try to play a few of these enormous games. An equally enjoyable siege game could be as small and quick as a few units of Attackers trying to get into a lone tower. In fact, for the player who is new to siege, this size game will prove even more enjoyable, as the small numbers of troops will allow the generals to concentrate on the "added" siege items, like smashing down doors, firing from ramparts, calculating war machine damage on walls and towers, and so on. The next page has the scenario Storm the Watchtower, which is a highly strategic game as well as an excellent introduction to the art of taking defensive positions.
Another excellent place to get acquainted with the basics of siege is the Scale the Walls scenario from the Warhammer: Skirmish booklet. This scenario complements Storm the Watchtower, as it adds ladders, battling atop ramparts, and trying to batter down a front gate. We highly recommend that you start with one or both of these scenarios to get your feet wet.
[Photographs of a small siege in action (boiling oil used to counter the assault) and of the Skirmish booklet cover, omitted.]
Storm the Watchtower
A lone watchtower sits atop a hill, and the small defensive force stationed there maintains a constant vigil for marauding forces. The Tower Garrison also intimidates bandits, wards off monstrous beasts, and signals the approach of invaders. A small assault force has broken off from an Attacking army and intends to level the watchtower. As the main force marches forward, no enemies or strongholds must be left in its wake.
(The opening story of this scenario, about an Elven watchman in an oak-built watchtower, is flavour fiction and is not transcribed.)
Special Rules. This scenario is played with the standard Warhammer rules and those detailed in Appendix Four, Rules of Siege, with the following additions.
The Tower. Use the rules and Tower Damage Chart and Gate Damage Chart from Rules of Siege. Count the tower door as a gate, but add a +2 modifier for all attacks made against it, as it is not as sturdy as a castle gate.
No Special Deployment. Any troops with special deployment rules, like Scouts, may not take advantage of those rules in this scenario.
Reinforcements. Starting on the 2nd turn, roll a D6 at the start of the Defender's Movement Phase. The Strike Force will arrive on a roll of 4+ on Turn 2, 3+ on Turn 3, and 2+ on Turn 4 and subsequent turns. The force may enter from any board edge except the southern one and may not charge on the turn it enters the battlefield.
Objectives. The Attacking player's objectives are to knock down the tower and slay all the Defenders. The Defending player's objectives are to hold the tower at any cost and repulse the assault.
The Battlefield. The battlefield should be set up in a space about 30" x 30". A hill with the tower on top should be placed in the center of the northern half of the board. The rest of the terrain should include a loose scattering of trees and rocky outcroppings, although no additional terrain should be placed within 12" of the tower.
How Long Does the Scenario Last? The scenario lasts for 10 turns, until the tower falls, or until one side is entirely wiped out or has fled off the table.
The Forces. The Attacking force is divided into two parts. For the first, the Attacker may select Core choices and one Hero-level character to a maximum value of 500 points. The first force may also include any selections from the Siege Equipment List (see p. 258 of the Warhammer rulebook), but remember that siege towers, ladders, and grappling hooks can only be employed against walls; towers are simply too tall. For the second part of his force, the Attacking player may select a single war machine of up to 100 points. If the player prefers, or if his force has no war machines listed in its Army book, he may, for 100 points, opt to take a single Stone Thrower (see pp. 120-121 of the Warhammer rulebook) crewed by three appropriate Core troopers from the army list. Thus, armies like Chaos or Wood Elves that normally don't field war machines can make use of one under the special circumstances of this scenario. Any points not spent from the war machine allotment are lost.
The Defender must also divide his force into two separate parts. Any points not spent on one division are lost and may not transfer to the other. The first part of the Defender's force is the Tower Garrison. The Defender may select Core choices and one Hero-level character to a maximum value of 200 points for the Tower Garrison. The second part of the Defender's army is a Strike Force sent to bolster the Garrison. The Defender may select up to 100 points of any Core, Special, or Rare troops to make up his Strike Force. No characters, except Champions, are allowed in this group.
Deployment.
- The Defender deploys the Tower Garrison first. The entire Garrison must be deployed either inside (or on top of) the tower, or outside and within 3" of it.
- Next, the Attacker places all of his forces anywhere within 3" of the southern table edge.
- The Strike Force is not deployed at this time.
Who Has the 1st Turn? The Attacker takes the 1st turn.
Determining Victory.
- Victory for Attacker: The tower has fallen, and/or all Defending troops are dead, are fleeing, or have fled the battlefield.
- Victory for Defender: The tower stands, and the Defender has living models who are not fleeing on the battlefield.
[Battlefield diagram omitted.]
Small Siege/Big Game
Once you've tried one of the more basic siege scenarios, you'll be looking for some larger conquests. Many players jump straight into a full-blown siege game from here and never even consider incorporating elements of siege into a regular battle. By mixing siege elements, like scaling ladders to assault a fortified position, into a straightforward Warhammer battle, you can add some of the most exciting moments from a siege while retaining the sweeping charges and unit-to-unit fighting of a regular game. [The scan's text of this sentence is partly unclear.] For instance, imagine an Empire exploration army marching to do battle in the marshes in Lustria. Suddenly, a Lizardmen army rises from the murk to block the invader's path. As part of their cold-blooded strategy, Skinks with blowpipes have scaled the small rocky bastions that are scattered throughout the swamp. Not only does the Empire army have to worry about the advancing Lizardmen battle line, but in addition, the Skinks can shoot down poisoned death from the many rocky bastions. The Empire must meet the threat and find a way to shoot down the Skinks or scale the cliffs and slay them. Such a Warhammer battle will encourage you to think up cunning new strategies, all because small siege-like elements have been added.
The No Man's Land scenario that follows is another example. It combines elements of both attack and defense for both sides in the same game. The situation presents each commander with new dilemmas, as each must come up with a crucial plan to guard his own stronghold while simultaneously leveling his foe's towers. The scenario also gives you an excuse to build some cool and evocative terrain specifically for your army.
[Photograph of a small siege game in progress, with a caption ("These affairs are short and bloody and can be played over lunch. If you have a whole evening, you could swap sides and play a second game to test your tactics and to find out who really is the best general."), omitted. A second short story passage on this page is flavour fiction and is not transcribed.]
Crossing No Man's Land
Where natural barriers like rivers or mountain passes fail to protect a realm's borders, a wise warlord constructs fortifications. Along the borders of rival nations, fortifications are scenes of constant battle. Imagine the Kislev watchtowers looking out over a growing Chaos invasion from the north, or a Skaven structure guarding a new tunnel across from an ancient ancestral Hall of the Dwarfs. Every day, the soldiers see their foes building up their forces, separated only by an expanse of no man's land.
Objectives. Both players have the same objectives: to destroy their foes and to level or take over as many enemy strongholds as possible.
The Battlefield. This scenario requires quite a bit of room. It should be played on a table of at least 4' x 8'. A larger table, say 10' or 12' long by 4' or 5' wide, is even better. Most of the area has been cleared to allow for open lines of sight. Aside from the watchtowers, the terrain should be minimal: only a few trees or rocky outcroppings, which should be set up in any mutually agreeable manner. Each player's Deployment Zone runs along the length of your gaming table and out 12" from the table edge.
The Forces. Each player may select 2,500 points of troops, which could include the following defenses and equipment:
- 0-2 Towers at 250 points each.
- Any Siege Equipment (rulebook p. 258).
- If both players agree, any Siege Equipment or Tower Upgrades listed on p. 155 of this book may be used.
Deployment.
- Both players roll a D6. The player who scores the highest can choose the side of the table on which to deploy his forces. The player with the lower score may choose to deploy his towers (if any) first or second. Players may place towers in their Deployment Zone at least 24" away from other towers.
- The player who deployed the fewest towers now places a unit in his Deployment Zone. If both players have the same number of towers, dice off; the higher-scoring player may choose to go first or second.
- Hereafter, standard set-up rules apply (see Pitched Battle in the Warhammer rulebook, pp. 199-200), but note Deployment in Towers under Special Rules. Otherwise, players alternate placing units. Champions are deployed along with their units. All war machines must be deployed at the same time but may be deployed in different places. Characters in the army are deployed at the same time. Scouts are set up after all other units according to their special deployment rules.
Who Has the 1st Turn? Both players roll a D6. The player who finished his deployment first (not including Scouts) may add +1 to his die roll. The higher-scoring player may choose whether to go first or second. Reroll any ties.
Special Rules. This scenario is played with the standard Warhammer rules and those detailed in Appendix Four, Rules of Siege, with the following additions.
The Tower. Use the rules and Tower Damage Chart and Gate Damage Chart from Rules of Siege. Count the tower door as a gate, but add a +2 modifier to all rolls, as the tower gate isn't as strong as a castle gate.
Deployment in Towers. One unit of infantry (i.e., no troops on cavalry or monster bases) with a Unit Strength of 25 or lower may be deployed in the bottom levels of a friendly tower. Do not place the unit on the table; just make a note of which unit is where. It takes half of a unit's Move to leave the tower, even if the unit marches or charges.
How Long Does the Scenario Last? As this scenario has many movement and siege elements, the game will be lengthy. The scenario lasts for 8 turns.
Determining Victory. Unless one player concedes defeat, use the formula below to determine who has won the game. Use the standard Victory Points rules from the Warhammer rulebook (p. 198), with the following additions.
- Controlling board quarters is worth normal Victory Points. However, towers that are still standing and have at least one model inside count as regiments with a Unit Strength of 5 or more, and thus can enable armies to control table quarters or prevent armies from controlling them.
- Enemy towers that are toppled count for full Victory Points (250 points plus the cost of any upgrades).
- Enemy towers that are still standing but have been broken into and taken over entirely by friendly forces count for full Victory Points (250 points plus upgrades).
- Friendly towers that are still standing, have taken no damage (to the tower or the tower gate), and have no enemy models within count for 750 Victory Points.
- Friendly towers that are still standing, have taken damage (a roll of at least a 17 on the Tower Damage Chart, or a damaging roll to the Tower Gate), and have no enemy models within count for 500 Victory Points.
- Friendly towers that contain both enemy troops and Defenders who are not fleeing are worth 250 Victory Points.
[Photograph of a watchtower and a Chaos tower model, omitted.]
War Machines and Upgrades to Towers and Fortresses
Each of the many different races that populate the Warhammer world has its own style of warfare and defense. The following rules describe some upgrades that players can use to gear up their towers and castles. After all, no two defenses need be alike, and many players will want to create a theme not only with their armies but with their defenses as well.
Using This List
On this page, you will find general upgrades for fortifications, and on p. 161, you will find additional upgrades that are specific to the different Warhammer races. Some of these upgrades may be used on particular structures or sections (e.g., walls only). You must agree with your opponent beforehand before using any of these upgrades.
Some of these rules were inspired by historical research of real castles. Some came from our own siege games. Others were modified from old rules editions and battle reports. We pored over these dusty old tomes to dig up some gems that will really add to the fun of your sieges. This list is by no means exhaustive. Feel free to come up with your own ideas, just get your foe's permission to use them.
If you and your opponent decide to use this list, we recommend that no more than 10% of each player's points be spent on these options, unless you're modifying the scenario or rules to feature the unusual upgrades.
Additional War Machines
Both the Attacking and Defending players may purchase Stone Throwers or Bolt Throwers, even if they aren't normally available to the players' armies. For armies that don't include these war machines in the standard list, use the following points costs:
- Stone Thrower: 110 points
- Bolt Thrower: 75 points
Full rules can be found in the Warhammer rulebook in the War Machines section. Each will be crewed by three Core troopers that seem most appropriate for the army in question (such as Clanrats for Skaven, Skeletons for Vampire Counts, etc.).
Fortification Upgrades
The following upgrades may be made to improve defenses, be they whole castles or individual towers.
- All Wooden Fortifications (Free downgrade). A stronghold made entirely of wood is not as sturdy as one made predominantly of stone. Add +1 to any rolls made on the Damage Charts for attacks against wooden fortifications. As wooden walls and towers are extremely vulnerable to fire, flaming attacks gain +3 on the Damage Charts. Wooden fortifications are much cheaper to build, however, and any Defender who chooses All Wooden Fortifications may add 15% more points to his force to reflect the conservation of resources.
- Timber Additions (50 points per tower). Timber additions provide extra platform space for additional archers and/or provide space for a second war machine (towers may normally support only one).
- Hidden Sally Ports (25 points per door). When troops charge out from a besieged tower or castle it is known as "sallying forth." A hidden Sally Port is a door or sliding panel that looks like immobile stone but instead can be opened by the Defenders to send out a hard-hitting attack of their own. At the start of the game, the Defender makes a sketch of the fortification and marks the exact location of any hidden Sally Points. Dwarfs are especially renowned for their secret doors that are cut seamlessly into ordinary rock. Troops emerging from a hidden Sally Point may march or even charge out if the controlling player so chooses (it is assumed that they have peepholes to spy out the situation)!
- Impressive Heraldry (50 points). A mighty flag, banner, trophy, or heirloom is hung from or affixed defiantly to the Defender's stronghold. So powerful is this imagery that all models in that section (the wall, tower, or other) may add +1 Ld (to a maximum of 10) and reroll a single Break test per game. Note, only one of these devices may ever be deployed.
- Bolted Doors (10 points for each door). Normally all doors leading from the ramparts into towers aren't obstacles to enemy troops. Players who buy this upgrade make their towers more difficult to capture. A bolted door must be destroyed before enemy troops can gain access to it. The bolted doors have a Toughness of 5 and 1 Wound. Doors are hit automatically and can be struck by up to two models in each Combat Phase. Any door leading from a tower to the ramparts or into the courtyard can be upgraded to a Bolted Door.
- Hoarding (35 points per 6" section). Hoarding is an enclosed timber structure that is added to a castle wall or tower top for further protection. It has arrow slits for archers and offers an additional -1 to hit protection from enemy missile fire. If hit by a war machine, a hoarding can be destroyed. Each hoarding has Toughness 7 and 5 Damage Points.
- Reinforced Steel Gates (Castles only; 30 points per door). Steel reinforcements make the castle gates nearly impregnable. All attacks against the gates suffer a -1 modifier to the results on the Gate Damage Chart.
- Spikes & Blades (Wall sections only; 30 points per section). The wall section is festooned with spikes, sharpened stakes, and blades. Roll a D6 for any model attempting to climb the wall with a grappling hook. If the result is higher than the model's Initiative, it takes a S3 hit.
Scenery Showcase: A Selection of Warhammer Towers
[Photographs and captions of hobby tower models (Orc, Lizardmen, Dark Elf, Beastmen, and Dwarfen towers), omitted. The page is hobby material rather than rules.]
Natural Defenses
Thus far, we have described how to incorporate towers and some elements of siege into your Warhammer games, but it's possible to add the dynamics of a siege into a game with no castle terrain at all. Read on to find out how.
Defensive Terrain
While any truly desperate Defender wishes he had a full curtain of heavy castle walls surrounding him, in a pinch, a cliff-face, a platform mounted in a tree, or even some simple stakes in the ground can give him the edge. The following page and scenario provide examples of games that involve small elements of a full-blown siege.
Rules for Defensive Terrain
Natural Wall. Natural Walls include cliff faces, rock formations, several stacked blocks like the Lizardmen use for making temples, and anything of a similar nature. Unlike an actual castle, Natural Walls are unlikely to enclose as much space as a Defender would desire, but may still act as a breakwater against Attackers. Troops atop Natural Walls may be assaulted by Attackers using ladders or grappling hooks. Natural Walls provide space for however many models will fit upon them, but unlike a castle's ramparts, Natural Walls do not confer any protection against enemy missiles. Natural Walls can provide very useful firing platforms for a unit of missile troops or a war machine. Unless specified by a particular scenario, Natural Walls should be no higher than 4" and no longer than 8".
Natural Towers. Natural Towers are very much like Natural Walls, that is, rocky projections or perhaps even large trees with platforms. Natural Towers are taller than Natural Walls and, as such, may not be assaulted with ladders or grappling hooks. Otherwise, Natural Towers follow the rules for Natural Walls. Unless specified by a particular scenario, Natural Towers should be between 6" and 10" tall and no wider than 4".
Use the standard Damage Charts when attacking Natural Towers and Walls made of stone, but add +1 to all rolls on the Damage Charts when the Natural Wall or Tower is made of wood (+3 for flaming attacks).
Barricades. Barricades could be an already existing wall, a hedge, hewn logs, piled debris, or even hastily stacked stone. A barricade forms a Defended Obstacle and can be any length. For standard scenarios, each section is assumed to be no more than 6" long.
Spikes. In order to halt the enemy, desperate Defenders can quickly sharpen wooden stakes to plant point upward in hastily constructed earthworks. Spikes act just like Barricades in terms of forming a Defended Obstacle, but also inflict injuries on units that attempt to charge over them. While avoiding the Spikes would be easy for an individual, the press of bodies in a charging unit generally lands a few soldiers on the Spikes. Any unit that charges over Spikes takes an automatic D6 S4 hits. Any casualties caused by the Spikes are factored into Combat Resolution in the first round of combat. Also, any cavalry unit must pass a Fear test to charge over Spikes, as mounts understandably are not keen to be impaled. If this test is failed, the unit may not move at all that turn. Spike sections can be of any length, but for standard scenarios, each section is assumed to be no more than 6" long.
[Photograph of Skinks in a rocky natural defense, with a caption, omitted.]
Setting Up a Natural Defense Game
While players are free to incorporate any amount of defensive terrain for their own plans and scenarios, we wanted to find a standard that could be used to achieve balanced and fun battles that use some defensive elements without making the game a full-scale siege. In a true siege game, the besieged force is only half the size of the Attacker. As the benefits of Natural Defenses aren't nearly as valuable as those of a full castle, the Defender may take 75% of the Attacker's total.
In place of 25% of his force, what does a Defending player get? He may choose from the following:
- 1-4 Natural Walls or Towers (or any combination of the two within those numbers).
- 1-3 Barricades. A Defender may trade two Barricades for either a line of Spikes or another single Natural Wall or Tower.
Placement Rules. One of the many differences between a fortress or castle and Natural Defensive terrain is that the natural stuff is never quite where you want it! In a Natural Defense game, no more than two individual defensive items may touch each other. Leave gaps of at least 6" between terrain pieces (although it is possible to have two linked pieces, then a 6" gap, then two more linked pieces, and so on).
Defend the Pass
An outnumbered and beleaguered force finds favorable ground and turns to face the pursuers. Will this move prove victorious or result in a deadly last stand?
Objectives. The Attacking player's objective is to wipe out the Defenders while losing as few of his troops as possible in the process. The Defending player's objective is to slay the enemy and maintain control over the Natural Defenses.
The Battlefield. The battlefield is relatively barren aside from some defensive rock piles and a few cliff-like projectiles. Three rock piles (Barricades) approximately 6" in length are placed by the Defending player. At least one must be placed in each Defender Deployment Zone (see map). Three cliffs (Natural Walls) and one tall column (a Natural Tower) are then placed by the Defender. At least one of these terrain pieces must be placed in each Defender Deployment Zone.
The Forces. Both armies are chosen from the Warhammer Army lists to an agreed points total. The Defender has only 75% of the Attacker's points. For instance, an Attacker with a 2,000-point army would face 1,500 points of Defenders.
Deployment. The Defender deploys all of his troops first. Up to three units may be deployed in Deployment Zone B if the Defender wishes. After the Defender has deployed, the Attacker sets up all his troops in his Deployment Zone.
Who Has the 1st Turn? Both players roll a D6. The Defender may add +2 to his die roll. The higher-scoring player chooses whether to go first or second. Reroll any ties.
Special Rules. This scenario is played with the standard Warhammer rules, Appendix Four, Rules of Siege, and the Natural Defenses rules on the previous page. Siege equipment can be purchased by either side.
How Long Does the Scenario Last? The scenario lasts for 8 turns or until one side is entirely wiped out or has fled off the table.
Determining Victory. Use the standard Victory Points rules on p. 198 of the Warhammer rulebook to determine which side has won. The Defender may count any board quarters he controls twice (i.e., they count as 200 Victory Points as opposed to the usual 100) to reflect the importance of maintaining control of the defensive terrain.
[Battlefield photograph and deployment map omitted. The caption reads, in part: "...a Tomb Kings army... The cunning Tomb Kings General has placed his archers and war machines atop the cliffs and his hardened infantry in narrow corridors to prevent flank attacks."]
Siege Proper
While the previous pages have shown how to incorporate elements of siege into Warhammer in different ways and in games of different sizes, there is no denying that a full-fledged assault on an nigh-impregnable fortress is the kind of ultimate battle that many tabletop generals aspire to reach. Here are some tips, ways, and scenarios to make those larger and more traditional siege games even better.
Sieging a Full Castle
Laying siege to a full castle is one of the ultimate challenges for a tabletop general. Both in terms of tactical game play and of modeling and terrain making, the siege is a great opportunity for truly inspired Warhammer enthusiasts. The siege scenario in Appendix Four, Rules of Siege, is a great starting point. If you've never played a full castle assault, this scenario is the classic set-up: three walls, a gatehouse, and four towers are beset on all sides.
Truly ambitious players who want to take their siege games to a more detailed level can try a siege game as part of a linked tree campaign (like those described in Chapter 1). You can make up your own series of battles, and you'll also find an excellent mini-campaign on the Games Workshop web site. These battles track the build-up to a siege and the final assault on the walls. Players can gain advantages for the final all-out battle by winning the earlier games in the siege campaign. There are opportunities to starve the besieged, undermine the castle, and even a chance to sally forth. You can find the linked scenarios in The General's Compendium section at www.games-workshop.com/generalscompendium/.
As well as using linked games to create a tree campaign, you can change the structure of the castle by adding more towers, including multiple gates, altering the terrain (e.g., putting the castle on top of a cliff), or even adding characteristics to the fortress itself. Over the next few pages, you will find ideas, alternate castle rules, a scenario, and pictures of strongholds from the Warhammer world to spur your imagination. Put your own tactical skills and modeling talents to the test and start planning out your glorious path toward becoming a siege expert. Remember, gaming legends are made, not made up!
First, You'll Need a Castle
Before you can become involved in a full siege game, you'll need a castle. We begged our editors for more room to add a complete castle-making section, but the truth is that this whole book could be dedicated to such an endeavor. We have included a few pages of examples and tips, but really the crucial step in detailing your mighty edifice is that you've thought through the ecology of your army. In other words, where exactly is this fortress? Who built it and why? What details and extra touches can you add to bring the structure alive and tie it in firmly with your own army? Whether you are building a stronghold from scratch or just adding details to the existing Warhammer Fortress, the more you think through the background, the better the final results. For many armies, the Warhammer Fortress is a fantastic starting point. Before you can build a Dwarf fortress that guards a mountain pass, you'll have had to think like a Dwarf builder: decide what color the surrounding rock is, plan out the best defensive location, and more.
Castles of the Warhammer World
From the vine-entwined heavy blocks of the Lizardmen to the shanty lean-to towers of the Skaven, no two armies in the Warhammer world build the same type of defenses. What follows are some rules and added features that can help personalize your army's own mighty fastness.
Using This List. If your opponent agrees, the following list may be used to add army-specific characteristics and special abilities to your castle. If both players agree, you may also use these rules for battles involving individual towers and smaller fortresses.
Imbued with Magical Powers (50 points). The fortification has either been built on the nexus of a magical ley line (basically a jet stream for the winds of magic), or been constructed of magical materials. In the Magic Phase, the Defender may add an additional Power Die (Dark Elves or Tzeentch) or a Dispel Die (High Elves or Lizardmen). Note, only one bonus may be gained. May be chosen by Lizardmen, High Elves, Dark Elves, and Chaos armies of Tzeentch.
Ironclad (100 points per section). It is possible to use metal to reinforce the already strong structure of a wall, tower, or even an entire fortress. The Dwarfs have been known to affix iron plates over vulnerable areas, particularly those that experience repeated attacks. The additional fortification means all attacks against the section suffer a -1 modifier to all results on the Damage Table. May be chosen by Dwarfs, Chaos Dwarfs, and Chaos armies of Khorne.
Fearsome Appearance (60 points). Many Warhammer races make special efforts to ensure that their fortresses are loathsome for others to gaze upon. For instance, the Dark Elves display the skins of their foes from their walls, and many of their tortured victims still swing from gibbets high atop towers. Horrific stone gargoyles are favored by many Vampire Counts, and the walls that protect Chaos armies have been known to drip blood, sprout writhing and contorted faces, and pulsate as if made of living flesh. Castles with a Fearsome Appearance radiate an aura of Fear, and any unit wishing to charge (to attack doors on a tower or attack the walls with ladders, battering rams, or grappling hooks) must first pass a Fear test. If failed, the unit remains stationary that turn. May be chosen by Chaos armies, Vampire Counts, Dark Elves, and Beasts of Chaos.
Camouflage (150 points). Until enemy models are within 20" of the castle, they cannot see or target it. This camouflage is accomplished either by casting powerful illusionary magics or by crafting the fortress in such a way that it blends perfectly into the surrounding terrain. The Wood Elves have been known to build elaborate defenses atop the mighty boughs of the Athel Loren forest, while the Tomb Kings use ancient and powerful enchantments to cause their entire strongholds to vanish in the shimmering heat of the desert, only to spring up like a mirage when trespassers close. May be chosen by Tomb Kings and Wood Elves.
Squig Pits (18 points per Squig; 0-2 Squigs per section). The grounds in front of the structure are pock-marked with pits and fissures. The very walls themselves may have small gaps or tunnels bored into them. Chained Squigs have been trained to spring out and attack from these darksome holes. Before the game begins, draw a map of the fortress and indicate where the Squig Pits are located. As soon as enemies approach within 6" of the nominated site, stop the foe and place the charging Squig model on the board. Work out attacks as normal. If the Squig loses the combat round and is broken, it is automatically destroyed. As the Squig is chained, if it is victorious and breaks the enemy, it may not follow up but instead will return to its hole. Inside their holes, Squigs are invulnerable to missile fire. May be chosen by Orcs & Goblins.
Traps (25 points per trap; 0-2 Traps per section). This upgrade may take many forms: pits, hidden dart-firing mechanisms, spring-loaded spikes, crude land mines, and worse. They are cunningly concealed by sod, debris, false doors, or other ingenious devices. Before game play begins, write down or sketch out exactly where the traps are concealed. Traps are sprung when a unit or model assaults the walls within 4" of the trap location. Roll a D6. If the result is equal to or under the unit's or model's Initiative, the trap was avoided and does no damage. If the result is higher than the unit's or model's Initiative, D6 S3 hits are inflicted. For an extra 10 points per trap, Skaven and Lizardmen may make their attacks poisoned (treat as S4). Once the trap is set off, it is no longer effective. May be chosen by Skaven, Lizardmen, and Beasts of Chaos.
Poisoned Gas (75 points). A poisoned gas trap is a particularly sinister device. On the Defending player's command, secret vents open and dispel noxious fumes. Place the large template over the trap with one edge touching the structure. Any model that is touched by the template takes a S3 hit with no armor save. Only one such trap may be taken, and its location must be written down or sketched out before play begins (so choose a key gate or door location). May be chosen by Skaven and Chaos armies of Nurgle.
Swivel Gun (10 points per gun). A swivel gun is not much more than a large and somewhat unsophisticated blunderbuss, which, due to its size, is mounted on a castle wall. It is filled with broken glass, spare nails, and other sharp bits of metal, and fired at troops scaling the structure. The gun may be fired by any model not engaged in combat. Place the flame template with the small end touching the tip of the swivel gun. Any models completely covered take a S3 hit with a -2 save. Models partially covered are hit on a D6 roll of 4+. Swivel guns may not be moved and can be fired once per game. They may be fired either in the Defender's Shooting Phase or as a Stand & Shoot reaction. May be chosen by Dwarfs or Empire.
Hold Like a Rock
Castles are usually built in strategically important areas and are often built into easily defensible areas as well. In this scenario, the Defenders have built their stronghold directly into an imposing cliff face or mountainside. The Attacking player has some difficult decisions to make about how to split his forces to crack the defense.
"That's not a fortress. That's a deathtrap." Last words of Count Volstag before his ancestral castle was overrun by Goblins (attributed).
Objectives. The Attacking player's objective is to enter the fortress and slay or drive off all the Defenders. The Defender must survive and hold out until the end of the game.
The Battlefield. The battlefield consists of a castle arranged as shown on the map. The cliff and rock faces are steep and cannot be scaled at any point save the stairs. The tower near the eastern edge must be breached in order to move through the impassable terrain on either side of the tower.
The Forces. Both armies are chosen from the Warhammer Army lists to agreed points totals. The Defender has only 50% of the Attacker's points. For instance, an Attacker with 2,500 points would face 1,250 points of Defenders. Both sides may purchase siege equipment. If both players agree, the upgrades and options on pp. 155 and 165 of this book may be used as well.
Deployment.
- The Attacker deploys first and splits up his force as follows.
- At least half of the Attacker's total number of units must enter from the western board edge. Place the front rank on the table edge, and move the whole unit onto the board during the Attacker's 1st turn. If all the available space is taken up, remaining forces enter from this edge in Turn 2.
- The remaining forces are allowed to enter the battle from any other board edge, but the following rules apply.
- Units entering from the eastern board edge (having found a hidden mountain pass somewhere off table) must start on the table edge as described above for units entering the western board edge.
- Units may attempt to enter from the northern or southern board edges at the start of Turn 2. Roll a D6 for each unit attempting to enter via these table edges. On a roll of 4+, the unit enters. Any units that do not enter may try again in subsequent turns and gain +1 to their die roll (thus requiring a roll of 3+ in Turn 3, 2+ in Turn 4 and subsequent turns). A roll of 1 always fails. No models may enter atop the cliff from the northern or southern edges.
- The Defender sets up after all the Attacker's eligible units are placed. All the Defender models must be inside the fortress or in the lone tower facing the eastern table edge.
Who Has the 1st Turn? The Attacker has the 1st turn.
Special Rules. The scenario is played with the Warhammer rules as well as those in Appendix Four, Rules of Siege. No rules for special deployment, such as Scouts or Underground Advance, may be used in this scenario.
How Long Does the Scenario Last? The scenario lasts for 8 turns.
Determining Victory. The Attacker must capture the castle, and all the Defenders must be slain or fleeing. If any Defenders survive and are not fleeing, the Defenders win. Note, Defending forces that are fleeing at the end of the game count as being destroyed.
[Battlefield map and a battle illustration omitted.]
Scenery Showcase: Fortresses and Siege Engines of the Warhammer World
[Photographs of hobby fortresses and siege engines, with captions (e.g., Death comes on leathery wings for the inhabitants of this Empire city; Nurgle Warriors prepare their battering ram to crush the gates; Skaven swarm the ramparts; Ghouls swarm through the gates; A Tomb King, surging with power, watches from afar), omitted. Hobby material rather than rules.]
Scenery Showcase: Nurgle Siege Tower and Bretonnian Castle
[Photographs and captions of a Nurgle siege tower and a Bretonnian castle, omitted. Hobby material rather than rules.]
[Two-column showcase photographs of an Orc fortress, an Undead battering ram, and a conversion of a human castle to a greenskin stronghold (pdf pp. 166-167), omitted. Hobby material rather than rules.]
Raiding the Enemy
Pillaging and burning are all too common in the strife-filled Warhammer world. Small fiefs and kingdoms expand, contract, or disappear into flames, and even the mightiest of realms is not immune to periodic attacks and raids.
[Epigraph: "Dem 'umies'll never know what 'it 'em. We ride in wiff flames, grab wot we kin eat, an' burn da rest." Goblin Chief Groff Dogbreff, before raiding and burning to the ground a series of villages and hamlets in Stirland.]
No Lands Are Safe
From the outlying villages and farmsteads of the Empire to the lesser crypts in the sand-covered lands of the Tomb Kings, all lands face the threat of raiding armies. The ruthless Attackers could be Wolf Riders at the borders, roving bands of mercenaries, strike forces of Dark Elves, or any number of other opportunistic raiders. Raid battles make for exciting Warhammer gaming! When was the last time you burned an enemy camp to the ground?
The principles of a Raid scenario can be boiled down to the age-old practices of looting and burning. While destroying enemy forces is well and good, the real key to winning a Raid scenario is how much loot the Attackers can acquire and how many enemy structures they can level (or at least set on fire). Before we get into Victory Points and scenarios, we will quickly describe looting and burning.
[Photograph of Warhammer loot counters (a Dwarfen ale barrel, ancient icons of the High Elves and Vampire Counts, and a wheelbarrow of goodies taken by a Goblin for his tribe), with caption, omitted.]
Looting. The nature of the looting depends largely on the forces involved. For instance, Goblins raiding a Bretonnian village could be looking for something to eat, while in the reverse situation, the Bretonnians might be raiding a Goblin camp to recover captives or lost artifacts (they certainly wouldn't eat anything they found in a Goblin camp!). The loot could be prisoners, lost Lizardmen treasure, Dwarfen ale, magical tomes, a cache of weapons, or other valuables. Generic "loot" is represented on the battlefield by appropriate counters.
Burning & Destruction. A good Raiding force gets in, reaches the valuables (or loot), gets out, and leaves only smoke and ruins. For a variety of reasons, like sowing terror and teaching rival warlords a lesson, to name just a few, raiders sometimes choose to burn a settlement rather than to fight over it. Buildings can be destroyed in hand-to-hand combat, but many raiding forces can't take that kind of time and prefer instead to torch the enemy structures and let the flames do the work. You can find the rules for destroying buildings in the Warhammer rulebook (p. 130). Should you wish to set them on fire, however, use the following rules.
Rules for Burning
- Any attack that normally uses flame to do damage will set a building aflame on a D6 roll of 4+ (in addition to any initial structural damage the attack may cause).
- War machines that do not normally use flame may set a building on fire as well. After calculating any structural damage as normal, roll a D6. On a result of 5+, the building is set aflame. (We assume Cannon have heated shot and Bolt Throwers fire flaming bolts, etc.)
- Each flaming arrow that scores a successful hit on a building will set it aflame on a D6 roll of 6.
- A torch-armed model will set a building aflame on a D6 roll of 6 (roll once for each torch-armed model in base contact with the structure).
- Any model inside a flaming building takes a S4 hit (with no armor save) during both players' Shooting Phases.
- For Raid scenario purposes, buildings are on fire or they are not. It is too much bookkeeping to track each building's Damage Points each round.
Quenching the Flames. The Defenders in a Raid scenario may attempt to put out the flames, although it is difficult. A model or unit that is attempting to put out flames must be next to the structure and must do nothing else that turn (no rallying, moving, casting spells, shooting, fighting, or anything else). Count up the Unit Strength of the models attempting to quench the flames, divide by 5, and round down. Roll a number of D6 equal to the resulting quotient. The flames will be put out if any of the dice score a 6. For instance, if a unit of 27 Zombies attempted to quench the flames, you would roll 5 dice (i.e., Unit Strength of 27 divided by 5 = 5.4; rounding down, we see that this unit should roll 5D6 to try to quench the flames; any result of 6 on these five dice indicates that the flames have been quenched).
Rules for Looting. The process of looting involves kicking in doors, searching suitable hiding spots (e.g., cellars, chests, and mining carts), and other avaricious behavior. Looting is represented on the tabletop by having a unit spend a full turn adjacent to any unoccupied building or structure that contains loot. Cavalry, Swarms, and non-humanoids (e.g., Chariots, war machines that do not normally loot) may not loot. The looting unit may not rally, move, cast spells, shoot, fight, or anything else during the turn it collects the valuables. Once a unit has spent the required turn, place a suitable loot counter behind the unit to represent its ill-gotten booty. In order to loot and subsequently carry off the counter, a unit must have and maintain a Unit Strength of 5 or more. Once a unit has the loot, it is treated in very much the same way as a captured standard; that is, the loot may be reclaimed by the Defenders if they break the enemy unit in combat and follow up. Loot is discarded (and can no longer be carried) by troops who are routing, or by a unit that drops below Unit Strength 5. Simply leave the loot counter where it was dropped, and it may be picked up or gathered by any unit (friend or foe) that touches it. Note that Defending units cannot loot their own dwellings (even to keep their property safe), and may reclaim loot counters only after they have been "looted" in the first place.
[Photograph of Zombies extinguishing flames, with caption, omitted.]
Raid Scenarios & Variations
On the following page, you will find a standard Raid scenario. Add your own situations, special rules, and stipulations to the game. Perhaps there is one specific artifact that must be looted. A loot table can add loads of randomness and desperation to the search. What if the game took place on the high seas or a broad river and didn't involve set buildings but a dock and merchant ships that could flee from the looters? What if a few of the Defender's structures were harder to burn, because they were made of stone or protected by powerful magic? It is conceivable that some races could build structures that were hidden by camouflage or protected by illusions so that Attackers would have to find them first (think of a Wood Elven tree village or the hidden ruins of a Vampire Count that has the appearance of being just a run-down cemetery). There are more great gaming situations and hobby projects than you'll ever have time to finish!
Raiding in Campaigns
The storytelling nature of campaigns makes it nearly impossible to come up with specific scenarios ahead of time, but it is possible to come up with some scenario types. Over the course of a large Games Mastered campaign, there will be countless instances where supply centers, towns, and more are the targets for raids. Perhaps the raid has been undertaken to free a captured character from hideous torment, or to cause the enemy some economic damage? Regardless of the exact nature of the target, the basic Raid can form the nucleus around which any particular scenario rules can be added. Simply model your games after the basic Raid scenario. Remember, no matter how grandiose your enemy's plans are, they will come to naught if you torch everything he builds!
[Photograph of Zombies shambling forth to extinguish flames, omitted.]
Raid!
A classic game of looting, destroying, and burning! Attacking forces are on a search-and-destroy mission in an attempt to cause damage and to haul off ill-gotten wealth. The Defenders, of course, want to defend their property.
Objectives. The Attacking player's objective is to loot and destroy as many of the enemy's buildings as he can, while slaying as many Defenders as possible. The Defender player's objective is to prevent his side's buildings from being looted and destroyed, while slaying as many Attackers as possible.
The Battlefield. The most important features on the battlefield are the five structures. These can be houses in a small village, a brewery, a gristmill, or whatever evocative buildings you can come up with for your army. Each of these buildings contains the equivalent of 1 Loot Point. At least one building must be set up in Zones A, B, and C (see map), and buildings cannot be within 12" of each other. The rest of the battlefield has a scattering of terrain appropriate for the theme of the table (e.g., a few hedges and carts in a village).
The Forces. Both armies are chosen from the Warhammer Army lists to agreed points totals. The Defender has only 75% of the Attacker's points. For instance, an Attacker with a 2,000-point army would face 1,500 points of Defenders.
Deployment. The Defending player sets up his entire army in his Deployment Zone first (see map). The Attacker brings his army in from the appropriate table edge. All appropriate Attacking units are equipped with torches (no Monsters, Swarms, etc.). Missile-armed units and war machines have flaming missiles for this game. Special deployment rules, such as those for Scouts, may be used only by the Attacking forces. The Defending player may select such units but can't take advantage of the special deployment rules.
Who Has the 1st Turn? The Attacker goes first.
Special Rules. The five structures are classified as timber, brick, or log buildings and therefore have Toughness 7 and 5 Damage Points. The Looting, Burning & Destruction, and Quenching the Flames rules are also in effect.
How Long Does the Scenario Last? The scenario lasts for 6 turns or until one side is entirely wiped out or has fled off the table.
Determining Victory. Victory in a Raid is not measured by how many of the enemy you have slain, but instead by how much loot the two sides have gathered (or saved) and how many buildings have been destroyed (or saved). The Attackers get 1 Victory Point for each loot counter in their possession at the end of the game and 1 Victory Point for every building or structure that has been destroyed or that is on fire at the end of the game. Likewise, the Defenders get 1 Victory Point for each loot counter on the board that is not in the Attackers' possession (even if it is on fire), as well as 1 Victory Point for each building that is still standing and not on fire.
[Battlefield map and a battle photograph omitted. Photograph caption: "A ravenous horde of Orcs, Goblins, and Trolls systematically tears through the city one structure at a time."]
Alternate Raiding Scenario Rules
With only a little manipulation, you can add a massive variety of twists and turns to the basic Raid scenario. A few suggestions follow to get you thinking of different special rules you could try.
Special Loot. You can have one particular piece of loot (like an artifact or prisoner) that is placed secretly by the Defender in any building of his choosing. This special loot counter counts for 3 Victory Points for both Attacker and Defender. Imagine a fast-striking Lizardmen force traveling from Lustria to reclaim a stolen artifact, or a High Elf raiding force attempting to free one of their nobles from the hideous tortures of Dark Elf imprisonment.
Looting Charts. Making the exact booty a bit of a mystery is also a lot of fun and can really add character and randomness to your game. There are two chart examples given below, including loot for a generic Raid that can be played between any two armies, and loot from a Raid on an Orc & Goblin camp. Try to come up with some special rules for each loot roll. For instance, in addition to counting as loot, rescued prisoners could join the unit that saved them. Or perhaps the assorted weapons cache could allow you to "re-equip" the unit that found it with additional hand weapons or arms not normally allowed. Just remember that the point isn't to introduce too large an advantage (or disadvantage) but to add a little color and fun to the game.
Generic Loot (D6).
| Roll | Result |
|---|---|
| 1 | Trap. The looting unit takes D6 S3 hits and gains no loot. |
| 2 | No loot worth anything. |
| 3 | Heavy supplies worth 1 Loot Point, but the unit carrying the supplies may not march. |
| 4 | Foodstuffs worth 1 Loot Point. |
| 5 | Supplies worth 1 Loot Point. |
| 6 | Treasure worth 2 Loot Points. |
Orc & Goblin Loot (D6).
| Roll | Result |
|---|---|
| 1 | D3 Squigs leap out and attack! No loot is gained. |
| 2 | Severed head collection. No loot is gained. |
| 3 | Assorted weapons cache. Re-equip the looting unit. |
| 4 | Livestock worth 1 Loot Point. |
| 5 | Prisoners to be eaten later. Add 1 Loot Point as well as D6 models to the looting unit. |
| 6 | Trinkets worth 1 Loot Point. |
Scale and Points Values. Increasing or decreasing the number of buildings involved will change their tactical importance. There is no margin for error in a Raid on three buildings. Alternatively, if you've got the time and inclination for a lengthy slugfest of a game, a match with a dozen potential buildings to prey upon would play out very differently. In a game of that size, the Defenders could concentrate on just one section of the village and afford to see many of their buildings go up in flames! Likewise, adjusting the points of models used would give you some different challenges. For instance, a Raid between a 1,000-point Attacking force and a 750-point Defending one will present a different set of challenges than a game with a 3,000-point Attacker.
Buildings. By changing the types of buildings, you can make the scenario different as well. In a battle for a brewery, perhaps the main building and the warehouse each count double for Victory Points, but the outhouse and refinery are each worth normal value. Also, different races build different types of buildings. Dwarfen structures may be more solidly built and resistant to fire than the more numerous, but flimsy, buildings of the Skaven. Try adding to or subtracting from the Toughness values and/or the number of Damage Points a building can sustain.
Playing with Fire
[Photographs of flame markers made from cotton, green stuff, and Orc top knots, with paint notes (e.g., "paint your counters with Blood Red and highlight them with Blazing Orange followed by Golden Yellow") and a modeling note on using blu-tack to fix bases to buildings, omitted. Hobby material rather than rules.]
City Sacking
While plundering villages and military outposts can be profitable for raiding armies, nothing helps an invading force and hurts a Defender more than plundering and burning an enemy city. Read on to find out how.
[Photograph of an Empire city going up in flames under the devastating assault of an attacking army, with caption, omitted.]
Leave Behind Only Rubble & Smoke
The Warhammer map is covered in cities and population centers, but the ones no longer on the map would often have the most interesting stories to tell. How many Tilean cities were overrun by Skaven hordes? Countless Dwarfen strongholds of great fame are now known by humans only in songs and legends. Once the Elves ruled the Old World, but over the centuries, the High Elves have been all but wiped out, leaving only ruins marked on present-day maps. The warlords and conquerors who have heaped the most spoils and gained the most fame (or infamy, depending on which side you're on) have invariably sacked a major city or two. So why haven't you?
Culminating Battle
Once your army has passed the watchtowers, crumbled the impeding fortresses, and raided the lands, there is only one thing left: sacking the city. In a campaign, city sacking is often one of the final apocalyptic battles that will wipe an aspiring realm off the map or mark the turning point when the flag is firmly planted and the Defenders defiantly hold on and prosper.
City sacking involves penetrating the outer defenses and unleashing troops into the sporadically guarded city proper, where their aim is to plunder and burn to a hitherto unseen scale. In other words, the city sacking rules and the following scenarios will extend and add to the previous sections on Sieges and Raids. So if you are unsure of how to play (or strategically exploit) those elements, we suggest you give the earlier scenarios a try before you attempt the grandiose scale of leveling an entire Warhammer city! On the practical side, if it takes you as long as it took us to build our city, there should be plenty of time for you to get in some smaller games in the meantime.
Blood on the Streets
No general in the Warhammer world would ever choose his own city as a battlefield. Ideally, the Defenders could defeat their enemy at the outskirts of the city, or even at the gates or on the walls surrounding the populace. Should the foe break through, however, there is nothing for it but a running battle amid the buildings and dwellings. Unlike the headlong collision between forces in an open battlefield, the fighting during city sacking is more scattered and chaotic. The Defenders try to muster around key points in the city, while the Attackers rampage and burn bloody swathes of territory. It all makes for some great, but really different, games of Warhammer.
It Takes a City
Let's face it: city sacking is an advanced game that requires a lot of terrain. There are probably very few players out there who have amassed the number of buildings required to build a single street, much less three or four. That makes this type of scenario ideal for a gaming group or club who can plan ahead and divvy up the workload. One well-planned afternoon of putting together as many buildings as possible can turn a plain field into an urban area in a hurry.
Don't overlook easy additions to your city like card buildings (from Warhammer editions of yesteryear), and even Mordheim buildings can be pressed into service in a pinch (especially for damaged sections).
[Photographs of an intact and a ruined city section, with a caption, omitted.]
Crowded & Unmaneuverable
Before we get to the scenarios and terrain, it is well worth firing off a warning shot about battling out the sacking of a city. Many gamers play Warhammer without terrain and prefer wide open spaces to any kind of tight maneuvering. If you think terrain is a nuisance and that you should never slow the game down by entering buildings, then this type of scenario probably isn't for you. City battles require lots of terrain. On top of that, the streets and pathways tend to be closer in form to the claustrophobic passageways of a medieval city rather than the spacious four-lane highways so common in suburbia. The city sacking scenarios are built to allow a steady trickle of troops to enter the fray. There are no large battle lines of troops stretched across the table as are common in tournament play.
Still, if you've got the time, terrain, and the patience to carefully shift buildings to allow for units to march along crowded roadways, then you'll find city sacking to be some of the most challenging and visually stunning wargaming you'll ever do!
[Photograph of a thriving Orc city manning the walls, with caption, omitted.]
They Ain't All Human Either!
The variety of buildings and city styles in the Warhammer world is as vast as the army and painting options. While the human cities of the Empire and Bretonnia are often the easiest to visualize and certainly dominate this chapter's examples, there are numerous other options to explore. Although Orcs have few permanent dwellings, their crude camps and strongholds contain many of the same building types as a human city (idols, huts, and Squig pens replace monuments, houses, and stables, respectively). With broad streets and vast temples, Lizardmen cities are ideal places for battles, especially because Warhammer Armies: Lizardmen has loads of building descriptions and even a city map from which to draw inspiration. Imagine putting together battles among the cavernous underground homes of Skaven or Dwarfs, the Viking-like long houses of the Marauders, or even the menacing spired cities of the Dark Elves.
While your first thought may be that the creation of an entire miniature city is quite mad, who couldn't imagine having some towers, a fortress, and a collection of city buildings and appropriate terrain for any of the armies he's chosen to collect? As we see it, the desire to build cities is just further proof that the scale of the wargaming hobby is vast and that we have too many projects left to do!
Battle in the Streets
This scenario describes a Warhammer battle in a large city. The Attackers must choose between fighting the enemy and setting the buildings ablaze, while the Defenders must react before their city goes up in flames.
Objectives. The Attacking player's objective is to destroy as much of the enemy and the enemy's city as possible. The Defending player must attempt to drive off his foes and slay as many of them as possible.
The Battlefield. The battlefield represents the insides of a city. In this scenario, all the buildings have the same statistics (T7 and 5 Damage Points), and all have the same level of importance. You will need a lot of them, as 15 or more buildings should be laid out per the map at right. Make sure to leave some unobstructed pathways and/or streets.
The Forces. Both armies are chosen from the Warhammer Army lists to an agreed points total. We recommend 2,000 points a side for this battle. Although the gaming board is crowded, larger armies can be used, as the forces trickle into action.
Deployment. Due to the erratic nature of an urban fight, troops from both sides stagger into the battle from other areas of the city. This nonstandard deployment goes as follows.
- First, the Attacking player places up to four units (not war machines) in his Deployment Zone.
- Next, the Defending player places any four units anywhere on the table that is not in the Attacker Deployment Zone, not within 8" of an enemy unit, and not in line of sight of an enemy unit.
The game then begins. At the start of each player's turn, he may bring on a single unit of troops. The Attacker's models must come in along any board edge in his Deployment Zone, and the Defender's models may come from any board edge that is NOT in the Attacker Deployment Zone. Units entering from the table edges may march, cast magic, or fire missile weapons, but they may not charge an enemy unit on the turn they are brought onto the table. It is possible that a unit may enter the board right up against a building. Such a unit may either adopt a Skirmish formation (per the Entering a Building rules on pp. 129 & 130 of the Warhammer rulebook) and go inside the structure, or charge the building and attack it. Buildings are the only exception to the rule stating that a unit may not charge on the turn it enters.
If a player forgets to bring additional troops onto the board, or simply runs out of turns in which to do so (at one unit a turn), the models are assumed to be rampaging or defending some other part of the city, and the troops will take no part in the game. Thus, make sure you plan ahead when selecting your troops!
[Photograph of Savage Beastmen storming through the narrow streets of an Empire city, with caption, omitted.]
Who Has the 1st Turn? The Attackers go first.
Special Rules. The scenario is played with the standard Warhammer rules, buildings rules (see p. 129 of the Warhammer rulebook), Burning & Destruction, and Quenching the Flames (see pp. 166-167 of this book). Buildings that are destroyed may be moved across (at half speed, of course) and are treated as Difficult Terrain, EXCEPT that troops may march over them as far as normal rules would allow (e.g., no enemy troops within 8" and no maneuvers). No rules for special deployment, such as those for Scouts or Underground Advance, may be used. All Attacking units are equipped with torches. Missile-armed units and war machines have flaming missiles for this game.
How Long Does the Scenario Last? Unless one side capitulates or is wiped out, the scenario will last for 8 turns.
Determining Victory. Use the Victory Points rules on p. 198 to determine the winner, with the following additions and modifications.
- Board quarters are worth double (200 points each).
- Attackers Only. Each building that has been destroyed by the Attackers or is on fire at the end of the game adds 200 to the Attacker Victory Point total.
- Defenders Only. Each enemy unit destroyed is worth an additional 50% of its points (multiply the points by 1.5). This bonus applies only to destroyed or fleeing enemy units. Slaying the enemy General, capturing enemy standards, controlling table quarters, reducing enemy units to 50% or less of their original size, and the like earn Victory Points as normal (that is, with no additional bonuses).
Bursting Through the City Walls
This scenario details a full-blown city sacking that takes place just as the Attacking army has burst through and made a few inroads past the sporadically defended city walls. The Defenders must make a desperate attempt to save the key points in the city before their numbers and morale collapse in flame and ruin. The Attacking general must swiftly destroy the strategic heart of the city, but his troops are rapidly becoming more and more out of control.
Objectives. The Attacking player's objective is to destroy or set fire to as much of the city as possible, particularly the key buildings that the Defenders are using to gather and rally their defense. In order to save the city from destruction, the Defenders must try to eliminate the Attacker.
The Battlefield. The battlefield is made up of a formidable city wall with several gaping holes (at least 4" wide) behind which are streets and lanes that are packed with various buildings. All the buildings have the same statistics (T7 and 5 Damage Points). The Defender will also nominate some buildings to represent key points (see Special Rules below). The Defender may use the City Battles Key Buildings list on p. 174 to select two Military Key Buildings and three Rally Point Key Buildings. These buildings must be nominated once the battlefield is set up. Key Buildings may NOT be within 12" of each other.
The Forces. Both armies are chosen from the Warhammer Army lists to agreed points totals. The Attacker may select 2,500 points of troops, and the Defender may have 2,000, but will get additional reinforcements as long as their special buildings are in play.
Deployment. Due to the erratic nature of an urban fight, troops from both sides stagger into the battle from other areas of the city. This nonstandard deployment goes as follows.
- First, the Attacking player places up to three units (not war machines) either on the city walls or in the gaps between the walls.
- Next, the Defender places any five units anywhere on the table but not within 18" of the Attacker. No Defending models may use special set-up rules.
- Up to one unit of Attacking Scouts may then be set up per the normal rules.
The game then begins. At the start of each player's turn, he may bring in additional troops so long as he has troops remaining on his army list. The Attacker may bring up to two units a turn and measure their movement starting from the board edge with the city wall. The Defender may bring in one unit at the start of his turn, and these units must enter from the eastern board edge. Units entering from the table edges may march, cast magic, or fire missile weapons, but they may not charge an enemy unit on the turn they are brought onto the table.
Who Has the 1st Turn? The Attackers go first.
Special Rules. The scenario is played with the standard Warhammer rules, buildings rules (see p. 129 of the Warhammer rulebook), Burning & Destruction, and Quenching the Flames (see pp. 166-167 of this book). Buildings that are on fire need to be clearly marked, while buildings that are destroyed may be moved across (at half speed, of course) and are treated as Difficult Terrain, EXCEPT that troops may march over them so long as normal rules would allow (e.g., no enemy troops within 8" and no maneuvers). Only the Attacker may take advantage of the special deployment rules for Scouts, but only for a single unit. No other special deployment rules may be used. All Attacking units are equipped with torches. Missile-armed units and war machines have flaming missiles for this game.
How Long Does the Scenario Last? Unless one side capitulates or is wiped out, the scenario will last for 10 turns.
Determining Victory. Use the Victory Points rules on p. 198 to determine the winner with the following additions and modifications.
- Board quarters are worth double (200 points each).
- Attackers Only. Each building that has been destroyed by the Attackers or is on fire at the end of the game adds 200 to the Attacker Victory Point total. Any of the Key Buildings are worth an extra 100 points (for a total of 300 each).
- Defenders Only. Each enemy unit destroyed is worth an additional 50% of its points (multiply the points by 1.5). This bonus applies only to destroyed or fleeing enemy units. Slaying the enemy General, capturing enemy standards, controlling table quarters, reducing enemy units to 50% or less of their original size, and the like earn Victory Points as normal (that is, with no additional bonuses).
In addition, Key Buildings that survive the game and are not on fire at the end of the game earn the Defender an additional 100 Victory Points each.
[Battlefield map and battle photograph omitted.]
City Battles Key Buildings
Using This List. In a city sacking battle, certain buildings represent points of tactical importance. These locations add impetus and strategy to the Attacking player's plan, as he must decide where to commit troops and which areas to raze first, and also add plenty of flavor as the Defenders cling desperately to key points. After all, if the city is raging in flames and armed enemies are all around you, would you want to save the pastry bakery or the armory first?
The Bursting Through the City Walls scenario requires the Defender to pick a number of Key Military Buildings and Key Rallying Points, but you may well want to create your own scenarios and add some Key Buildings specifically to match your own games, armies, and terrain collections.
Key Military Buildings
Stables. This building is where domesticated riding beasts are kept and sheltered. It is often full of stalls and foodstuffs (ranging from hay for horses to the odd slave or Snotling for Cold Ones or Boars, respectively). Every 3 turns, the Defender may generate up to 200 points of new cavalry models (i.e., models not on his starting army list) at this location.
Barracks. Barracks provide space for local troops to sleep, mess, and gather. Every 3 turns, the Defender may generate up to 200 points of new Core infantry models (i.e., models not on his starting army list) at this location.
City Watch Building. This building is where the night watch guards are quartered. They are invariably not as well equipped as regular infantry, but still useful in a pinch. This building is a great gathering spot for the city's local militia. Every turn, the Defender may generate up to 100 points of new Core infantry (i.e., models not on his starting army list). No unit upgrades are allowed for these infantry models.
The Keep. Cities that have a Keep use it to house the elite guard and/or war machines of the army. Every 3 turns, the Defender may generate up to 200 points of new Special choices (i.e., models not on his starting army list).
Warehouse. A Warehouse is no more than a place where goods are stored, and could be a separate building or merely a stockpile in transit on the docks. The Defending player may use the various contents of the Warehouse to bribe mercenaries to fight for their side. Every 4 turns, the Defender may generate a single unit of up to 200 points of Dogs of War (or, if you'd rather not, or aren't allowed to take Dogs of War, take a 100-point unit of any troops from your army instead). These troops are "new," i.e., models not on the starting Defender army list.
Armory. Here a great hoard of weapons and armor is kept to arm the soldiers and militia in times of need. This stockpile may be broken into and used to equip or upgrade your troops. Any unit (Defending or Attacking) that spends a full turn within 3" of the building not doing anything (e.g., moving, shooting, fighting, casting spells) may add to their equipment by taking one item from the Arms or Armor list.
- Arms: Additional hand weapons, spears, halberds, or great weapons.
- Armor: Shields or light armor. One unit may take heavy armor (but then the supplies run out).
Note that you may equip troops with items from this list even if the troop type isn't normally allowed to be equipped as such.
Key Rallying Points
Tavern or Pub. Although there are many variants throughout the Warhammer world, drinking halls are places for gathering and imbibing strong spirits, be they Dwarfen ale, the mead of the Norsemen, or the psychotropic black wines of the Dark Elves. All Defending units within 6" of the Pub are immune to Panic, Fear, and Terror.
Temple. Every Warhammer race has some sort of temple or shrine in which the people can make offerings, seek blessings, and participate in rituals. Many troops find such buildings reassuring in times of war. Any fleeing Defending unit automatically passes its rally test (as long as it is eligible to make one) if it passes within 6" of the structure. Also, any Defending wounded character or multi-Wound creature that spends an entire unoccupied turn (no moving, magic, shooting, or fighting) within 6" of the temple will heal a single Wound on a die roll of 4+.
Monument. A Monument could be a statue of a famous hero or an inspirational work of art. The reminder of national pride fills nearby Defending troops with a robust morale. Treat the Monument as an Army Battle Standard with the same 12" range.
Comfort Station. A comfort station can take many forms and may be a kindly civilian's home where the inhabitants cheer the soldiers and boost their morale, an aid station where wounded soldiers have their wounds dressed, or even a house of ill repute where the mere presence of lovely creatures inspires the troops. A Defending unit within 6" of this building that spends an entire unoccupied turn may either regroup and reform back to its original number (but not over), or add a +1 on all its to-hit rolls as long as the unit remains within 6" of the building. The player must declare which option he will take at the end of the unit's unoccupied turn.
Town Center. Although this feature may take many forms, from a clock tower to a fountain of special significance, the town center is clearly known to the populace as a fantastic meeting point. Any unit that spends a full unoccupied turn within 6" of the Town Center may attempt to increase the unit's size. ONCE PER GAME, roll a D6 and consult the chart below to determine how many additional models, if any, join the ranks. The controlling player must have models on hand to represent the additional troops.
Town Center (D6).
| Roll | Result |
|---|---|
| 1 | None. Bad luck. |
| 2-3 | A single model. |
| 4-5 | D6 new models. |
| 6 | 25% more troops. |
Building Tips & Examples
[Hobby material: photographs and step notes on building city structures from foamcore, balsa wood, and card, with detailing tips (clock tower, temple, stable, monument, and the Red Wolf Inn). Not reproduced.]
Ship-Turning Template
[The printed page here reproduces four 90° templates for aligning boat turns. Players are told to photocopy or cut them out for personal use, to mount them on card, or to download the templates from the Games Workshop web site. Printed for personal use; the template is referenced in the Maneuvering Ships rules above and is not transcribed as a graphic.]