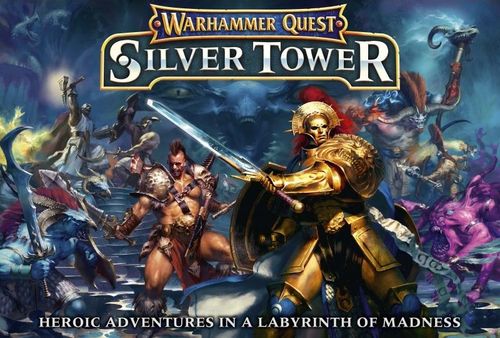
Warhammer Quest: Silver Tower
Warhammer Quest: Silver Tower Rulebook
Table of Contents
Table of Contents
Legends of the Silver Tower
"Gather now about the fire. Huddle close to its light, for this is a dark and terrible tale. A tale of the Silver Tower..."
A labyrinth the Silver Tower was, an impossible fastness of timeless evil. It was a crystalline web, an insanely complex machine, a puzzle-fortress beyond the scope of mortal minds. It was the lair of the Gaunt Summoner. Within its ever-shifting pathways that sorcerous daemon ruled with absolute power.
Nothing brought the Gaunt Summoner greater pleasure than to ensnare mortal champions within his web. He delighted in the playing of twisted games, pitting his captives against the tides of fate and the ingenuity of his trials. Some of his victims were plucked from the ether, snatched while walking the ways between the realms. Others came to the Silver Tower of their own free will, finding their way into its chill shadows and glittering mists by way of dark rituals or dire pacts.
Whether trapped, coerced, or lured into the Silver Tower, there was but one way the champions could leave. They would need to fight their way through fiendish trials, monstrous denizens and deadly traps to seize the fragments of the Summoner's true name. Only with the power of these eldritch syllables could the daemon be defeated. The victorious champions could either strike their tormentor down, or else demand from him a mighty boon. Few were the gifts beyond a Gaunt Summoner's power to bestow, from endless wealth and power to the regard of the gods and the deepest secrets of reality itself. Whatever their choices, those who returned alive from the Silver Tower were never the same, and fate rested heavy upon them forevermore...
The following pages teach you how to play Warhammer Quest Silver Tower. By carrying out each step as it is described, you can begin your first trial without having to read all of the rules first. Of course, some concepts and components may not be explained straight away, but have faith; all will be revealed in time.
Setting Up
1. Miniatures
Before your first game you must assemble the miniatures that represent the champions seeking their fate in the Silver Tower, the adversaries that stand against them and the bizarre familiars of the Gaunt Summoner, as detailed in the assembly guide.
2. The Rune
Whoever wishes to be the first to enter the Silver Tower becomes the runemarked player – give them the Rune of Tzeentch. If you cannot decide, the player who most recently won a game of Warhammer Age of Sigmar has the casting vote. The rune will change hands later.
3. Heroes
Starting with the runemarked player and going clockwise, each player chooses one of the six hero cards and places it in front of them, along with its miniature. Each player then chooses one of the coloured renown markers. A player that chooses the Excelsior Warpriest also takes the Gryph-hound's card and miniature, while the Fyreslayer Doomseeker's player takes the Fyreslayer rune.
4. Fate Board
Put the fate board where the players can reach it. Put each player's renown marker on the circular track, on the space marked with a circle.
5. Dice
Put the five purple destiny dice next to the fate board. Each player then takes the four hero dice that are the same colour as their renown marker. Put any remaining dice to one side – they can be used by any player during the game.
6. Cards
Shuffle the treasure and skills decks, and put each on its space on the fate board. Put the exploration cards to one side for now. If you discard a treasure or skill card during the game, return it to the bottom of its deck.
7. Chambers
The double-sided board sections are referred to as chambers. Each chamber is divided into spaces, each of which can hold a single miniature. Some chambers have black-bordered spaces, representing obstructions which heroes cannot move or see through (these are also marked in red on the exploration cards). Chambers also have one or more exits, each marked with a swirling vortex. Put the chambers to one side for now.
8. Portals
Set the portals aside with the chambers. The following pages will tell you when to set them up. Miniatures can see and move through them freely. If the rules tell you to set up a miniature at a portal, set it up as close to it as possible.
9. Ingress
Find the ingress chamber and set it up in the centre of the table. The runemarked player sets up their hero next to its exit, then each other player (going clockwise around the table) sets up their hero anywhere in the chamber.
10. Adventure Book
Give the adventure book to whoever is most comfortable reading aloud. Do not open it until instructed. It is mostly taken up with numbered passages which you will be instructed to read. When this happens, read the passage aloud, follow any instructions that you are given and then close the adventure book.
11. It Begins
The player with the adventure book reads 'Starting a Trial' on the first page out loud. Before you return here, your trial will have begun...
The First Round
Rounds and Phases
A game of Warhammer Quest Silver Tower plays out across a number of rounds, each of which follows the same pattern of four phases: the Destiny Phase, the Hero Phase, the Adversary Phase and the End Phase. When the last phase is over, a new round begins.
Dice Terms: Sometimes, the rules will use shorthand to refer to the dice. D6 simply means dice. If a hero suffered 2D6 wounds, you would roll two dice to see how many wounds it suffered. To roll a D3, roll a dice and halve the result, rounding up.
Waiting: Instead of taking your turn, you can choose to wait. It might be advantageous to let another player go first, for example. Players who choose to wait take their turns after all the other players have had the chance to take theirs, in the same clockwise order as before.
Destiny Phase
First comes the destiny phase. The runemarked player takes the destiny dice and rolls them, then puts any dice that show a unique number on the blue spaces of the fate board. Any other dice (doubles, triples and so on) are discarded. In later turns, discarded dice might have consequences – see page 19.
Hero Phase
With the destiny phase complete, the hero phase begins. Each player takes a complete turn with their hero, starting with the runemarked player and going clockwise around the table.
A Hero's Turn
The first thing you do in your turn is make your action roll. Roll your four hero dice and put them on the spaces on your hero card. Over the page you will learn how to use them to make actions.
Actions
Making Actions
Actions let your hero move, fight and explore, and you make them by spending the hero dice from your action roll. Each action has a score in brackets, limiting which dice you can spend to make it. For example, to make an action with a score of (3+), you would need to spend a dice with a score of 3 or more.
You can make the same action multiple times, but must end an action before starting a new one.
When you spend a hero dice, discard it by removing it from your hero card. When you cannot make any more actions, your turn ends; discard any unused hero dice.
Choices... You will often come across situations where your instructions are rather vague, such as the guidelines for setting up adversaries on the next page. The player following the instruction is free to interpret it as they wish, within the constraints that are set out.
Basic and Unique Actions
There are three basic actions, which any hero can make: Explore (1+), Move (1+) and Recuperate (1+*). These are listed on the back of this book for reference. Each hero also has a number of unique actions on their hero card.
The first action that the runemarked player will need to make is Explore (1+), to reveal the first chamber.
Explore (1+)
You can make this action whenever your hero is standing at an unexplored exit – one which is not connected to another chamber. After you have spent your hero dice, turn over the top card of the exploration deck and follow these steps:
- Set up the chamber shown on the card so that one of its exits completely lines up with the one in your hero's chamber. Place any portals in the chamber, as shown on the card.
- Read the card text and follow any instructions. Encounter tables are found on the back of the adventure book. Any adversaries are set up by the runemarked player, as close to the centre of the chamber as possible.
- Place the exploration card face-up next to the chamber, and put the rest of the exploration deck next to the new chamber's exit.
Adversaries: There are often different miniatures for each adversary, armed with different weapons. The runemarked player can choose which ones to use when setting them up, but cannot use a duplicate miniature unless that is the only option.
Move (1+)
When you make this action, your hero can move up to as many spaces as the Move value on their hero card. Each space they move into must be adjacent to their current space. Any spaces that touch (including diagonally) are considered to be adjacent.
Heroes that start their action adjacent to an adversary might be pinned. If this comes up, you can see how to resolve it on page 19.
Recuperate (1+*)
If your hero has been wounded, you can make this action to heal a wound (see page 18). It has a score of (1+) the first time you use it in a turn, (2+) the second time, (3+) the third time and so on.
Destiny Dice
The destiny dice on the fate board are effectively extra hero dice that are shared between the players. You can make actions during your turn by spending the destiny dice on the blue spaces.
Fate has no favourites, of course, so do not presume that you can claim them all if you take the first turn. Each time you spend a destiny dice, the highest-scoring dice that is still on a blue space is locked – move it to one of the two purple spaces. You cannot use locked dice, but they return to the blue spaces at the end of your turn so that the next player can use them.
The last player to take their turn in the round does not lock destiny dice, and can spend as many of them as they wish.
Moving Through Miniatures: Heroes can move through heroes, and adversaries can move through adversaries, but they cannot move through each other. Whatever the case, you can never end your move in the same space as another hero or adversary.
Weapon Actions
Each hero has a number of weapon actions on their hero card, which you can use to attack adversaries. After you have spent the hero dice, you make the weapon action by picking a target and making an attack roll.
Picking a Target
Each weapon action has a Range, which limits the targets you can pick for it. There are three Ranges:
A weapon with Combat range can target any adjacent enemy.
A weapon with Missile range can target any visible enemy miniature (see below), but cannot be used while adjacent to an enemy miniature.
A weapon with Area range targets each enemy miniature in the same chamber. Make an attack roll for each, in an order of your choice.
These ranges are summarised on the back of this book for quick reference.
Visibility: If you can trace a straight line between the centres of two spaces, miniatures in those spaces can see each other as long as the line does not cross through a chamber wall or touch an obstruction (see page 5).
Attack Roll
Once you have picked a target, roll the hero dice you spent to make the weapon action. If the result is lower than the weapon action's Hit value, the attack misses. Otherwise, the adversary suffers as many wounds as the weapon's Damage value.
Put wound markers next to the adversary to track the wounds it has suffered. Each adversary has a Vigour value, representing its resilience and defensive skill, and you will find a summary of these on the back on this book. If the wound markers next to an adversary reach its Vigour value, it is slain and removed from the board. Any excess wounds are ignored.
Renown
Each time you slay an adversary, you gain a point of renown. Each hero can also gain renown in a unique way, as described at the bottom of their hero card. Whenever you gain renown, move your marker one space around the renown track on the fate board.
If your renown marker reaches the starting space (marked with a circle), your hero is gifted with the knowledge of a new skill, as described on page 20.
Finish the Phase: Once the runemarked player has completed their turn, the player to their left has a turn. Once all of the players have had a turn, read on to see how the adversaries will react.
Adversary Phase
Once all of the heroes have taken their turn, it is the adversaries' turn to attack. They are controlled by the runemarked player, following these instructions:
If there are any adversaries on the board, the runemarked player should now turn to their page at the back of this book and look through their rules. If there are no adversaries on the board, the heroes have the chance for a respite (see below).
Respite: If there are no adversaries on the board at the start of this phase, the heroes can take a respite. Each player sets up their hero anywhere in the current chamber. Then roll a dice and add the number of skill cards that the heroes have between them. If the result is 9 or more, there is an ambush (page 19). Otherwise each player can either rest to heal D3 wounds or search the room by rolling a dice. On a result of 4 or more, take a treasure card.
There cannot be a respite two rounds in a row. If one would happen, an unexpected event occurs instead – see the back of the adventure book.
Adversary Groups
Adversaries of the same type that are on the board are referred to collectively as an adversary group. For example, all of the Kairic Acolytes on the board are a single group. The runemarked player activates these groups one at a time, in an order of their choice.
Adversary Behaviour
At the bottom of each adversary page is a behaviour table. The runemarked player rolls a dice (or two for certain adversaries) and looks up the result on their chosen group's behaviour table, then follows the instructions shown there.
Moving Adversaries
Adversaries can move as many spaces as the Move value shown on their page. Each space they move into must be adjacent to their current one.
Pinning Tests
If an adversary is adjacent to a hero at the start of its move, it must take a pinning test. The runemarked player rolls a dice; if the score is lower than the adversary's Agility value, it is pinned and cannot move that phase. It can still attack or carry out any other instructions from the result on the behaviour table.
Attacking Heroes
The runemarked player picks a target, limited by the weapon's Range and the instructions from the behaviour table, and then rolls the number of dice shown by the weapon's Dice value. Each dice that scores lower than the weapon's Hit value is discarded; any others hit the target hero.
Unlike adversaries, heroes have a chance to deflect hits before they cause wounds. Roll a dice each time your hero is hit. If the score is less than the Save value shown on your hero card, you suffer as many wounds as the weapon's Damage value, as described on the next page. Otherwise, the hit is ignored.
Wounding Heroes
Each time a hero suffers a wound, place a wound marker so that it covers one of the hero dice spaces on their hero card. When you make your action roll, each wound marker reduces the number of dice you roll by one. If all four spaces are covered, you will need to rely on destiny dice!
If your hero heals a wound, remove a wound marker from your hero card.
Grievous Wounds
If your hero suffers a wound but all of their spaces are already covered, they are grievously wounded. Remove them from the board. The next time there is a respite (page 16), set them up with the other heroes in the current chamber, with four wound markers still on their hero card.
End Phase
After all the adversaries have acted, the runemarked player passes the Rune of Tzeentch to the player on their left, who becomes the runemarked player for the next round. Later on, distant chambers may vanish in this phase – see page 21.
Round Over: With the End Phase done, your first round is complete! A new round now begins. The next page explains some rules that will come into play from the second round onwards.
Later Rounds
Destiny Roll
When you discard dice from the destiny roll, there may be consequences. See 'Consequences of Destiny' on the back of this book.
Pinned Heroes
If you wish to move your hero (either with a Move action or as part of another action) and they are adjacent to an adversary, roll a dice. If the result is lower than your hero's Agility value, they cannot move and the hero dice is spent, but you can still make any other parts of the action.
Ambushes
As heroes progress through the Silver Tower and draw the attention of its denizens, their chances for rest grow ever fewer. If there is an ambush during a respite, roll on Encounter Table D. If the result shows any adversaries, set them up at the nearest unexplored exit to the runemarked player's hero. If there are no unexplored exits, set them up at the nearest portal instead. The adversary phase then proceeds as normal, with these new arrivals attacking before the heroes have a chance to react!
More Rules: The following pages detail some additional rules which only come up occasionally. You can either read them in full now, or just read the headers so that you know where to turn if one of these situations should arise.
Further Rules
Gaining Skills
When your hero gains a skill, draw the top two cards from the skills deck, then choose one to discard. Put the other next to your hero card.
Skills give your hero additional actions or abilities. Some of them have extra rules which come into play if your hero has a certain trait listed at the bottom of their hero card.
The Current Chamber: Sometimes, the rules will refer to the 'current chamber'. This is the chamber where the majority of the heroes are. If the heroes are spread evenly between multiple chambers, the one which was most recently explored is the current chamber.
Multiple Exits
If a chamber has three exits, the path divides and you must split the exploration deck. Dealing from the bottom, deal one card at a time to each of the exits until they have all been distributed. The heroes now have two different paths to follow.
Dead Ends
After exploring a chamber, if there are no more exploration card to place at an exit, it is a dead end and cannot be explored further. Similarly, if an explored chamber does not have any other exits, discard the rest of the exploration deck.
Vanishing Chambers
As the heroes progress, the path behind them is swallowed up by the drifting mists of change. As such, chambers can vanish from play at the end of each round.
The current chamber is safe, as is any chamber connected to it and any chamber that is connected to that one. Any other chambers are cleared away, and their exploration cards are moved to a discard pile next to the fate board. If a hero is cleared away, they are lost in the tower and grievously wounded (see page 18).
If any unexplored exits are cleared away, bring their exploration decks forward to the nearest remaining unexplored exit. If this leaves multiple decks at a single exit, combine them together into one deck by dealing cards from the bottom of each, one at a time.
In the unlikely event that a chamber cannot be placed after exploring an exit because other chambers are in the way, the obstructing chambers immediately vanish as described above, along with any that are no longer connected as a result.
Re-rolling
Some rules allow you to re-roll one or more dice. If you choose to do so, pick up the dice after rolling it and roll it again. The second result applies, even if it is not as good as the first. Unless explicitly stated in the rules, you cannot re-roll a dice more than once.
Companions
During the quest, there may come a time when an unused hero joins the party as a companion. The runemarked player takes their hero card and places it next to their own.
After each of the other heroes has taken a turn, the runemarked player takes a turn with the companion. After making their action roll, they must turn all but one of their hero dice to show a score of 1 – after all, the companions are only minor players in this tale.
Companions cannot use destiny dice, gain renown or pick up treasure. At the end of the round, the companion is passed to the new runemarked player along with the Rune of Tzeentch. If an unexpected event occurs, or there is a respite, the companion is removed from play as they slip away to seek their own fate.
Stunned
Some attacks have a Damage value of 'Stun'. These stun the target instead of wounding them.
When an adversary is stunned, place a stun marker next to it. Adversaries with stun markers do not act in the adversary phase. Remove any stun markers at the end of the adversary phase.
When a hero is stunned, place a stun marker on their hero card instead of a wound marker. If there is no space for one, the marker is discarded with no effect – stun attacks cannot grievously wound heroes. Stun markers affect your action roll like wound markers, but you remove them all from your hero card at the end of your turn.
Each time a stunned miniature suffers a wound, flip one of their stun markers to its wound marker side.
Limited Adversaries
If you cannot set up as many adversaries as instructed for any reason, for example because there is not enough room or all the miniatures are already on the board, the excess adversaries are not set up and an unexpected event occurs.
The Power of the Amulet
If you have any fragments of the amulet, you can use the power of each once during each trial to do one of the following:
Heal D3 of your hero's wounds at the start of your turn, before making your action roll. If your hero is grievously wounded, set them up in the current chamber before healing the wounds.
Re-roll any of the dice in your action roll before making your first action.
Re-roll any of the destiny dice, before discarding any, if you are the runemarked player.
Treasures of the Tower
You can pass treasure cards to another player before making your action roll if your heroes are adjacent. You can also pass treasure cards to any other player during a respite.
Heroes can only carry four treasure cards. If you have more than four treasure cards at the end of a phase, you must discard any excess until you only have four.
Failed Quests
If all of the heroes are grievously wounded at the same time, or if you reveal the last exploration card without finding the grand chamber, the trial is failed! The heroes will be revived, ready to attempt the trial again or try a different one.
Other Adventures
The Adventure Book acts as your guide as you journey through the Silver Tower. Its passages detail the heroes' quest as they encounter the denizens of this strange place, and overcome the often bizarre tasks set for them by the Gaunt Summoner and his minions. However, that is not all the adventure book contains...
New Heroes
The adventure book contains hero cards for four more heroes from the Warhammer Age of Sigmar miniatures range. If you have these miniatures, you can add these heroes to your games of Warhammer Quest Silver Tower.
Exotic Adversaries
The adventure book also contains four new adversaries from the Warhammer Age of Sigmar range, as well as rules to include them in your games if you wish to face some new challenges.
The Ongoing Quest
Questing Parties
The heroes' progress through the tower is measured by the amulet fragments they have collected. If you want to play through the game with multiple groups, you simply need to keep track of which fragments each group has acquired. Players can change during the course of a quest; if a player whose hero has a fragment is not present, give their fragment to another player for the duration of that trial, or until the original owner returns.
Evolving Groups
The party may change from trial to trial, as heroes join forces or part ways. You do not need to use the same hero throughout your quest – but it is important to keep track of which skills and treasures each of the heroes has picked up, as even if another player controls them in the next trial they still start with those cards. Note that your hero is tied to their quest; if you start a new quest, you cannot bring their skills and treasures along with you!
Warhammer Quest: My Hero
Enhance your adventure with the Warhammer Quest: My Hero companion app. Play as more heroes, expand your trove of treasures, unlock new skills and track your progress as you explore the Silver Tower with this handy digital companion.
Heroes
The Knight-Questor
Borne into war by bolts of divine lightning, the Stormcast Eternals are warriors of vengeance. Each is a mighty hero, reforged by the God-King Sigmar into a living weapon against the powers of Chaos. Armed and armoured in shining sigmarite, infused with godly energies, the Stormcasts are faster, stronger, more courageous and more resilient than even the greatest mortal. In these warriors the Slaves to Darkness have found an enemy unlike any other, and fall in ever greater numbers beneath their flashing blades. Even amongst the august ranks of the Stormcast Eternals there are those whose deeds stand out as truly remarkable. Such champions are named Knights-Questor, and they have vowed to stand as shields between the denizens of the Mortal Realms and the depredations of Chaos. It falls to these heroes to undertake great quests in Sigmar's name. They adventure across the realms and beyond to slay terrible enemies or recover arcane artefacts whose power can turn the tides of war. Legend has it that it was just such a search that brought the Knight-Questor to the deranged maze of the Silver Tower.
The Fyreslayer Doomseeker
It is said of the Doomseeker that his axe scorches the air with every swing, that he spits glowing cinders with every war cry, and the wrath of the forge burns in his glare. This fearsome duardin warrior has runes of precious ur-gold hammered into his muscular body that blaze with enchanted strength. It is for ingots of this precious substance that the Doomseeker quests. During the Age of Myth the Fyreslayers' god, Grimnir, fought a titanic battle that saw him shattered into countless fragments of ur-gold. It is these fragments that the Fyreslayers search for tirelessly, spreading out from their original magmaholds in Aqshy and fighting across the Mortal Realms for any who would meet their price. These are no dishonourable mercenaries, but religious crusaders whose word is their bond. To them, no reward is worth having that has not been fairly earned. So it is that the Fyreslayers swear great and binding oaths, and hold to them at all costs. Indeed, it was an oath that led the Doomseeker to forsake his lodge, and to come at last to the Gaunt Summoner's unnatural domain.
The Excelsior Warpriest
The God-King Sigmar is a beacon of hope to the beleagured peoples of the Mortal Realms. His is a warlike faith, for so the times demand, and his priests are warriors all. The Excelsior Warpriest is as much a hammer-wielding crusader as he is a zealous orator of Sigmar's holy word. This courageous mortal man has taken up arms to protect Sigmar's faithful from Chaos. It is a duty that he intends to discharge with selfless determination until his last breath, and his fervour and faith do not go unrewarded. The Warpriest has been gifted the power to summon forth the divine light of Sigmar. With this holy radiance he scours away the abominations of Chaos, burning their taint out of existence in a blaze of light even as he heals the wounds of his comrades in battle. Nor does this holy warrior fight alone, for a noble Gryph-hound prowls always at his side. This faithful beast is brave and fierce, a fitting companion for the Excelsior Warpriest. The Gryph-hound is ever ready to battle the corrupt servants of Chaos, and would give its life for its master if the need arose.
The Darkoath Chieftain
Not all come to the Silver Tower to battle the powers of Chaos. Some, like the cruelly charismatic Darkoath Chieftain, seek instead to win the Dark Gods' favour. Amidst the all-encompassing horror of the dominion of Chaos, only the strong and the ruthless survive. All others are soon naught but bleached bones, ground to dust beneath the iron heel of those who serve the Dark Gods. Only by mighty deeds can true power be seized, and those who commit the greatest atrocities rise to command warbands, even whole tribes. The Darkoath Chieftain has set his feet upon the path to glory. His every deed is meant to win the favour of the gods. This barbarous warrior has slain mighty rivals, bested great beasts, and torn down the enclaves of order and light wherever he has found them. Before each victory he swore a mighty oath to one or other of the Gods of Chaos, entreating their gifts in exchange for his violent tribute. It was this twisting road to ascendancy or damnation that led the Darkoath Chieftain to the Silver Tower, there to claim the daemon's boon or die in the attempt.
The Mistweaver Saih
Veiled behind skeins of illusion, the Mistweaver Saih turns her enemies' own minds against them. Little is known of this sinister figure except that she hails from Ulgu, the enigmatic Realm of Shadow. Who she calls master, who she considers friend or foe, even her most basic motivations – all of these things remain a mystery to those who fight at her side. The only certainty is that the Mistweaver Saih is a powerful enchantress. Drifting amidst a swirling, sorcerous haze, the Saih flickers in and out of sight at will, sowing confusion and paranoia amongst those who have drawn her ire. Enemies seek her to no avail, lashing out blindly with clumsy swipes of their weapons, only to be struck down by her insidious powers. Some are beguiled, stumbling gladly onto the points of blades; others claw frantically at their own flesh, tearing themselves apart or immolating their comrades with blasts of magic as the cruel illusions of the Mistweaver do their work. Amidst the carnage the aelven enchantress remains disturbingly serene, the eye at the heart of a storm of illusory horror and violent bloodshed.
The Tenebrael Shard
The threat of death hangs heavy around the Tenebrael Shard. Legends tell that he is a being of darkness and fear, but beyond this no two tales are ever truly in agreement. He is credited with a bewildering array of powers. Some say the Shard can step between the shadows at will, treading the interstice between darkness and light in the blink of an eye. Others claim he can cloak himself in gloom, or transform into living smoke that flows around his enemies' blades. Snapping swords with his bare hands, reaching through chests to crush beating hearts, even killing with a single cold-eyed glare – all of these terrifying abilities are attributed by some to the Tenebrael Shard, while others simply deny his very existence. Whatever the truth, the Shard is doubtless a killer of superlative skill. Fast beyond belief, supernaturally agile and ominously silent, the Tenebrael Shard closes upon his prey as fast as thought and ends their lives with callous efficiency. Whether he is an assassin, a spy, or simply a terrifying force of nature, none know, but to stand in the path of the Tenebrael Shard means certain death.
The Denizens of the Silver Tower
The unnatural chambers and corridors of the Silver Tower are lair to myriad monstrous beings. Around any jagged corner or winding crystal stair, the Gaunt Summoner's captives might encounter terrifying enemies the likes of which they have never seen. Tzeentch delights in endless variety, and so the denizens of the Silver Tower are as uncountable and diverse as the scintillating grains of sand upon all the shores of the Mortal Realms. So vast is their number that the Gaunt Summoner has forgotten many altogether, leaving them to wander the tower at will. Any attempt to comprehend the profusion of strange creatures said to infest the Silver Tower would drive a mortal mind to madness.
Such is the sorcerous power of the Gaunt Summoner that he can tear open portals into any of the Mortal Realms. From Aqshy to Ghyran the daemon mage plucks up those who take his fancy. Wild beasts and sorcerous cults are scattered through the ever-shifting Silver Tower, there to protect the Gaunt Summoner's forbidden secrets and strange treasures.
Daemons there are in the Silver Tower, great hosts of Tzeentchian creatures subservient to the Gaunt Summoner's will. Sorcerous babblers, fungoid changebelchers, swoopwinged hunters and more infest the Silver Tower from its roots to its peak.
Mortal servants of the Changer of Ways lurk there also, in numbers beyond count. Stories tell of ogroid sorcerers who act as the high priests of the Gaunt Summoner's rule. These hulking monsters command the cultists and beast herds that dwell within the Silver Tower, leading them in rituals and flinging them into battle for their master's fickle amusement.
Not all the denizens of the tower are there by the Summoner's will. Green-skinned invaders proliferate in dark corners, sprouting like fungus and spinning their webs to ensnare the unwary that they might be devoured. Magical beings there are too, capricious manifestations of the tower itself. These freakish creatures serve no master but the Silver Tower, and help or hinder as the whim takes them.
Adversaries
Gaunt Summoner
A daemon mage of terrible power, the Gaunt Summoner delights in tricks and torments. He dirties his hands in battle against only the worthiest foes.
Move 9, Vigour 9, Agility 1+
| Weapon Actions | Dice | Range | Hit | Damage |
|---|---|---|---|---|
| Warptongue Blade | 1 | Combat | 2+ | 1 |
| Searing Warpfire | D6 | Missile | 3+ | D3 |
| Infernal Flames | D3 | Area | 4+ | 1 |
Warptongue Blade: If your hero is wounded by a Warptongue Blade, you cannot use any skill cards until the next adversary phase.
Lord of the Tower: The Gaunt Summoner cannot be stunned. When he is slain, whichever hero landed the killing blow gains D3 renown rather than 1, and each other hero gains 1 renown.
Mercurial Temper: If the Gaunt Summoner has six or more wound markers next to him, subtract 2 from any rolls on his behaviour table (to a minimum of one).
Creature of Change: When the Gaunt Summoner is wounded, the attacking hero must discard their highest remaining hero dice.
Behaviour Table
| D6 | Action |
|---|---|
| 1 | Summon Minions: Set up a Pink Horror at the nearest portal, and replace the Gaunt Summoner with another. They act this phase, unless Pink Horrors have already acted. Then set up the Gaunt Summoner in the same chamber, as far as possible from any of the heroes. |
| 2 | Capricious Fury: Remove the Gaunt Summoner from the board, then each player rolls a dice. Set the Gaunt Summoner up adjacent to the hero whose player rolled the lowest (re-roll ties). The Gaunt Summoner attacks the hero whose player rolled the lowest with his Warptongue Blade. |
| 3 | Mindstorm: The Gaunt Summoner moves as far from the heroes as possible. Then the runemarked player rolls two dice, and takes as many stun markers as the highest number rolled. They put one on their hero card, then pass the rest to the player on their left, who does the same. Continue until they have all been placed. |
| 4 | Fires of Change: Remove the Gaunt Summoner, then set him up at the portal that is furthest from where he was, but is still in the same chamber as a hero. Then he attacks the nearest hero with Searing Warpfire. If that hero is grievously wounded, their player must discard one of their skills at random and draw the top card of the skills deck to replace it. |
| 5 | Roiling Inferno: The Gaunt Summoner moves so that there are as many heroes in his chamber as possible. Then he attacks with Infernal Flames. |
The Familiars
These diminutive, capricious beings are physical manifestations of the raw magical energies that permeate the Silver Tower. Their behaviour is strange, and their presence can prove to be a boon to champions as often as it is a curse.
Familiars are not adversaries. They do not move or attack, and cannot be targeted by attacks. Instead, they affect the heroes and adversaries as described on the back of this book. If there is a respite, any familiars that have not been caught flee and are removed.
If your hero ends an action in the same space as a familiar, you must try to catch it. Both you and the player to your left roll a dice.
If you score lower, the familiar curses you then flees. Remove it from the board then resolve its bane. Otherwise, you catch the familiar. Move it to your hero card. You can discard it to use its boon. If the familiar is set up on the board again before you use the boon, it is lost – move the familiar off your hero card.
Tweak: This imperious creature is convinced that he is one of Tzeentch's vast and terrifying Lords of Change. Tweak believes himself all-powerful, and delights in delivering longwinded speeches about his evil schemes to any who will listen. He also enjoys vexing riddles, threatening to lay a terrible curse upon those who fail to answer them correctly.
Blot: A walking tome of forbidden lore, Blot is the most mercurial of the familiars. The strange illuminations and crawling script that cover his pages flow and change from moment to moment, the darkest secrets of creation surfacing like questing worms before burrowing back beneath layers of gibberish and ephemera.
Slop: The legends say that Slop is, without exception, the single most annoying creature to dwell within the Silver Tower. He might wriggle out from anywhere, at any time, his rotten stench and moronic, high-pitched gibbering filling the air around him. None can fail to be worked into a rage by the idiot attentions of this wriggling fishbeast.
Pug: Pug is a surly and acquisitive little imp. Fleet of foot and light of finger, he scurries by hidden ways through the Silver Tower, snatching up whatever shiny objects catch his eye. Anything Pug desires, he sees as his, and more than one mighty warrior has been led on a deeply undignified chase when this burbling little fiend grabbed their treasures and fled.
Ogroid Thaumaturge
Combining bestial strength and ferocity with dark occult powers, the Ogroid Thaumaturge is a cunning and deadly foe.
Move 4, Vigour 9, Agility 2+
| Weapon Actions | Dice | Range | Hit | Damage |
|---|---|---|---|---|
| Brutal Fists | 2 | Combat | 2+ | D3 |
| Great Horns | 1 | Combat | 6+ | 3 |
| Cloven Hooves | 1 | Combat | 4+ | 2 |
| Coruscating Flame | D3 | Missile | 4+ | D3 |
Overwhelming Power: At the start of the adversary phase, remove a wound marker and any stun markers from the Thaumaturge. When it is slain, whichever hero landed the killing blow gains D3 renown rather than 1, and each other hero gains 1 renown.
Mighty Bulk: The Thaumaturge can move through spaces occupied by heroes. Whenever it does, that hero's player rolls a dice. If the score is less than their hero's Save, their hero suffers a wound and is stunned.
Brutal Rage: Once the Thaumaturge has suffered 9 wounds, it is not slain but becomes enraged instead. Remove all wound markers from next to it. He is slain if he suffers another 9 wounds. Until then, roll 1 dice instead of 2 on his behaviour table.
Behaviour Table
| 2D6 | Action |
|---|---|
| 1-2 | Bull Charge: The Thaumaturge moves towards the most distant hero he can see, moving through as many heroes as possible as he moves. Then he attacks the nearest hero with his Great Horns. Add 1 to the attack roll for each space he moved. |
| 3-4 | Bestial Fury: The Thaumaturge moves towards the nearest hero, then attacks with his Brutal Fists. Then, roll a dice. On a 1, 2 or 3 set up that many Tzaangors at the portal closest to the Thaumaturge. They act this phase, unless Tzaangors have already acted. |
| 5-6 | Arcane Assault: If the Thaumaturge is not adjacent to any heroes, he attacks each one that he can see with Coruscating Flame. Otherwise, he attacks each adjacent hero with his Cloven Hooves. |
| 7-9 | Fireblast: If the Thaumaturge is not adjacent to any heroes, he attacks the nearest one with Coruscating Flame. Capering daemons spring from the fire; set up a Pink Horror adjacent to the hero if they suffered 3 wounds, a Blue Horror if they suffered 2 or a pair of Brimstone Horrors if they suffered 1. Otherwise, he attacks each adjacent hero with his Cloven Hooves. |
| 10-12 | Healing Incantation: Roll a D3; each adversary on the board, including the Thaumaturge, heals that many wounds. Then, if there are no adjacent heroes, the Thaumaturge attacks the nearest one with Coruscating Flame; otherwise, he attacks each adjacent hero with his Cloven Hooves. |
Skaven Deathrunner
This cunning invader has breached the tower on an errand of assassination. By poisoned blade and shadow magic does he seek to strike down his mark.
Move 6, Vigour 13, Agility 1+
| Weapon Actions | Dice | Range | Hit | Damage |
|---|---|---|---|---|
| Stab-slicer | 3 | Combat | 3+ | 1 |
| Bloodblade | 1 | Combat | 3+ | D6 |
| Warpstars | 1 | Missile | 2+ | 1 |
| Shadowsmoke Bomb | 2 | Area | 4+ | Stun |
Chosen for the Kill: When the Deathrunner is set up, each player rolls a dice. The hero whose player scored the lowest (re-roll ties) is the Deathrunner's quarry... for now.
Deadly Assassin: The Deathrunner cannot be stunned. When he is slain, whichever hero landed the killing blow gains D3 renown rather than 1, and each other hero gains 1 renown.
The Deed is Done: If the Deathrunner's quarry is grievously wounded when you roll on his behaviour table, add 3 to the result.
Illusory Twin: Although he has two identical miniatures, there is only one Deathrunner – with the uncanny ability to appear in two places at once. If one of the miniatures is slain while the other is on the board, roll a dice. On a 1, 2 or 3 the slain model was the illusion – it is removed, but the hero gains no renown. On a 4, 5 or 6 it was the true Deathrunner, and both miniatures are removed. If both miniatures are on the board when the Deathrunner is activated, randomly determine which of them is the real Deathrunner and remove the other, along with its wound markers.
Behaviour Table
| D6 | Action |
|---|---|
| 1-3 | Assassinate: The Deathrunner moves towards his quarry. He then attacks his quarry with his Bloodblade, if they are in range; otherwise, he attacks each hero he can see with either his Stab-slicer or Warpstars, whichever is in range. The runemarked player can choose the order in which he attacks the heroes. |
| 4-6 | Skitterstrike: Set up the Deathrunner's second miniature as close to the first as possible, with the same number of wounds next to it as the first. The second miniature moves so that it is adjacent to as many heroes as possible, then attacks each adjacent hero with its Stab-slicer. |
| 7+ | Swift Exit: The Deathrunner attacks with a Shadowsmoke Bomb. It then moves so that it is as far as possible from any heroes. Then, it attacks each hero it can see with Warpstars. If it cannot see any heroes, it flees into the shadows and is removed from the board. |
Tzaangors
These savage avian beastkin have been warped into shapes more pleasing to Tzeentch. They fight with the speed and violence of unbridled change.
Move 4, Vigour 5, Agility 5+
| Weapon Actions | Dice | Range | Hit | Damage |
|---|---|---|---|---|
| Savage Blade | 2 | Combat | 3+ | 1 |
| Vicious Beak | 1 | Combat | 4+ | 1 |
Tzaangor with Two Blades: Roll 4 dice for this Tzaangor's Savage Blade rather than 2.
Tzaangor with Shield: This Tzaangor has a Vigour of 7 rather than 5.
Tzaangor with Greataxe: This Tzaangor's Savage Blade has a Damage of 2 rather than 1.
Bloodhunger: Each time a Tzaangor inflicts a wound on a hero, it immediately attacks the same hero with its Vicious Beak.
Behaviour Table
| D6 | Action |
|---|---|
| 1 | Bloodfeast: Each Tzaangor moves towards the most wounded hero it can reach, or towards the nearest hero if it can't reach any. Then, each Tzaangor attacks with its Savage Blade if it is in range. |
| 2-4 | Bestial Charge: Each Tzaangor moves towards the nearest hero. Then, each Tzaangor attacks with its Savage Blade if it is in range. |
| 5-6 | Challenge the Mighty: Each Tzaangor moves towards the least wounded hero it can reach, or towards the nearest hero if it can't reach any. Then, each Tzaangor attacks the least wounded hero in range with its Savage Blade. |
Grot Scuttlings
Grot Scuttlings infest the Silver Tower's dark depths. They are wily and tribal, half-arachnid beings whose poisons and webs are the bane of the unwary.
Move 5, Vigour 2, Agility 2+
| Weapon Actions | Dice | Range | Hit | Damage |
|---|---|---|---|---|
| Stabba | 2 | Combat | 5+ | 1 |
| Huntin' Bow | 1 | Missile | 4+ | 1 |
Grot with Two Stabbas: Roll 4 dice for this grot's Stabba rather than 2. It cannot attack with a Huntin' Bow.
Grot with Stabba and Huntin' Bow: This grot can attack with a Huntin' Bow as well as its Stabba.
Grot with Stabba and Spear: This grot's Stabba has a Damage of 2 rather than 1. It cannot attack with a Huntin' Bow.
Sneaky Opportunists: Whenever a grot attacks a hero, add 1 to the attack roll for each stun marker on their hero card.
Behaviour Table
| D6 | Action |
|---|---|
| 1-2 | Web 'em: Each grot moves towards the nearest hero. Then, roll a dice for each hero. If the result is higher than the number of adjacent grots then the hero dodges aside; otherwise, they are hit by a web and stunned. Then each grot attacks the nearest hero with whichever weapon is in range. |
| 3-4 | Huntin' time: Each grot armed with a Huntin' Bow attempts to move so that it is not adjacent to any heroes, but can see at least one of them. Any other grots move towards the nearest hero. Each grot then attacks the nearest hero with whichever weapon is in range. |
| 5-6 | Scarper: Roll a dice for each grot, one after the other. If you roll a 6, that grot scuttles off into the shadows and is removed from the board. Each time a grot flees, add 1 to the result of any remaining rolls (to a maximum of 6) – once one grot decides it's time to scarper, a mass panic isn't far off! Then, each grot that is still on the board attacks the nearest hero with whichever weapon is in range. |
Horrors
Daemons possessed of potent magical powers, horrors can split and split again when slain, their mien becoming more spiteful with every division.
Move 5/4/3, Vigour 4/2/1, Agility 3/2/1
| Weapon Actions | Dice | Range | Hit | Damage |
|---|---|---|---|---|
| Flickering Blade | 2 | Combat | 2+/3+/4+ | 1 |
| Blue Fire | 1 | Missile | 3+/4+/5+ | 2 |
| Pink Fire | 1 | Area | 3+/4+/5+ | 1 |
Pink Horror: When a Pink Horror is slain, replace it with a Blue Horror, then place another Blue Horror as close to it as possible.
Blue Horror: When a Blue Horror is slain, replace it with a pair of Brimstone Horrors.
Pair of Brimstone Horrors: Heroes gain no renown for slaying a pair of Brimstone Horrors.
If a pair of Brimstone Horrors attacks with Pink Fire, it is removed after the attack is resolved.
Ecstatic Duplication: Horrors have three values for some of their characteristics; the first is for Pink Horrors, the second for Blue Horrors and the third for pairs of Brimstone Horrors. Treat each type of horror as a separate adversary group.
Behaviour Table
| D6 | Action |
|---|---|
| 1-2 | Bolts of Azure Flame: Each horror in the group attempts to move so that it is not adjacent to any heroes, but can see at least one of them. Each horror in the group attacks the nearest hero they can see with Blue Fire, or with its Flickering Blade if it is still adjacent. |
| 3-4 | Blazing Whirlwind: Each horror in the group moves so that there are as many heroes in its chamber as possible. Then each horror in the group attacks with Pink Fire. |
| 5-6 | Vicious Capering: Each horror in the group moves towards the nearest hero. Each horror in the group then attacks the nearest hero with either Blue Fire or its Flickering Blade, whichever is in range. |
Kairic Acolytes
Marked by the Changer of Ways for their cunning and devotion, these warrior cultists fight with blade, sorcery and terrifying zeal.
Move 4, Vigour 3, Agility 4+
| Weapon Actions | Dice | Range | Hit | Damage |
|---|---|---|---|---|
| Cursed Blade | 2 | Combat | 4+ | 1 |
| Sorcerous Bolt | 1 | Missile | 3+ | 1 |
Mighty Blast: If the attack roll for a Sorcerous Bolt is 6, it deals twice as much Damage.
Kairic Adept: The Adept's Sorcerous Bolts have a Damage of 2 rather than 1.
Acolyte with Shield: This acolyte has a Vigour of 4 rather than 3.
Acolyte with Glaive: This acolyte's Cursed Blade has a Damage of 2 rather than 1.
Acolyte with Two Blades: Roll 4 dice for this acolyte's Cursed Blade rather than 2.
Behaviour Table
| D6 | Action |
|---|---|
| 1-2 | Draw Their Blood: Each acolyte moves towards the nearest hero, then attacks them with whichever weapon is in range. Then, roll a dice and add 1 to the result for each wound they caused. On a 6 or more, set up a Pink Horror at the nearest portal. They will act in this phase unless Pink Horrors have already acted. |
| 3 | Slay the Unbelievers: Each acolyte attacks the nearest hero with whichever weapon is in range. Then, each acolyte that did not attack moves towards the nearest hero. |
| 4-5 | There Is No Escape: Each acolyte moves towards the nearest hero. Then, each acolyte attacks the nearest hero with whichever weapon is in range. |
| 6 | Fall Back: If there are twice as many heroes on the board as acolytes, each acolyte moves towards the nearest portal. An acolyte that ends its move on a portal flees and is removed from play. Each acolyte still on the board then attacks the nearest hero with whichever weapon is in range. |
Reference
Round Sequence
- Destiny Phase: Roll destiny dice, discard duplicates, resolve consequences.
- Hero Phase: Each player takes a turn. The runemarked player goes first.
- Adversary Phase: Runemarked player activates adversary groups.
- End Phase: Pass rune to the left, then distant chambers vanish.
Basic Actions
Explore (1+) Move (1+) Recuperate (1+*)
* See page 12.
Weapon Ranges
Combat weapons can target an adjacent miniature.
Missile weapons can target any miniature you can see. You cannot use them while an enemy is adjacent.
Area weapons target each enemy in the same chamber. Make an attack roll for each one separately.
Consequences of Destiny
When you discard duplicate dice from the destiny roll, certain results will have a consequence. If all the heroes are in the ingress chamber, duplicates are still discarded but these consequences do not apply.
Fickle Fate: Fate giveth, and fate taketh away. If all five dice are discarded, each hero can roll a D3 and discard that many wounds from their hero card. If all five destiny dice show the same number, each hero can also draw a skill card. Then resolve the consequences of the discarded dice.
Unexpected Event: If any 1's or 6's are discarded, an unexpected event occurs. Roll two dice, one after the other. Treat the first dice as tens and the second as units, then read that passage in the adventure book. For example, if you rolled 2 then 6, you would read passage 26 in the adventure book.
If any 2's are discarded and there is a hero with 2 or more treasure cards, set up Pug as close as possible to the hero with the most.
Heroes cannot use treasure cards while Pug is in the same chamber.
Boon: Discard Pug when you draw a treasure card to draw two instead.
Bane: Roll a dice for each of your treasure cards. On a roll of 1 or 2, return it to the bottom of the deck.
If any 3's are discarded and any of the heroes have 2 or more skill cards, set up Blot as close as possible to the hero with the most.
Heroes cannot use skill cards while Blot is in the same chamber.
Boon: Discard Blot when you gain a skill to draw four cards instead of two.
Bane: Pick one of your skill cards at random and turn it face-down until your next respite. You cannot use it while it is face-down.
Pug, Blot, Tweak and Slop are the Gaunt Summoner's familiars. Rules for how they affect the game can be found on page 35 of this book.
If any 4's are discarded and there are any adversaries on the board with a Vigour of 3 or more, set up Tweak as close as possible to the one with the highest Vigour.
Subtract 1 from any attack rolls for heroes in the same chamber as Tweak.
Boon: Discard Tweak to re-roll up to two dice after you make an action roll or destiny roll.
Bane: Discard D3 hero dice from your hero card. Discard a destiny dice for each hero dice you cannot discard.
If any 5's are discarded and there are three or more adversaries on the board, set up Slop at the portal that is closest to the runemarked player's hero.
Subtract 1 from the Move values of all heroes while Slop is on the board.
Boon: Discard Slop during your turn to move up to 3 spaces without spending a dice.
Bane: Your hero's Move value is 1 and their Agility is 6+ until the end of the round.
Adversaries' Vigour
| Adversary | Vigour |
|---|---|
| Grot Scuttling | 2 |
| Kairic Acolytes | 3 (4 with a Shield) |
| Tzaangors | 5 (7 with a Shield) |
| Brimstone Horrors | 1 |
| Blue Horrors | 2* |
| Pink Horrors | 4* |
| Skaven Deathrunner | 13* |
| Ogroid Thaumaturge | 9* |
| The Gaunt Summoner | 9* |
* These adversaries have some additional rules for when they are slain. See their pages in this book for details.