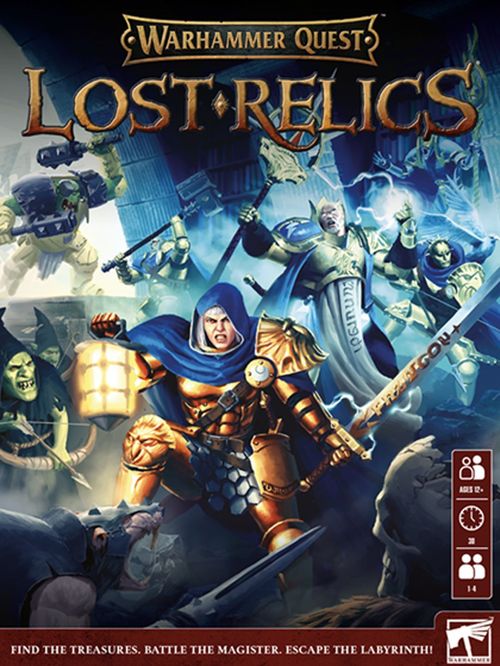
Warhammer Quest: Lost Relics
Warhammer Quest: Lost Relics Rulebook
Table of Contents
Table of Contents
- Introduction
- Components
- Cards
- Game Boards
- How to Play
- Actions
- Hostiles
- Playing a Campaign
- Adventure 1: Into the Hoard
- Adventure 2: The Warden Strikes
- Adventure 3: Wrecking Ball
- Adventure 4: Sudden Mayhem
- Adventure 5: Shatter the Sentinels
- Adventure 6: A Kunnin' Trap
- Adventure 7: Dark Secrets
- Adventure 8: The Warden's Revenge
- Adventure 9: Loose Ends
- Adventure 10: Halt the Rampage
- Adventure 11: Cornered
- Adventure 12: The Final Battle
Introduction
Warhammer Quest: Lost Relics is a co-operative game for 1-4 players. Taking on the role of heroic Stormcast Eternals, you will undertake adventures into the dangerous depths of the Hoard of Hallowheart to thwart the evil forces lurking there. Will you triumph over the minions of Chaos and Destruction? Or will their nefarious schemes come to fruition, to the ruin of all?
This rulebook and the other components included in the box give you everything you need to play the game – within these pages you will find the rules for the varied adventures your heroes will undertake, as well as how to set them up and play them, taking turns, making actions and weathering the reactions of the hostiles arrayed against them.
Components
In addition to the dice and this rulebook, Warhammer Quest: Lost Relics includes the following components:
- 5 Citadel Miniatures
- 1 adventure token
- 1 bounty token
- 4 initiative cards
- 29 treasure cards
- 1 adventure card
- 4 destiny tokens
- 20 damage tokens
- 1 blocked area token
- 5 double-sided hero cards
- 15 double-sided hostile cards
- 4 double-sided game boards
- 6 double-sided door tokens
- 31 hostile tokens
Cards
Each hero is represented by a Citadel Miniature, and each hostile is represented by a token that bears that hostile's portrait. In addition, each hero, companion and type of hostile is represented by a card that tells you what they do in the game. This game also includes treasure cards to represent the treasures the heroes discover in their adventures as well as initiative cards.
Hero Card
- Name
- Action dice spaces
- Attack actions
- Resilience value
- Damage box
- Common actions
- Unique actions
Companion Card
One of the heroes is a companion called Taros. Taros doesn't have an initiative card or action dice – instead, whichever player chooses the hero Luxa also controls Taros, and can make actions with Taros as described on Luxa's hero card.
- Name
- Attack action
- Resilience value
- Damage box
- Abilities
- Common actions
Hero and companion cards are double-sided – the reverse is used when the hero is wounded.
Initiative Cards
The four initiative cards are used to determine the order in which the heroes act in each round. Each hero's initiative card bears that hero's portrait.
Adventure Card
Some adventures use the adventure card to track the passage of time.
Hostile Card (Leader)
- Name
- Attack actions
- Reactions
- Resilience value
- Damage box
- Unique actions
- Leader phase action
Hostile Card (Minion)
- Name
- Attack actions
- Resilience value
- Reactions
- Unique actions
Both types of hostile card are double-sided – the reverse describes an empowered version of that hostile. The adventure rules will tell you when to use the empowered versions.
Treasure Cards
During your heroes' adventures, they will discover treasure cards. There are three types of treasure card: a Weapon gives a hero an additional Attack action, a piece of Armour gives a hero a permanent ability, and an Artefact gives a hero a one-use unique action. Each hero can have up to one of each of these kinds of cards.
When a hero gains a treasure card, they can keep it or immediately give it to another hero, regardless of where that hero is on the battlefield or even if that hero is out of action. If a hero would gain a second Weapon, Armour or Artefact, that hero's player must choose one of those cards and shuffle it back into the treasure deck. Many cards can only be used by a certain hero – where this is the case, that hero's name is stated after the card's name.
Taros cannot have treasure cards.
- Card name, hero name (if any) and type
- Attack action (Weapons only), ability (Armour only), or unique action (Artefacts only)
- Description. This has no bearing on the game.
Game Boards
Warhammer Quest: Lost Relics uses double-sided game boards to represent the battlefields of the Hoard. Each board has a label, making it easy to identify when setting up an adventure and is split into a number of areas. Each area is defined by a thick white border and contains a number in a symbol. This number is the area limit which tells you how many heroes and/or hostiles can fit in that area at once.
Adjacent
An area that touches another area – even if it is just at one corner – is said to be adjacent to that area. Everything in one of those areas is said to be adjacent to the other area and everything in it. In addition, if two areas are touching the same door token, those areas are said to be adjacent in the same way.
How to Play
This section of the rules tells you how to play a game of Warhammer Quest: Lost Relics.
Getting Ready
First, make sure that you have all of the components to hand. If you haven't already done so, assemble the Citadel Miniatures following the instructions on page 15, and push all of the tokens out of the punchboard.
Then, choose an adventure. You can play any of the adventures in this book in any order. They are presented in the order of easiest to most difficult. However, if you want to follow the story of the heroes, simply start with the first adventure on page 16 and play each of the adventures in turn.
Each adventure gives you the following information:
- Description of what the heroes are trying to achieve
- Map showing which game boards, door tokens and hostile tokens you need, as well as any points of interest. Each map indicates one or more starting areas – set your heroes up in these areas before starting the adventure.
- Objective which describes how the heroes can win the adventure
- List of the hostiles in the adventure
- Rules for the Adventure phase
- Rules explaining how heroes can earn destiny tokens in the adventure
- Any additional rules that apply to the adventure
Set Up
Decide which heroes each player will control. If you do not have four players, players can control more than one hero so that each hero has a player. Then set up the playing area as shown in the diagram in the rulebook, with each player's hero card(s) in front of them face up (with the wounded side hidden). Set up the game boards and door tokens as shown on the adventure map, then add hostile tokens as shown on the adventure map and listed in the adventure rules.
- Battlefield with game boards, door tokens and hostile tokens as shown on the adventure map
- Hero card
- Companion hero card
- Hostile cards as listed in the adventure rules
- Initiative cards
- Treasure card deck, shuffled and placed face down
- Some adventures use the adventure card along with the adventure token and/or the bounty token.
You may find it easier if you split the hostile cards for the adventure between the players – this means you can easily keep track of the reactions each hostile can make (pg 13).
You're now ready to play the first round of the adventure.
Playing a Round
To play a round, play each of the following phases in order. Once you have done so, the round ends and a new round begins. Keep playing rounds until the adventure ends as described below or in the adventure rules.
The phases, in order, are: Adventure Phase, Dice Phase, Initiative Phase, Action Phase, Leader Phase, Recovery Phase.
Adventure Phase
The adventure you are playing will tell you what happens during this phase. This will often involve moving hostiles and sometimes making Attack actions with these hostiles. See pages 13-14 for the rules for moving and attacking with hostiles.
Dice Phase
Each player takes three action dice for their hero. If they have more than one hero, they take three action dice for each one. They roll the action dice and then, without changing the result shown on the dice, place them in the spaces on that hero's hero card. A player uses these dice during the Action phase to make actions with their hero. Don't do this for any heroes that are out of action (pg 12).
Initiative Phase
Take the initiative cards for your heroes and shuffle them together face down. Then deal them out face up in a line to one side of the battlefield. This is the order in which heroes will take their turns in the Action phase. Don't do this for any heroes that are out of action.
Action Phase
The hero whose initiative card is on the left of the line of initiative cards has the first turn in the Action phase, and then the hero whose initiative card is next in line has the next turn, and so on, until each hero has had a turn.
When it is a hero's turn in the Action phase they can make three actions, one for each of their action dice. A hero doesn't have to make all three actions, or any actions at all – a player can end their hero's turn immediately or after any action. When they do, change each of that hero's remaining action dice to a result of 1.
After each action there is a Reaction step, in which one hostile may react (pg 13). In addition, there is a Reaction step after a player ends their hero's turn without taking any actions.
The actions a hero can make during the Action phase are described on pages 9-12.
Leader Phase
Each hostile leader on the battlefield makes its Leader action, if possible. If there is more than one leader, the player whose hero took the first turn in the round decides the order in which they make these actions.
Recovery Phase
In this phase, if one or more heroes are adjacent to an empty Haven area (these are marked on the adventure map), place one hero who is out of action in that area, and turn their hero card over to the unwounded side.
Finally, in this phase remove any unused action dice from each hero's hero card. Then the round ends.
Ending an Adventure
An adventure ends immediately if the adventure objective is met, in which case the heroes are victorious. An adventure also ends immediately if each of the heroes, not including Taros, is out of action, in which case the heroes are defeated. The adventure rules describe any other conditions in which the adventure will end in defeat for the heroes.
Actions
To make an action with one of their heroes a player must choose one of the actions on that hero's card, or on one of that hero's treasure cards, and then spend an action dice by removing it from that hero's card. If they can't do this, that hero can't make an action (unless another rule says otherwise). When the player spends the action dice, the hero makes the action.
Common and Unique Actions
Common actions are actions found on every hero card: Move, Attack, Rest, Interact. The rules for using these actions are found on the following pages of these rules. Unique actions are other actions found on a hero card, on a treasure card or in an adventure's rules. The rules on the card or in the adventure will explain how they are used.
Inspired Actions
A player can spend an action dice showing any result to make any action with their hero. However, most actions are followed by an inspired number, like this: Move (3+). If a player spends an action dice which is showing a result at least as high as the inspired number, the resulting hero's action is called an inspired action. This number might be different for different heroes. An inspired action will allow a hero to move further, fight harder, or perform other incredible feats! If an action doesn't have an inspired number, it can't be made as an inspired action.
Inspired Move, Attack and Rest actions are described in these rules. Any further inspired rules are presented alongside their action, following the word 'Inspired' (see below). These rules only apply when a hero makes the inspired version of that action.
Action Chains
Action Chains allow heroes to work together with explosive results. Whenever a player spends an action dice with a result of 1 to make an action with their hero, that player can start an Action Chain. If they do, a hero (which could be the same hero or a different hero) can immediately make an action if their player spends an action dice with a result of 2 to make that action (which can be an inspired action, if that result is high enough). This happens before the Reaction step (pg 13) and before the hero who started the Action Chain continues with their turn.
After that action, a hero can immediately make an action if their player spends an action dice with a result of 3 to make that action (which can be an inspired action, if that result is high enough), and so on, allowing the heroes to work together to make an Action Chain of up to six actions, one immediately after the other, during which there are no Reaction steps (pg 13).
If, after an action in the Action Chain is resolved, the heroes are unable or unwilling to continue the Action Chain, there is a Reaction step and then the hero who started the Action Chain resumes their turn.
Destiny Tokens
During their adventures, heroes other than Taros can earn destiny tokens as described in each adventure's rules. Each hero can only have one destiny token – if they would earn another one, nothing happens.
When a player spends an action dice, they can also spend a destiny token if their hero has one. If they do, they can change the facing of that action dice before they spend it, so it has whichever value they choose.
Move
To make a Move action, a hero moves from one area into an adjacent area, up to two times (so a hero could move into one area, and then from that area into another area).
A hero cannot move into an area if the number of heroes and hostiles in that area is equal to the area limit – this area is said to be full. However, this may change during an inspired Move action – see below.
Example: Regis could move from his current position on the battlefield; he could end his Move action after moving just one area.
Engaged
If the total of hostiles in an area is at least as high as the number of heroes in that area, heroes in that area are said to be engaged, and cannot make Move or Interact actions. If a hero becomes engaged during a Move action, that Move action ends.
Example: There are two Deathrattle Skeletons in the same area as Calthia and Dhoraz. Calthia and Dhoraz are engaged and cannot make a Move or Interact action. If Regis made a Move action into the same area, none of the heroes would be engaged.
Inspired Move
When a hero makes an inspired Move action, they make a Move action following the rules above, but with one of the following changes (the hero's player chooses):
- Sprint: The hero can move into an adjacent area three times, instead of twice, during that Move action.
- Evade: The hero ignores the engaged rule during that Move action.
- Barge: The hero can move into one full area during their Move action. When they do so, one hero or hostile chosen by that hero's player is moved into an adjacent area to make room for that hero.
Example: three inspired Move actions that Regis could make: a sprint in which he moves three areas, an evade in which he ignores the engaged rule to move through an area that contains a Deathrattle Skeleton, and a barge to move into a full area, moving the Deathrattle Skeleton that was filling that area into an adjacent area.
Closed Doors
If there is a closed door token between two areas on the battlefield, a hero cannot move from one of those areas to the other. A hero in an area that touches that door can open that door by making an Interact action. When they do so, flip the closed door token over to show its open side.
Attack
Each hero has one or more different Attack actions found on their hero card. You can also find Attack actions on Weapon treasure cards. In this case, a hero who has that treasure card can make that Attack action.
Each Attack action appears as a profile with a Weapon name (with its inspired number), a Type (Melee or Ranged) and Damage (for example 1/3).
There are two kinds of Attack action: Melee and Ranged.
- Melee: The attacker targets an enemy in the same area as the attacker.
- Ranged: The attacker targets an enemy visible to the attacker (see below).
When a hero makes an Attack action, first that hero's player picks a hostile as the target of that Attack action, following the restrictions above. A hero or hostile making an Attack action is called 'the attacker'.
Then the attacker deals damage to the target as specified by the Attack action (see below). If there are two values, use the first of these values for a normal Attack action, and the second for an inspired Attack action.
Some Attack actions have an ability listed after their profiles. Make sure to follow the rules of this ability when a hero makes that action. If an ability begins 'Inspired:' then the ability only applies when the hero makes the inspired version of that action.
Once the attacker has dealt damage and you have resolved any additional Attack action abilities, the Attack action is over.
Area Attack Actions
Some Attack actions have an area symbol after Melee or Ranged in their profile. When a hero or hostile chooses a target while making one of these Attack actions, the Attack action also targets each other hero and hostile in the same area as the first target. This means that a hero (or hostile) can damage their allies if they are not careful! The player resolving these Attack actions does so one by one, in whichever order they like.
Example: if Regis chose to target the Deathrattle Skeleton with his Storm's Fury Attack action, it would also target the other hostiles and heroes in that area: the two Grots and Dhoraz!
Visible
An area – and everything in that area – is visible to a hero that is in that same area or in an adjacent area, as long as there isn't a closed door token between those areas.
Example: each Grot is visible to Regis, but none of the Deathrattle Skeletons are visible to Regis.
Damage to Hostiles
When an Attack action deals damage to a hostile, check the target's Resilience value, found on their hostile card. If the Attack action deals damage equal to or greater than the hostile's Resilience value, that hostile is slain and removed from the battlefield.
Otherwise, if the hostile is a minion (not a leader) flip that hostile's token over to the wounded side. If the token is already on its wounded side, that hostile is slain and removed from the battlefield.
This means that any minion, however big, can be slain by two Attack actions. Bear this in mind against minions with a high Resilience value.
If the hostile is a leader, place a number of damage tokens equal to the damage dealt in the damage box on that hostile's hostile card. If a leader has a number of damage tokens equal to or greater than their Resilience value, remove the damage tokens, then that leader is slain and removed from the battlefield.
Damage Tokens
Damage tokens are double sided; they have '1' on one side and '3' on the reverse. The sides with a '3' represent three damage tokens, and make it easy to keep track of the damage heroes and leaders have suffered. However, when a rule refers to damage tokens, remember that a damage token that is showing a '3' represents that many tokens, not a single token.
For example, if an ability instructed you to remove one damage token from a hero, and that hero had a damage token showing a '3', you would treat that hero as if they had three damage tokens showing a '1'. After resolving the ability, the hero would have two damage tokens, each showing a '1'.
Damage to Heroes
When an Attack action deals damage to a hero, place a number of damage tokens equal to the damage dealt in the damage box on the target's hero card.
Once you have done so, if a hero has a number of damage tokens equal to or greater than their Resilience value, flip that hero's card over to show its wounded side and remove those tokens. If that hero's card is already showing its wounded side, that hero is taken out of action – remove those tokens, then remove that hero's miniature from the battlefield and place it on their hero card. If that hero has one or more treasure cards, that hero's player must choose one of them and shuffle it back into the treasure card deck.
A hero that has been taken out of action may be able to return to the battlefield later on in the Recovery phase (pg 8).
Tough
Some hostiles have a Tough symbol instead of a Resilience value. These hostiles are Tough. When an Attack action deals damage to a Tough hostile, if that hostile's token is on its unwounded side, flip that hostile's token over to the wounded side.
This means that it will always take two Attack actions to slay a Tough minion.
Rest
A hero can only make a Rest action if there are no hostiles visible to that hero. When a hero makes a Rest action, remove one damage token from that hero's hero card. When a hero makes an inspired Rest action, remove two damage tokens from that hero's hero card instead, or if that hero has no damage tokens and their card is showing its wounded face, flip that card back over.
Interact
A hero can only make an Interact action if they are not engaged (pg 10). In addition, a hero can only make an Interact action when there is something for them to interact with – most often a closed door, but many adventures include other interactive objects. Each adventure specifies what, if any, additional Interact actions can be made, and how. If an Interact action can be inspired, the rules will state this.
Hostiles
The heroes will encounter many hostile creatures during their adventures. Each hostile is represented by a hostile card and a token used to mark its position on the battlefield.
Unlike the heroes, hostiles do not have initiative cards or action dice. Instead, hostiles react to the heroes' actions, as described on each hostile card or in the rules for the current adventure.
Available Hostiles
In some adventures, you will be instructed to place one or more 'available' hostiles. A hostile is available if you have at least one token showing that hostile that is not on the battlefield.
Making Choices for Hostiles
You will often need to make a choice when a hostile reacts or makes an action in the Adventure or Leader phase – usually when choosing the target of an Attack action. Whenever this is the case, the player whose hero last acted in this round chooses. If a hero has not yet acted, the player whose hero's initiative card is first chooses instead.
Reaction Step
Each time a hero completes an action, there is a Reaction step. In the Reaction step, one hostile that is visible to that hero makes a reaction – for example, if a hero attacks a hostile, a hostile will often attack the hero as a reaction.
Only one hostile can make a reaction in each Reaction step.
As each hero can make three actions in each of their turns, you can expect up to three hostile reactions in each hero turn, so long as there are visible hostiles. Working out ways to reduce the number of reactions the hostiles make is key to the heroes' success!
Reaction Steps and Action Chains
Note that there is only one Reaction step when heroes make an Action Chain – this happens after the last action in that chain, and the hero who acted last in that chain is considered to be the hero that last made an action.
Reaction Steps and Taros
When Taros makes one or more actions as a result of Luxa's action, the Reaction step happens after Taros' actions, and Taros is considered to be the hero that last made an action.
Choosing a Hostile and a Reaction
First, the player whose hero made the action chooses one hostile to make a reaction.
- The player must choose a leader visible to the hero if possible.
- Otherwise, the player must choose a hostile in the same area as the hero if possible.
- Otherwise, the player must choose a hostile visible to the hero.
If the player can choose from more than one hostile, they must choose a hostile whose reaction will result in damage to one or more heroes if possible.
Resolving a Reaction
The same player then resolves the first reaction listed on the hostile's hostile card.
Each hostile has between one and three reactions. On a hostile card the reactions appear in a row beside the hostile's Resilience value, each reaction shown as one or more action symbols.
If the reaction includes more than one action, the player resolves each of them in the order in which they are listed.
If, following the rules for each action (below) the player is instructed to skip each action in a reaction, then the player skips that reaction and resolves the second reaction listed on the hostile card instead, and so on until the player can resolve a reaction or until the hostile has no other reactions.
For example, if the reaction is to make a Move action and then an Attack action, the player might be instructed to skip the Move action or the Attack action, depending on the state of the battlefield. If they are only instructed to skip one of these actions, the reaction is still resolved (the player resolves the action that can be resolved). If the player is instructed to skip both of the actions, they would skip the reaction entirely and resolve the next reaction instead.
Hostile Actions
Hostiles can make a variety of actions during their reactions. The most common are described here, but others are described on the hostile cards themselves or in the rules for the adventure you are playing.
- Attack (Melee/Ranged): The hostile makes a Melee/Ranged Attack action as appropriate, targeting a hero. If there is no possible target, skip this action.
- Execute: The hostile makes an Attack action that targets a hero with the most damage tokens possible. If two or more heroes are tied for the most damage tokens (including if no heroes have any damage tokens), the player chooses one of those heroes as the target. If there is no possible target, skip this action.
- Move: If this hostile is in the same area as one or more heroes, skip this action. Otherwise, if there are one or more heroes in one or more adjacent areas, the player whose hero acted last moves this hostile into one of those areas. If each of those areas is full, deal damage to one hero in one of those areas equal to the damage value of the first Attack action on that hostile's card. Otherwise, the player whose hero acted last moves this hostile one area closer to the closest hero. If this is not possible, skip this action.
- Retreat: The player whose hero acted last moves this hostile one area so that this hostile is not visible to any heroes. If this is not possible, skip this action.
Hostiles and Doors
Hostiles treat all door tokens as open when they move.
Playing a Campaign
Although each adventure can be played on its own, the adventures are designed to fit together to tell the story of the heroes' quest through the Hoard, from their first skirmish with the vengeful Deathrattle through to the climactic conflict at the end of their journey.
To play a campaign that tells this story simply play the adventures in order, with the following additional rules.
Treasure in a Campaign
Each hero keeps their treasure cards from one adventure to the next. If you are not going to play the next adventure immediately, after your adventure use a pencil to list each hero's treasure cards (Weapon, Armour, Artefact) in the space provided in the rulebook as a reminder.
Out of Action in a Campaign
If a hero is out of action at the end of an adventure, that hero begins the next adventure with their card's wounded side showing. If you are not going to play the next adventure immediately, after your adventure use a pencil to list any of the heroes who are out of action in the space provided as a reminder.
Note that destiny tokens and damage tokens do not carry over from one adventure to the next, and heroes who are wounded at the end of an adventure are not wounded at the start of the next adventure.
Defeat in a Campaign
If the heroes are defeated in an adventure during a campaign, you can simply attempt the adventure again. When you do so, keep whichever treasure cards your heroes retained after their defeat, and none of the heroes begin the adventure with their card's wounded side showing.
Adventure 1: Into the Hoard
With a sudden wrench, the heroes find themselves in an unfamiliar setting. Is this a dungeon, a treasury, a temple or a tomb? Unsure and disoriented, the heroes are suddenly set upon by a contingent of animated Deathrattle Skeletons. They must fight their way through!
Hostiles
- 5 Deathrattle Skeletons
Remember that hostiles get a Reaction step after each action a hero makes (pg 13). Check the Deathrattle Skeletons' hostile card so that you know how they will respond to your heroes.
Map key: starting area, exit, chest (see the adventure map in the rulebook).
Objective
The heroes must break through the Deathrattle Skeletons and out of this trap. To do so, a hero in the Exit area must make a Move action. When this happens, the heroes are victorious.
Adventure Phase
- Place one available Deathrattle Skeleton in an area visible to one or more heroes. Remember that the player whose hero's initiative card is first in line decides how to do this, and that if there are already 6 Deathrattle Skeleton tokens on the battlefield, there are no available Deathrattle Skeletons.
- Then make one Attack action with each Deathrattle Skeleton that can do so. In the first round of this adventure, none of the Deathrattle Skeletons will be able to attack.
Destiny
A hero gains a destiny token after an Action Chain of two or more actions that they started (pg 9). If they already have a destiny token, ignore this rule.
Additional Rules
Note that heroes cannot make a Move action if they are engaged (pg 10), unless that Move action is an inspired Move action.
Scouting
Do not use the companion, Taros, in this adventure.
Chest
A hero in the Chest area can make an Interact action. If they do, their player draws one treasure card. Once a hero has done so, ignore this rule.
Remember that the hero who discovers the treasure card can immediately give it to another hero if they want (pg 5).
Adventure 2: The Warden Strikes
As the heroes are recovering their breath after their first skirmish with the forces of Death, they come under attack once more. This time, the skeletons are lead by the horrifying and powerful Deathrattle Warden.
Hostiles
- 5 Deathrattle Skeletons
- 1 Deathrattle Warden
Remember, that as leader, the Warden will make a Leader action in each Leader phase (pg 8).
Map key: starting area, Haven, chest.
Objective
The heroes must survive the attack until the adventure marker moves to the end of the adventure track, or until the Deathrattle Warden is slain. When either of these happens, the heroes are victorious.
The Warden is more dangerous than the Deathrattle Skeletons. Make sure to check how its reactions work, and consider using Action Chains if you aim to slay it.
Adventure Phase
- The adventure token starts on the space marked '6' on the adventure card. Move the adventure token one space down the adventure track at the start of each Adventure phase. When the token reaches the space marked '0', the adventure ends immediately – the heroes are victorious.
- Place one available Deathrattle Skeleton in an area visible to one or more heroes.
- Then move each Deathrattle Skeleton one area closer to the closest hero.
- Then move the Deathrattle Warden one area closer to the closest hero.
- Then make one Attack action with each Deathrattle Skeleton that can do so.
Destiny
If a hero made one or more Attack actions that targeted the Deathrattle Warden during their turn or an Action Chain, they gain one destiny token after that turn or Action Chain. If they already have a destiny token, ignore this rule.
Additional Rules
Remember that hostiles treat all door tokens as open when they move. The heroes, however, have to open door tokens with an Interact action before they can pass through.
Chest
A hero in the Chest area can make an Interact action. If they do, their player draws one treasure card. Once a hero has done so, ignore this rule.
Adventure 3: Wrecking Ball
The heroes are advancing stealthily through the corridors of the Hoard. The walls are lined with forgotten treasures, some of which surely belong in a Stormvault. Suddenly the quiet is shattered by a brutish war cry and an orruk mob attacks! The heroes must act quickly to save a priceless relic from the rampaging Ardboys.
Hostiles
- 3 Ardboys
- 1 Ardboy Boss
- 6 Deathrattle Skeletons
Map key: starting area, Haven, Relic, chest.
Objective
The heroes must eliminate the Ardboys and their Boss, preventing them from destroying the relic (see below). If the relic is destroyed, the heroes have failed. When the heroes have slain each of the Ardboys and their Boss, they are victorious.
If an Ardboy or the Ardboy Boss is in the same area as the relic and makes an Attack action, they destroy the relic. When this happens, the heroes are defeated.
The adventure token starts on the space marked '4' on the adventure card. A hero in the same area as the relic can make an Interact action to commune with the relic. When a hero does so, move the adventure token one space down the adventure track, or two spaces if it was an inspired Interact action. When the adventure token reaches the space marked '0', the hero who made the final commune action draws one treasure card.
Remember that a hero cannot make an Interact action if they are engaged (pg 10).
Adventure Phase
- Place one available Ardboy as close as possible to the Ardboy Boss.
- Move each Ardboy one area closer to the Relic area.
- Then move the Ardboy Boss one area closer to the Relic area.
- Then make one Attack action with each hostile that can do so.
Destiny
A hero gains a destiny token immediately if a hostile attempts to move into their area, but cannot because it is full. If they already have a destiny token, ignore this rule.
Additional Rules
The Relic
Each time an Ardboy or the Ardboy Boss makes a Move action, move them into an adjacent area that is closer to the Relic area. Note that you still skip the Move action if one or more heroes are in the same area as that hostile (pg 14).
Chest
A hero in the Chest area can make an Interact action. If they do, their player draws one treasure card. Once a hero has done so, ignore this rule.
Adventure 4: Sudden Mayhem
Shrieking and cackling fills the halls of the Hoard – thieving grots are laying claim to its hidden treasures and cannot be allowed to escape. Ravenous, bouncing squigs and whirling fanatics will make it far from a simple task.
Hostiles
- 1 Squig Herd
- 2 Squigs
- 4 Grots
- 1 Grot Fanatic
- 5 Deathrattle Skeletons
Map key: starting area, Haven, chest.
Objective
Slay the Squig Herd to break the morale of the Grots. When the heroes slay the Squig Herd, they are victorious.
Adventure Phase
- Place one available Deathrattle Skeleton in an area visible to one or more heroes.
- Then move each Deathrattle Skeleton and each Squig one area closer to the closest hero.
- Then make one Attack action with each Deathrattle Skeleton and each Squig that can do so.
Destiny
If a hero redirected one or more hostiles (see below) during their turn or an Action Chain, they gain one destiny token after that turn or Action Chain. If they already have a destiny token, ignore this rule.
Additional Rules
Chest
A hero in a Chest area can make an Interact action. If they do, their player draws one treasure card. Once a hero has done so, ignore this rule for that area.
Redirected Mayhem
A hero in the same area as the Grot Fanatic and/or one or more Squigs can make an Interact action to redirect one of these hostiles in that area. When they do so, pick an area visible to that hero and place the redirected hostile in that area. The redirected hostile then makes one Attack action that targets another hostile (or hostiles, in the case of the Grot Fanatic) if possible. In the Reaction step that follows, treat the redirected hostile as the hero that acted last.
Remember that a hero cannot make an Interact action if they are engaged (pg 10).
Adventure 5: Shatter the Sentinels
Determined to put a stop to the waves of Deathrattle Skeletons assaulting them, the heroes launch an attack on their dread leader – the Warden.
Hostiles
- 1 Deathrattle Warden
- 6 Deathrattle Skeletons
- 1 Clawpack Leader
- 4 Clanrats
Map key: starting area, Haven, chest.
Objective
Slay the Deathrattle Warden before the adventure token moves to the end of the adventure track. When the Deathrattle Warden is slain, the heroes are victorious.
Adventure Phase
- The adventure token starts on the space marked '4' on the adventure card. Move the adventure token one space down the adventure track at the start of each Adventure phase. When the token reaches the space marked '1', remove the Clawpack Leader from the battlefield unless it has already been slain. When the token reaches the space marked '0', the adventure ends immediately – the heroes have been defeated.
- Then place one available Clanrat and one available Deathrattle Skeleton in an area visible to one or more heroes.
- Then move each Clanrat and each Deathrattle Skeleton one area closer to the closest hero.
- Then make one Attack action with each Clanrat and each Deathrattle Skeleton that can do so.
Destiny
If a hero slew two or more hostiles during their turn or an Action Chain, they gain one destiny token after that turn or Action Chain. If they already have a destiny token, ignore this rule.
Additional Rules
Chest
A hero in the Chest area can make an Interact action. If they do, their player draws one treasure card. Once a hero has done so, ignore this rule.
Loot
If the Clawpack Leader is slain, the player whose hero slew it draws one treasure card.
Adventure 6: A Kunnin' Trap
The heroes have travelled beyond the dungeons into an area infested with lethal snares. Can the heroes avoid these traps or, better yet, use them against their foes?
Hostiles
- 1 Ardboy Boss
- 3 Ardboys
- 1 Grot Shaman
- 4 Grots
- 1 Grot Fanatic
- 1 Squig Herd
- 2 Squigs
Map key: starting area, Haven, Switch, Trap.
Objective
Slay each leader before the adventure token moves to the end of the adventure track. When the last leader is slain, the heroes are victorious.
Adventure Phase
- The adventure token starts on the space marked '5' on the adventure card. Move the adventure token one space down the adventure track at the start of each Adventure phase. When the token reaches the space marked '0', the adventure ends immediately – the heroes have been defeated.
- Then move each hostile one area closer to the closest hero.
- Then make one Attack action with each hostile that can do so.
Destiny
If a hero slew one or more leaders during their turn or an Action Chain, they gain one destiny token after that turn or Action Chain. If they already have a destiny token, ignore this rule.
Additional Rules
Traps
If, after a hero's turn, they are in a Trap area and there is no hero in the Switch area, that hero is taken out of action.
The bounty token starts on the space marked '0' on the adventure card. A hero in the Switch area can make an Interact action. If they do, one hostile in a Trap area is slain. If they make an inspired Interact action, each hostile in each Trap area is slain instead. For each leader slain in this way, move the bounty marker one space up the adventure track. If the heroes are victorious, the last hero to make an action in this adventure draws the number of treasure cards indicated by the bounty marker's space on the adventure track.
Adventure 7: Dark Secrets
Finally, the heroes catch sight of their tormentors – a band of Tzeentchian cultists who are surely responsible for the trickery that brought them here. The heroes only have a small window of opportunity to prevent their escape. They must move quickly to capture and interrogate them.
The heroes will face empowered hostiles for the first time in this adventure. Use the empowered side of the hostile card for empowered hostiles, and take care – they are very dangerous!
Hostiles
- 1 Empowered Clawpack Leader
- 4 Empowered Clanrats
- 2 Kairic Acolytes
- 2 Horrors
- 1 Tzaangor
The game's punchboard includes two tokens to represent the Horror minions: a Blue Horror and a Brimstone Horror. These tokens function identically in game, using the same minion card, despite looking very different.
Map key: starting area, Haven, Exit, Path, chest.
Objective
Slay each Kairic Acolyte before either of them escapes the battlefield. When both Kairic Acolytes are slain, the heroes are victorious.
Adventure Phase
- If a Kairic Acolyte is in the Exit area, the heroes are defeated.
- Otherwise, move each Kairic Acolyte one area closer to the Exit area, following the path marked on the map. If they cannot move into the next area along the path, they instead make an Execute action. If a Kairic Acolyte is no longer in an area on the path marked on the map, they instead move one area closer to an area that is on the path marked on the map. If they cannot do that, they instead make an Execute action.
- Then make one Attack action with each hostile that can do so.
Destiny
If a hero slew one or more empowered hostiles during their turn or an Action Chain, they gain one destiny token after that turn or Action Chain. If they already have a destiny token, ignore this rule.
Additional Rules
Warded
Kairic Acolytes cannot be the target of an Attack action until the Tzaangor and both Horrors have been slain.
Chest
A hero in a Chest area can make an Interact action. If they do, their player draws one treasure card. Once a hero has done so, ignore this rule for that area.
Bounty
When a hero slays the Clawpack Leader, that hero draws two treasure cards.
Adventure 8: The Warden's Revenge
As the heroes try to find some sanctuary for a quick rest, they hear once more the dreaded clacking of the Deathrattle Skeletons. The Warden has returned, more powerful than ever and set on revenge!
Hostiles
- 1 Empowered Deathrattle Warden
- 5 Empowered Deathrattle Skeletons
- 4 Grots
- 1 Squig Herd
- 2 Squigs
Map key: starting area, Blocked, Exit, chest.
Objective
Slay the Deathrattle Warden or escape the battlefield – to do so, a hero in the Exit area must make a Move action. When the heroes achieve either of these aims, they are victorious.
There is no Haven area on this battlefield. If you decide to tackle the Warden, bear in mind that it's do or die!
Adventure Phase
- Place one available Deathrattle Skeleton in an area visible to one or more heroes.
- Then move each Deathrattle Skeleton one area closer to the nearest hero.
- Then move the Deathrattle Warden one area closer to the nearest hero.
- Then move each Squig one area closer to the nearest hero.
- Then make one Attack action with each hostile that can do so.
Destiny
A hero gains a destiny token after their turn or Action Chain if they end that turn or Action Chain on a different game board to the one they were on at the start of that turn or Action Chain. If they already have a destiny token, ignore this rule.
Additional Rules
Blocked Area
Place the blocked area token on the Blocked area marked on the map. Heroes and hostiles cannot move into the Blocked area – treat the Blocked area as if it doesn't exist.
Chest
A hero in a Chest area can make an Interact action. If they do, their player draws one treasure card. Once a hero has done so, ignore this rule for that area.
Adventure 9: Loose Ends
The heroes happen upon some scattered minions looting and wrecking, but leaderless. Seeing an opportunity, the heroes swoop upon their enemies, intent on clearing this scourge from the Mortal Realms.
Hostiles
- 6 Empowered Deathrattle Skeletons
- 4 Empowered Grots
- 4 Empowered Clanrats
Map key: starting area, Haven.
Objective
Slay each hostile before the adventure token moves to the end of the adventure track. When the last hostile is slain, the heroes are victorious.
Each type of hostile will keep returning to the battlefield until you have slain all hostiles of that type. Plan your attacks!
Adventure Phase
- The adventure token starts on the space marked '6' on the adventure card. Move the adventure token one space down the adventure track at the start of each Adventure phase. When the token reaches the space marked '0', the adventure ends immediately – the heroes have been defeated.
- Then, if there are one or more Deathrattle Skeletons on the battlefield, place each available Deathrattle Skeleton on the battlefield in the same area as another hostile that is not a Deathrattle Skeleton. If you cannot do this, place it in an area visible to one or more heroes.
- Then, if there are one or more Clanrats on the battlefield, place each available Clanrat on the battlefield in the same area as another hostile that is not a Clanrat. If you cannot do this, place it in an area visible to one or more heroes.
- Then, if there are one or more Grots on the battlefield, place each available Grot on the battlefield in the same area as another hostile that is not a Grot. If you cannot do this, place it in an area visible to one or more heroes.
- Then make one Attack action with each hostile that can do so.
Destiny
If a hero slew the last remaining Deathrattle Skeleton, Clanrat or Grot during their turn or an Action Chain, they gain one destiny token after that turn or Action Chain. If they already have a destiny token, ignore this rule.
Additional Rules
Salvaged Treasures
At the end of the adventure, if the heroes are victorious, the hero who acted last draws the following number of treasure cards as determined by the adventure token's space on the adventure track:
- 1: 1 treasure card
- 2: 2 treasure cards
- 3 or higher: 3 treasure cards
Adventure 10: Halt the Rampage
The heroes are fighting a running battle against the cunning clanrats and the brutal orruks. Amongst their assailants are the clawpack leader and the Ardboys' boss. Is this a chance to eliminate them once and for all?
Hostiles
- 1 Empowered Ardboy Boss
- 3 Empowered Ardboys
- 1 Empowered Clawpack Leader
- 4 Empowered Clanrats
- 3 Empowered Deathrattle Skeletons
Map key: starting area, Haven, Tunnel, chest, Relic.
Objective
Slay each hostile before the adventure token moves to the end of the adventure track. When the last hostile is slain, the heroes are victorious.
Adventure Phase
- The adventure token starts on the space marked '7' on the adventure card. Move the adventure token one space down the adventure track at the start of each Adventure phase. When the token reaches the space marked '0', the adventure ends immediately – the heroes have been defeated.
- Then move the Ardboy Boss one area (see The Relic).
- Then move each Ardboy one area.
- Then move each Clanrat one area.
- Then move the Clawpack Leader one area.
- Then make one Attack action with each hostile that can do so.
Destiny
If a hero ends their turn or an Action Chain closer than each hostile to the Relic area, they gain one destiny token after that turn or Action Chain. If they already have a destiny token, ignore this rule.
Additional Rules
The Relic
Each time a hostile makes a Move action, move them into an adjacent area that is closer to the Relic area. Note that you still skip the Move action if one or more heroes are in the same area as that hostile (pg 14).
If a hostile is in the same area as the relic, and makes an Attack action, that Attack action deals no damage – instead they destroy the relic. If the relic is destroyed, ignore these rules for the remainder of the adventure.
At the end of the adventure, if the relic has not been destroyed, the hero who acted last draws one treasure card.
Tunnel
A hero in one Tunnel area can move to the other Tunnel area by making a Move action.
Chest
A hero in a Chest area can make an Interact action. If they do, their player draws one treasure card. Once a hero has done so, ignore this rule for that area.
Adventure 11: Cornered
The heroes have discovered the lair of the mastermind behind their abduction and imprisonment in the Hoard – Magister Mondothir. The heroes must run a gauntlet of foes to eliminate this threat, and time is against them.
Hostiles
- 1 Empowered Deathrattle Warden
- 6 Empowered Deathrattle Skeletons
- 2 Horrors
- 1 Empowered Tzaangor
- 2 Empowered Kairic Acolytes
- 1 Magister Mondothir
Map key: starting area, Haven, Portal, Stairs.
The heroes only have five rounds to complete their goal in this adventure – and they have to get past the Warden and reach a whole new area before they even encounter their target. You may find that you don't have a single action to spare!
Objective
Slay Magister Mondothir before the adventure token moves to the end of the adventure track. When the Magister is slain, the heroes are victorious.
Adventure Phase
- The adventure token starts on the space marked '6' on the adventure card. Move the adventure token one space down the adventure track at the start of each Adventure phase. When the token reaches the space marked '0', the adventure ends immediately – the heroes have been defeated.
- Then make one Attack action with each hostile that can do so.
Destiny
If a hero moved from one Stairs area to the other (see below) during their turn or an Action Chain, they gain one destiny token after that turn or Action Chain. If they already have a destiny token, ignore this rule.
Additional Rules
Stairs
A hero in one Stairs area can move to the other Stairs area by making a Move action. When a hero does this for the first time, place two Horrors in the Portal area (even if they are already on the battlefield).
Horrors
Each time a hero slays the last Horror on the battlefield, that hero draws one treasure card.
Adventure 12: The Final Battle
A low chuckle reverberates around the chambers of the Hoard as the Magister dissipates – it was an illusion! The true Magister reveals himself, chanting a ruinous invocation as a tide of grots spill from every hallway to swamp the heroes. Can the heroes survive and save the relics they have recovered?
Hostiles
- 1 Empowered Magister Mondothir
- 2 Empowered Horrors
- 1 Empowered Tzaangor
- 2 Empowered Kairic Acolytes
- 1 Empowered Grot Shaman
- 1 Empowered Grot Fanatic
- 1 Empowered Squig Herd
- 2 Empowered Squigs
- 4 Empowered Grots
Map key: starting area, Haven, Portal 1, Portal 2, chest.
Objective
Slay Magister Mondothir before the adventure token moves to the end of the adventure track. When the Magister is slain, the heroes are victorious.
This is the final battle – don't hold anything back!
Adventure Phase
- The adventure token starts on the space marked '6' on the adventure card. Move the adventure token one space down the adventure track at the start of each Adventure phase. When the token reaches the space marked '0', the adventure ends immediately – the heroes have been defeated.
- Then move each minion one area closer to the nearest hero.
- Then make one Attack action with each hostile that can do so.
Destiny
If a hero started an Action Chain during their turn, they gain one destiny token after that turn. If they already have a destiny token, ignore this rule.
Additional Rules
Defensive Wards
The first time Magister Mondothir is damaged by an Attack action, after placing the damage tokens on his card, place the Magister in the Portal 1 area. If that is not possible, place the Magister as close as possible to that area.
The next time Magister Mondothir is damaged by an Attack action, after placing the damage tokens on his card, place the Magister in the Portal 2 area. If that is not possible, place the Magister as close as possible to that area. Then ignore this rule.
Countless Treasures
The heroes have found the hidden treasures of the archive, which are nearly limitless! Each Chest area contains countless treasures, but don't get too distracted by the loot on offer – time is running out!
A hero in a Chest area can make an Interact action. If they do, their player draws one treasure card.