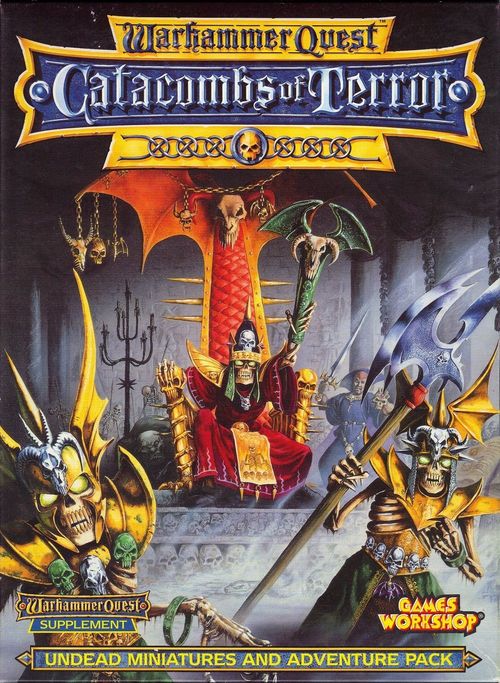
Warhammer Quest: Catacombs of Terror
Warhammer Quest: Catacombs of Terror Rulebook
Table of Contents
Table of Contents
- Introduction
- Game Contents
- The Rulebook
- Cards
- Counters
- Board Sections
- Section 1
- Setting Up
- The Undead
- The Denizens of the Catacombs of Terror
- Catacombs of Terror Adventures
- New Rules
- The Adventures
- Section 2 - Advanced Rules
- Catacombs of Terror Events
- Magic Items of the Undead
- Undead Monster Tables
- Undead Monsters
- Section 3
Introduction
Catacombs of Terror is a supplement for Warhammer Quest, the game of dungeon adventures in the Warhammer World. This Adventure pack includes seven brand new metal Citadel miniatures. four new board sections. 36 playing cards, several counters and a comprehensive 48 page rulebook. The pack is designed to work with all the rules in Warhammer Quest, so you can now take the Elf, Dwarf, Barbarian and Wizard deep into a Necromancer's lair in search of treasure and glory. Apart from any special rules in this book, all the normal set-up and game rules for Warhammer Quest also apply to Catacombs of Terror.
Game Contents
Your copy of Catacombs of Terror should contain the following components:
- 1 Catacombs of Terror rulebook
- Floorplans:
- 1 Objective Room (The Dread King's Throne Room)
- 1 Dungeon Room (The Hall of Death)
- 1 Corridor (Chasm of Despair)
- 1 Corner (Flames of Khazla)
- Counters:
- 6 Catacombs counters
- 36 playing cards:
- 4 Dungeon cards
- 17 Event cards
- 12 Treasure cards
- 3 Special cards
- Citadel miniatures:
- Dread King on his throne
- Luthor the Hunchback
- Gunther Laranscheld
- 3 Tomb Guardians
- The Grimoire Necris
- 2 plastic Doorways
The Rulebook
This rulebook is split into sections according to how much of the Warhammer Quest rules you want to use. The first section of the rulebook explains how to incorporate the components from Catacombs of Terror into your straightforward games of Warhammer Quest, just by adding the new floor plans, cards and miniatures. At the end of this section you will find six brand new adventures set in the catacombs of the Dread King.
The second section of the book contains many new tables and charts that can be used with the Advanced rules and the Roleplay game, plus some new Monster tables specially designed for Catacombs of Terror.
The final section of the rulebook is a pre-written adventure set in Khemri. It is designed for Warriors of Battle-level 5-7. You will need a Gamesmaster to play this adventure.
Cards
This Adventure pack includes new Dungeon cards for the new board sections as well as cards for the new Monsters, events and treasures that can be found in the catacombs.
Counters
In this pack you find six Catacombs counters, which are used in the pre-written adventures.
Board Sections
There are four new board sections in this Adventure pack that can be added to your games of Warhammer Quest. First, there is the Chasm of Despair, a slender and perilous bridge which the Warriors must cross if they wish to succeed in their quest. Secondly, there is the Hall of Death, a bleak and fearful place stacked with the bones of hapless Warriors. The Flames of Khazla is another new corridor. This corner section passes through an ancient shrine, where the Warriors will be able to heal their wounds. Finally, the Dread King's Throne Room is the new objective room, a place where the chilling hand of terror will reach out and grasp at the heart of even the bravest Warrior. This is the resting place of the Dread King himself, and his baleful presence has been roused from his slumber of centuries.
Board section images (not transcribed): The Flames of Khazla (Corridor/Corner), Dread King's Throne Room (Objective Room), Chasm of Despair (Corridor), The Hall of Death (Dungeon Room).
Section 1
All the components from Catacombs of Terror slot straight into the Warhammer Quest rules system. Just as in Warhammer Quest, you must generate your Warriors and decide what adventure they are embarking upon. The dungeon is generated by a pack of cards, and as the Warriors overcome the hazardous events along the way, they gain much treasure and gold. Eventually, they will arrive at their ultimate destination, the objective room. Here they must overcome the final challenge before leaving the Monsters' lair for the outside world once more, hopefully laden down with priceless gems and treasure.
Setting Up
The procedure for setting up a game of Warhammer Quest is almost the same when you are using the Catacombs of Terror Adventure pack. In addition to the contents of Catacombs of Terror, you will need the following components from the original Warhammer Quest game: The dungeon room and corridor board sections The Dungeon cards Note that you won't need the objective room board sections or the Objective Room cards because you'll be playing with the new Dread King's Throne Room objective room.
Dungeon Cards
You will need to sort out the Dungeon deck slightly differently from normal, to make sure you come across the new board sections.
Put the four new Dungeon cards (the Dread King's Throne Room, the Flames of Khazla, the Hall of Death and the Chasm of Despair) to one side for the moment. Shuffle all the other Dungeon cards, deal out nine, and put the rest back in the box. Now take the Hall of Death, the Flames of Khazla and the Chasm of Despair and shuffle them in with these nine cards to give you a deck of twelve Dungeon cards.
Now proceed as normal: deal out six Dungeon cards, and shuffle the Objective Room card (The Dread King's Throne Room) in with them. Place these seven cards face down on the table, and put the other six cards on top of them to form the Dungeon pack for your adventure.
New Dungeon Cards
The three new Dungeon cards - the Hall of Death, the Chasm of Despair and the Flames of Khazla - all have special rules. These are summarised on the cards, and also explained in this rulebook.
Event Cards
There are enough Event cards in Catacombs of Terror to create a whole new Undead Event deck if you wish. Just shuffle the Undead Event cards and use these instead of the Event cards from Warhammer Quest.
If you wish, you can shuffle the Event cards from this pack in with the Event cards from Warhammer Quest to give you one huge mixed Event deck!
If you don't have enough miniatures to represent all the Undead creatures in this pack, you can replace some of the Event cards you can't use with some from Warhammer Quest. The giant bats are particularly appropriate!
Treasure Cards
Catacombs of Terror includes a selection of new Treasure cards, specially designed for playing Undead adventures. You should find there are enough cards for one adventure, but if you run out you can use the Treasure cards from Warhammer Quest.
If you wish, you could expand the Undead Treasure pack by shuffling in the Treasure cards from Warhammer Quest and/or any other Treasure cards you have.
Alternatively, you could use the following special rule. Whenever the Warriors are due to take a Treasure card, they must roll a dice. If they score a 1, 2 or 3, they take one of the Warhammer Quest Treasure cards. If they score a 4, 5 or 6 they take one of the special Catacombs of Terror Treasure cards instead.
The Objective Room
You will find six new adventures for the Dread King's Throne Room later in this rulebook. Work out which adventure you will be playing as usual, by rolling a dice.
Special Miniatures
You will find seven exciting new Undead miniatures in this box. These models have been specially designed for Catacombs of Terror, and are not available separately.
Brief rules for these new Monsters can be found on their Event cards, and a more detailed explanation of any special rules which relate to them is given over the next few pages. These models will need to be clipped onto their slotta-bases ready for painting. The photographs on the covers of this book show the superb results that can be achieved with Citadel paints, a steady hand and a keen eye!
Dungeon Bash!
If you don't want to play a specifically Undead adventure, or just fancy a bit of a change, you can use the cards in this set, and any others you might have, for a massive dungeon bash adventure.
Shuffle all your Objective Room cards together and pick one at random to find out which adventure you will be playing. Then shuffle all your Dungeon cards together, all your Event cards together, all your Treasure cards together and have a great time!
With all the exciting Adventure packs and Treasure card packs Games Workshop produce, you'll have some amazing (if rather unpredictable) games!
The Undead
Throughout the Old World and beyond there are many outposts and hiding places of the Undead. Working in secret, evil Necromancers make their lairs in ruined cities and abandoned fortresses, away from the prying eyes of those who might seek to stop their foul practices. Through fell, dark ceremonies, these practitioners of death raise armies from the ancient dead of battles long since fought. When the time is ripe, the Necromancer leads his shambling horde back to civilisation to raid the lands of the Empire, Bretonnia and the other countries of the Old World.
The motives that drive such evil masters to perform these acts of destruction against their fellow men are varied and often unreasonable. Many Necromancers were once great wizards of the Colleges of Magic, driven out by their associates for dabbling with dark arts and reading forbidden texts of resurrection and summoning. Some Necromancers long for revenge against those who despised them. They see only through hate-filled eyes the achievements of their comrades of distant years.
Such is this anger and hatred that many Necromancers continue to exist in this world long after their appointed time of death, living on as immortal Liches. Perhaps living is the wrong word for such creatures, as they no longer require sustenance nor draw breath. They continue to exist in our world, brooding across the millennia, gathering their strength and malice until they are ready to wreak their revenge.
When a Liche has reached the pinnacle of his power he sends forth his minions to prepare the way for his Undead horde. Wraith messengers on old and terrible winged beasts spread fear and dread throughout the land. Strange omens and portents cloud the oracles and fortune tellings of those who possess such powers. The moon of M6rrslieb blazes full throughout the months, abandoning its natural cycle of waxing and waning. The men of the Empire and the Old World jump fearfully at shadows as starless nights echo with the sound of rusting metal on bone and the rustle of decayed muscle on rotted leather.
When night is at its darkest the legions of the damned issue forth to slay the enemies of their master. The victims of the Undead army are not allowed to keep their new found rest. The Liche or Necromancer raises the dead from where they fall, so that with each victory the ranks of the Undead are swollen by the slain.
Nagashizzar
Thousands of years ago there was a powerful and extensive empire in the lands now known as the Land of the Dead. The inhabitants of that realm became obsessed with death, and built huge pyramids and tombs for their dead kings and nobles. Out of their ranks rose the legendary Necromancer Nagash, who discovered secret elixirs and spells that prolonged life, allowing him ever to evade the clutches of death.
The story of Nagash's rise to power and his discovery of the arts of necromancy is a long one. He battled long and hard against the Tomb Kings of the Land of the Dead, and during this time he built the fortress realm of Nagashizzar in the Worlds Edge Mountains.
The fortress-city of Nagashizzar is built over a huge warpstone mine, which provided Nagash with much of the power and raw material he needed to raise his vast armies. Nagash used the warpstone to forge many evil items, some of which have been lost, while others have fallen into the hands of evil creatures such as Chaos followers and Skaven.
Nagash is dormant now, but his armies of Undead followers patrol the area around the Sour Sea and Nagashizzar, kept alive by the power of their master's subconscious will. No one dares venture within Nagashizzar itself, but there are many outposts connected by underground tunnels and roadways, and it is into these towers and castles that most Warriors descend into when they seek the ancient treasures of the dead.
The Denizens of the Catacombs of Terror
The sepulchres and pyramid tombs of the Lands of the Dead are populated by lots of powerful beings, many of which are included in Catacombs of Terror, represented on the Event cards. We have provided special character models for the most infamous of the inhabitants of the catacombs: The Dread King, Gunther Laranscheld, Luthor, the Grimoire Necris and three of the Dread King's Tomb Guardians.
Apart from these models, you will need some Skeleton, Zombie, Carrion and Ghoul models to get the most from this pack. However, if you do not have all the miniatures represented on the Event cards, do not worry. You can just remove those Event cards from the deck and replace them with cards from the original Warhammer Quest Event deck that you do have the models for.
Although this will lessen the Undead aspect of your adventures, it means you can start playing straight away. As you collect more and more models you can use more of the cards in this pack.
If you have several Warhammer Quest Adventure packs you can shuffle all of your cards into one deck, providing you with a very wide array of opponents and problems to overcome. Building up your collection like this is fun, and if you play Warhammer as well, you can add to your Warhammer armies at the same time.
Van Damneg the Dread King
Deep within the halls of the Twisted Spire, the ruined pyramid tomb and palace of Van Damneg the Dread King, sits the immobile corpse of this evil Liche Lord. The Dread King was one of Nagash's original followers and fought for him in the Kingdoms of the Dead. He has studied necromancy for thousands of years, and like Nagash he has continued his existence beyond the death of his mortal shell.
When you enter his vaulted throne room, the dim pale flicker of ghostlights is the only illumination. In the dark mists at the far end of the hall looms a tall shadow. Wrought from ancient gold and encrusted with the skulls of long-extinct creatures is the throne of the Dread King. Upon the massive chair sits the crumpled figure of Van Damneg himself. His skin has dried to his bones, his limbs lie limply upon the dark throne and only his eyes betray any sign of life. In horror your blood starts to freeze as the piercing blue points of light set deep within dark eye sockets blaze with malignant sentience and turn towards you.
You feel an irresistible surge of will and you are forced to your knees. Pain wracks your body as the Dread King exerts his magic on you. Gasping in terror and agony the last thing you see is a withered finger lifting from the folds of a dark cloak and a hissing voice:
"One more soul reaped for the harvest..."
- Wounds: 18
- Move: -
- Weapon Skill: 5
- Strength: 4
- Toughness: 4
- Attacks: 1
- Damage: 2D6
- Gold: 700
Special Rules
Placing the Dread King. The Dread King will either appear as a result of his Event card being turned over, or in the Dread King's Throne Room at the end of the adventure. If an Unexpected Event reveals him, then simply shuffle the Dread King's Event card back into the deck and take another Event card instead.
If the Event is the result of the Warriors entering a room, then place the Dread King in a corner as far away from the Warriors as possible. He will always appear with his minions, and these Monsters surround him upon his throne. These will either be generated by the Minions card (if he appears as a result of an Event card), or by the Objective Room Monster Table (if he appears in the objective room).
If the Dread King appears in the throne room, then place him on the raised dais at the far end of the hall.
Necromantic Magic. The Dread King and Laranscheld are both powerful magic users, skilled in the dark arts of necromancy. Apart from fighting the Warriors in hand-to-hand combat, they also assault the Warriors with blasts of evil magical energy.
The details of their spells are given on the Necromantic Spell card, and are printed on page 11 of this rulebook.
The Dread King is a powerful Necromancer, and may cast one spell each Monsters' Phase. Roll a D6 and consult the Necromantic Spells Table to see which spell he casts. Van Damneg may cast spells even if he is pinned in hand-to-hand combat.
Dispel Magic. Any spell that affects Van Damneg costs the Wizard 1 extra point of power to cast, effectively increasing the spell's casting level by 1.
Curse of the Dread King. Van Damneg rarely leaves his throne, the source of much of his power. Instead, he controls his minions all across the Old World through sheer force of will. Van Damneg's evil presence is represented by the special Curse of the Dread King Event card. If you draw this card when you are playing a Dread King's Throne Room adventure, Van Damneg has become aware of the Warriors' intrusion and summons his forces around him. When the Warriors enter the Dread King's Throne Room, there is a -1 modifier to their roll on the Objective Room Monsters Table.
Note that this will apply equally to the Minions tables and to the Objective Room Monster Table for Catacombs of Terror. For example, if you do not have the correct miniatures for Gunther Laranscheld's minions, then just make him appear with 1D3 Tomb Guardians instead.
Gunther Laranscheld
Gunther Laranscheld was once a great wizard of the Celestial college at Altdorf, delving into the secrets of the future, scrying out the course of things to be and reading texts hidden from humanity for centuries. During his research Laranscheld came across the Grimoire Necris, an ancient tome written by the Necromancer Van Hels. As he read the volume, one of many written by the dark sorcerer during his life, Laranscheld heard whispers of conquest and greatness. His demeanour became more bleak and he lost all interest in his other work.
As he experimented in secret Laranscheld's power grew. From the humble beginnings of reviving recently killed insects, he progressed through small mammals and managed to reincarnate the life force within a human corpse.
Gunther Laranscheld was discovered breaking into the sealed vault within the Temple of Sigmar in Altdorf, attempting to steal the books of Nagash and the Liber Morris. Knowing that he could no longer practise his arts within the civilised confines of the Empire, Laranscheld shrivelled his foes with winds of death and fled.
Since then his son Alberto recently joined him, though he has proved to be an inept Necromancer and was banished by Gunther Laranscheld a few years ago. Laranscheld has searched long for the resting place of the Dread King, baneful servant of Nagash. He seeks to restore this awful entity to his full strength once more, gaining unlimited riches and authority through the power of the Dread King.
Eternal life is the aim of Laranscheld, and the Dread King may be able to help him avoid the clutches of death. To achieve this end, the Necromancer will risk anything, stopping at nothing until his grim lord is once more in dominion over all he surveys.
- Wounds: 15
- Move: 4
- Weapon Skill: 4
- Strength: 4
- Toughness: 3
- Attacks: 2
- Damage: 1D6
- Gold: 550
Special Rules
Minions. Gunther is always protected by a number of Undead guards. When you draw the Gunther Laranscheld Event card, roll on the Undead Minions Table at the end of this section to see who is accompanying him. The Minions table is also printed on one of the Special cards for convenience.
Gunther Laranscheld is placed as far away from the Warriors as possible, whilst remaining on the same board section. This is because he tends to stand back and cast spells to destroy the Warriors, rather than engage them in combat - he leaves that dirty work to his minions.
Gunther always appears with the Grimoire Necris. His exact position is determined by the positioning of the Grimoire (see below - place the Grimoire, then Gunther, and finally his minions).
The Grimoire Necris
The origins of this black book are lost in horrific legend, though it is reputed to be written by the long dead Necromancer Van Hels. Its ancient pages crackle and whisper, promising great power to any who dares read on. It is within the pages of this dark and brooding book that Gunther Laranscheld first learnt of the legend of the Dread King, and since that fateful day he has been driven by a burning desire to reinstate that dark lord to power over the world.
The Grimoire Necris can appear in two places in the Catacombs of Terror. Firstly, it may appear with Gunther Laranscheld, enabling him to cast spells from its evil pages. Secondly, it may appear in the Dread King's Throne Room.
Gunther is always placed next to the Grimoire, wherever it appears. In the Dread King's Throne Room, the Grimoire is always placed in the square at the top of the dais (printed "Crimoire"), and the Dread King is placed in the square behind it. In any other room, the Grimoire is placed in one corner, away from any Warriors, and Gunther is then placed next to it.
Necromantic Magic. The Grimoire is a source of great power. The Dread King has committed the entire contents of the book to his ancient memory, but so long as he is not pinned in combat, having the Grimoire on hand (next to him) means that when rolling to see what spell he casts that turn, he re-rolls the dice if he scores a 1.
If Gunther is standing next to the Grimoire at the start of the Monsters' Phase, and is not pinned, he may attempt to cast a spell. Roll a D6 - on a score of 4 or more Gunther may cast a spell that turn. Consult the Necromantic Spells Table to see which spell he casts.
Luthor
Luthor was born in a backwater village somewhere in the Border Princes. Supposedly kicked by a mule when he was a child, his back is hideously crippled and his intelligence severely impaired. Being able to find no useful role in normal society, Luthor turned to thieving and banditry to survive. His time in the wilderness left Luthor a cruel man, heartless and without mercy. Feeling bitter with his lot in life, Luthor likes nothing better than to vent his frustration on those he deems weaker than himself.
Luthor made the mistake of trying to rob Gunther Laranscheld as he travelled about his dark business. Rather than kill the miserable wretch, Gunther Laranscheld recruited the hunchback into his service and put him to work. Luthor is now hopelessly addicted to an elixir of life that the Necromancer prepares for him. Having lived for over ninety years already, if he were to stop drinking the potion Luthor would quickly die as his age caught up with him and turned him into a shrivelled husk. (Printed "Cunther".)
Laranscheld uses Luthor for his most laborious and unpleasant tasks - fetching supplies, mixing volatile potions, supervising the rat broods and digging up corpses to be reanimated.
Luthor accompanies his master wherever he goes, and is at present assisting Laranscheld in the re-awakening of the Dread King. Whatever black deed his master instructs him do, Luthor will go about his task with slow witted determination which rarely if ever fails. Time is on his side, so long as his beloved master continues to supply him with the elixir of life.
- Wounds: 8
- Move: 4
- Weapon Skill: 3
- Strength: 5
- Toughness: 5
- Attacks: 1
- Damage: 1D6
- Gold: 300
Special Rules
Ignore Blow. Every time Luthor is hit, roll a D6. On a 6 Luthor ignores any damage he would normally have taken.
Special Attack. Luthor has perfected a special form of attack. Dashing from the shadows or swinging down on a rope, he strikes a Warrior and disappears into the darkness again.
To represent this, whenever you draw the Luthor Event card, determine who Luthor attacks as normal. Luthor makes his attacks immediately, as soon as he is placed on the board. After resolving Luthor's attacks roll a dice. On a roll of 1 Luthor stays and fights as normal. On a roll of 2 or more Luthor vanishes into the darkness and is removed. If Luthor disappears put his Event card to one side for the moment.
From now on, any time an Unexpected Event occurs it is because of Luthor, either triggering traps or leading the Monsters to the Warriors. In addition to whatever happens because of the Unexpected Event, Luthor will attack as well, using the rules above. If Luthor's card is in play when you come across Gunther Laranscheld, the hunchback has fetched his master. Place Luthor on the board next to Laranscheld. He will stay and fight automatically, there is no chance he will run off into the darkness.
Tomb Guardians of the Dread King
The Dread King summoned his most powerful lieutenants and captains many aeons ago, and bound them to him in oaths so terrible that they can never be spoken aloud again. These baleful servants swore to protect their master even after death, while he slept the long sleep down the years. Even now, these skeletal warriors stand guard over the Catacombs of Terror. When intruders encroach upon their territory the Tomb Guardians attack. Their red eyes blaze with sentient malice and they fight with the speed of a living creature.
Tomb Guardians are made all the more deadly by their independence. Most Undead are animated by their summoner's force of will. The Tomb Guardians of the Dread King are given life by much more powerful magic, and retain some of their malign intelligence and wits. Tomb Guardians are able to adapt their tactics and overcome complacent opponents.
The Tomb Guardians carry a variety of weapons, and wear ornate and ancient armour. Many Tomb Guardians were once personal guards of honour for long-dead nobles, and their aged equipment is of the highest quality. Their armour will turn aside the strongest blow and their weapons still retain a keen edge despite the centuries that have passed.
- Wounds: 15
- Move: 4
- Weapon Skill: 3
- Strength: 3
- Toughness: 3(4)
- Attacks: 1
- Damage: 1D6 + 3
- Gold: 110
Special Rules
Guardians. Tomb Guardians are bound by the Necromancer who raised them never to leave the place they are guarding. Tomb Guardians will never leave the board section they are placed on.
Armour. Tomb Guardians have 1 point of armour which takes their Toughness up to 4.
Regenerate. Tomb Guardians are sustained by the foul magic of the Necromancer who created them. If a Tomb Guardian is standing at the end of the turn, it gets back D6 Wounds, up to a maximum of its Starting Wounds score.
Undead Minions Table
| D6 | Monsters |
|---|---|
| 1 | Tomb Guardian |
| 2-3 | 1D6 Skeletons armed with spears |
| 4 | 1D6 Zombies |
| 5 | 1D6 Ghouls |
| 6 | 1D6 Skeletons armed with swords |
Catacombs of Terror Adventures
This section of the rulebook contains six adventures set in the Catacombs of Terror. All the adventures that follow are stand alone adventures which use all the standard rules from the Adventure Book in Warhammer Quest. However, the adventures do link together into a loose campaign adventure. This means that if you like, rather than rolling a dice to see which adventure you play you can play them in order, starting with Adventure 1 and working through to Adventure 6. These adventures take the Warriors to the distant Lands of the Dead, the blasted and poisoned realms of Khemri and the Priest Kings.
The new adventures follow all the rules from the Warhammer Quest Rulebook and Adventure Book, with the exceptions of the new rules printed earlier in this book and on the following pages. The special rules which follow mostly relate to the new board sections, cards, miniatures and so on which come with the Catacombs of Terror pack.
The Dread King's Throne Room
In Warhammer Quest, the aim of each adventure is to reach the objective room, defeat the Monsters guarding it and complete the adventure laid out in the Adventure Book.
The Dread King's Throne Room is a new objective room and the rules for it are given below. The six new adventures all have the Dread King's Throne Room as their objective.
The Return of the Undead. The Undead lords of the Catacombs of Terror are powerful Monsters, and are not easily killed. They are fully capable of recovering from the most hideous wounds, to strike back at the Warriors when they least expect it.
This means that if the Warriors "kill" Laranscheld or the Dread King early on in the adventure, then they may well crop up again in the final room, having retired to the Dread King's Throne Room to be revived by the dark power of Necromantic magic.
This means that even if you "kill" Laranscheld, Luthor and so on when they crop up as a result of an Event card, they may still appear in the objective room if you roll them on the Objective Room Monsters table.
Who Guards the Final Room? When the Warriors enter the Dread King's Throne Room, do not roll on the Objective Room Monsters Table in the Warhammer Quest Adventure Book. Instead, use the Catacombs of Terror Objective Room Monsters Table below to see what Monsters are lurking there.
Catacombs of Terror Objective Room Monsters Table
| D6 | Monsters |
|---|---|
| 1 | The Dread King, 3 Tomb Guardians, 2D6 Skeletons and 1D6 Skeleton Spearmen |
| 2 | The Dread King, 1D3 Tomb Guardians, Gunther Laranscheld, Luthor, 1D6 Skeletons with swords |
| 3 | The Dread King, 1D3 Tomb Guardians, 2D6 Skeleton Archers |
| 4 | The Dread King, 2 Tomb Guardians, Gunther Laranscheld, 1D6+3 Skeleton Bowmen |
| 5 | The Dread King, 1 Tomb Guardian, 1D6+3 Skeletons, 1D6+3 Skeleton Spearmen |
| 6 | The Dread King, 1 Tomb Guardian, 1D6 Skeleton Spearmen, 1D6 Skeleton Bowmen |
New Rules
The Dread King's Throne Room
This vaulted chamber is a most fearful and terrifying place. The silence of the dead fills the air with a tangible aura of menace, and the all-pervading stench of age and death chokes the Warriors' faltering breath.
The Warriors will enter this chamber up the ramp, between the two raised platforms on either side. Where possible, Monsters with missile weapons will occupy these spaces, from where they can fire down at the Warriors, and the Warriors will be unable to attack them back except with their own missile weapons. The only way to attack Monsters on these areas is to get up the ramp and around the side, advancing square by square along the ramparts.
At the top of the ramp, two squares split into three, making a block of five squares in total. Any model can move between these five squares as usual, and any model in one of these squares can attack (and be pinned by!) any model in a square which is even partly adjacent to their square. Where possible, any Monsters who are guarding the throne and who do not have missile weapons will form a line in these three squares first, blocking the Warriors off from getting to the Dread King himself.
The Dread King sits atop the dais at the end of the hall, in the far square. The Grimoire Necris stands in the square in front of him (see the diagram below). Models may move up and down the steps just as if they were normal squares - the steps are not very steep, and provide no obstacle to a determined Warrior.
Diagram labels (not transcribed): Dread King; Grimoire Necris; Entrance Ramp.
Multi-level Rooms
If you look at the Dread King's Throne Room floorplan, you will see that it has several different levels. The Warriors will enter the room up a ramp, which leads onto the main level. At the back of the room, steps lead up to a raised dais, where the Dread King sits on his throne.
Special Rules for Multi-level Rooms
- Models may only move from one level to another via the ramp or the stairs.
- If a Warrior or Monster attacks a target on a higher level, they get a -1 modifier on their roll to hit. If a Warrior or Monster attacks a target on a lower level, they get a +1 modifier to hit. Being on the stairs counts as being up on the next level.
- Models on higher levels cannot be pinned by models on lower levels, and vice-versa. This means, for example, that Skeleton archers on the main level can shoot at Warriors on the entrance ramp even if they seem to be standing right next to them.
These rules can be used in all rooms that have more than one level - including the Tomb Chamber, the Idol Chamber and the Fighting Pit.
Hall of Death
The bone-filled Hall of Death is a source of dark magic and draws evil power from the surrounding area. This power acts like a beacon to the fell creatures of Undeath,
The Hall of Death is rather like a T-junction in some ways, in that it has many possible exits. Have a look at the Dungeon card and you will see that there are four doorways to be clipped on when this room comes into play. This includes the door the Warriors enter the Hall of Death by, but this still leaves three other exits. The remaining Dungeon cards are split between the possible exits, just like a normal T-junction.
The Hall of Death does not trigger events when the Warriors enter the hall, the foul magic in the loom instead tries to prevent them leaving its grim walls. As soon as the Warriors enter the Hall of Death, take the top three Event cards in the Event deck without looking at them. Place one by each door out of the hall face down.
When the Warriors explore through a doorway leading from the Hall of Death, turn over the card in the Dungeon deck as normal and place the relevant board section down. Next turn over the Event card for that door. If it is an 'E' card resolve it immediately. If it is Monsters place them on the board straight away. The Monsters will get to fight in the next Monsters' Phase as normal.
Otherwise, events only happen in the Hall of Death if a 1 is rolled in the Power Phase.
Chasm of Despair
The slender bridge that spans the Chasm of Despair is very narrow and any Warrior or Monster who is clumsy may end up toppling down into the darkness.
Any Monster or Warrior that rolls a natural 1 to hit with a hand-to-hand attack while standing on the bridge will lose their balance and fall down into the depths of the catacombs and is quite, quite dead. The Warriors do not get gold for Monsters who die in this way. The Warriors may save themselves with the Dwarf's Rope Equipment card, which stops them falling in, but may break as written on the card. Otherwise, events only happen in the Chasm of Despair if a 1 is rolled in the Power Phase.
Flames of Khazla
Where the corridor turns a corner, the Warriors come across a small shrine of multi-coloured flames.
The first time a Warrior enters this board section, he regains 2D6 Wounds, up to his Starting Wounds maximum. Each Warrior may only be healed once in this way. The Flames of Khazla is a corridor, not a Dungeon room, so entering it will not trigger an Event card. Note that Warriors may not move through the square that contains the shrine.
Because the room is so small, only three squares effectively, the Warriors will have to be careful when they pass through it. If the leader moves onto the new board section the turn after exploring, the fourth party member, stuck on the previous board section, will immediately become lost in the dark! It is a good idea for the leader to stay in the Flames of Khazla board section until any players who are on the previous board section have moved into the Flames of Khazla, or out onto the new board section.
Necromantic Magic
Some Undead creatures are so powerful that they can use magic to attack the Warriors. They can also cast Necromantic spells that allow them to summon other Undead creatures to protect them and fight their enemies. These summoned Monsters are placed on the board using the normal One-on-One rule and the Warrior counters, and may attack on the same turn they are raised.
Van Damneg and Gunther Laranscheld can both cast Necromantic spells, details of which are given on the Necromantic Magic special card. and below.
Monsters cast their spells at the start of the Monsters' Phase. To see which spell they cast, roll a dice and look up the result on the Necromantic Spells Table. Work out the results of the spell immediately. Note that Van Damneg may cast spells even if he is pinned in hand-to-hand combat, unlike missile troops who cannot shoot while pinned.
Necromantic Spells Table
| D6 | Result |
|---|---|
| 1 | The spell fails to work, and has no effect |
| 2 | Hand of Death. A single random Warrior loses 1 attack in the next Warriors' Phase. |
| 3 | Soul Drain. One random Warrior suffers 1D6 Wounds, with no deductions |
| 4 | Summon Skeletons. Place 1D3 Skeletons on the board as normal. They attack immediately. |
| 5 | Summon Ghouls. Place 1D3 Ghouls on the board as normal. They attack immediately |
| 6 | Summon Zombies. Place 1D3 Zombies on the board as normal. They attack immediately. |
The page 12 vignette (a short narrative about Feorn the Red-handed, Dumstok Kardak, Verash and Ned Neddley opening Kharask's tomb) is flavour fiction and is not transcribed.
The Adventures
1. Find the Orb of Chalcidar
Rumours have reached the Empire: dark tales of a brooding evil lurking within the pyramid mountain known as the Twisted Spire. This cursed peak lies in the far off Lands of the Dead, amongst the shifting sands and bleached bones of Khemri and Quatar. The Twisted Spire is said to be the time worn remains of an ancient pyramid, the resting place of a once powerful king. It is said that a black soul has returned to haunt this tomb, who plans to blight the world with death and pain. This evil lord of the Undead is known only as Van Damneg the Dread King. The wizards of the Empire need time to consider what course of action to take. While they ponder, the power of the Dread King grows...
The Warriors are called upon to seek out the ancient Orb of Chalcidar, as it may be powerful enough to bind the Dread King forever in his pyramid tomb, if not destroy him outright. This powerful magical artefact was stolen by Gunther Laranscheld some months ago, and spirited away to his stronghold Spine Mountain Keep, in the Black Mountains. For the Warriors to stand any chance whatsoever of defeating the Dread King, they must retrieve this orb from the clutches of Laranscheld. Spine Mountain Keep is a dark and dangerous place, and the Warriors must have quick wits and brave hearts to survive this deadly challenge.
Special Rules
Do not include the Dread King Event card in the Event deck for this adventure, as he is far off in the Lands of the Dead.
Whenever the Warriors find a room, they may search it for the lost orb. They may only do this once any event triggered by the room has been completed, and so long as there are no Monsters on the board. If the Warriors want to search the room, it will take a whole turn, during which time they may do nothing else except heal each other if they have the means.
Searching
To search a room, place all the Catacombs of Terror counters in a cup. To find the orb, one of the players rolls a dice, and another takes a counter at random from the cup. The number on the counter is added to the score rolled on the dice. If the total is 8 or more, then the players have found the orb.
Remember that whatever they score, a 1 is a 1 and always fails. Each room can only be searched once per turn, and one dice roll is made per room (not once per Warrior!). Once a counter is out of the cup, the Warriors keep it, even if they did not find the orb. When they next search, they add the totals of all the counters that are out of the cup to the dice roll.
As soon as the Skull counter is picked, their search is over for now. The room they were searching does NOT have the orb in it, so there is no point searching further. All the counters go back in the cup, and the Warriors must take an Event card immediately - the noise of their searching has disturbed some evil force noise of their within the catacombs. (Printed as shown.)
As soon as they find the orb, each Warrior also takes a Treasure card.
If the Warriors do not find the orb by the time they come to the objective room, then whatever else happens in the room, the orb will be there.
The Objective Room
Use the Dread King's Throne Room, which in this adventure is the lair of Laranscheld the Necromancer.
Do not roll on the Objective Room Monster Table to see what Monsters lurk inside. The Warriors will face Laranscheld, Luthor, the Grimoire Necris, 1D3 Tomb Guardians and 2D6 Skeleton bowmen.
If the Warriors find the orb before the objective room, they may make off with it without venturing any further. However, such is the fervour within the Empire to stop this insidious Undead menace, that the Warriors have been offered an extra 30 gold for every servant of Undeath that they destroy, on top of whatever gold value the Monsters are worth anyway...
2. The Orb and the Dread King
The Wizard has been entrusted with the Orb of Chalcidar - a powerful weapon to be used against the Undead. Now the Warriors must venture far into the Lands of the Dead to the pyramid tomb known as the Twisted Spire. There they must try and destroy the Dread King, the malevolent and malign ruler of this bleak realm. If they fail, his power will grow beyond all telling, and the whole world will be threatened by his deathless legions.
The orb can be used once in the adventure. When the power of the orb is released all the Warriors gain +2 to their Strength for working out damage against Undead Monsters they hit in hand-to-hand combat. This lasts until the end of the turn.
This adventure uses the special Catacombs counters. Take all six counters and put them in a mug or other opaque container, just like the Warrior counters. When the Warriors reach the Dread King's Throne Room do not place Van Damneg sitting in his throne, just put the throne model in place. The Wizard must place the orb in its socket within the back of the throne. To do this he must be standing next to the throne in the Warriors' Phase, and must make a successful to hit roll as if against an opponent with a Weapon Skill of 2 (representing the baleful energies surrounding the throne). This counts as an attack. If he is successful, the magic of the throne is cut off, and the Dread King is trapped in his tomb, hopefully for ever more.
Until the Wizard places the orb in its socket, all Power rolls of a 1 or ~ mean that an Unexpected Event has occurred. (The "~" is as printed.) Every time an Unexpected Event occurs within the Throne Room, take a Catacombs counter first. If this is the Skull counter Van Damneg has awoken! Place the Dread King on his throne; he can attack and cast spells as normal on the turn he appears. If it is any other counter, place it to one side, do not place it back with the others.
Once the orb is in place and all the Monsters on the board are killed the Warriors may leave the Throne Room via a secret tunnel located behind the throne. Before they escape however, the Warriors manage to loot some useful equipment, previously stolen from the Dread King's victims. Each Warrior should take two Treasure cards each.
3. Banish the Spirit
Heroic Warriors have trapped the Dread King in his tomb, deep within the Lands of the Dead. Although his physical form can no more stride forth at the head of his Undead legions, the brooding spirit of the Dread King is strong, and not easily destroyed. Aided by the twisted Necromancer Gunther Laranscheld, his black spirit is slowly escaping its prison to coalesce in a place carefully prepared by the Necromancer.
On the borders of the Lands of the Dead and Araby stands the city of Ka Sabaar. Little do the priests of the city know, but their temple is built upon an older, evil site of magical power. The Dread King seeks to use this pool of dark magic as a conduit for his evil spirit to escape the shackles which bind it. Even now, his evil form coalesces in the dark halls beneath the temple. As the dark power grows, the priests have been driven out by otherworldly night predators, and have offered the Warriors a substantial reward if they can destroy the Dread King and sanctify the temple.
Special Rules
Setting Up. Take the Fountain of Light Objective Room card and shuffle it into the top half of the Dungeon deck as well as the other six cards. Shuffle the Dread King's Throne Room card into the bottom half of the Dungeon deck as usual. Play proceeds as normal.
The Fountain of Light contains three Event cards' worth of Monsters and traps. When the Warriors first enter the Fountain of Light turn over the top three Event cards to see what is in there.
Once the Warriors have killed the Monsters in the room they must fill up their water skins with holy water from the Fountain of Light. This takes them a whole turn during which the Warriors must stand next to the fountain and may do nothing else except heal themselves. Once they have done this they must go to the Dread King's Throne Room. Once there, the Warriors must fight whatever creatures are found within (generated normally from the Objective Room Monsters table).
Once they have defeated the foul creatures inside the Dread King's Throne Room, the Warriors sprinkle the holy water about the room, exorcising the spirits of the Undead forever and restoring the sanctity of the temple. The priests will give each Warrior 200 gold and an Objective Room Treasure card if they succeed in their quest.
4. Retrieve the Grimoire
It appears that once again Gunther Laranscheld has cheated death. Thwarted before by brave Warriors, and left for dead on the sun-drenched deserts of the Lands of the Dead, his iron will alone kept him alive. Now he seeks vengeance! He has crept back into the forbidden libraries of the Empire and stolen a most terrible evil book - the dreaded Grimoire Necris.
It is obvious that Laranscheld hopes to use the Grimoire to restore the Dread King to his former glory, bringing about a new era of death and despair to all mortal folk. The Warriors must quest into the dungeons of Laranscheld's old tower and kill him before he succeeds in joining his power to his patron, the Dread King of Twisted Spire.
Special Rules
Take the Necromancer Event card out of the Event deck. When you roll on the Objective Room Monster Table, replace the Dread King with Gunther Laranscheld. Laranscheld's minions are represented by the other Monsters in the objective room. Laranscheld should be placed at the far end of the room, next to the throne, where he is performing his ritual. His Grimoire Necris should be placed in the space before the throne.
The Warriors must retrieve the Grimoire Necris before Laranscheld can complete the summoning. (Printed as "Crimoire Necris".) They have 2D6 turns to kill Laranscheld, starting from the first turn after they enter the objective room. If the 2D6 turns pass before the Warriors have killed the Necromancer, Laranscheld completes the ceremony. Place Van Damneg on his throne at the start of the next Power Phase. Van Damneg can cast spells and attack as normal on the turn he appears.
Once they have prevented the summoning, or destroyed Van Damneg once and for all, they can return to the wizards of the Empire, where they will each receive a Treasure card and 150 gold as a reward.
5. Escape from the Depths
The Warriors are travelling back from an adventure in Spine Mountain Keep. One night, as they sleep fitfully in the mountains, they are set upon by a large Undead horde. Outnumbered and surprised, the Warriors have no chance, and are knocked unconscious. They awake to find themselves in a dank cell, chained up beside another prisoner. The prisoner tells them he has a way to escape, but they will have to leave through the throne room of the Dread King himself. The next day he is taken from the cell and led to the sacrificial altar of the Dread King.
It seems that the blood of mortals is being used to free the Dread King from the realm of death, and even now he is close to overcoming the magic which holds him prisoner in his dark halls far away in the Lands of the Dead. The Necromancer Laranscheld and many of his minions are scouring the area for more victims.
The Warriors manage to break free of their bonds and regain their equipment from the Zombie guards. They must hurry to reach the throne room before the Dread King appears. If they dawdle, however...
Special Rules
Generate the dungeon as usual, the Warriors start just outside their cell. This adventure uses the special Catacombs counters. Take all six counters and put them in a mug or other opaque container, just like the Warrior counters.
Every time an Unexpected Event occurs, as well as drawing the next Event card, take one of the Catacombs counters and place it, without looking, to one side. Place the Catacombs counters red face down next to the board.
When the Warriors enter the Dread King's Throne take all the Catacombs counters that have been selected and turn them over. If any of them is the Skull counter the Warriors are too late - Van Damneg has awoken!
If the Skull counter has not been picked take the next two Event cards to see what is in the Dread King's Throne Room. If the Skull has been picked then roll on the Objective Room Monsters Table as normal.
If the Warriors manage to kill all the Monsters in the Dread King's Throne Room they each snatch a piece of treasure before making their escape. Every Warrior gets a single Treasure card.
Even though the Warriors have struck a blow to his gathering physical form, they know that they do not have the weapons to banish the Dread King forever! They must return to the Empire and gather magical weapons powerful enough to banish the Dread King once and for all.
6. The Final Conflict
After an exhausting journey through the mountains, the Warriors are told by the wizards of the Empire that they must return to Twisted Spire and the Catacombs of Terror to deal the death blow to the Dread King before his power overwhelms the world. Despite all attempts to destroy him, the Dread King's spirit has returned once more to his ancient haunts. Rumours abound that he seeks to awaken Nagash himself once he is restored to power, and this must be prevented at all costs. After much research, it has been discovered that the means to achieve this are kept deep in the Twisted Spire itself - the Dread King cunningly possesses the only weapons powerful enough to destroy him. The Warriors must find these weapons before facing the Dread King.
Special Rules
Before playing this adventure, remove the Dread King Event card from the Event deck, and place the special Catacombs counters in a cup or mug. Whenever the Warriors finish a combat, then as well as any treasure and gold they gain, the leader takes a counter from the cup for every Event card of Monsters that was involved in the combat. If he finds the Skull counter, then the Warriors have found one of the legendary Death Dealer swords of Malach the Cruel. These are the only weapons capable of harming the Dread King.
The leader then places all the counters back in the cup, ready for the next combat, when the Warriors can try to find another sword. There will only ever be four swords, and without one a Warrior will be able to inflict no damage on the Dread King whatsoever. With a Death Dealer sword, a Warrior may fight the Dread King as usual, inflicting damage as normal.
If the Warriors manage to defeat the Dread King, at the end of the adventure they are richly rewarded - each Warrior gains two extra Treasure cards. Not only that, but they have the choice of plundering the Dread King's ancient tomb if they wish. Any Warrior who wishes to plunder the gold from the tomb may roll as many dice as he likes, adding up the totals rolled and multiplying the result by 100, to see how much gold he has found. If any dice he rolls come up as a 1, then as the Warrior packs the gold into his bag, he fails to notice the huge stone blocks sliding into place behind him. He has triggered the ancient defences, and will be sealed into the Twisted Spire forever, a rich, yet very dead Warrior. Otherwise, he may escape with the gold intact. Warriors are not allowed to use Luck or any other abilities to re-roll this result.
Section 2 - Advanced Rules
This section of the Catacombs of Terror adventure pack contains some new tables to use with your games of Warhammer Quest. These include sub-tables of Events, Treasure and Monsters which relate particularly to the Undead and their like, plus a Hazards Table for travelling in the lands of the Undead, as the areas the Warriors will pass through are particularly dangerous.
Travelling to the Dungeon
In the Warhammer Quest rulebook, an adventure is described as encompassing everything that happens from the moment the Warriors descend into the Monsters' lair or dungeon, to the moment they are ready to descend into the next lair. An adventure therefore includes one actual underground mission, travelling back to civilisation (and encountering whatever hazards they come across during their journey) plus whatever happens to the Warrior during their stay in the settlement. When they finish their visit, and decide that it is now time to venture once more into the craggy mountains in search of glory and treasure, a new adventure begins.
So far, we have assumed that the Warriors are able to reach the entrance to the cave system they are about to explore without mishap, with the help of a good map or with aid of a friendly guide. In Catacombs of Terror, however, this is no longer the case. The lands of the Undead are perilous, inhospitable and barren. Little is known about the Undead because few have lived to tell the tale of their exploits in Sylvania and the wastes around the Sour Sea, let alone report about the dark machinations that are conceived within the walls of Nagashizzar itself.
The Lands of the Dead
Although the adventures in this pack by no means represent the Warriors kicking down the door to Nagashizzar and asking Nagash if he wants to surrender, they do involve trips into the magical, cursed kingdoms of the Undead. Travelling across this twisted terrain is dangerous, and should be taken into account before the Warriors actually get into the adventure proper. Hence the new Undead Hazards Table, below.
When travelling to and from the various lairs of the Undead, on the way to the next adventure site and back again, the Warrior's journey will typically consist of the following:
A relatively easy journey as they travel to the borders of civilisation. There they will stand on the very edge of the Land of the Dead, knowing that perils await them at every step from now on. Eventually, after an arduous and hazardous trek through this barren and hostile land, the Warriors will arrive at their destination, and descend into the Catacombs of Terror to undertake their adventure. Then, when they emerge into the cold light of day, they will have to fight their way back through the Lands of the Dead and other perilous realms to find civilisation once more.
In the game, this is represented by the Undead Hazards, which are generated on the table below.
If the Warriors are playing an Undead adventure, they should roll a dice as they leave town to embark upon their journey to the lair of their foes. Look up the number rolled on the table below, to see how many extra weeks of travel the Warriors have to make to get to the adventure site in the Land of the Dead.
| D6 | Result |
|---|---|
| 1-2 | The dungeon is 4 weeks' extra travel away |
| 3-4 | The dungeon is 3 weeks' extra travel away |
| 5 | The dungeon is 2 weeks' extra travel away |
| 6 | The dungeon is 1 week's extra travel away |
This extra travel represents the time from leaving the familiar borders of the Empire and the civilised world, and venturing into and through the Worlds Edge Mountains until you reach the outposts of Nagashizzar.
Undead Hazards
On the way out to the adventure, you must roll one Undead Hazard for every week of travel through the Lands of the Dead, as you leave the well trodden paths and strike out into this hazardous and deadly land. On the way back, you will have to roll the same number of Hazards just to get back into the relative 'safety' of the Worlds Edge Mountains. Once there you must decide whether you are trying to find a village, town or city and then roll for Hazards on the table given in the Warhammer Quest Roleplay Book as usual.
When using these new Hazards there is another change to the normal rules. When you travel to a dungeon in this way, a new adventure starts as soon as you leave the settlement. This is important because it may affect your skills, the items you may use and other considerations.
You only need to roll once per adventure to see how far you need to travel to reach the Catacombs of Terror - the Warriors will encounter the same number of Hazards on the way there and on the way back. The Undead Hazards of course will vary on each journey. Roll once for the party of Warriors as a whole, not once per Warrior.
Undead Hazards Table (Roll 2D6)
11-12 The Restless Dead. The Warriors are walking through a deep cleft in the mountains. The sun is setting, and the Warriors' shadows lengthen behind them. As they look around them they realise they appear to have wandered into some ancient battlefield. Smashed chariots, rusting armour and rotted corpses stretch for miles around them. As the sun finally dips below the horizon the Warriors settle down to camp. Deep within the darkness the ancient armies stir once again...
Draw a Warrior counter to see who is on watch when the old war is reborn. This Warrior sees the ranks of the dead file past their camp, translucent ghosts walk through the bodies of the Warriors and the screams of the dying fill the air again after many centuries. The Warrior on watch should immediately test against Terror (10). If he fails the test he is so scared by the event he is at -2 to all Fear and Terror tests caused by Undead creatures for the next 1D6 adventures. After this time he has come to terms with the horror he has witnessed, and tests against Fear and Terror as normal.
13-15 The March of the Dead. Mórrslieb, the malignant second moon, is full and hangs over the Warriors' campsite like a baleful eye. A faint breeze blows through the twisted, rotted trees, stirring their lifeless limbs. Then, far away in the distance, the Warriors hear the clink of metal on metal and the heavy tramp of a horde of dead feet. The Warriors huddle around their fire, eyes wide with anticipation and fear. Suddenly the wind blows up a cloud of dust and a screeching wail keens over the mountainside. Ranks upon ranks of Zombies and Skeletons stride past the Warriors, their dead eyes staring ahead, their marching limbs perfectly synchronised.
To resist the ghostly call to march, each Warrior must roll a dice and add their Toughness. On a roll of 7 or more the Warrior manages to break the enchantment and ignore the call to march. On a roll of 6 or less the Warrior's mind is numbed, and his limbs go limp. To the horror of the rest of the party he stands up and falls into step with the marching host.
If all the Warriors fail then they join the March of the Dead, doomed to live out eternity fighting in the wars of the Undead. Any Warriors who pass their test must rescue their companions. They must make one roll on this Hazards Table before they can recapture their friends. By then they are a further two weeks away from the catacombs they are heading for.
16-21 Tomb Chamber. Rising above the mountainside to their right, a huge cairn towers above the Warriors. Its entrance is marked by many ancient hieroglyphs, which seem to twist in the harsh light of the noon sun. You may ignore the tomb chamber and move on, or you may break open the seal and investigate.
If you elect to investigate, roll a dice:
- 1 As the Warriors enter the chamber, the entranceway trembles, their lantern is blown out and the lintel stone collapses. Each Warrior must roll a dice and add their Initiative. On a score of 7 or more they manage to leap to safety outside. On a score of 6 or less they are trapped inside the tomb and are mercilessly killed by the spirits of the dead when the sun goes down...
- 2-4 The air inside the tomb chamber is damp and chilly. Ghostly voices whisper on the edge of hearing, the odd word of lament barely discernible against the pounding of the Warriors' hearts. Sudden, unreasoning panic grips the Warriors and they race back into the sunshine and throw themselves upon the stony ground, hearts beating wildly and their breath coming in ragged gasps. A lucky escape...
- 5 The glint of treasure draws the Warriors further into the depths of the tomb chamber. There, on an ancient throne sits the skeleton of a king. The corpse is over eight feet tall, and surrounded by piles of treasure. As they stand there, the Warriors see new life tremble within the wasted body. They make a run for it, grabbing some treasure as they go. The party gains a piece of treasure, just as if it had successfully completed an Event.
- 6 The Warriors walk down gold plated corridors, up a spiralling stairwell into the heart of the tomb chamber. Magical gems line the wall and cast a dull, eerie green glow on their surroundings. Across a massive arch are engraved some words, mysteriously appearing in the respective native languages of each of the Warriors. The message is simple. "Here is the resting place of King Eppechotumis. Pay homage and take a gift." Inside, laid upon a black marble slab is a sarcophagus, embedded with riches. The Warriors each pay their respects according to their beliefs and the treasure glows dully. Each Warrior gains a piece of objective room treasure.
22-24 Tomb. The early glow of dawn touches the sky after another cold and cheerless night in the Land of the Dead. The rays glint off something large and golden in the distance. The Warriors are intrigued and set off immediately. They reach a tomb around dusk, fashioned after the pyramids of the Kingdom of the Dead.
The Warriors may investigate the tomb. If they do so place a single corridor section leading to an objective room board section on the table, with a single doorway. The Warriors should be placed on the corridor just as if they had started a new dungeon.
Start a new turn and play in the same way as any other dungeon. The Warriors may enter the objective room, and will encounter Monsters determined by a dice roll on the Undead Monster Table for their Battle-level. If they kill all of the Monsters they gain a piece of objective room treasure each and may exit by walking out into the corridor.
25-31 Landslide. The Warriors are walking along a narrow path that winds up the mountainside, a precipitous drop on one side of them and a sheer cliff face on the other. Suddenly a distant rumbling starts high above them. Rocks come tumbling down towards the party and they must dive aside to avoid certain death.
Each Warrior must roll a dice and add his Initiative. On a roll of 7 or more he avoids the crashing boulders by huddling against the rock face. On a roll of 6 or less he just manages to reach safety in time, but loses one randomly determined piece of treasure as he does so.
32-35 Sand Storms. The Warriors are constantly battered by hot sandy winds. Despite their attempts to protect themselves, the sand gets into their clothes, their footwear, and their possessions. Keeping their heads down, the Warriors trudge wearily over the shifting landscape.
Miraculously, they manage to keep going in the right direction, and make good progress this week. As the storms subside, the Warriors shake the sand out of their cloaks, and prepare for yet another week's travel in the bleak Lands of the Dead.
36-42 The Desert Shrine. The Warriors squeeze through a narrow cleft between the rocks and emerge into a tiny secluded valley. In the middle of the valley they see a low stone altar, out of which bubbles a stream of crystal clear water. A worn inscription on the altar reads "Give a gift and drink deep."
If he wishes to, a Warrior may place a piece of treasure on the altar and drink from the pool. Each Warrior may only try this once. If a Warrior does this, roll a dice and look up the result on the table below. Whatever the result, the treasure glows and then fades away, remove it from your Adventure Record sheet.
| D6 | Result |
|---|---|
| 1 | Your Warrior feels uplifted. During the following adventure the Warrior may automatically pass one Fear or Terror test. |
| 2 | Your Warrior feels strength flowing through his veins. The Warrior gains +1 Starting Wounds, permanently. |
| 3 | Your Warrior feels his muscles toughen and his sinews grow strong. The Warrior gains +1 Strength for the rest of the adventure. In addition, roll a dice - on a roll of 6 the increase is permanent. |
| 4 | Your Warrior feels strength and vitality surging through his veins. The Warrior gains +1 Toughness for the rest of the adventure. In addition, roll a dice - on a roll of 6 the increase is permanent. |
| 5 | Your Warrior gains enlightenment and all knowledge is his for a brief moment. As the event passes he still has vague memories. The Warrior may add +1 to his Weapon Skill, Ballistic Skill or Initiative, whichever he decides. This increase is permanent. |
| 6 | Your Warrior is enchanted by the spirit of the shrine, and its protection flows through him, changing events to keep him from harm. The Warrior permanently gains +1 to his Luck characteristic. |
43-46 Lost City. The Warriors descend into a wide vale which from a distance looked like a fertile river valley. As they reach the bottom of the slope the air shimmers and the illusion disappears. They find themselves in the middle of a deserted ruined city, choked by the shifting sands. The Warriors lose all sense of direction amongst the empty streets and sand filled avenues, and must add two weeks to their journey time.
51-55 Vale of Gloom. Trudging through the searing heat of the day, the Warriors see the hazy outline of the great pyramid tombs of the dead in the far distance. However, before them a great crack opens up in the ground, a ravine many miles long and so deep that light does not penetrate its depths. A small path leads down the cliff face into the dismal chasm below. The Warriors now have a choice to make. They can carry on across the sun-blasted wastes, or they can descend into the Vale of Gloom and try to find a way across to the other side.
If they do not descend into the vale, roll a dice. The number rolled is the number of extra weeks travel the Warriors have to make as they skirt around the ravine.
If the Warriors descend into the ravine, they are surrounded by darkness, and clutching tendrils of fear reach for their quailing hearts. Taking it in turn, starting with the leader and progressing in order of Initiative, each Warrior should roll a dice, and consult the table below to see what happens to them in the Vale. Each result takes a day to resolve, and the Warriors should keep rolling until they manage to escape the dreadful place.
| D6 | Vale of Gloom |
|---|---|
| 1 | Guardians of the Vale. The Warriors are set upon by raging beasts in the black depths of the ravine. Place a dungeon room floor plan on the table to represent the floor of the vale. Roll once on the Undead Monster Table for the Warrior's Battle-level to see what fell creatures they meet. Once these Monsters have been defeated, the Warriors gain gold plus one Treasure card. Now carry on rolling on this table for the next day. |
| 2 | Curse of the Dead. A wailing scream echoes through the canyon, cursing the Warriors for disturbing the dead in the Vale of Gloom. Take a Warrior counter. That Warrior must deduct -1 from his Movement characteristic, as fear and despair make his feet drag in the choking dust. If a Warrior's Movement characteristic is ever reduced to 0, then he falls prostrate to the ground, dead, to join the cadaverous inhabitants of the deathly Vale of Gloom forever. The Warriors' Movement characteristic will be renewed when they escape from the vale. Now carry on rolling on this table for the next day. |
| 3 | The Lord of the Vale. A shadow moves in the darkness, eerie witching lights playing in a deadly nimbus around a black hooded form. The Lord of the Vale, disturbed by the Warriors' intrusion, demands tribute before allowing you safe passage through his realm. Each Warrior must pay 1D6 x his Battle-level x 10 gold (eg, a level 3 Warrior will have to pay 1D6x30 gold) before he is allowed to pass. Any Warrior who cannot, or will not pay, must deduct 1D3 Wounds permanently from his Starting Wounds score as the Lord leeches his life essence as payment instead. Now carry on rolling on this table for the next day. |
| 4 | Lost. The Warriors wander aimlessly around the dismal valley, with no sense of direction or purpose. Above them there is no sign of sun or sky, whilst below them all is dark and silent as the tomb. Now carry on rolling on this table for the next day, and so on. |
56-62 Bat Swarm. One night, as the Warriors chat around a small campfire, the moon seems to be obscured by a cloud. As they look up they see the sky is filled with bats, which sweep down to attack them.
There are thirty bats in all. Each Warrior must roll 1D6 and add their Strength, this is the number of bats they kill, and they gain 5 gold for each one. Work out how many bats are left: the result is the number of Wounds that each Warrior takes, with no deductions. These Wounds are infected and cannot be healed during this adventure. Reduce the Warrior's Starting Wounds accordingly. As soon as they return to civilisation the Wounds can be cleaned out professionally and the Warrior's Starting Wounds return to normal.
63-66 Hounds of Nagash. Just after dusk the Warriors look for a campsite in the lee of a huge granite obelisk surrounded by dusty flagstones. The sound of hunting horns blares out nearby, and the crash of pursuit echoes across the stones. Suddenly, a huge lion, shimmering with golden light, leaps out of the surrounding scrub. It gazes at the Warriors with all-seeing eyes and then unleashes a mighty roar before turning and running off. Moments later the Warriors see the hunters. The riders are clad in dark armour, horns and batwings adorn their ornate helms. They ride dark chariots pulled by skeletal steeds and a pack of daemonic, red-eyed jackals surrounds them.
The Warriors can stop the hunters or hide and let them pass.
If the Warriors hide then the spirit of the obelisk curses them, they all lose 1 Luck point immediately and permanently. If they have no Luck they lose a point of Toughness instead.
If the Warriors confront the hunters roll 2D6 and add the party's Battle-level. This is the number of hunters. Next, each Warrior should roll a dice and add their Weapon Skill, this is the number of hunters they manage to slay. Each hunter left will make one attack before they are finally killed, distributed using the rule of One-on-One and the Warrior counters. They attack at Strength 10 with Chill Blades, and have a Weapon Skill of 10. If a Warrior takes any wounds from a Chill Blade then reduce their Starting Wounds permanently by 1D3.
Whatever the result of their fight, the Warriors gain the blessing of the Golden Lion. This will allow them to heal themselves to their Starting Wounds once per adventure, and will happen at the end of the turn the first time they are reduced to zero Wounds.
Catacombs of Terror Events
Once the Warriors reach the Catacombs of Terror, who knows what menacing evils they will find lurking in the darkness? The Catacombs are amongst the most dangerous places in the Warhammer World, and the Warriors would be well advised to walk softly and carry a big sword!
In the games you have played so far, you have used the Event cards that come with this pack to see what happens to the Warriors in the Catacombs of Terror. This section of the rules gives you an alternative system to use if you wish, incorporating the Event Tables from the Warhammer Quest Roleplay Book, and including 11 new extra Undead Events. Of course, if you wish, you can just keep using the Catacombs of Terror Event cards as they are!
Whenever an Event card is picked up which has an "E" in the top corners, roll a dice. On a score of 1 or 2 follow the Event on the card. On a roll of 3 or 4 use the Event Table from the Warhammer Quest Roleplay Book, and on a 5 or 6 use the Catacombs of Terror Events Table printed below.
Catacombs of Terror Events Table (D66)
A D66 table works by rolling two dice. The first dice gives you a 'tens' value, and the second gives 'units'. For example, if you roll a 3 and a 4, you have rolled 34. If you roll a 1 and a 6, you have rolled 16, and so on.
11-13 Ambush. Draw the next two Event cards.
14-16 Trap - Lightning Bolt. Roll a D6 for each Warrior. The Warrior with the lowest score has set off a trap, causing a bolt of magical lightning to shoot into him from a hieroglyph on the ceiling. The Warrior suffers 2D6 Wounds, with no deductions for armour.
There is a chance that the lightning may leap to another Warrior. Roll a dice: on a roll of 1, 2 or 3 another Warrior is affected. The bolt will hit the Warrior nearest to the original victim. If two Warriors are the same distance from the original victim, the Warrior with the most points of armour is affected (dice randomly if there is still no clear target). This continues until all the Warriors have been hit once or you roll a 4, 5 or 6.
No treasure is gained for this Event.
21-23 Trap - Dark Mist Spell. The Warriors are suddenly enveloped by a dark mist. Stumbling around for a few minutes the Warriors bump into each other and the walls. Suddenly the mist dissipates, but the Warriors discover some of their equipment is gone. Take a Warrior counter. That Warrior will lose any non-magical weapons (including missile weapons) and armour that he was carrying.
No treasure is gained for this Event.
24-26 Treasury. The Warriors have stumbled upon a treasury filled with gold, weapons, magic items, jewels and armour. Take the next Event card and resolve it now. In addition to any treasure from the Event, the Warriors each gain 2D6x100 gold, a Treasure card and a roll on the Dungeon Room Treasure Table!
31-33 Ghost. After some time, the Warriors realise that they are being followed by a ghostly figure, a proud looking man wearing fine armour. The only thing he lacks is a sword. He indicates that one of the swords you carry is his. You have a choice - do you give up one of your weapons and let him rest in peace, or do you deny that you carry his sword?
If you do not give him a sword then he grins cruelly and reaches out to touch one of the Warriors. That Warrior is frozen to the spot for D6 turns, during which time he may neither attack in any way nor be attacked in any way. Take another Event card now.
If you give him a weapon then the ghost smiles benignly and makes to leave. Before he goes, he indicates four amulets in a far corner.
"These may keep you from harm. Alas that I did not find them sooner."
The amulets each contain D6 points of Luck which the Warriors can use instead of their own Luck. When the stored Luck is exhausted, the enchantment of the amulets fails, and they cannot be used again.
No treasure is gained for this Event.
34-36 Sarcophagus. The Warriors find an ornate sarcophagus in a secret alcove. Take a Warrior counter to see who opens the sarcophagus. Roll a dice to see what that Warrior finds.
| D6 | Result |
|---|---|
| 1-2 | The Warrior gasps in sheer horror, and slams the lid shut. When he turns back to face the Warriors, his hair is pure white and he seems to have aged dramatically. He never tells what unspeakable horror he saw in the sarcophagus. He loses -1 from his Strength, permanently. |
| 3-4 | The sarcophagus is empty, but as the lid is slammed shut, a screeching alarm is heard in the darkness. Take another Event card now. |
| 5 | The sarcophagus contains precious stones worth 1D6x200 gold! |
| 6 | The sarcophagus contains hidden treasure - take a Treasure card. This does not count towards the total number of Treasure cards the Warrior has gained in this adventure. |
Once one Warrior has opened the sarcophagus, another may try if he wishes. Each Warrior can try once and once only.
No treasure is gained for this Event.
41-43 Tomb Chamber. As the Warriors move about, one of them steps on a false flagstone, which gives off an audible click. A section of the wall slides back to reveal a large room beyond. Take a Warrior counter to see who set off the secret lock and place a new doorway against any spare side of the board section that Warrior is on.
If the Warriors explore through the new doorway place the Tomb Chamber Objective Room on the other side. This room contains three Events cards' worth of traps and Monsters. However, while in the Tomb Chamber a roll of 1 or 2 rolled in the Power Phase will mean an Unexpected Event has occurred. The Warriors all gain a piece of objective room treasure if they manage to clear out the Tomb Chamber.
44-46 Escape or Die! As the Warriors progress through the darkness, one of them knocks against a rock that protrudes from the ceiling of the tunnel. To the Warriors' horror, the rock falls away, and sand pours down into the tunnel from a hole in the roof. As they stand horror-struck, they hear a dull rumbling in the distance as huge slabs of rock slowly move into position to seal the tomb forever. Each Warrior rolls 2 dice, and the scores are added together. The total shows how many turns the Warriors have to find the mechanism that disables these ancient defences.
From now on, whenever the Warriors enter a new board section, then whatever else happens on that section, they may search for the deactivation mechanism. To successfully stop the mechanism, the Warriors must declare which single Warrior is searching, then take a Warrior counter at random. If the counter is the one for the chosen Warrior, then the mechanism has been found and deactivated.
If the Warriors do not find the mechanism in time, and are still in the Catacombs, then they will be sealed in forever. Once their time is up, they may not even roll on the Escaping Table printed in the Adventure Book.
51-53 The Pit of Eternity. The ground suddenly collapses inwards, and a great rift appears, exuding a huge cloud of billowing smoke, tinged with flecks of red. A screeching howl echoes from the walls.
Place a Pit of Despair template anywhere on the board, within the light of the lantern. Any model covered by the template will be sucked down and destroyed on a D6 roll of 6. Models which are not sucked down must be placed at the pit's edge.
Each Warrior may look into the pit once, as long as they are standing next to it and do nothing else for a whole turn. Roll 1D6 for each Warrior that has a look.
| D6 | Result |
|---|---|
| 1 | The noxious fumes overcome the Warrior. He must roll 1D6 and add his Toughness. On a score of 7 or less he loses 1D3 Wounds permanently. |
| 2-4 | The Warrior is transfixed by the rhythmic pulsing within the Pit of Eternity. The Warrior may do nothing until a 6 is rolled in the Power Phase. Monsters attacking the Warrior in hand-to-hand combat have +2 to all their to hit rolls. |
| 5 | The Warrior reaches into the pit, and his hand closes about an item magically placed there. The Warrior immediately gains a piece of objective room treasure. |
| 6 | As he gazes into the depths, the Warrior realises that he is looking into the well of all consciousness. Every lie, truth, ambition and weakness is revealed to him for a brief moment, and he is filled with a giddying sense of knowledge. This new-found inner awareness is represented by an additional point of Luck, added to the Warrior's total immediately. This is a permanent increase. |
No treasure is gained for this Event.
54-56 Curse of Years. Time drags slowly as the Warriors proceed upon their way. Eventually, one of the Warriors wipes his sweaty brow and exclaims, "How long have we been down here my friends? How long since we saw the light of day?" His companions shake their heads in confusion, as none of them has the faintest idea as to the answer. As they look about themselves, they realise that they are but shadows of their former selves, as time has mysteriously worked its way with them. Each Warrior must roll a dice.
| D6 | Result |
|---|---|
| 1 | The Warrior is now old and grey, his eyes rheumy and his grip frail. He must deduct -1 from his Strength or Toughness, and 1D6 from his Starting Wounds. |
| 2-5 | Although there are a few grey flecks in his hair, the Warrior has not aged sufficiently to affect his battle worthiness. |
| 6 | Strangely, time has run counterclockwise. The Warrior is returned to the first flush of youth, a teenager in the prime of fitness. He gains +1 Strength or Toughness, plus an extra 1D6 Wounds. |
61-63 Laughter of the Damned. An insidious spell is woven around the Warriors, who begin to chuckle, then laugh, then burst into hysterical guffaws as their faces twist into rictus grins. From now on, the Warriors must each roll 1D6 and add their Toughness at the start of every turn, after the Power dice has been rolled. If they score a 6 or less they are at -1 to all of their rolls for that turn, as they are overcome with fits of laughter. If ever they roll a natural 6 the spell has been broken totally and they are no longer affected by it, unless of course it is cast on them again...
No treasure is gained for this Event.
64-66 Death Rot Fungus. One of the Warriors disturbs some grotesque fungus on the floor, sending up a cloud of infectious spores.
Draw a Warrior counter to see who stepped on the Death Rot fungus. That Warrior and any other Warrior in an adjacent square to him have their Movement, Strength and to hit roll reduced by -1 for the rest of the dungeon. This can only be reversed by a magic potion or healing spell.
No treasure is gained for this Event.
Magic Items of the Undead
The legions of the Undead lay claim to many potent magic artefacts, often centuries old and acquired when they were made. Necromancers and Liches can turn their powers to constructing devices and weapons that aid them in their rituals, or create many corpses for them to use their dark arts on. The tombs and pyramids of the Kingdom of the Dead are filled with a variety of ancient items, buried with the dead kings in distant millennia.
In the Warhammer Quest Roleplay Book, there are tables of magic items, weapons and armour for the Monsters. On the Monster charts, some Monsters are denoted as having one or more items. If the Monster table indicates that a particular Monster has magic items, weapons or whatever, you roll on the relevant table in the Roleplay Book.
Over the next few pages you will find three new tables that give the rules for specific Undead magic weapons, items and armour. Now, whenever you are playing a Undead adventure, and come across a Monster in the adventure who has any sort of magic items, use the following rules:
If the Monster is a Wight, Necromancer, Liche, Vampire or Mummy, then use the Undead Magic Items tables.
Otherwise, use the normal magic items in the Warhammer Quest Roleplay Book. However, there are some Undead in the original Warhammer Quest Monster tables as well, and if you prefer, they can use these new items too. You can either decide at the start of the game which tables you are going to use, or roll a dice whenever some of them turn up. In this case, if the Monster tables from Warhammer Quest Roleplay generate Undead Monsters who have special items of magical equipment such as weapons, armour and magic items, roll a dice. On a score of 1, 2 or 3 generate their magic items etc from the normal tables from the Warhammer Quest Roleplay Book. On a score of 4, 5 or 6, use the following tables.
All other rules for magic items, weapons and armour for Monsters apply, such as multiple Monsters with magical items. These rules can be found in the Monsters Special Rules section of the Bestiary.
Undead Magic Weapons
1 Dread Blade. This sword exudes an icy chill. The air around its blade swirls with small ice crystals, freezing everything nearby.
Any Warrior standing in a square adjacent to the wielder at the end of the turn suffers 3 Wounds, with no deductions. This is Fatal Damage (see p81 of the Warhammer Quest Roleplay Book).
2 Chaos Tomb Blade. This blade is forged from the raw fabric of Chaos and constantly thirsts for blood.
Every time a Warrior is reduced to zero Wounds by this blade roll a D6. On a roll of 1 the Warrior loses -1D3 Wounds permanently.
3 Blade of Resurrection. As the blood spilt by this blade sprays to the ground, it coalesces on the floor. When the bloody puddle measures two hand spans wide, a skeletal corpse bursts from the red pool and attacks the Warriors.
Make a note of how many Wounds the Monster armed with this weapon inflicts. For every 10 Wounds it causes a Skeleton Warrior armed with a sword is created. The Skeleton Warrior is placed using the normal rules and may make its attacks in the next Monsters' Phase.
4 Grave Ripper. A Grave Ripper sword is sharply serrated and made from black steel. Despite its dark surface it glows with an unnatural blue sheen and tears through armour with ease.
Whenever the wielder hits his foe, this blade ignores 1D6 points of armour. If the roll is a 6 the blade destroys one randomly determined piece of armour the affected Warrior is wearing.
5 Axes of Nagashizzar. These axes were created by the Great Necromancer Nagash and have ground warpstone incorporated into their blades. They are always carried in pairs and the warpstone in the blades can have horrifying effects on their victims.
The Monster carrying these axes gains an extra Attack. In addition, if a Warrior is reduced to zero Wounds by an Axe of Nagashizzar roll 1D6 and consult the following table.
| D6 | Effect |
|---|---|
| 1 | The Warrior is dead and may not be healed by any means. He may be the subject of a resurrection spell or similar magic in later turns. |
| 2-3 | The Warrior loses -1D6 Wounds permanently. |
| 4 | The Warrior loses -1 Toughness permanently. |
| 5 | The Warrior loses -1 Strength permanently. |
| 6 | The Warrior suffers no additional effects. |
6 Flail of Skulls. This ancient weapon is cunningly wrought from lengths of black chain. These link together hideous skulls which continue to chatter and champ their jaws.
The jaws of the flail may bite a Warrior who is hit. On a natural to hit roll of 6 the Warrior takes an extra 2D6 Wounds with no deductions at all.
Undead Magic Items
1 Staff of Flaming Death. This staff hurls gouts of burning flames at the Warriors.
This staff gives the Monster the equivalent of the Breathe Fire (3) special ability. See the Warhammer Quest Bestiary section for details.
2 Skull Staff. The jaws of the staff gnash and mutter, warning the bearer of hostile magic or magic items.
Only a magic-using Monster may have this item. If the Monster does not use magic roll again on this table.
This staff allows the bearer to re-roll any Resist Magic or Dispel Magic attempts which the Warriors make. If this second dice roll fails, the spell works as normal. In addition, any magic item used against the wielder has no effect on a D6 roll of a 6, rolled every time the item is used. Weapons will cause normal damage, but no additional effects. Items with limited uses still count as being used, even if the attempt was unsuccessful. For example, a Frostblade will not freeze the bearer and may not be used again for the rest of the adventure.
3 The Cursed Books of Har-Ak-Iman. These books contain the insane ramblings of the Arabian Necromancer Har-Ak-Iman, the most evil and depraved man ever to draw breath in the world (or so it is claimed.
These books radiate so much pure evil that nearby enemies find themselves physically overcome and shaken. Any Warrior adjacent to a Monster carrying a Cursed Book has a -1 modifier on their hand-to-hand and missile to hit rolls. All spells cast by a Warrior on the same board section cost an extra 1 point of Power.
4 Bracelet of Khemri. Khemri is one of the major cities in the Kingdoms of the Dead. This bracelet seems unnaturally twisted and can be used to ward off blows.
Any hand-to-hand attacks against this Monster are deflected by the bracelet on a D6 roll of 6 and have no effect. This is in addition to any other abilities the Monster may already have.
5 Amulet of Helsnicht. This bronze amulet was forged by the Necromancer Dieter Helsnicht and allows the wearer to use the dark winds of magic, summoning creatures from the grave, or healing his own wounds.
Roll 1D6 for the bearer at the start of each Monsters' Phase.
| D6 | Result |
|---|---|
| 1-2 | The amulet has no effect this turn. |
| 3-5 | The bearer creates 1D6 Skeletons, placed immediately using the normal rules. They may attack in this Monsters' Phase. |
| 5 | The bearer gains unnatural vitality and may heal 2D6 Wounds immediately. This may not take the Monster over its Starting Wounds total. |
| 6 | The bearer may immediately cast a single Necromantic spell. See the Warhammer Quest Bestiary section for details. |
(The table is printed with "3-5" and then "5" as separate rows; transcribed as printed.)
6 Staff of Osiris. This staff is tipped with a symbolic carving of a snake which may magically strike out at nearby Warriors.
Any Warrior standing next to the Monster at the start of the Monsters' Phase will take a hit on a roll of 4, 5 or 6. The attack has a Strength equal to the Warrior's Battle-level and is worked out as normal.
Undead Magic Armour
1 The Blighted Shield. This shield is forged from iron and warpstone and glows a dull red in the dark. It blazes to life when magic is cast at the bearer.
The shield adds +1 to the Monster's Toughness. In addition, any spell cast at the bearer may be reflected back at the caster. This works on a roll of 6 on 1D6, and the spell will affect the casting Warrior as normal.
2 The Helm of Krell. Krell was once a mighty Chaos Warrior who now serves Nagash in unlife. His rune encrusted helm can cause madness in those who gaze upon it.
All Warriors are at -1 to hit the Monster, with hand-to hand and missile attacks. In addition, any Warrior that rolls a 1 to hit the wearer has been temporarily seized by the madness of Krell, and may do nothing at all for a whole turn. Monsters are at +1 to hit a Warrior affected by the Helm of Krell.
3 Armour of Warding. This full suit of armour is shaped like a human skeleton and is made from the toughest steel gilded with ancient gold. The shining surface of the armour deflects enemy spells.
The Monster gains Magic Resistance (4). See the Warhammer Quest Bestiary section for details.
4 Armour of Blight. This armour is forged from the decay of centuries and gives unnatural vitality to its bearer.
The Monster gains Regenerate (2). See the Warhammer Quest Bestiary section for details. This is in addition to any abilities the Monster may already possess.
5 Breastplate of Numas. This ornate red breastplate was forged centuries ago in the city of Numas. Its wearer can survive terrible wounds that would kill other Monsters.
When the Monster wearing this armour is reduced to zero Wounds, roll 1D6. On a roll of 5 or 6 it is not dead, but has another 1D6 Wounds remaining. Only if you roll a 4 or less is the Monster finally dead.
6 The Cursed Armour of Quatar. This infamous suit of cursed armour is thousands of years old, crafted at a time when scaly monsters slithered over the land, and dragonfire streaked the skies. Who can now guess the dark race or purpose of its creator. The armour slowly leaches the life from its wearer, until they are no more than a skeleton of withered bones held together by evil magic.
The Monster wearing this armour loses 1 Attack, but has an additional +3D6 Starting Wounds. No Monster may ever have less than 1 Attack.
The page 25 vignette (a short comic narrative about Guntar Leitzen, Gimball Jotweed and Finastan the Magnificent fighting Mummies) is flavour fiction and is not transcribed.
Undead Monster Tables
To save space, the Monster tables in this book are presented slightly differently from normal. Roll on the appropriate table below to see what sort of and how many Monsters the Warriors encounter. All the Monsters' characteristics are given after the Monster tables, in one big section. They are listed alphabetically, so you can find their rules and stats quickly and easily.
Here are two new Undead creatures for Warhammer Quest that we simply couldn't fit into the Roleplay Book!
Carrion
Carrion are the remains of ancient flying creatures that soared the skies before the coming of Elves or Dwarfs. Seated across their skeletal backs is a wraith-like creature that feeds off the departing spirits of the slain.
- Wounds: 10
- Move: 8
- Weapon Skill: 3
- Ballistic Skill: -
- Strength: 3
- Toughness: 3
- Initiative: 4
- Attacks: 3+
- Gold (each): 450
- Armour: -
- Damage: 1D6
Special Rules
Carrion Attack (Ambush Magic, A); Fear 6; Fly.
CARRION ATTACK: Each time the Carrion makes a successful hit, roll twice for damage (1D6+3) and apply both lots of damage to the Warrior.
Zombie Dragon
Dragons have ruled the skies since time began, and they are fearsome and mighty creatures. When a dragon feels the call of death, it flies wearily off to the Plain of Bones to breathe its last among the bones of its kind. Here the winds of Dark Magic are strong and occasionally a dragon's massive wings will beat again with unnatural vigour.
- Wounds: 75
- Move: 6
- Weapon Skill: 4
- Ballistic Skill: -
- Strength: 7
- Toughness: 6
- Initiative: 3
- Attacks: 6
- Gold: 5000
- Armour: 8
- Damage: 6D6
Special Rules
Fly; Ignore Blows 4+; Ignore Pain 7; Large Monster; Pestilential Breath (Ambush Magic, A); Plague; Terror 13.
PESTILENTIAL BREATH: Zombie Dragons can belch forth a cloud of pestilential corrosive gas that shrivels all it touches. When the dragon attacks roll a dice to see how many Warriors are affected. If the score is greater than the number of Warriors all of them have been affected. Any Warrior affected by the pestilential breath suffers 3D6 Wounds with no deductions for armour. Any Warrior reduced to zero Wounds by this attack suffers from the Zombie Dragon's Plague ability and will therefore lose -1 Toughness when he is healed back to life.
Level 1-2 Monster Table
| D66 | Monsters |
|---|---|
| 11 | Roll on the Level 3-5 Monster Table |
| 12-13 | 1D3 Tomb Guardians |
| 14-16 | 1D6+6 Giant Bats |
| 21 | 1D3 Carrion |
| 22 | 2D6 Giant Spiders |
| 23 | 2D6 Giant Rats |
| 24-31 | Luthor |
| 32-33 | 1D6+3 Skeletons, armed with [1-3] Bows (Str 4) or [4-6] Swords |
| 34 | 1 Wraith |
| 35 | 2D6 Giant Rats |
| 36 | 1 Gigantic Spider |
| 41-42 | 2D6 Ghouls |
Level 3-5 Monster Table
| D66 | Monsters |
|---|---|
| 11 | Roll on the Level 6-7 Monster Table |
| 12-13 | 1D6 Tomb Guardians |
| 14-16 | 1D6+2 Ghosts |
| 21 | 1D6 Carrion |
| 22 | 1D6+2 Ghosts |
| 23 | 1D3+1 Gigantic Spiders |
| 24-31 | Luthor & 1D6 Carrion |
| 32-34 | 1D6 Mummies |
| 35 | 1D6 Wights |
| 36 | 1D3 Mummies |
| 41 | 1 Necromancer, 2D6 Ghouls & 1D6+3 Skeleton Spearman |
| 42 | 1D3 Wight Lords |
Level 6-7 Monster Table
| D66 | Monsters |
|---|---|
| 11 | Roll on the Level 8 Monster Table |
| 12-13 | 1 Necromancer, 2D6 Skeletons, 1D6 Mummies, 1D6 Tomb Guardians & 3 Carrion |
| 14-16 | 1 Tomb King, 1D6 Mummies & 3 Carrion |
| 21 | 1 Wight Lord, 1D6 Wights & 3 Carrion |
| 22 | 1 Vampire Count, 1D3+2 Wraiths & 2D6 Zombies |
| 23 | 1 Vampire Count, 1D6+3 Skeleton Spearmen & 2D6 Ghouls |
| 24-31 | 1D3+2 Wraiths, 1D6 Carrion, 2D6 Skeletons armed with [1-3] Swords, [4-6] with Bows) & 2D6 Zombies |
| 32-34 | 1 Necromancer, 2D6 Skeletons (Roll a D6: 1-3 Armed with Swords, 4-6 Armed with Bows) & 1D6+3 Zombies |
| 35-36 | 1 Vampire Count, 1 Wight Lord & 6 Wights |
| 41-42 | 1 Vampire Count, 1D6+3 Skeleton Spearmen & 2D6 Ghouls |
Level 8 Monster Table
| D66 | Monsters |
|---|---|
| 11 | Roll on the Level 9-10 Monster Table |
| 12-13 | 1 Master Necromancer, 10 Skeletons (Roll a D6: 1-3 Armed with Swords, 4-6 Armed with Bows), 1 Tomb King, 1D3+2 Wights & 6 Tomb Guardians |
| 14-16 | 1 Master Necromancer, 1 Tomb King, 1D6 Mummies, 1 Wight Lord & 3 Wights |
| 21 | 1 Wight Lord, 3 Wights & 6 Carrion |
| 22 | 1 Zombie Dragon |
| 23 | 1 Vampire Count, 1 Necromancer, 2D6 Skeletons & 2D6 Zombies |
| 24-31 | 1 Zombie Dragon |
| 32-34 | 1 Master Necromancer, 1 Necromancer, 1 Wight Lord, 2D6 Skeletons & 6 Wights |
| 35-41 | 2 Necromancer Champions, 10 Ghouls, 6 Tomb Guardians & 2D6 Skeleton Spearmen |
| 42 | 1 Vampire Lord, 1 Master Necromancer & 6 Wights |
Level 9-10 Monster Table
| D66 | Monsters |
|---|---|
| 11 | Roll twice on this table |
| 12 | 1 Liche King |
| 13 | 1 Master Necromancer, 2D6 Skeletons, 1D6 Mummies & 2D6 Tomb Guardians |
| 14-16 | 1D3 Tomb Kings & 1D6 Mummies |
| 21 | 1 Liche, 1 Wight Lord, 6 Wights & 6 Carrion |
| 22 | 1 Zombie Dragon |
| 23 | 1 Vampire Count, 1 Necromancer, 2D6 Skeletons & 1D6+3 Zombies |
| 24-31 | 1 Liche & 1 Zombie Dragon |
| 32-33 | 1 Master Necromancer, 2 Wight Lords, 2D6 Skeletons, 6 Tomb Guardians & 1D6 Wights |
| 34 | 1 Vampire Lord, 1 Vampire Count & 2D6 Skeletons |
| 35-36 | 1 Wight Lord & 1 Zombie Dragon |
Undead Monsters
The characteristics of the Undead Monsters are listed below in one table. The column headed "I" is printed as "1" in the source (Initiative).
| Race and Type | M | WS | BS | S | T | W | I | A | Gold | Arm. | Dam. | Special Rules |
|---|---|---|---|---|---|---|---|---|---|---|---|---|
| Carrion | 8 | 3 | - | 3 | 3 | 10 | 4 | 3+ | 450 | - | 1 | Carrion Attack (Ambush Magic, A), Fear 6; Fly |
| The Dread King | - | 6 | 1+ | 5 |
Note on conflicting printed profiles: the Dread King's Event card entry in the Denizens section (Wounds 18, Weapon Skill 5, Strength 4, Toughness 4, Attacks 1, Damage 2D6, Gold 700) and Luthor's entry in the Denizens/Luthor section (Weapon Skill 3, Strength 5, Toughness 5, Attacks 1, Damage 1D6, Gold 300) do not match the profiles in this table (Dread King: W34, WS6, A4, Dam 3, Gold 2,780; Luthor: WS2, BS6, S4, T3, A2, Dam 1, Gold 250). Both are transcribed as printed; the source does not reconcile them.
Section 3
Andy Jones' Gamesmastering Guide
This section of the Catacombs of Terror Adventure pack sets you up for the Dark Necropolis adventure, which follows in a few pages. On this page you will find a light-hearted look at some of the complexities and nightmares of the arcane art of gamesmastering, which will hopefully impart some useful tips and ideas, and if not... It should be an entertaining read anyway!
If you Gamesmasters thought that The Doom of Gr!shnak was a beast to run, then welcome to your worst nightmare! The Dark Necropolis is a fairly complicated adventure, with quite a few twists and turns, and a detailed subplot. All the hard work has been done, however, as it has taken some time and quite a lot of blood, sweat and tears to get the Dark Necropolis ready for visitors. All you have to do is read, memorise and inwardly digest the following pages, and then bring the words to life for your impatient players. They will expect you to know the story inside out, and it will not do to disappoint your public.
One way you can limit the proportions of the task before you is to read through the whole thing once, to get a basic grip on the adventure, and then decide where you are going to play up to on the first session. After all, you do not have to play the whole adventure at one sitting, even if it is traditional to keep playing until the small hours and beyond. This way, you will only have to have an in-depth knowledge of the first Deep, for example, whilst maintaining a veneer of all-knowing omnipotence to the players. Before you get to play the next Deep, you should have at least a day or so to swot up the next part of the adventure.
The Warriors
Before starting the adventure, have a session where you do a lot of the setting up. Let your players know that you are thinking of running a Battle-level 7 adventure (or whatever level you decide to run the adventure at), and spend an evening getting all the players' Warriors together. This will be no problem at all (perhaps even unnecessary) if you are playing an ongoing campaign and know the four (or more) Warriors like friends of old.
However, you will still have to go through their Adventure Record sheets to see how tooled up they intend to be, and you can try to spot any items which you think are likely to ruin the adventure. Any skilled Gamesmaster will be able to think of a good excuse for getting rid of such an item, at least for the duration of the adventure. You can conceal this blatant manipulation by rolling a few dice for a number of items, some of which you do not care for, and then mysteriously giving the player a message saying "Your Boots of Swiftness seem to feel heavy, unmagical..."
Of course, this sort of preparation is absolutely paramount if there are any new Warriors or players in your group. The worst thing in the world is to find out that a Warrior has every item of kit under the sun and is all but invulnerable to anything you throw at him... And you have no way of knowing if he cheated or not (of course he did, he's a player, isn't he, not an upstanding and trustworthy Gamesmaster!).
Spotting these kind of innocent and understandable mistakes before the game starts will avoid any acrimonious exchanges later on, and will allow you to mediate the position in advance. For example, how on earth will you respond if at the first sign of danger all the Warriors unsling Hammers of Sigmar? TWO EACH?! Preparation is the Gamesmaster's watchword.
Apart from anything else, a good preparation and briefing session gives the players different expectations than saying "Greetings victims, sorry, Warriors. We'll start my new adventure tonight!" and then spending hours setting everything up. If the players know they are going to a briefing session, then they will not expect to be slaying any Monsters straight away, and will probably actually quite enjoy the opportunity to get an in depth introduction to the other Warriors and the adventure proper.
Even if you do the briefing on the same night as the first Deep, keep the two parts of the game separate, and let the players know what you are doing - after all, you run the show. If you do not make things clear, the front end of the adventure can often degenerate into you hurriedly reading out bits of text, to a yawning accompaniment of "Yeah, yeah, yeah, wheel in the Trolls and let's rock'n'roll". This will not be because the introduction is dull, simply that you have wrongly set up the players' expectations. Give them the briefing first, in a dark room, the mysterious introduction for the game which will follow...
Hopefully, you will end up with a group of players with a vivid picture of where they are, what they know, who they are and what they are trying to do.
Of course, you could just throw the introduction away completely and wheel in the Trolls...
Can You Wing It? Yes You Can...
Sometimes players can be awkward, recalcitrant, miserable beggars. Actually, it would probably be just as well to assume that this will be the case. You are out to get them and they are out to get you. Sort of. Anyway, it often happens that the players try and do exactly what they shouldn't. Show them the entrance to a pyramid, with a big neon sign, ticket booth and free passes if they go in within the next five minutes and you can be sure that they will want to go off and check out the strange coloured patch of desert on the horizon. Expect this. It will happen.
Your job is to get them down the pyramid one way or another, or make up an adventure on the spur of the moment. Like awkward sheep on a sheepdog trial, the players know exactly where they are supposed to go, but they are often just plain awkward. Remember, they enjoy this, they want to see you squirm as they prove that a single Gamesmaster is no match for the four lightning-sharp brains of the players. Obviously, this is not the case, and you have to gently shepherd the little lambs to the place you want them - ready for the slaughter is about right most of the time.
This is actually quite easy. In the example above, you can let them head off for the patch of sand, and after about a hundred yards get them to make Initiative tests (which they all fail, no matter what they roll - it's good to be in control!), and then make them fall through a hole which opens up beneath them. They have fallen down a pit, into... The first corridor in the adventure!
With a little bit of ingenuity and quick thinking, most things the players dream up can be sorted out like this. The one thing you must never do is say, "Come on lads, you can't go there, it's not written up," as then they have won, and we simply can't have that now, can we!
Dark Necropolis
The Dark Necropolis lies at the heart of a web of treachery, violence and evil which spans thousands of years, and provides the setting for a desperate struggle against the forces of the Undead. This adventure takes a party of Warriors at Battle-level 7 or thereabouts on a continent-spanning romp of epic proportions. If you intend to take the part of one of the Warriors, then READ NO FURTHER! If you intend to be the Gamesmaster, then this section is for your eyes only.
Dark Necropolis is set in Khemri, in the Land of the Dead. The Warhammer Armies Undead book contains a wealth of information about this dreaded realm. If you have read the Undead book, then you will have a good idea of what is in store for the Warriors. The background section of this book also contains a useful guide for this blasted region.
You will need to make sure that the Warriors stay together as a group - you do not want some of them heading off to Sylvania whilst the others visit Karaz-a-Karak! You will not need any floorplans for these introductory paragraphs, although you may find that some of the information presented gives you ideal opportunities to play mini adventures of your own design along the way.
To play through Dark Necropolis, you will need a Gamesmaster and a group of four Warriors. You can play with more than four Warriors if you like, but remember to adjust the number of Monsters accordingly. Remember that this adventure is subject to all the rules and guides from the Roleplay Book, including the Declaration Phase and so on. There are many traps and puzzles described in this adventure, with guides as to how to resolve them, but the Warriors will be bound to come up with all sorts of strange ideas that you will have to resolve using Initiative tests, Willpower tests and so on. The more familiar you are with the Roleplaying Book and with this adventure, the easier you will find it to react to even the weirdest of their ideas.
The adventure is designed to work with Warriors of Battle-level 7 or so, but the basic plot line should work for Warriors of any level. As the Gamesmaster, you may decide to play this adventure at any Battle-level you like. The logic and storyline will hang together perfectly, you will just have to go through and tailor the Monsters to suit the Battle-level of the Warriors. As written, the arch villains are Laranscheld, Luthor and the Dread King. As the adventure is aimed at Warriors of about Battle-level 7, the Monsters are very tough indeed. The profiles for these arch villains have been toughened up a fair deal to bring them up to par with the Warriors.
Getting to the Dark Necropolis
Rather than just dumping the Warriors in Khemri, with no explanation as to how they arrived there or what they are doing, this adventure has a semi-random quasi-adventure at the beginning.*
Before the rules for the adventure proper, you will find a number of background information paragraphs, which serve to lead the players into the adventure. Each paragraph is numbered, and related to a specific place. At the end of the paragraph you will see another two numbered locations mentioned, which tie in with other paragraphs. As each paragraph is read to the players by the Gamesmaster, they have to choose which location to visit next, and so on, until hopefully they end up at the Twisted Spire where the Dread King is to be found.
*Impressive language as befits a Roleplaying game.
Eventually, the players will be guided on towards the adventure proper, in Khemri, deep in the Land of the Dead. Depending on the choices which they made in the introduction, they will know more, or less of the background plot, and may even have a few items to help them along the way.
Have a look at the lead-in paragraphs, starting with "The Drunken Halfling" in Altdorf, and you will immediately see how this works.
The Dark Necropolis
The actual adventure takes part in Twisted Spire, the resting place of the Dread King, an ancient pyramid in Khemri. The pyramid is laid out over a number of different Deeps and as the Gamesmaster you should thoroughly familiarise yourself with the maps, traps, twists and turns before running the adventure.
The Gamesmaster background "A History of the Dark Necropolis" is not transcribed (see the transcription notes in the Table of Contents block).
Unexpected Events
If, during the adventure, a 1 is rolled in the Power Phase an Unexpected Event happens as usual. Shuffle the Undead Event cards and draw the top card. If it is an "E" event, see the rules for Undead Events on page 19 of this rulebook. If it is an "M" event, then roll on the Undead Monster Table appropriate to the Battle-level of the Warriors.
If the Event is Monsters, then the Warriors will be entitled to some treasure when the event is complete. Roll a dice to see what they find:
| D6 | Treasure |
|---|---|
| 1 | Gold. See page 67 of the Warhammer Quest Roleplay Book |
| 2-4 | Take a Treasure card |
| 5-6 | Roll on the Dungeon Room Treasure Tables from the Warhammer Quest Roleplay Book |
Treasure for Scripted Events
Most of the Monsters that the Warriors encounter in Dark Necropolis will be pre-written into the script, appearing at a specified location at a certain time. When the Warriors kill any of these Monsters, they get the gold as usual, but they will only get a Treasure card if the specific location says so. Usually, the treasure will be specifically related to the area or Monster in question. If no treasure is mentioned, the Warriors do not get any!
Handouts
At the end of this adventure, you will find a number of handouts. These should be photocopied, cut up and given to the players at the appropriate moments in the game.
Leading the Players to the Dark Necropolis
The paragraphs that follow are very brief descriptions of the various locations the Warriors may visit as they make their way towards the adventure. Feel free to flesh these out with mini adventures of your own devising, using floorplans, models etc as usual. This way, the Dark Necropolis adventure will become a campaign which could cover weeks of playing!
You might even like to start off with Battle-level 5 Warriors, hoping that by the time they get to the Necropolis itself, they will have gone up a level or two! In the first paragraph for example, describe the inn where the Warriors learn the rumours. Who tells them the rumours? Do you want to actually play out the inn encounter using floorplans? You can see that rather than just reading out the brief sketch outlines which follow, with a little thought you can expand them into exciting adventures in their own right.
In the paragraphs that follow, each useful location is followed by a number in brackets. This shows which paragraph to move onto if the players decide to go to that location.
Provisions. You may like to give the Warriors opportunities to buy provisions, bandages etc at some of these locations, as they will certainly need them when they reach the Dark Necropolis itself.
Time. It is up to you how long this epic introduction takes to complete, but if you wish, you could make the Warriors roll a certain number of weeks travelling between each numbered location, rolling on the Travelling Hazards Table, and disregarding any result which would bring their journey to a premature end.
The Story Begins
The Warriors start in the Empire city of Altdorf, and the following paragraph describes the rumours they overhear at "The Drunken Halfling", an inn of dubious repute. Think of a good reason why the Warriors are in this rundown area of Altdorf. Perhaps robbers have stolen most of their money...
1 The Drunken Halfling Inn. It is hard to tell what the inn looks like inside, as it is swathed in a thick fug of smoke from dozens of halfling briar pipes and a roaring fire. The smell of stale beer, sawdust, Ogre sweat and vomit more than make up for the lack of visual stimuli.
If you like, you can lay down a floorplan or draw a map of the inn, and play out a bar-room scenario. However you handle the start of the adventure, the Warriors need to get the following information while at the Drunken Halfling:
- The Grimoire Necris, a powerful book of dark magic, has been stolen. Those suspected include the outcast wizard Gunther Laranscheld and his son Alberto. They reside in Cripple Peak.
- There are also Strange Happenings reported in Sylvania, with many sightings of ghosts and worse.
- Thundrumm's Dragonback Book of Grudges. This ancient book tells about the Dread King, but pages are ripped out just at details of his specific location. The Dwarf custodian (if plied with gold and beer perhaps) tells of a pilgrimage recently passing through led by one "Gerard Laramere" - a hooded pilgrim (Gunther Laranscheld again!). He came with an entourage of glaze-eyed followers.
- Laramere paid in good gold, but no-one can remember what he looked like, exactly when he was here, or when he left (sorcery at work). He carried with him a black book (the Grimoire). The Book of Grudges of Lord Thundrong Thundrumm alludes to an axe, forged in the Dragonback Mountains, and now held by the Dwarfs of Karaz-a-Karak after the great shame of Ekrund. It says that the name of the true bearer of the axe was Grimdrang Thundrumm, and mentions a ruined stone circle in the Marshes of Madness, allegedly the source of great shame.
- The Book of Grudges also mentions a list of other 'grudged' names which are so old it's hard to tell whether the book refers to people, places, battles, rivers etc. Those legible are Nagash, Quatar, Numas, Khemri, Van Damneg, Settra and Arkhan.
- The Dwarfs of Barak Varr don't know any of these names, but say that others might...
The Warriors can now either go to Sylvania (3) or Cripple Peak (2). So, the Warriors can trek off to the Marshes of Madness (6), or make their way to Karaz-a-Karak (5).
2 Cripple Peak. Laranscheld's tower is deserted when the Warriors get there (although you could play through an adventure where Laranscheld gets away just in time). All the Warriors manage to find in the rubbish is a single ancient black coin, bearing the likeness of a skeletal lord (this is coinage of the realm of the Dread King). There is also a map of Sylvania.
5 Karaz-a-Karak. If the Warriors are polite and cheery, and if they know the name of the true bearer of the axe, then the Dwarf king of Karaz-a-Karak may give them a hearing. On payment of gold, ale, or any other valuables, they will entrust the Warriors with Grimdrang's axe. If he knows the name, then the Dwarf king might let a Dwarf (particularly a Slayer on his death quest) take the axe for nothing.
The Warriors must now choose whether to go back to Altdorf (1) or on to Sylvania (3).
Grimdrang's Axe. Who knows what dark secrets Lord Grimdrang Thundrumm of Ekrund learnt when he stormed the Lands of the Dead? He certainly learnt of the Dread King, and about the Undead. The axe he forged is designed with one thing in mind - laying Undead to rest, for good!
3 Sylvania. In this dark and brooding realm, the dead walk again. Many people have been taken as prisoners and carted away by the "hooded one" (Gunther Laranscheld). This would be a great opportunity to play a game out against some Undead - perhaps the Warriors meet Gunther's son, Alberto, the bungling Necromancer (Warhammer Quest Roleplay, Death Below Karak Azgal).
Priests in the temple of Sigmar in the Sylvanian burgh of Schvarzerhafn say that a dark prophecy is being fulfilled. They mention Van Damneg the Dread King, Lord of the Twisted Spire, and that he is "awakening". They also mention the Great Axe which must be used to slay him.
More details of this axe are reputed to be held in the Thundrumm clan's Book of Grudges at Barak Varr, but the axe itself is believed to be held by the Dwarfs of Karaz-a-Karak.
The Warriors may either press on to Barak Varr (4), or go to Karaz-a-Karak (5).
4 Barak Varr. Is there a Dwarf in the party? If so, the Dwarfs may be more likely to let the Warriors see the Thundrumm Book of Grudges. Otherwise, a good deal of gold could be involved. Some gold would not go amiss by way of a "thank you" anyway...
The axe is a two-handed axe, and may only be used by Warriors able to use battle-axes. A Warrior wielding it may not use a shield. Later on in the adventure, the Warriors will come across the black jewel of the Dread King. This is the jewel which stores his soul. Grimdrang designed the axe so that the jewel would fit in its haft, in a specially crafted claw grip. This is noticeably and obviously empty. All any Dwarfs know is that it was meant to hold a very powerful jewel, which would augment its powers considerably.
Grimdrang's axe has the following properties:
It is magic, and gives the wielder +1 to hit Undead, and +1D6 Wounds against them. Furthermore, if the wielder rolls a 6 to hit when attacking Undead with Grimdrang's Axe, he causes an extra Wound per Battle-level (so a Battle-level 4 Warrior will cause +4 Wounds on a 6 to hit).
See the Dread King's Tomb at the end of the adventure for details of how the axe affects the Dread King himself, particularly when coupled with the black jewel.
If the Warriors do not know the name of the axe bearer, the Dwarfs will tell them that they should go and have a look in the Dragonback Book of Grudges of the Dwarfs of Barak Varr (4). If they have already mentioned the names listed in the Book of Grudges, the Dwarfs of Karaz-a-Karak will look horrified, but will confirm the following:
| Name | Description from the Dwarfs' records |
|---|---|
| Nagash | Evil Lord of Undead |
| Quatar | Ancient citadel |
| Numas | Ancient citadel |
| Khemri | Ancient citadel |
| Van Damneg | Legendary Liche Lord, also known as the Dread King |
| Settra | Tomb King - Mummified lord |
| Arkhan | Arkhan the Black, Liche Lord |
If asked, a hooded man was by recently, asking similar questions. He was carrying a big book and a nasty hunchback sidekick. This was of course Gunther Laranscheld and his sinister henchman Luthor. The Dwarfs didn't trust the stranger, so gave nothing away. He insulted them greatly, threatening to destroy them with his power. The stranger obviously realised they were holding out on him and threatened to be back with his Lord, to teach the Dwarfs some manners. The Dwarfs' suspicions were aroused when they overheard that he was heading for the Marshes of Madness (6).
Unimpressed, the Dwarf King sent him packing after stripping him naked, trussing his hands and putting an apple in his mouth!
The Warriors can now go on to either the Marshes of Madness (6), or Barak Varr (4).
6 Marshes of Madness. This is a terribly bleak and awful place, to the south of Barak Varr, beyond even the Dragonback Mountains. In this desolate land the Warriors find an ancient stone circle. A Dwarf in the party will recognise Dwarf work in the stones, and anyone with half an eye will notice the recent footprints, and evidence of foul human sacrifices. Any magic user may pick up the resonances of terrible magic at work.
The stones in the circle each bear the same likeness as the coin from Cripple Peak (if the Warriors have a look at them). One of the standing stones is bigger than all the others. There are twenty six stones in all (if the Warriors think to count them). The stones represent a simple code. The big stone marks the start of the alphabet, and represents the letter A. The second stone stands for B, the third stone is C, and so on.
Some of the stones have been knocked down or are missing. These are, travelling clockwise from the big stone, numbers 5, 8, 9, 11, 13, & 18. This gives the letters E H I K M R, which, rearranged read 'Khemri'! (7)
(This is part of an ancient device devised to reveal the location of the Dread King when the time was approaching for his revival. Laranscheld learnt of it in the Grimoire Necris.)
You might find it useful to draw a plan of the stones, indicating which stones have been knocked over or smashed. The Warriors have little choice but to head for Khemri (7), where they will find the Twisted Spire pyramid, and evidence that it has recently been tampered with. Along the way they will find freshly dug graves, litter, and trampled roads, a sure sign that some kind of pilgrimage has been this way before them...
7 Khemri. This is an evil place, in the Lands of the Dead. The Warriors will make their way to the ruins of the city of Khemri itself, buried in the sand and blasted by the burning heat of the sun.
You could use the Undead Hazards Table to represent a few weeks' travel in these awful lands, before having the Warriors arrive at their destination. They will be following footprints in the sand as Laranscheld has led his prisoners this way. There will be some skeletons lying by the wayside, their bones picked clean by the numerous carrion birds which circle overhead in the hammering noonday heat.
Twisted Spire. In the ruins of Khemri stands a single, sand blasted spire with a strange kink in it. It looks like a towering dune or rock, shaped by the battering of the wind and scoured by century upon century of abrasive sand and grit.
If the Warriors explore the spire, describe how vast it is, how it takes them an hour or so to walk around it, how it reaches far into the sky, etc. Eventually, they will find the entrance to the spire. In fact, this is the only entrance, there are no others, even if the Warriors try and walk all the way around the spire and climb every inch of its twisted surface.
Thus the Warriors are led to the entrance of the adventure proper, to the very threshold of the Dark Necropolis.
If the Warriors really take ages getting here, acting in a bungling and indecisive fashion, then perhaps Laranscheld will be well ahead of them, and will have prepared some extra traps, or gathered some more Undead to his banner. Also, the Warriors might run short on provisions, water etc, by the time they reach the spire.
Within the Pyramid Spire of Twisted Peak
In the adventure which follows, many of the locations are described only in brief detail, so we could fit this adventure into the book. It will be up to you as the Gamesmaster to flesh out the descriptions and to really make the players feel that they are exploring deep within an ancient pyramid.
The Hieroglyphs. Explain, if the Warriors look, how the walls of all the corridors are covered in spidery hieroglyphs of an unknown language. The Wizard or Dwarf may be able to make out a few words, but they all go on about death, dying, mortality, immortality, sacrifices and the like - you can play on this to really unnerve the Warriors. Also, there are many pictograms of dragons scouring the land with fire and death - disturbing stuff indeed.
Using the Following Pages. From here on, the adventure is mapped out into a series of Deeps, each of which is broken down into specific locations by board sections. The map of each Deep will show exactly which numbered description goes with which room or corridor, and what the Warriors will meet there. As the Gamesmaster, it is your job to familiarise yourself with the whole adventure, so you can relay it to the players convincingly, without constant stopping and starting to read up bits you missed earlier.
To play through this adventure, you will have to have a good selection of Citadel Undead models, which will hopefully mostly be from your Undead Warhammer army. Of course, the models from this pack star as the anti-heroes of the piece, but you will need a supporting cast of Zombies, Mummies, Ghouls, even a Vampire or two, not to mention a Zombie Dragon at one point!
Deep One: A Place of Darkness
1 Steps Down. Wan sunlight streams into the entrance, illuminating a tumble of stones and rubble. Covered in an inch of ancient dust, stairs lead down into darkness. Now is the time to light the lantern...
Place the Warriors OUTSIDE the stairs, facing the entrance. In the first turn, they will step into the pyramid, in order of Initiative.
The steps down into the pyramid are covered in dust. All the steps except those marked as traps on the map have footprints on them. The footprints are actually very important. Laranscheld has a map of the tomb, and knows which steps are trapped and which are not. You will need to tell the Warriors exactly which steps have footprints on (if they ask), as the other steps trigger traps. Remember that the Warriors may be able to make reaction tests to avoid the traps, particularly if they declare that they were moving carefully down into the dungeon, not just charging ahead.
The first stone stepped on will close the door at the top of the stairs. Describe to the players how the stones slowly and inexorably grind together. Maybe this takes several turns, during which time the Warriors will all have entered the pyramid, and can try and escape if they wish. Whatever the Warriors do, they will not be able to close the door, not unless they think of something really clever.
The second trap triggers the sound of a huge horn, deep within the pyramid, and its baleful note echoes sonorously around the caverns of the dead. Make a note that the guardians in the Hall of Death at the bottom of the stairs will be ready and waiting now the alarm has been set off. This has little or no effect (unless you decide otherwise!), but it will help to make the players suitably paranoid.
The rest of the trapped steps just fall away into deep pits. They actually fall down into tiny cells below the pyramid. Anyone failing down will take perhaps 2D6 Wounds with no deductions, and will find themselves in a locked chamber with no way of escape. This is where the Dread King used to wall up his enemies to die. Any Warriors who suffer this fate will be out of the game unless the others manage to free them. A rope would be useful, or the Levitate spell.
2 Hall of Death. This room will be empty, unless the Warriors set off the alarm on the steps down.
Describe how the chamber has a high vaulted ceiling, skulls littered about in vast piles, and how there are three doorways leading out of the room. All except the door to Corridor 5 are simply archways, with dimly seen corridors leading off into darkness.
The doorway to Corridor 5 actually has a huge stone door in the archway, and the door is slightly ajar.
At the end of every turn in which the Warriors stay in this room, roll a dice. On a score of 1, 2 or 3, the ancient magic binding the dead to this place reactivates some of the bones and 1D6 Skeletons rear up out of the piles of bones, ready to fight the Warriors in the next turn. You could give them swords, spears or bows, make some of them Champions with magic weapons etc, just to give the players a surprise. These are the skeletons of long dead sacrifices to the Dread King, destined to serve him in the next realm.
If the Warriors did set off the alarm, then Laranscheld will be aware that someone is following him. Also, the guardians of the pyramid tomb will close in. When the Warriors first enter this room, there will already be 2D6 Skeletons animated. They will wait until the Warriors enter the chamber, and then spring their ambush, attacking immediately. From then on, more may appear as outlined above.
Once the Warriors leave this chamber, no more Skeletons will re-animate.
3 Corridor. As the Warriors enter this corridor, they are assaulted by what feels like a physical attack upon all their senses. Touch, sight, hearing, smell, sound, all are overpowered by dread and terror. Evil apparitions surround them, harsh and hideous voices scream at them, their hands and feet plunge into decaying and putrefying corpses and the choking stench of death and disease causes them to retch and vomit. A snarling, disembodied voice warns them to go no further, and they can see the dim outline of a skeletal figure upon a throne hovering at the far end of the corridor.
To progress down this corridor will take an immense amount of will power. The dark magic of the Dread King is strong in this corridor, as it leads to his treasure chamber. The Warriors will have to resist the magic in order to make any progress, and this will require Willpower tests as outlined in the Warhammer Quest Roleplay Book (page 167). The Warriors will have to make a test for each square they move forward, and for each square they successfully move forward, they may add +1 to the score. Remember that a 1 is a 1 and always fails!
If the Warrior fails, then the effect of succumbing to the magic will depend on what sort of Warrior he is, and how badly he failed. A Barbarian may be flung to the ground by unseen hands, dashing him hard against the flagstones and causing some damage. An Elf may be driven mad by the screaming voices in his head, losing points of Initiative/Willpower for so many turns. Whatever, once a Warrior has failed, he certainly will not be able to make any more progress down the corridor during that turn, and will probably have to make another Willpower test just to avoid turning and fleeing.
Note that if the Wizard has the Dispel Magic spell, it will have little effect against this dark magic, perhaps just adding +1 to his Willpower tests for the turn.
4 Treasure Chamber. Once a Warrior makes it to the Treasure Chamber, the spell defending the corridor fades away, for now.
When the Warriors enter the Treasure Chamber, tell them that they have just entered an empty chamber. It looks as though it may once have contained a great deal of treasure, but empty stone caskets and rotted wooden cases lie strewn about the floor. It was obviously once a treasure chamber, but has long since been looted.
A hole knocked in the far wall, presumably by tomb robbers many years ago, leads out into the desert, and the sun streams into the chamber. Outside, the towering buildings of Khemri can be seen, sand and dust swirling about their monolithic columns and walls.
This is an illusion. Obviously, Khemri is no more. The Warriors know this to be the case, as they have walked through the ruins. Likewise, they may also be aware that they came through the only entrance to the pyramid tomb.
Stepping out through the hole in the wall is a bad idea. If they insist, you have a number of options. They could be transported back in time to the days of the Priest Kings in Khemri, pawns in a greater game. Maybe something they carry has been searched for across time by Nagash himself, and he has lured the Warriors into his trap. Or maybe the city they can see is not Khemri at all, but some other city in far off Araby. These two options would of course give the Warriors no chance of stepping back the way they have come, and would lead to completely new adventures... Which you will have to write for yourself!
Within the confines of this adventure, any Warriors who step through the hole in the wall are transported to the miniature version of the city of Khemri in the Temple of the Sun (Deep 4). Unfortunately, in the process, they themselves are miniaturised, with no apparent way of redemption! If this happens, the Warrior will realise that he is in a very strange place - the buildings and figurines will seem very crude and undetailed to him, obviously models!
Because this is so dangerous, and potentially irreversible, you need to allow for the players to come up with neat solutions. For example, they may send someone through with a rope attached, firmly anchored to something solid (a Barbarian for instance) in the real world. That way, they could pull the hapless Warrior back (unminiaturised!) and find out what lies through the hole.
The Warriors might also detect the strong magic protecting this chamber, and try to dispel it or disbelieve it. This will require Willpower tests, or a successful Dispel Magic spell (with HEAVY modifiers), or maybe both. If you decide in the Willpower test route, then all the Warriors in the room have to pass the test in the same turn to dispel the illusion. They can try once per turn. If they almost do it, describe the outlines of the room growing hazy and dim, as the power over their minds is stretched and strained.
Overcoming the Illusion
Once the illusion is overcome (with suitable explosive sound effects), the Warriors will find themselves in a room whose walls, floor and ceiling are plated in gold. Treasure lies heaped around the room, and there are many magic swords, artefacts and so on for the taking. Unfortunately for the Warriors, this room is also guarded by two Wight Lords, each with three Wight bodyguards. Because of the illusion, the Wights ambush, attacking as soon as they are revealed.
The Treasure. Once the combat is over, the Warriors may make as many dice rolls as they like on the Dungeon Room Treasure Table to see what treasure they find. They can just keep going until they have rolled every single result if they like. If you are using the Treasure card packs, the Warriors can just take all the cards if they want to - they are rich!
However, once they leave the room, you should make each Warrior who took more than two items roll a number of dice equal to the number of items he personally took. If any dice that Warrior rolls come up as a 1, then all the items he took fade away like mist, to reappear again in the Treasure Chamber. Note that once a Warrior has exited the chamber with some treasure once, if he returns for more treasure, it automatically vanishes back to the Treasure Chamber. This is to stop a cunning player taking just one item, and then returning for another one, and another, and another...
Searching the Room. After doing anything else they want to in the room, if they search it thoroughly, the Warriors will find a hidden door, which is locked. The door is revealed as a section of gold plated wall that slides smoothly back, the ancient mechanism not affected by age at all. The door revealed bears the same skeletal symbol as the coin and the stones in the stone circle. If a Wizard has a look at the door, he will probably be able to identify that the door is magically trapped too.
Any attempt to force the door will bring all sorts of trouble down on the Warriors. If they force the door, then make the walls of the room start to close in, crushing them to a pulp. They have one turn to escape, after which they will be dead! Once the walls grind together, they slide back and reset themselves once more.
The door can only be unlocked with the key that the Undead Priest King B'Nakkar holds - see the description of location 10. On the other side of the door, steps lead down to location 1, Deep 5, the bottom level of the pyramid.
5 Corridor. It will take some pushing to get the stone door open more than it already is, requiring successful Strength tests from two Warriors standing side by side. Beyond the doorway lies a corridor which is lit by the guttering flicker of a candle on the floor. Any Warrior with an ounce of sense will realise that this means someone has been here recently.
6 Corner (actually a T-junction with a secret door). At the end of the corridor, the passage turns sharply right, leading to a stout wooden door. There is a grille in the door, and beyond it you can see several figures shuffling about in the darkness.
Unless the Warriors are very vigilant at this moment, now would be as good a time as any for Luthor and some minions to ambush the Warriors, charging up behind them. You could actually describe how he looks quite surprised to see them, as he was on his way to collect some fresh sacrifices. Once he's spotted the Warriors, however, he sets to attacking them with typical gusto. His minions are likely to be Zombies, but there is nothing to stop you giving them some armour and a magic item or two. In fact, you could always tool Luthor up with a magic sword and a magic item which Laranscheld has given him. A Grave Ripper and a Bracelet of Khemri would give the Warriors a surprise!
Whatever else happens, make sure that Luthor escapes to fight another day. When Luthor is beaten off, he drops a bunch of keys. These include the key to the cell where the prisoners are kept, and one other.
This corner is actually a T-junction. The Warriors, if they search the corner, will find a secret door. The other key on Luthor's belt unlocks this door. Take the corner off the board and replace it with a T-junction. At the end of the T-junction is another closed door. This will leave four squares which the Warriors have not been in yet - a sort of alcove.
The Alcove. The walls of the alcove are honeycombed, making stone shelves built into the rock of the pyramid. These appear to be empty, but the Warriors can stick their hands in and see what they can find if they like.
| D6 | Result |
|---|---|
| 1 | Trap. The Warrior's hand is seized in a stone vice, which crushes his arm in an unbreakable grip. This turn, the Warrior suffers 1D6 Wounds with no deductions. He must make a Strength test at the start of the next turn, or suffer the same effect again, and so on, until he pulls himself free. |
| 2 | A Scorpion. The creature stings the Warrior for 1D6 Wounds (no deductions) and the bite is poisonous (see Warhammer Quest Roleplay, page 85). |
| 3 | Empty. There is nothing there... |
| 4 | Treasure. Take a Dungeon Room Treasure card. Once four cards have been taken, treat this result as a '3'. |
| 5 | A Small Bag. Roll a D6 to see what the bag contains. |
| 6 | A Scroll! See the notes below. |
A Small Bag (D6):
| D6 | Contents |
|---|---|
| 1-2 | 1D6 human finger bones |
| 3-4 | 1D6x50 gold |
| 5-6 | A strange looking item. Roll on the table below |
Strange Looking Item (D6):
| D6 | Item |
|---|---|
| 1-3 | A bandage, obviously designed for mummification. Although old, it is well preserved and could be used to staunch the flow of blood. When used, this Bandage will heal 6 Wounds. One use, then discard. |
| 4-6 | A healing salve which can heal 6 Wounds. Each can be used up one at a time if required. |
Once all these have been found, treat this result as a '3'.
Scrolls! The first two scrolls will reveal Handouts 1 and 2. After that, treat the Scroll result as if it were a 3 (Empty).
Handout 1 - Notes. This is a weighty scroll, with much written on it. Each entry is dated - it is a kind of diary, written by one Pkharazar d'Var. It is very old, but has obviously been studied recently, as there are various notes scrawled over the margins. It is written in a very ancient version of the tongue of Araby, with occasional lapses into what looks like a classical version of the language of the wizards colleges of the Empire. It will take some time to study, perhaps 2D6 turns, and only a magic user will have any chance of reading it. The scroll reveals the following: (Handout 1 text, see the Handouts section at the end of this adventure)
It is obvious that d'Var was some kind of Necromancer. He writes about the Grimoire Necris. Much of the text does not bear close scrutiny as it contains dark, evil magic. The notes in the margin have been written by Laranscheld.
Each ring contains the soul of a Vampire, one of the original servants of Nagash, the Undead lords of Lahmia, imprisoned by the Priest King Alcadizzar aeons ago. Over millennia, the rings found their way to Sylvania, land of Vampires, but even the magic of the Vampire Counts could not overcome the enchantments wrought on the rings. The Vampires have remained trapped for thousands of years. They are glad to be returned once more to their homeland, and sense that the magic which binds them is weakening.
Handout 2 - Notes. The next is written in a scrawl that the Warriors will perhaps match up with the writings in the margin of the earlier scroll - this is Laranscheld's handwriting.
Bronze Jug. There is nothing else in the alcove except a bronze jug containing a noxious smelling liquid. This is the liquid which Laranscheld feeds to Luthor, and is a heady brew of great power. There is enough of the brew for four draughts. Each draught will increase the drinker's Strength by +1D3 for the duration of the next combat, and will restore 1D6 Wounds.
However, if the same Warrior drinks more than one draught, he must see whether he suffers any adverse side-effects. Roll a dice and subtract the number of draughts the Warrior has drunk from the score. On a score of 3 or less, the Warrior is racked by agony, and must spend 1D3 turns writhing on the floor. Whilst in this state, he may do nothing, and any Monster is at +2 to any to hit rolls against the Warrior. When the spasms subside, the Warrior has lost 1D3 Wounds from his Starting Wounds total, permanently.
The last thing in the alcove is a door leading to Location 8.
7 The Sacrifices
When released, the prisoners are understandably delighted. They have been brought all the way from Sylvania, and one by one have been dragged off as sacrifices. Describe their sorry state, and how terrified they are.
One of them is a scholar, and he has deciphered some of the hieroglyphs on the walls. Give the Warriors Handout 3 to see what he has scrawled out whilst incarcerated in the cell.
The rest of the prisoners are lowly peasants for the most part, although one of them has something more about him. He thanks the Warriors, introducing himself as Baron Ludwig Schmidt of Schvarzerhafn, a small barony on the fringe of Sylvania. These are his people, and it is his job to escort them safely back to their lands on the borders of Sylvania.
The baron implores the Warriors to give them some water and provisions for the long trek, and thanks them effusively for their rescue. Moreover, he declares that the Warriors are now honorary lords of his small barony, welcome whenever they are passing. Most of his fine clothes, weapons, gold and other possessions have been stolen from him, but he does have three rings which he offers to the Warriors as tokens of his gratitude. He says that they have been in his family a long while, and are worth a great deal of gold.
If pressed, the prisoners will give fairly accurate descriptions of Laranscheld the Necromancer, Luthor his assistant, the Grimoire Necris and so on, although they obviously will have no idea what any of this is about.
The Rings. There is a faint magical aura about the rings. They are obviously very old indeed, and are very finely wrought. They are probably worth at least 2,000 gold apiece. They each have fine gems set in them, within which the light shifts and moves, catching the torch light and moving like cool grey smoke. They are things of beauty, rare treasures, an honour to receive. When they put them on, each Warrior receives +2 to his Starting Wounds. This benefit is permanent.
From now on, whenever the Warriors enter a new chamber or corridor, roll 3 dice in secret. If a double is rolled, one of the Vampires is released. Do not relate this in any way to the rings, just describe the shadowy form of a Vampire coalescing out of smoke in the corridor or chamber. The first will be a Vampire Count, the second a Vampire Lord, and the third a Vampire Lord Necromancer. They will appear one at a time, no more than one appearing per new board section.
If the Warriors study their rings, they may realise that the gem in which the grey smoke floated sluggishly is now cold and dead, and the ring has changed to a simple gold band, worth perhaps 50 gold. Note that the rings will have their effect even if the Warrior does not wear the ring but stores it safely in his pack. Leaving the rings well alone is the only way to avoid the Vampires.
Stairs Down - Lead to the Fighting Pit
If the Warriors open the door which leads out from the alcove, they will see steep stairs before them, lit by torches burning fiercely in the iron braziers. Use the steps overlay, just clipped onto the board. Although there are no squares, as soon as a Warrior steps onto the section, take the model off the board and say nothing. Only when all four descend the stairs let them know where they are going - down stairs! They will know nothing more until they have explored the door at the bottom, which leads to the Fighting Pit.
8 Stairs. (Location 8 is the stairs described above.)
9 Corridor. This is just another doom-laden corridor, with more hieroglyphs on the walls.
10 The Tomb of B'Nakkar. This is the tomb of an ancient Priest King, and has been set up to deter any raiders from finding the real tomb of the Dread King and his treasure. There are no Monsters in this chamber other than the Undead creature that lies in the tomb and his skeletal guards. This is one of the great Tomb Kings who warred against Nagash many centuries ago. The stirring of the dark Necromantic magic cast by Laranscheld in his attempts to discover and revitalise the Dread King have seeped through the pyramid, and now this ancient Warrior stirs once more.
If the Warriors lift the lid on his tomb, they will see that the Tomb King holds a key in his mummified right hand, and a sword in the other. The key is the key to the secret door in the Treasure Chamber (location 4), placed in the hand of the dead to deter any would be tomb robbers who got this far. As soon as any Warrior takes the key, the Skeletons at the base of the tomb awaken, determined that the interlopers should join them in Undeath.
There are eight skeletons - four Archers and four Warriors. They each have a magical weapon, armour and item. The Skeletons ambush the Warriors, although you might like to give the Warriors a chance to react.
The Priest King's sword is cursed, and any Warrior who takes it will suffer -1 to hit until he puts it down. Once he has picked it up, however, it works its dark magic upon him, and he is so taken by the blade that he has to pass a successful Willpower test (modified if you like) to be able to drop it.
11 The Fighting Pit
If the Warriors go down the stairs beyond the alcove [8], then they end up coming through the large door at the far end of the Fighting Pit. Describe the cavernous chamber, the deep pit, the towering spiked walls and so on. At the far end of the pit, there is what appears to be a ledge, with sinister looking gargoyles (six of them) carved out of the rock face (observant Warriors might notice them move a bit if they look very closely).
Once the Warriors enter the room from the alcove, the door slams shut behind them. As Gamesmaster, you will have to be very sure of who is going down the stairs and who is not, as once the door has slammed shut, it is shut for good. This may cause problems with the lantern, but remember that there is a candle in the corridor, torches in braziers, and you can always give the Fighting Pit a few torches on the wall too. Also, clever Warriors might deliberately prop the door open with something solid.
So, at least some of the Warriors will probably be trapped in the pit. As soon as the door shuts, a stream of Zombies begins to clamber out of the trap-door in the bottom of the pit. There are 3D6 Zombies held below the pit, and the Warriors will have to kill them all if they want to escape. At the same time, the six Gargoyles reveal their true nature - they are Carrion, and swoop down on the hapless Warriors out of the darkness. You will have to fudge where the models are placed, as you need the Zombies in close, and the Carrion attacking from overhead.
While the Warriors fight the Skeletons, the Tomb King slowly rises from his grave behind them. Take a Warrior counter to see who he attacks.
B'Nakkar has the following profile:
- Wounds: 55
- Movement: 4
- Weapon Skill: 5
- Ballistic Skill: -
- Strength: 5
- Toughness: 6
- Initiative: 5
- Attacks: 4
- Gold: 2,100
- Armour: -
- Damage: 4D6
Special Rules: Fear 8, Magic armour, Magic weapon, Magic item, Tomb Rot 1D6.
Until all the Monsters are destroyed, as soon as one is killed, place another in the space it occupied, until there are no more to place. This represents the shambling press of Undead clawing remorselessly at the Warriors.
If B'Nakkar is destroyed, then below his tomb the Warriors find (if they bother to look) a small alcove containing enough healing potions to restore them to full Wounds. These will even restore dead Warriors to 1D6 Wounds, although the restored Warrior will have permanently lost 1 point of Initiative, Willpower and Luck after his sojourn with the dead. The Warriors also find a map of the chamber, on which a concealed door is marked.
Though secret, this door is not locked, and swings open if pushed. It leads to steps which rise up into the heights of the pyramid. These are the steps up to Deep 3.
Finally, the Warriors find a glittering orb. This is an Orb of Sigmar, and the treasure card for this item is included in this pack.
Maybe the Warriors think at this point that they have killed the Dread King... They should pay more attention to the scrolls and the words of the scholar.
The Warriors can use the rope at the far end of the pit to climb onto the ledge. You can make them take Strength or physical Initiative tests to do this if you feel mean. Once the Warriors are on the ledge, they can see a trap-door above their heads. The problem is that they cannot reach it, as it is maybe 12 feet overhead. The Warriors should be able to think of something - climbing the walls (although they are very smooth), using the rope to make a grapple, levitating (if they have the spell) etc. If they are very clever, they might think of tying an arrow to the rope, firing it at the trap-door and tugging it open, then climbing up the rope to safety. If they do not have the lantern, they would be advised to take a torch from the wall, as it's dark up through the trap-door.
The trap-door leads up to Corridor 1 of Deep 2 - up into the pyramid.
If the Warriors bother to open up the trap-door that the Zombies came out of, they will see nothing except a black cavern and rickety steps leading down. If they go down, they will be perfectly safe (although they of course should not know this), and will find the cave empty. All that is now there, if they search, is a Sword of Vengeance (Warhammer Quest Roleplay Book, Objective Room Treasure Table, page 74, item 51).
Deep Two: Onwards and Upwards
From the way the corridors in this section slope steeply upwards and around, the Warriors should work out that they are a) getting higher up, and b) following the shape of the pyramid.
1 Corridor 1. The Warriors will arrive here either through the trap-door from the Fighting Pit (Location 11, Deep 1), or through the secret door in the Tomb Chamber (Location 10, Deep 1). Describe how the corridor slopes steeply and around, deep inside the gloomy pyramid. No torches gleam in this darkness, and it looks as though no-one has been here for many years.
If they search this section, the Warriors will notice a trap-door in the floor (if they did not come up this way it leads to the Fighting Pit), and a door at the far end (if they did not come this way, it leads to the Tomb Chamber). Furthermore, anyone who checks the walls thoroughly may find soot on them at certain places, giving away the fact that someone has actually had torches put up fairly recently...
2 Flames of Khazla. Nestled in the corner ahead is a small shrine of multi-coloured flames. The first time a Warrior enters this board section, he regains 2D6 Wounds, up to his Starting Wounds maximum. Each Warrior may only be healed once in this way. The Flames of Khazla is a corridor, not a Dungeon room, so entering it will not trigger an Event card.
3 Corridor 2. Another steeply sloping corridor, leading ever upward. However, if the Warriors search this corridor, they will find a secret door. This leads into the Ascension Chamber of Deep 3 (numbered 7 on this map, and 1 on the next).
4 & 5 Corridors. Winding corridors, leading ever upward to the Temple of the Dragon. Describe how the walls of the corridors are engraved with horrific scenes of a huge flying beast scouring the land with flame... If the Warriors bother to look!
6 Temple of the Dragon. Since the Priest Kings left, the Dread King's loyal dragon, Gaurgon Blazefang, has returned to guard his master. The dragon was old even in the days of Nagash, and although long lived, he too has died in the pyramid during his long vigil. Tainted with the same dark magic as his master, he lives on, a Zombie Dragon, though his body is a rotting husk. The only difference between Blazefang and other Zombie Dragons is that he has been sleeping the sleep of the dead for so long that it takes him some time to awaken and react to the Warriors' intrusion. He does not get his normal ambush with his pestilential breath.
When Blazefang is dead, (properly dead and not moving around that is), the Warriors will find 1D6x100 gold each, as the dragon was as keen on his treasure hoard after death as he was during his long life. The Warriors also find a Talisman of Alcadizzar, and the treasure card for this item is included in this pack.
Rules for Zombie Dragons can be found on page 25 of this rulebook. (The Zombie Dragon profile is printed in the Undead Monster Tables section of this rulebook.)
7 The Ascension Chamber. The doors to this room open inwards. As the Warriors enter this room, describe it as a fairly plain-looking chamber, with four icons on the floor:
- The sun
- A stylised eight-pointed star
- Flames
- A skull
The icons are inscribed on the floor, one in each corner. (You will have to make sure that the Warriors do not just walk into the room and stand on one of the icons, so you may have to fudge exactly which squares they are in.)
If the Warriors have a good look, they will see that the flagstone bearing the flames icon is approximately one inch lower than all the others. This is because this is the level the Ascension Chamber has stopped at for now (flames = dragon!). Also, all the other icons look as if they too could be depressed by treading on them. In the centre of the room is a circular depression with a hole drilled in its centre.
Any Dwarf will recognise some kind of mechanism, perhaps an elaborate trap. While they are thinking about this, tell them that the door they entered by slowly swings shut. You can really get the players worried by passing the Dwarf a bit of paper that says: "All your Dwarf senses are shrieking TRAP TRAP TRAP! at you."
Alternatively, you could hand the Wizard a piece of paper saying "Your magical senses detect powerful energies at work - the classic sign of a deadly trap."
There is another doorway on the far wall, but it will not open unless really forced. If they do force it, it will open inwards, but all the Warriors find is a solid rock wall.
Of course, this is a lift! Do not tell the Warriors this at all costs. Standing on one of the icons will take the Warriors to the level indicated by the icon. If Warriors are standing on more than one icon at the same time, the Ascension Chamber will not move.
Each one of the icons indicates a level of the pyramid:
| Icon | Deep | Meaning |
|---|---|---|
| Sun | 4 | This refers to the Temple of the Sun |
| Star | 3 | Dark Magic. This refers to the level where Laranscheld has his lair |
| Flames | 2 | This refers to the dragon the Warriors have hopefully just beaten, or perhaps not even met yet |
| Skull | 5 | Death. This refers to the bottom level, the Halls of the Dread King (Deep Five) |
When they get going, describe the grating grinding sound, and the sudden sickening lurches of motion as the ancient contraption begins to move. Really get the players worried here if they haven't cottoned on yet. This room does look like a hideous trap to anyone who does not know what a lift is - and that will include ALL the Warriors!
The circular depression in the centre of the chamber is the directional control, but a rod is needed to place in the required directional 'hole'. Laranscheld has the rod, which is in his lair (locations 3&4, Deep 3). This is only relevant in the lowest level of the pyramid, the Hall of the Dread King.
Notice that the doors which open onto the lift have no windows or gratings at all, so the Warriors cannot explore. They will just have to open the door and get on with it. One Warrior will have to declare he is opening the door, the others will have to decide what they are doing - "I'm waiting to see what lies beyond", "I'm just charging off as soon as the door is open" etc.
Reaching the Bottom of the Pyramid. When the Ascension Chamber reaches the bottom of the pyramid, only one door will open. The other simply refuses to budge. Before opening the door, however, check whether the Warriors have the control lever from Laranscheld's chamber or not. If they do not, the chamber rotates ominously, and opens onto Chamber 13 or 14. Both of these are filled with malicious guardians and nothing else - see Deep 5. In this case, having defeated the guardians, or run off, the Warriors will have no option but to go back up in the Ascension Chamber.
If the Warriors have the rod, and have realised what to do with it, it slots perfectly into the depression in the middle of the Ascension Chamber. Turning the rod in the slot will turn the chamber when it reaches the bottom deep, until the door which opens leads out into the Tomb level - easy!
Deep Three: In the Lair of the Necromancer
1 The Ascension Chamber. A description of and rules for the Ascension Chamber can be found in Deep 2, immediately above.
2 The Guard-room. If the Warriors have used the Ascension Chamber to go up to Laranscheld's level, describe how the lift grinds to a halt and stops. They will have to open the door however, it will not open of its own accord. Furthermore, the door they came in by now takes some opening, revealing a solid rock wall!
The exit is on the far side, and leads the Warriors straight into Laranscheld's guards - they meet Luthor and cronies again! You can tell the Warriors that they hear a scrabbling sound against the far door if you like, as the waiting Ghouls claw eagerly at its surface, trying to get at them before the door is opened.
In the Guard-room is Luthor (feel free to kill him this time round), and the following Monsters: 2D6 Ghouls (some hapless once peasants from Sylvania) & 1D6 Mummies.
These Monsters will all rush in from Laranscheld's area next door as soon as the lift arrives at their floor. They will charge into the lift itself in their eagerness to get at the Warriors. By the time the doors are opened, Ghouls will literally tumble into the chamber with the Warriors, probably catching them by surprise.
The Mummies will shamble along behind. Luthor will try to avoid being trapped anywhere, chivvying the others along with a club or other such blunt instrument.
You could make quite a play of Ghouls stepping on the control icons and sending the lift juddering up and down the shaft for a while as the occupants struggle for supremacy. Remember that if the Warriors are high level (7 for example!) you might want to give the Ghouls a fighting chance by toughening them up a little - these could be Laranscheld's 'special' Ghouls. On the other hand, they could just have some magical armour or items, etc. Bear in mind that the 'Break' rule will not apply as the Ghouls are trapped in the lift with the Warriors - they have nowhere to run!
If the Warriors actually get into the Guard-room, destroy the Mummies etc, then they may search it if they wish. They may notice that one of the flagstones is pure black, and emanating magic. In fact it does not look like stone, more like... darkness! This is a teleport square leading to Laranscheld, around the corner. It will only teleport the Necromancer and his lackeys, and any Warriors who stand on it will suffer wracking pains - they will suffer 1 Wound per Battle-level with no deductions.
The Lair of the Necromancer. Beyond the Guard-room are Laranscheld's quarters. The two dungeon rooms link together to make one big room with an ornate double arch in the centre. Describe how this room is quite lavishly appointed with heavy drapes and rugs, paintings etc, all in oppressive and sombre tones. The Necromancer will be in Room 4, with the Grimoire Necris. The Warriors may not notice him to start with, as he is in the far corner of the room. He will be well aware of the Warriors.
3 & 4. There is a powerful enchantment cast upon Room 3, making the Warriors' limbs feel terribly heavy. Whilst on this board section they only move at half their normal rate. Maybe Willpower tests can help overcome this, but probably not. Dispel Magic may help, perhaps for one turn or so.
Laranscheld has positioned eight Skeleton bowmen in Room 4 with him, and they shoot at the Warriors as soon as they appear. They are well prepared, and loose off as soon as the Warriors turn up, and in every Monsters' Phase thereafter.
Each doorway is blocked by two Wight Lords. Laranscheld now has the following profile:
- Wounds: 29
- Movement: 4
- Weapon Skill: 5
- Ballistic Skill: 2+
- Strength: 4
- Toughness: 3
- Initiative: 4
- Attacks: 3
- Gold: 1,630
- Damage: 2D6
Special Rules: Necromantic Magic 2, Magic Resistance 4+, 2 Magic items (1 Undead item, 1 from WHQuest Roleplay Monster Items Tables), Magic weapon, Regenerate 2.
Note that depending on the Battle-level of the Warriors, you can use either the Necromantic spell card for his magic, or use the Necromantic spells from the Undead section of the Bestiary in the Warhammer Quest Roleplay Book.
The Grimoire Necris. The Grimoire Necris now has the effect on Laranscheld of strengthening the spells he casts against the Warriors, on a dice roll of 5+ each turn. So long as he is standing next to the Grimoire then he may add +1 to the effect of the spell he casts, where appropriate. So, for example, Winds of Death will reduce all the Warriors' attacks by -2 on a dice roll of 5+, and Summon Mummies will summon 1D6+1 Mummies.
Laranscheld will insult the Warriors vehemently, and tell them that they will never get the jewel of power from the Temple of the Sun. "It is the only thing which can destroy the Dread King now, and you puny idiots are too late by far! Besides, only I have the spell which will unlock the room - ha ha HA HA HAHAHA!"
Behind Laranscheld is another black flagstone. As soon as a Warrior steps into board section 4, the Necromancer steps backwards and is teleported (with the Grimoire) to Room 2. From there he can continue attacking the Warriors, or escape via the lift. This is up to you, depending on whether you want him to turn up again in the Throne Room at the end of the adventure.
When the room is cleared, the spell affecting Room 3 dissipates, and movement returns to normal. In Laranscheld's quarters the Warriors will find the following items.
Spell Scroll (Handout 4). A Wizard will, after some studying, realise that this is in fact a two part spell. The first part involves the opening of the gateway to the sun (the door to the sun temple at the top of the pyramid), whilst the second part deals with restoring things to their rightful size. If they have not yet been up to Deep 4, this scroll will mean little at the moment.
If used properly, the scroll will open the door to the Temple of the Sun, and once inside, will re-instate any lost Warriors who are trapped in the model of Khemri which is in that chamber. It will also reveal some items of treasure (see the Temple of the Sun). The way the players have to do this is to stand by the door and ignite the spell scroll. The burning icons on the door, or the flaming braziers, may help them to do this. Once the scroll is aflame, the door opens majestically, leading the Warriors into the Temple of the Sun.
Once in there, all the Wizard (or any other Warrior) has to do is to shout the magic word, and any lost Warriors will be resized from the model of Khemri, and the treasure will appear. The magic word is taken from the spell scroll. It is the first letter of each line on the scroll. These letters spell out the word "changeling".
Torn Pages. These are the missing pages from the Book of Grudges of Ekrund (Handout 5).
Another Scroll. This contains instructions on how to use the Jewel of Power to destroy the Dread King (Handout 6). Note that this is actually a red herring, which Laranscheld hopes will persuade the Warriors to give the jewel to the Dread King. You will see that it really states the obvious, which isn't what the Warriors should be expecting. If any of them seem suspicious, then to some extent at least encourage this. Maybe they might even recognise Laranscheld's writing, or the identical colour of the ink. Perhaps the parchment is actually quite new, not what you would expect an ancient treatise to be written on. Do not hand them the fact that this is a fake on a plate, they should work it out.
A Strange-looking Staff. This is a tall gold rod, covered in strange inscriptions. Any investigation by a Wizard or Dwarf will detect magic emanating from it.
This is in fact the control lever for the Ascension Chamber. It slots into the depression in the floor, and is used to align the door correctly when reaching the bottom of the pyramid. See the Ascension Chamber, and Deep 5, for more details!
A Stone Icon. This is a Stone Icon of Ghamaluk, and the treasure card for this item is included in this pack.
Deep Four: The Temple of the Sun
Deep 4 is reached via the lift, or by being miniaturised and teleported there from the Treasure Chamber in Deep 1.
1 Ascension Chamber. See the description on pages 39 & 40.
2 Bridge of Doom. The lift opens onto a narrow causeway. A Wight Lord blocks the way. He will not step off the bridge, and must be faced by a single Warrior. To assist him in this task, he has a ring which deflects arrows or other missile weapons on a roll of 3+ on a dice, and has Magic Resistance 4+ too. Other than that, he is a standard Wight Lord, with magic armour etc.
The door to the Temple of the Sun is sealed tightly. It is covered in bright gold, and bears a holy inscription of a long dead order. In short, it does not look evil. A wooden plaque on the door reads as follows (Handout 7). The door can only be opened by a magic user - and not an evil one, by using the spell scroll Handout 4. Laranscheld wants the Warriors to believe that they have to get into the temple, grab the jewel and destroy the Dread King with it.
Nothing is farther from the truth. Laranscheld is evil, and the spell will not work for him. He needs the jewel to bring the Dread King back to life. The Warriors will hopefully fulfil this task unknowingly.
If the Warriors have a close look at the plaque they might wonder why a wooden plaque has been put on such an ornate door. The answer is that the plaque has been put there by Laranscheld. He cannot enter the chamber himself, but he wants to encourage the Warriors to do so. A plaque telling them they are doomed if they try to take the gem is a sure way of getting them to try!
3 The Temple of the Sun. This is the room where the soul of the Dread King is held captive. It is exactly as described in the introduction section, with a huge model of Khemri taking up the middle four squares of the room, and the black gem placed on the highest building. Sun streams in through countless unseen slits in the ceiling, and from the angles of the walls, it is obvious that this is the very pinnacle of the pyramid.
If the Warriors have lost any of their companions in the Treasure Chamber, they will be here, in squeaky miniature. The spell to restore them to full size can be found in Laranscheld's quarters (locations 3 & 4).
In addition, when the deminiaturisation spell is cast, several powerful items of treasure are recreated too. These had been miniaturised and hidden in the city model of Khemri. The magic items are:
- The Black Diamond
- Eltharion's Bow (Warhammer Quest Dungeon Room Treasure, Weapons & Armour, entry 34)
- Crown of Night (Warhammer Quest Dungeon Room Treasure, Magic Items, entry 15)
Deep Five: The Tomb of the Dread King
This level is far below the pyramid, buried underground. It is accessed through two possible entries. The first of these is via the secret door in the Treasure Chamber on Deep 1. The second is via the Ascension Chamber, which comes down to Room 7 in this Deep.
1 Corridor. The entrance corridor from the Treasure Chamber (location 4, Deep 1). Nothing special happens here at all.
2 Corridor (T-Junction). This looks just like another gloomy passageway, so place a corridor section on the board, with a door at the end as usual. However, there is a secret door to the right, and a walled up doorway to the left. Even if the Warriors search the section, they will find the secret door but not the doorway beyond the walled up section.
The walled up doorway leads to the Temple of the Dead (location 9), and has been sealed for many years. The secret door leads through to the Fountain of Immortality (location 8).
A powerful and complex illusion spell has been wrought upon this area of the dungeon, flipping Rooms 8 and 9 around so that all is not as it seems. This illusion is described fully in locations 8 & 9.
This means that when the Warriors search this corridor, it will appear to them that the secret doorway is on the left. This is not as complicated as it sounds (honest!). All you have to do is look at the map (which shows how the dungeon is REALLY laid out), and imagine that locations 2, 8 & 9 are flipped around like a mirror image.
3, 4, 5 Passageways. Beyond section 2, the dimly lit corridor twists to the right and left, leading to T-junction 5. The Warriors may notice that these sections are particularly swathed in cobwebs, and that the cobwebs look pretty substantial (this corridor leads to the Spiders' Lair).
6 Spiders' Lair. This chamber has been occupied by an enormous spider and her brood. There is the spider herself, three gigantic spiders, and 12 giant spiders. Obviously these will not all fit on the board section, but as soon as the Warriors explore this area, make the giant spiders swarm out and ambush them. The other spiders will follow on...
The enormous spider herself has the following profile:
- Wounds: 30
- Movement: 5
- Weapon Skill: 4
- Ballistic Skill: -
- Strength: 5
- Toughness: 5
- Initiative: 2
- Attacks: 3
- Gold: 900
- Armour: -
- Damage: S
Special Rules: Web (1D6).
Once the Warriors clear the room, they find a collection of ancient stoppered bottles. Most of them are smashed, but there are three still intact - a green bottle, a black bottle, and a brown one. The labels have worn off, so the Warriors will have to try and identify them or just take pot luck!
- Green bottle - Potion of Healing (Dungeon Room Treasure Table, Magic Items, entry 35)
- Black bottle - Potion of Invisibility (Dungeon Room Treasure Table, Magic Items, entry 36)
- Brown bottle - Potion of Strength (Dungeon Room Treasure Table, Magic Items, entry 41)
They also find an ancient spell scroll. When interpreted - and the Wizard will have to make a few Initiative (intellectual) tests to succeed - the Warriors will find that this is in fact a Dispel scroll, specifically designed to destroy one particular spell. What that spell may be is uncertain, but the Wizard seems to think it is something to do with "Mirrors, reversion, or illusion".
In fact, this scroll will dispel the Inversion spell which the Dread King cast on Chambers 8 and 9. Without it, the Warriors will never discover where the Dread King lies.
7 Chamber. This is the room where the Ascension Chamber comes down. If you don't already know where the Ascension Chamber is, you can decide whether it is present or not. If it is, then all the normal rules for the Ascension Chamber apply - see pages 39 & 40. If the lift is on another level, then describe the dark, dank chamber, with various crushed skeletons etc on the floor and deep scouring on the walls. Actually, you could have a lot of fun making the lift descend with a crashing and grinding as the Warriors are standing around underneath it.
There are two doors leading out from this chamber, both to guard chambers designed to cause trouble for unauthorised visitors descending in the Ascension Chamber. The Ascension Chamber will descend to Deep 5, in such a position that the two doors in the chamber only open onto Rooms 13 and 14 - the Guard-rooms. The Warriors will be able to explore these doorways and enter the Guard-rooms as normal, but they will not be particularly welcome.
The only way to line up the exit door from the Ascension Chamber so that the Warriors can get into location 5 (T-junction), is by placing the Golden Rod from Laranscheld's quarters into the depression in the centre of the Ascension Chamber. The chamber will then rotate 90 degrees, aligning the door with the required exit. If the rod is left in place, then after a minute or so, the chamber will rotate again, and so on.
8 The Fountain of Immortality. A complex and powerful spell has been cast upon these chambers, in order to disguise the whereabouts of the Dread King. A spell of inversion has flipped the two rooms around, so that they are actually in mirror image placement of their true position. The scroll to dispel this magic lies in the Spiders' Lair.
NOTE: This room, and the secret door that leads to it, initially appear on the left hand side of location 2.
In this chamber, the Warriors hear the pleasant sound of running water, as they have entered a chamber in which an ancient fountain still functions.
An inscription around the base of the fountain can be deciphered, although some Initiative tests will be required no doubt, especially taking note of which Warriors can read! When deciphered, the inscription reads:
Drink and be immortalised, in song and dance and jest The bravest only reach this place, their cares to lay to rest Jealous be of this fine gift, its like you will see never Many are the Warriors who wish to live forever
It is important at this point to realise that the Inversion spell cast on this room means that it is only a reflection of its true self. Until it is returned to normal, and the illusion broken, whatever the Warriors do will have no effect. The water will taste pleasant enough, but any Warrior who asks, or is generally suspicious, might notice that his thirst does not seem quenched. In fact, although he is convinced that he has had a drink, he cannot feel the physical effects of it. Likewise, if they experiment, they will find that splashing the water around will soak the floor, walls etc of the chamber, but will leave them bone dry! Strange...
If the Warriors search this chamber, they will discover a secret door in one of the walls. This they can prise open with great difficulty, but what they see is very confusing. They might all see different things. One Warrior may see what is really there - the blank wall of the Idol Chamber! Others might see a cloudy void. Others might see a corridor.
9 The Temple of the Dead. Until such a time as the Warriors cancel the Inversion spell, then they will not be able to find this room. Even if they find the bricked up hollow wall in Corridor 2, they will not be able to break it as it has been substantially built. Furthermore, the Wizard may be able to detect strong magic pervading this section of the wall, and may well think it a bad idea to go knocking it about too much.
The Warriors are not going to be able to get through this wall until the Inversion spell is dispelled. When the spell is dispelled, then the secret door appears in its proper place - on the right side of Corridor 2. At the same time, the walled up section leading to the Temple of the Dead will appear on the left of the corridor. This means that the Fountain of Immortality will still be through the secret door, but it will lead off to the right, just as it appears on the map.
You might let the Warriors make some Willpower tests at this point to begin to suspect that the door at least is a trap or illusion of some sort. If any Warriors actually step through the door, then you have a number of choices as to what happens. They could either bump into the wall, step through into the void and vanish (perhaps to turn up in the Idol Chamber when the players get there), or perhaps be thrown violently back into the room by the power of the illusion spell. You can describe the Warriors being fuddled, confused, uncertain as they look at this doorway, and the longer they stare the more confused they become.
Cancelling the Inversion Spell
Once the Inversion spell has been nullified, then the secret door that leads to location 8 will appear on the right hand side of Corridor 2, its true position. The Warriors will now be able to explore this room properly!
The effects of the water will now be very real indeed. If a Warrior drinks from the fountain he must roll a dice for every 5 Wounds of his Starting Wounds score. He must then separate out every 1, and every 6. If the 1's outnumber the 6's, the water sears and burns his throat, causing him to thrash around in agony. He loses a Wound from his Starting Wounds score permanently for each 1 he rolls.
If the 6's outnumber the 1's, then describe how the water tastes like ambrosia, the finest wine or strongest ale (depending on the Warrior's taste!). The Warrior gains an extra Wound to his Starting Wounds score, permanently, for every 6 rolled.
As the dispel is cast, the walled up section crumbles away with a crash of masonry, and through the dust, the Warriors can see a dark and brooding chamber where only moments before was a fountain chamber - they can now enter the Temple of the Dead.
This ancient temple is haunted by the spirits of those who the Dread King had slaughtered before he was entombed: his servants, employed to construct the complex defences of his tomb. Obviously, having implemented the Dread King's designs, they knew far too much, and so were slain in this chamber thousands of years ago.
In addition, however, as soon as the effect has been worked out, the guardians of the fountain emerge, grim Undead Warriors who have drunk too often of the fountain and are now under its spell forever. They have gained immortality, of a sort, and must spend eternity guarding the enchanted waters. Roll a dice to see who the guardians are:
| D6 | Guardians |
|---|---|
| 1-3 | A Wizard and 1D6 Warriors |
| 4-6 | 1D6 Warriors |
The Warriors have the same characteristics as Wight Lords, and the Wizard as a Necromancer. However, they look like the noble Warriors they once were. They are dressed in the garb of a number of countries, cultures and races, spanning a great number of years, centuries even. They are not skeletal, decayed or evil looking at all, which may throw the Warriors somewhat.
Before fighting, they will try and persuade the Warriors to drink again, as the powers of the fountain are truly invigorating. Any Warrior who drinks again must follow the rules outlined above, and in addition, take a Willpower test. If he fails this, then he sinks into the pool, to join the other guardians. Each successive drink from the fountain will involve a tougher Willpower test.
The Warriors may step through the fallen masonry and enter the chamber if they dare.
The spirits occupying this table are mean, malevolent beings. They were servants of the Dread King in life, evil servants one and all. In death they are no more friendly and their betrayal by their trusted master has made them extremely bitter and twisted, even as ghosts and spirits go. They refuse to leave this temple, as they believe that the Dread King will surely see the error of his ways and revive them one day. Failing that, they will wait until he walks again, and do their utmost to destroy him as he destroyed them. Since their death, the ghosts of others have joined their number, dominated by the original malevolent spirits. These lost souls have no wish other than to find their rest, and are the spirits of dead Warriors, labourers used to build the temple (and subsequently killed) adventurers, tomb robbers and the like.
As soon as the Warriors enter this chamber, an eerie wailing begins to build up. It starts as a whispering, rustling, keening note, as of wind blowing through the ancient stones. Over the next few turns it builds to a horrendous screaming and shouting, as the spirits of the ancient dead manifest themselves. You can preface this by the Warriors being hit by various projectiles - stones, torches etc, even old spears and swords that are lying around.
There are six evil spirits, and they are very similar to the Ghosts from the Warhammer Quest Roleplay Book, with the following differences:
Evil Spirit
- Wounds: 20
- Movement: 4
- Weapon Skill: 2
- Ballistic Skill: -
- Strength: -
- Toughness: 4
- Initiative: 3
- Attacks: 2
- Gold: -
- Armour: -
- Damage: S
Special Rules: Chill 2; Ethereal (-1); Fear 7.
While the fight goes on, some of the less malignant spirits will hiss and whisper a warning to the Warriors. The Warriors may or may not hear this, depending on how generous you feel, and how well they pass their Initiative tests...
If the Warriors have the axe and the gem, then the message goes something like this: "The axe and the gem, the gem and the axe, the axe is the gem, the gem is the axe, his life is his death, his death is his life...." and so on, endlessly. This is to try and get the Warriors to put the black gem in the pommel of the axe, where it fits snugly (surprise, surprise). If the Warriors have already done this, then the message will be a welcome confirmation of what they have done.
If they do not have the axe, or the gem, then the Warriors are in trouble...
They should perhaps have the opportunity to go and get the gem, but fetching the axe from the Dwarfs of Karaz-a-Karak is clearly out of the question. In this case, the ghosts will clearly be anxious "Where is the gem? The axe? The gem? The axe?" and so on.
Once the spirits have been defeated, the Warriors can find the following items in the temple, if they overturn the foul idol which stands atop the dais. It will take two of the Warriors to make successful Strength tests to overturn the statue once they have realised it is loose on its mountings. Once toppled, it reveals the following:
- The Kingshield of Tilea (The Treasure card for this item is included with this pack)
- A Protection Ring (Dungeon Room Treasure Table, Magic Items, entry 45)
10 Corridor. This corridor leads out of the Fountain of Immortality chamber, and can only be found after the Inversion spell has been dispelled. The Warriors will probably get the feeling that they are near the end of their quest here, and things are about to get tough (and they will be right!).
11 Corridor - Bridge of Death. This is the Bridge of Death, and leads to the Dread King's tomb. It is guarded by his most trusted lieutenant (use one of the Tomb Guardian models), whose name is G'Harrak the Prince of Skulls. He has waited throughout eternity to guard his master, and absolutely will not let the Warriors pass.
Printed above G'Harrak's profile in the layout, and transcribed here: He wears a ring which on a dice roll of a 5+ allows him to cast a Necromantic magic spell at the start of every turn.
G'Harrak the Prince of Skulls
- Wounds: 45
- Movement: 4
- Weapon Skill: 5
- Ballistic Skill: -
- Strength: 4
- Toughness: 4
- Initiative: 4
- Attacks: 2
- Gold: 1,000
- Armour: 2
- Damage: 2D6
Special Rules: Fear 9, Wielding an Axe of Nagashizzar, Armour of Warding (see the Magic Items of the Undead section).
12 Dread King's Tomb. This room is dark, brooding, emanating an ancient and powerful evil. A ramp leads upwards between towering pillars, and in the distance a raised dais looms. Atop this dusty edifice a twisted figure sits, a skeletal apparition whose eyes burn like coals. This is the throne room of the Dread King, and he has waited long for this moment.
If Laranscheld escaped earlier, he will turn up now. He will be delighted if the Warriors turned up with just the jewel. His reaction will obviously depend on whether they have the jewel, the axe and so on.
No Jewel, no Axe? If the Warriors do not have the black jewel or Grimdrang's axe, then there is not a lot they can do really. They will not be able to harm the Dread King at all, in fact there will be no indication that he is even alive. However, the Dread King's magic will be weak too, so it will be something of a stalemate. All the Dread King will do is cast a Summon spell each turn the Warriors remain in the chamber. Roll a dice to see what he summons:
| D6 | Summons |
|---|---|
| 1-2 | 1D6 Skeletons |
| 3-4 | 1D6 Tomb Guardians |
| 5-6 | 1D6 Mummies |
Do not give any indication that he is doing this, just make the Monsters shamble forth from the shadows, or appear from nothing out of the floor.
Jewel, no Axe. This is possibly the worst thing that could happen. Once animated by the black jewel, the Dread King is restored to his awesome glory. Due to the dark power of the ancient tomb, and the surging energy released from the jewel, the Warriors will be at -2 to hit the Dread King, and all spells will cost double the normal magic points to cast (any other type of magic you will have to render similarly useless, such as the Ranger's spells). The Warriors are in for a tough time. Not only that, but the Dread King will regenerate an extra 1D6 Wounds at the end of every turn, until he is knocked to zero Wounds.
The Jewel and the Axe. If the Warriors have the black jewel and Grimdrang's axe, but have not united them, then see the rules for the axe earlier, and the rules for the jewel which follow.
If they have put the two together, then the jewel will not fly to the Dread King, until the Warrior bearing Grimdrang's axe hits the Dread King with it. Until the Dread King is animated, any Warriors can hit him automatically, but the blows will do no damage. He is, after all, dead. When hit with the axe, the power of the jewel flies into his chest, together with a large axe. The Dread King will reanimate, as described, but will immediately suffer the damage from the axe. The Dread King will shriek in pain and exultation at being re-animated. The shock of this bone-chilling yell so stuns the Warrior wielding Grimdrang's axe that he loses the rest of his Attacks that turn.
The Dread King has the following profile:
- Wounds: 34
- Movement: -
- Weapon Skill: 6
- Ballistic Skill: 1+
- Strength: 5
- Toughness: 4
- Initiative: 5
- Attacks: 4
- Gold: 2,780
- Armour: 3
- Damage: 3D6
Special Rules: Necromantic Magic 3, Magic Dispel 4+, Magic Resistance 4+, 3 x Magic item, Magic weapon, Regenerate 2.
Having been hit by the axe, the Dread King will not be able to regenerate extra Wounds as described earlier. Neither will the Warriors be at -2 to hit him, or spells affected in any way. The power of the axe in combination with the jewel ensures this, largely negating the Dread King's power.
Fighting the Dread King
The Dread King is immobile. He cannot be killed, and he can do very little himself, until the jewel is returned to him. If the jewel is brought within two squares of him, then his magical power tugs it from the Warrior's hand. It flies toward the Dread King (maybe any Warriors can make Initiative test to catch it... but make them tough), and imbeds itself in his rib cage. There, it begins to beat, like an obscene, black and glistening heart. A corona of black flames springs up from around the Dread King and he throws back his head and laughs aloud.
"AHAHAHAHA! Ch'Zaaa!, B'nagga!, Ey P-taarv!" Presumably the Warriors will be none the wiser for this, so describe how they feel an ancient and powerful malice enter their minds, ripping through their memories and rifling through their thoughts like a careless thief (maybe this will drive the Warriors mad for a while...).
The Dread King turns and faces the Warriors, and tries again. His voice is clumsy and strained because a) He is dead and has no vocal chords to speak of (as it were..), b) He has not spoken at all in aeons, and c) He does not know their language.
"Mor... tals. My. .. Tha... nksss. I... Live. I Brea... the. My... Heart... Beatsss. I... Will... Rule".
At this point, a skeletal finger points at one of the Warriors. The impassioned, cold, dead voice rings out again: "You... Die... NOW."
Now the battle commences. The Dread King casts a Soul Drain and Death Chill spell simultaneously at a single Warrior, and also summons 2D6 Skeleton Archers, 6 Ghouls and 1D6 Mummies.
The Skeleton Archers are placed on the balconies around the ramp first, from where they shoot at the Warriors.
Be sure to make the Dread King make a suitably ominous and chilling threat as he is consigned finally to the netherworld by the Warriors - "I KNOW YOUR NAMESSS WARRIORSSS, MORTALSSS - I WILL HAVE YOUR SOUUUULLLLSSSSS!!"
Once the Warriors have destroyed the Dread King, they may explore his tomb, finding the following items:
- A Ring of Cheshnakk (Objective Room Treasure Table, entry 32)
- A Brooch of Power (Objective Room Treasure Table, entry 15)
- A Blade of Leaping Gold (Objective Room Treasure Table, entry 34)
- A Shield of Ptolos (Objective Room Treasure Table, entry 63)
Having destroyed the Dread King, the Warriors may then return home, unsung heroes, knowing that they and they alone thwarted a great evil from returning to curse the world.
13 & 14 Guard-rooms. These Guard-rooms have been designed to cause trouble for unauthorised visitors descending in the Ascension Chamber. Each of these rooms contains a Wight Lord and 2D6 Tomb Guardians. See the rules for the Ascension Chamber on page 40 for more details.
The Wight Lord and the Tomb Guardians will never leave the chamber they are guarding. If any Warriors leave the chamber, the next time they re-enter it, the guardians will be back again, even if they were destroyed!
Each Tomb Guardian has a magic weapon or armour, or item. You can decide which each time the Warriors enter one of these chambers.
After the Adventure
Having finished this adventure, you have many options by which you can carry on the story, as there are a number of plot lines left unfinished. Perhaps the Warriors return the axe and the pages from the Book of Grudges to the Dwarfs of Karaz-a-Karak. On their return to Barak Varr, or Karaz-a-Karak, perhaps tell them the whole story if they have not worked out exactly what went on.
Did Laranscheld escape? If so, the Warriors could chase after him. Maybe the Warriors get the opportunity to head south after the rest of the Dwarfs from Ekrund, who have not been heard of for centuries.
Handout Texts
Photocopy these handouts and give each one to the players when instructed. Handouts 1, 2, 3, 4, 5, 6 and 7 are reproduced below as printed. Handout 4 is printed as a set of vertical lines; they are listed here left to right.
Handout 1
So far, my of efforts are to no avail. the pyramid defies me. the cursed priests of Alcadizzar have done their work well. I cannot enter the temple of the sun, it is too well defended against my kind. The location of the king, eludes me. Though I know, him to be sealed in this accursed place somewhere. I will find him! He will walk again!
Handout 2
Grimoire (✔) Refers to Dead Lands - Sylvania? ✗ Below Middenheim? ✗ Mousillon? ✗ Praag? ✗ The Lands of the Dead? ✔
But where? what of "the coin"? What of "the shamed Dwarfs'"? "Stonebeard clan"? What of "the Dread King's axe"?
Dwarfs - Karaz a Karak? ✗ Karak Kadrin? ✗ Barak Varr? ✔
Book of Grudges - Stonebeard clan - Excellent!
The axe has been moved to Karaz-a-Karak - Curses! It still eludes me! What of the Marshes of Madness? The stone circle! The Dread King! Khemri! The coin! His glorious likeness! What of Pkharazar D'Var? He failed! The temple is still sealed! The Dread Lord stirs, but he needs his heart! The dragon awakens - he may be a threat...
I suspect meddlers and fools follow me. They will fail. The sacrifices are all but complete. I have bodies to spare. My children already stir. And I have found B'Nakkar the Womb King, who will surely serve us well!
Handout 3 - Scholar's Scrawl
The (eternity/time/hour) will (tourney/arrive/terminus)... (lots I do not understand)... Upon the (holy chair/carriage/throne) the Dread (master/king/overlord) will (arrive/awaken/thaw)... something about death, carnage or blood (perhaps all of them). Many living (gifts/given away/offered??) to (lift/raise/invigorate) the Dread (master/king/overlord). Blood and souls (definite about this, very close the language of the nomadic tribes around the Gulf of Medes). The dead will (live again/walk/return). The rest of it was largely indecipherable, except for just a few odd words really - pyramid, circle of stones, power, Nagash, lots of references to death, and something that could be "the black jewel", or "heart of blackness", "precious night" - hard to tell. The only other consistent reference seems to be about the dread steed, or flaming steed.
More than this I cannot read.
Rudolph Seville
(The printed scrawl reads "lots 1 do not understand"; the "1" is transcribed as "I", the same glyph confusion noted above.)
Handout 4 - Spell Scroll (acrostic)
Consumed by Fire Heat of the Sun Ashes burning Now the Magic is done Gone in the End Enter a new Beginning Look to the Ashes In the Opening of the Door Now Say the Word Grant yourself Redemption & Treasure
Handout 5 - Pages from the Dragonback Book of Grudges
The torn pages tell all about the fall of Ekrund, and the betrayal of the pale travellers. It tells of the origins of the stone circle, and the shame of the Thundrumm Dwarfs. It tells of the axe of Grimdrang, and the search for the lost hold of Karak Zom. Ask the Gamesmaster all about these things, he has the notes!
Handout 6 - Another Scroll
Take the Black Jewel, It contains great Power It will destroy the Dread King, He will be no More Stone Dead Forever Thrust the Jewel in his Rib Cage, He will die Do it, Do it now.
Handout 7 - Tomb Plaque
YOU WILL NEVER TAKE THE BLACK GEM. IT WILL STAY HERE FOR ETERNITY. TO TRY TO REMOVE IT IS TO INVITE YOUR CERTAIN DOOM.
Reference Sheet
The printed reference sheet restates the Luthor, Hall of Death, Grimoire Necris and Chasm of Despair rules transcribed above. Its wording is reproduced below where it differs from the full sections; the Luthor profile and rules are as in the Luthor section above.
Luthor is Gunther Laranscheld's dim-witted hunchback servant. Having had a long and miserable life, Luthor is a bitter man, and likes nothing better than to vent his frustration on those he deems weaker than himself. (Profile: Wounds 8, Move 4, Weapon Skill 3, Strength 5, Toughness 5, Attacks 1, Damage 1D6, Gold 300.) Special Rules: Ignore Blow, Special Attack, as above.
Hall of Death. The bone-filled Hall of Death is a source of dark magic and draws evil power from the surrounding area. This power acts like a beacon to the fell creatures of Undeath. When the Warriors discover the Hall of Death, split the Dungeon cards between the three exits, just like when they reach a T-junction. As soon as the Warriors enter the Hall, take the top three Event cards in the Event deck without looking at them. Place one by each door out of the hall face down. When the Warriors explore through a doorway leading from the Hall of Death, turn over the card in the Dungeon deck as normal and place the relevant board section down. Next turn over the Event card for that door. If it is an 'E' card resolve it immediately. If it is Monsters place them on the board straight away. The Monsters will get to fight in the next Monsters' Phase as normal. Otherwise, events only happen in the Hall of Death if a 1 is rolled in the Power Phase.
The Grimoire Necris can appear in two places in the Catacombs of Terror. Firstly, it may appear with Gunther Laranscheld, enabling him to cast spells from its evil pages. Secondly, it may appear in the Dread King's Throne Room. Gunther is always placed next to the Grimoire, wherever it appears. In the Dread King's Throne Room, the Grimoire is always placed in the square at the top of the dais, and the Dread King is placed in the square behind it. In any other room, the Grimoire is placed in one corner, away from any Warriors, and Gunther is then placed next to it. (As printed on the reference sheet; the full Grimoire Necris section above carries the same rules.)
Necromantic Magic. The Dread King has committed the entire contents of the book to his ancient memory, but so long as he is not pinned in combat, having the Grimoire on hand (next to him) means that when rolling to see what spell he casts that turn, he re-rolls the dice if he scores a 1. If Gunther is standing next to the Grimoire at the start of the Monsters' Phase, and is not pinned, he may attempt to cast a spell. Roll a D6 - on a score of 4 or more Gunther may cast a spell that turn. Consult the Necromantic Spells Table to see which spell he casts.
Chasm of Despair. The slender bridge that spans the Chasm of Despair is very narrow and any Warrior or Monster who is clumsy may end up toppling down into the darkness. Any Monster or Warrior that rolls a natural 1 to hit with a hand-to-hand attack while standing on the bridge will lose their balance and fall down into the depths of the catacombs and is quite, quite dead. The Warriors do not get gold for Monsters who die in this way. The Warriors may save themselves with the Dwarf's Rope Equipment card, which stops them failing in, but may break as written on the card. Otherwise, events only happen in the Chasm of Despair if a 1 is rolled in the Power Phase.
Cards and Floorplans
The rulebook closes with a card and floorplan section (printed pages 51 to 61) that consists of card and floorplan images; no card text is present in the source as text, so none is transcribed. Card text is summarised on the cards themselves and in the sections above.