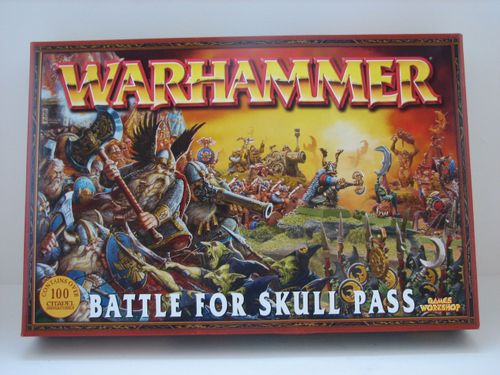
Warhammer: Battle For Skull Pass
Warhammer: Battle For Skull Pass Rulebook
Table of Contents
Table of Contents
- What's in the Box?
- What's It Like to Play?
- Preparing for Battle
- Dwarf Profiles
- Goblin Profiles
- Playing Warhammer
- Reference Sheet
- Training Exercise: Movement
- Training Exercise: Shooting
- Training Exercise: Close Combat
- Training Exercise: Multiple Combat
- Training Exercise: Manoeuvres
- Training Exercise: Panic
- Training Exercise: Fleeing
- Battle of Skull Pass
- Using Characters
- The Art of Magic
- The Cannon Roars
What's in the Box?
ALL YOU NEED TO GET STARTED
The Battle for Skull Pass boxed set contains everything you need to play Warhammer and re-create the infamous struggle between Dwarf and Goblin forces at Skull Pass. Battle for Skull Pass includes over 100 plastic Citadel miniatures.
- 12 Dwarf Warriors
- 40 Night Goblin Spearmen
- 10 Dwarf Thunderers
- 20 Night Goblin Archers
- 8 Dwarf Miners
- 10 Forest Goblin Spider Riders
- Dwarf Thane
- Night Goblin Big Boss
- Dwarf Dragon Slayer
- Night Goblin Shaman
- Dwarf Cannon & Crew
- Troll
- King's Wall Obstacle Terrain
- Idol of Mork Terrain
- Dwarf Grudge Pony Terrain
- Captured Dwarf Terrain
- Battle for Skull Pass Starter Booklet
- Pocket-Sized Warhammer Rulebook
- Six-Sided, Artillery, and Scatter Dice
- 2 Plastic Range Rulers and 3 Gaming Templates
What's It Like to Play?
Battle for Skull Pass walks you through all the steps that make up a game of Warhammer. Each side alternates taking their turn: first, one player moves, shoots, and fights with his army. Then, the other player does the same with his army. Back and forth you go until one player achieves victory and is declared the winner. Here's a description of the three phases of each player's turn.
MOVE INTO POSITION
At the Movement phase stage of the game, you move your models around the battlefield, or even into combat with your enemies. Manoeuvring your units around the battlefield is a vital part of the game.
READY, AIM, FIRE
In the Shooting phase, any units that are allowed can fire missile weapons, such as bows or handguns. Ranged attacks like these help you soften up the enemy for your final hand-to-hand assault.
IT'S GO TIME!
In the Close Combat phase, units in contact with each other battle it out in the hack-and-slash of personal combat. If the slaughter is great, the victors can induce the losers to run away — maybe even right off the table!
Learning the game of Warhammer is easy with Battle for Skull Pass. Its Starter Booklet is chock-full of diagrams and explanations that will gradually teach you the ins and outs of this strategic game. All the while, you'll be having fun as you pick up the rules in scenarios specially crafted to show you the basics. By the end of the Battle for Skull Pass gaming scenarios, you'll know how to move an entire army of Citadel miniatures, as well as shoot and engage in close combat with them.
Preparing for Battle
Starting to play Warhammer is easy. You just need to put together some models, as explained here, then read the gaming section of the Battle for Skull Pass getting started booklet. There, you can play through training exercises as you pick up the game. Soon, you will be fighting a full battle!
Learning the Game
The best way to learn how to play Warhammer is to get stuck in and start playing! The Battle for Skull Pass getting started booklet breaks the game down into easy chunks. That way, you can learn each part of the rules in turn and only need to put together a few models at a time. Finally, the booklet helps you put everything together to fight your first Warhammer battle.
All you need to do is find a suitable place to play and an opponent to challenge — everything else is provided in the Battle for Skull Pass boxed set.
The Playing Area
You can play on any flat surface, from the kitchen table to your living room floor. The gaming exercises don't need much space to play out, while full battles require a bit more room.
Assembling Your Models
Each of the training exercises in the Battle for Skull Pass getting started booklet (and in this web section) will show you which models you need. You don't have to put all of them together before you can start! For the first training exercise, you will need only 12 Dwarf Warriors and 20 Goblin Spearmen.
The first thing you will need to do is remove the models from their plastic frame (also called a "sprue"). It is a good idea to use a pair of clippers for this job, as simply twisting the components off can damage them. The models push together without needing glue, so you can play with them straight away. Later, you can glue them together with a suitable adhesive, such as Citadel Plastic Glue. After that, all your models need are bases.
1 - CLIP: Clip the models from the plastic frame (avoid cutting off the tabs on the models' feet that slot into the bases).
2 - PRESS: A few models have several parts — gently push them together to assemble them (no glue needed).
3 - SLOT: Slot each model into a base. The Troll and the Spider Riders fit on the larger bases.
Forming Units
In Warhammer, the models that make up your army are arranged into formations called units. A unit might be a single powerful character or monster, but is usually several troops organised together. All of the models in a unit are placed in contact with each other and stay together as long as they are "alive."
A unit like this is made up of a number of rows called "ranks." All of the ranks must include the same number of models as the front rank, except for the back rank, which can contain less if needed. Most units also have three special models: the Champion, Standard Bearer, and Musician.
Dwarf Profiles
In Warhammer, units have differing abilities and skills. Some are adept at close combat, while others rely on ranged weapons. Here, we look at how these qualities are represented in the game.
Characteristic Profiles
Don't be daunted by all the numbers on these pages — you don't have to memorise them to play! As you learn the rules by playing games, you'll find out what they all mean and how to use them. Every model in the game has a variety of strengths and weaknesses, which are represented by a profile. A profile contains nine different characteristics — numerical values that show how fast, strong, or tough an individual is. Characteristics are measured on a scale of 1 to 10, with 10 being the best. Also included will be notes on any armour and unusual weapons. All models are assumed to have a basic hand weapon such as an axe or a sword.
| Abbreviation | Characteristic |
|---|---|
| M | Movement |
| WS | Weapon Skill |
| BS | Ballistic Skill |
| S | Strength |
| T | Toughness |
| W | Wounds |
| I | Initiative |
| A | Attacks |
| Ld | Leadership |
Below are some Dwarf unit profiles for you to examine to see how they work.
12 Dwarf Warriors
Regiments of the Dwarf clans march to war, determined to defend Skull Pass.
| M | WS | BS | S | T | W | I | A | Ld | |
|---|---|---|---|---|---|---|---|---|---|
| Dwarf | 3 | 4 | 3 | 3 | 4 | 1 | 2 | 1 | 9 |
| Champion | 3 | 4 | 3 | 3 | 4 | 1 | 2 | 2 | 9 |
Armour Save: 4+
10 Dwarf Thunderers
Thunderers are armed with handguns that can pierce even the thickest armour.
| M | WS | BS | S | T | W | I | A | Ld | |
|---|---|---|---|---|---|---|---|---|---|
| Dwarf | 3 | 4 | 3 | 3 | 4 | 1 | 2 | 1 | 9 |
| Champion | 3 | 4 | 3 | 3 | 4 | 1 | 2 | 2 | 9 |
Armour Save: 6+ Handguns: Strength 4
8 Dwarf Miners
These Dwarfs work in the gold mines and in battle wield their heavy picks with both hands.
| M | WS | BS | S | T | W | I | A | Ld | |
|---|---|---|---|---|---|---|---|---|---|
| Dwarf | 3 | 4 | 3 | 5 | 4 | 1 | 2 | 1 | 9 |
| Champion | 3 | 4 | 3 | 5 | 4 | 1 | 2 | 2 | 9 |
Armour Save: 5+ Armed: Great weapons
Goblin Profiles
In Warhammer, units have differing abilities and skills. Some are adept at close combat, while others rely on ranged weapons. Here, we look at how these qualities are represented in the game.
Characteristic Profiles
Don't be daunted by all the numbers on these pages — you don't have to memorise them to play! As you learn the rules by playing games, you'll find out what they all mean and how to use them. Every model in the game has a variety of strengths and weaknesses, which are represented by a profile. A profile contains nine different characteristics — numerical values that show how fast, strong, or tough an individual is. Characteristics are measured on a scale of 1 to 10, with 10 being the best. Also included will be notes on any armour and unusual weapons. All models are assumed to have a basic hand weapon such as an axe or a sword.
Below are some Goblin unit profiles for you to examine to see how they work.
20 Night Goblin Spearmen
Night Goblins have adapted to life underground, and wear black robes to protect themselves from sunlight.
| M | WS | BS | S | T | W | I | A | Ld | |
|---|---|---|---|---|---|---|---|---|---|
| Nt. Goblin | 4 | 2 | 3 | 3 | 3 | 1 | 3 | 1 | 5 |
| Champion | 4 | 2 | 3 | 3 | 3 | 1 | 3 | 2 | 5 |
Armour Save: 6+ Armed: Spears
20 Night Goblin Archers
Some Night Goblins use short bows, allowing them to attack the enemy from a distance.
| M | WS | BS | S | T | W | I | A | Ld | |
|---|---|---|---|---|---|---|---|---|---|
| Nt. Goblin | 4 | 2 | 3 | 3 | 3 | 1 | 3 | 1 | 5 |
| Champion | 4 | 2 | 3 | 3 | 3 | 1 | 3 | 2 | 5 |
Armour Save: None Short Bows: Strength 3
10 Forest Goblin Spider Riders
Those Goblins bold enough to ride Giant Spiders into battle make swift and deadly cavalry.
| M | WS | BS | S | T | W | I | A | Ld | |
|---|---|---|---|---|---|---|---|---|---|
| Sp. Rider | 7 | 2 | 3 | 3 | 3 | 1 | 3 | 2 | 6 |
| Champion | 7 | 2 | 3 | 3 | 3 | 1 | 3 | 3 | 6 |
Armour Save: 5+
Playing Warhammer
Once you have a playing area and some assembled models, you're ready to learn the basics. The pages that follow will teach you how to create a bitter fight between the armies of Dwarfs and Goblins.
Taking Turns
A game of Warhammer is played out over a series of turns, until one player achieves victory and is declared the winner. Both players alternate taking their turn: first one player moves, shoots, and fights with his army. Once he's finished, the other player does the same with his army.
The Phases
Each player's turn is divided into a number of phases, which he moves through in order. Once finished, his opponent gets to play through the same phases with his army. When both players have taken a turn like this, they have completed a full game turn and a new one is started.
Movement Phase. At this stage of the game, you move your models around the battlefield or even into combat with your enemies.
Shooting Phase. In this phase, any units that can fire missile weapons do so, such as bows or handguns.
Close Combat Phase. In this phase, units in contact with each other battle it out in the hack-and-slash of close combat.
Game Turn Sequence
Goblin Player's Turn
- Movement Phase — Goblins move.
- Shooting Phase — Goblins shoot.
- Close Combat Phase — Both sides fight.
Dwarf Player's Turn
- Movement Phase — Dwarfs move.
- Shooting Phase — Dwarfs shoot.
- Close Combat Phase — Both sides fight.
Using the Training Exercises
In this gaming section and in the Battle for Skull Pass getting started booklet, we have a series of guides that each teach you a phase of the game and then let you try it out for yourselves. Once you've read the rules in each guide, play through the training exercise to reinforce your grasp of the game mechanics.
Fighting a Battle
When you're happy that you have a grasp of the Movement, Shooting, and Close Combat phases, you're ready to put them all together in your first battle. You'll need to make more space for this, as you'll be using most of the miniatures in the boxed set. Now, you are ready to pit the vicious Goblins against the stout Dwarfs of Skull Pass!
The Most Important Rule
Remember, you're playing to enjoy a challenging battle with friends, where having fun is more important than winning at any cost. When you come across a situation in a battle that is not covered fully by the rulebook, be prepared to interpret a rule or come up with a suitable solution for yourselves.
If you can't reach an agreement, then roll a D6. On the score of 1-3, player "A" may decide the outcome of the dispute, while on a 4-6 player "B" may decide.
Reference Sheet
This quick reference sheet is for you to use as you learn to play Warhammer. It contains almost everything you need to play at a glance so you can spend more time gaming and less time flipping through the rulebook.
The Turn
- Start of the Turn Phase
- Movement Phase
- Magic Phase
- Shooting Phase
- Close Combat Phase
Movement Phase
- Declare Charges. If you want any of your troops to charge, you must declare this at the very start of the movement phase.
- Rally Fleeing Troops. If any of your troops are fleeing, you can attempt to rally them after declaring charges.
- Compulsory Moves. Move troops that are subject to a compulsory movement rule.
- Move Chargers. Move charging troops and resolve other movement resulting from the charge.
- Remaining Moves. Move the rest of your troops.
Shooting Phase
- Declare the ranges at which all guess-range weapons are firing.
- Resolve the firing of all guess-range weapons, in any order you wish.
- Resolve the firing of all units equipped with missile weapons that do not require you to guess the range, in any order you wish.
- The opposing player makes any Panic tests required (as explained in the Psychology section on page 48).
Ballistic Skill to Hit chart
| Ballistic Skill | 1 | 2 | 3 | 4 | 5 | 6 | 7 | 8 | 9 | 10 |
|---|---|---|---|---|---|---|---|---|---|---|
| To Hit score | 6 | 5 | 4 | 3 | 2 | 1 | 0 | -1 | -2 | -3 |
To Hit Modifiers:
- +1 Shooting at large target
- -1 Shooting while moving
- -1 Stand & shoot
- -1 Shooting at long range
- -1 Shooting at a single model or skirmishers
- -1 Target is behind soft cover
- -2 Target is behind hard cover
7+ To Hit — Score needed to hit / Dice rolls needed
| Score needed to hit | Dice rolls needed |
|---|---|
| 7 | 6 then 4, 5 or 6 |
| 8 | 6 then 5 or 6 |
| 9 | 6 then 6 |
| 10 | Impossible! |
Close Combat Phase
- Pick any one of the combats on the table and resolve it, following the sequence given below.
- Pick another combat and resolve it.
- Continue like this until all combats are resolved.
How to Resolve Combats
- Fight Combat. Models in base contact with the enemy will fight, as explained in the rules that follow.
- Combat Result. Work out which side has won the combat and by how much. If the fight is not a draw, the losing side will have lost by 1, 2 or more 'points'.
- Break Test. Each unit on the losing side must take a Break test. Any units failing their Break test are deemed 'broken' and will run away.
- Flee & Pursue. Units that have broken must flee away from their enemy. Units whose enemies have broken and fled that turn are allowed to pursue them and might possibly catch and destroy them.
- Redress Ranks. Units are tidied up, ready to continue the battle.
Combat Result Bonus
| Situation | Bonus |
|---|---|
| Extra rank | +1 per rank after the first (maximum +3) |
| Outnumber enemy | +1 |
| Battle standard | +1 |
| Standard | +1 |
| High ground | +1 |
| Flank attack | +1 |
| Rear attack | +2 |
| Overkill | +1 per excess wound (maximum +5) |
Armour
| Type | Save |
|---|---|
| Unarmoured | No Save |
| Light armour | 6+ |
| Heavy armour | 5+ |
| Shield | +1 |
| Barding | +1 |
| Mounted | +1 |
Armour Save Modifiers
| Strength of hit | Save modifier |
|---|---|
| 3 or less | None |
| 4 | -1 |
| 5 | -2 |
| 6 | -3 |
| 7 | -4 |
| 8 | -5 |
| 9 | -6 |
| 10 | -7 |
To Hit Chart — Attacker's Weapon Skill (rows) vs. Opponent's Weapon Skill (columns 1-10)
| WS | 1 | 2 | 3 | 4 | 5 | 6 | 7 | 8 | 9 | 10 |
|---|---|---|---|---|---|---|---|---|---|---|
| 1 | 4 | 4 | 5 | 5 | 5 | 5 | 5 | 5 | 5 | 5 |
| 2 | 3 | 4 | 4 | 4 | 5 | 5 | 5 | 5 | 5 | 5 |
To Wound Chart — Attacker's Strength (rows) vs. Opponent's Toughness (columns 1-10); "N" means no wound is possible
| S | 1 | 2 | 3 | 4 | 5 | 6 | 7 | 8 | 9 | 10 |
|---|---|---|---|---|---|---|---|---|---|---|
| 1 | 4 | 5 | 6 | 6 | N | N | N | N | N | N |
| 2 | 3 | 4 | 5 | 6 | 6 | N | N | N | N | N |
Magic Phase
- Generate Power Dice & Dispel Dice
- Cast
- Dispel
- Spell Fails or Spell Succeeds
- Repeat Steps 2 to 4
- Dispel Spells in Play
Maximum Casting Dice Chart
| Wizard Level | Maximum Number of Dice |
|---|---|
| Level 1 | 2 |
| Level 2 | 3 |
| Level 3 | 4 |
| Level 4 | 5 |
Power Dice — The player whose turn it is generates power dice as follows:
| Source | Dice |
|---|---|
| Power dice pool | 2 dice |
| Each Level 1 Wizard | 1 dice |
| Each Level 2 Wizard | 2 dice |
| Each Level 3 Wizard | 3 dice |
| Each Level 4 Wizard | 4 dice |
Dispel Dice — The player whose turn it is not generates dispel dice as follows:
| Source | Dice |
|---|---|
| Dispel dice pool | 2 dice |
| Dwarf army | +2 dice |
| Each Runesmith | +1 dice |
| Each Runelord | +1 dice |
| For each Level 1 Wizard | +1 dice |
| For each Level 2 Wizard | +1 dice |
| For each Level 3 Wizard | +2 dice |
| For each Level 4 Wizard | +2 dice |
Miscast Table (2D6 Result)
| Roll | Result |
|---|---|
| 2 | The Wizard is annihilated and immediately removed as a casualty, regardless of any protective magic item or special rule he might have. Models in base contact, friend or foe (including the Wizard's monster or chariot mount), suffer one Strength 10 hit (no armour saves allowed) as their flesh mutates and their soul is sucked away. |
| 3-4 | The Wizard and all models in base contact with him (including his monstrous mount or chariot) suffer a Strength 6 hit, with no armour saves allowed. |
| 5-6 | The opposing player may immediately cast any one of his own spells. No casting roll is required — the spell is automatically cast — but it can be dispelled by the player whose turn it is as normal (by using power dice in the same way as dispel dice). He needs to beat the basic casting value of the spell to dispel it. |
| 7 | The caster suffers one Strength 2 hit (no armour saves allowed), loses all his remaining power dice and cannot do anything else during this magic phase. |
| 8-9 | The caster suffers one Strength 4 hit (no armour saves allowed). In addition, all spells currently in play on the entire battlefield are automatically dispelled and the magic phase ends. All power and dispel dice stored in magic items are also lost. |
| 10-11 | The caster suffers one Strength 8 hit (no armour saves allowed) and loses a Wizard level (the spell lost must be the one he just attempted to cast). If the caster reaches Level 0, he stops counting as a Wizard and therefore will not be able to use any arcane magic items he is carrying (see the Magic Items section) and will generate no power/dispel dice. |
Training Exercise: Movement
The best way to see how movement works is to put a couple of units on the table and move them around. In this exercise, the objective is for both units to manoeuvre around the obstacles and charge into the enemy. First the Goblin player takes a turn moving, followed by the Dwarf player. Referring to the profiles on p. 4-5 of the Battle for Skull Pass getting started booklet, alternate taking turns until one unit has charged the other.
You Will Need
- A Flat Playing Area
- The King's Wall
- The Grudge Pony
- 20 Night Goblin Spearmen
- 12 Dwarf Warriors
- Range Rulers
Turn Sequence
Goblin Player's Turn
- Movement Phase
- A. Normal Movement
- B. Charging
- Shooting Phase
- Close Combat Phase
Dwarf Player's Turn
- Movement Phase
- A. Normal Movement
- B. Charging
- Shooting Phase
- Close Combat Phase
Set Up Your Models
Place your models as shown in the photo below.
Playing the Battle
Starting with the Goblin player, take turns completing a Movement phase. For now, don't worry about the Shooting and Close Combat phases — just concentrate on movement.
- The King's Wall and the Grudge Pony and cart are stationary obstacles between the Night Goblins and the Dwarfs. Models are not allowed to move through or over these obstacles.
Winning the Game
The person who successfully charges their opponent wins!
Training Exercise: Shooting
We've devised this exercise so that you can practice rolling To Hit, rolling To Wound, and making Armour saves. The objective is to kill all the models in the opposing unit. Starting with the Goblin player, refer to the profiles on p. 4-5 of the Battle for Skull Pass getting started booklet and alternate taking turns shooting at the enemy. For the purposes of this exercise, ignore the Movement and Close Combat phases of each turn.
You Will Need
- A Flat Playing Area
- Range Rulers
- Dice
- 20 Night Goblin Archers
- 10 Dwarf Thunderers
Turn Sequence
Goblin Player's Turn
- Movement Phase
- Shooting Phase
- A. Choose a Target
- B. Roll to Hit
- C. Roll to Wound
- D. Make Armour Saves
- Close Combat Phase
Dwarf Player's Turn
- Movement Phase
- Shooting Phase
- A. Choose a Target
- B. Roll to Hit
- C. Roll to Wound
- D. Make Armour Saves
- Close Combat Phase
Set Up Your Models
Place your models as shown in the photo below.
Fighting the Battle
Both players take turns completing a Shooting Phase. For now, don't worry about the Movement and Close Combat phases — just concentrate on shooting.
Winning the Game
The first person to wipe out their opponent wins!
Training Exercise: Close Combat
Close combat is one of the most important and involved parts of Warhammer, so it's worth playing this exercise a few times until you are comfortable with the rules.
The objective here is to wipe out the enemy. Alternate playing through the turns, referring to the profiles on p. 4-5 of the Battle for Skull Pass getting started booklet, and assuming the Goblin unit has just charged.
Remember that in each phase, once one unit has attacked, the other side will get to attack back.
You Will Need
- A Flat Playing Area
- Dice
- 20 Night Goblin Spearmen
- 12 Dwarf Warriors
Turn Sequence
Goblin Player's Turn
-
Movement Phase
-
Shooting Phase
-
Close Combat Phase
- A. 1st side rolls To Hit
- B. 1st side rolls To Wound
- C. 2nd side makes Armour Saves
Before moving onto step D, the 2nd side follows through steps A and B, then the 1st side follows step C.
- D. Combat Results
Dwarf Player's Turn
-
Movement Phase
-
Shooting Phase
-
Close Combat Phase
- A. 1st side rolls To Hit
- B. 1st side rolls To Wound
- C. 2nd side makes Armour Saves
Before moving onto step D, the 2nd side follows through steps A and B, then the 1st side follows step C.
- D. Combat Results
Set Up Your Models
Place your models as shown in the photo below.
Fighting the Battle
Both players take turns completing a Close Combat phase. For now, don't worry about the Moving and Shooting phases — just concentrate on combat.
- The Goblins attack first in the 1st turn because they have charged (but cannot use their spears).
- Remember, in each Close Combat phase, both players get to fight.
Winning the Game
The first person to wipe out their opponent — either by killing them all or forcing them to fail a Break test — wins!
Training Exercise: Multiple Combat
Having more than two units in a combat can be tricky, so play this exercise to make sure you know what to do in this gaming situation. Alternate playing through the turns while referring to the profiles on p. 4-5 of the Battle for Skull Pass getting started booklet, and assume the two Goblin units have just charged. Again, remember that all units get to fight in each player's turn. Once you are familiar with the rules for movement, shooting, and combat, you are ready to fight the epic Battle for Skull Pass.
You Will Need
- A Flat Playing Area & Dice
- 12 Dwarf Warriors
- 20 Night Goblin Spearmen
- 20 Night Goblin Archers
Turn Sequence
Goblin Player's Turn
-
Movement Phase
-
Shooting Phase
-
Close Combat Phase
- A. 1st side rolls To Hit
- B. 1st side rolls To Wound
- C. 2nd side makes Armour Saves
Before moving onto step D, the 2nd side follows through steps A and B, then the 1st side follows step C.
- D. Combat Results
Dwarf Player's Turn
-
Movement Phase
-
Shooting Phase
-
Close Combat Phase
- A. 1st side rolls To Hit
- B. 1st side rolls To Wound
- C. 2nd side makes Armour Saves
Before moving onto step D, the 2nd side follows through steps A and B, then the 1st side follows step C.
- D. Combat Results
Set Up Your Models
Place your models as shown in the photo below.
Fighting the Battle
Take turns completing a Close Combat phase. Don't worry about the Moving and Shooting phases — just concentrate on combat.
- The Goblins attack first in the 1st turn because they have charged (but cannot use their spears).
- Remember, in each Close Combat phase, both players get to fight.
Winning the Game
The first person to wipe out their opponent — either by slaying them all or forcing them to fail a Break test — wins!
Training Exercise: Manoeuvres
There are many ways that a unit of troops can move around the battlefield, of which wheeling is only one type of manoeuvre. Here we show you two other manoeuvres that your units can perform.
Wheeling allows a unit to move around most obstacles without too much trouble, although it can be a little unwieldy with large units. In some situations, a Turn may be more useful. Also, a unit can sacrifice all of its movement in order to Reform, changing its formation and the direction it is facing in a single manoeuvre.
The full rules for Manoeuvres can be found on pp. 12-14 of the regular-sized Warhammer rulebook.
Movement
Use the movement rules given in the Battle for Skull Pass getting started booklet on pp. 8-10.
Turn
Instead of wheeling around one of the forward corners as a unit, the warriors can turn on the spot to face a different direction. A turn can be either a quarter turn (90 degrees) or a half turn (180 degrees). To start with, turn each model the intended quarter or half turn.
The Night Goblins have started to make a quarter turn to the left.
Next, move any Champion, Standard Bearer, and Musician models so that they are in the new front rank, and fill the gaps with the models removed from the front rank.
Finally, if there was an incomplete rank at the back of the old formation, you will have some spare models to one side of the new formation. Simply move these to the back of the unit to make the new back rank.
The command group has been placed facing from the front of the new formation. The "spare" Goblin has been placed in the back of the unit.
Turning and Other Movement
It costs a unit 1/4 of its movement distance to make a turn. For the Goblins, with a movement of 4", a turn costs them 1". This cost is the same whether a quarter turn or half turn is made. The Night Goblins can move a further 3" after turning.
Reform
Instead of moving, a unit can choose to Reform during its Movement Phase. When you Reform a unit, you are allowed to reposition the models facing in any direction and also change the number of ranks in the unit. A unit is not allowed any other movement in the turn it Reforms.
The centre of the unit remains in the same place, and the unit is reformed around this location. The new formation can be any that you wish, as long as you follow the rule that all the ranks have the same number of models (except the back rank). Remember to place the Standard Bearer, Musician, and Champion (and any character that has joined the unit) in the new front rank.
Determine the centre of the unit before reforming. The archers have reformed into two ranks and are facing a new direction. Here, the Night Goblins have turned around and narrowed their formation.
Reforming and Shooting
It takes a while for a unit to reorganise itself during a Reform. For this reason, a unit that has Reformed may not shoot in the same turn.
Training Exercise: Panic
Often, an army will not fight to the last warriors, but will run away due to casualties inflicted. The rules for Panic represent this behaviour in your games.
Panic is used in most of the phases, but for this exercise, we're going to concentrate on how to cause Panic in the Shooting phase to give you an idea of the rules. The full Panic rules and the different situations in which it can occur can be found on pp. 48-49 of the regular-sized Warhammer rulebook.
Shooting
Use the shooting rules given in the Battle for Skull Pass getting started booklet on pp. 11-13.
Turn Sequence
Goblin Player's Turn
- Movement Phase
- Shooting Phase
- A. Choose a Target
- B. Roll to Hit
- C. Roll to Wound
- D. Make Armour Saves
- E. Make Panic Tests
- Close Combat Phase
Dwarf Player's Turn
- Movement Phase
- Shooting Phase
- A. Choose a Target
- B. Roll to Hit
- C. Roll to Wound
- D. Make Armour Saves
- E. Make Panic Tests
- Close Combat Phase
Panic Tests
A unit may suffer from Panic when it has taken a large number of casualties. Compare the number of models that were in the unit at the start of the Shooting Phase with the number left at the end. If the number of models has been reduced by 25% or more, then they must take a Panic test. A unit only ever takes one Panic test in each Shooting Phase, even if it loses more than a quarter of its models.
As they have only lost two (less than 25% of 10), the Thunderers do not take a Panic test. As three models are more than a quarter of the unit, the Thunderers must take a Panic test.
A Panic test is much like a Break test. Roll 2D6 and add the scores together. Compare this total with the Ld value of the unit. If it is equal to or lower than the unit's Ld, the test has been passed. If the two dice score higher than the unit's Ld, the test has been failed and the unit runs away.
The total of the two dice is less than their Ld of 5, so the Night Goblins pass their Panic test. The two dice score more than 5, and so the Goblins will run away.
Training Exercise: Fleeing
When they run away, warriors do not simply disappear from the battlefield. Fleeing and pursuit allows units to escape from a combat if they fail a Break test, but also gives the victors a chance to run down and destroy the escapees.
Fleeing and pursuit is an important factor in Warhammer. Troops can flee for many reasons, but for the purposes of this introduction, we are going to look at how troops flee from close combat. The full rules for fleeing and pursuit are quite extensive and are covered on pp. 40-46 of the regular-sized Warhammer rulebook.
Turn Sequence
Goblin Player's Turn
-
Movement Phase
- A. Rally Tests
- B. Move Fleeing Troops
- C. Normal Movement
- D. Charging
-
Shooting Phase
- A. Choose a Target
- B. Roll to Hit
- C. Roll to Wound
- D. Make Armour Saves
-
Close Combat Phase
- A. 1st side rolls To Hit
- B. 1st side rolls To Wound
- C. 2nd side makes Armour Saves
Before moving onto step D, the 2nd side follows through steps A and B, then the 1st side follows step C.
- D. Combat Results
- E. Make Break Tests
- F. Determine Flee Distances
- G. Move Fleeing Units
- H. Determine Pursuit Distances
- I. Move Pursuing Units
Dwarf Player's Turn
-
Movement Phase
- A. Rally Tests
- B. Move Fleeing Troops
- C. Normal Movement
- D. Charging
-
Shooting Phase
- A. Choose a Target
- B. Roll to Hit
- C. Roll to Wound
- D. Make Armour Saves
-
Close Combat Phase
- A. 1st side rolls To Hit
- B. 1st side rolls To Wound
- C. 2nd side makes Armour Saves
Before moving onto step D, the 2nd side follows through steps A and B, then the 1st side follows step C.
- D. Combat Results
- E. Make Break Tests
- F. Determine Flee Distances
- G. Move Fleeing Units
- H. Determine Pursuit Distances
- I. Move Pursuing Units
Combat and Break Tests
Use the combat rules given in the Battle for Skull Pass getting started booklet on pp. 14-17. Rather than simply removing a unit if it fails its break test, use the fleeing and pursuit rules given below.
Fleeing
If a unit loses a close combat and fails its Break test, it will flee. A unit always flees directly away from the unit that beat it in combat, so turn the unit around to face the opposite direction.
Next, you must find out how far the unit flees. Units that are fleeing are very unpredictable, so roll 2D6 and add the scores together to see how far they will move. Turn the fleeing unit around and move it straight forward this distance in inches.
The Goblins have failed their Break test and have turned away from the victorious Dwarfs. The Night Goblins flee 6" from the combat they just lost.
The victorious unit can now pursue. As with the fleeing unit, the distance they will move is random, so roll 2D6 and add the scores together to see if they can catch their quarry.
Before moving the pursuing unit, compare their score with the fleeing unit's distance. If the pursuers moved equal to or more than the fleeing troops fled, the pursuers have caught up and run them down. Remove the fleeing unit from the table. They might not all be dead, some may have scattered or hidden themselves away, but they all count as casualties.
If the pursuers scored less than the fleeing unit, the fleeing unit has managed to get away. Once you have determined whether the fleeing unit has been caught, you can then move the pursuers the distance rolled.
The Dwarfs' distance is more than the Goblins and so the Goblins have been wiped out. The Dwarfs are moved the full distance rolled. The Dwarfs are not fast enough, and their 4" move is not sufficient to catch the fleeing unit of Goblins.
Rallying Fleeing Units
Troops that start fleeing may well continue running away, or they might regain their nerve and return to the fight. To find out what happens, at the start of the Movement Phase, all fleeing units get to make a Rally test. This is a Leadership test (like the Break test), so roll 2D6, add the scores together, and compare the total with the unit's Ld value.
If the score is higher than their Ld, they do not rally themselves and will continue to flee. If the score is equal to or less than the unit's Ld, they have rallied. You can turn the unit to face in any direction. However, they cannot move further this turn or shoot.
The Night Goblins have failed their Rally test and will continue to flee. The Night Goblins have passed their Ld test and have rallied.
Fleeing in the Movement Phase
A unit that fails to rally will flee again instead of making its normal movement. This continued fleeing distance is equal to the roll of 2D6, just like fleeing from combat. However, rather than fleeing from the enemy, the unit will move towards the closest edge of the battlefield.
A fleeing unit is very vulnerable to being attacked, and the troops may scatter completely if they feel they cannot escape.
If the fleeing movement of the unit means it has to move into another enemy unit or a piece of terrain, the unit is removed from the table. Also, if any of the models in the unit move off from the table, the whole unit is removed.
The Miners have positioned themselves behind the Night Goblins, and when the Night Goblins flee a total of 10", they are wiped out. Reaching the edge of the table, the Night Goblins have fled the battlefield entirely and are removed as casualties.
Charging a Fleeing Unit
A unit that is fleeing when it is charged will try to run away again. If a unit can charge a fleeing enemy unit (in other words move into close combat with it) before the charging models are moved, the charged unit will flee. This is equal to the roll of 2D6 as usual.
If the charging unit can still charge the fleeing unit (because doubling their move will still get them into contact), the fleeing unit is wiped out and the charging unit is moved double its movement distance as a result of the pursuit. However, if the fleeing unit cannot be charged any more, the charging unit does not get to double its movement and will move its normal distance after the fleeing troops.
The fleeing dwarfs have been charged by the Night Goblins and will flee directly away from them. The Dwarfs do not run far enough with a roll of 3" and have been caught by the pursuing Goblins that can move 8". The Dwarfs, with a roll of 7", have managed to outpace the charging Night Goblins and have gotten away.
Battle of Skull Pass
This game combines everything you have learned so far about Warhammer in a battle between the Dwarfs of Skull Pass and the invading Goblin hordes. The time has come! A horde of Goblins has invaded Skull Pass, and the Dwarfs have mustered to defend their gold. Now, you are ready for your first battle! Each player will take turns going through the three phases (moving, shooting and fighting) with all his warriors. You will also learn the additional rules required to play larger games like the Battle for Skull Pass. These include rules such as line of sight, moving and shooting, and shooting into combat.
You Will Need
- A Flat Playing Area
- Range Ruler
- Dice
- The Idol of Mork
- The Grudge Pony
- The King's Wall
- 20 Night Goblin Spearmen (x2)
- 20 Night Goblin Archers
- 10 Spider Riders
- 12 Dwarf Warriors
- 10 Dwarf Thunderers
- 8 Dwarf Miners
Turn Sequence
Goblin Player's Turn
-
Movement Phase
- A. Normal Movement
- B. Charging
-
Shooting Phase
- A. Choose a Target
- B. Roll to Hit
- C. Roll to Wound
- D. Make Armour Saves
-
Close Combat Phase
- A. 1st side rolls To Hit
- B. 1st side rolls To Wound
- C. 2nd side makes Armour Saves
Before moving onto step D, the 2nd side follows through steps A and B, then the 1st side follows step C.
- D. Combat Results
Dwarf Player's Turn
-
Movement Phase
- A. Normal Movement
- B. Charging
-
Shooting Phase
- A. Choose a Target
- B. Roll to Hit
- C. Roll to Wound
- D. Make Armour Saves
-
Close Combat Phase
- A. 1st side rolls To Hit
- B. 1st side rolls To Wound
- C. 2nd side makes Armour Saves
Before moving onto step D, the 2nd side follows through steps A and B, then the 1st side follows step C.
- D. Combat Results
Gaming Area
Games of Warhammer are played on an area called a battlefield. Any suitably large flat area, such as a kitchen table or floor, can be used as the battlefield for this Battle for Skull Pass introductory battle. A roughly 3-4 square foot area will do just fine.
Set Up Your Models
Set up the models and scenery as shown below. The two sides should start at least 18" apart.
Fighting the Battle
- The Night Goblins take a turn.
- The Dwarfs take a turn.
- If neither the Dwarfs nor the Night Goblins have won, repeat steps 1 and 2!
Winning the Game
Players take turns as described in the game turn sequence. The side that manages to wipe out all of the opposing force wins the battle for possession of Skull Pass!
Additional Rules
As you are now playing a full Warhammer battle, a few extra rules come into play. They are: Line of Sight, Moving and Shooting, Cavalry, Shooting and Combat, Great Weapons, and Locked in Combat.
Line of Sight
A warrior must be able to "see" an enemy model in order to shoot at it. Models can see in a 90-degree arc to their front — this is called a model's "line of sight." Enemies that are outside this area cannot be shot at. Line of sight is blocked by terrain — if a unit is on the far side of the King's Wall for example, it cannot be seen. Other models also block line of sight, whether they are friend or foe.
Models can only see (and therefore shoot) in the 90-degree arc in front of them. The Dwarfs are behind a wall, so they cannot be targeted by the Goblin Archers. With the Spearmen in the way, the Goblin Archers cannot shoot the Dwarf Warriors.
Moving and Shooting
Dwarfs handguns need a long time to reload, so Thunderers cannot shoot in the same turn they have moved. The short bows of the Night Goblins, on the other hand, can be reloaded quickly and can be fired on the move. Night Goblins can move up to 4" and still shoot — if they charge, however, they cannot shoot that turn.
Night Goblins can move up to 4" and shoot. Thunderers must stand still if they want to fire.
Shooting and Combat
This one should be the first introductory battle you've encountered that includes both shooting and combat, so there are a few extra rules that cover how the two interact. Firstly, it is important to note that you are not allowed to shoot at enemies that are in combat — the risk of killing friendly models is too great.
Also, a unit is not permitted to shoot if it is fighting in close combat itself. The warriors are too busy hacking at their enemies and defending themselves to fire a bow or handgun. If their enemies are all killed or fail a Break test and run, then the unit can shoot again as normal in later turns.
The Thunderers cannot fire while they are occupied fighting a combat. The Night Goblins cannot shoot at the Dwarfs for fear of hitting the Goblin Spearmen.
Locked in Combat
Units cannot choose to move away from combat. If one side has not been wiped out in the first round of combat, the units stay locked together and continue to fight in later turns. As before, both sides will fight in every Close Combat Phase.
Cavalry and Great Weapons
In the Battle for Skull Pass, you will be using the Spider Riders, which are a special kind of unit called "cavalry." Cavalry models work much like infantry models, except with bigger bases. Each Spider Rider is considered a single model, not two — so you will never need to separate the Spider from its Goblin master. In practice, this means that when a Spider Rider suffers a wound, you remove the whole model as a casualty.
As their spiders can also fight, each model has an extra Attack in close combat, as detailed on their profile.
This battle introduces the Dwarf Miners, who carry hefty double-handed picks known as "great weapons." Great weapons can include any massive weapon from mighty axes to huge clubs. If a unit carries great weapons, it will be mentioned in their profile. Due to the size and weight of their weapon, a model with a great weapon adds 2 to its Strength (this has been included in the Miners' profiles). However, unless it has charged, a model with a great weapon always goes last in close combat.
Using Characters
As well as units of troops, your army can include particularly heroic warriors. These are called "characters," and they have additional rules to reflect their unique abilities.
Along with having better profiles, characters are exceptional due to their ability to join and leave other units. When on their own, they form a unit of a single model. If they have joined another unit, they move and fight as part of that unit, albeit with a superior profile and a few other special rules.
You Will Need
- A Flat Playing Area
- Range Ruler
- The Idol of Mork
- The Grudge Pony
- The King's Wall
- Thane Godri Thunderbrand
- Dragon Slayer Borri Graniteskin
- Big Boss Dagskar Earscrapper
- 20 Night Goblin Spearmen
- 20 Night Goblin Spearmen
- 20 Night Goblin Archers
- 10 Spider Riders
- 12 Dwarf Warriors
- 10 Dwarf Thunderers
- 8 Dwarf Miners
- Dice
Turn Sequence
Goblin Player's Turn
-
Movement Phase
- A. Normal Movement
- B. Charging
-
Shooting Phase
- A. Choose a Target
- B. Roll to Hit
- C. Roll to Wound
- D. Make Armour Saves
-
Close Combat Phase
- A. 1st side rolls To Hit
- B. 1st side rolls To Wound
- C. 2nd side makes Armour Saves
Before moving onto step D, the 2nd side follows through steps A and B, then the 1st side follows step C.
- D. Combat Results
Dwarf Player's Turn
-
Movement Phase
- A. Normal Movement
- B. Charging
-
Shooting Phase
- A. Choose a Target
- B. Roll to Hit
- C. Roll to Wound
- D. Make Armour Saves
-
Close Combat Phase
- A. 1st side rolls To Hit
- B. 1st side rolls To Wound
- C. 2nd side makes Armour Saves
Before moving onto step D, the 2nd side follows through steps A and B, then the 1st side follows step C.
- D. Combat Results
Gaming Area
Games of Warhammer are played on an area called a battlefield. Any suitably large flat area, such as a kitchen table or floor, can be used as the battlefield for this Battle for Skull Pass introductory battle. A roughly 3-4 square foot area will do just fine.
Set Up Your Models
Set up the models and scenery as shown in the Battle for Skull Pass scenario found on p. 25 of the Battle for Skull Pass getting started booklet. The two sides should start at least 18" apart.
Fighting the Battle
- The Night Goblins take a turn.
- The Dwarfs take a turn.
- If neither the Dwarfs nor the Night Goblins have won, repeat steps 1 and 2!
Winning the Game
Players take turns as described in the game turn sequence. The side that manages to wipe out all of the opposing force wins the battle for possession of Skull Pass!
Additional Rules
As you are now playing a full Warhammer battle, a few extra rules come into play. They are: Moving Characters, Characters in Combat, Unbreakable, Characters' Leadership, and Army Generals.
Character Movement
Moving Characters. Characters are allowed to move around on their own, although they can also join a unit. As long as they are moving on their own, characters do not have to wheel like a ranked unit. Simply move them in whatever direction you like as long as they travel no more than their Movement value: 4" for the Goblin characters and 3" for the Dwarf characters. Like other units, lone characters can double this distance if they charge.
Characters Joining Units. Characters can join friendly units simply by moving them so they touch the unit and then placing them anywhere in the front rank, moving the model(s) they replace to the back of the unit. Remember to leave the Musician, Standard Bearer, and the Champion in the front rank, though. The advantage of joining a unit is that the character cannot be specifically targeted by shooting — the enemy must fire at the unit as a whole, and only when they are all dead can the character be singled out by ranged fire.
If a character has a lower M than the rest of the unit, they are all reduced to his movement rate (for example, if Dagskar joins the Spider Riders). A character can also leave the unit simply by moving away during the Movement Phase (he does this before the unit moves).
Unlike other characters, Borri is a Slayer, which means he prefers to fight alone. Thus, he cannot join other units.
Characters can turn and move freely — they do not have to wheel. When a character joins a unit, he replaces a model in the front rank.
Characters in Combat
Now that there is such a variety of units on the table, all with different profiles, you will need to work out the scores required To Hit using the opposing models' Weapon Skills (WS). Remember that characters often have more than 1 Attack, like Boss Grizzit.
Directing Attacks. A model can attack if its base is touching the base of an enemy model, even if only corner-to-corner. Normally attacks are made against the ordinary models in a unit. However, if a model is in contact with a character, they can choose to attack the character instead. You must announce who is attacking which enemy before rolling any dice to see if they hit.
To Wound Scores. Just like other models, the score needed To Wound a character is worked out by comparing the Strength of the attack with the Toughness of the target on the To Wound Chart. For example, Night Goblins (Strength 3) need to score a 6 to wound Godri Thunderbrand (Toughness 5). However, mighty heroes such as Godri won't be killed that easily...
Multiple Wounds. Normally, a model can only suffer 1 Wound before being removed as a casualty. However, models like Dagskar and Godri might have 2 or more Wounds. This characteristic means that they won't fall as a casualty until they have suffered the number of Wounds shown on their profile. The Warhammer boxed set includes some small markers to keep track of the Wounds these characters have suffered — simply place a marker next to the model for each Wound they have lost and then remove the model when they lose their last Wound.
Only one Goblin may attack the Dwarf Thane, although the greenskin can also attack a Dwarf Warrior, since it's in contact with both. Here, you can see that Borri has suffered a Wound — one more will kill him. That's why the wound markers are useful reminders.
Weapons
Great Weapons. Dagskar carries a large spiked club. Like the pickaxes of the Dwarf Miners, this is a great weapon and adds +2 to Dagskar's Strength (included in Dagskar's profile). However, unless he has charged, Dagskar always goes last in close combat. If both sides in a combat have great weapons and neither has charged that turn (for instance, Dagskar is fighting the Miners), then the model with the highest Initiative value goes first.
Two Weapons. Borri is armed with two axes, making him even more fearsome in close combat because models with two weapons gain an extra Attack. For Borri, his axes mean he has 4 Attacks in close combat, which are included in his profile already.
Unbreakable
A Slayer is sworn to a glorious death in battle and is not afraid of dying. If Borri loses a combat, he does not have to take a Break test. This means that he will never flee for any reason.
Characters' Leadership
As well as being better fighters, characters will often have a better Leadership value than normal troops. If a character has joined a unit, the unit can use the character's Leadership instead of their own, for example when taking Break tests.
Though wounded and outnumbered, Borri does not have to take a Break test. While Dagskar is with them, the Goblins have a Leadership of 7.
Army Generals
An army is led by a General — the most important character in the force. The General will normally have the highest Leadership value in the army, and it is this value, alongside his special rules, that makes him so useful. Godri is the Dwarfs' General, and Dagskar is the Goblins' General.
When any unit in an army is required to take any Leadership test (usually a Break test), it can use the General's Leadership (Ld) value instead of their own, as long as they are within 12" of their General. This area of effect is important, because it means that units close to the General are normally less likely to run away from close combat.
The Night Goblin archers and Spider Riders can both use Dagskar's Leadership. The Night Goblins with spears are too far away.
The Art of Magic
Some models have the ability to cast spells to protect their friends or blast the enemy apart with gouts of sorcerous fire.
When using models that are Wizards, a whole new phase is introduced between Movement and Shooting. During this Magic phase, the player whose turn it is can try to cast spells while their opponent tries to prevent these spells with "dispels."
You Will Need
- A Flat Playing Area
- Range Ruler
- The Idol of Mork
- The Grudge Pony
- The King's Wall
- Nazbad Wartfinger
- Thane Godri Thunderbrand
- Dragon Slayer Borri Graniteskin
- Big Boss Dagskar Earscrapper
- 20 Night Goblin Spearmen
- 20 Night Goblin Spearmen
- 20 Night Goblin Archers
- 10 Spider Riders
- 12 Dwarf Warriors
- 10 Dwarf Thunderers
- 8 Dwarf Miners
- Dice
Turn Sequence
Goblin Player's Turn
-
Movement Phase
- A. Normal Movement
- B. Charging
-
Magic Phase
-
Shooting Phase
- A. Choose a Target
- B. Roll to Hit
- C. Roll to Wound
- D. Make Armour Saves
-
Close Combat Phase
- A. 1st side rolls To Hit
- B. 1st side rolls To Wound
- C. 2nd side makes Armour Saves
Before moving onto step D, the 2nd side follows through steps A and B, then the 1st side follows step C.
- D. Combat Results
Dwarf Player's Turn
-
Movement Phase
- A. Normal Movement
- B. Charging
-
Magic Phase
-
Shooting Phase
- A. Choose a Target
- B. Roll to Hit
- C. Roll to Wound
- D. Make Armour Saves
-
Close Combat Phase
- A. 1st side rolls To Hit
- B. 1st side rolls To Wound
- C. 2nd side makes Armour Saves
Before moving onto step D, the 2nd side follows through steps A and B, then the 1st side follows step C.
- D. Combat Results
Gaming Area
Games of Warhammer are played on an area called a battlefield. Any suitably large flat area, such as a kitchen table or floor, can be used as the battlefield for this Battle for Skull Pass introductory battle. A roughly 3-4 square foot area will do just fine.
Set Up Your Models
Set up the models and scenery as shown in the Battle for Skull Pass scenario found on p. 25 of the Battle for Skull Pass getting started booklet. The two sides should start at least 18" apart.
Fighting the Battle
- The Night Goblins take a turn.
- The Dwarfs take a turn.
- If neither the Dwarfs nor the Night Goblins have won, repeat steps 1 and 2!
Winning the Game
Players take turns as described in the game turn sequence. The side that manages to wipe out all of the opposing force wins the battle for possession of Skull Pass!
Additional Rules
As you are now playing a full Warhammer battle, a few extra rules come into play. They are: Casting Magic, Miscasts!, Irresistible Force!, Gaze of Mork, and The Idol of Mork.
Character
Nazbad the Shaman is a character — play the Characters introductory battle to learn how to use characters in your games. In this battle, Nazbad acts as the Goblins' General, while the Dwarfs do not have a General to lead them.
Magic
Casting Magic. Now that Nazbad has arrived, the Magic Phase comes into play. During this Phase, Nazbad can cast the spell Gaze of Mork, which shoots bolts of green energy from his eyes. He cannot cast it if he is fighting in close combat. To cast the spell, the Goblin player rolls 3D6 and adds the score together. If this roll scores 5 or better, the spell is cast.
The Dwarf player then has a chance to stop the spell, and gets a Dispel roll. Dwarfs are very resistant to magic, so the Dwarf player rolls 4D6. The spell is stopped if the Dwarf player scores equal to or better than the total of the Goblin player.
The Goblins player rolls a 3, 4 and a 6, totaling 13. The Dwarf player then rolls four dice, and needs to score 13 or higher to stop the spell. The Dwarfs player rolls a 2, 3, 5 and 6, totaling 16. This is enough to stop Nazbad's spell from being cast.
Miscasts! If the Goblin player rolls two or more 1's during the roll of the casting dice, the spell has gone wrong and Nazbad explodes with magical energy — remove him from the table!
Irresistible Force! However, if the Goblins player manages to roll 2 or more 6s on the casting dice, the spell is cast with irresistible force! This means the Dwarf player is not allowed a Dispel attempt. Uh-oh!
Nazbad has rolled double 1's while casting. As a result, he explodes! Calling on the powers of the Waaagh!, Nazbad casts an unstoppable bolt of energy!
Gaze of Mork. If the Dwarf's Dispel attempt fails (or was not allowed), the Gaze of Mork spell is successfully cast and has the following effect. It can attack an enemy at a distance like shooting, and has a range of 24". As with shooting, Nazbad must be able to see a model in the unit he is casting the spell toward, so you have to be able to draw a line between Nazbad and the unit.
Roll one D6. The unit under attack suffers that many hits, and each hit is worked out with Strength 4 (and so wounds Dwarfs on a roll of 4 or higher). The Dwarfs can take Saving throws to avoid being killed, just like in shooting. Models that are removed are taken from the back of a unit, just like shooting hits, or if the unit is in one rank, they are removed from the ends of the unit.
Picking the Miners, Nazbad rolls to see how many hits are inflicted. In this case, it is four. Two of the four hits have rolled a four or more, killing two of the Miners.
The Idol of Mork. The Idol of Mork concentrates magical energy, giving Nazbad a power boost. When Nazbad is within 6" of the Idol of Mork, he rolls an extra D6 to cast his spell. Remember though, two or more 1's means his head explodes, and the more dice he rolls, the greater the chance of a miscast!
If Nazbad rolls double 1's and double 6's, he casts the spell with no dispelling attempt allowed...and then explodes! Such is the risk and reward of using magic.
With more power dice to roll, Nazbad makes it harder for the Dwarfs to dispel his magic while also putting himself in greater danger.
The Cannon Roars
Some models are especially large and fearsome, such as Slugdrool the Troll. Fortunately, there are mighty war machines like the Dwarf cannon to deal with this kind of threat!
Large creatures such as Trolls work like other foot models, except that they are bigger! War machines, in contrast, are quite different to ordinary units in the way that they move, shoot, and fight.
You Will Need
- A Flat Playing Area
- Range Ruler
- The Idol of Mork
- The Grudge Pony
- The King's Wall
- Thane Godri Thunderbrand
- Dragon Slayer Borri Graniteskin
- Big Boss Dagskar Earscrapper
- Dice
- Slugdrool the Troll
- 20 Night Goblin Spearmen
- 20 Night Goblin Spearmen
- 20 Night Goblin Archers
- 10 Spider Riders
- 12 Dwarf Warriors
- 10 Dwarf Thunderers
- 8 Dwarf Miners
- Dwarf Cannon
Turn Sequence
Goblin Player's Turn
-
Movement Phase
- A. Troll Stupidity Test
- B. Normal Movement
- C. Charging
-
Magic Phase
-
Shooting Phase
- A. Choose a Target
- B. Roll to Hit
- C. Roll to Wound
- D. Make Armour Saves
-
Close Combat Phase
- A. 1st side rolls To Hit
- B. 1st side rolls To Wound
- C. 2nd side makes Armour Saves
Before moving onto step D, the 2nd side follows through steps A and B, then the 1st side follows step C.
- D. Combat Results
Dwarf Player's Turn
-
Movement Phase
- A. Normal Movement
- B. Charging
-
Magic Phase
-
Shooting Phase
- A. Shoot the Dwarf Cannon
- B. Choose a Target
- C. Roll to Hit
- D. Roll to Wound
- E. Make Armour Saves
-
Close Combat Phase
- A. 1st side rolls To Hit
- B. 1st side rolls To Wound
- C. 2nd side makes Armour Saves
Before moving onto step D, the 2nd side follows through steps A and B, then the 1st side follows step C.
- D. Combat Results
Gaming Area
Games of Warhammer are played on an area called a battlefield. Any suitably large flat area, such as a kitchen table or floor, can be used as the battlefield for this Battle for Skull Pass introductory battle. A roughly 3-4 square foot area will do just fine.
Set Up Your Models
Set up the models and scenery as shown in the Battle for Skull Pass scenario found on p. 25 of the Battle for Skull Pass getting started booklet. The two sides should start at least 18" apart.
Fighting the Battle
- The Night Goblins take a turn.
- The Dwarfs take a turn.
- If neither the Dwarfs nor the Night Goblins have won, repeat steps 1 and 2!
Winning the Game
Each player takes turns, as described in the game turn sequence. The side that manages to wipe out all of the opposing force wins the battle for possession of Skull Pass!
Additional Rules
As you are now playing a full Warhammer battle, a few extra rules come into play. They are: Cannon, and Slugdrool the Troll.
Characters
Dagskar and Godri are characters — see the Characters battle for details on how to use them. Each one is the General of their army, so friendly units can use their Leadership value if they are within 12" (which you'll realise is very important for Slugdrool once you read his Stupidity rules!).
Cannon — Movement Phase
Large engines of destruction like the Dwarf Cannon have to be set in place in order to be operated properly. The Dwarf Cannon can't be moved after it has been set up. The crew do not rank up like an ordinary unit, but instead must remain within 2" of their cannon.
In this battle, if any unit in the Goblin army charges the cannon or its crew, the crew will run away automatically — the cannon is wrecked and the model is removed. For this battle only, the Goblin player wins as soon as this happens.
The cannon crew stays within 2" of their mighty war machine. Once charged, the Dwarf cannon crew flees the battlefield.
Cannon — Shooting Phase
A cannon shoots in a different way than a handgun or short bow. It fires once per turn, before any other Dwarf shooting. This is how you do it:
First, turn the cannon towards the target and nominate the model at which it is shooting. Now comes the hard part — the Dwarf player must guess the range between the muzzle of the cannon and its target. You might want to reduce your guess by a few inches because you are going to be adding a random distance to your guess to see where the cannonball actually lands.
After making your guess and declaring it to your opponent, roll the Artillery dice. If you roll a Misfire, the cannon has malfunctioned and does not shoot this turn. If it doesn't roll a Misfire, add the number shown to your guess. This result is where the cannonball first lands — measure the distance and place the cannonball marker at this point.
After hitting the ground, the ball will bounce forwards for a distance. To find out how far the cannonball bounces, roll the Artillery dice again. If it comes up as a Misfire, the cannonball doesn't bounce at all and will only hit a model that it directly landed on.
If a number is rolled, this is the distance of your bounce, and any model crossed by the cannonball during its bounce is hit.
The Dwarfs player aims towards the Night Goblins and guesses 10" for his shot. Ready, aim, fire! After adding the Artillery dice roll, the shot hits the ground 16" from the cannon. That's going to leave a mark. Avoiding a Misfire, the cannonball bounces a further 8", which means three Night Goblins have been struck.
Wounding with the Cannon
A cannonball packs a big punch, and even the toughest creatures are likely to be hurt by it. A cannon has Strength (S) 10 and will wound anything in the Goblin army on a roll of a 2+, as the To Wound chart shows. It's so powerful that no model is allowed to take an Armour Saving throw against a cannon hit.
A cannon is so deadly that a single shot can inflict multiple Wounds. Normal warriors suffer a single Wound as normal. However, against a model with more than 1 Wound (such as Dagskar and Slugdrool), the Cannon does 1-3 Wounds. To get a 1-3 score, roll a D6 and halve the result (rounding up). So a 1 or 2 = 1, a 3 or 4 = 2 and a 5 or 6 = 3. The model hit will lose this number of Wounds, just as if they had been wounded several times by a bow or handgun.
Slugdrool has been wounded. Rolling the dice, the Dwarfs player sees that 2 Wounds have been inflicted — not quite enough to kill the fearsome Troll this time!
Shooting at the Cannon
The cannon and crew can be shot at like any other unit. However, the crew can shelter behind the cannon to gain additional protection from enemy fire. After rolling To Hit, but before rolling To Wound, you need to work out whether the crew has actually been hit. Roll the D6 that scored successful hits; on a roll of 1, 2, 3 or 4, the shots have actually hit the cannon and ricochet away harmlessly. If you roll a 5 or 6, the shot has hit the crew — use these dice to roll To Wound against the crew as normal.
If all of the crew are killed, the Goblins are victorious in this battle.
Slugdrool the Troll
Start of Turn Phase — Stupid Troll! Trolls are exceptionally dense, and even in the heat of battle, there's a good chance they will get distracted and start scratching their heads, sit down or pick their noses, and stare blankly at the enemy. Unless Slugdrool starts his turn in combat, he has to pass a Stupidity test in the Start of Turn Phase. This test is similar to a Break test and is taken in the same way — roll 2D6 and add the scores. You are trying to score equal to or lower than Slugdrool's pitiful Leadership (Ld) of 4! However, having Dagskar within 12" of Slugdrool means the Troll can use the Boss's Ld 7 instead, which is very helpful.
If Slugdrool passes the test, he is not Stupid that turn and can move normally in the Movement Phase. However, if he rolls higher than his Ld, he goes Stupid as described below.
The score of the two dice is equal to Slugdrool's Ld of 4, so the Troll miraculously manages to pass his Stupidity test this turn.
Movement Phase. Slugdrool the Troll is a unit of a single model, and he moves like a character. This means he can move in any direction up to his M value (6") and turn freely any time during his movement. He can move up to 12" if he charges into an enemy.
However, when Stupid, Slugdrool moves straight forward 3" and does nothing else. If this means he moves into contact with an enemy, then he counts as charging and can fight as normal. He does not get to double this to 6", even if that would allow him to charge.
As he does not have to wheel, Slugdrool can move around obstacles more easily. If he fails his Stupidity test in the Start of Turn Phase, Slugdrool ambles forward aimlessly.
Close Combat. Slugdrool fights in close combat like any other unit. Remember that a model can attack if its base is touching the base of an enemy model, even if only corner-to-corner. This means that against a single model such as Slugdrool, enemy models are sometimes not allowed to attack because they are not in contact.
Slugdrool can attack Borri or the Warriors, and Borri can strike him back. Only three of the Warriors can attack as they are the ones whose bases are touching the Troll's.