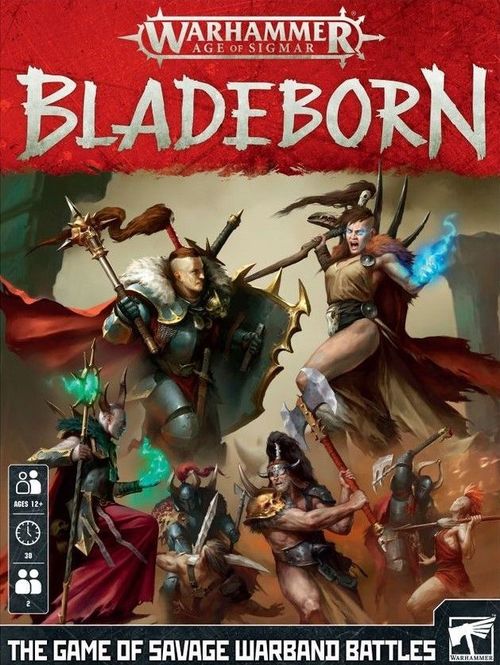
Warhammer Age of Sigmar: Bladeborn
Warhammer Age of Sigmar: Bladeborn Rulebook
Table of Contents
Table of Contents
Introduction
Bladeborn is a game for two players, in which you are trying to best your rivals in battles for glory and dominance. You win each battle by eliminating your enemies or by gaining control over the battlefield. You can play a single battle in 30 minutes, or play a campaign of connected battles with a rival over the course of a few hours to chart your warband's path to glory!
Getting Started
If you have not already done so, punch the tokens off the token sheet and assemble the miniatures in this set (assembly instructions are on pages 18-19 of the rulebook).
Now you'll need an opponent. If you are playing a skirmish (a one-off battle) or the first battle in a campaign (see Playing a Campaign), decide which player will use which warband. Each player takes the miniatures (called fighters in these rules), the fighter cards and the ability card for their warband (cards with the Godsworn Hunt symbol and cards with the Khagra's Ravagers symbol). The fighters in your warband are called friendly fighters and other fighters are called enemy fighters.
Other Warbands
In addition to the Godsworn Hunt and Khagra's Ravagers, this game includes fighter cards and ability cards for four other warbands - Garrek's Reavers, the Eyes of the Nine, Grashrak's Despoilers and the Dread Pageant. The miniatures for these warbands are available separately, should you wish to add to your collection and try out different tactics on the battlefield.
Once you have chosen your warbands, it's time to choose which battle you will use. Each battle is found on a battle card. If this is your first battle, use the Drawn and Quartered battle card. Otherwise, for a skirmish, shuffle the battle cards face-down and draw one, or just choose a battle both players want to use. The rules on the following pages tell you how to fight a battle.
Contents
- This rulebook
- Double-sided game board, divided into hexes with a grid
- The Godsworn Hunt (6 easy-to-build Citadel Miniatures)
- Khagra's Ravagers (4 easy-to-build Citadel Miniatures)
- Warcry rulebook booklet
- 31 fighter cards
- 10 lesser artefact cards
- 6 ability cards
- 18 convergence cards
- 14 twist cards
- 12 battle cards
- 8 double-sided turn tokens (player A / player B)
- 6 action dice
- 5 double-sided objective control tokens (player A / player B)
- 6 Godsworn Hunt ability dice
- 6 Khagra's Ravagers ability dice
- 8 activation tokens
- 5 double-sided objectives
- 3 Desecration tokens
- 36 double-sided damage tokens
Fighting a Battle
The following rules tell you, step-by-step, how to fight a battle. Some battles have rules that contradict some of the rules that follow. When this is the case, follow the rules for the battle. Similarly, some rules on fighter cards, ability cards, twist cards, artefact cards or reward cards contradict some of the rules that follow. When this is the case, follow the rules on that card.
Set-up
First set up the battlefield as shown in the rules for the battle you are using:
- Place the game board down with the side pictured on the battle card face-up. The board should be placed so the long edges are facing the players.
- Place any objectives in specific hexes as shown on the battle card's map.
- Roll-off (see Roll-off, below).
- The winner picks a number of reserve fighters from their warband, as shown on their warband's ability card, and sets these to one side.
- The other player then does the same.
- The winner then places one of their remaining fighters in one of the starting hexes shown on the battle card's map. All starting hexes with the same colour and symbol as that hex, and all hexes adjacent to those hexes, are that player's territory. All the other starting hexes, and all hexes adjacent to those hexes, are the other player's territory.
- The other player then places one of their remaining fighters in one of the hexes in their territory.
- The players take it in turns placing a fighter in their own territory until all of the fighters in both warbands have been placed, other than those picked as reserve fighters. A fighter cannot be placed in a hex that contains another fighter or in a blocked hex (a hex marked with a thick white outline on the board).
- Each player takes the four turn tokens that match the colour of their starting hexes, and places them with the red timer side face down. Place all the remaining tokens within easy reach of both players.
- Shuffle all of the twist cards face-down and draw the top card. Use the rule on that card in this battle.
- Each player places their warband's fighter cards and ability card face-up in front of them.
Battle Card Example: Drawn and Quartered
To know victory, we must seize this entire region.
Battle Rules: At the end of each battle round, each player scores 1 victory point for each objective they control.
Reserves: At the start of a player's first turn in each battle round (except in the first battle round), if they have one or more reserve fighters, they place one of those fighters on or adjacent to a reserve hex that shares a symbol with their starting hexes.
Victory: The battle ends after 3 battle rounds. When the battle ends, the player with the most victory points wins the battle. If the players have the same number of victory points, the result is a draw.
Battle card key: objectives; blocked hexes; Player A's starting hexes; Player A's reserve hexes; Player B's starting hexes; Player B's reserve hexes. Player B's territory is Player B's starting hexes and all the hexes adjacent to those hexes.
Roll-off
When a rule tells you to roll-off, each player rolls one action dice (not an ability dice). Whoever rolls the highest score wins. If the scores are drawn, re-roll the dice (see below) and keep doing so until one player wins.
Re-rolls
When a rule allows you to re-roll, it means that you can pick up the dice you just rolled and roll them again. If the roll you are making uses more than one dice, re-roll all of those dice unless the rule says otherwise. You cannot re-roll a dice more than once, except in a roll-off.
Battle Round
Play a series of battle rounds until the battle ends as explained in the battle's Victory rules. Play these battle rounds one after the other, in the sequence described here. Each battle round has four phases:
- Hero Phase
- Reserve Phase
- Combat Phase
- End Phase
The rules for the battle will tell you which player has won at the end of the battle (usually after the final battle round).
Hero Phase
Each player rolls a set of six dice, called ability dice. Each player then divides their results into singles (a dice that does not have a matching score on any other dice in the roll), doubles (two dice that have the same score) and triples (three dice that have the same score). Players use their doubles and triples during a combat phase to use abilities.
4 or more of a kind: If a player rolls four or more dice that have the same score, that player divides those dice into doubles and triples (but not singles). For example, if a player rolled six dice with the same score, that player can divide those dice into three doubles or two triples. They could not divide the dice into a double and a triple, because that would leave a single.
Determine Initiative
- If one player has more singles than the other player, that player has the initiative, which affects the order in which players will act in this battle round.
- Otherwise, if this is the first battle round, the players roll-off (use the action dice) and the winner has the initiative.
- Otherwise, whichever player did not have the initiative in the previous battle round has the initiative.
Reserve Phase
Skip this phase in the first battle round. In later battle rounds, if players have one or more reserve fighters, they are placed on the battlefield as described in the rules on the battle card.
Combat Phase
The players take it in turns to activate their fighters. Each player has four turns in each battle round which are counted using the turn counters - simply turn a counter over after each of your turns. The player with the initiative picks which player takes the first turn.
When it is a player's turn, they activate one friendly fighter. They cannot activate a fighter that has already been activated unless each friendly fighter on the battlefield has already been activated in this battle round.
When a player activates a fighter, that fighter makes 2 actions, one after the other. The fighter can make the same action twice. If that fighter was already activated in this battle round, that fighter instead makes 1 action.
Tip: If all of your fighters have already been activated in the current battle round, you can activate the same fighter in each of your remaining turns!
The actions a fighter can make are:
- Move
- Attack
- Disengage
- Wait
A fighter may also use one ability when they are activated, which uses the player's ability dice. Actions and abilities are described below.
After a fighter's activation, give them an activation token (either place it next to them in their hex or on their fighter card).
Some fighters have an additional rule on their fighter card. When using these fighters, be sure to follow these additional rules.
Abilities
When a player activates a fighter, that fighter can use one ability. That fighter can use an ability before their first action, or after their first action, or after their second action. The abilities a fighter can use are listed on that fighter's warband's ability card.
An ability card shows the warband's name, its Reserve number (for Khagra's Ravagers, 1), and a list of abilities, each with a cost ([Double] or [Triple]), a name and rules. For a fighter to use an ability, that fighter's fighter card must have all of the runemarks shown for that ability.
To use the ability, that fighter's player must discard ability dice as shown in the ability's cost: a double or a triple. A player can discard a triple to match the cost of a double ability, but if they do so they must discard all of the dice in that triple. Discarded ability dice cannot be used for the rest of the battle round.
Each double and triple has a value, which is the score shown on the dice. For example, a triple in which each dice shows a score of 4 has a value of 4. This is important for some abilities.
When a fighter uses an ability, follow the rules detailed for that ability on the fighter's card or the warband's ability card. An ability may allow a fighter to make one or more bonus actions, but an ability is not an action and bonus actions do not count towards that fighter's actions for that activation.
Example abilities from Khagra's Ravagers ability card:
- [Double] Imbued with Dark Power: Until the end of this fighter's activation, add the value of this ability to the Strength of this fighter's Range 1 and Range 2 weapons.
- [Double] Whispers of Chaos: Pick one visible enemy fighter within 4 hexes of this fighter. Pick one: deal 2 damage to that fighter or push that fighter one hex.
- [Double] Champion of Darkness: A fighter can only use this ability after an enemy fighter is taken down by this fighter's attack action. This fighter makes a bonus move action or a bonus attack action.
- [Triple] Mask of Darkness: Pick one visible friendly fighter within 3 hexes of this fighter. Place that fighter in any of the outermost hexes on the battlefield which does not contain another fighter.
- [Double] Desecration: A fighter can only use this ability after the last action in this fighter's activation, if this fighter is within 1 hex of an objective that does not have one of your Desecration tokens on it. Place one of your Desecration tokens on that objective. While there is one of your Desecration tokens on an objective, add 1 to the number of fighters you have within 1 hex of that objective for the purpose of controlling it. At the end of the battle round, remove the Desecration token.
- [Triple] Ravaging Advance: This fighter makes a bonus move action.
Move Actions
When your fighter makes a move action, you move that fighter into an adjacent hex (a hex next to the hex the fighter is in) up to a number of times equal to their Move characteristic, as shown on their fighter card.
A fighter cannot move into a hex that contains another fighter or into a blocked hex.
A fighter that is adjacent to one or more enemy fighters (that is, in a hex next to them) cannot make a move action.
Example: Theddra makes a move action. Theddra has a Move characteristic of four, so she can move up to four hexes. Theddra's player moves her into an adjacent hex four times. She cannot move into the blocked hex, so moves around it instead.
Push: Some abilities and artefacts allow you to push a fighter one hex. This means that you move that fighter into an adjacent hex, in any direction. A fighter cannot be pushed into a hex that contains another fighter or into a blocked hex.
Attack Actions
When your fighter makes an attack action, follow this sequence:
-
Pick Weapon and Target: Pick a weapon from the fighter's card and an enemy fighter that is:
- Visible to that fighter (see Visible, below), and
- Within range (in hexes) as shown by the Range characteristic of the weapon.
If the fighter is adjacent to one or more enemy fighters, you must pick one of those enemy fighters as the target.
-
Roll to Hit: Roll a number of action dice, as shown by the Attacks characteristic of the weapon, and count the number of hits and critical hits.
- If the Strength of the weapon is higher than the target's Toughness, rolls of 3 or more are hits.
- If the Strength of the weapon is equal to the target's Toughness, rolls of 4 or more are hits.
- If the Strength of the weapon is lower than the target's Toughness, rolls of 5 or more are hits.
- Rolls of 6 are critical hits instead.
-
Allocate Damage: For each hit, deal damage to the target as shown by the first Damage characteristic of the weapon (the one on the left). For each critical hit, deal damage to the target as shown by the second Damage characteristic (the one on the right) instead.
When you deal damage to a fighter, give that fighter one damage token for each point of damage. If the number of damage tokens a fighter has is ever equal to or higher than their Wounds characteristic, that fighter is taken down and removed from the battle.
A weapon on a fighter card shows: weapon's name, Range, Attacks, Strength and Damage (two numbers, e.g. 3/5). A fighter card also shows the fighter's Move characteristic, Toughness and Wounds, plus runemarks (a faction runemark and other runemarks) and a cost.
Damage Tokens: Damage tokens are double-sided; some have '1' on one side and '3' on the reverse, and others have '5' on one side and '10' on the reverse. The higher numbers represent a number of damage tokens, and make it easy to keep track of the damage fighters have suffered. However, when a rule refers to damage tokens, remember that a damage token that is showing a '3', '5' or '10' represents that many tokens, not a single token.
For example, if an ability instructed you to remove one damage token from a fighter, and that fighter had a damage token showing a '3', you would treat that fighter as if it had three damage tokens showing a '1'. After resolving the ability, the fighter would have two damage tokens, each showing a '1'.
Distance: The distance between two objects (e.g. two fighters) on the battlefield is counted in hexes. A hex adjacent to fighter A is 1 hex from A; hexes two steps away are 2 hexes from A; hexes three steps away are 3 hexes from A, and so on.
Visible: Fighters are visible to each other if you can draw a straight, thin, imaginary line from the centre of one fighter's hex to the centre of the other fighter's hex without that line going through one or more blocked hexes. If the line just touches the edge of a blocked hex without going through it, the fighters are still visible to each other.
Disengage Actions
When your fighter makes a disengage action, you move that fighter into an adjacent hex. You cannot move the fighter into a hex that contains another fighter or into a blocked hex. After this action, the fighter must be adjacent to no enemy fighters.
Wait Actions
When your fighter makes a wait action, that fighter's activation ends. A wait action is normally only made when you must activate a fighter but there isn't anything that fighter can do at that point to help you achieve victory.
End Phase
In the end phase, remove all activation tokens from the battlefield and flip your turn counters back over. Once the end phase is complete, the battle round is over and you are ready to begin the next battle round.
Objectives
Many battles include objectives, as shown on the battle map. A player gains control of an objective if, after either player's turn, they have more friendly fighters within 1 hex of it than there are enemy fighters within 1 hex of it. Place a control token in the same hex as that objective to show which player controls it. Once a player gains control of an objective, it remains under their control until another player gains control of it.
Playing a Campaign
Bladeborn is a game that you can play in individual skirmishes, where a player's victory or defeat is decided in a single quick, tense battle. However, you can also enjoy Bladeborn in a campaign, which is a term for a number of connected games played by the same two players. In a campaign, a player may lose one or more battles, only to overcome adversity and triumph in the end! You can play a campaign in a day or across a couple of evenings.
In a campaign, your warband is aiming for more than victory in a skirmish against their hated foes: they are aiming for lasting glory, and a chance to impress Archaon Everchosen.
In addition to fighting normal battles, your warband's progress towards their goal is marked by convergences - moments in their campaign where your fighters face a crucial test to determine their worth. In this test, you are called the aspirant, and your opponent is called the adversary. Should your warband succeed in a convergence, they will win a great reward and be one step closer to their goal. Should your warband fail, however, it will be a setback that will create an opportunity for your rivals.
When a player wins their final convergence, they win the campaign.
To play a campaign:
-
First decide which warband you will use. Each player uses the same warband for each battle in the campaign.
-
Start by playing a random battle. To determine a random battle, shuffle the battle cards face-down and draw one.
- Each time a player wins a battle, they will gain the spoils of battle (see Spoils of Battle, below).
- Campaign battles must have a winner. If the battle would result in a draw, use the tiebreakers to determine a winner (see Tiebreakers, below).
-
The winner of that battle (now called the aspirant) plays their convergence. To play a convergence, determine a random battle. Then use the relevant convergence card in this battle. Each warband has three convergence cards, labelled first convergence, second convergence and final convergence. The convergence cards for each warband show that warband's icon. Each convergence card contains a rule that applies to the battle in a similar way to a twist card.
To determine which convergence the aspirant plays, count their artefacts of power:
- If they have no artefacts of power, play their first convergence.
- If they have one artefact of power, play their second convergence.
- If they have two artefacts of power, play their final convergence.
-
If the aspirant wins the convergence, return to step 2. Otherwise, the adversary (the other player) becomes the aspirant: return to step 3 and play their convergence.
-
Once an aspirant wins their final convergence, they are the winner of the campaign.
Tiebreakers
Campaign battles must have a winner for the campaign to continue. If, at the end of the battle, the result is a draw, use the following tiebreakers to determine who wins.
- If there are fighters from only one warband on the battlefield at the end of the battle, that warband's player wins.
- Otherwise, if one warband controls more objectives than the other at the end of the battle, that warband's player wins.
- Otherwise, if one warband has a higher proportion of its fighters on the battlefield at the end of that battle, that warband's player wins.
- Otherwise, the players roll-off, and the winner of the roll-off wins.
Spoils of Battle
Lesser Artefacts
Lesser artefacts are cards that heal a fighter or give them a temporary boost in one battle. They are powerful cards and can mean the difference between victory and defeat! The player can keep the lesser artefact card until they use it, and they can use it when they want as described on the card. Each lesser artefact can only be used once as described on the card.
When a player wins a campaign battle, they gain one lesser artefact. To do so, they shuffle all of the lesser artefact cards face-down (other than those the players already have) and draw the top card.
When a player uses a lesser artefact, and that artefact affects a fighter until the end of the battle, the player should place the lesser artefact next to that fighter's card as a reminder. At the end of each battle, before the winner draws a lesser artefact, first return all of the lesser artefacts used in that battle to the pile of lesser artefact cards.
Artefacts of Power and Rewards
Artefacts of power grant a fighter of your choice a bonus that lasts for the length of the campaign, as described on the card. Unlike lesser artefacts, they are not 'used up' and discarded at the end of a battle.
When a player wins a convergence, in addition to gaining a lesser artefact (see above), they turn the relevant convergence card over: on the reverse is an artefact of power or a reward which is now theirs.
Rewards grant a specific fighter a bonus to mark the success of their campaign, as described on the card. In future games and campaigns, whenever you use that fighter's warband and your opponent is the player who you defeated in that campaign, you can use that reward. This means if you start a new campaign with that warband against the same opponent, you will have that reward for the length of that campaign - a significant increase in power to mark your achievement! However, when you next fight that warband's final convergence, you must discard that reward before the start of the battle.
Battling Champions
Khagra's Ravagers
Khagra the Usurper leads a warband of Chaos Warriors, each a plate-armoured veteran who has earned the favour of the Dark Gods through a lifetime of brutal battle. They bristle with weapons and the spoils of war, and their rune-marked tower shields can turn aside an axe-blow with ease. The Ravagers have fought their way across the realms together, emerging unbeaten from cursed labyrinths and beast-infested lairs on their route to the Eightpoints. Khagra's sister, the sorcerer Zarshia, once led the warband, but the Chaos Gods are fickle - Zarshia's dark powers abandoned her at a crucial moment, and the Ravagers were ambushed. In that moment the brutal warriors Cragan and Razek turned to Khagra for direction, and she was quick to prove that her strength and skill were more than a match for her sister's magic. Zarshia has not abandoned her own ambitions, however, and is poised to overturn her upstart sibling when the opportunity arises.
Fighters: Khagra the Usurper, Zarshia Bittersoul, Dour Cragan, Razek Godblessed.
The Godsworn Hunt
Theddra Skull-scryer is the war shaman of the Tribe of the Black Fang. Guided by searing visions of conquest and glory, Skull-scryer navigates the shifting wastes, moving ever towards the Varanspire's towering gates. With her walk the most ferocious champions from a tribe of hardened killers, each a merciless and resourceful hunter who has earned their name through many bloody deeds. Their bodies bedecked with trophies and oath-stones, the warriors of the Godsworn Hunt fear nothing, for they have given themselves over to the Dark Gods' service. Each of them has sworn the blood-oath, the pact of soul and iron - they must achieve their aim, or forfeit their lives to their cruel patrons. They will not rest until they claim their place in Archaon's army of conquest by cutting down the greatest warriors who stand before them. Whether their foes are fellow aspirants or Archaon's sworn warriors, the Godsworn Hunt will offer their victims' lives in tribute to the Chaos pantheon.
Fighters: Theddra Skull-scryer, Grundann Blood-Eye, Grawl, Shond Head-Claimer, Jagathra, Ollo.
Warbands of the Bloodwind Spoil
- The Eyes of the Nine: Led by the sorcerer Vortemis the All-Seeing, the Eyes of the Nine are disciples of Tzeentch, the Chaos God of change and mutation. They wield magic and trickery as other warriors wield a blade, and have received many blessings from their enigmatic patron. Fighters: Vortemis the All-seeing, Narvia, Blue Horror, Turosh, Brimstone Horrors, K'charik.
- The Dread Pageant: Vasillac the Gifted and his Dread Pageant are devotees of Slaanesh, the lord of excess. They revel in the extreme sensations of battle, drawing out their enemies' agonies by dealing them a thousand smaller cuts rather than a single killing blow. Fighters: Hadzu, Glissete, Vasillac the Gifted, Slakeslash.
- Grashrak's Despoilers: The gor-kin who follow the Bray-shaman Grashrak are bestial hunters, in their element amongst the wilds of the Bloodwind Spoil. Grashrak rules his savage herd through fear alone, conjuring the mutating energies of Chaos to rend his victims' flesh and ravage their souls. Fighters: Gnarl, Murghoth, Ushkor, Korsh 'the Sneak', Grashrak Fellhoof, Draknar.
- Garrek's Reavers: Garrek's Reavers have sworn themselves to Khorne, god of carnage and slaughter. They eschew heavy armour, preferring to feel the blood spatter across their chests, and chase their prey as tirelessly as hunting wolves. Blinded by battle-madness, they care not from whence the blood flows, only that it flows. Fighters: Garrek Gorebeard, Karsus the Chained, Targor, Bloodied Saek, Arnulf.
Assembling Your Miniatures
This box contains 10 finely detailed Citadel Miniatures. All of the miniatures in this set have been designed so that the pieces simply push together. To assemble your models, carefully remove the components from their frames, one model at a time, and follow the step-by-step guides on these pages (illustrated, not transcribed): 1 Theddra Skull-scryer, 2 Ollo, 3 Grundann Blood-Eye, 4 Shond Head-Claimer, 5 Jagathra, 6 Grawl, 7 Dour Cragan, 8 Razek Godblessed, 9 Khagra the Usurper, 10 Zarshia Bittersoul.
Battle Round Sequence (Quick Reference)
- Hero Phase: Each player rolls their six ability dice, dividing the result into triples, doubles and singles. If one player has more singles than the other, they have the initiative. Otherwise, the player that did not have the initiative last has the initiative (roll off in the first battle round).
- Reserve Phase: Each player places one reserve fighter as described on the battle card. Skip this phase in the first battle round.
- Combat Phase: The players take it in turns to activate fighters. Each player has four turns; the player with the initiative chooses who goes first. When activated, a fighter makes two actions, unless they have already been activated this round, in which case they make one action. A fighter cannot be activated a second time unless each surviving friendly fighter has been activated in this round. When activated, a fighter can spend action dice to use one ability from their warband's ability card before their first action, after their first action, or after their second action.
- End Phase: Remove all activation tokens from the battlefield and flip your turn counters back over.
Actions (Quick Reference)
-
Move Action: Move the fighter a number of hexes equal to or less than their Move characteristic. A fighter that is adjacent to enemy fighters cannot make a move action.
-
Attack Action: Pick a weapon from that fighter's fighter card, and a target that is visible and in range. A fighter that is adjacent to enemy fighters must target those first. Roll action dice equal to the weapon's Attacks characteristic.
- If the Strength of the weapon is higher than the target's Toughness, rolls of 3 or more are hits.
- If the Strength of the weapon is equal to the target's Toughness, rolls of 4 or more are hits.
- If the Strength of the weapon is lower than the target's Toughness, rolls of 5 or more are hits.
- Rolls of 6 are critical hits instead.
For each hit, deal damage to the target as shown by the first Damage characteristic of the weapon. For each critical hit, deal the damage shown by the second Damage characteristic instead. If a fighter's damage tokens equal or exceed their Wounds characteristic, that fighter is taken down.
-
Disengage Action: Move the fighter one hex so they are not adjacent to any enemy fighters.
-
Wait Action: The fighter's activation ends.