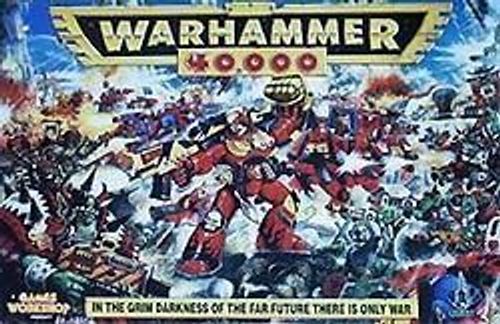
Warhammer 40,000 (Second Edition)
Warhammer 40,000 (Second Edition) Rulebook
Table of Contents
Table of Contents
WARHAMMER 40,000
The Warhammer 40,000 game enables you to fight conflicts between human and alien warriors on a tabletop battlefield. Opposing armies are represented by models, assembled and painted by yourself, representing the armed forces of your chosen race. You will find more information about the human and alien races of the galaxy in the Codex Imperialis book. Each race presents its own unique tactical challenges and provides different opportunities to hone your modelling and painting skills.
The aim of every Warhammer 40,000 player is to fight battles against other players. Win or lose, all battles are entertaining challenges in which you try to out-think and out-play your opponent, taking advantage of what good luck comes your way, but ultimately relying upon sound tactics to win the day. Collecting a battle-winning force and learning how to use it is something that any committed general can achieve with time and experience. From a small core of troops you can add new squads, gradually painting your forces and bringing them to battle, expanding your army as your generalship improves, until you are ready to play huge sweeping battles with hundreds of troops and fighting machines on each side.
As well as collecting and painting armies, you can create battlefield layouts on which to fight. Warhammer 40,000 is a very demanding game where your skills and imagination are at least as important as this rulebook. Amongst Warhammer 40,000 players can be found many dedicated collectors, accomplished artists, and cunning tabletop generals, as well as the vast majority of players who enjoy the opportunity to get together with a group of friends for an evening’s battle.
This book, the Warhammer 40,000 rulebook, contains all the rules of the game itself. You don’t need to learn all the rules to play, indeed it is probably impossible to literally learn every one off by heart. Very few games will involve all the rules. To start with at least you'll want to learn how to play the basic game as described within the first sections of this book. Don’t be put off by the apparent size and complexity of the rulebook, much of its thickness is taken up with examples and diagrams to make things as clear as possible. The most important game rules are summarised on the back cover and you'll quickly find this is all you need to play, consulting the text only occasionally to resolve an unusual situation.
If you are new to Warhammer 40,000 then you'll be reassured to know that meeting other players isn’t usually a problem — you'll be surprised just how many players there are. If you are fortunate there will be a Games Workshop store nearby, where you can obtain Warhammer 40,000 models, paints and game supplements. Games Workshop stores are not just shops, they are hobby centres where the staff will happily help you learn the rules, show you how to paint, and suggest ways to use and develop your armies. Games Workshop staff are also players who collect and paint armies and fight battles themselves.
THE WARHAMMER 40,000 BOX
This box contains the following plastic models, card cut-out pieces and rulebooks.
20 Space Marine models
20 Ork models
40 Gretchin models
The Warhammer 40,000 Rulebook
The Codex Imperialis book
The Wargear book
Scenario booklet
20 Card cut-out and assemble ruins
1 Card cut-out Ork Dreadnought
1 Card Summary Sheet for reference
1 Card Weapons Summary Sheet
3 Squad Reference cards
8 Mission cards
12 Wargear cards
6 Vehicle cards
14 Card templates
56 Card counters
14 Dice (10 6-sided, 1 scatter, 1 artillery, 2 sustained fire)
1 Victory Record Chart and markers
THE MODELS
The Warhammer 40,000 box contains three different types of Citadel Miniatures: Space Marines, Orks and Gretchin. There are four different kinds of Space Marine models: Sergeants (2), Space Marines with Flamers (2), Space Marines with missile launchers (2), and Space Marines with boltguns (14). Each model is moulded within a separate plastic frame that includes all the components you need to assemble a complete model. If you find that the frames are joined together they can be easily parted without damaging the models.
Select the model you want and carefully remove all the components from the plastic frame using either a craft knife, snips or even a pair of old nail clippers. Do not twist or pull the components apart as delicate parts may break if they are roughly treated. Any scars or marks that are left on the models may be gently cleaned off with a craft knife or a small file.
The models are designed to fit together without glue, but we recommend you glue them together using a suitable adhesive such as polystyrene cement or superglue. You might wish to assemble some models without gluing them so you can play out a few games fairly quickly — you can always glue them together later!
You can paint your models with Citadel Colour paints. It is not necessary to paint models before you use them, but many people enjoy painting Citadel Miniatures and you will probably want to paint yours eventually. If you are new to model painting then you can obtain a painting guide from any Games Workshop store or direct from our mail order service.
ASSEMBLING THE MODELS
VEHICLE, WARGEAR AND MISSION CARDS
These cards are explained in this rulebook. The Vehicle cards are used to determine the effect of hits on vehicles and contain all the data required for the vehicles described. The Mission cards are used to determine game objectives at the start of the battle, these are important when it comes to deciding who has won. The Wargear cards are used to allocate special items of equipment to heroic characters.
THE CARD DREADNOUGHT
We have included a stand-up card Dreadnought model with the Warhammer 40,000 game. Although this is no real substitute for a Citadel model, it does allow you to fight a game immediately using the extra Dreadnought rules in this book. An Ork Dreadnought is available as a metal model from Citadel Miniatures should you wish to add one to your collection.
The card Dreadnought is designed to fit snugly into the plastic base provided — it is not necessary to use glue.
ASSEMBLING THE CARD RUINS
The card ruins are designed so that they can be easily assembled without glue if you wish. The smaller wall sections need only to be folded along the crease and they are ready. The larger pieces have a separate floor section which slots into place as shown on the diagram.
In order to make the models more sturdy we have included small triangular supporting sections for the smaller sections.
CARD TEMPLATES
Special templates are used to determine the effects of many weapons in the Warhammer 40,000 game. For example, the teardrop-shaped template is used to establish the effect of flamer-type weapons which fire a gout of fire or burning chemical. The reverse side of each template includes useful game summaries which will save you looking up details in the rulebook. The use of these templates is explained in the appropriate rules sections.
The Multiple Hit template or Thudd Gun template will need to be assembled before it can be used. The diagram below shows how it fits together to produce an inter-linked series of burst indicators. In order to fit the individual pieces together so that they move freely you will need some paper fasteners, available from any stationers. Carefully make a hole in each template in the appropriate position and push the fasteners through. If you do this neatly the individual pieces will swivel and the template will stand up to a reasonable amount of wear.
These may be glued into place to make the ruins more rigid, in which case they will withstand considerable wear and will be more resistant to being knocked over.
You will find that where the card is pre-cut and folded a white mark will show on the completed model. We recommend that you paint over this with a little blue or grey paint to disguise the fold.
CARD RUINS
The Warhammer 40,000 box contains a selection of different card ruins which allow you to represent a war-torn battlefield to fight over. By arranging the ruins into various configurations you can create different battlefields with different tactical options for the combatants. You may wish to make your own model scenery, and there are many examples of hand-built terrain in this book to provide you with inspiration. The card ruins will not provide you with an exhaustive collection of scenery, but they're a good start!
RULES SUMMARY SHEET
This sheet summarises the most important rules of the Warhammer 40,000 game. After a while you'll find you can play Warhammer 40,000 using this sheet rather than the rulebook, although you will find it necessary to consult the rulebook occasionally for more detailed rules or for a full explanation.
WEAPONS SUMMARY SHEET
There are many different weapons available to the warriors of the far future and they are all described in detail in the Wargear book. All the pertinent data for each weapon appears on the Weapons Summary Sheet.
Four different sorts of dice are supplied with the game:
10 x Ordinary Dice (D6) 1 x Scatter Dice
2 x Sustained Fire Dice 1 x Artillery Dice
Ordinary dice are marked 1 to 6 in the usual way. These are used extensively in the game to resolve shooting, hand-to-hand combat, psychological effects, and so on. We refer to these dice as D6. When the rules tell you to roll a D6 this simply means roll an ordinary dice. When the rules tell you to roll 2D6 this means roll two dice and add the scores together, so when you roll 2D6 you could score between 2 and 12. In the same way 3D6 is three dice added together, 4D6 is four dice added together, and so on. We have supplied you with a number of ordinary dice, but you'll find that it’s worth having as many as possible especially if you want to fight big battles.
Sustained Fire dice are marked 1, 1, 2, 2, 3 and with a special
JAM symbol (as shown in the photo below). This dice is used when you shoot weapons that fire a protracted burst, blazing away many rounds within a very short time. Such weapons can cause many hits on their target, but can also jam, in which case it will take one or more turns to fix them. How to use this dice to represent sustained fire is explained in the Shooting section of this rulebook.
The Scatter dice is marked with four arrows and two HIT symbols. This dice is used to determined where shots from certain types of weapon land when they miss their target. These are mostly heavy weapons which fire an explosive shell, or weapons with explosive or similar effects which cover a large area. If such a weapon misses its target then the arrows on the Scatter dice indicate the direction in which the shot has landed relative to the target, ie the direction in which the shot has ‘scattered’, Note that even the sides marked HIT have arrows inscribed on them to facilitate this. This dice can therefore be used to establish a random direction from any point should you so wish. An explanation of how to use this dice during play is given in the Shooting section.
The Artillery dice is marked 2, 4, 6, 8, 10, and MISFIRE. This dice is used in conjunction with the Scatter dice to determine where shots from certain types of weapon land when they miss their target. The numbers indicate the distance by which the shot misses, while a roll of ‘misfire’ generally indicates that something has gone wrong and the weapon itself has either failed to fire or even exploded. An explanation of how to use the Artillery dice and Scatter dice is given in the Shooting section of this rulebook.
RULEBOOK, WARGEAR BOOK & CODEX IMPERIALIS
These three books contain all the information you need to play the Warhammer 40,000 game. The book you are reading now is the rulebook and this contains the rules of the game itself. The Wargear book provides a description of the many deadly weapons of the forty-first millennium and give games details for using them. The Codex Imperialis contains vital background information about the Imperium and its enemies, and provides descriptions and special rules for many of the warriors of the 41st millennium including Space Marines, Orks, Gretchin, the Imperial Guard, Eldar and many others.
WHAT ELSE YOU WILL NEED
To play Warhammer 40,000 you will need two or more players and a firm, level, surface such as a tabletop or area of floor. The kitchen table will do fine. Some gamers make their own games tables from a piece of chipboard or something similar, and place this on top of their kitchen or dining room table. The games table can therefore be slightly larger than the table which supports it, and can be divided into two or more pieces for ease of storage. Many players find that a green blanket or heavy cloth draped over the table or spread upon the floor makes an ideal surface for a battle. You can place books or other suitable objects underneath to create hills and folds in the ground.
As well as a battlefield and an opponent you will need at least one retractable metal tape measure marked in feet and inches — all distances in Warhammer 40,000 are given in Imperial measurements. A ruler is useful too, and some paper and pens for marking down casualties and making notes.
A selection of other dice will also come in useful. For example, a four-sided dice (D4), a ten-sided dice (010), and a twelve-sided dice (D12) are used to establish damage from some weapons. You may find an eight-sided dice (D8) useful for occasional randomising purposes. All of these dice can be bought from Games Workshop, but are not strictly necessary. A D4 can be represented by rolling a D6 and re-rolling results of 5 or 6 until you get a result of between | and 4. A DIO can be represented by rolling a D6 to get a high or low spread (1, 2 or 3 = low spread and 4, 5 or 6 = high spread) and then rolling a further D6 for each spread band, ie on a low spread roll a D6 and re-roll any score of 6 to get a spread of 1 to 5, on a high spread add +5 to the dice and re-roll any score of 11 to get a spread of 6 to 10.
STARTING THE GAME
Warhammer 40,000 isn’t as daunting as it may first look — you don’t need to learn everything in all the books before you start to play! All you need to do is read this rulebook to familiarise yourself with the general flow of the game and then start off by playing your first game — it'll be a bit slow at first but it’s really the best way to pick up the rules.
In the Warhammer 40,000 box you’ll find two splendid starting forces, one of Blood Angel Space Marines and the other of Orks and Gretchin, and we’ve included a scenario booklet which guides you through the use of different tactics and weapons in a series of genuinely challenging battles. Once you’ve mastered the command of the forces that come with the game you'll be ready to fight with larger and more varied forces from the vast selection of models and miniatures available for the Warhammer 40,000 universe.
THE BATTLE
Battles are fought between two opposing sides with each side normally being controlled by a single player. You can involve several players on each side if you wish, with one player acting as overall commander while the rest each control part of the force, rolling dice and moving their own troops. In the game rules we assume that each side is being controlled by a single player.
Before you begin your battle both sides will have to choose their forces. If the game is a pre-planned scenario like those in the scenario booklet the forces are already selected for you. However, if you want to fight a straightforward battle you will need to have two forces at your disposal.
THE GAME
The contents of the Warhammer 40,000 box supply you with two reasonably sized starting forces, but after a few battles you'll probably find that you want to start your own model collection. You could use the models you have already to form the basis of a larger army of Orks or Space Marines.
When you choose a force yourself you do so by picking troops up to a certain points value. Every type of warrior and vehicle has its own points value. The better a warrior is, the more points he costs. If a model carries particularly potent weapons or wears armour its points value is increased further.
When you fight a battle both sides choose armies to the same total points value. As a rule of thumb, a battle between two armies worth 1000 points each can be fought in an evening. A battle between two 1500 or 2000 point armies will last for an afternoon or a long evening. A battle of 3000 points each will probably take a full day to fight. It's up to you to decide how big a battle you want to fight, from a few hundred points a side to several thousand if you have space and time!
While discussing armies and points values we ought to mention the Warhammer 40,000 Codex series of books. Each book describes a particular race or fighting force such as the Imperial Space Marines, the Eldar, the Orks and so on. Each book provides you with a description of the army, special rules for using it, a detailed painting guide with unit and army insignia and an army list. The army list contains the points values for the different troops available so you can choose your own armies.
SETTING UP
Before the opposing forces clash you need to prepare a tabletop or an area of floor as a gaming area to battle across. Initially a small playing area will suffice, say about 5' by 3' (the size of most dining tables). This gives the troops room to manoeuvre and bring their weapons to bear. As battles get progressively bigger and include armies of greater points values you will need a larger area to fight over. Tables 6' by 4' or 8' by 4' are generally the norm but obviously this can be adjusted to fit what space you have available.
The tabletop or floor represents a flat and featureless plain without any of the rocks, ruins, woods, hills and bushes which break up battlefields in real life. Part of the challenge and enjoyment of Warhammer 40,000 is that you can create your own battlefield layouts. To begin with, the ruins supplied in this boxed game will be enough. Once you have played a few games you will probably want to introduce new terrain.
For the uninitiated, *terrain' is a gaming term for all the model trees and buildings games are played over and around. Terrain is important for two reasons. First, and probably most importantly, well modelled terrain makes the game look much better. Until you've played a game with nice, varied and interesting terrain you just can't appreciate what a difference it makes.
If you haven't had much experience of terrain making then watch out for articles in White Dwarf, Games Workshop’s monthly gaming magazine. You can also visit your local Games Workshop store where you'll be able to see examples of well-made terrain and receive lots of free advice on how to make it! As a temporary measure you can improvise by using books laid flat to represent hills, twigs and roots for trees and polystyrene packing for buildings. This should supply you with a more varied selection of terrain to be going on with.
The second reason that terrain is so important is that it breaks up the lines of sight and fields of fire when you are playing the game. Line of sight (sometimes abbreviated to LOS) is a straight line drawn between an attacker and his target. If this line is blocked, by a piece of terrain for example, the attacker can’t see the target and may not shoot.
Field of fire is best explained by an example. Imagine you are standing on the top of a hill. You can see all around you, so we say that you have an unrestricted field of fire. Now imagine you are standing on the same hill, but now you are inside a house, looking out through a window. The walls of the house limit what you can see, so you have a restricted field of fire. These examples from real life apply equally to the miniature warriors you command on the Warhammer 40,000 battlefield.
What this means is that the more terrain you have in a game — that is, the more dense the terrain — clear fields of fire will be fewer and shorter, and the less chance there will be that a unit will be able to see all of the battlefield. This is vitally important in Warhammer 40,000 because it stops heavy weapons and vehicles from completely dominating the game and causing it to degenerate into a long range shooting match.
Certain forces are more effective at the close ranges afforded by dense terrain while others favour long range exchanges in terrain clear enough to get their numbers to bear. We've found, almost without exception, that the denser the terrain the better the game will be.
Of course, even if you’ve got lots of terrain to put on your wargames table it soon becomes difficult to come up with new and interesting set-ups each time you play. One popular method is for one player to set up the terrain and then for the other player to decide which side of the table he wants to fight from. This should ensure that terrain is laid out in a fairly even-handed manner and not confer too much of an advantage to either side.
To help you set up your battlefield we have devised a system which lets both players set up the terrain. Firstly you need to mark the two opposing deployment zones by placing a counter, dice or similar small marker at each corner of the deployment zones as shown in the diagram below.
DEPLOYMENT ZONES
BATTLE ZONE
The deployment zones are the areas where you are allowed to set up your troops and vehicles at the start of the game. As you can see, the two zones are 24" apart. It doesn’t matter how wide your playing area is as long as the two forces start at least 24" apart. The deployment zone extends all the way back from this front line to the edge of the playing area (usually the edge of the table). Similarly, the deployment zone ends 12" away from the edge of the playing area so no models can start off right in the corners.
The playing area outside the two deployment zones is called the battle zone. Once you have established where the deployment zones are you can start placing terrain pieces. Roll a D6 and the player who rolls highest places the first piece of terrain. The two players then alternate placing pieces until one them decides that he doesn’t want to place any more. After this the other player can place one more piece of terrain if he wants to.
Sounds easy doesn’t it! However there are three rules about placing terrain.
-
Every other piece of terrain a player puts down must be placed in the battle zone.
-
Neither player can stop placing terrain until there are at least 2D6 pieces in the battle zone.
-
When both players have finished placing terrain they roll a D6 and the one with highest score can pick which deployment zone he will use.
A ‘piece’ of terrain can comprise several smaller bits, usually covering an area 4" to 6" square. As a broad guideline a single “piece” of terrain might be:
- A single hill, building, marsh, lake, pool or section of woods, jungle, petrified forest, etc.
- Two large items like craters, rock spires, big trees, monolithic pillars, boulders, pylons, wrecked vehicles etc.
- Four ruined wall sections (like the ones in this game!)
- Four or five individual medium-sized trees, bushes, rocks, oil drums, crates, craters etc.
- A 12" long continuous section of crevasse, wall, hedge, monorail, stream or river.
Finally, if both players agree, terrain can be shifted around a bit to create a more aesthetically pleasing set-up or a better battle — you may want to ensure that a road terminates at a building, for example, or to move that swamp slightly out of the way and so on. The guidelines given above are really just to make sure that no-one gets an unfair advantage out of the terrain set-up. Feel free to bend or break them if you like, as long as both players agree it’s fine to do so.
HINTS & TIPS
Whenever you're placing terrain for a Warhammer 40,000 battle there are a few points worth mentioning:
About halfway through setting up the terrain take a moment, stand back and look at what you’ ve placed so far. Sometimes this gives you an idea for a ‘theme’ for the terrain, which you can carry on over the table and which will give you a much more interesting and logical lay-out.
Don’t be afraid to place lots and lots of terrain — “the more terrain, the better the game” is an adage which holds very true for Warhammer 40,000. Aim to have at least half the surface of the table covered by terrain if at all possible, and preferably more.
Try to place large or tall pieces of terrain in the centre of the table. This will block off line of sight across the table and stop troops with long range heavy weapons having a field day.
For similar reasons you should try to avoid placing high buildings or hills on the edge of the table if possible. If you can’t help it then place a few trees in front of the hill or building to block off some of the lines of sight.
You can sprinkle brown or grey flock (flock is simply coloured sawdust and is available from model shops) straight onto the table to create paths or road sections. You'll be surprised what a difference it makes to have a small path running up to the door of a building, or for there to be a road (maybe with hedges or walls on either side) running across the table.
When you are placing walls or hedges, make sure that you leave a few gaps for models to move through. It is assumed that any doors or gates in a wall or hedge are open and count as clear terrain. Likewise crevasses, streams and rivers will need points where troops can cross them somehow.
DEPLOYING FOR BATTLE
Once the battlefield has been set up players can start deploying their forces. As stated above both players roll a D6 and the person who scores highest can choose which deployment zone he will use. To determine which player deploys his models first and who has the first turn, different armies have what's called a strategy rating.
An army's strategy rating is based on how mobile and flexible it is as well as its racial grasp of strategy and tactics. For example, the Imperial Space Marines have the highest strategy rating because they are very mobile and are commanded by some of the finest military minds in the Imperium. Orks on the other hand have a rather more crude approach (“find ‘em and kill 'em!") but are quite mobile with a large number of vehicles at their disposal. The Imperial Guard are certainly better tacticians than Orks but their lack of mobile forces and large steam-roller type army organisation mean that their strategy rating is slightly lower. The different races’ strategy ratings are listed below.
STRATEGY RATING TABLE
| Race/Army | Strategy Rating |
|---|---|
| Space Marines | 5 |
| Eldar | 4 |
| Orks, Chaos | 3 |
| Imperial Guard, Squats | 2 |
| Tyranids | 1 |
The force with the lowest strategy rating must deploy its models first. If several units from different armies are fighting together as allies then they are still deployed according to their individual strategy ratings. So, for example, in a battle with a mixed force of Space Marines and Imperial Guard fighting an Eldar force the Imperial Guard would be deployed first, then the Eldar and finally the Space Marines.
Models may be deployed anywhere inside their deployment zone, including inside buildings if there are any. Any models deployed in or behind cover (in woods, behind walls etc.) may start the game ‘hiding’. Hiding is fully explained later in the rules but it means that those models are keeping themselves out of sight initially — a sensible tactic if you don’t want to get your head shot off in the first turn of the game! Mark squads of hiding troops with a ‘hidden’ counter so that your opponent knows that those models are keeping their heads down.
Vehicles are considered either stationary or moving at their “slow” speed when they are deployed. If you want them to start at slow speed be sure to place a Speed marker next to them (see the Vehicle section of the rules).
THE INFILTRATION RULE
Many forces contain troops which are specially trained to infiltrate the battlefield ahead of a main force to scout out the enemy’s strength, sabotage equipment and installations or assassinate enemy leaders. Space Marine and Eldar Scouts are two examples of these highly effective and much feared troops. Troops which are allowed to use the Infiltration rule are noted as being able to do so in their Codex Imperialis characteristic profiles.
Such troops are well versed in using camouflage and natural concealment to advance into or through the enemy’s battle lines. To represent the way in which they move onto the battlefield unseen a player can deploy any squads of troops which can infiltrate after the enemy has placed all his models on the table. The infiltrating troops can be placed anywhere in the battle zone which places them out of sight of the enemy at the start of the game. The troops can be set up in hiding if they are in or behind concealing terrain as normal.
If both players are using troops which can infiltrate they both roll a D6 and the player that rolls lowest has to deploy his infiltrating troops first.
STARTING AND ENDING THE GAME
Once everybody’s models have been deployed both players roll a D6 and add the strategy rating of their force’s commander to the score. The player with the highest score takes the first turn of the game, moving and shooting with all of his models before his turn ends and his opponent takes a turn.
From then on the turns alternate between the two players until both have had a predetermined number of turns (usually four turns each), then the battle is over. Military commanders seldom have the luxury of taking as long as they like to make their moves against the enemy. One side could be running low on manpower or ammunition and be forced to break off the engagement, or enemy reinforcements could be approaching and your troops will soon be outnumbered. Whatever the reason, you will be working under a time limit and just as in real life you will have a limited amount of time to make your decisions, achieve your objectives and win.
WINNING THE GAME
At the end of the game the victory points are counted up, and the player who has scored the most points is the winner. Victory points are awarded for destroying enemy troops and vehicles, with bonus points being awarded for achieving mission objectives. When you start the game your mission objectives will be defined either by the scenario, if you are playing a pre-planned scenario, or by the Mission cards. See the rules section on missions for more details about scoring victory points and the missions themselves.
THE MISSION CARDS
Battles seldom happen by accident: commanders are constantly seeking a weakness in their enemy and send out forces to scout, disrupt, confuse and undermine the opposition. These constant duels are fought out in no-man’s-land — the disputed ground between the two armies. The Mission cards allow players to recreate these vital skirmishes, using their cunning and skill to accomplish their missions and at the same time thwart their opponent.
After you have set up the terrain for the game and picked your armies, but before the battle begins, each player takes a Mission card. Read the card carefully and then declare what your mission is to your opponent (some players may prefer to keep their missions secret but we've found that declaring missions makes for a better game). How you get Mission cards is entirely up to you — you could deal them out randomly or pick them yourselves or roll dice for them. Different players prefer different ways of deciding on which missions to take so it's up to you to choose which method you want to use.
Each Mission card has a brief description of what you are attempting to do at the top followed by a primary and secondary objective. Your primary and secondary objectives will give you ways of scoring victory points. Victory points are always scored for destroying or damaging enemy models and this will be either your primary or secondary objective. Extra victory points are awarded for completing specific mission objectives. At the end of the game the player with the most victory points is the winner.
VICTORY POINTS
The table below details how many victory points you get for destroying or damaging different things. You always receive victory points for destroying enemy models regardless of your mission.
Victory points are cumulative, so if you destroy a vehicle which is worth more than 100 points you receive two victory points (one for damaging it and one for destroying it). Likewise, a squad worth more than 100 points is worth one victory point when it takes 50%+ casualties and another point when it is wiped out.
A vehicle is considered disabled if it can't move and all of its weapons have been destroyed or all of its crew has been killed. A squad which is broken (not shaken) at the end of the game counts as wiped out for the purposes of counting victory points. Space Marine squads form a special case because they are bought as squads of ten and then split up into two five-man combat squads. Victory points are scored for the Space Marine combat squads individually, scoring one point for 50%+ casualties and one point for wiping it out.
There will often be ways of scoring bonus victory points depending on the mission: these might be for taking and holding an objective until the end of the game, killing the enemy leader and so on. These will be detailed on the Mission cards themselves. As you acquire victory points keep a tally of them on the victory point track. This lets you keep an eye on how you are doing relative to your opponent.
VICTORY POINTS TABLE
| Each Enemy Squad | 50% Casualties | Broken/Wiped Out |
|---|---|---|
| If it has a value of 100 points or less | 0 victory point | 1 victory point |
| If it has a value of more than 100 points | 1 victory point | 1 victory point |
| Each Enemy Vehicle | Damaged | Destroyed or Disabled |
|---|---|---|
| If it has a value of 100 points or less | 0 victory point | 1 victory point |
| If it has a value of more than 100 points | 1 victory point | 1 victory point |
| Each Enemy Character | Wounded | Killed |
|---|---|---|
| 0 victory point | 1 victory point |
WINNING THE GAME
At the end of the game the player who has scored the most victory points is the winner. Don’t forget to count any extra points for squads which are broken at the end of the game, bonus victory points for achieving mission objectives and so on. Winning by only one or two points is a marginal victory, three or four points difference is quite respectable but winning by five or more points is a truly great victory entitling you to mock your opponent, laugh a lot and generally bask in the glory of your triumph!
GAME LENGTH
The game itself can last as long as you want it to — you can agree to play for a set number of turns (four turns is recommended), until a set time (eg, tea time) or until there aren't enough troops left on the table to make it worth continuing (when it’s down to one Space Marine chasing two Gretchin for example). Another alternative is to play a ‘sudden death’ game, stopping when one player or the other has scored a preset number of victory points (five or ten is about right). This is often a good option if you just want a quick game, and you can make it even quicker by both taking the Engage and Destroy mission.
However, it’s usually best to play a battle for a set number of game turns. The missions have been balanced to work best in battles which lasts for four game turns, so each player gets four turns in which to achieve his objectives. This should be fine for most sizes of games and we recommend that players stick to having battles with a four-turn limit. At the end of four turns both players count up their victory points and the one with the most victory points is the winner.
For players who want gargantuan mega-conflicts a variable turn limit may be more in order. At the start of the game roll a dice to see how long the battle will last. Once both sides have completed the number of turns indicated the battle is over and both sides count up their victory points to determine who has won.
| D6 Roll | Number of turns |
|---|---|
| 1-2 | 3 Turns |
| 3-4 | 4 Turns |
| 5-6 | 5 Turns |
CHARACTERISTICS
In Warhammer 40,000 there are many different types of warriors, from mighty Space Marines to noble Eldar. There are other creatures too, some small, like the green-skinned Gretchin, and others as massive as the dreaded Tyranids. To represent these creatures in the game we have nine categories which describe the various aspects of their physical or mental makeup. These are called characteristics.
All characteristics are measured on a scale of 1 to 10. The higher a characteristic the better it is. The characteristics are:
Movement Allowance (M) Often simply called move, this shows the number of inches a creature can move on the tabletop under normal circumstances. For example, a Gretchin with a Move of 4 can move 4 inches.
Weapon Skill (WS)
Defines how accomplished or skilled a warrior is with his weapons in hand-to-hand combat, or how determined and vicious a creature is. The higher the score the more likely the fighter will beat another hand-to-hand combat opponent. An ordinary human has a Weapon Skill of 3. A battle-hardened Space Marine will have a Weapon Skill of 4, 5 or even higher.
Ballistic Skill (BS)
Shows how accurate a warrior is with ranged weapons such as guns and thrown grenades, though it also includes a measure of the warrior’s technical competence with his weapons. The higher this score is the easier a creature finds it to hit when it shoots at something. Some monsters have natural weapons that can be used at range (they might be able to spit venom, for example) and their BS is used to determine whether they hit or not.
Strength (S)
Shows how strong a creature is. An exceptionally puny creature might have a Strength of 1; a deadly Genestealer has a Strength of 6. Most men have a Strength of 3. Strength tells us how hard a creature can hit in hand-to-hand combat and thus how easily it can hurt an opponent it has struck. A creature with a high Strength characteristic can also pierce armour more easily. Toughness (T)
Toughness is a measure of a creature’s ability to resist damage, or withstand physical damage and pain, and reflects such factors as the toughness of a creature’s flesh, hide or skin. The tougher a creature is the better it can withstand an enemy’s blows or shots.
Wounds (W)
Shows how much damage a creature can take before it either dies or is so badly hurt it can’t fight any more. Most humans and human-sized creatures have a Wound characteristic value of only 1. Large monsters are often able to withstand several wounds that would slay a smaller creature and so have a Wound value of 2, 3, 4 or more.
Initiative (I)
Indicates how alert a creature is and how fast it can react. Creatures with a low Initiative score are slow and cumbersome; creatures with a high Initiative score are much more quick and agile. In close combat Initiative gives faster creatures an edge over slower ones.
Attacks (A)
Indicates the number of Attack dice a creature rolls during close combat. Most creatures only roll one Attack dice, although some warriors of exceptional skill or monsters may roll several dice to represent them striking several times.
Leadership (Ld)
A creature with a high Leadership value is courageous, steadfast, and self-controlled. A creature with a low value is the opposite! Creatures with high Leadership can lead others, inspiring them to greater feats of valour.
0 LEVEL CHARACTERISTICS
Some creatures have been given a ‘0’ for certain characteristics which means they have no ability whatsoever in that field! This usually applies to creatures unable to use missile weapons, so they have a BS of 0, for example a Genestealer, but it might equally well apply to other characteristics too.
CHARACTERISTIC PROFILES
Every creature in Warhammer 40,000 has a characteristic profile which lists the value of its characteristics. In the Codex Imperialis you will find profiles for many of the races and monsters of Warhammer 40,000. The examples below show the profiles for an Ork and a man.
| Troop Type | M | WS | BS | S | T | W | I | A | Ld |
|---|---|---|---|---|---|---|---|---|---|
| Ork | 4 | 3 | 3 | 3 | 4 | 1 | 2 | 1 | 7 |
| Man | 4 | 3 | 3 | 3 | 3 | 1 | 3 | 1 | 7 |
As you can see, an Ork and a man are very similar in many respects. They both move at the same speed — 4”, and they both have the same Weapon Skill and Ballistic Skill which means they are very evenly matched in combat. Both have the same Strength value, so they can deliver blows with equal potency. When it comes to Toughness the Ork wins over the man — the Ork’s value is 4 compared to 3. This is not a huge difference, but it makes the Ork better able to withstand damage and so gives it more chance of surviving shots and blows.
Both creatures have one wound which is the normal value for man-sized creatures. The Ork loses out when it comes to Initiative. This is not a terrible disadvantage, but it does mean that the man will tend to have a slight edge once they get stuck into hand-to-hand fighting, though the Ork’s Toughness will make it hard to hurt. Both races have the same Leadership, 7, which is about average.
WEAPONS AND ARMOUR
The technology of the 41st millennium has spawned innumerable weapons of destruction, ranging in complexity from the simple but efficient laspistol to the reality-warping D-cannon. You will find special rules that reflect the differences between different weapons later in this volume.
Most troops wear armour to protect them from the weapon fire and blows of their enemies. Armour greatly affects a warrior’ s chance of survival and so influences the outcome of combat. The more heavily armoured troops are, the harder they are to kill. With the advent of lightweight armaplas alloys, ceramics and synthetic fibres there is no disadvantage to warriors wearing a great deal of armour. However, the limited availability of some kinds of armour, in particular power armour, ensures that it is only used by elite troops.
ARMOUR
Armour ranges in effectiveness from the simple flak jacket to the immensely powerful tactical dreadnought armour of the Space Marines. The most common types of armour are:
Flak. Flak armour comprises several layers of different ablative and impact absorbent materials which should absorb the majority of the energy from a shot. The protection it offers is somewhat questionable at the best of times but it does have the advantage of being cheap and easy to produce en masse, requiring a very low technology base. Flak armour is mostly used by Orks and the Imperial Guard.
Mesh Armour. Mesh armour is formed from tens of thousands of individual pieces of thermoplas interwoven to produce a flexible material rather like reptile scales or archaic chainmail. When struck the mesh becomes momentarily rigid, spreading the impact across a larger area. The thermoplas material also disperses heat very rapidly indeed, giving reasonable protection against energy weapons. Mesh armour is commonly used by the Eldar.
Power Armour. This is a completely enclosing suit of armour as worn by Space Marines of the Imperium. It is made from thick ceramite plates and would be heavy and cumbersome but for the electrically motivated fibre bundles implanted in the armour which replicate the movements of the wearer and supplement his strength. Power armour is fully sealed to provide protection against gas weapons and hard vacuum. It also commonly includes numerous auxiliary systems such as communicators, auto-senses etc.
Tactical Dreadnought Armour. Tactical dreadnought armour or Terminator armour, as it is more commonly known, is without doubt the toughest personal armour in the galaxy. The armour is massively bulky so it contains a full exo-skeleton arrangement of fibre bundles and adamantium rods to support the heavy gauge plasteel and ceramite plates which form the outer carapace. Because Terminator suits are valuable and often very old, they are reserved for use by the most highly trained members of the Space Marine Chapters.
SQUADS
Groups of warriors operate in units called squads. A squad is normally composed of five or more troopers armed in a similar fashion who stick together on the battlefield. They fight in a loose group with gaps between each model. This gives the troopers freedom to move over difficult terrain quickly, and enables them to take advantage of minor folds in the ground, scrub, and other small features to shelter from enemy fire.
However, the members of a squad must remain relatively close to each other otherwise individual troopers become scattered and the squad quickly loses its cohesion as a fighting unit. To represent this we have the Rule of Squad Coherency. This rule affects all units unless specified otherwise, including Ork mobs and other formations with different names — the term ‘squad’ is used as a convenient catch-all term.
SQUAD COHERENCY
Models belonging to the same squad must remain close to each other at all times; individuals may not wander off on their own as the player pleases. Once a squad has moved it must be possible to trace a line through all the models in the squad so that the distance between one model and the next is no more than 2".
Diagram 1: A squad of five Space Marines spread out with 2” gaps between them.
Diagram 2: A squad of Space Marines advancing in a mass. No trooper is more than 2” from another trooper.
Diagram 3: This squad has broken its coherency. The Space Marine on the right is more than 2" from the group on the left. This is not permitted.
BROKEN COHERENCY
During the course of a game it is likely that a squad's coherence will be broken, usually because the squad takes casualties or because individual models are engaged in hand-to-hand combat. When this happens the following rules apply.
-
If models are engaged in hand-to-hand combat they are not bound by the Squad Coherency rule or the rules given below. When the combat finishes the coherency rules apply again.
-
If a squad’s coherency is broken and it is possible for it to be restored in the squad’s next movement phase there are no detrimental effects, but the squad must restore its coherency in the next movement phase.
-
If it is not possible to restore squad coherency in the following movement phase the smaller part of the split squad (this will be just one model in many cases) counts as being broken. Broken troopers must either stay where they are if they are in cover or flee 2D6" to a piece of cover away from the enemy if they are in the open. Broken troops may not fire and if they are engaged in hand-to-hand combat they are at a great disadvantage. As soon as squad coherency is restored the broken part of the squad rallies automatically. See the rules for broken troops elsewhere in this volume.
DISPERSED FORMATIONS
Some troops can fight in a more dispersed formation than ordinary squads, because their training or style of fighting dictates it. Troops capable of fighting in a dispersed formation may extend their squad coherency distance up to 4" between models instead of the normal maximum of 2". Troops that can fight in a dispersed formation are noted in the Codex Imperialis book.
CAVALRY
As well as squads of warriors fighting on foot, the armies of Warhammer 40,000 include troops riding horses, giant ravening cyboars and other creatures. Such horse-sized creatures and their riders are referred to as cavalry. Troops may also ride into battle on bikes, trikes or similar vehicles; these are dealt with separately in a later section.
In the game, “cavalry” is defined as troops riding horses, cyboars, giant lizards, insects and any other mounts which have one wound on their characteristic profile. If a monstrous creature has more than one wound, and assuming it can be ridden, special rules apply and the cavalry rules are not used.
A cavalry model is treated in all respects as a single model. Should the rider be slain the entire model is removed from the battle.
Cavalry models use the rider’s Leadership characteristic value for all tests that require it. For movement the mount’s Move characteristic is used. When the cavalry model is attacked it is the rider’s Toughness and Wounds characteristics which are used. The mount’s Toughness, Wounds, and Leadership are never used, but are included on its characteristic profile because such creatures sometimes appear on their own.
Because a cavalryman gains a measure of protection from being mounted on a large, burly creature cavalry also gain a +1 on their armour saving throw. In hand-to-hand combat the rider of a cavalry mount adds his steed’s Attacks characteristic to his own so, for example, an Imperial Guard Rough Rider (A=1) mounted on a warhorse (A=1) would actually roll two attack dice (1+1=2).
So, as well as having an improved armour save cavalry gain the advantage of an improved Move characteristic and in hand-to-hand combat a cavalry mount's attacks are added to those of its rider. This combination of beast and rider can be a potent weapon even on the fire-swept battlefields of the 41st millennium.
THE TURN
Battles are fought between two opposing sides — two armies pitting armed might and cunning against each other. The forces represented by the models are commanded by captains and warlords, psykers and heroes. Their model counterparts are commanded by you — the player.
In a real battle lots of things happen at once and it is very difficult to tell exactly how the battle is progressing at any one moment. The fortunes of each side sway throughout the battle as one side advances, then the other counter attacks. Explosions shake the earth and the shriek of incoming shells is only drowned out by the roar of mighty engines and the blasts of energy beams.
In Warhammer 40,000 the howling maelstrom of action is represented by turns, in a similar way to chess or draughts. Each player takes one complete turn, then his opponent takes a turn. The first player then takes another turn, followed by the second player again, and so on: each player taking a turn one after the other until the battle is over. To decide which side takes the first turn both players roll a D6 and add their strategy rating. The player who rolls highest goes first.
Within the turn actions are performed in a fixed order — this is called the turn sequence. Each turn is divided up into phases during which the player moves all his squads, shoots his weapons, then resolves all hand-to-hand combat and so on.
THE TURN SEQUENCE
While it is your turn it is up to you to keep track of where you are in the turn sequence. If you forget, your opponent should be able to remind you. Each turn is divided into the following phases. These phases are always completed in the order given below, and all actions in each phase must be resolved before moving onto the next phase.
1. MOVEMENT
During the movement phase you may move your troops as defined in the rules for movement.
2. SHOOTING
During the shooting phase you may fire any ranged weapons as described in the rules for shooting.
3. HAND-TO-HAND COMBAT
During the hand-to-hand combat phase all troops in hand-to-hand combat may fight. Note that this is an exception to the normal turn sequence in that both sides fight, not just the side whose turn it is.
4. PSYCHIC
In the psychic phase all psykers may use their powers. Note that as with close combat this is an exception to the normal turn sequence in that both sides may use powers, not just the player whose turn it is.
5. RALLY
During the rally phase you can attempt to rally any of your squads whose morale has broken during the previous turns. See the rules on breaking and rallying for more details.
IMPROVISING
Warhammer 40,000 is a challenging and involving game, with many fantastic races, and endless possibilities. In a game of this size and level of complexity there are bound to be some situations where the rules seem unclear, or a particular situation lies outside the rules as they are written. This is inevitable, as we can't possibly give rules to cover every circumstance. Nor would we want to try, as that would restrict what you can and cannot do far too much. Players should feel free to invent and improvise, exploring the galaxy of Warhammer 40,000 for themselves and taking the game far beyond the published rules if they wish.
When you come across a situation not covered fully by the rulebook, be prepared to interpret an existing rule or come up with a suitable rule for yourselves.
When a situation of contention arises players should agree on a fair and reasonable solution and get on with the game as quickly as possible. One way of resolving a dispute is to roll a D6 to see whose interpretation applies and get on with the battle. Afterwards sit down and discuss what happened and see if you can reach an agreement in case the situation arises again. Remember that you're playing to enjoy a challenging battle with friends, where the spirit of the game is more important than winning at any cost.
EXCEPTIONS
There are exceptions to the general turn sequence when things are worked out as they occur rather than in any strict order. Quite often the actions of one player will trigger some special weapon or an action from the other player. This is rather like stepping onto a land-mine or sinking into quicksand — consequences resulting from movement which may be conveniently resolved there and then. Inevitably there will be the odd occasion when events can be worked out in one phase or another with little real difference.
THE MOVEMENT PHASE
During the movement phase, or move phase, you may move your forces on the battlefield. As with the turn sequence, the things that you can do within the movement phase are performed in a strict sequence. Each part of the sequence is fully explained below.
- Declare Charges. If you want any of your troops to charge into hand-to-hand combat you must declare this at the very start of the movement phase.
- Compulsory Moves. Move troops and vehicles that are subject to a compulsory movement rule.
- Move Chargers. Move charging troops.
- Remaining Moves. Move the rest of your troops and vehicles.
DECLARE CHARGES
At the start of your move phase the first thing you must do is declare which squads are going to charge. Except in a few unusual circumstances explained later, you are never forced to charge. It is always your decision. However, charging is the only way troops are normally allowed to move into hand-to-hand combat. If you want to attack an enemy in hand-to-hand combat then you must charge him — you cannot simply move into hand-to-hand combat without declaring a charge. To make this very clear, opposing troops are normally kept at least 1" apart, and troops are not permitted to move closer to each other unless they are charging.
To declare a charge you must indicate which of your squads is charging, and which enemy it is going to charge. For example, you might wish to declare that your Ork mob is charging the enemy's Space Marine squad. When troops charge they move at double their normal speed — this double move is called a charge move.
When you declare a charge you must be reasonably confident that the chargers will reach their target. You may not measure the distance before declaring the charge, so you must try to judge for yourself whether your troops have enough move to reach their enemy. Obviously charging troops must have a reasonably clear run at their target. If there are models in the way, you cannot charge through them, and you must take account of any terrain that might slow your troops down. Troops which charge may not fire weapons in the shooting phase even if they fail to make contact with the enemy.
COMPULSORY MOVES
Generally speaking, a player can move his troops how he wishes within the confines of the rules governing movement. However, sometimes models move about the battlefield randomly because they are affected by gas weapons or are blinded or disoriented for some other reason. Equally, vehicles may be forced to move out of control because of damage. The player has no control over the movement of these models and so these are referred to as compulsory moves.
All compulsory movement is done first, before any other movement takes place. This gives troops moving in this way the opportunity to get in the way, block lines of advance and do all sorts of other annoying things.
Models that are moving randomly or are out of control may simply blunder into hand-to-hand combat without a charge being declared. This is an exception to the normal rule that says you have to declare a charge before moving into hand-to-hand combat. Models moving unintentionally into hand-to-hand combat do not receive the usual bonus for charging, but their opponent has the usual options as if he were charged (see Charge).
NORMAL MOVES
After the compulsory moves have been made the rest of your forces can be moved, starting with charging units. As the rules governing the movement of charging troops and other troops are essentially the same, we will return to the specific rules for chargers later. The following rules affect all movement.
During their movement phase models can move up to their movement rate in inches in any direction. For example, humans have a movement characteristic (M) of 4 and so may move up to 4" in any direction. Squads which are charging or running may move further (see below). Remember that members of a squad must satisfy their squad coherency at the end of their movement.
The following chart summarises the movement characteristics of some of the main races in Warhammer 40,000.
| Race | Movement |
|---|---|
| Human | 4 |
| Ork | 4 |
| Eldar | 3 |
| Squat | 3 |
| Ogryn | 6 |
| Genestealer | 6 |
You do not have to move the full movement allowed or even at all if you prefer, indeed certain “heavy” weapons require that their operator remains stationary in order to fire. This may lead to you moving some members of a squad while leaving others stationary to fire heavy weapons. This is fine as long as squad coherency is maintained.
TURNING
Models can move in any direction they wish and turn to face in any direction at no penalty to their movement. Turning does not count as movement so a model armed with a weapon which requires him to stay stationary to fire may still shoot if he turns to face in a different direction.
TERRAIN
Troops move their full movement distance over unobstructed ground or through terrain dotted with obstacles as they can simply avoid them. They will slow down if impeded by densely packed obstacles such as thick jungles, patches of thick mud and so forth. To simulate this areas of terrain are divided into four types: open, difficult, very difficult and impassable.
OPEN TERRAIN is clear ground and terrain in which obstacles are widely scattered or easily traversed such as:
- Brush, scrub and other vegetation.
- Woods or other dense foliage.
- Debris, ruins, wreckage, loose rocks, boulders.
- Small crevasses and fissures.
- Stairs, ramps or steps.
DIFFICULT TERRAIN includes the following:
- Steep or treacherous slopes. This can include hills if both players agree to it before the game, but otherwise hills are considered to be ‘open’ terrain.
- Very thick forests or dense jungles.
- Fords, streams or shallow water.
- Marshes, bogs or thick mud.
- Soft sand and thick dust.
- Ladders and very steep ramps.
Troops cross difficult ground at 1/2 their normal rate. So if your squad has a normal move of 4" it can only move 2" through a dense jungle. If troops move over open terrain and difficult terrain during the same turn, then their movement over the open ground is at full rate and that over difficult ground is reduced exactly as normal.
For example, a man moves 2" across open ground and then enters a marsh. He now has 2" of his move left. This is halved for the difficult terrain so he only moves a further 1" through the marsh. The easiest way to measure this is to count each actual inch moved through difficult terrain as 2".
VERY DIFFICULT TERRAIN includes areas that are even more arduous to move through such as the following:
- Almost sheer slopes that need to be climbed on hands and knees.
- Tar pits and swamps.
- Pools and fast flowing but still fordable rivers.
Very difficult terrain reduces movement to 1/4 of the normal rate, so count each inch of movement through very difficult terrain as 4" off a model’s movement.
IMPASSABLE TERRAIN is terrain so difficult to move through that it cannot be crossed during the course of a battle. It includes terrain features such as deep rivers, lakes, sheer cliffs and very high walls. Troops must go round impassable terrain. It is possible to traverse impassable terrain with the appropriate equipment, eg ropes and grapnels for a cliff face, scuba gear or a raft to cross a river etc. Players should feel free to improvise their own rules for such situations.
Players may decide before battle is joined whether certain terrain features will count as difficult, very difficult or impassable during the course of the battle. The types of scenery already described can be used to determine whether scenery is difficult or very difficult, but players can always agree to make a terrain feature more or less passable if both sides prefer to. The examples given above should supply guidelines but if in doubt count terrain as difficult rather than very difficult and very difficult rather than impassable — Warhammer 40,000 is a game about decisive manoeuvring and knife-edge action, not inching through masses of very difficult terrain.
OBSTACLES
Obstacles are things like fences, walls and trenches that troops must clamber over to cross. If an obstacle is no more than 1" high and/or 1" broad models can vault or jump over it without penalty.
If an obstacle is more than 1" tall but no more than twice the height of the model trying to cross it the model can still clamber over. It takes a model half of its move to cross such an obstacle. So if a model has a move of 4" it must surrender 2" to cross a tall hedge or a wall. If a model has insufficient move left to cross an obstacle it must halt in front of it. The model does not count as half way across if it has 1" remaining, for example. Models are never positioned half way across obstacles.
It is perfectly possible for part of a squad to end up on one side of an obstacle and another part to be on the far side. This is fine. Place the part of the unit which can cross on the far side of the obstacle and leave the part that could not cross on the other side. As long as squad coherency is maintained this is quite acceptable.
If an obstacle is more than twice the height of a model it may not be crossed by that model and counts as impassable terrain.
If a wall, hedge or fence has a gate in it then it is assumed to be open unless otherwise agreed, and troops may move through the gate as if it were open terrain.
The penalties for difficult terrain types and obstacles are cumulative. If troops are moving at half rate of 2" across difficult terrain, then they must surrender half their remaining move, a further 1" in this case; to cross a high obstacle.
CHARGE
A charge is a move intended to bring a model into hand-to-hand combat. The attacker leaps towards his enemy, yelling some blood-curdling warcry or roaring a spine-chilling challenge.
A model or squad cannot engage an enemy model in hand-to-hand combat except by charging. When you wish to charge an enemy model(s) you first declare that you are charging and nominate the enemy model you wish to charge. In the case of a squad the whole unit must charge at once, even if some models cannot reach their enemy. The reason charges are declared is that the models you are charging may be able to shoot as their attackers bear down upon them - this is explained in the Overwatch Fire section in the Shooting rules.
A charging model may move up to double its normal move rate. For example, a model that normally moves 4" can charge up to 8". Players may not measure the distance before declaring the charge — you must rely on your judgement to estimate whether a model can reach its intended opponent. Generally speaking, a charging model must engage the closest enemy model it can reach but it can ignore enemy models already engaged in hand-to-hand combat. If a charging model fails to make contact with an enemy, it may do nothing for the remainder of the turn.
If a model charges an enemy behind a wall or other obstacle, it will be impossible to move the models so that their bases are touching because the wall is in the way. However, they are still considered to be touching and the hand-to-hand combat proceeds as normal. No move penalty is imposed on the charger on account of the obstacle.
RUNNING
Running is a type of extra fast move that allows troops to cover ground more quickly at the expense of firing at the enemy. This allows squads to make rapid outflanking moves and enables troops that are slightly removed from the main fighting zones to move up fast.
Running troops move at double pace so, for example, a human with a move of 4" would move 8" at a run. A whole squad must run together or not at all; you cannot opt to just move some models from a squad at a run and take a normal move with the rest.
It is not a good idea for troops to run when they are close to the enemy as running models have their weapons holstered or shouldered. No squad would approach the enemy with weapons unready. Troops may only run if there are no enemy within 8" of them. If running troops move to within 8” of enemy troops then they immediately halt and ready their weapons. Running troops count the normal deductions for crossing difficult terrain and obstacles.
A squad which ran in the movement phase cannot fire ranged weapons during the shooting phase. It is unprepared for combat and any weapons carried are not ready to be used. Special ‘Run’ counters are supplied with this game. Place a counter next to models that run as a reminder that they cannot shoot.
HIDING
The hiding rules are an important part of the game, allowing models to move into and within cover without being seen by the enemy. Because models hide during their movement phase the rules are given here, but if you are reading the rules for the first time we recommend you skip the following pages and read the Shooting section next. In fact, it is a good idea to play a few games without the Hiding rules at all, so you can learn how basic movement and shooting work first.
Just as real combatants can conceal themselves behind rocks, walls or undergrowth, so models may hide behind appropriate scenery. A hidden model cannot be seen and so cannot be shot at, but can still see as normal by stealing a glance from his concealed position.
Going into Hiding
At the end of his movement phase a player can hide foot troopers which are in cover or behind an obstacle which would conceal them. Models may only hide if they either didn't move or moved their normal move distance, they cannot hide if they charged or ran. Cavalry, vehicles and models wearing tactical dreadnought armour cannot hide because they are simply too big! Like running, a whole squad must hide together or not at all; you cannot opt to just hide some models out of a squad. A “hidden” counter is placed next to any squads or models which are hiding.
Examples. A model can hide behind an obstacle or the corner of a building or a vehicle. A model may hide inside a wood (or similar area of vegetation), a crater, ditch, trench, pit, or any hole in the ground. A model inside a building can hide behind a door or window. Common sense is required here: obviously a Space Marine could not hide behind a lamp post or a chain link fence but he could most certainly hide behind a bush or wall (if it was big enough!).
Hidden Models
A hidden model cannot be seen and cannot be shot at.
If a hidden model or squad moves or shoots it is instantly visible again — remove the ‘hidden’ counter. Even if only some members of a hidden squad move or shoot it gives away the whole squad.
A hidden model or squad may go into overwatch (see below) without revealing itself, but as soon as it fires it will give away its position and lose its “hidden” counter.
Spotting Hidden Models
Models which are sufficiently close to a hiding enemy model can spot it. This distance is called the Spotting distance and is equal to the model’s Initiative characteristic in inches. For example, a Space Marine with an Initiative of 4 would spot hidden models from 4" away. Equally, if a model is hidden behind an obstacle and enemy troopers get into a position to see around or over it the hidden model can be seen and is spotted.
When hidden models are spotted they can be fired at normally by the troops that spotted them. The troops that spotted them will also communicate the hidden model’s positions to any friendly models that are carrying communicators (as almost all models do) so flip the Hidden counter over to show its ‘detected’ side. For more details on being detected see below.
Detecting Hidden Models
Some technological devices or special traits allow troops to detect hidden enemies from a greater distance; these are described more fully later. More commonly, some troops will spot hidden models and report their positions to the rest of the force so that they have a general idea of where they are.
When a model or squad has been detected flip the Hidden counter over to show its ‘detected’ side. Every model in the opposing force which is equipped with a communicator will be aware of the location of the detected models.
Firing on Detected Models
Although the enemy is aware of the position of hidden models once he has detected them, the hidden models remain out of sight and so cannot be fired on directly. However, area effect weapons such as flamers, grenades, missiles and so on can be fired at the hidden models in the hopes of catching them in the blast.
Roll to hit as explained in the Shooting section: any hidden model caught under the template is hit on a D6 roll of 4, 5 or 6. Roll to wound any hidden models which are hit and make armour saving throws as normal. This rule also applies to hidden models which are hit by area effect templates which have scattered away from their intended targets.
Hiding and Moving
Normally a hidden model is revealed as soon as it moves, but if a model starts its turn hidden and moves only through concealing terrain (ie along a wall or through a wood) it can remain hidden. This rule represents troops gradually infiltrating their way forward through cover and allows individual warriors such as assassins to sneak around unmolested.
Hiding and Overwatch
Overwatch is fully explained in the rules for shooting but basically troops on overwatch forgo their turn to enable them to fire during the enemy turn. Troops in hiding can go into overwatch but it will take them two turns to do so — they go into hiding on the first turn and then go into overwatch on the second turn. This is a good way of setting up ambushes where the hidden models lie in wait for the enemy concealed from sight but able to fire at the most opportune moment.
SHOOTING
Each model may shoot one weapon or throw a single grenade during its own side’s shooting phase. Generally speaking, a model may shoot only once, although in some special cases certain weapons may be fired several times as discussed later. The rules given here are general rules which apply to most weapons in most circumstances. Some weapons are exceptions which work in their own unique way, and the rules which apply to them are discussed together with the descriptions of the weapons themselves in the Wargear book.
FACING
The direction faced by a model indicates the actual direction faced by the individual foot soldier it represents. The same goes for vehicles, large weapons, and every other model on the table. Obviously it is not possible for a man to shoot a weapon behind himself, or to shoot a large artillery piece backwards. Not only would be it physically impossible to perform these contortions, but it would also be impossible to see where you were shooting!
To represent this, a weapon may only be fired, or a grenade thrown, within a 90° arc to the front of the model as shown on the diagram below. This represents the area in front of the individual that he can reasonably be expected to see. Occasionally a target may lie very close to the edge of this arc, so that it is practically impossible to tell whether it can be seen and shot at or not. In cases like this a straight 50/50 dice roll will decide the matter fairly.
LINE OF SIGHT
As we have already established, a trooper must be able to see his target in order to shoot. It is not possible to shoot through terrain, buildings, vehicles or other models which conceal a target beyond. This ability to see and draw a line from the shooter to his target is called line of sight. Usually it will be obvious that a model can’t shoot because there is a hill, a building, or some other large and solid object in the way.
Arc of Fire diagram: This Space Marine can fire at either of the Orks in front of him as they are both inside his 90° fire arc.
However, in some cases it is difficult to tell if a line of sight is blocked or not, and players must stoop over the table for a “model’s eye view”. This is always the best way to determine whether or not a line of sight exists — some players even use small periscopes or mirrors to check the views from their models! The following specific examples show how line of sight can be blocked by various types of terrain.
-
In the case of hills, large boulders and buildings, it is obviously impossible to draw a line of sight through these large, solid features.
-
Lines of hedges, walls, and rows of bush or scrub which are approximately as high as a human model (ie about 2" or more) and up to 1" wide are collectively known as obstacles. A model cannot normally see or shoot through an obstacle unless it only partially blocks sight — eg, sparse bushes or a chainlink fence. However, if a model is only covered up to its shoulders or waist by an obstacle it's fair game to shoot and be shot at, with appropriate modifiers on the to hit roll for cover as explained later.
-
If a wall or hedge is higher than a model then it will normally block a line of sight completely. No matter where the model is positioned, he is unable to see over the obstacle because he is too short, or the wall or hedge is simply too tall.
Interposing woodland blocks line of sight even if there are little gaps between the model trees. This is because there are more trees, bushes, and undergrowth in a real wood than you can reasonably represent on the tabletop. We must imagine that the few tree models are really dense dark woods with tangled undergrowth and great shrouds of foliage. A model on one side of a wood cannot therefore see or fire at a target on the other side.
A person inside a wood can obviously see a little way even though he is surrounded by foliage, although this distance will not be particularly great. If a model is shooting at another model inside a wood, or if a model wishes to shoot from a wood at a model outside, the line of sight is blocked if there is more than 2" of woodland between the shooter and the target. This means that a model which is inside a wood but within 2” of the edge can see and shoot out. By the same rule it is possible for the model to be seen and shot at by troops outside.
- Interposing models block the line of sight in the same way as interposing terrain. This means that it is not possible to fire through a model at a target beyond.
POSITION
By stooping down over the table for a model’s eye view it will be obvious that a trooper on the top of a hill or the roof of a building could see over the top of terrain or troops below him. A model positioned on a hill or on top of a building is therefore able to shoot at targets which would otherwise be obscured from view.
The general rule applies that if a model can see his target then the target can also see him! In the case of a model on the roof of a building or the crest of a hill, he is silhouetted against the sky and can be seen.
Position/Building diagram: Space Marine B can see Orks 4 and 5 - Ork 4 is within 2" of the edge of the wood, and the rocks are low enough to see Ork 5 over. Space Marine A can see Orks 1, 2, 4, and 5 because he is higher up and can see over the wood and the building. Ork 3 is out of sight to everyone because he is more than 2" into the wood.
COVER
On a real battlefield trenches, walls, scrub, and woods provide cover for foot troops. By moving from one patch of cover to another a trooper makes it hard for an enemy to shoot at him. In the rules any shots against models in cover suffer a minus “to hit’ dice modifier as explained later. Making good use of available cover is a vital skill to learn in your battles. You'll quickly come to appreciate even the smallest rock or bush as a haven from enemy fire.
Cover is divided into two types: hard cover and soft cover. Hard cover comprises walls, ditches, trenches, vehicles, rocks, the corners of buildings, and other features which not only partially obscure a shooter’s target but which also offer a measure of solid protection. Soft cover comprises features which partially obscure the target, but which offer no substantial protection. Most vegetation is considered to be soft cover, including hedges, scrub, and woods. Obviously, from the target's point of view, it is preferable to be behind a wall rather than a hedge, but it is better to be behind a hedge than out in the open!
Once again, common sense is your best guide to working out whether a model is in cover or not — most of the time it will be pretty obvious. The following points should be self-evident in play. Some situations are a bit more complex and the following guidelines will help you to decide if a model is behind cover.
- A model immediately behind an obstacle is in cover from shooters on the other side. It is assumed the model has taken up a position exposing at least some part of his body so that he can see or shoot.
Obstacles as Cover diagram: The Ork is positioned behind a row of scrub. He can see and shoot from behind his cover, and be seen and shot at by enemy troops. However, all shots taken at him are at -1 to hit as he is behind soft cover.
- The corner of a building, vehicle, or large rock counts as hard cover to any model placed on the edge so that it is partly obscured. The character just leans out far enough to see and use his weapons, exposing as little as possible to the enemy. This is very useful when you are fighting amongst buildings or ruins.
Corners as Cover diagram: This Ork has been placed at the corner of the building to take advantage of the cover it offers — he counts as being in hard cover to the Space Marine, so there is a -2 modifier to hit him.
-
A model inside a wood always counts as being behind soft cover because of the general density of scrub, undergrowth and tree trunks.
-
Models in craters, trenches or pits always count as behind hard cover from models outside. The interior of large craters is pock-marked with smaller holes and boulders, so that even a model in the middle of the crater counts as within cover from shots outside the crater.
-
Models at windows or doors always count as behind hard cover from models outside.
CHOOSING A TARGET
The player declares a squad or model is shooting and nominates a target without measuring. A target must be an enemy squad or vehicle; individual characters and models may not be targeted unless they are the closest target. If any weapons are out of range their shots automatically miss and have no further effect. This rule prevents players changing their mind once they realise they have made a mistake and encourages players to choose sensible targets. After all, real life troops have to rely on their judgement and can’t try again just because they’ ve made a mistake.
A squad must normally fire at the closest possible target. This speeds the game up and makes it easier to move about away from the main fighting areas without any great fear of vulnerable models being picked off in an unrealistic manner. A number of exceptions that apply to this general rule are listed below.
Normally the members of a squad must all fire at the same target: a player might say “This squad of Space Marines is firing at that mob of Orks” for example. However, troopers within the squad armed with special or heavy weapons such as melta-guns or lascannon are allowed to fire at a different target — they will have been instructed to be on the look out for vehicles or similar threats and will act accordingly.
Heroes and other special characters are always allowed to fire at whatever targets they please. For example a Space Marine Captain or an Imperial Inquisitor are both steely-nerved individuals who would coolly ignore personal danger and do whatever seemed the best thing at the time. Such sure-mindedness in action is to be expected from heroes! Other than these individuals ordinary troopers must choose the nearest target with the following exceptions.
-
A squad or model may ignore vehicles in favour of other targets, or other targets in favour of vehicles. In other words you can choose to shoot at the closest vehicle or the closest target that isn't a vehicle. Obviously a trooper armed with a tank-busting lascannon isn't going to waste his time firing at infantry if he can find a better target!
-
A squad or model may also choose to shoot at a building or a specific game objective, for example storage tanks, generators, energy lines, supporting pylons, and so forth. These targets have probably been pointed out before the battle so that their importance is well known.
-
Any models in hand-to-hand combat and any models with broken morale may be ignored. Obviously you don’t want to risk shooting at your own troops, and enemy models with broken morale are hardly worth shooting at.
-
Targets in cover may be ignored in favour of targets in the open, even though the targets in cover may be closer. This takes into account situations where it may be either impossible or practically impossible to hit enemy because they are behind cover whilst troops in the open are an obvious alternative target.
Choosing a Target diagram: The Space Marines are confronted by three groups of Orks. Two Orks are behind some rocks, two are fleeing and four more are moving up. Although the Orks behind the rocks are the closest they may be ignored in favour of targets in the open (rule 4). The fleeing Orks have broken morale so they too may be ignored (rule 3). The Space Marines may therefore shoot at the four Orks advancing in the open even though they aren't the nearest group.
If they want to the Space Marines can still fire at the Orks behind the rocks but if they do they will suffer a -2 to hit modifier because their targets are behind hard cover.
Under some circumstances it may be necessary for a squad to split its firing between several enemy squads because some of the troopers can't see what their fellows are firing at or are actually closer to a different target than the rest of the squad. Obviously these troopers aren't going to sit around doing nothing if there are other available targets to shoot at so they may fire at a different target within the restrictions given above.
SPLITTING FIRE
Diagram: Space Marines A, B and C can fire in one direction but Space Marines D and E are facing in a different direction and will pick a different target even though all the Space Marines are members of the same squad.
Experienced commanders will quickly learn that it's possible to deliberately split up their squad’s firing by turning individual troopers to face in different directions during the movement phase. Because the models’ fire arcs are pointing in different directions they will have to split their fire against several different targets. This is fine as it represents the squad leader instructing his troops to cover the left flank/right flank/rear etc.
Diagram, Firing at Different Targets: This Space Marine squad has been placed so that it is covering all directions.
RANGE
The range is the distance in inches between a shooting model and its target. In most circumstances it is easier to hit a target at short range than it is at long range. Details of each weapon's short and long ranges are given later in with the descriptions of the weapons themselves. The maximum range of a weapon is always the most extreme long range as shown by the examples below.
| Weapon | Short Range | Long Range | Maximum Range |
|---|---|---|---|
| Bolt Pistol | 0-8" | 8-16" | 16" |
| Plasma Pistol | 0-6" | 6-18" | 18" |
| Lasgun | 0-12" | 12-24" | 24" |
| Bolt Gun | 0-12" | 12-24" | 24" |
| Melta Gun | 0-6" | 6-12" | 12" |
Once the shooter has nominated his target the range is measured to make sure the target is within the maximum range of the weapon, and if so, check to see if the range is short or long.
TO HIT THE TARGET
To determine if a shot hits its target roll a D6. The dice score needed to hit will depend on how good a shot the firer is (as shown by his Ballistic Skill characteristic or BS). The chart below shows the minimum D6 roll needed to score a hit.
| BS of shooter | 1 | 2 | 3 | 4 | 5 | 6 | 7 | 8 | 9 | 10 |
|---|---|---|---|---|---|---|---|---|---|---|
| D6 Score required | 6 | 5 | 4 | 3 | 2 | 1 | 0 | -1 | -2 | -3 |
For example: If the shooter is an Ork with a BS of 3, a dice roll of a 4 or more is required to hit. This is easy to remember if you just subtract the BS of the shooter from 7. This will give you the number you need to hit. For example, a model with a BS of 2 needs (7-2 = 5) 5 or more on a D6 to hit.
Although the chart covers scores of 1 and even less, the minimum dice roll needed to hit is always at least 2. There is normally no such thing as an automatic hit; a roll of 1 always misses.
RAPID FIRE SPECIAL RULE
The Space Marines of the Imperium are the most highly trained fighting force mankind has ever known. Because they are expected to fight and destroy forces many times their own size the Space Marines are specially trained to deploy maximum firepower when they take up a defensive position, letting rip with their bolters to lay down a curtain of accurate fire. To represent this a special “Rapid Fire” rule applies to Space Marines.
If a Space Marine model doesn’t move at all and is not engaged in hand-to-hand combat the Space Marine player may declare the model is using “Rapid Fire”. This means the Space Marine can fire a boltgun, storm bolter or bolt pistol twice during the shooting phase.
Space Marines may not use rapid fire on overwatch or with any weapon other than boltguns, storm bolters and bolt pistols. It’s fine for some of the Space Marines in a squad to use rapid fire with their bolters while others use heavy or special weapons (such as missile launchers or flamers for example) or throw grenades, but remember that only the ones which didn’t move can use boltguns, storm bolters or bolt pistols to shoot twice. All other shooting rules apply to rapid fire as normal.
BASIC MODIFIERS
Some shots are easier than others — a target might be moving fast, or it could be behind cover. Your dice roll to hit is modified to reflect how easy or difficult the shot is. Most basic modifiers are negative numbers so they will make it harder to hit.
| Modifier | Situation | Notes |
|---|---|---|
| -1 | If the target is in or behind soft cover | As defined in the section on cover |
| -2 | If the target is in or behind hard cover | As defined in the section on cover |
| -1 | Shooting at a rapid moving target | If the target moved between 10 and 20" during its previous movement phase. |
| -2 | Shooting at a very rapid moving target | If the target moved more than 20" during its previous movement phase. |
| -1 | Shooting from a vehicle which is moving at its fast rate | Applies to all weapons fired from the vehicle including those mounted in or on the vehicle. |
| +1 | Shooting at a large target | Such as a large vehicle like a Land Raider (but not bikes, dreadnoughts, land speeders etc), buildings or very large creatures (elephant sized +). |
For example: A Space Marine is firing at an Ork which is in cover behind a wall. Normally the Space Marine needs to roll a 3 to hit but the hard cover modifier applies so the Space Marine has to deduct 2 from whatever he rolls, so if he were to roll a 4 it would be modified by -2 and become a 2, which is a miss.
WEAPON MODIFIERS
Some weapons are more or less accurate than others for various reasons. Some are better balanced, others have a spread effect which makes them more likely to hit their target. Most weapons are less accurate at long range than at short range, especially pistols which are excellent short range weapons but inaccurate at long range. Every weapon has its own “to hit" modifiers which are added to or deducted from your dice roll. These are given in full in the descriptions of the weapons. The following examples show how the system works.
| Weapon | Short range | Long range |
|---|---|---|
| Bolt Pistol | +2 | 0 |
| Plasma Pistol | +2 | -1 |
| Boltgun | +1 | 0 |
| Lasgun | +1 | 0 |
| Melta Gun | +1 | 0 |
It can be seen how the two pistol weapons confer high short range bonuses (+2). The plasma pistol is relatively inaccurate at long range (-1). The boltgun, lasgun and melta-gun are larger, clumsier weapons and less likely to hit at short range than the pistols (+1) .
For example: If the Space Marine in the example above were firing his boltgun at close range he would gain a +1 to hit modifier, partly offsetting the -2 for hard cover so that he would need a 4 or more to hit.
7+ TO HIT
Sometimes it is impossible to hit because a roll of 7 or more is required once modifiers have been taken into account. Such shots may still hit so long as the score needed is not 10 or more. The shooter must first roll a score of 6. If successful the shooter is entitled to a further roll and requires the score indicated on the chart below. If this second roll is successful the shot has hit. If the initial score required is 10 or more the shot cannot hit.
| Roll Required to hit | 7 | 8 | 9 | 10 |
|---|---|---|---|---|
| D6 score needed | 4+ | 5+ | 6+ | Cannot Hit |
For example: A model using a plasma pistol with a BS of 3 requires a basic 4 to hit. The target is at long range (-1), and behind hard cover (-2). The dice roll required to hit will be 7 as 3 will be deducted from the score and a minimum roll of 4 is needed to hit. The firer will therefore need to roll a 6 followed by a 4 or more if he is to hit his target.
DAMAGE
Hitting your target is not always enough to put it out of action. Some targets can take quite a bit of damage before they are destroyed while some hits cause no damage at all. A hit might result in nothing more than a superficial graze or it might rebound off a piece of equipment. To decide if a hit causes damage, compare the weapon’s Strength characteristic with the target’s Toughness characteristic. Each weapon has its own Strength score as given in the weapon’s description.
Consult the chart below. Cross reference the weapon’s Strength (S) with the target’s Toughness (T). The number indicated is the minimum score on a D6 needed to convert the hit into damage. If this roll is successful the target has been damaged and it sustains one or more wounds. Most weapons cause only one wound. Some large or powerful weapons cause more, usually expressed as a further dice roll number of damage points: D4, D6, D10, etc.
When a foot trooper model is hit the number of damage points caused is deducted from its Wounds (W) characteristic. If the model has only one wound (as is usually the case) the model becomes a casualty and is removed from play. If the model has more than one wound, a record is kept of damage points sustained until its wound total is reached. Once the model has zero wounds remaining it is removed from the game as a casualty. Casualties are not necessarily dead, they may be hurt or merely knocked unconscious or incapacitated in some way. In any case, they are no longer fit to participate in the battle.
Note that ‘N’ on the chart means the hit has no effect. A target with the Toughness indicated cannot be harmed by a hit with that strength.
For example: An Ork armed with a boltgun shoots at an Imperial Guardsman and hits him. The boltgun has a Strength of 4 and the Guardsman has a Toughness of 3. Referring to the chart, a score of 3 or more is needed to convert the hit into damage. If the dice roll is 3 or more then the Guardsman takes 1 wound. As he has only 1 wound in the first place this means that he will be 'killed' and removed from play.
DAMAGE CHART
Cross reference weapon Strength (rows) with target's Toughness (columns). The number is the minimum D6 score needed to wound; N = no effect.
| Strength \ Toughness | 1 | 2 | 3 | 4 | 5 | 6 | 7 | 8 | 9 | 10 |
|---|---|---|---|---|---|---|---|---|---|---|
| 1 | 4 | 5 | 6 | 6 | N | N | N | N | N | N |
| 2 | 3 | 4 | 5 | 6 | 6 | N | N | N | N |
To use the chart first find your weapon's Strength down the left hand side. Now cross reference this against your target's Toughness along the top. Where the two lines meet is a number, which is the minimum score required on a D6 to score a wound. Roll a D6: if you score equal to or more than the score required you have wounded your target. If you score less then the hit has either rebounded from the creature's hide, entangled itself in clothing, or merely nicked his flesh causing no appreciable damage.
If you have scored several hits on an enemy unit then roll all the wound dice together to save time — so if you have 4 hits then roll 4 dice to wound. It is fastest to simply pick out the hit dice which have scored hits and roll them again to see if they cause wounds.
N. Where the table shows an 'N' this indicates that the target is simply too tough for you to hurt. N stands for no effect — or no chance!
SAVING THROWS
Most troops wear some sort of protective clothing or armour. If a model is wearing armour it is allowed a further dice roll to see if the armour stops the damage he has taken. This is called a saving throw.
To see if armour successfully stops damage roll a D6. The following table shows how the minimum D6 score required varies between three sample types of armour. Other values are indicated in the Wargear manual.
| Armour Type | Minimum D6 score required to save |
|---|---|
| Flak | 6 |
| Mesh armour | 5 |
| Power armour | 3 |
If the player rolls a D6 score equal to or greater than the score required all damage points from that hit are ignored.
For example: A model wearing power armour is hit and damaged sustaining 1 wound. The model is entitled to a saving throw of 3 so a D6 is rolled resulting in a score of 5. The damage is therefore saved, and the model is unharmed, the shot bounces harmlessly off its armour.
SAVE MODIFIERS
Some weapons are more powerful than others and are better at penetrating armour. For example, if an Imperial Guardsman wearing flak armour were hit by a relatively low-powered laspistol there'd be a good chance that his armour would absorb the damage and leave him unharmed. On the other hand if he were hit by the blast of the larger and more powerful lascannon then his armour would be vapourised instantly! Weapons which are good at penetrating armour are given a saving throw modifier. These are given in the Wargear book together with the descriptions of the weapons.
The examples given below show how these affect the final dice roll.
| Weapon | Save Modifier | Basic Save of Mesh | Score needed to save |
|---|---|---|---|
| Bolt Pistol | -1 | 5 | 6 |
| Plasma Pistol | -1 | 5 | 6 |
| Boltgun | -1 | 5 | 6 |
| Lasgun | -1 | 5 | 6 |
| Melta-gun | -4 | 5 | No Save |
| Flamer | -2 | 5 | No save |
If the dice roll required to save is 7 or more the shot is not saved — the weapon is so powerful that the armour counts for nothing.
TAKING SHOTS TOGETHER
You can always shoot with each model one at a time and work out the results of its shot before moving on to the next shooter. This is probably the best way to proceed until you are familiar with the game or where there are variously armed shooters firing at targets with varied armour and Toughness.
However, once you are familiar with the game you may find that shooting with each model one at a time becomes a bit tedious when you are firing a group of identically armed troops at a group of enemy all of whom have identical Toughness and armour. In cases like this, where several models are shooting at a group of enemy models and all shooters need the same ‘to hit’ roll, it is convenient to roll for all the shots at once. For example, four Space Marines are firing bolters at a group of six Orks and need 3+ to hit. The Space Marine player rolls all four dice scoring 4, 4, 5 and 6 = four hits.
If the targets have the same Toughness, the damage dice may be rolled all at once to establish how many hits cause damage. This is easily done by picking up all the dice which scored a hit and then rolling them again to see if wounds are caused. For example, from our Space Marines' four hits we could roll those four dice again and if we were lucky we might inflict, say, three wounds on the Orks. Orks can only sustain one wound before they are “killed”. The Orks are wearing flak armour which gives them a basic saving throw of 6, however boltguns have a -1 saving throw modifier which negates the Orks’ armour saves so three Ork models are removed.
Taking shots together is strongly recommended as it speeds up the game immensely. The only real problem it can cause is if some of the targets are in cover and some aren't. This may be dealt with in one of two ways. An obvious way is to split up your firing and roll your ‘to hit’ dice in two batches — “These three Space Marines are firing at the three Orks in the open and the other two Space Marines are firing at those two Orks behind the wall”. By using different coloured dice for those shots which need a different score to hit you can still roll your dice together.
An alternative method particularly suitable for larger games is “averaging out” the to hit modifiers so that it affects the whole target squad. This works as follows:
If more of a squad is in the open than in cover ignore the to hit modifiers for the cover altogether.
Otherwise if any of the target squad is in the open reduce the to hit modifier of the cover by 1.
If the entire squad is in cover but some are in hard cover and others in soft cover count the soft cover modifier instead.
This represents how easy or difficult the squad as a whole has made itself to hit and also favours taking shots together as the averaging process always works in favour of the firer. This is only right and proper as the veritable hail of fire from an entire squad letting fly together is more likely to blast the enemy out of cover than lots of individual troopers taking pot shots.
REMOVING CASUALTIES
Usually it doesn’t matter much which actual models fall casualty in which case you can simply remove the nearest models out of a squad without further ado. Even in cases where a target squad includes a particularly important model which is armed with a special weapon, for example, roll your shots together and remove the nearest opposing models as casualties. It is singularly unlikely that amidst the smoke and explosions of the battlefield your troops will be able to pick out a particular trooper so they will almost always hit the nearest enemy first.
If it isn’t clear which models in an opposing squad are the closest because they are in a line, randomise casualties by rolling a D6 for each casualty inflicted. Take each dice in turn and count along the enemy models in the target squad from the right hand side until you reach the number rolled and remove that model as a casualty. No model will be ‘killed’ more than once unless he is the last member of the squad.
HAND-TO-HAND COMBAT
Normally troops do not shoot at models engaged in hand-to-hand combat because it would very easy to hit the wrong target! However, a player wishing to take the chance may shoot. Work out hits as normal, and randomly allocate any successful hits between models from both sides. For example, if firing into a combat between two models, a D6 roll of 1, 2 or 3 would indicate one model, 4, 5 or 6 the other. If firing into a combat between three models a roll of 1 or 2 would indicate one model, 3 or 4 another and 5 or 6 the third and so on.
A model in hand-to-hand combat may not shoot weapons during the shooting phase. A model equipped with a pistol may use his weapon during close combat, this is covered by normal hand-to-hand fighting as explained in the Hand-to-Hand Combat section of the rules.
MOVING AND FIRING
In the case of the majority of weapons a trooper model can move in the movement phase and fire in the shooting phase. Moving the model in no way reduces its ability to shoot. However, models which make a double distance move because they are charging or running may not fire weapons or throw grenades in the shooting phase. This rule also applies to cavalry models which charge or run (gallop?).
A few special weapons require reloading relatively frequently compared to others, or else they need to be set up carefully before they fire. Rather than introduce special rules for recording how much ammunition each man carries and how much he expends (which would be very tedious indeed) we
shall rule that these special weapons may not move and shoot during the same turn. If the model moves during the movement phase the weapon may not fire during the shooting phase. Weapons restricted in this way are indicated in the Wargear manual. Cavalry troopers carrying weapons that can only move or fire are bound by the same restrictions as foot troopers.
A trooper riding in or on a vehicle may still fire a weapon despite a rule that forbids moving and firing. In these cases it is not the shooter who is considered to be moving but the vehicle, so the trooper actually has plenty of time to reload.
BLAST MARKERS
Most weapons fire a single shot or a single blast which strikes only one target, but a few special weapons fire a shell or project a blast which explodes and causes damage over a fairly large area. Some other weapons scatter shot with a similar effect. The spread of a shot or blast from a weapon is represented by a card circle. These circles are called blast markers or area markers and vary in size from 1" radius upwards. Depending on how large an explosion they cause, weapons use different sized blast markers as indicated in the Wargear book.
When you wish to shoot a weapon which uses a blast marker, nominate a target model and roll to determine if the target is hit just as you would with any other weapon. If the nominated target lies beyond the weapon’s maximum range then the shot automatically misses and explodes or dissipates harmlessly in the air, and the shot will not land or cause damage.
If the hit roll is successful, the player takes a blast marker of the appropriate size and places it on the target, with the centre of the marker directly over the target. The target is hit, and any other model whose base is wholly inside the marker’s area is also hit.
Using Blast Markers diagram: Kaboom! The two models complely covered by the blast marker are hit automatically. The model partially covered by the blast marker is hit on a roll of 4, 5 or 6 on a D6.
If a model’s base is only partially inside the area, it is hit on the D6 roll of a 4, 5 or 6. The normal to hit roll modifiers for cover, target speed and so on do not apply to this roll.
If the shot misses, then the shot has flown wide of its target but may still land close enough to cause damage. The player makes a further dice roll called a scatter roll. This roll determines if and where the shot has landed.
To make a scatter roll take the artillery dice and the scatter dice and roll them together. The result is indicated on the table below. Notice that if you roll a number on the artillery dice this indicates the number of inches the blast marker is moved in the direction indicated by the arrow on the scatter dice. If you roll a ‘misfire’ on the artillery dice a fault has occurred in the weapon itself. If the misfire roll is accompanied by the roll of an arrow on the scatter dice the shot has no effect, it is a dud. If the misfire roll is accompanied by a roll of a ‘hit’ on the scatter dice the weapon has malfunctioned catastrophically!
Place the blast marker over the firing model and calculate hits and wounds as normal. Even if the firing model survives this experience its weapon is destroyed automatically. The scatter roll is summarised on the table below.
SCATTER TABLE
| Roll on Artillery Dice | Roll on Scatter Dice | Result |
|---|---|---|
| Number | Arrow | Blast marker is moved in the direction indicated by the number of inches rolled on the artillery dice. |
| Number | Hit | As above |
| Misfire | Arrow | The shot is a dud and has no effect. Remove the blast marker altogether. |
| Misfire | Hit | Place the blast marker over the firing model and calculate hits as normal. The firing weapon is destroyed. |
Scatter diagram: The Space Marine fires his missile launcher at a group of Orks 8" away. He misses and rolls the scatter and artillery dice together to determine where the shot deviates. He rolls a 4 on the scatter dice indicating the blast marker is moved 4" in the direction of the arrow on the scatter dice.
Because the Space Marine is only 8" away the maximum distance the missile could scatter is 4", half the distance between the Space Marine and his target, so if the artillery dice had rolled 6, 8 or 10 the result would have been reduced to 4".
MAXIMUM SCATTER
No shot will ever scatter by more than half the range between the shooter and target. If the target is 10" away, for example, a miss may not scatter by more than 5" regardless of the dice score. Scatter may cause a shot to land outside its normal fire-arc, in which case the missile or shell has spun wildly off-course or the firer has stumbled around at the point of firing.
THROWING GRENADES
Many troops carry grenades of one type or another. The most common grenades are explosive, and can be used to attack vulnerable foot soldiers or even vehicles. There are also several special types of grenade which either release gas or have some other unusual effect. These different types of grenade and what they can do are all described in the Wargear book.
A model equipped with grenades may throw a grenade instead of shooting if the player prefers. A grenade throw is treated exactly like any other shot: a dice roll is made to score a hit, to cause damage, and saving throws are taken where models have armour. With the notable exception of krak grenades, grenades have a blast marker and will scatter if they miss. Roll to hit as normal using the model’s BS characteristic.
If a grenade misses roll for scatter using the scatter dice and the artillery dice in exactly the same way as for weapons with a blast area. Because grenades are invariably hurled at a shorter range always halve the number rolled on the artillery dice for the distance of the scatter. Conversely it’s a lot easier to drop a grenade or have it bounce off something and land at your feet! Because of this grenades don’t follow the rules for maximum scatter given above — you could throw a grenade at a target 2" away and have it scatter 5".
The range of a thrown grenade depends on how strong the thrower is: a stronger individual can throw a grenade further than a weaker one. The Strength characteristic of the thrower and the corresponding maximum range of his throw is shown on the table below. This can easily be remembered because the maximum distance a model may throw a grenade always equals 2" plus twice its Strength up to a maximum of 12".
| Strength of Thrower | Maximum Throw |
|---|---|
| 1 | 4" |
| 2 | 6" |
| 3 | 8" |
| 4 | 10" |
| 5+ | 12" |
TARGETTING THE GROUND
Not all grenades, missile shells and mortar bombs are designed to kill, some are designed to produce clouds of smoke in order to create barriers to sight. When using these weapons it is not necessary to nominate a specific enemy model as the target. Instead all the player has to do is nominate a point on the tabletop which is visible to the shooting model and within the maximum range of his weapon. The following rules apply to shots or grenade throws of this kind.
-
To hit the exact spot the player requires a dice roll of 6 on a D6. This represents the fact that the shooter or grenade thrower has a broad choice of aiming points and not just the one selected by the player. If the chance of hitting would normally be less than 1 in 6 then the chance of hitting is reduced to this level (roll a 6 followed by a further dice roll as explained under the section “7+ to Hit”).
-
If the shot misses then a normal scatter roll is made as described above.
-
A scatter roll of a hit and a misfire will not destroy the firing weapon, rather the shot counts as a dud.
TEMPLATE WEAPONS
Some weapons fire a short-ranged jet or stream of flame, energy or corrosive liquid which is deadly at close quarters because of its wide spread. The most common of these weapons is the flamer, a weapon regularly used by Space Marine tactical squads. Weapons like the flamer use one of three special teardrop-shaped templates to represent their area of effect. Each of these three templates is a different size to represent the varying potency of individual weapons.
Using template weapons is very easy as no roll to hit is required. Simply take the appropriately sized template (the weapon’s entry in the Wargear book will tell you which template to use) and place it so that the pointed end is touching the base of the model firing the weapon and the rounded end is covering the target. Any models completely covered by the template are hit automatically and any models partly covered are hit on a roll of 4, 5 or 6 on a D6. Damage rolls and armour saving throws are made as normal using the weapon’s Strength and saving throw modifier characteristics. Note that to hit modifiers for target speed, cover and so on do not apply to template weapons so they are exceptionally good for winkling opponents out of cover.
SUSTAINED FIRE
Most weapons can fire only once during the shooting phase, though this may in fact represent the weapon firing a short burst of fire. A few special weapons are not restricted to one shot but can fire several bursts at one or more targets. This is called sustained fire. Weapons capable of sustained fire are indicated in the descriptions of the individual weapons. These are weapons which fire a lengthy burst, often using a motor to force round after round into the firing chambers, spewing out a hail of bullets or devastating energy blasts.
Weapons capable of sustained fire are dealt with in the following way. The player nominates the initial target and rolls to hit exactly as normal. If the player makes the to hit roll he can roll one or more special sustained fire dice to see how many actual hits are scored by the hail of fire. The first of these hits will be scored on the initial target but any extra hits can be allocated to other visible targets within 4" of the first. Once all hits have been allocated roll to wound as normal.
Sustained Fire diagram: The land raider lets rip with its twin heavy bolters against a mob of Orks. It hits and rolls 4 sustained fire dice (2 per heavy bolter). It rolls 4 hits and a jam which it can allocate between the Ork it was aiming at and the other Ork which is within 4” of him. The third Ork, though within 4" of the original target, is out of sight around the corner so it can't be hit.
After the hits have been resolved the Space Marine player places a “Jam” marker next to the land raider as a reminder that it can’t fire in its next shooting phase while it clears the jam.
The number of sustained fire dice a weapon can roll is indicated in its description in the Wargear book. The number depends on the weapon itself, its size, ammunition supply and so forth. A sustained fire weapon can always be fired using less dice than its maximum if desired, and this is usually done to avoid the risk of jams occurring (see below).
WEAPON MALFUNCTION
Sustained fire places a considerable strain on a weapon's components. The sustained fire dice has a ‘jam’ result on one face. When this is rolled it means that the weapon has malfunctioned in some way. If the weapon is rolling multiple sustained fire dice any malfunctions are assumed to come after hits have been scored. Place one ‘jam’ counter next to the model for each jam result rolled.
Once a weapon has jammed it cannot be used until it has been fixed. To repair a weapon the model must miss its next shooting phase while it clears the jam. At the end of the shooting phase remove one ‘jammed’ counter. Only one jammed counter is cleared per turn, so if the weapon rolls two or more jams simultaneously it will be out of commission for several shooting phases. If a model is on overwatch, suffering broken morale or in hand-to-hand combat it can’t clear jams in the shooting phase but if it’s running or hiding it still can.
OVERWATCH
Overwatch is a special rule that allows models to forgo their own turn in order to shoot during the enemy’s turn. This is very useful as it allows you to set up ambushes and fire traps for advancing enemy troops. If you are reading the rules for the first time we recommend you skip this section for now and go straight to Hand-to-hand Combat. The Overwatch rules will make more sense once you have learned the Movement, Shooting and Hand-to-hand Combat rules. It is a good idea to play a few games without using the Overwatch rules to start with, as this will enable you to learn the game more easily.
As troops advance it is a good idea for squads behind them to take up a position where they can shoot at the enemy as they appear or as they move. In this way friendly advancing troops are protected by those behind who remain still, watching out for the first sign of the enemy, scouring the terrain for the slightest glimpse of movement. This is represented in the game by the Overwatch rule. It is mostly used to shoot at enemy troops as they emerge from cover, or as they move from one piece of cover to another. It also allows two squads to move forward and mutually protect each other — first one moving while the other uses overwatch, then reversing roles, one squad moving forward under the protection of the other.
PREPARING OVERWATCH
The player declares which troops are going on overwatch at the start of his turn. Only whole squads can go into overwatch, it is not possible to place some models out of a squad into overwatch while other models move and/or fire. Vehicles and characters may go into overwatch. An Overwatch counter is placed next to troops on overwatch as a reminder. Models on overwatch may do nothing during their turn: they may neither move nor shoot, for example. The Overwatch counter remains in place, so that the model is still on overwatch when it comes to the opposing player’s turn.
FIRING ON OVERWATCH
A model or squad on overwatch may shoot during the opposing player’s following movement phase. Troops on overwatch may shoot at targets as they present themselves at any time during the movement phase. For example, a model can be shot at before it moves, after it completes its movement, or at any time in between. A target which doesn’t move at all can still be shot at so long as it can be seen. The most common use for overwatch is to shoot at enemy as they move from cover to cover, where they would normally be hidden during the shooter’s own turn. Overwatch can also be used to ambush troops as they move into range, denying them the chance to reach cover. Troops may not throw grenades as part of overwatch fire.
As soon as a model or squad shoots its Overwatch counter is removed. Work out whether the shot hits and damages as normal and then proceed with movement. There is one extra modifier to take into account in overwatch fire.
-1 Shooting at a model which is either emerging from or moving into cover, or which is charging the shooter.
This modifier only applies to troops on overwatch. It applies if the target's intended move will take it into cover, or if it emerges from behind cover. It also applies if the target is charging the model on overwatch. This is the only time when a model which has been charged can shoot at his attacker as he closes. This takes into account that the target is visible only for a brief moment, or that the shooter is flustered by the enemy’s charge. Note that the -1 does not apply twice if a target jumps from behind cover and charges the shooter, it is only ever applied once. Overwatch fire at models charging into hand-to-hand combat always takes place at short range for whatever weapon the overwatching model is using.
LOSING OVERWATCH
Unused Overwatch counters are removed at the start of the player’s own turn. New Overwatch counters may then be placed as required. A model can stay on overwatch from turn to turn so long as neither side moves or fires, but it will save confusion if old counters are removed and new ones placed.
Troops shot at while on overwatch must immediately take a Leadership test as follows. Roll 2D6 – if the score is equal to or under their Leadership characteristic they have passed and all is well. If they roll more than their Leadership they fail the test and lose their Overwatch marker.
As soon as the Overwatch counter is lost the model or squad reverts to the normal game sequence. Note that you don't have to hit the target to force a Ld test — it only has to be shot at.
This rule represents troops being forced to duck and flinch by enemy fire. This is not likely to happen often as models on overwatch will usually fire before the enemy (ie in the movement phase which comes before the shooting phase). However, it is possible for a model to be hit by an off-target friendly weapon during his own shooting phase.
It is most likely that a model on overwatch will be shot at by an enemy who is also on overwatch during his own movement phase. In this way squads can give “covering fire” for their compatriots by keeping the enemies” heads down with their own overwatch fire.
HAND-TO-HAND COMBAT
Hand-to-hand combat, also called close combat, is the most violent and desperate of all fighting, with deadly adversaries hacking with swords, slashing with razor-sharp talons, biting, kicking, punching and doing their utmost to kill each other. Hand-to-hand combat is resolved differently to shooting, as described on the following pages. Hand-to-hand combat is more important to some troops than others. Genestealers can only fight hand-to-hand for example, and they're very good at it! Space Marines are good all-round troops, able to fight well either close to or at a distance. Gretchin, however, are too small and weak to fight very effectively at close quarters.
Hand-to-hand combat is assumed to involve grappling and striking out with fists, claws, swords and rifle butts, as well as very close range weapon fire with pistols and other suitable weapons. At such close range marksmanship counts for nothing as it is almost impossible to miss if you can overpower your foe long enough to get a chance to shoot. Speed and brute strength count for a great deal, with victory often going to the combatant who manages to win the upper hand and deliver a killing blow or shot first.
HAND-TO-HAND COMBAT
Opposing models fight hand-to-hand combat in the hand-to-hand combat phase if their bases are touching. When a model makes a charge move so that it touches an opposing model both are engaged in hand-to-hand combat. Once engaged in this way neither model may shoot in the shooting phase or move at all until the combat has been resolved. There are few exceptions to this, as it may be possible for a model to move away from his opponent in some situations, these are described later. It may take several turns to resolve the hand-to-hand combat if the combatants are tough and equally matched, but most combats will be over within a single turn.
Only pistols and close combat weapons can be used in hand-to-hand combat. These are weapons specifically designed for fighting at close quarters such as swords, chainswords, knives, axes and so forth. Pistols, because they are small, can also be used, one combatant trying to force his enemy’s arm away while his foe uses all his energy to point and shoot his gun.
Pistols and some close combat weapons have their own Strength value and saving throw modifier. Both kinds of weapon are described in the Wargear book with their game details including Strength values and armour save modifiers. All hits inflicted by hand-to-hand combat may be worked out using the Strength value and saving throw modifier of either the weapon or the model, whichever is the higher. In most cases you'll find the weapon’s value is higher.
WHO CAN FIGHT
In the hand-to-hand combat phase all models engaged in hand-to-hand combat may fight. Note that it doesn’t matter which player’s turn it is — even if it is not your turn you may fight with any models engaged in hand-to-hand combat.
Models are allowed to fight all round and not just against models to their front — ie, you can fight through a full 360° arc. This represents the fact that the warrior is whirling around, dodging and weaving, making desperate lunges, and generally doing its utmost to kill his opponent. Obviously the miniature itself is unable to move, but don’t let this fool you!
If a model is engaged against two or more enemy at once then all the models may fight. This is called a multiple combat and rules for this are covered later.
PROCEDURE
Most combats will be ‘one-on-one’ which means one of your models is engaged against one of your enemy’s models. These combats are worked out as shown below. Multiple combats are worked out slightly differently as described later.
1. Throw Attack Dice
Both players roll a number of D6’s equal to their model’s Attack characteristic.
2. Work Out Combat Score
Each player picks his single highest scoring dice and adds his model’s Weapon Skill to the score. He then adds any other Combat Score modifiers as shown on the chart over the page. The sum of these scores is called the Combat Score.
3. Determine Winner
The player who has the highest total Combat Score wins the combat. In the case of a tie the model with the highest Initiative wins the combat. If there is still a tie the combat is a stand-off.
4. Number Of Hits
Compare the Combat Scores of both combatants. The difference between their Combat Scores is the number of times the winner has hit the loser. If you won the combat on a tie you still cause 1 hit.
5. Throw to Damage
For each hit scored the attacker rolls a D6 on the Damage Chart and determines whether the hit causes damage exactly as with hits from shooting. You may use the Strength characteristic of either the model itself or any pistol or close combat weapon it carries.
6. Saving Throw
Models that are wearing armour may attempt to avoid the effects of any damaging hits by making an armour saving throw exactly as with shooting damage. You may use the saving throw modifier of either the model itself or any pistol or close combat weapon it carries.
ATTACK DICE
During hand-to-hand combat a model rolls the number of attack dice indicated by the Attacks (A) characteristic on its profile. Most models roll one attack dice as their Attack value is 1. If a model carries a close combat weapon in each hand, such as two pistols or a sword and a pistol, then the model automatically rolls one extra attack dice to represent the extra weapon. For example, a Space Marine normally rolls one attack dice. If he carries a chainsword and a bolt pistol this becomes two dice.
Remember that although you may roll more than one dice, you only use one dice when working out who won the combat. The advantage of rolling more dice is it gives you a better chance of rolling a high score.
DETERMINE WINNER
To determine the winner each player picks one of his attack dice, adds the model’s Weapon Skill (WS) to the roll, and then adds any Combat Score modifiers to find a final Combat Score. The player with the highest Combat Score has won the combat. The winner now subtracts the loser's Combat Score from his own to determine how many hits his model causes.
In the case of a tie the model with the highest Initiative wins the combat and inflicts one hit. If both models have the same Initiative value the combat is a stand-off and no hits are resolved on either model.
For example: A Space Marine is fighting an Ork. The Space Marine’s WS is 4 compared to the Ork's 3 and both have one attack. Each player rolls a D6 and adds the score to his model’s WS. The Space Marine rolls a 4 giving a Combat Score of 8 (WS4 + roll of 4) and the Ork also rolls a 4, giving a score of 7 (WS3 + roll of 4). The Space Marine has won by a difference of 1 so he has hit the Ork once. If the Space Marine had also been charging he would have received a close combat modifier of a further +1, giving him a score of 9 and inflicting two hits on the Ork.
THE PARRY RULE
A warrior armed with a sword (including chainswords, power swords and force swords) can parry or turn aside an opponent’s blow with his own blade. To represent this a model armed with a sword can force an opponent to re-roll his highest attack dice before the winner of the combat is determined. Models armed with two swords can force their opponent to re-roll one or two of his attack dice.
The swordsman doesn’t have to parry if he doesn’t want to. Though parries are useful it is possible an opponent may re-roll and get a better score. An opponent who rolls several dice can always pick his next highest score and use that to determine who won the combat rather than use the score of his re-rolled dice. Re-rolled dice can still produce fumbles or critical hits as described below. Two opposing models which both have parries cancel each other out — neither can force a re-roll!
THE FUMBLE AND CRITICAL HIT RULE
In the hurly-burly of close combat it is all too easy for a weapon to slip from your grasp, to trip over, or to overbalance and expose yourself to a quick punch or stab. This is represented by the Fumble rule.
When both players roll their attack dice any roll of a 1 represents a fumble. Any fumbled attack dice are handed over to the other player who adds +1 to his own Combat Score for each fumbled dice. This makes it occasionally possible for a hopelessly outclassed fighter to pull off a spectacular surprise victory against all the odds!
Conversely a warrior may strike a particular powerful or deadly blow, or else catch out his opponent with some trick or feint. This is represented by the Critical Hit rule.
When a player rolls two or more attack dice every additional roll of a 6 adds a further +1 to the Combat Score. The first roll of 6 is always taken as the highest dice roll and is used to work out the Combat Score, only additional 6's add a further bonus to that score.
COMBAT SCORE MODIFIERS
In some circumstances it will be easier or harder to defeat your opponent than others. For example, it is easier to strike at someone from above, and harder if they are behind a wall. To represent these factors the following modifiers are applied to the model’s Combat Score. All modifiers are cumulative. For example a +1, +1 and -1 is an overall +1.
-
+1 Fumble. If your opponent fumbles you automatically add +1 to your close combat score for each fumbled dice. Fumbles are explained above.
-
+1 Critical Hit. Every 6 you roll on your attack dice after the first adds +1 to your Combat Score.
-
+1 Charging. If the model charged into combat this turn then add +1 to your Combat Score.
-
+1 Higher Up. If the model is on a higher slope, stair, rampart, etc then add +1 to your Combat Score to represent the advantage gained by towering over your enemy. You don’t get this advantage just because your model is taller than his opponent. This is already taken into account by their WS, A and other characteristics.
-
-1 Encumbered. If the model is encumbered by carrying a heavy weapon or similarly large piece of equipment.
-
-1 Obstacle. If you charge against an enemy behind a hedge, wall, barricade, or other linear obstacle then he is protected to some degree by the interposing obstacle. This is represented by a deduction of -1 from your Combat Score. Note that this only applies in the turn in which you charge. Afterwards your model is assumed to have climbed over the obstacle to get to grips with his opponent.
Note that some pistol weapons have ‘to hit’ modifiers that are applied when shooting. These modifiers do not apply in hand-to-hand combat but only when shooting at a distance.
TO DAMAGE THROW
Once hits have been established determine if each hit causes damage in the same way as for hits from shooting, ie, compare the attacker’s Strength and the defender's Toughness on the Damage Chart. Refer to the Shooting section for full details.
Most pistols and close combat weapons have their own Strength value. If a model carries a close combat weapon, a hit is worked out using either the model’s value or the weapon’s value, whichever is the higher.
A model armed with two close combat weapons is free to use either or both of his weapons to strike blows against his opponent. It is assumed that warriors will fight sensibly by feinting with their worst weapon while striking with their best weapon.
SAVING THROW
Saving throws are made for armoured models that have suffered damage. This is exactly the same procedure as saving throws from shooting — refer to the Shooting section for full details.
Most pistols and close combat weapons have their own saving throw modifier. If a model carries a close combat weapon, a hit is worked out using either the model’s modifier or the weapon’s modifier whichever is the higher. A model’s saving throw modifier depends on its Strength characteristic (S) and is shown on the table below.
| Creature's Strength | Save Modifier |
|---|---|
| 3 or less | 0 |
| 4 | -1 |
| 5 | -2 |
| 6 | -3 |
| 7 | -4 |
| 8 | -5 |
| 9 or more | -6 |
MULTIPLE COMBATS
When two or more models are fighting a single enemy this is called a multiple combat. To resolve what happens the outnumbered model must fight each of its opponents one after the other in the same hand-to-hand combat round. The player whose models outnumber the lone warrior may choose which of his models attacks first and the combat is resolved exactly like a one-on-one combat.
If the outnumbered model survives he must then fight the next attacker chosen by the opposing player, but this time the enemy model rolls one extra attack dice and adds +1 to his Combat Score. Should the outnumbered model survive again he must then fight the third, fourth and any other opponents who are attacking him.
Each further opponent adds another +1 to his Combat Score and rolls an additional dice. For example a third opponent adds +2 and rolls two extra attack dice, a fourth opponent adds +3 and rolls three extra attack dice, and so on. This means it is possible to swamp a very strong opponent with sheer weight of numbers.
FOLLOW-UP
If all a combatant's opponents are slain the model may make a special follow-up move. The victor can use this special move to leap behind cover, rush forward to engage a further enemy, or to move in any way he wishes. The model may be moved up to 2” in any direction. Note that this extra move is an exception to the turn sequence in that it takes place in the hand-to-hand combat phase. If your model slays all his Opponents you may make a follow-up move regardless of whether it is your turn or your opponent’s turn.
If you use a follow-up move to engage a fresh enemy then leave the models in base-to-base contact but do not work out the hand-to-hand combat until the next hand-to-hand combat phase. The victor has time to engage his new foe, but there isn’t enough time left to continue fighting. Because they are engaged hand-to-hand, neither model may do anything until the following hand-to-hand combat phase. The model which made the follow-up move does not count the Combat Score modifier for charging.
During the follow-up move no movement penalty is imposed for crossing a wall or other obstacle because it is assumed troops make their way across such obstacles as they fight. Other terrain penalties apply as normal. Note that a model that makes a follow-up move can still move normally in its movement phase assuming it is not engaged in hand-to-hand combat. The follow-up move does not affect the distance models are allowed to move in their next movement phase; it is a bonus due to the intense bout of activity during close quarter fighting.
SQUAD COHERENCY
Models engaged in hand-to-hand combat are not bound by the Squad Coherency rule. They are allowed to be more than 2" away from the rest of their squad. Models which follow-up are also permitted to move out of the normal 2" coherency distance. However, once the engagement is over they will become subject to the coherency rules again, and must move back to within 2" of the rest of their unit as soon as possible. See the Squad Coherency rules for details.
BREAKING OFF
Models engaged in hand-to-hand combat may not move during their movement phase because it is assumed the actual fighting takes place throughout the turn. Therefore the opposing models remain locked in combat and the result is worked out during the hand-to-hand combat phase: The models cannot move away as to do so would invite their enemy to pounce and almost certainly slay them.
This is the general rule, however we allow an exception where a player feels his model is so hopelessly outclassed, or the situation is so desperate, that it is worth trying to disengage from close combat. Under these desperate circumstances a squad is permitted to disengage but its morale will be broken automatically as it turns and flees. More commonly squads are likely to be forced to disengage because they become broken due to casualties. Models with broken morale must disengage from hand-to-hand combat and flee immediately. Rules for determining morale, and for troops with broken morale, are given later.
When a warrior flees he must turn his back on the enemy and try to leap away. Perhaps the fighter is lucky enough to take advantage of a sudden lull as his enemy is thrown aside. Maybe his enemy is forced to duck to avoid a blow, giving the warrior a bare second or so to break away. It must be said that this is very risky! If the enemy recovers in time he will rush forward and attack your fighter from behind. It is possible but unlikely that a warrior on the verge of fleeing may actually score a hit on his attacker. In this case obviously the attacker's eagerness to finish his opponent has led him to drop his guard or make some other dire mistake.
A model may attempt to disengage from close combat in the following way. Work out the combat result as normal except that the model attempting to disengage counts his Weapon Skill (WS) as 0. The model may roll attack dice as normal but may not parry. This is because he has his back turned and cannot fight back effectively. If the model survives then it is moved out of hand-to-hand combat and has disengaged successfully. This is an exception to the normal game sequence as the movement takes place in the hand-to-hand combat phase. The model immediately moves 2D6" directly away from the enemy. The retreating model(s) and the squad its part of are automatically broken without recourse to a Leadership test. Note that broken troops may not attempt to rally in the same turn as they disengaged from hand-to-hand combat — see Breaking and Rallying.
EXAMPLE OF HAND-TO-HAND COMBAT
As an example of hand-to-hand combat we'll take a look at a fight between a Space Marine Sergeant, an Ork and a Gretchin. The Space Marine Sergeant is armed with a chainsword and a bolt pistol, while the Ork has an axe and bolt pistol and the Gretchin has an autogun and a knife for hand-to-hand combat.
| Model | M | WS | BS | S | T | W | I | A | Ld |
|---|---|---|---|---|---|---|---|---|---|
| Space Marine | 4 | 4 | 4 | 4 | 4 | 1 | 4 | 1 | 8 |
| Ork | 4 | 3 | 3 | 3 | 4 | 1 | 2 | 1 | 7 |
| Gretchin | 4 |
In the movement phase the Sergeant charges out of the building and into hand-to-hand combat with the Ork and the Gretchin. Neither is on overwatch, so they are not allowed to take a shot at the Sergeant as he enters combat with them. In the shooting phase the Sergeant is not allowed to fire at the greenskins because he is engaged in close combat.
Diagram 1. We now come to the hand-to-hand combat phase. The Sergeant has to fight both the Ork and the Gretchin this phase, one after the other. The Ork player is allowed to choose which of his models will fight first and he chooses to throw in the Gretchin in the hope that it will distract the Sergeant long enough for the Ork to bash him over the head!
The Sergeant has an Attack value of 1. This is increased by a further +1 to 2 because he is armed with two close combat weapons (bolt pistol and chainsword). This means that the Sergeant rolls two attack dice, one for each attack. His Weapon Skill is 4, and he is charging so he's entitled to the +1 modifier from the Combat Score modifiers for charging, giving him a total bonus of (4+1=) 5. So, the Sergeant rolls two attack dice and adds +5 to the score of the highest dice roll.
The Gretchin also has an Attack value of 1, but this is not increased as he only has one close combat weapon (a knife, as the auto-gun cannot be used in hand-to-hand combat). The weedy Gretchin's Weapon Skill is 2, and he is not entitled to any modifiers, so the Ork player will roll one attack dice and add +2 to it.
The Sergeant player rolls a “6” and a ‘2’. He adds +5 to the highest dice roll, for a Combat Score of 6+5=11. The Ork player rolls a ‘4°. He adds +2 to it for a final Combat Score of 4+2=6. The Sergeant has won the combat by 5 points and so scores five hits on the unfortunate Gretchin.
The Space Marine player can choose which of his model's close combat weapons scored the hits, but as the chainsword and bolt pistol both have a Strength of 4 and a -1 save modifier it does not matter which is used. The Space Marine player rolls for each hit on the Damage Chart and scores three wounds. The Ork player can't make the Gretchin's armour save against the wounds because the Sergeant s weapons both have a -1 save modifier. The Gretchin dies noisily.
Diagram 2. The Sergeant now turns his attention to the Ork, who is a much tougher opponent. He has two hand-to-hand combat weapons (axe and bolt pistol), a WS of 3 and he now gets a +1 modifier and rolls an extra dice for being the Sergeant’s second opponent in the same turn.
The Sergeant rolls a ‘1° and a ‘4’. He takes the 4 and adds his bonus of +5 for a total Combat Score of 4+5=9. The Ork rolls a ‘5’, a ‘3’, and a ‘2’, obviously he picks the 5 which with his bonus of +4 also totals 9. In the case of a tie the model with the highest Initiative scores a hit, which would be the Space Marine. But hold on just a minute! The Sergeant player rolled a ‘1’, which counts as a fumble, and which the Ork is allowed to add to his score. This takes the Ork’s total Combat Score to 5+4+1=10, so the Ork will win the combat by 1 point and score a hit!
Fortunately the Space Marine player has seen this coming and declares that he will parry with his chainsword and force the Ork to reroll the dice which scored 5. The Ork player does so and rolls a ‘3’ which takes his Combat Score down to 3+1+4=8, so the Sergeant wins by 1 point and hits the Ork once.
The ensuing damage roll wounds the Ork, who fails his saving roll and is eliminated. The Sergeant is now allowed to make a follow-up move of up to 2". After glancing round for more opponents and finding none he uses the move to get back into cover in the building.
BREAKING & RALLYING
Unfortunately, the troops under your command are not infallible. There will come a time when even the sturdiest warriors lose interest in fighting the enemy and start becoming a lot more concerned with getting into cover or running away rather than shooting back. Troops which have entered this shameful jelly-like state become broken and won't follow orders or fight until they rally on their own or with the help of some inspirational character.
THE BREAK TEST
A squad has to take a Break test if it loses 25% or more of its current Strength to shooting and/or hand-to-hand combat during a single turn. The test is taken as soon as the squad has suffered enough casualties to warrant it and only one test is ever taken per turn.
A Break test is taken using the squad leader’s Leadership characteristic or the highest Leadership characteristic in the squad if the leader is dead. The test is made by rolling 2D6. If the score is equal to or less than the Leadership value the test has been passed and the squad may continue to fight as normal. If the score is greater than the squad’s Leadership value the test has been failed and the squad becomes ‘broken’ as described below. Place a Broken counter next to the squad as a reminder of their miserable status.
For example, a squad of five Space Marines suffers one casualty during the Orks’ shooting phase and another during the hand-to-hand combat phase and takes a Break test immediately in the hand-to-hand combat phase for losing 25% of its current Strength in one turn. Rolling 2D6 against the sergeant's Leadership characteristic of 8 the Space Marine player rolls a 7 and passes his Break test.
Remember that only one Break test is ever taken by a squad per turn. So, in the example given above, even if another Space Marine were killed in close combat after the test had been made, the surviving Space Marines would not have to test again because they had already made one Break test that turn.
BROKEN TROOPS
Broken troops may no longer move, fire, fight in hand-to-hand combat or use psychic powers. In short, they may not do anything other than remain stationary or move as described below.
A broken squad will remain where it is and ‘hide’ at the start of its next turn if it is in cover. If not in cover broken troops will immediately flee 2D6" towards the nearest cover away from any enemy models. After this initial, out of sequence, move, broken troops may not move again unless they are still in the open at the start of their turn, and if this is the case they will flee another 2D6" towards cover. If a broken squad is attacked in hand-to-hand combat or a creature which causes fear or terror moves within 8" it will flee another 2D6". See the section on Psychology for more details on the effects of terror-causing creatures.
Fleeing troops ignore terrain penalties but may not enter impassable terrain. Some difficult or very difficult terrain such as marshes may warrant a 1 in 6 chance of fleeing troops becoming casualties if they move into it, but this is left to the players” discretion.
BROKEN TROOPS IN HAND-TO-HAND COMBAT
Troops may break while engaged in hand-to-hand combat or be charged and engaged in combat once they are already broken. If this occurs the enemy will receive ‘free hacks” at the broken troops as described in the hand-to-hand combat rules. Surviving broken models will flee 2D6" directly away from the enemy.
THE SPACE MARINE SHAKEN RULE
The indomitable Space Marines of the Imperium are legendary for their incredible bravery. Even in the face of devastating casualties and hopeless odds they will hold out to the last and only grudgingly withdraw while there is a chance of victory. However this does not mean that they will hurl themselves at the enemy regardless of danger — Space Marines are quite aware of their own worth and will not throw away their lives in displays of futile bravado. To represent the Space Marines” high morale special rules apply to them when they take Break tests.
Space Marines still take break tests like other troops but if they fail they do not break like other troops. Instead of breaking Space Marines become ‘shaken’. This means that they may not move towards the enemy but otherwise they can shoot, fight in hand-to-hand combat and use psychic powers normally. If they are unable to move without approaching closer to the enemy (if they are surrounded, for example) then they may not move at all other than to turn around to face their enemy. As long as they are not moving closer to the enemy Space Marines are free to move as they like, so they can move to cover for example or off the edge of the table if the situation warrants it.
If shaken while engaged in hand-to-hand combat the same rules apply. This means that any shaken Space Marine squad is unable to use follow-up moves to engage new opponents. Shaken Space Marines that kill their personal opponents can still use follow-up moves to attack enemy models which are already fighting other Space Marines or to move into cover as normal. This reflects the fact that even shaken Space Marines would be willing to pitch in and help their comrades.
Space Marines that are already shaken and who fail another Break test become broken and follow the normal rules for broken troops. When Space Marines successfully rally they lose their shaken or broken status immediately and may act normally in their next turn.
RALLYING
During the rally phase a player can attempt to bring broken troops back under control. A squad may not attempt to rally if:
- It is not in or behind cover.
- It was forced to flee during the same turn for any reason.
- If the closest other friendly models are also broken.
In order to rally a squad must pass a Leadership test by rolling equal to or under its Leadership characteristic on 2D6. If the test is passed the squad pulls itself together and is able to fight, shoot, move and use psychic powers again as normal. The squad’s Broken counter is removed and it may hold its collective head high again. If the Leadership test is failed the squad continues to grovel in the dirt until it gets another rally attempt at the end of the player’s next turn.
In addition to the restrictions given above a squad may not rally at all if it has been reduced to 25% or less of its starting strength. When a squad reaches such a devastated state the tattered remnants are removed as casualties if the squad is broken.
INSANE BRAVERY AND CRAVEN COWARDICE RULES
When a squad attempts to rally it is assumed that its leader is inspiring his troops with some stirring words of defiance, dire threats or a combination of both. On occasion a squad may be inspired to such a level of reckless bravery that they turn and charge back into the fight without a moment’s hesitation, attempting to expunge the stain upon their honour with a welter of enemy blood. On the other side of the coin a few ill-chosen words may shatter what remains of the squad’s morale, reducing the troops to a tattered mob of terrified individuals fleeing pell-mell from the battlefield.
To represent these extremes two special rules apply to rally rolls for broken squads (not for shaken Space Marines). If the 2D6 roll for rallying scores a 2 the squad is truly inspired and leaps straight back into action without pause! The squad may immediately take a normal turn so they may, for example, move and fire, go into overwatch or charge into hand-to-hand combat (but not fight that turn). After this initial burst of activity the squad acts as normal from the player’s next turn onwards and may be subsequently broken again.
On the other hand, if the 2D6 rally roll is a 12 the squad is destroyed as its cohesion disappears completely and individual members scatter to hide in the deepest, darkest holes they can find. Though the troopers are not dead there is no longer any chance of rallying them and they will play no further part in the battle. Remove the remaining models in the squad as casualties.
PSYCHOLOGY
In the heat of battle troops often don’t respond as you, their commander, might want them to. Faced with terrifying supernatural foes their courage may fail, or they may simply be too dim to understand the orders they have been given. The hatred engendered by age-long feuds can overwhelm military discipline and leave troops overcome by bloodlust against their ancestral foes. Certain warriors can be so overwhelmed by berserk fury that they will charge into battle regardless of any plan or order.
As commander of your army it is your duty to know about these things and take them into account in your plans. If you do not you may find that you are defeated before you even begin!
The psychology rules represent these factors in the game and call upon the player to make occasional tests to determine whether his troops are affected by adverse psychology. All psychology tests are made in the same way, so we'll describe the procedure first before we look at the individual psychological factors.
When taking psychology tests roll 2D6 and compare the result to your Leadership (Ld) value. If the result is less than or equal to the unit's Leadership score the test is passed and all is well. If the result is greater than the unit’s Leadership then the test is failed.
Note that in the case of cavalry it is the rider’s Leadership that is used and not the mount’s. A psychology test is usually taken by a whole squad at one time. Individual heroes or other characters may also be called upon to take psychology tests on occasions.
FEAR
Fear is a natural reaction to huge monsters or unnerving situations. Creatures that cause fear are indicated in the Bestiary section and include such large and disturbing monsters as Tyranids as well as supernatural horrors such as daemons. Some creatures may fear particular weapons such as flamers or Tyranid bio-weapons for example. A squad or individual character model must take a Fear test in the following situations:
-
If it is charged by an enemy that it fears then it must make a test to overcome its fear. If successful then the unit can fight as normal. If the unit fails to overcome its fear then the unit will automatically break if outnumbered by the charging enemy. If the enemy does not outnumber the squad it will fight as normal, but halves its WS (rounding up) in the first turn of combat and may not fire overwatch shots at the charging enemy. Note that this test is taken once the enemy declares his charge and is found to be within his charge distance.
-
If it wishes to charge an enemy that it fears then it must take a test to overcome its fear. If the test is failed the squad may not charge and must remain stationary for the turn. The squad or model may still fire normally.
-
If it is hit by a weapon that it fears it must take an immediate Break test regardless of the casualties inflicted by the weapon.
-
A squad outnumbered by an enemy that it fears in hand-to-hand combat must take a Break test at the end of each hand-to-hand combat phase even if it did not suffer 25% casualties in the combat. If the squad is not outnumbered by its fearsome opponents it suffers no further penalties for the duration of the combat but must still take Break tests for every 25% casualties suffered as normal.
TERROR
Some creatures are so huge and threatening that they are even more frightening than those described by the fear rules. These creatures cause terror. Troops confronted by monsters or situations that cause terror must test to see if they overcome their terror. Should they fail they will be completely overwhelmed with horror and reduced to gibbering wrecks.
Troops only ever test for terror once in a battle. Once they have overcome their terror they are not affected again.
If a creature causes terror then it automatically causes fear as well, and all the rules described above apply. However, you never have to take a Terror and a Fear test from the same enemy or situation — just take a Terror test: if you pass the Terror test then you automatically pass the Fear test too. As you only ever take one Terror test in a battle, any subsequent encounters with terrifying monsters or situations will simply count as fear.
-
A squad or individual character model must test to overcome its terror if charged by or wishing to charge an enemy that causes terror.
-
A squad or individual character model must test for terror at the start of its turn if there is an enemy model which causes terror within 8".
Remember that only a single test is ever made for terror by any squad or individual character model during the whole game, whether it is made because of a charge or because the unit finds itself within 8" of a terror-causing monster.
A unit which fails its Terror test will break immediately, exactly as if it had failed its Break test for casualties. In addition, the broken models will flee 2D6" directly away from the terrifying creature regardless of whether they are in cover or not.
FEAR AND TERROR LIABILITIES
Obviously a large monster is less likely to suffer from fear or terror. There is no way a huge Greater Daemon is going to be scared of a Tyranid warrior! The following rules apply:
A creature that causes fear is not affected by an enemy that causes fear. Faced with an enemy that causes terror, a fear-causing monster only suffers fear, not terror.
For example, an Ogryn causes fear and a Greater Daemon causes terror. The daemon is not at all worried by the Ogryn, but the Ogryn fears the daemon.
A creature that causes terror is not affected by fear or terror at all.
It sometimes happens that a squad of perfectly ordinary troops is led by a mighty hero or a creature which causes fear or terror. In this situation you must test for fear/terror if a charge will result in you fighting the hero or creature in question.
In the case of terror you must also test if you are within 8" of the creature at the start of your turn, but not necessarily because you are within 8" of the squad it is with. If you are charging a squad in such a way that you won't have to fight a fearsome creature in it, then you do not have to test. Basically this is common sense — if you don't have to confront the beast then no test is required.
STUPIDITY
Many large and powerful creatures are unfortunately rather stupid. Even some otherwise quite intelligent creatures act stupidly now and again because they are confused or distracted, or perhaps because they are drugged or have been knocked insensible. The stupidity rules represent the sort of slow wittedness or dumb behaviour that most animals instinctively avoid, but which some especially stolid or stubborn beasts may be prone to. Creatures which are stupid are indicated as such in the Codex Imperialis.
Stupid creatures must make a test at the start of their turn to see if they overcome their stupidity. Make a test for each unit of stupid troops. If you pass the test by rolling less than their Leadership on 2D6 then all well and good — the creatures behave reasonably intelligently and the player may move and fight with them as normal. If the test is failed then all is not well and the following rules apply until the start of the creatures’ next turn when they must test once more to see if they are overcome by stupidity.
-
If already in hand-to-hand combat stupid creatures are liable to suddenly stop fighting. Roll a D6 for each stupid creature that’s fighting in hand-to-hand combat. If the result is 4-6 the creature fights; on a roll of 1-3 it forgets what it’s doing and rolls no attack dice and makes no parries though it still counts its full WS (instinct!).
-
If not in hand-to-hand combat the creatures momentarily forget what they are doing. Roll a D6 to determine how they move this turn. This is compulsory movement and so occurs before other movement (see the Movement section).
-
1-3: Move each stupid creature its normal move in a random direction determined by rolling the scatter dice. Any enemy troops encountered are automatically engaged in hand to hand combat (though the creatures may not actually fight, see above).
-
4-6: The creatures stand around in a confused and ineffective manner. They will do nothing for the remainder of the turn.
- Creatures cannot shoot weapons or use psychic powers while they are suffering from stupidity.
Creatures affected by stupidity are quite unaware of anything happening around them, such is their state of confusion. While overcome by stupidity they ignore all further psychology tests. This means that stupid creatures cannot be affected by terror, fear, etc, but they can still take and fail a Break test exactly as normal. Broken troops are not affected by stupidity until they have rallied, after which they must take Stupidity tests at the start of each subsequent turn.
It sometimes happens that a cavalry model will be riding a stupid creature. If a rider' s mount is stupid then he will have to test for stupidity at the start of his turn, but the rider's Leadership characteristic is used rather than that of the mount. If the test is failed the rider is obliged to hang on while the creature behaves in whatever bizarre manner the rules dictate, but the rider can fight normally if he gets the opportunity. A rider on a mount suffering from stupidity does not add the mount's attack dice to his own if the creature does not fight, see 1. above.
FRENZY
Certain warriors can go into a fighting frenzy, a whirlwind of destruction or raging fury in which all concern for their personal safety is ignored in favour of a blood-letting, flesh-tearing attack. Many of these frenzied warriors are drugged or tranced, and have worked themselves up into a frenzy with loud chanting and screaming.
Frenzied troops will automatically go into a furious berserk state if there are enemy within charge reach at the start of their turn, and will remain frenzied until they are broken in hand-to-hand combat, or until there are no enemy within charge reach.
If you wish you can try and restrain troops by making a restraining test to bring them under control at the start of your turn, but you don't have to do this unless you want to. If you want to restrain frenzied troops roll 2D6 against their Leadership just like any other psychology test. If you roll equal to or less than the unit’s Leadership you are successful and the unit is not frenzied for that turn and not affected by the following rules.
-
Frenzied troops must charge the enemy if they are within charge distance. This counts as compulsory movement so it is done before normal movement and charges as explained in the rules for movement.
-
Frenzied troops fight with double their normal number of attack dice in hand-to-hand combat. Troops with one attack therefore roll two dice, troops with two attacks double up to four and so on. Note that this is double the Attacks characteristic shown on the creature’s profile, don’t add the bonus for using two weapons and then double it!
-
Frenzied troops cannot make parries in hand-to-hand combat, they are simply too worked up to think about fancy swordplay.
-
Frenzied troops always use their 2" follow-up moves to get closer to the enemy or, ideally, to engage another foe in hand-to-hand combat whether the player wants to or not. Unlike other troops, they may not use their follow-up moves to move into cover as they are far too crazed with blood lust.
-
While frenzied, troops are not affected by other psychology. They are immune to fear, terror etc, and do not have to make these tests.
If frenzied troops are broken in hand-to-hand combat their frenzy is automatically ended. They flee exactly like other troops. Should they subsequently rally they may continue to fight but are not affected by frenzy for the remainder of the battle. Their exuberant, crazed frenzy has been beaten out of them and they continue to fight just like other troops.
HATRED
Hate is a powerful emotion and the galaxy of the 41st millennium is full of hatred and rivalry, grudges borne over tens of centuries, of racial animosity bordering on madness, and of irreconcilable feuds leaving generations of dead in their wake. Some races hate other races with such bitter conviction that they will fight almost to the death rather than flee from them. The following rules apply.
-
Troops who hate their adversaries take any Break and Rally tests with a Leadership value of 10.
-
Troops fighting hand-to-hand combat with a hated foe may re-roll any attack dice when they first attack. This bonus only applies in the first turn of combat and represents the troops venting their hatred on the foe. After the first round of blood-mad hacking they lose some impetus and so fight as normal.
-
Troops in hand-to-hand combat who hate their enemy must always use their 2" follow-up moves to get closer to the enemy or to engage another hated foe in hand-to-hand combat.
HEROIC CHARACTERS
Heroes are exceptional members of their race. They include inspired leaders, extraordinary fighters, those with special skills and the possessors of secret knowledge. Many heroes are highly placed commanders, officers and leaders. Heroes have a tendency to rise quickly to positions of respect and prominence, especially when they are members of a warrior culture. On the other hand a hero might be a stalwart individual, perhaps a tough veteran soldier or a grizzled frontiersman. Heroic characters are a vital and exciting part of your forces. A hero is capable of fighting with the strength of many ordinary troops, and his leadership inspires courage in others around him.
HEROES
Heroes are individual models that represent heroic leaders, people who are tougher, meaner and more powerful than the average members of their race. Perhaps they are faster than a typical member of their race, maybe they are stronger, more skilled with weapons, or they could be natural leaders with the power to inspire others to greater deeds.
In reality an individual could have almost any combination of unique abilities, but on the tabletop we make three broad divisions which are quite sufficient for our purposes: Champions, Heroes, and Mighty Heroes. In some cases they may be known by different names. Ork characters, for example, are called Bosses, Big Bosses and Warbosses.
Of course, these three types of valiant individual cannot really represent every nuance of distinction between mighty warriors, but it does enable us to fight with comparably powerful characters, whether they are stalwart Space Marines or saturnine Champions of Chaos.
Champions, Heroes and Mighty Heroes have superior characteristic values as shown on the chart below.
| Champion | - | +1 | +1 | - | - | - | +1 | - | +1 | | Hero | - | +2 | +2 | +1 | +1 | +1 | +2 | +1 | +1 | | Mighty Hero | - | +3 | +3 | +1 | +1 | +2 | +3 | +2 | +2 |
For example, in the case of men the values are as shown below.
| M | WS | BS | S | T | W | I | A | Ld | |
|---|---|---|---|---|---|---|---|---|---|
| Human | 4 | 3 | 3 | 3 | 3 | 1 | 3 | 1 | 7 |
| Champion | 4 | 4 | 4 | 3 | 3 | 1 | 4 | 1 | 8 |
| Hero | 4 |
In the case of Orks the values are as follows. Note that Orks and Gretchin have different names for the three types of character, but the values are exactly the same.
| M | WS | BS | S | T | W | I | A | Ld | |
|---|---|---|---|---|---|---|---|---|---|
| Ork | 4 | 3 | 3 | 3 | 4 | 1 | 2 | 1 | 7 |
| Ork Nob | 4 | 4 | 4 | 3 | 4 | 1 | 3 | 1 | 8 |
| Ork Big Boss | 4 |
As you can see from these examples the three types of character are quite different.
Champions are brave fighters, with superior weapon and ballistic skills, but most importantly they are superior leaders. Champions are therefore useful individuals when it comes to inspiring demoralised troops and keeping them in the fight.
Heroes are more resilient and even better fighters: they will fight on if they suffer a wound and provide the extra leadership of a champion as well.
Mighty Heroes are even better fighters and can take even more damage before they are slain, but their greatest value is their inspirational leadership and the extra confidence they instil in others. Although the leadership bonus may seem quite small in relation to the value of a typical warrior (9 compared to 7 for a human warrior for example) this is a BIG difference in game terms, as you will quickly discover.
PSYKERS
Psykers and psychic power are an important part of Warhammer 40,000. Emergent psykers are appearing in ever increasing numbers and the limitless energies of the warp offer either mankind's ultimate salvation or eternal damnation. In battle psykers can make all the difference between victory and defeat.
In the Imperium psykers are rigorously tested and screened, those who are strong enough to resist the temptations of abomination are permitted to live so that they can fight the Emperor's wars, the weak die.
The Eldar, whose psychic nature led to the ultimate collapse of their civilisation, have perfected methods of manipulating warp energy too subtle for the daemons of the warp to become aware of. Even Orks, low-minded as they are, have Weirdboyz who can blast the enemy with raw psychic energy.
There are four levels of psyker: Psyker, Psyker Champion, Master Psyker, and Psyker Lord. As with heroes, these four types are not intended to represent every possible variation in an individual's abilities. They are useful categories that enable us to match comparable psykers against each other.
| M | WS | BS | S | T | W | I | A | Ld | |
|---|---|---|---|---|---|---|---|---|---|
| Psyker | - | - | - | - | +1 | - | +1 | - | - |
| Psyker Champion | - | +1 | +1 | +1 | +1 | +1 | +1 | - | - |
| Master Psyker | - |
For example, in the case of men the values are as shown below.
| M | WS | BS | S | T | W | I | A | Ld | |
|---|---|---|---|---|---|---|---|---|---|
| Human | 4 | 3 | 3 | 3 | 3 | 1 | 3 | 1 | 7 |
| Psyker | 4 | 3 | 3 | 3 | 4 | 1 | 4 | 1 | 7 |
| Psyker Champion | 4 |
The rules for psykers and psychic powers are covered in the Psionics section of the rulebook.
SPECIAL CHARACTERS
We have invented three types of hero for convenience and to provide comparability between adversaries, but this does not mean there are no individuals whose abilities vary wildly from the values we have given for heroes.
Although we are not concerned with the rules for special characters here it is worth bearing in mind that they can be incorporated into your battles if you wish. For example there are the mighty war leaders such as the infamous Ork Warlord Ghazghkull Uruk Thraka, the celebrated Eldar Exarch Yarlen Fireblade, Blood Angel Space Marine Commander Dante, and many more. There are also important military leaders and high ranking individuals such as Imperial Inquisitors and Squat Warlords.
All of these special characters are individual and quite different, and so are represented by their unique characteristics. Some are therefore better fighters than others, but some are better leaders, while many carry ancient technological artefacts or possess unique individual skills.
The details and extra rules for special characters are not given here in the Warhammer 40,000 game – there are simply too many and space does not permit it. Details of heroic individuals will be published in Warhammer 40,000 supplements and White Dwarf magazine as appropriate.
CHARACTERS AS LEADERS
Most characters, whether they are heroes or psykers, move and fight as individuals, they are not organised into squads. However, there is one exception to this. Champions (not Psyker Champions) are always members of a squad and always fight as part of it, moving and maintaining coherency with the rest of their squad. Champions are squad leaders, and comrades look up to them and take pride in their prowess. None-the-less, the Champion is a member of the squad like any other trooper. A Champion fights with his squad for the entire battle and cannot leave it.
Except for champions, character models can fight on their own as individuals, although they are free to join squads of ordinary troops and lead them if you wish. This is quite in keeping with the role of characters as high ranking leaders moving from squad to squad and exhorting them to greater efforts in the face of adversity. Note that all psykers are individual characters and can fight on their own — Psyker Champions do not need to fight with a unit as champions do.
To join a squad a character has only to move so that he is within 2" of a member of it — normal squad coherency distance. A character who has joined a squad may leave again during any subsequent movement phase. He may not join and leave the same squad in a single turn, but he may leave one squad and join another on the same turn if you wish.
A character may not leave a squad that is affected by psychology, which has declared a charge or which is engaged in hand-to-hand combat. If a squad declares a charge any characters that have already joined it must charge too and take part in the resulting combat. This means that once hand-to-hand fighting has begun a character will not be able to leave the squad he has joined until all the fighting is over.
A character may always choose to charge into hand-to-hand combat alone if he wishes, leaving the squad he has joined behind while he close assaults an enemy tank or battles an opposing hero or performs some similarly heroic feat.
CHARACTERS AND SQUADS
A squad accompanied by a character may use the character’s Leadership value for any Leadership tests. This is a very important rule, as it provides squads of poor troops with the leadership they need. This is especially true of Gretchin, for example, which are all but useless without a character to lead them. Leadership is used for psychology tests, Rally tests and Break tests.
If a squad is joined by several characters use the highest Leadership amongst them. While the character is with the squad he is considered to be part of the squad in all respects. If the squad is broken then he is broken too and must flee with them if they are in the open or go to ground and hide if they are in cover.
If the squad is forced to charge because of frenzy or forced to follow-up because of hatred, the character must move with the squad, but he does not benefit from the bonuses for frenzy or hatred unless he is affected by it himself. This means a character does not go into a frenzy just because he is with a squad that can do so, although he can accompany them as they charge. If a squad is affected by stupidity the character must move as the squad moves, although he can always fight normally.
Remember that a character cannot leave a squad when it turns stupid and stands still or moves stupidly; such a squad is bound by a psychology rule and the character must therefore stay put. In reality he is trying to goad the stupid creatures into activity, or perhaps he is pinned down or hemmed in by the unthinking brutes and unable to move of his own volition.
If a character is liable to a psychological rule which doesn't apply to the squad he is with, he must make any appropriate tests on his own and will react on his own. This may cause the character to separate from the squad. For example if he is obliged to charge because of frenzy, compelled to follow-up because of hatred, or forced to move or stand immobile due to stupidity.
MOVING CHARACTERS
If a character is travelling on his own he is free to move as he wishes. He must take into account any penalties for crossing terrain and obstacles as normal, but he is able to move entirely independently and is not otherwise restricted by squad coherency for example.
SHOOTING AT CHARACTERS
If a character is within coherency distance of a squad of other models of comparable size to himself or larger, then he may not be picked out as a specific target by the enemy, including enemy characters. In reality it is difficult amidst the confusion of battle to single out a target in this way, so any shots at the squad are worked out against the ordinary troopers and not the character. If the squad takes hits then they may be randomised in any suitable way. For example, in the case of two ordinary models and a character there is a 1 in 3 chance of hitting the character so roll a D6 for each hit scored. Any roll of 1, 2, 3 or 4 shows an ordinary model has been hit; a roll of 5 or 6 indicates the character is hit. Roll to wound and make armour saving throws separately against characters as these individuals will often have a superior Toughness to their fellows and usually better armour as well.
If a character model is more than 2" from a squad then he may only be picked out as a target by enemy shooters if he is the closest target. This means that characters can move around behind the battlelines without attracting an unrealistic and unreasonable amount of enemy fire.
WARGEAR CARDS
Heroes often have access to special equipment and weapons normally unavailable to ordinary troopers. This may be in the form of rare and valuable grenades which are too expensive to mass produce, ancient technological devices from lost civilisations, customised weapons which the character has had built for him and so on. To represent the specialised equipment that characters can be expected to carry you are allowed to select a number of Wargear cards for each character. Each card describes a weapon, grenade, force field etc. along with rules on how to use it. Each card has a points value for that piece of wargear which is added to the points value of the character carrying it. Choose the wargear cards you want for your characters and write them down on your army’s roster sheet.
Of course characters cannot simply carry an unlimited number of Wargear cards, they are limited to the maximum number shown on the chart below. Remember that although the chart refers to Champions, Heroes and Mighty Heroes the restrictions apply equally to Ork bosses, Eldar Exarchs and so forth.
| Character | Maximum number of Wargear cards |
|---|---|
| Champion/Psyker, Psyker Champion | 1 |
| Hero/Master Psyker | 2 |
| Mighty Hero/ Psyker Lord | 3 |
If a character is killed his wargear is considered destroyed with him so it may not be salvaged by anyone else. Equally, characters may not pass wargear from one to another during a battle. This general rule might be broken in certain scenarios where the objective of the game is to capture some device or piece of equipment, but this would be an exception.
COMMANDERS
Every army has a heroic character to lead it. We refer to this character as the commander, although this is only to distinguish him from other heroes. He might be an Ork Warboss, an Eldar Farseer, an Imperial Guard colonel, or whatever.
The commander of your force is always the character with the highest Leadership value. If several characters have the same Leadership value then choose one to be the commander. He is in command of the whole army and, more than any other model, represents you personally. The commander is an important character because he can inspire others to fight on where otherwise they might turn and flee.
Any squad with models within 12" of the commander model may use the commander’s Leadership value instead of its own when making a Leadership-based test. This means that a squad near the commander can use his superior Leadership when testing for fear, terror and other psychology, or for Break tests. A squad which is broken may use the commander’s Leadership when attempting to rally if they are within range.
However if such an exalted individual as the commander falls in battle a wave of panic will sweep across his troops, particularly those close by. To represent this any friendly troops within 12" of a commander who is slain must make an immediate Break test, even if they have already taken a Break test during the same turn.
THE BATTLE STANDARD
A commander may be accompanied by a character carrying either his personal banner or the battle standard of the army itself. The battle standard forms a rallying point for the army, a central focus of the army’s determination and martial pride. This battle standard does not have to move along with the commander but it is most useful when he is close by. An army’s battle standard is usually carried by a heroic individual and all the rules for character models apply.
Any squad within 12" of the battle standard may retake a failed Break test. The squad is only allowed to retake this test once per turn. If the commander is within 12" of the unit as well then it will also benefit from being able to use his Leadership value. These two factors combined: the commander’s Leadership and the opportunity to re-take a failed throw, mean that units near to the commander and the battle standard will tend to hold their ground come what may.
PSIONICS
Psionics are a real and very potent force in the Warhammer 40,000 universe. Most of the intelligent races know about psionics and a small percentage of individuals have evolved psychic abilities. These gifted individuals are called psykers by the enlightened, or warlocks, sorcerers, magi or more derisory names by the superstitious masses. They are mostly feared and hated for their ability and, within the Imperium at least, rigorously suppressed.
Individuals able to use psychic powers are indicated in the Warhammer 40,000 Codex army lists. As well as Imperial Psykers, Ork Weirdboyz, Eldar Warlocks, and other obvious examples, some other creatures are able to use psychic powers too. Various daemons, for example.
Psychic energy is thought to be drawn from the parallel realm of energy known as warp space, the same medium through which starships travel between worlds. Certainly uncontrolled psykers pose a terrible threat to humanity as their open minds can be used as a gateway into the material universe by the hungry, daemonic inhabitants of the warp. This is why they are so zealously rooted out and monitored, for just one rogue psyker can bring about the destruction of an entire world.
At the time of writing we have in preparation a complete set of rules for psionics with many special powers for each race. Because there are so many powers, and because the full rules for psionics are very detailed, we do not have space to print them all in the Warhammer 40,000 game. A supplement, Dark Millennium, will cover the Psionics rules in depth, and will also give rules for many new items of wargear and more Warhammer 40,000 vehicles. Meanwhile, we have prepared the shortened version of the Psionics rules which is given here.
PSYKERS
Psykers are able to draw upon the unlimited energy of warp space and bend it to their will. Some can use it to summon devastating fire storms, others to project protective psychic shields. More powerful psykers can wield the energies of warp space in many different ways at once.
To represent their different potentials psykers are rated according to the number of mastery levels they have — the higher the mastery level the better the psyker. A lowly Adeptus psyker might have a mastery level of 1 whereas a Genestealer Magus or Inquisitor might have a mastery level of 3 or 4. Most psykers have a mastery level from 1 to 4, equating to the four levels of psyker already explained in the Characters section. The mastery levels of the different types of psykers is shown below.
| Psyker Class | Mastery Level |
|---|---|
| Psyker | 1 |
| Psyker Champion | 2 |
| Master Psyker | 3 |
| Psyker Lord | 4 |
PSYCHIC POWERS
At the start of the game each psyker may be given one psychic power for every mastery level. A psyker with a mastery level of 1 can choose a single power, a mastery level 2 psyker can choose 2, and so on. Different characters can choose the same power if you wish. There are six different psychic powers, and these are listed below. When you choose powers for your psykers you will have to make a separate note of which powers they have.
THE PSYCHIC PHASE
During the psychic phase both players may employ psychic powers. The psychic phase is therefore an exception to the normal turn sequence in a similar way to the hand-to-hand combat phase.
The player whose turn it is nominates a psyker and uses one of his powers. The opposing player then does the same. The first player then nominates another psyker and uses one of his powers. Play alternates in this way until every psyker who is able to do so has used one power. Note that a psyker may only use one power per turn regardless of how many powers he has.
Powers do not work automatically. When a psyker uses a power roll a D6. If he scores the required value then the power takes effect. If he does not roll the score needed then he has failed. A failed power has no further effect.
Psykers of mastery level 2 or more add a bonus to their dice score when rolling to work. Level 2 adds +1, level 3 adds +2, and level 4 adds +3. However, regardless of any bonus, a dice roll of 1 is always a failure — success is never 100% assured, even for a Psyker Lord.
POWERS
PSYCHIC SHIELD. Works on a 3+. A shadow forms around the psyker’s body. Any attacks which touch this area of darkness may be deflected. A character can carry only one psychic shield at a time and a note must be made to indicate its presence.
Should the psyker suffer one or more wounds from shooting or hand-to-hand combat then roll a D6 for each wound. A wound is negated on the D6 roll of a 3 or more. Normal save modifiers for armour do not apply.
Should the Psyker suffer wounds from a psychic attack (eg Hellfire or Purge Psyker), or should he be killed outright by a psychic power (eg Destroy Mind), then the shield will negate the attack completely on the D6 score of a 4+. When used to save against a psychic attack the psychic shield is automatically negated itself.
TELEPORT. Works on a 4+. The psyker glows brightly and then fades away, reappearing some distance away. A psyker cannot teleport into a space too small for him to occupy, nor into an enclosed vehicle or building.
The psyker model may be moved up to 4D6" away anywhere the player wishes. The model can be moved into hand-to-hand combat, in which case he fights as normal from the following hand-to-hand phase and counts as charging in the first phase.
HELLFIRE. Works on a 4+. A mighty ball of fire erupts from the ground near to the psyker, engulfing everything within its fiery compass.
Take a 2" circular blast marker and place it anywhere within 24" of the psyker. Note that it is not necessary for the psyker to be able to see his target. Any model touched by the Hellfire automatically suffers a single Strength 4 hit with a -1 armour save modifier.
DESTROY MIND. Works on a 5+. The psyker directs a beam of mental force against a single enemy in an attempt to destroy him in a battle of wills.
Choose a single enemy model within 24". It is not necessary for the psyker to be able to see his target, and he may therefore direct his attack against a vehicle crewman, a dreadnought’s operator, and so on. The target must immediately pass a test against its Leadership on 2D6 (in the same way as a Break test). If the target passes it is unharmed. If the target fails it is immediately destroyed regardless of the number of wounds, armour, etc.
PURGE PSYKER. Works on a 5+. This power allows the psyker to engage another enemy psyker in a supreme test of psychic power.
The player chooses any enemy psyker on the battlefield. The player rolls 2D6 and adds his psyker’s mastery level. The enemy player does the same. The highest score is the winner. If the player who used the Purge Pysker power wins then the enemy loses 1 wound for each point of difference in their scores. If the enemy wins, or if the score is a draw, then there is normally no effect. However, if the enemy’s score is double the player’s own score then his own psyker sustains D6 wounds from psychic feedback.
POWER VOMIT. Works on a 4+. Only Ork Weirdboyz can use a Power Vomit. The Weirdboy hurls a ball of fluorescent green psycho-plasma from his churning innards.
Draw a straight line 18" from the Weirdboy. Any models that lie under the line are struck by the Power Vomit and sustain an automatic Strength 5 hit with a -2 save modifier. The Power Vomit will pass through any target, even if it causes no damage. Its progress is not blocked by scenery or buildings, the psychic energy automatically passes right through them.
FORCE WEAPONS
Force weapons are specially attuned to psykers so that they act as a conduit for psychic energy. A serpentine pattern of crystalline matrices channels the force of the psyker’s mind into the blows he strikes, more often than not rending his opponents apart with a flash of energy and the stink of ozone. Force weapons are exceedingly rare and many are of unknown origin or manufacture. Force weapons appear in many different guises, the most common being rods, axes and swords.
A psyker equipped with a force weapon is a fearsome opponent, especially for the denizens of the warp who are particularly vulnerable to the force weapon’s bite. When a psyker using a force weapon scores hits in hand-to-hand combat he adds his psychic mastery level to his Strength characteristic for the roll to wound. This bonus also affects the psyker’s saving throw modifier. For example a Space Marine Chief Librarian (mastery level 4, Strength 5) armed with a force sword would hit in hand-to-hand combat with a Strength of 9 and a -6 saving throw modifier.
A psyker armed with a force weapon automatically wounds daemons if he hits them in hand-to-hand combat, he does not have to make a separate roll ‘to wound’. The force weapon also completely negates the ordinarily unmodified daemonic saving throw, making psykers vital daemon-hunters for the Imperium.
VEHICLES
Vehicles are an important part of the Warhammer 40,000 game, whether simple transports, fast assault bikes, or lumbering heavy tanks bristling with weaponry. The fighting forces of the Imperium, Orks, Squat Homeworlds and the Eldar all have their own unique design philosophy which determines the appearance and tactical role of their fighting vehicles. All of these widely differing vehicles are covered by these rules, although further special rules apply to the most unusual of them. We recommend that players fight a few games with just infantry before introducing vehicles as the rules for these are by necessity rather long and detailed.
VEHICLE DATAFAX
The details of each vehicle’s armament, movement and defensive capabilities are included on a single sheet of card called a datafax.
Every vehicle has its own datafax in the format shown below — this example is the datafax for a Land Raider.
As you can see, the front of the datafax contains details of the vehicle’s weaponry, speed and motive type as well as its number of crew and points value. The back of the card has a hit location table and armour values for the various parts of the vehicle at the top, while the rest of the back is taken up with damage tables.
The datafax records for some of the most commonly used vehicles are included in this game. A complete selection of datafaxes is not included because there simply isn’t enough space for the vast range of different tanks, buggies and skimmers used in Warhammer 40,000. Extra datafaxes will be printed in supplements and in White Dwarf magazine as new models are added to the Warhammer 40,000 range.
SPACE MARINE LAND RAIDER (example datafax)
VEHICLE DATA. Ram Value: Strength 8, D12 damage, -5 save. Movement: Slow speed 7", Combat speed 14", Fast speed 20". Type: Tracked. Crew: 1 Space Marine driver, 2 Space Marine gunners.
WEAPONS. Four lascannon, two linked in each side mount, and twin heavy bolters linked in a pintel mount. Each pair of lascannon has a targeter and an 180° field of fire to their side of the vehicle. The heavy bolters are also fitted with a targeter and have a 360° field of fire. The Land Raider may be fitted with a set of auto-launchers carrying frag or blind grenades at an additional cost of +5 points.
TRANSPORT. 10 Space Marines in Power Armour, or 5 Space Marines in Terminator Armour, or 1 Dreadnought. The Land Raider may also be used to tow a single piece of field artillery.
POINTS COST: 220 points.
(The example's weapon data table and its reverse-side hit location and damage tables appear in the source only as a small illustration and are not transcribed here.)
VEHICLE CREW
With the exception of vehicles such as bikes bought as an upgrade for a character model, the points value of a vehicle includes its crew. The number of crew needed for a vehicle is recorded on the vehicle’s datafax. The characteristics and equipment carried by a vehicle’s crew are shown in the appropriate sections of the army lists.
The crew of a vehicle are allowed to board or leave the vehicle in the same way as any other model. If the driver of a moving vehicle dismounts then his vehicle will go out of control in its next turn. Other crewmen that dismount will obviously not be able to operate the equipment that they were using until they reboard their vehicle. Dismounted crewmen must remain within 6" of their vehicle, unless it has been destroyed, in which case any surviving crew form their own unit and are subject to the normal rules for unit coherency. As long as the crew stay on/in their vehicle they are immune to psychology and never have to take Break tests. However, if they dismount then they become subject to the rules for psychology just like any other model.
All crewman on board the same vehicle are assumed to be trained to do each other’s jobs, so that they can replace each other if someone is killed or injured. It takes an entire turn for a crewman to swap positions in this way, and he is not allowed to do anything else on the turn that he swaps over. Adeptus Mechanicus Engineers, Techmarines, Squat Engineer Guildmasters and Ork Mekaniak models are also allowed to take over from crewmen in the same way. Other models in a player’s army may not take over a position in a vehicle as they have insufficient training to do so.
MOVEMENT
MOVING VEHICLES
A player may move his vehicle models during the movement phase of his turn at the same time as foot troopers and other forces. There is no particular need to move vehicles either before or after infantry, the choice is up to the player.
Unlike a human or other living creature, a vehicle has three different move rates: fast, combat, and slow. These move rates are indicated on the datafax. In each case the number shown is the greatest distance that the vehicle can move at that rate. For example, a Predator moving 12" is travelling at combat speed; if it were moving more than 12" it would be travelling at fast speed.
The fastest a vehicle can travel is its maximum fast move rate. For example, the Imperial Predator has a maximum speed of 25".
Vehicles can move quickly compared to troops on foot, but if they are to shoot weapons accurately and negotiate corners or obstacles they will need to moderate their speed. For this reason, players will probably want to move vehicles at combat speed when fighting — hence the description ‘combat speed’, this being the move rate most appropriate for combat. Even at combat speed a vehicle is travelling relatively quickly, and will have to reduce its speed to slow rate in order to negotiate corners or tricky obstacles.
At the start of the game your vehicles are all assumed to be halted or travelling at slow speed. From then on, a vehicle may only accelerate or decelerate by one speed band per turn. So on your second turn, for example, your vehicle could carry on moving at slow speed or accelerate to combat speed. A number of counters is included in the game for you to keep track of your vehicles? speeds.
TURNING VEHICLES
Vehicles normally travel directly forwards in a straight line. Changes in direction are accomplished by means of turns of up to 45°.
A vehicle travelling at fast speed may make one turn of up to 45° during its move. This turn may be to the right or left, and may be made at the start of the move, at the end, or at any point in between.
A vehicle travelling at combat speed may make up to two turns during its move. Each turn may be of up to 45°. The two turns may be combined into a single turn of 90° if required.
A vehicle travelling at slow speed may make any number of unrestricted turns during its move. Each turn can be up to 360°.
MEASURING TURNS
A card turn template is provided with this game. However, it is often easier not to use the template but to estimate the turn and ask your opponent to approve the move.
It is actually quite simple to estimate 45° by eye, but the template can still be used if your opponent prefers. Generally speaking, we have found it is only necessary to use the template in situations where the exact position of the model is vital to the outcome of the game. The template is placed in front of the vehicle with the direction arrow pointing the same way as the vehicle — the vehicle is then turned up to 45° either to the left or right.
MOTIVE TYPES
The datafax gives the general motive type of the vehicle — whether it has wheels, legs, gravitic reaction engines or tracks. Some motive types also reflect the vehicle’s size or design, such as bikes and jet bikes.
TRACKED. Tracked vehicles have caterpillar tracks like tanks. They can move unhindered over most terrain, but can only move through woods at a maximum of half their slow speed. A tracked vehicle moving through a bog or other swampy ground at combat or fast speed risks becoming stuck. On the D6 roll of a 6 the vehicle becomes stuck fast in the bog for the remainder of the game and cannot move at all. A tracked vehicle may move over obstacles at slow speed without incurring any penalty — at faster speeds it will crash and incur damage like any other vehicle. Tracked vehicles cannot move over deep water, but can traverse streams and fords without penalty.
WHEELED. Wheeled vehicles have large rugged wheels designed for off-road as well as normal urban use. They cannot cross over difficult or very difficult ground at combat or fast speed. A wheeled vehicle cannot move through a wood at all and may not cross an obstacle of any kind.
BIKES AND TRIKES. Bikes and the larger three wheeled trikes are very much like contemporary motor cycles and trikes. A bike cannot cross an obstacle of any kind: it will crash if it attempts to do so. Bikes may cross difficult or very difficult ground, including woods, at slow speed only — at faster speeds they crash and incur damage. They may not cross water other than shallow streams and fords.
WALKERS. Walkers have been specially designed to be good at moving over difficult ground, and can move over any type of terrain except deep water unhindered. They can walk underwater along a river or sea bed at half rate. Walls over the height of the model’s knee will stop it moving over them, but they are big enough to just push their way through hedges or other light vegetation. Walkers can enter buildings if they can find a hole big enough to get in through and the model will physically fit inside.
SKIMMERS. These vehicles are powered by gravitic reaction motors which allow the vehicle to float a foot or so above the ground surface. A skimmer may move over terrain features without penalty as it can simply fly over any obstacle that gets in its way. The skimmer should also be allowed to finish its move on top of a terrain feature, but as it's next to impossible to balance a jet bike model on top of a building or wood we usually say that it may not end a move on top of such terrain.
BOARDING AND LEAVING
Some vehicles are capable of carrying troops in addition to their normal crews. The number of troops a vehicle can carry is indicated on its datafax under the entry for “transport”. This shows the number of human-sized or smaller troops that can be transported in the vehicle and includes humans, Space Marines, Squats, Ratlings, Orks, Eldar, and so on. Ogryns, Space Marines in Terminator armour and other equivalently-sized creatures take up the same space as two normal-sized humanoids.
Any number of models may enter or leave a vehicle during a turn, up to the total number of models that can be transported within it. Models leaving a vehicle can leap out at any point in the vehicle’s move, interrupting it if necessary. The models leaving the vehicle are positioned touching its sides or rear and may make a normal move immediately. Normal unit coherency must be maintained between the troops leaving the vehicle and any remaining inside.
Models may board a vehicle which was stationary or moving at slow speed in its previous turn if they are within 2" of its side or rear after they have made a normal move. The vehicle can then move off.
If a vehicle is moving up to 10", then troops may leave or board it without risk. If a vehicle is moving more than 10" then each model boarding or leaving sustains an automatic hit with the Strength shown on the chart below. Any model suffering damage is allowed its normal saving throw and sustains 1 wound if this is failed.
| Vehicle's Move | 0-10" | 11 | 12 | 13 | 14 | 15 | 16 | 17 | 18 | 19 | 20+ |
|---|---|---|---|---|---|---|---|---|---|---|---|
| Strength of Hit | None | 1 | 2 | 3 | 4 | 5 | 6 | 7 | 8 | 9 | 10 |
| Save Mod. | None | 0 | 0 | 0 | -1 | -1 | -2 |
OUT OF CONTROL!
In certain situations vehicles can move out of control. Usually because they are damaged, or have been affected by a psychic attack or exotic weapon type. Note that only a vehicle which moved in its previous turn can go out of control: stationary vehicles never go out of control. Mark out of control vehicles with one of the counters provided.
Vehicles moving out of control are moved before other models at the start of their side’s movement phase. A vehicle which goes out of control is moved 3D6" but no faster than its maximum speed. The vehicle moves straight ahead or towards the right or left as shown on the diagram below. Roll a D6 to determine direction and move the vehicle in its movement phase.
| D6 | Result |
|---|---|
| 1-2 | The vehicle turns 45° left and moves 3D6" |
| 3-4 | The vehicle moves 3D6" straight ahead |
| 5-6 | The vehicle turns 45° right and moves 3D6" |
Some damage results specify that vehicles move out of control for one turn and then come to a halt. Other results specify that vehicles move out of control for the remainder of the game, or until the vehicle is brought to a halt by a collision. In the case of a slain driver, it may be possible for another crew member to restore control as explained on the damage result table.
COLLISIONS, RAMMING AND OVERRUNS
If a vehicle moving faster than 10" moves into another vehicle, a building, a piece of terrain or an obstacle that it cannot cross this results in a collision. Where a vehicle collides with another vehicle or building, both may suffer damage. Vehicles travelling over 10" may also deliberately run over foot troopers or ram other vehicles. This is also treated as a collision for the purposes of working out damage.
Collisions are worked out using the vehicle’s ram value which is written on its datafax. For convenience and comparison we have included a summary of ram value categories below, though the actual ram values of individual vehicles will often vary.
RAM VALUES
| Creature* | Bike | Buggy | Dreadnought* | Larger | |
|---|---|---|---|---|---|
| Strength | = Creature's Toughness | 5 | 6 | 7 | 8 |
| Damage | 1 | D4 | D6 | D10 | D12 |
| Save Mod. | -1 | -2 | -3 | -4 | -5 |
- Creatures and Dreadnoughts cannot deliberately ram things, their ram values are used only when they are rammed by something else or collide accidentally.
In a ram or collision involving vehicles, each vehicle rolls dice for its own ram value against the armour of the opposing vehicle. The locations on the two vehicles which actually touch are automatically hit in the collision and a D6 is rolled for each other location on both vehicles.
A location will be hit on a D6 roll of 4, 5 or 6. Once you’ ve worked out which locations have been hit roll for the armour penetration value of each vehicle involved in the collision: this is equal to D6 plus the Strength of the vehicle’s ram value. If the ram value of the vehicle causes a variable amount of damage (D4, D6, D10, D12) roll the dice indicated and add it to the total as well. This total is compared to the armour value of each and every location hit on the opposing vehicle. If the result is equal to or more than the armour value of a location hit, the collision has damaged that location — roll a D6 on the appropriate damage table. Exposed crew that are hit in a collision suffer a hit with a Strength, damage and save modifier shown.
In the case of buildings and impassable terrain, including walls, trees, and other terrain which the vehicle is unable to cross, work out damage in the same way. So, the location on the vehicle which hit the obstacle first is automatically hit in the collision, any other locations are hit on a 4, 5 or 6 on a D6.
Use the vehicle’s own ram value to calculate the armour penetration of the collision, but the maximum armour penetration value which can be caused in a collision with a building is equal to the armour value of the building itself. Buildings struck will also suffer a hit with the same penetration value which may knock a breach in them. It is left to the players’ discretion whether other pieces of terrain should be removed after they have been in a collision.
A vehicle may run into creatures as well as vehicles and scenery, this may occur accidentally if the vehicle is moving out of control or because the vehicle is making a deliberate overrun attack against the enemy. Vehicles travelling 10" or less per turn will not harm creatures at all as they have ample time to step out of the vehicle’s path.
Creatures which are run over may attempt to dive out of the way of oncoming vehicles by rolling equal to or less than their Initiative characteristic value on a D6. A roll of a 6 always fails regardless of the model’s Initiative. Creatures diving out of the way are positioned to either side of the vehicle and are not harmed. Because creatures will see the vehicle bearing down on them the second creature the vehicle attempts to run over in the same turn gets a +1 bonus on his Initiative for diving out of the way, the third creature gets a +2 bonus, the fourth a +3 bonus and so on.
Models which fail to dive out of the way suffer a hit with the Strength, damage and saving throw modifier of the vehicle’s ram value. The vehicle will suffer a randomly located hit with a penetration value equal to the creature’s Toughness characteristic + D6 for each creature they hit during their movement.
SHOOTING VEHICLE ARMAMENT
During the shooting phase any vehicle crewman can fire one of the vehicle’s weapons. It does not matter if the crewman is the driver, as the driver can also operate one weapon. Weapons may be fired within the shooting arc as described on the vehicle’s datafax.
Note that some weapons are rigged up to fire in tandem — two or more linked weapons are operated by a single action and fire together at the same target. Although a linked weapon actually consists of two or more weapons it is considered to be a single weapon when it is fired, only a single crewman is therefore required to fire a linked weapon.
SHOOTING FROM VEHICLES
If a vehicle is transporting troops in addition to its own crew, these may shoot weapons from the vehicle during their shooting phase. If the vehicle is open-topped (such as the Ork battlewagon) then all the models inside may shoot so long as they don't fire over the heads of other troops in the vehicle (apart from the driver, who is sensible enough to keep his head down).
If the vehicle is enclosed the maximum number of models that can shoot out depends on the positions of doors and hatches. As these can vary a great deal no specific rules are given to cover firing from specific vehicles. However, players can assume that an access hatch or door is large enough to permit two models to fire through, while a firing slit or viewport is large enough to permit one model to fire through.
SHOOTING AT VEHICLES
A model can shoot at an enemy vehicle if it has a line of sight to it in the same way as when firing at any other model. Because vehicles are very much larger than ordinary troops, most obstacles and other low cover will not block the line of sight either to or from them. In other words, an Imperial Land Raider is just too big to hide behind a hedge! As ever you should use true line of sight to work out whether a vehicle is visible or not.
Some vehicles count as large targets so firers will receive a +1 modifier on their to hit roll. It is quite possible that a vehicle will also be travelling fast enough to count the -1 or -2 modifier for being a fast or very fast moving target so don't forget to count this modifier if applicable.
Just like ordinary foot troopers, vehicles are harder to hit if they are in cover behind hedges, walls, rocks etc or in woods. Of course, very small bushes and rocks are not going to make a big vehicle like a Land Raider harder to hit so at least a third of a vehicle must be obscured for it to claim the benefit of cover.
Weapons with sustained fire capability work against vehicles exactly as they would against ordinary foot troopers — see Shooting.
If a hit is scored roll a D6 and consult the hit location table on the back of the vehicle’s datafax, this will tell you what part of the vehicle you have hit. It might be impossible to hit some bits of a vehicle in some situations — if a Rhino is hidden behind a wall, for example, it might be impossible to hit its tracks. In a situation like this just use common sense and roll again until you get a possible location.
HITS FROM WEAPONS WITH A BLAST MARKER
Grenades, missiles and other weapons with a blast marker work slightly differently from normal weapons against vehicles because they treat each location on a vehicle as a separate target. Place the blast marker and roll to hit as normal, if the shot misses it will scatter just as usual. The location on the vehicle model which completely fills the hole in the centre of the blast marker is automatically hit. Any other locations covered or only partially covered by the blast marker are hit on a D6 roll of 4, 5 or 6.
Blast marker diagram: The Land Raider takes a direct hit from a blast marker aimed at its right track. The right track is automatically hit, while the right lascannon and the hull will also be hit on a roll of 4, 5 or 6 on a D6. A separate armour penetration roll is made against each location hit.
FRONT, SIDE AND REAR SHOTS
Most vehicles have thicker armour on their front than on their rear. This is from an understandable desire to design vehicles with the thickest possible armour facing the enemy! An astute commander will try to position his troops so they can get a shot at the thinner armour on a vehicle's sides or rear. If a model firing at a vehicle is in its forward 90° arc the shot counts against the vehicle’s front armour. If the model shoots from anywhere else it counts against the vehicle’s side/rear armour.
ARMOUR PENETRATION
Once it has been established where a shot has hit, look at the armour value of the location struck. The higher the armour value the thicker the armour and the more difficult it is to penetrate. The firing player has to roll to beat the armour value of the location he’s hit. Whether or not a shot penetrates armour depends mostly on the firing weapon — obviously a lascannon will punch through armour a lot better than a laspistol!
Test for armour penetration as follows: roll a D6 and add it to the Strength of the weapon causing the hit. If the weapon normally causes a variable number of wounds (D3, D4, D6, D10, 2D6, etc) roll the dice indicated and add them to the total as well. This is the thickness of armour penetrated. If the result is equal to or more than the armour value of the area hit, the shot has penetrated. If the result is less than the armour value the shot has bounced off the armour and has no further effect.
For example: A lascannon has a Strength of 9 and causes 2D6 points of damage. It will therefore penetrate D6 + 9 + 2D6 value of armour (a thickness between 12 and 27). The lascannon is an ideal anti-tank weapon because it can penetrate a great thickness of armour. An ordinary bolter can penetrate D6 + 4 value of armour (5-10) which is only likely to harm the lightest types of vehicle.
RANGE
Attacks that are made at long ranges penetrate less armour than those made at short ranges because the attack will lose some of its energy as it travels through the air to the target. To represent this an attack loses 1 point of penetration for each full 24" of range between the attacker and the target. To make this all crystal clear the effects of range on armour penetration are summarised on the table below.
| Range | Below 24" | 24-48" | 48-72" | 72"+ |
|---|---|---|---|---|
| Penetration Modifier | 0 | -1 | -2 | -3 |
LINKED WEAPONS
Some vehicles carry linked weapons such as the twin-mounted lascannon on the Land Raider. Only one dice roll to hit is made for a linked weapon. If a hit is scored both the linked weapons score a hit. Likewise, if the shot misses both weapons miss. The hits from such weapons will be fairly tightly grouped, so in this case just make one roll for location.
Both of the linked weapons strike the same point, but roll penetration and damage separately for each weapon. In the case of linked weapons shooting at ordinary models one roll is made to hit but two rolls are made to wound and two separate armour saves are required if both weapons wound.
If a linked weapon has sustained fire capability, like the twin autocannon on an Ork warbike, roll to hit as normal as if one weapon were firing. If a hit is scored roll the sustained fire dice for both weapons together: jam results on either dice will jam both of the linked weapons but as usual any hits are resolved before the weapon(s) jam.
DAMAGE
If a shot penetrates the target’s armour then the vehicle will sustain damage. In most cases the location hit will be destroyed, and in some cases the whole vehicle may be destroyed and rendered useless. Refer to the damage effect chart printed on the back of the vehicle’s datafax corresponding to the location, and roll a D6 to determine the effects of a penetrating hit.
MULTIPLE HITS ON A LOCATION
Roll for damage for each hit that penetrates armour; all damage is cumulative. Once an area has been destroyed, a crewman killed, or a weapon destroyed, subsequent hits in that area are not re-rolled and cannot cause damage. The energy of the hit is absorbed by the existing wreckage and surrounding superstructure.
ARMOUR PENETRATION TABLES
Armour penetration does not apply to the following grenade types: Anti-plant, Blind, Choke, Hallucinogen, Photon Flash, Scare, Smoke, Tanglefoot.
Close Combat Weapons
| Weapon | Armour Pene. | Min. | Max. |
|---|---|---|---|
| Blades & Saw | S+D6 | VAR | VAR |
| Bonesword | D6+D12+6 | 8 | 24 |
| Chainsword | 2D6+4 | 6 | 16 |
| Chainfist | D20+D4+D6+10 | 13 | 40 |
| Harlequins Kiss | Special | - | - |
| Lightning Claws | Special | - | - |
| Mandiblasters |
Pistols
| Weapon | Armour Pene. | Min. | Max. |
|---|---|---|---|
| Auto Pistol | D6+3 | 4 | 9 |
| Bolt Pistol | D6+4 | 5 | 10 |
| Hand Flamer | D6+4 | 5 | 10 |
| Laspistol | D6+3 | 4 | 9 |
| Needle Pistol | D6+3 | 4 | 9 |
| Plasma Pistol | D6+6 | 7 | 12 |
| Shuriken Pistol | D6+4 |
Heavy Weapons
| Weapon | Armour Pene. | Min. | Max. |
|---|---|---|---|
| Assault Cannon | D6+D10+8 | 10 | 24 |
| Auto Cannon | 2D6+8 | 10 | 20 |
| Terminator Cyclone | D10+D6+8 | 10 | 24 |
| Heavy Bolter | D6+D4+5 | 7 | 15 |
| Heavy Bolter, Hellfire Shell | D6+5 | 6 | 11 |
| Heavy Flamer | D6+5 | 6 | 11 |
| Heavy Plasma Gun, Low energy |
Basic Weapons
| Weapon | Armour Pene. | Min. | Max. |
|---|---|---|---|
| Autogun | D6+3 | 4 | 9 |
| Boltgun | D6+4 | 5 | 10 |
| Bow | D6 | 1 | 6 |
| Crossbow | D6 | 1 | 6 |
| Death Spitter | D6+6 | 7 | 12 |
| Flamer | D6+4 | 5 | 10 |
| Fleshborer | D6+4 |
Support Weapons
| Weapon | Armour Pene. | Min. | Max. |
|---|---|---|---|
| D-Cannon | Special | - | - |
| Battle Cannon | 3D6+8 | 11 | 26 |
| Conversion Beamer | Special | VAR | VAR |
| Mole Mortar | VAR | VAR | VAR |
| Rapier | D6+2D10+9 | 12 | 35 |
| Scatter Laser | D6+6 | 7 | 12 |
| Tarantula |
Grenades
| Weapon | Armour Pene. | Min. | Max. |
|---|---|---|---|
| Frag | D6+3 | 4 | 9 |
| Krak | 2D6+6 | 8 | 18 |
| Meltabomb | D6+D20+8 | 10 | 34 |
| Plasma | D6+5 | 6 | 11 |
| Rad | 2D6+D4 | 3 | 16 |
HAND-TO-HAND COMBAT
Attacking a vehicle in hand-to-hand combat is a desperate and terrifying affair for a model on foot. Against vehicles an attacker risks being gunned down or run over and crushed under wheel or track if his attack fails. Even against light vehicles like bikes or trikes there is the armed and highly skilled rider to defeat before the vehicle can be disabled.
A vehicle, then, is a formidable opponent for a normal model. However, not everything is in the vehicle’s favour, and against a skilled or lucky opponent a vehicle can be very vulnerable to a hand-to-hand attack. In hand-to-hand combat the attacker can take his time to locate any weak points on the vehicle, climb up onto the structure, push his gun barrel through hatches, etc, and therefore make sure that the attack hits the exact location that he wants.
Vehicles are even more vulnerable in dense terrain such as woods or cities. In such close terrain infantry can move up on the vehicle under cover, avoiding the vehicle’s firepower until the last possible moment, and then overwhelm it by sheer weight of numbers. The wise vehicle commander will learn to keep well away from such areas without adequate infantry support of his own.
Vehicles cannot be engaged in hand-to-hand combat as such, but a model may charge a vehicle in the movement phase and attack it during the hand-to-hand combat phase. This is not a proper hand-to-hand combat engagement and does not restrict the movement of either the vehicle or the attacker in their subsequent movement phases.
A model that is attacking a vehicle automatically hits it once for each Attack characteristic on its profile. The attacker may choose the location struck without having to roll dice, though the location chosen must be reasonably within reach of the model — a model attacking the right hand side of a Predator could not attack its left hand lascannon, for example. Armour penetration and damage effects are worked out exactly as for hits from shooting. However, when attacking a vehicle or dreadnought it is possible to place a blow more accurately than when you are shooting at it. Accordingly attackers receive a bonus on their armour penetration dice roll against vehicles or dreadnoughts according to their Strength or the Strength of the weapon they are using.
| Attacker's Strength | 1-3 | 4-5 | 6-7 | 8-10 |
|---|---|---|---|---|
| Bonus Penetration Dice | None | +1D6 | +1D12 | +1D20 |
For example: A Terminator armed with a power fist attacks a vehicle in hand-to-hand combat, scoring one automatic hit because his Attacks characteristic is 1. The Terminator can choose the location attacked and has an armour penetration value of 8 + 1D6 + 1D20.
If the attacker is armed with a grenade or any ranged weapon which isn't a ‘move or fire’ weapon he may use this in hand-to-hand combat against a vehicle. Note that these weapons can’t normally be used in close combat, so this is an exception to the normal rules. This allows for troops pushing gun barrels into hatches or through vision ports, or throwing grenades into exposed compartments. The attacker chooses his hit location exactly as if he were using a close combat weapon such as a pistol or power sword, and damage is worked out in the same way.
Any area effect of the weapon is ignored — the blast being contained inside or under the vehicle. When used in hand-to-hand combat weapons only fire once, so any sustained fire ability is ignored when used in close combat against vehicles.
Vehicles that are not moving are even more vulnerable when attacked in close combat. To represent this, hand-to-hand attacks against immobilised or stationary vehicles receive an armour penetration bonus of a further +1D6. This is very useful as it allows troops armed with relatively light weapons to swarm all over and destroy a heavily armoured vehicle that has been brought to a halt.
“IT'S GONNA BLOW!" SPECIAL RULE
It’s possible that troopers attacking a vehicle will damage it badly enough to make it blow up. Obviously the warriors responsible are not going to hang about and wait to be blown up with it. To represent this models in base-to-base contact with a vehicle that suffers a damage result which will make it explode get a special move rather like a follow-up move. Each model can move up to D6" directly away from the vehicle before the explosion is resolved. Like a follow-up move this is an exception to the turn sequence in that it takes place in the hand-to-hand combat phase and your models move regardless of whether it is your turn or your opponent’s. Models running from an explosion may not engage new opponents in hand-to-hand combat.
ROBOTS AND DREADNOUGHTS
Robots and dreadnoughts, or indeed any type of machine that has a Weapon Skill, may fight in hand-to-hand combat using the normal rules described in the Hand-to-hand Combat section. If the robot or dreadnought is hit the attacker may choose which location is struck. Armour penetration and damage is assessed in the same way as shooting damage with the additional bonus dice for high Strength noted above. Attackers can only use close combat weapons, pistols and grenades against machines with a Weapon Skill.
Normally models engaged in close combat can't move away from each other, but robots and dreadnoughts are an exception and may move out of close combat if the player wishes. The machine just uses its strength and size to brush man-sized opponents out of the way. If it is fighting another model of similar size, like a Greater Daemon, it may not move away and must continue to fight just like an infantry model.
SPECIAL VEHICLE RULES
BIKES & TRIKES
The warring races of the 41st millennium employ all kinds of well-armed and highly mobile troops for reconnaissance and seizing forward positions from the enemy. Bikes and trikes fulfil these roles throughout the Imperium and the Squat Homeworlds, with squads of bikers acting as shock/assault troops and trikes carrying heavy weaponry providing highly mobile support. Away from the battlefield bikes and trikes are invaluable in scouting and pursuit, compiling vital data on enemy troop movements and harrying opposing forces with lightning raids.
Bikes and trikes can be used to mount individual characters and entire squads in accordance with the rules in the various specific army lists. Squads of bikers must stay within 6" of each other to maintain squad coherency.
MOVING BIKES & TRIKES
Bikes and trikes move like normal vehicles, having a slow, a combat and a fast speed. Bikes and trikes are unusual because they can accelerate very quickly, so they are capable of going from slow speed to fast speed in one turn whereas most vehicles must spend a turn at combat speed before they can move at fast speed. However, it’s worth noting that bikes can only decelerate at the same rate as other vehicles. Bikes and trikes may also attempt special skid turns as described below.
SKID TURNS
A bike or trike travelling at slow speed can make as many turns as the player wishes, but when travelling at faster speeds they are limited to one or two turns exactly like other vehicles. However, bikes or trikes are also allowed to make additional turns of up to 45° called skid turns. Skid turns therefore allow a bike to change direction several times even while travelling at high speed. These manoeuvres are quite dangerous and call for extra skill on the part of the rider. The biker revs his engine and swings his machine round in a controlled skid, dipping low to the ground to balance the machine. This is a spectacular manoeuvre — all the more so when it goes wrong!
EXPOSED VEHICLE CREW
Most vehicle crew are safely ensconced behind several inches of armour and therefore may not be attacked in hand-to-hand combat. However, on some vehicles the crew ride on the outside of the vehicle or in an open-topped compartment so they are exposed to attack. If a model moves into hand-to-hand combat with a vehicle with exposed crew it must fight the crew instead of attacking the vehicle. When a vehicle has more than one crew then any models on foot always attack the nearest crew member.
Hand-to-hand combat between exposed crew and foot troopers is worked out exactly as normal. If the driver of a vehicle is killed then it will go out of control in its next turn, while other crewmen will obviously not be able to operate the equipment that they were using.
A bike wishing to make a skid turn must take a skid test. A bike may attempt as many skid turns as the player wishes — a separate test is made for each. Skid turns can be made immediately after normal turns or after each other, allowing the biker to turn 90° or more. Of course, the greater the change in direction the more tests the biker will have to take and the greater the chance of crashing. To determine if the skid turn is completed successfully roll a D6, reference the score with the vehicle’s speed and read the final result.
SKID TEST CHART
| Bike Speed: Combat | Bike Speed: Fast | Result |
|---|---|---|
| - | 1 | The bike crashes and is destroyed together with its rider. The flaming wreck travels straight forward for the remainder of its maximum fast move, and then explodes with an area radius of 1" causing a Strength 4 hit on any target within the effect area. If the bike hits something before its move is complete, work out normal collision damage and then the bike explodes. |
| 1 | 2 | The biker skilfully guides his protesting machine in the desired direction, but is too preoccupied to do anything else this turn. No weapons may be fired from the bike this turn, including any fired by a passenger (who is more interested in holding on than shooting). |
| 2-3 | 3-4 | The biker skilfully guides his protesting machine in the desired direction, but is too preoccupied to do anything else this turn. The rider may not fire any weapons, including bike weapons, this turn. A passenger or sidecar crewman may shoot as normal. |
| 4+ | 5+ | The biker successfully completes the manoeuvre. |
MOUNTING, DISMOUNTING AND FALLING OFF BIKES
A trooper can mount a stationary bike or trike which is within 2" of him at the end of his move and ride off at the start of his next turn. A passenger can jump on or off a bike at any point in the bike’s movement, but obviously if the bike is travelling quickly this is rather risky. If the bike is moving up to 10", then troops may mount or dismount it without risk. If it’s moving more than 10" then a model trying to jump on or off sustains an automatic hit with the Strength shown on the chart below. Any model suffering damage is allowed its normal saving throw and sustains one wound if this is failed.
| Bike's Move | 0-10" | 11 | 12 | 13 | 14 | 15 | 16 | 17 | 18 | 19 | 20+ |
|---|---|---|---|---|---|---|---|---|---|---|---|
| Strength of hit | None | 1 | 2 | 3 | 4 | 5 | 6 | 7 | 8 | 9 | 10 |
| Save Modifier | None | 0 | 0 | 0 | -1 | -1 | -2 |
A rider can jump off a moving bike if he wants to but this is even more dangerous! A moving bike without a rider will move out of control for one turn and then fall over and come to a halt.
COLLISIONS
Bikes are considerably smaller and lighter than most other vehicles and so will not cause nearly as much damage when they crash into something. To represent this, a bike or trike which crashes into a larger vehicle will only cause damage to the location hit rather than all of them. The bike itself still takes an automatic hit to the first location to make contact and there is a 4, 5, 6 chance of every other location suffering damage.
SHOOTING FROM BIKES
Bikes often carry fixed weapons mounted to fire directly ahead. The rider can fire these during the shooting phase at targets in his forward arc unless he’s trying to control his bike after a skid turn or suffering damage effects which prevent him shooting. Trikes and sidecars normally carry a pintel-mounted weapon which can fire into the forward 180° arc under the same restrictions.
Instead of firing weapons mounted on the bike or trike a rider can fire a pistol during the shooting phase. A passenger can fire any basic weapon if he doesn’t fire his pintel-mounted weapon. The advantage of firing a bolt pistol or bolter instead of a mounted weapon is that the biker has an unrestricted fire arc so he can shoot all round.
HIT AND RUN ATTACKS
Riders and passengers on bikes and trikes can make hand-to-hand combat attacks at other models as they pass them during their move. This is a special type of attack called a hit and run attack. It is handled slightly differently to ordinary close combat as the bike or trike is not halted when it moves into close combat with a foot trooper. Instead, the rider or passenger makes a single attack out of the normal turn sequence when the bike moves into contact and the foot trooper strikes back before the bike hurtles on.
The combat is resolved using the hand-to-hand combat rules, except that each player may only roll one attack dice no matter what their model’s Attacks characteristic normally is, and no matter what the models are armed with. This represents the fact that both sides only have a fleeting moment to deliver their attack before their opponent is gone! The biker is always considered to be charging and to have a better Initiative than his target; also, no parries can be made by either warrior. A biker or passenger can only make one attack against an enemy model during his movement in this way, and may not shoot in the same turn that he made a close combat attack.
DREADNOUGHTS AND WAR WALKERS
Dreadnoughts are heavily armoured fighting machines which use legs for locomotion. They are controlled by the living consciousness of a sentient mind neuro-planted into an exo-skeleton. Dreadnoughts are a common sight on battlefields across the galaxy, being ideally suited to close support and spearheading attacks in dense terrain where their manoeuvrability, thick armour and heavy weapons are a real advantage. Amongst the Eldar Exodite colonies dreadnoughts are rare. Instead, Eldar war walkers are used with great success to scout and ambush enemy forces, while the sentinel performs the same service for the Imperial Guard. Employed by every race in the Warhammer 40,000 universe, walkers like these form a very distinct class of war machine and as such they have their own special rules.
SPACE ORK DREADNOUGHT (example datafax)
VEHICLE DATA. M 6, WS 5, BS 4, S 6, I 3, A 4, Ld 6. Crew: one Gretchin. Ram Value: Strength 7, D10 damage, -4 save.
WEAPONS. Arm 1: Power Claw. Arm 2: Power Claw. Arm 3: Heavy Bolter, 90° field of fire to the front. Arm 4: Heavy Flamer, 90° field of fire to the front. Up to two arms can be upgraded to carry a lascannon or a missile launcher with frag and krak missiles at an additional cost of 25 points each.
POINTS COST: 120 points.
(The example's weapon data table appears in the source only as a small illustration and is not transcribed here.)
Dreadnoughts, sentinels and war walkers have a datafax record similar to the standard vehicle datafax. The main difference is that they have a characteristic profile like that used for a living creature, with a Movement allowance, Weapon Skill and Ballistic skill and so on. Note that the profile does not have an entry for the machine’s Toughness as this is included in its armour values.
Dreadnought, sentinel and war walker weapons are fully integrated into the machine’s control systems, allowing the occupant to shoot with any or all weapons during the shooting phase. This is different from most other vehicles, where one crewman may only fire one weapon.
MOVEMENT
Dreadnoughts, sentinels and war walkers have legs as their motive power, so they move using much the same movement rules as ordinary infantry. They have a basic Movement allowance included in their characteristic profile and can make a double-distance move when they charge into close combat or run, giving up their chance to fire for the turn.
Dreadnoughts, sentinels and war walkers must move in a straight line in the direction they are facing but they can change their facing by up to 90° at the start and the end of their movement for free. If they need to change direction during their movement (to manoeuvre around an obstacle for instance) each facing change of up to 90° costs 1" of their movement.
Dreadnoughts, sentinels and war walkers have been specially designed to be good at moving over difficult ground, and can move over any type of terrain except deep water unhindered. They can walk underwater along a river or sea bed at half rate. Walls over the height of the model’s knee will stop it moving over them, but they are big enough to just push their way through hedges or other light vegetation. Dreadnoughts, sentinels and war walkers can enter buildings if they can find a hole big enough to get in through and the model will physically fit inside.
CRASHES AND COLLISIONS
Dreadnoughts, sentinels and war walkers are designed to move more or less like living creatures. They can avoid collisions by stepping aside like ordinary creatures and can move up to and then fight enemy models in hand-to-hand combat. For these reasons they are not normally affected by the collision and crash rules for vehicles given in the main vehicle rules above. However, if a damaged dreadnought, sentinel or war walker staggers into another vehicle, building or terrain that it cannot cross, then it is treated exactly like any other vehicle and normal crash rules apply.
A Dreadnought, sentinel or war walker must attack foot troopers in hand-to-hand combat in order to cause damage. Its ponderous movements normally present no accidental threat to troops, so the machine may not harm infantry by running them down as vehicles can. However, models on foot which are struck by a staggering or falling dreadnought, sentinel or war walker may suffer damage as normal.
SKIMMERS
Land speeders, jet bikes and other skimmers hover above the ground by using powerful gravitic jet motors — a highly advanced form of anti-gravity motor. When you move a skimmer it has the option of climbing above the terrain features on the table such as woods and buildings so that it can move over them. In addition, skimmers are allowed to make a special type of attack which allows the skimmer to rise up from behind cover, make an attack, and then drop back down all in the same turn.
SKIMMER MOVEMENT
A skimmer may move over terrain features without penalty as it can simply fly over any obstacle that gets in its way.
Skimmers can land if they are travelling at slow speed, but will crash if going any faster. A landed skimmer can move no further on the turn that it lands. The skimmer can take off in any subsequent move phase, travelling off at slow speed.
Skimmers are allowed to halt and remain stationary without landing — this is called hovering. A hovering skimmer may turn by any amount. Skimmers must land or hover for troops to mount or dismount from them.
OUT OF CONTROL (Skimmers)
A skimmer that goes out of control immediately moves 3D6" in a random direction just like any other vehicle. However, you must make an additional roll to see if the skimmer zooms up or down as it moves. Roll on this table to see what happens:
| D6 | Result |
|---|---|
| 1 | The skimmer swoops down and crashes into the ground. |
| 2-5 | Stays at same altitude. |
| 6 | The skimmer zooms straight up, stalls, and then crashes to ground 2D6" away in a direction determined by rolling the scatter dice. |
POP-UP ATTACKS
A skimmer that was either stationary or travelled at slow speed in its previous move is allowed to make a special type of attack called a pop-up attack. You must declare that a skimmer will pop-up in the move phase. Instead of moving across the table the skimmer moves upwards: place the skimmer on a mug, plastic cup or some other object to show that it has popped up to a high altitude. Enemy models that are on overwatch are allowed to shoot at the skimmer as it pops-up. In fact, this is usually the only way the skimmer can be shot at when it uses this tactic.
In the shooting phase skimmers that are making a pop-up attack may trace their line of sight to a target as if they were up to 12" above the table, as can any enemy models shooting back on overwatch! Models that fire on a skimmer that has popped up must add 12" to the range. Note that this penalty does not apply when the skimmer shoots back, as its shots don't have to fight against the force of gravity!
After the attack has been completed the skimmer drops back down. Remove it from the plastic cup to show this. In its next turn the skimmer can pop-up again, or move off at slow speed.
SKIMMERS IN HAND-TO-HAND COMBAT
Skimmers may only be engaged in close combat by troops on the ground if the skimmer has landed. Skimmers can't try to deliberately overrun enemy foot troopers in the same way as other vehicles because of the dangers of crashing into the ground. The one exception to this is the crews of jet bikes that are armed with close combat weapons such as swords or pistols. These crewmen are allowed to make “hit and run” attacks as they move, in exactly the same way as the riders of ordinary bikes.
BUILDINGS
The Warhammer 40,000 rules are extremely flexible, and allow you to fight out battles almost anywhere, from sweltering slime-jungles and baking sulphur deserts to frozen polar wastes. Games set on such worlds are unlikely to include many buildings, if any at all. On the other hand, the hive worlds of the Imperium are so densely urbanised that some are completely covered by structures, the entire planetary surface sheathed in a man-made cocoon of metal and plascrete. Between these two extremes players have the choice of using as few or as many buildings as they wish.
Buildings provide interesting features on the battlefield. Not only do they look attractive, but they are also important from a tactical point of view. Towers may overlook the battlefield and provide excellent fields of fire for snipers or heavy weapons. Troops inside a building will be hard to winkle out, and may be able to hold out against far larger numbers of enemy. A good commander knows that every scrap of cover is important and buildings can form vital strongpoints in defence or important stepping stones on the attack. Conversely, a building in the middle of a wood is probably of little value (unless it’s taller than the trees...) and one too far out on its own could become a deathtrap. You must weigh the tactical considerations for yourself, and decide whether or not a particular building has any tactical value.
MODEL BUILDINGS
Model buildings represent not only houses, but also industrial complexes, military installations, tombs, monuments, public buildings and so on.
MOVING INSIDE BUILDINGS
Wherever possible model buildings should be made so that troops can be positioned and moved around inside them. Sometimes this is not practical, and players will have to remove models from the table and record their positions on a sheet of paper. If you intend to fight a game around a large building where placing models in the building is impossible, it is best to draw out a map showing the building interior. The positions of models can be marked on the map during play as necessary.
Alternatively players may wish to rule that if you can’t place models inside a building then that building is locked up tight or choked with rubble and can’t be entered during the game.
Probably the best way of handling movement inside buildings is to use floorplans from another game such as Space Hulk to construct the interior of the building. When models enter simply transfer them onto the floorplans and continue moving as normal.
MOVING INTO AND AROUND BUILDINGS
Models may enter a building in their move phase by moving through an unlocked door, open doorway or window. Doors and doorways offer no movement penalty. Moving in through a window counts as crossing a wall of equivalent height. If a door is locked it must be broken down before models can move through. There is no limit to the number of models that can pass through a door or window, the models’ movement rate imposes a natural and realistic limit.
Once inside a building models can move only at their normal rate. Models may not run and charges can only be declared against enemy models visible at the start of the turn. This is because buildings, particularly unfamiliar ones, are full of obstacles and potential hiding places for booby traps and enemy troops. Any warrior will move warily in a building both to avoid blundering into walls or furniture and to avoid running straight into an ambush.
If a building contains ramps, stairways, escalators, lifts etc. for travelling between levels assume that it takes a model the entire movement phase to move from one level up or down to an adjacent one. If buildings have long stairways or ramps where models can be positioned, players can move models along them within the normal movement rules.
SHOOTING FROM BUILDINGS
Models inside buildings can shoot from firing-slits, windows, doors or any other openings. This is a good tactic because models firing from windows and doors gain a -2 to hit modifier for being behind hard cover. There is no formal restriction on the number of models that can fire out of a door or window as this will depend on the size of the opening. The size of the models will again provide a natural limit on the numbers that can practically fire.
Models positioned at a window or door may choose to hide in the same way as troops behind a wall or other obstacles. While hiding they may not be seen or shot at. See the section on hiding for more details.
WEAPONS WITH A BLAST MARKER IN BUILDINGS
A common tactic when assaulting buildings is to use grenades or weapons with a blast marker to clear each room of enemy troops in turn. Some special rules apply to scatter and blast markers when used in buildings. Players should use common sense when using these rules — for example if a battle is taking place within a very large open area such as a spacecraft docking area these rules won’t apply. Don’t allow the rules to dictate nonsensical situations under any circumstances: adjust them as necessary to achieve a realistic result.
SCATTER
Outdoors no special rules apply to scatter because of intervening terrain. It is assumed that shots that scatter fly up into the air or ricochet off pieces of terrain, potentially ending up out of sight of the firer. However, in a building, if you fire a missile through a doorway into a room and miss, the missile isn’t going to scatter so that it goes through a solid wall into another room on the other side!
To represent this, roll for scatter normally. If the centre of the blast marker is within the line of sight of the firer then this is where the shot has landed. If the centre of the blast marker is not within the line of sight of the firer then move the blast marker back in a straight line towards the firer until its centre is in his line of sight.
This rule also applies when firing weapons or throwing grenades into a building from outside. Obviously this means that a weapon can potentially scatter right back in your face but that’s the risk you take in using these weapons at such close quarters!
Scatter in Buildings diagram: The Space Marine fires his missile launcher at some Orks in a building. He misses and the shot scatters to an area inside the building out of his line of sight. The blast marker is moved back straight towards the Space Marine until it is in his line of sight again, impacting against the wall of the building as shown.
BLAST MARKERS
A weapon with a blast becomes far more deadly when it’s contained in an enclosed space — shrapnel ricochets, shockwaves rebound and heat reflects back into the area. To reflect this, weapons with a blast (including grenades) are far deadlier indoors.
If a blast marker detonates in a confined space it adds +1 Strength and -1 saving throw modifier to its profile. A confined space is an area inside a building that the burst marker won't fit completely in to. Flamers and gas weapons add +1 to their dice roll to affect models in a confined space.
Obviously models that are on the other side of a solid wall from the centre portion of a blast marker are unaffected by it unless there is a window or doorway the blast could travel through to reach them.
HAND-TO-HAND COMBAT INSIDE BUILDINGS
Hand-to-hand combat is worked out as normal inside buildings. Players must still declare a charge in order to enter hand-to-hand combat and the enemy they wish to charge must be visible to the charging models at the start of the turn.
Models trying to fight their way into a building through a window or door count the -1 Weapon Skill modifier for attacking across an obstacle on the first round. Once inside a building models are on equal footing so the obstacle modifier is applied to neither model.
If a squad in a building is broken and flees each model will make for the nearest exit. This may result in the squad becoming split as the fleeing models run for different exits. A split squad will attempt to get back together again once they are outside.
DESTROYING BUILDINGS
If a building can be seen it can be shot at. Use true line of sight to find out if you can see a building: most buildings can be seen unless they are obscured by other buildings, woods or high ground. Because buildings are generally rather large and immobile it's hard to miss them. Unless it's smaller than 4" square a building is hit automatically by any weapons firing at it. Smaller buildings must be hit like ordinary targets.
Weapons with a blast marker that are fired at buildings don't affect surrounding models: it is assumed that they hit the building too high up or bury themselves in the structure too deeply to affect nearby models. For convenience, buildings aren't normally affected by weapons with a blast marker which are directed at models inside or nearby, it is assumed that a deliberate attempt has to be made to collapse a building. Players may feel that it's appropriate to roll for damage for certain weapons, which is fine as long as it doesn't bog the game down too much.
Although they are easy targets most buildings are pretty solidly built and hard to damage. To represent this they are given an armour value like vehicles as shown below. As most gamers make their own buildings you may prefer to tailor each building's values to its appearance. This is entirely up to you.
| Type of building | Armour Value |
|---|---|
| Tent or inflatable structure | 5 |
| Mud or straw hut, wooden or tin shack | 10 |
| Plexiglass or plastic | 15 |
| Solid timber, stone, concrete or plascrete | 20 |
| Steel, plasteel or rockrete | 25 |
| Armaplas, ceramite or adamantium | 30 |
Generally speaking, buildings in the Imperium are made of solid timber, stone, concrete or plascrete, depending on local conditions. Administratum and other official buildings are made of steel, plasteel or rockrete. Only bunkers and other purpose-built fortifications are constructed from armaplas, ceramite or adamantium.
Weapons that hit a building roll to penetrate it just as they would to penetrate a vehicle. If the penetration roll equals or exceeds the building's armour value the building is damaged and a D6 roll is made on the Damage Effect Table shown below. If the penetration roll is less than the building's armour value it is undamaged.
DAMAGE EFFECT TABLE
- 1-3 Shaken. The building rocks violently. Any models inside are knocked off their feet and may not move or shoot in their next turn. They may fight normally if they are engaged in hand-to-hand combat. Otherwise they are unaffected. Add +1 to all damage effect rolls against this building from now on.
- 4-5 Badly Shaken. Interior walls collapse, gaping holes appear in stairways, floors and ceilings partially collapse. Any models inside are knocked off their feet and may not move or shoot in their next turn. If they are engaged in hand-to-hand combat they are separated immediately. All further movement inside the building is at half rate. Add +2 to all damage effect rolls against this building from now on.
- 6+ Collapsed. The building collapses into a pile of rubble. Any models inside must make their armour saving throw on a D6 or be slain by the falling debris. Survivors may not move or shoot in their next turn. If they are engaged in hand-to-hand combat they are separated immediately.
If your buildings are very large it may not be appropriate to have weapon hits affecting the entire structure. You may prefer to divide up large buildings into several portions about 4" to 8" square. For example, you might have a bunker with a main portion and two gun emplacements on either side of it. This could conveniently be divided into three parts for recording damage points and probably for moving troops within it too.
DOORS
In most games doors can be opened and moved through without restriction. However if military installations, bunkers or high security buildings are being defended by one side at the start of the game, then the doors into them are locked. Models from the defending side may pass through locked doors without penalty, it is assumed that they have an electronic key or know the entry code. Enemy models may not pass through doors which have not been broken down.
Doors may be shot at from a range of 6" or less and are hit automatically. Doors may also be attacked in hand-to-hand combat (see below). Doors have an armour value just like buildings as follows.
| Type of Door | Armour Value |
|---|---|
| Plexiglass or plastic | 5 |
| Solid timber, stone, concrete or plascrete | 10 |
| Steel, plasteel or rockrete | 15 |
| Armaplas, ceramite or adamantium | 20 |
Exterior doors are normally made from the same material as the building itself (or the equivalent). Interior doors are usually made of material one grade lower than the main building material. For example, an armaplas bunker would have an armaplas outer door and plasteel internal doors.
Roll for armour penetration versus doors as against vehicles. If a door’s armour value is equalled or exceeded it is blown off, leaving a large door-shaped hole. If the armour penetration roll is double the armour value of a door or more the door has been totally obliterated and part of the building has gone with it! In this case make a roll on the Building Damage Table as well.
HAND-TO-HAND COMBAT AGAINST BUILDINGS
Some models are powerful enough to literally tear their way through walls and doors; others may carry weapons or special equipment capable of making a breach in them. If a model is in contact with a building it may attack it during the hand-to-hand combat phase. Ordinary models can’t shoot on the same turn that they attack a building but dreadnoughts, robots and other large models can shoot and still attack a building in the hand-to-hand combat phase.
In the hand-to-hand combat phase the model attacking the building hits it automatically and works out armour penetration in the same way as if it were attacking a vehicle. The bonus penetration dice for high Strength and a stationary target both apply. If the penetration roll equals or exceeds the building’s or door’s armour value the model knocks a hole in it the size of its base. For example, an Ogryn has a 40mm wide base so it would knock a 40mm wide hole in a wall. Use a piece of card or other appropriate marker to indicate the position of the hole.
Vehicles which collide with buildings either deliberately or accidentally may knock a hole in them. Roll the armour penetration dice indicated by the vehicle’s ram value. If the penetration roll equals or exceeds the armour value of the building a hole is knocked in it the width of the vehicle. Remember that the maximum armour penetration value which can be caused in a collision with a building is equal to the armour value of the building itself. Vehicles equipped with ram bars or similar attachments add +1D6 to the penetration dice rolled against a building and take -1D6 off the penetration value against the vehicle in a collision with a building.
For example: A Rhino with a ram bar hits a building. 7+D12+D6 are rolled for the Rhino’s ram value, giving a score of 17. A D6 is rolled for the ram bar scoring 4, so +4 is added to the score against the building for a total of 21 and -4 is deducted from the score against the Rhino for a total of 13.
SPECIAL RULES
Everybody who makes their own model buildings likes to include features which appeal to them: spiral stairways, chemical storage tanks, balconies, high gantries between towers, and so on. We can’t anticipate every variation of architecture, but this shouldn’t stop you making models as varied and imaginative as you please.
You can always invent your own special rules to incorporate unusual buildings into your games. For example, a winding stairway might take a half turn to climb, or a turn if it is very long. A narrow passage might allow passage for only four models per turn, an aerial walkway might reduce movement to half rate with a 1 in 6 chance of falling if you move faster, and so forth. You will find occasional features about making buildings and other terrain in Games Workshop’s monthly magazine White Dwarf.
DESIGNERS' NOTES
In creating the new Warhammer 40,000 game we've taken all
the best parts of the original book edition and added a whole lot of new material that has been evolved over the last few years. If you're new to Warhammer 40,000 you won't notice the changes, but you'll enjoy the benefits of the extra games testing none-the-less. In particular, we have devised rules to cover set-up and victory conditions (not in the original game) and we've introduced game objectives in the form of the Mission cards.
Every army now has a Strategy Rating — a sort of strategic initiative value that defines which side sets up first and takes the first turn. Of course, Strategy Ratings can be varied in specific scenarios to reflect the extraordinary tactical acumen of certain mighty commanders. Together these new rules give the game a distinct beginning, middle and (most importantly) end. This also encourages more varied and better balanced armies, forces which are flexible and mobile, rather than unrealistically over-equipped super armies bristling with heavy weapons and little else.
If we have done our job well then the most successful player will be the one who uses the best tactics on the day. Good tactics isn't a question of choosing big guns as some players seem to think. Players who persist in trying to find a winning combination of super-weapons would be better advised to choose a well balanced force and stick with it. A balanced force has a good mix of weaponry and troops. For example, long range weaponry to cover the advance of lighter troops, and fast, lightly armed troops to take forward positions and winkle out the enemy. A good army should be able to work with the terrain on the tabletop, exploiting the cover to move into position or to establish powerful fire bases. The rules for cover, hiding and overwatch all work together to reward careful tactics, and the good player will rely upon these rather than unpredictable wonder weapons for success!
A new feature in this game is the use of the sustained fire dice to represent rapid firing weapons. The more dice you roll the more casualties you can potentially inflict, but the greater your chance of jamming the weapon. This particular rule emphasises the inherent unreliability of the majority of heavy weapons, and should make you think twice about employing too many of those Space Marine Devastator squads or similar ‘heavies’. Frighteningly destructive weapons like these belong in a supporting role, which is only right and proper. Players of the original game will notice that the points values of heavy weapons in the Warhammer 40,000 Codex army lists have been reduced from the original values to compensate for their unpredictability.
If heavy troops are perhaps less effective than of old, hand-to-hand combat is far more deadly. The rules allow for close combat fumbles and unexpected critical hits, so hand-to-hand combat can also turn up the occasional surprise, but on the whole troops equipped for close combat will slice up their opponents in short order.
Another change we have made to the game is to substantially improve Space Marines, giving them a saving throw of 3, an improved profile, and special rapid fire and break rules. Space Marines are the finest troops in the galaxy, and their high points cost in the Codex army lists reflects their true worth. If your opponent is playing with Space Marines take heart that their high cost will strictly limit his numbers.
Some players may wish to invent their own weapons, new rules and troop types or otherwise alter the game to suit themselves. This is fine by us, but remember you'll also have to make up points values for your creations. While the Warhammer 40,000 Codex army lists will cover all the weapon options and give appropriate points values for them, not all individual points costs for specific weapons are included (in fact the values vary depending upon the tactical worth of the various squads). We're confident that players who want to improvise in this way will be able to judge for themselves the values of invented weapons or new combinations of weaponry. This is a far superior system to the original Warhammer 40,000 where every weapon had a fixed points value, a system which sometimes led to abuse when players invented their own combinations of armament. The inevitable result was a Frankenstein's monster of an army armed with all sorts of improbable and extreme weaponry! No system of fixed points values can be immune to abuse, so we leave it to your own sense of fair play to establish points for whatever you care to invent.
Of course, most players will probably wish to stick to the Codex army lists and the game rules as printed. This means you'll be able to take on other players wherever they're from, and take part in the various competitions organised by Games Workshop. We accept there'll always be a few players who want to do their own thing, who want to develop the game rules or background to suit themselves. Perhaps you want to invent your own Space Marine Chapter (and why not... there are over a thousand and we'll never describe them all) or maybe you've developed a super-detailed system for fighting out battles inside spaceships. As players become more experienced and discover for themselves what they like about Warhammer 40,000, so they may wish to make modifications which suit a certain style of gaming or which appeal to a particular gaming group.
The Warhammer 40,000 universe is very big indeed, so there is room enough for you to explore whatever corner of the background or game system appeals to you. Naturally you'll have to moderate and control such things for yourself, and you must persuade your fellow players that your rules are fair and reasonably balanced. Such matters are left entirely in your hands, and we wouldn't want to discourage players from doing exactly as they please with the Warhammer 40,000 game. You don't need to send us your new rules — you don't need our approval and we wouldn't presume to upset your rival players by giving you our stamp of official recognition.
On a final note we'd like to say just one thing: terrain! Warhammer 40,000 is a game of position, where cover is all important and the correct use of walls, woods, and other terrain will enable you to win the game. This means that the way you set up your tabletop will seriously affect the way the game plays. We always use lots of terrain, hills, woods, ruins, and so on, and we always make sure there is enough cover to fight over. Technologically advanced armies don't fight in the open at close ranges... the weapons are just too deadly.
If you fight your games over an open battlefield they will be short, bloody, and rather dull. Of course you might simply enjoy the brief moment of carnage which results... fair enough. It takes all sorts! The game balance, and the points values given in the Codex army lists, all assume that a reasonable amount of scenery is in use. Over an open battlefield armoured vehicles and heavier weapons will naturally dominate the game, just as the most effective weapons in a desert are tanks and long range artillery and missiles. If you find that heavy weapons are dominating your games then you can bet the reason is simply that you're using too little scenery. Our recommendation... use lots of scenery because the more terrain the better the game!