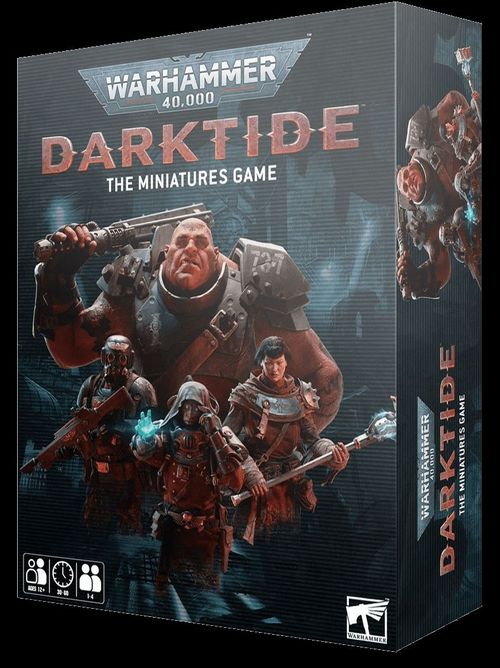
Warhammer 40,000: Darktide – The Miniatures Game
Warhammer 40,000: Darktide – The Miniatures Game Rulebook
Table of Contents
Table of Contents
Components
Operative Datacards
10 operative datacards.
Equipment, Upgrade and Activation Cards
- 17 Equipment cards
- 24 Upgrade cards
- 21 Activation cards
Dice
10 six-sided dice, known as 'D6'. If a rule specifies 'D3', roll a D6 and halve the result (rounding up).
Tokens
- Heavy Terrain hexes
- Light Terrain hexes
- Objective markers (1 and 2)
- Damage counters
- Damage tokens
- Activation tokens
- Servo-skull tokens
- Smoke tokens
- Stun tokens
- Prescience tokens
- Shroud tokens
- Endurance tokens
- Guard tokens
- Suppression tokens
Other Components
- 4 double-sided Killzone tiles
- Line of Sight marker
Miniatures
- 4 Kill Team miniatures: Veteran, Zealot, Ogryn, Psyker
- 16 Darktide miniatures: Moebian Gunner with grenade launcher, Moebian Gunner with flamer, Moebian Chieftain, Moebian Commsman, Moebian Sharpshooter, Moebian Troopers (5 miniatures), Poxwalkers (6 miniatures)
Overview
Darktide: The Miniatures Game is a game for 1-4 players where you command four specialist operatives in combat against the traitorous military forces of the Moebian 6th and shambling hordes of plague-ridden Poxwalkers. Players must decide who controls each specialist operative, then work together to defeat enemies and complete objectives.
The core rules to play the game are on pages 8-19. Pages 26-45 contain a selection of missions to play through, and rules for linking them together as a campaign.
Datacards
Datacards contain various essential information regarding the game's miniatures (known as operatives). Example datacards are shown in the rulebook (Zealot and Moebian Commsman).
- Operative Type: Who the operative is.
- Weapon Profiles: The ranged weapon and melee weapon the operative is equipped with. GUNNER operatives have more than one ranged weapon, but the miniature and its accompanying Activation card (pg 15) will show which each is equipped with, as will the mission. Weapons are used to perform Fight (pg 18) and Shoot (pg 19) actions. They have the following characteristics:
- Attacks: The number of attack dice to roll when the operative uses the weapon.
- Hit: The result required when rolling attack dice for the weapon. Note that a lower result is a better characteristic (e.g. 3+ is better than 4+).
- Damage: The amount of damage the weapon inflicts from each attack dice. The first value is damage from a normal hit, the second value is damage from a critical hit (pg 18-19).
- Special Rules: Any additional rules the weapon has, which are explained on the datacard. However, the Range X special rule ('X' being the number that follows 'Range', e.g. Range 3) is explained in the 'Select Valid Target' step on page 19.
- Behaviour: DARKTIDE operatives will perform two actions, as specified by this section of their datacard (see Darktide Activation, page 15). Behaviours are listed in order of priority, so if the operative cannot perform both actions of the first Behaviour, it will perform both actions of the next Behaviour, and so on. Once you've determined the right Behaviour, perform its two actions in the order specified. KILL TEAM operatives do not have a Behaviour section, as you can choose what actions they perform.
- Abilities: Unique rules some operatives have.
Key Rules
This section explains several key rules that underpin other rules. Don't worry about committing them all to memory now - as you read on and play through your first few games, you will gain the context to apply key rules. Simply refer back to them as you go.
Killzone Tiles
Killzone tiles are placed as specified by the mission's map (pg 28-45) to create the playing area of the game, known as the 'killzone'. Ensure the tiles are the right side up and are correctly aligned with adjacent tiles so the hexes connect.
Hexes
Hexes are used to determine operatives' locations in the killzone. While a hex doesn't have an operative in it, it's unoccupied. While a hex has an operative in it, it's occupied. Each hex can only be occupied by one operative at a time.
Incomplete hexes are at the edges of the killzone and are not ordinarily used. However, some missions have a red line on the mission map called an 'Exit Edge'. This shows an incomplete hex an operative can move across, which will be required to complete the mission. Line of Sight (pg 12) cannot go through or along the edge of incomplete hexes.
Figure: An incomplete hex. An exit edge as shown on a mission map.
Distance
Many rules require distance between hexes and/or operatives that occupy them. When determining this, count the shortest possible distance from one to the other.
Examples from the book: Hex B is 2 hexes from hex A. Hex C is more than 2 hexes from hex A. The TROOPER operative is 4 hexes from the VETERAN operative, and Hex A is 4 hexes from the VETERAN operative. Hexes A-F are 1 hex from hex G, and they are adjacent to hex G.
Terrain
Light and Heavy Terrain hexes are placed onto other hexes in the killzone. They are hexes with additional rules.
Heavy Terrain: Operatives cannot move into Heavy Terrain hexes and Line of Sight (pg 12) cannot go through or along the edge of them.
Light Terrain: If an operative occupies a Light Terrain hex or a hex that is adjacent to the yellow edge of a Light Terrain hex, and the Line of Sight drawn to that occupied hex crosses the yellow edge, the operative is in Cover. An example of this can be seen in the Line of Sight rules section (pg 12).
In addition, it costs an additional hex movement to move an operative into an adjacent hex if the hexes are connected by a Light Terrain hex's yellow edge (Normal Move action, page 16).
Line of Sight
Certain rules require Line of Sight to another operative (or hex). To determine if an operative (or hex) is in Line of Sight, draw an imaginary straight line 1mm wide between the centre of the operatives' hexes (or the hexes in question). You can use the Line of Sight marker or a piece of string to help do this. They are in Line of Sight unless that line goes through or along the edge of a Heavy Terrain (pg 11) or incomplete hex (pg 10). An operative always has Line of Sight to itself and the hex it occupies.
Examples from the book: Hexes A and B are not in the VETERAN operative's Line of Sight (nor are the operatives that occupy them). Hex C is in the VETERAN operative's Line of Sight (as is the operative that occupies it). Hexes A and B are in the VETERAN operative's Line of Sight here. The Line of Sight drawn to Hex A passes through the yellow edge of a Light Terrain hex adjacent to Hex A, so the operative occupying it is in Cover (pg 11).
Tokens
Tokens are used to mark effects throughout the game. Specific rules will say when to place them (and remove them).
Objective Markers
Objective markers mark areas of significance in the killzone. Mission rules will specify the effects they have on the game, which will usually require KILL TEAM operatives to perform actions while they occupy the hex an objective marker is in.
Damage
Damage is most commonly inflicted by Fight (pg 18) and Shoot (pg 19) actions. When damage is inflicted on a KILL TEAM operative, move the damage counter right along its Wounds bar equal to the amount of damage inflicted. When its damage counter moves onto the skull at the end of the bar, the operative is incapacitated (any excess damage is ignored). When damage is removed from a KILL TEAM operative, move the damage counter left along its Wounds bar equal to the amount of damage removed (any excess beyond '0' is ignored).
When damage is inflicted on a DARKTIDE operative, place damage tokens next to the miniature to show the total damage inflicted on it. Once the total equals or exceeds the operative's Wounds characteristic, it's incapacitated (any excess damage is ignored).
In either case, when an operative is incapacitated, it's removed from the killzone (along with its damage tokens in the case of DARKTIDE operatives).
Damage tokens: Damage Counter (KILL TEAM operatives); Damage Token (1 wound); Damage Token (3 wounds).
Threat Principle
Sometimes it may be unclear in what order you should resolve rules that happen at the same time, or which course of action you should take if they all fulfil rules requirements, in particular during a DARKTIDE operative's activation. In such instances, use the outcome that is worst for KILL TEAM operatives. Discuss it amongst yourselves, but don't worry too much if it's hard to determine this - just pick the one that feels right (if you still can't decide, randomise between the different possibilities). For example:
- A MOEBIAN operative performs a Shoot action. Two KILL TEAM operatives are in its Line of Sight and equally close, so which operative does it shoot? The operative that isn't in Cover (pg 11), is Ready (pg 15) or has more damage already inflicted on it.
- A POXWALKER operative performs a Fight action. Two KILL TEAM operatives are valid targets, so which operative does it fight in combat with? The operative that is Ready (pg 15) or has more damage already inflicted on it.
- A POXWALKER operative performs a Normal Move action. It cannot finish the move in the required hex for a Fight action, so which of the shortest possible routes should it take and end that move in? Behind a Heavy Terrain hex, but still as close as possible to the required hex.
Battle Structure
A game of Darktide: The Miniatures Game involves three rounds, each of which consists of a Prepare phase and a Battle phase. The players win if they complete every round objective of their mission (pg 28-45). They lose if every KILL TEAM operative is incapacitated (pg 12), or under any other conditions specified by the mission.
Prepare Phase
KILL TEAM operatives prepare for the upcoming Battle phase, and the next killzone and its DARKTIDE operatives are determined, as specified by the mission.
Killzone: Remove all tokens and operatives from the previous round (unless it's the first round), then set up the round's killzone by placing the specified killzone tiles, Heavy and Light Terrain hexes, objective markers (if any) and DARKTIDE operatives in the hexes specified by the mission map.
Deploy: Set up KILL TEAM operatives in any of the green 'start' hexes (max one per hex). Incapacitated KILL TEAM operatives cannot be set up and don't participate in the round.
Actions: Skip this step in the first round. Thereafter, KILL TEAM operatives that aren't incapacitated (pg 12) can each do one Prepare action. You must declare the actions that each operative will perform before any of them do so, and they are performed simultaneously. The actions available are as follows:
- Loot - Randomly draw one card from the Equipment deck for each operative performing this action. Give one of those cards to any KILL TEAM operative, then return the rest to the deck. Remember operatives cannot have more than two Equipment cards for a game (unless otherwise specified), but you can swap cards around. Return the unwanted cards to the deck.
- Heal - Remove two D3 damage from a KILL TEAM operative. Note that incapacitated operatives can have damage removed, but can't then perform an action themselves. Each operative can only have damage removed once per Prepare phase.
- Scout - For each operative performing this action, draw D3 cards from the Activation deck (see opposite) at the end of the phase. Have a look at the cards drawn, then return them to the top and/or bottom of the deck in an order of your choice. For example, if you draw six cards, you could return four to the bottom of the deck and two to the top (in an order of your choice).
Activation Deck: Create an Activation deck by adding an Activation card that corresponds to each operative in the killzone. Note that DARKTIDE operatives have specific cards that match their miniature, whilst KILL TEAM operatives have generic Activation cards (so if you have four KILL TEAM operatives in the killzone, you would add four generic Kill Team Activation cards). The remaining Activation cards are not used in this round and are placed to one side. Shuffle the Activation deck and place it face down on the table. Players cannot inspect the Activation deck unless otherwise specified.
Battle Phase
Operatives activate and perform actions. To determine which operative is activated, draw the top card of the Activation deck and activate the corresponding operative. Once that operative's activation ends, draw and activate again. Keep repeating this process until the round objective is met or the game is lost.
If you would draw a card from the Activation deck but there are no cards left to draw, recreate the deck. To do so, gather the discarded Activation cards, remove the ones that correspond to operatives not in the killzone (place removed cards to one side with the unused Activation cards), then shuffle the remaining ones and place them face down on the table. Finally, Ready KILL TEAM operatives by changing their activation token to blue side up.
Kill Team Activation
If a drawn Activation card corresponds to a KILL TEAM operative, discard the card and activate any Ready KILL TEAM operative. An operative with its activation token blue side up is Ready. If a drawn Activation card corresponds to a KILL TEAM operative but you have none Ready (usually because one or more have been incapacitated or escaped the killzone), remove the card and draw another.
When a KILL TEAM operative is activated, it must perform two actions (pg 16-19). Once it's done so, this ends its activation; change its activation token to grey side up to show it's no longer Ready. Unless otherwise specified, operatives cannot perform the same action more than once during each of their activations. You don't need to declare all of the operative's actions; it can perform one action, then you can decide the next action after seeing its effects. If you declare an action but it's not possible to resolve it, perform a different one.
Darktide Activation
If a drawn Activation card corresponds to a DARKTIDE operative in the killzone, discard the card and activate that operative. If a drawn Activation card corresponds to a DARKTIDE operative that's not in the killzone (usually because its been incapacitated), remove the card and draw another.
When a DARKTIDE operative is activated, perform two actions with it as specified by the Behaviour section of its datacard (pg 9). Behaviours are listed in order of priority, so if the operative cannot perform both actions of the first Behaviour, it will perform both actions of the next Behaviour, and so on. Once you've determined the right Behaviour, perform its two actions in the order specified. This ends its activation.
Actions
KILL TEAM operatives perform actions as the players wish, whilst DARKTIDE operatives perform actions according to the relevant Behaviour on their datacard (pg 9). Unless otherwise specified, operatives cannot perform the same action more than once during their activation. While an operative is performing an action, it's known as the active operative.
Actions are categorised as follows:
- Universal actions are presented over the following pages. They can be performed by all operatives.
- Unique actions can be found on Upgrade and Equipment cards. Therefore they can only be performed by KILL TEAM operatives with the card.
- Free actions can only be performed when another rule specifies. Each time an operative would perform a free action, the following rules apply:
- The operative can perform the action, so long as the requirements of the action are met.
- It does not cost one of the operative's actions to do so.
- The operative would still count as performing the action for all rules purposes. For example, if it was during its activation, it would not be able to perform the action again during that activation.
Normal Move
Move the active operative up to three hexes. More specifically, you can move the active operative into an adjacent unoccupied hex that isn't Heavy Terrain up to three times. If the active operative is a KILL TEAM operative, this can be in any combination of directions as desired, but it cannot finish the move in a hex it started the action in. If the active operative is a DARKTIDE operative, it will move according to Darktide Move Priority (pg 17).
It costs an additional hex movement to move an operative into an adjacent hex if the hexes are connected by a Light Terrain hex's (pg 11) yellow edge. If the operative can't move a sufficient amount to do this, they can't move there.
Examples from the book: The ZEALOT operative moves three times into adjacent hexes. It cannot move into the hexes containing the TROOPER operative or Heavy Terrain. It costs the PSYKER operative two of its three hex movements to move into hex A, B or C. It would cost one hex movement to move into hex D, E or F as they are not connected by a yellow edge.
Darktide Move Priority
Each time a POXWALKER operative performs a Normal Move action, move it towards the closest hex in which it could perform a Fight action (pg 18) via the shortest possible route.
Each time a MOEBIAN operative performs a Normal Move or Dash action, move it towards the closest hex in which it could perform a Shoot action (pg 19) via the shortest possible route.
Examples from the book: The ZEALOT operative uses two of its three hex movements to move from hex A to Hex C. Light Terrain hex D is adjacent, but it's connected by a yellow edge, therefore it costs two hex movements for the operative to move there. The operative only has one hex movement remaining, therefore it must end the action in hex C, or move into a different adjacent hex. Hex B is the closest hex in which the POXWALKER operative could perform a Fight action. Note that if hex A did not contain the TROOPER operative, it would move there instead, as it would only need to move two hexes. Hex A is the closest hex in which the POXWALKER operative could perform a Fight action. It moves the shortest possible route towards that hex. It could finish the move in hex B or C. According to the Threat Principle (pg 13), it finishes the move in hex B, as it would not be in the VETERAN operative's Line of Sight (pg 12). Hexes A and B are the closest hexes in which the GUNNER operative could perform a Shoot action. According to the Threat Principle (pg 13) it moves to hex A, not hex B (even though it's the same distance away), as hex B would be closer to the PSYKER operative.
Dash
Same as a Normal Move action, except the operative can only move one hex. Note that this means the operative cannot move into an adjacent hex if the hexes are connected by a Light Terrain hex's (pg 11) yellow edge, as that would cost two hexes of movement.
Pass
No rules effect for the active operative. This action is used if the operative will do nothing for an action. Unlike other actions, operatives can perform this action more than once during each of their activations.
Fight
Fight in combat with the active operative against an adjacent target operative using the sequence below.
-
Select Valid Target: For KILL TEAM operatives, select a DARKTIDE operative in a hex adjacent to it. For DARKTIDE operatives, select a KILL TEAM operative in a hex adjacent to it, but if multiple are adjacent, use the Threat Principle (pg 13) to determine one of them. Both of these operatives now fight, and consider the other an enemy operative in the sequence.
-
Select Melee Weapon: Select one melee weapon (crossed-swords symbol) the active operative is equipped with and collect attack dice. Then select one melee weapon the target operative is equipped with and collect separate attack dice. Attack dice are a number of D6 equal to the selected weapon's Attacks characteristic.
-
Roll Attack Dice: Roll attack dice for the active operative and the target operative separately. Each result that equals or beats their selected weapon's Hit characteristic is a successful hit and is retained. Each that doesn't is a failed hit and is discarded. Keep track of each retained result of 6 - this is a critical hit. Each other retained success is a normal hit.
-
Resolve Successful Hits: Starting with the active operative's attack dice, alternate resolving successful hits. Repeat this process until one operative in that combat is incapacitated (pg 12) or they have no more hits to resolve, in which case the other operative in that combat resolves all of their remaining successful hits. To resolve a successful hit, select one of the operative's retained attack dice, choose for that operative to strike or parry, then discard that attack dice. For DARKTIDE operatives, resolve critical hits first, and they must always strike.
- If they strike, inflict damage (pg 12) on the enemy operative.
Shoot
Make a shooting attack with the active operative against a target operative using the sequence below.
-
Select Ranged Weapon: Select one ranged weapon (crosshair symbol) the active operative is equipped with and collect attack dice. Attack dice are a number of D6 equal to the selected weapon's Attacks characteristic.
-
Select Valid Target: For KILL TEAM operatives, select a DARKTIDE operative of your choice in its Line of Sight. For DARKTIDE operatives, select the closest KILL TEAM operative in its Line of Sight, but if multiple valid targets are equally close, use the Threat Principle (pg 13) to determine one of them.
Some weapons have the Range X special rule, e.g. Range 3. If such a weapon is selected for the shooting attack, operatives are not valid targets if they are more than X hexes from the active operative, e.g. 3 hexes.
-
Roll Attack Dice: Roll attack dice for the active operative. Each result that equals or beats the selected weapon's Hit characteristic is a successful hit and is retained. Each that doesn't is a failed hit and is discarded. Keep track of each retained result of 6 - this is a critical hit. Each other retained success is a normal hit.
-
Roll Defence Dice: Roll three defence dice for the target operative. For KILL TEAM operatives, each result of 4 or more is a successful save and is retained. For DARKTIDE operatives, each result of 5 or more is a successful save and is retained. In either case, each that isn't is a failed save and is discarded. Keep track of each retained result of 6 - this is a critical save. Each other retained success is a normal save.
If the target operative is in Cover (pg 11), before rolling defence dice, retain one as a successful critical save without rolling it.
-
Resolve Successful Saves: Resolve as many successful saves as possible. To do so, select one retained defence dice, pair it with one retained attack dice, then discard them both.
Tertium Hive Campaign
Editor's note: the printed campaign background narrative (pages 20-25: "Rising Shadows", "Coldiron Stack", "The Admonition" and "Investigation and Purge") is flavour fiction and is not transcribed here. The rules for playing and linking missions begin on page 26 below.
Missions
Over the following pages, you will find a variety of missions used when playing a game of Darktide: The Miniatures Game. Each mission has three rounds, and every round has round rules that add specific game effects, a round objective that details what the players must do to achieve victory in that round, and a mission map to show how to set that round up. Missions can be played as single games or linked together as part of a campaign.
Single Game
To play a single game, simply choose the mission you would like to play, or roll one D6 and play the mission that corresponds to the result. Assign each KILL TEAM operative to the players as you wish, then each player selects two associated Upgrade cards and two Equipment cards for their assigned KILL TEAM operative(s) to have for the battle.
Campaign
In a campaign, follow the process for a single game for your first game. After the game, regardless of whether you win or lose, operatives will Recover, Improve and Gear Up. The missions are presented in narrative order from 1-6, but feel free to play them in any order.
Recover
After each game, remove all damage from KILL TEAM operatives that weren't incapacitated. Remove D6+5 damage from each KILL TEAM operative that was incapacitated (roll separately for each).
Improve
Keep track of how many DARKTIDE operatives each KILL TEAM operative incapacitates during the game. After each game, rank KILL TEAM operatives 1st-4th based on this. If operatives incapacitate an equal number, assign the relevant ranks between them as you wish.
Then, each KILL TEAM operative Improves. When an operative Improves, randomly draw Equipment cards and/or the operative's associated Upgrade cards until you have a number determined by their rank from the game (see table below). Select one drawn card to add to the store (see Gear Up opposite). Then, after every operative has Improved, return the remaining cards to their decks.
| Rank | Total Cards Drawn |
|---|---|
| 1st | 4 |
| 2nd | 3 |
| 3rd | 2 |
| 4th | 1 |
Gear Up
Players have a store for Upgrade and Equipment cards earned when they Improve. Note that excess Equipment cards from the Loot Prepare action (pg 14) are not added to the store. Before the next game, select the mission (choose or randomly determine) and reassign each KILL TEAM operative to the players as you wish. Then each player can return any Equipment and Upgrade cards from their assigned operative(s) to the store, then give Equipment and Upgrade cards to their operatives from the store. Remember, each operative can have a maximum of 2 Equipment cards and a maximum of 2 associated Upgrade cards.
Abort
Sometimes missions won't go to plan, and to avoid taking even more damage, you may want to abort. If all players agree, a mission can be aborted the next time the Activation deck runs out of cards. If you do so, complete the Recover and Gear Up steps, but skip the Improve step. You can then repeat that mission or move on to another.
Servo-skull
If a mission has the Servo-skull round rule, use the Servo-skull token. It's treated as a KILL TEAM operative for rules purposes, meaning it's set up, a KILL TEAM operative Activation card is added to the Activation deck for it, it can be activated and perform actions, etc. The Servo-skull has the following rules:
- It can only perform Normal Move, Dash and Pass actions. It cannot perform Prepare actions.
- It's not a valid target for shooting attacks unless it's adjacent to the active operative, or up to 3 hexes from the active operative if that operative is a SHARPSHOOTER.
- If an operative shoots it, do not roll defence dice for it.
- It cannot fight in combat, but can be selected as the target of combat (i.e. do not roll attack dice for it).
- It has a Wounds characteristic of 1.
- If it's incapacitated, the game is lost.
- For the purposes of the Threat Principle (pg 13), it's always worse if DARKTIDE operatives target it rather than another KILL TEAM operative. (DARKTIDE operatives must still follow procedure, e.g. shoot and move towards the closest valid target. However, if multiple KILL TEAM operatives, including the Servo-skull token, are equally close, the token is worse for the Threat Principle.)
Mission Map Key
- KILL TEAM Starting Hex (green hex with Kill Team symbol)
- DARKTIDE Spawning Hex (purple hex with Darktide symbol)
- Heavy Terrain Hex (pg 11) (dark hex with orange edge)
- Light Terrain Hex (pg 11) (dark hex with yellow edges): the yellow edges represent the direction of Cover and the way you should orient your hex tile. If this hex is also designated as something else, e.g. an Enemy Starting Position, that icon will be shown inside this one.
- Objective Marker (blue hex with objective symbol)
- Enemy Starting Position (red circle with Darktide symbol): the type of DARKTIDE operative to be placed here will be labelled next to this icon.
- Exit Edge (red zigzag line): see Hexes (pg 10).
Note on mission maps: each round's mission map is a graphic showing killzone tile layout, starting hexes, terrain, objective markers and enemy starting positions. The map layouts are not reproduced in text; refer to the printed mission map for the exact placement.
Mission One: Cleanse
In their initial actions to uncover the fate of Coldiron Stack, kill teams in service to the Inquisitor have run foul of packs of rotten Poxwalkers. The mission is to root out heresy, and within these nests of mutants is the worst kind. The Agents must purge the bloated filth before they can amass in overwhelming numbers.
Round 1
The Inquisitor's Agents scouted outlying hab-blocks and industrial holdings at the mines before mobs of walking corpses made an appearance in an abandoned manufactorum. The Poxwalkers attack as soon as the kill team step foot within the huge building. The tide must be held back as more emerge from the dark. Step by step, the Agents must force their way forwards.
Round Rules
Tide of Poxwalkers: Each time you recreate the Activation deck, set up one POXWALKER operative on the purple hex (unless it's occupied or there are 6 POXWALKER operatives in the killzone). If you do so, add that operative's Activation card to the deck before shuffling.
Round Objective
Eliminate Poxwalkers: No DARKTIDE operatives in the killzone.
Round 2
Emerging into a deeper section of the manufactorum, the kill team continue to fight through the stream of Poxwalkers. They soon discover the presence of the Moebian 6th's heretical elements, whom the Poxwalkers strangely ignore. The traitors must be orchestrating the tide of rotting filth somehow, and the Agents' priorities quickly switch to the traitors' elimination.
Round Rules
Tide of Poxwalkers: Each time you recreate the Activation deck, set up one POXWALKER operative on the purple hex (unless it's occupied or there are 6 POXWALKER operatives in the killzone). If you do so, add that operative's Activation card to the deck before shuffling.
Round Objective
Eliminate Poxwalkers: No DARKTIDE operatives in the killzone.
Round 3
Countless Poxwalkers have been put down - some Agents are convinced they have 'killed' the same individual creatures more than once - but ammunition reserves are running low. If the kill team can eliminate the traitors' command structure within the manufactorum, the remaining Poxwalkers may become directionless and easier to destroy.
Round Rules
Irascible Grasp: Each time a POXWALKER operative fights in combat, in the Roll Attack Dice step of that combat, re-roll one failed hit.
Round Objective
Eliminate Poxwalkers: No DARKTIDE operatives in the killzone.
Mission Two: Scan & Upload
The Inquisitor suspects the Moebian 6th traitors are committing some dark atrocity in the glacial mines. Procastor Inigo supplies the kill team with a specialist servo-skull - fashioned from a favoured former Agent - with which to locate and scan possible sources of the water's contamination and then deliver the damning evidence via a shielded upload link.
Round 1
With its scanners, augurs and detection equipment, the servo-skull has identified several potential sources of contamination deeper in the mines. It needs to conduct more detailed analysis at each site, however, and the kill team must protect the robotic device as it draws its samples.
Round Rules
Servo-skull (pg 27)
Contamination Source: When setting up the killzone, shuffle objective markers 1-4, then place them numbered side down without looking at the numbers so you don't know which objective marker is which. If the Servo-skull token performs the Pass action while it occupies a hex with an objective marker, look at its number, then remove it.
Tide of Poxwalkers: Each time you recreate the Activation deck, randomly determine two unoccupied purple hexes and set up a POXWALKER operative on each of them (to a maximum of 6 POXWALKER operatives in the killzone). For each operative that you set up, add its Activation card to the deck before shuffling.
Round Objective
Secure Sample: Remove objective marker 1 from the killzone, then move the Servo-skull token across the Exit Edge of the killzone. If you do so, the round objective is completed, but keep playing the battle until every KILL TEAM operative has either moved across the Exit Edge of the killzone or has been incapacitated.
Round 2
With the samples gathered, the servo-skull follows its programmed directives to transmit its findings to the Inquisitor's hidden sanctum. The Agents' orders are to escort it to a communications relay, but the relay's control chamber is sealed and guarded. The kill team must override the relay's locking protocols at a security terminal.
Round Rules
Servo-skull (pg 27)
Moebian Reinforcements: Each time you recreate the Activation deck, set up one TROOPER operative on the purple hex, or on an unoccupied hex as close as possible to it (unless the objective marker hasn't been removed yet or there are 4 TROOPER operatives in the killzone). If you do so, add that operative's Activation card to the deck before shuffling.
Round Objective
Access Control Chamber: Any KILL TEAM operative must perform the Pass action while it occupies the hex with the objective marker to remove that objective marker. Then, move the Servo-skull token across the Exit Edge of the killzone. If you do so, the round objective is completed, but keep playing the battle until every KILL TEAM operative has either moved across the Exit Edge of the killzone or has been incapacitated.
Round 3
Under heavy fire, the kill team have breached the control chamber of the communications relay, but more heretics are racing to cut down the interlopers. The Agents must shield the servo-skull as it transmits its findings at a transmission terminal, ensuring the data is sent.
Round Rules
Servo-skull (pg 27)
Moebian Reinforcements: Each time you recreate the Activation deck, set up one TROOPER operative on the purple hex, or on an unoccupied hex as close as possible to it (unless there are 5 TROOPER operatives in the killzone). If you do so, add that operative's Activation card to the deck before shuffling.
Round Objective
Transmit: The Servo-skull token must perform the Pass action 5 times while it occupies the hex with the objective marker.
Mission Three: Escort
Contact has been lost with Procastor Inigo and some kill teams have disappeared. Those that remain cannot turn back now, not when the trail has led to the discovery of a traitor base. The kill team must protect the servo-skull as it hacks into the enemy database, then ensure the automata's safe escape through armed checkpoints to bring the data to light.
Round 1
The kill team have successfully infiltrated one of the traitors' logistics stations. A lone Moebian officer is accessing a database terminal, but begins a desperate purge of incriminating data upon sighting the Agents. The traitor is surrounded by the living dead, which lurch to attack at the officer's snarled command. The kill team must eliminate the officer to allow the servo-skull to access the terminal, then begin their escape.
Round Rules
Servo-skull (pg 27)
Purging Data: The CHIEFTAIN operative has the following behaviour instead:
- Fight and Pass
- Shoot and Pass
- Pass and Pass
Tide of Poxwalkers: Each time you recreate the Activation deck, set up one POXWALKER operative on the purple hex (unless it's occupied or there are 6 POXWALKER operatives in the killzone). If you do so, add that operative's Activation card to the deck before shuffling.
Round Objective
Download Data and Escape: The Servo-skull token must perform the Pass action while it occupies the hex with the objective marker to remove the objective marker. Then, move the Servo-skull token across the Exit Edge of the killzone. If you do so, the round objective is completed, but keep playing the battle until every KILL TEAM operative has either moved across the Exit Edge of the killzone or has been incapacitated.
Round 2
Their initial entry point has been compromised, forcing the Agents to retreat through the enemy base in search of escape. The Moebians have set up heavily guarded checkpoints, forcing the kill team through hunting Poxwalkers as they race the servo-skull to safety.
Round Rules
Servo-skull (pg 27)
Guarded Checkpoint: MOEBIAN operatives have the following behaviour instead:
- Shoot and Pass
- Pass and Pass
Tide of Poxwalkers: Each time you recreate the Activation deck, set up one POXWALKER operative on the purple hex (unless it's occupied or there are 6 POXWALKER operatives in the killzone). If you do so, add that operative's Activation card to the deck before shuffling.
Round Objective
Escape: Move the Servo-skull token across the Exit Edge of the killzone. If you do so, the round objective is completed, but keep playing the battle until every KILL TEAM operative has either moved across the Exit Edge of the killzone or has been incapacitated.
Round 3
An exit is in sight! The kill team must fight through the last Moebian checkpoint to escape with the servo-skull's purloined data, but a tide of Poxwalkers is close on their heels.
Round Rules
Servo-skull (pg 27)
Tide of Poxwalkers: Each time you recreate the Activation deck, set up one POXWALKER operative on the purple hex (unless it's occupied or there are 6 POXWALKER operatives in the killzone). If you do so, add that operative's Activation card to the deck before shuffling.
Round Objective
Escape: Move the Servo-skull token across the Exit Edge of the killzone. If you do so, the round objective is completed, but keep playing the battle until every KILL TEAM operative has either moved across the Exit Edge of the killzone or has been incapacitated.
Mission Four: Rescue
The traitors have besieged the mines' fortified chapels, but the priests still attempt to slip through to bless the water supplies. Rumours of the ambush of a priestly delegation reach the kill team, and of a survivor on the run. The Agents must search the ambush site, discover the priest and make contact before shepherding them to safety for questioning.
Round 1
Loyalist corpses litter the site of the ambush and danger still lurks nearby. The kill team must investigate the bloody remnants of the massacre for any clue at all concerning the location of the survivor whose knowledge may be key.
Round Rules
Tide of Poxwalkers: Each time you recreate the Activation deck, set up one POXWALKER operative on each unoccupied purple hex until they're both occupied (to a maximum of 6 POXWALKER operatives in the killzone). For each operative that you set up, add its Activation card to the deck before shuffling.
Investigate Clues: If a KILL TEAM operative performs the Pass action while it occupies a hex with an objective marker, remove that objective marker.
Round Objective
Investigate and Escape: Remove all objective markers from the killzone, then move at least one KILL TEAM operative across the Exit Edge of the killzone. If you do so, the round objective is completed, but keep playing the battle until every KILL TEAM operative has either moved across the Exit Edge of the killzone or has been incapacitated.
Round 2
With expert reading of the battle site and the discovery of the priest's hastily scratched coded sigils, the Agents have located the fugitive's bolt hole. They must make contact quickly, however, for roving traitors are on the priest's trail too.
Round Rules
Tide of Poxwalkers: Each time you recreate the Activation deck, set up one POXWALKER operative on each unoccupied purple hex until they're both occupied (to a maximum of 6 POXWALKER operatives in the killzone). For each operative that you set up, add its Activation card to the deck before shuffling.
Escort Priest: If a KILL TEAM operative performs the Pass action while it occupies a hex with an objective marker, you can remove that objective marker and that operative is now carrying it. While an operative is carrying an objective marker, it cannot perform Dash or Fight actions. It can drop the objective marker into the hex it occupies at any point during its activation (this isn't an action). If it's incapacitated or an enemy operative fights in combat with it, it must drop the objective marker into the hex it occupies.
Round Objective
Escort and Escape: Move an operative carrying an objective marker across the Exit Edge of the killzone. If you do so, the round objective is completed, but keep playing the battle until every KILL TEAM operative has either moved across the Exit Edge of the killzone or has been incapacitated.
Round 3
The priest is wounded but their faith and anger still burn brightly. The kill team must fight through a hunting party of Moebian soldiers organised to execute the priest to ensure that the pious witness, and their knowledge, survive.
Round Rules
Escort Priest: One KILL TEAM operative must be set up carrying an objective marker. See Round 2 for how the objective marker is dropped and subsequently carried again.
Guarding the Exit: TROOPER operatives have the following behaviour instead:
- Shoot and Pass
- Pass and Pass
Pursuing Poxwalkers: The third time you recreate the Activation deck, and each time thereafter, set up to two POXWALKER operatives up on the purple hex, or on an unoccupied hex as close as possible to it (to a maximum of 6 POXWALKER operatives in the killzone). For each operative that you set up, add its Activation card to the deck before shuffling.
Round Objective
Escort and Escape: Move an operative carrying an objective marker across the Exit Edge of the killzone. If you do so, the round objective is completed, but keep playing the battle until every KILL TEAM operative has either moved across the Exit Edge of the killzone or has been incapacitated.
Mission Five: Contamination
The rescued priest has revealed his discovery of the glacial meltwater's contamination; a supernatural foulness is being spread through pipe systems to neighbouring districts. The kill team must investigate which macro-pumping station the taint is being added at, force their way in and sabotage the industrial machineries suborned by the traitors.
Round 1
The priest's information, ruthlessly extracted by the Inquisitor, has led the Agents to a supply conduit through which super-cooled glacial meltwater is fed from one processing station to another. As living corpses lurch from the shadows, the kill team have scant time to investigate the conduit and discover whether the information is accurate.
Round Rules
Dormant Poxwalkers: POXWALKER operatives begin the battle dormant, meaning they only perform Pass actions. If a KILL TEAM operative performs any action other than Normal Move or Pass, or moves into a hex adjacent to a POXWALKER operative, all POXWALKER operatives are no longer dormant.
Tide of Poxwalkers: Each time you recreate the Activation deck, set up one POXWALKER operative on the purple hex, or on an unoccupied hex as close as possible to it (unless there are 6 POXWALKER operatives in the killzone, or POXWALKER operatives are dormant). If you do so, add that operative's Activation card to the deck before shuffling.
Round Objective
Investigate and Eliminate: A KILL TEAM operative must perform the Pass action 2 times in one activation while it occupies the hex with the objective marker, then there must be no DARKTIDE operatives in the killzone.
Round 2
The priest's declamation has been confirmed. Armed with knowledge of the water supply's contamination, the kill team have traced the conduit's source to a fortified macro-pumping station. With little opportunity for subtlety, the Agents must breach the station's perimeter, but its treacherous guards must be eliminated first.
Round Rules
Dormant Guards: MOEBIAN operatives begin the battle dormant, meaning they only perform Pass actions. If a KILL TEAM operative performs any action other than Normal Move or Pass, or moves into a hex 3 hexes from a MOEBIAN operative, all MOEBIAN operatives are no longer dormant.
Round Objective
Eliminate Guards: No DARKTIDE operatives in the killzone.
Round 3
Like a cathedral to unrestrained industry, the vast macro-pumping station echoes and reverberates with the grind of gigantic engines. The Agents force their way through its depths, their goal to reach an unfathomable engine designated by the Inquisitor as the source of the conduit's taint. The machinery must be sabotaged at all costs.
Round Rules
Dormant Enemies: DARKTIDE operatives begin the battle dormant, meaning they only perform Pass actions. If a KILL TEAM operative performs any action other than Normal Move or Pass, or moves into a hex 3 hexes from a DARKTIDE operative, all DARKTIDE operatives are no longer dormant.
Tide of Poxwalkers: Each time you recreate the Activation deck, set up one POXWALKER operative on the purple hex (unless it's occupied, there are 6 POXWALKER operatives in the killzone, or DARKTIDE operatives are dormant). If you do so, add that operative's Activation card to the deck before shuffling.
Guard: The GUNNER operative has the following behaviour instead:
- Shoot and Pass
- Pass and Pass
Round Objective
Sabotage Objective: A KILL TEAM operative must perform the Pass action 2 times in one activation while it occupies the hex with the objective marker.
Mission Six: Assault
The kill team learn the macro-pumping station was only one of several. The corruptive taint turning hive dwellers into rotting abominations is being coordinated from a central control hub. The kill team must breach its fortified sanctum, holding off traitors swarming to the control hub's defence until the servo-skull has initiated a catastrophic meltdown.
Round 1
The Agents conduct a rapid infiltration of key data-stations, shepherding a specialised servo-skull into the control hub whilst securing a route of escape. However the sound of boots and shuffling steps warn of enemy reinforcements approaching.
Round Rules
Servo-skull (pg 27)
Moebian Reinforcements: Each time you recreate the Activation deck, if there's a COMMSMAN operative in the killzone, set up one TROOPER operative on a randomly determined unoccupied purple hex (unless they're all occupied or there are 5 TROOPER operatives in the killzone). If you do so, add that operative's Activation card to the deck before shuffling.
Round Objective
Eliminate and Infiltrate: There must be no COMMSMAN operative in the killzone, then one or two KILL TEAM operatives (the players' choice) and the Servo-skull token must move across the Exit Edge of the killzone. Those KILL TEAM operatives will be infiltrators in Round 2.
Round 2
With its Agents and the servo-skull now in place behind enemy lines, the kill team begin a shock assault on the control hub's primary sanctum. Their operatives must engage the traitors hard and fast, giving them no opportunity to coordinate a defence while the servo-skull begins unpicking the sanctum's complex security data-scripts.
Round Rules
Infiltrators: The KILL TEAM operatives that moved across the Exit Edge in the previous round are infiltrators. Infiltrators must be set up in the green start hexes at the bottom of the mission map. The other KILL TEAM operatives must be set up in the green start hexes at the top.
Covert Approach: For the purposes of the Threat Principle and selecting valid targets, MOEBIAN operatives ignore all infiltrators until they are discovered. All infiltrators are discovered if any of them perform any actions other than Normal Move or Pass, or move into an orange hex.
Round Objective
Eliminate: No DARKTIDE operatives in the killzone.
Round 3
With the control hub's sanctum breached, the dark heart of the traitors' operations are revealed. The stakes could not be higher; every moment's delay could mean more districts tainted. The kill team must hold off the waves of counter-attacking enemies while the servo-skull completes its delicate sabotage and initiates the meltdown.
Round Rules
Prepared Defence: At the start of the Battle phase, each KILL TEAM operative can perform one free action.
Tide of Enemies: Each time you recreate the Activation deck, randomly determine one operative from the TROOPER or POXWALKER operatives not in the killzone. Randomly determine one purple hex, set up that operative on that purple hex, or on an unoccupied hex as close as possible to it, then add that operative's Activation card to the deck before shuffling.
Round Objective
Eliminate: No DARKTIDE operatives in the killzone.
Note: the closing page of the book (printed page 46) is an advertisement for Kill Team and is not transcribed.