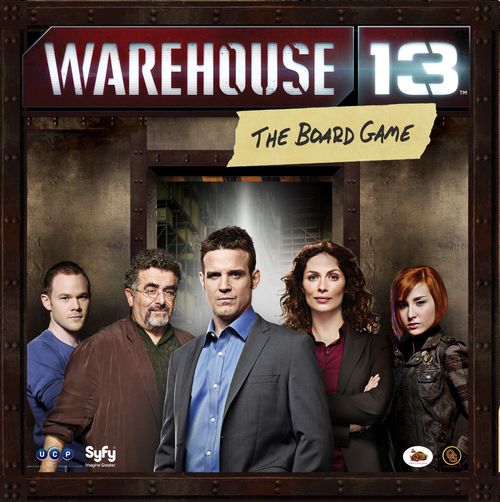
Warehouse 13: The Board Game
Warehouse 13: The Board Game Rulebook
Table of Contents
Table of Contents
Overview
Each Episode begins with the Ping Phase, in which the artifact's location is revealed and clue dice are rolled. Clues are represented by 13 custom six-sided dice.
After the Ping Phase, the Investigation Phase begins. During the Adversary turn, the Adversary will act. Afterwards, each Agent must perform an Action, such as drawing Traits, playing a Trait, performing Warehouse Maintenance, or traveling to the Field. Next, each Agent must attempt to claim a clue die. If an Agent cannot claim a clue die, one must be neutralized, removing it from play for the remainder of that Episode. Finally, each Agent must draw a free Trait.
The Investigation Phase repeats until all of the clue dice are either claimed or neutralized, then the Retrieval Phase begins. Each artifact displays symbols that correspond to the symbols on the clue dice. During each round of the Retrieval Phase, the players secretly roll all of their clue dice and each player chooses one to apply to the artifact. The chosen dice are revealed simultaneously. The Adversary will intervene by rolling Goo dice which can neutralize clue dice. If enough clues are applied to match the artifact's symbols, the artifact is retrieved. If the Agents run out of clue dice before rolling enough symbols, the artifact is lost to the Adversary.
Play then continues to the next Episode. After three artifacts are retrieved, the Warehouse Agents win. However, if three artifacts are lost, the Finale begins, in which the Agents have one last chance to thwart the Adversary's grand scheme.
Ways for the Warehouse to Win
- Retrieving three Artifacts
- Stopping two Plots
Ways for the Traitor to Win
- Depleting the Stress deck
- Filling the Warehouse Maintenance track
- Executing two Plots
Component List
- 1 Field Agent Training Manual (this book)
- 1 Warehouse board
- 1 Lost Artifacts board
- 5 Warehouse Agent Shields
- 5 Warehouse Dice Covers
- 18 Dice
- 13 Clue Dice (3 blue, 3 red, 3 yellow, 3 green, 1 black)
- 3 Goo Dice (purple)
- 2 Warehouse Dice (brown)
- 182 Small-sized Cards (44 x 67 mm)
- 80 Traits
- 25 Stress
- 39 Traitor Cards
- 13 Consequences
- 5 Loyalty Cards
- 20 Ability Cards
- 73 Large-sized Cards (63 x 88 mm)
- 26 Pings
- 26 Artifacts
- 8 Adversary Artifacts
- 13 Plots
- 34 Cardboard Tokens
- 5 Warehouse Agent Tokens (with plastic stands)
- 1 First Agent Token (with plastic stand)
- 18 Obstacles
- 4 Obstacle Rings
- 1 Broken Gear Token
Before playing, punch out the cardboard tokens. Place the Warehouse Agent tokens and the First Agent token in the plastic stands. Always be sure to keep game components away from small children, animals, and neutralizer goo.
Component Descriptions & Rules
These descriptions contain important information about components you will encounter. Don't just skim over these! Failing to fully understand your surroundings and equipment can lead to disastrous consequences.
Warehouse Board
The Warehouse board depicts the Actions that can be taken in and around the Warehouse. The right side of the board depicts the artifact's location, which is also called the Field.
Lost Artifacts Board
The Lost Artifacts board is used to display the artifacts that are lost as well as the Consequences that are affecting the Agents.
Warehouse Agent Shields
The Warehouse Agent shields depict each of the playable Warehouse Agents in the game. Each shield provides the following information about the Agent:
- Agent ID number
- Physical and Mental attributes
- Focus Traits
Ability Cards
The Ability cards are used to indicate whether an Agent's abilities are available. Each Agent has the following Ability cards:
- Asset Ability – an ability that is always available to the Agent
- Episode Ability – an ability that is usable once per Episode
- Season Ability – an ability that is usable once per Season
- Downside – a negative characteristic that affects the Agent
When an Episode Ability or Season Ability is used, flip the card over to indicate that the ability is unavailable.
Loyalty Cards
Loyalty cards indicate whether an Agent is a Loyal Agent or the Traitor. Loyal Agents work for the benefit of the Warehouse. The Traitor works for the benefit of the Adversary. There is always exactly one Traitor.
Warehouse Agent Tokens
The Warehouse Agent tokens indicate where the Agents are in and around the Warehouse or the Field.
First Agent Token
The First Agent token is placed in front of the First Agent, who acts first during the Episode.
Warehouse Dice Covers
Warehouse dice covers are used to cover clue dice during the Retrieval Phase.
Traits
Traits are cards that are used for their text effects or to investigate clues. Each Agent has a hand limit of 13 Traits. An Agent who has more than 13 cards at any time must immediately discard Traits until the hand limit is no longer exceeded.
There are four different types of Traits: Logic (Blue), Intuition (Red), Lore (Yellow), and Tech (Green). The top of each card indicates when the Trait can be played for its text effect. Action Traits require an Action to activate. Instant Traits can be used at any time. Retrieval Traits can be used only during the Retrieval Phase.
Each Trait has a numeric value of 0, 1, or 2. These values are used to claim clue dice.
Traits are discarded face up into discard piles. Discard piles are not searchable. When someone needs to draw a Trait and no cards are available, shuffle the discard pile and create a new draw pile.
Each Trait draw pile contains two Calamities. When a Calamity is drawn, resolve it immediately following Warehouse Standard Protocol (page 19) if necessary and do not draw a replacement card.
The Calamity card shows the Action "Allow any other Agent to immediately perform an Action."
Clue Dice
The clue dice colors and symbols correspond to the colors and symbols on the Traits. The four clue symbols are Logic, Intuition, Lore, and Tech.
Each die has a 1-Logic, 1-Intuition, 1-Lore, and 1-Tech face. It also has a 0-clue and a 2-clue face that corresponds to the die's color. For example, a Logic die will contain a 0-Logic face and a 2-Logic face. Therefore, a Logic die has a greater chance of rolling a Logic symbol than other dice do.
There is also one black Wild die. Like the other clue dice, it has a 1-Logic, 1-Intuition, 1-Lore, and 1-Tech face. In addition, it has a 1? and 2? face. These can be used to represent any clue type. For example, the 2? face could mean 2 Logic, 2 Intuition, 2 Lore, or 2 Tech clues.
Goo Dice
The three purple Goo dice have a 1-Logic, 1-Intuition, 1-Lore, and 1-Tech face. They also have a 2? face and a blank face. These dice can neutralize the Agents' clue dice during Retrieval. Neutralized dice are placed in the Neutralizer bucket space on the game board and remain neutralized until the end of the current Episode.
Warehouse Dice
There are two Warehouse dice that have a 0 face, two 1 faces, two 2 faces, and one 3 face. These dice are used for challenging obstacles and for other game effects.
Pings
The Field location is represented by the city on the Ping card, which is where the Episode's artifact is located. Some clues can be investigated only in the Field. The number and type of clue dice that are in the Field are indicated on the bottom right of the Ping card. Some Pings also contain an Action or a Travel effect. Action effects are indicated by the word Action and require an Action to activate. Travel effects are activated when an Agent moves to the Field.
Artifacts
Artifacts are what the Agents are attempting to investigate and retrieve. Field Clues are placed on top of the face-down Artifact card. Artifacts remain hidden until the last clue die is removed from the card. Some artifacts contain a Whammy that can negatively affect the Agents if they take too long to identify the artifact.
Each artifact has number values for Logic, Intuition, Lore, and Tech. These number values indicate how many clues are needed to retrieve the artifact during the Retrieval Phase.
Adversary Artifacts
Adversary Artifacts are powerful artifacts that are tied to a particular Adversary. Each of MacPherson's Adversary Artifacts contain an additional Consequence that will affect the Warehouse Agents if the artifact is lost.
Plots
If MacPherson captures three artifacts, the Finale begins in which he will attempt to complete two Plots. Each Plot has number values for Logic, Intuition, Lore, and Tech. These number values indicate how many clues are needed to stop the Plot.
Consequences
Lost artifacts are used by MacPherson to cause Consequences that affect the Warehouse Agents. Consequence cards make the Adversary more powerful. For example, some Consequences can lock clue dice, taking them permanently out of play for the rest of the game.
Traitor Cards
Traitor cards are used by the Adversary and, eventually, by the Traitor. The top of each Traitor card indicates when the card can be played. Action cards require an Action to activate. Instant cards can be played at any time.
Obstacle Rings
Obstacle rings are used to indicate a +1 modifier on an obstacle. Each obstacle can have only one obstacle ring. If the obstacle is discarded, its ring is also discarded.
Broken Gear
The broken gear token is used to cover a Warehouse Maintenance space. When the broken gear is on the Warehouse Maintenance track, only four obstacles are required to blow up the Warehouse.
Stress
Stress cards are accumulated during each Episode and reduce the number of Traits that can be held by an Agent. Although the back side of Stress cards look like Traits, Stress cards are not Traits. When you are instructed to discard Traits, you cannot discard Stress.
Wound Tokens
Wound tokens are used to indicate that an Agent is wounded. A wounded Agent is placed on its side with a wound token on top. A wounded Agent must heal to remove the wound token. However, the Agent token is still on its side, which means that the Agent is still KO'd, or Knocked Out. Being KO'd is less severe than being wounded. A KO'd Agent must heal to stand up the Agent token.
An Agent cannot be double KO'd or double wounded. However, a KO'd Agent who becomes wounded receives a wound token.
Obstacles
Obstacles are barriers that stand in the Agents' way. Obstacle tokens with an arm represent Physical obstacles. Obstacle tokens with a head represent Mental obstacles. There are four 2s, three 3s, and two 4s of each type.
Once an obstacle is discarded, it remains face up. When there are no more face-down obstacles to draw, turn all of the obstacles face down and randomize them.
Game Setup
- Place the Warehouse board and the Lost Artifacts board on a flat surface.
- Place the obstacles face-down beside the board and randomize them. Place the obstacle rings, broken gear token, wound tokens, and dice beside the board.
- Shuffle each Trait deck and place them face-down next to the Warehouse board beside their corresponding colors.
- Place five Stress cards for each player in a stack next to the Warehouse board. Place the remaining Stress cards in the game box.
- Shuffle the Traitor cards and place them face-down next to the Lost Artifacts board.
- Shuffle the Plots and place them face-down next to the Lost Artifacts board.
- Shuffle the Consequences and place them face-down next to the Lost Artifacts board.
- Shuffle the Pings and place six of them face-down on the Ping space on the Warehouse board. Place the remaining Pings in the game box.
- Shuffle the Artifacts and Adversary Artifacts separately. Deal two Artifacts face-down and place them on the Artifact space on the Warehouse board. Randomly select one Adversary Artifact and add it face-down on top. Add two more Artifacts face-down. Place the remaining Artifacts and Adversary Artifacts in the game box.
- Each player chooses a character and takes the corresponding Warehouse Agent shield, token, Ability cards, and a dice cover. Place the Agent tokens in the Warehouse.
- Each player draws one Trait card for each of their Agent's Focus Traits. If a Calamity is drawn, discard it and draw a replacement card. Shuffle any Calamities back into their corresponding Trait draw piles.
- Remove one Loyal Agent card for every player fewer than 5. Shuffle the Traitor card and the rest of the Loyal Agent cards together. Deal one Loyalty card face-down to each player.
- Give the First Agent token to the player with the lowest Agent ID number. For example, Artie has an Agent ID number of 1914-10.
After setup is complete, start the first Episode.
Episode Sequence
- Ping Phase
- Investigation Phase
- Retrieval Phase
- Cleanup Phase
Ping Phase
- Reveal Ping
- Roll Clue Dice
Reveal Ping
Turn over the top Ping card. Resolve any immediate card effects.
Roll Clue Dice
Roll the clue dice that are displayed in the bottom right of the Ping card. If a die is unavailable because it is locked, roll as many dice as can be rolled. Sort these dice by symbol and place them on top of the face-down artifact. These clues are called Field Clues. They can be accessed only by Field Agents, who are Agents that have traveled to the Field.
Roll all remaining clue dice, sort them by symbol, and place them on the Leads spaces that match each symbol. Leads can be accessed by any Agent, whether in the Warehouse or in the Field. (see example below)
Example: A Ping is revealed and the artifact is in Nashville. The three dice listed on the Ping are rolled and placed on the face-down artifact. The remaining ten dice are rolled, sorted, and placed in the Leads area.
The blue Logic dice all display Logic symbols, but each has a different value (0-Logic, 1-Logic, and 2-Logic), and all of them are placed on the blue area with the Logic symbol. Although two green Tech dice were rolled, none of the dice display Tech clue symbols, so no dice are placed in the green area. One of the green Tech dice displays an Intuition symbol, so it is placed in the red area, NOT the green area. The Wild die displays a 1? symbol, which does not correspond to any particular symbol, so you can place this die on any symbol or on the bar next to the Leads.
Investigation Phase
- Adversary/Traitor Turn
- Agent Turns
Adversary Turn
If the Traitor has not been revealed, draw and resolve a Traitor card. If a clue die or an Agent must be selected, follow Warehouse Standard Protocol under Gameplay Mechanics (page 19). If any other choices must be made, the First Agent Rule applies, also listed under Gameplay Mechanics (page 19).
If the Traitor has been revealed, the Traitor will instead follow the steps under Traitor Turn.
Traitor Turn
- Take a Traitor Action
- Draw a Traitor Card
Take a Traitor Action. Play an Action card or draw a Traitor card. Instant cards can be played at any time. If a clue die or an Agent must be selected, the Traitor chooses.
Draw a Traitor Card. Draw one Traitor card. Like Agents, Traitors have a maximum hand size of 13.
Agent Turns
- Take an Action
- Work the Case
- Draw a Focus Trait
Take an Action
Starting with the First Agent and proceeding clockwise, each Agent must take one of the following Actions:
- Heal a KO or a wound
- Play an Action Trait
- Perform a Warehouse Action
- Travel
- Perform a Field Action
- Perform a Ping Action
Healing is a mandatory Action. If you are KO'd or wounded, you MUST use your Action to heal by standing your token up or by removing a wound token.
Obstacles
An obstacle blocks access to whatever the obstacle is placed upon. For example, an obstacle on a Warehouse location blocks access to that Action, and an obstacle on a Trait draw pile prevents Agents from drawing those Traits.
An Agent must challenge and defeat an obstacle to remove it. To challenge an obstacle, announce what you intend to do. Then, roll a Warehouse die and add the Agent's corresponding attribute; Traits that affect the obstacle must be played before the die is rolled. If the total exceeds the obstacle's difficulty, discard the obstacle and you may proceed. However, a die roll of 0 always fails. If the die roll is a 0, or if the total is equal to or less than the obstacle's difficulty, the obstacle remains and you cannot proceed.
Example: Claudia plays a Collaborate card as an Action, targeting the Logic deck. However, access to the Logic deck is blocked by a Mental obstacle with a value of 5 (4 plus a +1 ring). To defeat it, Claudia needs to roll a 3 on a Warehouse die to exceed the obstacle's value (Claudia's 3 Mental + 3 = 6).
Jinks is in the Warehouse with Claudia, so he plays an Analog Password Decoder, which reduces the difficulty by 1. Now Claudia needs to roll a 2 or greater.
Myka also has an Analog Password Decoder, but she is in the Field. The Analog Password Decoder can be played only in the same location as the Mental challenge. But Myka does have a Farnsworth, which she plays as an Instant to send her Analog Password Decoder to Claudia. Claudia plays the Analog Password Decoder to reduce the difficulty by another point. Now Claudia needs to roll a 1 or greater. Remember, a roll of 0 always fails, so there is no need to reduce the difficulty any further.
Before Claudia rolls the Warehouse die, Pete the Traitor plays Self-fulfilling Prophecy, which forces Claudia to roll two dice and take the worst. Claudia rolls a 2 and a 0. A roll of 0 always fails, so the Collaborate card is lost and the Mental obstacle remains on the Logic deck.
Some cards can cause an Agent to immediately face an obstacle. Afterwards, the obstacle is discarded regardless of whether or not the Agent defeats the obstacle.
An obstacle at your location can be challenged as an Action even if you cannot perform the action that is being blocked.
Example: Claudia knows that Pete wants to travel to the Field. However, the Travel space is blocked by a 4-Mental obstacle, which Pete cannot defeat on his own. Since nobody else is in the Field, Claudia cannot travel, but she can spend her Action to challenge and defeat the obstacle, allowing Pete to travel to the Field unimpeded.
A Snag is a permanent restriction that blocks access to certain Actions or Abilities. An Agent can bypass a Snag by rolling greater than the Snag value on a Warehouse die. Bypassing a Snag does not remove it.
Warehouse Actions
The Warehouse Actions are:
- Travel: Travel to the Field, following any Travel instructions that appear on the Ping.
- Warehouse Research: Draw two Trait cards of the same color.
- Bed & Breakfast: Return up to two Stress to the Stress deck. If an Agent is ever required to draw Stress when the Stress deck is empty, the Traitor immediately wins.
- Warehouse Maintenance: Challenge any obstacle on the Warehouse Maintenance track. If the challenge is successful, the obstacle is defeated. If the Warehouse Maintenance track is ever filled, the Warehouse blows up and the Traitor immediately wins.
- Bronze Sector: Vote to Bronze or Debronze an Agent. After an Agent has been selected, the remaining Agents should vote by showing a thumbs-down to Bronze or a thumbs-up to not Bronze. A majority vote is required (2 of 2 / 2 of 3 / 3 of 4) to Bronze an Agent; no vote is required to Debronze an Agent. If a player is Bronzed, follow the Bronzing steps under Gameplay Mechanics (page 19).
Only one Agent can be Bronzed at a time. If a Loyal Agent has been Bronzed, they must be Debronzed before a different Agent can be Bronzed.
After the Traitor has been revealed, the Bronze Sector can no longer be used.
Example: Jinks believes that Pete is the Traitor, so he spends his Action to activate the Bronze Sector. Artie, Claudia, Myka, and Jinks must now vote, and since four players are voting, three thumbs-down votes are required to Bronze Pete. The four Agents hold out their hands, and Jinks counts down - "3, 2, 1, Vote!" All four players immediately show a thumbs-down vote, so Pete is Bronzed. Pete must now follow the steps listed under Bronzing.
Field Actions
- Field Research: Draw one Trait that corresponds to one of the Agent's Focus Traits.
- Field Investigation: Investigate a clue, paying normal cost (see Work the Case, below).
- Ping Action: Some Pings have an Action that you can perform.
- Travel: Travel back to the Warehouse. Do NOT perform any Travel effects.
Claiming Clues
You can only claim a clue that you can access. If you are in the Warehouse, only the Leads are available to you. If you are in the Field, all of the unclaimed clues are available to you.
If you cannot or do not want to claim a clue die, you must neutralize a clue die of your choice by placing it in the Neutralizer bucket. If a Lead is available, it must be chosen first.
Example: Myka is in the Field, so she can access any of the clue dice (Leads and Field Clues). Pete and Claudia are in the Warehouse, so they can access only the Leads (not the Field Clues). However, Claudia could use her "Remote Access" Episode Ability to claim the green tech die in the Field. Always remember that card effects override normal game rules.
Myka says that she doesn't have a card that will claim any of these clues. She cannot choose to neutralize the green die in the Field because Leads must be chosen first. She chooses the 2-Lore clue, since neither Pete nor Claudia have Lore as a Focus Trait.
Work the Case
Starting with the First Agent and proceeding clockwise, each Agent must Work the Case by spending a Trait to investigate a clue (even if they claimed a clue as an Action). However, a KO'd or wounded Agent MUST heal and cannot claim a clue die.
To investigate a clue, you must discard any one Trait that matches the symbol on the die (NOT the color of the die!). Whenever you investigate a clue, you spend a Trait for its number and symbol, NOT for its card text. The number on the Trait card must be equal to or greater than the number on the clue die. After you discard the Trait, claim the die, placing it in front of you.
Exactly ONE card can be used to claim exactly ONE die. You cannot add two cards together to claim a die. You can overpay for a die, but you don't get any "change" in return.
Example: Consider these clue dice.
A 2-Intuition Trait (like Goozooka) can claim any of these clue dice (NOT two of the 1-Intuition clues - remember, we don't do math, and we don't make change).
A 1-Intuition Trait (like The Caretaker) can claim either of the 1-Intuition clues or the 0-Intuition clue.
A 0-Intuition Trait (like Premonition) can claim only the 0-Intuition clue.
(Claim example cont'd) You CANNOT use a Lore Trait (like I Smell Fudge) to claim the 1-Intuition clue on the yellow Lore die - you must match the symbol on the die, NOT the color of the die. Also, remember that the card text does not apply when you Work the Case.
Revealing the Artifact
As soon as the last clue is removed from the artifact, reveal the artifact. Resolve the Whammy if no Leads remain when the artifact is revealed (in other words, the clue on the artifact was the last remaining clue). If a Whammy exists, it will be printed at the bottom of the Artifact card.
Also, when you reveal the artifact, reveal the top Consequence. If the artifact is lost, this Consequence will remain in play for the rest of the game.
Draw a Focus Trait
Starting with the First Agent and proceeding clockwise, each Agent must draw one Trait that corresponds to one of the Agent's Focus Traits.
Retrieval Phase
The Retrieval Phase begins immediately when all clues (Field Clues AND Leads) have been claimed or neutralized.
At least one Agent must be in the Field for an artifact to be retrieved. If no Agents are in the Field, the artifact is automatically lost to the Adversary; follow the Artifact Lost conditions on page 16.
Starting with the First Agent, the remaining revealed clue dice can then be applied to the artifact by placing the dice in the Leads area that correspond to the matching Clue symbol.
A 2-clue contributes 2 to the artifact's requirement; a 0-clue contributes nothing. A die that helps to fulfill an artifact clue requirement is considered to be applied. A die that does not help to fulfill an artifact clue requirement is considered to be misapplied.
Example: The Agents are attempting to retrieve the Aztec Bloodstone. Artie is the First Agent, Pete is sitting to his left, and Myka is sitting to Pete's left. After the three Agents roll their dice, they each place a die underneath their respective dice covers, sliding the covers out from behind their shields.
They reveal their dice simultaneously. Artie and Myka have both rolled a 1-Logic clue. Pete has rolled a 1? on the Wild die. Pete chooses to work on the Lore requirement by making his 1? a 1-Lore symbol.
The Traitor has not yet revealed, so a Goo die is rolled for the Adversary, a 1-Lore symbol. The Goo die does not match Artie's die.
Next is Pete; the Goo die matches Pete's die, so it is sent to the Neutralizer bucket.
Artie applies his die, placing it on the blue gear. The Logic requirement is now complete, so Myka's die is placed just outside of the blue gear as a misapplied die.
If there are more than enough clues to fulfill one of the artifact's clue requirements, you can swap applied and misapplied clue dice to choose which dice are used to fulfill the requirement.
Example: The Agents still need more Lore clues to retrieve the Aztec Bloodstone. Artie has not used his "Senior Agent" Episode Ability to reroll a misapplied Lore die. Since there are more than enough Logic clues, Artie can swap the yellow Lore die and the green Tech die, then use his Episode Ability to reroll the Lore die.
The Agents will then perform another Retrieval round by rolling their remaining clue dice. This process will continue until the artifact's requirements are fulfilled or until the Agents run out of clue dice and have no other cards or Abilities to use.
As soon as the artifact's requirements are met, the artifact can be retrieved. However, if the only Agent in the Field is the unrevealed Traitor, he or she can choose to immediately capture the artifact for the Adversary; follow the Artifact Lost conditions below, then follow the steps in Traitor Reveals under Gameplay Mechanics (page 19).
Retrieval Round Steps
Several game effects are marked as "Before Retrieval". These take place first, before the Agents attempt to retrieve the artifact. Resolve effects in this order:
- Artifact effects
- Consequence effects
- Character abilities
Additionally, all dice in the Bronze Sector and dice held by Agents who are currently Bronzed are rolled and immediately applied to the artifact.
During each Retrieval round, the Agents roll their claimed clue dice behind their Agent shields. However, KO'd and wounded Agents must heal instead of rolling their dice. An Agent who heals must neutralize one of their claimed clue dice, if possible.
After the Agents roll their dice, each Agent must secretly cover one clue die by placing a Warehouse dice cover over it. Do not move your remaining dice in case any game effects can influence them.
The Agents reveal their dice simultaneously. Any game effects that change the dice or require that a decision be made (such as choosing the Wild symbol or selecting a die to be applied) must then be performed.
A Goo die is then rolled for the Adversary. The Goo die will neutralize the first clue die that matches it, starting with the First Agent and proceeding clockwise. The Adversary never runs out of Goo dice.
If the Traitor is revealed (and not Bronzed): Instead of the Adversary rolling one Goo die, the Traitor rolls all available Goo dice and covers one of them. The Traitor reveals the Goo die when the Adversary normally would. The Traitor may choose to neutralize ANY Agent's matching die. However, neutralizing an Agent's die also neutralizes the Goo die. If the Goo die does not match any of the Agent's dice, or if the Traitor chooses to not neutralize a matching die, the Traitor keeps the Goo die.
Artifact Retrieved
Place the artifact in the Stacks and discard the Consequence. If three artifacts are in the Stacks, the Warehouse immediately wins. Otherwise, proceed to the Cleanup Phase, then begin a new Episode.
Artifact Lost
If the artifact's requirements are not met, the artifact is lost. Place the artifact on the Lost Artifacts board and place the face-up Consequence either on top of or next to the artifact. If three artifacts have been lost, proceed to the Cleanup Phase, then to the Finale. Otherwise, proceed to the Cleanup Phase, then begin a new Episode.
Cleanup Phase
- Return Dice
- Return to Warehouse
- Draw Stress
- Apply Consequence Effects
- Refresh Episode Abilities
- Pass First Agent Token
- Discard Ping
Return Dice
Return all unlocked clue dice to the side of the board.
Return to Warehouse
Return all Agent Tokens to the Warehouse. Remove any lingering KO and wound effects.
Draw Stress
All Agents draw one Stress. Remember, if an Agent is ever required to draw Stress when the Stress deck is empty, the Traitor immediately wins.
Apply Consequence Effects
Apply any Consequence effects that take place during Cleanup.
Refresh Episode Abilities
Turn over any face-down Episode Ability cards.
Pass First Agent Token
Pass the First Agent Token clockwise.
Discard Ping
Discard the face-up Ping card.
Finale
After three artifacts have been lost, the Finale begins. If the Traitor has not yet revealed, the Traitor MUST reveal, following the steps listed under Traitor Reveals (see page 19).
Finale Sequence
- Reveal Plot
- Resolve Plot Effects
- Allocate Dice
- Actions
- Stop the Plot
- Cleanup
Reveal Plot
The Traitor draws up to a hand size of two Plots, then chooses one Plot to play, keeping or discarding the other Plot.
Resolve Plot Effects
Resolve any immediate Plot effects. Some Plot effects activate during the Stop the Plot phase. Agents choose any dice that should be neutralized unless otherwise specified.
Allocate Dice
Starting with the First Agent and proceeding clockwise, each Agent takes one die that matches each of his or her Focus Traits. If a matching die is not available, the Agent can take any available die.
After the Focus Trait dice have been distributed, each Agent will take one die, again starting with the First Agent and proceeding clockwise, until all dice have been claimed.
Example: Myka, Jinks, and Claudia are attempting to stop MacPherson's Plots. A Consequence has locked a Logic die. Myka is the First Agent, so she takes a Logic die and a Lore die, which match her Focus Traits. Jinks takes an Intuition die and a Logic die. Claudia takes a Tech die, and because there are no more Logic dice to take, she takes another Tech die. Starting with Myka, the remaining dice are taken one at a time by the Agents.
Actions
- The Traitor does ONE of the following:
- a. plays an Action card
- b. draws a Traitor card
- c. discards any Traitor card to [gear symbol, as printed; the printed text does not define it]
- d. discards any Traitor card to force an Agent to draw two Stress
- The Traitor draws a free Traitor card.
- Starting with the First Agent and proceeding clockwise, each Agent may take an Action or pass. However, after an Agent takes an Action, the Traitor can immediately play an Action card or draw a Traitor card. This continues until all Agents have had the opportunity to take an Action or pass.
Stop the Plot
The Warehouse Agents will attempt to stop the Traitor's active Plot. This works exactly like the Retrieval Phase: the Agents roll, cover, reveal, and apply clue dice, while the Traitor attempts to neutralize the Agents' clue dice. Any Traits, Consequences, or Abilities that reference Retrieval can be used during the Stop the Plot phase.
If the Plot's requirements are met, the Warehouse has stopped the Plot. If two Plots are stopped, the Warehouse immediately wins.
If the Agents run out of clue dice and have no other cards or Abilities to use before the Plot's requirements are met, MacPherson's Plot succeeds. If MacPherson successfully executes two Plots, the Traitor immediately wins.
Cleanup
Return the clue dice to the side of the Warehouse board, apply Cleanup effects, pass the First Agent token clockwise, and begin a new Plot turn. Agents do NOT draw Stress and Episode Abilities do NOT refresh.
Gameplay Mechanics
First Agent Rule
The First Agent makes choices that affect the team and settles any disputes between the Agents.
Warehouse Standard Protocol
If a clue die or an Agent must be chosen by the Traitor, and the Traitor is not revealed, the following Warehouse Standard Protocol must be followed:
Clue:
- The First Agent chooses the lowest-numbered Lead of that type.
- If no Leads are available, the First Agent chooses the lowest-numbered Field Clue of that type.
- If there are no Leads or Field Clues available, a claimed die of that type must be neutralized, starting with the First Agent and going clockwise.
Agent:
- The First Agent is chosen.
- If it is impossible to choose the First Agent, select the next applicable Agent, going clockwise.
Bronzing
A Bronzed Agent immediately reveals his or her Loyalty card.
If the Agent is a Traitor:
- Place the Traitor's token on its side in the Bronze Sector.
- Place all of the Traitor's clue dice on the Bronze Sector.
- Discard all of the Traitor's Traits to their corresponding discard piles.
- Return all of the Traitor's Stress to the Stress deck.
- If the Traitor is the First Agent, pass the First Agent Token to the left.
- The Traitor remains Bronzed until the next Traitor Turn, at which time the Traitor's token moves to the Lost Artifacts board as his or her Action.
If the Agent is a Loyal Agent:
- The Traitor can choose to reveal his or her Loyalty card. If so, follow the steps under Traitor Reveals (below).
- Place the Agent's token on its side in the Bronze Sector.
- Place all of the Agent's Traits and Stress in the game box; they are no longer available for the Agents to use.
- The Agent remains Bronzed until another Agent activates the Bronze Sector to Debronze.
- While Bronzed, a Loyal Agent:
- Cannot take any Actions
- Cannot play any cards
- Cannot draw any Traits or Stress
- Cannot use Abilities
- Must neutralize a die when Working the Case
- Rolls and applies all their dice before Retrieval
Traitor Reveals
The Traitor can choose to reveal ONLY when one of the following events occurs:
- The Traitor is alone in the Field with an artifact that has been successfully retrieved.
- A Loyal Agent has been Bronzed.
- A lost Adversary Artifact contains a "Traitor may Reveal" Consequence.
The Traitor MUST reveal as soon as the Finale begins.
If the Traitor reveals, follow these steps:
- Place his or her Agent token on the Lost Artifacts board.
- Place all of the Traitor's Clue dice on the Bronze Sector.
- Place all of the Traitor's Traits and Stress in the game box; they are no longer available for the Agents to use.
- Place all of the Traitor's Ability cards in the game box.
- If the Traitor is the First Agent, pass the First Agent Token to the left.
- The Traitor draws two Traitor cards into his or her hand.
FAQ
Secrecy Rules
- The number of cards in your hand is public knowledge.
- The type of cards in your hand (Traits or Stress) is not public knowledge. You are allowed to provide general information about your hand (for example, "I don't have many Traits left" or "I can't claim any clue dice"). You do not have to be truthful, however.
- Do not provide detailed information about the Traits in your hand (for example, "All I have are 0s" or "I have two Teslas."). However, you are allowed to request assistance (for example, "Does anybody have a Zipline?" or "Can anyone Farnsworth me a Lore card?").
- You are allowed to suggest which clue a player should investigate or which clue you plan to investigate.
- The color and number of dice you have claimed is public knowledge.
- Do not reveal any information about the die or dice you roll behind your shield or place underneath your dice cover. This information should remain secret until the dice are revealed. Similarly, do not suggest which clue requirements the other agents should fulfill until the dice are revealed.
Discard Piles
-
When a card must be drawn from a draw pile but no cards remain, shuffle the discard pile to refresh the draw pile.
-
You cannot search through the discard piles. Only the top card of each discard pile is public knowledge.
-
Calamities in discard piles CANNOT be drawn by Abilities or by cards that allow you to draw the top card of the discard pile.
-
Trait discard piles are NOT affected by obstacles that cover the Trait draw piles.
-
A card in Artie's Travel Bag does not count against the hand size limit of 13 cards.
-
A Wild die displaying a 1? or 2? symbol cannot be claimed by abilities or cards that allow you to claim a die with a particular clue symbol (such as Parallel Investigation or The Restricted Files).
-
Players can play multiple copies of Instants. For example, two Teslas reduce the difficulty of a Physical challenge by 2.
-
If a card or ability forces a reroll of a die, any modifiers that were in effect are still in effect.
-
You can select yourself as "an Agent at your location".
-
Obstacles can be challenged, but not all challenges are obstacles. Some Traits affect challenges, some Traits affect only obstacles.
-
Trait decks and the Travel space are accessible from anywhere; therefore, obstacles that cover these locations can be challenged from anywhere.
-
An Agent who has more than 13 cards must discard Traits, not Stress. However, if an Agent manages to acquire 13 Stress, any further Stress must be discarded to the game box.
Variants
Several variants are available to tailor the game to your particular preferences. These variants are not mutually exclusive; they can be combined to create an altogether different gameplay experience.
Fully Cooperative (2 - 5 Players)
In this variant, there is no Traitor; all players are Loyal Agents. The following rules apply to this variant:
- Remove any Adversary Artifacts that include "Consequence: Traitor may Reveal" (2 in the base game).
- All Traitor decisions are handled by Warehouse Standard Protocol.
- The Bronze Sector is unavailable.
- During the Finale, the Plot is revealed from the top of the Plot deck.
- During the Finale, any Traitor Action is always to draw and resolve a Traitor card.
Because there is no Traitor, the game can be easier than intended. Therefore, you might want to consider the suggestions in the Increased Difficulty variant.
Fully Revealed Traitor
In this variant, the Traitor starts as revealed, and the Bronze Sector is unavailable. The Traitor can be chosen or selected randomly. The Traitor does not receive any Trait cards at the beginning of the game. Instead, perform the following steps:
- Place the Traitor's Agent token on the Lost Artifacts board.
- Place all of the Traitor's Ability cards in the game box.
- The Traitor draws two Traitor cards into his or her hand.
Increased Difficulty
To increase the difficulty, you can add one or more of the following suggestions:
- Start the game with one or more Consequences.
- Reveal two Consequences for every artifact.
- While the Traitor is hidden, allow the Adversary to roll two Goo dice, neutralizing the first matching die.
- Do not start the game with any Trait cards.
- The Traitor wins after one Plot is executed.
Decreased Difficulty
To decrease the difficulty, you can add one or more of the following suggestions:
- Play the Fully Cooperative Variant.
- Start the game with each Agent drawing two Trait cards for each Focus Trait.
- Remove one or both Calamities from each Trait deck.
- Do not resolve Calamities when drawn.
- Begin the Finale after four artifacts are lost to MacPherson.
- The Traitor wins after three Plots are executed.
Shorter Game
In this variant, there is no Finale. The Traitor wins as soon as MacPherson captures three artifacts.
House Rules
Ultimately, this is your game. Play it however best suits your group's play style.