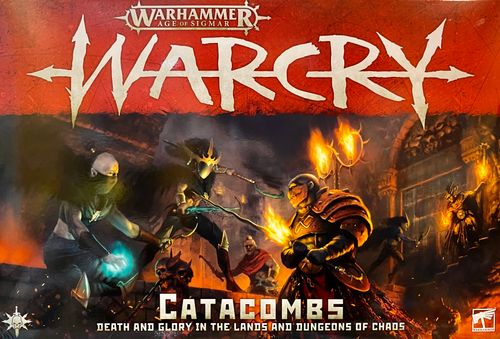
Warhammer Age of Sigmar: Warcry – Catacombs
Warhammer Age of Sigmar: Warcry – Catacombs Rulebook
Table of Contents
Table of Contents
Box Contents
The box contains: overground terrain, dungeon terrain, tokens, dice, fighter cards, ability cards, the Catacombs book, the Warcry Core Book, and a reversible gameboard.
Varanthax's Maw
The infernal forge of Varanthax's Maw rises out of the Skullpike Mountains, belching sulphurous fumes and clouds of black ash. Built into the skeleton of a long-dead drake, it is a hellish place of raging forge-fires, sweltering tunnels bedecked with icons of ruin, and blazing canals of molten rock that wind and wend through the earth. The very air burns as it is dragged into the lungs, and cinders hiss all around like angry glowflies. A simmering aura of rage lies heavy over the place. Indeed, the flames within burn with a fury that seems to leave its mark upon all who enter. The further one descends into the Maw, the more terrible and wondrous the sights become – lakes of sulphur that echo to the screams of bound fire-daemons, cavernous chambers filled with stacks of ancient treasure, and shrines raised in honour of forgotten deities of tyranny and enslavement.
War in the Depths
The Maw plays host to a brutal underground war, as tribes and warbands from across the Eightpoints and beyond lay waste to one another in a storm of blood and iron. Many of these scattered gangs seek to obtain powerful relics that rumours say lie buried deep beneath the forge-complex, or secure arcane furnaces with which to create their own nightmarish weapons. Amongst the most fearsome of these killers are Scions of the Flame, worshippers of fiery oblivion. They believe the Maw to be their sacred place alone, a volcanic fortress from which to spread their desired inferno across the land. Prowling the halls and warrens of the great forge-complex, they search for relics of ruin with which to conduct their profane rituals of immolation, as well as trespassers to sacrifice to the Ever-Raging Flame.
Fire and Slaughter
Of the many underground dungeons, crypts and cursed temples that stretch far beneath the crust of the Eightpoints, there are certain names that resonate with particular infamy and foreboding. Varanthax's Maw is one of them. None save perhaps the Everchosen recall the origins of the hellish forge, nor the fate of Varanthax itself – the drake whose titanic bones form the outer walls of the structure. Some say it was Archaon that slew the beast, others that it was leashed and bound by Chaos-worshipping duardin.
Whatever the truth of its origins, the scale of this immense subterranean complex is yet to be fully understood. Even after years of raids and expeditions into its seemingly endless depths, such incursions nearly always end in death and madness, for unspeakable things lurk in the darkest places of the deep earth. The forge-tunnels of the Maw connect to many primordial places, lairs occupied by monstrous entities waiting with the patience of aeons for unwary souls to stumble into their domain.
Khainite Shadowstalkers
Killers in the Depths
Below the surface of the Eightpoints there exists another world, a subterranean network of caverns and chambers that plays host to brutal clashes between rival warbands, each with their own unique fighting styles, traditions and imposing iconography. Despite their many differences, these killers are united by their ruthless pursuit of glory and domination.
'I swear by the Ruinous Ones that I will drown these cursed warrens in blood.'
Scions of the Flame
Consumed by a furious zealotry, the Scions of the Flame are utterly single-minded in their determination to incinerate their foes and set the realms ablaze with purifying fires.
Fighters: Blazing Lord, Brazen Champion, Immolator, Fireborn.
Khainite Shadowstalkers
Having tracked their quarry silently through the night, the Khainite Shadowstalkers strike with cruel precision, wielding darkness as a weapon to disorient and terrify their foes.
Fighters: Shroud Queen, Shroudblade with Umbral Spear, Darkflame Warlock with Repeater Crossbows, Slaughtershade with Umbral Spears, Darkflame Warlock with Doomfire Ring, Shroudblades with Cursed Swords.
So too does Morathi, High Oracle of Khaine, set her eyes upon the Maw. Travelling the hidden shadow-ways known as the Umbral Web, her elite Khainite Shadowstalkers slip into its sulphurous halls, searching for timeworn ruins of the old order that might conceal treasures of interest to their ever-scheming mistress. Yet they have another, greater purpose. Word has reached the High Oracle of the strange powers of varanite, and the vast deposits of the stuff to be found beneath Varanthax's Maw. She has claimed it to be the Blood of Khaine, the long-dead God of Murder whose will she claims to interpret, and desires it as a fuel for her dark rituals. Morathi herself is not so foolish as to step foot in the Eightpoints, but her faithful will gladly infiltrate Archaon's domain and brutally eliminate anything that stands between them and that which their high priestess desires.
Tunnels of Death
This section includes rules for fighting dungeon battles. These rules are used in addition to the core rules, and are separated into the following sub-sections:
- Dungeon Battles — a step-by-step guide on how to set up a dungeon battle.
- Dungeon Terrain — additional rules that are used when fighting a battle on a dungeon battlefield.
- Infernal Forgefloor — the set-up instructions for the dungeon battlefield included in this boxed set.
- Dungeon Battle Battleplan Generator — tables for generating the deployment card, victory card and twist card for a dungeon battle.
Dungeon Battles
The running battles that rage throughout the cramped dungeons of the Eightpoints are claustrophobic and unpredictable, and every bit as bloody as those that take place above ground. This section explains how to play a dungeon battle using the contents of this boxed set. These rules are used in addition to the core rules.
To set up a dungeon battle, resolve the following steps in order (page 36 of the Core Book explains how to resolve steps 1-3):
- Muster warbands
- Make the priority roll
- Pick battle groups
- Pick a dungeon battlefield (see below)
- Generate the battleplan cards
- Set up the dungeon terrain (see below)
- Resolve the instructions on the battleplan cards
- The battle begins
Picking a Dungeon Battlefield: Dungeon battles are fought on a special kind of battlefield referred to as a dungeon battlefield. The Infernal Forgefloor dungeon battlefield is included in this boxed set. If both players agree, they can pick which dungeon battlefield the battle will be fought on. Otherwise, the players roll off and the winner picks which dungeon battlefield is used.
Generating the Battleplan Cards: Use the battleplan generator to determine the battleplan cards that will be used for the battle. Then, the player who won the priority roll chooses which player uses the red deployment points and which player uses the blue deployment points.
Setting Up Dungeon Terrain: In a dungeon battle, terrain is set up as follows:
- Set up bridges. Dungeon battlefields usually have one or more bridges placed over pits. Set up any bridges as shown in the set-up rules for the battlefield you picked (the rules for the Infernal Forgefloor are below).
- Set up dungeon doors. Starting with the player that won the priority roll, players take it in turns to set up 1 dungeon door on any dungeon doorway, until all dungeon doorways have a dungeon door upon them. There are 10 dungeon doors in this boxed set: 6 are open and 4 are sealed.
- Set up unique dungeon features. Lastly, starting with the player that won the priority roll, players take it in turns to set up 1 unique dungeon terrain feature until 4 have been set up in total. There are 7 unique dungeon features to choose from: the wall breach, the arms stash, the cursed caskets, the lever, the shattered pillars (comprised of two models), the sewer and the collapsed doorway (see Unique Dungeon Features, below). The same unique dungeon feature cannot be chosen more than once, with the exception of the lever, which can be chosen twice (there are 2 models for the lever in the box). Unless noted otherwise, each unique dungeon feature is set up anywhere on the battlefield floor more than 1" from any doorways, bridges or other unique dungeon features.
Resolving the Battleplan Cards: Each of the battleplan cards is resolved in the order of deployment, victory and twist. The battle is now ready to begin.
Reserve Phase: The deployment cards used in dungeon battles do not indicate the battle round in which reserve fighters are set up, or where they are set up. Instead, all fighters from battle groups that are in reserve are set up on the battlefield in the reserve phase of the third battle round. Starting with the player who has the initiative, players take it in turns to set up 1 of their reserve fighters on the battlefield until all reserve fighters have been set up. Each reserve fighter must be set up within 3" of the centre of an entrance tunnel and more than 3" from any enemy fighters that were set up in the same reserve phase.
Monsters: Fighters with the Gargantuan runemark cannot be included in warbands in dungeon battles.
Dungeon Battles During Campaigns: If the players agree, a campaign battle can be fought on a dungeon battlefield. If a convergence battle is a dungeon battle, the convergence map will dictate where dungeon doors are placed and which unique dungeon features are used and where they are placed. Note that fighters in the same battle group do not need to be set up within 3" of the same entrance tunnel.
Dungeon Terrain
Fighting in the cramped confines of a subterranean complex comes with its own unique challenges; doors and narrow tunnels restrict movement and form chokepoints in life-or-death battles, while the very ground beneath one's feet can give way, dropping unwary combatants into spike pits or streams of bubbling lava.
Dungeon Walls: Dungeon battlefields have areas referred to as dungeon walls. A dungeon wall is outlined with a thin red line and includes the area enclosed within. Dungeon walls are a type of terrain feature that uses the following rules:
- Terrain feature: While not represented by scenery models, dungeon walls are terrain features that are treated as obstacles. Dungeon walls are not treated as the battlefield floor. This means that fighters, treasure tokens, objective markers and other terrain features cannot be placed upon them. Because dungeon walls are obstacles, fighters may receive the benefit of cover from them.
- Movement: Fighters cannot move through dungeon walls. This includes models that can fly. The only exception to this is when a fighter uses the 'Float Through Wall' ability.
- Visibility: When determining visibility, lines drawn across dungeon walls are treated in the same way as those drawn through terrain features, meaning that dungeon walls block visibility. (For example, a fighter is not visible to an enemy fighter if a straight line cannot be drawn between the two without it passing through a dungeon wall.)
- Measuring distances: Distances cannot be measured through dungeon walls. Instead, players must measure around them.
- Objectives: If a straight line drawn from the centre of an objective marker to the closest point on a fighter's base crosses over a dungeon wall, that fighter does not count when determining control of that objective.
Dungeon Doors: A dungeon battlefield will have one or more dungeon doors. Dungeon doors are mounted on a base that is treated as the battlefield floor. There are two types of dungeon doors: open dungeon doors and sealed dungeon doors. Dungeon doors are obstacles that use the following additional rules:
- Sealed dungeon doors: Sealed dungeon doors are treated as dungeon walls for the purposes of movement, visibility, measuring and objectives. This means that fighters are not visible to each other through a sealed dungeon door, even if the model itself has gaps in it. Some abilities can open a sealed dungeon door. If a sealed dungeon door is opened, remove the model from play. Treat the doorway it was placed upon as an open dungeon door for the rest of the battle. (For example, a fighter is visible to an enemy fighter if a straight line can be drawn from a part of one fighter to a part of the other, unobstructed by a sealed door.)
- Open dungeon doors: Open dungeon doors use the rules for doors from the Core Book, except that no fighters are restricted from moving through them.
Pits: A dungeon battlefield may have one or more areas referred to as pits. Pits will be clearly outlined on the map in the set-up rules for the dungeon battlefield on which they appear (the set-up rules for the dungeon battlefield in this book are below). Pits are a type of terrain feature that uses the following rules:
- Terrain feature: Pits are not treated as the battlefield floor. This means that fighters, treasure tokens, objective markers and other terrain features cannot be placed upon them.
- Movement: Pits are treated as the air. This means that fighters can jump over them. However, a fighter that jumps over a pit suffers impact damage at the end of that move action (this represents the fighter being scorched by the heat rising from the lava below). A fighter that finishes a move action with the centre of their base on a pit is immediately taken down. Edges of the battlefield floor that touch a pit are treated as the edge of a platform. This means that fighters attacked near a pit may fall. If a fighter within ½" of a pit is said to have fallen, they are immediately taken down.
- Treasure tokens and pits: If a fighter carrying treasure is taken down on a pit, before the fighter is removed from play, the players roll off. The winner of the roll-off picks a point on the battlefield floor within 3" of the fighter and within 1" of the edge of that pit and places the treasure token there.
Bridges: A dungeon battlefield may have one or more bridges. There are two types of bridges: metal bridges and wooden bridges.
- Movement: Bridges are treated as the battlefield floor. The long edges of a bridge are treated as the edge of a platform. If a fighter with the centre of their base on a bridge is said to have fallen, they are immediately taken down.
- Objectives and treasure tokens: Objectives and treasure tokens cannot be placed on bridges. If a fighter on a bridge drops treasure, the players roll off. The winner of the roll-off picks a point on the battlefield floor within 3" of the fighter and within 1" of the edge of that pit and places the treasure token there.
- Weakened and collapsed bridges: If a fighter ends a move or disengage action with the centre of their base on a metal bridge, after that action, roll a dice. On a 1, the bridge is said to be weakened; place a token next to the bridge to represent this. Wooden bridges start the battle weakened. If a fighter ends a move or disengage action with the centre of their base on a weakened bridge, after that action, roll a dice. On a 1, the bridge is said to have collapsed. When a bridge collapses, every fighter with the centre of their base on that bridge is taken down one after the other, in an order chosen by the player whose turn is taking place. The bridge is then removed.
Using Dungeon Terrain in Other Battles: If you are using any dungeon terrain scenery models in battles that are not dungeon battles, none of the special rules for those models in this book apply — for example, the bridges are simply platforms and the unique dungeon features are either obstacles or low terrain.
Unique Dungeon Features: Each unique dungeon feature has its own special rule, as follows:
- The Wall Breach: The wall breach must be set up wholly on a dungeon wall, with only the stand of the gallows and debris being allowed to overhang. Parts of dungeon walls within ½" of the wall breach are considered to be the battlefield floor instead.
- The Arms Stash: Add 1 to the Attacks characteristic of attack actions that have a Range characteristic of 3 or less made by fighters within 1" of the arms stash.
- The Cursed Caskets: Roll a dice each time a fighter ends a move action or disengage action within 1" of the cursed caskets. On a 1, allocate D6 damage points to that fighter.
- The Lever: The lever can only be set up within 1" of a sealed dungeon door. A fighter within 1" of the lever can operate it as an action. If they do so, the player controlling that fighter picks 1 sealed dungeon door within 1" of the lever. That dungeon door is opened. If both lever models are set up, they can be set up within 1" of the same dungeon door or different dungeon doors.
- The Shattered Pillars: Each of the two models that make up the shattered pillars can be set up anywhere on the battlefield floor more than 1" from any doorways, bridges or other unique dungeon features. Each model is both an obstacle and low terrain.
- The Sewer: The sewer is an entrance tunnel if there are no enemy fighters upon it.
- The Collapsed Doorway: To set up the collapsed doorway, the player picks 1 open or sealed dungeon door, removes it from the battlefield, and replaces it with the collapsed doorway. The collapsed doorway is both an obstacle and dangerous terrain. Parts of dungeon walls within ½" of the collapsed doorway are considered to be the battlefield floor instead. When placing the collapsed doorway, all of the dungeon doorway must be beneath the model.
Dungeon Abilities
During a dungeon battle, fighters can use the following abilities in addition to any others they can use. There are 3 universal abilities, and 3 faction-specific abilities (1 for Nighthaunt, and 2 for the Corvus Cabal).
Universal Dungeon Abilities
- [Double] Lurk in the Shadows: Until the end of the battle round, this fighter is not visible to enemy fighters more than 6" away if this fighter is within 1" of a dungeon wall.
- [Double] Breach Door: Only fighters that do not have the Nighthaunt runemark can use this ability. A fighter can use this ability only if they are within 1" of a sealed dungeon door. Pick 1 weapon from this fighter's fighter card that has a Range characteristic of 3 or less and roll a number of dice equal to the value of this ability. Add the number of dice that scored a 2+ to the Strength characteristic of the weapon you picked. If the score is 6 or more, that dungeon door is opened.
- [Triple] Push into Pit: Pick a visible enemy fighter within 1" of this fighter and within ½" of a pit. Both players roll a dice and add the roll to their fighter's Toughness characteristic. If your score is higher than your opponent's, the enemy fighter is taken down.
Faction Dungeon Abilities
- [Double] Wall Run (Corvus Cabal): A fighter can use this ability only if they are within 1" of a dungeon wall. Until the end of this fighter's next move action this activation, this fighter can move over other fighters as if they could fly. However, during that move action, this fighter must stay within 1" of a dungeon wall.
- [Triple] Float Through Wall (Nighthaunt): Until the end of this fighter's activation, they can move over dungeon walls and through sealed dungeon doors but must end any move action with their base wholly on the battlefield floor.
- [Quad] Running Strike (Corvus Cabal): This fighter uses the 'Wall Run' ability, then makes a bonus move action, and can then make a bonus attack action.
Infernal Forgefloor
The upper levels of Varanthax's Maw are dominated by immense and cavernous forge-chambers, connected by blisteringly hot tunnels through which flow the rivers of lava that power the furnaces.
A dozen vast furnace-halls comprise the upper levels of Varanthax's Maw, connected by a series of cramped tunnels and lava channels. After centuries of contested rule during which each subsequent claimant of the Maw laid down their own cruel traps to deter intruders, these warrens and forgeworks have been transformed into sweltering deathtraps. Warbands battling down here must negotiate rivers of molten rock and metal, treacherous walkways and countless other hazards, even as they seek to avoid the blades of their foes.
Dungeon Battlefield Terrain Set-up: Each dungeon battlefield comes with set-up instructions like those found on these pages. The image of the battlefield shows where to set up the bridges, while the rules above tell you how to set up the doors and unique terrain features. However, in a convergence, the battleplan will show where to set up any doors and unique terrain too.
- Set-up Bridges: There are 2 metal bridges and 2 wooden bridges on this dungeon battlefield, which are set up in the positions shown on the map.
- Pits: The areas outlined by broken yellow lines are pits.
- Entrance Tunnels: The entrance tunnels are indicated by the green arrows. There are 12 in total.
- Orientation: The orientation arrow next to the map indicates how it aligns with the deployment card that is in play.
Key to the map: 1. Open Dungeon Door. 2. Sealed Dungeon Door. 3. Metal Bridge. 4. Wooden Bridge.
Dungeon Battle Battleplan Generator
Dungeon battles do not use the rules for generating a battleplan in the Core Book. Instead, the battleplan is generated using the cards presented in this section. There are two tables each for the deployment cards, victory cards and twist cards.
Designer's Note: Terrain cards are not used in dungeon battles; see Dungeon Terrain, above, for the rules on dungeon terrain placement.
The player who won the priority roll first rolls a dice to determine if Table A or B will be used for the deployment card (1-3 = Table A, 4-6 = Table B), and then rolls a dice to determine which card from that table is in play. The same process is then repeated for the victory card and the twist card. Once the battleplan cards have been determined, the player that won the priority roll chooses which player uses the red deployment points and which player uses the blue deployment points. Then, the terrain is set up, before each of the battleplan cards is resolved in the order of deployment, victory and twist.
Fighters in battle groups that do not have a deployment point are placed in reserve, and will come onto the battlefield using the Reserve Phase rules (see Dungeon Battles, above).
Exhibition Battles: You can use these tables to generate an Exhibition Battle (Core Book). Deployment Card Table A and Victory Card Table A only include cards with the Symmetrical runemark. To generate an Exhibition Battle, the player who won the priority rolls a dice on each of these tables to determine the deployment and victory card in play. The player who lost the priority roll then chooses which table to roll on to determine the twist card in play.
Deployment Cards: Dungeon deployment cards show the entrance tunnels on a dungeon battlefield. In addition, each dungeon deployment card will include only 2 of the battle groups for each warband. Fighters from battle groups shown on the deployment card are set up as normal within 3" of the centre of the entrance tunnel next to their deployment point.
Deployment Card Table A: 1. Hunt and Kill. 2. Frantic Melee. 3. The Dispute. 4. Turf War. 5. Chance Encounter. 6. Headlong Charge. Each card shows a diagram of the entrance tunnels used for deployment and which battle groups deploy at them.
Deployment Card Table B: 1. Into the Breach. 2. Scramble. 3. Dominant Position. 4. Close Quarters. 5. Hold Fast. 6. Lying in Wait. Each card shows a diagram of the entrance tunnels used for deployment and which battle groups deploy at them.
Victory Card Table A
- Overpower: You encounter a rival warband in the dark depths. Strike them down and take this place for your own. Starting with the player who won the priority roll, players alternate placing objectives until they have placed 3 objectives each. Each objective can be placed anywhere on the battlefield more than 6" from any other objectives and more than 3" from the battlefield edge. At the end of each battle round, each player scores 1 victory point for each objective they control. The battle ends after 5 battle rounds. When the battle ends, the player with the most victory points wins the battle.
- Vital Territory: The greatest warlords value every inch of the battlefield. The battlefield is divided halfway along its width and length into quarters of equal dimensions. Then, place 1 objective at the centre of the battlefield. At the end of each battle round, each player scores 1 victory point for each quarter of the battlefield that has more fighters from their warband wholly within it than it does enemy fighters. Fighters within more than one quarter do not contribute towards the number of fighters in any quarter. At the end of the fifth battle round, the player that controls the objective scores 1 additional victory point. The battle ends after 5 battle rounds. When the battle ends, the player with the most victory points wins the battle.
- Diminishing Gains: Time is of the essence. You must strike out swiftly, for the longer you tarry, the lesser the rewards. Place 1 objective at the centre of the battlefield. Then, starting with the player who won the priority roll, players alternate placing objectives until they have placed 2 objectives each. Each objective can be placed anywhere on the battlefield more than 6" from any other objectives and more than 3" from the battlefield edge. At the start of the combat phase of the fourth and fifth battle round, each player removes 1 objective from the battlefield, starting with the player with the initiative. At the end of each battle round, each player scores 1 victory point for each objective they control. The battle ends after 5 battle rounds. When the battle ends, the player with the most victory points wins the battle.
- Treasure Hoard: There are riches in this place to be taken. Destroy your rivals before they can escape with it. Starting with the player who won the priority roll, players alternate placing treasure tokens until they have placed 3 treasure tokens each. Each treasure token can be placed anywhere on the battlefield more than 6" from any other treasure tokens and more than 3" from the battlefield edge. At the start of the combat phase of the fourth and fifth battle round, each player removes 1 treasure token from the battlefield, starting with the player with the initiative. The battle ends after 5 battle rounds. When the battle ends, the player who has the most fighters carrying treasure wins the battle.
- Running Battle: The momentum of battle shifts this way and that, as both sides seek to claim the highest body count. At the end of each battle round, each player totals the Wounds characteristics of fighters from their warband that were taken down that battle round. The player with the lower total scores 1 victory point. The battle ends after 5 battle rounds. When the battle ends, the player with the most victory points wins the battle.
Victory Card Table B
- Take By Force: Your rivals claim this place as their own. Take it by force and send any survivors fleeing. The players roll off and the winner chooses who is the attacker and who is the defender. The defender places 4 objectives anywhere on the battlefield, each more than 9" any other objectives and more than 3" from the battlefield edge. At the end of each battle round, the attacker scores 2 victory points for each objective they control, and the defender scores 1 victory point for each objective they control. The battle ends after 5 battle rounds. When the battle ends, the player with the most victory points wins the battle.
- Critical Point: Strike the enemy where they are the most vulnerable. The players roll off and the winner chooses who is the attacker and who is the defender. The defender places 3 objectives anywhere on the battlefield, each more than 9" any other objectives and more than 3" from the battlefield edge. At the start of each combat phase, the defender picks 1 objective to be the critical point until the end of the battle round. At the end of each battle round, each player scores 1 victory point for each objective they control. If the attacker controls the critical point, they score an additional 3 victory points. The battle ends after 5 battle rounds. When the battle ends, the player with the most victory points wins the battle.
- Annihilation: Having fled into the dark depths of this place, your enemies make one last stand against you. Leave none alive. The players roll off and the winner chooses who is the attacker and who is the defender. The battle ends after 5 battle rounds. If at the end of the battle half or more of the defender's fighters have been taken down, the attacker wins the battle. Otherwise, the defender wins the battle.
- Breakout: Trapped in this subterranean labyrinth, you will have to battle past your rivals if you are ever to see the light of day again. The players roll off and the winner chooses who is the attacker and who is the defender. The attacker picks one battlefield edge to be the escape route. Any of the defender's fighters that finishes a move action within 1" of an entrance tunnel on the escape route can escape the battlefield. Remove the fighter from the battlefield but do not count them as being taken down. Reserve fighters cannot be set up within 1" of entrance tunnels on the escape route. If half of the fighters in the defender's warband escape, the defender wins the battle. Otherwise, after 5 battle rounds, the battle ends and the attacker wins the battle.
- The True Prize: The enemy have invaded your domain, seeking to loot and pillage. One of your treasures is worth more than any other – make sure it does not fall into their hands. The players roll off and the winner chooses who is the attacker and who is the defender. The defender takes 6 treasure tokens and secretly notes down which is the true prize. Then, starting with the attacker, players alternate placing treasure tokens until they have placed 3 treasure tokens each. Each treasure token can be placed anywhere on the battlefield more than 6" from any other treasure tokens and more than 3" from the battlefield edge. At the start of each combat phase, the defender picks 1 treasure token on the battlefield or 1 piece of treasure that is being carried and removes it from play. The true prize cannot be picked. The battle ends after 5 battle rounds. When the battle ends, if one of the defender's fighters is carrying the true prize, the defender wins the battle. Otherwise, the attacker wins the battle.
Twist Card Table A
- Alert and Ready: Both warbands have hidden scouts lurking just beyond sight, ready to ambush the foe. In the reserve phase of the first battle round, starting with the player who has the initiative, players alternate rolling a dice for each reserve fighter in their warband. On a 4+, the fighter being rolled for arrives immediately.
- Suffocating Heat: From somewhere deep below, a sweltering heat rises, stifling the air and draining fighters of their energy. If a fighter makes any move actions, subtract 1 from their Toughness characteristic (to a minimum of 1) until the end of the battle round.
- Delayed Allies: There is no sign of either warband's reinforcements until the battle is almost over. Reserve fighters arrive in the reserve phase of the fourth battle round instead of the third battle round.
- Dark Shadows: This place is flooded in thick, impenetrable darkness. Fighters more than 6" apart are not visible to each other.
- Dangerous Doorways: The doors in this level have been lined with poisoned spikes and etched with life-draining magical sigils. Roll a dice each time a fighter moves through a dungeon door. On the roll of a 1, allocate D6 damage points to that fighter.
- Sealed, Never to be Opened: Whoever created this place did not intend for it to be opened again. Fighters cannot use the 'Breach Door' ability this battle.
Twist Card Table B
- Warning Calls: At the first shouts of battle, reinforcements race to join the fray. Reserve fighters arrive in the reserve phase of the second battle round instead of the third battle round.
- Hidden Traps: From rigged pressure plates to gouts of flame shot from hidden openings, whoever built this catacomb clearly didn't care for trespassers. If a fighter makes any move actions or disengage actions during their activation, roll a dice after the fighter finishes their activation. On a 1, allocate D6 damage points to that fighter.
- Lost in the Dark: The corridors of this place are twisting and hard to navigate. You cannot be sure when your allies will arrive. Reserve fighters do not automatically arrive in the third battle round. Instead, in the reserve phase of the second and subsequent battle rounds, starting with the player who has the initiative, players alternate rolling a dice for each reserve fighter in their warband. On a 5+, the fighter being rolled for arrives immediately. Otherwise, they do not arrive that battle round. In the fifth battle round, any remaining reserve fighters arrive as normal.
- Rumoured Riches: Tales of treasures hidden just beyond in this place have given you cause to muster all your resources for this battle. At the start of each hero phase, you receive 2 wild dice instead of 1.
- The Unknown Beast: It is said a fell creature stalks this place, yet none have seen it; only have they heard the screams of their allies dragged off into the darkness. At the start of the combat phase, the player with the initiative can pick 1 enemy fighter more than 6" away from any other fighters and roll a dice. On a 6, that fighter is taken down. On a 1-5, their opponent can pick 1 enemy fighter more than 6" away from any other fighters and roll a dice. On a 6, that fighter is taken down. On a 1-5, the sequence ends.
- Treacherous Bridges: Rusted or rotten, the bridges of this place are brittle and ready to snap. Every bridge starts the battle weakened.
Terrain Cards for Overground Battles
This page includes 6 terrain cards that utilise the overground scenery models in the Warcry: Catacombs box. These cards are intended to be used when setting up a battle that is not a dungeon battle (Core Book) or one of the overground convergences from the Campaign Section later in this book. If you are playing such a battle, when the Core Book tells you to draw a terrain card, instead roll a dice on this table to determine the terrain card that is in play. If you are playing a convergence from a campaign in the Core Book, you can substitute the terrain card for that convergence with one from this page. If you do so, the player controlling the Adversary warband picks the terrain card on this page they think best matches the narrative of that convergence.
Campaign Section
This section contains a host of campaign quests that warbands can embark upon: three campaign quests for the Khainite Shadowstalkers (the first is an overground campaign, while the second and third are dungeon battle campaigns), two campaign quests for the Scions of the Flame, and four fated quests which can be embarked upon by warbands of any faction.
The Captured Melusai
Ill tidings have reached the court of the Shadow Queen. The Melusai Illaxineth, an agent of Morathi, has been captured during a Slaaneshi raid upon Ulgu and taken back to the Eightpoints. Illaxineth knows too much about the machinations of the Daughters of Khaine and the movements of their Ulguan armies. The High Oracle has decreed that she must be silenced permanently, lest the enemy extracts sensitive secrets from her mind. This task falls to the Khainite Shadowstalkers, and must be completed in the utmost haste.
Territory Rules — Weave Shadow Nexus: In their wake the Khainite Shadowstalkers erect pillars of night-black stone, around which the umbral magic of Ulgu lies thick and heavy. You can spend 10 glory points to dominate a territory by weaving a shadow nexus. Mark on your warband roster how many territories you have dominated. Dominating territory offers the following bonus: for each territory dominated by your warband, increase the points you have available to spend on fighters when mustering your warband for a campaign battle by 50.
Convergence map: First Convergence: Jagged Pass. Second Convergence: Cloying Mists. Final Convergence: Halls of Torment.
| D3 | Artefact of Power |
|---|---|
| 1 | Shade-kraken Oil: Sourced on the black market from Amelgard, weapons coated in this poison deal a deadly bite. Add 3 to the damage points allocated by each critical hit from attack actions made by the bearer that have a Range characteristic of 3 or less. |
| 2 | Nightwoven Garrotte: This thin cord is made from pure Ulguan shadowstuff. Once per battle, the bearer can use this artefact as an action. Pick 1 visible enemy fighter within 1" of the bearer and roll 6 dice. For each roll that is higher than the target fighter's Toughness characteristic, allocate 3 damage points to that fighter. |
| 3 | Ebonite Cuirass: This sleek breastplate is as light as air and as tough as meteoric steel. Add 1 to the Toughness characteristic of the bearer. |
| D3 | Command Trait |
|---|---|
| 1 | Favoured of Morathi: It is said this warrior courts the Shadow Queen's esteem. If this fighter is included in your warband, you begin the battle with 1 additional wild dice. |
| 2 | Murderous Agility: Enemies fall in quick succession as this warrior carves a bloody path through their lines. When this fighter uses the 'Dance of Death' ability, they can make a bonus disengage action. |
| 3 | Impervious to Pain: Wounds dealt to this warrior seem only to fuel their fervour and murderlust. Subtract 1 from the damage points allocated by each hit and critical hit (to a minimum of 1) from attack actions that target the bearer. |
First Convergence — The Search Begins: The Golden Twins, two impossibly vain and sadistic Slaaneshi warlords, seized Illaxineth and several other prisoners during a raid. You have tracked them to the winding canyons of Carrion Gulch, yet it is not only the worshippers of the Dark Prince that dwell within this labyrinth of jagged rock. You can feel cruel eyes upon your back – a rival warband, stalking you through the rocks. Make an example of them to dissuade further attacks. Battleplan — Terrain: see map. Deployment: generate a deployment card as described in the Core Book. Victory: No Mercy. Twist: Foreboding Location.
Second Convergence — Maze of Secrets: As you approach the gaudy mass of tents that lie amidst the ruined fortress that the Twins have claimed as their own, the air grows cloyingly thick. Everywhere echo the screams of the Slaaneshi warlords' terrorised prisoners. Foul censers spewing intoxicating perfumes into the air mark the entrance to the Twins' personal lair. These must be destroyed swiftly, before their corrupting influence overwhelms your mental defences – as has happened to the wretched souls that now assault your warband. Battleplan — Terrain: see map. Deployment: generate a deployment card as described in the Core Book. Victory: The Raid (the Aspirant warband is the attacker). Twist: No Holding Back.
Final Convergence — Tormented Souls: Chambers of excruciation have been constructed by the Twins in the ruins of an ancient temple. Guided by the subtle urgings of the shademark seared into your flesh, you can sense the presence of your quarry close by. The Golden Twins' forces outnumber your own many times over. Unlocking the cells of their tormented captives should cause a sufficient distraction, while the Chaos defenders wet their blades on these unfortunate souls, you can slip through the shadows and locate Illaxineth. Battleplan — Terrain: see map. Deployment: generate a deployment card as described in the Core Book. Victory: Purge (the Aspirant warband is the attacker). Twist: Grudge Match.
Campaign Outcome: If the Aspirant warband is the winner, they complete this campaign quest and claim their reward.
Khaine's Blood
Long has Morathi desired to secure for herself a bounty of varanite, that strange and terrible realmstone unique to the Eightpoints which tears apart and mutates the flesh of all who touch it. Thus, she has ordered her most trusted Shadowstalkers to journey to the dominion of Archaon and recover a sizeable sample of this most volatile of substances, which she has named Khaine's Blood. Such a mission will be difficult indeed, for the servants of the Three-Eyed King defend all deposits of the stuff with rabid ferocity, aware of what should happen to them if they fail their master.
Territory Rules — Weave Shadow Nexus: as described under The Captured Melusai, above.
Convergence map: First Convergence: Sentry Posts. Second Convergence: Magma Flows. Final Convergence: The Molten Wound.
| D3 | Artefact of Power |
|---|---|
| 1 | Chokemist Censer: This lantern spews a suffocating, impenetrable mist. Subtract 1 from the Attacks characteristic (to a minimum of 1) of attack actions made by enemy fighters while they are within 3" of the bearer. |
| 2 | Nightpiercer: This insubstantial sliver of realmstone can find the gaps in any armour. Add 2 to the Strength characteristic of attack actions made by the bearer that have a Range characteristic of 3 or less. |
| 3 | Echo Hood: This cowl adds to the bearer's range of senses, allowing them to strike with greater certainty and accuracy. Add 1 to the damage points allocated by each hit and critical hit from attack actions made by the bearer that have a Range characteristic of 3 or less. |
| D3 | Command Trait |
|---|---|
| 1 | Unnatural Speed: This warrior hunts their prey with terrifying swiftness. Add 1 to the Move characteristic of this fighter. |
| 2 | Whirlwind of Blades: This fighter is deadliest in close combat, unleashing devastating flurries of attacks. Add 1 to the Attacks characteristic of attack actions made by this fighter that have a Range characteristic of 3 or less. |
| 3 | One With the Darkness: This warrior fights wreathed in tendrils of shadow and smoke. This fighter is not visible to enemy fighters more than 6" away. |
First Convergence — Breaching the Forge: Even your Shadowstalkers would be hard-pressed to infiltrate the most prosperous varanite excavation sites in the Eightpoints, for they are guarded by great legions of Archaon's soldiers and protected by lethal arcane wards. Yet whispers have guided you towards a new source of Khaine's Blood, located far beneath the great volcano-forge of Varanthax's Maw. Approach the Maw, and swiftly slit the throats of its sentries before the entire garrison can be roused against you. Battleplan — Terrain: see map. Deployment: generate a deployment card from Deployment Card Table B (the Aspirant warband uses the red deployment points). Victory: Annihilation (the Aspirant warband is the attacker). Twist: Dark Shadows.
Second Convergence — The Drowned Tunnels: Those who first discovered the vein of varanite bubbling up from beneath the Maw have moved swiftly to secure their prize. They have sealed the precious realmstone deposit behind one of the forge-complex's immense underground vaults, and filled the surrounding tunnels with lava in order to keep intruders at bay. To reach your prize, you must locate the levers that control the vast floodgates of the Maw, raising them in order to drain the rivers of magma. Kill any who stand in your way. Battleplan — Terrain: see map. Deployment: generate a deployment card from Deployment Card Table B (the Aspirant warband uses the red deployment points). Victory: Take by Force (the Aspirant warband is the attacker). Twist: Sealed, Never to be Opened.
Final Convergence — Archaon's Gift: Within the Maw's great vault you find a flowing river of varanite that has forced its way up from deep underground like blood from a mortal wound, twisting the very rock around it into lurid and impossible configurations. Extracting the realmstone yourselves would prove utterly lethal, but those who discovered this deposit have already drawn up some of the substance and stored it within ewers of rune-marked nullstone. Secure a sample of the stuff, and put all witnesses to the sword. Battleplan — Terrain: see map. Deployment: generate a deployment card as described in the Dungeon Battle Battleplan Generator. Victory: Search and Pillage (the Aspirant warband is the attacker). Twist: Warning Calls.
Campaign Outcome: If the Aspirant warband is the winner, they complete this campaign quest and claim their reward.
Pit of Darkness
As darkness stretches across the Eightpoints, you lead a cadre of Shadowstalkers into the Everchosen's domain, sliding unnoticed past oblivious sentries. Your task here is one that could only be accomplished by those with shadow-stuff in their blood. The High Oracle of Khaine desires to link the strands of the Umbral Web to this cursed land by securing the Well of Shadows – a font of untapped dark magic that lies in the depths of Varanthax's Maw. The most holy Oracle has tasked you with securing this prize before any others can lay claim to it.
Territory Rules — Weave Shadow Nexus: as described under The Captured Melusai, above.
Convergence map: First Convergence: The Descent. Second Convergence: Cremation Chambers. Final Convergence: Well of Shadows.
| D3 | Artefact of Power |
|---|---|
| 1 | Umbral Snare: This net of wisping shadows can ensnare the unwary. Once per battle, the bearer can use this artefact as an action. Pick 1 visible enemy fighter within 6" of the bearer. Until the end of the battle round, that fighter cannot make move actions or disengage actions. |
| 2 | Darkseeker Darts: These enchanted throwing knives seek out their target with the unnerving precision of angry bloodwasps. Once per battle, the bearer can use this artefact as an action. Pick 1 visible enemy fighter within 18" of the bearer and roll 2 dice. For each roll of 5+, allocate 5 damage points to that fighter. |
| 3 | Snatcher's Cloak: Fashioned from the hide of a shadow-snatcher, this cloak whips out to intercept incoming projectiles. Subtract 2 from the damage points allocated by each hit and critical hit (to a minimum of 1) from attack actions that target the bearer made by enemy fighters that are more than 6" away. |
| D3 | Command Trait |
|---|---|
| 1 | Hobbling Strike: This warrior seeks to first slow their foe before moving in for the kill. Each time an enemy fighter is allocated damage points by an attack action made by this fighter, halve the Move characteristic of that fighter until the end of the battle round. |
| 2 | Escape Artist: This warrior is all but impossible to pin down. When this fighter makes disengage actions, they can move up to 5" instead of 3". In addition, this fighter does not suffer impact damage from deadly terrain. |
| 3 | Shadow Channeller: This warrior's mastery of the night is second to none. Add 1 to the value of abilities (to a maximum of 6) used by this fighter. |
First Convergence — The Consort of Night: Legend has it that the Well of Shadows was constructed by an ancient cult of umbramancers, who utilised it to summon horrors of the night to do their bidding. Its exact location is unknown, but rumours tell of a powerful sorcerer, Kol Rothzir, who proclaims himself the Consort of Night and has gathered shadow daemons to his side and conquered a section of Varanthax's Maw. Seek out some of the sorcerer's minions and pry the truth from them. Battleplan — Terrain: see map. Deployment: generate a deployment card as described in the Dungeon Battle Battleplan Generator. Victory: Overpower. Twist: generate a twist card as described in the Dungeon Battle Battleplan Generator.
Second Convergence — Silent Blades: You discover the location of the cremation chambers in which Rothzir resides, which are forever encompassed in a pall of blackest night – an aura that is of negligible use against your kin, who carry the stuff of shadows in their very blood. Of more concern are the sigils of agony that the sorcerer has erected throughout the catacombs, arcane traps that paralyse intruders in a state of permanent excruciation. Slide unseen through the darkness, eliminate Rothzir's guards and unbind his magical defences. Battleplan — Terrain: see map. Deployment: generate a deployment card from Deployment Card Table B (the Aspirant warband uses the red deployment points). Victory: Running Battle. Twist: there are 2 twist cards in play — Dark Shadows and Hidden Traps.
Final Convergence — The Shadow Seal: As you kill your way deeper and deeper into Kol Rothzir's lair, you sense a potent swell of Ulguan magic. Alerted to the assassins in his domain, the sorcerer has secured himself in the chamber of the Well itself, where he is attempting to draw an unspeakable horror up from the depths to loose upon his foes. Time runs short. One of Rothzir's lieutenants carries the shadow seal necessary to access his private chambers. Slay this warrior, and retrieve the seal. Battleplan — Terrain: see map. Deployment: generate a deployment card as described in the Dungeon Battle Battleplan Generator. Victory: The True Prize (the Aspirant warband is the attacker). Twist: Alert and Ready.
Campaign Outcome: If the Aspirant warband is the winner, they complete this campaign quest and claim their reward.
The Immolation Engine
Deep in the bowels of Varanthax's Maw, the deranged warsmith Pavollax Iron-eye is fashioning a flame-spewing machine of destruction, intent upon using it to immolate his rivals and secure dominion over the Bloodwind Spoil. This weapon would surely prove invaluable to the worshippers of the Ever-Raging Flame, who seek to engulf the lands in a cleansing inferno. Yet first, they must seize the engine from Iron-eye, which will prove no small task; many are the warriors that the warsmith has swayed to his cause with promises of plunder and glory.
Territory Rules — Raise Monolith: The Scions of the Flame erect burning braziers filled with smouldering brimstone and ragerock fragments that burn eternally. You can spend 10 glory points to dominate a territory by raising a monolith. Mark on your warband roster how many territories you have dominated. Dominating territory offers the following bonus: for each territory dominated by your warband, increase the points you have available to spend on fighters when mustering your warband for a campaign battle by 50. In addition, you can include 1 thrall in your warband when mustering for a campaign battle. Thralls included in this manner cost points like any other fighter. Thralls are not added to your warband roster and can never gain destiny levels, bear artefacts or be chosen to become a favoured warrior.
Convergence map: First Convergence: The Fissure. Second Convergence: Sunken Tunnels. Final Convergence: Iron-eye's Workshop.
| D3 | Artefact of Power |
|---|---|
| 1 | The Molten Blade: This blade glows bright hot and holds immense heat, as if just removed from the forge. Add 1 to the damage points allocated by each hit and critical hit from attack actions made by the bearer that have a Range characteristic of 3 or less. |
| 2 | Flameblessed Ashes: These ashes are all that remains of a mighty warrior sacrificed to the Ever-Raging Flame. If the bearer is included in your warband, you begin the battle with 1 additional wild dice. |
| 3 | Magmavore Fang: Merely holding this trophy against the skin fills one with furious strength. Add 2 to the Strength characteristic of attack actions made by the bearer that have a Range characteristic of 3 or less. |
| D3 | Command Trait |
|---|---|
| 1 | Subterranean Warrior: This warrior is a veteran of claustrophobic underground battles. Add 1 to the value of abilities (to a maximum of 6) used by this fighter. Add 2 instead in dungeon battles. |
| 2 | Zealous Conqueror: This warrior delights in seizing territory from the faithless. Add 2 to the Attacks characteristic of attack actions made by this fighter that have a Range characteristic of 3 or less while they are within 3" of an objective. |
| 3 | Heart of Fire: The flame within this warrior burns fiercer than any other. During the aftermath sequence, when rolling for destiny levels, this fighter gains a destiny level on a 5-6. |
First Convergence — Furious Tremors: In his arrogance the warsmith Iron-eye does not even care to conceal the scale of his construction. The tremors unleashed by the Immolation Engine can be felt far and wide. It is easy to trace this to the gates of Varanthax's Maw, the great forge-complex. You enter the structure through a fissure deep in the earth, bored out in ages past by a giant magmavore. Those who deny the primacy of the Ever-Raging Flame have claimed this subterranean level – they must be put to the torch. Battleplan — Terrain: see map. Deployment: generate a deployment card as described in the Dungeon Battle Battleplan Generator. Victory: Overpower. Twist: generate a twist card as described in the Dungeon Battle Battleplan Generator.
Second Convergence — The Fire Rises: Varanthax's Maw rocks beneath your feet, as the tremors of the Immolation Engine become more insistent than ever. From ruptured crevasses in the earth, bubbling lava spills forth, oozing slowly towards you. You seek high ground before the tide of molten rock sweeps over you. Even as you search for a way out of these tunnels, you run straight into a rival warband, also seeking to escape. Sacrifice your foes to the Flame, and perhaps its wrath will temporarily be sated. Battleplan — Terrain: see map. Deployment: generate a deployment card as described in the Dungeon Battle Battleplan Generator. Victory: Breakout (the Aspirant warband is the defender). Twist: Suffocating Heat.
Final Convergence — For the Endless Flame: Pavollax Iron-eye's workshop is a sulphurous pit that echoes to the thunder of hammers and the hiss of superheated steam. Looming before you is the Immolation Engine; a wheeled behemoth of glowing metal and rune-marked daemonflesh the size of a cogfort. You are not the only warband that has been drawn here by the rumblings of the flame-spewing war machine's construction; burn all who stand in your way to ashes, and seize the dread Immolation Engine from the clutches of its maker. Battleplan — Terrain: see map. Deployment: generate a deployment card as described in the Dungeon Battle Battleplan Generator. Victory: Take By Force (the Aspirant warband is the attacker). Twist: Alert and Ready.
Campaign Outcome: If the Aspirant warband is the winner, they complete this campaign quest and claim their reward.
Beasts of Flame
The Ever-Raging Flame has blessed you with a vision of glorious devastation. Somewhere deep below the earth, an elemental force of annihilation rages against its bonds. Your god's desire is to see it unleashed. Guided by skull-searing flashes of pain, you travel far across the Bloodwind Spoil, to the caverns of Varanthax's Maw. The song of fiery wrath that echoes in your mind emanates from far below these ancient, haunted ruins. You must travel deep underground and locate its source.
Territory Rules — Raise Monolith: as described under The Immolation Engine, above.
Convergence map: First Convergence: Ambush Site. Second Convergence: Ancient Shrine. Final Convergence: Chamber of Boiling Blood.
| D3 | Artefact of Power |
|---|---|
| 1 | Drakeblood Tattoos: White-hot spiral patterns of enchanted drakeblood cover this warrior's skin. Subtract 1 from the damage points allocated by each hit and critical hit (to a minimum of 1) from attack actions that target the bearer. |
| 2 | Cindermaw Helm: The wearer of this obsidian helm can spit hot, blinding ash into the face of a foe. Once per battle, the bearer can use this artefact as an action. Pick 1 visible enemy fighter within 1" of the bearer and roll 6 dice. For each roll of 2+, allocate 2 damage points to that fighter. |
| 3 | Banner of the Ashen King: This relic of the legendary warrior-prophet is sacred to the Scions. Once per battle, the bearer can use this artefact as an action. Until the end of the battle round, add 1 to the Attacks characteristic of attack actions that have a Range characteristic of 3 or less made by friendly fighters while they are within 6" of the bearer. |
| D3 | Command Trait |
|---|---|
| 1 | Voice of Doom: This warrior spouts litanies of hate in the heat of battle, filling their allies with battlelust. While this fighter is waiting, add 1 to the Attacks characteristic of attack actions made by friendly fighters while they are within 6" of this fighter. |
| 2 | Master of the Blazing Form: This warrior wields their blade in an unconventional high guard, parrying any incoming strikes. Subtract 1 from the Attacks characteristic (to a minimum of 1) of attack actions made by enemy fighters while they are within 3" of this fighter. |
| 3 | Scorching Aura: In battle, this warrior is surrounded by a blistering heat haze. Each time this fighter finishes a move action, visible enemy fighters within 3" of this fighter suffer impact damage. |
First Convergence — Guided by Fire: The tunnels of the Maw are long and winding, and though you travel for many days you cannot find a path to the lower levels. As you pass through yet another cramped dungeon, you sense movement in the shadows. You are being hunted. A smile crosses your burn-scarred face. You will fall upon these would-be ambushers, and seize some of their number to be offered to the Ever-Raging Flame. Perhaps, when sated, the Flame will light your path forward. Battleplan — Terrain: see map. Deployment: generate a deployment card as described in the Dungeon Battle Battleplan Generator. Victory: Take By Force (the Aspirant warband is the defender). Twist: generate a twist card as described in the Dungeon Battle Battleplan Generator.
Second Convergence — Echoes of Tyranny: You come across a recently looted shrine hidden in the depths of the Maw that is dedicated to a primordial deity of tyranny and fiery domination. Amongst the shattered tiles that litter this unholy place, you find reference to the 'Chamber of Boiling Blood', within which daemonic fire-spirits were bound into cages of beaten brass. From what you can decipher, it seems as though this sacrificial hall lies somewhere nearby. Perhaps those who looted this place possess relics that will reveal more... Battleplan — Terrain: see map. Deployment: generate a deployment card from Deployment Card Table B (the Aspirant warband uses the red deployment points). Victory: Treasure Hoard. Twist: generate a twist card as described in the Dungeon Battle Battleplan Generator.
Final Convergence — Boiling Blood: The relics you recovered lead you to the Chamber of Boiling Blood. Within this brazen vault, worshippers of long-forgotten gods have sealed fire-daemons into brass sarcophagi. Bound within the cursed metal, these elemental beings rage and thrash, unable to break free. Should they be loosed, their furious rampage will surely sate the Ever-Raging Flame. Yet at that moment, a rival warband arrives upon the scene, no doubt seeking this power for themselves. They must burn. Battleplan — Terrain: see map. Deployment: generate a deployment card as described in the Dungeon Battle Battleplan Generator. Victory: Cursed Relics. Twist: Rumoured Riches.
Campaign Outcome: If the Aspirant warband is the winner, they complete this campaign quest and claim their reward.
Fated Quests
Warriors fight for many reasons, be it the pursuit of treasure, lust for power or a simple love of war. Those who battle amidst the Bloodwind Spoil are no different, though each warlord's story is defined by their choices and character.
In this section, you will find four special campaign quests known as fated quests. To use these quests, refer to the fated quests rules in the Core Book.
Paths Open to Any Who Dare: Fated quests do not have a faction runemark. Instead, you can choose 1 faction runemark to apply to a fated quest. This means it can be embarked upon by a warband from any faction.
In addition, individual fated quests do not have their own territory rules. Instead, the territory rules below are used by all warbands that embark upon a fated quest.
Fated Quest Territory Rules — Dominate Territory: As the power of a warband grows, so too does the extent of the territory to which it can lay claim. Those serving the Dark Gods often raise imposing monoliths within their domain, whilst those of a different allegiance display their might in myriad other ways. You can spend 10 glory points to dominate a territory. Mark on your warband roster how many territories you have dominated. Dominating territory offers the following bonuses:
- Growing Power: For each territory dominated by your warband, increase the points you have available to spend on fighters when mustering your warband for a campaign battle by 50.
- Thralls: If your warband is from one of the following factions, for each territory dominated by your warband, you can include 1 thrall in your warband when mustering for a campaign battle: Beasts of Chaos, Blades of Khorne (Daemons of Khorne), Blades of Khorne (Khorne Bloodbound), Corvus Cabal, Cypher Lords, Disciples of Tzeentch (Daemons of Tzeentch), Disciples of Tzeentch (Tzeentch Arcanites), Hedonites of Slaanesh, Iron Golem, Maggotkin of Nurgle (Daemons of Nurgle), Maggotkin of Nurgle (Nurgle Rotbringers), Scions of the Flame, Skaven, Splintered Fang, Spire Tyrants, Untamed Beasts, and The Unmade. Thralls included in this manner are not added to your warband roster and cost points like any other fighter. Thralls can never gain destiny levels, bear artefacts or be chosen to become a favoured warrior.
Honour or Glory: Even the most noble champion may occasionally sully their soul in pursuit of glory, while a black-hearted rogue might reveal themselves to possess a shred of honour – albeit only if it benefits them to show it. In the corrupted lands of the Eightpoints, it is a warrior's deeds alone that define them and chart the course of their destiny.
The campaign outcomes for fated quests differ from faction-specific campaign quests. When you complete a fated quest, you have to make a choice between Honour or Glory before you claim your reward. If you choose Glory, your reward will be an artefact of power. If you choose Honour, your reward will be an exalted command trait — a powerful command trait that defines your leader for the rest of their life. The first time you receive an exalted command trait, it must be given to your leader, and it replaces any existing command trait that they might have. Once your leader has been given an exalted command trait, subsequent command traits (exalted or otherwise) can be given to any fighter that can be chosen as a favoured warrior.
The Obsidian Tower
Few who inhabit the deadly wilds of the Bloodwind Spoil do not know of the Obsidian Tower. Located in a high pass of the Skullpike Mountains that overlooks Varanthax's Maw, it is home to a coven of vile sorcerers known as the Zythian Kin, who have committed countless outrages against your kind. They are slavers and daemonists, torturers and despoilers, and within their black-walled fortress think themselves all but invulnerable.
It is time to disabuse them of that notion. The tower stands upon a thin promontory of rock, with a single arched bridge leading to its gates, and a plunging precipice on all other sides. Immune to conventional assault, but not, perhaps, to an attack from below...
Convergence map: First Convergence: Fire-crystal Shipment. Second Convergence: Undertunnels. Final Convergence: Beneath the Tower.
| D3 | Artefact of Power |
|---|---|
| 1 | Rockstrider Pelt: The skin of this sure-footed mountain beast imbues the wearer with speed. Add 1 to the Move characteristic of the bearer. |
| 2 | Golden Scale: This gleaming scale mail seems almost impervious to damage. Subtract 1 from the damage points allocated by each hit and critical hit (to a minimum of 1) from attack actions that target the bearer. |
| 3 | Vitriolic Blade: This weapon pumps searing acids into those it strikes. Each time the bearer scores a critical hit with an attack action that has a Range characteristic of 3 or less, subtract 1 from the Toughness characteristic of the target fighter (to a minimum of 1) for the rest of the battle. |
| D3 | Command Trait |
|---|---|
| 1 | Calculating: Cold blooded and pragmatic, this warrior is apt at split second decision making. If this fighter is included in your warband, you begin the battle with 1 additional wild dice. |
| 2 | Blastproof: This warrior shrugs off explosions and arcane assaults. Add 1 to the Toughness characteristic of this fighter. |
| 3 | Darting Strike: Like a viper, this fighter can strike before the enemy has time to react. Add 2 to the Attacks characteristic of attack actions made by this fighter that have a Range characteristic of 3 or less if they have made a move action in the same activation. |
First Convergence — Lethal Payload: Before you can launch your assault upon the Zythian Kin, you require something that can breach the walls of the fortress. Something powerful, and lethally explosive. Some barrels of Aqshian fire-crystals would suit your needs very well. Fortunately, you have heard of a shipment of this volatile substance passing through Carrion Gulch. Seize it, and claim the fire-crystals. Battleplan — Terrain: see map. Deployment: generate a deployment card as described in the Core Book. Victory: The Raid (the Aspirant warband is the attacker). Twist: generate a twist card as described in the Dungeon Battle Battleplan Generator.
Second Convergence — Fire-crystal Rush: Now that you have several caskets filled to the brim with fulminating fire-crystals, you must place them next to the foundations of the Obsidian Tower. The only way to reach the promontory is through the fiery tunnels of the Maw – hostile territory. It is not long before you come under attack by a rival warband. Hold these attackers off, and ensure they do not lay their hands upon your cargo. Battleplan — Terrain: see map. Deployment: generate a deployment card as described in the Dungeon Battle Battleplan Generator. Victory: Search and Pillage (the Aspirant warband is the defender). Twist: Warning Calls.
Final Convergence — Detonation: You are directly beneath the foundations of the Obsidian Tower, where the slick, black roots of the tower meet the pitted rock that characterises this section of the Maw. Having identified several key structural weaknesses, you must now place your volatile fire-crystals. Yet these caverns are home to a warband that is angered by your intrusion. Fight them off, and prepare the tower for demolition. Battleplan — Terrain: see map. Deployment: generate a deployment card from Deployment Card Table B (the Aspirant warband uses the red deployment points). Victory: Overpower. Twist: generate a twist card as described in the Dungeon Battle Battleplan Generator.
Campaign Outcome: If the Aspirant warband is the winner, they complete this campaign quest. Read the text below, and then choose either Honour or Glory.
You place your caskets filled with sparking fire-crystals next to the most vulnerable points of the Obsidian Tower's foundations, and hastily retreat to what you hope is a safe distance. No sooner have you thrown yourself into cover than a cataclysmic explosion rocks the cavern, and a boiling tide of blue-white flame roars over your head. You witness the fall of the Obsidian Tower, which collapses in on itself and tumbles into an abyss blasted open by the detonation. When the smoke finally clears, the Zythian Kin's fortress has been reduced to ashes and rubble.
You cautiously enter the ruins, to make certain that you have obliterated the Zythian Kin. To your surprise, however, you stumble upon one of the sorcerers pinned beneath a shelf of blasted stone, kept barely alive by his arcane wards. You ready your blades to finish the man off, but he pleads with you to spare him – in exchange for his life, he promises to lead you to a cache of potent magical items. Do you honour your vow to wipe out the black hearted Kin, or does the promise of powerful treasure stay your hand?
If you choose Honour or Glory, claim the corresponding reward (see Spoils of Victory, below).
The Spawnmaster
The discovery of vast seams of molten realmstone boiling up from below Varanthax's Maw has drawn the eye of countless avaricious souls who wish to make use of its terrible, warping power. Most die in the catacombs of the Maw, hopelessly lost and ultimately either devoured by roving monsters or slain by rival killers.
Yet word has reached your ears of a deranged sorcerer known as Ithixa Kar – the Spawnmaster – who has laid claim to a potent vein of varanite. Whispers tell that he is using the stuff to create his own personal army of Chaos Spawn, dousing captives in the boiling, mutagenic liquid in order to transform them into razor-fanged, multi-limbed abominations. Kar must be stopped, before his depraved plans come to fruition.
Convergence map: First Convergence: The Captive. Second Convergence: Sealed Door. Final Convergence: Spawning Chambers.
| D3 | Artefact of Power |
|---|---|
| 1 | Souldrinker Pendant: Enemies that come close to the bearer feel their strength being sapped from them. Subtract 1 from the Attacks characteristic (to a minimum of 1) of attack actions that target the bearer that have a Range characteristic of 3 or less. |
| 2 | Sepulchral Plate: Despite being many centuries old, this ornate suit of armour has not rusted. Add 1 to the Toughness characteristic of the bearer. |
| 3 | Lifeward Ring: This ring is said to have sustained the life force of an ancient lord of Velorum by devouring that of his retainers. Once per battle the bearer can use this artefact as an action. Pick 1 visible friendly fighter within 1" of the bearer. That fighter is taken down. Then, remove any damage points allocated to this fighter. |
| D3 | Command Trait |
|---|---|
| 1 | Blade Master: This warrior's single-minded devotion to martial prowess has seen them become a peerless fighter. Add 1 to the Attacks characteristic of attack actions made by this fighter that have a Range characteristic of 3 or less. |
| 2 | Deathless Vitality: How this warrior still retains their strength and vigour after so long is unknown, even to their closest allies. Add 5 to the Wounds characteristic of this fighter. |
| 3 | Slaughter Seeker: In battle, this warrior thirsts for bloodshed and hunts down their enemies without mercy. Each time an enemy fighter is taken down by an attack action made by this fighter, roll a dice. On a 4+, this fighter can make a bonus move action. |
First Convergence — The Escapee: Many are seeking the lair of Kar, for the lure of varanite appeals to all sorts of avaricious souls. Word has reached your ears that one such band in the canyons of Carrion Gulch has captured a half-insane human who escaped from the warlord's clutches before he could be sacrificed. You must secure this prisoner at any cost, for he may have valuable knowledge as to Kar's location. Battleplan — Terrain: see map. Deployment: generate a deployment card as described in the Core Book. Victory: No Mercy. Twist: No Holding Back.
Second Convergence — The Brazen Keys: The prisoner reveals that Ithixa Kar is lurking within the ruins of an ancient forge-temple beneath the Maw, where his seam of varanite is concentrated. To enter the temple, one must pass through a sealed door that can only be unlocked by three keys crafted from unstable, white-hot anthracite. Unfortunately, these keys lie in the hands of a rival warband, and must be seized. Battleplan — Terrain: see map. Deployment: generate a deployment card as described in the Core Book. Victory: Steal the Prize. Twist: generate a twist card as described in the Core Book.
Final Convergence — The Spawning Chambers: Kar's stronghold is a gallery of nightmares. In cages surrounding the chamber, a host of mutated horrors shriek and howl insanely. You notice that there are red hot metal grates in the ground beneath the cages. Perhaps the channels of lava that flow through these tunnels could be redirected in order to incinerate the Chaos Spawn. Kar's hired killers are guarding the ancient machinery that controls the flow of magma, and must be put to the sword. Battleplan — Terrain: see map. Deployment: generate a deployment card from Deployment Card Table B (the Aspirant warband uses the red deployment points). Victory: Vital Territory. Twist: Suffocating Heat.
Campaign Outcome: If the Aspirant warband is the winner, they complete this campaign quest. Read the text below, and then choose either Honour or Glory.
The agonised shrieking of his mutant flock drives forth Ithixa Kar, a gaunt and skull-faced giant of a man with a shock of unkempt grey hair and madness dancing in his eyes. The Spawnmaster screams in rage as he watches them burn to cinders. You pursue the sorcerer through his lair, and come to a chamber that might once have been a hall of convocation. It now looks more akin to an infected wound; a vast quantity of molten varanite is spewing up from a hole in the earth, twisting and warping the rock around it into unnatural configurations.
Above the geyser of varanite, a cage filled with terrified prisoners dangles precariously on a thick chain of iron. The fleeing Kar hauls upon a brass lever set into the wall, and the cage begins to descend towards the bubbling pool of blood-coloured realmstone. Cackling madly, Kar dashes out of sight down an adjoining corridor. You could catch the old devil, you are certain, but that would mean sentencing the ashen-faced prisoners to a terrible fate. Saving the helpless would be an honourable act, but who is to say that tracking down and killing Kar now would not save more lives in the greater account? You must make your decision with haste, for the cage is lowering swiftly...
If you choose Honour or Glory, claim the corresponding reward (see Spoils of Victory, below).
The Orb of Secrets
One level of Varanthax's Maw has been claimed by a coven of Mindstealer Sphiranxes – cruel-minded and cunning devourers of secrets that delight in flaying the minds of their captives, stripping memories and knowledge away piece by piece. Rumour has it that these arcane beasts have stored their most treasured findings in an aetherquartz glyph-orb.
This artefact lies at the heart of the creatures' lair, above a confluence of several magma channels. Only the bravest or most foolhardy souls would dare to enter the domain of the Sphiranxes and seek out this device, but surely the rewards to be claimed outweigh the deadly risks?
Convergence map: First Convergence: Maze Entrance. Second Convergence: Ritual Chamber. Final Convergence: The Orb.
| D3 | Artefact of Power |
|---|---|
| 1 | Helm of Portents: Any who don this helm are granted visions of what may come to pass. If the bearer is included in your warband, you begin the battle with 1 additional wild dice. |
| 2 | Onyx Lodestone: When drawn out into the open, the air around this stone stifles and grows heavy. Once per battle, the bearer can use this artefact as an action. If they do so, until the end of the battle round, fighters cannot fly. |
| 3 | Twilight Timeglass: As sand falls through this glass cylinder, time seems to slow for the bearer. Once per battle, the bearer can use this artefact as a bonus action. If they do so, they can make a bonus move action and can fly for that move action. |
| D3 | Command Trait |
|---|---|
| 1 | Uncanny Luck: This warrior seems touched by the hand of fortune. When rolling for [Perishable] lesser artefacts borne by this fighter, they retain their power on a 2+ instead of a 4+. |
| 2 | Focus Strength: With incredible mental fortitude, this warrior can call upon deep reserves of strength. When this fighter makes a wait action, until the end of the battle, add 1 to the Attacks characteristic of attack actions made by this fighter that have a Range characteristic of 3 or less. |
| 3 | Legendary Warrior: It seems nothing can oppose this warrior on their path to greatness and glory. During the aftermath sequence, when rolling for destiny levels, this fighter gains a destiny level on a 5-6. |
First Convergence — Maze of the Sphiranx: The Sphiranx coven has transformed this stretch of the Maw into a deadly maze, laced with devious traps and sigils of binding. As you enter yet another chamber lined with channels of molten iron, doors slam shut around you, and flickering phantasmal images of blood-crazed warriors charge towards you from the darkness. Banish these ephemeral foes! Battleplan — Terrain: see map. Deployment: generate a deployment card as described in the Dungeon Battle Battleplan Generator. Victory: Running Battle. Twist: Sealed, Never to be Opened.
Second Convergence — Ritual Killings: The sound of frenzied chanting reaches your ears. In the chambers ahead, a dishevelled gathering driven to madness by decades trapped within the Sphiranxes' fiery lair are preparing a sorcerous ritual in an attempt to shatter the walls of their prison and escape. Seize the slivers of Chamonite they are using as a catalyst, but beware the lethal emanations of the corrupted realmstone. Battleplan — Terrain: see map. Deployment: generate a deployment card as described in the Dungeon Battle Battleplan Generator. Victory: Cursed Relics (the Aspirant warband is the attacker). Twist: generate a twist card as described in the Dungeon Battle Battleplan Generator.
Final Convergence — Surfeit of Secrets: As you press on, images of gleaming yellow eyes flicker on the periphery of your vision, but no sooner do you spin about than the half-glimpsed observers dissolve into nothingness. Yet you are sure it is this unseen presence that lures you into the chamber that contains the Orb of Secrets itself. Perhaps it also guided the rival warband that now stand before the artefact, bathed in its eerie glow. Defeat them, and ensure you alone lay claim to the priceless artefact. Battleplan — Terrain: see map. Deployment: generate a deployment card as described in the Dungeon Battle Battleplan Generator. Victory: The True Prize (the Aspirant warband is the attacker). Twist: generate a twist card as described in the Dungeon Battle Battleplan Generator.
Campaign Outcome: If the Aspirant warband is the winner, they complete this campaign quest. Read the text below, and then choose either Honour or Glory.
No sooner have you taken up the Orb of Secrets than it disintegrates into sand in your palm, the fine, white dust trickling through your fingers. The sound of mocking laughter fills your ears, and you look up to see a Mindstealer Sphiranx padding out of the shadows, turquoise eyes blazing in the gloom. You hear a voice in your mind that can only have issued from the feline beast; it speaks in a tongue incomprehensible to you, but somehow you understand its intent. The telepathic Sphiranx is impressed by your resilience and ingenuity, and offers you a trade – it will grant you the device that you seek – an item of great magical power – but in exchange it wishes to rifle through your mind in search of precious secrets.
Can you risk allowing such a devious entity to invade the darkest corners of your consciousness? Honour demands that you take up arms against the Sphiranx, even if such an undertaking would mean your death. On the other hand, you have come far to seek the Orb of Secrets, and such a treasure would surely prove invaluable. The creature's Blazing Blue eyes peer at you so intently that you are almost certain it can read your thoughts. Reach your decision swiftly, before the Mindstealer Sphiranx grows tired of its game.
If you choose Honour or Glory, claim the corresponding reward (see Spoils of Victory, below).
Trail of Destruction
Rumours have reached you of a savage colossus that has embarked upon a rampage of destruction across the Eightpoints, pulverising anything unfortunate enough to get in its way. Sensing an opportunity to earn fame and renown by slaying this beast – and curious as to the strangely erratic nature of the monster's movements – you set off in pursuit.
It is all too easy to follow the creature's trail of destruction to the sulphur-caverns of Varanthax's Maw. Your quarry must be somewhere inside, for the ruins of smashed pillars and shattered masonry belie its presence.
Convergence map: First Convergence: Destroyed Shrine. Second Convergence: Splintered Bridge. Final Convergence: Cyclopean Ruins.
| D3 | Artefact of Power |
|---|---|
| 1 | Smuggler's Brooch: When the outer ring of this jadestone brooch is twisted, wreaths of smoke momentarily shroud the bearer. Once per battle the bearer can use this artefact as a bonus action. If they do so, until the end of the battle round, they are not visible to enemy fighters more than 3" away. |
| 2 | Faceless Statuette: Plundered from the rubble of an ancient shrine, this marble statue grants the blessing of a long-forgotten deity. Add 2 to the value of abilities (to a maximum of 6) used by the bearer. |
| 3 | Chameleonic Mask: Covered in scales and inset with gems, this mask can take on many aspects. At the start of the battle, before the first battle round, you can pick 1 artefact of power borne by a fighter in either player's warband. This artefact of power gains that artefact of power's ability until the end of the battle. |
| D3 | Command Trait |
|---|---|
| 1 | Impetuous Fighter: This warrior is known for charging into the fray the instant they sight the enemy. In the first battle round, add 2 to the Move characteristic of this fighter. |
| 2 | Bone-shattering Strikes: Like the fomoroid they hunt, this fighter has learned to destroy their enemies with mighty, two-handed swings. Add 2 to the Strength characteristic of attack actions made by this fighter that have a Range characteristic of 3 or less. |
| 3 | Eye for Treasure: This warrior has a sixth sense when it comes to tracking down valuable loot. If this fighter is included in your warband, you can make an additional search roll on the lesser artefacts table in the aftermath sequence of the battle. |
First Convergence — Mistaken Identity: Soon after descending into the Maw you enter a chamber that contains a shrine to some ancient deity, now bashed and hammered into a million fragments. As you sift through the wreckage, you hear a cry of outrage. The guardians of the shrine have returned to find their site of worship ruined, and now blame you for the desecration. Defend yourself from their outraged assault. Battleplan — Terrain: see map. Deployment: generate a deployment card as described in the Dungeon Battle Battleplan Generator. Victory: Annihilation. Twist: generate a twist card as described in the Dungeon Battle Battleplan Generator.
Second Convergence — Descent into Darkness: You are crossing a narrow stone bridge when you see your quarry for the first time – a hulking Fomoroid Crusher. With a roar, it brings its stone club down upon the bridge, shattering it and pitching you into darkness. You hit the ground hard. When you finally come round, you find yourselves face to face with a band of cut-throats that seek to strip you of everything of value. Battleplan — Terrain: see map. Deployment: generate a deployment card as described in the Core Book. Victory: No Mercy. Twist: generate a twist card as described in the Core Book.
Final Convergence — Chamber of Sigils: After a long and deadly trek through Varanthax's Maw, you finally pick up the fomoroid's trail. It leads to a great door of smooth black stone far too heavy for you to open. There is a glowing sigil on its surface, and as you study your surroundings you realise that there are matching symbols carved upon pillars across the chamber. These must be activated in order to open the path ahead. Slay anything that stands in the way of your progress. Battleplan — Terrain: see map. Deployment: generate a deployment card as described in the Dungeon Battle Battleplan Generator. Victory: Critical Point. Twist: Alert and Ready.
Campaign Outcome: If the Aspirant warband is the winner, they complete this campaign quest. Read the text below, and then choose either Honour or Glory.
After many days of travel through the winding tunnels of the Maw, you have finally caught up with your quarry. The fomoroid has apparently ceased its berserk charge and is now sitting motionless amidst a chamber filled with strange, cyclopean pillars of stone. Images are carved crudely across the columns, depicting hordes of the creature's kind raising immense edifices of stone and marble under the watchful eyes and lashing whips of masked lords. The diorama ends with a scene of great slaughter, with the fomoroids turning upon their enslavers in a bloody uprising, and raising new shrines and monuments from their bones.
The fomoroid does not seem to have noticed your presence. Were you able to discern an expression upon its brutish face, you would judge it to be one of terrible loss. The creature hardly seems the furious force of destruction that you anticipated. Indeed, you sense that its rampage is at an end. An honourable warrior would leave the fomoroid to its silent vigil. On the other hand, taking its head as a trophy would no doubt earn you great renown and glory. The choice is yours.
If you choose Honour or Glory, claim the corresponding reward (see Spoils of Victory, below).
Spoils of Victory
The deadly confines of Varanthax's Maw no longer hold any fear for you or your grizzled comrades. Under your leadership your warband has grown into a truly deadly force, feared by all who have heard the legends of their exploits. Your tale is not yet over, but for now you can relish the rewards of your victory.
On the following pages you will find conclusions for the faction-specific campaign quests provided in this book, concluding your warband's epic journey. You will also receive a unique reward for completing each campaign: an item or blessing which you can grant to your favoured champion to wield in any future battles. Although you have earned a great victory, your warband's odyssey is not over. You can continue to take on all rivals with the new and powerful tools at your disposal, or embark upon a fresh campaign – either one of those detailed in this book or one provided in another Games Workshop publication. In time, your foes will learn to dread the very mention of your name!
Khainite Shadowstalkers Quest Rewards
The Captured Melusai: The chained Blood Sister named Illaxineth greets you with a bloody smile, knowing the gift that you are here to grant her. She has suffered greatly under the cruel blades of the Golden Twins, but she swears on the life of the High Oracle that not a single secret escaped her lips. Your blade strikes swift and sure, ending her torment. Nearby, you find her stolen wargear, including a double-bladed glaive of crimson crystal – a weapon Illaxineth named Bloodspite. The outraged cries of the Golden Twins echo behind you in perfect harmony as you make your escape.
Artefact of Power — Bloodspite: A gift from the High Oracle herself, this master-crafted heartshard glaive transforms the blood of those it slays into razor-sharp daggers of crystal and sends them whipping towards nearby foes. Each time the bearer takes down an enemy fighter with an attack action that has a Range characteristic of 3 or less, before that fighter is removed from play, allocate D6 damage points to each visible enemy fighter within 3" of that fighter. Roll a dice for each.
Khaine's Blood: When the last of your foes has been cut down, you gather several of the nullstone ewers filled with varanite – a meagre offering, considering the vast size of this deposit of molten realmstone, but enough to satisfy the High Oracle's needs for now. On the corpse of one of the slain extractors, you discover a dagger fashioned from a sliver of refined varanite. A truly vile creation, it radiates the mutating power of Khaine's Blood – not a weapon to be handled lightly, but an example of the ferocious power of the stuff.
Artefact of Power — Varanite Kris: This crudely fashioned but impossibly sharp sliver of crystallised varanite possesses the power to twist the flesh of those it strikes in violent and terrible fashion. Add 5 to the damage points allocated by each critical hit from attack actions made by the bearer that have a Range characteristic of 3 or less.
Pit of Darkness: You burst into the Well of Shadows just as Kal Rothzir's dread ritual is approaching its climax. Something amorphous and blacker than night is coalescing in the air, summoned by the sorcerer's arcane call. Yet before it can manifest in its entirety, your hurled dagger strikes Rothzir in the heart. With a soundless scream, he tumbles off the precipice into the Well, his body claimed by the inky blackness. You believe you hear a faint susurrus of laughter, as the shadows calm. The Well is secured in the name of the High Oracle.
Artefact of Power — Rothzir's Sceptre: Crafted from Ulguan realmstone and black gold, this sceptre hungrily drains the energy and will to fight from nearby foes. Subtract 1 from the Attacks and Strength characteristics of attack actions (to a minimum of 1) made by enemy fighters while they are within 3" of the bearer.
Scions of the Flame Quest Rewards
The Immolation Engine: Pavollax Iron-eye does not die easily; you duel the crazed warsmith on top of his creation, the metal shell beneath your feet glowing hot enough to sear flesh and melt iron. For all his fury, Iron-eye cannot match the wrath of the Ever-Raging Flame. Your ferocious strike sends him tumbling into one of the Immolation Engine's great brass chimneys, and a gout of sulphur-smelling steam envelops him, boiling him inside his armour. Having claimed the Immolation Engine for your own ends, you also retrieve the dead warsmith's brass gauntlets.
Artefact of Power — Brimstone Gauntlets: Apparently fashioned from rough, igneous rock, these gloves can emit a cloud of blazing, blinding sulphur. Subtract 2 from the Attacks characteristic of attack actions (to a minimum of 1) that target the bearer that have a Range characteristic of 3 or less.
Beasts of Flame: A cyclone of white-hot flames bursts forth as you break open the sarcophagi, half-formed shapes with molten fangs and eyes like black coals visible amidst the inferno. This living firestorm rushes away down the tunnels of the Maw, incinerating all in its path but sparing the lives of you and your fellow warriors. Doubtless the Ever-Raging Flame will be sated by the catastrophe that these unbound fire-spirits will unleash. Better still, there are many other treasures of fire and ruin to be found in these sacred chambers.
Artefact of Power — Firecloak Ring: Containing the bound essence of a fire-daemon, this glowing, red-hot band of iron can summon a shield of flames and cinders to protect the bearer. Once per battle, the bearer can use this artefact as an action. If they do so, until the end of the battle round, subtract 3 from the damage points allocated by hits and critical hits (to a minimum of 1) from attack actions that target the bearer.
Background Tables
Khainite Shadowstalkers
The Shadowstalkers are Morathi's deadliest assassins. Wreathed in darkness, they slip past sentries and locked gates to murder their targets without leaving a hint of their presence unless they wish it.
To be granted the shadowmark by the Shadow Queen is to be sentenced to a lingering death in pursuit of duty – a pact entered into by all who join the ranks of the Shadowstalkers, either willingly or otherwise. Every time one of Morathi's secretive agents transports themselves across vast distances through the mysterious Umbral Web, they sacrifice a portion of their soul to the mists of the Shadow Realm. Yet when they are imbued with the power of Ulgu, these killers are all but unstoppable, leaping between pools of darkness as they cut apart any who dare to cross blades with them.
Shadowstalkers First Name (D10): 1. Syreth. 2. Vorya. 3. Scythia. 4. Druchon. 5. Slitha. 6. Krath. 7. Lóiru. 8. Móirath. 9. Aneth. 10. Róth.
Shadowstalkers Last Name (D10): 1. Dhusk. 2. Calesk. 3. Mhasik. 4. Hellekos. 5. Ortess. 6. Vhanir. 7. Eroth. 8. Palhesk. 9. Wychar. 10. Siress.
Origin (D6):
- Morathi's Ire – This warband has, through failure or insubordination, earned the fury of Morathi, and now strive to regain her favour.
- Infiltrators – Your warriors can scale any fortress wall and open any lock in pursuit of their prey.
- Honoured – Having risen high in the ranks of the faithful, your warriors have been granted the mircath, and power over darkness.
- Umbramancers – Few can claim so potent a mastery over the shadows as your warriors.
- Shadowpath Watchers – Your warriors' former duty was to watch over the twisting labyrinth of the Ulguan shadowpaths.
- Banished – These warriors are forbidden from returning to Ulgu until they have satisfied their queen's demands.
Leader/Favoured Warrior Background (D6):
- Inner Daemon – The daemonic entity that resides in this warrior's blood sometimes exerts its own, powerful will.
- Utterly Silent – This warrior never makes a sound, no matter what surface they are walking on.
- Fading to Mist – This warrior often appears insubstantial, as if the wind might carry them away – this does not render their blades any less deadly.
- Bringer of Darkness – Where this warrior walks, pitch-black clouds gather.
- Umbral Familiar – This warrior is accompanied by a strange creature fashioned from wisps of darkness.
- Shadow Consort – Rumour has it that this warrior was once an intimate companion of Morathi.