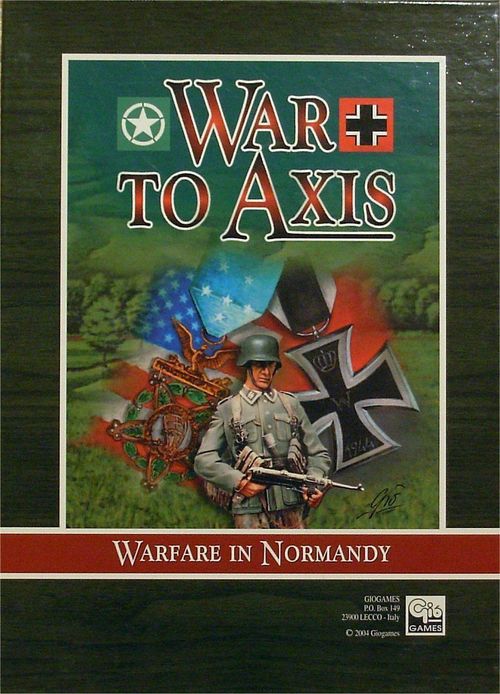
War to Axis: Warfare in Normandy
War to Axis: Warfare in Normandy Rulebook
Table of Contents
Table of Contents
Scale
- Infantry unit = Battalion
- Other units = Company
- 1 hexagon (hex) = from 300 to 500 metres
- 1 game turn = from 20 to 30 minutes
1.0 Game Components
- 6 geomorphic maps, measuring 30x48.5cm
- 160 unit counters
- 120 plastic stands
- 150 plastic chips
- 2 sheets of card each with 16 event cards
- 10 special dice
- 2 sheets with adhesive labels for the dice
- 3 Army tables
- 1 punched sheet of terrain overlays
- various markers
- the rulebook
2.0 Preparation
2.1 Stands
Glue an Army Group marker on each stand (A, B or R).
Suggestion: On the German Army stands (the black ones) glue 20 "A" markers, 20 "B" markers and 10 "R" markers. On the green Anglo-American stands glue 28 "A" markers, 28 "B" markers and 14 "R" markers.
2.2 Combat Units
Each counter must be cut out, folded and mounted onto a plastic stand.
We use stacked plastic chips to simulate the size of the units in terms of number of men and vehicles, on top of which we place the unit stand itself. The chips and the unit represent the losses that the unit can take before it is destroyed. A red number (+#) that you will find on the Army table shows the number of chips to be placed under each unit.
Example: an infantry unit comprises 4 elements: three chips and the stand showing an Infantryman.
Each counter shows a picture of the unit that it represents: Command group, Infantry unit, Armoured unit, Anti-tank unit etc.
There are some symbols on the upper part of the counter that identify the type of target that it represents:
- Target that is vulnerable to anti-personnel fire (Infantryman icon).
- Blue circle: Heavy armour. Target vulnerable to anti-tank fire.
- Green circle: Medium armour. Target vulnerable to anti-tank fire.
- Yellow circle: Light armour. Target vulnerable to anti-tank fire.
- Target vulnerable to bombardment (Explosion icon, HIT).
2.3 The Dice
You will find ten dice in the box: One yellow, four white and five black dice. These dice must be prepared by sticking special labels onto them.
Activation Dice (Yellow Dice): Stick an "A" on two faces, a "B" on two faces, an "R" on another and an "Event (?)" on the last.
Anti-tank Dice (Four white dice): Stick a "Hit on light tank" (yellow) label on three faces, a "Hit on medium tank" (green) label on two faces and a "Hit on Heavy tank" (blue) label on the last face.
Special dice (Five black dice): Stick an Infantry hit label on two faces, a radio communication label on another two, a bombardment label on one and a flag label on the last.
2.4 Maps
Each of the three maps are printed on both sides and have an identifying letter on opposite corners, with a number 1 on one side to facilitate the correct positioning shown in each scenario. (see example)
Every map also has a hexagonal grid with an alphanumeric code that identifies each single hexagon (hex).
The maps represent different types of terrain, and their game characteristics are summarised in the "Terrain table" that is on each Army Table.
Note: The maps in some scenarios may be modified by adding some overlays.
2.5 Army Table
Each of the three Army tables have:
- a terrain table showing:
- the cost in movement points for each terrain type;
- whether the terrain blocks line of sight;
- if a unit in this terrain has any modifiers;
- the effect of an Artillery bombardment in the area.
- the characteristics of each unit:
- a picture that represents the unit;
- how many chips should be placed under the unit;
- the maximum movement point value (MPs);
- the value of MPs required to advance whilst firing;
- anti-personnel firing strength;
- anti-tank firing strength.
Example, the American unit "Cacciacarri M10*" (the asterisk is explained in 5.6, where armoured units marked with a (*) do not take the bombardment modifiers): it needs 2 chips (+2), has a Movement (no fire) value of 6 MP, an Advance (firing: -1) value of 4 MP, anti-personnel fire of "3 hex - 2" and anti-tank fire of "4 hex - 4/3/3/2".
Key to the firing values:
- Anti-personnel fire: 3 hex - 2. Fire allowed up to 3 hex distance. Roll 2 "special action" (black) dice.
- Anti-tank fire: 4 hex - 4/3/3/2. Fire allowed up to 4 hex distance. Roll 4 (white) dice if the target is next to you; roll 3 dice if the target is 2 hexes away; roll 3 dice if the target is 3 hexes away; roll 2 dice if the target is 4 hexes away.
2.6 Event Cards
Unexpected events may occur during a battle, or reinforcements may arrive; this will make the game unique each time you play.
This element of "chance" is simulated with the Event Cards.
The game provides you with 32 cards on two sheets that you should cut out. Of these, 16 are events that may involve either player (light yellow background), and 16 are reinforcement cards (light green for the Allies, light grey for the Axis (see 2.6.1)).
The Event Card deck will comprise a number of cards that is defined by the scenario that you are going to play.
If all the Event cards are drawn, no other event will occur during the rest of the game.
Every card has one or more nationality symbols at the top that show the army to which the event on the card will apply. If the event card shows both sides (Axis and Allied) then the player that drew the card can play it to his own advantage. If the event shows the symbol of the enemy army, the card must be given to your opponent.
If it is marked "IMMEDIATE" this means that the event must be applied immediately.
If "IMMEDIATE" is not on the card then it can be held in the player's hand until they decide to play it, always depending on the terms specified on the card itself.
2.6.1 Reinforcement Cards
The number of reinforcement cards to be included in the Event deck is shown in each scenario. These cards will be chosen at random by each player.
2.6.2 Reinforcements
When the Event card shows the arrival of reinforcements, the player may take the reinforcements from the box and place them on a map edge on a friendly road.
If the card shows 2 reinforcements, the second unit will be immediately behind the first one, just off the edge of the map.
If there are no more friendly road hexes then the reinforcement will be placed in any hex, as long as it is the closest possible to a friendly road.
These units can move as soon as they are activated.
Note: The text on the card refers to the Advanced version of the game. If you are playing the basic version, ignore it.
3.0 Basic Game Turn Sequence
Note: In the BASIC game we don't use Army Groups (A, B and R). Ignore the letters on the stands (2.1).
a. The player with the initiative determines how many units can be activated and the number of artillery that are available this turn (3.1).
b. The player with the initiative activates 1 unit at a time until he has activated all the units shown in "a" (3.2).
c. The player without the initiative can perform "opportunity fire" (5.5) when enemy units move within 2 hexes of them.
d. The player without the initiative performs actions "a" to "c".
e. Move the Turn marker.
f. If that was the last turn, check the victory conditions.
3.1 Determine how many units can be activated
Roll 1d6 and add 6 to the result. The total (which will be from 7 to 12) is the number of units that can be activated this turn.
Moreover, the number rolled on the dice is the number of artillery batteries available this turn.
A roll of 1 on the dice means an Event has occurred too.
3.2 Unit activation
When a unit is activated it can perform one of the following actions:
a) Remain stationary.
b) Fire at a target in line of sight and within range.
c) Advance and fire at a target in line of sight and within range. Some units cannot advance and fire and so they cannot perform this action.
d) Move.
In addition to the actions listed above, Command Units can also choose between two other actions:
e) Request Artillery support (5.6).
f) Rally units that have taken losses (6.0).
4.0 Movement
A unit can generally perform two types of movement: advance or full move.
The advance allows you to move and fire, subtracting a dice from your fire capacity. Full Movement does not allow you to attack the enemy. Not all units can use Advance movement.
Whichever type of movement is used it is measured in Movement points (MP).
Normally it costs 1 MP to cross a hex. However there are some hexes that represent particular types of terrain that require more MP, shown in the Terrain Table.
If a unit moves into a hex containing a marsh or a bunker it must stop without firing.
A unit moves from one hex to another adjacent hex along any route he may choose.
If a unit moves next to an enemy unit, he must stop (4.1).
4.0.1 Movement on road
Movement on roads always costs 1MP, no matter what terrain that road crosses.
Important: This bonus only applies if the unit enters from another road hex; if this is not the case then you must spend the MP required by the surrounding terrain (and shown in the Terrain table) to enter the hex.
If the unit performs its entire move on the road it gains 1MP if it is Infantry. The bonus is 2MP for motorised units.
The road movement bonus only applies to full movement and NOT to an advance.
4.1 Zone of Control (ZoC)
All units have a Zone of Control in the six adjacent hexes (except for rivers, 4.3.2).
A unit in an enemy ZoC may not move within that ZoC nor move to the ZoC of another enemy unit on the same turn.
4.2 Stacking units
Each hex can contain only one unit.
A unit can cross a hex occupied by a friendly unit by spending an additional movement point, but at the end of the turn only 1 unit can be in each hex.
4.3 Terrain
The Terrain table shows the cost in movement points (MP) to enter each hexagon.
Special terrain:
4.3.1 Hills
Hills delineate changes in altitude of the battlefield but only the hexes containing the slope line change the movement cost of that hex. Units in these hexes are always considered to be at the higher altitude.
4.3.2 Rivers
Rivers are placed on the map as shown in the scenarios and run along hex edges.
A hex edge can be crossed normally if an intact bridge is present.
Motorised units can only cross a river using a bridge. Infantry units can cross a river beginning their movement next to a river on one side of the hex edge and they use their entire movement allowance to move to the other side of the river. This is not considered an Advance movement. Motorised Infantry will lose their vehicles, while Mechanised Infantry will be replaced by foot Infantry.
Bridges can be destroyed with a hit by an artillery attack, or they can be demolished by engineers. Dice rolls needed may be modified depending on the scenario and the type of bridge present.
Important: Units may not extend their ZoC across a river.
4.3.3 Bocage
Bocage hexes represent a particular type of terrain found in Normandy and are shown on the map with cultivated fields when required by the scenario. Bocage hexes are considered to be corn fields, but they block line of sight for units at the same height.
When Motorised or Mechanised Infantry counters enter a Bocage hex, their movement points are reduced to 4 and their advance MPs are reduced to 3.
Important: Bocage hexes are impassable for motorised units.
Note: From August 1944 onwards the Allies can penetrate Bocage hexes with armoured units that open a gap which costs 4 movement points per hex. The cleared hex is shown with a special marker.
All motorised units can cross a cleared Bocage hex at the normal cost for a cultivated field.
4.3.4 Trenches and Bunkers
These defences can only be used by Infantry and Anti-tank units.
The entire hex is considered to be trenches or a bunker.
A hex that contains one of these elements interrupts a road.
Trenches cannot be placed in urban areas (city or town). Identify a trench hex with the special marker.
Effects: The trench absorbs the first loss taken after any dice roll.
A bunker absorbs the first two (2) losses taken after any dice roll.
A unit that undergoes opportunity fire cannot benefit from the advantages given by trenches or bunkers.
4.3.4.1 Attacking units in trenches
During an anti-personnel attack, entrenched units that are hit by 2 explosions (HITs) will remove the trench marker.
Until that moment, the trench absorbs the first loss taken after any dice roll.
If the attack was a bombardment, 2 explosions (HITS) will remove the trench marker and inflict 1 damage to the unit.
4.3.5 Engineer Units
Engineer Units are Infantry units that have special weapons.
When Engineer units attack a unit in a trench or bunker they ignore the protection.
Every hit is damage.
In urban combat engineer units apply a modifier of -1 die (instead of -2 dice) against an anti-personnel target in the city.
Demolition: An activated Engineer unit can try to demolish a bridge if it is in one of the two hexes next to the bridge and the other hex is not occupied by enemy units.
Attacks on bridges are resolved like a bombardment with 4 special dice.
The bridge is destroyed with 1 HIT.
(Editor's note: the source prints the two sentences above a second time immediately after; the duplicate is omitted here.)
Repair: An engineer unit can try to repair a destroyed bridge by using all its activation allowance for that turn. Roll the special dice. A "flag" means that the bridge has been repaired.
In the first attempt only roll one dice; in further attempts add one dice to the roll up to a maximum of four (4) dice.
4.3.6 Overlays
The overlays are single hexes or groups of hexes that are placed on the map to change the terrain shown on the map.
Each overlay is numbered by the type of terrain that it represents, so as to identify it when you are playing the scenarios.
If the overlap is a group of hexes, you will see a number in a circle in the middle of one edge.
That hex is the "reference hex".
The reference hex is used to both identify the overlay and to help position it correctly: it will be placed over the hex indicated in the scenario with the side with the circle facing the specified direction: North (N), North East (NE), East (E), South East (SE), South (S), South West (SW), West (W), North West (NW).
Example: Marsh 1(N) in A/d10. This means that the reference hex of Marsh overlay 1 must be placed on Map A, Hex d10, with the side with the circle facing North.
5.0 Combat
An attack can be performed against a unit that is within range (5.2) and towards which it has a clear line of sight (5.1).
An Infantry unit must fire at the closest enemy unit but can choose if more than one are at the same distance.
The type of target will dictate what sort of direct attack a unit must perform (anti-personnel or anti-tank) and therefore the type of dice that must be rolled: black (anti-personnel), white (anti-tank).
Every unit counter shows the sort of target that it represents.
Whatever the target type it may always be bombarded (Explosion icon, HIT).
5.1 Line of Sight (LoS)
In good atmospheric conditions and during daylight all units can see six (6) hexes in all directions.
Imagine a straight line that joins the centre of the attacker's hex to the centre of the target hex. If this line does NOT cross a hex that blocks LoS then the hex is visible and the target is a valid one.
The terrain table shows what sort of terrain blocks the Line of Sight.
Units, be they friendly or enemy, are also considered obstructions, and block the LoS across a hex.
A LoS that runs along the side of a hex is only considered blocked if both adjacent hexes contain an obstruction.
If only one of the two hexes contains an obstruction then the LoS is not blocked.
5.1.1 Hills
Hills allow units to be at altitudes that are higher than the rest of the battlefield.
Higher units have LoS beyond obstructing hexes except for the hexes immediately behind the obstructing hexes.
Example: Map "B". Units in G6 cannot see these hexes: 13, 14, 15, 16, 17, I8, H3 and H9. Also they cannot see from B7 to B11, but can see row "A" up to hex A9.
The crest line is an obstruction for LoS towards lower hexes for units at the same altitude but not within the hex containing the crest itself.
5.2 Firing Range
Every unit had a maximum distance within which it can fire at the enemy.
Count the hexes that separate the firing unit from the target, counting the hex containing the target but not the hex that contains the firing unit.
The target distance indicates the number of dice to be rolled depending on the type of attack performed.
You should use the special dice (black) for an anti-personnel attack, and the anti-tank dice (white) for an attack against armoured vehicles.
The type of terrain in which the target is found may modify the number of dice to be thrown (see Terrain table).
Moreover, also apply the following modifiers if:
- The unit that is firing is also advancing: -1 dice
- The unit has lost half of its strength: -1 dice
- The unit is performing opportunity fire: -1 dice
5.3 Combat resolution
Once you have decided the type of attack and the right number of dice to roll, the player rolls the dice and resolves the combat.
The results should be interpreted as follows.
Attack against infantry: 1 step of damage for each Infantry icon rolled on the dice.
Anti-tank attack:
- 1 step of damage to a light armoured unit (L) for each yellow vehicle icon rolled.
- 1 step of damage to a medium-armoured unit (M) for each green vehicle icon rolled.
- 1 step of damage to a heavy-armoured unit (H) for each blue vehicle icon rolled.
Bombardment: 1 step of damage to any target for each explosion icon (HIT) that is rolled.
5.4 Retreat
After removing the damage that it has taken, if a unit is not in a bunker, trench or town it must retreat one hex for each point of damage taken above the first.
The retreat must be a movement that moves the unit away from the enemy, without moving through impassable hexes, and without moving into hexes that are adjacent to enemy units.
During a retreat all hexes cost one movement point, no matter what their normal cost.
If a unit cannot retreat then it will take a further point of damage for each hex of retreat that it didn't perform.
After the retreat the unit is marked with a marker that shows that the unit is disorganised (5.4.1).
During a retreat the unit may pass through hexes containing friendly units but those hexes are not counted as a move.
Each friendly unit that is passed through by a retreating unit becomes disorganised.
After combat a unit which provokes the retreat of an enemy which was previously adjacent to them may move and occupy the abandoned hex.
5.4.1 Disorganised units
Units that take at least 2 damage in one turn and that have had to retreat are considered to be disorganised.
This condition lasts for the current turn.
The only limit imposed to a disorganised unit, if it is activated, is the impossibility to move or advance; any other action is allowed.
Disorganised units may not perform opportunity fire.
5.5 Opportunity Fire
During a unit's movement the enemy may perform "opportunity fire" with any unit within 2 hexes that has the requirements to do so (5.5.1).
Important: A player may ONLY declare opportunity fire if the unit that is moving moves for at least 1 movement point into a hex that is in the LoS of the enemy unit.
The movement is temporarily suspended until the opportunity fire is resolved.
If NO losses are taken then the unit may continue the movement to it's chosen destination.
The firing unit is marked with an opportunity fire marker.
If the target takes any damage their movement will stop. The unit may return fire but may not move any further.
A unit can only perform opportunity fire once during the enemy's turn.
Units attacked by opportunity fire that take two or more damage are disorganised and must retreat.
5.5.1 Requirements to perform opportunity fire
A unit may perform opportunity fire if it has not yet been activated and if it does not have an opportunity fire marker.
A unit performing opportunity fire rolls 1 dice less than normal.
A unit using the road movement bonus may not use the protection of the terrain in that hex.
5.6 Artillery support
Each scenario gives a number of Artillery Batteries (BTR), with an attack value shown for each, and the number of special dice that must be rolled to attempt a radio communication.
A player may use the command unit's action to request artillery support.
This operation allows 1 artillery unit to perform an attack against the target hex (exception for the American player, 5.6.1).
Artillery units may attack any target on the map. The target hex must be in Line of Sight of the activated command unit, and within 6 hexes of them. Event cards and some scenarios may reduce this maximum visibility.
Radio communication attempt: To request artillery support the player must roll a number of special black dice shown in the scenario and, with one or more radio contact icons he will be able to perform the attack on the chosen target with an artillery unit of his choice.
Always use the special black dice to resolve the bombardment:
- A medium armoured unit (M) has a modifier of -1 dice.
- Heavily armoured units (H) have a bonus of -2 dice.
- Armoured units (M) and (H) with a (*) on the counter do not have these modifiers.
Every dice that shows an explosion icon (HIT) means a successful hit.
5.6.1 American artillery support
The American player may perform an artillery attack for each radio communication icon that he rolls. Each battery resolves the attack on their own on the same target.
6.0 Rallying Units
A player may decide to use a command unit action to recover the damage taken to adjacent units, or recover the command unit itself.
Conditions for rallying: The command unit or the unit that is trying to rally MAY NOT be adjacent to an enemy.
Moreover the above-mentioned units must be in hexes that provide cover or, if in the open, they must be in hexes that are out of the LoS of enemy units.
The recovery attempt is made with the roll of the number of special dice indicated in the scenario.
A chip is recovered for each "flag" result.
The chips are distributed at will amongst the adjacent units or on the command unit. A unit may not recover more chips than the original number it had at the start of the scenario.
Advanced Rules
As well as the basic rules, the advanced game also uses some variants and additions that make the game more realistic and strategic.
We advise you to only read the "advanced" rules once you are familiar with the basic game.
Variants and additions to the advanced game:
- Army Groups (7.0)
- Zone of Command (7.1)
- Reinforcements (7.2)
- Activation system (8.0 adv)
- Simultaneous activation (8.1)
- Request for strategic bombardment (9.0)
- Opportunity fire (10.0)
- Closing Fire (11.0)
- Hidden units (12.0)
- Reconnaissance (12.4)
7.0 Army Groups
At the start of the game each player has a certain number of units as shown in the scenario.
These units must be assigned to one or more groups, up to a maximum of three, which will be called groups A, B and R respectively.
The groups do not necessarily have to have the same sort of weapon, they can be a mix.
Note: If a player wishes he can build only two Army Groups or even just one, but he should remember that if he activates an inexistent or destroyed group, he will activate less units.
7.1 Zone of Command
In order to be activated without limitations, the unit must be within 6 hexes of their command unit.
A unit that is not within this distance will have the following limitations:
- Cannot move towards the enemy.
- Movement is only allowed towards the commands unit, as long as point 1) is not violated.
If the command unit is destroyed, then ALL units are considered out of the Zone of Command in the current turn.
Beginning with the next activation, one unit will be designated as Command Unit with the following modifiers:
- Rally: -1 dice
- Radio Contact: -1 dice.
7.2 Reinforcement Cards
This paragraph replaces 2.6.2.
Once an event determines the arrival of reinforcements, the indicated player may assign these units to one or more Army groups.
From the following turn when that group (or unit) is activated, the reinforcements may come onto the map from a friendly road hex.
8.0 Advanced Game Turn Sequence
This paragraph replaces 3.0 and 3.1 in the basic game.
Activation
Each player must roll 1 activation dice (yellow dice) + 1d6 at the start of every turn.
The result of the activation dice will have the following effects:
- Activates the group shown on the dice for this turn.
- If the group shown is "R" (Reserves), the player may choose one of these actions:
- a) Activate all the reserves;
- b) Detach one or more formations from the Reserve to groups "A" or "B";
- c) Perform a recovery action with ALL the commands in play;
- d) Request for strategic bombardment with any command (9.0).
- If the group shown is "R" (Reserves), the player may choose one of these actions:
- If the die shows an event "?" then first resolve the event and then activate a group of your choice.
A group may NOT be activated for more than 2 consecutive turns. If this happens draw an event card and activate one of the other two groups.
The result of the six-sided dice has this effect:
- The number shown is the number of artillery batteries available for that ENTIRE turn.
- Moreover you can activate a number of chosen units (that have not yet been activated that turn) equal to the number shown on the dice.
8.1 Simultaneous activation
Resolve any eventual events, then alternate activating a unit each, starting with the player that has the initiative as shown in the scenario.
Units in the activated group have precedence.
A unit that chooses to remain stationary for its activation will be able to perform opportunity or closing fire.
Each turn you must record the activated groups and the number of units that must be activated on the record sheet.
Important: For a better use and visibility of the units activated during the turn, rotate the stand to show the Army group letter to the adversary once they have been activated.
9.0 Request for Strategic Bombardment
Instead of an "artillery support" (5.6) a command may request a "Strategic Bombardment".
This action, if successful, will be the only action performed by the activated Group.
9.1 Declaration
a) The player whose phase it is declares that he wants to request a strategic bombardment with the activated command unit.
9.2 Requirements
b) The target hex must be in Line of Sight of the activated command unit.
c) The command unit must be the first unit that is activated.
9.3 Attempt at radio contact
Apply the rule indicated in Paragraph 5.6.
If the special dice roll produces at least one radio icon then the radio communication has been successful and ALL the artillery batteries available for that turn will perform a bombardment.
No other units in the same group may be activated.
Important: If the communications attempt fails, the Command Group will have spent their action, but the other units in the group can be activated normally.
9.4 Resolution of Bombardment
Each available battery will perform an attack against a hex starting from the target hex (9.2).
The next hex will be an adjacent one to the previously bombarded one and so on until all the available batteries have fired.
Each HIT result on the dice means one damage.
During strategic bombardment a hex may only be attacked once.
10.0 Opportunity Fire
A unit that performs opportunity fire during an enemy move is considered already activated for the current turn.
Mark a unit that performs opportunity fire with a special marker.
Important: A unit may only perform opportunity fire once per game turn.
11.0 Closing Fire
At the end of each turn, units that have NOT been activated or that have remained stationary during the turn may perform "closing fire" against units that are in an adjacent hex.
11.1 Resolution
a) Calculate the basic number of dice to be rolled.
b) Apply any modifiers due to:
- Terrain that gives cover.
- The firing unit has lost 50% strength.
- Subtract 1 dice for closing fire.
c) Divide the number of dice to be rolled by two (round down).
Final/closing fire is contemporary.
12.0 Hidden Units
If the terrain offers cover, then instead of placing the unit the defender will place an identification number for each unit or dummy (12.1).
Assign the same number to the unit that is hidden in that terrain and that will be placed next to the map.
As soon as the unit fires, moves or when an enemy unit moves into its ZoC then the unit will be revealed or, if it is a dummy, the marker will be removed and the enemy unit can continue their move.
Hidden units can not be a target of anti-personnel or anti-tank attacks.
12.1 Dummy units
Some scenarios require that the defender has a certain number of dummy units.
These units are placed on the map with the sole aim of confusing the enemy.
Dummy units are removed from play as soon as they are uncovered.
12.2 Bombarding hidden units
Hidden units that are bombarded have a modifier of -2 dice.
This modifier should be added to any applicable terrain modifiers.
12.3 Hiding
A unit can hide under these conditions:
a) It is in terrain that provides cover.
b) It is 4 or more hexes from enemy units.
c) It uses its entire action to "hide".
Remove the unit from the map and replace it with a numbered counter.
The same number will be placed by the stand placed next to the game-map in such a way as it cannot be seen by the opponent.
12.4 Reconnaissance
An activated unit can use its action to identify a hidden enemy unit.
Requirements: The enemy unit must be in LoS and within 4 hexes.
Resolution:
- Roll 2 dice if the enemy unit is 2 or 3 hexes away.
- Roll 1 dice if the unit is 4 hexes away.
A "Flag" result will reveal the hidden unit.
13.0 Victory Conditions
Check the victory conditions at the end of the game turn indicated in the scenario.
Important: We advise you to play a second game, swapping sides and then to compare the victory points each player won to decide the winner of the scenario in a more balanced way.
Note: The turn record sheet printed on the last page of the PDF (turn 0 to 20 tracking grid, Allied and German rally/radio/artillery lines and a blank Victory Conditions box) is a blank form and is not reproduced.