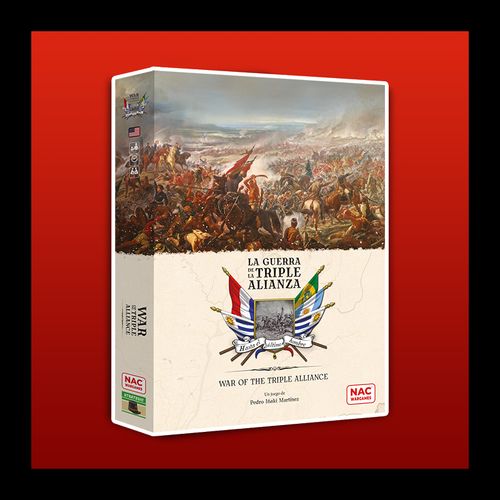
War of the Triple Alliance
War of the Triple Alliance Rulebook
Table of Contents
Table of Contents
- 1. Contents and Setup
- 2. Sequence of Play
- 3. Transport Phase
- 4. Movement Phase
- 5. Stacking
- 6. Leaders
- 7. Combat Phase
- 8. Retreating
- 9. Fortresses
- 10. River Markers
- 11. Control of Spaces
- 12. Maintenance Phase
- 13. Paraguayan Capitals
- 14. Capturing Leaders
- 15. Uruguay
- 16. Winning the Game
- 17. Example of Play
- 18. Optional Rules
- Optional rule 1: More realistic leaders
- Optional rule 2: The long way to Mato Grosso (Favors the Allied Player)
- Optional rule 3: Historically accurate El Chaco region
- Optional rule 4: Paraguayan strategic blunder (Favors the Paraguayan Player)
- Optional rule 5: Argentinian peace treaty with native tribes (Favors the Allied Player)
- Setup
1. Contents and Setup
Players choose which side to play. From now on, the player who controls the blue units of Brazil, Argentina and the Uruguayan Colorados faction will be called the Allied player, while the player who controls the red units of Paraguay and the Uruguayan Blancos faction will be called the Paraguayan player.
Unit counters show a card icon, a unit name, a flag, a combat factor and a unit type. The unit types are: Brazilian infantry, Argentinian cavalry, Uruguayan infantry (Colorados Faction), Paraguayan cavalry, reduced-strength Paraguayan infantry, and Uruguayan infantry (Blancos Faction).
Place the Leader Counters in their corresponding boxes on the board and create a pool of Control Markers within reach of both players. The Paraguayan Capital Markers should be placed near the Paraguayan player.
Players lay out the board and place Unit Counters, Cards, and Markers on the map according to the rules indicated on the Setup page. Spaces on the map are colored differently in accordance with which countries control them (Paraguay, Brazil, Argentina, Uruguay).
There are also gold-framed Strategic Spaces located in Argentina, Brazil, and Paraguay. These special spaces allow players to replenish reduced-strength units as well as receive reinforcements.
Each side has their own deck of cards which must be shuffled and placed face down on the board in the box labeled EVENT CARDS. Players then place their Starting Card face up in the box labeled CARD IN USE.
The game starts with the Allied player's sequence of play, who performs all the actions listed on their Starting Card. Once finished, the Paraguayan player's sequence of play begins. When both players have carried out all phases, the turn is completed and a new one begins, starting with the Allied player's sequence of play.
2. Sequence of Play
On their turn, each player performs the following phases in order:
- Transport Phase
- Movement Phase
- Combat Phase
- Maintenance Phase
3. Transport Phase
A player may transport any number of their units along the rivers or coastline (note the blue waterways that pass through certain spaces). Units that players wish to transport must start the Transport Phase in a Main River or Coastal space, and may pass through any number of these spaces controlled by their side. Units being transported during this phase may not move during the Movement Phase of the same turn.
4. Movement Phase
Players may move any number of units that were not transported in the previous phase. Infantry units can move up to two spaces each turn. Cavalry units can move up to three spaces each turn.
Movement can occur between adjacent spaces connected by blue, brown, main rivers or coast lines.
If a unit enters or passes through an empty space belonging to the opponent, the player moving that unit places a Control Marker to indicate that this space is now controlled by their side. If one or more units enter a space containing enemy units, combat ensues.
5. Stacking
Any given space may have a maximum of six units. Neither Fortresses nor Leaders count towards the stacking limit.
If more than six units would end up in one space due to retreating after a battle, the controlling player must continue moving any units in excess of this limit to the closest space controlled by their side.
6. Leaders
When units enter a space occupied by enemy units, a battle occurs.
In order to initiate combat, the attacking player must place a Leader on the space being attacked. A Leader Counter may be taken from any of the Leader Boxes on the board or space on the map. If no Leader is available, then the battle does not take place. Unless accompanied by a Leader, units are not permitted to move into a space occupied by the enemy.
If Paraguay has no available Leader, their units may not move to the enemy-occupied space. If Paraguay places a Leader, their units can move to the enemy-occupied space. Combat will occur.
Units entering an enemy-occupied space may move from multiple spaces simultaneously so long as the stacking limit is observed.
Therefore, during their Movement Phase, players may freely place Leaders on any space or return them to the Leader Box on the board. Once the Movement Phase has ended, Leaders must remain where they are, whether that is a space on the map or in the Leader Box, and may not be moved again until the following Movement Phase.
A Leader is removed from the game if all units under his command are eliminated. The elimination of an opponent's Leader will give players Victory Points or trigger the event shown on the back of the eliminated Leader's counter.
7. Combat Phase
Combat occurs when units from opposing sides occupy the same space after the Movement Phase. The units that have entered the space are considered the attackers, while those originally occupying the space are the defenders. Battles are resolved one at a time and in a sequence determined by the attacking player.
To resolve combat between two opposing stacks, both players place all participating units on the Battlefield Display. Then, follow these steps:
- The defender places their units first on the Battlefield Display, in any order they desire, starting with space #1 and continuing until space #6 or until all defending units have been placed.
- Place attacking units next, following the same order from space #1 to #6, and placing each attacking unit so that it is directly opposite a defending unit on the opposing side.
- If the space being attacked contains a Fortress Marker, place it in the designated box (halfway between the players' #1 spaces).
- Attacking units fire first. Roll a die for each, attacking the unit directly opposite.
- If the die result is equal to or less than the attacking unit's combat factor, then it is considered a successful hit. The unit that was hit is immediately placed on its reduced-strength side. If already on its reduced-strength side (or if there is only one side), remove the unit from play.
- When all attacking units have fired, defending units now fire following the same steps.
Units always attack those directly opposite. That is to say, a unit located in space #3 on the attacking side will fire at the unit in space #3 on the defending side. If the space directly opposite is empty, players may decide which enemy unit to target. Note that spaces may be empty if one player does not have enough units participating in the battle, or the unit previously occupying a space has already been eliminated.
For example, if the attacking unit in space #1 is a Brazilian 'Caçadores' infantry unit with a combat factor of 2, then when determining the result of the roll, if the die shows a 1 or 2 the unit in space #1 on the defending side is hit.
Hit results are applied immediately, causing the affected unit to be placed on its reduced-strength side. If the unit hit was already on its reduced-strength side, or does not have a combat unit printed on the back, then it is removed from play.
After the first round of combat (both attacking and defending units have fired and hits have been applied), a second round begins. This continues in the same fashion until one of the players has no remaining units or decides to retreat.
The decision to retreat must be taken right after the opposing player finishes rolling dice. Therefore, once a player has started rolling dice they may not decide to retreat and must finish the current round of combat.
8. Retreating
If the attacker withdraws, any surviving units must return to the space(s) they originally attacked from.
If the defender withdraws, any surviving units must abandon the space where combat occurred and move to an adjacent controlled space. If there is no such space, then the player may not retreat and the battle continues.
9. Fortresses
When a space containing a Fortress is attacked, the defending player places the Counter in the appropriate space on the Battlefield Display (between the spaces labeled #1). The first successful hit against the defending unit in space #1 does not affect the unit but rather the Fortress, causing the counter to be placed on its reduced-strength side. A second hit will eliminate the Fortress Counter and any further hits will then affect the defending unit in space #1.
If the battle ends with the Fortress Counter on its reduced-strength side, it is returned to the map on its full-strength side.
The Fortress Counter is eliminated if it receives two hits or if the opposing player conquers the space where it is located.
10. River Markers
If attacking units enter the targeted space via a blue line (symbolizing a river), then the attack is considered to be a river crossing and the Attack Across River Marker is placed on the corresponding space in the Battlefield Display. An Attack Across River marker changes the rules for combat in the following way: both players roll dice and apply hits simultaneously.
If the battle occurs on a Main River or Coastal Space, then the Attack on Main River Marker is placed on the corresponding space in the Battlefield Display. A battle on a Main River or Coastal Space changes the rules for combat in the following way: the defending player rolls dice and applies hits first.
If both cases are applicable (Attack Across River AND Attack on Main River), Attack on Main River takes precedence. That is to say, if a Main River space is attacked by units following a blue line, the defender fires first.
11. Control of Spaces
Control of a space is conditional upon who occupies it. If a player moves units into an empty space belonging to their opponent, then control changes to that player. Players can obtain Victory Points by occupying certain spaces owned by their opponent (indicated on the space itself). If this occurs, update the VP Track immediately to reflect the amount earned. Some spaces also provide Cards to the player who occupies them. Upon occupying such a space, players immediately draw the amount of Cards indicated. These Cards may not be used until the Maintenance Phase. Place a Control Marker on a space to indicate that control has passed to the opposing side.
If a player regains control of a space, the Control Marker is turned over but is not removed. During the game, control of a space may change several times, but any bonuses it provides to the occupying player only occur the first time it changes hands, meaning that if players lose control of a space they never lose VPs or Cards obtained previously from that space.
12. Maintenance Phase
12.1. Cards
Players draw one card at the beginning of this phase.
Players count all Victory Points obtained from Cards this turn. This includes all Cards obtained by conquest as well as the one drawn at the beginning of the phase.
Then, players must choose one of these Cards to place in the CARD IN USE box on the board. The rest of the Cards are moved to the DISCARDS box on the board. Note that players must count Victory Points from all Cards they received this turn, but will only have the option to apply the effects of one event (the one placed in the CARD IN USE box).
Event Cards are self-explanatory, but in the Companion Book players can find more detailed explanations and historical notes for each Card.
A Card's event is only valid for as long as it is visible in the CARD IN USE box on the board. When a new Card is placed here the following turn, the card below it no longer has any effect.
12.2. Reinforcements and Replenishment
Paraguay, Brazil and Argentina can receive reinforcements and replenish reduced-strength units in their respective Strategic Spaces (indicated by a golden frame).
- Paraguay: Asunción and Cerro León
- Brazil: Cuiabá, Porto Alegre and Rio Grande
- Argentina: Santa Fé and Buenos Aires
Each country's Strategic Spaces can only be used for units belonging to that country. Furthermore, if a Strategic Space is occupied by the opposing player, it is no longer considered a Strategic Space for the rest of the game. This rule applies even if control of a Strategic Space is returned to the original player.
Players receive reinforcements by taking units of their choice from the reserve and placing one on each Strategic Space. Special Units (indicated by a card symbol in the upper left corner) can only be played as reinforcements through the use of events.
Additionally during this phase, if a reduced-strength unit is located on one of their country's Strategic Spaces, players may return them to their full-strength side instead of taking a unit from the reserve as reinforcements. This action is known as replenishment. Therefore, for each Strategic Space, players may decide whether to play reinforcements or replenish a reduced-strength unit, but they may not do both.
In an empty Strategic Space, players may receive one new unit from reserve. If a Strategic Space is occupied by a reduced-strength unit, players may choose whether to replenish the reduced-strength unit (placing it on its full-strength side), or receive a new unit from reserve.
12.3. Victory Points
Players receive Victory Points throughout the game and any points received must be reflected by updating the Victory Point Track. This is done by adjusting the appropriate Marker(s) on the track.
Players receive Victory Points in a variety of ways:
- VPs indicated on Cards.
- For occupying enemy spaces (the first time), as indicated on the spaces themselves.
- For capturing enemy Leaders, as indicated on the reverse side of the Leader Counters.
- For capturing Paraguayan Capitals, as indicated on the reverse side of the Capital Markers.
13. Paraguayan Capitals
There are four Paraguayan Capital Markers in the game.
At the beginning of the game, the Paraguayan Capital is Asunción. If this space is conquered by the Allied player, the Paraguayan player must place the 2nd CAPITAL Marker on any Paraguayan-owned space.
If the second Capital is conquered by the Allied player, they receive the amount of VPs indicated on the reverse side of the Marker. Then, the Paraguayan player must place the 3rd CAPITAL Marker in another Paraguayan-owned space. This continues until the 5th CAPITAL Marker has been placed. The Allied player immediately wins the game if they capture the space where the 5th CAPITAL Marker is located.
14. Capturing Leaders
When all units under the command of a Leader are eliminated in combat, the Leader is captured. The opposing player receives any bonuses indicated on the reverse side of the Leader Counter.
Bonuses for capturing Leaders:
- Victory Points: the player immediately adjusts their VP marker on the VP Track.
- Argentina abandons the war. The Allied player immediately eliminates all Argentinian units on the map and in reserve. Units from other nations may enter Argentinian spaces but cannot gain control of them. Therefore, neither player may receive bonuses for capturing Argentinian spaces nor transport units through them. All Argentinian spaces are considered neutral.
- Allied Victory. The Allied player immediately wins the game.
15. Uruguay
Uruguay begins the game on Paraguay's side, so its spaces on the map are controlled by the Paraguayan player. If the Allied player conquers Montevideo, follow these steps:
- All spaces still not under Allied control are treated as if they had been automatically conquered by the Allied player. The Allied player gets any Cards these spaces provide as bonuses.
- The entire country of Uruguay changes sides and its spaces on the map are now friendly to the Allied side. The Allied player removes all Allied Control Markers. Henceforth, if the Paraguayan player occupies a space in Uruguay, they place a Paraguayan Control Marker but do not receive any Cards as bonuses (since they cannot draw blue Cards).
- The Allied player may use the Coastal and Main River spaces to transport units.
- In the event that the Paraguayan player retakes Montevideo, Uruguay does not change sides again and no special events occur.
16. Winning the Game
The game ends immediately if one of the following occurs during play:
- López (Leader) is captured: The Allied player wins the game.
- 5th Capital is conquered: The Allied player wins the game.
- Paraguay conquers Rio Grande, Porto Alegre or Buenos Aires: The Paraguayan Player wins the game.
- Either player draws the last Card from their Deck: The player who drew the last Card from their Deck counts any VPs this Card awards and the game ends. The player with the most VPs wins the game. If the game ends in a tie, that's a great opportunity to change sides and play again.
17. Example of Play
Shown here is a full turn of a game already in progress. Reasons behind each player's decisions, and what risks each one involves, are provided in detail. Players are encouraged to consult the map as they read and/or play out this example turn.
Game situation: The Allied player controls Uruguay but Paraguay has made progress on several fronts. Its largest army has advanced along the Paraná River, having taken Corrientes, Riachuelo and Goya. The previous turn, Paraguay attacked Paraná but failed to conquer it. Both sides have many reduced-strength units.
Another Paraguayan army, composed of four units of infantry and one of cavalry, has advanced through the Entre Ríos region unopposed, conquering Apipé, Santo Tomé, São Borja, Itaqui, and Uruguaiana. No Allied force is nearby to stop them.
A third Paraguayan army, three infantry units, is located in Puerto Esperanza in the north and is ready to advance through Mato Grosso. In addition to these armies, the Paraguayan player has individual units in Asunción, Cerro León, Ygatimí, Cerro Corá, and Ytatí.
The Allies only have one army located in Paraná, which, after defending the city, has some reduced-strength units. There are additional units scattered throughout the map: one unit of infantry in Niaoque, Vacarías, Forte Coimbra and Cuiabá along with one cavalry unit in Yatay. The Allied player has also received a unit in each of their Strategic Spaces.
Allied player turn
Transport Phase. The Allied player feels the units Brazil received the previous turn in Rio Grande do Sul and Porto Alegre are urgently needed on the front and so transports them through Maldonado, Montevideo, Colonia, Mercedes, Concordia, Paysandú, Yatay and Salto. Transportation to Uruguaiana is impossible because Paraguayan units are present there. Meanwhile, Argentina takes units in Buenos Aires and Santa Fé (received as reinforcements) and transports them to Paraná. The Allied player is worried about the diminishing strength of their forces and decides to send two reduced-strength units back to the safety of the Argentinian Strategic Spaces for later replenishment.
Movement Phase. The Allied player spots an opportunity to disrupt the opponent's lines of communication. The Brazilian cavalry unit in Yatay is moved through San Roque and Riachuelo to Corrientes, which was unoccupied. The Allied player does not remove the Paraguayan Control Markers, but instead turns them over to denote the change in ownership to the Allies. Now, the Paraguayan player's reduced-strength units in Goya will not be able to transport out, and neither will they have the possibility of receiving reinforcements. The Allied player, however, still has the option of assembling a force of fresh troops in their Strategic Spaces. In the north, defensive positions are maintained in Niaoque and Vacarias with the intention of blocking the Paraguayan advance. All other Allied units converge on Albuquerque.
Combat Phase. At this stage of the game, the Allied player still sees themselves at a disadvantage but is encouraged by good defensive positions blocking the Paraguayan advance as well as strong tactical moves made in the previous phase. The Allied player decides to forgo any offensive moves, hoping that maintaining a defensive position now will allow for a stronger counterattack later on.
Maintenance Phase. The Allied player must now draw a Card and receives 'Naval Battle on Paraguay River' which immediately provides one Victory Point. With no other Cards to choose from, they place it face up in the CARD IN USE box on the board. The Allied player begins to think about how to take advantage of this event the following turn.
Three Brazilian units from reserve are placed on the three Brazilian Strategic Spaces on the map. In the case of Argentina, instead of receiving reinforcements, the Allied player feels more pressed to replenish the two reduced-strength units transported earlier this turn, returning them to their full-strength side. This illustrates an important point: it is often desirable to replenish strong units so they can stay in the fight for longer. Otherwise, you may find yourself relying on much weaker troops later in the game.
Paraguayan player turn
Transport Phase. The Allied player's decision to move a cavalry unit to Corrientes has greatly disrupted the Paraguayan player's plans and furthermore put their forces in Goya in a very precarious situation. There will be no way this turn to replenish the reduced-strength units stationed there (moving them to Asunción or Cerro León) or send the army more reinforcements. Dismayed but not discouraged, the unit in Asunción is sent through Villeta, Angostura, Humaitá, Curupaytí and Itapirú to prevent the pesky Argentinian cavalry unit from advancing any further.
Movement Phase. The Paraguayan player is aware that clearing a path to Corrientes pass is of the utmost importance, but that the Paraguayan unit in Ytatí is not enough to achieve this. This lies behind the reason to send the army in Goya to Riachuelo and from there on to Corrientes to bring an end to the cavalry unit that got them in this situation. A Leader is needed to command these units and the Paraguayan player decides on Caballero, taking the corresponding Counter and placing it in Corrientes.
Alternatively, the Paraguayan player could have just as easily maintained this army in Goya, knowing full well the Allied player does not yet have enough forces to guarantee a successful attack. However, with Corrientes blocked, the situation of the Paraguayan army there would deteriorate with each turn.
It is also decided that the Paraguayan army at Uruguaiana will attack the Brazilian units in Salto before the Allied player is able to gather more troops. This will keep the pressure going in the south and force the Allied player to devote a significant amount of resources to the theater. However, the cavalry unit in this army will not participate in the attack. Wanting to give the opponent a taste of their own medicine, the Paraguayan player instead decides to move said cavalry unit from Uruguaiana to Sant'Ana do Livramiento through Alegrete and Cacequi. This way, they are able to threaten Brazil's Strategic Spaces and force the Allied player to deal with this new risk. Here we can see how the clever use of cavalry units can ultimately force your opponent's hand. For the attack on Salto, the remaining four infantry units will be led by Estigarribia. Finally, Brazil's growing strength in the north has caused the Paraguayan player to realize that another attack would be too risky. Paraguay decides to remain on the defensive there for the time being.
Combat Phase. Being the attacker, the Paraguayan player decides which combat to resolve first and settles on the battle in Salto. Four Paraguayan infantry units attack two Brazilian units. One of the attackers has a combat factor of 3 and the rest are of factor 2. The Brazilian defender Counters both have a combat factor of 3, making it a risky move for the Paraguayan player.
Both players take their units in Salto to the Battlefield Display. Brazilian units must be placed first in spaces #1 and #2. The Paraguayan player decides to put the three 2-factor units in the first spaces and places the best unit in space #4. This means it will avoid direct confrontation against the Brazilian units. Players also place the "Attack on Main River" Counter as a reminder that the defender fires first.
The Allied player rolls the first die and gets a 3, causing the Paraguayan unit in space #1 to be placed on its reduced-strength side. The roll for the second Brazilian unit is a 5 and therefore a miss. Now the Paraguayan player rolls. The first result is a 3 (miss) and the second a 2, which reduces the strength of the opposing Brazilian unit in space #2.
The two units in spaces #3 and #4 can choose which enemy units to target, but must do so before rolling the dice. The Paraguayan player decides that both will fire on the unit in space #1. The first die result is a 1 so the Brazilian unit is placed on its reduced-strength side. A result of 3 or less will eliminate the Brazilian unit, but unfortunately a 4 is rolled.
Now it is the Allied player's turn to roll the dice again, but with such a slim chance for victory and the possibility of losing two good infantry units, the decision is made to retreat. The retreating units must move to an adjacent controlled space, and the Allied player decides Yatay is the best option.
The battle of Salto concludes, but combat in Corrientes is still to be resolved. Due to the one-sidedness of the battle, combat is relatively straightforward. Suffice it to say that the Brazilian cavalry unit is eliminated. Corrientes is once again under Paraguayan control.
Maintenance Phase. The Paraguayan player draws a Card and obtains 'Cavalry Raid' which also comes with one Victory Point. The Paraguayan player's hand is otherwise empty so little thought is put into the decision of placing it in the CARD IN USE box on the board. Following the instructions on the Card, the Paraguayan player chooses one of the Brazilian units in Mato Grosso to place on its reduced-strength side.
Since it was not possible to move any unit to a Strategic Space for replenishment, Asunción and Cerro León both receive one new unit from the reserve as reinforcements.
This concludes a full game turn.
18. Optional Rules
These optional rules add more realism to the game. Players should agree beforehand which optional rules (if any) to use during the game. Some of them favor one side and so can be used to balance the game if one of the players is more experienced.
Optional rule 1: More realistic leaders
Leader Counters, while depicting a single person, actually symbolize an entire staff that provides the intelligence and logistics necessary to command troops in battle. If players prefer Leader Counters to specifically represent the person who appears on them, a series of additional rules should be observed in order to simulate their location on the map.
- During the Transport Phase, any player may transport their Leaders like any other combat unit. The same limitations also apply.
- During the Movement Phase, once Leaders are placed in a space with their units, they can no longer return to their off-map square. Leaders can move up to six spaces (all spaces must be controlled by their side). A Leader who does not spend all his movement points may join other units and perform an attack on the same turn.
- Leaders alone may not enter a space occupied by an enemy unit. They may only do so while accompanying friendly units into battle.
- Leaders may enter any unoccupied space controlled by the enemy, but they risk being caught. For each unoccupied enemy space the Leader enters, the opposing player rolls a die. On a result of 6, the Leader is captured and grants the bonuses indicated on the reverse side of the Counter.
Optional rule 2: The long way to Mato Grosso (Favors the Allied Player)
The Mato Grosso region in Brazil was very difficult to reach and traverse, but not impossible. Several expeditions brought troops and supplies to that theater of operations, although attrition due to sickness and desertion accounted for at least 50% of all losses. To represent the dangers of moving units between the regions of Brazil on the map, implement the following rule:
- During the Transport Phase, Brazilian units may move between the Strategic Spaces of Rio Grande and Porto Alegre to Cuiabá and vice-versa. However, place any unit transported this way on the targeted Strategic Space with its reduced-strength side face-up.
Optional rule 3: Historically accurate El Chaco region
Although the El Chaco region is not treated in any special way on the map, the truth is that this area was quite hazardous and largely unexplored. Any movement west of the Paraguayan River required painstaking effort to clear paths wide enough to carry supplies into the region. To represent this special circumstance in regards to the El Chaco region, implement the following rule:
- During the Transport Phase, Brazilian units may move between the Strategic Spaces of Rio Grande and Porto Alegre to Cuiabá and vice-versa. However, place any unit transported this way on the targeted Strategic Space with its reduced-strength side face-up.
Optional rule 4: Paraguayan strategic blunder (Favors the Paraguayan Player)
The initial deployment of Paraguayan forces in three separate columns gave the Allies the ability to defeat them piecemeal. This strategic misstep provided the Allies with an important edge from the very beginning of the war and is considered to be one of the reasons Paraguay eventually lost. If players would like to explore how Paraguay adopting another strategy might have changed the course of the war, implement the following rule:
- The Paraguayan player is free to place their starting units in any space in Paraguay. Stacking limits must be observed.
Optional rule 5: Argentinian peace treaty with native tribes (Favors the Allied Player)
Argentina entered the war with its small army mostly occupied with native tribes along its southern border. This conflict had dragged on for decades, and even in the midst of hostilities with Paraguay, a large portion of Argentina's cavalry was forced to remain in the south protecting its border. If, however, Argentina had negotiated a peace treaty or ceasefire with the native tribes in that region, they would have had cavalry units available at the beginning of the war. To represent this possibility, implement the following rule:
- As part of their starting forces, the Allied player places an Argentinian cavalry unit of combat factor 2 in each of the following spaces: San Cosme, Ytatí, and Apipé.
Setup
The map is divided into regions separated by lines marked with X's. There are some cases where the main rivers create a border between the regions (for example, Uruguay and Entre Ríos, or Entre Ríos and Paraguay). Each space on the board belongs to one specific region on the map.
The map key notes the following space types:
- Strategic Space: In each of these spaces, players may place a new unit or replenish a reduced-strength unit (place it on its full-strength side).
- VP or Card Space: If conquered, players receive the indicated amount of cards and/or victory points.
- Roads: During the Movement Phase, infantry units can move up to two spaces along these lines while cavalry units can move up to three spaces.
- River Crossing: Attackers and defenders fire simultaneously in battles involving river crossings.
- Main River or Coastline: Units may move along these spaces during the Transport Phase or use them as roads during the Movement Phase. The defender fires first in combat.
At the start of the game, each side's Starting Card is placed in the CARD IN USE box, setting the following special conditions for the first turn:
Paraguay Declares War (Paraguayan Starting Card): You are second in turn order (the Allied player goes first). You may move any Paraguayan unit and enter any space in any country.
Brazil Invades (Allied Starting Card): You may only move Brazilian units and they may not enter Paraguayan or Argentinian spaces. Only Brazilian Strategic Spaces may be used for Reinforcement and Replenishment.