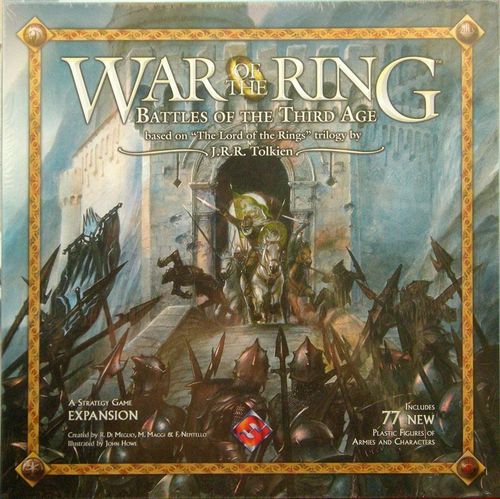
War of the Ring: Battles of the Third Age
War of the Ring: Battles of the Third Age Rulebook
Table of Contents
Table of Contents
- Core Rules
- Battle for Rohan
- Battle for Rohan – Game Components
- Battle for Rohan – Figures/Units Table
- Battle for Rohan – Setup
- Battle for Rohan – The Game Board
- Battle for Rohan – Breaching a Stronghold
- Battle for Rohan – Event Cards
- Battle for Rohan – Strongholds
- Battle for Rohan – The Power of the Shadow
- Battle for Rohan – The Shadow Commander-in-Chief: Saruman
- Battle for Rohan – Fate and the Fate Track
- Battle for Rohan – Characters and Fate
- Battle for Gondor
- Battle for Gondor – Game Components
- Battle for Gondor – Figures/Units Table
- Battle for Gondor – Setup
- Battle for Gondor – The Game Board
- Battle for Gondor – Recruitment Tokens
- Battle for Gondor – Recruitment Areas
- Battle for Gondor – Strongholds
- Battle for Gondor – Event Cards
- Battle for Gondor – The Power of the Shadow
- Battle for Gondor – The Shadow Commander-in-Chief
- Battle for Gondor – The Nazgûl
Core Rules
Translation note: this section is an English rendering of the Russian community translation (Vitaly Nosov). Die-face names follow the terms used in the English scenarios: Character die (sword), Army die (flag), Muster die (helmet), Event die (Palantír), Eye die (Mordor Orcs), and Will of the West die (usable as any other die).
Turn Sequence
The game is played as a series of turns. Each turn is divided into six phases.
Phase 1. Draw Event Cards. Each player, starting with the Free Peoples player, draws two event cards: one from the common deck and one from their own story deck. If a player has more than 6 cards in hand, they must immediately discard the excess.
Phase 2. Phase of Darkness. The Shadow player chooses the position of their Commander-in-Chief. Depending on this position, the player places a set number of action dice into the Shadow Box on the game board. The player does not roll these dice in the corresponding phase. Dice in the Shadow Box automatically count as the sword (Character) result. The number of leadership tokens the Shadow army receives depends on the number of dice in the Shadow Box. The Shadow player immediately receives these leadership tokens and places them on the map in any location.
Phase 3. Fate Track Phase. The Free Peoples player may draw Fate tiles, one after another, up to a number equal to the number of dice in the Shadow Box. After drawing a tile, the player may either apply it or set it aside and draw another, hoping for a more favourable one. The player may stop drawing at any time (except when a special Shadow tile is drawn, or when the number of tiles drawn has reached the number of dice in the Shadow Box). Only the last tile drawn takes effect. Move the Fate marker along the track by the number of spaces shown on the tile, and carry out any additional actions indicated. Remove the used tile from the game, and return all set-aside tiles to the common pile and mix them together again.
Phase 4. Roll Action Dice. Players roll their action dice. The Shadow player immediately places all of their dice showing the sword (Character) result into the Shadow Box. The Shadow player receives leadership tokens equal to the number of dice placed in the Box and places them on the table next to the board. These tokens are used in the next phase.
Phase 5. Carry Out Actions. Each player, starting with the Free Peoples player, in turn uses one die to carry out the corresponding action. A player may pass if their opponent has more unused dice than they do. If the Free Peoples player has passed and has an unused action token, they may use it. The phase ends when the players have used all their action dice.
Phase 6. Victory Check. Check whether either player has achieved a victory condition. If not, remove all leadership tokens from the board. Then begin a new turn.
Event Cards
All event cards are divided into several decks. The common event deck consists of 30 cards. These cards are used to carry out a special action or to assist in a battle. Both players draw from the common deck. This deck is used in both scenarios.
Story cards are divided into two decks of 16 cards each. Each deck belongs to one side and has the matching card back. These cards introduce the storylines described in the book. Story cards have two texts: one applies in the Battle for Rohan scenario, the other in the Battle for Gondor scenario.
Special cards consist of two decks of 6 cards each. Only the Shadow player uses these cards. Each deck belongs to a separate scenario.
At the start of each turn, the players, starting with the Free Peoples player, draw two event cards: one from the common deck and one from their own story deck. In the action phase, a player may use a die showing the Palantír to draw either two cards from the common deck or one card from their story deck. The Shadow player draws special cards only in the Phase of Darkness, if they choose the corresponding Commander-in-Chief position.
If a player has more than 6 cards in hand, they must immediately discard the excess. Special cards are counted toward this total.
If the common deck runs out, take the played cards, shuffle them, and form a new deck. If a story deck runs out, it is not replenished, and played cards are not returned to play.
Common cards have two values. The upper text is carried out when the die is used in the action phase. The lower text applies in battle.
A story card is also carried out when a die is used in the action phase. The text on the card has two values, one for each scenario. Only the text matching the scenario being played applies. The other text is ignored.
In the action phase, each card may be played in the following ways:
- By using an action die showing the Palantír.
- By using an action die showing the symbol equivalent to the symbol on the card. (The Will of the West may be used to play a card of any type.)
Normally a card is discarded immediately after the action printed on it has been carried out. If a card says that it is "played on the table", the card is placed on the board and remains in effect until it is removed from the game. The conditions for removing such a card from the game are printed on the card.
Some cards have conditions under which they may be played. If the conditions are not met, the player may not play that card.
Sometimes not all of a card's effect is applicable in the game. In that case, apply the text of the card in the fullest way possible.
Sometimes the card text contradicts the rules of the game. In that case, apply the rules of the game that do not contradict the card text.
The Power of the Shadow (Phase of Darkness)
The Shadow player chooses the position of their Commander-in-Chief. Depending on the position, the player may immediately carry out certain actions. The position determines the number of action dice the player places into the Shadow Box. The player does not roll these dice in the corresponding phase. Dice in the Shadow Box automatically count as the sword result. They may be used either for a special action or for a normal action. The more dice lie in the Shadow Box, the more effective the actions of the Shadow armies become, but the faster the Fate marker moves along the track. Any die that shows the sword in Phase 4 is also placed into the Box, but such dice do not affect the drawing of Fate tiles.
The number of leadership tokens the Shadow army receives equals the number of dice in the Shadow Box (unless the rules of the scenario modify this number). The Shadow player immediately receives these tokens and attaches them to their armies on the map. In Phase 4 the Shadow player may gain additional sword dice by rolling them. For each such die the player receives an additional leadership token. These tokens are placed on the map in the action phase. A token joins an army at any moment before or after an action die is used. Each such token represents a leader in the army.
A token placed on the board may not be moved to another army. At the end of the turn, all leadership tokens are removed from the board.
The Fate Track
At the start of the game the Fate marker is placed on space 0 of the track. The End-game marker is placed on the space specified by the scenario. Each turn, in Phase 3, the Fate marker moves along the track according to the mechanics described in these rules. Some cards also affect the movement of the marker along the track.
Depending on the scenario, the marker triggers certain events when it reaches their spaces on the track. When the Fate marker reaches the End-game marker, the game ends and the Free Peoples player wins. The Shadow player must reach a victory condition before the two markers meet.
At the start of the game, all standard tiles (grey) are placed in an opaque container and shuffled, forming the Fate pool. Additional tiles are set aside. They are added to the pool when certain event cards are played.
The Free Peoples player may draw Fate tiles, one after another, up to a number equal to the number of dice in the Shadow Box. After drawing a tile, the player may either apply it or set it aside and draw another, hoping for a more favourable one. The player may stop drawing at any time (except when a special Shadow tile is drawn, or when the number of tiles drawn has reached the number of dice in the Shadow Box). Only the last tile drawn takes effect. Move the Fate marker along the track by the number of spaces shown on the tile, and carry out any additional actions indicated. Remove the used tile from the game, and return all set-aside tiles to the common pile and mix them together again.
The description of each scenario contains instructions for placing the character markers on the Fate track. When the Fate marker reaches a character's portrait, that character is considered ready. Such a character may be brought into play by using a die showing the sword. When a character is brought into play, follow the text of the corresponding card. A character may be brought into play and placed in a Region even if that area has been captured by the enemy. Units may not be recruited in an area belonging to the opponent.
Action Dice and Action Tokens
The Shadow side begins the game with 6 action dice in its reserve. The Free Peoples begin the game with 4 dice in reserve. Other dice may be added to the reserve during the game. The Shadow player adds one die to their reserve when all the settlements within a single Territory are controlled by the Shadow. If at least one settlement is liberated by the Free Peoples, the Shadow player loses one die from the reserve. The Free Peoples player adds one action die to their reserve when the corresponding character enters play (the character has a special icon on the character card). If that hero dies during the game, the action die is removed from the reserve. In some scenarios dice may be added to the reserve in other ways. Any changes to the dice reserve take place only at the start of a turn.
A settlement passes under the control of an opponent if, at the end of an action, an enemy army occupies it. Place a control marker on that settlement. A settlement is considered liberated if the army of its original owner (not a hero) captures it. Moving into an empty settlement and liberating it is not considered an attack. A Territory is considered controlled by a player if all the settlements within its borders are under that player's control.
Actions
In Phase 5 each player, starting with the Free Peoples player, in turn uses one die to carry out the corresponding action. A player may pass if their opponent has more unused dice than they do.
Character die (die showing the sword):
- Quick Move. The player may move one army with a leader two Regions.
- Attack. The player may move one army with a leader into an adjacent Region and attack from it.
- Hero Movement. The player may move all characters on the game board.
- Play a card. The player may play a card showing the sword.
Army die (die showing the flag):
- Strategic Movement. The player may move two armies, each one Region.
- Attack. The player may move one army into an adjacent Region and attack from it.
- Combined Attack. The player may attack with all armies located in Regions adjacent to the Region that is the target of the attack.
- Play a card. The player may play a card showing the flag.
Muster die (die showing the helmet):
- Recruitment into an army. Flip one matching recruitment token to recruit one unit in each of two different Regions.
- Quick Muster. Carry out two musters in two different armies. Roll a number of dice equal to the number of units in the army. For each result of 5 or 6, remove one damage marker from that army. The player may re-roll a number of dice equal to the leadership of their army.
- Play a card. The player may play a card showing the helmet.
Event die (die showing the Palantír):
- Draw up to two cards from the common deck.
- Draw one card from the story deck.
- Play one card.
Eye die:
- Recruitment in Mordor. Place one Mordor Orc in each of two recruitment areas.
- Movement of Mordor Orcs. Move two armies containing Mordor Orcs one Region.
- Attack. Move one army containing Mordor Orcs into an adjacent Region and attack.
Will of the West die:
- Used as any other action die.
The Free Peoples player, in addition to the reserve of action dice, has 2 action tokens. With them the player may carry out a partial action instead of passing. Using an action token takes the place of using a die.
Free Peoples action tokens:
- Partial Movement. Move one army into an adjacent Region.
- Partial Recruitment into an army. Flip one matching recruitment token to recruit one unit.
- Partial Muster. Carry out a muster for one army.
- Partial movement of characters. Move one hero or one group of heroes on the game board.
Action tokens become available at the start of each turn. Phase 5 ends when the players have used all their action dice.
Some characters have special abilities listed on their cards. In place of an action, the player may pay the corresponding die and use the character's ability as described on the card.
Armies and Heroes
All units belonging to one player and located in the same Region are called an army. An army consists of any units, to a maximum of 5. Any number of leaders and heroes may be attached to an army. In battle an army may suffer a certain amount of damage, which is shown by damage markers. Markers are placed in the same Region as the army and move together with it.
Leaders and heroes. Heroes join an army when they finish their movement in a Region containing a friendly army. Once attached to an army, a hero may move with it and take part in battle. Leaders may not move separately from an army; they must always be attached to one. If an army to which leaders and/or heroes were attached is destroyed, all leaders and heroes attached to it also leave the game.
Leaders and heroes in an army give it their leadership. Leadership extends the army's movement (a sword die is used) and gives a chance to re-roll dice in battle. Each hero has a leadership rating and a leadership modifier (for example, 2/+1). Usually the rating is simply a number and the modifier is a number with a plus sign. However, sometimes both numbers may be 0. With a rating of 0, the hero does not count as a leader for the purposes of the rules.
The rating reflects the command abilities of a hero when they command an army, while the modifier is a bonus to the leadership of the commander. In battle there may always be only one commander of an army (usually the hero with the highest leadership). The rating and modifiers are added together to find the total leadership of the army. Standard leaders have values of 1/+1. The leadership token of the Shadow side counts as an ordinary leader with values of 1/+1. The leadership values of Shadow minions attached to an army are also added to the leadership tokens if they are in the same army.
Movement of Armies
Armies usually move when a die showing the flag or the sword is used. When a die showing the flag is used, the player may move two armies into adjacent Regions, or move one army into an adjacent Region and then attack from that Region. When a die showing the sword is used, the player may either move the army into an adjacent Region and attack from it, or move the army two adjacent Regions. Regions separated by an impassable border are not considered adjacent for the purposes of quick movement. In both cases the army's leadership must be 1 or more. The eye die may be used to move an army containing Mordor Orcs.
When an army moves, the player may leave any number of units in the starting Region, thereby dividing the army. In this case the player must divide the damage markers of the army so that the number of markers in each of the two new armies does not exceed the number of units in it. If a sword die is used to divide an army, at least one leader or hero with a leadership of at least 1 must move with the army.
When an army moves a quick move, or moves under certain cards, it may move through several Regions. In this case the army may not drop off or pick up units in the Regions it passes through. If during such a move the army enters a Region adjacent to an area containing an enemy army, it must immediately end its movement (Regions are not considered adjacent if they are separated by an impassable border).
If an army finishes its movement in a Region containing a friendly army, the two immediately merge into one before any battle begins. If the army formed has more than 5 units in it, the excess must immediately be removed. Units and leaders of the newly formed army may take part in battle if the action allowed both movement and an attack on the enemy.
Recruitment
There are many ways to recruit units into an army, but the standard way uses recruitment tokens. These tokens bear the symbol of a particular unit. A unit removed from the game board may be recruited again in a later turn of the game.
At the start of the game, the number of recruitment tokens specified by the scenario is randomly selected and placed on the game board face down. During the game, tokens may be added to the board in the same way. If all recruitment tokens have already been placed on the board, the player may not place any more, even if cards, heroes or events require it.
At any moment when an action or ability requires a token to be flipped, the token is turned over, a unit of the corresponding type is placed in that Region, and the token leaves the game. If the required type of figure is not available, the player may choose any available figure instead. All tokens used or discarded for any reason leave the game.
If, after a movement or battle, an enemy army is in a Region containing foreign recruitment tokens, all of those tokens are immediately removed from the board and leave the game.
The Free Peoples player may use a die showing the helmet to recruit: flip one recruitment token in each of two different settlements or Regions belonging to them. Recruitment by cards or by the abilities of heroes may place a unit directly on the board without using recruitment tokens. Some scenarios have additional ways of recruiting units.
The Shadow player may use a die showing the helmet to recruit: flip one recruitment token in each of two different settlements belonging to them. The Shadow player may also, using a die showing the eye, recruit one Mordor Orc in each of two different Mordor recruitment areas. Recruitment by cards or by the abilities of heroes may place a unit directly on the board without using recruitment tokens. Some scenarios have additional ways of recruiting units.
If a recruitment would exceed the limit of 5 units for one army, the player must immediately remove the excess, choosing which unit to remove.
Battle
A battle begins at the end of an Attack or Combined Attack action. A battle may also arise from playing an event card. The active player is called the attacker, and their opponent the defender. Before a battle begins, after an army has moved, all friendly units located in that Region automatically join the moving army and take part in the battle. Remember that any excess of units above 5 in an army must be removed before the battle begins.
Preparing for battle. Each figure in an army, except leaders and heroes, is called a unit and represents a varying number of warriors. A figure also indicates the type of unit. Each unit in the game has several characteristics:
- Favoured terrain
- Strength
- Special abilities
All units are fully described in the table supplied with the scenarios.
Before a battle begins, take the tactics markers corresponding to the types of units involved in the battle. These markers activate the special abilities of the units. The players must also take the Regroup marker and the Play-a-card marker.
Battle roll. Before each battle round, the players count the strength of their armies. The strength of an army equals the sum of the strengths of all units in it, but no more than 5. Ordinary units have a strength of 1, and better units a strength of 2 or 3. Events and the terrain of the area where the battle takes place may also affect the strength of an army.
After all counts are made, the final strength of the army determines the number of dice the player rolls in that battle round (the number of dice may not exceed 5). A value of 5 or 6 on each die counts as a wound inflicted on the enemy army.
When a card or rule speaks of modifying the battle roll, this means that the stated number must be added to (or subtracted from) each result on the dice. No modifier may reduce the battle roll result below 1 or raise it above 6.
Leadership. Leadership allows the re-rolling of dice that showed an unsuccessful result in the battle roll. The total leadership of an army is calculated as follows:
- Free Peoples: take the rating of the army's commander and add to it the leadership modifier of all heroes and leaders in that army.
- Shadow: the player adds together the leadership of all same-named leadership tokens attached to the army, and adds to the sum the leadership of a minion located in the same Region. Otherwise, the player calculates the army's leadership in the same way as the Free Peoples player.
The total leadership indicates the number of dice the player may re-roll as a leadership roll. Simply take the dice that showed an unsuccessful result in the battle roll, select as many as the leadership allows, and roll them again. Both battle dice and manoeuvre dice may be re-rolled in a leadership roll. Thus a die that was not a successful hit before the re-roll may become one after the leadership re-roll.
Terrain. In battle, the terrain of the Region in which the defending army is located is taken into account.
Each type of terrain and the modifier it gives are described in the instructions for each scenario. The modifier gives a bonus to the strength of the defending army (usually +1 or 0). Remember that even with this modifier a player may not roll more than 5 dice. The terrain modifier does not apply to manoeuvre dice.
| Terrain | Modifier |
|---|---|
| Hills, swamps, fort, woods | +1 modifier |
| Plains | 0 |
Depending on the type of terrain on the border between the attacking and defending armies, the number the attacking player must roll on the dice may rise from 5 to 6, reflecting the difficulty of crossing the terrain with the units going into battle. The type of terrain and the description of its modifier are found in the description of each scenario. Usually this modifier applies only in the first round of battle, but some types of terrain require the modifier to be applied for more rounds (see the scenario descriptions).
| Border | Effect |
|---|---|
| Stream, ford, pass | 6 in the first round |
| Dike, wall | 6 in the first round |
| River | attack not possible |
The first-round modifier in a combined attack by several armies applies in the first round of battle with each army. The modifier for walls and dikes applies only if the attacking side is storming the wall from the outside while the defenders are on its inner side.
Different unit types fight differently on different types of terrain. This is represented by the favoured terrain of each unit (see the unit descriptions). Before the first round of battle begins, the players must determine which of them has terrain superiority. Each player adds up the number of units that are fighting on their favoured terrain. The player with terrain superiority immediately takes one event card from the common deck. If the numbers of units fighting on their favoured terrain are equal, neither player takes a card.
Course of battle. After the strength and leadership of the armies have been counted, the terrain and the border between the areas have been taken into account, the battle begins. A battle is divided into rounds and lasts until one of the sides is destroyed or retreats.
Each round is divided into the following steps:
- Tactics.
- Battle roll.
- Leadership re-roll.
- Application of unit special abilities.
- Application of damage.
- End of battle.
1) Tactics. Each type of unit has a special ability. It may be used in the round by choosing the manoeuvre marker. A player may also regroup their forces, or play a card from their hand from the event card's battle (lower) text.
Each type of unit is represented by a manoeuvre marker bearing a picture characteristic of the unit. Before the battle begins, the players take all manoeuvre markers corresponding to the unit types involved in the battle, as well as the Regroup marker and the Play-a-card marker (these are the tactics markers that will be available in the battle).
Before each round of battle, each player secretly chooses one tactics marker to use. Once the choice is made, both players reveal their markers simultaneously. If a manoeuvre marker is chosen, the player may attempt to manoeuvre. If the play-a-card marker is chosen, the player may play a card. If the Regroup marker is chosen, the player may take back into hand all manoeuvre markers that they have used up to that point in the battle. A player may also declare a retreat, to be carried out at the end of the given round (this action is not treated as a rout).
A used manoeuvre marker is placed on the table to the side and counts as used. It is no longer available until the end of the battle, or until the player plays the Regroup marker (in which case all manoeuvre markers are returned from the table to the player's hand). Regroup and play-a-card markers always remain in hand and are not counted as used.
Manoeuvring. When a manoeuvre marker is chosen, the player must replace white dice with black dice. The number of dice replaced equals the number of units in the army carrying out the manoeuvre. Black dice are manoeuvre dice. If, after the battle roll and the leadership re-roll, at least one manoeuvre die shows a successful result, apply the unit's special ability. All damage is applied in the standard way alongside the unit's special ability.
Playing a card. If the event marker is chosen, the player may play a card from their hand. If both players have chosen to play a card, the effects of the cards are applied simultaneously. In the event of a conflict between cards, the card of the defending player takes effect first, and then that of the attacking player. If for any reason the play-a-card marker is cancelled, the player may not play a card. However, the card is not discarded from hand.
Regroup. If the Regroup marker is chosen, the round proceeds in the standard way, except that the player may not use unit special abilities or play cards. However, at the end of the round the player may take back all manoeuvre markers used earlier in the battle so that they can be played again. If the Regroup marker is chosen and the player wishes to withdraw the army from the battlefield, the army withdraws in good order (this action is not treated as a rout). Playing the Regroup marker does not force an army to retreat; the marker only makes that possible.
2) Battle roll. Roll a number of dice equal to the strength of the army, but no more than 5. Apply all modifiers and replace white dice with black dice if required (see the rules above). Each value of 5 or 6 on a die means a successful wound inflicted on the enemy troops. The required numbers may change depending on the rules and circumstances.
3) Leadership re-roll. You may re-roll a number of dice equal to the leadership of your army (including manoeuvre dice). A leadership re-roll normally requires the same result as the battle roll. Unlike the game War of the Ring, in this game you may also re-roll dice that already show a successful result (for example, in order to obtain a 6 instead of a 5, as some special cases require). Only the last result of a roll is taken into account.
4) Application of unit special abilities. If the player chose a manoeuvre marker and at least one black die shows the required number, immediately apply the special ability of the unit taking part in the manoeuvre (unless the ability itself specifies a different time of application).
5) Application of damage. For each point of damage, place one damage marker in the Region with the army. In this step the player may choose to remove one unit from their army in order to remove two damage markers from that area.
An army may take damage as long as the number of damage markers does not exceed the number of units. As soon as the number of damage markers exceeds the number of units, the army takes mandatory losses. The player must remove one unit and two damage markers from the army, until their number is equal to, or less than, the number of units. As soon as one damage marker remains, the player may cease removing units from the army, if they wish.
The player is also obliged to take losses if their army retreats in disorder.
Leaders and heroes in an army are eliminated if the army itself is destroyed.
6) End of battle. The battle ends if one of the sides is destroyed, or if:
- The attacking player has decided to stop the attack.
- The defending player has played the Regroup marker, and may now retreat to an adjacent free Region.
If the defending player has not played the Regroup marker, they may still withdraw the army to an adjacent free Region, but this withdrawal counts as a rout.
If the defending army is destroyed, retreats, or routs, the attacking player has the right to advance.
The attacking player always decides first whether to continue the battle or not, and only afterwards does the defending player have the right to decide. If the battle has not ended, a new round begins.
If both armies are destroyed, control of the area remains with the defending side.
Combined Attack
A combined attack takes place in the usual way, except that before each round of battle the attacking player decides which of their armies located in a region adjacent to the battle Region will fight. Only the strength, leadership and units of the chosen army are taken into account in that round. All damage from the battle in that round is borne only by the chosen army.
Terrain superiority is determined by the first army that attacks in the first round of battle.
The attacking player always returns the tactics markers they have used to hand when switching to attack with another army.
The terrain modifier between the regions applies always in the first round of battle of each army.
After the Battle
Retreat. An army may retreat at the end of a round if the player has played the Regroup marker. An army may retreat into an adjacent Region that contains no enemy army or enemy control marker for a settlement or fortress. That Region must not be adjacent to a Region containing an enemy army (including the attacking army). An army may not retreat into a Region located beyond a water stream or a fort.
Even if not all of the listed conditions are met, an army may always retreat into an adjacent Region containing a friendly army, its own settlement, or its own fortress.
If there is no Region meeting the above conditions, the army may withdraw into an adjacent free Region, taking one damage marker.
If there is no free adjacent Region, retreat is impossible.
Rout. An army may rout from the battlefield. This action is always available to the players at the end of any round, regardless of which tactics markers they played. When a rout is carried out, all damage markers must immediately be converted into losses (one unit and two damage markers removed), until no damage markers remain (or only one remains). After that the army retreats in accordance with the rules described above.
Advance. If the defending army is destroyed, retreats, or routs, the attacking player has the right to advance any of their attacking units into the now-empty Region. If the player advances not all of the units into the attacked area, they must divide the damage markers between the new armies as the rules require. All leaders and heroes may be distributed between the armies as desired. Leaders may advance without any units, remaining alone.
After a combined attack, only one army (or part of its units) may advance. Units from the other armies that took part in the combined attack may not advance.
Army Muster
Using a die showing the helmet, the player may muster troops in two different armies. To muster, roll as many dice as there are units in the given army. For each result of 5 or 6, remove one damage marker. You may re-roll dice using the army's leadership.
Battle for Rohan
Scenario rules, transcribed from the official English Fantasy Flight Games "WOTR002 – Operational Scenarios" document (printed pages 17–22).
Battle for Rohan – Game Components
To play the Battle for Rohan scenario, you need the following specific game components in addition to the components usually necessary for any Battles of the War of the Ring game:
- The Battle for Rohan game board
- The figures detailed in the Figures/Units Table
- The Gríma deck of Event Cards
- The Character Counters and Character Cards of Théoden, Théodred, Eomer, Gandalf, Aragorn, Legolas, Gimli, Treebeard, and Saruman. Use only the Rohan side of the Gandalf and Aragorn cards; the other side is for the Gondor scenario
- The Tactics Tokens detailed in the Figures/Units Table
- The Recruitment Tokens detailed in the Figures/Units Table
[Images: Recruitment Token (Free Peoples) and Recruitment Token (Shadow).]
Place the figures and the Recruitment Tokens as shown in the Setup image on page 19.
Put aside for later use any unused figures and tokens.
Battle for Rohan – Figures/Units Table
The source shows a miniature picture for each figure and a tactics icon for each unit type. The pictures and icons are images and are not reproduced here; "(icon)" marks where the source shows a Unit Tactics Token icon.
Left and centre columns of the printed table:
| Unit Type | Number of Units | Included in | Unit Tactics Token | Number of Recruitment Tokens |
|---|---|---|---|---|
| Rohan Footmen | 14 | WotR + ES | (icon) | 10 |
| Archers | 10 | WotR | (icon) | 8 |
| Rohan Riders | 13 | WotR + ES | (icon) | 11 |
| Ent | 8 | ES | - | - |
| Leaders | 4 | WotR | - | - |
Right column of the printed table:
| Unit Type | Number of Units | Included in | Unit Tactics Token | Number of Recruitment Tokens |
|---|---|---|---|---|
| Uruk-hai | 18 | WotR + ES | (icon) | 14 |
| Warg Riders | 6 | WotR | (icon) | 5 |
| Half-orcs | 12 | ES | (icon) | 9 |
| Dunlendings | 12 | ES | (icon) | - |
| Mordor Orcs | 12 | WotR | (icon) | - |
WotR = War of the Rings. ES = the Expansion Set.
Battle for Rohan – Setup
The setup is shown as an image on page 19 (figure and token placement, with the count for each piece). The source's setup text reads:
Place the Fate Marker, the Endgame Marker, and the Free People Characters on the Fate Track as detailed in the "Rohan Fate Track" table.
Rohan Fate Track table (image, printed page 20): it shows the Fate Marker and the Free People Characters Treebeard, Éomer, Aragorn and Gandalf the White on the track, and the Endgame Marker "Ents Destroy Orthanc". The exact track spaces are given in the rules under "Fate and the Fate Track" and "Characters and Fate" below.
Battle for Rohan – The Game Board
The terrain types featured on the Battle for Rohan game board are:
- Plains
- Woods
- Forts (West Fords, Aglarond, Dunharrow)
- Hills
- Swamps
- Strongholds (Edoras, Hornburg, Orthanc)
Strongholds are a special terrain type explained below, in the Strongholds section.
The border between two Regions may be:
- Clear (no special rules)
- Stream (Deeping Stream, Snowbourne)
- Dike/Wall (troops south of the West Dike and East Dike are protected)
- Ford/Pass (fords are Fords of Isen, Entwade; passes are leading to Aglarond, Dunharrow)
- River (impassable except at Fords: Rivers are the Isen and the Entwash)
- Mountains (impassable except at passes)
Territories. Territories represent a broad division of the map and may be referred to by the rules or cards. The Territories in Battle for Rohan are:
- North Marches (north of the River Entwash)
- West Marches (south of the River Entwash, east of the River Isen and west of the Deeping Stream)
- East Marches (east of the Snowbourne and south of the River Entwash)
- Rohan Plains (between the West Marches and East Marches, south of the River Entwash)
- Fangorn Forest (the two regions of Woods east of Orthanc: Derndingle and Fangorn)
- Helm's Deep (the Hornburg, West Dike, East Dike, and Aglarond)
- Isengard (Orthanc, East and West Nan Curunir)
- Gap of Rohan (west of the River Isen)
Refer to the Rohan Territory Map for a graphical reference to the extent of each Territory. The East Marches, West Marches, and Rohan Plains Territories have two settlements each (Edoras and the Hornburg are not considered settlements).
Special Unit Recruitment Areas. Four Regions on the game board show special Unit Type Icons. These areas are called Recruitment Areas and they refer to:
- Dunlendings (North Dunland, Gap of Calenardhon)
- Mordor Orcs (East Eaves of Fangorn, Sarn Gebir)
Each Recruitment Area can be used to muster Units of the corresponding type (see Special Recruitment Actions, below).
If the Free Peoples player controls a Recruitment Area, the Shadow player cannot recruit new Units there until the Region is captured back.
Battle for Rohan – Breaching a Stronghold
Whenever an Army attacks an enemy Army protected by a Stronghold, it must first inflict damage to the Stronghold (instead of damaging the Army) up to its Protection Value. Damage inflicted to a Stronghold is permanent and cannot be removed or repaired.
These attacks against the Stronghold are hindered by the effects of the Stronghold (+1 to Combat Strength of the defender and Target Number of 6 for the attacker).
When damage inflicted to a Stronghold reaches its Protection Value, the Stronghold is considered to be breached, and does not protect any more the armies inside it: All residual damage and any damage inflicted afterwards is applied to the defending Army normally.
After a Stronghold is breached, the defender still receives the +1 bonus to Combat Strength, but the Target Number for the attacker becomes 5.
Note: To keep track of damage to a Stronghold, put a number of Damage Counters in the Damage Box of that Stronghold.
[Image: Stronghold Damage Box. Image: Rohan Territory Map.]
Battle for Rohan – Event Cards
The Special Event deck in Battle for Rohan is the Gríma deck.
One of the positions chosen for Saruman during the Shadow Phase (see below), The Palantír Room, enables the drawing of one Gríma Event card.
A drawn Gríma card is added to the hand of the player and is counted against the hand limit. Gríma cards are played normally, either with an Event Action Die result or the die result matching the type of the card.
All Gríma cards, whether played on the table, still in the deck, or in the Shadow player's hand, are out of play as soon as Théoden enters play, or if Edoras becomes controlled by the Shadow.
Battle for Rohan – Strongholds
Effects of a Stronghold. Strongholds provide to the defender both the effect of defensive terrain (+1 to Combat Strength) and of a defensive border (a Target Number of 6 against the defender). This latter bonus, however, only applies until the Stronghold is breached (see below).
Strongholds are a special terrain type which represents fortresses, castles, and fortified cities. In Battle for Rohan, Orthanc, Edoras, and the Hornburg are all considered Strongholds.
Additional protection from a Stronghold. In addition, Strongholds protect the Units inside them by withstanding a certain number of damage on their own. This value is called Protection Value. Different Strongholds have a different Protection Value:
- Edoras has a Protection Value of 3.
- The Hornburg has a Protection Value of 6.
- Orthanc has a Protection Value of 8.
The Protection Value is also indicated in the Damage Box of that Stronghold on the board.
Battle for Rohan – The Power of the Shadow
Superimposed on the Shadow Box is a group of three circles, numbered with the Elven numerals from 1 to 3. The Shadow player must place the Commander-in-Chief figure (Saruman) in one of the three circles during the Shadow Phase. The position where Saruman is placed determines a special ability for the Shadow player and sets the allocation of Character dice as follows:
1) The Palantír Room
- Put 1 Character die in the Shadow Box.
- The Shadow player immediately draws one Gríma card.
2) The Balcony
- Put 2 Character dice in the Shadow Box.
- The Shadow player receives 2 additional points of Shadow Leadership (for a total of 4 points) and immediately places them.
3) The Pits
- Put 3 Character dice in the Shadow Box.
- The Shadow player immediately places a total of three Units (one Uruk-hai, one Half-Orc, and one Warg Rider) in three different Armies anywhere on the board.
Battle for Rohan – The Shadow Commander-in-Chief: Saruman
In Battle for Rohan, Saruman is the Commander-in-Chief of the Shadow Armies. Independently from the position chosen during the Shadow Phase, Saruman is always assumed to be in the Orthanc Region. Saruman has 3 different Special Abilities which can be used during the Action Resolution step by spending one Character Action Die:
- The Fires of Orthanc: Use one Character die result to place and immediately flip one Recruitment token in Nan Curunir, East Nan Curunir, and Orthanc; or to place two Recruitment tokens in each of these Regions.
- The Voice of Saruman: Use one Character die result to make three Rally actions on three different Armies, adding 1 to the dice results (so you succeed on 4, 5, or 6 rather than just 5 or 6).
- Hosts of Isengard: Use one Character die result to move four different Armies, each one to a free adjacent Region.
Remember that a Character die in the Shadow Box can still be used as a normal Character Action Die result if you prefer.
Battle for Rohan – Fate and the Fate Track
In Battle for Rohan, the Fate Marker starts on the "0" space and the Endgame Marker is placed on the "18" space.
Fate in Rohan is related to the awakening of the Ents of Fangorn. The actitivities of Saruman are enraging the Shepherds of the Trees, and when the Fate Marker reaches the Endgame Marker, the rage of the Ents reaches Orthanc and the fortress of Saruman is destroyed, bringing victory to the Free Peoples if this happens before Rohan falls.
Every time that a Fate tile bearing the Fate icon is chosen by the Free Peoples player, an Ent enters play: Place one Ent figure in the Entwood, as explained below in the section The Ents of Fangorn. If Treebeard is in play, two Ents enter play whenever a Fate Icon appears on a tile.
Battle for Rohan – Characters and Fate
The advancement of Fate will also bring Characters to the scene of battle, which may turn the tide of victory in favor of the Horse-Lords of Rohan:
- Treebeard becomes ready on space 3 of the Fate Track.
- Éomer becomes ready on space 5 of the Fate Track (note that Éomer's Special Ability applies while he's still on the Fate Track).
- Aragorn becomes ready on space 6 of the Fate Track.
- Gandalf becomes ready on space 8 of the Fate Track.
See the Battle for Rohan – Free Peoples Player Reference Sheet and the appropriate Character cards for the details on how each Character can enter play when he's ready.
Théodred is already in play at the beginning of the game, while the arrival of Théoden depends on the action of the players (as specified on his Character card and the various Events involving his entrance in play). Legolas and Gimli come into play through the play of an Event card.
Battle for Rohan – Actions
Action Dice Pool. The Shadow player adds one die to his Action Dice Pool when both settlements of a Rohan territory (West Marches, Rohan Plains, and East Marches – see the game board) are conquered by Shadow Units.
If either or both settlements are freed by the Free Peoples player, the die is lost.
The Free Peoples player adds one die to his Action Dice Pool when Éomer and Théoden enter the game. If the character is eliminated, the die is lost.
Special Actions. In addition to the actions explained in the Battles of the War of the Ring rules, in Battle for Rohan there are special muster actions available to either player:
- The Shadow player may use a Muster Action Die result in the Action Resolution step to Place a total of two Dunlending Units, one each in two different Regions containing either a Dunlending Recruitment Area (North Dunland and Gap of Calenardhon) or a Free Peoples Settlement controlled by the Shadow.
- The Free Peoples player may use a Muster Action Die result in the Action Resolution step to place one Ent in Derndingle, if the Entwood is there.
Battle for Rohan – The Ents of Fangorn
The Ents of Fangorn played an essential role in the defeat of Saruman's Armies at Helm's Deep and in the destruction of Orthanc. In Battle for Rohan, they are an important ally for the army of the Horse-Lords, but as in the story their speed in reacting to the unfolding events cannot be fully predicted or controlled by the Free Peoples player.
Raising the Entwood. All Ents in play are always grouped in one Region; the group of Ents is called the Entwood. The Entwood is created in Derndingle when the first Ent is put in play, either by the Free Peoples player using a Muster die result, or as an effect of the Fate Tile he chooses in this turn.
- As long as the Entwood is in Derndingle, one Ent can be added by the Free Peoples player using a Muster die during the Action Resolution step.
- Additionally, one Ent is placed in the Entwood (wherever it is located) during the Fate Track Advancement step if the tile chosen for the turn bears a Fate icon. In this case, if Treebeard is in play, two Ents are added instead.
Some Story Event cards can also let the Free Peoples player place new Ents in the Entwood: Follow the instructions on the card.
Treebeard. Treebeard is considered a Character, but he is neither a Companion nor a Captain. After he is put in play (using a Character die result after he becomes ready), he is always considered to be in the Region with the Entwood.
The arrival of Treebeard allows the Ents to be activated (see below) and increases the speed of recruiting the Ents, as each time a Fate icon appears on a Fate Tile, two Ents are recruited instead of one.
The March of the Ents. The Entwood can be activated, when Treebeard is in play, using a Will of the West die result, or using the "Merry and Pippin, Hasty Folk" Story Event card. When the Entwood is activated it may move and attack; finally, the Entwood must re-form.
The Ents Move. To move the Entwood, take one Ent from the Entwood and place it in an adjacent Region; if you want to move further, take another Ent from the Entwood and place it in a Region adjacent to one containing the previously placed Ent, thus forming an uninterrupted chain of Ents. The Region you enter during movement may not contain enemy armies. Proceed until you decide to stop (or until there are no Ents left in the Entwood).
Note: Ents may not cross a Mountain or River border, but may always move from Derndingle to Fangorn or from Fangorn to Derndingle. Ents may move across Fords normally.
The Ents Attack. After moving, you may attack, with the Ents, a Region adjacent to any Ent figure on the board. You must remove one Ent from the Entwood to make an attack roll. You may continue to make attack rolls and eliminate Ents as long as you have Ents in the Entwood; when you remove the last Ent in the Entwood, you make the last attack roll and then the activation is over. If there are still Ents left in the Entwood after the attack is over, you may resume movement and/or attack a different Region.
Resolve an Ent attack by rolling five dice, scoring hits on a 5 or 6. Any die which does not score a hit may be re-rolled (as if the Ents had a Leadership of 5). Terrain effects do not modify this roll.
The Shadow player must always apply casualties after each roll, immediately removing one Unit for every two Damage Counters.
Note: Ents removed from the game can still be recruited again later in the game. The number of figures included in the game only limits the maximum number of Ents which may be in play at a given time.
Note: Treebeard is not considered an Ent Unit for the purposes of moving and attacking with the Entwood.
The Entwood Re-Forms. When you decide to stop moving and attacking, or no more Ents are left in the Entwood, regroup all Ents on the map in one Region containing at least one Ent, or in the Region that contained the Entwood before the activation, to form again the Entwood. Move Treebeard to the Region with the Entwood.
If there are no more Ents, move Treebeard back to Derndingle. The Entwood is considered to be there for the purpose of placing new Ents.
The presence of the Entwood does not give control of a Region to the Free Peoples.
Example: Treebeard and four Ents are in Derndingle when the Free Peoples player decides to activate the Ents. A lone Warg Rider Unit is in Westmark, while a 5 Units-strong Shadow Army is in the Westmark Hills. The first Ent is removed from Derndingle and placed in West Eaves of Fangorn; then a second Ent is removed to attack the single Warg Rider in Westmark, which is eliminated thanks to a successful roll. A third Ent is placed in Westmark and the fourth and last Ent is removed from Derndingle to attack the Shadow Army in the hills. Five dice are rolled and they score three hits, then the two failed dice are re-rolled to score one additional hit. With a total of four hits, two Shadow Units are removed from the Army in the Westmark Hills. With no more Ents left in Derndingle, the activation is over and the two Ents remaining in West Eaves of Fangorn and Westmark re-form the Entwood, together with Treebeard, in Westmark.
Armies and the Entwood.
- The Ents are not normal Army Units and do not count for the purpose of stacking limits if they are in the same Region as a Free Peoples Army. A battle against a Free Peoples Army in the same region as the Entwood does not affect the Ents.
- The Entwood cannot be attacked. If a Shadow Army enters (or is recruited in) a Region containing the Entwood, immediately roll for one Ent attack against that Army (see above) without removing any Ent.
Battle for Rohan – Victory Conditions
At the end of each turn, check the following Victory Conditions, one after the other. If any of these conditions apply, the game ends with a victory for one of the players. Note that lower-numbered Victory Conditions take precedence over higher-numbered Victory Conditions, if two or more are achieved on the same turn.
Fate Victory
- The Free Peoples player immediately wins if the Fate Marker reaches the space where the Endgame Marker is, representing the destruction of Orthanc by the Ent.
Shadow Victory
The Shadow player wins if any one of the following conditions is true:
- if he controls 10 Victory Points worth of Free Peoples' Regions at the end of any turn.
- The Hornburg is worth 6 points;
- Edoras is worth 4 points;
- any other Free Peoples settlement is worth 1 point.
Note: It is possible for the Shadow player to win either by conquering the Hornburg and any 4 other Settlements, or the Hornburg and Edoras, or Edoras and all the Free People Settlements.
- if all the Free People Characters are eliminated (Treebeard is not considered a Character for this purpose since he cannot be eliminated).
Free Peoples Victory
The Free Peoples player wins if any one of the following conditions is true:
-
if he controls Orthanc, or Saruman is eliminated, at the end of any turn;
-
if Théoden is in play, and no Rohan Territory is controlled by the Shadow player (i.e., at least one Rohan Settlement is free in each Territory).
Note: Except for a Fate Victory, if both the Shadow player and the Free Peoples player fulfill any of their Victory Conditions at the end of a turn, the Shadow player wins.
Battle for Gondor
Scenario rules, transcribed from the official English Fantasy Flight Games "WOTR002 – Operational Scenarios" document (printed pages 23–32).
Battle for Gondor – Game Components
To play the Battle for Gondor scenario, you need the following specific game components in addition to the components usually necessary for any Battles of the War of the Ring game:
- The Battle for Gondor game board
- The figures detailed in the Figures/Units Table
- The Darkness deck of Event Cards
- The Darkness Tokens
- The Character Counters and/or Character Cards of Faramir, Imrahil, Théoden, Éomer, Gandalf, Aragorn, Pippin, Legolas, Gimli, the Witch-king, and Gothmog (use the Mouth of Sauron figure from War of the Ring to represent Gothmog). Use only the Gondor side of the Gandalf and Aragorn cards; the other side is for the Rohan scenario
- The Tactics Tokens detailed in the Figures/Units Table
- The Recruitment tokens detailed in the Figures/Units Table
[Images: Recruitment Token (Free Peoples) and Recruitment Token (Shadow).]
Place the figures and the Recruitment Tokens as shown in the Setup image on page 26.
Put aside for later use any unused figures and tokens.
Battle for Gondor – Figures/Units Table
The source shows a miniature picture for each figure and a tactics icon for each unit type. The pictures and icons are images and are not reproduced here; "(icon)" marks where the source shows a Unit Tactics Token icon.
Left column of the printed table:
| Unit Type | Number of Units | Included in | Unit Tactics Token | Number of Recruitment Tokens |
|---|---|---|---|---|
| Gondor Footmen | 15 | WotR | (icon) | 15 |
| Gondor Archers | 10 | WotR | (icon) | 9 |
| Gondor Knights | 5 | WotR | (icon) | 5 |
| Rohan Riders | 13 | WotR + ES | (icon) | 4x1, 3x2, 2x0, 1xW |
| Gondor Leaders | 4 | WotR | - | - |
Centre column of the printed table:
| Unit Type | Number of Units | Included in | Unit Tactics Token | Number of Recruitment Tokens |
|---|---|---|---|---|
| Gondor Captains (Faramir, Imrahil) | 2 | ES | - | - |
| Companion (Gandalf) | 1 | WotR | - | - |
| Companion (Aragorn) | 1 | WotR | - | - |
| Companion (Legolas) | 1 | WotR | - | - |
| Companion (Gimli) | 1 | WotR | - | - |
Right column of the printed table:
| Unit Type | Number of Units | Included in | Unit Tactics Token | Number of Recruitment Tokens |
|---|---|---|---|---|
| Olog-hai | 6 | WotR | (icon) | - |
| Southron Horsemen | 8 | ES | (icon) | 7 |
| Easterling Infantry | 24 | WotR | (icon) | 12 |
| Mûmakil | 6 | WotR | (icon) | 5 |
| Nazgûl | 8 | WotR | - | - |
WotR = War of the Rings. ES = the Expansion Set.
Battle for Gondor – Setup
The setup is shown as an image on page 26 (figure and token placement, with the count for each piece). The source's setup text reads:
Place the Fate Marker, the Endgame Marker, and the Free People Characters on the Fate Track as detailed in the "Gondor Fate Track" table.
Gondor Fate Track table (image, printed page 27): it shows the Fate Marker and the Free People Characters Imrahil, Théoden and Éomer, Faramir and Aragorn on the track, and the Endgame Marker "The Ring is Unmade". The exact track spaces are given in the rules under "Characters and Fate" below.
Battle for Gondor – The Game Board
The terrain types featured on the Battle for Gondor game board are:
- Plains
- Woods
- Forts (East and West Osgiliath, Causeway Forts)
- Hills
- Swamps
- Strongholds (Cair Andros, Minas Tirith)
Strongholds are a special terrain type explained in the Strongholds section, below, and in the rules of the Battle for Rohan scenario.
The border between two Regions may be:
- Clear (no special rules)
- Stream
- Dike/Wall (troops inside the Pelennor are protected)
- Ford/Pass (fords are at Osgiliath, Cair Andros)
- River (impassable except at Fords: The only river is the Anduin)
- Mountains (impassable)
Note: The board shows certain elements of the Pelennor (the North Gate, the Harlond) which do not have an actual significance in the game, but are portrayed for artistic reasons.
[Image: Gondor Territory Map.]
Territories. Territories represent a broad division of the map and may be referred to by the rules or cards. The Territories in Battle for Gondor are:
- Outer Defences (along the west banks of the River Anduin)
- Minas Tirith and the Pelennor Fields (inside the Pelennor Wall)
- North Ithilien (East of the Anduin, north of Osgiliath)
- South Ithilien (East of the Anduin, south of Osgiliath)
- Gondor Farmlands (around the Pelennor)
- Mordor (the Black Gate and inside the Mordor Mountains)
Refer to the Gondor Territory Map for a graphical reference to the extent of each Territory. The Outer Defences, Pelennor Fields, and Gondor Farmlands have two settlements each (Minas Tirith is not considered a settlement).
National Recruitment Areas. Four areas on the game board show special National Icons and are surrounded by a thick black border. These areas are called Recruitment Areas and they refer to:
- Gondor (To the Outlands)
- Rohan (To Rohan, Forgotten Road)
- Evil Men (To the East, To Harad)
- Mordor (Udûn, Gorgoroth, Minas Morgul)
Each Recruitment Area can be used to muster Units belonging to the appropriate Nation. To do so, the Recruitment tokens must be kept separate, in different pools corresponding to the four Nations.
Battle for Gondor – Recruitment Tokens
The Recruitment tokens used in Battle for Gondor differ from those used in Battle for Rohan, since they are distinguished by Nation and can also bear a Number.
Recruitment tokens can belong to the Nations of Gondor and Rohan (for the Free Peoples) or Mordor and Evil Men (for the Shadow). The Nation of a token indicates in which Recruitment Area the token may be placed, and the kind of Unit that it brings into play. Moreover, the Nation can be relevant in connection with Event cards (see below).
Number of Units. If a token has a number on it, when it is flipped the indicated number of Units of the appropriate type is put in play. If the number is zero, no Units are recruited. If a token does not have a number, it is used to recruit one Unit.
Battle for Gondor – Recruitment Areas
In Battle for Gondor, Recruitment Areas are not considered Regions (while they are such in Battle for Rohan) and use the following rules:
- Recruitment Areas are not considered Regions and they cannot be attacked.
- Recruitment Areas have no Stacking Limit.
- You may attack from a Recruitment Area to an adjacent Region with any action which allows to do battle. In this case, form an Army with a maximum of 5 Units from those inside the Area. The defending Army must immediately retreat to an adjacent free Region (if this is not possible, the defending Army is eliminated) following the normal Retreat rules. The attacking Army immediately advances into the attacked Area.
- You may move from a Recruitment Area in Mordor to an adjacent Recruitment Area (for example, from Gorgoroth to Minas Morgul, or from Udûn to Gorgoroth) in the same way as you move from a Region to an adjacent Region, except that there is no limit to the number of Units you may move.
A Region is considered to be adjacent to a Recruitment Area only if a small white arrow crosses the border between the region and the Recruitment Area.
Example: Cross-roads is adjacent to Minas Morgul; Ephel Dúath is not considered adjacent to Gorgoroth.
Note: Rohan reinforcements normally come from the "To Rohan" Area unless the Woses token is drawn (see The Woses, below), in which case they can use the "Forgotten Road" Area instead.
Adding Units to an army using a "Place and Flip" Event card. Some Event cards instruct a player to "place and flip" a Recruitment token in an Army in play. This means that the player:
- picks a Recruitment token belonging to the same Nation of at least one Unit in the Army, then
- flips the token to see the correct number or type of Unit to place, then
- places the newly recruited Unit(s) in the chosen Army.
Battle for Gondor – Strongholds
In Battle for Gondor, the island of Cair Andros and the city of Minas Tirith are Strongholds. Cair Andros has a Protection Value of 3, while Minas Tirith follows a set of special rules. See the Battle for Rohan scenario for the complete Stronghold rules.
Minas Tirith. Minas Tirith was the strongest fortress of the Free Peoples at the end of the Third Age, and the following special rules are used to represent the strength of its bastions and defenses.
The City of Minas Tirith is considered a Stronghold, but it is different from other Strongholds. The protections of Minas Tirith are divided in three sections, each one with a separate Protection Value.
- The North Protection (value 10) is reduced by attacks from North Rammas and the North City Wall.
- The South Protection (value 10) is reduced by attacks from South Rammas and the South City Wall.
- The Gate Protection (value 6) is reduced by attacks from the Great Gate Region.
- An attack against Minas Tirith is considered to be against a Breached Stronghold only if the attack comes across a Breached Border (i.e., a border which has lost all of its Protection Value).
- No movement or retreat is allowed across a border which is not breached except between Minas Tirith and the Great Gate Region (attacks are still possible following the Stronghold rules). Advancement after combat is possible through such a border in an attack with Siege Towers (see Siege Engines, below).
[Image: Minas Tirith diagram, labelled 1 North Protection, 2 Gate Protection, 3 South Protection.]
Battle for Gondor – Event Cards
The Special Event deck in Battle for Gondor is the Darkness deck. The first position of the Power of the Shadow procedure (see below), The Dawnless Day, enables the Shadow player to draw a Darkness Event card (see The Power of the Shadow, below). A drawn Darkness card is added to the hand of the Shadow player, and counts against the hand limit. Darkness cards are played normally, either with an Event Action Die result or the die result matching the type of the card.
Merry and Éowyn. The Free Peoples Story Event card "No Living Man Am I!" is used to represent the heroic actions of Merry and Éowyn. If the Free Peoples player draws and chooses this tile during the Fate Phase, the following effect immediately applies:
- If Théoden is on the Fate Track: Advance Théoden one space to the left on the Fate Track, then draw another Tile. The "No Living Man Am I!" is discarded.
- If Théoden is not on the Fate Track: If the Witch-king is on the board, eliminate the Witch-king (Fate is 0). If the Witch-king is not on the board, draw another tile and put the "No Living Man Am I!" tile back in the Fate Pool.
[Image: "No Living Man Am I!" Special Tile.]
All Darkness cards, played or still in the deck, are out of play as soon as all Darkness tokens are discarded.
Corsair Ships. The Corsairs of Umbar are represented by the brown Corsair Ship figures and are not considered Army Units. They are placed along the river Anduin to show their presence, but their actual position is not important; just follow the rules explained on either or both the two Story Event cards which put them in play. Corsair Ships placed by either card can be used to activate the effect on the other card, if both cards are in play.
[Image: Two Corsair Ships on the Anduin.]
Battle for Gondor – The Power of the Shadow
Superimposed on the Shadow Box is a group of three circles, numbered with the Elven numerals from 1 to 3. The Shadow player must place the Commander-in-Chief figure (either the Witch-king or Gothmog, see below) in one of the three circles during the Shadow Phase.
The position where the Commander-in-Chief is placed determines a special ability for the Shadow player and sets the allocation of Character dice as follows:
1) The Dawnless Day
- Put 1 Character die in the Shadow Box.
- The Shadow player immediately draws one Darkness card.
- The Shadow player may immediately place one Nazgûl.
2) The Tower of Sorcery
- Put 2 Character dice in the Shadow Box.
- The Shadow player may immediately place up to two Nazgûl.
- The Shadow player may immediately place the Commander-in-Chief in one Region.
3) The Might of Mordor
- Put 3 Character dice in the Shadow Box.
- The Shadow player may immediately place up to three Nazgûl.
- The Shadow player immediately places one Mordor Orc in up to three different Armies containing Mordor Units, and one Olog-hai in one Shadow Army anywhere on the board.
Battle for Gondor – The Shadow Commander-in-Chief
In Battle for Gondor, the Witch-king starts as the Commander-in-Chief of the Shadow Armies. If the Witch-king is eliminated and Gothmog is in play, Gothmog immediately replaces the Witch-king as the new Commander-in-Chief. If the Witch-king is eliminated and Gothmog is not yet in play, the game is over and the Free Peoples player wins.
In Battle for Gondor the Commander-in-Chief figure is placed in a Region on the board only if Position 2 (The Tower of Sorcery) is chosen during the Shadow Phase; remove the Commander-in-Chief figure from the board at the end of the game turn. Regardless of the position chosen, the Commander-in-Chief's special abilities always apply.
The Witch-king. As long as the Witch-king is in play, the Shadow player can use the following Special Abilities by spending one Character Action Die:
- The Black Captain Leads Them: Use one Character die result to place and immediately flip one Recruitment token in every Evil Men Recruitment Area and Mordor Recruitment Area; or to place two Recruitment tokens in every Evil Men Recruitment Area and Mordor Recruitment Area.
- Fear of Their Master: Use one Character die result to make three Rally actions on three different Armies, adding 1 to the dice results (so you succeed on 4, 5, or 6 rather than just 5 or 6).
- Flung into the Fray: Use one Character die result to move four different Armies.
The Witch-king has one additional Special Ability (Nazgûl Lord) which can be used in battles involving the Witch-king. The Witch-king is considered a Nazgûl for movement purposes only.
Gothmog. Gothmog has one Special Ability (New Strength to Rape Gondor) which can be used during the Action Resolution step if Gothmog is in play, by spending one Character die.
When Gothmog replaces the Witch-king as Commander-in-Chief, he gains the two Special Abilities of the Witch-king called Fear of their Master and Flung into the Fray (i.e., he does not gain The Black Captain Leads Them). The Shadow player can use them spending one Character die. Gothmog's Special Ability New Strength to Rape Gondor remains available when he is Commander-in-Chief, and in this case can be used even when Gothmog is not placed on the board (if the Shadow player has chosen Position 1 or 3 during the Shadow Phase).
Battle for Gondor – The Nazgûl
Placing Nazgûl on the board. Nazgûl are put in play only during the Shadow Phase. The position chosen instructs the Shadow player to place a number of Nazgûl: The player can take that number of Nazgûl from among both those already in play and those not yet in play, placing them anywhere on the board. Each Nazgûl can be placed in any Region, regardless of the presence of Settlements, Strongholds, enemy or friendly Units, and so on.
Using Nazgûl. Nazgûl are moved on the board using Character Action Die results. Nazgûl are used by the Shadow player to help in battle, and to weaken enemy armies (see the Battle for Gondor – Shadow Player Reference Sheet and the Nazgûl reference card).
To make use of its powers, a Nazgûl must be in a Region belonging to the same Territory containing the Region to be affected. Each use of a Nazgûl power requires a Nazgûl to be removed from play; Nazgûl thus removed are not permanently taken out of play but are available again.
Nazgûl and Armies. Nazgûl are not affected by Armies or Characters, and cannot attack or otherwise affect enemy Armies or Characters. Nazgûl are not Leaders and are never considered to be part of a Shadow Army, and they are not eliminated if a Shadow Army in the same Region is destroyed in Battle.
Battle for Gondor – Fate and the Fate Track
In Battle for Gondor, the Fate Marker starts on the "0" space and the Endgame Marker is placed on the "18" space.
When the Fate Marker reaches the Endgame Marker, the Quest of the Ring-bearers is complete; the Ring is unmade, bringing victory to the Free Peoples, if this happens before Gondor falls.
While the Ring-bearers slowly advance toward Mount Doom, the Dark Lord has fed the furnaces of the Black Land to cast a deadly shadow on Middle Earth. A supernatural Darkness now precedes the assault of his hosts, favoring their evil ways. But the Winds from the West will blow soon, and destiny – or design – is bringing the rightful heir to the throne of Gondor, in time for the last battle.
Effects of the Darkness. At the beginning of the game, five Darkness tokens are placed in the Shadow Box to form the Darkness Pool. As long as there is at least one Darkness token in the pool, the Shadow player can draw from the Darkness deck of Event cards (choosing the first Position in the Shadow Phase) and use them. As soon as the last Darkness token is removed from the pool, the following rules are applied:
- All Darkness cards (in the hand of the Shadow player, on the table, or in the Darkness deck) are removed from play.
- Remove immediately all Nazgûl currently in play (they may return to the game afterwards and follow all rules normally).
Darkness and Fate. One Darkness token is removed from the pool every time that a Fate tile bearing the Fate icon is chosen by the Free Peoples player during the Fate Track Advancement Phase. Additionally, some Story Event cards can also let the Free Peoples player remove Darkness tokens: Follow the instructions on the card.
Battle for Gondor – Characters and Fate
The advancement of Fate will also bring Characters to the scene of battle, which may turn the tide of victory in favor of the defenders of Minas Tirith:
- Imrahil becomes ready on space 3 of the Fate Track.
- Faramir becomes ready on space 5 of the Fate Track (note that Faramir's Special Ability applies while he's still on the Fate Track).
- Théoden and Éomer become ready on space 9 of the Fate Track.
- Aragorn becomes ready on space 12 of the Fate Track.
See the Battle for Gondor – Free Peoples Player Reference Sheet and the appropriate Character cards for the details on how each Character can enter play when he's ready.
Gandalf is already in play at the beginning of the game. Legolas, Gimli, and Pippin come into play through the play of Event cards.
Battle for Gondor – Actions
Action Dice Pool. The Shadow player adds one die to his Action Dice Pool when both settlements of a Gondor Territory (see The Game Board) are conquered by Shadow Units. If either or both settlements are freed by the Free Peoples player, the die is lost.
The Free Peoples player adds one die to his Action Dice Pool when Faramir and Théoden enter the game. If the Character is eliminated, the die is lost.
Free Peoples Special Actions.
- The Free Peoples player may use a Muster die result in the Action Resolution step to add one Recruitment token to both the Gondor and Rohan Muster Areas (or one token in one Area, using an Action token).
- As soon as Aragorn and Théoden have left the Fate Track, the Free Peoples player can flip Recruitment tokens in Recruitment Areas using a Muster Action Die (or an Action token), just as if they were in a normal Region: For example, flipping one token in each of the two Areas, or flipping one token in a Recruitment Area and one token in a Settlement.
Battle for Gondor – Siege Engines
The armies of Sauron brought with them engines of destruction to help the assault of the Stronghold of the Free Peoples. This is represented in the game by the rules for Siege Engines.
Building Siege Engines. The Shadow player may use a Muster die to place a total of two Siege Engines, respecting the following rules:
- Siege Towers may only be placed in the Pelennor Regions adjacent to Minas Tirith. You may have a maximum of one Tower in each Region, which does not count against the stacking limit.
- Trebuchets may only be placed in Pelennor Regions not adjacent to Minas Tirith. You may have a maximum of two Trebuchets in each Region, which do not count against the stacking limit.
[Images: Siege Tower; Trebuchet.]
Special Actions. In addition to the actions explained in the Battles of the War of the Ring rules, in Battle for Gondor there are special actions available to the players, which are explained below.
Shadow Special Actions.
- The Shadow player may use a Character die result in the Action Resolution step to move all the Nazgûl and Minions.
- The Shadow player may use a Muster die result in the Action Resolution step to place up to two Siege Towers and/or Trebuchets.
- The Shadow player may use an Army die result to attack, with Trebuchets, a Free Peoples Army in Minas Tirith.
Using Siege Engines.
Attacking with Siege Towers. When the Shadow player attacks from a Region with a Siege Tower to Minas Tirith, he may decide, at the beginning of a battle, to use the Siege Tower to storm the walls. The Siege Tower is discarded and the following rules apply to the attack:
- Damage from the attack is applied against the defenders ignoring the Protection Value of the Stronghold.
- Target Number for the attacker is 5.
- The battle ends after one round. Advancing after combat is allowed if the defender is eliminated.
- No Unit Ability of the Shadow player's Units may be used during this attack.
Note: Siege Towers may not be used in a Combined Attack.
Attacking with Trebuchets. The Shadow player may use one Army die to shoot with all Trebuchets (up to 5) on the board against a Free Peoples Army in Minas Tirith, or against the Protection of one of the borders of Minas Tirith (see Minas Tirith). For each roll of 5+, score one damage.
Destroying Siege Engines. Any Siege Engine is destroyed if there are no more Shadow Units in its Region.
Battle for Gondor – Mustering the Free Peoples Armies
While the hosts of Sauron advance, armies from Southern Gondor and Rohan are coming to the rescue of Minas Tirith. How many can be mustered before the White City is beyond help? This uncertainty is represented by the rules for mustering the Free Peoples Armies.
Gondor and Rohan Recruitment Areas.
- The Free Peoples player may place one Recruitment token in the Rohan Recruitment Area and one token in the Gondor Recruitment Area using a Muster action (or one token in one Area, using an Action token).
- Recruitment tokens in these areas cannot be flipped normally (using a Muster action), but only when certain Characters enter play (see below).
- As soon as both Aragorn and Théoden have left the Fate Track, the Free Peoples player can flip Recruitment tokens in Recruitment Areas using a Muster Action Die, just as if they were in a normal Region.
- If a Free Peoples Army in a Recruitment Area attacks an adjacent Region, no battle takes place, the Shadow Army is forced to retreat immediately, and the attacking Army advances in the vacated Region.
Characters and the Recruitment Areas.
- When Imrahil enters play, flip up to four Recruitment tokens in the Gondor Recruitment Area.
- When Aragorn enters play, flip all Recruitment tokens in the Gondor Recruitment Area.
- When Théoden enters play, flip all Recruitment tokens in the Rohan Recruitment Area.
Rohan Special Recruitment Token: The Woses. If the "Woses" token is revealed, the Free Peoples player may immediately move all the contents from the "To Rohan" Recruitment Area to the "Forgotten Road" Recruitment Area.
[Image: Woses Token.]
Battle for Gondor – Victory Conditions
At the end of each turn, check to verify if either of the Victory Conditions is fulfilled. Check the following Victory Conditions one after the other. If any of these conditions apply, the game ends with a victory for one of the players. Note that lower-numbered Victory Conditions take precedence over higher-numbered Victory Conditions, if two or more are achieved on the same turn.
The Free Peoples player wins if any one of the following conditions is true:
- if Aragorn is in play and no Gondor Territory is controlled by the Shadow player (i.e., at least one Gondor Settlement is free in each Territory);
- if both the Witch-king and Gothmog are eliminated, or the Witch-king is eliminated when Gothmog is not in play yet;
- if both the Black Gate and the Cross-roads Regions are occupied by a Free Peoples Army.
Note: Except for a Fate Victory, if both the Shadow player and the Free Peoples player fulfill any of their Victory Conditions at the end of a turn, the Shadow player wins.
Fate Victory
- The Free Peoples player immediately wins if the Fate Marker reaches the space where the Endgame Marker is, representing the destruction of the Ring.
Shadow Victory
The Shadow player wins if either of the following conditions is true:
- if he controls the City of Minas Tirith;
- if all the Free People Characters are eliminated.