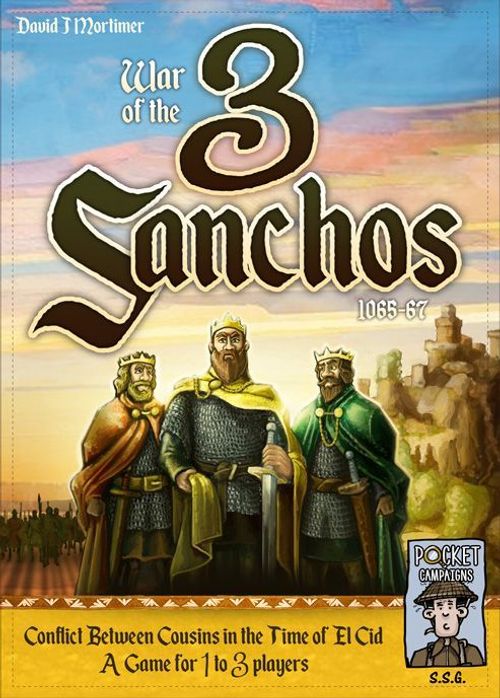
War of the 3 Sanchos 1065-67
War of the 3 Sanchos 1065-67 Rulebook
Table of Contents
Table of Contents
- Objective
- Contents
- Solo Play
- Board Layout (2-3 players)
- Action Card Layout
- Player Aids
- Set-up
- Game Sequence
- Armies, Field Armies, and Garrisons
- Description of a Round in Detail
- Winning
- El Cid
- Solo Scenarios
- Solo Campaign Challenge
- Auto-Sancho Reference
- Player Aid
- Hints on Play
- El Cid Inspires! (Optional Variant, January 2024)
Objective
All 3 Sanchos, including players and any Non-player Sanchos, are competing to win by occupying the castles and towers illustrated on the board (1 per region). Sanchos score victory points whenever they occupy a castle or tower with their pieces, and lose them whenever they abandon a castle or tower they own, or another Sancho successfully besieges it. The number of victory points gained and lost during the game is as follows:
- 3 victory points for a Home castle (2 in the Solo game),
- 2 victory points for a neutral castle, and
- 1 victory point for a tower.
If at any time during the game a single Sancho has 10 or more victory points, they win a major victory. If no Sancho achieves this during the game, the Sancho with the most victory points after the last card is played wins a minor victory.
Note: player means an actual player; Sancho refers to all 3 Sanchos; opponent refers to the 2 enemy Sanchos.
Contents
- 1 double-sided board
- 27 Action cards
- 1 El Cid card (optional)
- 3 sets of player pieces in 3 colours: red, yellow, and green. Each set: 1 King piece, 14 Troop pieces, 1 Score marker
- 1 Battle token (purple cube)
- 2 Action tokens (black cubes)
- 1 Tiebreak token (brown disc) - used in the Solo game only
- 1 King's Guard dice (larger dice, numbered 0, 1, 3, 5, 7, 9)
- 5 Troop dice (smaller dice, numbered 1 to 6)
Solo Play
When playing a Solo game, you will choose 1 Sancho to play. The 2 Non-player Sanchos are called "Auto-Sanchos" in the Solo game. As the Solo player, you will take your turns as usual, and the orange boxes in the rulebook (shown here as "Solo game:" notes) explain how each Auto-Sancho will react and other differences to the rules for Solo play. The player must win in the Solo game before the deck is empty and a card needs to be drawn.
Board Layout (2-3 players)
The board shows: each Home castle space (Nájera, Aragón, Castilla) with its Home region banner; Garrison spaces (circles); neutral castle spaces; towers; regional boundaries; "No Entry!" regions (marked with a number of players, i.e. not used at that player count); victory points if garrisoned; and the Battle chart and Score track along the bottom.
Action Card Layout
Each card shows Command Points (CPs) in the top left corner, a card identifier, and three actions (Action 1, Action 2, Action 3), one headed by each Sancho (NÁJERA, ARAGÓN, CASTILLA). Above the line: the player uses this text. Below the line: use this part of Action 3 for the Auto-Sancho in Solo games only.
Example card (1 CP):
- NÁJERA: Fortify 1. If not possible, use 1 point to Besiege most favourable.
- ARAGÓN: Deploy 1 to King. Recruit any remaining points.
- CASTILLA: Use 1 point on one of: Move. / Attack not in ARAGÓN. / Fortify empty Garrison space. Below the line (Solo): Move 1, and Attack 1 not in ARAGÓN, and Fortify 1, empty Garrison space only.
Player Aids
On pages 26 and 27 of the rulebook there is a Player Aid for all player counts and an Auto-Sancho Reference for Solo play (both reproduced at the end of this document). We recommend having the rules open at the appropriate page(s) during play.
Set-up
- Place the board in the centre of the table, using the side corresponding to the player count. Leave a space below the board for dice to be placed during battles.
- Place the Battle token and the 2 Action tokens to one side of the board.
- Place 1 Troop piece of each Sancho in the Garrison space (the circle) on their Home castle. Place 3 Troop pieces and the King piece in their Home region as a Field Army (not in the Garrison space).
- Each player chooses a Sancho to represent. In a 2-player game, players choose between the Sanchos for Castilla and Aragón. Place 2 Troop pieces in their colour in a Reserve area off the board by each Sancho (player and Non-player Sanchos) as recruits. There will be one Non-player Sancho in a 2-player game, and two in a Solo game (the latter are Auto-Sanchos).
- Place all of the other Troop pieces in a Supply accessible to all the players. Put all the dice here as the dice pool.
- Place all Score markers on space 3 of the Score track for a 2- or 3-player game. This track also operates as the Battle chart (see the Attack action). See below for Solo game markers.
- Shuffle the 27 Action cards and deal 3 to each player, but not to any Non-player Sanchos. Place the deck next to the board convenient for all players leaving room for a discard pile.
- In a 2-player game, each player rolls a dice, and the highest roller is the commander for the first round. In a 3-player game, the player who is Sancho IV of Nájera (yellow) begins as the commander.
Solo game: use the Solo side of the board; it includes an identifying number for each region. The 2 Auto-Sanchos will use 1 Score marker, combine their victory points, and win if they reach 10 victory points before the player, but they will still act against each other as opponents in the multi-player game. The Solo side of the board has 2 victory points for the Home castles, so the Auto-Sanchos start on 4 victory points, the player on 2. The player is the commander for the first round. Cover the top decision arrow with the Tiebreak token. Refer to the Solo Scenarios for any additional set-up changes for your chosen player Sancho.
Game Sequence
The game is played in rounds. At the start of the round, the commander chooses to play or reserve a card from their hand. If the commander chooses to play a card, all players will take a turn. The commander takes their turn before, after, or between the other Sancho's turns. During the commander's turn, they spend 1 to 3 Command Points (CPs) as determined by the played card. The other players carry out the actions listed on the card.
The game ends either at any point when a single Sancho has 10 or more victory points, or after the final card from all players' hands has been resolved.
A round has 4 phases, carried out in the following order:
- Commander plays or reserves a card. If the commander reserves a card (only possible if they have no cards already reserved), skip phase 2 and proceed to phase 3.
- Player turns.
- The commander uses the CPs in the top left corner of the card before, after, or between the other Sancho's turns. The commander never uses their action on the card!
- The other Sanchos take their turns and use their actions, in order from top to bottom on the card.
- In a 2-player game, the commander will also control Nájera using the Nájera action and pieces. The commander does this to their own advantage. Non-player Nájera is never the commander, has no hand of cards, and does not play any cards.
- Commander draws a card. Skip this phase if the deck is empty.
- Sieges - remove siege losses for all players involved in sieges.
After phase 4 has been completed, start a new round with the next player clockwise round the table from the current commander as the new commander. A non-player Sancho is never the commander.
After the final card in the deck has been drawn, continue to play (skipping phase 3) until a single Sancho wins with 10 victory points or all players have emptied their hands. In the latter case, the game ends at the end of the round, and the winner is the one with the most victory points (see Winning). In a 2-player game, Nájera might win, in which case both the players lose.
Solo game: The player is the commander in alternate rounds, and play proceeds as normal during those rounds. For rounds when the player is not the commander, draw a card from the top of the deck and resolve the actions for all the Sanchos, including the player, without using CPs. The Auto-Sanchos never use CPs. The Solo game ends when either the player or the combined Auto-Sanchos have 10 victory points, or the deck is empty and a card needs to be drawn.
Example: the commander is Sancho of Castilla in a 3-player game. She chooses a 3 CP card from her hand of 3 cards. As she has no Reserved cards, she could reserve this one, in which case there would be no player turns. But she wants to use the powerful 3 CPs for actions. She chooses to let the other players take their turns before using the CPs. First, Aragón takes their turn using the green action. Second, Nájera takes their turn using the yellow action, ignoring the bottom section marked with a crown, as this is for the Solo game only. Finally, Castilla takes her turn using the 3 CPs and ignoring the red Castilla action.
Armies, Field Armies, and Garrisons
- Army: All pieces of a Sancho in a region, including any Field Army and/or Garrison and the King piece.
- Field Army: Pieces of a Sancho that are in the region but not in its region's Garrison space (the circle). Besiegers are part of the Field Army.
- Garrison: Pieces of a Sancho that are in a region's Garrison space (the circle).
Empty castles, towers, and regions have no intrinsic Garrisons or Troop pieces.
Description of a Round in Detail
Phase 1. Commander Plays or Reserves a Card
The commander chooses a card from their hand to either:
- Play - in which case they place it face up in front of them and play continues with phase 2 (Player Turns); or
- Reserve - in which case they place it face down next to their recruits in their Reserve area. Skip phase 2 (Player Turns) and immediately continue with phase 3 (Commander Draws a Card). The commander may only reserve a card this way if they don't already have a Reserved card in front of them.
Solo game: if the Solo player was the commander in the previous round, there is no commander for the new round and nobody uses CPs. In phase 1, draw a card from the top of the deck and reveal it; it is only reserved by an action. All Sanchos use their action on the revealed card, including the Solo player. When an Auto-Sancho plays the action at the bottom of any card, use the Solo version indicated by the crown icon and ignore the main text of this action.
Phase 2. Player Turns
The commander may choose to take their complete turn at the start of the phase, the end of the phase, or between the other 2 Sancho's turns. During the commander's turn, they will use CPs up to the CP value of the card on one or more CP actions of their choosing, in any order. If the commander has sufficient CPs, they may repeat Recruit, Deploy, Move, and Fortify actions, in any order, but not carry out more than 1 Attack and/or 1 Besiege action per turn. For example, with 3 CPs, the player could use 1 CP to Move, then 1 CP to Attack, then the final CP to Move again.
The commander's action on the card is always skipped.
Carry out these steps in order as follows. Players may wish to use the 2 Action tokens to track the actions completed on the card.
- The commander may take their turn.
- The Sancho, excluding the commander, whose action is higher on the card takes their turn by carrying out the action.
- The commander may take their turn, if not already taken.
- The Sancho, excluding the commander, whose action is lower on the card takes their turn by playing the action.
- The commander must take their turn, if not already taken.
- The commander discards the played card face up in the discard pile next to the deck.
Solo game: on the Auto-Sanchos' turn, the player carries out the actions as indicated on the Action card. For Auto-Sancho tiebreaks, refer to these boxes and the Auto-Sancho Reference.
CP Actions on Commander Turns
Recruit. For each CP spent, the commander takes 1 of their Troop pieces from the Supply and places it in their Reserve.
Deploy. For each CP spent, the commander takes 1 of their Troop pieces from their Reserve and places it either with their King piece (wherever he is on the board, except that you cannot deploy to a besieged King) or into their Home region (as a Field Army or Garrison at the player's choice). If their Home castle is garrisoned by an opponent or besieged, they must place the piece in their Home region as a Field Army.
Solo game: when deploying to the Home region, Auto-Sanchos will place pieces in the Home castle for preference.
Move. For each CP spent, the commander moves their King piece or 1 of their Troop pieces from 1 region into an adjacent region (not into a Garrison space). You may move your pieces from your Field Armies or Garrisons. Pieces being moved do not need to start in the same region. You may move a piece more than once, as long as you pay 1 CP for each move of each piece. There is no extra cost for moving out of a Garrison space. A Sancho is never forced to move the last Garrison piece from a Garrison space and thereby lose victory points. Besieged pieces never move. Opponents' pieces do not block movement.
Solo game: when an Auto-Sancho performs a Move as part of their action, they will only move from 1 selected region to 1 other adjacent region, regardless of the number of points. When moving from a region containing their King on a 2 or 3 CP move, the King will be the second piece moved. If the region moved from contains a Garrison and a Field Army, the Field Army pieces will move first. The King will move from that region as the second piece irrespective of whether he is leading a Garrison or Field Army. Besieged pieces never move. An Auto-Sancho will never move the last piece out of a Garrison space. An Auto-Sancho move is always from its strongest Army to an opponents' weakest Army in an adjacent region, unless the action on a card says otherwise (see Action Terminology); if that is not possible, to an empty region instead.
Fortify. For each CP spent, the commander takes 1 piece (Troop or King) in a region and places it into that region's Garrison space; the space must be either empty or already occupied by them. You may do this in more than one region during a 2 CP or 3 CP Fortify action. You may not Fortify a Garrison space if it is under siege. Move the Score marker on the Score track immediately to record any victory points gained. Victory points count even if the castle or tower is under siege.
Solo game: when an Auto-Sancho carries out a Fortify action as part of their turn, they will only use the King piece if no Troop pieces remain to be used to Fortify. Treat each Fortify point separately. They will always occupy as many empty locations as possible before adding to existing Garrisons.
Example of using 3 CPs with 1 Troop piece: 1 on Deploy to King, then 1 on Move, then 1 on Fortify.
Attack. The commander attacks by spending 1 or more CPs on the Attack action. They only carry out 1 Attack, regardless of the number of CPs they have. Select a region containing your Field Army and/or Garrison, and at least 1 opponent's Field Army. Garrison pieces in a besieged castle or tower may be used for an Attack action, either on their own or in conjunction with a Field Army. Place the Battle token to mark the region where the Attack is taking place (the "Battle region").
Solo game: an Auto-Sancho's priorities to select a region to attack are: most favourable (see Action Terminology), then with own King, then use the tiebreak.
All pieces in the Field Armies of all Sanchos in the Battle region will be involved in the battle. A player (or Nájera under a player's control in a 2-player game) with a Garrison in the Battle region may release as many pieces from their Garrison as they wish to join the Field Army in the battle.
Solo game: an Auto-Sancho will release all of their pieces except one (a Troop piece, if possible), which will stay as a Garrison.
Resolve the attack by following these steps in order:
-
Each Sancho involved in the battle takes a Troop dice of their colour for each Troop piece involved, and their King's Guard dice if their King piece is involved. The attacker also takes additional Troop dice equal to the CPs spent on this Attack action. The maximum number of dice players may have in a battle is 5 Troop dice and 1 King's Guard dice; any extra are lost.
-
Roll all the selected dice. Then, in turn order starting with the attacker's dice and going clockwise round the table, players allocate their dice below the corresponding number on the Battle chart, starting next to the number and working away from the board. A King's Guard 0 is placed at 0!
-
Players with Reserved cards may now play them, one at a time. The attacker plays first or may pass. Play continues clockwise with each Sancho playing one Reserved card or passing. Players may pass and then come back in if an opponent plays a card. This step finishes when all 3 Sanchos pass consecutively. When a card is played, the player reveals it, and chooses a column of dice containing at least 1 of their dice. They must then select as many dice in that column as possible up to the CP of the card to reroll (theirs and/or opponents'); if there are more CPs on the card than dice in the column, ignore the extra CPs. Place the rerolled dice on the end of their new columns. In a 2-player game, the commander chooses if Nájera wants to play a Reserved card, and they choose which column to affect with rerolls. It must include at least 1 Nájera dice. Players discard any played Reserved cards.
-
Starting with the highest numbered column and working towards 0 on the Battle chart, check how many dice there are in each column, skipping empty columns.
- If there is only 1 dice, the owning player removes it and chooses 1 opponent's dice on the Battle chart, putting both dice back into the dice pool. They then take an opposing piece of the same colour and type as the opponent's dice (Troop or King) from the Battle region. Return Troop pieces to the Supply. Return a King to his Home castle space if the King's Guard dice is removed (Home region if the castle is occupied by an opponent or under siege). If no opposing pieces of the same colour and type remain, just remove the dice. If there are no opposing dice to remove, return all remaining dice on the Battle chart to the dice pool, and do not take off any more pieces.
- If there is more than 1 dice in the column, remove all the dice in that column back to the dice pool, and do not take off any pieces.
Solo game, step 3: An Auto-Sancho may only play a Reserved card if the highest single dice on the Battle chart is not theirs. In the Solo game, Auto-Sanchos use their cards differently from players. Instead of rerolling dice, the Auto-Sancho will add CPs from Reserved card(s) to its highest ranking dice, in order to move that dice to be the highest single dice or, if not possible, to be equal to the opponents' highest single dice. The Auto-Sancho will use the fewest Reserved cards to do this. If this is not possible, they pass instead.
Solo game, step 4: An Auto-Sancho will prioritise removing the opponents' highest value dice on the Battle chart that is either a single dice or equal to 1 and only 1 of their dice. If this priority is not relevant, use these priorities: lowest value opponents' dice in a column of 3 or more dice; then, lowest value opponents' dice in a column of 2 dice; then, opponents' dice nearest the Battle chart. If there is more than 1 dice in the column selected for removal of a dice, Auto-Sancho will prioritise removing the player's dice if possible.
Example of a battle. Sancho of Castilla is attacking and spends 1 CP for their Attack action. As all 3 Sanchos have a Field Army in the Battle region, all players will be involved in the battle. The purple cube marks the Battle region. Players will roll the following dice:
- Castilla (red): King's Guard dice, 3 Troop dice (1 for each Troop piece), and 1 extra Troop dice for the 1 CP used for the Attack action.
- Nájera (yellow): King's Guard dice, and 1 Troop dice.
- Aragón (green): Sancho of Aragón decides not to release their Garrison to the battle, so only gets 1 Troop dice.
The players roll their dice simultaneously. Then, starting with Castilla as the attacker, they lay out their dice on the Battle chart at the bottom of the board. Diagram 2 shows 8 dice: a single die in the 1 column, two dice in each of the 2, 5 and 6 columns, and the red King's Guard alone in the 7 column.
Without Reserved cards, the battle would be resolved as follows. Starting with the rightmost (highest numbered) column containing dice, the King's Guard red 7 is a single dice in the 7 column, so Castilla chooses an opponent's dice to remove, which will take a corresponding piece off the Battle region and return it to the Supply. Removing the yellow 2 dice would seem the best, because removing either of the 5s would give an opponent the chance to inflict a casualty with the then solitary dice in the 5 column. Continuing to the left on the Battle chart, the pair of 6s would be removed without casualties, because there is more than 1 dice in this column. Similarly, the 5s would be removed without casualties, then, the single 2 (yellow having been removed earlier) and the single 1 would be removed without casualties. These last dice have no effect, because there would be no opponents' dice remaining on the Battle chart to remove. So, the result prior to playing Reserved cards would be that Castilla inflicts 1 loss on Nájera, and no others occur.
Castilla was hoping for a better result, so plays a 2 CP Reserved card. Castilla has the first opportunity to play a card, because they are the attacker. They may choose any column containing one of their red dice, and the player chooses the 6 column. They must reroll both the 6s, because you have to use all the CPs on the card if you can (Castilla has played a 2 CP card). Castilla rolls a 5 and a 3.
Nájera is the next player round the table. They don't want to lose a piece, particularly not their King. So, Nájera plays a 1 CP card and rerolls their King's Guard dice, hoping for a 9 or 7, but rolls 0. Disaster!
Aragón has no Reserved card, so the turn comes back to Castilla. Players may use more than 1 Reserved card in a battle, but no one has any left in this example, so we continue on to the final result of the battle. Starting with the red 7, Castilla uses this single dice to remove the green 5, and the sole corresponding Troop piece of Aragón. Continuing to the now solitary red 5, Castilla uses this single dice to remove the yellow 2 dice, and its matching yellow Troop piece. Finally, Castilla uses the single red 3 dice to remove the yellow King's Guard dice, and therefore Nájera's King piece, resulting in a clean sweep for Castilla.
Example of a battle including an Auto-Sancho. The player is Aragón, and Auto-Sancho is Nájera. The player has their King piece plus 2 Troop pieces. Auto-Sancho has 3 Troop pieces. The player has no Reserved cards, Auto-Sancho has a 1 CP and a 2 CP Reserved card. The player attacks with 2 CPs, and rolls King's Guard plus 4 Troop dice. The player rolls 3 Troop dice for the Auto-Sancho. Player dice: King's Guard 7, Troops 3, 3, 4, 6. Auto-Sancho dice: 5, 6, 6. (Example A: column 3 has two dice, column 4 one, column 5 one, column 6 two, column 7 one.)
As Auto-Sancho does not have the highest single dice, it must play its Reserved cards if it is able to get either the highest single dice, or equal to the opponents' highest single dice. In this case, it plays its 2 CP value card to boost one of its 6 dice to the 8 column, which places it as the highest single dice (Example B). Note that if it only had a 1 CP card, it would have played that card, because, if it was not able to get the highest single dice, it would still equal the opponents' highest single dice, if possible.
The player has no Reserved cards, so the final outcome of the battle is as follows. Auto-Sancho's dice in the 8 column eliminates the player's King's Guard dice and King piece. The 2 dice in the 6 column are removed for no losses. Then, Auto-Sancho's solitary 5 removes the player's 4 and eliminates one of the player's Troop pieces, and the two 3s are removed as before. The player loses their King and a Troop piece, while Auto-Sancho loses nothing.
Besiege. The commander besieges a garrisoned castle or tower (not already under siege) by spending 1 or more CPs on the Besiege action. They may only carry out 1 siege, regardless of the number of CPs they have. For each CP spent, they may stack up to 2 pieces (Troop or King) from their Field Army on top of the Garrison as Besiegers. Select a region where you have a Field Army and an opponent has a Garrison. You may only perform a Besiege action if the number of besieging pieces exceeds the number of pieces in the Garrison by at least 1.
Solo game: when an Auto-Sancho performs a Besiege action, they will place a maximum of 1 more than the number of Garrison pieces onto the Garrison, if possible. Their King will only join the siege if no other pieces remain.
Interception: If the Sancho owning the Garrison has any pieces in a Field Army (not in the Garrison space) in the region of the Besiege action, they may attack the Besiegers before the siege. Interception does not count against that Sancho's actions for the round. It is optional and may be done only once for each Besiege action. If they intercept, resolve a battle as normal, but only the intercepting Sancho and the Besieging Sancho participate. They only use dice equal to the number of intercepting and besieging pieces; do not include any additional dice for attacking. Sanchos may use Reserved cards as normal. Note: depending on the number of CPs spent on the Besiege action, the target of the interception (the Besiegers) might not include the whole Field Army of the besieging Sancho in this region. After the interception has been resolved, the Besiegers may continue with the siege if they have sufficient pieces remaining, regardless of other survivors of the battle.
Solo game: an Auto-Sancho will always oppose a Besiege action by another Sancho with their Field Army if they have one.
Example of a Besiege action: Aragón's Army takes a 1 CP Besiege action, enabling the King piece and 1 Troop piece to attempt to besiege the castle held by Castilla. Castilla's single Troop piece in its Field Army intercepts (attacks) the Aragónese to try to prevent the siege. The Garrison is not permitted to help with this interception attack. The Aragón player rolls the King's Guard dice and 1 Troop dice, while the Castilla player rolls a single Troop dice. If the Castilla Field Army manages to remove the King's Guard or the Troop piece, the Aragónese force will be reduced to only 1 piece, which is less than the minimum pieces required to besiege the castle (Garrison strength plus 1), so the Aragón Army will remain where it is. If Castilla fails to cause a casualty in the battle, then the 2 Aragón pieces may besiege the castle.
A siege is broken in 1 of 3 ways:
- When pieces belonging to a Sancho other than the Besieger attack in that region. At this point the siege ends, and all the Besiegers become normal Field Army pieces. If the Besieged pieces are player pieces, the owning player may choose to join the battle or to leave some or all of the pieces in the Garrison space.
- The besieged Sancho may break the siege by taking the Attack action with all the Garrison pieces. Place all the pieces (Besieged and Besiegers) into the main part of the region and resolve the battle. After the battle, the Garrison space will be empty.
- If the Besieger moves some of their pieces involved in the siege, such that the Besiegers have equal to or fewer pieces than the Garrison, the siege ends immediately. Move the former Besiegers off the Garrison piece(s) into the main part of the region.
In the above example, if Aragón besieges the castle, the Castilla player could break the siege during their turn by attacking with the Garrison, or the Field Army, or both before the siege is over.
Actions on Non-commander Sancho Turns
The actions on Non-commander Sancho turns follow the rules for the corresponding CP actions described above, but the Sancho named on the action takes any required decisions (in a 2-player game, the commander decides for Nájera). If a card uses an action keyword, such as Move or Fortify, refer to the CP actions to see how the action is carried out. References to "points" on the cards equate to CPs in the CP actions in the rules; for example, "Fortify 1" on a card means the same as using 1 CP for a Fortify action.
Some card actions allow players to reserve cards even if they have a Reserved card already.
The actions on the cards must be carried out as fully as possible, even if it is to the detriment of the Sancho taking their turn. The card text dictates what happens and sometimes represents the cunning of the commander luring an opponent into performing an action they would rather not take or failing to take an action at all, because they cannot carry it out!
The first 2 actions on each card dictate a specific action that must be performed, if possible, by the Sancho named on the action. These actions are explained on the cards, but the terms used are defined in more detail under Action Terminology.
The third action on each card contains multiple opportunities and a restriction on the number of times each may be carried out. If the commander's Sancho is the one named on any action, that player must use their CPs and not the described action.
When establishing which Army to activate or region to use, the player taking their turn must follow the text on the card in strict sequence, referring to the Action Terminology below where necessary.
If there is a tie between Armies or regions (for example, 2 Armies of the same strength when selecting the strongest Army), the player taking their turn chooses between them (in a 2-player game, the commander chooses for Nájera ties).
Solo game: if the action belongs to an Auto-Sancho, the player performs it for them, but must adhere to the Solo play instructions. If there is a tie during an Auto-Sancho's action, check which of the Auto-Sancho decision arrows is visible, and activate the corresponding highest or lowest numbered tied region. Then move the Tiebreak token to cover the arrow just used. Refer to the Auto-Sancho Reference for the tiebreak priorities for each action.
Once the relevant Army or region has been selected, follow the instructions as much as possible. In a 2-player game, the actions of Nájera are carried out by the commander.
Action Terminology
For army, Field Army (including Besiegers), and Garrison, see Armies, Field Armies, and Garrisons.
Strongest Army: Check to see which region has the most of that Sancho's pieces, including Field Armies and Garrisons, but not Besieged pieces. The King is counted; an Army with a King piece is stronger than an Army with the same number of pieces, but no King piece. No Sancho is forced to move the last piece from a Garrison space (in a 2-player game, Nájera will never do this). (Solo game: Auto-Sanchos will never move the last piece from a Garrison space.)
Move... to Opponent's Weakest Army: Check to see if any of the regions adjacent to the selected strongest Army contain opponents' pieces, including Field Armies and Garrisons, but not Besieged pieces. If they do, select the one with the fewest individual opponent's pieces in it; an Army without a King is weaker than an Army of the same size with a King. When moving to an opponent's weakest Army with a Move 2 or Move 3 action, move each piece only once (into the adjacent region).
Empty region: Region with no tokens in it adjacent to the selected strongest Army.
Most favourable: Count the Sancho's pieces in the region. Subtract the number of all opponents' pieces in the region. Select the region with the highest result.
Recruit remaining points: After deploying all Troop pieces from their Reserve, the Sancho spends the remaining points recruiting.
Deploy to Home region: Place Troop pieces from Reserve into their Home region (as a Field Army or Garrison at their owner's choice). If their Home castle is garrisoned by an opponent or besieged, they must place the pieces in their Home region as a Field Army. (Solo game: Auto-Sanchos will place them in the Home castle for preference.)
Deploy to King: Place Troop pieces from Reserve to the Field Army or Garrison space containing their Sancho's King piece.
Reserve this card at end of round: This happens when the card would normally be discarded. Instead, the Sancho places the card in their Reserve even if they already have card(s) reserved. Place all Non-player Sancho Reserved cards face up with CP showing. Place players' Reserved cards face down; the owning player may look at them at any time.
If not possible: Only carry out the alternative action if you cannot use any points for the initially stated action. For example, "Fortify 3. If not possible, use 3 points to Besiege most favourable"; if you are able to carry out at least 1 point of Fortify, you cannot Besiege. Note: you cannot use both actions; for example, "Attack, if not possible Move"; if you cannot Attack, you must Move, but you cannot use 1 point to Move, and then another 1 point to Attack.
Phase 3. Draw a Card
The commander draws 1 card from the deck and adds it to their hand. If the deck is now empty, skip this phase for the rest of the game.
Phase 4. Siege Losses
For every siege, remove 1 piece from the Garrison and 1 piece from the Besiegers back to the Supply. If present on either side, the King piece will always be the last piece removed from a siege; place him in his Home castle Garrison space if removed; if the Home castle is under siege or enemy occupied, place him in his Home region outside the Garrison space. If the besieged Garrison space is now empty, the Besieger puts all their pieces taking part in the siege into the Garrison space to occupy it.
Remove siege losses for all sieges before adjusting the Score markers for any castles and towers that changed hands. This could result in one or more Sanchos having 10 or more victory points; see Winning.
Winning
The game ends and a winner is declared in one of the following circumstances:
- At any time a single Sancho has 10 or more victory points, in which case they claim a major victory. This may happen after any action in a Sancho's turn in phase 2, or at the end of phase 4 of a round.
- When all players' hands are empty, complete the round. The Sancho with the most victory points at the end of the round claims a minor victory.
In a 2-player game, non-player Nájera wins in the same ways as any player Sancho.
In the event of a tie, the tied Sancho with the most occupied Garrison spaces wins. If there is still a tie, the Sancho with the most Troop pieces on the board wins. Otherwise, the tied Sanchos share the victory.
Solo game: if neither the player nor the combined Auto-Sanchos have 10 victory points, the game ends in phase 3 (Draw a card), when the deck is empty and a card needs to be drawn, in which case the player or combined Auto-Sanchos with the most victory points claims a minor victory. The Auto-Sanchos win if points are tied.
El Cid
If all players agree, players may include the optional El Cid card in a 2- or 3-player game. See the Solo Campaign Challenge for El Cid in Solo games. Rules for El Cid are on the card, but repeated here.
During battle only, El Cid counts as a Reserved card. A commander who has claimed El Cid is not prevented from Reserving a main deck card in the normal way.
- Set-Up - Put the El Cid card face down in the Supply area.
- Claiming - At the end of each round, check the Score track. If 1 player (not a Non-player Sancho) has a lower score than all the other Sanchos, that player takes the El Cid card from the Supply or from another player's Reserve area and places it face up in their own Reserve area. El Cid stays in the player's Reserve area until that player plays it, or another player claims it.
- Playing - The player with this card may play it as a Reserved card to move 1 of their own dice left or right 1 space on the Battle chart. After the El Cid card has been played, return it to the Supply face down. It may be claimed again at the end of the current round or any subsequent one.
Solo Scenarios
- Player is Aragón. At the end of normal set-up, place from the Supply as Field Armies: 2 Castilla Troop pieces in Region 1, and 2 Nájera Troop pieces in Region 8.
- Player is Castilla. At the end of normal set-up, place from the Supply as Field Armies: 1 Aragón Troop piece in Regions 8 and 12, and 1 Nájera Troop piece in Region 9.
- Player is Nájera. At the end of normal set-up, place from the Supply as Field Armies: 1 Aragón Troop piece and 1 Castilla Troop piece in Region 8.
On the Solo side of the board, home castles are worth 2 victory points instead of 3. The 2 Auto-Sanchos combine their victory points in a fragile alliance; use only 1 Score marker for the 2 Auto-Sanchos. They will continue to attack each other as normal. For a harder game, use the difficulty levels described under the Solo Campaign Challenge. For an easier game, use the El Cid card, as described under the Solo Campaign Challenge.
Solo Campaign Challenge
For a Solo campaign, play a sequence of games as each Sancho in this order: Nájera, Aragón, Castilla. The campaign challenge uses difficulty levels (see below). Start at Normal or Hard level, dependent on your experience and skill. Keep playing as a specific Sancho until you win a game as that Sancho. If you win a game, increase the difficulty by 1 level, and move to the next Sancho in priority order. If you lose a game, stay at the current difficulty level and play the next game with El Cid on your side (except if Aragón, see El Cid below).
To win the campaign, you must win 1 game as each Sancho and lose no more than 2 games in total.
Difficulty levels:
- Normal - use the standard set-up for Solo play. Remember to include the opponents' extra Troops in specific non-home regions.
- Hard - as Normal, then add 2 Troops to each Auto-Sancho's Reserve in set-up.
- Very Hard - as Hard, then add 1 extra Troop piece to each Auto-Sancho's main Field Army and to each of their outlying Field Armies in set-up.
- Epic - as Very Hard, then also modify cards as follows: during set-up, find the 9 cards with your Sancho's action at the bottom of the card. Shuffle the three 1 CP cards and set 1 of them aside, returning the other 2 to the deck. Do the same in turn with the three 2 CP cards, and the three 3 CP cards. Take the 3 set-aside cards, shuffle them, and deal 1 of them at random face up to each Auto-Sancho's Reserve as a Reserved card and remove the third one from the game. Finally, shuffle the deck, which will now consist of 24 cards.
- Impossible - if you find that Epic level is not difficult enough, start the campaign challenge at Very Hard level instead of Normal or Hard. You must win all 3 games in a row without losing a game. In addition, for your final Epic game as Castilla, you must win with a major victory (have 10 or more points before the end of the game and before the Auto-Sanchos).
- El Cid (easier game) - when playing either Castilla or Nájera, put the El Cid card into play at set-up. Note: he will not serve Aragón in the Solo game! Only the player may claim and play El Cid. Otherwise, follow the normal rules for El Cid, except that you compare your score to the combined Auto-Sancho's score.
Auto-Sancho Reference
"/" is next tiebreak rule. "TB" means use the Tiebreak token.
Actions - If tied, resolve tie; if Tiebreak token used, slide it to cover other arrow.
- Move: King is always 2nd piece moved (unless King is only piece in Garrison). From Field Army first. Strongest Army to opponent's weakest Army / TB. If no adjacent opponent, empty region / TB.
- Attack region: Most favourable / With own King / TB.
- Strongest Army = Region with most pieces / With King / TB.
- Weakest Army = Region with fewest pieces of any single opponent / Without King / TB.
- Fortify = Most unoccupied victory points / Auto-Sancho's smallest Garrison / Auto-Sancho's largest Field Army / TB.
- Fortify empty Garrison space = Most victory points / Auto-Sancho's largest Field Army / TB.
- Besiege = Most victory points / no opponents' Field Army / smallest Garrison / TB.
- Most favourable = Number of pieces Auto-Sancho has in a region minus all opponents' pieces in that region: select region with highest result / TB.
Round Sequence - Solo Changes: If the player was the commander in the previous round, there is no commander for the new round and nobody uses CPs. In phase 1, draw a card from the top of the deck and reveal it; it is only reserved by an action. All Sanchos use their action on the revealed card, including the player.
Solo Game End: The Solo game ends with a major victory if a Score marker reaches 10 or more victory points, or a minor victory to the side with most victory points (player or combined Auto-Sanchos) when a card cannot be drawn. Auto-Sanchos win if points are tied.
Attack Steps:
- Use Reserved card(s) - Only plays if highest single dice is not theirs. If enough CP on Reserved cards to move its highest dice to top (or second preference, equal top), does so. If played, uses minimum number of cards.
- Resolve - Auto-Sancho targets opponents' highest dice that is a single, or nullifying exactly 1 of its own dice / Lowest value opponents' dice in column of 3 or more dice / Lowest value opponents' dice in column of 2 dice / opponents' dice nearest the Battle chart. If there is a choice, prioritise removing the player's dice.
Player Aid
Round Sequence
- Commander chooses: Play or reserve a card (if has no cards reserved).
- Player turns. Commander takes turn before, after, or between the other Sancho's turns. Commander must use CPs. Other players take actions in order on card.
- Commander draws a card. Skip if deck empty.
- Siege losses - for every siege.
Home castles are worth 3 points, neutral castles 2 points, towers 1 point. Game ends when a single Sancho has 10 victory points or end of round using last card. The player with most victory points wins. Tiebreak: most Garrison spaces occupied, then most Troops on the board.
Command Point Actions. Commander spends CPs on 1 or more action types in any order. Per point:
- Recruit - Troop from Supply to Reserve.
- Deploy - Troop from Reserve to Home region or to King.
- Move - King or Troop to adjacent region.
- Fortify - Only Garrison space empty or controlled by you.
- Attack - See below.
- Besiege - See below.
Attack
- Declare region for battle. All players take a dice for each of their pieces (may join from Garrison). Active player +1 dice per CP / action point.
- Dice rolled and allocated.
- Use Reserved card(s) - clockwise until all pass. Reroll as many dice as possible up to x dice (any) from column with your dice, where x is card's CP. Reallocate dice to the new numbers.
- Resolve columns highest to lowest. i) If multiple, remove all dice in column. ii) If single, owner removes it, and eliminates a dice and matching piece of an opponent, if able. Removed King returns to Home castle.
- Finish when all dice removed.
Besiege
- Declare region and number of Besiegers for siege. There must be a Defender in the Garrison space.
- Defending Field Army (not Garrison) may attack pieces trying to besiege.
- Place more pieces on target than defender has; up to 2 pieces per CP / action point spent.
At the end of each round of siege: Both sides lose 1 piece from each besieged castle or tower. King last. Siege ends immediately when no defending pieces in Garrison space; or if Besiegers are attacked by Besieged or Field Army; or if Besiegers no longer have 1 more piece than Besieged.
Hints on Play
Each King Sancho has different strengths and weaknesses in the Action cards. Your opponents are likely to have to play cards to your strengths, but where you are weak, you may want to choose these actions more often yourself, when you are the commander for the round.
Sancho I of Aragón's strengths lie in deploying Troops, reserving cards for battle, and besieging castles and towers. Aragón is weaker in relation to fortifying and attacking, and cannot force opponents to discard Reserved cards.
Sancho II of Castilla has a lot of Fortify actions, but may only carry out a siege if fortifying is not possible. He may deploy Troops relatively easily, particularly directly to the King, but has fewer Attack actions than Nájera.
Sancho IV of Nájera has a central position on the board, and fewer actions to deploy Troops. In compensation he has more Attack and Move actions than the other Sanchos, and greater flexibility for fortifying and besieging.
Be aware not only of the possibilities of your own position, but also of how you might manipulate your opponents.
El Cid Inspires! (Optional Variant, January 2024)
Official optional variant from the publisher: this variant amends the optional El Cid rules and uses the El Cid piece supplied with the Gamefound version of War of the 3 Sanchos.
El Cid does not count as a piece for deciding on the size of armies, he cannot garrison a castle or tower, and players cannot spend CPs or action points to use El Cid.
Set-up. Place El Cid with the El Cid card in the Supply.
Claiming. A player (not a non-player Sancho) may claim the El Cid card as specified on the card and in the El Cid section of the rulebook. A player may use El Cid and/or the El Cid card ability only if they have the El Cid card. When a player claims the El Cid card, they may immediately move El Cid to any region on the board.
Playing El Cid. A player who has claimed the El Cid card may use the card's ability only if El Cid is in the Battle region. If there is a battle involving the pieces of the player with the El Cid card, that player may place El Cid directly into the Battle region from anywhere on the board, and optionally use El Cid's inspire ability to attempt to move their own pieces with El Cid directly into the Battle region too.
El Cid Inspires! This optional ability may only be used immediately before a battle, and only if you hold the El Cid card and choose to move El Cid into the Battle region. Roll Troop dice equal to the number of your pieces (Troops and King) in the region containing El Cid. When you move El Cid from that region into the Battle region, for each dice scoring 4 or more, you must move one of your pieces with El Cid from his current region into the Battle region. You choose whether or not to include your final garrison piece if you have one (you are never forced to move your final garrison piece).
Moving El Cid or your pieces in this way does not cost any CPs or action points. You do not have to be Commander for the round to use El Cid.
If you used El Cid to inspire and/or played the El Cid card ability, return the card and the piece to the Supply at the end of the battle.
Note that you may use El Cid if any Sancho starts a battle involving your pieces, not just yourself.
Example: Nájera, the yellow player, has a Field Army of 1 Troop piece and their King in their Home region and 2 Troop pieces garrisoning it. At the end of the round, Nájera has a lower score than both other Sanchos, so they claim the El Cid card and put it in their playing area, and at the same time move El Cid to their Home region.
During the next round, the yellow player spends a CP or action point to attack Aragón in their Home region with their single Troop piece. As this is a battle involving at least 1 of their pieces, they use El Cid to try to get more pieces to the battlefield. They roll 4 Troop dice, 1 for each Troop and King they have in the region El Cid occupies, rolling 1, 3, 5, and 5 (2 successes). The player must now move El Cid to the Battle region, together with 2 pieces, choosing their King and 1 Troop piece. It is likely that Nájera will win this battle and might subsequently use further points to besiege Aragón's castle.
If the yellow player had rolled 4 successes, they would only have had to move 3 pieces; you do not have to move out your final garrison piece.
After the battle, the yellow player returns the El Cid card and piece to the Supply.
Alternative use for El Cid: instead of this variant, you might use El Cid simply as the Battle marker if the player with the El Cid card has pieces participating in the battle. At all other times, place El Cid with his card.