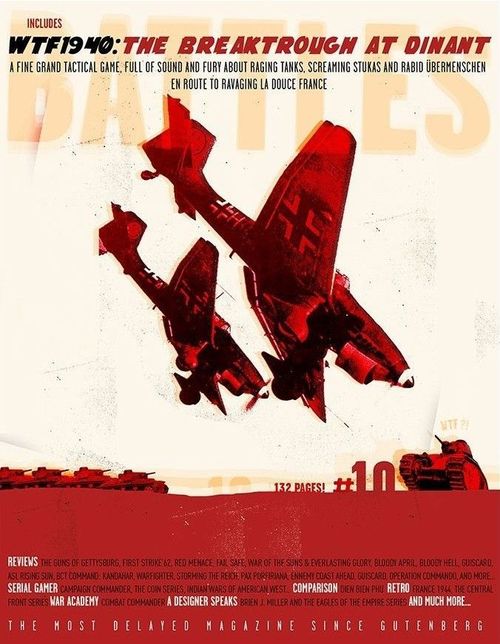
War of Tanks: France 1940 – The Breakthrough at Dinant
War of Tanks: France 1940 – The Breakthrough at Dinant Rulebook
Table of Contents
Table of Contents
Design Notes
This game is very freely inspired by the excellent Rommel At the Meuse, a game by Randy Moorehead, published as a DTP by Simulations Workshop in 1995, and that I discovered in 2012 thanks to a certain Markus Stumptner's eulogies on BGG. I advise you to try it; the game is excellent. WTF1940 and RatM are two different games and two very different systems, but the issues and the salient points of the battle had already been well thought out and built into RatM. Randy's game was a wonderful canvas upon which I was able to embroider my own version. My thanks go to him.
Glossary
- BCC – Bataillon de chars de combat (Combat Tank Battalion)
- BDAC – Batterie divisionnaire anti-chars (Divisional Anti-Tank Battery)
- CHAS – Rgt de Chasseurs (Chasseur Regiment, Cavalry)
- DCR – Division Cuirassée (Armoured Division)
- DLC – Division légère de cavalerie (Light Cavalry Division; light armour and cavalry)
- DIM – Division d'infanterie motorisée (Motorised Infantry Division)
- DINA – Division d'infanterie nord africaine (North African Infantry Division)
- DRAG – Rgt de Dragons (Dragoon Regiment, Cavalry)
- EDAC – Escadron divisionnaire anti-chars (Divisional Anti-Tank Squadron)
- GRCA – Groupe de reconnaissance de Corps d'Armée (Corps Reconnaissance Group)
- GRDI – Groupe de Reconnaissance Divisionnaire (Divisional Reconnaissance Group)
- GRDIM – Groupe de Reconnaissance Divisionnaire Motorisé (Motorised Divisional Reconnaissance Group)
- RAM – Régiment d'autos-mitrailleuses (Armoured Car Regiment)
The Map
The playing surface of the game is, down to a few rows of hexes, the same as that of RatM. I just wanted to add Godinnes and its bridge to the north and a few kilometres to the east of the Meuse. It was tempting to enlarge the map by 3 or 4 hexes to the north and the south, to include Givet and Pronfondeville, and this was trialled in an earlier version of the game. However that generated too many 'what-if' possibilities that did not necessarily fit in with the main aim of the game. The terrain is much more hilly, contains more villages and wooded areas. I went there last year (I wouldn't advise anyone to spend an evening, alone, in winter, in Dinant) and I also used a Michelin map from 1937 (without doubt the same map that the panzer divisions used in 1940). The terrain of the Battle of Dinant was as difficult to attack, as it was to defend (the Americans in 1944 were to call it with a little exaggeration, "the Belgian Colorado"). This, amongst other things, is what I hope the "2 battalions only" rule simulates for certain movements and combats. As a general rule, having organised units moving away from the main roads should be anything but simple. (It should be noted that what is represented for simplicity's sake on the map with the same symbol as a cliff, in fact represents several kinds of terrain with the same potential effect: cliffs, steep hill sides, ravines and complex terrain of all kinds). The artillery observation posts at Haut le Wastia and on the Sommières plateau restore the importance these two hexes had during the battle. They were fought over until the evening of the 14th and changed hands several times in the course of bitter fighting. These two hexagons could perhaps have changed the course of the battle if the French artillery had been in position, dug in, and supplied in time. Perhaps...
Order of Battle
- The two French DLCs were sent east of the Meuse at the start of the German attack to slow down its advance. On the 12th of May, in view of the infantry divisions' delay in taking up their positions, the order was given to the DLCs to retreat. It's quite difficult to know exactly which units of these two divisions actually took part in the battle we are concerned with, and in what condition they were in at that point. I've chosen to figure all the units mentioned at least once in the numerous, and sometimes greatly contradictory, sources I consulted. Their condition at the start of the game depends on the accounts of the combats they were involved in east of the Meuse. If you have sources that indicate an error in my judgement, please let me know. In any event I have decided to include the units that I haven't featured in the battle on the counter sheet (their designations are in white on the counters); in this way you can correct things on your own if necessary.
- There are also mentions of the presence of Belgian Chasseurs Ardennais at Yvoir, without any source specifying whether this only consisted of a few rear-guard engineer units (see the historical article, Lieutenant De Wisplaere) or if these constituted the remains of formations which had fought at Bodange, Martelange etc. The most likely answer is that these were elements of the 5e Régiment de Chasseurs, containing engineer units. This formation was attached to the French 5e DIM.
- The presence of 6 BCC (R35 tanks) also has very few mentions in the sources. There is confirmation in its War Diary that its 3 squadrons took part in the Battle of Dinant. Rather than form a mobile shock unit out of the battalion, the general staff, in line with the idiotic doctrine of the day, dispersed its R35s to the four winds to act as infantry support. They were to be seen nonetheless accompanying AMRs of 1er RAM (which by the by, contained a certain Félix Revenu in its ranks - my grandfather) counterattacking successfully at Haut-le-Wastia, and taking around fifty German prisoners in an attack on the German bridgehead at Houx. But without proper infantry support they were unable to exploit their success.
- 18e and 22e DI were weak. They had to reach their positions by forced march and did not have time to ready themselves. More than 50% of their AT guns were either missing or had never been issued.
- II/39 RI of 5e DIM starts the game in "disorganised" status. Orders, counter-orders, delays, the retreat of the I/66 ... (see the historical article). This status is without doubt a little exaggerated, but it allows the game to simulate, at little cost, the unit's delayed arrival at the Houx position that became the German's first bridgehead.
- The B1 Bis is the only unit with 3 step losses. Its impressive armour and the terror it inspired amongst the enemy infantry at the start of the campaign were definite advantages. However its many design faults always prevented it from becoming the decisive arm it should have been. In mobile warfare against moving targets it was sometimes greatly handicapped; hence the penalty in tank versus tank combats. In short, it was a mechanical mastodon, difficult to beat but incapable of winning. Nonetheless, at the start of the campaign these steel giants still had an effect on the enemy's morale. Therefore the first enemy troops who have to face them suffer a -2 penalty in combat. The supply problems that lay behind the Flavion disaster are represented by the rule "The Elephants".
Crossing the Meuse (design)
In its general outline this part of the rules is virtually identical to that of RatM. The ease of crossing is, a little artificially admittedly, determined according to the nature of the terrain bordering the river. The more inhabited the zone, the "easier" it is to access and to find a means of crossing the river; the more complicated the terrain, the more "difficult" the crossing will be. I have left a rating of 4 at the historical crossing point on the île de Houx. I advise you to read these rules (6.0) carefully before beginning to play. The game can very quickly get bogged down if the German player does not use all of his options effectively. You have been warned.
Combat (design)
Rather than a large offensive in the manner of a pitched battle, it was more a succession of chaotic attacks and counter-attacks, of daring displays of initiative and swift advances, of retreats and reorganisations. The German breakthrough, as spectacular as it may have been, was the result of stubborn, bitter and costly fighting. Given the scale and the nature of this battle, it was important to retain a significant tactical feeling to the combat system, hence the hex against hex system and also simultaneous combat. The system of secret Damage chits became necessary after several game tests showed a German advance that was too easy, not from the point of view of raw results, but in terms of planning and decision-making. This secret recording of damage forces the German to plan reserves and to organise reconnaissance in force. It also allowed a better integration of the notion of simultaneous operations while adding a necessary dose of uncertainty and chaos. In light of the game's time scale, and of the violence and speed of the German advance, the results of engagements or reports on the troops' condition were slow to get back to HQs, or did not get back at all; orders were given late or with incomplete knowledge of the situation. It is this that the system of secret Damage Chits seeks to simulate.
The system can sometimes produce results that are a little abstract (for example when you attack a hex which in the end turns out to be clear of any enemy), but in the end nothing irrational, quite the reverse; nor is there anything that cannot easily be rationalised. It certainly makes combat a little less fluid (having to apply the results of the preceding combat when you are starting a new one can be a little disconcerting before you get used to it), but it's a minimal sacrifice and one that in my view is necessary given the advantages it confers.
Tactical Chits (design)
These allow the addition of some chrome without overloading the rules, bringing out particular points or details of the battle without generalising them; they also add an interesting random variable that affects both game play and decision-making.
Battleplan (design)
An early version of the rules planned for a simple orders system. But summary as it was, it already made the German attack too rigid, an attack that in fact was marked by the flexibility and the initiative of its commanders. The Battleplan does however force the German to try to follow a pre-determined plan and objectives while still allowing him a historical flexibility of action. I hope this will simulate the tensions already existing between the impetuous Rommel and the German high command, intimidated as it was by the success of its own Blitzkrieg. The German player (i.e. the commanders on the ground and in particular Rommel), while directing the battle as he intends will have to take care he reassures the high command and keeps it happy.
Warning
The game is perhaps more complex than you may have expected after having read the rules (this is what has come out of the playtests). It also needs a German player at the top of his form to achieve the historical result and equal the young Rommel, but a lesser result will still assure an honourable victory. This game is long. Players should reckon on 9 hours or more for the complete historical scenario, if you are playing fast. For my own part I wanted to see this battle unfold step by step on the map in front of me. I think it has been achieved. Fortunately 2 shorter scenarios have been provided, each of which covers the two parts of the battle: crossing the Meuse and establishing the bridgehead as the first scenario, and the breakout towards the west as the other.
Rules of Play
1 - Outline
1.1 Scales
- One hexagon corresponds to approximately 1 mile or 1.6 kilometres.
- A combat unit represents in general a battalion, sometimes a regiment, and a company (or squadron) for tanks and some other units.
- A day comprises 5 turns (4 day, 1 night).
1.2 Units
- The term 'unit' in the rules is used to define any combat unit counter, no matter its size. One unit = one unit counter.
- Those units whose divisional or corps designation is in italics are attached units (a detail given just for information, and which does not affect the rules).
- The term 'motorised unit' includes mechanised units.
- Units are defined by their Combat Factor (CF), their quality (Q), and their movement points (MP).
- The quality of a unit represents a mixture of morale and experience, the quality of its equipment and of its training. Above all it is a measure of the unit's ability to react effectively.
- Units with a white CF suffer a penalty of -1 in combat if the enemy's point unit (see 3.3.2) is a tank unit. Units with a yellow CF have a bonus of +1 in combat if the enemy's point unit is a tank unit. Units with a red CF have a bonus of +2 in combat if the enemy's point unit is a tank unit.
- Units with a white or a coloured band under their designation, along with tank units, are companies, squadrons, AT guns or platoons. In the rules they are referred to as 'small units'. For convenience's sake, the others are called 'battalions'.
- Warning! 3 small units correspond to a battalion for most purposes. Each time you see a reference to 'battalions' in the rules, you may add 'or 3 small units' - unless otherwise specified.
- Units with their MP in white are considered 'mobile'.
- A 'divisional unit' is a unit taking orders from a divisional HQ, and a 'non-divisional unit' is a unit taking its orders directly from a corps HQ.
- Units have from 1 to 3 step losses. A unit which has lost a step is eliminated if it has no other steps remaining, is turned onto its reduced side if possible or is replaced by the counter featuring its 3rd (final) step (B1bis only).
- HQs follow particular rules (see 7.3).
1.3 Stacking
- A hex may contain up to 3 battalions.
- Stacking is checked at the end of movement. A stack of units may therefore exceed stacking limits while crossing a hex. However should it do this while travelling along a road, or a major road, it must spend 1 extra MP.
- There may not be any more than 3 tank units in a hex, movement excepted.
- A unit may never stack with an enemy unit nor cross a hex containing an enemy unit.
- HQs do not count for stacking purposes.
- In any case of overstacking problem, slap your opponent.
1.4 Fog of War
The opponent's stacks may never be examined (in front of a witness).
1.5 Rounding Off
Fractions are always rounded down to the nearest whole number.
1.6 ZOC
- In general, a battalion or a tank unit projects a zone of control into the six hexes surrounding it, known as ZOC. An EZOC is an enemy unit's ZOC. Exception: artillery units do not project ZOCs.
- A unit may not project a ZOC across the Meuse, or across a river (even where the river is crossed by a bridge).
- Units cannot project ZOCs into Rough Terrain or towns. They can project ZOCs into villages.
- At least 2 battalions are required to project a ZOC from a Rough Terrain hex, or across a ridge.
- If a unit moves directly from one EZOC to another EZOC, the units in the hexes exercising the ZOCs may reaction fire (see 3.3.8) once the unit has reached its destination hex.
- If the two EZOCs are exercised by the same hex, the reaction fire still takes place in the destination hex, but using the least favourable Terrain Modifier for the moving unit (either the departure hex, or the destination hex).
- This is the only automatic effect of ZOCs.
1.7 Quality Test
- At several points in the game a unit may be required to undergo a quality test. The player rolls 2D6. If the result is the same as, or lower than, the unit's Quality rating it has passed the test. If not, it has failed.
1.8 Damage Chits
At the start of the game place all the Damage Chits face down in the 3 spaces provided on the map. As the game progresses, used chits are placed in the 'Spent' box of their particular space. Once all the chits of a category (green, red or black) have been used, take them out of the 'Spent' box and replace them in the main space, face down and 'shuffled'.
2 - Sequence of Play
-
Each player draws his Tactical Chits (except on Turn 1). 2 chits for the French player, 5 for the German player.
-
Repair phase: on turns 3, 8 and 13, the German player rolls 1D6 for each non-disorganised reduced tank unit that is in command and not in an EZOC. On a roll of 1 to 3 the unit returns to full strength.
-
1st German Operations Phase (except on turn 1). The German player may activate:
- his choice of up to 1D6 units at the start of the game.
- up to 1D6+3 units from the moment he has, or has had, at least one unit, in command and not disorganised, in any hex of the column 17XX, at the West of the Meuse.
-
French Operations Phase. The French player activates all or part of his units.
-
2nd German Operations phase. The German player activates all or part of his units - unless already activated in (3).
-
End of turn.
Exception: units that remain disorganised act differently (see 3.3.5).
3 - Operations
3.1 Activations
- An activation consists of selecting a number of units in the same hex and making them act together. Exception: artillery units do not need to be in the same hex to be activated at the same time. (See 4.0)
- In general the player can select up to 3 battalions in one hex per activation (see restrictions below for combat and movement in Rough/Ridge Terrain).
- An activation must be completed before starting another.
- When a player activates a unit:
- if it is affected by a Damage Chit (see 3.3.3), he turns the Damage Chit over and applies the effects to all the units concerned.
- then, if the unit is disorganised he attempts to reorganise it (see 3.3.5).
- The selected units may attack an adjacent hex, or move, or move and attack a hex adjacent to their arrival hex, at a cost of 1 extra MP. Exception: "mobile" units are not required to expend the supplementary MP.
- Except for special cases, a unit may only be activated once per turn. We advise you to rotate activated units through 45° to identify them.
- Units that have been activated together must act together and in the same way.
3.2 Movement
The Terrain Effects Table gives the MPs required to enter a hex. Note: If the border between two hexes is represented by two ridges (ex: 1604/1603), only apply the modifier once.
3.2.1 Restrictions
- Units, except mobile units, must expend an extra 1MP to fight after moving.
- In rough terrain, a maximum of two battalions may move together (stacked). Roads negate this condition (but not trails).
- A maximum of 2 battalions may cross a ridge together (stacked). Roads negate this condition (but not trails).
- Roads and trails negate the effects of the terrain they cross in a hex (except for trails in the two cases above), from the moment where the unit enters the hex by a road or trail.
- Units moving in a stack may leave the stack at any moment and stay in a hex. In doing so they finish their activation (i.e. they may not fight).
- When a road or a trail crosses a river on the map, it is considered that there is a bridge there.
- The Meuse may only be crossed by a bridge, a pontoon bridge or according to the rules in 6.0.
3.2.2 Reaction Movement
- Tactical Advances
- When a hex is empty after an elimination, a retreat or a tactical withdrawal, adjacent enemy mobile units whether activated or not, may enter the hex "for free". A tactical advance does not activate a unit if it was not already activated. This movement may give rise to reaction fire if the conditions are met (see 3.3.9).
- A tactical advance may not take place across a river or the Meuse if there are no bridges or pontoons between the two hexes.
- A disorganised unit cannot carry out a tactical advance.
- Redeployment
- A mobile unit, non-activated, and which is not in an EZOC may enter an adjacent hex if that hex is attacked. In order to do so it must pass a quality test. This redeployment is done before combat resolution once the attacker has designated the hex to be attacked. Redeployment does activate a unit if it was not already activated.
- Redeployment may not take place across a river or the Meuse if there are no bridges or pontoons between the two hexes.
- A disorganised unit cannot carry out redeployment.
- Tactical Withdrawal
- A mobile unit, non-activated, may, when the opposing player declares an attack against its hex, move one hex without cost. In order to do this it must pass a quality test. This withdrawal does activate a unit if it was not already activated.
- A tactical withdrawal may not take place across a river or the Meuse if there are no bridges or pontoons between the two hexes, and may not be made into an EZOC.
- A disorganised unit cannot carry out a tactical withdrawal.
3.3 - Combat
3.3.1 Outline
- Combat is the term used to designate the action of attacking or defending.
- The terms "attacking" and "defending" must be distinguished from "combat" which encompasses both actions.
- A combat always takes place between one hex and another, and may not include any other hexes.
- Those units selected during activation may attack a hex adjacent to them at the start of their activation, or at the end of their movement (providing that, for non-mobile units, they can still expend an extra MP).
- As a general rule 3 battalions may combat together, with the following exceptions:
- Case 1: If the defender's hex is in rough terrain, a maximum of 2 battalions from either side (owning player's choice) may engage in the combat.
- Case 2: If the attacker's hex is in rough terrain and the defender's hex is not, then a maximum of 2 battalions may attack (owning player's choice) and up to 3 may defend.
- Case 3: If the two hexes are separated by a ridge, a maximum of 2 battalions from either side may engage in combat (owning player's choice).
- All the units in an attacked hex must defend, except in cases 1 and 3 above, in which event the defender chooses those units which will defend.
- A unit or stack of units attacking after moving may combine for combat with other units already present in the arrival hex, if those units have not yet been activated, and while adhering to the cases outlined above.
- A defending unit is not considered activated after combat if it was not activated before.
- Restrictions for the French player:
- units from different divisions but the same army corps may combat together.
- units from different army corps may not attack together, but they may defend together.
3.3.2 Procedure
- The attacker announces which units are attacking and which hex is being attacked. He also designates a point unit amongst the attacking units.
- All the units in the hex being attacked must defend (exception: cases 1 and 3 above). The defender chooses the point unit from his defending units. Exception: if the defender is in clear terrain it is the attacker who chooses the defending point unit.
- A small unit may not be chosen as point if it is accompanied by battalions which are not disorganised, unless the small unit is a tank unit.
- A disorganised unit may not be chosen as point if it is accompanied by units that are not disorganised (including small units).
- The attacker totals the CFs of the attacking units, makes deductions according to the Terrain Modifiers of the hex being attacked and any possible obstacles on the hexside (rivers, ridges etc.) and rolls a die. The final result is the Attack Value (AV).
- The defender totals the CFs of the defending units, deducts the TMs of the attacker's hex and any possible hexside obstacles, and rolls a die. The result is the Defence Value (DV). Note: if the border between the hexes is represented by two ridges (ex: 1604/1603), only apply the modifier once.
- Subtract the Quality of the defending point unit from the AV to determine the attacker's combat result.
- Similarly, subtract the attacking point unit's Quality rating from the DV to determine the defender's combat result.
- The result falls into one of five possible categories:
- Category 1: 0 or less. No result.
- Category 2: 1, 2, or 3. Place a green Damage Chit on the point unit.
- Category 3: 4, 5 or 6. Place a red Damage Chit on the point unit.
- Category 4: 7, 8 or 9. Place a black Damage Chit on the point unit.
3.3.3 Allocation of Hits
A: Revealing Markers
- The Damage Chit is turned over when:
- a unit affected by the Damage Chit is activated.
- a unit affected by the Damage Chit is attacked again.
- a unit affected by the Damage Chit carries out reaction fire or reaction movement.
- The hits can give a combination of three results, in order of seriousness:
- X: nothing happens, false alert.
- R: retreat.
- L: one step loss.
- A revealed Damage Chit is placed in its spent box on the map after allocation of the results.
- On an R result, the unit moves one hex (and one only). The unit is now considered activated if it was not already so.
- In retreating, a unit may not exceed stacking limits. A retreat may not be made into an EZOC. A unit may not retreat across a river or across the Meuse, unless by bridge or pontoon bridge.
- If a retreat movement is not possible, the unit undergoes a Quality test. If it passes, it remains where it is and becomes disorganised. If it fails, it remains where it is, becomes disorganised and suffers a step loss.
- A unit may only suffer one R result per Damage Chit.
- On an L result, the unit is turned over if it is still face up, or eliminated if it has already been flipped. Exception: B1Bis units have 3 step losses. The unit's replacement counter takes the place of the eliminated counter.
- If a unit or a group of units attacks a hex which turns out to be clear of enemy units after a Damage Chit has been revealed, the activation of these units is still terminated. They may still perform a Tactical Advance.
B: Allocation of the Results
- The result of a Damage Chit is shared amongst all the units concerned (i.e. all the units in the hex which took part in the combat that resulted in the Damage Chit).
- For example: LR means that one unit has to suffer a step loss and that same unit, or another affected unit, must retreat. 2L means that a unit must suffer 2 step losses, or that two units suffer one step loss each, etc.
- The point unit may never suffer a less serious result than its other units. Exception: if the combat result leads to the elimination of the point unit, you may be obliged to inflict greater damage on the remaining units.
- Units that did not take part in the combat may not suffer any effects.
- The player may voluntarily change an R result into an L result.
3.3.4 Eliminated Units
- When an out of command unit is eliminated, it is removed from the game permanently.
- When a unit that is in command is eliminated, place it in the "non-operational units" space on the map.
- At the start of each Operations Phase, the player concerned checks to see if he has 3 or more battalions in the "non-operational units" space. For each trio of battalions he chooses one of the trio's units, that he then places on its reduced side, at a maximum of one hex from its divisional or corps HQ. The remaining units of the trio are permanently eliminated. Exception: A tank unit may never be returned to play in this manner.
3.3.5 Disorganised Units
- A "D" marker is placed on a disorganised unit.
- A disorganised unit has its Quality reduced by 1 (cumulative with the OOC penalty - see 7.2), may not initiate combat, may only move 1 hex – never towards an EZOC – and has its CF reduced to zero.
- A disorganised unit may not attack but may always defend.
- A disorganised unit has no ZOC.
- A disorganised unit may not spot an enemy unit for the artillery (see 4.0).
- When a disorganised unit is activated, it undergoes a Quality test. If it passes, the unit immediately regains its non-disorganised status and may act normally. If it fails, the unit remains disorganised, may move a maximum of one hex and finishes its activation. If the dice rolls for the Quality test result in 3/3, 4/4, 5/5, 6/6 for the French, or 5/5 6/6 for the Germans, the unit suffers a step loss no matter the outcome of the test.
- A disorganised unit that starts its activation stacked with its divisional or corps HQ automatically recovers its non-disorganised status.
- A disorganised unit that suffers another disorganised result immediately undergoes a Quality test. If it passes the test, there is no effect. If it fails the test it suffers a step loss.
3.3.6 Breakthrough
A breakthrough is a combat that takes place in a particular fashion. It is a moving combat.
- Only mobile units may attempt a breakthrough.
- During a breakthrough, the attacking units may move and attack an adjacent hex every time they enter a new hex. To do this they must spend 1 extra MP. They may also attack the hex adjacent to their start point, and then begin their movement having thus already spent 1 MP.
- For each attack after the first one, the attacking units lose 1 Quality Point, up to the end of their activation. This penalty is cumulative, i.e. 1 attack = -1 QP, 2 attacks = -2 QPs.
- A Breakthrough cannot result in any Damage Chits for the defenders. If the result of the attack is superior to the defending point unit's Quality rating, the defending units then become disorganised, and that's it.
- Units attacked during a breakthrough defend normally, except that any Damage Chits suffered by the attacking units are revealed and their effects applied immediately.
- A breakthrough may be stopped as soon as the player wishes. Units of the breakthrough stack may leave the stack at any point. They finish their activation in the hex where they stopped.
- If the attacking units perform a tactical advance during the breakthrough, they finish their activation.
3.3.7 Special Cases
- A unit with a CF of 0 does not affect the calculation of the AV or the DV. It may however take part in the combat and suffer losses.
- Combined Arms: if the attacking unit contains only SR units (Schützen-Regimenter – panzer division infantry) and tank units from the same division, the German player may declare a combined attack.
- the German point unit must be a tank unit.
- the opposing point unit loses 1 Quality point for combat resolution. A combined arms attack may not take place across a river or the Meuse even if the two hexes are linked by a bridge.
- Anti Tank Units: if a hex containing a non-disorganised AT unit is attacked by an enemy stack whose point unit is a tank unit, and if the attack is not a combined arms attack, then the AT unit may make a preliminary reaction fire against the tank unit (and only the tank unit). The Damage Chit is revealed and the effects applied immediately. The AT unit is not activated after this attack if it was not already previously so. If the tank unit lost a step, is eliminated or has to retreat, the initially planned combat MUST still take place.
- B1 Bis (38 and 37 BCC): Every combat that involves these units begins with a penalty of -2 on the dice for the Germans. However, as soon as the B1 Bis unit/units have suffered 3 step losses (this could be one unit suffering 3 step losses, or 3 units each suffering 1 step loss, etc.) this penalty no longer exists.
3.3.8 Reaction Fire
- Reaction fire is resolved in the same way as normal combat, except that those units hit by the reaction fire may not take part in the 'combat' (i.e. they may not defend themselves).
- Reaction fire may be carried out by units whether activated or not.
- Reaction fire does not activate the unit that carried out the action if it was not already activated.
- If several hexes perform reaction fire after the same enemy movement, the second hex fires with a bonus of +1, the third hex with +2, and so on.
- Reaction fire does not allow the opponent to perform a tactical withdrawal or to redeploy.
- If a unit receives a Damage Chit as a result of reaction fire, its activation is ended. If this causes an overstacking situation, replace the moving unit(s) in the first eligible hex on the path they took before the reaction fire.
- See also 1.6.
4.0 - Artillery
4.1 Outline
- Each artillery unit may carry out one (and only one) fire mission per turn. It must not have moved during that turn. Exception: the two SiG units of 5 and 7 Pz.Div. may fire after moving, but with a penalty of 1 applied to their CF.
- An artillery unit adjacent to an enemy hex may not take part in a fire mission concerning any other hex than the adjacent enemy hex.
- Up to 3 artillery units from different hexes may take part in the same fire mission, as long as they satisfy the following conditions:
- they are in range of the target hex.
- they belong to the same Corps. Note: this is the only occasion where units from different hexes may be activated at the same time.
4.2 Fire Missions
There are two types of fire mission: barrage and support.
4.2.1 Barrages
a) Outline
- An artillery unit may carry out a barrage on a hex if the target hex is in range and the hex has been spotted.
- A hex is spotted if:
- a non-disorganised unit from the same corps is adjacent to it,
- or, for the French only, if the target hex is in range of an artillery observer.
- A unit which spots a target is not activated if it was not previously so.
b) Artillery observers
- The two hexes 1704 and 1804 are artillery observation posts.
- They allow a hex within the arc of the red arrows, and at a distance of 3 hexes, to be targeted as if a friendly unit were adjacent. Example: The OP on 1804 can spot targets up to 3 hexes away, in the (southern) arc between the two red arrows. At its furthest the arc then extends as far as 2104 (Dinant, east bank) to 2103 inclusive. The OP on 1704 can spot targets up to 3 hexes away, within the broad arc moving south from 1705 round to 1703, i.e. within a 3 hex deep hemisphere sweeping round from 1703 to 1701 inclusive.
- There is no need to have a French unit in these hexes; the artillery observers are there by default.
- As soon as a German unit enters one of these hexes, the OP no longer exists (place the 'No observer' marker on the hex).
- However, if after that a non-disorganised French unit re-enters the hex, it may spot enemy targets for artillery units of its own corps under the same conditions as an artillery observer.
c) Procedure
- The player rolls 1D6, adds the CFs of the participating artillery units and subtracts any terrain modifiers (TMs for hexsides are ignored).
- Any unit in the target hex whose quality rating is lower than the result becomes Disorganised.
- A straight 1 rolled on the die means the barrage has no effect, a straight 6 means every unit in the hex becomes Disorganised, whatever the result. (see also: 4.2.5).
4.2.2 Support
- Up to 3 artillery units not activated, and from different hexes, may be used in support of attack or defence in a combat. They add half of their CF (divide the CFs before totalling them) to the overall combat factor calculation.
- To do this they must be in range of one of the hexes involved in the combat, and be in the same corps as at least one of the units taking part in the combat.
- An artillery unit in support may not be affected by the results of the combat, unless it is in one of the two hexes taking part in the combat.
4.2.3 Off Map Artillery
- German artillery units which are not yet on the map may carry out fire missions as far as hex column 19XX, from Turn 3 for units of 5 and 7 Pz.Div., and from Turn 6 for units from XV AK, and 32 and 8 I.Ds.
- These missions are resolved as normal and under the same conditions. Those units that have fired are placed in the "Spent OBA" space on the map, and may not enter the playing area that turn.
4.2.4 Artillery in Defence
- Artillery units that have to defend themselves do so using half of their CF.
4.2.5 Special Cases
- COLORADO Hexes 1904 and 1905, marked with a black dot may not be shelled from hexes further west. Note: the cliffs and steep slopes overlooking Anhée and its surroundings created dead ground, which the game's map symbols cannot easily represent.
- LACK OF PREPARATION For German fire missions, a straight 1 on the die moves the shelling from the target by 1 hex. The player rolls again. A 1 moves the shelling to the north of the target hex, a 2 to the north east, and so on. He re-rolls for the attack and the fire mission hits the unit(s) of the new hex (if he re-rolls a 1, the fire mission is aborted). Note: the French artillery had surveyed the ground long before and does not suffer from this disadvantage.
- LA BOUCHERIE SANZOT (did you read Tintin?) On the French side poor communication between units, headquarters, army corps etc. played a large part in the battle. When the French player selects units for a fire mission, and if these units are not in the same hex, firstly roll 1d6. On a result of 1, if the artillery units are in two different hexes, or on a result or 1 or 2 if the artillery units are in 3 different hexes, the fire mission is cancelled and the artillery units are considered activated.
5. Air Strikes
- Air Missions (AM) are resolved by spending AM points.
- Each player has an AM track on the map and an AM marker.
- The AM points are available according to the Tactical Chits (see 9.0).
- If AM points are not used, they may not be accumulated for use in another turn.
- A player may announce an AM at any moment in his Operations Phase, except during night game turns. There are two types of Air Mission: Observation and attack.
5.1 Observation
- The player expends 1 point and tries to spot a hex for an artillery barrage fire mission, as if a friendly unit were adjacent to the target hex. Roll 1D6, the hex is spotted on 1, 2 or 3.
- Or the player may choose to expend 2 points and spot the hex automatically.
- An HQ may not be spotted by air if it is alone in its hex.
5.2 Air Strikes
- An air strike may be launched on a hex if it is adjacent to a friendly unit that is not disorganised and in command, or if the hex has been spotted by an air observation mission.
- The bombing is resolved like a barrage. The player rolls 1D6 and adds as many AM points as he wishes to expend.
- A straight 1 on the die roll generates an aiming error (see 4.2.5 – Lack of Preparation).
6 – Crossing the Meuse
A French unit may never cross to the east bank of the Meuse. A disorganised German unit may never cross to the west bank of the Meuse.
6.1 Bridges
- 6 bridges cross the Meuse on the map.
- The French player may decide to demolish a bridge at any moment in the game. There is no requirement to have a friendly unit adjacent to the bridge for the attempt. The French player rolls a 1D6. On a roll of 1 the bridge is not destroyed. On any other result the bridge is demolished. Place a Destroyed marker on the bridge. Note: historically all the bridges were blown up as planned. However the bridge at Yvoir was only just destroyed – see the historical article. If the German player manages to capture an intact bridge, the game is liable to gather pace significantly and play will be unbalanced – although interesting. You may, if you wish, decide at the start of the game that all the bridges will blow automatically whenever the French player decides, without needing to roll for it. In that case award 5VPs to the German player at the end of the game.
- In order for a second attempt to take place in the event of a failed demolition, there must be a non-disorganised allied engineer unit (this includes the Chasseurs Ardennais) next to the bridge at the start of the next turn. This unit must be activated right at the start of the operations phase (i.e. the first activation of the French player's operations phase). If by the end of the turn the unit has not moved and has not suffered any hits, the second demolition attempt may be undertaken immediately.
- An engineer unit preparing a bridge for a second demolition attempt may be attacked in isolation, even though it is stacked with other friendly units (this is an exception to 3.3.1). In this case it does not benefit from any TMs.
6.2 Civilian River Boats and Locks
Note: the locks on the Meuse were not destroyed for fear of lowering the water level too much. Also, civilian boats were neither destroyed nor moved away through negligence and a lack of time. All of these provided a determined enemy with possible means of crossing the river.
- Infantry and reconnaissance units (MC and Aufk. units) can try to cross the Meuse using their own means.
- The values marked on the map (in blue circles with an arrow) represent possible ways across the river.
- A unit that wishes to try to cross the river using its own means must start its activation next to the hex it wishes to cross to. That hex must be free of enemy units, but may be in an EZOC. The player rolls 1D6. If the result is higher than the value in the blue circle, the unit has not found a way across and its activation is terminated. If the result of the die roll is lower than or equal to the value in the blue circle, the unit may attempt the crossing.
- If a hex containing French units is adjacent to both the departure hex AND the destination hex, the unit(s) in that hex may carry out reaction fire, with a DRM of +1. The unit crossing the river may not benefit from any TMs. In this particular instance, Damage Chits are revealed immediately.
- If the unit suffers a 'retreat' result, it is put back in its original hex. If it survives and does not retreat, the player places it in its destination hex. In both cases its activation is complete.
- If the destination hex is in an EZOC, and if the hex had not contained any German units before the arrival of the crossing unit, the French player may carry out reaction fire for each hex exercising the EZOC. If the hex already contained a German unit there is no reaction fire (bridgehead).
- Once across the Meuse, those units other than 'pure' infantry (i.e. non-motorised infantry) that have crossed in this fashion are placed under an 'isolated' marker. They reduce their CF by 1 and their MPs to 4. The marker is removed and their original values restored as soon as they can trace a path of hexes, free from any enemy units, to the east bank of the Meuse, passing over either a bridge or a pontoon. Note: units crossing in this fashion have left their transport and a good part of their heavy equipment behind on the far bank.
- Once a crossing point has been 'discovered', whether it was crossed or not, place a 'Passage' marker on the hex with the arrow pointing towards the destination hex. Any infantry or reconnaissance unit may now use the crossing under the same conditions as explained above, except that there is no longer a die roll to 'find' the crossing.
- Only one battalion per turn may use a crossing point. Return the 'Passage' counter onto its 'spent' side once the crossing has been used. Place it face up (Passage) again at the end of the turn.
6.3 Engineer Units
- 5 and 7 Pz.Div. each have a divisional engineer unit. These two units may build a bridge anywhere over the Meuse, but may not do this at the same time. Note: right from the start both divisions argued about the bridging equipment they had to share.
- The engineer units can also use pontoons to ferry units from their division across the river.
- A disorganised engineer unit may not construct a pontoon bridge nor use pontoons to ferry units.
6.3.1 Pontoon Bridges
- To construct a pontoon bridge, the engineer unit must start its operations phase adjacent to the Meuse, must be activated at the start of the First German Operational Phase, and the hex it is trying to connect to must be clear of any enemy units. The engineer unit is placed under a 'bridging' marker.
- If by the end of the turn the unit has not suffered any Hits and is not disorganised, and if the hex it is trying to connect to is still clear of any enemy units, place a Pontoon Bridge marker on it. Otherwise the attempt has failed.
- An engineer unit constructing a PB may be attacked on its own, even if stacked with other friendly units (an exception to 3.3.1). In this case it does not benefit from any TMs.
- An allied engineer unit may not destroy a PB.
- A pontoon bridge may not be built in the turn immediately following the construction of another PB.
- There are two types of PB: 8 tonnes and 16 tonnes. German tank units marked with a black dot to the right of their silhouette (•) may only use the 16 tonnes bridge.
- Only 3 pontoon bridges may be constructed during the game, one 16t, and two 8t.
- The 16t PB may not be built before Turn 6. At the start of Turn 6 the German player rolls 1D6. On a 1, 2, 3 or 4 it is attached to 7 Pz.Div.'s engineer unit. On a 5 or 6 it is attached to 5 Pz.Div. Note: the equipment took time to arrive at the Meuse, and Rommel and von Hartlieb argued over who should have priority.
6.3.2 Pontoons
- An engineer unit can also ferry one of its division's units per turn by pontoon.
- The engineer unit, and the unit it has to cross, must start their activation in the same hex, adjacent to the Meuse.
- If there is a hex containing French units that is adjacent to both the departure AND the destination hex, then the unit(s) in that hex may carry out reaction fire with a DRM of +1. The unit crossing does not benefit from any TMs. In this particular instance, Damage Chits are revealed immediately.
- If it suffers a 'retreat' result it is placed back in its start hex. If it survives and does not retreat, there are 3 possible situations:
- the destination hex is free of enemy units and is not in an EZOC: the player places the unit in the destination hex. Its activation, and that of the engineer unit, are terminated.
- the destination hex is free of enemy units but is in an EZOC: the player places the unit in its destination hex. Its activation, and that of the engineer unit, are terminated. If the destination hex had not contained any German units previous to the arrival of the new unit, every hex projecting an EZOC into the destination hex may reaction fire.
- the destination hex contains an enemy unit: an amphibious assault must be performed (see 6.3.3).
6.3.3 Amphibious Assault
This combat follows special rules:
- The French unit combats the German unit with a DRM of +2 without adding any TMs to its DV. The German unit fights the French unit using the TMs of the French unit's hex.
- Any Damage Chits are revealed immediately.
- If the German unit suffers a 'retreat' result it returns to its start hex and its activation is terminated. The participating French units may reaction fire against the retreating German unit. This time the TMs of the German's hex are used.
- If at the end of the combat there are surviving units on either side, there are two possibilities:
- the German player decides to stop the assault. The German unit returns to its start hex and its activation is terminated.
- the German player wishes to continue the assault and the procedure is repeated until either all the units on one side have been eliminated, or the German unit returns to its start hex, either voluntarily or because of a 'retreat' result.
- If / when the French units have been eliminated, the German unit is placed in its destination hex and its activation is terminated.
- If the destination hex is in an EZOC, the French player may perform a reaction fire for each hex projecting the EZOC.
6.4 Schützen Regiments
- The SR units (Pz.Div. infantry) had an engineer troop with them. They are identified by the 'E' underneath the unit's NATO symbol. These SR units may cross the Meuse on their own, as if they were being ferried by an engineer unit (see 6.3.2 and 6.3.3).
7. Command
- A divisional unit is in command if it can trace a path of 5 hexes (French) or 7 hexes (German), free of enemy units, passing over a bridge, a pontoon bridge or a crossing point if the path is over the Meuse, as far as its divisional HQ. It is also in command if it is adjacent to its Corps HQ.
- A non-divisional is in command if it can trace a path of 5 hexes (French) or 7 hexes (German), free of enemy units, passing over a bridge, a pontoon bridge or a crossing point if the path is over the Meuse, as far as its Corps HQ.
- A divisional HQ is in command if it can trace a path of 10 hexes free of enemy units, over a bridge, a pontoon bridge or a crossing point if necessary, to its Corps HQ.
- A Corps HQ is in command if it can trace a path free of enemy units as far as a friendly map edge (i.e. any map edge west of the Meuse for the French, or east of the Meuse for the German, passing over a bridge or a pontoon bridge if west of the Meuse for a German HQ).
- Units that cannot comply with these conditions are Out Of Command.
- If a Corps HQ is OOC all non-divisional units under its command are also OOC. Div. HQs under its command must undergo a quality test. If the test is passed, then there is no effect. If the test is failed then the Div. HQ is also OOC. The procedure must be repeated at the start of every turn where the Corps HQ remains OOC.
- If a Div. HQ is OOC, then all the units under its command are OOC.
7.1 Special Cases
- In the absence of their own Div. HQ, the units of the two French DLCs may be commanded directly by their own Corps HQ, or by other Div. HQs from their own corps.
- Units of the French 22 DI are considered in command only if they can trace a path free of enemy units a maximum of 4 hexes to the southern map edge.
- Units of the German 32 ID are considered in command if they can trace a path free of enemy units a maximum of 5 hexes to the southern map edge.
- Units of the German 8 ID are considered in command if they can trace a path free of enemy units a maximum of 6 hexes to the northern map edge.
- Apart from 32 and 8 IDs, German units are always considered in command when they are east of the Meuse.
- On turn 4 of the scenario, the French player decides which corps to attach 4 DINA to (enters as a reinforcement on turn 6). He places the marker for 4 DINA on the map in the space for II or XI Corps.
- On turn 8 of the scenario, the French player decides which corps to attach 1 DCR to (enters as a reinforcement on turn 10). He places the marker for 1 DCR on the map in the space for II or XI Corps. Note: historically, and after many prevarications that delayed their entry to the battle, both divisions were attached to XI Corps.
- The SR units (that had an engineer troop with them) west of the Meuse that crossed the Meuse on their own are not out of Command if:
- they are adjacent to the Meuse
- or if they are adjacent to an other in command SR unit of the same division which is also west of the Meuse
- or, of course, if they qualify for the conditions in 7.0
- Non SR units ferried by engineers west of the Meuse are not Out of Command if:
- they are adjacent to the engineer that ferried them.
- they are adjacent to an other in command unit of the same division which is also west of the Meuse
- or, of course, if they qualify for the conditions in 7.0
7.2 Out of Command Units
- An OOC unit has its quality reduced by 1 (cumulative with the penalty for being disorganised), may not initiate combat, may not carry out an artillery fire mission, may not spot for a fire mission and may not enter an EZOC.
- OOC status may be checked at any point in the game. A unit may start its activation OOC and finish it in command. And vice versa.
7.3 HQ Units
- An HQ unit is considered motorised.
- An HQ unit may not fight.
- An HQ unit may not suffer any damage.
- An HQ unit may retreat along with the other units in its stack.
- If an HQ unit finds itself at any time alone AND in an EZOC, it is removed from the map and placed on the Turn track, on the space for the following turn.
- In the case of a Div. HQ, all the units under its command are immediately OOC. Div. HQs under its command must undergo a quality test. If the test is passed, then there is no effect. If the test is failed then the Div. HQ is also OOC.
- In the case of a Corps HQ, all the non-divisional units under its command are immediately OOC. Div. HQs under its command must undergo a quality test. If the test is passed, then there is no effect. If the test is failed then the Div. HQ is also OOC.
- The HQ withdrawn from the game is placed back on the map at the start of the next turn in any hex desired (if possible in a town or village), capable of tracing a free path to a friendly map edge. It also immediately undergoes a quality test. If it passes, all the units it commands are back in command if they meet the necessary conditions. If the test is failed, or does not take place, the HQ becomes disorganised. Whatever the result of the quality test, the HQ's activation is terminated.
- All the units that depend directly on a disorganised HQ are OOC. Div. HQs are not affected if their Corps HQ is disorganised.
8 Special Rules
8.1 Darkness
8.1.2 Night
- Turns 2, 7, 12, 17 are night time turns.
- There are no air missions at night.
- All combats are carried out with a -2 DRM on both sides.
- Artillery CFs are divided by 2, unless the target hex is adjacent to the artillery unit. Support missions are prohibited.
8.1.3 Mist
- Turns 3, 8 and 13 are mist turns.
- All combats involving a hex adjacent to the Meuse are carried out with a -1 DRM for both sides.
8.2 L'Exode
Note: the civilian population was no more ready for the German thrust through the Ardennes than the allied staffs. Entire families rushed for the roads at the sound of the guns. Cars, carts, wheelbarrows, even prams, were hastily loaded with everything they could carry. Traffic jams, panic, deliberate and deadly Stuka attacks . . . l'exode had started. The congestion of the roads was at its peak.
- When a German unit reaches Onhaye (1708) or Bioul (1503) and more than 10 German units are west of the Meuse, place the Exode marker on the Turn track, 4 spaces to the right of the current turn. From the following turn, and up to and including the turn indicated by the Exode marker, movement on major roads west of the Meuse is 1 MP per hex for motorised units. Temporary overstacking while moving on roads and major roads west of the Meuse is prohibited. Combats involving a road or a major road hex result in a -1 DRM for the French player.
8.3 Disbanding Units
A unit that is in command may be disbanded at the player's choice instead of being activated. It is removed from the map and placed on the Turn track 4 spaces to the right of the space for the current turn. (ex.: disbanded on Turn 9, the unit is placed on the space for Turn 13). On the indicated turn the player then automatically places it on the map, reduced, at a maximum of one hex from its Div. HQ or its Corps HQ. This hex cannot be in an EZOC.
8.4 The Elephants...
Note: the units of the French 1 DCR entered the battle short of petrol. The French tanks had a high fuel consumption, and the supply system of slow moving tractor vehicles towing fuel bowsers was not up to the task.
- From Turn 11, and before the first German operation phase, the German player may decide to replace his 5 TCs in the mug. He places the 'Out of Gas' marker on the Turn track, in the space for the current turn.
- From that moment all the tank units of 1 DCR may only move half of their MPs and have their CF and Quality decreased by 1.
- The OOG marker advances with the Turn Marker for as long as the French player decides not to turn it over to its REFUELLING side, and its effects last as long as it is on the Turn track.
- The French player may decide at the end of any turn that he is refuelling. He moves the OOG marker one space to the right, turning it to its Refuelling side. On the turn marked by the Refuelling counter (the following turn), the tanks of 1 DCR are immobilised, and have their CF and Quality decreased by 2. At the end of that turn they regain their full values, if they have survived.
- The German player must wait at least 3 turns after the refuelling turn before he can play the OOG marker again.
8.6 Corap's Orders
Note: The situation was so unexpected and traumatic for the French general staff that Corap very soon lost any hope of throwing the Germans back across the Meuse. Rather than trying to attack XV AK's flanks, he quickly opted to set up a cohesive front line to stop the enemy advance, while waiting for reinforcements from the 1st Army and the setting up of a defence line on the Sambre.
- As soon as the German player controls Rosée OR Ermeton OR Saint Gérard, the units of 1 DCR may no longer move further east than column 12XX inclusive. If units of the division are already further east than this, they must return west of the hex column as soon as possible.
8.7 Out of Ammo
At the start of each turn, from the beginning of Turn 8, the French player rolls 1D6 and consults the table below. The artillery regiments beside each result are Out of Ammo and may not carry out barrage or support missions that turn. However they may defend themselves with half of their CF.
- 1: No effect
- 2: 11 RAD or 19 RAD (player's choice)
- 3: 111 RAL or 105 RALD (player's choice)
- 4: 219 RALD or 102 RALT (player's choice)
- 5: line 2 + line 3
- 6: line 2 + line 3 + line 4
8.8 Problems of Deployment
- Any battalion or tank unit fighting from a town hex has its CF decreased by 1.
- A tank unit fighting from a wooded hex has its CF decreased by 1.
9. Tactical Chits
- At the start of the game place the French TCs in one mug, and the German TCs in a wasabi cup.
- At the start of every turn (except Turn 1) the French player draws 2 TCs and the German player 5 TCs.
- The TCs may be used to apply their effects as described below. If not used for their specific effects, they may instead be used to force a re-roll of the die (no matter what roll, including the opponent's). The TC is then replaced in the mug.
- At the end of the turn, the TCs remaining to each player may be replaced in the mug or retained for the following turn. In any event, the French player may never have more than 2 TCs and the German no more than 5 TCs.
9.1 Tactical Chit Descriptions
German TCs:
- Furor teutonicus!
- may be played before combat resolution, but after all participating units have been declared.
- Effect: the combat result for both sides is increased by one category.
- Indecision
- may be played at the moment the French player announces which units he is activating.
- Effect: the units selected by the French player for activation cannot act, are considered to have been activated and to have completed their activation. This effect cannot be applied to units entering the map as reinforcements.
- Luftwaffe
- Note: Although mainly occupied over Sedan in support of Guderian's troops, the Luftwaffe was able to intervene regularly and effectively in the skies above Dinant.
- may be played at any moment in a German operations phase.
- Effect: the German player may choose one, and one alone, of his Luftwaffe TCs and moves his Air Mission marker as many cases to the right as is indicated on the TC. Its points may be used immediately, or later on in the turn. Only one Luftwaffe chit may be turned into AM points per turn. AM points may not be retained for use in another turn.
- Tactical superiority
The German player chooses one, and one only, from the effects listed below:
- may be played before combat resolution.
- Effect: the German player is freed from the restrictions of Cases 1, 2 or 3, as explained in 3.3.1.
- may be played before combat resolution.
French TCs:
- Ambush
Note: many elements of routed or retreating French units were able to reform themselves into small independent groups and harass the enemy as soon as possible.
- may be played at any time at the end of a German movement.
- Effect: if a German unit or stack of units stops adjacent to a rough terrain or a wooded hex clear of any units, it immediately undergoes an attack at +4.
- Michelin?
- may be played at any time during a German movement.
- Effect: if a German unit or stack of units west of the Meuse moves away from a road or a major road, the French player may stop this movement as soon as he wishes. The activation of the stopped units is immediately terminated.
- Armée de l'air
Note: on the evening of the 14th a group of 7 Le0.451s and 5 MB174s bombed the bridgehead at Dinant. It was almost the only time when French aircraft penetrated the airspace over the battlefield.
- may be played at any time during the French operations phase.
- Effect: the French player may move his Air Missions marker two spaces to the right. Its points may be used immediately or later on in the turn. The AM points may not be retained for use in another turn. Remove the TC from the game once it has been used.
- Friendly Fire
- may be played before an artillery bombardment or an air strike, or if the German player uses artillery support in combat.
- Effect:
- In the case of a barrage or air strike, the French player designates a hex adjacent to the target hex, which immediately suffers the effects of the attack.
10 - Battleplan
At the start of the game the German player draws 5 objectives at random and keeps them secret. An objective wins 5 VPs if it is achieved, and loses them if it is not. When an objective is achieved, or when it can no longer be achieved, it is revealed by the German player and the VP count is immediately updated on the track.
- Objective 1: To have a bridgehead (with at least one non-disorganised unit) west of the Meuse at the end of Turn 2.
- Objective 2: To have at least 12 non-disorganised units west of the Meuse before the end of Turn 4.
- Objective 3: To control the two artillery OP hexes before the end of Turn 9. If the points for this objective have been added to the VP track, they are removed if the French player recaptures one of the hexes AND uses it to call up the artillery.
- Objective 4: Not to lose any tank units from 7 Pz.Div. before at least one in-command unit from the division has reached column 10XX.
- Objective 5: Not to lose any tank units from 5 Pz.Div. before at least one in-command unit from the division has reached column 10XX.
- Objective 6: Not to have any enemy units or EZOCs adjacent to the Meuse, between 1702 and 1610 inclusive, at the end of Turn 12.
- Objective 7: To control Mettet and Rosée at the end of the game.
- Objective 8: To control Rosée before the end of Turn 12.
- Objective 9: To control Falaën before the end of Turn 10.
- Objective 10: To control Bioul before the end of Turn 12.
11 - Scenarios
11.1 Scenario 1 – Complete Historical Scenario
11.1.2 French Setup
-
5e DIM:
- 1/129 RI: 1802 • 2/129 RI: 1203 • 3/129 RI: 1904
- 1/39 RI: 1201 • 2/39 RI (disorganised): 1604
- 3/39 RI: 1101 • 1/8 RI: 1701 • 1/6 BCC: 1101
- 1/105 RAD: 0605 • 2/105 RALD: 0605
- 1/11 RAD: 0602 • 2/11 RAD: 0602 • 3/11 RAD: 0703
- 11 BDAC: 1203 • EDAC: 1203 • 5/1 SAP: 1701
- 5 Chass (Belgian): 1802 • HQ: 1203
-
22DI:
- 1/116 RI: 1612 • 1/19 RI: 1611
-
18DI:
- 2/6 BCC: 0312 • 3/6 BCC: 0508 • 18 Cie SAP: 1808
- 1/66 RI: 1906 • 2/66 RI: 1605 • 3/66 RI: 0508
- 1/77 RI: 0411 • 2/77 RI: 1807 • 3/77 RI: 1708
- 1/125 RI: 1908 • 2/125 RI: 1309 • 3/125 RI: 1009
- 1/19 RAD: 0909 • 2/19 RAD: 1408 • 3/19 RAD: 1208
- 30 GRDI: 1606 • HQ: 1506
-
1DLC:
- 1 RAM: 2106 • 1 CHAS (reduced): 2106
11.1.3 - French Reinforcements
(The source prints "11.1.3" for the French reinforcements, the German setup and the German reinforcements. The numbering is kept as printed.)
- Turn 1:
- 22 DI: • 2/19 RI: 1112 • 1/18 RAD: 0812
- Turn 2:
- 18 DI: • 19 BDAC: 0301 • 1/219 RALD: 0009
- 5 DIM: • 1 GRDIM: 0901
- 22 DI: • 3/19 RI: 1412
- 4 DLC: • 1/77 RATT: 1301 • 5 EDAC: 1301
- 8 DRAG (reduced): 1301 • 14 RDP: 0901
- 4 RAM: 0901 - reduced
- Turn 3:
- 18 DI: • 2/219 RALD: 0009
- 4 DLC: • 94 GRDI: 1301
- Turn 6:
- 4 DINA: 0008, 0010 and/or 0012.
- 4 units maximum per turn of 4 DINA enter from Turn 6, by the indicated hexes. Div. HQ may accompany any unit and does not count against the limits above.
- Turn 10:
- 1 DCR: • 1, 2, 3/28 BCC: 0301 and/or 0901 • 1, 2, 3/25 BCC: 0301 and/or 0901
- Turn 11:
- 1 DCR: All units: 0001 and/or 0301 and/or 0901
11.1.3 - German Setup
- 5 Pz.Div.: • MC: 2203 • 8 Aufk: 2303 • 1/14 S: 22502 • 1, 2, 3/15 PR (3 units): 2501
- 7 Pz.Div.: • 37 Aufk: 2406 • 2/6 SR: 2506 • 58 Pio: 2506
11.1.3 - German Reinforcements
- Up to and including Turn 6, a maximum of 4 battalions per turn may enter the map. From Turn 7 up to 8 battalions may enter. HQ units may accompany any unit and do not count against the limits above.
- Units of 5 Pz.Div. enter by 2501 and/or 2504 from Turn 1.
- Units of 7 Pz.Div. enter by 2506 and/or 2509 from Turn 1.
- Units of 8 ID enter by 2501 from Turn 6.
- Units of 32 ID enter by 2509 from Turn 6.
- Corps units enter anywhere from the east edge of the map from Turn 6.
11.1.4 - Special Rules
- 1/8 RI may not leave its hex (1701). If it has to retreat it leaves the map permanently.
- 1/116 RI can only move in 1612 and 1611. If it has to retreat and can't retreat in 1611, it leaves the map permanently.
- French units west of and adjacent to the Meuse have just reached their positions and must not move in Turn 1.
- All the other French units that start west of the Meuse have their MPs halved in Turn 1.
- French non-divisional units and their HQs cannot be activated before Turn 3.
- The units of 1 DLC must pass west of the Meuse and move to within at least 1 hex of Sommière for their first activation. They then become disorganised.
- The unit of 4 DLC has to leave the north edge of the map on its first activation, and returns to the game on Turn 3 by whatever entry hex 4 DLC uses. Note: yes, it's true, we could have simply placed the units concerned by the two points above directly on their positions west of the Meuse. We preferred, through using this automatic movement, to portray the development of the very first moments of the battle...
11.1.6 - Victory Conditions
- Victory Points:
- Only the German player counts the Victory Points.
- The German player loses 4 VPs for each tank unit eliminated, 2 VPs for any other unit from 5 and 7 Pz.Divs. eliminated and 1 VP for any other unit eliminated. Units in the non-operational units space on the map at the end of the game are considered eliminated.
- The German player wins 2 VPs for each tank unit from 1 DCR eliminated or in the non-operational units space on the map at the end of the game.
- The German player wins or loses the associated points for each Objective.
- There are four possible victory categories, depending on the situation at the end of the game (see further down). If the German player has:
- less than -10 VPs: the victory level drops two categories.
- from -10 to 0 VPs: the victory level drops to the category below.
- from 0 to 19 VPs: nothing changes.
- 20 VPs or +: the victory level rises a category.
Victory Levels
(The source numbers the victory levels 1, 2, 2, 3, 4 as printed; the levels are kept in their printed order.)
- 1 – German defeat, French victory: the situation does not match any of the situations below.
- 2 – "So lala" Victory (German): The German player controls Rosée (1009) or one hex of Mettet (0904) and can trace a path from these hexes to the east edge of the map, free of enemy units or EZOCs, crossing the Meuse by bridge or pontoon bridge.
- 2 – "Deutsche Qualität" Victory (German): The German player controls a town or village in column 04XX and can trace a path from this hex to the east edge of the map, free of enemy units or EZOCs, crossing the Meuse by bridge or pontoon bridge (but not by a crossing point).
- 3 – "Wunderbar" Victory (German): The German player controls 0009 or 0004 and can trace a path from this hex to the east edge of the map, free of enemy units or EZOCs, crossing the Meuse by bridge or pontoon bridge (but not by a crossing point).
- 4 – "Kolossal" Victory (you are Rommel) (German): The same as for 'Wunderbar' + the player has exited at least 8 units from the same Pz.Div. through one or both of these hexes, including at least 4 tank units.
11.2 Scenario 2 – The Crossing
11.2.1 Length
From turn 1 to turn 7 included.
11.2.2 Setup
As per scenario 1.
11.2.3 Reinforcements
As per scenario 1.
11.2.4 Special Rule
As per scenario 1 + :
- remove all the Battleplan counters of the game and do not apply rule 10.
11.2.4 Victory Conditions
(The source prints "11.2.4" for both the special rule and the victory conditions. The numbering is kept as printed.)
- 1 – German defeat, French victory: the situation does not match any of the situations below.
- 2 – "So lala" Victory (German): The German player controls Dinant (2006) and Anhée (1904) and all the adjacent hexes.
- 2 – "Deutsche Qualität" Victory (German): Same than above + The German player controls Haut-le-Wastia (1704) and 1804.
- 3 – "Wunderbar" Victory (German): Same than above + The German player must have more than 20 in command non disorganised units on the west side of the Meuse.
- 4 – "Kolossal" Victory (you are better than Rommel): Samne than above + the German player must control Onhaye (1708).
11.3 Scenario 3 – Go West!
Note: It is difficult to know absolutely exactly where were all the units and how fit they were at the start of the day. The setup for this scenario is an extrapolation of the historical accounts. Though, we should not be far from the real stuff. Feel free to try a different setup if If you have sources that indicate an error in our extrapolation.
11.3.1 Length
From turn 8 to turn 17 included.
11.3.2 French Setup
-
dis: disorganised
-
red: reduced
-
GC: place a green Damage Chit on the unit
-
RC: place a red Damage Chit on the unit
-
N.O.U: place the unit in the non-operational units space on the map.
-
22 DI:
- 1/116 RI: 1612 • 1/19 RI: 1609 • 3/19 RI red.: 1609
- 1/18 RAD: 1611
-
18 DI:
- 1/77 RI red.: 1506 • 2/77 RI: 1806 • 3/77 red.: 1908
- 1/125 RI dis.: 1809 • 2/125 RI: 1408 • 3/125 RI red.: 1509
- 1/66 RI red., dis.: 1805 • 2/66 RI: 1705 • 3/66 RI red.: 1606
- 2/6 BCC: 1806 • 3/6 BCC: N.O.U • 30 GRDI: 1604
- 1/19 RAD: 1507 • 2/19 RAD dis.: 1306 • 3/19 RAD dis.: 1306
- 1/219 RALD: 1005 • 2/219 RALD: 1106 • HQ: 1506
-
5 DIM:
- 1/8 RI: 1701 • 1/129 RI: 1802 • 2/129 RI red.: 1703
- 3/129 RI: N.O.U • 1/39 RI: 1603 • 2/39 RI: N.O.U
11.3.3 German Setup
-
dis: disorganised
-
red: reduced
-
GC: place a green Damage Chit on the unit
-
N.O.U: place the unit in the non-operational units space on the map.
-
5 PzD:
- MC: N.O.U • 8 AUFK red, des: 1804 • 89 PIO: 1905
- 53 PzAb: 1904 • 705 SiG: 2105 • 1/116 AR: 2203
- 2/116 AR: 2203 • 1/13 SR red.: 1605
- 2/13 SR red.: 1905 • 1/14 SR: 1804
- 2/14 SR red, des, GC: 1704 • 1/1/15 PR red.: 1803
- 2/1/15: 1904 • 3/1/15 PR: 1903 • 1/2/15 PR: 1905
- 2/2/15 PR: 1904 • 3/2/15 PR: 2005 • 1/1/31 PR: 1803
- 2/1/31: 1803 • 3/1/31 PR: 2005
- 1/2/31 PR des., GC: 1704 • 2/2/31 PR: 1605
- 3/2/31 PR: 1903 • HQ: 2105
-
7 PzD:
- 7 MC (des.): 1907 • 37 AUFK (réd. des.): 1906
- 47 PzAb (des): 2006 • 58 Pio: 2106 • 704 SiG: 2107
- 1/78 AR: 2206 • 2/78 AR: 2206 • 1/6 SR (des.): 1906
- 2/6 SR (red): 2007 • 1/7 SR: 2007 • 2/7 SR: N.O.U.
- 1/66 PR: 2007 • 2/66 PR: 2106 • 3/66 PR: 2007
11.3.4 Special Rules
- Place the Exode marker on turn 11.
- Place the Bridge 16 t. counter between 2106 and 2006.
- Place a Bridge 8 t. counter between 2003 and 1904.
- Remove objectives #1 and #2 of the game.
- Remove 1 Rommel TC of the game.
11.3.5 Victory Conditions
As per scenario 1.
A kolossal victory seems doubtful...