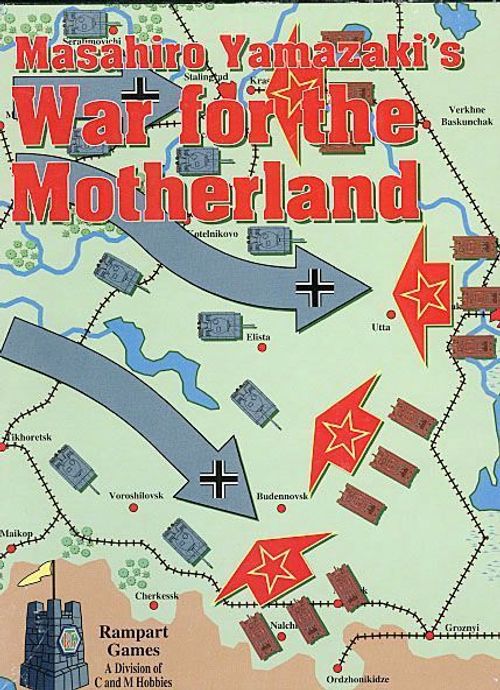
War For the Motherland
War For the Motherland Rulebook
Table of Contents
Table of Contents
- 1.0 Introduction
- 2.0 Components
- 3.0 Sequence of Play
- 4.0 Stacking and Zones of Control
- 5.0 Movement
- 6.0 Overrun
- 7.0 Uncertain Soviet Combat Strengths
- 8.0 Combat
- 9.0 Supply
- 10.0 German Airpower
- 11.0 Weather
- 12.0 Soviet War Economy
- 13.0 Reinforcements
- 14.0 Unit Breakdown and Buildup
- 15.0 Scenarios
- 16.0 Introductory Scenario
- 17.0 Short Scenario
- 18.0 Medium Scenario
- 19.0 Campaign Scenario
- 20.0 Optional Rules
- 21.0 1942 Scenario
- 22.0 Reference Charts
1.0 Introduction
War for the Motherland is a strategic/operational game covering the German-Soviet fighting in World War 2 from June 1941 until April 1944. This is a two-player game; one player controls Germany and its Axis allies and one player controls the Soviet Union. Play proceeds in Game Turns, with 7 Phases each. There are four separate scenarios in the game. Each scenario lasts a specific number of game turns and at the end of the last game turn victory is determined.
Note: One scenario not mentioned above is included with the Baku Expansion from Six Angles #10. I have not translated it yet since most people don't have the magazine. I assume MMP will include it when their edition of the game is released. [TAD]
2.0 Components
2.1 The game map is a representation of the terrain over which the campaign was fought. There is a hexagonal grid printed over the terrain to regulate the movement and positioning of the game's counters. Each hex has its own individual identification number. Several charts and tables are printed on the map. Three scenarios use multiple maps and they are assembled as indicated:
2.2 There are four sheets of unit counters ("units") in the game. They represent the combat units that participated in the campaign or could have. Units are distinguished by type, size and identification. Each unit has an offensive combat strength, a defensive combat strength and a movement point allowance. Most Soviet units have a Combat Class (A-C) on them, which corresponds to a similarly-coded combat strength marker which will be drawn for them when in combat.
2.21 Unit Descriptions
Soviet partisans and German air fleets have characteristics of both units and markers.
[Counter anatomy diagrams are not reproduced in text. The labelled fields shown on each counter type are listed below.]
- German Panzer Corps (full strength side and reduced strength side): Unit Size, Unit Type, Unit Designation, Attack Value, Defense Value, Movement Allowance, Starting Hex.
- Soviet Combined Arms Army: Unit Size, Unit Type, Unit Designation, Attack Value, Defense Value, Movement Allowance, Strength Level, Combat Class, Turn of Entry, Offensive Support Radius, Offensive Support Means.
- German Supply Base: Unit Type, Unit Designation, Starting Hex, Attack Value, Defense Value, Movement Allowance, Supply Radius, Defense Status Side, Expended Status Side, Supply Status.
- Soviet Headquarters: Unit Size, Unit Type, Unit Designation, Attack Value, Defense Value, Movement Allowance, Turn of Entry, Supply Radius.
- German Air Fleet Marker: Unit Designation, Range Allowance (hexes), Air Zone of Influence Radius (hexes), Front and Back sides.
- Soviet Strength Chit: Unit Designation, Turn of Entry, Attack Value and Defense Value, shown on Front and Back.
2.22 Unit Type Summary
German Forces
- Armored Corps
- Infantry Corps
- Mountain Infantry Corps
- Armored Division
- Armored Kampfgruppe
- Infantry Kampfgruppe
- Mountain Infantry Kampfgruppe
- Normal Supply Depot
- Extended Supply Depot
- Airbase
- Siege Artillery
Soviet Forces
- Rifle Corps
- Marine Corps
- Mechanized Corps
- Airborne Corps
- Rifle Army
- Guards Army
- Shock Army
- Armored Army
Axis Allies Forces
- Finnish HQ
- Finnish Infantry Corps
- Rumanian HQ
- Rumanian Infantry Corps
- Rumanian Mountain Infantry Corps
- Italian Infantry Army
- Hungarian Infantry Army
Headquarters, Support and Economic Assets
- Offensive Support Group
- Factory (Economic Asset)
- Oil Field (Economic Asset)
- Coal Field (Economic Asset)
- Mineral Deposit (Economic Asset)
- Strategic Port (Economic Asset)
- Oil Pipeline (Economic Asset)
2.23 Marker Summary
- Game Turn marker
- Phase marker
- Out of Supply marker
- Lack of Supply marker
- German Control marker
- Soviet Control marker
- Destroyed marker
- German Air Fleet marker
- Soviet Partisan marker
- "C" Combat Strength Marker
- "B" Combat Strength Marker
- "A" Combat Strength Marker
2.24 Unit Abbreviations
German Panzer Divisions
- GD: Grossdeutschland
- LAH: 1st SS Leibstandarte Adolf Hitler
- DR: 2nd SS Das Reich
- TOT: 3rd SS Totenkopf
- WIK: 5th SS Wiking
- HS: 9th SS Hohenstaufen
- FR: Frundsberg
German Wehrmacht
The abbreviations below are those of the commander of the combat unit in parenthesis:
- Ape: Apell (22nd Pz. Div.)
- Arn: Arnim (39th Pz. Corps)
- Ede: Edelscheim (24th Pz. Div.)
- Gro: Grossmann (6th Inf. Div.)
- Har: Harpe (41st Pz. Corps)
- Hol: Hollidt (17th Corps)
- Lan: Lanz (22nd Corps)
- Lau: Lauchert (39th Pz. Reg.)
- Lgm: Langerman (24th Pz. Corps)
- Mac: Mach (23rd Pz Div.)
- Mkn: Mackensen (3rd Pz. Corps)
- Pfe: Pfeiffer (297th Inf. Div.)
- Pue: Puchler (257th Inf. Div.)
- Ram: Ramcke (2nd Parachute Div.)
- Rau: Raus (6th Pz. Div.)
- Rei: Reinhardt (421st Inf. Reg. of 125th Inf. Div.)
- San: Sanne (100th Jaeger Div.)
- Sch: Schell (25th Pz. Div.)
- Sie: Siebert (44th Inf. Div.)
- Str: Strecker (111th Corps)
- Tri: Trierenberg (167th Inf. Div.)
- Wei: Weiss (27th Corps)
- Zim: Zimmer (14th Inf. Div.)
Axis Units
- Kar: Karelia
- SE: Southeast
- Mtn: Mountain
Soviet Corps
- BLM: Baltic Sea Marines
- BSM: Black Sea Marines
- Kem: Mechanized Group Kem
- Med: Mechanized Group Medvezh'egorsk
- Mur: Mechanized Group Murmansk
- One: Mechanized Group Onega
- Pet: Mechanized Group Petrozavodsk
- Zat: Zatebakin (Independent Airborne Corps leader)
Soviet Armies
- Gd: Guard
- Sh: Shock
Soviet Front Headquarters
- NW: Northwest
- W: West
- C: Central
- SW: Southwest
- S: South
- Bry: Bryansk
- Kal: Kalinin
- Lng: Leningrad
- N: North
- Ncs: North Caucasus
- Res: Reserve
- Stg: Stalingrad
- Stp: Steppe
- Tcs: Trans-Caucasus
- Vol: Volkhov
- Vzh: Voronezh
Soviet Army
- Sib: Siberia
Soviet Army, Partisans
- Kor: Korzh
- Kov: Kovpak
- Pro: Prokopyuk
- Nau: Naumov
- Shu: Shukaev
Factories
- AMI: Archangelsk Machine Industry
- ANA: Admiral/Nev (Admiral Shipbuilding Factory)
- ARS: Factory Arsenal
- BOL: Factory Bolshevik
- CRB: Complex Red Bunker
- FLN: Factory Lenin
- FRO: Factory Red October
- DMF: Donbass Metallurgy Factory
- DNM: Dnepropetrovsk Metallurgy Factory
- FJR: Factory January Riot
- GAZ: Gorky Automobile Factory
- GVZ: Gorky Aircraft Factory
- HAS: Factory Hammer and Sickle
- IKF: Izhora/Kolpino Factory
- KAZ: Kuibyshev Aircraft Factory
- KTF: Kharkov Tractor Factory
- LKF: Leningrad Kirov Factory
- MAF: Moscow Automobile Factory
- MMF: Makeevka Metallurgy Factory
- RMI: Rostov Machine Industry
- RPR: Red Proletariat Factory
- SAZ: Saratov Aircraft Factory
- STF: Stalingrad Tractor Factory
- TAF: Tbilisi Aviation Factory
- TWF: Tula Weapon Factory
- VAF: Voronezh Arms Factory
- ZKS: Factory Red Sormovo
2.25 National Colors
- German Wehrmacht: grey-blue
- German Security Divisions: dark grey-blue
- German Luftwaffe: blue
- German SS: black
- Finland: blue
- Rumania: green
- Italy: light green
- Hungary: yellow
- Soviet: orange
- Soviet Guards, Shock and partisan units: red
2.3 Game Scale
Each hex is approximately 35km across. Game turns fluctuate depending on the season, with summer turns being 10 days or two weeks each, mud turns 2 months and snow turns 1 month each.
2.4 Halving and Doubling
When halving unit values, round units up individually. In a situation where a value is both halved and doubled, the value remains the same. Rounding is done after all other calculations.
2.5 Component Summary
Each game of War for the Motherland should have the following:
- Two game maps, composed of three sections: C (large single map), E (medium) and N (small). Note that E and N must be cut off from the charts to be assembled properly.
- Four countersheets (800 counters total)
- One rulebook, included in Six Angles #9
In addition, one 6-sided die is required.
Note: One small mapsheet is also included if the Baku Expansion map is included from Six Angles #10.
2.6 Glossary of Game Terms
- Air Zone of Influence (AZOI): The "umbrella" of hexes that are within an air fleet's AZOI range.
- Axis: All German, Rumanian, Hungarian, Italian and Finnish units. Luftwaffe units are German. Within the rules, "German" applies only to German units and "Axis" applies to all Axis units.
- Breakdown: German corps breaking up into smaller KG. Optionally, Soviet armies may breakdown into 2 corps.
- Buildup: Units of both sides joining together to create larger units.
- Combat Class: The rating Soviet armies have indicating which draw cup Combat Strength Markers are randomly drawn from.
- Combat Strength Marker: Markers used to randomly determine the combat strengths of Soviet infantry, Guard, Shock and tank armies.
- Conversion: Replacing a Soviet C-3 army with either a Guards or Shock army.
- Defensive Combat Strength: The relative value of a unit when it defends.
- Disengagement: Leaving an enemy ZOC for +3 additional MP.
- Economic Asset (EA): A Soviet unit used for production and sometimes victory determination. EA include factories, which may be evacuated.
- Enemy: Units, hexes and phases of the opposing player.
- Units, hexes and phases of yours.
3.0 Sequence of Play
Each game turn is composed of 7 phases, detailed below. The player whose turn is in progress is called the "phasing player" and his opponent is called the "nonphasing player." Some phases have Steps (a-?) that are performed in the order listed.
1. Mutual Supply Phase
a) The Axis player determines supply for each of his airbases. Out of Supply airbases are immediately removed (see 9.55).
b) The Axis player places his air fleets on the map (exception: not during mud turns). It is possible to Air Supply German units by air after this (see 9.6).
c) Each player determines the supply status of each of his units on the map. Place Out of Supply and Lack of Supply markers as required. Units that cannot trace supply at twice normal distance are Isolated and must make an Attrition Check (see 9.9).
d) The Soviet player places reinforcing Combat Strength Markers he receives this turn into their respective draw cups (see 13.32).
2. Axis Movement Phase
a) The Axis player places any reinforcements due him this turn on the map.
b) All Axis units may move to the limit of their MP (overruns may be performed). Units move in the following order:
- Sea Movement (see 5.5) then Strategic Movement (see 5.6),
- Normal movement (and overruns) for nonairbase units,
- Airbase movement.
3. Axis Combat Phase
Axis units may attack adjacent Soviet units according to Combat (8.0).
4. Soviet Combat Phase
Soviet units may attack adjacent Axis units according to Combat (8.0).
5. Soviet Movement Phase
a) The Soviet player places any reinforcements due him this turn on the map.
b) All Soviet units may move to the limit of their MP (overruns may be performed). Units move in the following order:
- Sea Movement (see 5.5) then Strategic Movement (see 5.6),
- Normal movement (and overruns) for non-OSG units,
- OSG movement.
6. German Mechanized Movement Phase
a) The Axis player may again move his German panzer units (only) up to the limit of their MP (overruns are allowed).
b) Remove German air fleets from the map.
7. Administrative Phase
a) The German player may Breakdown, Buildup and Exchange Steps with German units (see 14.0).
b) The Soviet player may convert infantry armies into Guard and Shock armies (see 13.2).
c) The Soviet player may Rebuild armies (see 14.32) and Incorporate corps into reduced strength armies (see 14.4).
d) (Optional) If this is a Production Turn, the Soviet player may breakdown 1 Soviet army into 2 corps (see 20.2).
e) Check for Strategic Port EA supply (12.41).
f) If this is a Production Turn, the Soviet player determines if he receives an OSG (12.2).
g) If this is a Production Turn, the Soviet player may Evacuate up to three factories (see 12.3).
h) The Soviet player deploys Partisans.
i) The Soviet player removes all CSM from Soviet armies which are not adjacent to an Axis unit (see 7.21).
j) The Soviet player draws a CSM for each Soviet army which doesn't have a CSM that is adjacent to an Axis unit (see 7.12).
k) Advance the Game Turn marker one space on the Game Turn Track. Reset the Phase marker to the Mutual Supply Phase on the Phase Track and begin a new turn.
Note: The step letters cited in 7.12 ("Step 'i'") and 7.21 ("Step 'h'") do not match the lettering printed in this list (drawing CSM is printed as step j, removal as step i). The source is transcribed as printed; the list above follows the printed letters.
4.0 Stacking and Zones of Control
Each player is limited to the number of units that may end a phase stacked in one hex. Most units possess a Zone of Control (ZOC) which consists of the 6 hexes surrounding a unit. ZOC affect supply line tracing, movement, and combat.
4.1 Stacking Restrictions
4.11 Putting more than one unit in a hex is called 'stacking.' There is a limit to the number of units which may be in a hex. This limit is applied at the end of each phase. Stacking may be temporarily exceeded during phases (exception: 4.17, 8.105 and 8.118).
4.12 The Axis player may stack 2 corps plus 1 division in a hex. German divisions count as 1/3 of a corps and KG units count as ½ of a corps. Axis army-sized units count as two corps.
4.13 The Soviet player can stack one army per hex. Corps count as ½ an army.
4.14 Airbases, EA, headquarters, markers, OSG, siege artillery and supply depots do not count for stacking.
4.15 Non-German Axis units can stack with German units. Non-German Axis units cannot stack with non-German Axis units of a different nationality, even temporarily.
4.16 Whether a unit is at half strength or not has no bearing on stacking.
4.17 Units cannot execute an overrun from an overstacked hex.
4.18 At the end of each phase, if a hex is found to be overstacked, the owning player must choose and eliminate a unit from the hex.
4.2 Zone of Control
4.21 Most units have a Zone of Control (ZOC) which extends into the 6 hexes adjacent to the unit. Airbases, EA, security divisions, headquarters, markers, OSG, siege artillery and supply depots do not have ZOC. German infantry KG with a printed attack strength of 1 do not have a ZOC unless stacked with another unit that has a printed attack strength of 1 or more.
For example: One 1-1-5 KG in a hex by itself has no ZOC. Two such KG stacked together have a ZOC.
4.22 Multiple units have the same effect as one unit for ZOC purposes. Effects are not cumulative.
4.23 If a unit is in the ZOC of an enemy unit, then the enemy unit is conversely in the ZOC of the friendly unit. Friendly ZOC does not affect friendly units.
4.24 ZOC do not extend across sea/lake hexsides (exception: 5.26). No other terrain affects or precludes ZOC (exception: 8.108).
4.25 Units occupying a hex in an enemy ZOC negate that ZOC for several game functions (see 8.104, 9.42 and 9.52).
4.26 Units must generally stop moving when they enter a hex in an enemy ZOC (exception: 4.27, 5.4, and 6.27). Units may not move directly from an enemy ZOC to another enemy ZOC (exception: 5.43, 6.27).
4.27 Units starting a friendly movement phase in an enemy ZOC can leave that ZOC by expending 3 additional MP. A unit entering an enemy ZOC during movement may expend 3 additional MP to leave that enemy ZOC (see 5.4).
4.28 Airbases, headquarters, OSG, siege artillery and supply depot units may not enter an enemy ZOC unless a friendly unit with a ZOC is already there.
4.29 A unit or stack of units which retreats into a hex in an enemy ZOC loses one step of strength. Friendly units negate enemy ZOC in the hex they occupy for retreat and supply purposes. Units that are Out of Supply cannot retreat into an enemy ZOC unless a friendly unit is there (see 8.104 and 9.52).
5.0 Movement
Units move in the friendly movement phase of each game turn. All, some or none of a player's units may move each movement phase. Each unit may move up to the limit of its MP each turn but is not required to expend any or all of its MP. The phasing player may conduct overruns while moving (see 6.0).
The Axis player may again move (and overrun with) any of his German panzer units during the German Mechanized Movement Phase.
5.1 Movement Procedure
5.11 Each unit with a printed MP allowance of 1 or more can move during its friendly movement phase. A unit's MP may be adjusted due to supply (see 9.52 and 9.53).
5.12 Each unit or stack moves individually. Units which begin their friendly movement phase stacked together may be moved together. Units in a stack that are dropped off along the way may not move afterwards.
5.13 Units are not allowed to exceed their movement point allowance when moving (exception: 5.24).
5.14 Units with 0 MP cannot move (exception: factory EA units may evacuate; 12.3).
5.15 Movement is not required. The phasing player moves only those units he wants to. Units are not required to spend all their MP and may move in any direction or combination of directions.
5.16 Once a player's hand leaves a unit or stack of units, the movement of those units is considered finished.
5.2 Expending Movement Points
5.21 Units spend MP when entering hexes. Each terrain type and its MP cost is listed on the Terrain Effects Chart (TEC). Additionally, units pay 3 MP to exit an enemy ZOC (see 5.4) and 3 MP to conduct an overrun (see 6.1) (exception: Soviet units pay 2 MP during snow turns; 11.29).
5.22 Some terrain (major and minor rivers) are on hexsides and require MP in addition to the cost of the hex entered. Units cannot exit the map (exception: 12.3). Borders do not affect movement or ZOC (exception: 17.42, 18.42 and 19.42).
5.23 Certain units are 'motorized' and some are 'non-motorized.' These units sometimes expend differing amounts of MP (per the TEC) to enter the terrain.
5.24 A unit that begins a friendly movement phase not in an enemy ZOC, and that does not have enough MP to enter a hex, is still allowed to move 1 hex. Units with 0 MP are not allowed to move using this rule. Out of Supply and Lack of Supply units are allowed to use this rule. Units that have had movement prohibited to them are not allowed to move. Units may not use this rule to make an otherwise illegal move (such as moving ZOC to ZOC).
Note: Units that use 5.24 to move may not move more than the 1 hex allowed by this rule.
Note: German panzer units may not use the above rule in the German Mechanized Movement Phase.
5.25 German and Rumanian mountain units may move into mountain hexes at 1 MP.
5.26 Some lake hexsides have dual-direction red arrows. During snow turns, Soviet non-tank/mechanized units may move and attack across these hexsides and their ZOC also extends across these hexsides. Supply lines may be traced across these hexes during snow turns. Units may not retreat or advance across these hexes in any weather. Axis units may never use red arrow hexsides.
5.27 During snow turns, swamps are treated as forests in all regards. Also, all hexes north of the Arctic Circle (Tundra) cost twice the normal MP cost.
5.28 The German siege artillery unit may move up to 3 hexes per turn along a railroad (only), regardless of the terrain. It may not enter an enemy ZOC, even if a friendly unit is in that hex. It may use Strategic Movement (see 5.6).
5.3 Movement Restrictions
5.31 Only the phasing player can move units in his friendly movement phase. Units of the non-phasing player cannot move during an enemy movement phase (except to retreat from an overrun).
5.32 Units may not enter a hex occupied by an enemy unit. German air fleets and Soviet partisans are treated as markers for this rule (exception: 20.35). Enemy units may enter hexes with only these units without restriction.
5.33 German airbases and Soviet OSG units are moved after all other friendly units have finished their movement.
5.34 MP may not be transferred between units nor saved from turn to turn.
5.35 During the German Mechanized Movement Phase, only German panzer units (corps, divisions and KG) may move. Other units may not move.
5.4 Disengagement
Leaving an enemy ZOC is called 'Disengagement.'
5.41 A unit which Disengages expends 3 MP in addition to the cost of the terrain moved into.
5.42 A unit may Disengage if it began the phase in an enemy ZOC and/or if it moved into the enemy ZOC during the phase.
5.43 German panzer units (only) may move directly from one enemy ZOC to another. Other units of both sides may not move directly from one enemy ZOC to another.
5.44 German panzer KG (MP 8) and divisions (MP 9) can Disengage multiple times in one movement phase as long as they have the MP to spend.
5.45 Units which conduct an overrun are not Disengaging and do not spend the 3 MP.
5.5 Sea Movement
5.51 During each player's friendly movement phase, 1 unit may use Sea Movement. Sea Movement is not allowed during the German Mechanized Movement Phase.
5.52 All port hexes containing an Axis control marker are friendly to the Axis player; all other ports are friendly to the Soviet player.
5.53 To move by Sea Movement, the unit must begin and end the movement phase in friendly ports. A unit using Sea Movement is simply picked up and placed in the friendly destination port. See 5.57 and 5.58 for restrictions. Normal or Strategic Movement may not be used by a unit using Sea Movement in the same phase. A unit may use Sea Movement into and out of enemy ZOC.
5.54 Axis panzer, airbase, siege artillery, armies and Soviet tank, mechanized, OSG, EA and headquarters units of both sides may not use Sea Movement. Units that can use Sea Movement are: German infantry, mountain, supply depot and Axis corps-sized units, Soviet infantry corps and armies, Guard and Shock armies, marine and airborne units.
5.55 German infantry KG (including mountain KG) and Soviet infantry, naval and airborne corps count as one-half of a unit for Sea Movement. When moving two units, they must both start and end their Sea Movement in the same ports.
5.56 A unit that is Out of Supply or Lack of Supply can use Sea Movement.
5.57 A unit occupying Murmansk (hex N1327) may only use Sea Movement to move to Arkangelsk (hex N2718) and vice versa. A unit occupying Leningrad (hex 1418) may only use Sea Movement to move to Konigsberg (hex 2933) and vice versa. These ports may not be used for Sea Movement during snow turns.
5.58 In the Black Sea, Sea Movement is allowed between any cities with a port symbol.
5.6 Strategic Movement
5.61 A unit may use Strategic Movement if it does not move by normal means or use Sea Movement during the same turn.
5.62 A unit may use Strategic Movement if it remains at least 5 hexes from all enemy units at all times in the movement phase. Distance is counted from the enemy unit (exclusive) to the moving unit's hex. When tracing distance, terrain does not matter (including all sea/lake hexes). German air fleets and Soviet partisan units count as 'units' for this rule (see 9.84 and 10.24).
5.63 Since a unit using Strategic Movement cannot move to within 5 hexes of an enemy unit, it may never enter an enemy ZOC and cannot overrun or attack this turn.
5.64 Units using Strategic Movement do not use their printed MP but instead move up to 25 hexes. Neither a unit's movement class (non-motorized or motorized) nor terrain has any effect on a unit using Strategic Movement (exception: 5.65).
5.65 Units may not use Strategic Movement across lake/sea hexsides. Units may use Strategic Movement across the 5710/5811 hexside.
5.66 Airbases, headquarters and EA may not move by Strategic Movement. Axis depots may use Strategic Movement during mud turns, but may not otherwise use Strategic Movement (see 11.14).
5.67 An Out of Supply or Lack of Supply unit cannot use Strategic Movement (see 9.52 and 9.53). Units using Strategic Movement must remain in supply throughout the move.
5.68 German panzer units may use Strategic Movement in either of their movement phases, but not both.
5.69 In one movement phase, there is no limit to the number of units which may use Strategic Movement.
5.7 Hex Control
5.71 The Axis player initially controls all major cities and ports in Germany, Finland, Poland, Hungary and Rumania. The Soviet player initially controls all other major cities and ports.
5.72 To control a major city or port, a unit of the side must be in or have been the last to occupy the hex. Enemy ZOC and Soviet partisans have no effect on hex control. Control markers do not affect the movement of either player's units.
5.73 If the Axis player gains control of a major city or port hex outside of Germany, Finland, Hungary, Rumania, and Poland, place an Axis Control marker in the hex. Immediately remove it if the Soviet player regains control of the hex.
5.74 If the Soviet player gains control of a major city or port hex outside of the Soviet Union, place a Soviet Control marker in the hex. Immediately remove it if the Axis player regains control of the hex.
6.0 Overrun
During his movement phase (and the German's Mechanized Movement Phase), the phasing player may have a unit or stack of units (see 6.23) conduct an overrun. An overrun is an attack during movement. An overrun is successful if the defender is retreated or eliminated from his hex. If an overrun is successful, the phasing player automatically enters the defender's vacated hex and he may continue to move the overrunning units to the limit of their MP. Overruns are similar to combat, but are treated as movement.
6.1 Overrun Procedure
After the phasing player has moved adjacent to the defending stack and the overrun has been declared, resolve it in this order:
- The overrunning units move adjacent to the target hex and spend 3 MP, regardless of the defender's terrain (exception: 11.29).
- Total the offensive and defensive combat strengths of the involved units.
- Resolve the battle as a normal combat (see 8.1). However, add 1 to the die roll.
- If the overrun is successful, the overrunning units enter the defender's now-vacated hex (at no MP cost).
6.2 Overrun Restrictions
6.21 Only the phasing player may conduct overruns and only during his movement phase. The Axis player may also conduct overruns during his German Mechanized Movement Phase.
6.22 Units Out of Supply or Lack of Supply may not overrun.
6.23 Units stacked in the same hex at the start of the movement phase may overrun together as long as they remain stacked. Units must have the same movement category (motorized, non-motorized) to overrun together. After an overrun is completed, the units may separate if desired. At the instant of overrun, the attacking units may not be overstacked. Only one stack of units can conduct an overrun at one time, multiple stacks cannot overrun together.
6.24 Overruns target one defending hex, including all enemy units in it.
6.25 There is no limit to the number of overruns that may be performed against one unit or hex during a movement phase. There is no limit as to how many overruns a unit may conduct other than its MP.
For example: A German panzer division (9 MP) could conduct three overruns in one movement phase.
6.26 If an overrun fails to retreat or eliminate the defending units, the attacking units are finished moving. If the attacking units suffer a retreat, their movement is finished after the retreat. If attacking units suffer a step loss, they enter the defender's vacated hex (if vacated) and then finish their movement.
6.27 If an overrun results in the retreat or elimination of all defending units and the attacker suffers no retreat or loss, the attacking units are moved into the just-vacated hex at no MP cost, regardless of enemy ZOC. The attacking units may continue movement if they have MP remaining. Defending units may not advance in an overrun.
6.28 Overruns cannot be performed across major or minor rivers, all-sea/lake hexsides (regardless of the weather), or into swamp (swamps are considered forest hexes during snow turns (11.24)), mountain, major cities or fortress hexes.
6.29 The German air fleet Air Support is applied during German overruns (see 8.5). Soviet OSG die roll modifiers are applied during Soviet overruns (see 8.6).
7.0 Uncertain Soviet Combat Strengths
In War for the Motherland, Soviet army-sized units do not have pre-printed offensive and defensive combat strengths, but instead have a Combat Class letter (A, B or C). These units have unknown combat strengths until they participate in combat or end a turn adjacent to an Axis unit during an Administrative Phase. The Soviet player will then randomly draw a Combat Strength Marker (CSM) from the same draw cup as the Soviet unit's Combat Class. The CSM will remain with the unit until the unit is eliminated or is not adjacent to an Axis unit during an Administrative Phase.
Both players are always free to examine the CSM under a Soviet army.
7.1 Combat Strength Markers
7.11 If a Soviet army unit is involved in a combat or overrun as either attacker or defender and doesn't have a CSM, one is randomly picked for it.
7.12 During Step 'i' of the Administrative Phase of each turn, each Soviet army without a CSM that is adjacent to an Axis unit must have one CSM randomly picked for it.
7.13 There are three Combat Classes of CSM (A, B and C). Each CSM has its Combat Class and its offensive and defensive combat strengths printed on it. CSM are separated by Combat Class letter and kept in three opaque draw cups until needed.
7.14 When picking a CSM, the Soviet player randomly draws one CSM out of the draw cup that matches the Combat Class of the unit it is being drawn for. Redraws are not possible. The CSM is placed under the receiving unit, full strength side up.
7.15 At the start of the game, the Soviet player places most of his CSM with an "*" into one of three containers, one each for A, B, and C CSM. During the game, new CSM are received as reinforcements during the Mutual Supply Phase and are placed in their respective containers and mixed with the other CSM (see 13.32).
7.16 When a CSM is first chosen for a unit, it is placed with the stronger, front side up.
7.2 Removing Combat Strength Markers
7.21 During Step 'h' of each turn's Administrative Phase, the Soviet player must remove from play all CSM belonging to Soviet armies that are not adjacent to an Axis unit. It doesn't matter if the CSM is on the front or back side.
7.22 If a Soviet army is eliminated, its associated CSM is removed from play.
7.23 When a CSM is removed from play, it is placed back into the appropriate draw cup from where it came (exception: 7.24). The CSM may be chosen again.
7.24 "*" CSM are not placed back in the draw cups when removed from play. When removed, these CSM are permanently removed from play (exception: 19.43).
8.0 Combat
The phasing player is the attacker and the non-phasing player is the defender. The phasing player may resolve combats in any order he chooses. Combat occurs between adjacent units at the discretion of the phasing player.
8.1 Combat Procedure
- The phasing player declares which attacking units will attack which defending hex (however, see 8.34).
- Total the attack strengths of the attacking units and total the defense strengths of the defending units. If an involved Soviet army does not have a CSM, one is randomly drawn for it now. If the defending units are able to receive the defense strength bonus for minor or major rivers, it is applied now (see 8.42, 8.43 and 8.44).
- The attack and defense strength totals are compared and reduced to a combat ratio as shown on the Combat Results Table (CRT), rounding in favor of the defender.
For example: 15 offensive points attacking 4 defensive points is 15 / 4 = 3.75:1, rounded down to 3:1.
-
Determine the terrain in the defender's hex. Using that same terrain row on the CRT, move across to find the combat ratio as determined in Step #3 above. If the combat ratio is higher than the right hand column on the CRT, use the right hand column. If the combat ratio is lower than the left hand column of the CRT, use the left hand column of the CRT.
-
If all defending Soviet hexes are within a German air fleet's AZOI, the combat odds are shifted one column to the right in favor of the Germans (see 8.52). If all defending Axis hexes are within a German air fleet's AZOI, the combat odds are shifted one to the left in favor of the Germans (see 8.53).
-
The attacker determines the total combat die roll modifier:
- When the combat or overrun is being performed during a snow turn, add +3 or +1 to the die roll (see 11.27 and 11.28).
- If you are resolving an overrun, add +1 to the die roll.
- During a Soviet attack, if the defender is within 3 hexes of a Soviet OSG, the Soviet player must add +3 to the combat die roll (see 8.6).
- During an Axis attack, if the defender is occupying a major city or fortress and the German siege artillery unit is within 2 hexes, the Axis player may add +4 to the die roll (see 8.7).
Die roll modifiers are cumulative. A modified die roll higher than 10 is treated as 10.
-
The attacker rolls the die and modifies it according to Step #6 above. The modified die roll is cross referenced with the previously determined combat ratio column to determine the result.
-
Apply the combat result immediately (see 8.8-8.10).
-
The attacker may advance after combat if eligible (see 8.11).
Note: The Combat Results Table (CRT) is printed on the game map and is not reproduced in this text.
8.2 Which Units May Attack
8.21 Units may only attack during their friendly combat phase (exception: 6.0 Overrun). They may attack adjacent enemy units unless prohibited by terrain.
8.22 Attacking is always voluntary, units are never required to attack. Defending is not voluntary-when the defender's hex is attacked, all units in the hex are required to defend. Units not attacking or defending are not affect by the results of combat.
8.23 In one combat phase, there is no limit to the number of attacks that may be performed. Attacking units may only attack once per combat phase and may not have their offensive combat strength divided for use in more than one combat. Defending units may only be attacked once per combat phase. Within these rules, the attacker can allocate attacking units to combats as he chooses.
8.24 Units with an attack strength of 0 may not attack (and may therefore not advance after combat).
8.3 Multi-Unit and Multi-Hex Combat
8.31 Multiple attacking units in one combat total their attack strengths. Multiple defending units in one combat total their defensive combat strengths.
8.32 Attacking units occupying the same hex may attack different hexes or some units not at all. A unit may not split its attack strength to make separate attacks against different hexes.
8.33 Multiple defending units in one hex must be attacked as a group; they may not be attacked separately.
8.34 One attacking unit may attack defending units in multiple hexes. Multiple attacking units may only attack a single defending hex. Multiple attacking units may not attack defending units in multiple hexes.
8.35 If there are two or more defending hexes involved in a combat, the terrain most beneficial to the defender is used.
8.36 Non-German Axis units may participate in attacks with German units. However, non-German Axis units may not participate in attacks with other non-German Axis units of a different nationality. Two or more non-German Axis units of different nationalities may be involved in the same Soviet attack.
8.4 Terrain Effects on Combat
8.41 Terrain does not modify the attacker's or defender's combat strengths (exception: 8.42, 8.43 and 8.44). Terrain affects combat by determining which row of the CRT to use.
8.42 If the attacking units are attacking entirely across minor river hexsides, the defender adds +2 to his defense strength total. However, if the defender only has 1 defense strength point, add +1 to the defender's total instead.
8.43 If the attacking units are attacking entirely across major river hexsides, the defense strength total is doubled. The Kerch Straits (hexsides 6006/6007, 6007/6106 and 6106/6107) are treated as major river hexsides.
8.44 If the attacking units are attacking entirely across a combination of major and minor river hexsides, the defender's combat strength is doubled.
8.45 Changes to the defense strength total for major and minor rivers are only applied if all attacking units are attacking across river hexsides. If even one unit attacks across a non-river hexside, the defender receives no benefit.
8.46 During snow turns (only), the Soviet player may attack across lake hexsides that have a red arrow with non-armored/mechanized units. Otherwise, attacks are prohibited across any sea/lake hexsides. The attack is treated as if it was across a major river hexside. Units may not retreat or advance across sea/lake hexsides (even those with red arrows during snow turns).
8.47 Soviet units defending fortresses are considered to be occupying major cities. Fortresses are usable only by Soviet units and only in defense. If an Axis unit ever enters a Soviet fortress hex, the fortress is destroyed (place a Destroyed marker in the hex) and the hex is treated as a minor city for the remainder of the game. Fortresses may not be repaired.
8.48 The MP cost to enter a fortress hex doesn't change even if the fortress is destroyed.
8.5 Axis Air Support
8.51 Only the Axis player receives Air Support. It is received during the Axis Movement, Axis Combat, Soviet Movement, Soviet Combat and German Mechanized Movement Phases.
8.52 When resolving a combat, if all Soviet defenders are within an Axis air fleet's AZOI (see 10.21), the combat odds are shifted 1 to the right.
8.53 When resolving a combat, if all Axis defenders are within an Axis air fleet's AZOI (see 10.21), the combat odds are shifted 1 to the left.
8.54 The effect of only one air fleet applies per combat.
8.55 There is no Axis Air Support during snow and mud turns (see 10.25 and 10.26).
8.56 Axis Air Support may be used during overruns if all other restrictions are met.
8.6 Soviet Offensive Support Groups
8.61 Only the Soviet player receives Offensive Support Group (OSG) units. OSG are only used when the Soviet player attacks (including overruns), never when defending.
8.62 When resolving a Soviet attack or overrun, if all Axis defenders are within 3 hexes of a Soviet OSG, add +3 to the die roll. Only one OSG may support a single combat. One OSG can support any number of combats in one movement or combat phase if they are within range.
8.63 Terrain has no effect on the range of support of an OSG (including all-sea/lake hexsides). Ignore the presence of Axis units and ZOC in tracing the three-hex range.
8.64 The Soviet player is required to use an OSG +3 die roll modifier if the defending hex is within 3 hexes of an OSG.
8.65 OSG move last, after all other units during the Soviet Movement Phase.
8.7 German Siege Artillery
8.71 When resolving an Axis attack (not overrun) that includes at least 1 other German unit against a major city or fortress hex which is within 2 hexes of his siege artillery unit, the Axis player may add +4 to the combat die roll.
8.72 The Axis player is not required to use the siege artillery's +4 die roll modifier. He must state whether he will use it or not during Step #6 of the Combat Procedure.
8.73 If the siege artillery unit is in a Soviet ZOC and is not stacked with a friendly unit (not air fleet), it may not use its die roll bonus.
8.74 The siege artillery unit cannot use its die roll bonus in an overrun, against a non-major city/fortress hex, or in more than one attack in the German Combat Phase.
8.75 The German siege artillery unit may only move or retreat along a railroad.
8.8 Combat Resolution
8.81 "AE" results in the elimination of all attacking units.
8.82 "DE" results in the elimination of all defending units.
8.83 Combat results other than Eliminations and those in red boxes are shown as affecting one side with a number. "A" applies to the attacker, "D" applies to the defender.
8.84 The number means that the affected side's units must all retreat and/or take a number of step losses equal to the number. The player receiving the combat result may choose to satisfy it with a combination of step losses and hexes retreated.
For example: The result of a Soviet attack against two German corps is a "D2." The German player has three options to satisfy the result:
a) Each corps loses one step, or b) Both units retreat 2 hexes, or c) One corps loses one step and both corps retreat one hex.
8.85 Every unit involved in a combat must receive a step loss before any unit receives two step losses. When two units (one with a ZOC and one without a ZOC) participate in combat, the unit with a ZOC loses a step first.
For example: A Soviet army and economic asset are stacked and receive a combat result of "D1." Because the economic asset has no MP and cannot retreat, the result will be a step loss. The Soviet army has a ZOC and economic asset does not, so the army takes a step loss.
8.86 Combat results in red boxes cause step losses without the option of retreating. The number to the left of the slash applies to the attacker and the number to the right of the slash applies to the defender. The defender applies his losses first.
8.87 If either hex is now vacated after applying step losses and retreats, the opposing units may advance after combat (see 8.11).
8.9 Step Losses
German units and their steps of strength:
- Armored Corps: 4 steps of strength
- Infantry Corps: 4 steps of strength
- Mountain Infantry Corps: 3 steps of strength
- Armored Division: 2 steps of strength
- Other units: 1 step of strength
8.91 Non-mountain German corps-sized units have 4 steps of strength. The 1st and 2nd steps are the front and back of the unit. The 3rd and 4th steps are the front and back of the replacing KG unit (which must be the same type as the unit it is replacing). German mountain corps have only three steps (mountain KG don't have a reduced strength side).
8.92 Axis armies, German panzer and infantry KG, panzer divisions and Soviet armies have two steps of strength (the front and back of the unit (or CSM)).
8.93 German mountain KG, siege artillery, supply depot, airbase and non-German Axis corps-sized units plus Soviet OSG, factories, corps and headquarters of both sides have only one step.
8.94 Should a unit receive a step loss, it is either flipped over to its weaker side or replaced with an appropriate KG. If the unit had only one step, it is eliminated.
For example: When a German 5-7-4 loses a step in combat, it is flipped over to its 3-5-4 side. The unit now has three steps left. When it loses its next step (or, if the 5-7-4 loses two steps), it is replaced with a 2-3-5 infantry KG. It has two steps left. When the KG loses a step, it is flipped over to its 1-1-5 side. It now has only one step remaining. When it loses another step, the unit is eliminated and removed from the map.
8.95 When applying step losses to multiple units, a single unit may not take 2 step losses until all units have taken at least 1 step loss. Also, a unit may not take a step loss if there is another unit in the combat which has a ZOC. Units which have a ZOC take precedence on who must take a step loss if there is a choice.
8.10 Retreats
8.101 In order to satisfy a combat result, units may be retreated. Each hex all units retreat satisfies one point of the combat result. Retreat does not use any MP, but units with 0 MP may not retreat at all. If a unit with a 0 MP is alone in a hex, it must be eliminated to satisfy a combat result. If it is stacked with a combat unit that has a ZOC, the combat unit must lose steps first to satisfy the combat result. Any remaining combat result is then satisfied by the elimination of the unit with 0 MP. Units that retreat must end their retreat a number of hexes away from their original hex equal to the distance retreated.
8.102 The owning player always retreats his units. Each unit involved in the combat must retreat a number of hexes equal to the combat result. In other words, each unit affected by the combat result must retreat 1 hex in order to satisfy 1 point of a combat result. Units stacked together at the moment of combat may retreat to different hexes.
8.103 Retreating units may not retreat into an enemy-occupied hex. Units cannot retreat off the map or across an all sea/lake hexside (even if a red arrow is present). The German siege artillery unit may only retreat along a railroad.
8.104 A retreating unit that enters a hex an enemy ZOC loses a step unless a friendly unit is in the hex, in which case no step is lost. A retreating stack of units incurs only one step loss for the stack, not one step loss per unit. Retreating units that are Out of Supply cannot retreat into a hex in an enemy ZOC unless there is a friendly unit present (see 9.52).
8.105 Units must retreat to hexes that are not occupied by other friendly units if possible. It can retreat into hexes containing other friendly units only when vacant hexes not in an enemy ZOC cannot be found. Units may temporarily violate stacking restrictions during a retreat. If a unit would end its retreat in a hex in violation of stacking restrictions, the owning player may choose one of the retreating units in the hex to retreat 1 additional hex. If, following this additional retreat, any retreating unit would still occupy a hex in violation of stacking restrictions, the original retreating units is instead eliminated.
8.106 Retreat Priority. When a unit has the option of retreating into multiple hexes, the path of retreat is decided one hex at a time based on the following priorities:
- An unoccupied hex not in an enemy ZOC;
- A friendly-occupied hex not in an enemy ZOC (may temporarily exceed stacking restrictions);
- A friendly-occupied hex in an enemy ZOC;
- An unoccupied hex in an enemy ZOC (exception: units that are Out of Supply, 9.52).
8.107 If a unit retreats into a friendly unit's hex and that hex is later attacked by the enemy player in the same combat phase, the retreated unit doesn't add its defense strength to other units in the hex. If the new hex suffers any adverse combat result, the previously retreated units are automatically eliminated (and their loss doesn't count towards satisfying the result against the new hex). This does not apply to overruns.
8.108 When German panzer and Soviet tank/mechanized units retreat across a major river, the stack loses 1 additional armored step.
8.11 Advance After Combat
8.111 If one side retreats or is eliminated as a result of combat, the opposing side may advance after combat. Advance after combat is not required and may be performed by either the attacker or defender. Advances must be performed before the next combat is resolved or not at all. There is no advance after combat during overruns (however, see 6.27).
8.112 Advance after combat is similar to retreats, but units do not lose steps for entering an enemy ZOC. Units with 0 MP cannot advance.
8.113 The maximum length of advance after combat is equal to the combat result minus any step losses taken (however, see 8.114). If the combat result is an "AE" or "DE," the maximum advance after combat is 3 hexes.
For example: The combat result is "D3." The defender chooses to eliminate one step and retreat 2 hexes. The attacker may advance 2 hexes.
8.114 A unit's type also limits the distance it may advance after combat. German panzer units may advance up to 3 hexes. Soviet armored and mechanized units may advance up to 2 hexes. All other units may advance only 1 hex.
For example: The combat result in a red box is 1/3, and the defender has only 1 step. The step is eliminated and the attacker may advance 2 hexes. The German attackers consist of an infantry corps and a panzer corps. The infantry unit may advance a maximum of one hex while the panzer corps may advance two hexes.
8.115 The first hex of an advance must be a hex previously occupied by an opposing unit in the combat. If 2 or 3 hexes of advance are allowed, the advancing player may choose the second and third hexes. Advances are not possible across sea/lake hexsides (even if a red arrow is present). Major river hexsides may be crossed when entering the first hex of an advance, but not the second or third hexes. Swamps may not be entered if they are not the first hex of an advance.
8.116 Units advancing after combat must stop when they enter a hex in an enemy ZOC. Enemy ZOC are ignored in the defender's hex.
8.117 Units that did not participate in the combat cannot advance after combat. Soviet OSG and the Axis siege artillery unit cannot advance after combat.
8.118 During advance after combat, players are allowed to temporarily exceed stacking limits. Stacking limits are enforced at the end of each combat.
9.0 Supply
Logistics affect every aspect of warfare. If ammunition, fuel and basic necessities cannot be supplied to the troops, their survival for any length of time is in question. In order to get the most out of their forces, players must prevent their units from being cut off by the enemy or by hostile terrain so that the units may be kept in supply.
9.1 How to Determine Supply
9.11 Supply is determined for all units by both players during the Mutual Supply Phase of each turn.
9.12 A unit found to be in supply during the Mutual Supply Phase remains so for the duration of the turn. A unit found to be Out of Supply or Lack of Supply during the Mutual Supply Phase remains so for the duration of the turn even if it moves into supply during the turn.
9.13 A unit that is not supplied is in one of two states: Out of Supply or Lack of Supply. A double-sided marker is provided to indicate units so affected.
9.2 Axis Supply
9.21 For a non-Finnish, non-Rumanian Axis to be in supply, it must trace a Line of Supply (LOS) 4 hexes to an Axis Supply Source (see TEC) or to an Axis supply depot that is itself in supply (see 9.22). The LOS is affected by Soviet partisans in that they influence the maximum length of the supply line (see 9.8).
9.22 The Axis player supplies his units through chains of connected supply depots back to an Axis supply source. In this way the Axis player builds a chain of connected supply depots through which units may trace supply. Any number of supply depots may comprise a chain, but the provisions of 9.4 must be followed within each link of the chain or it is broken.
For example: A supply depot may trace up to 4 hexes to an Axis Supply Source and be in supply. Other supply depots could trace up to 4 hexes to the first supply depot and be considered in supply.
9.23 A supply depot may provide supply to any number of non-Finnish, non-Rumanian Axis units (see 9.28) including other supply depots that trace an LOS to it.
9.24 There are two types of supply depots: one has 3 MP (the 'normal' kind) and one with 4 MP (the 'extended' kind). There is no difference between the two except the MP difference (exceptions: 16.32 and 20.1).
9.25 Supply depots are motorized units. They are always in supply themselves, even if unable to trace an LOS.
9.26 If an LOS can be traced from Axis units to a supply depot that is not linked to an Axis Supply Source, the supply depot may be 'expended' to put those units in supply. This must be done at the beginning of the Mutual Supply Phase at the option of the Axis player. An unlimited number of supply depots may be expended in 1 turn. When a supply depot is expended, it is turned over to its Expended side. There is no limit to the number of units that can trace supply to expended supply depot (exception: 9.28). At the end of the Mutual Supply Phase, remove all expended supply depots (see 9.27). Supply depots may be expended for no reason if the Axis player desires.
9.27 Supply depots that have been removed from the game (due to combat or by being expended) may appear as a reinforcement 4 turns later (see 13.53).
9.28 Finnish and Rumanian units do not trace supply through Axis supply depots. Instead, these units trace supply to headquarters units of the same nationality which are themselves in supply, or to their home country capital (Finnish units to Helsinki (6327) and Rumanian units to Bucharest (1225)). For Finnish and Rumanian headquarters to be in supply, they must be on a railroad hex leading uninterrupted back to their home country capital (see 9.47). If, during the Mutual Supply Phase, the Soviet player has control of the capital of one of these countries, all units of that country are Out of Supply.
9.29 German units may be supplied by air if within an AZOI (see 9.6). Axis supply may be traced through Black Sea ports using sea supply (see 9.7).
9.3 Soviet Supply
9.31 Soviet non-headquarters, non-economic asset units are in supply if they can trace an LOS 6 or less hexes from itself to a Soviet headquarters which is itself in supply. A non-headquarters unit may not trace supply directly to a Soviet Supply Source.
9.32 Soviet headquarters units are in supply if they occupy a railroad hex that can trace an uninterrupted LOS to either a Soviet Supply Source or Moscow (C2706) (see 9.47). If Moscow is ever occupied by an Axis unit, it is unable to be used as a Soviet Supply Source for the rest of the game (place a Destroyed marker in Moscow to show this).
9.33 Soviet EA are always in supply.
9.34 If Soviet non-headquarters, non-OSG units are Out of Supply, but occupy a hex with a factory EA, they are considered Lack of Supply instead (see 9.53).
9.35 Soviet supply may also be traced through Black Sea ports using sea supply (see 9.7).
9.4 Line of Supply
9.41 A Line of Supply (LOS) is a path of adjacent hexes that leads from a unit to a supply source or a hex occupied by a supply depot or headquarters.
9.42 A LOS may not be traced through an enemy-occupied hex. A LOS may not be traced through an enemy ZOC unless that hex is occupied by a friendly unit.
9.43 A LOS may not be traced across a major river hexside unless along a railroad. A LOS may not be traced through all-sea/lake hexsides (exception: 9.44). Soviet LOS may be traced across all-sea/lake hexsides that have red arrows during snow turns.
9.44 The causeway which connects the Crimea with the Ukraine (the hexside between 5710 and 5811) is a special case. It may be used for both LOS and Strategic Movement. It is considered a lake/sea hexside for ZOC, normal movement, combat, retreat and advance after combat. The causeway may not be destroyed.
9.45 A LOS traced along connecting railroad hexes counts as only ½ hex instead of 1 hex.
9.46 Swamp and tundra hexes count as 2 hexes when tracing LOS (unless using a railroad, then see 9.45).
9.47 Any rail line used by a Soviet, Rumanian or Finnish headquarters for LOS trace must be free of enemy units and their zones of control (except where the EZOC is occupied by a friendly unit).
9.5 Supply Effects
9.51 A unit which cannot trace a valid LOS to a supply source is Out of Supply and an Out of Supply marker is placed on it (exceptions: 9.34, 9.58, 9.61, 9.71 and 9.72). The unit remains Out of Supply until the Mutual Supply Phase of a following turn when the unit can trace a valid LOS, at which point the Out of Supply marker is removed.
9.52 Out of Supply units halve their MP (round up). They may not perform Strategic Movement or overrun. They may perform Sea Movement (see 5.56). Their attack and defense strengths are halved (round up). Also, it cannot retreat into an enemy ZOC unless a friendly unit is there.
9.53 Lack of Supply units halve their MP (round up) and their offensive combat strength (round up). They may not perform Strategic Movement or overrun. They may perform Sea Movement (see 5.56). Their defensive combat strength is unaffected.
9.54 Breakdown and buildup (see 14.12 and 14.32), step exchanges between units (see 14.27) and Soviet Guard and Shock conversion (see 13.2) cannot happen if the units are Out of Supply.
9.55 When an Axis airbase is Out of Supply, it is immediately removed from the map and arrives as a reinforcement 4 turns later (see 13.52).
9.56 If a Soviet OSG is Out of Supply, it is immediately destroyed and removed from the game.
9.57 If a headquarters unit is Out of Supply, remove it from the map and the owning player rolls one die. If a 1-3, the unit arrives as a reinforcement next turn. If a 4-6, it arrives as a reinforcement in 2 turns (see 13.54).
9.58 Out of Supply units which cannot trace an LOS within twice the normal range are considered Isolated instead. Each Isolated unit must make an Attrition Check immediately (see 9.9). Other than the Attrition Check, there is no difference between being Isolated and being Out of Supply. There are no Isolated markers.
9.6 German Air Supply
9.61 German units which would be considered Out of Supply but are within the AZOI of an air fleet are considered to be Lack of Supply instead.
9.62 There is no limit to the number of German units which may receive air supply from one air fleet.
9.63 Airbases that are Out of Supply are removed immediately. Their associated air fleet may not be placed on the map to provide air supply before being removed.
9.64 Non-German Axis units cannot receive air supply.
9.65 German air supply is affected by weather (see 11.12 and 11.22).
9.7 Sea Supply
9.71 During the Mutual Supply Phase, if the Soviet player controls Novorossiisk (6205) or Tuapse (6402) in normal railroad supply he may supply all Soviet units within two hexes of a Black Sea port. The units receiving sea supply must be able to trace LOS to the port normally.
9.72 During the Mutual Supply Phase, if the Axis player controls both Odessa (5718) and Sevastopol (6313) in normal railroad supply he may supply all Axis units within two hexes of a Black Sea port. The units receiving sea supply must be able to trace LOS to the port normally.
9.73 Any number of units may receive sea supply (exception: headquarters, supply depot, airbase and OSG may not use sea supply). Non-German Axis units may not use Sea Supply. Ports which are not on the Black Sea may not be used for Sea Supply (exception: see 19.47).
9.74 During the Mutual Supply Phase, if the Axis player controls Sevastopol (6313), the Soviet player cannot sea supply Odessa (5718). If the Soviet player regains Sevastopol he can sea supply Odessa again.
9.8 Partisans
9.81 The Soviet player receives 5 partisans during the game. Partisans are placed in any eligible hex (per 9.82 and 20.35) during the Soviet Movement Phase of the turn they arrive. The Soviet player may reposition partisans to any eligible hex (per 9.82 and 20.35) each movement phase thereafter.
9.82 Partisans may be placed in any hex that doesn't contain an Axis unit. Partisans cannot be placed in hexes outside the Soviet Union (Finland, Greater Germany, Hungary, Rumania and Bulgaria). Only one partisan may occupy a hex.
9.83 A partisan in a hex counts as 2 hexes for tracing a LOS through it. When tracing a LOS through a partisan occupying a railroad hex, the hex is counted as 1 hex if it would otherwise have counted as ½ (see 9.45).
9.84 A partisan is considered an 'enemy unit' for the purposes of restricting Axis Strategic movement (see 5.62). Partisan markers have no effect upon combat. Units may enter and remain in a partisan marker's hex without penalty. Partisans may be negated (see 9.85), but may never be eliminated.
9.85 An Axis unit in a hex with a partisan negates the partisan's 5.62 and 9.83 effects.
9.9 Attrition Check
9.91 During the Mutual Supply Phase, Isolated units must check for Attrition. For each Isolated unit, roll one die and determine the result on the Attrition Decision Chart (ADC). Modify the die roll based on the unit's nationality, weather and terrain. The Attrition Check result will either be no effect, or a number, which represents the number of step losses the checking unit must immediately lose. Supply depots are always in supply, so they never check for Attrition.
9.92 If the Isolated unit occupies a minor city, +1 is added to the die roll. If the unit occupies a major city or a non-destroyed fortress, +2 is added to the die roll.
9.93 There is no Attrition Check on the first turn of the game.
10.0 German Airpower
The Axis player has three air units from the start of the game. Each is composed of two pieces: one airbase unit and one air fleet.
10.1 Placing Air Fleet Markers
10.11 At the beginning of each Mutual Supply Phase each air fleet may be placed on the map within range of its associated airbase (exception: 10.25).
10.12 Each air fleet marker may be placed within 4 hexes of its associated airbase, ignoring enemy units and terrain.
10.13 All air fleets are removed from the map at the end of every German Mechanized Movement Phase.
10.14 If an airbase is ever considered Out of Supply, it is immediately removed from the map (see 9.55).
10.2 Air Zone of Influence
10.21 Each air fleet placed on the map has an Air Zone of Influence (AZOI) which consists of all hexes within three or five hexes of it (depending on the air fleet). An AZOI is unaffected by terrain. If the AZOI of two or more air fleets overlap, their effects are not cumulative.
10.22 When an overrun or combat is being resolved, if all defending hexes are within an AZOI, the Axis player receives an air combat bonus (see 8.5).
10.23 During the Mutual Supply Phase, if a German unit would be considered Out of Supply but is within an AZOI, the unit receives aerial supply and is considered Lack of Supply instead (see 9.6).
10.24 An air fleet marker is considered an 'enemy unit' for the purposes of restricting Soviet Strategic Movement (see 5.62).
10.25 During mud turns, the Axis player may not place air fleets on the map.
10.26 During snow turns, the Axis player may place air fleets on the map, but they have no effect except to provide Air supply during the Mutual Supply Phase. They do not provide the Axis player with Air Support during an overrun or combat (see 8.55).
11.0 Weather
Weather's influence in War for the Motherland 2 is represented by the length of each game turn and in supply, combat and German airpower with the rules below.
11.1 Mud
11.11 Per the Game Turn Track, the following turns are considered "mud turns:" 7, 12, 21, 26, 35 and 40) and 11.12 through 11.15 apply.
11.12 The Axis player may not place air fleets on the map.
11.13 Subtract -3 from the die roll for Soviet parachute landings (see 13.43).
11.14 German supply depots may be moved by Strategic Movement (see 5.66).
11.15 German units which are in Soviet ZOC can perform breakdown/buildup and exchanging of steps (see 14.0). Soviet armies which are in an Axis ZOC can convert to a Guard or Shock army (see 13.23).
11.2 Snow
11.21 Per the Game Turn Track, the following turns are considered "snow turns:" 8-11, 22-25 and 36-39) and 11.22 through 11.29 apply.
11.22 The Axis player may place air fleet markers on the map, but they have no effect except to provide Air Supply during the Mutual Supply Phase.
11.23 The sea/lake hexsides where the red bidirectional arrow is printed are ice roads. Soviet units (exception: not tank/mechanized) can cross ice roads as if they were a major river (see 5.26, 8.103, 8.115 and 9.43). Units may not retreat or advance after combat across an ice road however.
11.24 All swamp hexes are treated as forest hexes (see 5.27). All hexes north of the Arctic Circle cost twice the normal MP cost.
11.25 There is no sea movement allowed into or out of Murmansk (hex N1327), Arkangelsk (hex N2718), Leningrad (hex 1418), or Konigsberg (hex 2933).
11.26 Subtract -3 from the die roll for Soviet parachute landings (see 13.43).
11.27 During the first winter (snow turns 8-11), all overruns and combat are resolved with a weather die roll modifier of +3.
11.28 During the second (snow turns 22-25) and third winters (snow turns 36-39), all overruns and combats are resolved with a weather die roll modifier of +1.
11.29 Soviet overruns require only 2 MP, not 3 MP as normal.
Note: In 9.57, 13.54 and 13.55 the source's text layer drops the dash in a die range ("If a 13", "If a 26"); these are transcribed as "1-3" and "2-6", matching the ranges that follow in the source. The source's closing parenthesis in 11.11 and 11.21 is missing; the turn lists are transcribed as printed.
12.0 Soviet War Economy
The Soviet player has been given a fixed number of Economic Asset (EA) units at the start of the game. EA are used to produce Soviet Offensive Support Group units.
There are 6 types of EA: Factories, oil fields, coal fields, mineral deposits (iron, nickel, manganese, etc.), strategic ports (U.S. Lend-Lease goods) and oil pipelines to the Soviet heartland.
12.1 General Rules
12.11 EA cannot move or retreat (exception: 12.3, Factory evacuation) and are always in supply. EA have a defense strength of 1, 1 step and no ZOC (4.21).
12.12 If an EA is eliminated, it is placed in the Destroyed Economic Assets Box. The number of EA in this box determines OSG Production (see 12.22).
12.2 OSG Production
12.21 Per the Game Turn track, the following turns are considered "Production Turns:" 5, 7, 9, 11, 12, 14, 19, 21, 23, 25, 26, 28, 33, 35, 37 and 39. These turns have a red square with a number in them as a reminder. This is the Production Number for that turn.
12.22 During the Administrative Phase of each Production Turn (not each game turn), the Soviet player adds up the total number of destroyed EA in the Destroyed Economic Assets Box. If the number of destroyed EA is less than the Production Number for that turn, the Soviet player receives one OSG and immediately places it on the map. It is not possible to delay the arrival of an OSG. If the number of destroyed EA is equal to or greater than the Production Number for that turn, no OSG is received.
12.23 New OSG are placed on the map in any Soviet-supplied hex not in an Axis ZOC (even if occupied by a Soviet unit).
12.24 A total of 10 OSG can be on the map at any time. If the Soviet player was able to produce the 11th OSG, it is forfeit instead. Eliminated OSG may be replaced by production on a following turn.
12.3 Factory Evacuation
12.31 The Soviet player may evacuate any number of factories during the game. Only factories may be evacuated. Other EA may not be evacuated.
12.32 During the Administrative Phase of each Production Turn (not each game turn), the Soviet player may evacuate up to three factories. Evacuated factories are placed in the Evacuated Factories Box for the remainder of the game.
12.33 In order to evacuate a factory, it must be able to trace a line of railroad hexes from its hex uninterrupted to a Soviet Supply Source. This path may not enter an Axis-occupied hex and it may not enter an Axis ZOC, unless that hex is occupied by a Soviet unit. If a factory begins the Administrative Phase in an Axis ZOC, it may not evacuate.
12.4 Strategic Ports
12.41 During the Administrative Phase of each game turn (not Production Turn), if a Strategic Port EA cannot trace a line of uninterrupted railroad hexes to a Soviet Supply Source, it is eliminated and placed in the Destroyed Economic Assets Box. Determining railroad use is the same as for Evacuation (see 12.33).
12.42 Murmansk (N1327) and Archangelsk (N2718) are port hexes. The Soviet player may use these ports for Sea Movement and Sea Supply even if their Strategic Port EA have been eliminated.
13.0 Reinforcements
Both players receive reinforcements according to their own Reinforcement Schedule. Each reinforcing unit is printed with "GT#", where the number is unit's turn of entry.
For example: A German unit with 'GT4' printed on it arrives during the 4th turn's German Movement Phase.
13.1 Reinforcement Entry
13.11 At the start of each player's movement phase, that player places his scheduled reinforcements on any supplied hex within the restrictions of 13.12, 13.13 and 13.14 (exceptions: 13.2 Soviet Guard and Shock Army Conversion; 13.3 Soviet CSM Improvement; and 13.4 Soviet Airborne Corps). Reinforcements may be placed in excess of stacking limits.
13.12 Axis reinforcements (including supply depot and airbases which return through rule 13.5) are placed at least 4 hexes away from Soviet units in a supplied hex (exception: 19.44).
13.13 Soviet reinforcements (other than Guard and Shock armies (13.2), CSM (13.3), and airborne corps (13.4)) must be placed in or adjacent to a Soviet headquarters unit in a supplied hex. Soviet reinforcements may not be placed in an Axis-occupied hex or in an Axis ZOC, even if a friendly unit in the hex. When a headquarters is itself in an enemy ZOC, if there are adjacent hexes that are not in enemy ZOC, those hexes may be used for reinforcement placement.
13.14 Headquarters that arrive as reinforcements (including previously destroyed headquarters) must be placed at least 4 hexes from the nearest enemy unit on a rail line that can trace a normal LOS to the capital of its country or a friendly Supply Source for Soviet headquarters.
13.15 Reinforcements are considered in supply and may move normally the turn they appear. However, they may not be placed in hexes which would be considered Out of Supply or Lack of Supply in the previous Mutual Supply Phase.
13.16 Axis reinforcements may not be placed already broken down into KG units.
13.17 Most reinforcements may be delayed until a later turn if the owning player chooses. However, Soviet CSM (see 13.3), partisan markers (see 9.8), Italian surrender (see 13.6), and German air withdrawals (see 13.7) may not be delayed.
13.2 Conversion of Soviet Guard and Shock Armies
13.21 Unlike other Soviet reinforcements, the Guard and Shock armies are not placed on the map when received. Instead, they are placed in the Conversion Waiting Box. In order to place these units on the map, the Soviet player must Convert a normal army unit.
13.22 At the start of each Administrative Phase of each turn, the Soviet player may use a Guard or Shock army in the Conversion Waiting Box to 'Convert' an army on the map. The Guard or Shock army is simply exchanged for the army unit on the map and the regular army unit is removed from play.
13.23 An Out of Supply or Lack of Supply army may not be Converted. An army which is in an Axis ZOC may not be converted (exception: 11.15).
13.24 If an army which is Converted already has a CSM, return the "C" CSM to its draw cup (exception: 7.24) and draw a "B" CSM. Even if the Converted unit had a reduced CSM, the new CSM is placed face up at full strength.
13.25 There is no limit to the number of units which can Convert during one Administrative Phase. However, only Guard and Shock units in the Conversion Waiting Box can be used for Conversion. Guard and Shock armies may not be Converted into normal army units.
13.26 An army which has been removed from the map due to Conversion may only be returned to play through Buildup and Reorganization (see 14.3) with 2 corps as a completely new unit. It may return in the same Administration Phase it was Converted.
13.3 Combat Strength Marker Improvement
13.31 The Soviet player receives new CSM with higher combat strengths during the game.
13.32 Reinforcing Soviet CSM arrive during the Mutual Supply Phase instead of the Soviet Movement Phase and are placed in the appropriate draw cup (A, B or C).
13.4 Soviet Airborne Corps
13.41 The Soviet player receives 2 airborne corps during the game. When received at the beginning of the Soviet Movement Phase, they are placed in the Paradrop Waiting Box (printed on the map).
13.42 The Soviet player may Paradrop an airborne unit which is in the Paradrop Waiting Box onto a hex during a Soviet Movement Phase. The drop hex must be within 6 hexes of a supplied Soviet headquarters and not in an Axis-occupied hex. You may drop into an Axis ZOC.
13.43 When an airborne unit drops, the Soviet player rolls one die. If the drop hex is in an Axis ZOC, add +1 to the die roll. If the drop is performed during a mud or snow turn, subtract -3 from the die roll. If the modified die roll is a 1 or 2, the drop is successful and the airborne unit is placed in the hex. If the modified die roll is a 3-6, the drop is unsuccessful and the airborne corps is eliminated.
13.44 After an airborne corps lands it functions like any other unit. The unit is considered in supply the turn it drops. Only one airborne corps can Paradrop per Soviet Movement Phase.
13.45 Each airborne corps may only Paradrop once per game.
13.46 The Soviet player may delay dropping his airborne corps as long as he chooses to. However, it is not possible to bring them onto the map as a normal reinforcement, they must enter by dropping.
13.5 Recovery
13.51 Units removed from play may be returned to play as a reinforcement under the following rules.
13.52 A German airbase (and its associated air fleet) are returned to play 4 game turns after being removed (see 13.12).
13.53 Axis supply depots are returned to play 4 turns after being removed (see 13.12).
13.54 When a headquarters is removed from play, the owning player rolls a die. If the die roll is a 1-3, the headquarters arrives as a reinforcement next turn. If the die roll is a 4-6, it arrives as a reinforcement in two turns (see 13.14).
13.55 When a Soviet infantry army is eliminated, the Soviet player rolls a die. If the die roll is a 1, the army is permanently removed from play and an infantry corps arrives as a reinforcement in 2 turns. If the die roll is a 2-6, the army returns to the game 2 times the die roll number of turns later as a reinforcement.
For example: If the die roll is a 3, the army will return as a reinforcement in 6 turns.
For example: If the die roll is a 1, the army is permanently eliminated and an infantry corps will arrive as a reinforcement in 2 turns.
13.56 When a Soviet tank army is eliminated, the Soviet player rolls a die. If the die roll is a 1, the tank army is permanently removed from play and a mechanized corps arrives as a reinforcement in 2 turns. If the die roll is a 2-6, the tank army returns to the game 2 times the die roll number of turns later as a reinforcement.
13.57 When a Soviet Guard or Shock army is eliminated, the Guard/Shock unit is automatically placed in the Conversion Waiting Box and the Soviet player rolls a die per 13.55 for the return of the infantry army which was previously Converted. The returning army does not have to be the exact unit that was converted.
For example: A Guard unit is eliminated on turn 20. The Guard unit is immediately placed in the Conversion Waiting Box and the die roll is a '4.' A Soviet C-3 army is then placed on the turn record track to arrive as a reinforcement on turn 28.
13.58 German KG may be reused as needed.
13.59 Other than the above, it is not possible for a destroyed unit to return to the game.
13.6 Italian Surrender
During the Administrative Phase of turn 34, the Axis player permanently removes the Italian 8th Army from the game, whether it is already eliminated or on the map (just pick it up and set it aside).
13.7 German Air Withdrawal
At the end of the German Mechanized Movement Phase of turns 11 and 31, the Axis player permanently removes from the game one airbase unit and its associated air fleet. The units are just picked up and set aside.
14.0 Unit Breakdown and Buildup
German corps-sized units may breakdown into or buildup from separate Kampfgruppe (KG) substitute counters of the same type. A Soviet army-sized unit that has been eliminated or converted may be rebuilt from two corps-sized units. A Soviet army with a reduced strength CSM may have the CSM returned to its full strength side by incorporating a Soviet corps-sized unit.
14.1 When Breakdown and Buildup Occurs
14.11 Units can breakdown or buildup during the Administrative Phase of each turn. During a turn, there is no limit to the number of units which may breakdown or buildup (see 14.33).
14.12 Units cannot breakdown, buildup or exchange steps if Out of Supply, Lack of Supply or if they are in an enemy ZOC. These actions may be performed in an enemy ZOC during mud turns (see 11.1).
14.13 In order to buildup, breakdown or exchange steps, the involved units must be in the same hex.
14.14 The Axis player is not allowed to breakdown corps into KG before the start of the game or when reinforcements are placed.
14.15 Non-German Axis units cannot breakdown or buildup.
14.2 German Kampfgruppe Units
14.21 The Axis player may breakdown a German corps into 2 KG of the same type. Each KG has two steps and it is possible to divide a KG into two one-step KG of the same type. When breaking down, the replacing KG are placed in the same hex where the corps unit was. When dividing KG, stacking limitations (see 4.1) cannot be exceeded.
14.22 The German Breakdown Chart (printed on the map) shows which KG German corps breakdown into or buildup with.
14.23 The Axis player may combine 2 KG of the same type that are stacked together. Refer to the German Breakdown Chart to determine what is needed. Only destroyed or broken down German corps may be built. Corps beyond those provided in the game may not be built. KG of different types may not be combined to buildup corps.
14.24 Reinforcing KG may be used as a normal KG on or after their turn of entry, but not before.
14.25 There is no limit to the number of KG which may be on the map at any one time. There is no restriction on the number of breakdowns and buildups that may be performed in a turn. However, each corps and KG can only perform 1 breakdown or buildup per turn.
For example: If a 9-8-7 panzer corps breaks down into 2 4-3-8 panzer KG, the KG cannot further breakdown into 4 2-1-8 panzer KG during the same Administrative phase.
14.26 During the Administrative Phase, the Axis player may exchange steps between stacked units if they are of the same type.
For example: Two 3-5-4 are in a hex. One of them breaks down into a 2-3-5 KG while the other absorbs one step and flips over to its 5-7-4 side.
14.27 German units exchanging steps per 14.26 are restricted by the "each corps and KG can only perform 1 breakdown or buildup per turn" rule from 14.25.
For example: A corps unit rebuilt from KG is not allowed to exchange a step with another KG during the same Administrative Phase.
14.28 A corps can be broken down into a KG and the KG absorbed by another corps, all counting as one action for each unit per 14.27.
For example: If two 7-6-7 panzer corps are stacked in a hex, one of them may breakdown into a 4-3-8 KG and its other panzer step is absorbed by the second panzer corps, flipping it over into a 9-8-7.
14.29 The only units that can exchange steps are German infantry and panzer units. Other unit types (mountain, non-German Axis units and all Soviet units) may not exchange steps. Panzer divisions can give away steps but can never incorporate steps.
14.3 Soviet Army Buildup and Reorganization
14.31 The Soviet player may rebuild armies from 2 stacked corps. The 2 corps are removed from the hex and an army is placed in that hex. This may be performed in an Axis ZOC.
14.32 The 2 corps do not have to match unit types and airborne corps may not be used. Lack of Supply corps may be used to buildup army units, but Out of Supply corps may not.
14.33 Armies that are Converted into Guard or Shock armies may be rebuilt normally through 14.32. Guard and Shock armies may not be rebuilt from corps. They must use 13.2 Conversion of Soviet Guard and Shock Armies.
14.34 Soviet armies cannot breakdown (exception: 20.2).
14.4 Incorporation
14.41 The Soviet player may Incorporate a corps into an adjacent army with a reduced strength CSM.
14.42 To Incorporate a unit, the Soviet player declares which reduced strength army will do this and which adjacent corps will be incorporated. The corps is removed from the map and the army's CSM is flipped over to its full strength side.
14.43 To Incorporate a unit, neither unit may be Out of Supply or Lack of Supply. They may be in an Axis ZOC.
14.44 Any type of army may Incorporate a corps. Rifle and mechanized corps may be Incorporated into an army. Airborne corps may not be Incorporated. A tank army may only Incorporate mechanized corps.
14.45 In an Administration Phase, there is no limit to the number of rebuilds and Incorporations the Soviet player may perform.
15.0 Scenarios
War for the Motherland 2 has 4 scenarios, each of which is played as a separate game. Choose a scenario to play and set it up according to the scenario special rules (16.0-19.0). "TURNING POINT" (16.0) is a small scenario using only the southern half of map E and makes a good introductory game. "FALL BARBAROSSA" (17.0) is a short scenario covering the German invasion of June 1941 until spring 1942, using map C. "THE ROAD TO STALINGRAD" (18.0) is a medium-sized scenario covering the German invasion to December of 1942 using maps C and E. "WAR FOR THE MOTHERLAND" (19.0) is the campaign scenario, showing the Russo-German war from June 1941 to May of 1944 using all three maps.
15.1 City Victory Points
15.11 The Axis player receives victory points (VP) for controlling victory point cities at the end of a scenario. Each scenario's special rules lists cities and the VP received for control of it (exception: not in scenario 1, "TURNING POINT"; see 16.0).
15.12 In order to control a victory point city, an Axis unit must either occupy it or have been the last to pass through it (see 5.7).
15.13 Also, for the Axis player to receive VP for control of a victory point city, he must be able to trace an unlimited path of hexes uninterrupted from the victory point city to an Axis supply source. This path of hexes cannot enter a Soviet unit's hex or ZOC (Axis units negate Soviet ZOC in their hex), or cross an all-sea/lake hexside. If the Axis player cannot trace such a path, he receives no VP for the city.
15.2 Axis Army Victory Points
15.21 The Axis player receives VP based on his remaining steps on the map at the end of each scenario. The indicated VP are received for each unit:
- Air Base unit: 4 VP
- Supply depot unit: 2 VP
- Panzer step: 2 VP
- Each other Axis step (including headquarters and security divisions): 1 VP
15.22 Only supplied units are counted for VP purposes. Remember that supply depots are always in supply. The Axis player may not expend supply depots for this determination at the end of play.
16.0 Introductory Scenario
"TURNING POINT"
16.1 Scenario Information
- Players: 1 or 2
- Game Length: 3 turns; 22 through 24 (November 1942 to January 1943).
- Game Map: Map E, 43xx hexrow and southwards.
- Solitaire Suitability: Excellent
Abbreviations used in the setup lists below: Inf: Infantry; Pz: Panzer; AK: Legion; PzK: Panzer Korps; GbK: Mountain Korps (Gebirgsjaeger); KG: Kampfgruppe; Ru: Rumanian; It: Italian; SD: Supply depot; AB: Air base; A: Army; HQ: Headquarters; Gd: Guard; Tk: Tank; Sh: Shock; OSM: Offensive Support Group.
16.2 Initial Setup
16.2 The initial setup of each unit is listed below. For each entry, from left to right: the hex of placement, the unit's ID, and the parenthesized numbers are the unit's current offensive and defensive combat strengths and MP. Unit IDs are shown for historical interest, but any unit with the same strengths may be substituted.
16.21 Axis Initial Setup (hex: units)
- 6511: Inf KG (2-3-5)
- 6407: 3PzK (9-8-7)
- 6306: PzKG (4-3-8)
- 6316: 49GbK (4-6-4)
- 6211: SD (0-1-4)
- 6105: 40PzK (9-8-7)
- 6108: SD (0-1-4)
- 5815: SD (0-1-4)
- 5505: PzKG (4-3-8)
- 5211: Ru4AHQ (0-1-8)
- 5216: 4AB (0-1-4)
- 5108: Ru7AK (2-3-3)
- 4909: Ru6AK (2-3-3)
- 4810: PzKG (4-3-8)
- 4913: Ru3AHQ (0-1-8), SD (0-1-4)
- 4709: 51AK (5-7-4)
- 4611: 11AK (5-7-4)
- 4610: 8AK (5-7-4), PzKG (4-3-8)
- 4612: Ru4AK (2-3-3)
- 4613: Ru5AK (2-3-3)
- 4614: Ru2AK (2-3-3)
- 4615: Ru1AK (2-3-3)
- 4516: It8A (4-5-3)
16.22 Soviet Initial Setup (hex: units)
- 6812: Tcs HQ (0-1-8)
- 6612: 37A (C-3)
- 6507: 9A (C-3)
- 6403: Ncs HQ (0-1-8)
- 6406: 58A (C-3)
- 6416: 46A (C-3)
- 6205: 44A (C-3)
- 5405: 28A (C-3)
- 5008: 51A (C-3), OSM (0-1-3)
- 4908: 57A (C-3)
- 4806: Stg HQ (0-1-8)
- 4809: 64A (C-3)
- 4708: 62A (C-3) (see 16.23)
- 4609: 66A (C-3)
- 4509: 24A (C-3)
- 4510: 65A (C-3)
- 4511: 21A (C-3)
- 4512: 5TkA (A-7), OSM (0-1-3)
- 4513: 1GdA (B-4)
- 4311: 3GdA (B-4)
- 4515: 6A (C-3)
- 4312: SWHQ (0-1-8)
Note: The source's setup tables are reproduced as hex and unit pairs in the order the source's text layer gives them. Each entry is the hex of placement followed by the unit(s) placed there.
16.23 The Soviet 62nd Army has a 6-9/3-5 CSM placed with it at the start of the game. The CSM is on its weaker (i.e. 3-5) side. No other Soviet army begins the game with a CSM.
16.3 Reinforcements
16.31 In this scenario, only the reinforcements listed below appear. The Soviet player receives his CSM reinforcements as normal.
- Axis, Game Turn 23: 57PzK (9-8-7), Inf KG (2-3-5)
- Axis, Game Turn 24: Inf KG (2-3-5)
- Soviet, Game Turn 23: 2GdA (B-4), 5ShA (B-3)
16.32 The Axis player uses only extended supply depots in this scenario.
16.33 The Guard and Shock armies which arrive as reinforcements appear directly on the map (per 13.12) instead of being 'converted' into play.
16.4 Special Rules
16.41 Units may not move by Sea Movement. Ignore the OSG Production rule (12.2) in this scenario. All other rules are used.
16.42 The Axis player can use 4717 and 5317 as Axis Supply Sources. The Soviet player can use 4312, 4309, 4304, 6401 and 7005 as Soviet Supply Sources.
16.43 Half hexes on the map edge are playable as full hexes.
16.44 At the start of the game, all Soviet CSM which are received as a reinforcement up through Game Turn 21 are placed in their draw cups (exception: remove all "A*" and "C*" CSM).
16.45 During the first turn of the scenario (turn 22), the Axis player does not get a movement or combat phase. The game proceeds normally otherwise.
16.5 Victory Conditions
16.51 At the end of the scenario, the Axis player receives VP based on the number of supplied Axis units and steps on the map per 15.2.
16.52 If the Axis player scores 58 or more VP, he wins. If he scores 51-57 VP, it is a draw. If he scores 50 or less VP, the Soviet player wins.
17.0 Short Scenario
"FALL BARBAROSSA"
17.1 Scenario Information
- Players: 1 or 2
- Game Length: 12 turns; 1 through 12 (June 1941 to March/April 1942).
- Game Map: Map C.
- Solitaire Suitability: Good
17.2 The setup for each unit is listed on each player's Deployment Display. Maps E and N and units that setup on maps E and N are not used.
17.3 Reinforcements are listed on each player's Reinforcement Schedule. Players receive units for the 1st through 12th turns only.
17.4 Special Rules
17.41 During the 1st turn, German units ignore rivers for movement and overruns.
17.42 During the 1st turn, all units setup in Finland and Rumania cannot move, overrun, attack or breakdown into KG. They defend and retreat normally.
17.43 There is no Attrition Check on the first turn of the game.
17.5 Victory Conditions
17.51 At the end of the scenario, the Axis player receives VP based on the number of Axis units and steps on the map per 15.2.
17.52 At the end of the scenario, if the Axis player controls the following cities, he receives the listed VP:
| City | Victory Points |
|---|---|
| Moscow (2706) | 30 |
| Stalino (5104) | 20 |
| Lenningrad [sic] (1418) | 20 |
| Sevastopol (6313) | 15 |
| Rostov (5301) | 15 |
| Voronezh (3902) | 15 |
| Kharkov (4508) | 15 |
| Odessa (5718) | 15 |
Note: The VP listed above are different than those printed on the map.
Note: The source numbering skips from 17.52 to 17.54; no 17.53 appears in the source.
17.54 The Axis player totals his VP received from 17.51 and 17.52 and the players determine the winner based on the chart below:
| Axis VP Total | Winner and Level |
|---|---|
| 190 or less | Soviet Strategic |
| 191-210 | Soviet Operational |
| 211-230 | Soviet Tactical |
| 231-250 | Draw |
| 251-270 | Axis Tactical |
| 271-290 | Axis Operational |
| 291 or more | Axis Strategic |
18.0 Medium Scenario
"THE ROAD TO STALINGRAD"
18.1 Scenario Information
- Players: 2
- Game Length: 24 turns; 1 through 24 (June 1941 to January 1943).
- Game Map: Maps C and E.
- Solitaire Suitability: Fair
18.2 The setup for each unit is listed on each player's Deployment Display. Map N and units that setup there are not used.
18.3 Reinforcements are listed on each player's Reinforcement Schedule. Players receive units for the 1st through 24th turns only.
18.4 Special Rules
18.41 During the 1st turn, German units ignore rivers for movement and overruns.
18.42 During the 1st turn, all units setup in Finland and Rumania cannot move, overrun, attack or breakdown into KG. They defend and retreat normally.
18.43 There is no Attrition Check on the first turn of the game.
18.5 Victory Conditions
18.51 At the end of the scenario, the Axis player receives VP based on the number of Axis units and steps on the map per 15.2.
18.52 For each destroyed Soviet Economic Asset listed below, the Axis player receives the listed VP:
| Economic Asset | Victory Points |
|---|---|
| Oil Field | 10 |
| Petroleum Traffic Channel | 8 |
| Each other Economic Asset | 5 |
Note: The source numbering skips from 18.52 to 18.54; no 18.53 appears in the source.
18.54 The Axis player totals his VP received from 18.51 and 18.52 and the players determine the winner based on the chart below:
| Axis VP Total | Winner and Level |
|---|---|
| 220 or less | Soviet Strategic |
| 221-240 | Soviet Operational |
| 241-260 | Soviet Tactical |
| 261-280 | Draw |
| 281-300 | Axis Tactical |
| 301-320 | Axis Operational |
| 321 or more | Axis Strategic |
19.0 Campaign Scenario
"WAR FOR THE MOTHERLAND"
19.1 Scenario Information
- Players: 2 or 4
- Game Length: 40 turns; 1 through 40 (June 1941 to March/April 1944).
- Game Map: C, E and N.
- Solitaire Suitability: Fair
19.2 The setup for each unit is listed on each player's Deployment Display.
19.3 Reinforcements are listed on each player's Reinforcement Schedule. Players receive all reinforcements listed.
19.4 Special Rules
19.41 During the 1st turn, German units ignore rivers for movement and overruns.
19.42 During the 1st turn, all units setup in Finland and Rumania cannot move, overrun, attack or breakdown into KG. They defend and retreat normally.
19.43 The first time an Axis unit enters Moscow (2706), the Axis player rolls a die. If the die roll is a 1, the Soviet Union surrenders and the Axis player wins a Decisive Victory. The die roll for Soviet surrender happens only once in the game.
If the die roll was a 2 or 3, the Soviet Union doesn't surrender, but the willingness of the population to sustain the war is temporarily reduced. All "*" marked CSM that have been removed from play are returned to their marker pools.
If the die roll is a 4-6, the Soviet Union steadfastly refuses to surrender, continuing the war to the end (of the game at least).
If Leningrad (1418) is Axis controlled, -1 is subtracted from the die roll.
19.44 At the start of the Mutual Supply Phase, if Murmansk (N1327) is Axis controlled, the Axis player considers it an Axis Supply Source, regardless of the weather. Axis reinforcements can be placed within LOS of Murmansk (N1327) per 13.12. However, Axis Supply Sources on map N other than Murmansk (those in N1032, N2034 or N2834) cannot be used for placement of non-Finnish Axis reinforcements.
19.45 The arctic circle theatre is included for historical interest, but the battlefield hardly saw any movement during the war. Thus, if both players agree, map N and all units starting play there may be ignored and not used.
19.46 There is no Attrition Check on the first turn of the game.
19.5 Victory Conditions
19.51 At the end of the scenario, the Axis player receives VP based on the number of Axis units and steps on the map per 15.2.
19.52 At the end of the scenario, if the Axis player controls the following cities, he receives the listed VP. The VP listed are the same as those printed on the map.
| City | Victory Points |
|---|---|
| Warsaw (3634) | 50 |
| Moscow (2706) | 50 |
| Konigsberg (2933) | 40 |
| Bucharest (6327) | 40 |
| Ploesti (6127) | 40 |
| Leningrad (1418) | 30 |
| Sevastopol (6313) | 30 |
| Kharkov (4508) | 20 |
| Stalino (5104) | 20 |
| Voronezh (3902) | 20 |
| Rostov (5301) | 15 |
| Kiev (4419) | 15 |
19.53 The Axis player totals his VP received from 19.51 and 19.52 and the players determine the winner based on the chart below:
| Axis VP Total | Winner and Level |
|---|---|
| 450 or less | Soviet Strategic |
| 451-480 | Soviet Operational |
| 481-510 | Soviet Tactical |
| 511-530 | Draw |
| 531-560 | Axis Tactical |
| 561-590 | Axis Operational |
| 591 or more | Axis Strategic |
Note: The Deployment Displays and Reinforcement Schedules referred to in 17.2, 17.3, 18.2, 18.3, 19.2 and 19.3 are separate printed sheets and are not included in this text.
20.0 Optional Rules
If the players would like to increase the historical accuracy of the game or balance the game between players of uneven skill, the following Optional Rules are presented.
20.1 Extended Supply Dumps
20.11 When using extended supply dumps, they must be the closest links in the supply chain to the units they are supplying. A LOS may not be traced through an extended supply dump after tracing through a normal supply dump.
The source's diagram of legal and illegal German army supply chain usage is an image and is not reproduced here.
20.12 There must be at least one regular supply depot in the LOS. Extended supply depots may not comprise all the supply depots in a LOS (exception: 16.32).
For example: Axis supply is coming from the left side and the units are on the right of the above supply units.
Note: Remember that supply is traced from the unit, through any number of connected supply depots to a Supply Source.
20.2 Soviet Army Breakdown
20.21 During the Administrative Phase of a Production Turn (not each game turn), the Soviet player may breakdown 1 regular army into 2 corps. The army that is broken down may not have Incorporated a corps this turn and is removed from play.
20.22 The corps that are received are placed in the army's hex. They are either 2 infantry corps or 1 infantry corps and 1 mechanized corps.
20.23 The army must be in supply and not adjacent to an Axis unit at the time of breaking down.
20.3 Axis Security Divisions
20.31 Security divisions increase the Axis army size and allow other Axis units to be at the front line. Security divisions are used to protect Axis rear areas by hunting partisans. The following rules bring Axis security divisions into the game.
20.32 The Axis player receives security divisions according to the schedule below. Security divisions are placed as any other reinforcement.
- Turn 12: 6x Security Divisions: 207, 213, 221, 281, 444, 454
- Turn 23: 2x Security Divisions: 201, 286
- Turn 34: 2x Security Divisions: 203, 391
20.33 Security divisions have no ZOC. Security divisions cannot move by Sea Movement (see 5.5) or Strategic Movement (see 5.6). Security divisions cannot be used to buildup or exchange steps with other German infantry units.
20.34 Security divisions must remain 4 or more hexes away from Soviet units. When the Axis Movement Phase begins, if a garrison is within 3 hexes of Soviet units, that garrison may remain in its hex. It may also move, but must move so as to end its turn farther away from Soviet units.
20.35 Soviet partisan markers cannot be positioned within two hexes of a security division.
20.36 Security divisions count towards Axis Army Victory Points per 15.21.
20.4 Additional Losses
In the standard game, the players can successfully attack cities with just panzer/armored units, using no infantry units. But historically, to do that would increase losses for no appreciable gain. When attacking with infantry, the attack was successful. The following rule reflects this historical fact.
20.41 When more than half the number of steps attacking a major city or fortress hex are panzer, armored or mechanized, after the battle is resolved (including step losses, retreats and advances), the player rolls one die for each panzer, armored or mechanized unit that was involved.
20.42 If the unit being rolled for was unaffected by the combat (no retreat or step loss), a die roll of 1 results in the unit immediately losing one step. A die roll of 2-5 has no effect.
20.43 If the unit being rolled for was affected by the combat (a retreat or step loss), a die roll of 1-3 results in the unit immediately losing one step. A die roll of 4-6 has no effect.
20.44 Since Additional Losses applies to every eligible unit, breaking down panzer corps down to KG increases the chance for losses.
20.5 Soviet Guards Cavalry Corps
20.51 The Soviet player receives five Guards Cavalry Corps (GCC) units during play as reinforcements, according to the following schedule:
- Turn 9: 1st, 2nd and 3rd GCC
- Turn 22: 4th and 5th GCC
20.52 Each GCC unit has one Attack and one Defense Strengths, and a six Movement Allowance (1-1-6). Each GCC has one step and no ZOC. GCC are not counted for stacking restrictions and may be freely stacked together with other friendly units, but no more than one GCC may occupy a single hex at any time (including movement, retreat and advance). GCC are non-motorized units. The Soviet player may not use GCC as one corps for Buildup (14.3) or Incorporation (14.4) purposes.
20.53 GCC may move directly from enemy ZOC like a German panzer unit during Snow turns (only).
20.54 Eliminated GCC may not return to play.
20.55 GCC are considered as same as other Soviet units for other functions (including supply).
21.0 1942 Scenario
"FALL BLAU"
21.1 Scenario Information
- Players: 2 or 4
- Game Length: 25 turns; 16 through 40 (July 1942 to March/April 1944).
- Game Map: C, E and B. Align Map B so that hex B6211 overlaps hex E6201 (see layout below).
- Solitaire Suitability: Medium
21.2 Unit Setup
21.21 A unit setup display is provided for each side, which displays the unit, and the unit's setup hex below the unit's picture. In addition, the Economic Asset markers displayed below are placed in the "Destroyed Economic Assets" box on the map at the beginning of play.
21.22 During scenario setup, before the game starts, the following "C*"-marked CSM are removed from the draw cups. Then, all reinforcement CSM that enter between Game Turns 1 and 15 are added to the draw cups. Remove the following C* CSM from play:
- 4x 1-2*
- 3x 1-3*
- 1x 1-4*
- 2x 2-2*
- 3x 2-3*
- 4x 2-4*
- 3x 3-4*
21.3 Reinforcements
Both players receive reinforcements per the standard Appearance Charts, beginning with Turn 16 and ending with Turn 40. In addition, the following Soviet Armies (which are considered to have been eliminated on previous turns, and had their appearance rolled for per 13.55) appear as per the following list. Place the Army on the Turn Track, so as not to forget their entry.
- Turn 17: 6th Army
- Turn 18: 45th Army
- Turn 19: 51st Army
- Turn 20: 58th Army
- Turn 21: 57th Army
- Turn 23: 8th Army
21.4 Scenario Special Rules
21.41 If Moscow (C2706) is occupied by an Axis unit at any point in the game, the Axis player immediately rolls one die in order to determine the fate of the Soviet Union. If the result is a "1", the Soviet Union immediately surrenders, and the game ends in an Axis Decisive Victory.
21.42 If the result of the Soviet surrender roll is a "2" or "3", the will of the Soviet people to continue the struggle is weakened. Immediately add all CSM marked with a "*" that were previously removed from the game per rule 7.24 back into their respective draw cups. If these CSM are thereafter drawn and used, they are then removed from the game as normal.
21.43 If the result of the Soviet surrender roll is a "4", "5", or "6", the Soviet Union remains determined, and the scenario continues to the last turn.
21.44 If Baku (B7202) is occupied by an Axis unit at any point in the game, the Axis player immediately rolls one die in order to check for Soviet surrender in exactly the same fashion as checking for Moscow's capture (21.41, 21.42, 21.43).
21.45 If Leningrad (C1418) is Axis-occupied at the moment of checking for Soviet surrender due to the capture of Moscow or Baku, one is subtracted from the surrender die roll. In addition, if all three cities are captured, subtract two from the surrender roll.
21.46 The surrender check due to Axis capture of Moscow or Baku may occur only once each, that is, instantly the first time Moscow is captured, and instantly the first time Baku is captured. Re-capture or any future entry after the first does not trigger a Soviet surrender roll.
21.47 The Soviet player may use Baku as a supply source (9.32) as long as it has never been occupied by an Axis unit. If it is ever Axis-occupied, Baku ceases to function as a supply source for the rest of the game.
21.48 If agreed to by both players, Game Map B may be omitted, and the scenario played on only C and E. Note that 21.44 and 21.47 rules are not used in this case and the die-roll modification due to occupation of Baku (21.45) will never come into effect.
21.5 Victory Conditions
21.51 Barring Soviet surrender, victory or defeat is determined per the standard Victory Conditions rules (19.5) at the conclusion of Game Turn 40.
22.0 Reference Charts
The reference charts below are printed on the source's page 25 and 26 (and on the game map). They are transcribed from the page images.
22.1 Combat Results Table
The attacker uses the terrain row of the defender's hex to find the column for the combat ratio (see 8.1, Step 4). The die roll (modified per 8.1, Step 6) is then read down that column.
| Terrain | 1 | 2 | 3 | 4 | 5 | 6 | 7 | 8 | 9 | 10 |
|---|---|---|---|---|---|---|---|---|---|---|
| Major City, Swamp | 1:1 | 3:2 | 2:1 | 3:1 | 4:1 | 5:1 | 6:1 | 7:1 | 8:1 | 9:1+ |
| Woods, Mountain | 1:2 | 1:1 | 3:2 | 2:1 | 3:1 | 4:1 | 5:1 | 6:1 | 7:1 |
Results by die roll (the table's numbered rows) for each ratio column:
| Die roll | 1 | 2 | 3 | 4 | 5 | 6 | 7 | 8 | 9 | 10 |
|---|---|---|---|---|---|---|---|---|---|---|
| 1 | AE | A2 | A2 | A1 | A1 | A1 | NE | D1 | D1 | D2 |
| 2 | AE | A2 | A1 | A1 | A1 | NE | D1 | D1 | D2 |
Results key:
- AE: Attacker is eliminated
- DE: Defender is eliminated
- A#: Attacker must retreat and/or take the number of step losses shown
- D#: Defender must retreat and/or take the number of step losses shown
- #/#: Number to the left applies to the attacker, number to the right to the defender; no option to retreat (red-box results, see 8.86)
- NE: No effect
22.2 Attrition Decision Chart
Roll one die for each Isolated unit (see 9.91). Modifiers: Minor City +1; Major City/Fortress +2 (see 9.92).
| Weather | Nationality | 1 | 2 | 3 | 4 | 5 | 6 |
|---|---|---|---|---|---|---|---|
| Snow | Finnish | 1 | 1 | – | – | – | – |
| Snow | Axis | 2 | 1 | 1 | 1 | – | – |
| Snow | Soviet | 1 | 1 | 1 | – | – | – |
Results: # = number of step losses; – = no effect.
22.3 Terrain Effects Chart
OT = Other Terrain. P = Prohibited. Superscript note numbers refer to the notes in 22.4.
| Terrain | Foot MP | Motorized MP | Combat Modifier | Other Functions |
|---|---|---|---|---|
| Clear | 1 | 1 | – | – |
| Woods | 1 | 2 | – | – |
| Swamp | 2 (note 1) | 4 (note 1) | – (notes 1, 6) | 2 hex (notes 10, 11) |
| Mountain | 2 (1 for German and Rumanian mountain units, note 2) | 3 | – | – (note 11) |
| Minor City | 1 | 1 | – | +1 (note 12) |
22.4 Terrain Effects Chart Notes
- During snow turns swamp is treated as woods in all regards. (5.27)
- German and Rumanian mountain units can move into mountain hexes at 1 MP. (5.25)
- All hexes north of the Arctic Circle cost twice the normal MP cost. (5.27)
- Causeway is considered lake/sea for ZOC, normal movement, combat, retreat and advance after combat. (9.44)
- During snow Soviet non-mechanized units may move and attack across these hexsides and their ZOC extend across them. Attacks are treated as if across a major river. Supply may be traced during snow. Units may never advance/retreat across these hexsides. (5.27, 8.46, 8.103, 9.43)
- Swamps/Major Rivers must not be entered/crossed during advance after combat unless it is the first hex entered. (8.115)
- Soviet units defending a fortress are treated as if they are in a major city. Fortresses are destroyed when entered by an Axis unit. (8.47)
- If attacking units are entirely attacking across a minor river add +2 unless there is only 1 defending SP in which case you add +1. (8.42)
- If attacking units are entirely attacking across a major river defense strength is doubled. Kerch Straits are treated like a major river. (8.43)
- Swamp and arctic count as two hexes when tracing LOS unless using a railroad. (9.46)
- Overruns cannot be performed across major or minor rivers, all-sea/lake hexsides or into swamp, mountain, major city or fortress hexes. (6.28)
- Attrition rolls for isolated units add +1 if occupying a minor city and +2 if occupying a major city or undestroyed fortress. (9.92)
- A LOS traced along connecting railroad hexes counts as only 1/2 hex instead of 1 hex. (9.45)
- When German panzer and Soviet tank/mechanized units retreat across a major river the stack loses one additional armored step. (8.108)
- Reference sea movement (5.5) and sea supply. (9.7)
- Reference supply rules. (9.2, 9.3)
22.5 Stacking and Weather Summaries
Stacking
- Axis: 2 Corps and 1 Division; Kampfgruppe = ½ Corps; Division = ⅓ Corps
- Soviet: 1 Army; Corps = ½ Army
Weather Summary: Mud
- No Axis air support.
- Axis player may not place air fleets on the map.
- Subtract -3 from Soviet parachute landings.
- German supply depots may move by Strategic Movement.
- German units in Soviet ZOC can breakdown/buildup and exchange steps.
Weather Summary: Snow
- No Axis air support.
- Axis air fleets can be placed but only provide supply.
- Swamp hexes are treated as woods.
- Sea/lake hexsides with red arrows are ice roads.
- No sea movement allowed into/out of Murmansk, Arkangelsk, Leningrad, or Konigsberg.
- Subtract -3 from Soviet parachute landings.
- During the first winter all overruns and combat are resolved with a modifier of +3.
- During the second and third winters all overruns and combat are resolved with a modifier of +1.
- Soviet overruns require only 2 MP instead of 3 MP as normal.
The source also prints a Sequence of Play summary card on page 24 (after the Fall Blau scenario). It repeats section 3.0 with the same phase order and is not duplicated here.