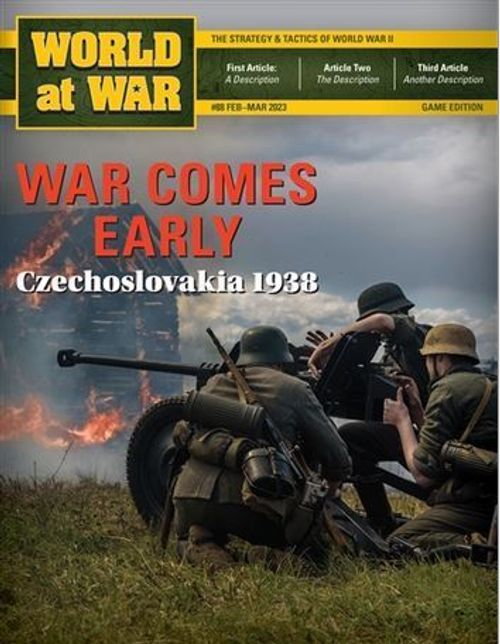
War Comes Early: Czechoslovakia 1938
War Comes Early: Czechoslovakia 1938 Rulebook
Table of Contents
Table of Contents
- 1.0 Introduction
- 2.0 Components
- 3.0 1938 Scenario Set Up & Hex Control
- 4.0 How to Win
- 5.0 Sequence of Play
- 6.0 Airpower
- 7.0 Reorganization & Disruption
- 8.0 Stacking
- 9.0 Zones of Control
- 10.0 Supply
- 11.0 Movement
- 12.0 Combat
- 13.0 1939 Scenario
- Player Aid: Combat Results Table
- Player Aid: Victory Point Awards & Debits
- Player Aid: Sequence of Play
- Player Aid: Game Turn Tracks
- Transcriber Notes
1.0 Introduction
War Comes Early (WCE) is a low to intermediate complexity two-player alternative history wargame. It investigates the parameters of the six weeks of the conflict that would have resulted had the Czechoslovakians refused to accept the Munich Agreement. Had they been willing to fight, the Soviets were pledged to come to their aid as fully and directly as possible.
That intervention would have immediately escalated the crisis beyond a Czech-German one and into the realm of a major war. The game is restricted to covering the hypothetical war's first six weeks in October and the first half of November. That is because none of the participants had the logistical wherewithal to go on fighting longer than that without a pause to resupply. There is also a short introductory scenario covering the historical German invasion of Poland in 1939.
1.1 Scale
Each game turn (GT) represents four days. Each hex represents 20 miles (32.52 km). Units range in size from fronts and armies for the Soviets, to armies and corps for all other nationalities. There are also German static divisions.
1.2 Map Compass Directions
The directional rose printed on the map sheet shows compass north. Throughout the rules if a rule refers to a map edge hex and a compass direction use the following guide (all are inclusive):
- North Map Edge Hexes: 0101–6110
- South Map Edge Hexes: 0134–6134
- East Map Edge Hexes: 6111–6133
- West Map Edge Hexes: 0102–0134
1.3 Sides
German Player: The German player commands the units of Germany, Italy, Hungary, and Poland.
Allied Player: The Allied player commands the units of Czechoslovakia, Soviet Union, France, Britain, Romania, and Yugoslavia.
Important: Switzerland is out of play. Neither side may enter Switzerland.
Neutral Nations: At the start of play, Belgium, Denmark, Estonia, Latvia, Lithuania, the Netherlands, and Luxembourg are neutral. These nations may be brought into play only via a German invasion of their territory, in which case they join the Allied side.
Important: All national forces in the game other than that of the USSR are collectively termed "Western," no matter which side they are on in the war. "Soviet" is the term used to describe only the forces of the USSR.
1.4 Halving
Whenever a number is to be halved, round all remainders up.
- If the combat strength of a stack of units is to be halved, add together all the factors to be halved and then halve the total.
- If a single unit is required to halve its combat strength and the unit has a combat strength of one, the unit's combat factor remains one.
2.0 Components
A complete game of War Comes Early includes a 22×34-inch game map, rule set, and a sheet of 280 ½-inch counters. Players must provide one six-sided die to resolve combat and other random game events.
2.1 Map
Map Errata:
-
Terrain Effects Chart: Cities line, Combat Effect column: second sentence should read: Ignore black dot cities for all purposes.
-
The following city names are spelled incorrectly:
- Bielefeld (1409)
- Konigsberg (4114)
- Hannover (1710)
- Giessen (1113)
- Dortmund (1208)
The map illustrates the militarily significant terrain found in and around this portion of Europe at the time of the crisis when viewed at these time and space scales. A hexagonal (hex) grid is printed over the map to regulate the placement and movement of units.
- A unit may only be in one hex at any given time.
- Each hex contains natural and/or man-made terrain that can affect the movement of units and combat between opposing units.
- The various terrain and water features on the map have had their exact real-world configurations altered slightly to make them coincide with the hex grid, but the relationships among them from hex to hex are accurate to the degree necessary to present players with the same space-time dilemmas that would have been faced by their historic counterparts had this war been fought.
- Every hex on the map has a unique four-digit identification number printed in it. They are provided to help find exact locations and to allow for the recording of unit positions if a game is taken down before it can be completed.
2.2 Counters
There are two basic types of counters: combat units and markers.
- Combat units represent the combat formations that existed at the time.
- Markers allow players to note the specific status of a hex or unit(s) and function as memory aids.
- After reading these rules at least once, carefully punch out the counters. Trimming off the dog ears from their corners with a fingernail clipper will facilitate easier handling and stacking during play and enhances their appearance.
2.3 Combat Unit
Each combat unit counter displays specific types of information: nationality, historic identification, unit type organizational size, and combat strengths.
[Counter diagram labels: Attack Factor, Type Symbol, Unit ID, Size Symbol, Nationality, Defense Factor.]
- All combat units are one-step.
- The back of a combat unit may display the unit's start position or arrival information if the unit is a reinforcement.
2.3.1 Unit Sizes
The units' historic organizational sizes are shown by the symbols below.
- If a unit's size symbol is bracketed, that means it is an ad hoc formation that was not part of its army's regular order of battle but was instead specifically organized for use in this campaign.
- Unit size distinctions are important for stacking and for determining combat losses.
XXXXX: Soviet Front
XXX: Corps
XXXX: Army
XX: Division
Important: Soviet front-size units are for all purposes the equivalent of all other nations' army-size units. Soviet army-size units are for all purposes the equivalent of all other nations' corps-size units.
2.3.2 Movement Factors
Combat units have a movement factor ranging from zero to six.
- A unit's movement factor is the measure of the unit's ability to move across the hex grid printed over the map.
- Units pay varied costs from their movement factor to enter different hexes, depending on the terrain in each hex, any water along the hexsides around them and the moving unit's mobility class.
- Movement factors do not appear on the counters. Instead, they are determined solely by each unit's organizational size as follows:
Soviet Front-sized Units: 4
Western Army-sized Units: 4
Soviet Army and all Corps-sized Units: 6
All Static Units: 0
2.3.3 National Colors
A unit's nationality is shown by its color scheme and a two-letter abbreviation of the unit's specific nationality:
| Nationality | Color Scheme |
|---|---|
| Belgian (Be) | Black on Yellow |
| British (UK) | White on Dark Brown |
| Czechoslovakian (Cz) | Black on Light Orange |
| Danish (Dn) | White on Dark Orange |
| French (Fr) | White on Blue |
| German Mechanized (Ge) | White on Blue Gray |
| German Non-Mechanized (Ge) | White on Gray |
| German Strategic Reserve (Ge) | White on Brown |
| Hungarian (Hu) | White on Dark Gray |
| Italian (It) | White on Green |
| Lithuanian (Li) | Black on Light Green |
2.3.4 Historic Unit Identification
All units show abbreviations of their historic identification numbers or names:
- Cc: Cracow
- AC: Armored Corps
- CDC: Coastal Defense Command
- 1B: First Belorussian Front
- Cr: Carpathian
- 2B: Second Belorussian Front
- CW: Corps Wodrig
- BEF: British Expeditionary Force
- Dr: Dreser
- BI: Bielsko
- EC: Eastern Corps
- C: Cavalry
- FA: Field Army
- CAC: Colonial Army Corps
- FC: Fast Corps
- CB: Corps Brand
- FG: Frontier Guard
- 7F: 7th Flieger Division
- GJ: Group Jaslo
- GR: General Reserve
- HB: Hungarian Border Group
- I: Independent
- IAC: Independent Army Corps
- KC: Kutno Corps
- Lr: Landwehr
- Lt: Light
- Lz: Lodz
- MC: Motorized (or Mobile) Corps
- Mo: Modlin
- Mt: Mountain
2.3.5 Unit Types
All ground units in the game belong to one of two mobility classes: mechanized (mech) or non-mechanized (non-mech). Those distinctions are important for movement and combat considerations. See sections (11.0 & 12.0), and the TEC for details.
- Mech units are those whose primary means of moving across the battlefield is by wheeled and/or tracked vehicles.
- Non-mechanized units are those whose primary means of movement is provided by legs, human and/or animal.
Mechanized Unit Types
- Motorized/Mechanized Combined Arms
Non-Mechanized Unit Types
- Infantry
- Mountain Infantry
- Flieger Division
- Cavalry
Static Unit Types
- Static
Important: All static units, which are a subset of the non-mechanized unit category, are easily differentiated from those other non-mechanized types by the fact that they have an attack factor of zero (0).
[Unit type symbols are shown on the printed counters and are not reproduced here.]
2.3.6 Attack Factors (AF) & Defense Factors (DF)
These numbers are the measures of a unit's ability to conduct offensive and defensive combat operations. The details of their uses are explained in section (12.0).
2.3.7 Unit Organizational Levels
Ground units may be combined to create larger organizational units (7.0).
2.4 Markers
The uses of the following markers are explained at appropriate points throughout the rest of the rules.
- Victory Point Markers (4.0): Allied V.P. and German V.P.
- Game Turn Marker (5.0)
- Airpower Markers (6.0)
- Soviet Railhead Markers (10.3.1)
- National Turn Markers (5.0)
- German Phase Markers (5.0): German Combat, German Move, German Reorg
- Breached Fortification Markers (11.5). Players may create additional breach markers if needed.
3.0 1938 Scenario Set Up & Hex Control
After deciding who will command which side, both players should sort and place their units in the order given in (3.1 and then 3.2).
- Both players should set aside the 17 white markers along with the units of the initially neutral nations (1.3).
Important: Stacking rules (8.0) apply during set up, except as modified in the specifics given below.
3.1 Allied Set Up
The Allied player should set up his forces in the following sequence:
Czechoslovakian Forces:
-
Place the four Czechoslovakian armies on the map in the hexes shown on their reverse sides.
-
Place the six Czechoslovakian border area corps (static units) in any border and/or city (ignore black dot cities) hexes in that country. Only one unit may be placed in a single hex.
-
Set aside the eight Czechoslovakian infantry corps.
Soviet Forces:
-
Place the Soviet 1B, 2B and NW front units in any three hexes in the USSR north of any hex xx24.
-
Place the Soviet SF, SW and UF front units and the IAC in any four hexes of the USSR on or south of the xx24 hex row.
-
Place the four railhead markers on any railroad hex adjacent to the Soviet border.
-
Set aside the 28 Soviet army units.
Yugoslavian Forces:
-
Place the three Yugoslavian armies and the 5th and 6th Independent Corps in any five hexes in that country.
-
Set aside, within easy reach off to the side of the map, the six Yugoslavian infantry corps.
Romanian Forces:
-
Place the two Romanian armies, cavalry corps, and mountain corps in hexes 3133, 3134, and 3233.
-
Set aside, the four Romanian infantry corps.
French and British Forces:
-
Place the nine French armies, the three motorized corps, the cavalry corps and the BEF in any 14 non-border hexes of France.
-
Set aside the 18 French infantry corps.
3.2 German Set Up
The German player should set up his forces in the following sequence:
Hungarian Forces:
-
Place the three Hungarian armies and mobile corps in any four hexes of that country.
-
Set aside the nine Hungarian infantry corps.
Polish Forces:
-
Place the eight Polish armies, the two static corps, and the two cavalry corps in the hexes shown on their reverse sides.
-
Set aside remaining 16 units.
Italian Forces:
-
Place the five Italian armies in any five hexes within Italy.
-
Set aside the eight Italian infantry corps and the three mechanized corps.
German Forces: (The 25 units marked with a "39" on the back of the counter are not used in this scenario).
-
Place the 11 German static divisions in any hexes of the West Wall.
-
Place the seven German armies and 14th, 15th, and 16th Motorized Corps in any hexes within Germany (excluding Danzig).
-
Set aside the 13 German infantry corps, the 18th Mountain Corps (3.2.2), the 18th Motorized Corps (3.2.1), the 7th Flieger Division (12.8), and the six static reserve corps (3.2.2).
Important: East Prussia is part of Germany.
3.2.1 German 18th Motorized Corps
This unit enters play whenever a contiguous path of nine or fewer German-controlled hexes exists between Vienna (2128) and Breslau (2821).
- When determining the number of hexes do not count either city hex.
- If the above condition is met at the end of any German phase, the German player may immediately place the corps in any hex used to trace the nine-hex distance requirement.
- Once placed the 18th Corps may operate normally.
3.2.2 German Static Reserve & Mountain Corps
Army Group Adam consists of 11 static divisions which are placed during set up (3.2), and six static corps which may arrive as reinforcements.
- The German 18th Mountain Corps is placed in any city within Germany during the German Movement Phase of GT 2.
- Beginning on GT 3, during the German Reorganization Phase, the six static corps may appear as reinforcements.
- During the German Reorganization Phase of GT 3, and all subsequent GTs until all six corps have arrived, the German player conducts the following procedure:
-
The German player rolls 1d6 and subtracts one from the DR.
-
The result is the number of static corps that are immediately placed on the map.
-
Place the corps in any German controlled city or West Wall hex. Stacking restrictions must be observed.
-
The units may be placed in an EZOC.
-
Once all six corps have arrived, the German player no longer conducts this procedure.
3.3 Neutral Nations
Set aside all the units of initially neutral nations' (Belgium, Denmark, Lithuania, and the Netherlands). Important: Luxembourg, Latvia, Estonia, and Danzig (hex 3714) begin the game neutral but do not possess any combat units.
- Neutral nations may only be brought into play by having that status violated by the German player.
- At the start of any German Movement or Combat Phase, the German player may announce that German or German-allied units are violating one or more neutral nations during the current phase.
- The Allied player then immediately sets up all units belonging to the country or countries whose neutrality is about to be violated.
- The Allied player may place the units of the previously neutral nation in any hex within their own country.
- The units are henceforth part of the Allied side.
Important: Latvia and Estonia begin the game neutral. If the German player violates the neutrality of either, all hexes within the violated country not occupied by German forces immediately become friendly to the Soviet Union (for all purposes) for the rest of the game. Latvia and Estonia do not award VP for either side and never capitulate (4.6.3).
3.3.1 Neutral Nations & Allied Airpower
For each neutral country that enters the war due to German violation of its neutrality, the Allied player adds one to the Allied airpower die roll (DR) (6.1). Exception: Danzig, Luxembourg, Estonia, Latvia, and Lithuania.
- If a previously neutral country capitulates, the above die roll modifier (DRM) no longer applies (4.6.2 & 4.6.3).
3.4 Turn, Phase & Victory Point Phase Markers
Place the turn marker in the Turn 1 Box of the Turn Record Track (TRT). Place each of the VP markers on the "50" space of the Victory Points Track. Place the seven national turn markers into a large-mouth opaque container. This will be the National Turn Pool. The German player sets the three German phase makers and the four breach markers to the side of the map.
3.5 Replacements
Non-German Western Corps & Soviet Army: When any in-supply Soviet army or non-German Western corps is eliminated in combat, the owning player rolls 1d6. The result is the number of GTs later that the unit re-enters play as a replacement unit. Exception: If the unit was out of supply, eliminated because of defending against a concentric attack, or while defending in or attacking into a city hex, the player must roll 2d6 (instead of 1d6) and add the results together to determine the number of GTs before the unit appears as a replacement.
- If the DR indicates that the unit would reappear after GT 10, or if the unit's nationality has capitulated, the unit is removed from play.
- Units reenter during their nationality's Reorganization Phase by being placed in any friendly-controlled supply source hex or city hex, from where they may begin operating normally that same GT.
- Static units and the Soviet IAC are never put through the replacement process. If eliminated those units are removed from play.
German Replacements: The German player may automatically replace one eliminated German infantry corps each GT. This replacement must be used on the GT received. Unlike the Western non-German or Soviet replacement requirements, it makes no difference if the unit was eliminated while in or out of supply.
Important: There is no die roll required. One eliminated German infantry corps may immediately be placed on the map each GT.
3.6 Hex Control
Hex control is the term used to describe which side is in control of (owns) important hexes at different times during play. Hex control is important when determining victory and when tracing supply lines (4.0 & 10.0).
- The control status of a hex changes the instant a unit of the other side enters the hex.
- A side controls a hex, if a friendly unit occupies or was the last unit to occupy the hex.
- The control status of each hex may change any number of times during a game as units of the two sides enter and reenter various parts of the map.
- The projection of a zone of control (ZOC) into a hex does not establish or change the control status of that hex.
4.0 How to Win
The German player is initially on the offensive, hoping to crush Czechoslovakia before any outside Allied intervention can prevent or offset that event. The Allied player is attempting to hold in Czechoslovakia for as long as possible, while advancing from the map's eastern and western edges, in such a way as to capture Berlin or otherwise overturn any German hope of victory.
4.1 Sudden Death Victory & Defeat
Both sides may win a sudden death victory or defeat at specific points in the game.
German Sudden Death Victory:
a) If, at any time prior to the end of GT 2 Czechoslovakia capitulates (4.6.1), the German player is declared to have won the game.
b) If, at any time prior to the end of GT 10:
-
The German victory point (VP) total is 100 or more and Prague is German controlled; or,
-
The Allied VP total is less than or equal to one, the game immediately ends in a victory for the German player.
Allied Sudden Death Victory: If at any time prior to the end of GT 10:
-
The German VP total is less than or equal to 1: or,
-
The Allied VP total is 100 or more: or,
-
The Allied player controls both Berlin hexes (2413 & 2414) then the game ends immediately in a victory for the Allied player.
4.2 End Game Victories & Draws
At the end of GT 10, if Czechoslovakia has not capitulated, the Allied player wins the game (ignore VP totals). If Czechoslovakia has capitulated, and one side has at least 20 VP more than the other side, the higher scoring side winds. Otherwise, the result is a draw.
4.3 Tracking Victory Points (VP)
Keep track of both sides' VP using the track provided on the player aid card.
- Each side begins the game with 50 VP (3.4).
- Only one VP total is kept for each side. Which nationality within each alliance that scores various VP awards has no significance. Record every change to either side's total as soon as it occurs.
4.4 VP Awards
A player receives VPs when a friendly unit gains control of victory point hexes in an enemy nation's country.
Important: VP are determined by which side controls a hex. Which nationality of a side makes no difference.
-
The VP value of each VP hex is listed on the map inside a red circle located in the hex.
-
When a side captures/controls (3.6) a VP hex in an enemy country, that side is awarded the listed number of VPs and the other side lowers its total VPs by the same number.
-
The supply status of the unit capturing a VP hex does not matter. The unit may be supplied or unsupplied.
-
VPs are awarded and deducted each time a VP hex is captured by either side. Example: The German player captures Brussels. The German VP total is increased by three and the Allied VP total is reduced by three. If the Allied player retakes the city, the Allied player would be awarded three VPs and the German player would reduce the German total by three VPs.
West Wall (4.5.1): For each West Wall hex captured by Allied units, the Allied player receives one VP, and the German player deducts one VP. Important: West Wall VPs are only added to the Allied player's total and deducted from the German player's total the first time an Allied unit enters each West Wall hex. If the German player regains control of a West Wall hex, there is no change to either VP total. They are noted with white circles around a white VP value.
4.5 Capitulation
The Soviet Union, France, Britain, Italy, Romania, Germany, and Yugoslavia never capitulate. Important: See (4.1,3) Allied Sudden Death Victory for the effect of both Berlin hexes (2413 & 2414) being enemy controlled.
4.5.1 Czechoslovakian Capitulation
Czechoslovakia capitulates the instant:
a) Prague is controlled by the German player; or,
b) All Czech fortifications have been breached.
-
If capitulation occurs prior to the end of GT 2, the German side wins a sudden death victory (4.1).
-
If capitulation occurs after the beginning of GT 3, play continues:
a) All Czech units are removed from the map.
b) If capitulation occurred due to German control of Prague, all Czech fortifications are breached.
c) VP awards and deductions for Prague are determined.
d) The German player then rolls 1d6. The result is the number of additional VPs awarded to the German player (do not deduct these VP from the Allied total).
e) All other VP cities in Czechoslovakia are not automatically captured by the German player. The German player must gain control of them to be awarded their VPs and have them deducted from the Allied player's total.
Important: Beginning the GT following the capitulation of Czechoslovakia and continuing until the end of the game, subtract one from the Allied airpower DR (6.1) per GT.
4.5.2 Belgian, Danish, & Netherlands Capitulations
If the German player violates the neutrality of any of these nations (3.3), that nation(s) immediately joins the Allied side. These nations each capitulate the instant their capital is controlled by the German side.
Important: The Danish capital of Copenhagen may only be reached by units moving or attacking across the Danish Straits from hex 2503 to hex 2603 (see Terrain Effects Chart).
-
VP awards and deductions for the capital are determined.
-
The German player then rolls 1d6. The result is the number of additional VPs awarded to the German player (do not deduct these additional VP from the Allied total).
-
All units belonging to the country are removed from play.
-
All other VP cities in that nation are not automatically captured by the German player. The German player must gain control of them to be awarded their VPs and have them deducted from the Allied player's total.
-
When Belgium capitulates, the fort hex is breached and is treated as a clear hex.
Important: Beginning the GT following the capitulation of each of these nations and continuing until the end of the game, subtract one from the Allied airpower DR each GT (6.1).
4.5.3 Danzig, Luxembourg, Latvia, & Lithuanian Capitulations
If the German player violates the neutrality of any of these nations (3.3), that nation immediately joins the Allied side. These nations each capitulate the instant their capital is controlled by the German side.
Exception: Latvia and Estonia do not capitulate (even if Riga is German-controlled (3.3). Important: The German player receives the Danzig VP if Danzig's neutrality is violated; however, there is no corresponding VP deduction from the Allied total. If Danzig is subsequently captured by the Allied player, VP are awarded and subtracted normally.
-
VP awards and deductions for the capital are determined.
-
Do not roll for additional VP.
-
All other VP cities in Lithuania are not automatically captured by the German player. The German player must gain control of them to be awarded their VPs and deducted from the Allied player's total.
-
If Lithuania capitulates, remove the Lithuanian unit from play.
Important: The capitulation of these countries does not affect the Allied airpower DR.
4.5.4 Hungarian & Polish Capitulations
Hungary and Poland are allied to the German player. These countries capitulate the instant their capitals are Allied controlled.
-
VP awards and deductions for the capital are determined.
-
Do not roll for additional Allied VP.
-
All units belonging to the country are removed from play.
-
All other VP cities in that nation are not automatically captured by the Allied player. The Allied player must gain control of them to be awarded their VPs and have them deducted from the German player's total.
Important: Beginning the GT following the capitulation of each of these nations and continuing until the end of the game, add one to the Allied airpower DR each GT (6.1).
4.6 German Mechanized Corps Elimination
If a German mechanized corps is eliminated, the German player:
-
Subtracts one from the German VP total if the mechanized corps was eliminated while in supply.
-
Subtracts two from the German VP total if the mechanized corps was eliminated while out of supply. status.
Important: A mechanized corps may be returned to play via the replacement system (3.5). The VP deduction occurs each time that unit is eliminated.
5.0 Sequence of Play
All GTs of WCE are divided into phases. Each full sequence of phases makes up one GT, of which there are a maximum of 10 GTs in a game.
- Every action taken by a player must be conducted during the appropriate phase of the sequence given below.
- Once a player has finished an activity, that player may not go back to perform a forgotten action or redo a poorly executed one unless his opponent permits it.
5.1 GTs 1 & 2
During the first two GTs, the only units that move and fight are those of Germany and Czechoslovakia. Important: German and Czechoslovakian units must remain in Germany and/or Czechoslovakia. They may not enter any other nation.
- Players tally VPs normally per (4.3 through 4.6).
- Airpower markers are not used during GT 1 and 2.
- The sequence of play for GT 1 and GT 2 is as follows:
German Player Turn (GT 1 & GT 2)
The German player first conducts all three of the following phases (once each). The player may conduct them in any order the player wishes.
a) German Reorganization or Movement or Combat Phase
b) German Movement or Combat or Reorganization Phase
c) German Combat or Movement or Reorganization Phase
Example: The German player may conduct a Combat Phase, then a Movement Phase, and finally a Reorganization Phase. Important: The German player must select the order of all three phases prior to conducting the first phase selected.
Czechoslovakian Player Turn (GT 1 & GT 2)
After the German Player Turn is completed, the Allied player must conduct the below phases in the order given.
-
Czechoslovakian Reorganization Phase
-
Czechoslovakian Movement Phase
-
Czechoslovakian Combat Phase
5.2 GT 3 Through GT 10
Beginning GT 3 and continuing until the end of the game, the sequence of play is as follows:
- The players are provided with national markers to randomly determine the order of play for each GT. Exception: The three German markers are managed per (5.3).
- When picked, each marker allows one nation or group of nations to conduct that group of nationalities' turn sequence:
Anglo-French: France, Britain, Belgium, Netherlands, and Denmark
Czech: Czechoslovakia
Hungary: Hungary
Italy: Italy
Poland: Poland
Yugo + Rom.: Yugoslavia and Romania
Soviet + Lith.: Soviet Union and Lithuania
Important: Nations that begin the game neutral may not be moved, reorganized, or conduct combat until their neutrality is violated (3.3).
The sequence of play for GT 3 onward (the national turn markers, Turn Determination Phase, and phases 1 through 6) is set out in the Player Aid: Sequence of Play at the end of this rulebook.
5.3 German Command-Control Exceptionalism
The three German phase markers are not placed in the Pool. The German player may, at the end of Phase 2 through 5 declare that German units will conduct one or more German phases. The German player may:
-
Conduct the German Reorganization, Movement, or Combat Phases in any order desired.
-
Conduct only one of each type of phase per GT.
-
Conduct one, two, or all three phases prior to the Allied player conducting a subsequent phase.
- The German player declares each German phase one at a time.
Example: At the end of the Turn Determination Phase, the German player declares that a German Movement Phase will take place.
-
The German player places the German Move marker on the TRT and conducts the German Movement Phase. At the end of that phase, he states that the drawn national group may conduct their Reorganization Phase.
-
The German player allows the GT to continue until the Soviet marker is drawn and the Allied player has completed the Soviet Movement Phase, at which time, the German player declares that the German units will conduct a Combat Phase. The German player places the German Combat marker on the TRT.
-
After all German attacks are complete, the German player states that the German units will conduct their Reorganization Phase, again placing the German Reorganization marker on the TRT.
-
After completion of the German Reorganization Phase, play continues with the Soviet Combat Phase.
-
Since the German player has now conducted all three German phases, play continues by drawing markers from the Pool, and each national group conducting Phase 3 through 5, until all markers have been drawn, at which time the players conduct the Airpower Return Phase and then begin a new GT.
6.0 Airpower
6.1 Air Superiority
Beginning GT 3, players conduct the Air Superiority Phase. The player with air superiority will have airpower markers available to conduct ground support (6.2.2) or terror bombing missions (6.2.1). Players determine which side has air superiority as follows:
-
The German player rolls 3d6 and totals the results.
-
The Allied player rolls 2d6 and modifies the DR as listed if the following nations have capitulated (modifiers are cumulative):
- -1: Netherlands
- -1: Czechoslovakia
- +1: Hungary
- -1: Belgium
- +1: Poland
- -1: Denmark
Important: If the German player has violated the neutrality of Belgium, Denmark, and/or the Netherlands each country provide a +1 DRM until each nation capitulates (3.3.1).
-
The side with the higher total has won air superiority.
-
The side with air superiority then subtracts the other side's total from his own. The result is the number of airpower markers the winning player may deploy that GT.
-
If the totals are equal, neither side has air superiority and airpower markers will not be used during the current GT. Important: At no time will both players use airpower markers.
6.2 Airpower Missions
After air superiority has been determined for the current GT (6.1), the player with air superiority must individually assign each of his available airpower markers to one of two missions: Terror Bombing or Ground Support. Important: Airpower markers are only distinguished by which side they may support. An airpower marker of one side may support any nationality belonging to that side.
6.2.1 Terror Bombing
Beginning GT 3, the side with air superiority (6.1) may assign airpower markers to terror bombing during the Air Superiority Phase.
- Airpower markers assigned to terror bombing are not placed on the map.
- Airpower markers assigned to terror bombing may not be assigned to ground support.
- For each airpower marker assigned to terror bombing the owning player rolls 1d6.
- 1–3: No effect.
- 4–6: Subtract one from the bombed player's total VP (4.0).
6.2.2 Ground Support
During the Air Superiority Phase, after all terror bombing attacks have been resolved, the player must place all remaining available airpower markers on the map.
- Only one airpower marker may be placed in each hex.
- They may be placed in any hexes on the map.
- Ground units (friendly or enemy) do not have any effect on airpower marker placement.
- When placed, airpower markers create an air zone in the hex of placement and all six adjacent hexes (regardless of terrain).
- Only one airpower marker may affect each hex (i.e., multiple air zones in a hex have no effect).
- All hexes within an air zone are affected as follows:
Enemy Unit Movement: Add one to the movement cost of an enemy unit when entering any hex within an air zone (this includes adding one to the one-half MP expended when moving along a railroad).
Friendly Units Attacking: If at least one participating friendly unit is within a friendly air zone, apply one right (1R) column shift when resolving combat on the Combat Results Table (CRT). Maximum of one shift.
Friendly Units Defending: If friendly units are defending in an air zone apply a one left (1L) column shift when resolving combat on the CRT. Maximum of one shift.
Unit Reorganization: Ground units may not reorganize if in an enemy air zone.
6.3 Airpower Marker Retrieval
During the Airpower Return Phase, all airpower markers on the map are removed from the map.
- Removed airpower markers are available for use in the next GT during the Air Superiority Phase.
- Airpower markers may be used for one mission per GT.
Important: Airpower markers cannot be used to satisfy combat loss requirements. See (12.8) for use of the German 7th Flieger Division.
7.0 Reorganization & Disruption
Western corps and Soviet armies may be reorganized to form (respectively) armies or fronts. They may also be voluntarily broken down or involuntarily disrupted, thereby converted into a stack of corps or armies.
- Western corps and Soviet armies are involuntarily broken down due to being out of supply or defeated in combat (10.5 & 12.4).
- Western corps or Soviet armies of sufficient number may be voluntarily reorganized into a Western army or Soviet front. A Western army or Soviet front may be broken down into a stack of corps/armies during its own nation's Reorganization Phase.
- Units conducting voluntary reorganizations or break downs must be in supply.
- See (10.5) for the effects of a Western army or Soviet front being found out of supply.
- Voluntary and involuntary reorganization or disruption may occur in an enemy zone of control (EZOC).
- A unit may not be both reorganized and broken down during the same Reorganization Phase.
- If a voluntary or involuntary break down/disruption results in a hex being over-stacked, the opposing (non-owning) player distributes the excess units into any of the immediately adjacent hexes he chooses; however, that dispersal must be kept to the minimum allowed by stacking.
- If hexes containing enemy zones of control (EZOC) are the only hexes available for distribution, the dispersal may still take place into those hexes.
7.1 Western Army & Soviet Front Structures
Each nationality has specific restrictions and requirements when reorganizing or breaking down units. Important: Western armies and Soviet fronts are never eliminated from the game, if removed from the map due to break down, lack of supply, or elimination in combat, they are immediately broken down into their component units (which are eliminated). Western armies and Soviet fronts are placed to the side and may be used to reorganize appropriate sub-units at any time.
- Czechoslovakian: Armies are made up of any two infantry corps. Static corps may not be reorganized.
- French: Armies are made up of any two infantry corps. French mechanized corps, cavalry corps, and the BEF corps may not reorganize.
- German: Armies are made up of any two infantry corps (including mountain infantry). Static divisions, reserve corps, mechanized corps, and the 7th Flieger Division may not reorganize.
- Hungarian: Armies are made up of any three infantry corps. The mobile corps may not reorganize.
- Italian: Infantry armies are made up of any two infantry corps. The Italian mechanized army may only be made up of the three Italian mechanized corps. Important: The Italian mechanized army and corps do not possess the combat and EZOC German special abilities. They do pay the same movement costs as other mechanized units.
- Polish: Armies are made up of any two infantry corps or ad-hoc groups. The cavalry corps, General Reserve, and Coastal Defense Command units may not be reorganized.
- Romanian: Armies are made up of any two infantry corps. The cavalry corps and mountain corps may not reorganize.
- Yugoslavian: Armies are made up of any two infantry corps.
- Belgian and Dutch: May not reorganize.
- Lithuanian and Danish Armies: May not break down.
- Soviet Fronts: Are made up of any five armies. Important: The ad-hoc Soviet IAC mechanized corps cannot reorganize.
8.0 Stacking
Stacking describes the placement of more than one friendly unit into a single hex at the same time.
- Opposing units may not stack in the same hex. Exception: 7th Flieger Division (12.8).
- Stacking limits are always in effect.
- Both players may stack up to five units in any hex; however, the following restrictions apply:
-
No more than one Western army or Soviet front may be in any hex at a time.
-
No more than one German 0-3 static corps may be in one hex at a time.
-
Each German mechanized corps and each static division counts as two units for stacking purposes.
- When moving units, players may not enter, or move through a hex if an overstack is created in that hex during that move.
- If a stack is found to be overstacked at the end of any phase, the opposing player may move the number of units to adjacent non-enemy occupied hexes to bring the hex back within stacking limits. Important: Different nationalities (even if friendly to each other) may not stack together, nor may they move through hexes occupied by other friendly nationalities.
8.1 Stacking & Movement
Units beginning a Movement Phase stacked together need not remain together because they started their movement in the same stack. They may be moved off individually and/or in partial stacks. Once an individual unit or partial stack is moved, the remaining units may resume their movement up to the extent of their remaining movement points remaining.
8.2 Markers
Markers do not count against stacking limits. They may be added to any stack in accordance with the rules governing their use.
8.3 Fog of War
Neither player may look beneath the top unit of an opposing stack until such time as the player has declared an attack from or against that hex. A player may not call off an attack after examining an enemy stack.
9.0 Zones of Control
The six hexes immediately surrounding a hex containing one or more units and/or intact Czechoslovakian or Belgian fortification hexes constitute the zone of control (ZOC) of those units and/or fortifications. Important: Unoccupied Maginot Line and Westwall hexes do not exert ZOC.
- Friendly ZOCs never affect units belonging to that side, no matter the nationality of the unit exerting the ZOC.
- ZOCs extend across hexsides and into and out of most types of terrain. ZOCs do not extend:
-
Across blocked hexsides.
-
Across or into all-lake/all-sea hexsides, or hexes.
-
Into any hex the unit exerting the ZOC may not enter.
- The supply status of a unit does not affect its ability to exert a ZOC.
9.1 Enemy Zones of Control (EZOC) & Movement
A moving unit must end its move for that phase when it first enters an EZOC.
- A unit that starts its Movement Phase in an EZOC may move normally provided the first hex it enters does not contain an EZOC. The unit may enter another EZOC later in its movement.
- A unit may not move directly from one EZOC to another EZOC. Exception: German mechanized corps may ignore EZOC for all movement purposes.
- Friendly units do not negate an EZOC for movement purposes.
9.2 EZOC & Supply
Supply lines may be traced into, but not through an EZOC. Important: If a hex is occupied by a friendly unit, any EZOC exerted into that hex is negated for supply purposes. Exception: When tracing a supply line to a German mechanized unit, ignore all EZOC.
9.3 EZOC & Combat
Units in EZOC are not required to attack those enemy units exerting the EZOC.
- EZOC do not inhibit or block the ability of a unit to advance after combat.
10.0 Supply
A unit must be in supply to move and/or fight at its full potential.
- Supply for movement is determined at the time that a given unit or stack begins a move and once determined that status lasts all during that move.
- Supply for combat is determined at the start of each individual battle for all participating units of both sides.
10.1 Automatic Home-Country Supply
All units are automatically in supply when moving and/or attacking into hexes of their own country. Units do not need to trace supply lines. Important: For purposes of this rule, all hexes in East Prussia and Danzig are treated as German home country hexes.
10.2 Tracing Supply Lines
No counters are provided to represent the materiel consumed by combat units. Instead, for units operating outside their home country, it is abstracted into the process of supply line tracing (tracing supply). See (10.3) for Soviet supply requirements when operating outside the Soviet Union.
- A unit outside its home country is supplied if it can trace a path of contiguous passable hexes of any length from a friendly supply source hex (10.4) to its own location.
- A unit without a valid supply line is said to be out of supply (OOS).
- Units may only use supply sources appropriate to their own nationality (10.4).
- Capturing an enemy supply source hex does not allow friendly units to use it as a supply source.
- Units of different friendly nationalities may trace their supply lines into and through hexes of allied nations. Exception: Soviet units (10.3).
- A supply path may never be traced into or through:
- a) Enemy-occupied hexes; or,
- b) Intact enemy fortification hexes; or,
- c) Intact enemy heavy fortifications; or,
- d) Enemy controlled cities (even if ungarrisoned by enemy units).
- A supply path may be traced into but not through an un-negated EZOC (9.2).
- A supply path may not be traced across or into a blocked or prohibited hexside/hex.
- A supply path may not be traced into or through a hex within a neutral country.
10.3 Soviet Supply Line Tracing
Soviet units operating outside the Soviet Union have a restricted supply line.
-
Soviet units (not in the Soviet Union) trace a supply path of no more than four hexes (do not count movement costs for the hexes, just the number of hexes) to a Soviet railhead (do not count the railhead hex); and,
-
From the Soviet railhead along any number of friendly controlled contiguous rail hexes to a Soviet supply source.
-
Soviet supply sources are any east or south map edge hexes in the Soviet Union that depict a railroad exiting the map.
10.3.1 Soviet Railheads
Markers are provided to show the forward edge of the Soviet rail supply system. Initially all railroad hexes within the Soviet Union are Soviet controlled and eligible railhead hexes.
- At the end of any Soviet Movement Phase, each railhead marker may be moved up to four hexes along railroad lines.
- Railroad hexes connecting the railhead marker hex to the Soviet Union must be Soviet controlled.
- If a railroad hex between the railhead marker and the Soviet border becomes enemy controlled, the Soviet player must immediately move the affected railhead marker back to the first hex that establishes a contiguous line of railroad hexes back to a Soviet supply source.
10.4 Non-Soviet Supply Sources
A supply source may not be used if enemy-controlled; however, a supply source immediately becomes a supply source again when friendly controlled.
When operating outside of a unit's home country, units must trace a supply line to the following supply sources:
- German: Any friendly-controlled German cities, including Danzig and the non-black-dot cities in East Prussia.
- Hungarian: Budapest.
- Yugoslavian: Any friendly-controlled south map edge hex in Yugoslavia.
- Anglo-French: French units and the BEF trace their supply to any friendly-controlled hex in France.
- Polish: Any friendly-controlled city in Poland.
- Romanian: Either friendly-controlled south map edge hexes in Romania.
- Italian: Any friendly-controlled south or west map edge hexes in Italy.
10.5 OOS Effects
A unit is not eliminated merely for being OOS. Units may potentially exist indefinitely in the OOS state. It is permitted for both players to move units into hexes in which the moving unit will become OOS.
OOS units are affected as follows:
- Movement: If a unit or stack is found to be OOS at the start of its move, the movement factor of that force is halved for that phase (1.4).
- Attacking Units: If an attack contains one or more attacking units that are OOS at the start of that battle's resolution, those OOS units have their attack factor halved (round up any remainder) (1.4).
- Defending Units: The combat factor of defending units is not affected by being OOS.
- Western Army/Soviet Front Units: A Western army or Soviet front found to be OOS (prior to movement, attacking, or defending in combat) is immediately disrupted and must break down into its component corps/armies (7.0).
11.0 Movement
A unit's movement factor (2.3.2) is the number of movement points (MPs) that a unit may expend each GT.
- Players move units from hex to adjacent hex (no skipping hexes) with units paying varied MP costs depending on their type, organizational size, and terrain in each hex entered and hexside crossed (TEC).
- MP may not be accumulated from GT to GT or phase to phase, nor may they be loaned or given from one unit or stack to another.
- A player may move any number of friendly units of the same nationality during each nationality's Movement Phase.
- Units are not required to expend all their MP before stopping.
- The movement of each unit or stack must be completed before that of another is begun (Exception: Stack Movement (11.2)). A player may only change the position of an already moved unit or stack if his opponent agrees to allow it. Important: A unit's movement factor may be modified by its supply status (10.0). Additionally, enemy air zones require the expenditure of additional MP (6.2.2).
11.1 Minimum Movement
A unit may always move at least one hex during a Movement Phase, regardless of the MP cost required to enter that hex. Exceptions: Units may not cross blocked hexsides, nor enter prohibited/enemy-occupied hexes. Units may not move directly from one hex in an EZOC to another hex in an EZOC (9.1).
11.2 Stack Movement
To move together as a stack, units must begin their Movement Phase already stacked together in the same hex. Units are not required to move together simply because they started their Movement Phase in the same hex; such units might be moved together, individually, or in smaller sub-stacks.
- When moving a stack, the player may halt it temporarily to allow a unit or sub-stack to split off and move away on a separate path.
- The units left behind in the original stack may then resume movement, even splitting off other units in a repeat(s) of that same process.
- Once a player begins moving an entirely different stack, or an individual unit that began in a different hex than the currently moving stack, the player may no longer resume the movement of the earlier stack without the opponent's permission.
- If units with different movement factors are moving as a stack, the stack must use the movement factor of the slowest unit within the stack. Of course, as the slower units exhaust their MF, the player may drop them off and continue moving the units with MF remaining.
- If units from two different mobility classes are stacked together, units within that stack may be required to expend different movement costs for entering the same hex. See the Terrain Effects Chart (TEC) on the map.
11.3 Terrain & Movement
All terrain features on the map are classified into two broad categories:
-
Natural: Clear, Woods, Swamp, Broken, Rough, Mountain, All-Lake, or All-Sea hexes, and River or Blocked hexsides.
-
Manmade: City and Fortification (including Czech and Belgian Heavy Fortifications, West Wall, and Maginot Line hexes), and Railroads.
-
The Terrain Key on the map illustrates the different types of terrain on the map. The Terrain Effects Chart (TEC) lists each type of pertinent terrain and its effect on movement and combat. Important: Ports (anchor symbols) are shown on the map; however, they serve no function other than their value as VPs.
-
If more than one type of natural terrain exists in a hex, the phasing player must expend the MP cost for the costliest terrain in the hex.
-
The total movement cost for entering a hex is always the number of MP of the costliest in-hex terrain and (if applicable) the hexside terrain crossed when entering the hex.
-
Manmade and natural terrains may coexist in the same hex.
- If a city exists in the hex ignore all other terrain in the hex.
- If an intact fortification exists in the hex, use the other terrain in the hex for movement purposes and the fortification for combat purposes.
-
Important: Cities with a black dot are ignored for movement and combat. In both cases use the other terrain in the hex.
Example: Ignore the Chemnitz (2017) black dot city.
11.4 Special Cases
Certain types of units have special abilities and/or restrictions in specific types of hexes.
- Mountain & Swamp Hexes: Mechanized units may only move into mountain and swamp hexes if moving along contiguous railroad hexes. Mechanized units may not attack into a mountain or swamp hex even if along a railroad.
- River Hexsides: Rivers run between hexes, along the hexsides, rather than existing in-hex. Every river hexside may be crossed by all units by paying one extra MP for the crossing. Units do not expend the additional MP when crossing a river if moving out of, or into a city hex. Important: All rivers on the map are treated the same. The differences in width shown on the map have no impact on play.
- All-Lake and All-Sea Hexes: Units may not move into or attack into these hexes.
- Blocked, Lake, and Sea Hexsides: Units may not move or attack across these hexsides. Exception: Danish Straits (hex 2503–2603). Important: Treat the hexside between hex 2401 and 2402 as a river hexside.
- Railroad Hexes: Units moving along railroad hexes (moving from one railroad hex to an adjacent railroad hex via a hexside crossed by the railroad symbol) to expend one-half an MP no matter the hexside or in-hex terrain.
11.5 Fortifications
Czechoslovakian (both heavy and standard) and the Belgian fortification hexes may only be entered by units of their respective owning nation while they remain intact (judged on a hex-by-hex basis).
- Intact fortifications are defined as fortifications that have not been successfully attacked by an enemy force.
- Breached fortifications are those fortifications that have been the subject of an attack resulting in the elimination of all defending units, including the intrinsic defense factor (TEC) and if at least one attacking unit advanced into or through the hex.
- A breached fortification is ignored for the remainder of the game (mark it with a breached marker). Units do not gain any defense benefits from a breached fortification.
- German West Wall hexes have no intrinsic garrisons. If otherwise undefended, they may be entered by moving enemy units paying only the natural terrain costs involved and are automatically breached.
- French Maginot Line hexes may not be entered or attacked in any way by German units.
11.6 Column Movement
In-supply units that are not adjacent to an enemy unit or stack and not in an enemy air zone at the beginning of their move may double their normal movement factor. Units conducting column movement may not enter an EZOC or enemy air zone at any time during their movement. Units using column movement are eligible to use railroads (11.4).
11.7 Geographic Restrictions
Only units of some nations may enter (and attack into) all other countries. Units of other nations have various geographical restrictions. See Geographic Restrictions Table.
| Country | May Only Move & Attack In |
|---|---|
| Belgium, Czechoslovakia, Denmark, Lithuania, Netherlands | Their own respective countries |
| France, Germany, Soviet Union, United Kingdom | Anywhere |
| Hungary, Romania, Yugoslavia | Hungary, Yugoslavia, Romania, & Czechoslovakia |
| Italy | Italy and Yugoslavia |
| Poland | Poland & Czechoslovakia |
12.0 Combat
Combat takes place between adjacent opposing units during each Combat Phase.
- The player who is conducting the Combat Phase is the "attacker," and the other player is the "defender," no matter the general situation across the map.
- Attacking is always voluntary. Players are always free to attack or not, as each chooses on a case-by-case basis, during each Combat Phase.
- Once an attack has been declared it may not be called off; its resolution must be carried through to a conclusion.
- If there are two or more enemy units in a hex being attacked, the attacking player may only attack that stack as if it were one combined defending unit.
- An enemy-occupied hex may be attacked by any or all attacking units that can be brought to bear from one or more adjacent hexes.
- No more than one hex may be the object of any one attack.
- No attacking unit may have its attack factor divided and applied to more than one combat.
- No defending unit may have part of its defense factor attacked by one or more attackers while another part is attacked by others.
- No attacking unit may attack more than once per Combat Phase, and no defending unit may be attacked more than once per Combat Phase (see (12.7) for the sole exception).
- There is no arbitrary limit on the number of attacks each player may resolve during a Combat Phase.
- The attacker need not declare all his attacks beforehand, and they may be resolved in any order the attacking player wishes if the resolution of one is completed before that of the next is begun.
- Not all the units stacked in a hex are required to participate in the same attack. Some units in a stack might attack into one hex, while others attack into another hex or do not attack at all.
- No defending unit may ever refuse combat; all units in an attacked hex must participate in its defense.
12.1 Combat Procedure
The attacking player should strive to have more attack factors involved in a battle than the defender has defense factors.
- The defending player totals all participating defending unit's defensive factors.
- The attacking player modifies participating attacking units' attack factors as required by the TEC and supply rules (10.5) and then totals the modified attack factors of all participating units.
- Players then subtract the defending player's total from the attacking player's total.
- Normally both players use the Attack Differential line; however, if the German player is the attacker and at least one-half of the total participating units are in-supply German mechanized units, the German player may use the German Mechanized line. Important: Static units may attack using an attack factor of zero. They may not advance after combat.
- Column headings on the CRT range from "≤ −1" to "≥ 30." Find the column heading that is closest to the combat differential that was just calculated. Example: If the attacking force contains five attack factors, and the defending force contains three defense factors, the combat would be resolved (unless columns shifts were also involved) using the "+2" column on the CRT.
- If the calculated differential is greater than one column but less than the next column to the right, use the lower column. Example: If an attack had a differential of +9, the combat would be resolved using the "+5" column.
12.2 Column Shifts
See Combat Results Table (center pullout). The full CRT, with its column shift rules, is reproduced under Player Aid: Combat Results Table at the end of this rulebook.
Combat differentials may be shifted by the terrain in the defender's hex, by the hexside(s) the attacking units must cross, the attacking or defending player's air zones (6.2.2), and/or if the attacking units qualify as a concentric attack (12.2.2).
- Left shifts favor the defender; right shifts favor the attacker.
- Consult the TEC to determine if any terrain shifts apply.
- All applicable column shifts are cumulative. All column shifts are applied resulting in a final left or right shift of one or more columns.
12.2.2 Concentric Attacks
If a defending hex is attacked by units in opposite hexes, or by units from three surrounding hexes with one hex between each and the next attacker-occupied hex, or by units from more than three hexes, that attack may be eligible to receive two column shifts to the right (German attacking only) or one column shift to the right (all other nationalities).
12.3 Combat Resolution
After all applicable differential shifts have been applied and the appropriate column on the CRT determined, the attacker rolls 1d6 and cross-indexes the result with the final differential column to get a combat result. Example: A result of "1" rolled for an attack made on the German Mechanized Differential Line of "+3" yields a combat result of "1/2."
- Combat results are given in terms of corps equivalents (CE) lost by the involved units of one or both sides.
- a) The number printed to the left of the slash applies to the involved attacking units.
- b) The number printed to the right of the slash applies to the involved defending units. Example: A combat result of "1/2" would mean the attacking force must lose a total of one CE, while the defending force must lose a total of two CE.
- In each combat the defender must eliminate the defending units' losses first, then the attacking player eliminates the attacking units' losses.
- If a side's force is eliminated, that side ignores all remaining losses. Important: Soviet, Danish, and Lithuanian army-sized units count as one CE. German static divisions count as one-half a CE. The intrinsic defense of a fortification counts as one CE and must be the last CE eliminated.
- Both players are free to apportion their own side's CE losses among involved attacking or defending units as the player desires.
- Players must break down in place Western army and Soviet front units as needed to meet CE loss requirements.
12.4 Attacker Disruption
Whenever the final resolution of an attack still leaves one or more defending units in their original hex, any surviving Western army or Soviet front that participated in that attack must be disrupted (i.e., broken down) into its component corps or armies. Follow the procedures in (7.0).
12.5 Advance After Combat
If, after removing all required losses, all defending units (including fortification intrinsic defense) are eliminated, the surviving attacking units may advance after combat.
- Attacking units may move into the defending hex.
- Stacking limitations must be observed.
- Advance after combat is not normal movement and does not involve the expenditure of MP.
- Advancing units ignore EZOC.
- Advance after combat is an option; it is not mandatory.
- The decision to advance must be made immediately after a combat is resolved and before that of another combat is begun.
- The advancing player may advance any number of participating attacking units (stacking limitations apply). Important: Defending units and/or attacking static units may not advance after combat.
12.6 German Mechanized Flank Attack
During a Combat Phase, if an in-supply German mechanized unit or stack is located such that it is adjacent to one or more hexes occupied by enemy units and hexes that contain only an EZOC, the German player may launch an attack (flanking attack) into any one of those unoccupied hexes within an EZOC.
- When conducting a flank attack, the attacking player declares the attack and then automatically advances after combat into the unoccupied hex.
- Qualified German mechanized units from different hexes may participate in the same flank attack. Stacking limits apply when moving the German units into the defending hex.
- Neither side suffers any losses.
- Units may only make one flanking attack per Combat Phase.
Important: Flanking attacks cannot be made into intact regular or heavy Czechoslovakian or Belgian fortification hexes.
12.7 German Mechanized Momentum Attacks
In-supply German mechanized units that advanced after combat (including those that launched a flank attack) may immediately initiate a second (momentum) attack against any adjacent enemy occupied hex or unoccupied hex within an EZOC. Important: If the German units conducted a flank attack (12.6) as their first attack, those units cannot conduct a second flank attack as their momentum attack.
- Only those German mechanized units that advanced after combat are eligible to conduct a momentum attack.
- Momentum attacks must be made prior to initiating another attack.
- Momentum attacks are not required; it is at the option of the German player.
- A unit may only initiate one momentum attack for each unit/stack of units that advanced after combat.
- A unit may only participate in one momentum attack per Combat Phase.
Important: Momentum attacks may not be launched into an intact regular or heavy Czechoslovakian or Belgian fortification hex.
12.8 German 7th Flieger Division
This marker becomes available for use by the German player during his Reorganization Phase of GT 3.
- Beginning GT 3 and continuing until the end of the game, the German player may make one paradrop (one drop per game) using the 7th Flieger Division.
- The German player must have air superiority on the GT of the drop.
- The drop is conducted in the German Combat Phase.
- To conduct the drop, the German player:
-
Places the marker in any enemy-occupied hex adjacent to Allied units that the German player intends to attack.
-
Rolls 1d6 and subtracts one from the DR. If the modified result is one or less: the division is destroyed and removed from play.
-
If the modified DR is two or more: the division awards a one right column shift to the German attack.
-
After completion of the attack remove the division from the game.
Important: If the German player declines to attack the hex where the marker was placed, the division is immediately removed from play.
13.0 1939 Scenario
This scenario can serve as a short introduction to the larger 1938 scenario. Except as modified below, all the 1938 scenario rules are used here. In this scenario, each GT represents three days. It covers that historic campaign from its start up through the time of the Soviet intervention.
The 1939 scenario game turn track is on the separate player-aid card (see the table under Player Aid: Game Turn Tracks below).
13.1 Area of Play
Only the territories of Germany (including East Prussia), Poland, and Czechoslovakia are in play in this scenario, and only the units of Germany and Poland are used. No Czech or other nation's units are used.
- German units may operate anywhere in Germany, Poland, and Czechoslovakia.
- Polish units must remain in Poland. Polish units may not attack into hexes outside of Poland.
13.2 Set Up & Hex Control
Set up the Polish forces exactly as in the 1938 Scenario. The German forces used in this scenario are only the 25 units with "39" on their reverse sides.
- German units that start on the map, six armies and four independent corps, have their set up hexes on their reverse sides.
- Set aside within easy reach off to the side of the map, the 15 German corps that have "39" and no set-up coordinates on their reverse sides.
- At the start of play, the German player controls all hexes in Germany and Czechoslovakia while the Polish player controls all hexes in Poland.
13.3 How to Win
There are no sudden death victories in this scenario; instead, it is won based solely on victory points determined at the end of the game (GT 6).
At the end of the game, the German player determines the German side's total VP as follows:
-
1 VP: Germany controls Krakow (3226)
-
1 VP: If the Polish CDC static unit has been eliminated and Germany controls Danzig (3714).
-
2 VP: Germany controls Warsaw (3821)
-
1 VP: Poland controls Warsaw, but there are one or more German occupied hexes adjacent to Warsaw.
-
The supply status of German-controlled VP cities has no effect on the award of VP.
-
The total number of VP awarded to the German player determines the outcome of the game. If the German VP total is:
- 0–2: The Polish player wins the game.
- 3: The game is a draw.
- 4: The German player wins the game.
13.4 Special Scenario Rules
All standard rules are in effect unless modified below.
-
Use the sequence of play in (5.1). The Polish player conducts the Czechoslovakian player turn.
-
Airpower markers are not used in this scenario.
-
German armies consist of three infantry corps instead of the two listed in (7.1).
-
The SAB army may not breakdown. It counts as one CE for combat purposes and counts as an army for stacking purposes.
-
The three German ad-hoc corps (2.3.1) listed in the set up (13.2) may not be incorporated into any army.
-
The German player receives replacements as given in (3.5). The German SAB army may not return to play if eliminated.
-
The Polish player may not replace units.
-
All German units may use the German Mechanized Differential Line on the CRT.
-
All German units (Exception: SAB Army) may conduct momentum and flank attacks.
-
Beginning GT 3, prior to the start of each GT, the players place the above markers into a wide mouth opaque container (Bin). Important: If a nation capitulates (4.5), immediately remove that nation's marker from the Pool or TST.
-
During the Turn Determination Phase, the Allied player randomly picks one marker from the Pool and places it in the left most empty box on the National Turn Sequence Track, and then conducts the following phases:
-
Air Superiority Phase (Conduct only once per GT)
-
Turn Determination Phase
-
Player Aid: Combat Results Table
Transcribed from the CRT on the printed player-aid page (page R7 of the rules insert). Each cell is attacker loss / defender loss, in corps equivalents (12.3).
| Die Roll | German Mech.* ≤ −1 / Attack Diff. ≤ 0 | German Mech. 0 / Attack Diff. +1 | German Mech. +1 / Attack Diff. +2 | German Mech. +2 / Attack Diff. +3 | German Mech. +3 / Attack Diff. +4 | German Mech. +4 / Attack Diff. +5 | German Mech. +5 / Attack Diff. +10 | German Mech. +10 / Attack Diff. +15 | German Mech. +15 / Attack Diff. +20 | German Mech. +20 / Attack Diff. +25 | German Mech. ≥ 25 / Attack Diff. ≥ 30 |
|---|---|---|---|---|---|---|---|---|---|---|---|
| 1 | 1/0 | 1/1 | 1/1 | 1/1 | 1/2 | 1/3 | 0/4 | 0/5 | 0/5 | 0/5 | 0/5 |
| 2 | 2/0 | 1/0 | 1/1 |
Column headings: the top header line is the German Mechanized line (*) and the second line is the normal Attack Differential line used by all other attacks (12.1).
Differentials less than −1/0 are resolved using that column. Differentials greater than +25/30 are resolved using that column.
*To use the German Mechanized line at least half the attack strength must be from supplied German mechanized-class units.
Combat differentials may be shifted by the terrain in the defender's hex, by the hexside(s) the attacking units must cross, the attacking or defending player's air zones (6.2.2), and/or if the attacking units qualify as a concentric attack (12.2.2).
- Left shifts favor the defender; right shifts favor the attacker.
- Consult the TEC to determine if any terrain shifts apply.
- All applicable column shifts are cumulative. All column shifts are applied resulting in a final left or right shift of one or more columns.
Concentric Attack (12.2.2)
- German: If German units are attacking and qualify for a concentric attack, shift two columns to the right.
- Other Nations: If non-German units are attacking and qualify for a concentric attack, shift one column to the right.
Special Terrain Rules (See TEC)
- Mountain Hexes: Mechanized units may not attack into a mountain hex, not even from a mountain railroad hex to another mountain railroad hex.
- Swamp Hexes: Swamps have no combat effect for non-mechanized units; however, mechanized units may not attack into a swamp hex, not even from a swamp railroad hex to another swamp railroad hex.
- River Hexsides: Apply one left column shift if all attacking units are attacking across river hexsides. This shift is cumulative with all in-hex terrain combat effects, including that of cities.
- City Hexes: The concentric attack shift does not apply. Mechanized units are halved when attacking into city hexes. Ignore black-dot cities for combat purposes. Important: Black dot cities have no affect on combat.
- Fortification Hexes: At the start of the game all Czechoslovakian and Belgian fortifications and heavy fortifications, the Maginot Line hexes, as well as all German West Wall hexes, are intact. See (11.5) for the definition of intact and breached fortifications. Concentric attack shifts do not apply when attacking fortifications. Important: West Wall hexes have no intrinsic garrisons, which means they can be entered and breached by moving Allied units (rather than attacking and advancing after combat) if left ungarrisoned.
Player Aid: Victory Point Awards & Debits
Summary from the player-aid page; it restates Sections 4.4 to 4.6 and 6.2.1.
- VP awards and debits (4.5): When a side captures/controls (3.6) a VP hex in an enemy country, that side is awarded the listed number of VPs and the other side lowers its total VPs by the same number.
- West Wall (4.5.1): The first time (only) that each West Wall hex is captured by Allied units: Allied player: +1 VP; German player: −1 VP.
- Czechoslovakia (4.6.1): Roll 1d6: Add result to German VP if Czechoslovakia capitulates after GT 2.
- Neutrals (4.6.2): Roll 1d6: Addd result to German VP for each Belgian/Danish/Dutch capitulation.
- Terror Bombing (6.2.1): Roll 1d6, if 4–6: −1 enemy VP for each friendly terror bombing raid.
- German Mechanized Corps (4.7): −1 German VP for every mechanized corps eliminated while in supply. −2 German VP for every mechanized corps eliminated while out of supply.
Note: the player aid numbers the German mechanized corps rule 4.7 and the neutral and Czechoslovakian capitulation rules 4.6.1 and 4.6.2; the body of the rules numbers them 4.5.1, 4.5.2, and 4.6. The body numbering is used above.
Player Aid: Sequence of Play
Transcribed from the Sequence of Play player-aid page; it restates Section 5.0. Where it differs in wording from Section 5.0 both are shown.
GTs 1 & 2
During the first two GTs, the only units that move and fight are those of Germany and Czechoslovakia. Important: German and Czechoslovakian units must remain in Germany and/or Czechoslovakia. They may not enter any other nation.
- Players tally VPs normally per 4.3 through 4.6.
- Airpower markers are not used during GT 1 and 2.
- The sequence of play for GT 1 and GT 2 is as follows:
German Player Turn (GT 1 & GT 2)
The German player first conducts all three of the below phases; however, the player may only conduct one of each the three phases listed below in any order the player wishes.
a) German Reorganization or Movement or Combat Phase
b) German Movement or Combat or Reorganization Phase
c) German Combat or Movement or Reorganization Phase
Example: The German player may conduct a Combat Phase, then a Movement Phase and finally a Reorganization Phase. Important: The German player must select the order of all three phases prior to conducting the first phase selected.
Czechoslovakian Player Turn (GT 1 & GT 2)
After the German Player Turn is completed, the Allied player must conduct the following phases in the order given.
-
Czechoslovakian Reorganization Phase
-
Czechoslovakian Movement Phase
-
Czechoslovakian Combat Phase
GT 3 to GT 10
Beginning GT 3 and continuing until the end of the game, the sequence of play is as follows:
- The players are provided with national markers to randomly determine the order of play for each GT. Exception: The three German markers are managed per 5.3.
- When picked, each marker allows one nation or group of nations to conduct that group of nationalities' turn sequence:
Anglo-French: France, Britain, Belgium, Netherlands, and Denmark.
Czech: Czechoslovakia
Hungary: Hungary
Italy: Italy
Poland: Poland
Yugo + Rom.: Yugoslavia and Romania
Soviet + Lith.: Soviet Union and Lithuania
Important: Nations that begin the game neutral may not be moved, reorganized, or conduct combat until their neutrality is violated (3.3).
- Prior to the start of each GT, beginning GT 3, the players place the above markers into a wide-mouth opaque container (Bin). Important: If a nation capitulates (4.6) immediately remove that nation's chit from the Pool or TRT.
- During the Turn Determination Phase, the Allied player randomly picks one marker from the Pool and places it in the left most empty box on the National Turn Sequence Track, and then conducts the following phases:
-
Air Superiority Phase (Conduct only once per GT)
-
Turn Determination Phase
-
Non-German Reorganization Phase
-
Non-German Movement Phase
-
Non-German Combat Phase
-
Airpower Return Phase (Conduct only once per GT)
Important: The German player may, at the end of phase 2) through 5) conduct one or more German phases (5.3).
- All non-German phases are conducted using the order given above (Phase 3 through 5).
- After the phasing player has completed Phase 5, the Allied player randomly picks another marker, and Phases 3 through 5 for the national group marked on the marker are conducted by the player who controls that nation. This continues until all markers have been picked at which time play moves to Phase 6.
- At the end of Phase 6, all markers are returned to the Pool and the turn marker is moved to the next GT box and the next GT begins with Phase 1.
- If the GT just completed was the last GT of the game, players determine which side won the game. Important: The game may end at any time if one side or the other achieves a sudden death victory (4.1).
Player Aid: Game Turn Tracks
1938 Scenario Game Turn Track (GTRT)
| Game Turn | Dates |
|---|---|
| GT 1 | 1–4 Oct |
| GT 2 | 5–8 Oct |
| GT 3 | 9–12 Oct |
| GT 4 | 13–16 Oct |
| GT 5 | 17–20 Oct |
| GT 6 | 21–24 Oct |
| GT 7 | 25–28 Oct |
| GT 8 | 29 Oct–01 Nov |
| GT 9 | 2–5 Nov |
| GT 10 | 6–9 Nov |
1939 Scenario Game Turn Track (GTRT)
| Game Turn | Dates |
|---|---|
| GT 1 | 1–3 Sep |
| GT 2 | 4–6 Sep |
| GT 3 | 7–9 Sep |
| GT 4 | 10–12 Sep |
| GT 5 | 13–15 Sep |
| GT 6 | 16–18 Sep |
Victory Points Track
The Victory Points Track runs from 1 to 100. Both sides start with 50 points.
National Turn Sequence Track (TST) runs from 1 to 10 boxes.
Transcriber Notes
Points where the printed text was corrected or left as printed:
- Section 4.2 prints "the higher scoring side winds"; kept as printed.
- Section 13.3 prints its VP values as "1:", "2:" and so on; written here as "1 VP:", "2 VP:" with the same values.
- Section 4.6, item 2 ends with a stray word "status." after "out of supply"; kept as printed.
- Section 4.6.2 (player aid) prints "Addd"; kept as printed.
- The Combat Results Table player aid prints "affect" for "effect" in the black-dot city note; kept as printed.
- Section 7.0 printed "must in in supply"; corrected to "must be in supply."
- Section 4.5.3 printed "Germancontrolled" with a missing line break; corrected to "German-controlled."
- Cross-references: the body and the aid cite capitulation rules as 4.6.x in places (4.1, 5.2, and the aid's 4.6.1 and 4.6.2) where the printed headings are 4.5.x; kept as printed.
- The Terrain Effects Chart (TEC) is printed on the game map, which is not part of the rules insert. Rules that refer to the TEC are transcribed as printed; the TEC values are not reproduced here.
- Counter diagrams and unit-type symbols are not reproduced; the text beside them is.
- The Sequence of Play player aid restates Section 5.0 and is transcribed in full under Player Aid: Sequence of Play.
- The magazine's contents page, credits, colour legend, and removal instructions are not transcribed.
- The 1939 scenario's player-aid card is not in the PDF. Section 13.0 is transcribed from the rules insert.