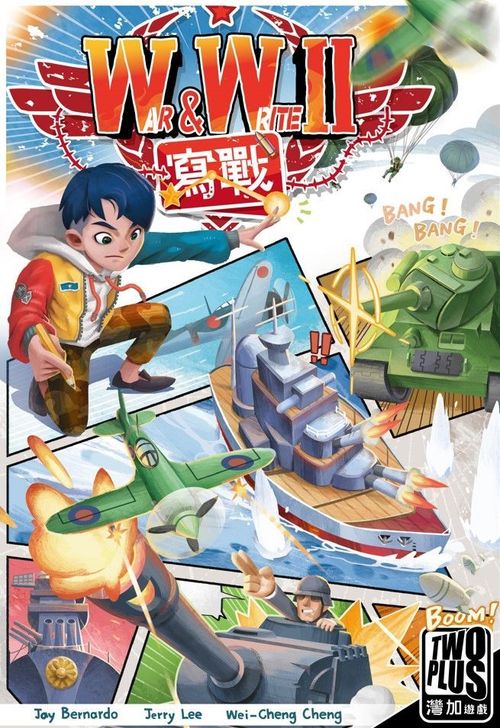
War & Write II
War & Write II Rulebook
Table of Contents
Table of Contents
- Components
- Game Setup
- Game Flow
- 1. Write (W)
- 2. Reinforce (R)
- 3. Diplomacy (D)
- 4. Movement (M)
- 5. Combat (C)
- 6. Battle Result (Battle)
- 7. LoN Arbitration (LoN)
- Game End
- Adjusting for Player Count
- Optional Rules
- Advanced Game Rules
- Tech Card Explanation
- Tech Card Supplementary Notes
- Scenario: Americas Map
- Scenario: Europe Map
- Scenario: Pacific Map
- Scenario: Americas + Europe Maps
- Scenario: Europe + Pacific Maps
- Scenario: Pacific + Americas Maps
- Scenario: World Map
Components
Maps (3 map boards)
- A: Americas map
- E: Europe map
- P: Pacific map
Each map has a Battle Card (戰役卡) area at the bottom. To give a better play experience and a sensible layout, the maps in the game do not fully match real-world proportions.
Map explanation
Each map is divided into 12 areas. There is no limit to the number of units that may be placed in an area. By terrain the areas have three background colours:
- Green areas represent inland; only tanks can be placed there.
- Purple areas represent coast; both tanks and ships can be placed there.
- Blue areas represent ocean; only ships can be placed there.
Areas that have a national flag printed on the map, and areas where a national flag marker is placed after a Battle resolution, are all called "flag areas". In the advanced game, some Tech cards place flag markers directly, increasing the number of flag areas.
Players should try to control as many flag areas as possible during the game. For detailed rules see "LoN Arbitration" later in this rulebook.
Other components
- Military units x 59:
- Allies: Britain (blue): 5 tanks, 5 ships. Soviet Union (red): 10 tanks. USA (green): 5 tanks, 5 ships.
- Axis: Japan (white): 4 tanks, 6 ships. Germany (black): 7 tanks, 3 ships.
- Neutral nations: 6 tanks, 3 ships.
- Cards x 48: Tech cards (科技卡) x 30; Battle cards (戰役卡) x 18.
- Order sheets (命令圖紙), a pad.
- Player help boards (玩家幫助板) x 5.
- National flag markers (國旗標記), 5 kinds, x 6 each.
- Nationality identification markers (國籍識別標記), 5 kinds, x 4 each.
- Yamamoto Isoroku marker (山本五十六標記) x 1.
- Action HQ (行動指揮部) x 1.
- Battle year markers (戰役年代標記), 4 kinds (1941, 1942, 1943, 1944), x 4.
- Fat Man atomic bomb (胖子原子彈) x 1.
- Spitfire fighters (噴火戰鬥機) x 2.
- Mockingbird fighters (百舌鳥戰鬥機) x 3.
- Ships: Vanguard (前衛號) x 1, Aircraft Carrier (航空母艦) x 1, Yamato (大和號) x 1.
Game Setup
- The players first agree on the scenario to be played, the game mode (basic or advanced), and the nation each player represents. For scenario details see the appendix later (pp. 13-23).
- Set up the game according to the scenario details: take out the combination of game maps; each player places their own units on the maps and in the reserve area in front of them, and places Battle cards as the scenario specifies.
- Each player takes 1 order sheet and a pen. On the order sheet, circle the map codes (A, E, P) that correspond to this scenario. Then, in the upper right of the sheet, draw (or write) the nation you represent and the number of AP available each round in this scenario.
- Each player takes a help board, which can be used during the game to cover the orders written each round.
- According to the year and area shown on the Battle cards, all players circle on their own order sheet the year and area in which each Battle resolves, as a reminder. Also place the corresponding year marker on the corresponding area of the game map.
- The starting position of the LoN marker on the LoN track is decided by negotiation of both sides. For a first game, it is suggested to choose the third space counting from the left.
- All players circle the starting position of the LoN track for 1940 on their own order sheet.
The LoN track in the game is the 7 spaces on the right, not including the white space. The LoN circle on different spaces represents different advantages for the two sides. When the game ends, the side with the LoN leaning toward it wins.
- The first space (marked "D & C"): the Axis faction has the diplomatic and combat tie advantage.
- The next two spaces (marked "D"): the Axis faction has the diplomatic tie advantage.
- The next two spaces (the "Axis wins / Ally wins" divider): no effect midway through the game.
- The last two spaces (marked "D"): the Allied faction has the diplomatic tie advantage.
The LoN circle to the left of the divider means the LoN leans toward the Axis faction; to the right means it leans toward the Allied faction. The suggested starting position (third space from the left) is marked on the track.
Game Flow
Each round of the game corresponds to one year in the real world, from 1940 to 1945, 6 rounds in total. Each round is divided into seven phases in order; finish one phase before starting the next:
- Write
- Reinforce
- Diplomacy
- Movement
- Combat
- Battle
- LoN
In each phase, all players act or resolve simultaneously.
1. Write (W)
-
In this phase players may discuss freely with teammates, but may not use any secret means to communicate strategy; all discussion must be public.
-
Each player secretly writes on their own order sheet all the actions they want to perform this round. When everyone has finished writing, they are revealed together and resolved in phase order.
-
The total number of orders each player may write each round differs according to faction and scenario settings.
-
In the basic mode, the only orders a player may write are the following four kinds, each costing 1 AP:
- R: Recruitment (deployment) order
- D: Diplomacy order
- Arrow (single line): tank movement order
- Arrow (double line): ship movement order
In other words, if the scenario gives a player 3 AP in a round, they may write any three of the orders above (the same kind of order may be written repeatedly).
-
When writing a movement order, the arrow must straddle two areas, showing from which area to which area the unit moves.
-
Tanks may only move to areas adjacent up, down, left and right; ships may move to areas adjacent up, down, left, right and diagonally. (See the diagram: tank arrows in 4 directions, ship arrows in 8 directions.)
-
When units move, tanks may not pass through blue areas (ocean); ships may not pass through .
Example (left diagram): a player uses 4 AP to write 4 orders:
-
Perform two Diplomacy orders in area E2.
-
Move one ship in area F1 to E2.
-
Move one tank in area G3 to H3.
-
In the advanced game, depending on the Tech cards a player has chosen, the player will be instructed to write different orders. Some orders cost no AP; some cost 2 AP.
-
A player may choose not to use up all their AP, but any order written must be carried out as far as it can be executed.
2. Reinforce (R)
- A player may only write R in an area that has their own national flag.
- For each R written, take 1 unit from your reserve area and place it in the area where R was written.
- If there are no units in the reserve area, or the unit in the reserve cannot be placed in that area, the order has no effect. Example: a player's reserve contains only tanks, but they wrote R in a blue area; this order is invalid.
- A player who destroyed neutral units in the previous round places the neutral units he destroyed back onto any area of the map that has a neutral unit symbol and matches the unit's terrain.
3. Diplomacy (D)
- A player may write any number of D in any area.
- If only one faction wrote D in an area, then one of the nations that wrote D places that nation's nationality identification marker on the neutral unit in that area. This neutral unit is commanded by that nation until it is destroyed.
- If both factions wrote D in an area, compare which faction wrote more D; the faction with more D gains that unit, and likewise places a nationality identification marker to remind which nation commands it.
- If both factions wrote an equal number of D, check the position of the LoN arbitration or certain Tech card abilities: the faction with the diplomatic advantage gains the unit; if neither faction has an advantage, the unit remains neutral.
- When a commanded neutral unit is destroyed, the player who destroyed it decides where to place it back on the board: an area with no other neutral unit and marked with a neutral unit's starting symbol.
LoN track (spaces: "D & C", "D", "D", "Axis wins / Ally wins" divider, "D", "D"):
- If the LoN circle is on one of the three left spaces (D&C, D, D), when the numbers of diplomacy orders are equal the Axis faction wins the neutral unit.
- If the LoN circle is on one of the middle two spaces, when the numbers of diplomacy orders are equal nobody wins the neutral unit.
- If the LoN circle is on one of the two right spaces, when the numbers of diplomacy orders are equal the Allied faction wins the neutral unit.
4. Movement (M)
- All players move their own tanks and ships on the map according to the single-line and double-line arrows they wrote on their sheets.
- Since the Movement phase comes after the Reinforce and Diplomacy phases, a player may also immediately move units obtained in those two phases.
Movement example: the units currently on the map are as shown in the upper picture. If the British player writes the orders shown on the order sheet (a D in E2, a ship move from E2 to F1 and a tank move from F2 to F1) ... after the units move, the situation is as shown in the lower picture. However, if in the Diplomacy phase Britain had not successfully gained the neutral ship in E2, then the ship move order from E2 to F1 would have no effect.
5. Combat (C)
- Check every area; if units of both factions are in the same area, combat occurs. In the basic rules, each unit counts as 1 point of combat strength.
- In a combat area, the faction with the lower strength is destroyed: all of its units are moved back to their respective reserve areas.
- If both strengths are equal but the Axis faction has the combat advantage of the LoN arbitration, the Allied faction moves all its units in the combat area back to their respective reserve areas.
- If the Axis faction does not have the LoN arbitration advantage, all units of both sides remain in the area; this is called a stalemate.
- If an area contains units of only one faction, that faction is regarded as controlling that area.
Example: after the Movement phase, area F1 contains two British tanks, one neutral tank commanded by Britain, one German tank and two German ships, so combat occurs. Since every unit counts as 1 point of strength, this combat is currently a stalemate. If at this time the Axis have the LoN advantage, Germany wins this combat, and the two British tanks and the neutral tank are all destroyed.
6. Battle Result (Battle)
- Check the Battle cards used in this game (placed below the map). If a card's year is the same as the current round's year, determine which faction controls the area indicated on the Battle card. If there is no stalemate there, the Battle card is resolved and that faction gains the result (戰果).
Battle card explanation
(Card diagram, numbered 1-5.)
- The Chinese and English name of the battle on the card.
- The year in which the Battle card is resolved; for example '43 is the year 1943, and so on.
- The area in which the Battle card is resolved.
- The result the Axis faction gains for winning this battle.
- The result the Allied faction gains for winning this battle.
Taking the Chongqing battle in the picture as an example, this battle will check in the year 1943 which side controls area J2:
- If it is controlled by the Axis faction, place a Japanese national flag marker in this area, and the Japanese player places one tank or ship there. (If there are no units in the reserve area, no unit may be placed.)
- If it is controlled by the Allied faction, one of the nations controlling this area places a flag of that nation, and one ship or tank. (If there are no units in the reserve area, no unit may be placed.)
- When a Battle card is resolved, if the reserve area of the nation it specifies has no corresponding unit at that time, the result relating to the unit is void. Remove the resolved Battle card from the game and do not use it again; a Battle card's result takes effect only once.
- If in the resolution area of a Battle card there are no units of either faction, or both factions are in a stalemate, then all players circle that battle area in the next year on their own order sheets as a reminder; the next year it will be checked again which faction wins this battle.
- After a Battle card is resolved, no new Battle card is turned over into the game.
- The national flag result gained from a Battle card may appear in a place that already has a national flag, regardless of whether it is of the same faction. In the LoN arbitration every national flag is judged independently and they do not affect each other.
7. LoN Arbitration (LoN)
- Every flag area on the map gives its faction 1 point of LoN influence in this phase.
- If a flag area is controlled by the enemy faction, then 1 point of LoN influence goes instead to the enemy faction.
- The two sides compare the difference in LoN influence; this is the number of spaces the LoN arbitration moves toward that faction. All players circle the corresponding LoN arbitration position on the LoN track of next year's row on their own order sheets.
Example: if this round the Allied faction gains 8 points of LoN influence and the Axis faction gains 6 points of influence, then next year's LoN position moves two spaces toward the Allied advantage side.
- When the LoN influence has moved to either end, it does not move any further; the excess influence does not affect the next round.
Game End
The game ends after the 1945 round has been completed. According to which faction the LoN leans toward, that faction wins. All players agree to turn one player's order sheet over; everyone signs the back and notes today's date and place, agreeing to conclude a peace treaty.
Adjusting for Player Count
When there are fewer players than nations in the scenario, the players may agree that one player commands two nations of the same faction. That player may use the total AP of the two nations and may freely write orders for the units of both nations.
Optional Rules
The following groups of optional rules are provided. Any one or several may be chosen to adjust the game experience; they do not conflict with one another.
International Opinion (國際輿論)
If there is a gap in game experience between the two factions, you may agree to adjust the starting position of the LoN at the start of the game, to compensate the side with less game experience.
Troop and General Deployment (調兵遣將)
Players may try moving the starting military units freely to different areas, but must follow these rules:
- No area may hold 4 or more units.
- Tanks may not be placed in blue areas, and ships may not be placed in green areas.
Time Pressure (迫在眉睫)
In the Write phase, time 2 minutes with a phone (or any time limit you agree on). When time is up, everyone must immediately stop writing and show their order sheets.
Scarce Supplies (物資匱乏)
In the Write phase, the number of Recruitment (R) orders a player writes may not exceed the number of national flags in that area.
Martial Law (軍法約束)
When the sheets are revealed, if a player has written an order that cannot be executed, each invalid order gives the enemy faction 1 point of LoN influence in the LoN phase.
Common invalid orders are, for example: writing more orders than your own AP, making one unit move in two directions at the same time, a number of Recruitment (R) orders exceeding the number of units in the reserve area, and so on.
Advanced Game Rules
- Once the players are familiar with the basic rules, Tech cards can be added to increase strategic variety.
- The scenario setup will state how many of its own Tech cards each nation may freely choose.
- All nations secretly choose the Tech cards they want to use, and reveal them simultaneously once chosen.
- If one player controls two nations, the Tech card effects of each nation can only affect the units of the nation it belongs to.
Tech Card Explanation
(Card diagram, numbered 1-6; example card: Blitzkrieg (閃電戰), code G.)
- The Tech card name.
- The years in which it can be used, shown by the coloured year labels. For example, the card in the picture can be used in 1940-1943, that is, in the first four rounds of the game.
- The code to be written on the order sheet when using this card.
- How much AP it costs to use this card. Some orders cost no AP; this is shown here as "0 AP". Some technologies need no order written and activate specially; this is shown here by a blank dash box.
- The timing of using this card, or in which phase the card's effect is activated, is shown here by the initial letters of the phases (W, R, D, M, C, B, L).
- The rule details and effect description of this card.
The example card (Blitzkrieg) reads: "W: Spend 1 AP, write G in an area next to a non-purple German unit. (Twice per year.) R: Recruit 1 tank in the G area. If there is a neutral unit in that area, it is commanded by Germany. (Place a German nationality identification marker.)"
Tech Card Supplementary Notes
Yamamoto Isoroku (山本五十六)
- If Yamamoto Isoroku is chosen, then in the first round of the game you must spend 1 AP to write Y; it can be written in any area, without regard to national flag or terrain.
- In later rounds you do not need to write a new Y. Yamamoto Isoroku does not move.
- Yamamoto Isoroku's effect is activated only when the area it is in contains only Japanese units, or no Japanese units at all.
- Yamamoto Isoroku is not regarded as a national flag and cannot be used to Reinforce.
- When Yamamoto Isoroku is removed in 1944 because of his year limit, the Allied faction does not gain LoN influence from this.
Kamikaze (神風特攻隊)
If there is no Japanese ship to sacrifice, the destruction cannot be performed.
Zero Fighter (零式戰機)
One ship can be combined with the combat strength of multiple Zero fighters.
T34 and Panther Tank (T34 / 豹式戰車)
No order needs to be written; the technology takes effect passively.
Dowding System (道丁系統)
A national flag does not count as 1 point of combat strength on its own. There must be an Allied unit for it to provide the extra combat strength.
SMERSH Counter-Intelligence (施密爾舒反間部隊)
You may write multiple D in the Write phase, and decide in the Diplomacy phase which 1 D will execute this ability.
Fat Man Atomic Bomb (胖子原子彈)
Regardless of the units' faction, as long as the number of units is sufficient, they must be destroyed down to 4 units. If there are fewer than 4 units, they are all destroyed.
If War Comes Tomorrow (假如明天戰爭)
Can be stacked with the effect of T34, but this effect requires writing at least 1 D order in any area.
Vanguard, Yamato and Aircraft Carrier (前衛號 / 大和號 / 航空母艦)
Ship units placed into the item (the large ship piece) return to the player's reserve area after being destroyed.
Transcriber's note: the Tech cards' own text is printed only as small illustrations in these pages of the rulebook and is not reproduced here beyond what is legible in running text.
Scenario: Americas Map
Players: 2-4.
In 1940 the USA imposed an embargo on steel and machinery against Japan; the USA continued to sell materials and military equipment to Britain, and the US Navy was responsible for protecting the transports. In July 1941 the USA imposed an oil embargo on Japan. These actions caused dissatisfaction in Germany and Japan.
In December 1941 Japan successfully attacked the US Pacific Fleet at Pearl Harbor, then further occupied other Pacific islands and turned its target toward the Americas. Germany actively attacked the Atlantic coastlines of the USA, Canada and Mexico and transport ships, hoping to paralyse Europe's supply lines and at the same time pin down the US aid sent to the Allied nations.
Germany and Japan knew well that the USA was a powerful threat; the two attacked the USA from the Atlantic and the Pacific respectively, the goal being to quickly capture the USA's coastal cities, hoping to make the USA unable to cope with a two-front war, only to meet stubborn counterattacks from the US homeland army...
Setup:
- Place the Americas map in the middle of the table. Place a Japanese flag in area A1 and a German flag in area D3.
- Shuffle the Americas Battle cards and draw 3 of them, placing them face up below the map, outside it.
- According to the markings on the Battle cards, place the battle year markers on the designated areas, to remind of the round in which the battle is resolved.
- According to the markings on the map, place the British, American, German, Japanese and neutral units on the map.
- According to the table below, take the reserve units and place them beside you; the other units are put back in the box and are not used.
In a two-player game, the two players each operate the two nations of one faction. In a three-player game, one of the players commands the two nations of the same faction at the same time.
| Faction | Nation | AP | Units in reserve | Advanced rules: number of Tech cards |
|---|---|---|---|---|
| Allies | Britain | 2 | 3 tanks | 1 |
| Allies | USA | 3 | 3 ships | 2 |
| Axis | Germany | 3 | 2 tanks, 1 ship | 2 |
| Axis | Japan | 3 | 1 tank, 2 ships | 2 |
Scenario: Europe Map
Players: 2-3.
In March 1938 Germany annexed Austria; seeing that the European powers did nothing, Germany went further and demanded that the Sudetenland of Czechoslovakia be returned to German territory. At the Munich Conference in September, Britain and France agreed that the area belonged to Germany, and Czechoslovakia was forced to cede territory.
In March 1939 Germany annexed Czechoslovakia. In August, after Germany and the Soviet Union signed the German-Soviet Non-Aggression Pact, Germany began to advance on Poland; on 3 September Britain and France formally declared war on Germany but could not give Poland much support. On 17 September the Soviet Union invaded Poland, and Polish territory was divided up by Germany and the Soviet Union.
In 1940 Germany successively captured the Netherlands, Belgium and France, while the Soviet Union also annexed Estonia, Latvia, Lithuania and other countries. In June 1941 Germany attacked the Soviet Union and occupied a large amount of Soviet territory. On 30 September Germany attacked the Soviet capital Moscow; stubborn Soviet resistance plus the help of the weather successfully stopped the German invasion, and in December the Soviet Union launched a counterattack and pushed the front line westward...
Special rule: in this scenario, the neutral ship is commanded by the German player at the start of the game. When this neutral ship is destroyed, it must be placed back in area E2 in the Reinforce phase of the next round.
Setup:
- Place the Europe map in the middle of the table.
- Shuffle the Europe Battle cards and draw 3 of them, placing them face up below the map, outside it.
- According to the markings on the Battle cards, place the battle year markers on the designated areas, to remind of the round in which the battle is resolved.
- According to the markings on the map, place the British, Soviet, German and neutral units on the map.
- According to the table below, take the reserve units and place them beside you; the other units are put back in the box and are not used.
In a two-player game, one of the players commands Britain and the Soviet Union at the same time.
| Faction | Nation | AP | Units in reserve | Advanced rules: number of Tech cards |
|---|---|---|---|---|
| Allies | Britain | 3 | 2 ships | 2 |
| Allies | Soviet Union | 3 | 2 tanks | 2 |
| Axis | Germany | 7 | 2 tanks | 3 |
Scenario: Pacific Map
Players: 2-3.
On 7 July 1937 Japan launched the Marco Polo Bridge Incident, after which it successively occupied Chinese cities such as Beiping, Shanghai, the capital Nanjing and Wuhan. China and the Soviet Union signed the Sino-Soviet Non-Aggression Pact, and the Chinese government, supported by the Soviet Union, moved to Chongqing in the interior and still did not surrender; afterwards Japan fell into a stalemate in the China theater.
In June 1941, taking advantage of Germany's invasion of the Soviet Union, the Soviet Union had deployed only a few troops in its east. At Germany's request Japan was to send troops to Siberia, attempting to cut off the Soviet supply to China and hoping to make the Soviet Union unable to cope with a two-front war.
In July 1941 the USA imposed an oil embargo on Japan. In order to obtain natural resources, Japan planned to quickly capture the Asian colonies of the European powers. In December Japan successively attacked British colonies such as the Malay Peninsula, Hong Kong, Singapore and Burma, prompting Britain, the USA and other Allied nations to formally declare war on Japan...
Setup:
- Place the Pacific map in the middle of the table.
- Shuffle the Pacific Battle cards and draw 3 of them, placing them face up below the map, outside it.
- According to the markings on the Battle cards, place the battle year markers on the designated areas, to remind of the round in which the battle is resolved.
- According to the markings on the map, place the British, Soviet, Japanese and neutral units on the map.
- According to the table below, take the reserve units and place them beside you; the other units will not be used.
In a two-player game, one of the players commands Britain and the Soviet Union at the same time.
| Faction | Nation | AP | Units in reserve | Advanced rules: number of Tech cards |
|---|---|---|---|---|
| Allies | Britain | 3 | 1 ship, 1 tank | 2 |
| Allies | Soviet Union | 3 | 2 tanks | 2 |
| Axis | Japan | 7 | 2 tanks, 1 ship | 3 |
Scenario: Americas + Europe Maps
Players: 3-4.
From September 1939 the German Navy successively attacked many merchant ships of Allied countries in the Atlantic waters of Central and South America, seriously threatening the sea transport lines. In December the German Navy and the British Navy fought near the mouth of the River Plate in South America, and the British Navy won.
After the war began, the USA continued to sell materials and military equipment to Britain, and the US Navy was responsible for protecting the transports. Therefore Germany actively attacked the Atlantic coastlines of the USA, Canada and Mexico and transport ships; besides paralysing Europe's supply lines, it also hoped to take the opportunity to capture the USA's coastal cities.
In the three years 1938-1940, Germany successively annexed European countries such as Austria, Czechoslovakia, Poland, the Netherlands, Belgium and France. In June 1941 Germany launched an attack on the Soviet Union, defeated the Soviet front line and occupied a large amount of Soviet territory.
However, the German army, fighting a two-front war in Europe and the Americas, was already exhausted by long campaigning, so it temporarily slowed its offensive, which also gave the Allied nations a chance to counterattack...
Setup:
- Place the Americas and Europe maps side by side in the middle of the table. Japanese units in areas A1 and A2 are not placed; a German flag is placed in area D3.
- Shuffle the Americas and Europe Battle cards separately and draw 2 of each, placing them face up below the maps, outside them.
- According to the markings on the Battle cards, place the battle year markers on the designated areas, to remind of the round in which the battle is resolved.
- According to the markings on the maps, place the British, American, Soviet, German and neutral units on the maps.
- Put the other units back in the box; they are not used. In this scenario, if a Battle card gives a Japanese result, it is regarded as a German result.
In a three-player game, one of the players commands two of the Allied nations at the same time.
In this scenario, the neutral ship in E2 is commanded by the German player at the start of the game. When this neutral ship is destroyed, it must be placed back in area E2 in the Reinforce phase of the next round.
| Faction | Nation | AP | Units in reserve | Advanced rules: number of Tech cards |
|---|---|---|---|---|
| Allies | Britain | 3 | none | 2 |
| Allies | USA | 3 | none | 2 |
| Allies | Soviet Union | 3 | none | 2 |
| Axis | Germany | 8 | none | 4 |
Scenario: Europe + Pacific Maps
Players: 3-4.
In the three years 1938-1940 Germany successively annexed European countries such as Austria, Czechoslovakia, Poland, the Netherlands, Belgium and France. In June 1941 Germany launched an attack on the Soviet Union; relying on the suddenness of the attack, its superiority in weapons and equipment, and its army's already rich combat experience, it defeated the Soviet front line and occupied a large amount of Soviet territory.
On 30 September the German army launched a major attack on the Soviet capital Moscow. As the season gradually entered winter, stubborn Soviet resistance together with the help of natural conditions successfully stopped the German invasion of Moscow, and in December the Soviet Union launched a counterattack and successfully pushed the front line westward.
In December Japan successfully attacked the US Pacific Fleet at Pearl Harbor, and afterwards, according to its previously drawn-up southern offensive plan, successively attacked British colonies such as the Malay Peninsula, Hong Kong, Singapore and Burma. Because Britain had placed the focus of the war in Europe before this and had not prepared sufficiently, it was defeated step by step here...
Special rule: in this scenario, the neutral ship in E2 is commanded by the German player at the start of the game. When this neutral ship is destroyed, it must be placed back in area E2 in the Reinforce phase of the next round.
Setup:
- Place the Europe and Pacific maps side by side in the middle of the table.
- Shuffle the Europe and Pacific Battle cards separately and draw 2 of each, placing them below the maps, outside them.
- According to the markings on the Battle cards, place the battle year markers on the designated areas, to remind of the round in which the battle is resolved.
- According to the markings on the maps, place the British, Soviet, German, Japanese and neutral units on the maps.
- According to the table below, take the reserve units and place them beside you; the other units are put back in the box and are not used.
In a three-player game, one of the players commands two nations of the same faction at the same time.
| Faction | Nation | AP | Units in reserve | Advanced rules: number of Tech cards |
|---|---|---|---|---|
| Allies | Britain | 3 | none | 2 |
| Allies | Soviet Union | 3 | 2 tanks | 2 |
| Axis | Germany | 5 | none | 3 |
| Axis | Japan | 5 | none | 3 |
Scenario: Pacific + Americas Maps
Players: 3-4.
In June 1941, taking advantage of Germany's invasion of the Soviet Union, Japan, at Germany's request, was to send troops to Siberia. In July the USA imposed an oil embargo on Japan; in order to obtain natural resources, in December Japan successively attacked British colonies such as the Malay Peninsula, Hong Kong, Singapore and Burma. Because Britain had placed the focus of the war in Europe before this and had not prepared sufficiently, it was defeated step by step here.
In December 1941 Japan successfully attacked the US Pacific Fleet at Pearl Harbor, then further occupied other Pacific islands. Japanese submarines lay in wait off the US west coast and California, attacking many US, Canadian and Mexican ships, and in June 1942 occupied Attu Island in Alaska, with the goal of capturing the big cities of the US west coast.
Although Japan already controlled almost the entire Pacific region, it had at the same time to face counterattacks from the Soviet Union and Britain and also deal with naval battles against the US fleet. With Japan's materials and troops heavily depleted, could the Allied nations take the opportunity to counterattack...
Setup:
- Place the Pacific and Americas maps side by side in the middle of the table. Place a Japanese flag in area A1.
- Shuffle the Pacific and Americas Battle cards separately and draw 2 of each, placing them below the maps, outside them.
- According to the markings on the Battle cards, place the battle year markers on the designated areas, to remind of the round in which the battle is resolved.
- According to the markings on the maps (ignoring D3, where no German units are placed), place the British, American, Soviet, Japanese and neutral units on the maps.
- According to the table below, take the reserve units and place them beside you; the other units are put back in the box and are not used.
In a three-player game, one of the players commands two of the Allied nations at the same time.
| Faction | Nation | AP | Units in reserve | Advanced rules: number of Tech cards |
|---|---|---|---|---|
| Allies | Britain | 3 | none | 2 |
| Allies | USA | 3 | none | 2 |
| Allies | Soviet Union | 3 | none | 2 |
| Axis | Japan | 8 | 1 tank | 3 |
Scenario: World Map
Players: 4-5.
In the three years 1938-1940 Germany successively annexed European countries such as Austria, Czechoslovakia, Poland, the Netherlands, Belgium and France. In June 1941 Germany launched an attack on the Soviet Union, defeated the Soviet front line and occupied a large amount of Soviet territory. Japan, in a stalemate in the China theater, was also to send troops to Siberia at Germany's request, attempting to cut off the Soviet supply to China.
In December 1941 Japan successively occupied British colonies such as the Malay Peninsula, Hong Kong, Singapore and Burma. At the same time, Japan successfully attacked the US Pacific Fleet at Pearl Harbor, then further occupied other Pacific islands.
Germany and Japan attacked many ships of the USA, Canada and Mexico, paralysing the Allied nations' supply lines; the two countries also attacked the USA from the Atlantic and the Pacific respectively, attempting to capture the big coastal cities of the USA.
The armies, worn down by long campaigning and with the theatre of operations expanding day by day, were no longer invincible as before for Germany and Japan, and the Allied nations tried to reverse the situation...
Special note! In the World Map scenario, the left side of the Americas map and the right side of the Pacific map are regarded as connected. If you want to command movement between the Americas and the Pacific, write it in the areas on the right side of the sheet (that is, the Pacific areas I-L are moved leftward into the Americas areas A1-A3, as shown by the arrows in the diagram: L1, L2, L3 connect to A1, A2, A3).
Special rule: in this scenario, the neutral ship in E2 is commanded by the German player at the start of the game. When this neutral ship is destroyed, it must be placed back in area E2 in the Reinforce phase of the next round.
Setup:
- Place all the maps side by side in the middle of the table. Place a Japanese flag in area A1 and a German flag in area D3.
- Shuffle the Americas, Europe and Pacific Battle cards separately and draw 2 of each, placing them below the maps, outside them.
- According to the markings on the Battle cards, place the battle year markers on the designated areas, to remind of the round in which the battle is resolved.
- According to the markings on the maps, place all nations' and neutral units on the maps.
- According to the table below, take the reserve units and place them beside you; the other units are put back in the box and are not used.
In a four-player game, one of the players commands Britain and the USA at the same time, or commands Germany and Japan at the same time.
| Faction | Nation | AP | Units in reserve | Advanced rules: number of Tech cards |
|---|---|---|---|---|
| Allies | Britain | 3 | none | 2 |
| Allies | USA | 3 | 3 tanks, 3 ships | 2 |
| Allies | Soviet Union | 3 | 2 tanks | 2 |
| Axis | Germany | 6 | none | 3 |
| Axis | Japan | 6 | 1 tank | 3 |