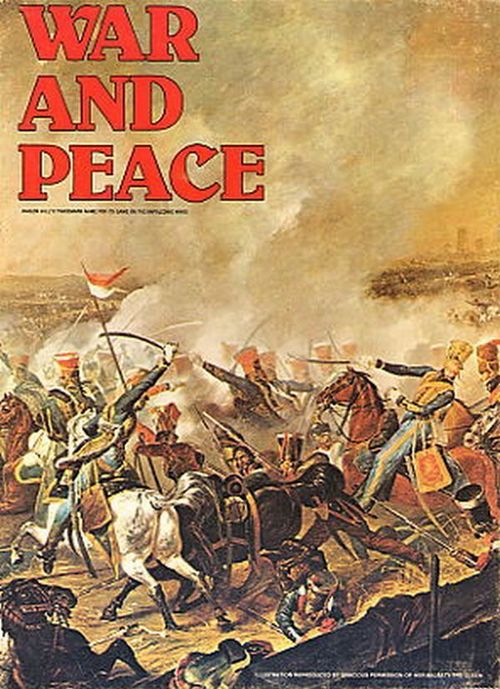
War and Peace
War and Peace Rulebook
Table of Contents
Table of Contents
- A. Introduction
- B. Game Equipment
- C. The Mapboard
- D. The Playing Pieces
- E. The Player-Aid Cards
- F. Sequence of Play
- G. Attrition
- H. Alliances
- I. Reinforcements and Replacements
- J. Movement
- K. Forced Marching
- L. Overrun
- M. Supply
- N. Combat
- O. Combat Resolution
- P. Explanation of Combat Results
- Q. Withdrawal, Retreat and Advance After Combat
- R. Leader Casualties
- S. Fortresses and Sieges
- T. Entrenchments
- U. The Tactical Matrix (Optional Rule)
- V. French Imperial Guard (Optional Rule)
- W. Russian Patriotism (Optional Rule)
- X. Demoralized Combat (Optional Rule)
- Y. Limited Intelligence (Optional Rule)
- Z. The Scenarios
- I. Austerlitz — 1805
- II. Jena to Friedland — 1806-1807
- III. Wagram — 1809
- IV. Napoleon in Russia — 1812
- V. The War of Liberation — 1813
- VI. Napoleon at Bay — 1814
- VII. Waterloo — 1815
- VIII. The Peninsular War
- IX. Spain — 1811-1814
- X. War and Peace: 1805-1815 (Grand Campaign Game)
- XI. The Final Glory — 1812-1815
- AA. Napoleon's War at Sea
A. Introduction
-
War and Peace is an historical game which recreates the vast European conflict known as The Napoleonic Wars. Since the outbreak of the revolution which deposed the French monarch in the last decade of the Eighteenth Century, the new French republic had inherited the enmity of the anxious crowned heads who ruled the rest of the Continent, and since 1792, France had depended upon her army for survival. In December 1804, the Corsican general who had risen to command that army was coronated Emperor and for the next ten years, the fate of France hinged upon his unique military genius. Now, War and Peace traces the rise, fall, return and final defeat of history's greatest soldier, Napoleon Bonaparte.
-
War and Peace is organized as a series of mostly chronological scenarios each of which recreates a major military campaign of The Napoleonic Wars. These scenarios share a common set of basic rules which are augmented by special rules indicating the initial deployment, victory conditions and other restrictions particular to each individual scenario.
The first scenario, Austerlitz-1805, is a relatively short and simple game designed to introduce players to the rules. The next pair of scenarios, Jena to Friedland: 1806-1807, and Wagram-1809, represent the campaigns during which the French army and Empire reached its dominant position among the major European powers. Napoleon in Russia-1812, and The War of Liberation-1813, are finely balanced, massive campaigns for the control of eastern and central Europe. Napoleon at Bay-1814, and Waterloo-1815, are scenarios that reflect the last ditch efforts of Napoleon to stave off total defeat at the hands of the Allied sovereigns and their armies. The lengthy campaign waged for control of the Spanish Peninsula is divided into two scenarios, one of which simulates the entire six year conflict while the second is limited to the decisive period of 1811-1814. The 1812, 1813, and 1814 scenarios can be linked in to a new scenario depicting the long defeat of Napoleon's France. Or conversely, the final scenario depicts the Marengo campaign of 1800 to go back to the beginning. Finally, War and Peace includes a grand campaign scenario covering the entire ten-year struggle which raged from the mountainous coasts of Portugal to the scorched earth of the endless Russian steppes.
-
Each of the campaign scenarios is played on one or two of the four map boards and require between two and three hours to play. The two scenarios dealing with the war in Spain require relatively few pieces but may require from eight to twelve hours to play to completion. The grand campaign game which utilizes all four map boards and all of the playing pieces is a long-term project which may last a maximum of 120 monthly Game-Turns.
B. Game Equipment
Each game of War & Peace includes the following parts:
- One Rulebook
- Four Mapboard Panels
- Four Sheets of Die-cut Playing Pieces
- Two Player-Aid Cards
- Two Dice
- Game Box
C. The Mapboard
-
The map board depicts the major terrain features and political boundaries which existed in Europe at the start of the Nineteenth Century. A hexagonal grid is superimposed on the map to regulate the movement and positioning of the playing pieces and to delineate the various terrain features which affect play. The map is scaled so that each hexagon (or hex) represents approximately 40 miles in width. The various terrain features depicted on the map are illustrated and their effects on combat and movement are explained on the Terrain Effects Chart.
-
The mapboard is composed of four separate panels which are numerically identified as follows: 1 = Spain, 2 = France, 3 = Germany (Austria/Prussia), 4 = Russia. To prepare for play, the panels are positioned on a table in numerical order — panel 1 (Spain) to the west, panel 2 (France) at the center-west, panel 3 (Germany) at the center-east, and panel 4 (Russia) to the east, forming a single continuous map.
-
The map board uses an alpha-numeric system to identify each hex individually. Whenever a particular hex is referred to in this text, the hex designation is followed by a parenthesized number identifying the map panel on which the hex is located. Example: Paris is located in hex CC9(2).
-
The red political boundaries on the mapboard delineate the territory of six major powers (Spain, England, France, Austria, Prussia and Russia) as they existed in 1805. The boundaries of many minor states are also depicted. Most, but not all of these minor states, have corresponding unit counters and are referred to as "minor powers". There are three minor powers (Dalmatia, Poland, and the Rhine Confederation) which were created after 1805 and are not delineated on the mapboard. Minor states which were allied or annexed by a major power prior to 1805 contain an abbreviation indicating the controlling major power. The minor states which are depicted on the mapboard are: Ansbach (Pr), Baden, Bavaria, Bayreuth (Pr), Brunswick, Denmark, the Empire (a group of minor German states which were later incorporated into a French satellite known as the Rhine Confederation), Hanover, Hesse, Holland (Fr) — (in 1805, this territory was still known as the Batavian Republic), the Kingdom of North Italy (Fr), Naples (Fr), Portugal, Saxony, Sweden and Swedish Pomerania (considered a Russian satellite state in 1805), Switzerland (Fr), Westphalia (Pr), and Wurtemburg.
-
The major and minor cities depicted on the mapboard are all considered to contain fortifications. The capital cities of the major powers are distinguished as follows: Spain (Madrid), England (London), France (Paris), Austria (Vienna and Budapest), Prussia (Berlin and Konigsberg), and Russia (Moscow and St. Petersburg). The city of Stockholm, which is located in a part of Sweden which is not on the map, is represented by a box on the north edge of Mapboard 3. The fortress of Gibraltar is an English possession which is located in hex E24(l).
D. The Playing Pieces
-
The die-cut playing pieces, hereafter referred to as unit counters, represent the forces and leaders which fought in the Napoleonic Wars. The armies and navies are represented in abstract terms as either infantry or cavalry, or naval fleet units or naval transport units. The large number printed on these units indicates their combat value which is measured in "strength points". Each infantry or cavalry strength point represents approximately 5,000 combat soldiers. Each naval strength point represents six vessels.
-
The army and navy units of each nationality are printed in several different denominations of strength points. Like money, strength points of the same nationality and type may be exchanged for ease of use. At any time, a player may consolidate unit counters which occupy the same hex by replacing them with a larger denomination counter which represents the same number of strength points as the units being replaced. Conversely, a single counter may be replaced by several smaller denomination counters which collectively represent the same number of strength points, identical in nationality and type to the unit they replace. The process of consolidation or disbursement is limited only by the number of unit counters physically available for the transaction at any given time during the game.
Example: A unit representing five French infantry strength points may be replaced by one unit worth two infantry strength points, and three units, each representing one infantry strength point. French guard or militia units may not replace regular infantry strength points.
-
Most of the important military commanders who participated in the Napoleonic Wars are represented by individual counters indicating the leader's name and relative leadership value. This value, which has an important influence on combat, may range from zero (poorest) up to three (best). Many of the zero value leader counters represent lower-ranking commanders which are not identified by name. Such leaders are distinguished by a single alphabetical designation. The leaders of major powers have a capitalized designation. The leaders of minor powers have a lower case designation.
-
The nationality of each major power unit is identified by the background color of the unit counter. There are six major powers identified by the following color scheme: Spain (yellow), England (red), France (blue), Austria (white), Prussia (grey), Russia (green). The symbology of all major power units is printed in either black or white.
E. The Player-Aid Cards
-
There are two player-aid cards included in the game. The first card includes all of the charts and tables needed to play any of the first nine scenarios — these include the Attrition Table, the Forced March Table, the Combat Results Table, the Combat Loss Chart, the Alliance Display, the Leader Display, and the Turn Record Track.
-
The second player-aid card provides the additional charts and tables which are needed to play the grand campaign scenario — these include the Naval Tables and the major and minor power Force Pool Displays. The use of this card is fully explained in the grand campaign scenario rules.
-
The Leader Display is provided to reduce the number of counters which are physically deployed on the mapboard. For each leader in the game, there is a corresponding box on the Leader Display in which all of the units which are stacked with or accompanying a given leader may be deployed. The leader counter itself remains on the map board and is moved normally. Naturally, all of the units in a leader's display box are assumed to be present in the hex the leader occupies on the mapboard. At any time during the play, units may be removed from the display and deployed directly under the corresponding leader counter. Unless players are using the optional limited intelligence rule, they may freely examine the opposing player's unit stacks, either on the display or the mapboard. There is no limit to the number of units which may be stacked in the same hex on the mapboard or in any individual box on the Leader Display.
-
Section JJ of this rulebook (the final section, below) contains many new charts that replace some charts on the Player-Aid Cards.
F. Sequence of Play
-
War and Peace is played in a series of turns each of which represents one month. Each turn consists of a French player segment followed by a non-French player segment. Each player's segment is further divided into five phases for attrition, alliance, reinforcement, movement and combat activities. During each turn, the player whose segment is currently in progress is called the active player; the opposing player is called the inactive player. Each player's segment is executed in the following sequence:
a. Attrition Phase: The active player rolls one die and consults the Attrition Table which may require a strength loss in any hex containing three or more of the active player's strength points. This die roll may be modified as specified in the Attrition rules (see section G).
b. Alliance Phase: The active player rolls one die and uses the resulting number to determine if political alliances are formed or dissolved according to the restrictions of the Alliance rules and the special rules regulating the scenario being played (see section H).
c. Reinforcement Phase: The active player may deploy any reinforcements or replacements scheduled for the current turn according to Reinforcement and Replacement rules regulating the scenario.
d. Movement Phase: The active player may move all of his combat units in accordance with the Movement rules and may conduct forced marches and execute overruns in accordance with those rules (see sections J, K and L).
e. Combat Phase: The active player announces all combats he cares to initiate and resolves them in any order he wishes subject to the Combat rules (see sections N-S).
-
After both players complete their respective player segments, the turn marker is advanced one month on the Turn Record Track, and a new turn is immediately initiated.
-
The turn sequence is repeated until the number of turns specified in the scenario rules have expired. The victor is then determined according to the victory conditions regulating the scenario.
G. Attrition
-
During the Attrition Phase the active player rolls one die and uses the resulting number to determine the effect of attrition in each and every hex which is currently occupied by three or more of the active player's strength points.
-
The effect of attrition is calculated separately for each hex by cross referencing the original die roll with the total number of strength points in the hex (ignoring any strength points controlled by the inactive player) and locating the result on the Attrition Table; if the result is greater than zero, the active player must immediately eliminate the indicated number of strength points from the hex. If the result is followed by an asterisk, the active player must eliminate one cavalry strength point in fulfilling the required loss if any cavalry are present in the hex. Within these restrictions, the required loss may be fulfilled in any manner the active player desires.
-
In determining the effect of attrition in each hex, the original die roll may be modified by various criteria particular to that specific hex. The criteria which may cumulatively modify the attrition die roll are as follows:
a. (-1) if all the strength points are either French or French satellite units.
b. (-1) if all the strength points are inside their home country.
c. (+1) if at least one strength point in a hex is unsupplied.
d. (+1) if the current turn is a winter month.
e. (+1) if the hex is on Mapboard 1 or 4.
f. If the strength points are inside a besieged city, the die roll is increased by the number on the siege status marker (see section S).
-
Example of Attrition procedure: During his Attrition Phase, the non-French player has rolled a "three" on the die and wishes to determine the effect in a hex in Russia occupied by ten Russian strength points which are unsupplied during the December turn. The die roll (3), is modified as follows: (-1) because the Russian units are in their home country, (+1) because the units are unsupplied, (+1) because December is a winter month, (+1) because the hex is on mapboard 4. Thus, the die is modified by a total of (+2), increasing the original result to (5). The player cross-references the modified die roll (5), with the total number of his strength points in the hex (10) and reads the result on the Attrition Table which calls for a loss of two strength points, one of which must be cavalry if any are present in the hex.
H. Alliances
-
During the Alliance Phase, the active player rolls one die and uses the resulting number to determine if he gains or loses the use of combat units of other major and/or minor states whose allegiance is subject to change according to the rules regulating the scenario being played.
-
The die roll executed during the Alliance Phase is modified as follows:
a. (-1) for each French victory point, city point, and pro-French power.
b. (+1) for each non-French victory point, city point, and anti-French power.
Note: In addition, the die roll may be modified for other reasons which are specified in the special rules governing the scenario; these rules also specify the city point awards. The status of major powers and minor power groups is only used in the grand campaign scenario.
-
The Alliance Display allows both players to keep track of the victory points, city points, and powers which modify the Alliance die roll. The display includes one box for each player's victory points, one box for each player's city points, one box for pro-French powers, one box for anti-French powers, and one box for neutral powers. The numerical counters may be used to record each player's point totals. In the grand campaign game (only), the counters representing the six major powers and four minor power groups may be used to record the current status of these powers.
-
During any Combat Phase, a player is awarded one victory point for each hex his units enter which was occupied by five or more enemy strength points at the start of the Combat Phase. The non-French player receives three victory points if his units enter a hex which was occupied by Napoleon and five or more strength points at the start of the Combat Phase. Note: A player cannot receive victory points for entering a city hex if any enemy strength points are also in that hex at the end of the Combat Phase (see section Q).
-
In certain scenarios, each player is awarded points for occupying cities specified in the scenario rules. City points are awarded to a player at the instant his units first occupy the specified city. If the city is subsequently recaptured, or vacated, the city point award is forfeited until it is reoccupied once again.
-
Regardless of the difference in point totals reflected on the Alliance Display, the Alliance Phase die roll may never be modified by more than plus or minus four. A modified die roll greater than six is always considered a "7". A modified die roll of less than one is always considered a "0".
I. Reinforcements and Replacements
-
During the Reinforcement Phase, the active player deploys any reinforcements specified to arrive that turn. These reinforcements are taken from the unused portion of the counters provided for play.
-
During the Reinforcement Phase, the active player may also deploy the replacements specified for the current turn if the appropriate units are available. Replacements may only be taken from units previously eliminated during the scenario.
J. Movement
-
During the Movement Phase, the active player may move as many or as few of his combat units in any order he desires. Units may be moved in any direction or combination of directions. In general, each unit must be moved individually, however, units which occupy the same hex at the start of the Movement Phase may be moved together for convenience. The active player moves each unit by physically tracing the path of movement through a series of adjacent hexes until the unit enters the hex the player wishes it to occupy at the end of the Movement Phase. Thus, once a player begins moving a particular unit, he must complete its movement before another unit may be moved. The movement of a particular unit is also restricted by its type and movement allowance, and by terrain features and the presence of enemy units along the chosen path of movement.
-
The distance which a unit may be moved during a single Movement Phase is restricted by the unit's movement allowance; this allowance is expressed as a number of movement points. In general, as a player moves a unit, that unit must expend one movement point from its movement allowance for each hex it enters; however, the cost to enter a specific hex will vary according to the terrain features in that hex (these varying entry costs are summarized on the Terrain Effects Chart, Section JJ, below).
-
During the Movement Phase, a unit may expend any portion of its movement allowance. Once a unit's movement allowance is exhausted, it may be moved no further, except by forced marching (see section K). If a unit's movement allowance is only partially expended during a Movement Phase, the unused portion is forfeited — it may not be saved or "lent" to another unit.
-
The movement allowance of a unit is based upon the unit's type. All leaders possess an allowance of ten movement points. Cavalry possess an allowance of four movement points. Infantry do not possess a movement allowance. Infantry may only be moved according to the following restrictions:
a. Infantry may only leave a hex if accompanied by a leader which occupied the same hex as the infantry at the start of the Movement Phase.
b. No more than ten infantry strength points may accompany a single leader as that leader is being moved.
c. No infantry strength points may accompany a leader after that leader has expended three movement points unless this movement is accomplished by forced marching.
d. No infantry may accompany a leader which is not the same color as the infantry unit(s); infantry may accompany any leader of the same national color, regardless of whether that leader represents a major power or a satellite state.
K. Forced Marching
-
During the Movement Phase, the active player may attempt to increase the mobility of his cavalry and infantry by forced marching.
-
At any time during the movement of any number of infantry or cavalry strength points, the active player may announce his intention to attempt to force march those strength points either one, two or three additional movement points.
-
When a player wishes to attempt a forced march, before rolling the die, he must indicate the movement path his units will follow. He then rolls one die, applies all appropriate modifiers, and consults the Forced March Table to determine the result of the attempted forced march. The result is found by cross-referencing the modified die roll with the required number of additional Movement Points. This result is interpreted as follows:
a. If the result is "0", the strength points may move no further than the distance they are allowed by the standard Movement rules.
b. If the result is a number, the strength points may move that number of additional movement points over and above the distance allowed by the standard Movement rules. If the strength points are accompanying a leader, they may accompany that leader for the indicated number of additional movement points.
c. If the result is followed by an asterisk, the active player must eliminate one strength point from the total group that was attempting to force march.
-
Cavalry may be force marched either independently or as part of a group accompanying a leader. Infantry may only force march while accompanying a leader. A leader may never attempt to force march unless accompanied by at least one strength point.
-
The die roll used to determine the result of an attempted forced march is cumulatively modified by the following criteria:
a. (-2) if the moving strength points are all French Guard units.
b. (-1) if the moving strength points are all French units.
c. (+1) if the moving strength points were unsupplied at the start of the Movement Phase.
d. (+1) if the moving strength points were on either Mapboard 1 or 4 at the start of the Movement Phase.
L. Overrun
-
During the Movement Phase, if the active player is moving a force which is sufficient to achieve at least 4 to 1 odds against a hex which is occupied by one or more strength points of the inactive player, the moving force may enter that hex by expending one additional movement point (over and above the normal entry cost imposed by terrain) and immediately eliminate all of the inactive player's strength points in that hex. This procedure, which does not require the use of the Combat rules or the Combat Results Table, is called an overrun.
a. If a force occupies a Mountain hex or is entrenched, the active player must achieve at least 5 to 1 odds to overrun that force.
b. If the moving force is sufficient to achieve 6 to 1 odds against a hex, it may execute an overrun without expending the additional Movement Point which is normally required.
c. The moving force, comprised of any combination of infantry and cavalry, is limited in its size. The total number of strength points accompanying the leader can never exceed ten (see section J.9, above).
-
The active player may only execute an overrun with units which occupied a single hex and were in supply at the start of the Movement Phase, and are being moved together as a single group.
-
The active player may use forced marching to execute an overrun, however, an overrun may not be executed unless the moving force can expend the full movement point cost to enter the hex in which the overrun occurs. A force which executes an overrun may continue moving, may execute additional overruns, and may initiate combat during the active player's ensuing Combat Phase.
-
A force containing cavalry may only be overrun by a moving force which possesses an equal or greater number of cavalry strength points.
-
Strength points inside cities may never be overrun. During the Movement Phase, if the inactive player's units are occupying a city hex, the active player may move his units adjacent and require the inactive player to announce whether his units are within or outside of the city in that hex. If the units remain outside of the city, they may be overrun.
-
Leaders have no offensive or defensive influence on an overrun, and cannot be injured, killed, or eliminated during the Movement Phase. If a leader of the inactive player occupies a hex which is overrun, the leader is immediately redeployed in the nearest hex occupied by a strength point of the same color as that leader.
M. Supply
-
During his player segment, the active player must determine the supply status of his strength points for attrition, movement, and combat purposes. A strength point may either be "in supply," or "unsupplied", at the instant its supply status is determined.
-
The strength point(s) in a hex are in supply if the active player can trace a supply line of three or less movement points from a hex containing a supply source into the hex the strength points occupy. This supply line may not be traced through any hex which is occupied by a strength point of the inactive player. Any strength point which does not possess such a supply line is unsupplied.
-
A supply source may be any hex which is not occupied by a strength point of the inactive player and contains either of the following:
a. a major city in the home country or a satellite state of the home country of the strength points being supplied.
b. a strength point which itself is in supply and is the same color as the strength points being supplied.
Example: During the French player's segment, one French strength point is in San Sebastian — hex P14(1), one Bavarian strength point is in Burgos — hex M15(1), one French strength point is in Madrid — hex L17(1). The French point in San Sebastian is within three movement points of Bayonne (a major city in France, the unit's home country) and is therefore in supply. The Bavarian strength point in Burgos is within three movement points of the French point in San Sebastian and since both points are the same color, the Bavarian point is also in supply. The French point in Madrid is not within three movement points of a supply source and is therefore unsupplied. While studying this example, notice that if the hex Q15(1) was occupied by a strength point of the inactive (non-French) player, the entire French supply line would be negated and the French units in Spain would all be unsupplied.
-
A unit, which is inside a city which is a supply source for that unit, is automatically in supply, even if opposing units also occupy the hex.
-
A supply line may be traced into a hex which is occupied by a strength point of the inactive player, but may not be traced through such a hex, to a more distant hex, unless the inactive player's strength point(s) are inside the city in that hex.
N. Combat
-
During the Combat Phase, the active player may initiate combat against any hex which is occupied by any strength points of the inactive player, providing the hex is directly adjacent to a hex which is occupied by at least one strength point of the active player, and these two hexes are not separated by an all-sea hexside. A leader does not have to be present for strength points to initiate combat. If the inactive player's strength points occupy a hex which does not contain a city, the combat is called a field battle. If the inactive player's strength points occupy a city hex, and the active player announces his intention to initiate combat against the hex, the inactive player must then announce whether his strength points are inside or outside the city's fortifications. Strength points which remain outside a city's fortifications may be engaged in a field battle. Strength points which are inside a city's fortifications may either be assaulted or besieged, at the active player's option.
-
At the start of the Combat Phase, before any combat resolution may occur, the active player must specify aloud each hex he wishes to initiate combat against, and for each such hex he must also specify which of his strength points will initiate that particular combat, by physically indicating the hex those strength points occupy. Each combat is initiated separately by the active player by indicating two hexes; the hex he wishes to attack, and the hex from which that attack is being initiated. An attack may not be initiated from more than one hex, although strength points from other adjacent hexes may subsequently reinforce a battle after at least one initial round of combat has been resolved.
-
The active player may initiate as many attacks as he desires at the start of the Combat Phase but he may never initiate any additional attacks once the combat resolution process has begun. During the Combat Phase, the active player may only resolve attacks against the hexes which he specified at the start of the Combat Phase. For each specified attack, at least one initial round of combat must be resolved.
-
The initial round of combat must be resolved as soon as the active player has specified all of the attacks he wishes to initiate. During the initial (or any subsequent) round of combat, the active player may resolve his specified attacks in any order he desires. During the initial round of combat, the active player must resolve all of the attacks he specified at the start of the Combat Phase before a new round of combat may be begun.
O. Combat Resolution
-
During each round of combat the players resolve each battle separately according to the following procedure:
a. Each player totals all of the strength points he has committed to the battle, taking into account the effects of supply and fortification. The player who possesses the greater total controls the larger force. If the opposing totals are exactly equal, the active player is considered to control the larger force.
b. For each battle, the combat odds ratio is determined by dividing the total strength of the larger force by the total strength of the smaller force. If the result of this division is two or greater, the odds ratio is "2 to 1". If the result is less than two but is equal or greater than one and one-half, the odds ratio is "3 to 2". If the result is less than one and one-half, the odds ratio is "1 to 1". Each odds ratio is printed on a separate horizontal line on the Combat Results Table.
c. After determining the odds ratio, the player who controls the larger force rolls two dice — the resulting number may then be increased or decreased by taking into account all of the appropriate combat modifiers. The final modified result is then located opposite the previously determined odds ratio. Directly above this number, at the top of the Combat Results Table, a result affecting both the larger and smaller force is indicated. This result is immediately applied to both forces, before any other battle may be resolved.
d. If the odds for any combat are determined to equal or exceed 4 to 1, the smaller force automatically suffers a "D3" result. If the smaller force loses more than one Strength Point, the larger force automatically suffers a "1" result; otherwise the larger force is unaffected.
-
The dice roll used to resolve a battle may be increased or decreased by taking into account modifications which represent the influence of leadership, morale, and various terrain effects. These modifications are effected as follows:
a. Leadership: Each player may use one leader to influence each battle. This leader must occupy the same hex as the majority of friendly strength points committed to the battle, and must also be the same color as the majority of committed friendly strength points (if a force has equal numbers of different colored strength points, the player may choose the color of the leader he wishes to influence the battle). The dice roll is increased by the value of the leader of the larger force and decreased by the value of the leader of the smaller force. If either force does not possess a leader, its leadership value is zero.
P. Explanation of Combat Results
-
Each time the dice are rolled to resolve a field battle or an assault, the Combat Results Table yields a result which affects both of the opposing forces. The result indicated under the letter "L" is immediately applied to the larger force. The result indicated under the letter "S" is immediately applied to the smaller force.
-
If a force receives a "0" result, it is assumed to suffer a minimal loss but no strength points are actually eliminated from the force.
-
If a force receives a result of "1", "D1", "D2", or "D3", the owning player immediately consults the Combat Loss Chart, cross-referencing the combat result obtained from the Combat Results Table with the total number of strength points in the smaller force (even if the player is determining the larger force's loss). The player must then immediately eliminate a number of strength points equal to the number indicated on the Combat Loss Chart by following the restrictions specified below:
a. At least fifty percent of the strength points eliminated must possess the same morale value as the morale value used by the force during the current round of combat. Note: If the force is composed of equal numbers of strength points of two or more different morale values, the morale value of the force is automatically the lowest morale value present in the force.
b. At least fifty percent of the strength points eliminated must be the same color as the leader whose value was used by the force during the current round of combat.
c. Whenever a force receives a "D" result, and is required to lose more than one strength point, it must lose at least one cavalry strength point if any are available in that force. Note: If there is a conflict as to which strength point must be eliminated, players should try to follow the priority sequence indicated in this rule. If there is still more than one alternative, the decision should be made at random by placing the units in a cup and picking one.
-
When a force receives a "D1", "D2", or "D3", combat result, it is considered demoralized and the appropriate Demoralization marker is immediately placed on top of the force. The morale value of the force is thereafter reduced by the number indicated on the Demoralization marker.
-
The effect of demoralization is cumulative. If a demoralized force is again demoralized during a subsequent combat round, the current demoralization level is added to the previous level. Note, however, that the morale value of a force may never be reduced below zero.
Q. Withdrawal, Retreat and Advance After Combat
-
At the end of each round of combat, immediately before he attempts to commit additional strength points, each player may voluntarily withdraw any of his forces which were committed to field battle during the round according to the following restrictions:
a. If a withdrawing force does not occupy a city hex, it must retreat one hex in any direction, providing it ends its withdrawal no further from a friendly supply source (in terms of Movement Points) than the hex it originally occupied. If a withdrawing force is currently unsupplied, the opposing player may determine where it may retreat, within the restrictions specified above although he may not retreat the force into a hex his units occupy if any other hex is available.
b. If a withdrawing force occupies a city hex, it may retreat into an adjacent hex (as regulated by a, above), or it may retreat inside the city in the hex it occupies providing there are no enemy strength points already inside the city, and that the hex was occupied by at least one friendly strength point before any enemy units which are currently in the hex entered that hex. Note: The number of strength points which may withdraw inside a city is limited by the Fortress Capacity of that city (see section S).
c. A withdrawing force may be divided into any number of smaller forces each of which may retreat separately in any manner which does not violate the restrictions stated above. If a demoralized force is divided, each component force inherits the current Demoralization level of the original parent force.
d. A force may retreat into an enemy occupied hex, if no other retreat path is open, but may not end its retreat in a hex occupied by an enemy unit — the force must continue its retreat until it enters a hex which is free of enemy units. A force automatically loses one strength point for each enemy occupied hex it enters during its retreat. Note: A unit may end its retreat inside a city even if there are enemy strength points (outside the city) in the same hex.
e. A force may not retreat into a hex containing friendly strength points which are currently committed to a battle. If a player wishes to withdraw a force from one battle in order to commit it to another battle, he must announce that he wishes to withdraw; he may then follow the normal procedure used to commit additional strength points to a battle (requiring a modified die roll of five or more). If his attempt succeeds, the force may be immediately withdrawn to join the neighboring battle. If the withdrawal attempt fails, the force must remain in place and is still considered engaged in its original battle.
f. Units inside a city may never retreat into an adjacent hex. In order to retreat into an adjacent hex, a unit must be withdrawn from a field battle.
R. Leader Casualties
-
At the end of each Combat Phase (not round), each player rolls the dice for each of his named leaders which occupied a hex in which any friendly strength points were committed to a battle during the Combat Phase. If the result is less than twelve, the leader is unharmed. If a "12" is rolled, the leader is considered a casualty and the player immediately rolls one additional die. If the result is 1-5, the leader is removed from the map and placed on the Turn Record Track (on a roll of "1" the leader is placed in the box representing the next turn, on a roll of "2" in the box representing two turns in the future, etc.). If the second die roll is a "6", the leader is considered to have been killed and is permanently removed from the game.
-
During the Reinforcement Phase, the active player may remove a leader from the current turn box of the Turn Record Track and deploy the leader in any hex containing a supplied strength point of the same color as the leader returning to the map.
-
If a named leader is temporarily or permanently removed from the map, the owning player may immediately replace him with any available unnamed leader of the same color. If all unnamed leaders of the same color are already on the map, no replacement is made.
-
Unnamed leaders can never be killed or injured.
S. Fortresses and Sieges
-
During the game, the player who currently controls a particular city is permitted to use the city's Fortress Capacity to shelter an equal or smaller number of friendly strength points (and any friendly leaders) which occupy the hex in which the city is located. The control of any city is determined as follows:
a. At the start of a scenario, a player automatically controls each city in his home country and in each country which is allied to his home country, providing no enemy strength points are initially deployed inside the city. The player whose units are initially deployed inside a city is always considered in control of that city at the start of a scenario.
b. During the Alliance Phase, if a player gains the allegiance of a major or minor power, he automatically gains control of each city in that power's territory, providing there are no enemy strength points currently inside the city.
c. At any time during the game, a player automatically gains control of a city, if at least one of his strength points and no enemy strength points occupy the hex in which the city is located. Thus, the control of a particular city may "change hands" any number of times during the course of a scenario.
-
The Fortress Capacity of each major city is six strength points. The Fortress Capacity of each minor city is four strength points. The Fortress Capacity of a city can never be increased, decreased or destroyed.
-
There are Fortress markers provided which either player may use. In general, any time a hex contains units both inside and outside of a city, the units which are inside the city should be placed under a Fortress marker.
-
During the Movement Phase, units which are inside a city may not be overrun.
-
During the Combat Phase, units which are inside a city may not be attacked if there are any friendly strength points remaining outside the city in the same hex (see 7, below).
-
At the start of any round of combat, the player who controls the city in a given hex has two options if his units are attacked:
a. All of his units may be deployed outside the city and be committed to a field battle.
T. Entrenchments
-
During the Movement Phase, the active player may entrench any friendly force of three or more strength points which remain stationary by placing an Entrenchment marker in the hex the units occupy.
-
The dice roll used to resolve a field battle is increased by one if the larger force is attacked in a hex containing an Entrenchment marker. The dice roll is decreased by one if the smaller force is attacked in a hex containing an Entrenchment marker. Units which initiate a battle (or a counterattack) never benefit from the presence of an Entrenchment marker in the hex they occupy.
-
During the Movement Phase or the Combat Phase, when an entrenched force vacates a hex, the Entrenched marker is immediately removed from the mapboard.
U. The Tactical Matrix (Optional Rule)
-
The Tactical Matrix allows each player an opportunity to directly influence the outcome of field battles and may be used by mutual agreement at the start of any scenario.
-
The Tactical Matrix is printed on the first Player-Aid Card, underneath the Combat Loss Chart. Each player is provided with a separate set of seven Tactical markers which include the following options: Charge, Envelop Flank, Skirmish, Bombard, Square, Refuse Flank, and Withdraw.
-
During each round of combat, whenever the players are resolving a field battle, each player secretly chooses one Tactical marker and places it face-down on top of the leader of his force (or in that leader's box on the Leader Display). After both markers are placed, they are simultaneously revealed. The tactic chosen by the player who controls the larger force is then cross-referenced with the tactic assigned to the smaller force. The result indicated on the Tactical Matrix is implemented as follows:
a. The dice roll used to resolve the battle is modified by the result (either positive, negative, or zero) indicated on the Tactical Matrix.
b. If the result is "NC", neither player is acting aggressively and there is automatically no result in the battle during the current round of combat (the dice are not rolled).
c. If the result is parenthesized, at least one player is attempting to Withdraw, and may do so immediately after the current round of combat (which is resolved as regulated by a or b, above).
-
When using the Tactical Matrix, the standard rules for Withdrawal (Section Q) are modified as follows:
a. At the end of any round of combat, if a force possesses more cavalry strength points than the opposing enemy force, it may voluntarily withdraw, regardless of the tactic it was assigned during the current round of combat.
b. If a force possesses an equal or smaller number of cavalry strength points than the opposing enemy force, it may only withdraw if the owning player chose the Withdraw Tactical marker during the current round of combat.
c. The player who controls a city may always withdraw units into the city — no Tactical marker is required to withdraw units into a city in the same hex the units occupy.
d. If a player chooses the Withdraw Tactical marker, his force must withdraw from the field (either into a city, or an adjacent hex) at the end of the current round of combat.
V. French Imperial Guard (Optional Rule)
-
At the start of any round of combat, if a French force under Napoleon's leadership possesses any Guard strength points, the French player may announce that he is committing the Imperial Guard. If the French Guard is committed, there are several special effects:
a. The French force is automatically considered to possess a morale value of three during the current round of combat.
b. As far as possible, any loss the French force suffers must be filled by eliminating Guard strength points.
c. If the French force is demoralized, its morale value is automatically reduced to zero.
W. Russian Patriotism (Optional Rule)
-
The morale value of any regular Russian infantry or cavalry unit on Mapboard 4 is increased to three.
-
The morale value of Russian Cossack units on Mapboard 4 remains at zero.
X. Demoralized Combat (Optional Rule)
-
At the end of any round of combat, if the morale value of a force is zero, the owning player rolls one die. This die roll is decreased by the leadership value of the force. If the modified result is greater than zero, the owning player must immediately eliminate the resulting number of strength points — these units are considered to surrender and are treated as prisoners of war in the grand campaign game.
-
If this rule is used, a force is never required to withdraw from a field battle or surrender a fortress simply because its morale value is zero.
Y. Limited Intelligence (Optional Rule)
-
A player may never examine the units in an enemy force (either on the map board or on the Leader Display) until he initiates combat against that force.
-
If a player wishes to overrun an enemy force, he must reveal the total strength of the moving force to the opposing player who must honestly inform the active player if the overrun can be executed.
Z. The Scenarios
-
War and Peace includes twelve separate scenarios. Each scenario is fully explained in a separate section of these rules. The scenario rules sections are organized as follows:
- I — Austerlitz-1805
- II — Jena to Friedland: 1806-1807
- III — Wagram-1809
- IV — Napoleon in Russia-1812
- V — The War of Liberation-1813
- VI — Napoleon at Bay-1814
- VII — Waterloo-1815
- VIII — The Peninsular War: 1808-1814
- IX — Spain: 1811-1814
- X — War and Peace: 1805-1815 (Grand Campaign)
- XI — The Final Glory: 1812-1815
- XII — Marengo: 1800
-
To begin a scenario, refer to the scenario rules and set out the components listed in Section B.
-
The scenario rules specify the month in which the scenario starts and ends. At the start, the Game-Turn marker is placed in the starting month, and the Game End marker is placed in the ending month on the Turn Record Track. At the end of each turn, the Game-Turn marker is advanced one month. When the Game-Turn marker reaches the final month, after both players complete their segments, the scenario ends and the winner is determined in accordance with the victory conditions specified in Section C of the scenario rules. For multi-year scenarios, a Game Year marker is also provided.
-
In each scenario, Section D contains special rules particular to that scenario. In certain instances, these rules may conflict with the standard game rules. Whenever such a conflict occurs, the scenario rules supersede the standard rules.
I. Austerlitz — 1805
A. Introduction. In the late summer of 1805, Napoleon assembled nearly 200,000 men on the Channel coast for a planned invasion of England. Together with Austria, Russia, and several minor powers, England had formed the Third Coalition, an alliance seeking to depose Napoleon and dismember the French Empire. By early autumn, Austrian troops had swarmed into Bavaria and northern Italy while a Russian army began marching west to join her allies. England supported the war effort with economic aid and minor coastal invasions in Italy and Germany. Napoleon reacted with unexpected speed, transferring the bulk of his forces south to meet the Austrian advance. In September, the "Grande Armee" surged across the Rhine. Within a month, the Austrian army in Bavaria surrendered the fortress of Ulm, and the allied forces were retreating out of Italy. By mid-November, Napoleon held Vienna, the Austrian capital. Prussia, although favoring the coalition, remained a cautious neutral. In early December, the Russians and the remnants of the Austrian army attacked Napoleon at Austerlitz, northeast of Vienna, and were severely beaten. After this disaster, the Russians retreated and Austria sued for peace. Although the coalition foundered, England won the most important battle of 1805. On October 21, Admiral Nelson destroyed the French Fleet at Trafalgar off the southwest coast of Spain. For the remainder of his life, Napoleon's continental Empire would be curtailed by England's indisputable control of the sea.
B. Game Equipment.
- The scenario is played on mapboards 2 and 3.
- The scenario requires Austrian, Russian, French and French satellite units. There is a possibility that Prussian units may also be needed.
C. Victory Conditions.
-
The French player wins the game if there is at least one un-besieged French strength point in Vienna at the end of the scenario.
-
If the French player does not achieve his victory condition, the non-French player wins the game.
-
The scenario begins in August 1805 and ends in December 1805.
a. Alternate Start Month (Optional Rule). To balance play, and make this scenario more difficult for the French player, the start turn can be moved to September.
D. Special Rules.
-
Alliance Phase
a. The French player receives one City Point for controlling Vienna.
b. The non-French player receives one City Point if a French unit enters any territory controlled by Prussia (including Ansbach, Bayreuth, Saxony, and Westphalia).
c. If a modified die roll of "0" occurs during an Alliance Phase, Prussia remains neutral for the remainder of the game.
d. If a modified die roll of "7" occurs during an Alliance Phase, Prussia declares war against France and the non-French player may immediately deploy and may use the following Prussian forces: At Magdeburg: Brunswick, Ruchel, 10I, 1C * At Dresden: Leader (0), 4I, 1C * At Weimar: Hohenloe, 6I, 1C * At Berlin, Posen, and Thorn: 1I each.
e. If a modified die roll of "0" or "7" occurs, the Alliance Phase is deleted for the remainder of the game.
f. Austrian and Russian units may not enter Prussian territory unless Prussia declares war against France.
-
Supply Sources
a. The supply source for all French and French satellite units is Milan or any major city in France.
b. The supply source for all non-French units is any major city in the unit's home country.
E. Initial Deployment.
-
French Player (deploys first)
a. French forces: In France, within one hex of Strasbourg: Napoleon, Lannes, Ney, 8I, 2GI, 4C * within one hex of Metz: Davout, Soult, 12I, 1C * At Milan: Massena, 3I, 1C * At Coblenz: Marmont, 3I, 1C * At Cologne: Bernadotte, 3I * At Florence: Leader (0), 4I * At Brest: Leader (0), 4I * At Amsterdam: 3I * At Hanover: 1I.
b. French satellite forces: At Wurzburg: Leader (0), 3I, 1C (B) * At Amsterdam: Leader (0), 3I (H) * At Milan: 4I, 1C (I) * At Baden: 1I (R) * At Geneva: 1I (Sz) * At Stuttgart: 2I (Wu).
-
Non-French Player
a. Austrian forces: In Bavaria, within one hex of Ulm: Ferdinand, Mack, 11I, 3C * Within one hex of Venice: Charles, Hiller, 14I, 4C * At Innsbruck: John, 3I, 1C * At Vienna: Leader (0), 2I * At Prague and Ratisbon: 1I each.
b. Russian forces: At Brest-Litovsk: Buxhowden, Constantine, 5I, 2GI, 1C, 1GC * At Lublin: Bagration, Kutuzov, 7I, 1C * At Grodno: Benningsen, 3I, 1C.
F. Reinforcements and Replacements.
-
The French player receives no reinforcements or replacements.
-
The non-French player receives Austrian reinforcements and replacements:
a. Reinforcements: At Budapest: 1I each turn.
b. Replacements: At Vienna: 1I each turn.
-
Reinforcements and replacements are forfeited if the opposing player controls the specified city on the scheduled turn of arrival.
II. Jena to Friedland — 1806-1807
A. Introduction. After Prussia declared war on France in the autumn of 1806, Napoleon's army crushed the Prussians within weeks at Jena and Auerstadt, seizing most of Prussia's fortresses. During the winter of 1806-1807 the Russian army moved into East Prussia to continue the fight; the two sides fought an inconclusive winter battle at Eylau in February 1807 before Napoleon decisively defeated the Russians at Friedland in June, leading Tsar Alexander to sue for peace.
B. Game Equipment.
- The scenario is played on mapboards 2 and 3.
- The scenario requires Prussian, Russian, French and French satellite units. There is a possibility that Austrian units may also be needed.
C. Victory Conditions.
- The non-French player wins the game if there is at least one un-besieged non-French strength point in any major city in Prussia, Saxony or Hanover at the end of the scenario.
- If the non-French player does not achieve his victory conditions, the French player wins the game.
- The scenario begins in October 1806 and ends in July 1807.
D. Special Rules.
-
Alliance Phase
a. The French player receives one City Point for controlling Berlin.
b. If a modified die roll of "0" occurs during an Alliance Phase, Austria remains neutral for the remainder of the game.
c. If a modified die roll of "7" occurs during an Alliance Phase, Austria declares war against France and the non-French player immediately deploys and may use the following Austrian forces: At Vienna: Charles, 7I, 3C * At Prague: Ferdinand, 7I, 3C * At Budapest: John, 7I, 3C.
d. If a modified die roll of "0" or "7" occurs, the Alliance Phase is deleted for the remainder of the game.
e. No unit may enter Austrian territory unless Austria declares war. If Austria declares war, both players' units may enter Austria. Note: In this scenario, and all subsequent scenarios except the Campaign Game, Austria does not control any territory on mapboard 2. Also, North Italy controls Venice, and Bavaria controls Innsbruck.
-
Supply Sources
a. The supply source for all French and French satellite units is Milan, Munich, or any major city in France or Holland.
b. The supply source for all non-French units is any major city in the unit's home country.
c. Non-French units are automatically in supply in any city on the Baltic coast.
-
Russian Naval Movement
a. During each non-winter turn in 1807, the non-French player may transport a maximum of two Russian strength points (with or without a leader) from any Baltic city he controls to any other Baltic city he controls, even if either city is besieged. The Baltic cities are Lubeck, Stralsund, Stettin, Danzig, Konigsberg, and Memel.
b. Russian naval movement is executed at the end of the non-French player's Movement Phase. The transported units may not move normally during the Movement Phase.
c. If units are transported to a besieged city, they may not be placed inside the city unless the siege is broken.
-
Saxony and Poland
a. During the first Alliance Phase in which the French player controls Dresden, Saxony switches her allegiance from Prussia to France. All (gray) Saxon units are immediately removed from the mapboard. During his next Reinforcement Phase, the French player receives one (blue) strength point of Saxon infantry at Dresden.
E. Initial Deployment.
-
French Player (deploys first)
a. French forces: At Mainz: Napoleon, 2I, 2GI * At Stuttgart: Davout, 5I, 1C * At Wurzburg: Lannes, Murat, 3I, 4C * At Ratisbon: Soult, 5I, 1C * At Ulm: Ney, 4I * At Ansbach: Bernadotte, 4I, 1C * At Florence: Massena, 2I, 1C * At Milan: Eugene, 3I * At Trieste: Marmont * At Frankfurt: Leader (0), 4I * At Boulogne: Leader (0), 5I.
b. French satellite forces: At Amsterdam: Leader (0), 3I, 1C (H) * At Milan: 4I, 1C (I) * At Florence: 5I (N) * At Munich: 2I, 1C (B) * At Ulm: 1I (B) * At Trieste: 2I (Da) * At Wurzburg: 2I (Wu) * At Baden, Cologne, and Frankfurt: 1I (R) each.
-
Non-French player
a. Prussian forces: At Leipzig: Brunswick, 10I, 3C * One hex south of Leipzig: Hohenloe, 4I, 1C * At Weimar: Ruchel, 4I, 1C * At Berlin: Leader (0), 4I, 1C * At Posen: Leader (0), 4I, 1C * At Breslau, Stettin, Danzig, Thorn, Warsaw, and Konigsberg: 1I each.
b. Prussian satellite forces: One hex south of Leipzig: Leader (0), 2I, 1C (S) * At Brunswick: 1I (Br) * At Cassel: 1I (He).
c. Russian satellite forces: At Stralsund: 2I (Sw) * At Lubeck: 1I (Sw).
F. Reinforcements and Replacements.
-
French Reinforcements:
a. In October 1806, At Mainz: Leader (0), 2I.
b. Each turn beginning in November 1806, At Mainz: 2I or 1C.
-
French Satellite Reinforcements:
a. October 1806 — At Munich: 1I (B) * At Cologne: 1I (R).
b. November 1806 — At Frankfurt: 1I (R).
c. December 1806 — At Frankfurt: 1I (R).
d. January 1807 — At Cologne: 1I (H).
e. February 1807 — At Milan: 3I (I) * At Florence: 3I (N).
-
Prussian Reinforcements: At Berlin: 1I each Turn.
-
Russian Reinforcements:
a. November 1806 — At Grodno: Benningsen, 10I, 1C, 1CC.
b. December 1806 — At Kovno: Buxhowden, 10I, 1C, 1CC.
c. January 1807 — At Brest-Litovsk: Leader (0), 4I, 1C.
d. February 1807 — At Kovno: Bagration, 2I, 2GI, 1GC.
e. Each turn beginning in March 1807, At Memel: 1I.
-
Reinforcements are forfeited if the opposing player controls the specified city on the scheduled turn of arrival.
-
There are no replacements in this scenario.
III. Wagram — 1809
A. Introduction. By 1809, with much of Napoleon's army committed in Spain, Austria launched a renewed war of revenge, invading Bavaria in March. Napoleon halted the advance at Eggmuhl and Ratisbon in April, entered Vienna in May, and was nearly defeated by Archduke Charles's counterattack at Aspern-Essling (May 21-22). After regrouping, Napoleon recrossed the Danube in July and defeated the Austrians at the two-day Battle of Wagram (July 5-6), the largest battle fought to date, prompting Charles to request an armistice.
B. Game Equipment.
- The scenario is played on mapboards 2 and 3.
- The scenario requires Austrian, English, French and French satellite units. There is a possibility that Prussian and Russian units will also be needed.
C. Victory Conditions.
- The French player wins if he controls Vienna, Prague, and Cassel, at the end of the game and none of these cities are besieged at that time.
- If the French player does not achieve his victory conditions, the non-French player wins the game.
- The scenario begins in March 1809 and ends in October 1809.
D. Special Rules.
-
Alliance Phase
a. The French player receives one City Point for each major city in Austria which he controls.
b. The non-French player receives one City Point for each major city he controls in any French satellite state. The French satellite states include all of the minor powers on mapboards 2 and 3. The Grand Duchy of Warsaw, Napoleon's Polish satellite state, is represented by the city of Warsaw. Venice is a major city in the French satellite Kingdom of North Italy and is not part of Austria for Alliance or Supply purposes; it is part of the French satellite state for Alliance and Supply purposes.
c. If a modified die roll of "0" occurs during an Alliance Phase, Russia declares war against Austria and the French player may immediately deploy and use the following Russian forces: At Grodno: Leader (0), 5I, 1C. Note: If Russia has already declared war against either France or Austria, the die roll has no effect on Russia.
d. If a second modified die roll of "0" occurs, the Alliance Phase is deleted for the remainder of the game.
e. If a modified die roll of "7" occurs during an Alliance Phase, Russia declares war against France and the non-French player receives the Russian forces listed in c, above. If Russia has already declared war, the die roll has no effect on Russia (see f, below). Note: The Russian forces scheduled to arrive in Pinsk may be deployed in any hex on the east edge of Mapboard 3, within three hexes of Lvov.
f. If a modified die roll of "7" occurs during an Alliance Phase, the non-French player may immediately deploy and use the following rebellious Prussian satellite forces: At Prague: Brunswick, 1I (Br) * At Brunswick: Leader (0), 1I (Br) * At Cassel: Leader (0), 1I (He).
g. If a second modified die roll of "7" occurs during an Alliance Phase, Prussia declares war against France and the non-French player may immediately deploy and use the following Prussian forces: At Berlin: Blucher, Kleist, Yorck, 6I, 2L, 1C (in addition, see h, below).
h. If a second modified die roll of "7" occurs, a portion of the French satellite forces immediately desert. The French player must immediately eliminate one strength point from each of the following satellite forces: Bavaria, Rhine, Saxony, and Wurtemburg. Note: If there are no strength points of these nationalities currently on the map, the French player ignores the required loss.
-
Supply Sources
a. The supply source for all French and French satellite units is any major city which the French player controlled at the start of the scenario. If the non-French player gains control of such a city, it may not function as a French supply source for the remainder of the game.
E. Initial Deployment.
-
French Player (deploys first)
a. French forces: At Paris: Napoleon * At Dresden: Bernadotte * At Florence: Murat * At Venice: Eugene * At Warsaw: Poniatowski * In Bavaria, within two hexes of Ratisbon: Davout, 4I, 6C * In Bavaria, within two hexes of Ulm: Leader (0), 4I * Three hexes south of Trieste: Marmont, 2I * At Ulm: Massena, 8I * At Strasbourg: 2I, 2GI, 1GC * At Mainz: 1I, 1C * At Antwerp, Bremen, Danzig, Hamburg, Hanover, Stettin, Stralsund, and Thorn: 1I each.
b. French satellite forces: At Cassel: Jerome Bonaparte, 3I (W) * At Amsterdam: Leader (0), 4I, 1C (H) * At Munich: Leader (0), 5I, 1C (B) * At Venice: 3I, 1C (I) * At Florence: 4I (N) * At Dresden: 2I, 1C (S) * At Warsaw: 2I, 1C (Po) * At Frankfurt: 2I (R, Pt) * At Stuttgart: 2I (Wu) * At Baden: 1I (R) * At Lubeck: 1I (D) * Three hexes south of Trieste: 1I (Da).
-
Non-French Player
a. Austrian forces: Within four hexes of Vienna: Charles, Hiller, Louis, 25I, 4C * Within two hexes of Leoben: John, Leader (0), 8I, 6L, 2C * Within two hexes of Prague: Two leaders (0), 9I, 1C * At Lublin: Ferdinand, 7I, 1C * At Vienna: Leader (0), 2I * At Budapest: 3I * At Innsbruck: 3L * At Leoben and Olmutz: 1L each.
F. Reinforcements and Replacements.
-
French Reinforcements
a. Each turn, At Strasbourg: 1I.
b. April 1809 — At Strasbourg: Lannes, Bessieres and Victor * At Milan: Leader (0), 2I.
c. May 1809 — At Mainz: 3I, 1C.
d. July 1809 — At Paris: 8I * At Mainz: 3I.
-
French Satellite Reinforcements
a. April 1809 — At Milan: 3I (I).
b. June 1809 — At Warsaw or Thorn: 1I (Po).
-
Austrian Reinforcements
a. April and May 1809 — At each major city in Austria: 1L.
b. June, July, and August 1809 — At each major city in Austria: 2L.
c. September and October 1809 — At each major city in Austria: 1L.
-
English Reinforcements
a. July 1809 — At Walcherin Island — hex HH4(2): Leader (0), 8I.
b. August and September 1809 — At London: 1I each turn.
-
Reinforcements are forfeited if the opposing player controls the specified city on the scheduled turn of arrival.
-
There are no replacements in this scenario.
IV. Napoleon in Russia — 1812
A. Introduction. After defeating Austria in 1809, Napoleon dominated most of Europe, with Russia and Austria as uneasy allies. Trade sanctions under Napoleon's Continental System steadily damaged the Russian economy, and by 1812 France and Russia were preparing for war. In June 1812 Napoleon invaded Russia with an army of more than half a million men; the outnumbered Russian army retreated all summer while attrition eroded the Grande Armee. After the bloody but indecisive Battle of Borodino (September 5-7), Napoleon entered Moscow with barely 100,000 troops remaining, and waited two months in vain for the Tsar's surrender. Unable to sustain his army through the winter, Napoleon began retreating in November to shorten his supply line; the severe Russian winter, combined with pursuing Russian forces, would go on to devastate the retreating Grande Armee. By the end of the year Prussia had defected and Austria had concluded a separate peace with Russia.
B. Game Equipment.
- The scenario is played on map boards 3 and 4.
- The scenario requires Austrian, Prussian, Russian, French and French satellite units.
C. Victory Conditions.
- The French player wins if he controls Warsaw, Smolensk, and either Moscow or St. Petersburg, and none of these cities are besieged, at the end of the game.
- The non-French player wins if there are no un-besieged French strength points in any city on map board 4, at the end of the game.
- If neither player achieves his victory condition, the game is considered a draw.
- The scenario begins in May 1812 and ends in December 1812.
D. Special Rules.
-
Alliance Phase
a. The French player receives one City Point for each major city on mapboard 4 which he controls.
b. The non-French player receives one City Point for each major city on map board 3 or 4 which he controls.
c. If a modified die roll of "0" occurs during an Alliance Phase, the French player may immediately deploy the following Austrian reinforcements: At Lublin: 1I.
d. If a modified die roll of "7" occurs during an Alliance Phase, all Austrian and Prussian forces desert and are immediately eliminated from the map board (see e, below).
e. If a modified die roll of "7" occurs during an Alliance Phase, Napoleon must immediately return to Paris (to suppress an attempted coup d'etat) and is removed from play for the remainder of the game.
f. The Allegiance Phase is deleted until the start of the November 1812 turn.
-
Supply Sources
a. The supply source for all French and French satellite units is any major city which the French player controlled at the start of the scenario. If the non-French player gains control of such a city, it may not function as a French supply source for the remainder of the game.
b. The supply source for Austrian, Prussian, and Russian units is any city in the unit's home country. If the opposing player gains control of a city, it may not be used as a supply source for the remainder of the game.
c. Austrian and Prussian units (only) may never voluntarily enter a hex in which they would become unsupplied.
-
Cossacks
a. Cossack units possess a basic morale value of zero.
b. At the start of any round of combat, if a committed force contains Cossacks, the Cossack strength points may withdraw unless the opposing force contains a larger number of cavalry strength points.
-
Russian Patriotism
The basic morale value of all regular Russian infantry and cavalry on mapboard 4 is increased to three.
E. Initial Deployment.
-
French Player (deploys first)
a. French forces: At Dresden: Napoleon, Leader (0) * At Danzig: Davout, 12I, 1C * At Posen: Bessieres, 6GI, 1GC * At Thorn: Ney, 5I, 1C * Within two hexes of Thorn: Eugene, 3I, 1C * Within one hex of Thorn: Murat, 4C * Within one hex of Danzig: Leader (0), 6I * In Prussia, within one hex of Warsaw: Poniatowski, Leader (0) * At Stettin: Victor, 2I * At Konigsberg: Leader (0).
b. French satellite forces: In Prussia, within one hex of Warsaw: Jerome, Leader (0), 6I (Po), 3I (S), 3I (W), 2C (Po), 1C (S), 1C (W) * Within two hexes of Thorn: Leader (0), 5I (B), 4I (I), 1I (Pt), 1C (B), 1C (I), 1C (Po) * At Danzig: 2I (R), 1I (Sz) * At Dresden: 2I (I), 1I (N), 2I (R) * At Hanover: 1I (W) * At Konigsberg: 1I (Po), 1I (W) * At Lubeck: 2I (D) * At Posen: 2I (Po), 1I (R) * At Stettin: 1I (Po), 3I (R) * At Thorn: 1I (Da), 3I (Wu).
c. French allied forces: At Konigsberg: Yorck, 4I, 1C (Prussian) * At Lublin: Schwarzenberg, 5I, 2C (Austrian).
-
Non-French Player
a. Russian forces (deploy in Russia): Within one hex of Vilna: Barclay, Constantine, 3I, 3GI, 1GC * Within one hex of Brest-Litovsk: Bagration, 8I, 2C, 2CC * Within one hex of Grodno: Docturov, 4I, 1C, 2CC * Within one hex of Pinsk: Tormazov, 7I, 2C * Within one hex of Kovno: Wittgenstein, 4I * At Vilna: Benningsen, 3I * At Kovno: Leader (0), 3I, 1C * At Moscow: 2I * At Riga: 2I * At Kharkov, Kiev, Minsk, and Vitebsk: 1I each.
F. Reinforcements and Replacements.
-
French Reinforcements
a. Each turn — At Dresden: 1I.
b. October 1812 — At Danzig: 2C.
c. The French player may replace one strength point of satellite infantry each turn. Polish replacements appear at Warsaw. All other satellite nationalities are replaced at Dresden.
d. French reinforcements and replacements are forfeited if the non-French player controls the specified city on the scheduled turn of arrival.
-
Russian Reinforcements
a. Each turn — At Moscow: 2I * At Kiev: 1I.
b. August 1812 — At Kiev: Leader (0), 5I, 2C.
c. September 1812 — At Moscow: Kutusov * At St. Petersburg: Leader (0), 5I.
d. October 1812 — At Moscow: 2CC * At Kiev: 1CC.
e. The non-French player may replace one strength point of Cossack cavalry each turn at Moscow.
f. If the French player controls a city on a turn when Russian reinforcements are scheduled to appear at that city, the reinforcements arrive at the nearest city which the non-French player controls.
V. The War of Liberation — 1813
A. Introduction. After the disastrous 1812 campaign, the remnants of the Grande Armee fell back through Prussia, and in March 1813 Prussia declared war on France; Austria stayed neutral through the spring. Napoleon rebuilt a new conscript army and won victories at Lutzen and Bautzen in May, but an armistice followed in June while both sides regrouped. Austria entered the war in August, and after a French victory at Dresden (August 26-27) the Allies avoided battle with Napoleon himself while wearing down his marshals. By October Napoleon had fallen back to Leipzig, where the Battle of Leipzig (October 16-18) — the largest battle of the Napoleonic Wars — ended in decisive defeat for France; the remaining German satellite states defected, and by year's end the French Empire had been reduced to France itself.
B. Game Equipment.
- The scenario is played on mapboards 2 and 3.
- The scenario requires Prussian, Russian, French and French satellite units. There is a possibility that Austrian units will also be needed.
C. Victory Conditions.
- The French player wins if he controls any un-besieged major city on mapboard 3 at the end of the game.
- If the French player does not achieve his victory condition, the non-French player wins the game.
- The scenario begins in April 1813 and ends in December 1813.
D. Special Rules.
-
Alliance Phase
a. The French player receives one City Point for controlling Berlin.
b. The non-French player receives one City Point for each of the following cities he controls: Berlin, Breslau, Dresden, Hamburg, Leipzig, Magdeburg, or any city on mapboard 2.
c. The Alliance Phase die roll is automatically increased by one in June 1813. In July, the die roll is increased by two. In August, and in each succeeding month, the die roll is increased by three until Austria declares war.
d. If a modified die roll of "0" occurs during an Alliance Phase, the initially neutral French satellite states become active French allies — the French player may immediately turn these units face-up and begin using them like normal French satellite units. These initially neutral states include Bavaria, Naples, Saxony and Switzerland.
e. If a modified die roll of "7" occurs during an Alliance Phase, the initially neutral states, Austria and Sweden, declare war against France — the non-French player may immediately turn these units face-up and begin using them as normal non-French units.
f. If a second modified die roll of "7" occurs during an Alliance Phase, all Bavarian, Naples, Rhine, Saxon, Swiss, and Wurtemburg French satellite units are immediately removed from the mapboard. The Bavarian units are immediately replaced with an equal number of Austrian landwehr strength points. The Saxon, Rhine, and Wurtemburg units are immediately replaced with an equal number of Prussian landwehr strength points. The Swiss and Naples units are not replaced by enemy landwehr. All landwehr strength points are initially deployed in the same hex as the units they replaced. However, if there are any remaining French (or loyal French satellite) units in the same hex, the landwehr is immediately moved into any adjacent hex which is free of French units. The newly deployed Austrian and Prussian landwehr are treated as normal non-French forces for the remainder of the game. Note: When Bavarian units are replaced by Austrian landwehr, the non-French player may deploy an unnamed Austrian leader in the same hex.
g. If a second modified die roll of "7" occurs, the Alliance Phase is deleted for the remainder of the game.
h. The following French satellite states remain loyal to the French player throughout the scenario and are not affected by the Alliance Phase rules: Denmark, Italy, Poland and Westphalia.
-
Neutrals
a. The following states are considered neutral at the start of the scenario: Austria, Bavaria, Naples, Saxony, Sweden, and Switzerland.
E. Initial Deployment.
-
French Player (deploys first)
a. French forces: Within two hexes of Mainz: Napoleon, Soult, Bessieres, Marmont, Ney, 13I, 2GI, 1GC * Within one hex of Hanover: Davout, 4I, 2C * At Brunswick: Eugene, Victor, 8I, 1GI, 1C * In Bavaria, within two hexes of Munich: Two Leader (0), 5I * At Cracow: Poniatowski * At Florence: Murat * At Danzig: 6I (entrenched) * At Milan: 2I * At Magdeburg: 1I * At Stettin: 1I (inside fort) * At Thorn: 1I (inside fort).
b. French satellite forces: At Bremen: 3I (D) * At Milan: Leader (0), 4I, 1C (I) * In Bavaria, within two hexes of Munich: 2I (I) * At Cracow: 2I, 1C (Po) * Within two hexes of Mainz: 1I (Po) * At Frankfurt: 1I (R) * At Wurzburg: 1I (R) * At Brunswick: 1I (W) * At Stuttgart: 3I (Wu) * Initially Neutral French satellite forces (deploy face-down): At Munich: Leader (0), 4I, 1C (B) * At Florence: 4I (N) * One hex north of Dresden: 2I (S) (entrenched) * At Geneva: 2I (Sz) * At Basel: 1I (Sz) * At Neuchatel: 1I (Sz).
-
Non-French Player
a. Prussian forces: At Dresden: Blucher, 4I, 2C * Within one hex of Berlin: Bulow, Kleist, Yorck, 6I, 1C * At Lubeck: Leader (0), 2L * Within one hex of Danzig: 3L (entrenched) * At Stettin: 2L (besieging French) * At Berlin: 1L * Prussian satellite forces: At Lubeck: 2I (He).
b. Russian forces: At Breslau: Constantine, Tormazov, 3I, 2GI, 1GC * Within one hex of Berlin: Wittgenstein, 2I, 1C, 1CC * Within one hex of Thorn: Barclay, 3I, 1C * Within one hex of Cracow: Leader (0), 3I, 1C * Within one hex of Danzig: 3I (entrenched) * At Leipzig: Leader (0), 3I, 1C, 1CC * At Brest-Litovsk: Leader (0), 2I * At Lubeck: 2CC * At Posen: 1I * At Warsaw: 1I * At Thorn: 1I (besieging French) * Russian satellite forces (initially neutral, deploy face-down): At Stralsund: Bernadotte, 5I, 1C (Sw).
c. Austrian forces (initially neutral, deploy face-down): At Prague: Schwarzenberg, two Leader (0), 10I, 2C * At Leoben: Hiller, Leader (0), 2I, 2L, 1C * In Austria, within one hex of Ratisbon: Leader (0), 5I, 1C.
F. Reinforcements and Replacements.
-
French and French Satellite Reinforcements
a. May 1813 — At Mainz: 2I * At Hanover: 2I (W) * At Milan: 1I (I) * At Stuttgart: 1I (Wu).
b. June 1813 — At Mainz: 8I * At Milan: 3I (I) * At Stuttgart: 1I (Wu). Note: The French leader Soult was sent to Spain at this time. If players wish to incorporate this historical fact, Soult is removed from play for the remainder of the scenario. This is an Optional Rule; all players must agree to this rule prior to start of play if it is to be used.
c. July 1813 — At Mainz: 10I, 6GI, 6C.
d. August 1813 — At Mainz: Leader (0), 2I, 1C.
e. September 1813 — At Mainz: 4I * At Munich: 1I (B) * At Hanover: 1I (W).
f. October 1813 — At Mainz: 2I.
g. November 1813 — At Mainz: 2I.
-
Prussian Reinforcements
a. Each turn — At Berlin: 1I, 1L.
b. Each turn — At Breslau: 1I, 1L.
-
Russian Reinforcements
a. Each turn — At Brest-Litovsk: 2I.
b. June 1813 — At Brest-Litovsk: Benningsen, Docturov, 8I, 2GI, 2C, 2CC.
-
Austrian Reinforcements
a. Each turn — At Prague: 1I, 1L.
b. Each turn — At Leoben: 1I, 1L.
c. May 1813 — At Prague: 1C.
d. June 1813 — At Prague: 1C.
-
If the opposing player controls a city where a major power is scheduled to receive reinforcements, these reinforcements may arrive at any major city in their home country which is not controlled by the opposing player.
-
If the non-French player controls a city where French satellite reinforcements are scheduled to arrive, these reinforcements are forfeited.
VI. Napoleon at Bay — 1814
A. Introduction. After the Battle of Leipzig in October 1813, most of the French satellite states were invaded, occupied, and forced to realign, further swelling the ranks of Napoleon's enemies. By the end of the year over half a million Allied troops stood ready to invade France. Greatly outnumbered, Napoleon fought a masterful campaign in eastern France in early 1814, but the odds were insurmountable, and before the end of March the Allies captured Paris. On April 6, Napoleon abdicated and was exiled to Elba.
B. Game Equipment.
- The scenario is played on map boards 1 and 2.
- The scenario requires units of all nationalities.
C. Victory Conditions.
- The non-French player wins if there is at least one un-besieged, supplied, non-French strength point inside Paris at the end of the game.
- If the non-French player does not achieve his victory condition, the French player wins the game.
- The scenario begins in January 1814 and ends in May 1814.
D. Special Rules.
-
Alliance Phase
There is no Alliance Phase during any turn in this scenario.
-
Supply Sources
a. The supply source for all French and French satellite units is any city in France or Italy which is not occupied by an enemy unit.
b. The supply source for Austrian, Prussian, Russian and Swedish units is either Munich or Munster.
c. The supply source for Spanish units is any city in Spain.
d. The supply source for all red (English, Portuguese, and Dutch) units is any city in Spain or Holland, or any port city occupied by a red unit. Any city in a coastal hex is considered a port.
-
English Sea Movement
Each turn, during the Movement Phase, the non-French player may move a maximum of two English strength points and one leader from any port city to any other port city which is not controlled by the French player. Units moved in this manner may not move normally during the same Movement Phase.
-
Dutch Revolt
During the first turn in which the non-French player controls the cities specified below, the player receives the following red units which represent rebellious Dutch reinforcements:
a. At Amsterdam: Leader (0), 1L.
b. At Antwerp: 1L.
c. At Brussels: 1I (H).
-
Partisans
a. During the first turn in which a hex in France is occupied by an enemy unit, the French player receives two strength points of French partisans during his Reinforcement Phase. The partisans may be deployed in any forest, mountain, or city hex in France which is not occupied by another (pro-French or anti-French) unit.
b. A partisan unit may never occupy the same hex as any other unit, including another partisan unit.
c. A partisan unit is not subject to attrition, may not be overrun, and has a basic morale value of zero.
E. Initial Deployment.
-
French Player (deploys first)
a. French forces: At Paris: Napoleon, Joseph, 6I, 1GI * At Bayonne: Soult, 11I, 2C * At Coblenz: Marmont, Ney, 2GI, 1C * At Strasbourg: Victor, 2I, 1C * At Venice: Eugene * At Rheims: Leader (0), 2I, 1GI * At Liege: Leader (0), 2I, 1C * At Antwerp: Leader (0), 3I * Within one hex of Barcelona: Leader (0), 6I, 1C * At Mainz: 3I * At Amsterdam: 2I * At Namur: 1GC * At Brussels, Cologne, Frankfurt, Geneva, Lyon, Neuchatel, Toulouse, and Wurzburg: 1I each.
b. French satellite forces: At Cologne: Jerome * At Venice: 8I, 1C (I) * At Milan: 1I (I) * At Metz: 1I (Po).
-
Non-French Player
a. Spanish forces: At Barcelona: Cuesta, 5I, 1C * At San Sebastian: Blake, 2I.
b. English forces: At San Sebastian: Wellington, Beresford, Hill, 5I, 1I (K), 1C * At Barcelona: Leader (0), 4I * Within one hex of Amsterdam: Leader (0), 2I * English satellite forces: At San Sebastian: 6I (Pt).
c. Austrian forces: Within one hex of Zurich: Schwarzenberg, Leader (0), 9I, 5L, 2C * At Trieste: Hiller, 7I, 3L, 1C * At Ulm: Leader (0), 4L, 1C * At Baden: Leader (0), 3L * At Florence: 5L * At Innsbruck: 1I, 1L * Inside Switzerland, within one hex of Geneva: 2I.
d. Prussian forces: Within one hex of Coblenz (east of the Rhine): Blucher, Yorck, 3I, 1L * Within one hex of Amsterdam: Bulow, 3I, 2L, 1C * At Munster (one stack): Kleist, 1I, 1L, 1C * Within two hexes of Munich: Leader (0), 2I * Prussian satellite forces: Within one hex of Frankfurt: Leader (0), 2I (He).
e. Russian forces: Within two hexes of Munich: Barclay, Constantine, Wittgenstein, 3I, 4GI, 1C, 1GC, 2CC * Within one hex of Frankfurt: Leader (0), 4I, 1C, 1CC * At Frankfurt (besieging French): Leader (0), 5I, 1C, 1CC * At Munster: Leader (0), 4I, 2C * At Munster: Leader (0), 1I, 1CC.
F. Reinforcements and Replacements.
-
French Reinforcements
a. Each turn — At Paris: 3I * At Lyon: 1I.
b. January 1814 — At Paris: 1GI, 1C.
c. February 1814 — At Paris: 3GI, 1C.
d. French reinforcements are forfeited if the non-French player controls the specified city on the scheduled turn of arrival.
-
Non-French Reinforcements
a. Each turn — At Barcelona: 1I (Spanish) * At London: 1I (English) * At San Sebastian: 1I (Pt) * At Munich: 1I, 1L (Austrian), 1I (Russian) * At Munster: 1I, 1L (Prussian), 1I (Russian).
b. January 1814 — At Munster: Bernadotte, 3I, 1C (Sw) * Leader (0), 1L (Prussian) * 3I (S) * 1I (Br).
c. February 1814 — At Trieste: Bellegarde, 2I, 1L, 1C (Austrian) * At London: 2I (English) * At Munster: 1I (Prussian).
d. If the French player controls a city where non-French reinforcements are scheduled to arrive, the reinforcements arrive at the nearest city which is not controlled by the French player.
-
There are no replacements in this scenario.
VII. Waterloo — 1815
A. Introduction. In March 1815, Napoleon escaped from Elba and returned to France to reclaim his imperial crown. His enemies reacted swiftly, branding him an international outlaw, and by early summer the allied armies of Austria, England, Prussia and Russia had mobilized more than 500,000 troops. Within a hundred days of his return, Napoleon had raised a quarter million soldiers and, in early June, launched a last offensive to strike the Anglo-Dutch and Prussian armies before they could unite in Belgium. On June 16, the French fought the Prussians at Ligny and Wellington's Anglo-Dutch force at Quatre Bras; the Prussians withdrew in good order overnight. On June 18, Napoleon and Wellington fought the Battle of Waterloo. French assaults against Wellington's ridge position failed through the day, and by late afternoon the reappearance of the Prussians on the field turned the battle; the commitment and repulse of the French Imperial Guard at sunset broke French morale and the army dissolved in a rout. Paris fell to the Allies within six weeks, forcing Napoleon's second abdication and exile to St. Helena, where he died in 1821.
B. Game Equipment.
- The scenario is played on map board 2.
- The scenario requires units of all nationalities.
C. Victory Conditions.
- The non-French player wins and the game automatically ends if there is at least one un-besieged, supplied, non-French strength point inside Paris at the end of any turn.
- If the non-French player does not achieve his victory condition, the French player wins the game. Note: This is an exceedingly difficult scenario for the French player to win. For competitive purposes, it is recommended that the players play this scenario twice with each player taking the French side in one game. The French player who maintains control of Paris for a greater number of turns should be considered the winner of the match.
- The scenario begins in June 1815 and ends in December 1815.
D. Special Rules.
-
Alliance Phase
There is no Alliance Phase in any turn in this scenario.
-
Supply Sources
a. The supply source for all French and French satellite units is any city in France or Italy which is not occupied by an enemy unit.
b. The supply source for Austrian units is Munich or Milan.
c. The supply source for all red (English) units is Antwerp or any port city occupied by a red unit.
d. The supply source for Prussian units is Liege, Mainz or Munster.
e. The supply source for Russian units is Frankfurt or Wurzburg.
-
English Sea Movement
The special rule governing English Sea Movement in Scenario VI (1814) is utilized in this scenario.
-
Dutch Forces
a. If the French player controls Brussels during his Reinforcement Phase, all red units bearing an "H" (Holland) nationality abbreviation are permanently removed from play.
b. Each turn, if the French player controls Brussels, he receives one strength point of blue "H" (Holland) satellite infantry at Brussels during his Reinforcement Phase.
c. If the non-French player regains control of Brussels, all blue "H" satellite infantry units are removed from play immediately and neither player may receive any additional Dutch reinforcements for the remainder of the game.
-
Partisans
The special rules governing Partisans in Scenario VI (1814) are utilized in this scenario.
-
French Demoralization
During any Combat Phase, if a force containing Napoleon is demoralized, the basic morale value of all French regular infantry and cavalry is permanently reduced to one at the start of the next player's segment.
E. Initial Deployment.
-
French Player (deploys first)
a. French forces: Within two hexes of Paris: Napoleon, Soult, Ney, 6I, 3GI, 1GC * At Lille: Leader (0), 4I * At Metz: Leader (0), 3I * At Lyon: Leader (0), 4I, 1C * At Strasbourg: Leader (0), 4I, 1C * At Amiens: 5I * At Rheims: 4C * At Tours: 2I * At Geneva: 2I * At Marseilles: 1I * At Paris: Davout * At Florence: Murat.
b. French satellite forces: At Florence: 8I, 1C (N) * At Geneva: 1I (Sw) * At Amiens: Jerome.
-
Non-French Player
a. Austrian forces: At Munich: Schwarzenberg, Ferdinand, 10I, 10L, 4C * At Milan: Bellegarde, 8I, 2L, 2C * At Zurich: Leader (0), 7L, 1C * At Ulm: Leader (0), 7L, 1C * Within one hex of Florence: Leader (0), 4I, 1C * At Baden, Stuttgart and Wurzburg: 1I each.
b. English forces: At Brussels: Wellington, Uxbridge, 5I, 1I (K), 2L, 2C * At Antwerp: 2I, 1L * English satellite forces: At Brussels: 5I, 1C (H).
c. Prussian forces: At Namur: Blucher, two Leader (0), 9I, 6L, 2C * At Liege: Bulow, 3I, 2L, 1C * At Coblenz: Kleist, 3I, 2L, 1C * At Brussels: Brunswick * At Mainz: Hohenloe * Prussian satellite forces: At Brussels: 1I (Br) * At Mainz: 3I (He).
F. Reinforcements and Replacements.
-
French Reinforcements
a. Each turn — At Paris: 4I.
b. Each turn — At Lyon: 1I.
-
Austrian Reinforcements
a. Each turn — At Munich: 1I, 1L.
-
English Reinforcements
a. Each turn — At London: 2I.
-
Prussian Reinforcements
a. Each turn — At Munster: 1I, 1L.
b. August 1815 — At Munster: Leader (0), 2I, 2L, 1C.
-
Russian Reinforcements
a. August 1815 — At Frankfurt: Barclay, Leader (0), 10I, 2C, 2CC.
b. August 1815 — At Wurzburg: Constantine, Leader (0), 6I, 4GI, 1C, 1GC, 2CC.
-
If the opposing player controls a city where reinforcements are scheduled to arrive, the reinforcements arrive in any hex adjacent to that city.
-
There are no replacements in this scenario.
VIII. The Peninsular War
A. Introduction. Although initially an ally of France, after Nelson's victory at Trafalgar in 1805 relations between Spain and France began to deteriorate; like Russia, Spain continued a clandestine trade with England in defiance of Napoleon's Continental System. In early 1808 Napoleon sent troops into the Iberian Peninsula, ostensibly to occupy Portugal, then engineered the removal of the Spanish king in favor of his brother Joseph. Both the Spanish army and populace revolted, and Napoleon answered with force; for the next six years a sizable share of French resources were consumed by a grinding guerrilla war. England rebuilt the Portuguese army and sent Wellington and a British army to contest the French, and after years of campaigning, Wellington expelled the French from the Peninsula in 1814 and was advancing into southern France when news of Napoleon's abdication ended the war.
B. Game Equipment.
- The scenario is played on map boards 1 and 2.
- The scenario requires Spanish, English, French and French satellite units. Note: Portuguese forces are represented by red (English) satellite units.
- The Spanish, English and French Force Pool sections of the Campaign Game Card should be used to show which units may be taken as replacements. The Production Track on the Campaign Game Card may be used to keep track of the Replacement Points available each turn (see section F).
C. Victory Conditions.
- The French player wins and the scenario automatically ends if there is at least one French strength point (besieged or un-besieged) inside each city on map board 1 at the end of any Combat Phase.
- The non-French player wins and the scenario automatically ends if there are no French units inside any city on mapboard 1, and there is at least one un-besieged, non-French strength point inside both Bayonne and Toulouse, on mapboard 2, at the end of any Combat Phase.
- If, at the end of the scenario, neither player has achieved an automatic victory, the French player wins the game if there is at least one un-besieged French strength point in Bayonne, Toulouse, and in any city on mapboard 1.
- If neither player achieves any of the specified victory conditions, the game is considered a draw.
- The scenario begins in May 1808 and ends in April 1814, unless prematurely ended by either player achieving an automatic victory.
D. Special Rules.
-
Alliance Phase
There is no Alliance Phase during any turn in this scenario.
-
Supply Sources
a. The supply source for French and French satellite units is Bayonne or Toulouse. Note: Many French units are unsupplied at the start of the scenario.
b. The supply source for Spanish units is any city in Spain which is not occupied by a French unit.
c. The supply source for English and English satellite units is Gibraltar or any city in Portugal which is not occupied by a French unit. In addition, a maximum of five English (or English satellite) strength points may be automatically supplied in any coastal hex, but only one such hex may be automatically supplied during any given turn.
-
Special Movement Restrictions
a. Militia and partisan strength points may never leave their home country.
b. A maximum of two Spanish infantry strength points and one Spanish leader may leave Spain. Spanish units outside of Spain may only be moved if accompanying an English leader.
c. Each turn, during his Movement Phase, the non-French player may move a maximum of two English (or English satellite) strength points (and any number of English leaders) from any coastal hex to any other coastal hex which is not occupied by a French unit. Units moved in this manner may not move normally during the same Movement Phase.
d. During any Combat Phase, any English (or English satellite) units which are besieged or committed to a battle in a coastal hex may be withdrawn "by sea," immediately removed from the mapboard, and redeployed by the non-French player, during his next Reinforcement Phase, in any coastal hex which is not occupied by a French unit. Withdrawal by sea otherwise follows the standard rules for withdrawing units from combat, except that besieged units may withdraw by sea without being required to come out of the city.
-
Gibraltar and Lisbon
a. Non-French units inside Gibraltar may be besieged but may not be attacked providing there is at least one strength point of English infantry inside Gibraltar.
b. The French player is not required to capture Gibraltar to win the game; the non-French player must control it to win.
E. Initial Deployment.
-
French Player (deploys first)
a. French forces: At Madrid: Murat, 5I, 1C * At Burgos: Bessieres, 3I * At Cordoba: Leader (0), 2I * At Lisbon: Leader (0), 4I, 1C * At Toledo: 3I * Within two hexes of Valencia: 2I * At Barcelona and Pamplona: 1I each.
b. French satellite forces: At Madrid: 1I (Po) * At Burgos: 1I (Sz) * At Cordoba: 1I (Sz) * At Barcelona: 1I (I).
-
Non-French Player
a. Spanish forces: At Corunna: Blake, 5I, 1C * At Saragossa: Pallafox, 5I, 1C * At Seville: Costanos, 5I, 1C * At Ciudad Rodrigo: Cuesta, 2I * At Valencia: 3I * At Granada: 2I * Spanish Force Pool (on Campaign Game Card): 10M, 6P.
b. English forces: At Gibraltar: 1I * English satellite forces (English Force Pool): 8I, 1C (Pt), 6M, 3P. Note: units bearing an "M" represent Portuguese militia; units bearing a "P" represent Portuguese partisans.
F. Reinforcements and Replacements.
This is a long, multi-year (1808-1814) scenario governed by a detailed turn-by-turn schedule of French, English and Spanish/Portuguese reinforcements, replacements, and mandated withdrawals, tracked on the Campaign Game Card's Production Track and City Point markers. In outline:
-
French Reinforcement Schedule. French Replacement Points accrue each turn at a rate that varies by year (roughly one point per turn in 1808, rising to two points per turn for most of 1810-1812, then falling to a die-roll-based rate in 1813-1814). Reinforcements and replacements arrive at Bayonne, Toulouse, or the nearest unoccupied French city. On certain historical turns the French player is instead required to withdraw named leaders and set numbers of strength points (simulating troops recalled to other fronts, including Napoleon himself in early 1809 and Marshal Soult and other forces at points in 1813-1814); if the required units are currently besieged, an equal number of un-besieged strength points are removed instead, and the specified units are withdrawn once free. Historical named reinforcements arrive on key turns throughout the war — for example Marshal Victor and ten infantry in June 1808, King Joseph in July 1808, and a large force under Napoleon, Lannes, Ney and other marshals in October 1808 — with further marshal-led reinforcements and replacement waves continuing through 1809-1812 before French strength is progressively withdrawn in 1813-1814 as the war turns against France.
-
English (Allied) Reinforcement Schedule. English Replacement Points likewise accrue each turn (the rate varies by year, becoming die-roll-based from 1811 onward), and this same schedule also carries the English and allied Spanish reinforcements. Reinforcements and replacements arrive in an unoccupied coastal city or coastal hex; English reinforcements may optionally be held "at sea" indefinitely rather than landing immediately. Notable historical arrivals include Wellington and two infantry strength points in August 1808, General Moore and a further force (with allied Spanish reinforcements under La Romana) in September 1808, and Generals Beresford and Uxbridge in April 1809, with additional smaller English reinforcements continuing at intervals through 1812; from 1813 onward only Replacement Points, with no further named reinforcements, are received.
-
Spanish and Portuguese Replacement Points. Unlike the French and English schedules, Spanish and Portuguese Replacement Points are not drawn from a fixed turn list. Instead, during his Reinforcement Phase the non-French player receives Spanish Replacement Points for each Spanish city not occupied by a French unit, and Portuguese Replacement Points for each Portuguese city not occupied by a French unit — two points for each major city and one point for each minor city in the respective country. These totals are tracked with the Spanish and Portuguese City Point markers on the Campaign Game Card's Production Track, starting the scenario at twenty Spanish and four Portuguese Replacement Points.
IX. Spain — 1811-1814
A. Introduction. By the end of 1810 the French held central Spain and were besieging the last Spanish garrisons, while Wellington's army held a fortified line near Lisbon under pressure from Marshal Massena; but exhaustion, guerrilla resistance, long supply lines, and the harsh climate had begun to erode the French position. Massena withdrew into Spain, and a French offensive in May 1811 was defeated at Fuentes de Onoro and Albuera. In 1812 Wellington took the offensive, capturing Ciudad Rodrigo and Badajoz, defeating Marmont at Salamanca, and liberating Madrid. He continued pushing the French toward the Pyrenees through 1813, culminating in victory at Vittoria (June 21); by early 1814 the French had been driven from the Peninsula, and Wellington's advance into southern France ended with the last battle of the war, fought near Toulouse in April 1814, days after Napoleon's abdication.
B. Game Equipment. The components required are the same as those used in Scenario VIII (The Peninsular War).
C. Victory Conditions. Identical to Scenario VIII. This scenario begins in June 1811 and ends in April 1814.
D. Special Rules. All special rules from Scenario VIII are in effect, including its Reinforcement/Replacement Point purchase system (see Scenario VIII, Section F, and below), Gibraltar/Lisbon rules, and partisan rules.
E. Initial Deployment. The scenario opens with the historical 1811 order of battle: French forces under Marmont, Ney, Bessieres, Soult, King Joseph and Victor holding Ciudad Rodrigo, Burgos, Badajoz, Madrid, Seville, San Sebastian and the other major Spanish cities, with French satellite garrisons at Barcelona, Saragossa, Pamplona and elsewhere; opposing Spanish forces under Blake, Costanos, Pallafox and Cuesta holding Corunna, Valencia, Cadiz and Cartagena along with scattered partisan bands, and an Anglo-Portuguese army under Wellington, Beresford and Hill based in Portugal near Ciudad Rodrigo, Badajoz, Lisbon and Cadiz.
F. Reinforcements and Replacements. All Reinforcement and Replacement rules from Scenario VIII are in effect; the Scenario VIII reinforcement schedules are used beginning with the June 1811 entries. At the start of the scenario, the non-French player records seven Spanish and six Portuguese Replacement Points on the Campaign Game Card's Production Track. Scenario VIII's Replacement Point purchase system governs both scenarios: each side's Replacement Points (earned via city control as described in Scenario VIII, Section F.3, or via the fixed schedules for French/English) may be spent immediately each Reinforcement Phase to buy strength points out of that nationality's Force Pool — infantry cost 1 Replacement Point (English/French/French-satellite), cavalry or guard cost 2, militia cost 4, partisans cost 6, and Portuguese/Spanish infantry cost 6 (cavalry 12) — with points forfeited if unused, a satellite-unit-first purchase requirement for the French player, and a "down payment" option allowing cavalry to be bought and deployed face-down (immobile and immune to attrition) for half price, to be activated later for the balance.
X. War and Peace: 1805-1815 (Grand Campaign Game)
A. Introduction. The Grand Campaign is an amalgamation of the preceding nine scenarios, covering the full ten-year sweep of the Napoleonic Wars on all four mapboards. It is far larger in scope than the individual scenarios — adding naval units, unit production, and a self-regulating political system for the minor and major powers — while remaining only slightly more complex to play, and it supports solitaire and multiplayer (up to six-player) games as well as the standard two-player format.
B. Game Equipment. The scenario is played on all four mapboards and requires units of every major and minor state, plus the Campaign Game Card (which carries the Campaign Turn Sequence, Naval Results Tables, and Force Pool Display).
C. Victory Conditions. The French player wins an automatic victory either by conquering England, Spain or Russia while controlling at least fifteen production cities at that instant, or by holding Paris with an un-besieged French strength point at game end while France remains an active, never-conquered state. Failing an automatic French victory, whichever player controls the most production cities (cities marked with a red or black infantry symbol) at the end of the game is the victor, with ties possible. The scenario runs from September 1805 to August 1815, subject to early conclusion by an automatic victory.
D. Initial Political Status and Multiplayer Rules. At the outset France and Spain are pro-French; England, Austria and Russia are anti-French; Prussia is neutral. Among the minor states, Bavaria, Holland, Italy, Switzerland and Wurtemburg begin as French satellites, Portugal as an English satellite, Brunswick/Hesse/Saxony as Prussian satellites, Denmark and Sweden as neutrals, and Dalmatia, Naples, Poland, the Rhine Confederation and Westphalia begin unformed (to be created by the French player later by occupying that state's production city). Any major or minor power not directly controlled by a player follows the Alliance Phase rules (Section H) to determine its allegiance over time. The rulebook provides guidelines for splitting control of the major powers among one (solitaire), two, three, four, five, or six players — for example, in a two-player game the French player runs all pro-French states and the non-French (English) player runs all anti-French states, with a neutral state that is invaded joining whichever side did not invade it; additional players progressively take over Russia, Austria, and Prussia as separate seats.
E. Campaign Turn Sequence. In place of the standard two-segment turn sequence (Section F, above), the Grand Campaign proceeds through separate segments for the Neutral, Pro-French, and Anti-French powers each turn. Each active power in turn executes a Naval Phase (moving its naval units under the Naval Movement rules; neutral naval units may not initiate combat), an Attrition Phase, an Alliance Phase (rolling to shift the political status of one major or minor state, per Section G's mechanics extended to the multi-power campaign), a Reinforcement Phase (purchasing units from its Force Pool, on the same Replacement Point model as Scenario VIII), and a Movement/Combat sequence following the standard rules, with the units of a currently-neutral state frozen in place until that state joins a faction (by Alliance Phase result, or by being invaded).
The remaining Grand Campaign sections (Production, Force Pools for the six major and many minor powers, Fortress/Capital rules specific to the campaign, and the full Naval System) supply the detailed reference tables that support this framework rather than additional rules of play; they are not reproduced here.
XI. The Final Glory — 1812-1815
A. Introduction. Rules to link the 1812 (Scenario IV), 1813 (Scenario V) and 1814 (Scenario VI) scenarios into one continuous campaign, reflecting the marshals' preference for consolidating at Smolensk rather than pressing on to Moscow — Napoleon's marshals were not overly in favor of his plan to conquer Russia in a single stroke, and this linked scenario lets players explore an alternative continuation of the war from 1812 through the fall of Paris in December 1814.
B.-C. Structure and Victory. The scenario is played by setting up and completing Scenario IV (1812) in full; if the French have not already won, play continues using Scenario IV's rules (including its Russian and French reinforcement/replacement schedules) through the February 1813 game turn. In March 1813, mapboard 2 is added and Scenario IV's and Scenario V's (1813) special rules, including their allegiance rules, take effect together, modified by this linking scenario's own reinforcement adjustments. In January 1814, mapboard 1 is added and the special rules of all three linked scenarios (IV, V and VI) apply together, except where this section's rules override them. The French win if they hold Paris, un-besieged, at the end of the December 1814 turn; otherwise the non-French player wins.
D. Special Rules. Detailed rules govern how the Alliance Phase mechanics of the 1812 and 1813 scenarios hand off to one another (the 1812 rules apply through January 1813, after which the 1813 rules take over, with added French City Point awards for controlling Russian cities, Berlin and Warsaw from January 1813 onward), and a full month-by-month reinforcement and replacement schedule (extending the pattern already established in Scenarios IV-VI) carries French, French satellite, Prussian, Russian and Austrian forces through the linked timeline from mid-1812 to the end of 1814, including a wave of forces returning to Mainz in the spring and summer of 1813 (Marmont, Soult and Napoleon among them) and the withdrawal of several satellite contingents at the December 1812/January 1813 transition. Reinforcements scheduled to arrive at a city already held by the opposing side are redirected to the nearest friendly major city, or, for French forces specifically, eliminated outright if the city is enemy-held.
XII. Marengo — The Italian Campaign of 1800
Originally published in The General, Vol. 26, No. 6.
A. Introduction. In late 1799 the French Republic was in poor shape, fighting Great Britain and Austria on multiple fronts including Italy, Holland and the Rhine, while enduring political upheaval at home. In November, Napoleon and a coalition of generals and ministers carried out the Brumaire coup, and Napoleon emerged as First Consul. Determined to restore France's military fortunes, he prepared a two-pronged offensive against Austria that became a back-and-forth struggle across the Italian and Rhine theaters, culminating in the decisive Battle of Marengo.
B.-F. Scenario Framework. This is the earliest and smallest of the twelve scenarios chronologically, focused on the Italian theater with a British naval/expeditionary element. Notable special rules include:
-
British Forces: The British begin the game "at sea" and use sea movement to land at coastal hexes or cities held by non-French forces; they may thereafter shuttle by sea between friendly ports (though not combine land and sea movement in the same turn) and may fight adjacent French units. The British player receives an extra infantry reinforcement "at sea" each turn that both Genoa and Florence are free of French units.
-
Reduced French Quality: French forces stacked directly with Napoleon keep their normal morale of "2"; all other French forces fight at a reduced morale of "1" (though they may still count toward the die roll for battles they win), and the defeat of an army led by Napoleon is worth only two victory points rather than the standard three.
-
Supply Sources: French forces are supplied from any unoccupied/unbesieged city in France; Austrian forces from any such city in Bavaria, Austria or Italy; English forces from coastal hexes or port cities they occupy.
-
No Replacements are available in this scenario.
-
Optional Rules allow players to add historical color: an additional Archduke Charles reinforcement for the Austrian player (reflecting his earlier successes against Napoleon in 1796, though he held no separate command in the actual 1800 campaign), and special rules modeling General Moreau's historical reluctance to fully cooperate with Napoleon's plan for the Army of the Rhine, including a provision that Moreau automatically commands any stack of French units he occupies within six hexes of Strasbourg.
AA. Napoleon's War at Sea
Official naval rules for the Grand Campaign Game, by designer Mark McLaughlin with Christopher Vorder Bruegge and William Parsons, originally published in The General, Vol. 19, No. 5, and incorporated here as the Third Edition's naval system (superseding the Second Edition naval rules, several provisions of which the designer identifies as historically inaccurate errors — including an over-restriction of the Spanish, Russian, Danish and Swedish fleets to specific seas, and an under-statement of transport capacity — and corrects).
Naval units and leaders use the same basic Movement, Combat and Leadership framework as land units, extended with sea-specific mechanics used only in the Grand Campaign Game (Scenario X):
-
Fleets and naval units. A "fleet" is any stack of one or more naval units; naval combat and interception rolls may be made either individually per naval unit or once per stack (fleet), and either a lone unit or an entire fleet may attempt to intercept an enemy force moving through its zone or run a blockade.
-
Naval movement and interception. Naval units move between the four naval zones (Baltic Sea, North Sea, Mediterranean Sea and Atlantic Ocean, introduced in Section C.7) and coastal/port hexes. An opposing fleet in the path of a moving naval force may attempt to intercept it; a successful interception roll allows that fleet (and any other intercepting fleets or units) to bring on naval combat against the moving force.
-
Naval combat and results. Naval combat is resolved with its own sequence and Naval Results Tables (on the Campaign Game Card), broadly parallel to land combat's odds-and-die-roll structure, and can sink, damage, or force the surrender/capture of naval units.
-
Transports. Each transport unit can carry two infantry strength points, one cavalry strength point, or five production/supply points, and is used to move land forces and production points by sea between friendly ports and coastal hexes — including recreating historical amphibious operations such as English landings in Portugal, Spain, the Walcherin Islands, and Denmark.
-
Leaders at sea. A leader traveling with a fleet is subject to the same leader-casualty risk as any land leader, except that if every naval unit accompanying him is sunk he is killed, and if every naval unit accompanying him is captured he is captured as well.
-
Prizes (Optional Rule). Rather than sending a captured naval unit straight to a prisoner-of-war box, the capturing player may instead tow it to port as a "prize," using a combat naval unit (never a transport) to tow it at normal naval movement speed; a prize may not remain at sea for more than two consecutive player segments or enter a non-port coastal hex without being automatically eliminated, and only one prize may be under repair at a friendly port at a time — a captured combat naval unit costing three production points and three months to repair, a captured transport one point and one month, payable on an installment basis. Once fully repaired, a prize is incorporated into the capturing player's active naval forces.