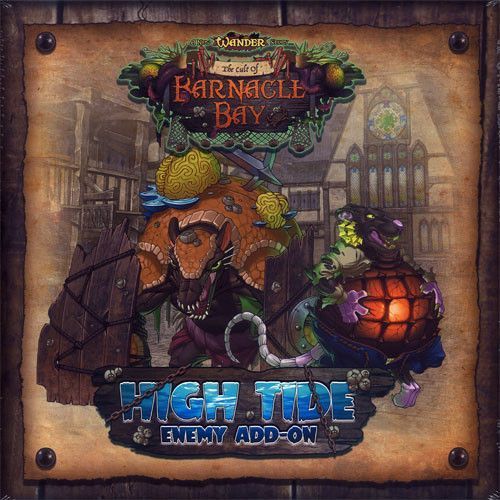
Wander: The Cult of Barnacle Bay – High Tide Enemy Expansion
Wander: The Cult of Barnacle Bay – High Tide Enemy Expansion Rulebook
Table of Contents
Table of Contents
Scenario Layout Symbols
In the Campaign Book, each Scenario will include symbols and icons in the "What You Will Need" section, as well as how any tokens are placed in the "Encounter Layout" section of the Scenario. The tokens commonly used during Scenario setup are:
- Start & End Tokens: These represent where you start your heroes in a Scenario and where their final goal is.
- Objective Token: This represents an objective you must obtain or protect during the Scenario, depending on special rules.
- Spawn Tokens: These are the Spawn Points where enemies will populate the board.
- Treasure Tokens: Once you pick up one of these tokens, you draw one Treasure Card from your Scenario level Treasure Deck.
- Constant Spawn Tokens: Unlike Spawn Tokens, these spawn one of their enemy type at the top of every round.
- Health Potion: Potions that restore half your heroes HP. These pre-set potions can save your game.
- Set Enemy: This is a single pre-set enemy that populates the board outside of being SPAWNED.
- Ladder Token: Ladder Tokens represent an entrance or exit to the other side of a tile.
- Wall Tokens: These are pre-set walls to change the layout of the tiles. The blue wall tokens represent doors or barriers that need to be unlocked.
- Darkness Tile: These are darkness tiles that will be placed on the board.
How to Read the Scenarios
In this section, you will learn how a Scenario is set up, the goals you'll need to accomplish, and what special rules apply, if any. The Scenario page is laid out as follows:
- Scenario Title: This indicates which Scenario you are currently playing. The title is also useful when you begin searching for the next Scenario during the choose-your-own adventure Campaign.
- Scenario Story: This section contains the story, explaining what is currently happening in the Scenario, and what the Wanderer's Guild heroes are trying to accomplish.
- Objective: This is your overall goal in the Scenario that you and your team are attempting to accomplish.
- Special Rules: Depending on the Scenario chosen, some may have Special Rules that need to be followed. Make sure to read this section carefully, as each Scenario is unique.
- Scenario Conclusion: Once you defeat a Scenario, read this section to determine the conclusion and a list of potential directions for the Wanderers to pursue next.
- Path Choice: Depending on where you want the story to go, you choose a path and follow it to the page dictated here.
- What You Will Need: This section details how many tokens, Darkness Tiles, and walls are required for the scenario.
- Encounter Number: Scenarios will have anywhere between one to three Encounters you will have to fight your way through. Starting on Encounter 1, you will have to find your way to the ladder token to get into the next Encounter.
- Encounter Layout: This shows you how each Encounter needs to be laid out, which includes tile direction, token and Darkness Tile placement, and which tiles are currently active or inactive in the Encounter. You may also have to place a pre-set enemy depending on the Scenario, which is represented by a silhouette of the enemy type.
- Active Area: The saturated section represents the Active Area in the Encounter. Depending on the tile, this will either be above-ground in the city streets and parks (signified as the A side of the tile), or below-ground in its sewers and cultist dens (signified as the B side of the tile).
- Inactive Area: The lighter-colored section represents the Inactive Area of the Encounter. The Inactive Area is off limits until you reach the ladder token and flip the tile. In some scenarios, an active enemy model may move along a set path; however, you will still have to reach the ladder token and flip the tile to access this area.
- Tile Guide: This is a simplified layout of the Encounter, which tells you which tiles you will need and where to place them. Purple tiles represent under-ground tiles, and Light Blue tiles represent above-ground tiles. Each guide has a number and letter tied to it. For example, "7B" means you will use Tile 7 on the "B" side (the below-ground side of the tile) in this Encounter. Smaller tiles will simply have an "A" or "B" side in this graphic, representing whether you need to use the above-ground or below-ground side.
The New Enemies
The High Tide enemy pack adds two new enemy types for the Wanderer's Guild to have to deal with in Barnacle Bay. Their stats and unique abilities are listed on their Enemy Stat Cards.
- Bloat Rats (Boomers)
- Garmadillos (Guards)
New Enemy Rules
The Bloat Rats and Garmadillos have their own unique rules that make them tough adversaries. Knowing their tactics and abilities can be the difference between winning a fight and losing one.
- Bloat Rat (Boomer): Whenever a Bloat Rat is defeated, they cause all CLOSE heroes to gain POISON. If you can, try to take care of these miscreants at Range to avoid being poisoned!
- Garmadillo (Guard): Garmadillo models take up an entire space on the board and block CLEARSHOT for the Heroes. While range enemies are able to shoot past the Garmadillo, heroes may not. Garmadillos also push enemies out of the space they spawn into as well as the space they are attempting to move into. Garmadillos have the special ability TAUNT; if an enemy has the TAUNT ability, all CLOSE heroes must target the Garmadillo for any attacks. For additional rules on PUSH, check the "Enemy Movement" section on page 32 of the Barnacle Bay Rulebook.
Spawning/Initiative
The High Tide enemies can be added to any of the Scenarios of Wander: The Cult of Barnacle Bay! To add these enemies, take half of the Barnacle Bay Spawn Cards and shuffle them with the new High Tide Spawn Cards. If the party is feeling a little overwhelmed with the amount of the High Tide enemies, you may shuffle together all the Barnacle Bay Spawn Cards with the High Tide Spawn Cards.
Once you spawn enemies onto the board (including Boomers and Guards), you take their corresponding initiative cards and add them to the Initiative Tracker. If every slot on the Initiative Tracker is full (which will very rarely be the case), then you do not spawn additional enemy types onto the board.
New Scenario Notes
Any of the new Scenarios in this book may be played instead of your typical level 1.0, 2.0, and 3.0 Scenarios. When you beat one of these new Scenarios, they will lead to a level 1.5, 2.5, and 3.5 Scenario.
Additional Heroes
The High Tide Enemy Add-On also comes with two additional heroes, Chompy and Bart! These are locals who were mutated by Elder Bane's dark magic but fought against his mind control. When they discovered the Wanderers trying to save their town, they decided to join in the fight to put an end to the Cult of the Deep! These heroes will come with their own Hero Cards, Initiative Cards, as well as their own Starting Gear. Add them to your roster to help free Barnacle Bay!
The Chompy and Bart Hero Cards and Initiative Cards are not in the source and are not transcribed here.
Scenario 1.0D: The Hoardadillo
While traveling through the streets and alleys of Barnacle Bay, our heroes found themselves at a crossroads. Wondering where to go next, they remembered stumbling upon a sewer grate with three rusted padlocks attached to it down a dank and dreary alley. Perhaps if they looked around a bit, they might be able to find the padlocks keys for their alternate route?
The Wanderers decided this was their best course of action and began to search the derelict streets and alleys around them. As they investigated, they could suddenly hear the sounds of low-pitched snarling, the pounding of heavy footsteps, and the scraping of wood on cobblestone. It appeared this simple search would be more difficult than they anticipated, but Wanderers never back down from a challenge! They readied their weapons and prepared for a fight.
Objective
- Defeat all the enemies.
- Reach the "END" Token.
What You Will Need
- 1x Start Token
- 1x End Token
- 3x Set Enemy (pre-set enemy silhouette)
- 1x Ladder Token
- 7x Spawn Token
- 11x Darkness Tile
- 4x Wall Token (grey)
- 2x Treasure Token
- 3x Objective Token (brown round)
Special Rules
- The Objective Tokens represent the keys for the sewer grate.
- When the heroes have acquired all three objective tokens and all enemies in the encounter have been defeated, they may use the ladder token.
Encounter Layout
Encounter One tile guide: tiles 7A, 3A and 4A, with a small B-side tile below 4A.
Encounter Two tile guide: tiles 7A, 3A and 4B (below-ground), with a small A-side tile above 3A.
Scenario Rewards
- Draw two Treasure Cards!
Once the Scenario is complete
After the Wanderers successfully defeated Elder Bane's minions, they took time to catch their breath and observed their surroundings. They found themselves in a hidden lair that appeared to be for rogues and scoundrels. They discovered a stash of stolen treasure from the inhabitants of Barnacle Bay. Surely, the Wanderers could put this equipment to better use than those petty criminals!
While grabbing their new equipment, the Wanderers stumbled upon a hidden passage that led out of the hideaway and forked into three different directions. These passages were marked with crude signs. Directly ahead of the Wanderers was a sign that read "The Urchin's Inn". The Wanderers agreed that inside the inn they might find food and drink to help replenish their lost stamina and empty bellies.
Pointing to the east was a sign labeled "Clearwater Park". The park would put the Wanderers out in the open, but also provide an equally exposed battlefield for Elder Bane's minions. Sometimes a good offense is an old-fashioned good offense.
Pointing to the west was a sign that had the words "Tidal Town Square" painted on it. Some of the Wanderers were eager to return to the comfort that the city streets provided knowing that they would have a clear and open view of what might be waiting for them in the square.
Path Choice
- If you believe the Wanderers continued towards the inn, proceed to Scenario 1.5A on page 17.
- If you believe the Wanderers continued towards the park, proceed to Scenario 1.5B on page 19.
- If you believe the Wanderers continued to the town square, proceed to Scenario 1.5C on page 21.
Scenario 2.0D: An Explosive Solution
After their hard-fought battle, the heroes took some time to check their gear and catch their breath. In the midst of their perusal, they heard the sound of hurried footsteps from around the corner. The Wanderers were curious to what might be afoot, so they decided to investigate the source of the skittering sounds. They spotted a Bloat Rat in the distance as it hurried off towards the shoreline of Barnacle Bay. They jumped to their feet, readied their weapons, and quietly followed the Bloat Rat to its destination.
As they arrived at the waterside, the heroes turned a corner only to discover their path was blocked by a hastily crafted barricade, clearly made by Elder Bane's minions to control movement through the town. They would need to find a way through, but it would take far too long to try and destroy or climb over the barriers. While pondering their next move, the Wanderers spotted two Bloat Rats furiously arguing with each other next to a fortified barrier. The fight escalated quickly as the Bloat Rats pushed each other aggressively, until one was thrown off kilter and into a wall. Upon impact, the Bloat Rat exploded with such force that it turned the barricade into nothing but splinters and dust. The heroes now had an idea of how to break through!
Objective
- Reach the "END" Token.
What You Will Need
- 1x Start Token
- 1x End Token
- 2x Objective Token (brown round)
- 6x Spawn Token
- 10x Wall Token (grey)
- 1x Ladder Token
- 8x Darkness Tile
- 3x Wall Token (blue; doors or barriers that need to be unlocked)
- 2x Set Enemy (small creature silhouette)
- 2x Set Enemy (larger creature silhouette)
- 2x Treasure Token
- 3x Health Potion (purple)
Special Rules
- Boomers must be defeated CLOSE to Objective Walls to destroy them.
- If there are ever zero Boomer models accessible in the encounter, spawn one Boomer at the closest Objective Token at the top of the next round and add them to the initiative board.
Encounter Layout
Encounter One tile guide: tiles 6A, 5B (below-ground) and 2A.
Encounter Two tile guide: tiles 6A, 5B (below-ground) and 2A.
Scenario Rewards
- Draw two Treasure Cards!
Once the Scenario is complete
As the heroes fought through the makeshift fortress, they found that the enemies they had defeated were embellished with a plethora of weapons and protective coverings. Were they preparing themselves for the Wanderers, or a more dire threat? Whichever the case, the Wanderers could use this equipment for their next challenge.
As they set off through the streets, the Wanderers took a moment to survey their surroundings. Down at the bottom of a hill, there was a shoreline littered with aged-docks. Looking closely, the Wanderers could tell that the tide seemed to be rising rather unnaturally. The Wanderers also noticed a tunnel close by with the sounds of chanting echoing from it. The fastest way there would be through the tunnel. Finally, looking back to the city, the Wanderers could see a hulking beast carrying a large obelisk through the streets of Barnacle Bay.
Path Choice
- If you believe the Wanderers headed to the docks, proceed to Scenario 2.5A on page 33.
- If you believe the Wanderers investigated the sounds of chanting, proceed to Scenario 2.5B on page 35.
- If you believe the Wanderers headed to the city to confront the hulking beast, proceed to Scenario 2.5C on page 37.
Scenario 3.0D: The Big Boom Below
While taking a moment to enjoy their hard-won victory, one Wanderer happened to feel a draft coming from a nearby wall in the tunnel. When they pressed their hand against the damp mossy wall, they found it gave way and crumbled rather easily. They dismantled the bricks one by one to reveal a hidden passage with a waterlogged ladder at the end leading to the surface.
Once they surfaced from the depths, the Wanderers felt the world beneath their feet shaking terribly, the sounds of explosions and collapsing stone followed by an unsettling roar of the earth filling in on the darkness below. It appeared that someone...or something...was trying to collapse Barnacle Bay from underneath. The Wanderers knew they had to stop it.
Objective
- Defeat the Mega Brute by collapsing the room.
What You Will Need
- 1x Start Token
- 1x Ladder Token
- 5x Spawn Token
- 13x Darkness Tile
- 4x Objective Token (brown round)
- 2x Set Enemy (small creature silhouette)
- 2x Set Enemy (larger creature silhouette)
- 1x Set Enemy (Mega-Brute silhouette)
Special Rules
- In the first encounter, the Objective Tokens represent the keys needed to unlock the path below ground.
- During the second encounter, the Objective Tokens represent pillars that must be destroyed to collapse the room on to the Mega Brute.
- A Boomer must be defeated CLOSE to an Objective Token (a pillar) to destroy it.
- Enemies start Encounter 2 ENGAGED.
- Mega-Brute is immune to all damage.
- Mega-Brute spawns Boomers instead of Crabblings.
- If there are ever zero Boomer models accessible in the encounter, spawn two Boomers close to the Mega-Brute at the beginning of the round, and add their Initiative Card to the end of the Initiative Track.
Encounter Layout
Encounter One tile guide: tile 9B (below-ground) with tile 8A (above-ground), with small A-side tiles above and below.
Encounter Two tile guide: tile 9B (below-ground) with tile 8B, with small A-side tiles above and below.
Scenario Rewards
- Draw two Treasure Cards!
Once the Scenario is complete
As the ceiling started to collapse due to the damaged columns, the Wanderers dove to the closest safe spot they could find. The beast they just battled tried to run, but it couldn't escape the huge debris tumbling down on top of it. It let out one last guttural roar before becoming completely still. The heroes breathed a sigh of relief, knowing if that creature had escaped, the city would surely have been destroyed soon after. Exhausted from the effort it took to defeat this new mutated abomination of Elder Bane's design, they collapsed onto the ground. Some of them couldn't help but ponder about what lengths Elder Bane would go to ensure his victory and control over Barnacle Bay.
They would not have to reflect on it for long. Behind a wall damaged from the constant assault of exploding Bloat Rats, the heroes found a villager quaking in terror, who told them that the remaining townsfolk were hiding in a homestead nearby, but he was concerned that cultists might soon discover their location. Before he could finish speaking, the church bells from above began to toll. Without a doubt, this would be spell doom for Barnacle Bay, between each ring the Wanderers could hear the sound of portals being opened in a tunnel nearby. The Wanderers also noticed a ladder to the church hidden in the shadows with the sound of many feet up above.
Path Choice
- If you believe the Wanderers headed towards the remaining townsfolk, proceed to Scenario 3.5A on page 49.
- If you believe the Wanderers headed towards the sounds of opening portals, proceed to Scenario 3.5C on page 53.
- If you believe the Wanderers took the ladder to Elder Bane's church, proceed to Scenario 3.5B on page 51.
Transcription notes: the "What You Will Need" token names follow the Scenario Layout Symbols legend on page 2 of the source. The source's obvious typos ("coulnd't", "guttural", "hidden passages", "f you believe") are corrected here.