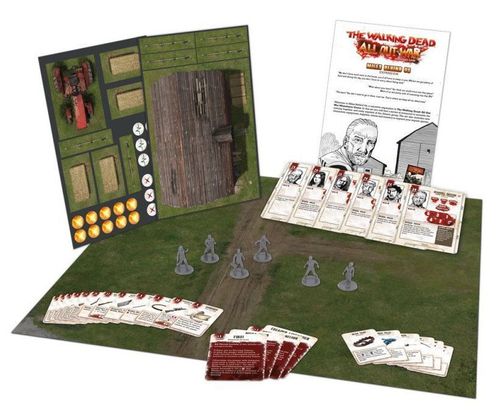
The Walking Dead: All Out War – Miles Behind Us Expansion
The Walking Dead: All Out War – Miles Behind Us Expansion Rulebook
Table of Contents
Table of Contents
New Rules
The following rules are additions to those found in the All Out War core set, or in some cases modify standard rules. Where there is any contradiction between a core rule and a rule found in this expansion, the expansion takes precedence.
Burning Tokens
There are several ways a Walker or item of scenery can acquire a Burning Token. When they do, follow the rules below to see what happens.
Only one Burning Token can ever be applied to a single Walker, no matter how many times it is hit with Flaming Attacks.
A Walker with a Burning Token adds one bonus red die to its side's Melee Attack rolls.
In the End phase, after rolling for any prone Walkers, roll a black die for each Walker that currently has a Burning Token. On a blank, the Walker is unaffected, and the Burning Token remains. On a skull, the Walker is laid prone, and the Burning Token is removed.
New Actions
The following Actions are presented in addition to those on page 11 of the All Out War core set. They follow all of the usual rules for Actions.
Start Fire
A Survivor in base contact with a Flammable scenery piece not currently burning (see page 4) may set it on fire. If the Survivor has an Equipment Card or other rule that allows them to make Flaming Attacks, then starting a fire takes only a single Action. If not, starting a fire takes two Actions. After the Start Fire Action is performed, place a Burning Token on the scenery piece.
New Keywords
Flaming
If a model with Flaming attacks wins a melee, then in addition to normal damage, any Walker in the same combat still standing receives a Burning Token. Survivors do not receive Burning Tokens – they are considered to be able to avoid the brunt of the attack, roll about to douse the flames, or are otherwise not very flammable!
New Scenery
The scenery in this expansion uses the Advanced Scenery rules from page 33 of the All Out War rulebook. Below you will find details of how to use the new scenery pieces in your regular games.
Hay Bales
A common feature on the farm, hay bales can be set alight to create clouds of smoke.
- Scenery Points: 2
- Special Rules: Cover (Light), Elevated, Flammable, Smoking, Traversable.
Split-Rail Fences
Common fencing for enclosing fields and pastures.
- Scenery Points: 1
- Special Rules: Collapse!, Cover (Light), Defensible, Traversable
The Barn
This large structure is used by the Greene family to store something far more sinister than hay…
- Scenery Points: 5
- Special Rules: Blocking, Flammable, Impassable, Resource Hub
Farm Machinery
It may not work too well any more, but it's still a valuable source of parts and a vital piece of cover.
- Scenery Points: 2
- Special Rules: Cover (Heavy), Impassable, Resource Hub
New Scenery Special Rules
The following special rules are in addition to those provided on page 33 of the All Out War rulebook.
Beacon
This scenery piece creates NOISE each turn, calculated at the start of the Action phase before any models have been activated. Walkers already in contact with it are not eligible to react to the NOISE.
Burning Brands
If your scenario includes any scenery with this special rule, set the Burning Brands supply cards to one side at the start of the game. If this scenery piece is in a Survivor's Kill Zone, then the Survivor may use an Action to equip a Burning Brand card.
Collapse!
If at any point three or more Walkers are in contact with the same scenery piece with this rule, the scenery piece is removed from play.
Flammable
Some scenery is Flammable, which means it can be destroyed by fire relatively easily.
If a Walker with a Burning Token ever moves into base contact with a Flammable scenery piece, immediately place a Burning Token onto the scenery piece. While the Burning Token is present, the scenery piece gains the Beacon, Burning Brands, Flammable and Impassable special rules. Conversely, if a non-burning Walker moves into contact with scenery that is currently on fire, it immediately receives a Burning Token.
In the End phase, after rolling for any prone or burning Walkers, roll a black die for each scenery piece that has any Burning Tokens. On a blank, the Burning Token remains. On a skull, another Burning Token is added. If the number of Burning Tokens on a scenery piece ever exceeds its Scenery Points, the scenery piece is removed from play.
Smoking
If a scenery piece has one or more Burning Tokens, then it gains the Blocking special rule in addition to those added by the Flammable rule.
New Event and Supply Cards
This expansion contains extra Event and Supply cards. These are shuffled into the decks from the core game where mentioned in the scenarios except the Burning Brands cards.
If your opponent agrees, you can also shuffle them into the decks in your regular games as well, to represent the game being set near the Greene family farm.
Narrative Campaigns
The following set of scenarios are best played in order. They recreate the story of the Atlanta group's early contact with the Greene family, along with their subsequent alliance.
This campaign comprises six solo scenarios (see Going Solo on page 3 of the All Out War rulebook), which can also be played co-operatively with a friend by splitting the Survivors between players.
Participants
Each scenario lists the recommended participants - the Survivors that actually took part in the action in The Walking Dead storyline. Some of those participants can be found in The Walking Dead: All Out War core and in this expansion. The Leader of the group is marked (L) in the scenarios.
However, one box could never hold the huge cast of characters from the story, which means some of the recommended participants are found in separate booster packs, available from Mantic. If you do not have all of the Survivor models and cards required, never fear! In each scenario you will find a set of guidelines for Alternative Participants – this section will detail how to play with Survivors of your own choosing.
Story Mode
When playing a narrative campaign, the results of each scenario impact the next – the better you do in one game, the better chance you'll have of victory in the next one, or so the theory goes!
Each scenario after the first will include the 'Story Mode' header. This will tell you how the results of the previous game affect the current one.
This will often relate to the number of supply counters collected in the previous scenario, so make sure to keep note of this number before you clear away the game.
Character Deaths and Injuries
If a Survivor is removed from play during a scenario, but is required for a later scenario in the campaign, roll a white die to see the extent of their injury. The result is the number of health points that are deducted from the Survivor's starting value in the next game.
If a Survivor undergoes an Amputation during a game, then the penalties carry over to subsequent scenarios.
Game Length
Unless stated otherwise in the scenario, these games last until one of the Victory Conditions has been met, or at the end of any turn in which the Threat Tracker is at maximum.
If the Threat Tracker is at maximum at the end of a turn, or all the Survivors are removed as casualties, the game is lost, and any supply counters collected are discarded.
Chapter 1: Clear The Road
Having persuaded his fledgling group to hit the road, Rick runs into his first obstacle – literally. The road ahead is blocked by wrecked vehicles, and swarming with Walkers. Rick has to clear the way before his people catch up and get bogged down. Thankfully, help is just around the corner.
Survivor Groups
Recommended Participants
- Group A
- Rick Grimes, Atlanta Camp Leader (L)
- Carl Grimes, Trainee Sharpshooter
- Glenn, Atlanta Scavenger
- Up to 40 points of equipment
- Group B
- Tyreese, Pro Football Player
- Julie
- Chris
- Up to 35 points of equipment
Alternative Participants
- Group A
- 125 point limit
- Group B
- 110 point limit
Story Mode
Days Gone Bye: If you also own the Days Gone Bye expansion, then you can link the scenarios from that box to the ones in this book to make a continuous narrative! Simply apply the Character Deaths and Injuries rules from page 5 to Days Gone Bye Chapter 6: Bad Blood, and continue onto Miles Behind Us Chapter 1: Clear the Road.
Setup Instructions
- Scenery: Set up a 20" x 20" gaming area. Place 4 Cars in the Walker Zone, no closer than 2" to each other. Then place up to 6 Scenery Points' worth of scenery anywhere on the board you like, but no closer than 2" to another scenery piece.
- Supplies: Place one supply counter in each Car.
- Walkers: You will need 14 Walker models. Place one in base contact with each Car, and the remaining 10 anywhere in the Walker Zone, no closer than 2" to each other.
- Survivors: The Survivors from Group A deploy in contact with the board edge in the area marked Group A Deployment. The Survivors from Group B deploy in contact with the board edge in the area marked Group B Deployment.
Set Threat Level
Position the Threat Tracker to one side of the board, and point the arrow towards position 1.
Special Rules
Clearing the Road: To move a car out of the road, you must have at least two standing Survivors in contact with it during the Action phase. No Walkers may be in contact with the car or the Survivors. Either model may spend an Action to move the car. Once this is done, the car is moved as close to the nearest edge of the Walker Zone as possible, by the shortest possible distance. The car may not pass through scenery pieces or prone models as it moves.
Any Walker or Survivor in the path of the car as it moves is moved aside by the shortest possible distance. Models may not be moved into contact with an enemy.
Example: In image 1, Rick and Tyreese are in contact with a car and want to move it. However, they cannot move it in a straight line to the edge of the road, because a barrier and a Walker are blocking the way.
The car must be moved around the barrier by the shortest possible route as shown. The Walker will be pushed aside by the car as it moves.
The end positions of the car and Walker are shown in image 2.
Victory Conditions
The player wins at the end of the turn in which all four cars have been cleared from the road (the Walker Zone).
Chapter 2: Leaving Wiltshire Estates
The newly strengthened group manages to find shelter in the abandoned Wiltshire Estates, but soon discovers it had been abandoned for a reason. As Walkers swarm the manicured gardens and abandoned streets, Rick and Tyreese lead a rear-guard action to save Julie and Chris, while the others escape back to open country.
Survivor Groups
Recommended Participants
- Group A
- Rick Grimes, Atlanta Camp Leader (L)
- Tyreese, Pro Football Player
- Up to 25 points of equipment
- Group B
- Julie
- Chris
Alternative Participants
- Group A
- 125 point limit
- 1-3 Survivors
- Group B
- 25 point limit
- 2 Survivors
- No equipment
Story Mode
If you won the previous scenario, then you may spend an additional 5 points on equipment for each supply counter you acquired.
Setup Instructions
- Scenery: Set up a 20" x 20" gaming area. Place four Cars in the Walker Zone, no closer than 2" to each other or to a board edge. Place up to 6 Scenery Points' worth of scenery pieces anywhere on the board you like, but not within 2" of any other scenery piece.
- Supplies: Place one supply counter in each Car.
- Walkers: You will need 14 Walker models. Place them in the Walker Zone, at least 3" from each other.
- Survivors: Group A deploys on the board edge in the 3" strip in the corner of the map. Group B deploys as close to the center of the bottom edge as possible.
Set Threat Level
Position the Threat Tracker to one side of the board, and point the arrow towards position 6.
Special Rules
Endless Horde: To represent the seemingly numberless herd, every time a Walker is removed from play, it immediately re-enters play using the normal rules.
Rescue: Each model in Group B may not make any Actions other than those forced on them by the Panic rules until a member of Group A has moved into base contact with them.
Victory Conditions
The player wins when at least three Survivors have moved off via the Escape Edge. They must have enough movement to take them physically off the edge of the board, and this is the only way any model can leave the gaming area during the game. The game ends immediately as soon as the third Survivor has left the board.
If the Threat Tracker reaches maximum, or there are no longer three Survivors left to escape, the game is lost.
Chapter 3: Friendly Fire
While scouting the woods beyond Wiltshire Estates, Carl Grimes is shot accidentally by a farmhand named Otis. Desperate, Rick follows Otis back to his farm, carrying Carl even as the Walkers shamble out of the woods behind them, attracted by the gunfire.
Survivor Groups
Recommended Participants
- Rick Grimes, Atlanta Camp Leader (L)
- Otis
- Up to 30 points of equipment
- Carl Grimes – model only – Carl plays no active part in the game
Alternative Participants
- 100 point limit
- No more than three Survivors
- Spare Survivor model to represent 'Carl'
Story Mode
If you won the previous scenario, then you may spend an additional 10 points on equipment.
Setup Instructions
- Scenery: Set up a 20" x 20" gaming area. Place four Hay Bales and the Farm Machinery anywhere on the board, but not within 5" of each other, and no closer than 3" to any board edge.
- Supplies: There are no supply counters in this scenario.
- Walkers: You will need 10 Walkers. Place 3 Walkers within 6" of each of the two Walker Starting Points, as shown on the map. These Walkers may not be placed within 2" of each other, or the board edge. The remaining 4 Walkers are placed in contact with the Escape Edge, at least 4" apart.
- Survivors: The Survivors are placed in contact with the Survivor Deployment Edge. Carl must be placed in base contact with one of the Survivors.
Set Threat Level
Position the Threat Tracker to one side of the board, and point the arrow towards position 4.
Special Rules
Events: Remove the Alarm! card from the Event Deck and instead add the Fire! and Grim Recognition cards.
Shambling Horde: At the start of each turn after the first, [white die icon] Walkers enter play. Roll a black die for each Walker to determine which of the two Starting Points they use. The first model to enter play is placed in contact with the edge of the board directly on the Starting Point. Subsequent Walkers entering play at the same point must be placed in contact with the board edge and within 2" of the first Walker. If they do not fit, they may be placed at the opposite Starting Point if there is room.
If you do not have sufficient Walker models, or are unable to place them for any reason, add 1 to the Threat Level instead.
Walkers that enter play using the normal rules are placed on any edge as normal.
Transcriber's note: the source prints a white die icon before "Walkers enter play" with no separate roll instruction or mapping to a number of Walkers. The text is transcribed as printed; the number of Walkers entering each turn is not stated in the source.
Carl: In this game, Carl is incapacitated. He is used only as a counter that must be carried to safety – he does not act as a Survivor in his own right for any reason.
One Survivor starts the game carrying Carl. A Survivor carrying Carl may not Run, they may only Sneak. If a Survivor carrying Carl is made prone, engaged in melee, or removed as a casualty, Carl is dropped within 1" of that Survivor.
Carl may be picked up as part of a model's Activation, by spending an Action while in contact with him.
In addition, due to Carl's injured state, all Survivors' Nerve values are reduced to Medium for this scenario unless they were already lower.
Victory Conditions
The player wins when a Survivor carrying Carl moves off the Escape Edge. They must have enough movement to take them physically off the edge of the board, and this is the only way any model can leave the gaming area during the game. The game ends immediately as soon as the Survivor has left the board.
Chapter 4: Attack on the Farm
A herd of Walkers approaches the Greene family farm, and Hershel recognizes some of them as former friends and neighbors. He organizes his family to do the Christian thing, and shepherd the lost souls safely to the barn. There, Hershel's family hope the Walkers will be safe until a cure can be found for their 'sickness'…
Survivor Groups
Recommended Participants
- Hershel Greene, Greene Family Patriarch (L)
- Billy Greene
- Otis
- Patricia
- Up to 50 points of equipment - at least one model must take an Animal Catcher Pole
Alternative Participants
- 145 point limit
- At least one model must take an Animal Catcher Pole
Story Mode
If Otis survived Chapter 3, he begins this scenario with a Browning Hunting Rifle, which is in addition to the 50 point equipment restriction.
Setup Instructions
- Scenery: Set up a 20" x 20" gaming area. Arrange the six Split-Rail Fences along the center boundary line. Place the four Hay Bales anywhere in the Walker Zone, at least 2" from each other, and 2" from the board edges. Place the Barn and Farm Machinery on the other side of the boundary line, but not within 2" of another scenery piece, or within 1" of the board edge.
- Supplies: Place one supply counter on the Farm Machinery, and four in the Barn.
- Walkers: You will need 12 Walker models. Place them in the Walker Zone, at least 3" from each other.
- Survivors: The Survivors deploy anywhere within the Survivor Deployment Zone.
Set Threat Level
Position the Threat Tracker to one side of the board, and point the arrow towards position 1.
Special Rules
Events and Supplies: Remove the Alarm! card from the Event Deck and instead add the Fire!, Escaped Livestock, Grim Recognition and Mega Herd cards.
Remove the Booby Trap card from the Supply deck and instead add the Miles Behind Us Supply cards.
Endless Horde: To represent the seemingly numberless herd, every time a Walker is removed from play, it immediately re-enters play using the normal rules.
However, in this scenario, all Walkers enter play from the Walker edge shown on the map.
Capturing a Walker: A Walker is considered captured if an Animal Catcher is used successfully on a Walker, and the Barn is within the Survivor's Kill Zone. The Walker is immediately removed from play, and is considered to be captured within the barn.
Victory Conditions
This game is won using Victory Points. The player scores one Victory Point for each Walker removed from play as a casualty, and two Victory Points for capturing a Walker. Keep a tally during the game.
The player wins and the game ends immediately when the player reaches 10 Victory Points.
Chapter 5: The Barn
Rick's group and the Greene family form an uneasy alliance, and the imprisonment of Walkers within the Greene's barn is a source of contention. Rick's view is proved tragically right when the barn is compromised, and the Walkers escape!
Survivor Groups
Recommended Participants
- Hershel Greene, Greene Family Patriarch (L)
- Maggie Greene, Rebellious Daughter
- Billy Greene
- Arnold Greene
- Lacey Greene
- Otis
- Rick Grimes, Atlanta Camp Leader
- Glenn, Atlanta Scavenger
- Up to 75 points of equipment
Alternative Participants
- 300 point limit
- No more than 10 Survivors
Story Mode
If you won the previous scenario, then you may spend an additional 20 points on equipment.
If Billy Greene was killed in Chapter 4, then Hershel may not use his Leader Ability in this scenario.
Setup Instructions
- Scenery: Set up a 20" x 20" gaming area. Place the barn in the dead center of the board. Next place four Hay Bales, four Split-Rail Fences, and the Farm Machinery anywhere on the board, at least 2" from any other scenery piece and 1" from any board edge.
- Supplies: Place one supply counter on the Farm Machinery, and four in the Barn.
- Walkers: You will need 14 Walker models. Place them in the Walker Zone, within 3" of the Barn, and not within 2" of each other.
- Survivors: The Survivors deploy anywhere on the board, at least 5" from the Barn.
Set Threat Level
Position the Threat Tracker to one side of the board, and point the arrow towards position 6.
Special Rules
Events and Supplies: Remove the Alarm! card from the Event deck and instead add the Fire!, Escaped Livestock, and Grim Recognition cards.
Remove the Booby Trap card from the Supply deck and instead add the Miles Behind Us Supply cards.
Imprisoned Horde: To represent the seemingly numberless herd, every time a Walker is removed from play, it immediately re-enters play using the normal rules, but from the Barn Door rather than the board edges. They must be placed in contact with the barn door, or in contact with any other part of the barn if there is no room. They may not be placed in contact with a Survivor.
Walkers that enter play using the normal rules are placed on any edge as normal.
Closing the Barn Door: To close the Barn Door, you must have at least three standing, unengaged Survivors in contact with the door during the Action phase. Any of the three may spend an Action to close the door. Roll a black die. On a skull, the door is closed and the Imprisoned Horde rule ceases to apply.
From this point on, Walkers will enter play using the normal rules.
Burning the Barn: If the Barn is destroyed due to fire, the Imprisoned Horde rule ceases to apply.
From this point on, Walkers will enter play using the normal rules.
Victory Conditions
The player wins and the game immediately ends if there are no Walkers in play.
Chapter 6: Supply Raid
With their resources depleted after the fight against the Walkers, Rick and Hershel send runners to a nearby town to find fresh supplies.
Survivor Groups
Recommended Participants
- Glenn, Supply Run Master (L)
- Andrea, Skilled Sharpshooter
- Maggie Greene, Rebellious Daughter
- Billy Greene
- Up to 50 points of equipment
Alternative Participants
- 180 point limit
- No more than five Survivors
Story Mode
If Arnold or Lacey survived the previous scenario, you may add one of them to your group.
Setup Instructions
- Scenery: Set up a 20" x 20" gaming area, representing the outskirts of a town. Divide the board diagonally as shown. Place two Cars in each board section, A and B, no closer than 6" to any corner, and not within 6" of each other. Next, place four Barriers in section A, no closer than 2" to any other scenery piece.
- Supplies: Place one supply counter in the corner of section A, representing the store entrance. Then, place one supply counter in each Car.
- Walkers: You will need 12 Walker models. Place 4 Walkers within 6" of the store entrance. Place the remaining 8 Walkers outside of that area, anywhere in section A, but no closer than 2" to each other.
- Survivors: Place the Survivors within 6" of the corner opposite the store.
Set Threat Level
Position the Threat Tracker to one side of the board, and point the arrow towards position 1.
Special Rules
Events and Supplies: Add the Grim Recognition and Mega Herd cards to the Event deck.
Shuffle the Miles Behind Us Supply cards into the Supply deck.
Victory Conditions
The player wins when one of their Survivors performs a Search Action on the store entrance supply counter, representing the Survivor breaking into the store. The game ends immediately when this happens.
Advanced Rules - Campaign Play
While The Walking Dead: All Out War lends itself well to one-off, nihilistic skirmishes, for maximum fun why not try playing a campaign with a group of friends?
What is a Campaign?
In its simplest form, a campaign is a series of linked games, where players choose a group and keep the same collection of models from game-to-game. Campaigns are normally organized in a basic league-style system, so that each participant plays one game in a single round, or 'campaign turn', results are recorded, and then a new round starts.
The really exciting thing about campaigns is watching your group grow with experience. With each victory, your Survivors will improve their skills, and you can earn points which can be spent on recruiting new members of the group and purchasing equipment.
Winning and Losing
It's highly recommended to structure a campaign right at the start. Make a list of players, and decide how many campaign turns will be played. Even numbers of players are best, otherwise someone will have to play twice and count their best result for the purposes of the ongoing score.
After each campaign turn is complete, mark down the scores and adjust your 'leaderboard' as necessary.
There are two methods for working out the ongoing scores and the overall winner. The first is a simple tournament system, awarding points for winning, drawing and losing each game (3 points for a win, 1 point for a draw – in which the Walkers 'win' – and 0 points for losing). The second system is to work out the current total value of the group – the number of points of each Survivor and Equipment card in the group at the end of the campaign turn. As groups start with the same value in points, and will grow at different rates during the course of a campaign, this is a sure indicator of who's doing the best. If there's a tie at the end of the campaign, the top-placed players will have to battle again to determine who is the greatest Survivor!
Campaign Roster
To begin with, use the guidelines on page 28 of the core rulebook to choose a group (including custom survivors if you wish!). Everyone in the campaign should have the same number of points – we recommend 150 points to start with. Write the composition of your group on a roster sheet – there's one provided below that you can photocopy if you like.
In addition, you should use the blank Survivor cards downloadable from www.manticgames.com for each of your Survivors, as their characteristics can change as the campaign progresses.
Roster Sheet (as printed in the source)
- Player Name:
- Group Name:
- Points Total (Survivors + Equipment):
- Unspent Points:
- Columns: Survivor | Equipment Cards | Experience
The Campaign Turn
Each campaign turn starts with the players pairing up and playing games against each other. These could all be the standard 'The Walking Dead' scenario, or any other of the players' choice.
Once the games are over, each player must complete the following sequence, and then you're ready for your next game!
Post Game Sequence
- Life and Death
- Experience
- Supplies
1. Life and Death
Of course, gaining experience all depends on your survival. If a Survivor is removed as a casualty during a game, it doesn't mean they're necessarily out of the campaign. Perhaps they dragged themselves away from the horde of Walkers at the last minute and escaped, or maybe someone found them and nursed them back to health. Either way, there's a chance that they'll remain part of your group for the next campaign turn, although they cannot earn any Experience.
As soon as the game ends, so that your opponent can witness the results, you will need to do the following:
- Roll a white die for every model that was alive at the end of the game but had been Bitten (i.e. their health counter was flipped to show the red Bite icon). Reduce the Survivor's health by the number rolled on the die, ignoring any '!'. If this takes them to zero, they are treated as if they had been removed as a casualty.
- For each model removed as a casualty during the game (including any from step 1), roll another white die. The number rolled is the number of health points that are deducted from the Survivor's starting value in the next game – note this lightly on your roster in pencil.
- If this die rolls a '!', the Survivor may not have escaped with their life. a. A Bitten character that rolls a '!' has died, and it along with all of its equipment are lost. Remove them from your roster sheet. You may not recruit the same character again during the course of the campaign. b. Otherwise, roll a black die. On a skull the character has survived, but on a blank the character has died as described above.
If a character does not die, any Bites are ignored and the health counter will be flipped back over for the next game. Perhaps it was all a mistake and the blood wasn't theirs, or they manage to fight off the infection long enough for one more battle.
Amputations
If a character permanently dies from a bite as described above, they can be saved by an emergency amputation if you wish. Roll to see whether their arm or leg is affected as normal (see page 38 of the core rulebook). Transcriber's note: the source prints no die icon at this point; transcribed as printed.
If a Survivor lives, but suffered an Amputation either during or after a game, they must miss the next campaign game while they recover. Also, any effects to their movement or hand slots are carried forward for the rest of the campaign. Just because they survived doesn't mean they grow a new limb!
Loss of a Leader
If your group's leader dies during the course of the campaign, you must either nominate another member of your group to be the leader, or purchase a new leader using your supplies.
Retiring Your Group
Sometimes the losses sustained in a campaign can be so heavy that there's no coming back. That's life in the harsh world of The Walking Dead! In this case, if a player wishes, they may simply retire their group from the campaign. All of their points up to that point are removed. In the next campaign turn, they may start afresh with a brand new roster at the starting points level, although they'll have some catching up to do.
2. Experience
At the end of each game, any character that was not removed as a casualty during the game receives an Experience bonus of one red die, and increases their points value by 3 points. This die may then be allocated to any of the Survivor's Melee, Shoot or Defense characteristics, or may be saved to spend on other improvements later. Keep a note of these saved dice in the Experience column on the Campaign Roster.
After you have calculated experience increases for your group, any Survivor may exchange any two red dice from their characteristics or saved dice pool for a single white die, or two white dice for a single blue die, and these may be allocated to their card as before. Upgraded dice that are already part of a characteristic must remain allocated to the same characteristic.
Remember that no characteristic may have a total of more than three dice (so, for example, as Rick Grimes has a Melee of one white die to start with, you could never allocate more than two bonus dice to his Melee).
In addition, you may exchange any three dice to upgrade a Survivor's Nerve by one level (Low to Medium, or Medium to High), or to learn a new Special Rule of your choice (see page 19 of the Days Gone Bye Expansion).
Underdog Bonus
Sometimes during a campaign you'll end up facing a group that has advanced much faster than your own, and is worth considerably more points than your group. In these situations, we award the player with the lesser value group an 'Underdog Bonus'.
For every full 15 points' difference between the two groups, the group with the lower points value gains one red die, which it gathers together into a pool. These dice may be used during a game, and added to any Attack or Defense roll you are required to take. No more than one Underdog die may be used on a single roll. Any dice not used by the end of the game are lost.
3. Supplies
Your group gains 10 points for each supply counter it controlled when the game ended. These points may be spent on new Survivors from your miniature collection, and/or new Equipment cards. During this step you may also swap any items between your Survivors. Any leftover points are recorded in the Unspent Points section of the roster sheet – these can be added to future gains, and spent at the end of any subsequent campaign turn.