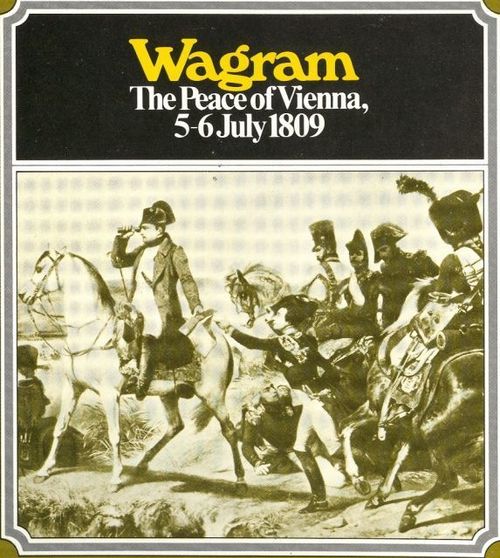
Wagram: The Peace of Vienna, 5-6 July 1809
Wagram: The Peace of Vienna, 5-6 July 1809 Rulebook
Table of Contents
Table of Contents
- Napoleon at War Standard Rules
- 1.0 Introduction
- 2.0 Game Equipment
- 3.0 Setting Up the Game
- 4.0 Sequence of Play
- 5.0 Movement
- 6.0 Zones of Control
- 7.0 Combat
- 8.0 Artillery
- 9.0 Terrain Effects Chart
- 10.0 Night Game-Turns
- 11.0 Developer's Notes
- 7.6 Combat Results Table
- 9.0 Terrain Effects Chart
- Wagram Exclusive Rules
Napoleon at War Standard Rules
1.0 Introduction
The Napoleon at War game system is an operational simulation of warfare during the era of the Napoleonic Wars. Each game in the system represents one of the great battles in the period. The Playing Pieces represent the actual units which participated in the battles, and the Map represents the terrain over which those units fought.
The rules for each game in the Napoleon at War Series are contained in two folders. The first contains Standard Rules, which are common to all the games in the series. The second folder contains Exclusive Rules, Initial Deployment and Reinforcement Rules, which are different in each game.
This game has been designed to insure maximum playability and maximum reality (in that order). In order to achieve these goals, the physical components, as well as the game rules, have been designed to make the game easier to understand and play. The components include a smaller, more compact playing map, never more than a hundred playing pieces, and standardized rules.
The standardization makes it easier for the gamer to go from one game to another within the series. It also enables the games' designers to concentrate on the realism aspect of the games (the standardization generally takes care of any playability problems).
2.0 Game Equipment
2.1 The Game Map
The 22" x 17" mapsheet portrays the area in which the battle was fought. It includes all the significant terrain in the battle, a Terrain Key, and a Turn Record Track.
A hexagonal grid is superimposed over the terrain features printed on the mapsheet in order to regularize movement and positioning of the playing pieces.
To make the map lie flat, back-fold it against the creases. Small pieces of masking tape may be used at the corners of the map to hold it taut.
2.2 Game Charts and Tables
Various visual aids are provided for the Players in order to simplify and illustrate certain game functions. These are the Terrain Effects Chart, the Combat Results Table, the Reinforcement Chart and the Deployment Chart.
2.3 The Playing Pieces
The cardboard Playing Pieces represent the actual military units that took part in the original battle. The numbers and symbols on the pieces represent the strength, movement capability, and type of unit represented by that piece. These playing pieces will hereafter be referred to as "units."
2.4 How to Read the Units
A unit shows its Designation (e.g. 1/Leg), a Type Symbol (infantry, cavalry or artillery), its Combat Strength and its Movement Allowance (e.g. 5-4: Combat Strength 5, Movement Allowance 4).
Unit Designations. Units are identified by numerals in this sequence: division/corps (roman numeral) or brigade/division.
Unit Types. Infantry, Cavalry, Artillery.
Combat Strength is the relative strength of a unit when attacking and defending, expressed in terms of Strength Points.
Movement Allowance is the maximum number of clear terrain hexes that a unit may be moved in a single Movement Phase, expressed in Movement Points. More than one Movement Point may be expended for each hex entered according to the terrain in the hex.
2.5 Game Scale
Each hexagon on the map represents between 400 and 800 meters of real terrain. Each Strength Point represents between 500 and 1,000 men. Each Game-Turn represents between one and two hours of real time.
2.6 Parts Inventory
| Folio Game | QuadriGame | |
|---|---|---|
| Game Map | 1 | 4 |
| Sheet of Die-Cut Counters | 1 | 4 |
| Standard Rules Folder | 1 | 2 identical |
| Exclusive Rules Folder | 1 | 4 different |
| Die | 0 | 1 |
| Game Box | 0 | 1 |
| Folio (folder) | 1 | 0 |
If any of these parts are damaged or missing, write: Customer Service, Simulations Publications, Inc., 44 East 23rd Street, New York, N.Y. 10010
Questions regarding the rules of the game, if accompanied by a stamped, self-addressed envelope, will be answered. Send to: Game Questions Editor, at the above address.
3.0 Setting Up the Game
The cardboard Playing Pieces should be punched out of the Unit Counter Sheet. The blue colored pieces represent French forces; the other colored pieces represent the force(s) opposing the French. Players should determine who will be the French Player and who will command the forces opposing the French (the non-French Player).
The Players then consult their respective Initial Deployment Charts. These charts tell the hex number, strength and designation of each unit which is in play (on the map) during the First Game-Turn. Players should simultaneously place each of these units in its proper position on the map. All remaining units should be placed aside and brought into play according to the Reinforcement Chart. In setting up units, Players may disregard historical designations, so long as the unit type and strength are correct.
Once the units are set up, Players are ready to commence Game-Turn One; place the Game-Turn Marker in the first position on the Game-Turn Track.
In order to determine which Player is the first Player and which the Second Player, consult the Exclusive Rules Folder. There Players will also find rules for bringing in the reinforcement units which are given on the Reinforcement Chart. Play proceeds according to the Sequence of Play through the final Game-Turn.
4.0 Sequence of Play
The game is played in successive Game-Turns composed of alternate Player-Turns. During each Player-Turn, the Player maneuvers his units and resolves combat in sequence, according to the following outline, and within the limits provided by the rules which follow. At the conclusion of the final Game-Turn, the Victory Conditions are consulted and a winner is determined.
4.1 Sequence Outline
The Game-Turn is divided into a First Player-Turn and a Second Player-Turn. The Player whose Player-Turn is currently in progress is termed the Phasing Player. The activity which may take place during each Phase is outlined below:
1. FIRST PLAYER-TURN
A. Movement Phase: The Phasing Player may move all, some or none of his units as he desires within the limits and restrictions of the rules of Movement and Zones of Control, and the Exclusive Rules of the game. The Phasing Player may bring reinforcement units onto the map as allowed by his Reinforcement schedule and the Reinforcement rules. The non-Phasing Player's units may not move.
B. Combat Phase: The Phasing Player uses his units to attack the non-Phasing Player's units according to the rules of Combat and Artillery. During this Phase neither Player may move his units except when forced to, as a result of the Combat Resolution procedure.
2. SECOND PLAYER-TURN
The Second Player now becomes the Phasing Player and accomplishes movement and combat in the manner described above.
3. GAME-TURN RECORD INTERPHASE
The Game-Turn Marker should be advanced one space on the Game-Turn Record Track to mark the passage of one Game-Turn and signal the start of another.
5.0 Movement
GENERAL RULE:
During the Movement Phase, the Phasing Player may move as many or as few of his units as he desires. They may be moved in any direction or combination of directions.
PROCEDURE:
Units are moved one at a time tracing a path of contiguous hexes through the hex grid. As a unit enters each hex, it must pay one or more Movement Points from its Movement Allowance.
5.1 Prohibitions
[5.11] Movement may never take place out of sequence. A Player's units may be moved during his own Movement Phase. During the Combat Phase, a unit which is either attacking or defending may be called upon to advance or retreat after its combat is resolved. During the Enemy Player's Movement Phase, and during both Players' Combat Phases, except when advancing or retreating as a result of combat, Friendly units must not be moved.
[5.12] A unit may never enter a hex containing an Enemy unit.
[5.13] A unit may never exit an Enemy controlled hex during any Movement Phase. An Enemy controlled hex may be left only during a retreat or advance as a result of combat (see 7.7).
[5.14] No combat takes place during the Movement Phase. Once a Player has begun to resolve combat, and has thrown the die, he has irreversibly initiated the Combat Phase.
[5.15] The number of Movement Points expended by a unit during a single Movement Phase may not exceed the Movement Allowance. A unit may expend any portion of the Movement Allowance, but unused Movement Points may not be accumulated until another Movement Phase or transferred to another unit.
[5.16] Movement from hex to hex must be consecutive; that is to say, a unit may not skip hexes.
[5.17] Once a unit has been moved, and the Player's hand is taken from the piece, it may not be moved any further during that Movement Phase, nor may it change its move without the consent of the opposing Player.
5.2 Effects of Terrain
[5.21] A unit must expend one Movement Point to enter a clear terrain hex. To enter other types of terrain, a unit must often expend more Movement Points. And some hexes are prohibited to movement entirely. See 9.0, Terrain Effects Chart.
[5.22] A unit which moves from one road hex directly into an adjacent road hex through a road hexside expends only 1/2 Movement Point regardless of other terrain in the hex.
[5.23] A unit which moves from one trail hex directly into an adjacent trail hex through a trail hexside expends only one Movement Point regardless of other terrain in the hex.
[5.24] Units may cross river hexsides only by moving through a bridge hexside. There is no additional cost for moving through a bridge hexside.
[5.25] Units may cross Stream hexsides. Movement through a Stream hexside costs two additional Movement Points. Example: If a unit moves through a Stream hexside into a forest hex, the cost is four Movement Points.
[5.26] A unit which moves from a slope hex (containing the slope terrain symbol) through a slope hexside into a clear terrain hex must expend one additional Movement Point. A unit which moves from a clear terrain hex through a slope hexside, into a slope hex expends no additional Movement Points.
5.3 Effects of Friendly Units
[5.31] A Friendly unit may move through hexes occupied by other Friendly units. There is no additional cost for entering a Friendly-occupied hex.
[5.32] A Friendly unit may not end any Phase stacked in the same hex with another Friendly (or Enemy) unit. There may never be more than a single unit in a hex at the end of any Phase.
[5.33] There is no limit to the number of Friendly units which may pass through a single hex in one Movement Phase.
[5.34] Friendly controlled hexes never inhibit the movement of Friendly units.
6.0 Zones of Control
GENERAL RULE:
The six hexagons immediately surrounding a hex constitute the Zone of Control of any unit in that hex. Hexes upon which a unit exerts a Zone of Control are called controlled hexes and inhibit the movement of Enemy units. All units must cease movement when they enter an Enemy controlled hex.
CASES:
[6.1] All units exert a Zone of Control throughout the Game-Turn, regardless of the Phase or Player-Turn. The presence of Zones of Control is never negated by units, Enemy or Friendly.
[6.2] Units do not pay any additional Movement Points to enter an Enemy controlled hex, as in some other SPI games.
[6.3] There are only two ways to exit a hex in an Enemy Zone of Control: Either by retreat or advance as a result of combat, or by removal of the Enemy unit exerting the Zone of Control as a result of combat.
[6.4] Obviously, if a given unit is in an Enemy controlled hex, the Enemy unit is also in its controlled hex. The two units are equally and mutually affected.
[6.5] If there is an Enemy and Friendly Zone of Control exerted over the same hex, both Zones co-exist, and that hex is mutually controlled by both Players. There is no additional effect from having more than one unit exerting Zones of Control onto a single hex.
[6.6] Zones of Control always extend into all six hexes adjacent to the controlling unit's hex, with this exception: Zones of Control never extend through a non-bridged river hexside.
(The printed rules include a Zone of Control example diagram here.)
7.0 Combat
GENERAL RULE:
Combat between adjacent opposing units is mandatory. Artillery units (8.0) are the only units which may attack units to which they are not adjacent. The Phasing Player is termed the Attacker; the other Player is the Defender, regardless of the overall situation.
PROCEDURE:
The Attacker totals the Combat Strengths of all the units attacking a given hex and compares the total to the Combat Strength of the defending unit in the hex under attack. The comparison is expressed as a ratio between attacking and defending Strength Points (attacking Strength Points divided by defending Strength Points) and is simplified by rounding down to one of the odds ratios on the Combat Results Table. Example: If thirteen Strength Points were attacking four, the combat odds ratio would be 3.25 to 1, rounded off (always in favor of the defender) to three to one.
Having determined the actual combat odds, the attacker rolls the die. The result indicates a line on the Combat Results Table (7.6), which is cross-indexed with the column representing the combat odds. The intersection of line and column yields a combat result. Separate combats may be resolved in any order that the Attacker wishes, so long as all combats are resolved during that Combat Phase.
CASES:
7.1 Which Units Attack
[7.11] All Enemy units that have Friendly units in their Zones of Control must be attacked by the Friendly (Phasing) Player's units in the Combat Phase. He may resolve these attacks in any fashion desired, as long as all adjacent units are attacked, within the requirements of 7.2.
[7.12] All of the Phasing Player's units which end the Movement Phase in an Enemy controlled hex must attack some Enemy unit during the ensuing Combat Phase. The Phasing Player may choose which attacking units will attack each defending unit, as long as all adjacent Friendly units participate in an attack.
[7.13] An Enemy-occupied hex may be attacked by as many units as can be brought to bear in six adjacent hexes, and by as many artillery units as are within range (see 8.0).
[7.14] No unit may attack more than once per Combat Phase, and no Enemy unit may be attacked more than once per Combat Phase.
[7.15] Units may only attack when adjacent to the defending unit (exception: see 8.0).
7.2 Multiple Unit and Multi-Hex Combat
[7.21] If a Phasing Player's unit is in the Zone of Control of more than one Enemy unit, it must attack all those adjacent Enemy units which are not engaged by some other attacking unit. The Combat Strengths of the defending units are totalled into one combined Strength to which the attacking unit compares its Strength to determine the odds.
[7.22] Units in two or more different hexes may combine their Combat Strengths and attack a single hex, if all the attacking units are adjacent to (or within range of) the Enemy occupied hex. The Combat Strengths of the attacking units are totalled into one combined Combat Strength, and then compared to that of the defending unit in order to determine the odds.
7.3 Combat Strength Unity
A given unit's Combat Strength is always unitary; it may not be divided among different combats either in attacking or defending.
7.4 Effects of Terrain
Units defending in certain types of terrain may have their Combat Strength increased. This increase is always a multiple of the original Combat Strength. Example: A unit with a Combat Strength of "5" would defend, on a Rough Terrain hex, at an effective Strength of "10." See the Terrain Effects Chart (9.0) for a complete summary.
7.5 Diversionary Attacks
A unit may make attacks at poor odds in order that adjacent attacks against other defenders may be made at higher odds (by allotting most of the attacking force to the major objective). These attacks are known as "Diversionary" or "Holding" Attacks.
7.6 Explanation of Combat Results
Ae = Attacker Eliminated. All Attacking units are eliminated (remove from the map).
De = Defender Eliminated. All Defending units are eliminated.
Ex = Exchange. All Defending units are eliminated. The Attacking Player must eliminate Attacking units whose total, printed (face value) Combat Strength at least equals the total printed Combat Strengths of the eliminated Defending units. Only units which participated in a particular attack may be so eliminated.
Ar = Attacker Retreat. All Attacking units must retreat one hex (see 7.7).
Dr = Defender Retreat. All Defending units must retreat one hex.
7.7 Retreating and Advancing as a Result of Combat
[7.71] When the Combat Result requires that a Player's units be retreated, the Owning Player must immediately move those units one hex so that they are no longer in an Enemy controlled hex. The Owning Player may decide the direction that each of his retreating units moves.
[7.72] A retreating unit may not retreat into a prohibited hex, cross a prohibited hexside, or enter an Enemy controlled hex. If no hex is open to retreat into, the unit is eliminated.
[7.73] A retreating unit may enter a vacant hex (within the restrictions of 7.72). If there is no permissible vacant hex, the retreating unit may displace an adjacent Friendly unit (see 7.8).
[7.74] Whenever a hex is vacated as a result of combat, one victorious unit which participated in that combat may advance into the vacated hex. This advance may be made regardless of Enemy Zones of Control. The option to advance must be exercised immediately, before any other combat resolution. A unit is never forced to advance. A unit may never advance more than one hex as a result of combat. After advancing, units may neither attack nor be attacked that Phase (see 7.14), even if their advance places them next to Enemy units whose battles are yet to be resolved, or who were not involved in combat. However, advances are useful in cutting off the retreat of Enemy units whose combat has not yet been resolved.
[7.75] Only one victorious unit may advance into a vacated hex. If two hexes are vacated as a result of a single combat, the victorious Player may still advance only one unit.
7.8 Displacement
[7.81] If the only hex available to the retreating unit is one which is already occupied by another uninvolved Friendly unit, then the uninvolved unit is displaced (pushed out of its hex) by the retreating unit. The displaced unit is moved back by the Owning Player (as if it were retreating as a result of combat) and its position is taken by the retreating unit. The displaced unit itself may not be forced into Enemy controlled or other prohibited hexes.
[7.82] If the displacement would cause the displaced unit(s) to be eliminated, the retreating unit is instead eliminated. Displaced units can themselves displace other Friendly units in a sort of chain reaction of displacement, if that is the only permitted path of displacement open to them. A unit may be displaced more than once per Combat Phase, if that is the only alternative. Displaced Artillery units which have not yet engaged in combat, may not fire during that Combat Phase. Units may not displace other Friendly units if they have other paths of retreat open to them.
7.9 Voluntary Reduction of Combat Odds
Prior to the resolution of any attack, the attacking Player may announce that he wishes to reduce the combat odds of that attack. He incurs no responsibility or penalty by doing this, but he may not change his mind subsequent to the die roll. Example: Attack is computed to be a "5-1" attack. Player announces that he desires a "3-1" attack, and resolves it using that column. Players may wish to do this to avoid excess casualties through exchanges, or to attempt to retreat Friendly units.
8.0 Artillery
GENERAL RULE:
Unlike infantry and cavalry units, Artillery units may participate in attacks by bombarding the defending unit. Artillery bombards a unit from two hexes distance. Artillery units must participate in combat when adjacent to opposing units. In other words, artillery may participate in two types of attack, depending on their distance from the defending unit (adjacent or not). Unlike other units, Artillery units are never destroyed or forced to retreat when bombarding a unit, although they are affected by all combat results when they are adjacent to the unit they are attacking.
PROCEDURE:
Determine the odds of the attack in exactly the same fashion as any other attack. All results are applied in the same fashion, except that bombarding Artillery units (i.e., units firing from a non-adjacent hex) are not affected by combat results. Thus, if an "Exchange" were the result in an attack solely by bombarding artillery, the defending unit would be eliminated, but the bombarding units would not be affected. Of course, other units cooperating with the bombarding Artillery units from an adjacent position (including adjacent Artillery units) would be affected by combat results, and they would suffer the effects of an "Exchange" result.
CASES:
8.1 Bombardment Attacks
[8.11] Artillery units may attack non-adjacent Enemy units, up to two hexes distant, but they are never forced to attack an Enemy unit merely because it is in range.
[8.12] Range from the bombarding Artillery unit to the target hex is counted by including the target hex, but not the bombarding unit's hex.
[8.13] Artillery units may only attack a single Enemy occupied hex when bombarding, except when making a combined attack with infantry or cavalry (see 8.2).
[8.14] Artillery attacking from a non-adjacent hex (that is, bombarding) suffer no combat results; they are never destroyed or retreated as a result of their own attacks.
[8.15] Bombarding Artillery may voluntarily elect to suffer "Attacker Retreat" if it is the combat result.
8.2 Combined Attack
[8.21] Artillery units may attack alone, in concert with other bombarding Artillery units, or in concert with any Friendly units which are adjacent to Enemy units within range, adding their bombarding Combat Strength to the attack.
[8.22] If, in a combined attack, Friendly units are attacking Enemy units in more than one hex, the Artillery units need only be within range of one of the defending hexes to add their Combat Strength to the attack.
[8.23] When making a combined attack with bombarding Artillery units, infantry and cavalry units always suffer all combat results, though bombarding Artillery units do not.
8.3 Line of Sight
[8.31] To determine if an Artillery unit may bombard a given hex, lay a straight-edge from the hex of the bombarding Artillery unit to the target hex. This straight line is the Line of Sight. If any of the hexes intervening between the bombarding hex and the target hex is blocking terrain, the target hex may not be bombarded by that Artillery unit.
[8.32] If the Line of Sight is congruent to a hexside (that is, falling exactly between two hexes) it is blocked only if both hexes adjacent to that hexside are blocking terrain.
[8.33] Forest and Town hexes are the only blocking terrain hexes (not Slope or Rough Terrain hexes or hexsides).
[8.34] The terrain in the target hex and in the hex of the bombarding Artillery does not block the Line of Sight.
[8.35] Artillery units may fire over other units, Enemy and/or Friendly.
8.4 Adjacent Attacks
[8.41] When in the controlled hex of an Enemy unit, Artillery units must participate in an attack against adjacent Enemy unit(s). When an Artillery unit is in an Enemy controlled hex, it is treated like an infantry or cavalry unit, and may not bombard.
[8.42] When attacking from a controlled hex, Artillery units may attack as many units as they are adjacent to, but may not attack non-adjacent units.
[8.43] Artillery units attacking from a controlled hex must suffer all the combat results of their attacks.
[8.44] Terrain does not prohibit artillery attacks into adjacent hexes.
[8.45] Although normal combat is not permitted across an unbridged river hexside, an Artillery unit may attack any Enemy unit within range across such a hexside according to the Bombardment Attack rules (8.1).
8.5 Defense
[8.51] Artillery units may never add their Combat Strength to another unit's Defensive value by bombardment. They may only bombard during their own Combat Phase.
[8.52] When Artillery units are themselves attacked, they suffer all combat results in the same manner as other units, even when bombarded by Enemy Artillery units.
9.0 Terrain Effects Chart
(see chart below)
10.0 Night Game-Turns
GENERAL RULE:
The tinted Game-Turns on the Turn Record Track are night Game-Turns, and have a different Sequence of Play than Day Game-Turns, in that the Combat Phase is omitted.
CASES:
[10.1] EFFECT ON COMBAT
There is no Combat Phase during a Night Game-Turn, and no combat is allowed. Opposing adjacent units do not engage in combat; they simply remain in place. Artillery units may not bombard during Night Game-Turns.
[10.2] EFFECT ON MOVEMENT
Movement restrictions during Night Game-Turns are identical to Day Game-Turn movement restrictions, with one addition. Units may not enter Enemy controlled hexes during a Night Game-Turn, nor may units already in Enemy controlled hexes exit them.
11.0 Developer's Notes
The Napoleon at War game series is based on the game system developed in 1972 for the SPI Introductory Game, Napoleon at Waterloo. Despite the popularity of NAW and its well received descendants, Borodino and Austerlitz, limited interest in the pre-Twentieth Century eras prohibited the publication of additional Napoleonic games until the QuadriGame and Folio concepts were initiated by SPI in 1975.
While the QuadriGame allows a wider range of games to be published, it also introduces the two-edged concept of standardization. Each series of games shares a common set of basic rules. This permits the Player to learn four games at once, in effect. After he is familiar with the basic rules, the Player is free to concentrate on the more enjoyable aspects of game play. On the other hand, however, standardization involves some compromises in the areas of both realism and historical accuracy. Such compromises appear in the Napoleon at War series as a result of the physical limits of the game components. Thus, it was necessary to omit distinct artillery units in the Battle of Nations game. But, in all other respects, the essence of Napoleonic warfare is remarkably preserved throughout the four games in this series. Equally important, the introduction of Special Rules tailored to each situation bestows an individual character to each game, thus ensuring that standardization does not make a game series monotonous.
All in all, we feel the Napoleon at War game series achieves an admirable balance between playability and realism.
7.6 Combat Results Table
Probability Ratios (Odds): Attacker's Strength to Defender's Strength
| Die Roll | 1-5 | 1-4 | 1-3 | 1-2 | 1-1 | 2-1 | 3-1 | 4-1 | 5-1 | 6-1 |
|---|---|---|---|---|---|---|---|---|---|---|
| 1 | Ar | Ar | Dr | Dr | Dr | Dr | Dr | De | De | De |
| 2 | Ar | Ar | Ar | Dr | Dr | Dr | Dr | Dr | De |
Attacks executed at greater than 6-1 are treated as 6-1; attacks executed at worse than 1-5 are treated as 1-5.
Explanation of Combat Results: Ae = Attacker Eliminated; De = Defender Eliminated; Ex = Exchange; Ar = Attacker Retreat; Dr = Defender Retreat (as explained in 7.6).
9.0 Terrain Effects Chart
(See Terrain Key on Map)
| Terrain | Movement Points (MP) to Enter [or Cross] | Effect on Combat |
|---|---|---|
| Clear Hex | 1 MP | No effect |
| Forest Hex | 2 MP | No Effect (See 8.3) |
| Rough Hex (Battle of Nations, Marengo only) | 2 MP | Defender doubled in hex |
| Slope Hexside (Wagram, Marengo, Jena-Auerstadt only) | 1 MP additional to cross moving from Slope hex | Defender doubled when attacked exclusively through Slope hexsides from Slope hexes |
| Road Hex | 1/2 MP if entered through road hexside | Depends on other terrain |
| Trail Hex (Marengo only) | 1 MP if entered through Trail hexside | Depends on other terrain |
| Marsh Hex (Battle of Nations only) | Entry prohibited except through road | Defender doubled in hex |
Note: Terrain Effects are cumulative for Movement purposes, but not for Combat purposes. Thus, to enter a Rough hex through a Stream hexside costs four Movement Points. A unit in a Rough hex which is attacked through a Stream hexside is merely doubled, not quadrupled.
Wagram Exclusive Rules
12.0 Introduction
Wagram is a simulation of the battle which took place between the armies of the Hapsburg Empire under Archduke Charles and the French-Allied armies under Napoleon on July 5th and 6th, 1809. It is a two-Player game on the grand tactical level.
13.0 Initial Deployment Chart
On the Initial Deployment and Reinforcement Charts, an "a" following the unit's type means the unit is artillery; a "c" means cavalry; all other unspecified units are infantry. Units are listed as Strength-Type, then Designation.
13.1 French Army
Within three hexes of hex 0524:
- 6-4 Morand (Mora)
- 6-4 Friant (Fria)
- 6-4 Gudin (Gudi)
- 6-4 Grandjean (Gran)
- 6-4 Demont (Demo)
- 2-6c Grouchy (Grou)
- 2-6c Montburn (Mont)
- 1-6c Pully (Pull)
- 6-4a 1/III
- 6-4a 2/III
Within one hex of 1320:
- 9-4 Claparede (Clap)
- 9-4 Tharreau (Thar)
- 1-6c Colbert (Colb)
- 8-4a II
Within two hexes of hex 1417:
- 8-4 D'Hillier (DHil)
- 4-4 Broussier (Brou)
- 4-4 Lecchi (Lecc)
- 4-4 Pacthod (Pact)
- 6-4a 1/Italian (Ital)
- 6-4a 2/Italian (Ital)
- 1-6c Gerard (Gera)
Within one hex of hex 0517:
- 5-4 Old Guard (OlGd)
- 3-4 Young Guard (YoGd)
- 4-6c Guard (Gd)
- 10-4a Guard (Gd)
Within one hex of hex 0514:
- 8-4 Dupas (Dupa)
- 8-4 Saxons (Sax)
- 2-6c IX
- 6-4a IX
Within two hexes of hex 0714:
- 6-4 Legrand (Legr)
- 6-4 Boudet (Boud)
- 6-4 St. Cyr (StCy)
- 6-4 Molitor (Moli)
- 3-6c LaSalle (LaSa)
- 8-4a 1/IV
- 8-4a 2/IV
Any hex on Lobau Island:
- 9-4 Marmont (Marm)
- 6-4 Reynier (Reyn)
- 5-4 Wrede (Wred)
- 6-6c Reserve (Res)
- 10-1a 1/Reserve (Res)
- 10-1a 2/Reserve (Res)
- 10-1a 3/Reserve (Res)
13.2 Austrian Army
| Hex | Strength-Type | Designation |
|---|---|---|
| 1926 | 6-4 | 1/Advanced Guard (AG) |
| 2025 | 6-4 | 2/Advanced Guard (AG) |
| 1233 | 1-6c | 1/Advanced Guard (AG) |
| 1628 | 2-6c | 2/Advanced Guard (AG) |
| 2026 | 6-4a | Advanced Gaurd (AG) |
| 2220 | 9-4 | 1/II |
| 2123 | 8-4 | 2/II |
| 2124 | 8-4 | 3/II |
| 2323 |
(The printed chart reads "Advanced Gaurd" for hex 2026.)
13.3 Player Sequence
The French Player is the First Player. His Player-Turn is first in each Game-Turn.
14.0 Reinforcements
GENERAL RULE:
Players may receive Reinforcements according to the Reinforcement Chart. These units are placed on the edge of the map in the hex indicated. Reinforcing units arrive during the Player's Movement Phase of the Game-Turn indicated.
CASES:
[14.1] The Owning Player may enter his reinforcement units onto the map at any time during his Movement Phase.
[14.2] Once a unit has entered the map, it may move and engage in combat freely, just as any other unit already present.
[14.3] Each reinforcing unit expends one Movement Point to be placed on the entry hex. Units may exceed the stacking restrictions when entering the map in the same hex, as long as they conform to stacking restrictions by the end of the Movement Phase.
[14.4] Units forced off the map by combat are considered eliminated for Demoralization and Victory Conditions.
[14.5] There are no French Reinforcements.
[14.6] AUSTRIAN REINFORCEMENT CHART
Reinforcements may enter the map in Enemy controlled hexes. They may not enter the map if their specified entry hex is occupied by any unit. Instead, they are delayed until the hexes are vacant.
Arriving on Game-Turn Three on any hex on the west map edge (Strength-Type, Designation):
- 6-4 1/III
- 6-4 2/III
- 5-4 3/III
- 8-4a III
[14.7] SPECIAL AUSTRIAN REINFORCEMENT
COMMENTARY:
Napoleon was concerned that the Archduke John would arrive from the east, bringing additional Austrian reinforcements. In the actual event, John never arrived in time, being of cautious nature and content to await the outcome of Wagram, a day's march away. Napoleon didn't know this and had to fight the battle with one eye over his right shoulder. To duplicate this problem, the possibility exists that the Austrian Player will get reinforcements from the east sometime during the second day of battle.
PROCEDURE:
Beginning on the Seventh Game-Turn (first Day Game-Turn of the second day), the Austrian Player rolls the die at the start of his Player-Turn. If he rolls a "1" he receives the reinforcements enumerated in case 14.71 immediately. These reinforcements enter anyplace on the eastern map edge between hex 1134 and hex 2934 (inclusive). If a "1" is not rolled on the Seventh Game-Turn, the Austrian Player repeats this process Turn by Turn until the Eleventh Game-Turn. If the reinforcements are not entered by the Eleventh Game-Turn, they never arrive and are ignored for the remainder of the game.
[14.71] Austrian Special Reinforcements (Strength-Type, Designation):
- 6-4 1/SR
- 6-4 2/SR
- 6-4 3/SR
- 5-6c SR
- 7-4a SR
[14.72] The Austrian Special Reinforcement units may only enter in hexes which are not controlled by French units (exception to 14.6).
[14.73] If all of the east edge hexes are controlled by French units on the Game-Turn in which the Austrian Player rolls successfully, the Special Reinforcements are held off the map until an east edge hex is free from French control during an Austrian Movement Phase.
[14.74] The Austrian Special Reinforcements may not be delayed. They must enter the map as soon as possible with the exception of case 14.73.
[14.75] Except for the restrictions imposed by the preceding case, the Austrian Special Reinforcements are treated exactly like normal reinforcements.
[14.8] GAME LENGTH
Wagram consists of fourteen Game-Turns (Turns Five and Six are Night Game-Turns).
15.0 Special Rules
GENERAL RULE:
Due to the physical characteristics of certain terrain features and certain units distinct to the Wagram game, the following Special Rules amend the Napoleon at War Standard Rules.
CASES:
[15.1] Cavalry and Artillery units are prohibited from crossing a non-bridged stream hexside. Infantry units may cross a non-bridged Stream hexside at a cost of two additional Movement Points. [Note: This rule should be considered an amendment to case 5.25 of the Standard Rules.]
[15.2] Cavalry and Artillery units' Zones of Control do not extend through a non-bridged stream hexside (exception to 6.4 and 6.6). Cavalry and Artillery may not attack through a non-bridged stream hexside. When they begin the Movement Phase in an Enemy controlled hex, they suffer an automatic Attacker Retreat in lieu of normal combat.
[15.3] The French 10-1 Artillery units may never leave Lobau Island.
16.0 Demoralization
GENERAL RULE:
Demoralization represents the cumulative effect of combat losses on army morale. When an army becomes demoralized, all units of that army permanently lose their ability to exercise an advance after combat (see 7.74 of the Standard Rules).
CASES:
[16.1] DEMORALIZATION LEVELS
[16.11] The French Army is demoralized at the instant that French combat losses reach a total of fifty Combat Strength Points.
[16.12] The Austrian Army is demoralized at the instant that Austrian combat losses reach a total of forty-five Combat Strength Points.
[16.2] OCCURRENCE OF DEMORALIZATION
[16.21] Once an army is demoralized, it remains demoralized for the remainder of the game.
[16.22] Either or both armies may be demoralized. An army is not prevented from becoming demoralized by simple virtue of the other army's having already become demoralized.
17.0 Victory Conditions
GENERAL RULE:
At the end of Game-Turn Fourteen, victory is awarded to the Player who has amassed the greatest number of Victory Points. Players receive Victory Points for destroying Enemy units and for securing certain territorial objectives either during the course of play or at the conclusion of the game. In addition, the Austrian Player receives Victory Points for exiting units off the map. See the Victory Point Schedule (Case 17.1) for the specific Victory Point awards.
PROCEDURE:
Each Player keeps track of the Victory Points that he has scored on a separate sheet of paper. These Victory Points are awarded for a variety of actions as detailed on the Victory Point Schedule (17.1). At the end of the game, the number of Points is totalled for each Player, and the Player with the higher number of Points is awarded a victory.
CASES:
[17.1] VICTORY POINT SCHEDULE
[17.11] Points Awarded During Play
-
Each Player is awarded 1 Victory Point for each Enemy Combat Strength Point eliminated.
-
The Austrian Player receives 25 Victory Points at the instant an Austrian unit enters Aspern (hex 0809 or 0810). He receives 30 Victory Points at the instant an Austrian unit enters Essling (hex 0714, 0813, or 0814). He receives 35 Victory Points at the instant an Austrian unit enters Gross Enzerdorf (hex 0516, 0517 or 0616). Note: During the course of the game the Austrian Player may receive Victory Points only once for each of the three listed towns (see 17.12). Victory Points are awarded for entering any hex in a given town, not for each hex in a particular town.
-
The Austrian Player receives 1 Victory Point for each Austrian Combat Strength Point which exits the western map edge. Only Austrian units may voluntarily exit the map and only off the western map edge. An Austrian unit must expend one Movement Point to exit the map. Austrian units which voluntarily leave the map are not counted for Austrian demoralization or French Victory Point purposes (they are not considered eliminated).
[17.12] Points Awarded at the End of the Game
-
The Austrian Player receives the Victory Point value of Aspern, Essling, and Gross Enzerdorf if an Austrian unit occupies any hex in these towns at the end of the game. Example: The Austrian Player would receive 55 Victory Points at the end of the game if one Austrian unit occupied hex 0809 and a second Austrian unit occupied hex 0813. Note: The Victory Points awarded for Austrian occupation of towns at the end of the game are additional to the Austrian Victory Points awarded for entering these towns during the game.
-
The French Player receives 1 Victory Point for each French Combat Strength Point which is on the Russbach Heights at the end of the game.
[17.2] FRENCH INITIATIVE AND VICTORY GRADES
In the actual battle of Wagram, the French had the burden of attacking if for no other reason than Napoleon simply had to clear the Austrians from the immediate area of the bridgehead, and this meant securing the Russbach Heights at the very least. There was no way he could have simply bivouacked on the Marchfield leaving the Austrians in possession of the hills. For one thing, he was dependent on pontoon bridges for his line of communication to Vienna. If he passively let the Austrians lurk in the immediate vicinity, they might have pounced on him if the Danube flooded. Secondly he wanted to crush the army of Charles before that of John arrived from Hungary.
[17.21] The French Player must have scored at least seventy-five Victory Points at the game's conclusion or he forfeits the game to the Austrian Player, regardless of the relative Victory Point totals. Thus, for example, if the French Player has scored sixty Points and the Austrian Player only ten, the Austrian Player is the winner.
[17.22] Victory is graded according to the margin of victory, expressed as a ratio winner's points to loser's Points. A ratio of 2:1 or better is a Decisive Victory; 1.5:1 or better is a Substantial Victory; and better than one 1:1 is a Marginal Victory.
18.0 Designer's Notes
Design problems in Wagram were almost non-existent. The game was put together by superimposing a map and counter mix on a Blue & Gray series Standard Rules. Stacking was prohibited, since the unit basis was a division rather than a brigade. Artillery was given a range of two hexes, equivalent to 800 meters, in keeping with pre-rifled cannon capabilities. Cavalry was given a movement differential over infantry and artillery to reflect that it fought mounted (unlike the Civil War cavalry). The result was a simple, classical system almost identical to Borodino.
Ridge hexsides and Stream hexsides are the two unusual features introduced into Wagram. Ridge hexsides were used rather than rough terrain, so that a defending force on top of a ridge would find it easier to maintain itself upon the ridge. If the ridges were portrayed as rough terrain hexes with a similar defender benefit, the attacking units (presumably French) would benefit from the hexes as soon as they managed to fight their way onto them. With a ridge hexside, the French must still attack a doubled Austrian defender, but when they advance into the vacated defending hex, they are exposed to a counterattack with no benefit. The exceptional Stream rules were necessary to duplicate the actual effect of the Russbach stream, which is described by all accounts of the battle as a slight obstacle to infantry, but virtually impassable to cavalry and guns due to steep, rocky banks and dense thickets of scrub. On the second day's battle, when Davout was ordered to take Marksgrafneusiedl, he insisted on several hours delay while he backtracked east along the Russbach to a point near Glinzendorf where he could finally get his guns and horses across.
The Demoralization rule is a new attempt at simulating the effects of prolonged combat, casualties and exhaustion on performance. This approach works on the mind of the Player rather than directly affecting unit values. Since the relatively bloodless CRT dictates a maneuver and penetration tactic to cause enemy losses (advancing after combat to pin and then surround by Zones of Control), the loss of the right to advance after combat (demoralization) sharply restricts a Player's offensive options.
19.0 Player's Notes
The strategic situation until July 5th (when Napoleon crossed from Lobau Island onto the eastern shore of the Danube) was as follows. Napoleon controlled all of Austria west of the Danube, including the Austrian capital of Vienna. He had concentrated in the Vienna area his major field forces; the Army of Germany and the Army of Italy. Opposite this concentration was the main Austrian Army under the Archduke Charles. This army had been defeated in the early 1809 Campaign losing Vienna as a consequence, but it had not been crushed and had been able to hand Napoleon a savage repulse at Aspern-Esseling upon his first attempt to cross the Danube. A second Austrian field army under Archduke John, defeated in Italy, is approaching Charles' army by a roundabout route through Hungary to the east. Napoleon is determined to crush Charles before John arrives. Or at least, if Charles refuses battle, Napoleon is determined to drive a wedge between Charles and John. Charles is drawing his supplies and recruits from Bohemia and his main depots lie off the map to the northwest. If Napoleon can sieze the Rossbach and the Danube, he will hold the central position between Charles and John, and be in a position to defeat either in detail. Napoleon is anxious for a conclusive victory. A prolonged war is not to his advantage. It can only bring unrest in Germany, complications with the Russians, further opportunity for the English, and a postponement of any conclusion in the Iberian Peninsula. The Austrians, too, want a decisive engagement. While they still hold Bohemia and Hungary and have strong forces in the field, their capital and their wealthiest provinces in Italy and Austria have fallen to the French. The German princes have not revolted against the French. And the Russians have shown no inclination to back what appears to be a losing horse. Charles decides to deliberately allow the French to cross the Danube and he withdraws his army from its fortifications in front of Lobau Island. He hopes to draw the French into a battle of annihilation on the Marchfield. Thus, the French find their extensive preparations for an assault crossing superfluous as they march over their pontoon bridges onto the Marchfield on the morning of July 5th.
19.1 Grand Tactical Situation (Balance of Forces and Geography)
The initial set-up finds the French Army across the Danube in strength and deploying toward the Austrian positions on the heights behind the river plain. This corresponds to the historical deployment in the middle afternoon of July 5, 1809. A comparison of forces available to each Player shows that the French have a measurable superiority of force even when counting all possible Austrian reinforcements. Balancing this numerical superiority is the enormous strength of the Austrian Russbach position and certain terms of the victory Conditions which reward Austrian raids against the French rear area. Examining the Russbach, the Players will find that it has two lines of defense, the Russbach stream backed up by the escarpment of the heights themselves. Three bastions in the form of the towns of Wagram, Baumersdorf and Marksgrafneusiedl anchor the position while the approaches are covered by the towns of Aderklaa and Grossofen. The woods lying on both sides of the Russbach stream prevent artillery from bombarding defenders on the other side of the stream while the terrain effect of the stream prevents cavalry or artillery from crossing except at bridges. The ridges to the northwest behind Leopoldau and Gerasdorf, while of some hinderance to movement and benefit to the defence, are nowhere near the natural fortress that the Russbach is.
19.2 French Player
On the first day the French Player should seek to establish a position from which he can develop this attack on the Russbach. Practically speaking, this means occupying the towns of Aderklaa, Grosshofen, Glinzendorf and establishing a bridgehead of sorts across the Russbach stream around Glinzendorf or Leopoldsdorf. On his left flank, the French Player would be well advised to develop the situation to determine what in fact are the Austrian intentions are on that flank. This means attacking through Leopoldau north towards Gerasdorf engaging and pinning as many Austrian units as possible. The idea is to force the Austrian to fight to protect the entry hexes of his Third Turn reinforcements. If he does this in strength the French should find it easy to divide the Austrians into two forces; one holding the Russbach position, the other concentrated against the west map edge. However, if the Austrians abandon their entry hexes and move to concentrate on Wagram, the French should seal off the west edge and fight to prevent any additional Austrians from reaching the Russbach. One way or the other, the French Player must stabilize his left flank on the first day hopefully liquidating any Austrian presence there.
During the night, the French should concentrate for the assault on the Russbach. The main thrust will come from Glinzendorf and Leopoldsdorf, hooking up through Siebenbrunn. This has a twofold advantage. First, it isolates the east edge of entry hexes used by the possible second day Austrian reinforcements and it places the French on the easiest approach to the Russbach Heights. By no later than Turn Eleven or Twelve, the French should be assaulting the eastern edge of the Heights. This gives them time to get onto the Heights with sufficient points to win. While developing their right hook, the French should maintain constant pressure on Marksgrafsneusiedl attacking the Austrian garrison at 1-1 or better at every chance.
19.3 Austrian Player
On the First Turn, the Austrian Player must decide what to do with his right flank (the units in the northwest corner of the map). It is too much to hope that the French will leave them alone, so the Austrian must make an immediate decision, to either advance and contest Leopoldau and Sussenbrunn, thus buying space and time to allow his Third Turn reinforcements to arrive or to run for Wagram. The Russbach position is so strong that the Austrian can afford to create a reserve from units behind Baumersdorf and Marksgrafneusiedl. He can use this reserve to pinch out French bridgeheads which inevitably will develop by Glinzendorf or Leopoldsdorf or he can use it to fight for Aderklaa and to link up with the right flank. In either event, he gains nothing by being passive. The worst mistake the Austrian can make is to sit back and let the French seize the complete initiative.
Despite the French superiority, they cannot be strong everywhere. If they mass to crush the Austrian right flank and simultaneously drive in strength toward Siebenbrunn, they cannot be strong in the center. Since the Siebenbrunn flanking maneuver must inevitably compromise the defense of the heights, the Austrian must either counter this move directly with strong forces or indirectly by driving on Raasdorf and threatening to reach Aspern, Essling or Gross Enzerdorf.
Order of Battle
ARMY OF GERMANY (NAPOLEON)
- 2nd Corps (Oudinot): Division (Claparede), Division (Tharreau), Division (Grandjean), Light Cavalry (Colbert).
- 3rd Corps (Davout): Division (Morand), Division (Friant), Division (Gudin), Division (Demont), Light Cavalry (Montbrun), Dragoons (Grouchy), Dragoons (Pully), Artillery (two echelons).
- 4th Corps (Massena): Division (Legrand), Division (Boudet), Division (St. Cyr), Division (Molitor), Cavalry (Lasalle), Artillery (two echelons).
- 9th Corps (Bernadotte): Division (Dupas), Division (Saxon), Light Cavalry, Artillery.
- 11th Corps (Marmont): Composite Division.
- Imperial Guard (Walther): Old Guard, Young Guard, Cavalry, Artillery.
- Reserve: Reserve Cavalry (Bessieres), Division (Wrede) (att from 7th Corps), Composite Division (Reynier), Lobau Artillery (three echelons).
ARMY OF ITALY (EUGENE)
- 1st Corps (Macdonald): Division (D'Hillier), Division (Broussier), Division (Lecchi), Division (Pacthod), Light Cavalry (Gerard), Artillery (two echelons).
IMPERIAL HAPSBURG ARMY (ARCHDUKE CHARLES)
- 1st Corps (Bellegarde): 1st Division, 2nd Division, 3rd Division, Artillery.
- 2nd Corps (Hohenzollern): 1st Division, 2nd Division, 3rd Division, Cavalry, Artillery.
- 3rd Corps (Kollowrat): 1st Division, 2nd Division, 3rd Division, Artillery.
- 4th Corps (Rosenberg): 1st Division, 2nd Division, 3rd Division, Cavalry, Artillery.
- 6th Corps (Klenau): 1st Division, 2nd Division, 3rd Division, Cavalry, Artillery.
- Army Reserve (Lichtenstein): 1st Division, 2nd Division, 1st Cavalry Division, 2nd Cavalry Division, 3rd Cavalry Division, Artillery.
ARMY OF ITALY (NORDMANN)
- Advanced Guard (Nordmann): 1st Division, 2nd Division, 1st Cavalry Division, 2nd Cavalry Division, Artillery.
- Main Body (Archduke John): 1st Division, 2nd Division, 3rd Division, Cavalry, Artillery.