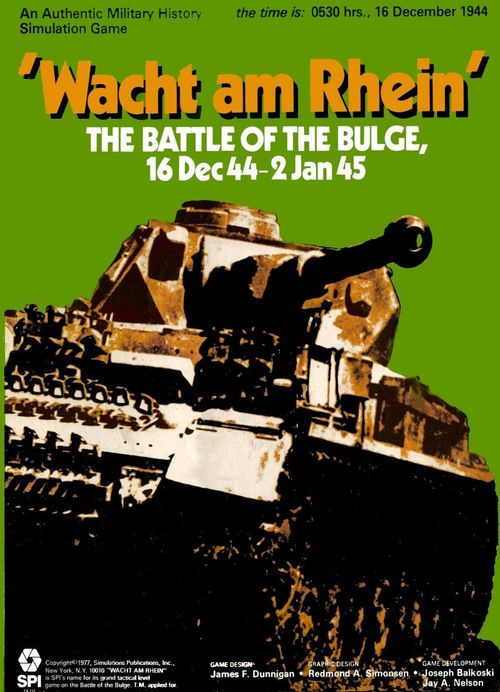
'Wacht am Rhein': The Battle of the Bulge, 16 Dec 44 – 2 Jan 45
'Wacht am Rhein': The Battle of the Bulge, 16 Dec 44 – 2 Jan 45 Rulebook
Table of Contents
Table of Contents
- [1.0] Introduction
- [2.0] Game Equipment
- [2.6] Inventory of Game Parts
- [3.0] Setting Up the Game
- [4.0] Player Orientation and Set-Up Suggestions
- [5.0] Sequence of Play
- [6.0] Movement
- [7.0] Formations
- [8.0] Zones of Control
- [9.0] Stacking
- [10.0] Combat
- [10.1] Which Units May Attack
- [10.2] Multiple Unit and Multi-Hex Combat
- [10.3] Effects of Terrain on Combat
- [10.4] Regimental Integrity Combat Bonus
- [10.5] Combined Arms Combat Bonus
- [10.6] Diversionary Attacks
- [10.7] Combat Resolution
- [10.76] The Combat Results Table
- [10.8] Retreats
- [10.9] Advance After Combat
- [11.0] Artillery
- [12.0] Night Game-Turns
- [13.0] Night Bonus Game-Turns and Fatigue
- [14.0] Supply
- [15.0] Engineers and Bridges
- [16.0] Improved Positions and Entrenchments
- [17.0] U.S. Battalion Breakdown
- [18.0] Weather and Ground Condition
- [19.0] Air Power
- [20.0] Master Air Power Availability and Historical Weather
- [21.0] Reinforcements
- [22.0] Master Reinforcement Schedule
- [23.0] British Movement Restrictions
- [24.0] Optional Rules
- [25.0] Single Map Scenarios
- [26.0] December 21 - The Race for the Meuse
- [27.0] Campaign Game
- [28.0] U.S., German, and British Divisional Organization
- [29.0] Abbreviations
- [30.0] Player's Notes
- Addenda & Errata: Clarifications and New Rules (as of July, 1977)
- Charts and Tables
- [6.8] Terrain Effects Chart
- [10.76] Combat Results Table
- [11.68] Artillery Effects Summary
- [14.68] Supply and Fatigue Effects Summary
- [24.35] Truppeneinheit Table
- [24.47] German Parachute Drop Table
- [18.16] Weather Table
- [18.26] Ground Table
- [19.44] March Mode Interdiction Table
- [25.14c] Green Unit Table
[1.0] Introduction
Wacht am Rhein is not a simple game. There are a great many rules and concepts that will at first be unfamiliar to the Players. To learn the game initially, the Basic Rules should be read thoroughly. The Players should then set up one of the limited scenarios which recreates an important segment of the entire battle. Once familiar with the basic course of play via a scenario or two, Players may proceed to the more complex four-map scenarios or the Campaign Game. Optional rules are also provided for those who have mastered the basic rules and who wish greater realism of play.
[2.0] Game Equipment
[2.1] The Game Map
The game map is composed of four separate 22" x 34" mapsheets which, when placed together, form the Ardennes battlefield. A hexagonal grid pattern is printed on the game map to regulate movement and location of playing pieces and to calculate ranges which affect all types of combat. There are several types of terrain indicated on the map, examples of which are given on the terrain key printed directly on the map.
[2.2] Game Charts and Tables
Various visual aids are provided with the game to simplify and illustrate certain game functions, such as the Combat Results Table, the Terrain Effects Chart, the Weather Determination Table, the Ground Condition Table, the Green Unit Table, the Road Interdiction Table, and the Supply and Fatigue Summary. The use of these graphic aids is explained in the appropriate rules sections.
[2.3] The Playing Pieces
There are 1,600 back-printed playing pieces called "counters" in Wacht am Rhein. Many of these are Informational Counters, such as March Mode markers, Improved Positions markers, Air Point markers, etc. The actual military units in the game are called Combat Counters. They include all the various infantry, armor, artillery, and other service troops with combat strengths on the counters. All Combat Counters contain information giving the historical designation of the unit and its original strength and movement capabilities. Combat counters are colored according to nationality. All non-artillery, non-headquarters combat units are back-printed with the reverse sides of the counters representing the unit's reduced strength after combat involvement. The numbers on both sides of these counters mean the same thing: Attack Strength, Defense Strength, and Movement Allowance respectively from left to right. All artillery units are back-printed, but the reverse side of the counter is not the reduced side. The front side is called the "In Battery" side and the reverse side is called the "Out of Battery" side. The "In Battery" Combat Strengths are Barrage, Final Protective Fire (FPF), and Range respectively. The "Out of Battery" Combat Strengths are Barrage and FPF (always zero), Defense, and Movement Allowance. Note that the reduced sides of non-artillery units and "Out of Battery" sides of artillery units may be distinguished at a glance. Hereafter, Combat Counters are referred to as "units" and Informational Counters are referred to as "markers."
[2.31] Sample Combat Counters
- Typical Infantry Unit: Front and Back each show the Unit Designation, Unit Type, Attack Strength, Defense Strength and Movement Allowance.
- Typical Artillery Unit: Front (In Battery) shows Unit Designation, Unit Type, Barrage Strength, FPF Strength and Range. Back (Out of Battery) shows Barrage and FPF Strength (zero), Defense Strength and Movement Allowance.
- Typical Tank Unit, Typical Anti-Tank Unit (with Gun Type) and Typical Headquarters Unit: Attack Strength, Defense Strength, Movement Allowance, as for infantry.
Note that all units with a Movement Allowance of 6 or less are regarded as "Class A" units; units with a Movement Allowance of 7 or more are regarded as "Class B" units (see Case 6.13).
Those units which, in the Standard Rules, are designated as belonging to "Green" divisions are indicated by a small "G" on the counter (see Case 25.14c).
Unit Designations
Units that are designated according to their organization are indicated in sequence of battalion/regiment, or brigade if British/division (e.g., 3/329/83) or battalion/corps (e.g., 158/VIII). Corps designations are always in roman numerals (see Section 29.0 for a list of type and organizational designations and abbreviations).
Infantry Types: Infantry; Glider Infantry; Airborne (Parachute) Infantry; Mechanized Infantry (Panzergrenadier); Reconnaissance; Ranger or Commando; Engineer.
Artillery Types: Artillery; Airborne Artillery; Self-Propelled Artillery; Rocket.
Tank Type: Tank, Tank Destroyer, or Assault Gun.
Anti-Tank Type: Anti-Tank.
Headquarters: HQ.
[2.32] Sample Informational Counters
Blown Bridge; March Mode; Bottleneck; Blocked; Bridge (Building); Bridge (Completed); Improved Position (Building); Improved Position (Completed); Entrenchment (Building); Entrenchment (Completed); Out of Communications; Unsupplied; Isolated 1; Isolated 2; Fatigue; Recovering; POL; False POL; Ground Support; Weather; Game-Turn; Ground Condition.
[2.4] Definition of Terms
Attack or Defense Strength: The quantification of a unit's strength in terms of attack and defense for the type of combat represented on the Combat Result Table.
Movement Allowance: The quantification of a unit's mobility in terms of Movement points. Basically, a unit expends one Movement-Point for each hexagon of clear terrain it enters. Note that a unit's Movement Allowance is subject to the formation the unit is in.
Formation: Combat units may be in one of two formations: March Mode or Tactical Mode. March Mode represents a formation intended for quickness of movement, either cross-country or on roads. Tactical Mode represents a unit's formation when it expects to engage in combat soon.
Clear Terrain: These hexes represent areas which have few trees and very little sloping of the ground.
Broken Terrain: Hexes which are moderately hilly with few heavily wooded sectors.
Woods Terrain: Hexes which are heavily forested or encompass very steep ridges, gorges, or cliffs. In general, any terrain not suitable for armor.
[2.5] Game Scale
Each hexagon on the map represents approximately one mile on the actual battlefield. Each unit represents either a company, battalion, or regiment. Each AM or PM Game-Turn represents 4 1/2 hours of real time. The AM and PM Game-Turns encompass the hours in which natural daylight was visible. The Night Game-Turn, representing 15 hours of real time, encompasses the hours of darkness. The Night Bonus Game-Turn is an abstract period of time, representing additional effort on the part of troops at night, when they normally would be resting or refitting.
[2.6] Inventory of Game Parts
A complete game of Wacht am Rhein includes:
- One Rules Booklet
- Four different Counter sheets
- Four different Game Map sections
- One plastic die
- Two Game Boxes
- Two identical sets of Charts and Tables
- One German Turn-Record Reinforcement Track
- One U.S. Turn-Record Reinforcement Track
If any parts are missing or damaged, please write: Customer Service, Simulations Publications Inc., 44 E. 23rd Street, New York, N.Y. 10010.
Questions regarding the rules of Wacht am Rhein will be answered if accompanied by a stamped, self-addressed envelope, and if phrased to be answered by a simple one word answer. Send the rules questions to the above address.
[3.0] Setting Up the Game
GENERAL RULE:
The four Map Sections have been designed so that they overlap each other when they are placed together. Players should note that two scenarios may be played on single Map Sections.
PROCEDURE:
The four Map Sections are identified by letter: A, B, C, or D. Section A is the northwest map; Section B is the southwest map; Section C is the northeast map; and Section D is the southeast map. If placed correctly, the 0101 hex will be visible on all four Map Sections and roads will be properly aligned where Map Sections overlap. Note that a hex is identified by Map Section and number (i.e. A3011 is hex number 3011 on Map A).
[4.0] Player Orientation and Set-Up Suggestions
PLAYER ORIENTATION:
One Player is chosen to play the Germans and the other Player is chosen to play the U.S. The U.S. Player controls all Allied units, including British, French, Belgian, and Canadian units, although throughout the rules he is referred to simply as the "U.S. Player". The German Player should sit on the east edge of the map. The U.S. Player should sit on the north or south edge of the map.
SET-UP:
It is strongly suggested that the many counters be sorted into their proper divisional organization as fully permitted by the component trays. The divisional designation number will appear in the upper right-hand corner of the counter or simply on top of the unit's type designation. This sorting will greatly facilitate play, especially regarding the arrival of Reinforcements. For typical divisional organizations for both sides, see Section 28.0.
[5.0] Sequence of Play
[5.1] The Game-Turn
Wacht am Rhein is played in Game-Turns which represent varying amounts of time. Day Game-Turns represent about 4 1/2 hours of real time. Night Game-Turns represent about 15 hours of real time. Each Game-Turn is composed of two Player-Turns, plus numerous independent segments. The Player whose Player-Turn is in progress is called the Phasing Player. Each Game-Turn proceeds strictly as follows.
[5.2] Game-Turn Sequence Outline
A. WEATHER DETERMINATION STAGE
On AM Game-Turns only, the U.S. Player rolls the die and consults the Weather Table to determine the state of the weather for the entire day and adjusts the Weather marker on the Weather Track. The U.S. Player rolls the die again, consults the Ground Chart to determine the current ground condition, and adjusts the Ground marker on the Ground Track to indicate this state.
B. MUTUAL AIR ALLOCATION STAGE
On AM Game-Turns only (starting December 17), both Players allocate Air Points to various missions on their Air Mission Control Displays, but only if the weather is Clear or Mist.
C. SURRENDER STAGE
On AM Game-Turns only, if either Player has units in a state of "Isolated-2", he must roll to determine if all Isolated-2 units of that particular division surrender.
D. U.S. PLAYER-TURN
- Mutual Supply Determination Phase: Both Players, beginning with the German Player, determine the supply status of all their units on the map. Then the U.S. Player may make March Mode Interdiction attacks on German units in March Mode (see Case 19.43).
- Movement Phase:
- a) March Mode Removal Segment: The U.S. Player may remove all March Mode markers from his units subject to the restrictions in the Formation rules. This is the only time during the Game-Turn, other than as a result of combat, that March Mode markers may be removed from units.
- b) Battalion Breakdown Segment: The U.S. Player may break down certain types of battalions into company-size units. Units that break down may not move during the ensuing Movement Segment.
- c) Improved Positions and Entrenchment Segment: The U.S. Player may place Improved Positions or Entrenchment markers on his units with the "Building" symbol showing. Units which already have the Building symbol showing may flip the marker over to reveal the Improved Positions or Entrenchment marker.
- d) In Battery Segment: The U.S. Player flips all of his "Out of Battery" units to their "In Battery" sides (combat sides). If the artillery unit is in March Mode, it may not flip to its In Battery side.
- e) Movement Segment: The U.S. Player may now move whatever units he wishes, subject to the Movement Rules.
- Bridge Blowing and Bridge Building Phase: Any U.S. Engineer units which are in position to blow bridges at this stage may attempt to do so. Roll the die to see if these attempts succeed. U.S. engineer units that are adjacent to River or Creek hexsides (and which have not moved during the immediately preceding Movement Phase) may place completed Bridge markers over any or all adjacent River or Creek hexsides.
- Combat Phase: U.S. units may attack German units according to the Combat Rules.
E. GERMAN PLAYER-TURN
- Mutual Supply Determination Phase: Same as in U.S. Player-Turn except U.S. Player checks supply first.
- Movement Phase:
- a) March Mode Removal Segment: Same as in U.S. Player-Turn applied to German units.
- b) Improved Positions and Entrenchment Segment: Same as in U.S. Player-Turn applied to German units.
- c) In Battery Segment: Same as in U.S. Player-Turn applied to German units.
- d) Movement Segment: Same as in U.S. Player-Turn applied to German units.
- Bridge Blowing and Building Phase: Any German Engineer units which are in position to blow Bridges at this stage may attempt to do so. German Engineer units which are stacked with a Bridge marker may place that Bridge marker on its Building side, but only if the Engineer unit did not move in the immediately preceding Movement Phase. Similarly, German engineers which are stacked under a Building Bridge marker may flip the marker over to reveal a completed Bridge, but only if the engineer unit did not move in the immediately preceding Movement Phase.
- Combat Phase: The German units may attack U.S. units according to the Combat rules.
F. MUTUAL FATIGUE REDUCTION STAGE
Both Players flip Fatigue markers to the Recovering side. All Recovering markers on the map at the beginning of this Stage are removed from the map.
G. GAME-TURN INDICATION
After all actions have been completed as described in this Sequence of Play, the Game-Turn is over. The Game-Turn marker is advanced on the Game-Turn Record Track signaling the start of a new Game-Turn.
[5.3] Night Bonus Game-Turn Sequence of Play
At the end of each Night Game-Turn, but before the start of the AM Game-Turn, the U.S. Player and then the German Player is permitted a Night Bonus Player-Turn. These special Game-Turns follow a special Sequence of Play that is used only in these Game-Turns.
A. U.S. PLAYER-TURN
- Movement Phase
- Combat Phase
B. GERMAN PLAYER-TURN
- Movement Phase
- Combat Phase
The Movement and Combat Phases of this Game-Turn are similar to normal Game-Turns, except there is no In Battery Segment in Night Bonus Game-Turns (see section 13.0).
[6.0] Movement
GENERAL RULE:
During the Movement Phase, the Phasing Player may move as many or as few of his units as he wishes. During his Friendly Movement Phase, each unit may move as many or as few hexes as desired as long as its Movement Allowance is not exceeded in a single Movement Phase. Unused Movement Points may not be accumulated or transferred.
PROCEDURE:
Move each unit individually, tracing the path of its movement through the hexagonal grid. Once the Player's hand is removed from the unit, movement of that unit is considered completed.
CASES:
[6.1] How to Move Units
[6.11] During a Movement Phase, all, some, or none of a Player's units may be moved. Combat may not occur in this Phase.
[6.12] Movement is calculated in terms of Movement Points depending on what type of terrain hex they are entering. These effects are summarized on the Terrain Effects Chart (6.8).
[6.13] There are two classes of units as far as Movement is concerned in Wacht am Rhein. Class A units are all those units which have Movement Allowances of six Movement Points or less. Class B units are all those units which have Movement Allowances of seven or more Movement Points. The Terrain Effects Chart (6.8) summarizes the cost per hex of both Class A and Class B units. For example, it costs two Movement Points for a Class A unit to enter a Woods hex, while it costs a Class B unit six Movement Points to enter the same type of hex.
[6.2] Movement Inhibitions and Prohibitions
[6.21] A Friendly unit may never enter a hex containing an Enemy unit.
[6.22] A unit must stop upon entering a "Rigid" Enemy Zone of Control (see Section 8.0). A Friendly unit must expend two additional Movement Points to leave a "Fluid" Enemy Zone of Control (see Section 8.0).
[6.23] A Friendly unit may leave a "Rigid" Enemy Zone of Control during its Movement Phase, but only if it first enters a non-Enemy controlled hex. This movement costs one-half of the Friendly unit's Movement Allowance (round fractions down) plus the cost of the terrain in the hex entered (see Section 8.0).
[6.24] A unit may not expend more Movement Points than its total Movement Allowance in any single Movement Phase. A unit may use all, some, or none of its Movement Points in a given Movement Phase. However, a unit may not save Movement Points for another Game-Turn or Phase, nor may unused Movement Points be transferred to another unit.
[6.25] Units may move only during their Friendly Movement Phase of each Game-Turn, although there may be some Movement as a result of combat in terms of advances and retreats. These combat results are not considered Movement and do not require the expenditure of Movement Points.
[6.26] Units that are Isolated or Unsupplied may be restricted in terms of Movement capabilities. (See Cases 14.5 and 14.6).
[6.27] Headquarters units have special Movement capabilities. (See Case 6.6).
[6.28] Class A units only may always move at least one hex per Friendly Movement Phase, even if they do not possess enough Movement Points to accomplish this Movement. However, if a Class A unit begins a Movement Phase in a Rigid Enemy Zone of Control, it may never move directly into another Rigid Enemy Zone of Control.
[6.29] Units in March Mode may have to pay different terrain costs per hex than units in Tactical Mode (see Section 7.0).
[6.3] Artillery Movement
[6.31] Artillery units may be either "In Battery" or "Out of Battery." In Battery means that an artillery unit is positioned to use its weapons effectively. Note that the numbers on either side of an artillery unit mean entirely different things, and that the Movement Allowance is printed only on the Out of Battery side (see Cases 2.31, 6.34, and 6.35).
[6.32] Immediately before a German artillery unit is moved, flip the unit from In Battery to Out of Battery. Each time a U.S. artillery unit moves more than one hex, flip the unit to Out of Battery as the unit enters its second hex.
[6.33] An artillery unit on its In Battery side may use its In Battery strengths as described in the Artillery Rules (see Section 11.0 and Cases 11.5 and 2.31).
[6.34] Players must recognize that the strengths at the bottom of In Battery and Out of Battery artillery units represent entirely different things (see Case 2.31).
[6.35] An artillery unit is flipped to Out of Battery immediately before it is moved (see Case 6.32). All Out of Battery artillery units are flipped to In Battery at the beginning of the next Friendly Movement Phase before any movement takes place (see Case 5.1).
[6.4] Effects of Other Friendly Units
[6.41] A Friendly unit may move through hexes occupied by other Friendly units at no extra Movement Point cost (exception: see Section 7.0). The number of units that may end the Movement Phase stacked together in the same hex is subject to the Stacking rules (see Section 9.0).
[6.42] There is no limit to the number of Friendly units that may pass through a single hex in a Game-Turn.
[6.43] Friendly-controlled hexes never interfere with Friendly movement of units.
[6.5] Roads, Bridges, and Rivers
[6.51] Class B units (units with seven or more Movement Points) may not cross Rivers unless the crossing is at a Bridge and the units are in March Mode (see Section 7.0; Exception: see the Terrain Effects Chart and Case 6.53). Class B units may cross Rivers in any Mode at Fords.
[6.51] (as printed; a second Case numbered 6.51) Class B units (units with seven or more Movement Points) may cross River hexsides at Bridges in March Mode only (see Section 7.0; Exception: see Terrain Effects Chart and Case 6.53). Class B units may cross River hexsides at Fords in either Mode. Class A units in Tactical Mode may cross any river hexside that contains neither a Bridge nor a Ford.
[6.52] Class A units (units with six or fewer Movement Points) may cross River hexsides on Bridges in March Mode only (see Section 7.0; Exception: see Terrain Effects Chart and Case 6.53). Class A units may cross River hexsides at Fords in either Mode. Class A units in Tactical Mode may cross any river hexside that contains neither a Bridge nor a Ford.
[6.53] If a Friendly engineer unit is adjacent to or stacked with a Class A unit that is attempting to cross a River, the penalty to the Class A unit becomes +2, not +4. If a Friendly engineer unit is adjacent to or stacked with a Mechanized or Motorized Infantry unit, that unit may cross the River at +4 penalty, even though it is considered to be a Class B unit. If an engineer unit provides this service for any Friendly unit during the Movement Phase, the engineer unit may not participate in combat during the ensuing Combat Phase. See the Terrain Effects Chart for complete details.
[6.54] All units may cross Creeks in either Mode, paying the penalties shown on the Terrain Effects Chart (see 6.8).
[6.6] Headquarters Units
[6.61] All headquarters units pay terrain costs as Class A units when moving in non-road hexes of any kind.
[6.62] All headquarters units pay Class B terrain costs when moving along Primary or Secondary roads. For example, a headquarters unit would pay 2 MP's to enter a Woods hex, but it could move along a Primary Road at 1/3 MP's per hex.
[6.63] Headquarters units may never voluntarily enter an Enemy Zone of Control, be it "Rigid" or "Fluid" (see Section 8.0).
[6.7] Special German and U.S. Movement Restrictions
[6.71] In all scenarios that start in the Dec. 16 Pre-dawn Game-Turn, the U.S. Player is restricted as to which units he may move. Consult the individual scenarios for complete information on these restrictions.
[6.72] In all scenarios that start in the Dec. 16 Pre-dawn Game-Turn, the German Player is restricted as to which units he may move. Consult the individual scenarios for complete information on these restrictions.
[6.8] The Terrain Effects Chart
(see separate sheet)
[7.0] Formations
COMMENTARY:
The importance of roads in the Ardennes has been universally recognized. Units in this type of rugged terrain—especially wheeled and tracked vehicles—had to stick to the roads if they wished to keep up a moderately quick pace throughout the day. Unfortunately, running into engagements in this formation created problems. Usually units would do all their pre-planned fighting in "Tactical Mode"—spread out on a frontage of attack. The characteristics of these two formations were crucial to operations in the Ardennes, and their re-creations the first prerequisite to any realistic Battle of the Bulge game.
GENERAL RULE:
All combat units in Wacht am Rhein may be in one of two formations at any time: Tactical Mode or March Mode. Tactical Mode is the normal state of the unit, and being in such a Mode does not require any special markers. The presence of the unit on the map without a March Mode marker indicates that the unit is in Tactical Mode. Units are in March Mode if they are directly under a March Mode marker. Units in March Mode move faster than units in Tactical Mode, but at the expense of their combat capabilities.
PROCEDURE:
Units in either Movement Mode follow all the Movement rules of Section 6.0 and all the instructions of the Terrain Effects Chart. All units start each scenario in Tactical Mode unless otherwise indicated. It costs Movement Points to change Modes according to the cases listed below.
CASES:
[7.1] When Units May Change Modes
[7.11] Units may enter March Mode at any time during the Friendly Movement Phase. However, units may leave March Mode (in order to change to Tactical Mode) only at the beginning of the Friendly Movement Phase, before the actual movement of the units takes place. (Exception: see Case 7.12).
[7.12] Units in March Mode are obligated to enter Tactical Mode if they engage in combat in March Mode and receive an unfavorable result on the Combat Results Table. This change does not require any Movement Point cost. For example, if a German unit in March Mode attacks a U.S. unit, and the result is an "A1", the March Mode marker is removed from the German unit, but only after the combat result has been fulfilled.
[7.13] You may never voluntarily change Modes in an Enemy Zone of Control, be it "Rigid" or "Fluid" (see Section 8.0).
[7.2] Movement Point Costs to Change Modes
[7.21] All units (except headquarters units) must pay four Movement Points to place a March Mode marker on a unit. This marker may not be placed if: 1) the unit is in a Woods hex; 2) if the unit is stacked with another Friendly unit that already has a March Mode counter on it; or 3) if the unit is in an Enemy Zone of Control.
[7.22] When a unit enters March Mode, place the March Mode marker directly on top of the unit in question. If there are any other markers on the unit (e.g. Isolated or Fatigued), they should be placed above the March Mode marker.
[7.23] All units that remove their March Mode marker in order to enter Tactical Mode must pay four Movement Points to perform this function. This procedure may not be performed in an Enemy Zone of Control.
[7.24] There is no Movement Point cost when a unit is forced to remove its March Mode marker. See Case 7.12.
[7.3] March Mode Inhibitions and Prohibitions
[7.31] Units in March Mode refer to the March Mode columns on the appropriate Class column (A or B) on the Terrain Effects Chart in order to determine the Movement Point cost per hex entered. Only units in March Mode may use Primary or Secondary Road Movement Point costs. Units in Tactical Mode ignore Roads completely and pay Movement Points only for the type of terrain in the hex entered. Units in March Mode may never enter Woods hexes except on roads. If forced to do so, they are eliminated.
[7.32] A unit in March Mode may never stack with another Friendly unit that also is in March Mode. If forced to do so, the unit attempting the move is eliminated (Exception: see Case 9.25).
[7.33] Units in March Mode may freely pass through or stack with units that are not in March Mode (see Case 9.22).
[7.34] Units in March Mode have their Attack and Defense Strengths halved (round fractions down).
[7.35] Units must be in March Mode to use the "Bridge" terrain costs listed on the Terrain Effects Chart. Note that all units may cross Creeks without the aid of Bridges by paying the Movement Point penalty for Creeks. Some units may also cross Rivers without the aid of Bridges by paying the appropriate penalty for crossing Rivers.
[7.36] Units that are in March Mode have "Fluid" Zones of Control (see Case 8.12).
[7.37] When an artillery unit is in March Mode, it is automatically considered "Out of Battery".
[7.4] Moving in March Mode Along Roads
[7.41] It should be noted that being in March Mode does not necessitate moving along Primary or Secondary Roads. Units in March Mode may move into any hex on the map except Woods hexes (unless on roads). Units must be in March Mode in order to use Bridges.
[7.42] Units in March Mode may use the special Movement Point costs for Primary or Secondary Roads only if they enter a particular hex through a hexside containing a Road feature. Check the Terrain Effects Chart for these Movement Point costs.
[7.43] When a unit is moving along a Road in March Mode, keep a cumulative, running total of the Movement Points expended, counting hex by hex using the fractions expressed on the appropriate column of the Terrain Effects Chart. For example, when a U.S. Class B unit is moving along a Primary Road, count "1/3, 2/3, 1 1/3, 1 2/3, 2, 2 1/3," etc. When changing Road types, the cumulative Movement Point total is rounded up to the nearest whole number on the last hex entered before changing Road types. For example, if a U.S. Class B unit had a 2 1/3 cumulative Movement Point total and, in the next hex entered, switched from a Primary Road to a Secondary Road, it would round up 2 1/3 to 3 and then proceed to move along the Secondary Road paying 1/2 MP's per hex entered. If the last hex entered before switching Road types is a whole number, it is then unnecessary to round any number up, and the unit may proceed along the new Road type normally.
[7.5] Headquarters Units
Headquarters units are always in Tactical Mode. They may never enter March Mode. When moving off Roads, they move as Class A units. They may travel along Roads without entering March Mode using the Movement Point costs listed for their nationality for "Class B units, March Mode".
[7.6] Reinforcements
[7.61] All units entering the game as reinforcements come on in March Mode (except headquarters units).
[7.62] Reinforcements will be assigned specific Road hexes to enter the map on. Reinforcements must be placed one behind the other in the Staging Area provided along the map border. The Movement Point cost for each Staging Area hex entered by units behind the lead unit is the same as the type of Road hex that the lead unit will enter on. Each unit behind the lead unit moves along these Staging Area hexes as if they were the type of Road hexes that the formation is entering the map on.
[8.0] Zones of Control
COMMENTARY:
Zones of Control simulate the power that combat units exert over hexes not actually occupied by the counter. Some types of units are more effective in exerting this power than others. The more effective units were usually the true "combat" units, which would defend on precise frontages both on attack and defense. Other types of units would probably defend in strongpoints, between which it was quite possible for the enemy to slip.
GENERAL RULE:
The six hexagons immediately surrounding a given unit (or stack of units) constitute that unit's Zone of Control. These Zones of Control affect Movement, Combat, and Supply. Some units exert Zones of Control that are "Rigid", some exert Zones of Control that are "Fluid", and some units exert no Zones of Control at all. Hexes upon which units exert Zones of Control are called Controlled Hexes.
CASES:
[8.1] Which Units Exert Zones of Control
[8.11] All full-strength battalion units in Tactical Mode exert "Rigid" Zones of Control, with the exceptions of engineer and artillery battalions.
[8.12] All reduced units, company units, engineer and artillery units, and all units in March Mode exert "Fluid" Zones of Control.
[8.13] Headquarters units never exert any Zones of Control.
[8.14] Any unit that has an Entrenched marker on top of it exerts a Rigid Zone of Control (except headquarters units) regardless of the type of unit under the Entrenchment marker.
[8.2] Effectiveness of Zones of Control
[8.21] All units that exert a Zone of Control exert it at all times during the entire Game-Turn.
[8.22] Units never pay an additional cost to enter an Enemy-Controlled hex.
[8.23] Friendly Zones of Control never affect Friendly units—only Enemy units.
[8.24] If an Enemy unit and a Friendly unit, both of which exert Zones of Control, are adjacent to each other, both units are jointly affected by each other's respective Zones of Control.
[8.25] Zones of Control extend into all six hexes surrounding the controlling unit's hex except across River hexsides. Zones of Control extend across River hexsides only at a Bridge or a Ford. No other terrain affects Zones of Control.
[8.26] There is no additional effect in having more than one unit exert its Zone of Control into a given hex.
[8.3] Zones of Control and Movement
[8.31] All units must cease movement immediately upon entering an Enemy Rigid Zone of Control. They may move no further in that Movement Phase.
[8.32] Units in an Enemy Rigid Zone of Control at the beginning of their Movement Phase may leave that Zone, but only if the units move directly to a hex that is not a Rigid Enemy Zone of Control. Units may never move directly from one Rigid Zone of Control to another, except as a result of combat. The Movement Point cost to leave an Enemy Rigid Zone of Control is one-half the Movement Allowance of the unit leaving the Zone (round fractions down) plus the terrain cost of the hex entered.
[8.33] Units that enter an Enemy Fluid Zone of Control are not obligated to stop movement immediately; they may continue movement and may immediately enter another Enemy Zone of Control (Rigid or Fluid) that same Phase. The only penalty incurred is a cost of two additional Movement Points to leave an Enemy Fluid Zone of Control. For example, if a U.S. Class B unit with a Movement Allowance of twelve leaves a German Fluid Zone and enters a Broken hex, it would cost five Movement Points (three for the Broken hex and two to leave the Zone).
[8.34] Units may move freely and without penalty into and through hexes that are adjacent to units which exert no Zone of Control.
[8.35] Units which do not exert Zones of Control may never voluntarily move into an Enemy Zone of Control.
[8.36] Class A units may always move at least one hex per Movement Phase (even if they do not possess enough Movement Points to accomplish this movement. See Case 6.28).
[8.37] Friendly units do not negate Enemy Zones of Control in the hexes they occupy for the purposes of movement.
[8.4] Zones of Control and Combat
[8.41] Units which are in an Enemy Zone of Control (Rigid or Fluid) at the beginning of their Combat Phase must attack all of those units in some way during the Friendly Combat Phase (see Section 10.0; Exceptions: see Cases 10.87 and 14.66).
[8.42] Headquarters units may never attack. If they find themselves in an Enemy Zone of Control during their Combat Phase, they are immediately eliminated (see Case 10.87).
[8.43] Units which occupy Town or Village hexes or which are under Improved Position or Entrenchment markers are not obligated to attack adjacent Enemy units in their Friendly Combat Phase. They may remain in these hexes for the duration of their Combat Phase without attacking. Adjacent Enemy units are still obligated to attack these units in their own Combat Phase (unless of course the Enemy units also occupy a Town, Village, Improved Positions, or Entrenchments hex).
[8.44] Units may retreat through Enemy Zones of Control as a result of combat. For each and every Enemy Zone of Control entered, the retreating stack would lose one "step" of strength (see Case 10.85).
[8.45] Friendly units do not negate Enemy Zones of Control for the purposes of retreats.
[8.5] Zones of Control and Supply
[8.51] The presence of a Friendly Rigid Zone of Control in a hex blocks the tracing of Enemy supply through that hex (Exception: see Case 8.53).
[8.52] Fluid Zones of Control do not block the tracing of supply.
[8.53] Friendly units (not Friendly ZOC's) negate the presence of Enemy Zones of Control in the hexes they occupy for the purposes of tracing supply.
[8.6] Zones of Control and Isolated Units
Units that are Isolated do not exert Zones of Control, although as soon as the Isolated marker is removed, the unit exerts its normal ZOC. Units that are Isolated still may attack (see Case 14.66).
[9.0] Stacking
COMMENTARY:
The number of troops committed to the Ardennes relative to the area of the battlefield was quite high. The Germans, and later the Americans, threw enormous numbers of formations into very small frontages, both on the attack and on the defense. The Stacking rules attempt to simulate the capabilities of both armies as far as concentrating troops for attack and spreading them for defense were concerned.
GENERAL RULE:
No more than three combat units may ever occupy a hex at the end of a Friendly Movement Phase, no matter what size the units in question are (e.g. company or battalion) (see Case 9.5). There are further restrictions for units in March Mode. Informational Markers never count against stacking restrictions.
CASES:
[9.1] Stacking and Tactical Mode
[9.11] At the end of a Friendly Movement Phase, as many as three Friendly combat units in Tactical Mode may occupy the same hex. Similarly, at the end of a Friendly Movement Phase, two units in Tactical Mode and one unit in March Mode may occupy the same hex.
[9.12] Stacking restrictions apply only at the end of a Friendly Movement Phase. During the Movement Phase, Friendly units may freely enter and pass through three-high stacks of units. If stacks of units are found to be in excess of the restrictions at the end of the Movement Phase, the excess must be eliminated. The choice of which units to eliminate is left to the Owning Player.
[9.13] There is no Movement Point cost to stack or unstack.
[9.14] Stacking restrictions apply to all combat units except headquarters, whether the units are companies or battalions.
[9.2] Stacking and March Mode
[9.21] A unit that is in March Mode may never stack with or move through a hex containing another unit that is in March Mode at any time. (Exception: see Case 9.25).
[9.22] Units in March Mode may freely pass through hexes that are occupied by Friendly units that are not in March Mode. They may also stack with units in Tactical Mode up to the stacking restrictions for Tactical Mode, but there may not be another unit in March Mode in that stack.
[9.23] The stacking restrictions for units in March Mode apply at all times during the Game-Turn. A unit in March Mode may not pass through or end its Movement in a hex occupied by another unit in March Mode during the Friendly Movement Phase.
[9.24] A unit may freely enter March Mode when stacked with a unit(s) that are in Tactical Mode.
[9.25] A U.S. company-size unit and a U.S. battalion-size unit may enter March Mode under one March Mode marker as a team if they started that Friendly Movement Phase in the same hex. This team is considered to be one unit for March Mode purposes and does not violate the March Mode stacking restrictions. When one of these units goes out of March Mode, the other must also. However, when stacking with units in Tactical Mode, this team counts as two units towards the stacking restrictions of three units per hex.
[9.3] Stacking and Combat
[9.31] In a stack, two battalion-size units plus one company-size unit may participate in combat during either Player's Combat Phase (Exception: see 9.32).
[9.32] If a stack of units is composed only of artillery units, all three (or fewer) of these units may use their Barrage or Final Protective Fire strengths from the same hex regardless of the units' sizes.
[9.33] The choice of which units in a stack will participate in combat according to the restrictions of Case 9.31 is left to the owning Player. For example, if the German Player were attacking with a stack of three battalion-size units, he would be obligated to choose which one of those battalions would not participate in that combat. The unit that does not participate may remain in the hex, although it is thus affected by the results of that combat. Also, the unit that is not participating in combat may not attack a different hex. It may not participate in combat at all in that Combat Phase, although it may advance or retreat as a result of combat.
[9.34] The stacking rules limiting combat participation apply both to attack and to defense.
[9.35] Note that since stacking restrictions apply only at the end of the Movement Phase for Tactical Mode, units in this formation may retreat as a result of combat onto Friendly stacks in violation of stacking restrictions. This situation must be corrected at the end of the next Friendly Movement Phase. Units in March Mode may retreat onto Friendly stacks of units in Tactical Mode in violation of stacking restrictions. Units in March Mode may not retreat onto any Friendly units in March Mode. If forced to do so, they are eliminated.
[9.4] Stacking and Zones of Control
If a unit that exerts a Rigid Zone of Control is stacked in a hex with a unit that exerts a Fluid Zone of Control, the stack is considered to exert a Rigid Zone of Control.
[9.5] Stacking and Headquarters Units
Headquarters units are never subject to stacking restrictions, and may stack for "free"—i.e., not subject to the stacking rules—with any Friendly unit or stack in either Mode not in an Enemy Zone of Control.
[10.0] Combat
GENERAL RULE:
Friendly units that are in an Enemy Zone of Control (Rigid or Fluid) during the Friendly Combat Phase must attack the Enemy unit(s) exerting the Zone of Control. (Note that although units in either state of Isolation exert no Zone of Control, Friendly units must still attack each and every Isolated Enemy unit within their Zone of Control. See Case 14.66).
A given unit's Attack and Defense Strengths are always unitary. That is, a unit's Strength may not be divided among different combats, either for attack or defense. Artillery units (see Section 11.0) are the only units which may lend their combat strengths in attacks on units to which they are not adjacent. See also the Air Power rules (Section 19.0).
The Phasing Player is termed the attacker; the Non-Phasing Player is termed the defender, regardless of the overall strategic situation.
PROCEDURE:
Total the Attack Strengths, Barrage Strengths, and Ground Support Strengths of all units that are participating in combat against a specific hex according to the Combat, Artillery, and Air Power rules. Then the defending Player totals his Defense Strengths and the Final Protective Fire (FPF) artillery points that he is able and willing to allocate to this defense. Compare the total Attack Strength to the total Defense strengths and state this comparison as a probability ratio: Attacker's Strength to Defender's Strength. Round the ratio in favor of the Defender to conform to the simplified ratio columns found on the Combat Results Table. Next, determine the terrain of the hex the Defender is located in. (If he is defending in more than one hex, or could conceivably defend on two different lines on the CRT, choose the Terrain line most favorable to the Defender.) Cross-index this Terrain line with the proper odds on the CRT. Then make whatever "shifts" in columns are necessary for this combat. The shifts, if any are called for, are to the left or right on the same Terrain line on the CRT. Now roll the die and read the result on the appropriate line under the ratio. Apply the result immediately, before resolving any other attacks. Separate combats may be resolved in any order the attacker wishes, so long as all required combats are resolved during that Combat Phase.
CASES:
[10.1] Which Units May Attack
[10.11] Every non-Phasing unit adjacent to a Phasing unit must be attacked by some Phasing unit during that Combat Phase (Exceptions: see Cases 9.31, 10.12, 10.14, and 14.66). The Phasing Player may resolve these attacks in any order as long as all adjacent units are attacked within the requirements of Case 10.2.
[10.12] Two battalion-size units plus one company-size unit may participate in combat from the same hex during either Player's Combat Phase. Thus, a Player with a stack of three battalion-size units in an Enemy Zone of Control could only attack or defend with two of those battalions (see Case 9.31).
[10.13] All of the Phasing Player's units which end their Movement Phase in an Enemy-controlled hex must attack some unit during the ensuing Combat Phase (Exceptions: see Cases 10.12 and 10.14). Note that it is permissible to move out of an Enemy Zone of Control during the Friendly Movement Phase if a Player wishes to avoid mandatory combat (see Cases 6.22 and 6.23). The Phasing Player may choose which Friendly units will attack each adjacent defending Enemy unit, as long as all adjacent Enemy units are attacked (see Case 9.31).
[10.14] For the purposes of combat, Enemy Zones of Control do not extend into Town or Village hexes or hexes occupied by Friendly units under Improved Position or Entrenchment markers. Thus, Friendly units occupying these positions are not obligated to attack adjacent Enemy units during the Friendly Combat Phase. They may remain in these positions until they leave of their own accord or are forced out by combat. Enemy units adjacent to Friendly units in these positions during the Enemy Combat Phase are still obligated to attack those Friendly units (unless of course the Enemy units also occupy a Town, Village, Improved Positions, or Entrenchment hex).
[10.15] A defending unit may be attacked from as many as six adjacent hexes, with possible additional Barrage or Air Power points. However, both the attacking and defending Players are permitted to use the Combat Strengths of only two battalion-size units and one company-size unit from a single hex in a Combat Phase (see Case 9.31).
[10.16] No unit may attack more than once per Combat Phase, and no Enemy unit may be attacked more than once per Combat Phase (Exception: see Case 10.86).
[10.17] Non-artillery units may attack only from a hex adjacent to the defending unit(s).
[10.18] Units which are in March Mode have all their Combat Strengths halved (round fractions down). Artillery units may not use their Barrage or FPF strengths at all while in March Mode.
[10.19] Units with a parenthesized Attack Strength may not attack when by themselves in a hex. If they are alone in a hex that is adjacent to an Enemy-occupied hex during their Friendly Combat Phase, they are immediately eliminated. Units with a parenthesized Attack Strength may be stacked with other Friendly units in an Enemy Zone of Control during their Combat Phase. In this case, they may add their parenthesized Attack Strength to the Attack Strengths of the other Friendly units in the hex if an attack is being made. Units with a parenthesized Attack Strength may freely defend while alone or stacked with Friendly units in a hex.
[10.2] Multiple Unit and Multi-Hex Combat
[10.21] If a Phasing Player's unit is in the Zone of Control of more than one Enemy unit, it must attack all those adjacent Enemy units which are not engaged by some other attacking unit.
[10.22] Units in two or more different hexes may combine their Attack Strengths to attack a single hex.
[10.23] All units in a given hex must be attacked as a single Defense Strength. The defender may not withhold a unit in a hex under attack, except as called for in the Stacking-Combat restriction described in Case 9.31. When more than one unit occupies a single hex, those units may not be attacked individually. An attack on that hex involves all units in the hex.
[10.24] When a single hex contains more than one unit, each of those units may attack a different hex at the Owning Player's discretion. Remember though, that only two battalion-size units plus one company-size unit may ever use their Combat Strengths from a single hex.
[10.25] A single attack may involve numerous attacking or defending units. For an attack to be resolved as a single combat however, all the attacking units must be adjacent to all the defending units (with the exception of Barrage or FPF points, for which artillery units need not be adjacent).
[10.26] If multiple units subject to a single attack are defending in more than one hex, use the terrain line on the CRT most favorable to the defender.
[10.3] Effects of Terrain on Combat
There are no increases or decreases of Attack or Defense Strengths because of terrain. Instead, the Combat Results Table is "Integrated". After determining the combat ratio, simply determine the terrain type that the defending unit is in and locate the appropriate line on the CRT. Cross-index this line with the correct ratio for a final result.
[10.4] Regimental Integrity Combat Bonus
[10.41] If two infantry or mechanized infantry battalions of the same regiment and division are stacked in the same hex, and that stack is either initiating an attack or defending in a combat, that stack receives a "Regimental Integrity" bonus. For example, if the 1/393/99 and the 2/393/99 were engaging in combat from the same hex, that stack would receive the Regimental Integrity combat bonus.
[10.42] When the Regimental Integrity bonus is applied to an attacking stack, shift the final odds one column to the right on the appropriate terrain line on the CRT. When the bonus is applied to a defending stack, shift the final odds one column to the left on the appropriate terrain line on the CRT. (These "shifts" are in addition to other possible "shifts", such as for "Combined Arms" attacks; see Case 10.5). For example, if the U.S. Player is attacking on the 5-1 column on the Broken terrain line and he fulfills the requirements for Regimental Integrity, the odds column would become 6-1 on the Broken terrain line on the CRT.
[10.43] The Regimental Integrity Bonus can be awarded only to infantry, mechanized infantry, glider infantry, and parachute infantry.
[10.44] To receive the Regimental Integrity bonus, units of the same regiment and division must be stacked in the same hex, but those units need not both participate in the ensuing combat. It is necessary that only one of the units participate in that combat. For example, if the 1/393/99 and the 2/393/99 and the 70/4xx Tank battalion were all attacking from the same hex, one of these units would be ineligible to participate in the combat according to Case 9.31. The U.S. Player could choose to use the 1/393/99 and the 70/4xx Tank battalion for this attack. He still would receive the Regimental Integrity bonus, however.
[10.5] Combined Arms Combat Bonus
[10.51] If any tank unit (any unit that bears only a pure tank symbol) is stacked in a hex with a combat unit that is not an artillery, anti-tank artillery, or tank unit (as defined above), and that stack is attacking, that stack receives a "Combined Arms Attack Bonus."
(Diagram: a pure tank unit plus an infantry-type unit (infantry, glider, airborne, mechanized, reconnaissance, ranger/commando or engineer) = Combined Arms Attack Bonus.)
[10.52] When the Combined Arms Attack Bonus is applied to an attacking stack, shift the final odds one column to the right on the appropriate terrain line on the CRT. For example, if the U.S. Player were attacking with the 1/393/99 and the 70/4xx tank battalion, he would fulfill the Combined Arms requirements. The odds column would be shifted one to the right (in addition to any other shifts that might be applied) before the die is rolled.
[10.53] If any tank unit (as defined above) or any unit that bears an anti-tank artillery symbol is stacked in a hex with a combat unit that is not an artillery, anti-tank artillery, or tank unit, and that stack is defending, the stack receives a "Combined Arms Defense Bonus."
(Diagram: a tank unit or an anti-tank unit + (units listed in 10.51) = Combined Arms Defense Bonus.)
[10.54] The Combined Arms Defense Bonus only nullifies an attacker's Combined Arms Attack Bonus. It may not be used if the attacker does not possess a Combined Arms Bonus. If both the attacker and the defender possess a Combined Arms Bonus, then these Bonuses negate each other and neither Player receives any Combined Arms Bonus at all. Other "shifts" (such as Regimental Integrity) may still be awarded.
[10.55] Units which fulfill the Combined Arms requirements described in Cases 10.51 and 10.53 need not actually participate in the ensuing combat. As long as all the units necessary to fulfill the Combined Arms requirements are stacked in the same hex and some units in that hex are attacking, the Combined Arms Bonus may be awarded. For example, if the 1/393/99, the 2/393/99, and the 70/4xx tank battalion were all stacked in the same hex adjacent to some German units, one of these U.S. units would be ineligible to participate in the combat according to Case 9.31. The U.S. Player chooses to use the Combat Strengths of the 1/393/99 and the 2/393/99 for the attack, yet he still receives the Combined Arms Attack Bonus because of the presence of the 70/4xx Tank unit. (In this example, the U.S. Player would also receive a Regimental Integrity Bonus. See Case 10.4).
[10.6] Diversionary Attacks
[10.61] In making a series of attacks, a Player may allocate his attacking units so that some attacks are made at "poor" ratios in order that adjacent attacks may be made at more advantageous ratios (by allotting most of the attacking forces to the major objectives). These attacks are known as diversionary or holding attacks.
[10.62] All attacks must meet the minimum odds column printed on the Combat Results Table, before any Final Protective Fire is allocated by the defending Player. Thus, an attack against units defending in Broken terrain must be at least 1-3 before FPF is allocated. If the allocation of FPF makes the odds lower than 1-3 in any terrain, resolve the attack on the 1-3 Broken terrain column. If an attacking unit cannot meet the minimum odds requirements before FPF is allocated, the attacking unit(s) are eliminated. Resolve all attacks that are greater than the highest ratios on the CRT on the highest column on the CRT.
[10.63] The Phasing Player may never voluntarily reduce the ratio of a given attack.
[10.7] Combat Resolution
[10.71] Each non-artillery battalion-size unit in Wacht am Rhein consists of two "steps" of strength, shown on either side of the counter. Units always start the game with the stronger of their two sides showing. These units may be reduced in steps or eliminated as a result of combat. For example, if a unit takes a one step loss, the counter must be flipped from the stronger to the weaker side to signify this change. A unit that is required to take a two step loss must be eliminated. If a unit is already on its reduced side, then a one step loss calls for the unit's elimination.
[10.72] All company-size, all artillery, and all headquarters units consist of one step only. A loss of one step means that the unit is eliminated.
[10.73] All combat results are expressed in terms of steps lost and/or hexes retreated. The letters "A" and "D" stand for Attacker and Defender respectively.
[10.74] All combat results are expressed in terms of a number(s) preceded by the letters "A" or "D". All numbers which are parenthesized in the combat results indicate mandatory step losses for the player indicated by the preceding letter.
[10.75] All numbers which are not parenthesized in the combat result mean that the affected unit(s) must either retreat the indicated number of hexes, lose the indicated number of steps, or do both—as long as the number of hexes retreated plus the number of steps lost equals the combat result non-parenthesized number. All units in the affected stack are affected by the combat result, although all units do not have to lose a step if one-step loss is called for—a single unit in the affected stack may fulfill this loss. Two or more units in a stack may take losses if more than a one-step loss is called for. For example, as a result of combat, a "D3(2)" result is called for. The defending Player immediately removes two steps from his units in any fashion desired. Then he must either retreat three hexes, lose three more steps, retreat two hexes and lose one more step, or retreat one hex and lose two more steps. Of course, if the stack is eliminated as a result of the initial mandatory step loss, ignore the retreat results.
[10.76] The Combat Results Table
(see separate sheet)
[10.8] Retreats
[10.81] Retreats are always optional. The Player may choose to lose steps rather than retreat (see Case 10.7).
[10.82] Retreats are expressed in terms of hexes, not Movement Points. Never assess Movement costs when retreating a unit.
[10.83] A unit may not retreat into a hex or across a hexside that is normally prohibited to that unit. For example, a Class B unit may not retreat into a Woods hex if it is in March Mode. Also, a Class B unit may not retreat across a River unless it is in March Mode and there is a Bridge across that hexside (or if a Ford is present).
[10.84] Retreats are conducted by the Owning Player. When a retreat is called for, move the stack as a whole (not each unit individually) according to the following priorities:
- (a) Towards a non-Enemy controlled hex
- (b) Towards a Friendly map edge (east for the Germans, north, south, or west for the U.S.).
- (c) To a vacant hex
- (d) Towards terrain that would cost the fewest Movement Points for that type of unit if it were moving during the Movement Phase.
In accordance with these four priorities, the Owning Player may retreat his units in any way he sees fit, as long as no retreating unit or stack enters any hex more than once.
[10.85] A unit may retreat through Enemy Zones of Control, whether the controlled hexes are occupied by Friendly units or not. However, for each Enemy Zone of Control entered during this retreat, the Owning Player must lose one step from some unit in the retreating stack.
[10.86] A unit may retreat in violation of stacking limitations so long as this situation is corrected by the end of the next Friendly Movement Phase (see Case 9.35). If a unit is forced to retreat into a Friendly-occupied hex and that hex then undergoes an attack, the retreated unit may never add its defense strengths to the units in that hex. However, if that new hex suffers any combat result, the previously retreated unit is automatically eliminated, regardless of whether the Player decides to retreat or not.
[10.87] Any headquarters unit may retreat one hex if it is subject to attack in a Combat Phase. This retreat is conducted before the resolution of the combat, and if the retreat is chosen the combat is not resolved. The attacking units may advance into the hex formerly occupied by the headquarters unit, but they may not attack again that Phase.
[10.9] Advance After Combat
[10.91] Whenever an Enemy unit(s) is forced to retreat (or is eliminated) leaving a hex vacant as a result of combat, it will leave a path of vacant hexes behind it called the Path of Retreat. Any victorious units which participated in (or are stacked with units which participated in) the combat are allowed to advance along this Path of Retreat, and sometimes deviate from it.
[10.92] The Advance after Combat may always be as many hexes as the defeated unit retreated (Exception: see Case 10.93). For example, if a "D2" result were called for, and the defeated unit retreated two hexes, the victorious unit(s) may advance two hexes. If a unit is eliminated as a result of combat, the victorious unit(s) may advance the number of hexes remaining in the defeated unit's unparenthesized combat result retreat obligation. For example, if a company-size unit receives a "D2" result and the Owning Player decides to eliminate the unit in its original hex, the victorious unit(s) could advance one hex, since that is the number remaining in the company's combat result obligation.
[10.93] A victorious unit that is in March Mode may always advance one more hex than the combat result allows, as long as the unit does not enter terrain that it would not be able to enter normally, during the Friendly Movement Phase.
[10.94] Advances after Combat are conducted as follows: move each victorious unit individually. The first hex entered must be the hex originally occupied by the defeated unit(s). Then all units except those units bearing a pure tank symbol or a reconnaissance symbol may advance the permissible number of hexes exactly along the Path of Retreat just conducted by the defeated Player. This move is performed hex-by-hex, and may not deviate from the Path of Retreat. Units which bear the pure tank symbol or the reconnaissance symbol may also advance the permitted number of hexes, but they may deviate freely from the Path of Retreat. Regardless of what type the victorious units are, they must stop immediately and move no farther upon entering an Enemy Zone of Control, not including the first hex entered during this advance.
[10.95] The victorious units may cease their advance at any point during their movement. They are never required to advance.
[10.96] Unlike retreats, a Player may never violate stacking restrictions as a result of an Advance after Combat.
[10.97] A unit may not advance into a hex or across a hexside that would normally be prohibited during the Friendly Movement Phase. For example, a Class B unit may not advance across a River unless it is in March Mode and there is a Bridge across that hexside (or if a Ford is present).
[10.98] A unit that advances after combat across a River hexside must halt its advance in the first hex it enters after crossing the River hexside.
[11.0] Artillery
GENERAL RULE:
Artillery units may participate in combat either from adjacent or from non-adjacent hexes. The artillery unit's Barrage Strength may be used to attack Enemy units, either alone or in conjunction with non-artillery units. The artillery unit's Final Protective Fire (FPF) Strength may be used to supplement the Defense Strengths of other Friendly defending units. In any case, artillery units must be within Range of the defending unit although they need not be adjacent to it. Each artillery unit has its own specific Range Allowance printed on the counter (in hexes). An artillery unit may use both its Barrage Strength and its FPF Strength in a single Game-Turn. When attacked, an artillery unit defends with its own Defense Strength. Artillery units which are Out of Battery may not use their Barrage or FPF Strengths at all. They may use their Defense Strengths.
CASES:
[11.1] Artillery Divisional and Corps Integrity
[11.11] Each artillery unit bears either a division or corps number. This is the unit to which that artillery unit is inherently attached.
[11.12] Artillery units may use their full Barrage and FPF Strengths only in conjunction with combat units of the same organization. Artillery units which bear a division number may use their full Barrage and FPF Strengths "in support" (see Case 11.13), only of combat units which bear the same division number. Artillery units which bear a corps designation may "support" any combat unit that belongs to the same corps. (To check what corps a combat unit belongs to, find the unit's divisional headquarters counter. If that headquarters counter bears the same corps designation as the artillery unit, the artillery unit may "support" that combat unit with its full Barrage and FPF Strengths.)
[11.13] To "support" a combat unit means that the artillery unit is using its Barrage or FPF points to aid in an attack or defense by units of the same nationality.
[11.14] An artillery unit may support a combat unit that does not inherently belong to the same parent formation, as long as it is of the same nationality. However, the artillery unit halves its Barrage or FPF Strengths (round fractions down) before allocating these Strengths to the hex in question. For example, an artillery battalion of the 2nd U.S. Division may support the 1/393/99 infantry battalion only by halving its Barrage and FPF Strengths because the 1/393/99 is from the 99th Division.
[11.15] An artillery unit may never support a combat unit of a different nationality. For example, British artillery units may not support U.S. units and vice versa.
[11.16] If a combat unit bears only a Corps designation, then any artillery unit that belongs to the same Corps (including artillery units that bear a division number but belong to the same Corps) may support that unit. To determine what Corps a unit belongs to (if it is not printed on the counter) find the divisional headquarters unit of the unit in question. That headquarters unit will bear the correct Corps designation.
[11.2] Combined Attacks
[11.21] Artillery units may attack in conjunction with Friendly non-artillery units that are attacking Enemy units in that Combat Phase. These attacks are called Combined Attacks.
[11.22] The artillery unit may be adjacent to the Enemy unit, or simply be within range (printed on the counter). In either case, the artillery unit must use its Barrage Strength to perform a Combined Attack.
[11.23] The Barrage Strength of an artillery unit may be used only in the Friendly Combat Phase.
[11.24] When Friendly units are attacking adjacent Enemy units in more than one hex, the Barraging artillery units need be within range (in hexes) of only one of the defending units in order to add their Barrage Strength to the attack.
[11.25] An artillery unit that is making a Combined attack from a non-adjacent hex is never affected by any Combat Results. They are never destroyed or retreated as a result of these attacks.
[11.3] Barrage Attacks
[11.31] When an artillery unit attacks either adjacent or in-range Enemy units without combining its attack with other Friendly non-artillery units, that attack is a Barrage attack.
[11.32] Barrage attacks may be performed only if a Friendly unit is adjacent to the Enemy unit that is going to be attacked. This adjacent Friendly unit need not attack that Enemy unit itself (although it still must attack some Enemy units); it must simply be adjacent to the Enemy unit at the moment the Barrage attack is being made.
[11.33] Use the artillery units' Barrage Strength when making a Barrage attack.
[11.34] Artillery units making a Barrage attack may attack only a single Enemy-occupied hex.
[11.35] Artillery units that are making a Barrage attack against an Enemy unit from a non-adjacent hex suffer no Combat Results; they are never destroyed or retreated as a result of their own attacks.
[11.36] Barrage attacks must meet the minimum odds column on the Combat Results Table. The terrain of the defending unit is taken into account when making a Barrage attack. Thus, a Barrage attack against an Enemy unit in Broken terrain must be at least 1-3 odds. If minimum odds requirements are not met, the Barrage attack is not allowed.
[11.37] Final Protective Fire may not be allocated by the defending Player in a Barrage attack.
[11.38] Two or more Friendly artillery units may combine their Barrage Strengths to Barrage attack an Enemy hex as long as each Barraging artillery unit meets the requirements of Case 11.32. An artillery unit may Barrage Attack only one Enemy-occupied hex per Friendly Combat Phase.
[11.39] An artillery unit that makes a Barrage attack may not make a Combined attack in the same Combat Phase (see Case 11.2).
[11.4] Final Protective Fire (FPF)
[11.41] A non-Phasing artillery unit, which is not in an Enemy Zone of Control and has not been subject to an Enemy attack in the current Combat Phase, may use its FPF Strength to supplement the Defense Strength(s) of a Friendly unit(s) which is under attack. An artillery unit that is in an Enemy Zone of Control or which has been attacked earlier in that same Combat Phase may not use its FPF Strength that Phase.
[11.42] The Friendly defending unit receiving the FPF Strength must be in range (in hexes) of the artillery unit providing the FPF. This range is computed to the hex occupied by the Friendly unit, not to the hex occupied by the attacking Enemy unit.
[11.43] FPF Strength Points are simply added to the Defense Strength of the unit(s) receiving the FPF.
[11.44] When an artillery unit supplies FPF, it neither benefits nor suffers from the Combat Result.
[11.45] FPF may not be used to supplement the Defense Strength of a Friendly unit that is subject to a Barrage attack.
[11.46] Each artillery unit may use its FPF Strength only once per Game-Turn.
[11.5] Artillery Defense
[11.51] When an artillery unit is attacked in any fashion, it uses its Defense Strength, not its FPF (although FPF from other artillery units may be used to supplement the Defense Strength of this unit). Note that although the Defense Strength of the artillery unit is found on the Out of Battery side, it is used in the defense by artillery units that are either In Battery or Out of Battery.
[11.52] Whenever an artillery unit is attacked and suffers a retreat result, flip the unit on to its Out of Battery side if it is not already on that side.
[11.6] Artillery Restrictions
[11.61] All Artillery Barrage Strength Points that are allocated to the following hex types in a Friendly Combat Phase are halved (total the number of Barrage Points allocated to the hex, and then halve the total, rounding fractions down): Woods hexes, Town hexes, Village hexes, or any Enemy unit that is in Improved Positions or Entrenched. For example, if the U.S. Player were making a Combined attack against a German unit in a Village hex using 39 Barrage Strength Points from various artillery units within range, those Barrage Strength Points would be halved to 19 Barrage Points. After the German Player allocates any FPF that he wishes, the ratio could be calculated and the combat resolved. FPF Strength Points are not halved when firing into such hexes.
[11.62] Barrage and FPF Points allocated during any Night or Night Bonus Game-Turn are halved against any hex (again, total the number of Strength Points being allocated to a hex, and then halve this total, rounding fractions down). This halving is in addition to the penalties described in Case 11.61. For example, if the U.S. Player were making a Combined attack at Night against a German unit in a Village hex using 39 Barrage Strength Points, the Barrage Points would first be halved to 19 because of the Village hex, and then halved again to 9 because of the Night Game-Turn.
[11.63] Artillery units that are "Out of Communications" (see Cases 14.53 and 14.55) may use their full Barrage and FPF Strengths. The first time they use either of these strengths, the Out of Communications marker is flipped over to reveal their "Unsupplied" state. When an artillery unit is Unsupplied, its Barrage and FPF Strengths are halved.
[11.64] Note that when artillery units incur penalties for firing at Night (see Case 11.62) or for firing into certain types of terrain (see Case 11.61), the total number of artillery points allocated to the target hex is totaled (after each individual artillery unit has incurred its own penalties, such as being Isolated, Unsupplied, or for violating Divisional Integrity) and then halved.
[11.65] When an artillery unit's Barrage or FPF Strength is halved due to Supply or Divisional Integrity and these Strengths fall to any fraction below one, that artillery unit's Barrage or FPF Strength is considered to be zero.
[11.66] An artillery unit that is in a state of "Isolation-1" (see Cases 14.63 and 14.65) has its Barrage and FPF Strengths halved. The first time this artillery unit uses either of these Strengths the Isolation-1 marker is flipped over to reveal "Isolation-2". Artillery units that are in a state of Isolation-2 may not use their Barrage and FPF Strengths at all. Artillery units in any state of Isolation move at one-half their Movement Allowance.
[11.67] An artillery unit may not use its Barrage or FPF Strengths if it is Out of Battery (see Case 6.3).
[11.68] Artillery Effects Summary (see separate sheet)
[11.7] German Artillery Barrage Restriction
[11.71] The German Player may never allocate more than twenty Barrage Strength Points to a hex when he is making a Combined attack or a Barrage attack during his Friendly Combat Phase (Exception: see Case 11.72).
[11.72] This restriction does not apply to the following Game-Turns: December 16 Pre-Dawn Game-Turn, and the December 16 AM and PM Game-Turns.
[11.8] German Artillery Ammunition Restriction
[11.81] Whenever the German Player is making a Combined attack or a Barrage attack during his Friendly Combat Phase and a six is rolled on the die roll resolving the combat, the German Player may be subject to artillery ammunition depletion. After a six is rolled in this situation, the German Player rolls the die again: if a one, two or three is rolled, the German Player must immediately remove one of the artillery units that participated in that attack (if more than one artillery unit participated in the attack, the choice of which unit to eliminate is left to the German Player; Exception: see Case 11.82).
[11.82] This restriction does not apply to the following Game-Turns: December 16 Pre-Dawn Game-Turn, and the December 16 AM and PM Game-Turns.
[11.83] During Night Bonus Game-Turns, the German Artillery Ammunition situation is more restricted (see Case 13.34).
[12.0] Night Game-Turns
GENERAL RULE:
Night Game-Turns occur after each PM Game-Turn. There are special rules with regard to combat during Night Game-Turns. All other rules remain the same during Night Game-Turns, and the Sequence of Play is followed exactly as it had been followed during AM and PM Game-Turns. Note that in the scenarios beginning with December 16, the "December 16 Pre-Dawn" Game-Turn is not considered a Night Game-Turn.
CASES:
[12.1] Combat in Night Game-Turns
[12.11] Combat proceeds normally during Night Game-Turns, and friendly units in an Enemy Zone of Control during their Combat Phase are still obligated to attack those units in that Phase.
[12.12] During Night Game-Turns, all combat is resolved on the "Woods, Night Combat" line on the Combat Results Table, regardless of what terrain the defending unit is in. The only exception to this rule is when the defending unit is located in a Town hex or defending behind a River hexside. In these cases, the appropriate line on the CRT is followed, regardless of whether or not it is a Night Game-Turn.
[12.13] All Barrage and FPF Artillery Points that are used during Night Game-Turns are halved against any hex (see Case 11.62).
[12.14] No Air Points may ever be used in a Night Game-Turn (see Section 19.0).
[13.0] Night Bonus Game-Turns and Fatigue
GENERAL RULE:
At the end of each Night Game-Turn, but before the start of the AM Game-Turn, first the U.S. Player and then the German Player is permitted a "Night Bonus Player-Turn." Night Bonus Game-Turns are not considered regular Game-Turns in any way—they follow a special Sequence of Play that is used only in the Night Bonus Game-Turns (see Case 5.3). Combat rules during Night Bonus Game-Turns are identical to normal Night Game-Turns. Movement rules are also normal, except that artillery and headquarters units may not move. However, any move during a Night Bonus Game-Turn results in "Fatigue", which is indicated by a marker placed on the affected unit. Being Fatigued means that a unit is hindered in its attack, defense, and movement capabilities.
CASES:
[13.1] Night Bonus Game-Turn Sequence of Play
A. U.S. PLAYER-TURN
- Movement Phase
- Combat Phase
B. GERMAN PLAYER-TURN
- Movement Phase
- Combat Phase
No actions other than movement and combat may take place in Night Bonus Game-Turns. If a unit moves or performs combat in this Game-Turn, supply status is based on the unit's last determined supply status.
[13.2] Night Bonus Game-Turn Movement
[13.21] All non-artillery and non-headquarters units may move during the Night Bonus Game-Turn, although neither Player is obligated to take any action in this Bonus Turn.
[13.22] Artillery and headquarters units may never move in the Bonus Turn. Artillery units may not go In Battery during Bonus Turns (see Case 6.35).
[13.23] All other Movement rules (see Section 6.0) are normal during this Bonus Game-Turn.
[13.24] If a unit moves in this Game-Turn, a Fatigue marker is placed on that unit after it has completed its movement but before the beginning of its Combat Phase.
[13.25] Isolated units may never move in this Game-Turn.
[13.26] Any action that requires the expenditure of Movement Points during this Turn, including going into or out of March Mode, necessitates the placement of a Fatigue marker after the unit has finished expending its Movement Points for the Movement Phase.
[13.27] The placement of Improved Positions or Entrenchment markers in the Night Bonus Game-Turn requires the placement of Fatigue markers on these units. Similarly, flipping Improved Positions or Entrenchment markers from their "Building" side to their completed side also requires the placement of Fatigue markers if such an action was taken during the Bonus Turn.
[13.28] In Friendly Movement Phases during Bonus Turns, a unit in a state of Fatigue or "Recovery" may use only one-half of its Movement Allowance (round fractions down).
[13.3] Night Bonus Game-Turn Combat
[13.31] Friendly units are not obligated to attack adjacent Enemy units in the Night Bonus Game-Turn Combat Phase if those Friendly units did not move in the immediately preceding Night Bonus Game-Turn Movement Phase. However, if the Player decides to attack with any unit during the Night Bonus Turn, he must attack each and every Enemy unit adjacent to that attacking unit as per the normal Combat rules.
[13.32] If a unit moves adjacent to an Enemy unit during the Friendly Movement Phase of the Night Bonus Turn, it must attack each and every adjacent Enemy unit as per the normal Combat rules. Note that when a unit has moved in the Bonus Turn, it will suffer all effects of Fatigue before the resolution of any attacks it makes during the Combat Phase. However, if a unit attacks in the Bonus Game-Turn Combat Phase without having moved in the Bonus Game-Turn Movement Phase, it does not suffer from Fatigue effects until after the resolution of combat. In this last case, place the Fatigue marker on the unit after the combat is resolved.
[13.33] Fatigue markers are not placed on units that have defended in combat during the Bonus Turn. Fatigue markers may only be placed on units during their own Friendly Movement or Combat Phase of the Night Bonus Game-Turn.
[13.34] When a German artillery unit uses its Barrage Strength during a Bonus Game-Turn, it is subject to Ammunition Depletion as per Case 11.81. However, if a six is rolled in an attack being supported by German artillery units, then one artillery unit (which participated in that combat) is immediately removed from play—the choice of which unit is left to the German Player.
[13.35] A unit in a state of Fatigue or Recovery has its Attack Strength halved (round fractions down).
[13.36] A unit that is Fatigued has its Defense Strength halved. A unit that is in Recovery from Fatigue (see Case 13.5) may use its printed Defense Strength.
FATIGUE EXAMPLE:
After the end of a PM Game-Turn, the U.S. Player may move his units in the Bonus Game-Turn. He decided to move one unit only—an infantry battalion, which moves two hexes and stacks with another U.S. infantry battalion adjacent to a German unit. Immediately after the movement is completed, the U.S. Player places a Fatigue marker on the infantry battalion that moved. The infantry battalion that did not move is not Fatigued at this time. The U.S. Player must attack with both of these battalions (see Cases 13.31 and 13.32). The U.S. battalion that is Fatigued must halve its Attack Strength. The other U.S. battalion may use its printed Attack Strength. The German unit may use its printed Defense Strength. The combat is resolved using normal Night Combat rules. Whatever the result of the attack, the other U.S. infantry battalion must also receive a Fatigue marker immediately after the resolution of the combat. In any case, the German unit does not receive a Fatigue marker (unless of course it moves or attacks in its immediately ensuing Bonus Player-Turn).
[13.4] Fatigue Markers
[13.41] Fatigue markers are front and back-printed. One side says "Fatigue" and the other says "Recovering". When a unit moves or engages in combat during its Friendly Bonus Player-Turn, mark that unit as Fatigued.
[13.42] A unit which is Fatigued has all Combat Strengths and its Movement Allowance halved (round fractions down).
[13.43] A unit that is in a state of Recovering has its Attack Strength and Movement Allowance halved. It may use its printed Defense Strength.
[13.5] Fatigue Removal
[13.51] During the Mutual Fatigue Reduction Stage of the Game-Turn, both Players reduce or remove their Fatigue or Recovering markers. If a unit is in a state of Fatigue, flip the marker over to reveal its Recovering state at this time. If the unit is already in a Recovering state, remove the marker from play entirely and place it back in the Game-Tray.
[13.52] Note that there is no Mutual Fatigue Reduction Stage in a Night Bonus Game-Turn. Therefore, no Fatigue or Recovering markers may be reduced until the immediately ensuing AM Game-Turn Mutual Fatigue Reduction Stage.
[14.0] Supply
GENERAL RULE:
Units must be in supply to use their full Combat Strengths and Movement Allowance. If they are not in supply, they can be penalized in various ways with respect to Movement and Combat capabilities.
PROCEDURE:
Supply determination for all purposes is made by both Players during the Supply Determination Phase of each Player-Turn. A unit that is in supply at the beginning of a Player-Turn is considered to be in supply at all times during that Player-Turn, including during the Combat Phase. A unit that is out of supply at the beginning of the Player-Turn is out of supply for the entire Player-Turn, even if the unit moves back "into supply" during its Movement Phase. Units that are in supply may use their full Combat Strengths and Movement Allowance. To be in supply, a unit must be able to trace a supply line to a supply source. When a unit is not in supply, it may be in one of two states: Isolated-1/2 or Unsupplied/Out of Communications.
CASES:
[14.1] United States Supply
[14.11] To be in supply, a U.S. unit must be able to trace a supply line of any length to a supply source. In turn, this supply source must be able to trace a similar supply line to a Primary or Secondary Road. This road must lead off the north, south, or west edges of the map. The supply line is traced from a unit to a supply source along a continuous series of hexes none of which may run through an Enemy-occupied or Enemy-controlled hex (unless that hex is occupied by a Friendly unit). Similarly, when a supply source is tracing a supply line to a Primary or Secondary Road, neither the supply line nor the Road may enter an Enemy-occupied or Enemy-controlled hex. After a supply source has traced a supply line to a Road, the U.S. Player must be able to trace a continuous series of Road hexes off the north, south, or west edges of the map. Once this supply line is traced to a Road it may never leave a Road hex.
[14.12] The U.S. supply sources are:
- (a) For all units with a division designation: the Division Headquarters unit bearing the same division designation.
- (b) For all units with a corps designation: any Division Headquarters unit of the same corps designation.
- (c) For any unit with a brigade designation: any Headquarters unit of the same nationality.
- (d) For any unit with a dash (-) in their designation: any Headquarters unit of the same nationality.
[14.13] Any number of units may be supplied from the same supply source.
[14.2] Supply for German Volksgrenadier and Fallschirmjäger Divisions
[14.21] To be in supply, a German unit which belongs to either a Volksgrenadier (Infantry) Division or a Fallschirmjäger (Parachute) Division must be able to trace a supply line to a supply source. (A unit belongs to a Volksgrenadier Division if its division is a two or three-digit number not followed by a letter. A unit belongs to a Fallschirmjäger Division if its divisional number is followed by the letters "FJ".) This supply line may be no longer than seven hexes (not Movement Points), traced according to the same restrictions described in Case 14.11. In turn, this supply source must be on a Road hex. The German Player must be able to trace a continuous series of Road hexes from this supply source off the east edge of the map without entering an Enemy-occupied or Enemy-controlled hex (unless that hex is occupied by a Friendly unit) for the unit to be considered in supply.
[14.22] A German Volksgrenadier or Fallschirmjäger unit may use any corps or army headquarters unit as a supply source. To be considered in supply, the supply source must be on a Road hex.
[14.23] The supply line from a unit to a supply source is seven hexes, not Movement Points. The hexes may be any type of terrain and may cross any type of hexside.
[14.3] Supply for German Panzer, Panzer Grenadier, and Corps
[14.31] To be in supply, a German unit whose parent organization is a Panzer, Panzergrenadier or Corps formation (any parent designation followed by a "P" or "PG", or any designation in Roman numerals) must be able to trace a supply line to a supply source. This supply line may be no longer than seven Movement Points in length. These Movement Points are paid according to the Class A Tactical Mode schedule, except when moving along a Primary or Secondary Road. When tracing along these Roads, pay Movement Points according to the Class B March Mode schedule. This supply line is traced according to the same restrictions described in Case 14.11. In turn, this supply source must be able to trace a supply line—also no longer than seven Movement Points in length—to a Primary or Secondary Road hex. This Road must lead off the east edge of the map in a continuous series of Road hexes free of Enemy-occupied or Enemy-controlled hexes.
[14.32] The German supply sources are:
- (a) For Panzer or Panzergrenadier Divisions: either the Division Headquarters unit that bears the same division designation or the Corps Headquarters unit that bears the same corps designation as the unit's Division Headquarters.
- (b) For Corps units: the Corps Headquarters unit that bears the same corps designation as the unit itself.
[14.33] All German units whose parent formation is a brigade (a number or series of letters followed by an "x" in the designation) may use any German headquarters unit as a supply source, but all supply lines are traced according to the restrictions described in Case 14.31.
Supply Example: The German unit whose designation is "2/3/2P" is determining supply. Since its parent formation ("2P") is a Panzer Division, it must first trace a supply line to either the 2nd Panzer Division Headquarters or XLVII Corps Headquarters (the 2nd Panzer's Corps formation). The 2/3/2P is twenty-one hexes from the XLVII Headquarters unit, but all these hexes are along a continuous Primary Road free of Enemy units or their Zones of Control. Since on Roads this formation is allowed to follow the Class B March Mode Movement schedule, the 2/3/2P may pay 1/3 Movement Point for every hex entered from the unit to the supply source. Therefore the supply line is seven Movement Points (21 x 1/3), fulfilling the requirement of Case 14.31. Next the XLVII Headquarters unit must trace a similar Supply Line to a Road, which in this example is unnecessary since the corps Headquarters unit is already on a Road hex. Since this Road hex leads off the East edge of the map along a continuous series of Road hexes, free of Enemy units or their Zones of Control, the 2/3/2P unit is considered to be in supply and may function normally.
[14.4] Blocking Supply Lines
[14.41] Only Enemy-occupied hexes or Rigid Zones of Control block supply lines (including all segments of supply lines: from a unit to a supply source; from the supply source to a Road; and along this Road to a map edge).
[14.42] Fluid Zones of Control never block supply lines.
[14.43] River hexsides block the supply lines of German Panzer, Panzergrenadier, and Corps formations. These units' supply lines may only cross River hexsides at Bridges or Fords.
[14.44] Friendly units (not Friendly Zones of Control) negate the presence of Enemy Zones of Control for the purposes of tracing supply lines.
[14.5] Unsupplied and Out of Communications
[14.51] A U.S. unit is considered to be Out of Communications under the following circumstances:
- (a) The unit cannot trace a supply line to its own Division Headquarters unit, but it can trace a supply line to another Friendly Headquarters unit on the map.
- (b) The unit can trace a supply line to its own Division Headquarters unit, but the headquarters unit cannot trace a supply line to a Road, or—assuming the Headquarters can trace a supply line to a Road—the Road cannot reach the north, south, or west edges of the map on a continuous series of Road hexes.
[14.52] A German unit is considered to be Out of Communications under the following circumstances:
- (a) The unit can trace a supply line to its appropriate headquarters unit, but this supply line is over the maximum number of hexes or Movement Points permissible for that type of unit's Supply Line.
- (b) The unit can trace a supply line to its appropriate headquarters unit, but the headquarters unit cannot trace a supply line to a Road or—assuming the Headquarters can trace a supply line to a Road—that Road cannot reach the east edge of the map along a continuous series of Road hexes, unblocked by Enemy occupied or Enemy controlled hexes.
[14.53] Place an "Out of Communications" marker on all units that are determined to be Unsupplied during the Mutual Supply Determination Phase of each Player-Turn (remember that both Players determine supply during this Phase of each Player-Turn). Units which have an Out of Communications marker on them may use their full Combat Strengths and Movement Allowance without penalty.
[14.54] At the conclusion of any Combat Phase in which a unit in a state of Out of Communications is involved in combat (either defensively or offensively), flip the Out of Communications marker over to reveal the state of Unsupplied. Units which have an Unsupplied marker on them have their Attack Strengths halved (round fractions down). Their Defense Strength remains the same. If the unit is a Class A unit, its Movement Allowance remains the same. If it is a Class B unit, its Movement Allowance is halved (round fractions down).
[14.55] Artillery units that are in a state of Out of Communications may use their full Barrage and FPF Strengths. The first time they use either of these Strengths, the Out of Communications marker is flipped to the Unsupplied side. When an artillery unit is in a state of Unsupplied, its Barrage and FPF Strengths are halved.
[14.56] Headquarters units are always considered to be in supply.
[14.6] Isolation
[14.61] A U.S. unit is considered to be Isolated if it cannot trace a supply line to any Friendly Headquarters unit.
[14.62] A German unit is considered to be Isolated if it cannot trace a supply line [of any length] to any of its appropriate Headquarters units (see Cases 14.2 and 14.3).
[14.63] Place an "Isolated-1" marker on all units that are determined to be Isolated during the Mutual Supply Determination Phase of each Player-Turn. Units which are in a state of Isolation-1 have their Attack Strengths halved. Their Defense Strengths remain the same. If the unit is a Class A unit, it may use its printed Movement Allowance. If the unit is a Class B unit, its Movement Allowance is halved (round fractions down).
[14.64] At the conclusion of any Combat Phase in which a unit in a state of Isolation-1 is involved in combat (either offensively or defensively), flip the Isolated marker over to reveal the state of "Isolation-2". Units which are in a state of Isolation-2 have an Attack Strength of one and their Defense Strength is halved. In a state of Isolation-2, all units operate at one-half of their printed Movement Allowances.
[14.65] An artillery unit that is in a state of Isolated-1 has its Barrage and FPF Strengths halved. The first time this unit uses either of its Strengths the Isolation-1 marker is flipped over to reveal Isolation-2. Artillery units that are in a state of Isolation-2 may not use their Barrage and FPF Strengths at all.
[14.66] Units that are in any state of Isolation exert no Zones of Control. However, Enemy units must still attack each and every Isolated unit to which they are adjacent. Isolated units may attack during their Friendly Combat Phase if they are adjacent to Enemy units, but are not obligated to do so. If the Owning Player attacks with his Isolated units, he must attack each and every Enemy unit to which he is adjacent.
[14.67] A unit that is both Fatigued and Isolated may not move at all. It may attack if its reduced Attack Strength is one or above.
[14.68] Supply and Fatigue Effects Summary (see separate sheet)
[14.7] Surrender
[14.71] During the Surrender Stage of AM Game-Turns only, both Players must roll the die to see if any of their units in a state of Isolated-2 surrender.
[14.72] Both Players roll the die once for each division that has units in a state of Isolated-2. A roll of "1" means that all of the units of that division that are in a state of Isolated-2 surrender. If they surrender, they are immediately removed from the map. Any other die roll indicates "no effect".
Surrender example: The U.S. Player has six units from the 106th Division and two units from the 99th Division in a state of Isolated-2. It is an AM Game-Turn. During the Surrender Stage the U.S. Player rolls a "1" for the 106th Division. As a result, all six of the 106th Isolated-2 units are immediately eliminated. Then the U.S. Player rolls a "2" for the 99th Division. As a result, all of the 99th Isolated-2 units remain on the map in a state of Isolated-2.
[14.8] Headquarters Units
Headquarters units are always considered to be in supply.
[15.0] Engineers and Bridges
GENERAL RULE:
Both Players' engineer units may attempt to blow Bridges over Rivers or Creeks during the course of the game. Both Players may use their engineer units to build Bridges as well.
CASES:
[15.1] Blowing Bridges
[15.11] During the Bridge Building and Blowing Phase, the Phasing Player may attempt to blow Bridges with his engineer units.
[15.12] An engineer unit may attempt to blow any and all Bridges that cross hexsides of hexes that make up that engineer unit's Zone of Control. The engineer unit may attempt to blow any or all of these Bridges during the Bridge Building and Blowing Phase. Roll once for each Bridge. The engineer unit may attempt to blow each Bridge only once per Bridge Building and Blowing Phase. Roll once for each attempt.
[15.13] A die roll of 1, 2, 3, or 4 is necessary to blow a Bridge. The Phasing Player rolls once for each of as many bridges in an engineer unit's Zone of Control he is attempting to blow. If a 1, 2, 3, or 4 is rolled, place a "Blown Bridge" marker so that it points to the hexside of the blown Bridge. If a 5 or 6 is rolled, the Bridge-blowing attempt has failed and no marker is placed. Remember that an engineer unit may attempt to blow many Bridges in one Phase.
[15.14] If a Bridge has been blown it is considered not to exist. The River or Creek that the Bridge crossed is considered to be the sole characteristic of that hexside.
[15.15] Engineer units that moved in the immediately preceding Movement Phase may attempt to blow Bridges if they wish. After engineer units attempt to blow Bridges, they may engage in combat in the ensuing Combat Phase. They may attempt to blow Bridges in Enemy Zones of Control.
[15.16] An engineer unit that is in March Mode may not attempt to blow Bridges.
[15.17] Engineers may not blow Bridges in the Night Bonus Game-Turn.
[15.2] German Engineers and Bridge Building
[15.21] German engineers—and only German engineers—may "carry" a Bridge marker. When carrying the Bridge marker, the engineer unit must be stacked on top of the marker. The Bridge does not count against stacking restrictions. When carrying the Bridge, the engineer unit must move with the same Movement Allowance as the bridge—seven Movement Points.
[15.22] A Bridge marker is not functional until it has been "built". To build a Bridge, a German engineer unit carrying a Bridge must be adjacent to a River or Creek hexside. The Bridge marker may be removed from under the engineer unit and placed on top of it during the Bridge Building and Blowing Phase of the German Player-Turn—with its "Building" side showing—but only if the engineer unit did not move in the immediately preceding Movement Phase.
[15.23] A Bridge marker is still not functional if it is on its Building side. It must be flipped over to its completed "Bridge" side. At the beginning of the Bridge Building and Blowing Phase, all Bridge markers that are already in a state of Building may be flipped over to the completed Bridge side, but only if the original engineer unit is still under the Bridge marker and it did not move during the immediately preceding Movement Phase.
[15.24] When a Bridge marker is on top of its original engineer unit on its Bridge side showing, the Bridge is considered built. Point the Bridge marker in the direction of the hexside the Bridge was built over. A Bridge is considered to exist over that River or Creek, functioning exactly like all other Bridges.
[15.25] After a Bridge has been built, the engineer unit that carried the Bridge may move normally. It need no longer stay in the same hex as the Bridge marker.
[15.26] German engineers may engage in combat while they are "building" a Bridge. However, they may not leave the hex that the Bridge building is taking place in. If they are forced to retreat as a result of combat, the Bridge unit is eliminated.
[15.27] German engineers may "pick up" a completed Bridge marker in order to move it again if they are stacked with the marker in the Bridge Building and Blowing Phase and they have not moved during the immediately preceding Movement Phase. If the engineer unit fulfills this requirement, simply take the Bridge marker and place it under the engineer unit. This signifies that the engineer unit is carrying the Bridge. It may now move with the marker (see Case 15.21).
[15.3] U.S. Engineers and Bridge Building
[15.31] U.S. engineer units that are adjacent to River or Creek hexsides and which have not moved during the immediately preceding Movement Phase may place completed Bridge markers over all adjacent River or Creek hexsides during the Bridge Building and Blowing Phase.
[15.32] U.S. engineer units never have to carry Bridge markers. They have an unlimited supply of these markers available for use. A single engineer unit could place more than one Bridge marker in one Bridge Building and Blowing Phase if he occupied a hex in which more than one of the six hexsides were formed by a River or Creek (e.g. he could theoretically place a maximum of six completed Bridge markers each Building Phase for each engineer unit).
[15.33] If an engineer unit that placed Bridges across River or Creek hexsides moves, the Bridge markers must be removed from the map. The Bridges may exist only over that hexside if the U.S. engineer unit remains adjacent to that hexside.
[16.0] Improved Positions and Entrenchments
GENERAL RULE:
During the course of the Game, German or U.S. combat units may enter Improved Positions or Entrenchments. Units in Improved Positions are augmented in defense by a "shift" on the Combat Results Table. Units in Entrenchments have their Defense Strength doubled.
CASES:
[16.1] Improved Positions
[16.11] Units that are in Improved Positions may "shift" the final odds column on the CRT one to the left on the same terrain line. For example, a 4-1 attack in Broken terrain against a unit in Improved Positions would become a 3-1 on the Broken terrain line. Shifts for Improved Positions are determined after all shifts for Regimental Integrity and the Combined Arms bonus have been applied.
[16.12] Units that are at least three hexes away from the nearest Enemy unit may attempt to enter Improved Positions.
[16.13] In order to enter Improved Positions, the following procedure must be followed: At the beginning of the Movement Phase (before Movement has taken place), the Phasing Player places Improved Positions markers on all of his units that he wishes to place in Improved Positions subject to the requirement of Case 16.12. These markers are placed with their "Building" symbol showing. Units with Building markers on them may not move during the ensuing Movement Phase. Units with a Building symbol showing are not considered to be in Improved Positions—the marker must be flipped over to reveal the completed Improved Positions indicator. This is performed as follows: at the beginning of the next Movement Phase, the Phasing Player may flip all of his Improved Positions markers that are on their Building side to their completed Improved Positions side. This signifies that the unit is in Improved Positions and receives the benefit described in Case 16.11.
[16.14] A unit that enters a hex occupied by a Friendly unit that is already in Improved Positions receives all of the benefits of the Improved Positions marker if it remains in that hex. Place all of the units in a hex that are in Improved Positions under a single Improved Positions marker (see Case 16.36).
[16.2] Entrenchments
[16.21] Units that are in Entrenchments have their Defense Strengths doubled.
[16.22] In order to enter Entrenchments, a combat unit must be stacked with a Friendly engineer unit at the beginning of a Movement Phase. After that, the procedure for entering Entrenchments is exactly the same as entering Improved Positions (see Case 16.12), except Entrenched markers are used instead of Improved Positions markers. After the Entrenchments have been built, the engineer unit may leave the hex without removing the Entrenched marker (the Entrenched marker remains in the hex it was built in).
[16.23] A unit that enters a hex occupied by a Friendly unit that is already Entrenched receives all of the benefits of the Entrenched marker if it remains in that hex. Place all of the units in a hex that are Entrenched under a single Entrenched marker.
[16.3] General Effects of Improved Positions and Entrenchments
[16.31] Artillery and headquarters units may never enter Improved Positions or Entrenchments.
[16.32] The total number of Enemy Barrage Strength Points that are allocated to a hex occupied by Friendly units in Improved Positions or Entrenchments is halved. Halving of Barrage Points due to terrain, Improved Positions, or Entrenchments is not cumulative. For example, a unit that was in a Woods hex and Entrenched would only halve Enemy Barrage Strength Points once during the Combat Phase. However, other halving of Barrage Points (e.g., due to Supply, Night, or Divisional Integrity) is cumulative with the terrain effects listed above (see Cases 11.61 and 11.62).
[16.33] Units in Improved Positions or Entrenchments are not obligated to attack adjacent Enemy units during their Friendly Combat Phase. They may remain in these positions for the duration of the Combat Phase without attacking.
[16.34] All units in Entrenchments exert Rigid Zones of Control. Improved Positions have no bearing on the type of Zone of Control exerted by the unit underneath the Improved Positions marker.
[16.35] Some scenarios may have units starting in Improved Positions or Entrenchments. When placed at the start of the scenario, these markers are considered already built.
[16.36] If, due to a combat result, all of the defending units that occupied an Improved Positions or Entrenchments marker at the beginning of the Combat Phase were retreated out of that hex or eliminated, the Improved Positions or Entrenched marker is removed from the map. Similarly, if a unit leaves an Improved Positions or Entrenched marker during its Movement Phase—leaving it unoccupied—the marker is removed from play.
[17.0] U.S. Battalion Breakdown
GENERAL RULE:
All U.S. infantry, armor, anti-tank (both towed and self-propelled), and reconnaissance battalions may break down into company-size units during the course of the game. Once broken down, a battalion may never be reconstituted—the companies must remain on the map (unless eliminated) for the duration of the game. Battalion breakdown is subject to counter limitations. If there are no more or not enough company-size counters for a particular type of battalion, that battalion may not break down.
CASES:
[17.1] When Battalions May Break Down
[17.11] U.S. battalions may break down into companies at the beginning of the Movement Phase before any movement has taken place. If a battalion breaks down, the companies placed on the map as a result of this breakdown may not move during that Movement Phase.
[17.12] Battalions may not break down in an Enemy Zone of Control.
[17.13] Battalions may not break down if there are not sufficient companies of the appropriate type in the Game-Tray.
[17.14] Stacking limitations may not be violated as a result of a breakdown. Since all battalions break down into three companies, this means that for a battalion to break down it must begin the Friendly Movement Phase alone in a hex.
[17.15] A battalion that has been reduced may never break down.
[17.16] Engineer battalions may never break down.
[17.2] How Battalions Break Down
[17.21] When a battalion breaks down, simply place three companies of the appropriate type in the hex occupied by the original battalion at the beginning of the Movement Phase. The battalion counter is removed from play—it may never be brought back into the game. Remember that companies brought onto the map at the beginning of a Movement Phase may not move during that Movement Phase.
[17.22] U.S. battalions break down as follows (company counters, each shown as Attack-Defense-Movement; parentheses around the Attack Strength as printed):
| Battalion type | Three companies |
|---|---|
| Infantry | three companies, each (1)-2-6 |
| Mech. Inf. | three companies, each 1-2-12 |
| Ranger, Glider, Parachute | three companies, each 1-2-6 |
| Tank (M4) | two M4 companies, each 3-2-12, and one M5 company, 2-1-12 |
| Tank (M10) | three M10 companies, each (1)-2-12 |
| Tank (M36) | three M36 companies, each 1-3-12 |
| Tank (M5) | three M5 companies, each 2-1-12 |
| Anti-Tank (Towed) | three 75 companies, each (1)-1-6 |
| Reconnaissance | three companies, each 1-2-12 |
[18.0] Weather and Ground Condition
GENERAL RULE:
Weather is determined at the beginning of all AM Game-Turns starting on December 17. The condition of the weather determined in an AM Game-Turn will last throughout the day (the AM, PM, Night, and Night Bonus Game-Turns). Ground condition is determined by a similar procedure.
CASES:
[18.1] Weather Determination
[18.11] During the Weather Determination Stage of each AM Game-Turn, the U.S. Player rolls the die and consults the Weather Table to determine the state of the weather for the entire day. He then adjusts the Weather marker on the Weather Track on the map as necessary.
[18.12] There are three possible weather states: Clear, Mist, and Overcast.
[18.13] On Clear Game-Turns, the full number of available Air Power Points may be used by each Player (see Section 19.0). On Mist Game-Turns, one-half (round fractions down) of the available Air Power Points may be allocated. On Overcast Game-Turns, no Air Power Points may be allocated.
[18.14] December 16 is considered to be an Overcast day in all scenarios.
[18.15] If the existing weather at the time of a Weather Determination die roll is Overcast, subtract one from this die roll. If the existing weather at the time of the weather die roll is Clear, add one to this die roll.
[18.16] Weather Table (see separate sheet).
[18.2] Ground Condition Determination
[18.21] During the Weather Determination Stage of each AM Game-Turn, the German Player rolls the die and consults the Ground Table to determine the state of the ground for the entire day. He then adjusts the Ground marker on the Ground Condition Track on the map as necessary.
[18.22] There are two possible ground states: normal and ground freeze.
[18.23] If there is a ground freeze, all Class B units in Tactical Mode may enter Broken terrain hexes at a cost of two (not three) Movement Points. They also may enter Woods hexes at a cost of four (not six) Movement Points.
[18.24] If the ground condition is normal, all the Movement Point costs listed on the Terrain Effects Chart apply.
[18.25] December 16 is considered to be normal in terms of ground condition in all scenarios.
[18.26] Ground Table (see separate sheet).
[19.0] Air Power
GENERAL RULE:
Each Player is provided with a certain number of Air Power Points each Game-Turn which must be allocated to various functions on the Player's Air Mission Control Display each AM Game-Turn starting December 17. The number of Air Points allocated is dependent on the Air Power Availability Chart (see Section 20.0) and the weather (see Case 18.13). After the end of an AM Game-Turn, both Players automatically reallocate the same number of Air Points on the Air Mission Control Display in exactly the same fashion. They may be used in this fashion during the PM Game-Turn. Air Points may never be used at all during Night Game-Turns. During the beginning of the next AM Game-Turn, each Player may allocate his Air Points on his Air Mission Control Display in a different fashion from the previous day. However each Player allocates his Air Points in the AM Game-Turn, the allocation must be exactly the same in the PM Game-Turn.
PROCEDURE:
The U.S. Player is provided with four Air Point markers and the German Player is provided with two. These markers all bear historical Air Force Commands and represent plane types that were actually involved in the Battle of the Bulge. However, these designations are provided purely for historical interest—they have no effect on the play of the game. These markers will be used on each Player's Air Mission Control Display and nowhere else. Air Points may be allocated in four ways: Ground Support, Patrol, Resupply Escort (U.S. only), and Interdiction (U.S. only). During the Mutual Air Allocation Stage of AM Game-Turns, both Players secretly place their Air Point markers on the desired number of Air Points per function on the Air Mission Control Display. One marker is used for each line (i.e. Ground Support, Patrol, etc.) on these Tracks and when Air Points are allocated simply move the marker to the appropriate number of Air Points desired in that function for that day. The total number of Air Points on these tracks may never exceed the number of Air Points actually available to the Player for that Game-Turn. Players do not have to allocate Air Points to all possible functions—they may allocate all Air Points to one function. An Air Point allocated to a certain function during the AM Game-Turn may perform only that function for the entire day. Air Points may not be accumulated from Game-Turn to Game-Turn.
CASES:
[19.1] Ground Support
[19.11] Air Points allocated to Ground Support may be used during any Combat Phase as if they were artillery, except that Ground Support Points are not limited by range—they may be used anywhere on the map. During the Friendly Combat Phase, Ground Support Points may perform Combined or Barrage attacks as per Cases 11.2 and 11.3. During the Enemy Combat Phase, they may be used for Final Protective Fire (see Case 11.4), except that Ground Support Points used for FPF are halved (i.e. it takes two Ground Support Points to equal one Point of FPF).
[19.12] Ground Support Points are subject to all artillery restrictions (see Case 11.6). Ground Support Points may never be used at Night.
[19.13] A Ground Support Point may be used only against a single hex during a Combat Phase, although different Ground Support Points may attack different hexes. More than one Ground Support Point may be allocated to a single hex, although a Player may never allocate more than one half of his total Ground Support Points to a single hex in a Combat Phase.
[19.2] Patrol
After both Players have secretly allocated their available Air Points to their functions during the Mutual Air Allocation Stage, each Player may examine the other Player's Air Mission Control Display. Check how many Air Points the opposing Player has allocated to Patrol. For every two Air Points the Enemy Player has allocated to Patrol, the Owning Player must reduce the number of Ground Support Points on his Air Mission Chart by one. After this procedure has been performed on AM Game-Turns, the Players may proceed with the Sequence of Play.
[19.3] Resupply Escort (U.S. Only)
[19.31] Air Points allocated to Resupply Escort give the U.S. Player the capability of removing Isolation and/or Unsupplied markers (either side) from all the units of a single division in a Game-Turn.
[19.32] Air Points may be allocated to Resupply Escort only during Clear Game-Turns.
[19.33] The U.S. Player may attempt to Resupply only one division (or any formation smaller than a division) in a single day (AM, PM, and Night Game-Turns).
[19.34] If the U.S. Player allocates four Air Points to Resupply Escort, he may remove all the Unsupplied-Out of Communications markers from all the units of a single division that are Unsupplied or Out of Communications on the map. Furthermore, no Unsupplied markers may be placed on any units of that division for the rest of the day [including the Night Game-Turn]. However, these units are still vulnerable to Isolation.
[19.35] If the U.S. Player allocates six Air Points to Resupply, he may remove all the Isolation markers from all the units of a single division that are Isolated on the map. Furthermore, no Isolated markers may be placed on any units of that division for the rest of the day (including the Night Game-Turn).
Resupply Example: At the beginning of an AM Game-Turn, the U.S. Player has three units that are Unsupplied (1/393/99, 2/393/99, and 1/112/28) and one that is Isolated (3/393/99). The U.S. Player allocates four Air Points to Resupply Escort. He may not remove the Isolated marker from the 3/393/99 because he has not allocated enough Air Points. However, he may Resupply the 28th or 99th Divisions. He chooses the 99th. During the next Supply Determination Phase, the Unsupplied markers are removed from the 1/393/99 and the 2/393/99. Furthermore, all units of the 99th Division are exempt from becoming Unsupplied for the rest of the day (AM, PM, and Night Game-Turns). The units of the 99th Division must still check supply during Supply Determination Phases to see if they have become Isolated. If they are Isolated, the Resupply Points will have no effect on Isolation during that day. Like the 3/393/99, they remain Isolated until they free themselves of this condition or they are Resupplied during the next day.
[19.4] Interdiction (U.S. Only)
[19.41] Air Points allocated to Interdiction may be used in two ways during the same Game-Turn: they may be used to decrease the length (in hexes and Movement Points) of a German supply line to a supply source and they may be used to attack German units that are in March Mode.
[19.42] For every three Air Points allocated to Interdiction, the German Player must reduce the permissible length of all his supply lines by one hex (for Volksgrenadier Divisions) and by one Movement Point (for other Divisions). For example, if the U.S. Player has allocated nine Air Points to Interdiction, German supply lines may now be no longer than four hexes or Movement Points to a supply source for the AM and PM Game-Turns of that day (see Cases 14.2 and 14.3). Interdiction Points may not be used at night.
[19.43] During the Mutual Supply Determination Phase of the U.S. Player-Turn, the U.S. Player may attack any single German unit that is in March Mode on the map with the same Air Points that he used for Interdiction. The U.S. Player may not examine any of the units under March Mode markers during this Phase—he must simply point to a March Mode marker and state that he is attacking it that Phase. Consult the March Mode Interdiction Table for the results. March Mode Interdiction may not be performed during Night Game-Turns. Interdiction Air Points may not be used to attack two different German units in the same Stage. However, the U.S. Player may attack more than one German unit during this Stage if the attacks are being made by different Interdiction Air Points.
[19.44] March Mode Interdiction Table (see separate sheet).
[19.5] U.S. Air Mission Control Display
(see separate sheet).
[19.6] German Air Mission Control Display
(see separate sheet)
[20.0] Master Air Power Availability and Historical Weather
GENERAL RULE:
This section gives the number of Air Power Points available to both Players on each AM and PM Game-Turn of every day covered in this Game. Consult this Section for all scenarios when allocating Air Points during the appropriate Stage of the Sequence of Play. In addition, for those Players who would like to ignore the Weather Determination Stage and play the game with historical weather, a section has been included listing the weather for each day of the battle. Players must still roll for the Ground Condition however.
[20.1] Master Air Power Availability
Air Points available (a dot is printed in the table where no number appears):
| Date | U.S. | German |
|---|---|---|
| Dec. 16 AM, PM | • | • |
| Dec. 17 AM, PM | 12 | 10 |
| Dec. 18 AM, PM | 12 | 10 |
| Dec. 19 AM, PM | 12 | 4 |
| Dec. 20 AM, PM | 12 | 4 |
| Dec. 21 AM, PM | 12 | 4 |
| Dec. 22 AM, PM | 12 | 4 |
| Dec. 23 AM, PM | 12 | 4 |
| Dec. 24 AM, PM |
[20.2] Historical Weather
| Date | Weather | Date | Weather |
|---|---|---|---|
| Dec. 16 | Overcast | Dec. 25 | Clear |
| Dec. 17 | Mist | Dec. 26 | Clear |
| Dec. 18 | Mist | Dec. 27 | Clear |
| Dec. 19 | Overcast | Dec. 28 | Overcast |
| Dec. 20 | Overcast | Dec. 29 | Overcast |
| Dec. 21 | Overcast | Dec. 30 | Mist |
| Dec. 22 |
[21.0] Reinforcements
GENERAL RULE:
Both Players receive Reinforcements. These appear during the Owning Player's Movement Phase on the Game-Turn indicated on the Master Reinforcement Schedule. The Reinforcement Schedule states the Game-Turn of appearance, the number of units, the designations of those units, and the specific hex on which they enter. (Note: sometimes the Reinforcement Schedule will simply state the parent formation, i.e. a division number, if all the units of that parent formation enter the map through the same hex that Game-Turn. It is up to the Players to locate all the units that make up that formation).
PROCEDURE:
During the Movement Phase, the Owning Player places reinforcement units in the scheduled hexes of the map edge. The Owning Player may place them at any time during his Movement Phase.
CASES:
[21.1] Movement of Reinforcements
[21.11] Reinforcements are presumed to be poised adjacent to the map. When placed on the map, a reinforcing unit expends Movement Points to enter the entry hex according to the Terrain Effects Chart. In all cases, the Reinforcements are entered onto a hex which has a road leading off the map; these units expend Movement Points at the road movement rate to enter the map. All reinforcements are considered to be in March Mode when they enter the map.
[21.12] In several cases, more than one unit is scheduled to appear in the same hex in the same Game-Turn. These units are deployed off map—in the Reinforcement Staging Area—one behind the other, with the lead unit poised adjacent to the map entry hex itself. A hypothetical road—of the type that is in the entry hex—may be presumed to stretch off the map, away from the entry hex in the Reinforcement Staging Area.
[21.13] As each unit enters the map, it will pay the cost for entering the entry-hex plus any additional cost for hypothetical road hexes that it would have to traverse in order to reach the entry hex.
[21.14] Once on the map, reinforcements may be moved normally. The Owning Player may sequence the arrival of his reinforcements with the movement of his already present units as he sees fit.
[21.2] Restrictions
[21.21] Reinforcements may not enter a hex which is currently occupied by an Enemy unit or in an Enemy Zone of Control.
[21.22] If, and only if, a scheduled entry hex is occupied by an Enemy unit or by an Enemy Zone of Control, the reinforcing unit may enter the nearest unblocked mapedge hex to the scheduled hex in the direction of the nearest Friendly unit. However, reinforcements so blocked are delayed by one Game-Turn in their arrival (e.g. they appear during the next Friendly Movement Phase). In the case of U.S. Reinforcements entering in the North or South, this new entry hex must be the next road entering the map to the West.
[21.23] A Player may deliberately withhold reinforcements from Game-Turn to Game-Turn, bringing them into play (if at all) on some later Game-Turn.
[21.24] Regardless of whether or not a reinforcement is brought into play on its scheduled turn, it must appear on its scheduled hex or alternate (see Case 21.22).
[21.25] The concept that Reinforcements are poised adjacent to the map is just a concept. Until they enter the map, reinforcements have no effect on play. They may in no fashion attack Enemy units or hinder their movement.
[21.3] U.S. Armored Divisions
When an entire U.S. armored division is scheduled to enter the map as reinforcements (see Section 22.0), its reconnaissance battalion and its tank (M10 only) battalion may enter the map already broken down into companies. See Case 17.2 for the breakdown of these types of battalions. See Case 9.25 for a description of company-size units and battalion-size units moving together while in March Mode.
[22.0] Master Reinforcement Schedule
GENERAL RULE:
The Master Reinforcement Schedule will be used (most often only in part) in all the scenarios provided in Wacht am Rhein. See Section 21.0 for the procedure of placing reinforcements. Reinforcements are given by Game Turn and area of entry. In addition, reinforcements are differentiated by organizational designation, type, and a code number following the map letter abbreviation to indicate where these units enter the map. Each road entering the map from any direction is given a code. The box with the code number is the entry box. The abbreviations used in the parentheses following the unit's designation are the unit's type. The abbreviations used in type designation are as follows: T-tank (M4), D-tank (M10 or M36), A-artillery, I-infantry, P-parachute infantry, R-reconnaissance, M-mechanized infantry, H-headquarters, E-engineer, G-ranger, W-anti-tank (75). Sometimes reinforcing units may choose to enter at one of several entry hexes. The Phasing Player must choose one of these entry hexes to place his reinforcements on. Sometimes, the Reinforcement Schedule will ask the Player to bring "all units" of a certain formation onto the map. Therefore, it is again strongly suggested that the Players sort their units by division and corps in the Game Tray. This will ease play considerably when the Reinforcement Schedule indicates that "all units" of a certain division will be brought into play on that Game-Turn (see Case 28.0). Reinforcements may enter the map only on road hexes.
[22.1] United States Reinforcements
Game-Turn 3 (December 16 PM)
- SOUTH: D6: 70/4xx(T), 803/4xx(D)
Game-Turn 5 (December 17 AM)
- SOUTH: D6: 20/4xx(A), 29/4xx(A), 44/4xx(A), 2/8/4(I)
- SOUTH: D4, D5, or D6: 2/22/4(I), 174/VIII(A), 81/VIII(A)
- NORTH: C6: 1/26/1(I), 2/26/1(I), 3/26/1(I), 751/VII(A), 32/1(A), 33/1(A), 17/7Axx(T), 23/7Axx(M), one company (D), one company (R)
- NORTH: C2: 31/7Axx(T), 40/7Axx(T), 38/7Axx(M), 48/7Axx(M), two companies (D), two companies (R), 7A/VIII(H)
- NORTH: C6: 1/V(H)
Game-Turn 6 (December 17 PM)
- SOUTH: Between D1 and D7 [inclusive]: all units of the 10th Armored Division
- NORTH: C6: 434/7Axx(A), 440/7Axx(A), 489/7Axx(A)
- NORTH: C7: 953/V(A), 187/V(A), 5/V(A)
Game-Turn 7 (December 17-18 Night)
- NORTH: C7: 1/47/9(I), 2/47/9(I), 3/47/9(I), 84/9xx(A), 9/VII(H) (printed as shown; see Addenda & Errata: should read 9/V(H))
Game-Turn 8 (December 18 AM)
- NORTH: C7: 18/V(A), 190/V(A), 997/V(A)
- NORTH: C2: 58/VII(A)
- WEST: A12 or A13 or between B12 and B16 [inclusive]: all units of 101st Airborne Division, all units of 82nd Airborne Division
Game-Turn 9 (December 18 PM)
- NORTH: C7: 1/39/9(I), 2/39/9(I), 3/39/9(I), 26/9xx(A), 957/VIII(A)
Game-Turn 10 (December 18-19 Night)
- NORTH: C2: all units of 30th Infantry Division, 400/VII(A)
- NORTH: C4: 755/VII(A), 254/VII(A), 705/VII(D)
Game-Turn 11 (December 19 AM)
- SOUTH: D4: 3/22/4(I)
- NORTH: C6: 1/16/1(I), 2/16/1(I), 3/16/1(I), 1/18/1(I), 2/18/1(I), 3/18/1(I), 703/1xx(D), 634/1xx(D), 1/1xx(E)
Game-Turn 13 (December 19-20 Night)
- NORTH: C1: 3/32a/3A(T), 3/33a/3A(T), 3/36m/3A(M), 83/3Axx(R), 54/3Axx(A), one company (D), 3A/VII(H)
Game-Turn 14 (December 20 AM)
- SOUTH: D1 or D2: all units of 4th Armored Division, 274/III(A), 177/III(A)
- NORTH: C2: 1/32a/3A(T), 2/32a/3A(T), 1/36m/3A(M), 67/3Axx(A), one company (D), 991/VII(A)
- WEST: Between B12 and B16 [inclusive]: 1/354/-(E), 2/354/-(E)
- WEST: Between A2 and A11 [inclusive]: all units of British Guards Armored Division, all units of British 43rd Division, all units of British 51st Division, all units of British 53rd Division, all units of British 29th Armored Brigade, all units of British 33rd Armored Brigade, all units with British XXX Corps designation
Game-Turn 15 (December 20 PM)
- WEST: Between B12 and B16 [inclusive]: 1/1313/-(E), 2/1313/-(E)
Game-Turn 17 (December 21 AM)
- SOUTH: D1 or D2: all units of 80th Infantry Division
- SOUTH: D3, D4, or D5: all units of 5th Infantry Division
- SOUTH: D1: 1/2/-(French, P)
- NORTH: C2: 1/551/VII(P)
- NORTH: A1: all units of 84th Infantry Division, 193/VII(A)
Game-Turn 18 (December 21 PM)
- SOUTH: D1 or D2: all units of 26th Infantry Division, 249/III(A)
- NORTH: C6: 1/33a/3A(T), 2/33a/3A(T), 2/36m/3A(M), 391/3Axx(A), 23/3Axx(E), 10/5Axx(T), 15/5Axx(M), 47/5Axx(A), one company (D), one company (R), 5A/V(H)
Game-Turn 21 (December 22 PM)
- SOUTH: Between B1 and B12 [inclusive] or D1: 6/III(R), 28/III(R), 5/III(G), 253/III(A)
- NORTH: A4: all units of 2nd Armored Division, 87/VII(A), 1/60/9(I), 2/60/9(I), 3/60/9(I), 60/9xx(A), 34/9xx(A), 746/9xx(T), 15/9xx(E) (one further entry is scribbled out on the scan; per the Addenda & Errata this was 9/V(H), which is to be deleted)
- WEST: Between A12 and B12 [inclusive]: 1/342/-(E), 2/342/-(E), 1/392/-(E), 2/392/-(E), 1/366/-(E), 2/366/-(E), 2/1308/-(E), 2/1308/-(E), 1/Metz/-(French, I), 2/Metz/-(French, I)
Game-Turn 23 (December 23 AM)
- NORTH: A4: 4/VII(R), 24/VII(R), 759/VII(T), 509/VII(P)
- NORTH: C2: 1/24/VII(I), 2/24/VII(I), 3/24/VII(I)
- WEST: Between A12 and B12 [inclusive]: all units of 75th Infantry Division, 298/VII(E), 18/III(A)
Game-Turn 26 (December 24 AM)
- NORTH: C6 or C7: 552/V(A), 272/V(A), 183/VII(A), 172/VII(A)
Game-Turn 27 (December 24 PM)
- NORTH: C6 or C7: 980/VII(A), 981/VII(A), 240/VII(A), 7/V(A)
Game-Turn 32 (December 26 AM)
- SOUTH: Between D4 and B4 [inclusive]: all units of 35th Infantry Division, 255/III(A)
Game-Turn 33 (December 26 PM)
- NORTH: A1: all units of 83rd Infantry Division
Game-Turn 38 (December 28 AM)
- SOUTH: Between D4 and B4 [inclusive]: all units of 6th Armored Division, 696/III(A) (one further entry is scribbled out on the scan; per the Addenda & Errata this was 176/V(A), which is to be deleted)
- NORTH: Between A2 and A11 [inclusive]: 147/34Ax(British, T), 107/34Ax(British, T), 9RT/34Ax(British, T)
Game-Turn 43 (December 29-30 Night)
- WEST: A12 or A13: all units of 11th Armored Division
Game-Turn 44 (December 30 AM)
- SOUTH: Between D4 and B4 [inclusive]: all units of 87th Infantry Division
Game-Turn 50 (January 1 AM)
- WEST: A12, A13, or B16: all units of 17th Airborne Division
[22.2] German Reinforcements
Starting with the German Movement Phase on the December 16 AM Game-Turn, the German Player rolls the die every AM German Movement Phase to see if he receives his Variable Reinforcements. Consult the following Chart and read the results:
| Die Roll | Reinforcements Received |
|---|---|
| 1 | All units of 246 Volksgrenadier Division |
| 2 | Mark VI battalion (15-16-9), ISS Corps |
| 3 | Mark VI battalion (15-16-9), ISS Corps |
| 4 | Mark V battalion (12-12-12), ISS Corps |
| 5 | Mark IV battalion (10-8-12), ISS Corps |
| 6 | Roll again: 1, 2: All units of the 11th Panzer Division; 3, 4: All units of the 10(SS) Panzer Division; 5, 6: No Reinforcements |
The results called for on this Chart are subject to their availability in the Game-Tray. If the units called for on the Chart are no longer available (e.g. they have already been brought on the map), read that result as "No Reinforcements". All Variable German Reinforcements must be brought on the map on any road on the Eastern edge of Map C[NE]—between entry hexes C10 and C15 (inclusive).
The following Reinforcements are not variable; they may be brought onto the map through any road on the Eastern edge of Maps C or D—between D8 and D13 or C10 and C15 (inclusive).
Game-Turn 11 (December 19 AM)
- Fuehrer Begleit Brigade (all units bearing the designation "FBx")
Game-Turn 12 (December 19 PM)
- All units of 2nd SS Panzer Division (2/2Pxx Engineers may be stacked on a Bridge marker); all units of 9th SS Panzer Division (9/9Pxx Engineers may be stacked on a Bridge marker); all units of 3rd Panzer Grenadier Division; II SS Corps Headquarters
Game-Turn 14 (December 20 AM)
- 1/1129/560(I), 2/1129/560(I)
Game-Turn 24 (December 23 PM)
- All units of 79th Volksgrenadier Division; all units of Fuehrer Grenadier Brigade (all units bearing the designation "FGx"); all units of the 15th Panzer Grenadier Division; all units of the 9th Panzer Division except 9Pxx Artillery units (86/9Pxx Engineers may be stacked on a Bridge marker); LIII Corps Headquarters
Game-Turn 29 (December 25 AM)
- All units of 167th Volksgrenadier Division
Game-Turn 38 (December 28 AM)
- All units of 9th Volksgrenadier Division; all Artillery units of 9th Panzer Division
[23.0] British Movement Restrictions
GENERAL RULE:
All British units enter the Game as Reinforcements on Map A. A British division may not cross a Meuse River hexside nor leave Map A unless one of the following three conditions is met:
- (a) A German unit has crossed the Meuse on any map (in which case all British units would be able to move without any restrictions).
- (b) A German unit has come within five hexes of a British unit (in which case only the division to which that British unit belonged may move freely; the other British divisions would have to wait until a German unit moved within five hexes of one of their units). Consider British brigades to be divisions in terms of these Movement restrictions.
- (c) It is a Game-Turn after Game-Turn Forty (December 28 Night). After Game-Turn Forty, no British movement restrictions are in effect.
Once a British unit is free from movement restrictions, it is free to move anywhere on the maps.
[24.0] Optional Rules
GENERAL RULE:
The following Optional Rules may be used individually or collectively by mutual agreement of both Players at the start of any scenario.
[24.1] Mechanized Infantry Movement
At the beginning of a Friendly Movement Phase, the Phasing Player may choose to move any of his mechanized or motorized infantry units as Class A units with a Movement Allowance of six and in accordance with all rules regarding Movement of Class A units. This decision must be made at the beginning of the Movement Phase. Place a blank marker on the unit to indicate this change. Any mechanized or motorized infantry unit with this blank marker on it has its Attack and Defense Strengths reduced by two. Its Movement Allowance is six Movement Points. In order to remove the blank marker and regain its printed capabilities, the unit must remain stationary for one Friendly Movement Phase. At the end of this Movement Phase in which the unit has remained stationary, the blank marker may be removed, and the unit's printed Combat Strengths and Movement Allowance may be used again. Such "switching" of Classes may be performed as many times as the Player wishes during the course of the game.
[24.2] Artillery
[24.21] All German artillery units which bear a corps designation take two Game-Turns to go In Battery. For example, if this type of German artillery unit moves during the German Movement Phase of Game-Turn Three, it would not be allowed to go In Battery at the beginning of the German Movement Phase of Game-Turn Four. It would have to remain stationary during the German Movement Phase of Game-Turn Four, being allowed to go In Battery only at the beginning of the German Movement Phase of Game-Turn Five.
[24.22] All artillery units in the game may increase their ranges by 50%, but they must halve both their Barrage and FPF Strengths by doing so. This halving penalty is in addition to any other penalties that the artillery unit might incur.
[24.3] German "Truppeneinheit"
[24.31] In the Kampfgruppe Peiper scenario and the Campaign game, the German Player may be provided with four "Truppeneinheit" (Commando) units. These must be deployed on Map C (Northeast) at the start of the game within one hex of a German SS unit.
[24.32] Truppeneinheit units may move during the German Movement Phase. They have a Movement Allowance of twenty hexes (not Movement Points), and they are not influenced by any U.S. Zones of Control. However, as the Truppeneinheit unit moves hex-by-hex on the map, count the number of Rigid U.S. Zones of Control that the unit has entered. (If more than one U.S. unit exerts a Zone of Control on a single hex, this counts as only one Rigid Zone of Control entered.) At the end of the Truppeneinheit unit's movement, total the number of U.S. Rigid ZOC's entered. Roll the die and consult the Truppeneinheit Table (24.35) to see if that movement has succeeded. If the movement has failed, remove the Truppeneinheit unit from the map (it may never be brought back into play). If the Movement succeeds, the unit may remain in the hex in which it ended its Friendly Movement Phase. Roll individually for each Truppeneinheit unit each German Movement Phase in which it moves at the completion of its movement.
[24.33] When a U.S. unit in March Mode enters a hex occupied by a Truppeneinheit unit, the U.S. unit must stop immediately. The German Player may then move the U.S. unit ten hexes in any fashion he desires as long as it is along road hexes, not into a hex already moved through that Movement Phase, and not into a German Zone of Control. This special movement is referred to as "sabotage movement".
[24.34] At the end of any Movement Phase in which a Truppeneinheit unit has conducted sabotage movement, the German Player must roll to see if his Truppeneinheit unit has survived. Roll once for every unit which conducted sabotage movement(s). Consult the "4+" column on the Truppeneinheit Table. If an "E" results, the unit is removed from the map. If there is no result, the Truppeneinheit unit may remain where it is on the map. It may move during the next German Movement Phase.
[24.35] Truppeneinheit Table (see separate sheet).
[24.4] Von der Heydte's Parachute Drop
[24.41] In the Kampfgruppe Peiper scenario and the Campaign game, the German Player may be provided with four parachute-commando units. These units are not deployed on the map at the start of the game. They may be "dropped" at the beginning of a German Movement Phase on an indicated drop hex by the German Player on any Clear or Mist Game-Turn. This drop hex may only be a Broken or Clear terrain hex on Map C (Northeast). Once "dropped", these units may never be dropped again. All four parachute-commando units must choose the same drop hex; they must drop together on the same Game-Turn. Consult the German Parachute Drop Table to determine the result of this maneuver.
[24.42] The parachute-commando units may drop on any Clear or Mist AM or PM Game-Turn that the German Player desires. They are not obligated to drop.
[24.43] Parachute-commando units which have successfully been placed on the map as a result of a die roll on the Parachute Drop Table may never move. Each unit has an Attack Strength of zero and a Defense Strength of one.
[24.44] The nearest non-headquarters U.S. unit to a successfully dropped parachute-commando unit must immediately move adjacent (if possible) to those parachute units during the next U.S. Movement Phase. If this U.S. unit cannot reach the German units that Movement Phase, it must move as close as possible and then move adjacent to the German parachute-commando units during the next U.S. Movement Phase. More than one U.S. unit may move adjacent to the German units, but the nearest U.S. unit is obligated to do so.
[24.45] During the U.S. Combat Phase following the U.S. Movement Phase in which a U.S. unit has moved adjacent to the German parachute-commando units, these German units must be attacked. More than one U.S. unit may use its Attack Strength in this attack. Normal combat rules are followed. Parachute-commando units may retreat. They are considered to be one step apiece, and if a loss of a step is called for on the Combat Results Table, one unit must be removed—they are not flipped over to their reverse sides. At least one U.S. unit must remain adjacent to the German parachute-commando units at the end of each U.S. Movement Phase in which these German units remain on the map. As soon as all the German parachute-commando units are eliminated, the U.S. Player is under no further obligation.
[24.46] Parachute-commando units exert no Zones of Control.
[24.47] German Parachute Drop Table (see separate sheet).
[24.5] 150th Panzer Brigade
The German Player is provided with two units of the 150th Panzer Brigade in the Kampfgruppe Peiper scenario and the Campaign game. These units must be deployed on Map C (Northeast). These two units may freely leave Fluid U.S. Zones of Control without penalty. They also may attempt to leave U.S. Rigid Zones of Control and immediately enter another Rigid ZOC if they have sufficient Movement Points to do so. Each and every time a unit of the 150th Panzer Brigade attempts to leave a Rigid Zone of Control to enter another Rigid ZOC, roll a die. A result of 1, 2, or 3 means that the German units may enter that new Rigid ZOC without penalty. A result of 4, 5, or 6 means that the infiltration attempt has failed and the German units may move no further that Movement Phase. In all other respects, units of the 150th Panzer Brigade are identical to other combat units.
[24.6] Additional Green Units
[24.61] In the Bastogne and Kampfgruppe Peiper scenarios, both Players possess "green" (untried) units (see Cases 25.14c and 25.24). These rules apply to the first three Game-Turns only. Players may wish to extend the green unit rule for the length of the Campaign game. When a unit of a green division engages in combat for the first time (offensively or defensively) roll on the Green Unit Table (25.14c) for the result. Once a unit of a green division has engaged in combat, note on a separate piece of paper that it has already rolled on the Green Unit Table. It may never roll on this Table for the rest of the game. However, all other units of that green division that have not engaged in combat must still roll the first time they are involved in a combat. Apply all results called for on this Table immediately.
[24.62] The U.S. green divisions are: 9th and 11th Armored Divisions; 35th, 75th, 87th, 99th, and 106th Infantry Divisions.
[24.63] The German green divisions are: 9th, 62nd, 167th, 246th, 272nd, 277th, 352nd, and 560th Volksgrenadier Divisions.
[24.7] German Westwall Fortifications
All German units that are attacked in any hex east of the Our River or east of all hexes ending with the numbers 15 on Map C are considered to be Entrenched when they are attacked. All German units that move into any hex in this area are considered to be Entrenched when they are attacked. See Case 16.2 for full explanation of Entrenchments. It is unnecessary to place an Entrenched marker on any German units east of this line. Simply consider all of these German units to possess all characteristics of Entrenched units described in Case 16.2.
[24.8] Alternate Set-Ups
[24.81] Free German Set-Up
In any scenario starting with the Pre-dawn Game-Turn of December 16, the German Player may be allowed a less rigid set-up than the historical deployment mandated by Cases 25.12 and 25.22. This alternate set-up may be allowed only if both Players agree to it before the start of the game as it will tend to throw the balance of the game in favor of the German Player.
Using this alternate set-up, the German Player may initially deploy his starting forces anywhere on their original starting map according to the following restrictions:
- (a) A unit must be within two hexes of another unit of the same division. If the unit is a corps unit, it must be within two hexes of another unit of that same corps.
- (b) Stacking restrictions must be observed.
- (c) Units may not set-up adjacent to a U.S. unit.
- (d) Units must deploy east of the imaginary line formed by the easternmost U.S. units or their Zones of Control.
- (e) The final German set-up must result in a line of German units or their Zones of Control from the northernmost hexrow to the southern-most hexrow of the original deployment map.
In any scenario utilizing this alternate deployment, the German Player has no movement restrictions (any special movement restrictions listed in the scenario are ignored).
[24.82] All-Out German Effort
In any scenario starting with the Pre-dawn Game-Turn of December 16, the German Player may increase his initial forces and quicken the arrival of his reinforcements. This may only be allowed if both Players agree to it before the start of the game as it will tend to throw the balance of the game in favor of the German Player. On Map C, the German Player may initially deploy all units of the 2nd SS and 9th SS Panzer Divisions around any of the deployment hexes listed for the German Player in Case 25.22. On Map D, the German Player may initially deploy all units of the 3rd Panzer Grenadier Division around any of the deployment hexes listed for the German Player in Case 25.12. The German Player receives all units of the 246th Volksgrenadier Division and all units of the 10th SS and 11th Panzer Divisions on Game-Turn Five (December 17 AM), subject to the rules of German reinforcements described in Case 22.2. In addition, all German reinforcements enter the map three Game-Turns earlier than listed in Case 22.2 (i.e. a German unit listed to enter the map on Game-Turn Eleven would enter on Game-Turn Eight using this alternate German effort).
[25.0] Single Map Scenarios
COMMENTARY:
Wacht am Rhein is presented as a series of four distinct scenarios, each of which can be played as a separate game. Two of these scenarios may be played using an individual map, either Map C or Map D. We recommend that these two scenarios be played first to afford a basic familiarity with the Game-system, through somewhat simplified play and a reduced area. These two scenarios are Bastogne (Map D) and Kampfgruppe Peiper (Map C), which simulate the opening drives of Fifth Panzer Army and Sixth Panzer Army respectively.
GENERAL RULE:
Each scenario represents a distinct game possessing special rules governing the length, deployment, special aspects, reinforcements, and victory conditions applicable to the situation which it simulates. Unless specifically contradicted by scenario rules, all units are deployed on their stronger sides. Artillery units begin the game In Battery. The stacking rules must be observed in the Initial Deployment. Only the specified units are deployed at the start of the scenario. Additional units may be brought onto the maps in accordance with the scenario rules and the Master Reinforcement Schedule (see Section 22.0).
[25.1] Bastogne
(The manual opens this scenario with a page-long historical narrative of the Fifth Panzer Army's attack on the Our River line, General Manteuffel's plans, and the American defense leading to Bastogne; it contains no rules and is not transcribed.)
[25.11] Scenario Length
The scenario begins with the pre-dawn Game-Turn of December 16 and continues until the end of the December 20-21 Night Game-Turn. Note that the pre-dawn Game-Turn of December 16 is a special Game-Turn. There are no "pre-dawn" Game-Turns for other days.
[25.12] Initial Deployment
Note: Only Map D is used in this scenario.
U.S.: Set up first. All units must be placed on the indicated hexes. All units are given an organizational designation, type, and starting hex. All hex numbers refer to Map D. If a unit is Entrenched at the start of the game, its initial hex number is followed by an "e". If a unit is in Improved Positions, its initial hex number is followed by an "i". Abbreviations are as follows: T-Tank(M4), D-Tank(M10 or M36), A-Artillery, I-Infantry, P-Parachute Infantry, R-Reconnaissance, M-Mechanized Infantry, H-Headquarters, E-Engineer, W-Anti-Tank(Towed), L-Light Tank (M5).
4th Infantry Division:
1 company(I) - 3707i; 1 company(I) - 3507i; 1 company(I), 1 company(D) - 3309i(Osweiller); 1 company(I), 1 company(D) - 3307i(Dickweiler); 1 company(I) - 3211i; 1/12/4(I), 42/4xx(A), 4/4xx(E), 4/VIII(H) - 3413(Consdorff); 1 company(I) - 3110i(Echternach); 1 company(I), 1 company(D) - 3012i(Berdorf).
28th Infantry Division:
1/109/28(I), 107/28xx(A), 108/28xx(A) - 2621 (Diekirch); 3/109/28(I) - 2519i; 1 company(I) - 2322e; 1 company(I), 1 company(W) - 2123e; 1 company(L) - 1925; 1 company(I) - 1924e; 969/VIII(A), 28/VIII(H) - 1831(Wiltz); 1 company(I) - 1827e; 1 company(I) - 1727e; 1 company(I) - 1724e; 687/VIII(A) - 1626; 103/28xx(E) - 1528; 109/28xx(A) - 1526; 1 company(I) - 1424e(Hosingen); 1 company(I) - 1327e; 2/110/28(I) - 1130; 1 company(I), 1 company(W) - 1126e(Marnach); 1 company(I) - 0926e; 1 company(I) - 0824e; 2/112/28(I), 1 company(W) - 0622i; 3/112/28(I) - 0520i; 2 companies (T) - 0425; 1/112/28(I) - 0319i; 229/28xx(A) - 0321.
9th Armored Division:
3/9Axx(A) - 3215; 19/9Axx(T), 1 company(D) - 2916; 1 company(R) - 3015; 60/9Axx(M) - 2716i; 2/9Axx(T), 73/9Axx(A), 52/9Axx(M) - 0528; 1 company(R), 1 company(D) - 0627; 9A/VIII(H) - 0829(Asselborn).
Corps Troops:
299/VIII(E) - 2721; 44/VIII(E), 159/VIII(E) - 1831(Wiltz); 35/VIII(E), 158/VIII(E), 1278/VIII(E) - 1542(Bastogne).
German: Set up second. German units must always set up east of the Our River. The German Player may never set up any of his units adjacent to a U.S. unit. No unit may ever start the scenario in March Mode.
212xx Replacement battalion (1-4-6) - 3605.
212xx Replacement battalion (1-4-6) - 3305.
All units of the 212th Volksgrenadier Division—within five hexes of 2908. (Remember: German units must always set up East of the Our).
All units of 276th Volksgrenadier Division—within two hexes of 2515.
All units of 352nd Volksgrenadier Division—within two hexes of 2217.
All units of 5th Fallschirmjäger (5FJ) Division—within two hexes of 1819.
All units of 26th Volksgrenadier Division—within two hexes of 1421.
All units of 2nd Panzer Division—within one hex of 1122.
All units of Lehr Panzer Division (LR or LehrPxx)—on any or all of the following hexes: 1411, 1412, 1413, 1414, 1415, 1416, 1417.
All units of the 560th Volksgrenadier Division (except 1/1129/560, 2/1129/560) - within one hex of 0818.
All units of 116th Panzer Division (except 3/16/116P, 1/60/116P, 2/60/116P, and 116Pxx 150mm Artillery) - within one hex of 0416.
Corps and Army Headquarters Units: 7 Army - 2013; XLVII - 1418; LVIII - 0716.
Corps or Army Artillery Units (may never set up on a road hex):
- 7 Army (six Army Artillery units) - within ten hexes of 7 Army Headquarters unit.
- XLVII Corps (five Corps Artillery units) - within six hexes of XLVII Corps Headquarters unit.
- LVIII Corps (six Corps Artillery units) - within six hexes of LVIII Corps Headquarters unit.
Corps and Army Tank Units:
- XLVII Corps (five 5-8-12 Corps Tank units) - within six hexes of XLVII Corps Headquarters unit.
- 7 Army (one 5-8-12 Army Tank unit) - within ten hexes of 7 Army Headquarters unit.
Bridges: The following engineer units may be stacked on top of a Bridge marker at the start of the scenario: 38/2Pxx; LehrPxx; 116/116Pxx; 5/5FJxx.
[25.13] Reinforcements
U.S.: The U.S. Player receives only those Reinforcements listed under the heading "South" on the Master Reinforcement Schedule (see Section 22.0). In addition, the U.S. Player receives the following Reinforcements on the indicated Game-Turn:
- Game-Turn 10 (Dec. 18-19 Night): 58/VII(A) - entry hex 0147.
- Game-Turn 11 (Dec. 19 AM): all units of the 101st Airborne Division - entry hex 1650 or 1350.
- Game-Turn 12 (Dec. 19 PM): 705/VIII(D) - entry hex 0147.
- Game-Turn 13 (Dec. 19-20 Night): 755/VII(A) - entry hex 0147.
German: The German Player receives only the 2nd SS Panzer Division as Reinforcements in this scenario. This formation appears on Game-Turn 12 (Dec. 19 PM) on any road on the east edge of the map.
[25.14] Special First Day Rules
There are seven special rules in this scenario which apply only to the first day (December 16). The "first day" includes the pre-dawn Game-Turn of Dec. 16, and the Dec. 16 AM and PM Game-Turns. After the Dec. 16 PM Game-Turn, these special rules are no longer used in the scenario.
(a) German Surprise: In all German attacks except Barrage attacks, the German Player receives an additional "shift" on the CRT of one column to the right. Combined Arms and Regimental bonuses may still be awarded.
(b) German Supply: German units are always considered to be in supply on the first day. It is not necessary to check supply for German units during these Game-Turns.
(c) "Green" Units: Both the German and the U.S. Player possess divisions which are considered to be "green." All green units for both the U.S. and the German Player are those units which bear a small "G" on the counter's right side. In this scenario, the U.S. 9th Armored Division is considered to be green. The German Player also possesses some green units. In the Bastogne scenario, the 352nd and the 560th Volksgrenadier Divisions are considered to be green. Each and every time a unit of a green division attacks or defends, the owning player must roll the die and consult the Green Unit Table to obtain the result. The die roll is conducted immediately before the die roll resolving the combat—after all Barrage and FPF Points have been allocated. Roll once for each unit that is considered to be green. If the Table calls for the unit to be reduced, reduce it immediately. A combat cannot be called off because the odds have proven to be unfavorable after the reduction of a unit due to the Green Unit Table. If a unit has already been reduced, it is eliminated if a reduction is called for on the Table. The Green Unit Table does not apply to Artillery or Headquarters units. Even if a unit was reduced on the Green Unit Table once, it must continue to roll every time it is involved in combat in ensuing Combat Phases for the duration of the first day. The U.S. Player adds one to his die roll when rolling on the Green Unit Table.
[25.14c] Green Unit Table (see separate sheet)
(d) Unlimited German Artillery Barrage: The German Player is not limited in his allocation of Barrage Strength Points for the first day (see Case 11.71).
(e) No German Artillery Ammunition Depletion: The German Player is not subject to Artillery ammunition depletion for the first day (see Case 11.81).
(f) Bottlenecks: The first time a German unit crosses a Bridge across a River during the German Movement Phase, a Bottleneck marker must be placed in any adjacent hex so that the "+2" indication faces the Bridge hexside. The next German unit to cross that Bridge must cross at the indicated +2 Movement Point penalty. As soon as this unit has crossed the Bridge, revolve the Bottleneck marker so that the "+4" indication faces the Bridge hexside. The next German unit to cross that Bridge that same Movement Phase does so at the indicated +4 MP penalty. When this unit has crossed, revolve the marker so that the "+6" indication faces the Bridge hexside. If another unit crosses at this +6 penalty, the marker is shifted so that the "+8" indication faces the Bridge hexside. If another unit crosses that same Movement Phase at the +8 MP penalty, the marker is flipped to its reverse side, which says "Blocked". "Blocked" means that no more German units may cross that hexside for the remainder of the German Movement Phase. All Bottleneck markers are removed from the map at the end of each German Movement Phase, although the process may begin again during the next German Movement Phase. Bottleneck markers are never used after the end of the first day. U.S. units never use Bottleneck markers.
(g) Traffic Jams: Each and every time a unit in March Mode enters a hex occupied by a Friendly unit not in March Mode, the unit in March Mode must pay an additional one Movement Point penalty to enter that hex. If, due to this penalty, the unit in March Mode does not have sufficient MP's to enter the hex, the move is not allowed. Both the U.S. Player and the German Player are affected by traffic jams during the first day.
(h) U.S. Disorganization: The following rule applies only on the pre-dawn December 16 Game-Turn: All U.S. Artillery units have their FPF Strengths halved (rounding fractions down).
[25.15] Air Power and Weather
Both Players receive one-half the number of Air Points listed for each Game-Turn on the Master Air Power Availability Chart per Game-Turn (see Case 20.1). Roll for the Weather and Ground condition as described in Section 18.0.
[25.16] U.S. and German Movement Restrictions
For a unit to be "committed" means that that unit is free to move in any fashion for the rest of the Game subject to the Movement rules. Only a committed unit may move. A unit is automatically committed when it has been attacked or finds itself (at the beginning of its Friendly Movement Phase) adjacent to an Enemy unit. If a unit is automatically committed as described above, it does not count against the number of units that may be committed by the following rules each Game-Turn:
U.S.:
- Game-Turn 1 (Dec. 16 pre-dawn): No movement; no units may be committed.
- Game-Turn 2 (Dec. 16 AM): The U.S. Player may commit one unit, which must not be in Improved Positions or Entrenchments.
- Game-Turn 3 (Dec. 16 PM): The U.S. Player rolls the die at the beginning of his Movement Phase and may commit the number of units indicated by the die roll on the chart below (the units committed must not be in Improved Positions or Entrenchments):
| Die Roll | # units committed |
|---|---|
| 1 | 3 |
| 2 | 3 |
| 3 | 4 |
| 4 | 5 |
| 5 | 6 |
| 6 | 7 |
- Game-Turn 4 (Dec. 16-17 Night): The U.S. Player rolls the die at the beginning of his Movement Phase and consults the same Table as the Dec. 16 PM Game-Turn. In this Game-Turn, the U.S. Player may commit double the number of units indicated on this Table. The units committed may still not be in Improved Positions or Entrenched.
- Game-Turn 5 (Dec. 17 AM): All units are committed except units which are in Improved Positions or Entrenchments that are also Isolated.
- Game-Turn 6 (Dec. 17 PM): All U.S. units are committed.
NOTES: U.S. engineer units which bear a corps designation may not be committed until the Dec. 17 AM Game-Turn. Reinforcements (for both Players) are automatically considered committed when they enter the map.
German:
All German units are committed on the December 16 pre-dawn Game-Turn except the entire Panzer Lehr Division. The Panzer Lehr Division is automatically committed on the December 16 AM Game-Turn.
Neither Player may ever enter a hex of the "0100" hexrow on the map [northern-most hexrow of Map D]. If forced to do so as a result of combat, the unit is eliminated. This restriction lasts for the duration of the scenario.
[25.17] Victory Conditions
- Decisive German Victory: Have a unit in Bastogne at the end of the December 20-21 Night Game-Turn, and exit at least nine units off the West edge of the map. (It costs one Movement Point to leave the map from a hex adjacent to the map edge).
- Substantive German Victory: Have a unit in Bastogne at the end of the scenario.
- Marginal German Victory: Exit at least nine units off the West map edge by the end of the scenario.
- Marginal U.S. Victory: Have a unit in Bastogne at the end of the scenario, with the German Player exiting fewer than nine units off the West map edge.
- Substantive U.S. Victory: Have a unit in Bastogne at the end of the scenario, without the German Player having exited any units off the West map edge.
- Decisive U.S. Victory: Have a unit in Bastogne, and Wiltz or Clerf at the end of the scenario without the German Player having exited any units off the West map edge.
[25.2] Kampfgruppe Peiper
(The manual opens this scenario with a page-long historical narrative of the Sixth Panzer Army's attack, Sepp Dietrich, Joachim Peiper's spearhead, the 106th Division salient and St. Vith; it contains no rules and is not transcribed.)
[25.21] Scenario Length
The scenario begins with the pre-dawn Game-Turn of December 16 and continues until the end of the December 20-21 Night Game-Turn.
[25.22] Initial Deployment
Note: Only Map C is used in this scenario.
U.S.: Set up first, according to the same restrictions listed in Case 25.12. The same abbreviations as in Case 25.12 are used. All hex numbers are Map C.
99th Division and 102nd Cavalry Group
2 companies(R), 1 company(D) - 0117e; 955/V(A), 941/V(A) - 0123; 1 company(L) - 0218; 200/V(A), 186/V(A) - 0222; 2 companies(R), 1 company(D) - 0317e; 62/V(A), 776/V(A) - 0319; 196/V(A) - 0518; 3/395/99(I), 1 company(W) - 0616i; 1/395/99(I), 2/395/99(I) - 1013; 372/99xx(A) - 1018; 2/393/99(I), 323/99xx(E) - 1113; 99/V(H) - 1120; 3/393/99(I) - 1213i; 254/V(E) - 1218; 1/393/99(I), 1 company(W) - 1312i; 370/99xx(A) - 1413; 2/394/99(I), 1 company(W) - 1512i; 371/99xx(A), 924/99xx(A) - 1614; 1/394/99(I), 1 company(W) - 1712i; 3/394/99(I) - 1813.
2nd Division
1/9/2(I), 2/9/2(I) - 0714; 1/38/2(I), 2/38/2(I), 1 company(W) - 0715; 3/9/2(I) - 0813; 3/38/2(I), 1 company(W) - 0915; 15/2xx(A), 37/2xx(A), 38/2xx(A) - 1116; 2/2xx(E), 2/V(H) - 1218(Elsenborn); 1/23/2(I), 2/23/2(I), 3/23/2(I) - 1415; 12/2xx(A) - 1417; 741/2xx(T) - 1516; 644/2xx(D) - 1616(Bullingen).
106th Division and 14th Cavalry Group
1 company(R), 1 company(W) - 2112e; 275/VIII(A) - 2116; 168/VIII(E), 2/423/106(I) - 2223; 1 company(R), 1 company(L) - 2311e; 592/106xx(A) - 2414; 1 company(R), 1 company(D) - 2511e; 589/106xx(A) - 2514; 578/VIII(A), 740/VIII(A) - 2624; 32/VIII(R) - 2632(Vielsalm); 1/422/106(I) - 2711i; 106/VIII(H), 965/VIII(A), 770/VIII(A) - 2723(St. Vith); 590/106xx(A) - 2815; 559/VIII(A) - 2819; 2/422/106(I) - 2912i; 561/VIII(A) - 2920; 1/424/106(I) - 2921; 3/422/106(I) - 3012i; 81/106xx(E) - 3016(Bleialf); 1/423/106(I) - 3113i; 3/423/106(I) - 3114i; 1 company(R), 1 company(W) - 3116i; 2/424/106(I), 1 company(W) - 3319i; 333/VIII(A), 771/VIII(A) - 3323; 591/106xx(A) - 3420; 3/424/106(I) - 3519i.
9th Armored Division
16/9Axx(A), 27/9Axx(M), 14/9Axx(T) - 1521; 1 company(R), 1 company(D), 9/9Axx(E) - 1522; 6/V(A) - 1523.
Corps Troops
526/V(M) - 0641(Louveigne); For/V(E), 99/V(I), 825/V(W) - 1036(Spa); 5Fus/V(I) - 1434; 291/V(E) - 1527(Malmedy); 202/V(E) - 1733(Stavelot); 296/V(E) - 1835(Trois Ponts); 51/V(E) - 2549(Erezee).
German: Set up second. The German Player may never set up units adjacent to U.S. units. No unit may ever start the scenario in March Mode.
1/980/272(I), 1/981/272(I), 1/982/272(I), 272xx(A-105), 272xx(A-150) - within one hex of 0214.
All units of 326th Volksgrenadier Division—within two hexes of 0612.
All units of 277th Volksgrenadier Division—within two hexes of 1109.
All units of 12th Volksgrenadier Division—within two hexes of 1709.
All units of 3rd Fallschirmjäger (3FJ) Division—within two hexes of 2008.
18/18xx(E), 1/294/18(I), 2/294/18(I), 1/295/18(I), 2/295/18(I)—within one hex of 2508.
18/18xx(W), 1/293/18(I), 2/293/18(I), 18xx(A-105), 18xx(A-150)—within one hex of 3110.
All units of 62nd Volksgrenadier Division—within three hexes of 3514.
3/16/116P(T), 1/60/116P(M), 2/60/116P(M)—3516.
116Pxx(A-150)—3816.
All units of the 12SS Panzer Division—on any or all of the following hexes: 1402, 1403, 1404, 1405, 1406, 1407.
All units of the 1SS Panzer Division—on any or all of the following hexes: 2101, 2102, 2103, 2104, 2105, 2106.
1/150Px(T), 2/150Px(M)—2205.
Corps and Army Headquarters Units: ISS—1408; LXVII—0710; LXVI—3209(Prum).
Corps Artillery Units (May never set up on a road hex)
- LXVII Corps (five Corps Artillery units)—within six hexes of LXVII Corps Headquarters unit.
- ISS Corps (nine Corps Artillery units)—within ten hexes of ISS Corps Headquarters unit.
- LXVI Corps (three Corps Artillery units)—within six hexes of LXVI Corps Headquarters unit.
Corps Tank Units
- ISS Corps (three 15-16-9 Corps Tank units)—within six hexes of ISS Corps Headquarters unit.
- LXVI Corps (one 5-8-12 Corps Tank unit)—within six hexes of LXVI Corps Headquarters unit.
Bridges: The following engineer units may be stacked on top of a Bridge marker at the start of the scenario: 1/1Pxx(SS); 12/12Pxx(SS).
[25.23] Reinforcements
U.S.: The U.S. Player receives only those Reinforcements listed under the heading "North" on the Master Reinforcement Schedule (see Section 22.0). In addition, the U.S. Player receives the following Reinforcements on the indicated Game-Turn:
- Game-Turn 11 (Dec. 19 AM): all units of the 82nd Airborne Division—entry hex 3549.
German: The German Player rolls for Reinforcements as per Case 22.2 each AM German Movement Phase. The German Player also receives all the Reinforcements listed on the Master Reinforcement Schedule up to Game-Turn 14 (December 20 AM), except for all the units of the 2nd SS Panzer Division.
[25.24] Special Rules
All the special First Day rules in Kampfgruppe Peiper are exactly the same as those in Bastogne (see Case 25.14). In addition, the following special rules are in effect for the duration of the scenario:
(a) All the units of the 1 SS Panzer Division are never subject to Unsupply; this division may never have an Unsupplied marker placed on any of its units. Units of the 1 SS Panzer Division are subject to Isolation.
(b) Units of the 116th Panzer Division may never move north of hexrow 3300. They may attack units that are in hexrow 3200, but may never move into this hexrow.
The following units are "green" (see Case 25.14c):
- U.S.: 99th Division, 106th Division, 9th Armored Division.
- German: 272nd, 326th, 277th, and 62nd Volksgrenadier Divisions.
U.S. Disorganization: The following rule applies only on the pre-dawn December 16 Game-Turn: All U.S. units have their FPF Strengths halved (rounding fractions downward).
[25.25] Air Power and Weather
Both Players receive one-half the number of Air Points listed for each Game-Turn on the Master Air Power Availability Chart per Game-Turn (see Case 20.1). Roll for the Weather and Ground condition as described in Section 18.0.
[25.26] U.S. and German Movement Restrictions
U.S.:
U.S. movement restrictions are exactly the same as in the Bastogne scenario (see Case 25.16). Units may only be committed as per the rules in that Case. In Kampfgruppe Peiper, the U.S. Player must commit one unit on the December 16 AM Game-Turn—this unit must be 32/VIII Cavalry Reconnaissance Squadron.
German:
All German units are committed on the pre-dawn Game-Turn of December 16 except the following: all the tank, reconnaissance, engineer, and artillery units of 1 SS Panzer Division and 12 SS Panzer Division. These units are committed on the December 16 AM Game-Turn.
[25.27] Victory Conditions
At the start of the scenario, the U.S. Player is provided with eight POL unit counters. Four of these counters are "false" (printed on the reverse side of the counter) and four are "true" (with "POL" printed on both sides of the counter). Before the start of the scenario, the U.S. Player must place a "true" POL unit on hex 1617 and another "true" POL unit on hex 1035. The U.S. Player must then place his six remaining counters (two of which are "true" and four of which are "false") with the letters "POL" showing according to the following restrictions: south of hexrow 0900 (inclusive), north of the Ambleve River, within six hexes of hex 1232 (Francorchamps), on a road hex, never adjacent to another POL unit.
The capture of POL units by the German player can effect the level of victory. A POL unit is captured by the German Player as soon as one of his combat units enters a hex occupied by a "true" POL unit. Only when the German unit actually enters a hex occupied by a POL unit may the marker be flipped over to reveal whether or not it is "true" or "false". The capture of a "false" POL unit has absolutely no effect on the outcome of the Game. As soon as a German unit enters a hex occupied by a POL marker (whether or not it is "true" or "false") the marker is removed from play. POL markers may never move, nor do they have any combat strengths. They do not count against stacking limitations.
- Decisive German Victory: exit eighteen or more combat units off the map on any or all of the following hexes: 0133, 0135, 0137, 0138, 0143, 1251 or 1551. (It costs one Movement Point to exit the map at these hexes; a Player may never exit the map on any other hexes, and an exited unit may never re-enter the map).
- Substantive German Victory: exit between twelve and seventeen (inclusive) combat units off the map on the hexes listed above.
- Marginal German Victory: exit between six and eleven (inclusive) combat units off the map on the hexes listed above.
- Draw: The German Player exits less than six combat units off the map on the hexes listed above.
- Marginal U.S. Victory: No German units have exited the map at the end of the scenario.
- U.S. Substantial: No German units have exited the map at the end of the scenario. Also, have a Friendly unit in St. Vith at the end of the game.
- U.S. Decisive: No German units have exited the map at the end of the scenario. Have a Friendly unit in St. Vith at the end of the game. No "true" POL units were captured by the German Player.
NOTE: If the German Player captures three or more "true" POL units, the level of victory is shifted one "step" in favor of the German Player. For example, if at the end of the scenario it is determined that the U.S. Player has won a Marginal Victory, but the German Player has captured three "true" POL units, the U.S. Marginal Victory becomes a Draw.
[26.0] December 21 - The Race for the Meuse
(The manual opens this scenario with a paragraph of historical narrative on the situation at the end of December 20, 1944; it contains no rules and is not transcribed.)
[26.1] Scenario Length
The scenario begins on Game-Turn Seventeen (Dec. 21 AM) and continues until the end of Game-Turn Thirty-Seven (Dec. 27 Night).
[26.2] Initial Deployment
Note: All four maps are used in this scenario.
U.S.: Set up first. All units may be placed anywhere within two hexes of the indicated hex number for those units, unless otherwise indicated. Abbreviations concerning types and designations are the same as in Case 25.12.
Players should note that some formations actually on the battlefield on the morning of December 21 are left out of play. This was an abstract decision on the part of the designer and the developer to simulate the losses taken by many formations in the fighting that took place before December 21. This was done as carefully as possible, with units that suffered the most losses in the early fighting being awarded the fewest units on the map on December 21. Units that were only moderately engaged during this time have only taken a few abstract "losses" as far as units on the map at the start of this scenario are concerned. In The Race for the Meuse, units must still set up on the sides with their full combat strengths showing without exception.
Map A:
2/26m/3A(M), 1/33a/3A(T), 2/33a/3A(T), 1 company(R), 1 company(D) - A2401; all units of British 33rd Armored Brigade - A0309; all units of British 43rd Division - A0514; all units of British 51st Division - A0719; all units of British 53rd Division - A0726; all units of British Guards Armored Division - A1030; all units of British 29th Armored Brigade - A2828; 35/VIII(E) - A3305.
Map B:
1/110/28(I), 1/109/28(I) - B2804; 44/VIII(E) - B1109; 159/VIII(E) - B2107.
Map C:
4 companies(R), 2 companies(D) - C0417; 1/47/9(I), 2/47/9(I), 3/47/9(I) - C0617; 1/39/9(I), 2/39/9(I), 3/39/9(I) - C0817; 1/395/99(I) - C1017; 1/394/99(I) - C1118; 1/393/99(I) - C1217; 1/9/2(I), 2/9/2(I) - C1318; 1/38/2(I), 2/38/2(I) - C1417; 1/23/2(I), 2/23/2(I) - C1518; 1/26/1(I), 2/26/1(I) - C1519; 1/16/1(I), 2/16/1(I), 3/16/1(I) - C1521; 1/18/1(I), 2/18/1(I), 3/18/1(I) - C1523; 1/26m/3A(M), 1/32a/3A(T), 2/32a/3A(T), 1 company(R), 1 company(D) - C1435; 2/119/30(I) - C1140(Remouchamps); 2/120/30(I) - C1232(Francorchamps); 1/119/30(I); 3/119/30(I) - C1341; 1/120/30(I), 3/120/30(I) - C1528; 1/117/30(I), 2/117/30(I), 3/117/30(I) - C1733; 1/508/82(P), 2/508/82(P), 3/508/82(P) - C1837; 1/517/30(P), 2/517/30(P), 3/517/30(P) - C2034; 1/505/82(P), 2/505/82(P) - C2234; 31/7Axx(T), 38/7Axx(M) - C2528; 1/504/82(P), 2/504/82(P), 3/504/82(P) - C2530; 1/325/82(P), 2/325/82(P) - C2632; 1/424/106(I) - C2727; 27/9Axx(M), 1 company(R), 1 company(D) - C2823; 1/112/28(I), 2/112/28(I) - C2827; 17/7Axx(T), 1 company(R), 1 company(D) - C2724; 23/7Axx(M), 1 company(R), 1 company(D) - C2623; 3/26m/3A(M), 3/32a/3A(T), 3/33a/3A(T), 1 company(R), 1 company(D) - C2148.
Map D:
11/10Axx(T), 54/10Axx(M), 1 company(R), 1 company(D) - D3124; 21/10Axx(T), 61/10Axx(M), 1 company(R), 1 company(D) - D3218; 60/9Axx(M), 2/9Axx(T) - D3416; 1/12/4(I), 2/12/4(I) - D3514; 2/8/4(I) - D3613; 2/22/4(I), 3/22/4(I) - D3713; all units of 4th Armored Division (including artillery) - D2841, D2842, D2941, D2942, D2943.
Divisional Artillery:
Artillery units of the following divisions may be placed anywhere within two hexes of a unit of the same division already on the map: 10th Armored Division (minus 420/10Axx), Guards Armored Division, 7th Armored Division, 3rd Armored Division, 1st, 2nd, 4th, 9th (minus 60/9xx, 34/9xx), 30th, and 99th Infantry Divisions, 43rd, 51st, and 53rd British Infantry Divisions, 82 U.S. Airborne Division.
Example: For the 3rd Armored Division, the U.S. Player would be able to place 54/3Axx, 67/3Axx, and 391/3Axx artillery units anywhere within two hexes of a 3rd Armored Division unit already on the map at this time.
Other Divisional Units:
Note: Anti-tank or tank units may be broken down into companies before placement.
The following units may be stacked with or placed within one hex of any unit of the same division that is already on the map: 4/4xx(E), 103/28xx(E), 323/99xx(E), 2/2xx(E), 741/2xx(T), 644/2xx(D), 23/3Axx(E), 9/9Axx(E), 33/7Axx(E), 307/82xx(E), 105/30xx(E), 743/30xx(T), 823/30xx(D), 1/1xx(E), 15/9xx(E).
Headquarters Units:
The following divisions may place their Headquarters unit anywhere within one hex of a unit of that division already on the map: 3rd, 4th, 7th, 9th, 10th, and Guards Armored Divisions; 1st, 2nd, 4th, 9th, 28th, 30th, and 99th U.S. Infantry Divisions; 82nd Airborne Division; 43rd, 51st, and 53rd British Infantry Divisions.
Corps Artillery Units:
The following artillery units with a corps designation may deploy within two hexes of a combat unit of the same corps already on the map. (Note: If unsure of a unit's corps, check that unit's Headquarters counter. The HQ unit will display that unit's parent corps formation.) 274/III, 177/III, 687/VIII, 174/VIII, 81/VIII, 770/VIII, 955/V, 941/V, 62/V, 196/V, 6/V, 953/V, 187/V, 997/V, 58/VII, 957/VII, 400/VII, 991/VII, 7/XXX(4.5g), 64/XXX(4.5g), 84/XXX(4.5g), 7/XXX(5.5g), 64/XXX(5.5g), 84/XXX(5.5g).
Other Corps Units:
The following corps units may be deployed anywhere within two hexes of a combat unit of the same corps already on the map: 299/VIII(E), 254/V(E), 291/V(E), 296/V(E), 51(E), 613/V(D), 526/V(M), For/V(E), 99/V(I), 825/V(W).
The following units may be deployed anywhere west of the Meuse River: 1/354/-(E), 2/354/-(E), 1/1313/-(E), 2/1313/-(E).
Bastogne Defense:
The following units must deploy within five hexes of the town of Bastogne (D1542): all units of the 101st Airborne Division (including artillery), 19/9Axx(T), 52/9Axx(M), 2/9Axx(A), 3/10Axx(T), 20/10Axx(M), 420/10Axx(A), 755/VII(A), 969/VIII(A), 705/VII(D), 2 companies(D).
German: Set up second. The German Player may never set up units adjacent to U.S. units unless otherwise noted. No unit may start the scenario in March Mode unless otherwise noted. All units may set-up within one hex of the indicated hex number for those units. (Abbreviation note: For the Germans, D=SGIII tank unit, S=StuH tank unit, T=Mk IV, V, or VI tank unit. Other abbreviations are the same as U.S. units. If the unit is an SS unit, an "SS" in parentheses will precede the type abbreviation).
Map A:
1/16/116P(T), 2/16/116P(T), 116Pxx(R) - A2701.
Map B:
No units at the start of the scenario.
Map C:
1/990/272(I) - C0315; 1/989/272(I) - C0414; 1/752/326(I), 2/752/326(I), 326xx(W) - C0714; 1/751/326(I), 2/751/326(I), 326xx(E) - C0715; all units of 3rd Panzer Grenadier Division (including artillery) - C1917; 1/989/277(I), 2/989/277(I), 277xx(W) - C1114; 1/990/277(I), 2/990/277(I), 277xx(E) - C1115; 1/27/12(I), 2/27/12(I), 12xx(W) - C1514; 1/48/12(I), 2/48/12(I), 12xx(E) - C1515; ISS(T-MkV) - C1513; 1/9/3FJ(P), 2/9/3FJ(P), 3FJxx(E) - C1921; 1/8/3FJ(P), 2/8/3FJ(P) - C1924; 1/5/3FJ(P), 2/5/3FJ(P), ISS(T-MkVI) - C2026; 1/150Px(T), 2/150Px(M) - C2028; all units of 9th SS Panzer Division (including artillery) - C2222; all units of Fuehrer Begleit Brigade - C2419; 1/12/12P(SS)(T), 2/12/12P(SS)(T), 12Pxx(SS)(R) - C2319; 1/2/12P(SS)(M), 2/2/12P(SS)(M), 3/2/12P(SS)(M), 12/12Pxx(SS)(E) - C2120; 1/25/12P(SS)(M), 2/25/12P(SS)(M), ISS(T-MkVI) - C2118; 1/1/1P(SS)(T), 2/1/1P(SS)(T), ISS(T-MkVI) - C1438(Stoumont), regardless of the presence of U.S. Zones of Control and in a state of fatigue; 1/1/1P(SS)(M), 2/1/1P(SS)(M), 1Pxx(SS)(R) - C2131; 1/26/1P(SS)(M), 2/26/1P(SS)(M), 1Pxx(SS)(T-JgV), 1/1Pxx(SS)(E) - C2330; 1/294/18(I), 2/294/18(I), 18xx(W) - C2520; 1/293/18(I), 2/293/18(I), 18xx(E) - C2619; 1/60/116P(M), 116/116Pxx(D) - C2749; LXVI(S) - C2818; 1/156/116P(M), 116/116Pxx(E) - C2847; 1/183/62(I), 2/183/62(I), 62xx(W) - C3122; 1/190/62(I), 2/190/62(I), 62xx(E) - C3124; 1/1128/560(I), 1/1130/560(I), 2/1130/560(I) - C3046; 1/1129/560(I), 2/1129/560(I) - C3209(Prum), in March Mode.
Map D:
All units of 2nd SS Panzer Division (including artillery) - D0427; 1/903/LR(M), 2/903/LR(M), LehrPxx(R) - D1433; 1/901/LR(M), 2/901/LR(M), LehrPxx(D) - D1836; 1/902/LR(M), 2/902/LR(M), LehrPxx(E) - D1947; 1/2/2P(M), 2/2/2P(M), 2Pxx(R) - D1247; 1/3/2P(T), 2/3/2P(T), 38/2Pxx(E) - D1448; 1/304/2P(M), 38/2Pxx(D) - D1749; 3/77/26(I), 1/78/26(I) - D0838; 1/77/26(I), 2/77/26(I) - D1647; 1/39/26(I), 2/39/26(I), 3/39/26(I) - D2244; 7 Army(S) - D2133; 1/14/5FJ(P) - D2019; 1/13/5FJ(P), 2/13/5FJ(P) - D2135; 1/15/5FJ(P), 2/15/5FJ(P) - D2138; 1/915/352(I), 2/915/352(I), 352xx(E) - D2523; 1/914/352(I), 2/914/352(I), 352xx(W) - D2722; 1/987/276(I), 2/987/276(I), 1/988/276(I), 276xx(E) - D2717; 1/986/276(I), 2/986/276(I), 276xx(W) - D2718; 1/423/212(I) - D2813; 2/423/212(I) - D3112; 1/320/212(I), 2/320/212(I), 212xx(E) - D3311; 1/316/212(I), 2/316/212(I), 212xx(W) - D3709.
Divisional Artillery:
All artillery units of the following divisions may be deployed anywhere within two hexes of a unit of the same division already on the map (but never adjacent or stacked with a U.S. unit): 3rd and 5th Fallschirmjäger Divisions; 12th, 18th, 26th, 212th, 272nd, 276th, and 277th Volksgrenadier Divisions; 2nd, Lehr, and 116th Panzer Divisions; 1SS and 12SS Panzer Divisions. (Note: since all units of 9th and 12th SS Panzer, and 3rd Panzergrenadier were initially deployed on the map, the artillery units of these formations should already be on the map at this stage.)
Divisional Headquarters:
Headquarters units of the following divisions may be deployed anywhere within two hexes of a unit of the same division already on the map (but never adjacent or stacked with a U.S. unit): 2nd, Lehr, and 116th Panzer Divisions; 1st SS and 12th SS Panzer Divisions. 1st SS HQ may not be placed on hex C1438. (Note: Since all units of the 2nd and 9th SS Panzer Divisions and the 3rd Panzergrenadier Division were initially deployed on the map, the headquarters units of these formations should already be on the map at this stage.)
Corps Artillery:
The following corps artillery units must be placed on specific hexes (number following designation is gun type; NW=rocket artillery): 7 Army(210) - D2513; 7 Army(150) - D2711; 7 Army(NW150) - D2910; XLVII(150) - D1127; XLVII(NW150) - D1128; LVIII(150), LVIII(NW150) - D0627; LXVI(150) - C3120; ISS(210) - C2114; ISS(NW150) - C2617; ISS(150), ISS(150) - C2020; LXVII(150), LXVII(150) - C0214; LXVII(NW150) - C0213.
Bridges:
A bridge marker should be initially placed so that a Bridge connects hexes D1124 and D1123. Another marker should be placed connecting D1522 and D1521. 2/2Pxx(SS) and 9/9Pxx(SS) engineer units may be carrying a Bridge marker at the start of the scenario.
[26.3] Reinforcements
Both Players receive reinforcements as per the Master Reinforcement Schedule starting Game-Turn Seventeen (December 21 AM). All reinforcements listed under each Game-Turn are received. The German Player continues to roll for his Variable Reinforcements each AM Game-Turn. All units of the 246th Volksgrenadier Division are considered not yet brought on as of Game-Turn Seventeen and are, therefore, still available as Variable Reinforcements. Other units on the German Variable Reinforcement Schedule are subject to their availability in the Game-Tray.
[26.4] Special Rules
(a) The Game begins with Game-Turn Seventeen. The U.S. Player, as always, is the first Player.
(b) No German Truppeneinheit units may be used in this scenario. No German parachute drop may take place. Units of the 150th Panzer Brigade may have no special capabilities in this scenario.
(c) All units of the 2nd SS Panzer Division are considered to be in a state of Unsupply during Game-Turns 17, 18, and 19, regardless of the presence of German Headquarters units. Place Unsupplied markers on all units of this division at the start of the scenario. They may not be removed until turn 20.
[26.5] Air Power and Weather
Both Players receive the full amount of Air Points listed for each Game-Turn on the Master Air Power Availability Chart (see Case 20.1). Roll for the weather and ground condition as described in Section 18.0. The weather for December 20 is considered to have been Overcast.
[26.6] Unit Commitment
All units on the map at the start of the scenario are considered committed. They may all move and engage in combat normally.
[26.7] Victory Conditions
- Marginal German Victory: Have at least one unit in three of the following Towns at the end of the scenarios: Neufchateau, St. Hubert, Rochefort, Marche, and St. Vith.
- Substantive German Victory: Have at least one unit in three of the Towns listed above, plus have at least one unit in three of the following Towns: Bastogne, Sedan, Givet, Dinant, and Spa.
- Decisive German Victory: Fulfill the conditions for a Substantive German Victory, plus have at least five units west of the Meuse River at the end of the scenario, three of which must be tank units.
- Marginal U.S. Victory: At the end of the scenario, the Germans have a unit in less than three of the following Towns: Neufchateau, St. Hubert, Rochefort, Marche, St. Vith, Bastogne, Sedan, Givet, Dinant, and Spa; in addition, the Germans do not have a unit west of the Meuse River at the end of the game.
- Substantive U.S. Victory: At the end of the scenario, the Germans have no units in any of the Towns listed above; in addition, the Germans do not have a unit west of the Meuse River at the end of the game.
- Decisive U.S. Victory: No German units are on Maps A or B at the end of the scenario.
NOTE: Any result that does not fall into one of these six categories is a draw. For example, if the Germans have no units in the ten listed Towns but have one unit west of the Meuse at the end of the game, the game is a draw.
[27.0] Campaign Game
HISTORICAL NOTES:
(The manual opens the Campaign Game with a page of historical narrative on Hitler's October 22, 1944 briefing of Generals Krebs and Westphal on the Wacht am Rhein plan and the alternative plans rejected; it contains no rules and is not transcribed.)
[27.1] Campaign Game Length
The Campaign Game begins with the pre-dawn Game-Turn of December 16 (Game-Turn One) and continues until the end of the January 2 Night Game-Turn (Game-Turn Fifty-Five).
[27.2] Initial Deployment
Note: All four maps are used in this game.
U.S.: Set up first according to the same restrictions as Cases 25.12 and 25.22. The U.S. Player sets up simply by combining the set-ups of Cases 25.12 and 25.22.
German: Set up second according to the same restrictions as Cases 25.12 and 25.22. The German Player sets up simply by combining the set-ups of Cases 25.12 and 25.22.
[27.3] Reinforcements
Both Players receive reinforcements exactly as designated in the Master Reinforcement Schedule and the Reinforcement rules (see Sections 21.0 and 22.0).
[27.4] Special Rules
All Special First Day Rules listed in Cases 25.14 apply to the Campaign Game in exactly the same way as described in that Case. In addition, the following Special Rules apply to the Campaign Game:
(a) The U.S. Player, as always, is the first Player in every Game-Turn.
(b) Units may exit the map in the Campaign Game. Once exited, units may never return to play. The Movement Point cost to exit the map is the same as the type of terrain in the hex the unit is exiting the map from. Units which have exited the map are not considered to have been eliminated for Victory Determination.
[27.5] Air Power and Weather
Both Players receive the full amount of Air Points for each Game-Turn listed on the Master Air Power Availability Chart per Game-Turn. Starting with Game-Turn Five, roll for the weather and ground condition each AM Game-Turn as described in Case 18.0. The weather for the first four Game-Turns is considered to be Overcast. The ground condition for the first four Game-Turns is Normal.
[27.6] U.S. and German Movement Restrictions
[27.61] Any unit may move into any hex on the map. No hexrow or individual hex is prohibited in terms of movement.
[27.62] U.S. and German Commitment: Both Players simply combine the effects of Cases 25.16 and 25.26 as far as commitment of units at the start of the Campaign Game is concerned. For example, on Game-Turn Two, the U.S. Player would be able to commit two units, one of which must be the 32/VIII Cavalry Reconnaissance Squadron. On Game-Turn Three (Dec. 16 PM), the U.S. Player rolls the die once for Map D and once for Map C. The number of units committed on the die roll for Map D applies only to units which start the game on Map D. The number of units committed as a result of the die roll for Map C applies only to the units which start the game on Map C. The U.S. Player continues to follow all the restrictions of these Cases for each individual map until all units are committed (Game-Turn Six).
[27.7] Victory Conditions
Before the start of the game, the German Player must secretly choose a Plan. Depending on the Plan chosen, the German Player will have different objectives in his attack. There are different Victory Conditions for each Plan as well. The Plan is revealed to the U.S. Player only at the end of the game, when both Players evaluate their performance in relation to the chosen German Plan. This evaluation will determine the winner of the game. The German Player must choose one of the following Plans before the start of the game:
(a) Historical Plan: The actual Wacht am Rhein offensive, with the objective of Antwerp. A crushing German victory could mean a turning point in the war in the west.
(b) Operation Liege-Aachen: A limited offensive to the northwest, attempting to encircle the U.S. forces in and around the Aachen area of Germany.
(c) Operation Luxembourg: A limited offensive to the south, attempting to cut off much of Patton's Third Army in the Metz and Longwy area of France.
(d) Operation Liege-Luxembourg: A combination of Plans b and c.
(e) Spoiling Attack: A simple straight-forward offensive, attempting to regain the initiative in the West and destroying as many U.S. troops as possible.
At the end of the game, the German Player reveals his Plan to the U.S. Player. Both Players then check that particular Plan's Victory Conditions to determine the winner. The winner then checks the "Explanation of Victory Levels" in order to determine the effect of his victory on the course of the war as a whole.
[27.71] Historical Plan Victory Conditions
- Strategic German Victory: Exit at least fifteen combat units off the north edge of Map A (or off the road leading to entry area C1) by the end of the game. Seven of these combat units must be tank units. Also, have a unit in the Town of Spa at the end of the game.
- Substantive German Victory: Have at least fifteen combat units west or north of the Meuse River at the end of the game. Seven of these combat units must be tank units. Also, have a unit in the Town of Spa at the end of the game.
- Marginal German Victory: Have at least one unit in each of four of the following Towns at the end of the game: Spa, St. Vith, Bastogne, Marche, St. Hubert, and Rochefort.
- Decisive U.S. Victory: No German units end the game on Maps A or B. In addition, no German units have exited the map off any map edges of Maps A or B.
- Substantive U.S. Victory: No German units end the game in any of the following Towns: Spa, Bastogne, Dinant, Marche, St. Hubert, Rochefort, Sedan, and Charleville-Mezieres.
- Marginal U.S. Victory: Any result that does not fulfill any of the other Victory Conditions.
[27.72] Operation Liege-Aachen Victory Conditions
- Decisive German Victory: Have at least one unit in each of the Towns of Verviers, Spa, and Monshau at the end of the game. In addition, exit at least fifteen combat units off the north map edge west of entry area C5 (inclusive). At least seven of these units must be tank units.
- Median German Victory: Have at least one unit in each of the Towns of Verviers, Spa, and Monshau at the end of the game. In addition, exit at least one tank unit off the north map edge west of entry area C5 (inclusive).
- Marginal German Victory: Have at least one unit in each of the Towns of Verviers, Spa, and Monschau at the end of the game.
U.S. VICTORY LEVELS: Exactly the same as in Case 27.71.
[27.73] Operation Luxembourg Victory Conditions
- Decisive German Victory: Have at least one unit in each of the Towns of Echternach, Diekirch, Wiltz, Bastogne, and Neufchateau at the end of the game. In addition, exit at least fifteen combat units off the south map edge west of entry area D6 (inclusive). At least seven of those units must be tank units.
- Median German Victory: Have at least one unit in each of the Towns of Echternach, Diekirch, Wiltz, Bastogne, and Neufchateau at the end of the game. In addition, exit at least three tank units off the south map edge west of entry area D6 (inclusive).
- Marginal German Victory: Have at least one unit in each of the Towns of Echternach, Diekirch, Wiltz, Bastogne, and Neufchateau at the end of the game.
U.S. VICTORY LEVELS: Exactly the same as in Case 27.71.
[27.74] Operation Liege-Luxembourg Victory Conditions
- Strategic German Victory: Fulfill the Decisive German Victory of Cases 27.72 and 27.73.
- Decisive German Victory: Fulfill the Median German Victory of Cases 27.72 and 27.73.
- Marginal German Victory: Fulfill any Single German Victory of Cases 27.72 and 27.73 without fulfilling the Decisive or Strategic Victories of Operation Liege-Luxembourg.
U.S. VICTORY LEVELS: Exactly the same as in Case 27.71.
[27.75] Spoiling Attack Victory Conditions
- Tactical German Victory: Have at least one unit in each of the Towns of Monshau, St. Vith, Bastogne, Houfallize, Diekirch, and Echternach at the end of the game. In addition, destroy at least sixty U.S. units at the end of the game.
- U.S. Substantive Victory: No German units end the game in any of the Towns listed under the German Victory Conditions for this Case.
- U.S. Marginal Victory: No German units end the game in the Towns of Bastogne, Spa, and Houffalize.
Any other result under this Plan is a Draw.
[27.76] Explanation of Victory Levels
STRATEGIC GERMAN VICTORY: Crippling Allied defeat. Capture of Antwerp and/or isolation of large British, Canadian, and American forces north of Aachen. General disorganization along American frontline south of the Ardennes. Patton must switch to supply heads of the divisions advancing from South France. Possible turning point of the war in the west.
DECISIVE GERMAN VICTORY: Large bodies of U.S. troops are isolated north of Aachen (if Case 27.72) or near Luxembourg City (if Case 27.73). No relief of these troops possible due to general disorganization of U.S. line and inability to work in conjunction with the British. Allied offensive into Germany will be delayed at least a year. Eisenhower's leadership is strongly criticized in both U.S. and Britain.
SUBSTANTIVE GERMAN VICTORY: Three U.S. divisions are totally destroyed. SHAEF command system breaks down. General Allied withdrawal on all fronts as supply network is thrown into disarray. Germans prepare for another offensive against Antwerp, although British and U.S. reinforcements now block the way into this city. Allies cancel all offensive plans for six months.
MEDIAN GERMAN VICTORY: U.S. offensive capability for next few months disrupted due to the destruction of precious fuel supplies in the Ardennes. U.S. line broken but most troops escape capture. Tremendous German morale boost, although U.S. and British units have efficiently sealed off the German breakthrough. In effect, German defeat is only postponed by a few months—in fact, the German offensive capability has played itself out in this attack.
MARGINAL GERMAN VICTORY: Extremely heavy losses among both sides, especially for German armor. Some panic caused in Allied rear areas, although massive U.S. and British reinforcements are rushed in from England. By the middle of January, all German breakthroughs are completely sealed off. By the end of January, an allied offensive against the nose of the "Bulge" begins. By the end of February, the salient is eliminated. The offensive across the Rhine will begin in one or two weeks.
TACTICAL GERMAN VICTORY: A quick, limited victory—the long term strategic results of which are few. However, the American reputation is tarnished, and German morale boosted. The Germans prepare for similar spoiling attacks all along the Western Front.
DECISIVE U.S. VICTORY: A crippling German defeat. Almost all German armor reserves are depleted. Other fronts must be stripped of troops to plug the gaps in the Ardennes due to the massive Allied counterattack in late January. The war will end in March 1945. Possible U.S. seizure of Berlin.
SUBSTANTIVE U.S. VICTORY: Irreplaceable German losses in men and materiel. After initial Allied panic, joint U.S.-British counteroffensive against German salient achieves decisive results. The war will end in April 1945.
MARGINAL U.S. VICTORY: All German breakthroughs sealed off by the middle of January, although U.S. supply, communications, and command systems are thrown into disarray. As a result, the joint U.S.-British counter-offensive at the end of January achieves little. However, other sectors of the German line in the west are weak and the Allies break through. The war will end by the middle of May 1945.
[28.0] U.S., German, and British Divisional Organization
GENERAL RULE:
When Players punch out the counters provided in Wacht am Rhein, it is strongly suggested that they separate combat units into their respective division formations. On many occasions, the Master Reinforcement Schedule will call for "all units" of a certain division to enter the map. It will simplify matters considerably if Players have all units of that division in a single compartment of the Game Tray. It should be noted that the divisional organizations listed in this section are typical division organizations—some divisions may vary slightly in structure. This Section is only meant to be an aid in understanding what to look for when making up a division. Some divisions, as listed in this Section, may be missing some units; others may have more units provided in the countermix than listed under their "typical" organization.
[28.1] U.S. Divisions
[28.11] U.S. infantry division (all units are battalions unless otherwise noted): nine infantry; three artillery "105"; one artillery "155"; one tank (M4); one tank (M10) or anti-tank (75); one engineer; one headquarters.
[28.12] U.S. armored division (except 2nd and 3rd Armored Divisions): three tank (M4); three mechanized infantry; three self-propelled artillery "105"; one reconnaissance; one tank (M10); one engineer; one headquarters.
[28.13] U.S. armored division (2nd and 3rd only): six mechanized infantry; three tank (M4); three self-propelled artillery "105"; one reconnaissance; one engineer; one headquarters.
[28.14] U.S. airborne division: nine parachute infantry; three glider infantry; four artillery "75"; one engineer; one headquarters.
[28.2] German Divisions
[28.21] German volksgrenadier division (all units are battalions unless otherwise noted): nine infantry; one artillery "105" (group of three btns.); one artillery "150"; one anti-tank (75); one engineer.
[28.22] German panzer division: two mechanized infantry; two tank (one MkIV, one MkV); two motorized infantry; one self-propelled artillery "105"; one self-propelled artillery "150"; one reconnaissance (234/1); one tank (SGIII); one engineer; one headquarters; one tank bridge.
[28.23] German panzergrenadier division: six motorized infantry; one tank (MkIV); one tank (SGIII); one self-propelled artillery "105"; one self-propelled artillery "150"; one reconnaissance (234/1); one engineer; one headquarters.
[28.24] German SS panzer division: six mechanized infantry; two tank (one MkIV, one MkV); one reconnaissance (234/1); one tank (JgV); one self-propelled artillery "105"; one self-propelled artillery "150"; one rocket "NW150"; one artillery "170"; one engineer; one tank (MkVI—usually corps tanks); one headquarters.
[28.3] British Divisions and Brigades
[28.31] British infantry division (all units are battalions unless otherwise noted): nine infantry; three artillery "25 lb."; one reconnaissance (Daim.); one anti-tank (17 lb.); one engineer; one headquarters.
[28.32] British armored division: three tank (Fly.); four motorized infantry; one reconnaissance (Crmw.); one artillery "25 lb."; one self-propelled artillery "25 lb."; two anti-tank (17 lb.); one engineer; one headquarters.
[28.33] British armored brigade: three tank (Fly.); one motorized infantry (no motorized infantry battalion in 33rd and 34th Armored Brigades).
[29.0] Abbreviations
[29.1] U.S.: A or a=armored; m=mechanized; TAC=Tactical Air Command.
[29.2] German: Fkkp=Fliegerkorps; FB=Fuehrer Begleit; FJ=Fallschirmjäger; FG=Fuehrer Grenadier; Jgkp=Jagdfliegerkorps; NW=Nebelwerfers; P=Panzer; PG=Panzer Grenadier; JG=Jagpanzer; Mk=mark.
[29.3] British: A=Argyll and Sutherland Highlanders; B=Black Watch; C=Cameron Highlanders; D=Dorsetshire Regiment; DC=Duke of Cornwall's Light Infantry; DY=Derbyshire Yeomanry; E=Yorkshire (East Riding) Regiment; F=Royal Welsh Fusiliers; FY=Fife and Forfar Yeomanry; G=Gordon Highlanders; H=Hampshire Regiment or Hussars (if tank unit); HL=Highland Light Infantry; I=Wiltshire Regiment; L=Shropshire Light Infantry; M=Monmouthshire Regiment; NY=Northumberland Yeomanry; OB=Oxford and Buckinghamshire Light Infantry; RT=Royal Tank Regiment; S=Seaforth Highlanders; TAF=Tactical Air Force; W=Welsh Regiment; WR=Worcestershire Regiment; RB=Rifle Brigade; CG=Coldstream Guards; GG=Grenadier Guards; IG=Irish Guards; WG=Welsh Guards.
[29.4] Canadian: For=Canadian Forestry company.
[29.5] Belgian: Fus=Fusilier.
[30.0] Player's Notes
Wacht am Rhein was designed with two basic goals in mind. The first and most important, of course, was to show as realistically as possible what really happened in the Ardennes in December 1944 on a scale never before attempted in a "Bulge" game. The second aim was more of a history lesson: we wanted to show the varying organizations, tactics, and practices of the three major armies engaged in the Battle of the Bulge. On this semi-tactical scale, this was an enormous task; but an extremely rewarding one once the game-system had been worked out. We felt that Players should be rewarded in this game for using some of the same successful strategies and tactics used by the armies in the Ardennes (and conversely, be penalized when repeating the same mistakes as in history). The vastly different capabilities of all the units in Wacht am Rhein may at first be baffling to the Players. However, once the game has been played a few times, Players will automatically understand which units should be allocated to certain tasks in the game. As a result, we believe that Wacht am Rhein is one of the first successful intermediate-level World War Two operational games to be published. And there are many who would insist that this is the only level on which Second World War battles can be understood.
[30.1] Unit Capabilities
Players must recognize the inherent strengths and weaknesses of all the units in Wacht am Rhein. Each Player has many different types of combat units at his disposal, and the improper use of these units will invariably lead to disaster.
[30.11] Infantry: This is the workhorse of both armies. Since this is the only type of unit awarded Regimental Integrity, it should be used in the attack in regimental stacks. If losses are taken, reduce all units of the regiment before eliminating any. Infantry must be used to take (or defend) positions in Woods, for in this type of terrain, infantry is more mobile than tanks.
[30.12] Tanks: This is the decisive attack element of all armies. However, it should almost never be used in massed stacks. Instead, tank battalions should be distributed to infantry stacks. The dream of the German Player during the beginning Game-Turns is to attack U.S. positions with two infantry battalions of the same regiment and a tank unit stacked together in the same hex. If it looks as though there is a possibility of a big breakthrough (e.g. the U.S. Player does not have a defense in depth), the German Player should probably place his tank unit in March Mode. The loss of its tremendous Attack Strength is well worth the greater mobility awarded in the advance after combat.
[30.13] Anti-tank: These units can be very important to the U.S. Player, even on the company level. On December 16, the U.S. Player will usually be attacked by massive amounts of German armor. A simple towed anti-tank company stacked in the same hex as an infantry unit can negate the German combined arms team. It is usually better to break down anti-tank units into companies. Most often, their weaker defense strength is offset by the negation of the Combined Arms Bonus.
[30.14] Engineers: There is always the temptation (especially for the U.S. Player) to use his engineer units as if they were infantry. This should only be done when absolutely necessary. Engineers are vital to both Players in Bridge building and blowing. They aid Class A units in crossing Rivers and give mechanized infantry units this capability. They also enable units to enter entrenchments. One of the most important functions the U.S. Player performs during the first few Game-Turns is bridge-blowing. His engineers must be properly positioned so that they can deny the use of the Bridges to German armor, forcing the Germans to go through the laborious task of building a Bridge.
[30.15] Artillery: There are many who say that American artillery was the decisive element in the U.S. victory in the Battle of the Bulge. Moreover, many also claim that the major German mistake in this assault was their failure to move their massive artillery formations forward along with their initially victorious infantry and tank columns. Without a doubt, both sides' artillery is vital in Wacht am Rhein. If the German Player plans carefully, he can advance most of his tremendous corps artillery forward, albeit slowly. This artillery can practically break the U.S. front by itself when properly positioned. However, the U.S. artillery FPF strength is also mighty. Each division has at least seven FPF points per Game-Turn to lend to the defense. In addition, there are numerous corps artillery units that can lend their FPF to the defense. At times (usually in the north) U.S. FPF can totally nullify a massive German attack. All in all, the outcome of the game may well depend on how well each Player uses his artillery units, both in the attack and in the defense.
[30.16] Reconnaissance: These units are important because of their high Movement Allowance and because of their special capabilities in the advance after combat.
[30.17] Headquarters: Obviously, headquarters units are vital for supply purposes. Most often they can avoid being eliminated in combat. However, great care must still be taken when moving and positioning these units so that they can achieve the most in terms of supply, yet still avoid being displaced by combat.
[30.2] A Note on the Map
The map was drawn from 1:100,000 and 1:50,000 G.S.G.S. maps of the Ardennes, editions 1942, 1943, and 1944. In addition, we used 1944 German Staff maps of the Ardennes as a reference, although these contained many errors. The most helpful maps were the 1:50,000, which went down to the level of navigable and non-navigable rivers, fords, ferries, woods, orchards, vineyards—even windmills! The following map quadrangles were used: Malmedy, Vielsalm, Hoffalize, Wiltz, Arlon, Bastogne, St. Hubert, Durbuy, Aywaille, Huy, Ciney, Namur, Dinant, Wellin, Givet, Charleroi, Paliseul, and Mezieres. These maps are in the "N5000" series of G.S.G.S. maps. The terrain was purposefully simplified in this game to three general states: Woods, Broken, and Clear.
[30.3] A Note on the Sources
An immense number of books have been published about the Ardennes offensive. Only a few of those were deemed worthwhile in the production of Wacht am Rhein:
- Cole, Hugh. The Ardennes: The Battle of the Bulge. Washington: Office of the Chief of Military History, 1965.
- Eisenhower, John. The Bitter Woods.
- Elstob, Peter. Hitler's Last Offensive. New York: Macmillan and Company, 1971.
- Dunnigan, James. Kampf: The Ardennes Offensive. New York: Project Analysis Corporation, 1968.
- Reeves, Joseph. "Artillery in the Ardennes", Field Artillery Journal, March 1946, pp. 138-184.
- Jung, Hermann. Die Ardennen-Offensive 1944/45. Ein Beispiel für die Kriegführung Hitlers. Musterschmidt-Verlag Göttingen, 1971.
Addenda & Errata: Clarifications and New Rules (as of July, 1977)
As a result of post-publication playtesting, the following errata and addenda has been assembled to clarify and correct various errors or ambiguities in the original game components. The errata follows the sequence of the Wacht am Rhein rules folder.
Counter-Mix
- The German 560 VG Division's regiments as printed on the counters are in error. They should read 1128, 1129, and 1130 rather than 128, 129, and 130 respectively.
- The German 9 Panzer Division has a tank battalion with a mis-printed designation. It should read 1/11/9P rather than 1/119P.
- The British engineer battalion 260/42xx should read 260/43xx.
- The German 26 VG Division should have an engineer battalion; this is not provided in the countermix. This is a standard VG engineer unit: 1-3-6.
- The U.S. 741 tank battalion is duplicated in the counters. The correct battalion is 741/2xx. The 741/99xx is not used.
- Players should ignore the Corps attachments on the following German HQ units: 3PG, 15 PG, 9P, 11P. When these Divisions enter the map as reinforcements, they may attach themselves to any corps HQ on the map, but once attached they may never switch corps (or armies) for the remainder of the game.
Map
- The River connecting the SE hexside of C1826 with the SE hexside of C1824 should not be a River; it should be a Creek.
- There should be a Ford between hexes C2433 and C2432, D0336 and D0435, and C3544 and D0244.
- The road connecting hexes D3104, D3105, and D3005 does not bridge the Sauer River. The road is considered to stop at the River at all points.
Rules Clarifications and Corrections
[7.31] (Clarification) Units in March Mode may never enter a Woods hex, although a unit in Tactical Mode on a Woods/Road hex may go into March Mode.
[8.42] (Clarification) This rule stands without exception. An HQ unit in a Town or Village hex that is adjacent to Enemy units during its Friendly Combat Phase is still eliminated.
[9.25] (Clarification) Two U.S. company-size units may enter March Mode under one March Mode marker as a team if they started that Friendly Movement Phase in the same hex.
[10.4, 10.5] (Clarification) The maximum number of Regimental Integrity and Combined Arms bonuses that may be awarded per attack is one, regardless of how many attacking stacks possess it.
[10.8] (Modification) Combat results take effect after all attacks made from a single hex have been rolled for. If two units in a single hex are attacking different hexes, no combat results may be applied until the second attack has been resolved. If, in one attack the defender could advance and in the other the attacker could advance, then neither Player may advance his unit after combat.
[10.94] (Clarification) Advancing units must stop when entering an Enemy Rigid Zone of Control, not including the first hex entered in this advance.
[11.1] (Clarification) German VG Divisions do have Corps attachments. The starting VG Divisions are attached as follows: 212, 276, 352, 5FJ VG's: 7 Army; 26 VG: XLVII Corps; 560 VG: LVIII Corps; 18, 62 VG's: LXVI Corps; 12, 277, 3FJ VG's: ISS Corps; 326, 272, 246 VG's: LXVII Corps. Reinforcing VG Divisions may attach themselves to any corps or army, but once attached they may never shift corps or army for the remainder of the game. (Note that they may still trace supply to any corps or army HQ.)
[11.7] (Correction) The restriction against German Barrage Strength Points applies only to pure Artillery Strength Points. Rocket Artillery Barrage Strength Points are never counted against the 20 Point restriction. Nor do German "120" Artillery units count against this restriction (these are mortars, although this is not indicated on the counters).
[11.4] (Clarification) An Artillery unit may not use its FPF Strength if it is adjacent to an Enemy unit.
[14.0] (Clarification) All German Artillery units with a Movement Allowance of zero are always considered to be in supply without exception.
[15.1] (Correction) Engineer units may attempt to blow a bridge only if they can trace a path of hexes, free of Enemy Zones of Control, to a hex to which the bridge hexside is attached. Friendly units negate Enemy ZOC's in the hexes they occupy for the purposes of tracing this path of hexes.
[16.0] (Clarification) Improved Positions and Entrenchments may not be built in the same hex.
[16.0] (Clarification) If an Enemy unit comes within three hexes of a Friendly unit that is building IP's or entrenchments, the IP or entrenchment marker is immediately removed from play.
[16.0] (Correction) Units in March Mode may not build IP's or entrenchments. They may never benefit from the effects of these positions.
[17.0] (Clarification) U.S. companies may trace supply to any U.S. HQ unit.
[17.0] (Clarification) During the first three Game-Turns of scenarios 25.1, 25.2, and 27.0 U.S. company-size units may receive full support from all artillery units listed under their Division for the starting set-up, plus all Artillery units listed under "Corps Troops" for these set-ups (only of course if the company's Corps is the same as that of the Corps Artillery). After the first three Game-Turns, U.S. company-size units never receive full artillery support from any Artillery unit. Barrage and FPF Strength Points are always halved as described in Case 11.14.
[19.2] (Correction) For every two Air Points the Enemy Player has allocated to Patrol, the Owning Player must reduce the number of Ground Support and/or Resupply Escort and/or Interdiction Air Points by one. The choice of which Air Points to be reduced is left to the Enemy Player. For example, if 10 German Air Points were allocated to Patrol, the German Player could reduce U.S. Ground Support Points by three, Resupply Escort Points by one and Interdiction Points by one.
[19.43] (Clarification) During the Mutual Supply Determination Phase of the U.S. Player-Turn, the U.S. Player may attack any German unit or units that are in March Mode with his Interdiction Air Points. One or more Interdiction AP's must be allocated against each German unit in March Mode that is to be attacked. For example, if the U.S. Player allocated six AP's to Interdiction, he could attack six German units in March Mode at a strength of one, three units at a strength of two apiece, or two units at a strength of three apiece.
[21.2] (Correction) Reinforcements whose entry hex is blocked may come on the map up to three entry boxes away from the scheduled entry box. A Game-Turn delay in arrival still takes effect, however. Otherwise, Case 21.22 applies in full.
[22.0] There are several omissions on the U.S. Master Reinforcement Schedule. These are as follows:
- Game-Turn 5: C2 (North) — 33/7Axx (E)
- Game-Turn 7: C7 (North) — 613/V (D-M36)
- Game-Turn 11: C6 (North) — 745/1xx (T), 20/1xx (E); C2 (North) — 740/VII (T), 643/VIII(D)
- Game-Turn 12: C7 (North) — 195/VII(A)
- Game-Turn 17: D1 or 2 (South) — 602/III(D); D3, 4, or 5 (South) — 737/III(T), 818/III(D)
- Game-Turn 32: Between D4 and B4 (South) — 654/III(D)
[22.0] (Correction) The 9/VII(H) unit listed under Game-Turn 7 reinforcements should be 9/V(H). Delete the 9/V(H) unit from Game-Turn 21 reinforcements for the U.S. Player.
[22.0] (Clarification) Two U.S. units are provided in the counter-mix that are already considered broken down into companies at the beginning of the game. These are the 801/99xx(D) and 612/2xx(D). These units are never used in the game. They are provided for historical purposes only. Additionally, the 610/III(D) U.S. unit is not used in the game.
[22.0] (Correction) Delete U.S. Artillery unit 176/V from Game-Turn 38 reinforcements.
[22.0] (Clarification) The Engineer units of the following German divisions may enter the map with a bridge marker: 11th Panzer, 10th SS Panzer, 3rd and 15th Panzer Grenadier. These bridges are in addition to the others already listed on the Reinforcement Schedule.
[24.1] (Correction) Motorized infantry is any unit in the game with a standard infantry symbol that possesses seven or more Movement Points. It is strongly suggested that Players use this optional rule. Any unit that so converts has its Defense Strength reduced by two, but its Attack Strength reduced by one.
[24.3, 24.4] (Clarification) German Truppeneinheit and parachute commando units never affect POL markers. U.S. units may retreat onto Truppeneinheit units, but not parachute-commando units.
[24.4] (Correction) German parachute-commando units must drop on any Clear or Broken hex within five hexes of C1131.
[24.5] (Clarification) Units of the German 150th Panzer Brigade may attempt to leave an Enemy rigid ZOC to enter another hex. This second hex does not necessarily have to be another Enemy rigid ZOC. The 150th Panzer Brigade units do not have to begin their Movement Phase in an Enemy rigid ZOC; they may enter this ZOC and then attempt to leave it as described in the rules of this Case. If the units are attempting to "infiltrate" in this manner, they do not pay the one-half MP cost for leaving an Enemy rigid ZOC.
[25.12] (Correction) U.S. units 3/112/28(I) and 1/112/28(I), starting on hexes D0520 and D0319 respectively, should start the game in Entrenchments, not Improved Positions.
[25.16] (Clarification) Uncommitted units may not build Improved Positions or Entrenchments, blow bridges, or break down into companies. Uncommitted artillery units may use their Barrage and FPF Strength.
[25.22] (Correction) U.S. unit 323/99xx(E) should read 324/99xx(E); the German 18 VG Division has a Replacement Battalion (1-4-6) that starts on the map within one hex of C2508; the German Artillery unit 116Pxx(150) begins the game on hex C3514 not C3816.
[27.4] (Addition) Special Rule 25.24a applies to the Campaign Game. Special Rule 25.24b does not apply to the Campaign Game.
Suggested Rules Changes
Post-publication playtesting has indicated that certain rules changes and additions make the game far more realistic. Players should consider the following rules optional. They should be used only by agreement of both Players. However, they should be viewed as official rules.
[11.9] Artillery Movement
The movement of Artillery units has proven to be confusing and unwieldy. The following changes can solve most of these problems.
[11.91] All non-self-propelled Artillery units may move only in March Mode. They may never move in Tactical Mode. The act of going into March Mode indicates that the Artillery unit is Out of Battery. Flip the Artillery unit over to indicate this state. This obviates the need for March Mode markers on Artillery units since any Artillery unit on its reverse side will be considered in March Mode. All standard March Mode rules apply. Ignore Case 6.3 when using this rule. Additionally, revise the "In Battery Segment" of the Sequence of Play to state, "The Player may flip all of his Out of Battery Artillery units to their In Battery sides."
[11.92] Some non-SP Artillery start the game in Woods hexes. Such units may enter March Mode and leave these hexes, but this is the only time during the course of the game that they may do so.
[11.93] Self-propelled Artillery units may move in both March and Tactical Modes. All SP Artillery units may move up to six Movement Points in Tactical Mode without having to go Out of Battery. SP units enter March Mode like other Artillery units—by flipping the unit to its Out of Battery side (thus expending four MP's) and then moving. SP units may never enter March Mode and use their Barrage and FPF Strengths in the same Game-Turn. At the moment an SP unit in Tactical Mode expends its seventh MP in its Friendly Movement Phase, it is flipped out of Battery.
[11.4] Final Protective Fire
These rules are slightly abstracted in Wacht am Rhein in that the Defensive Player has a tremendous leeway over odds determination because he states his FPF last. In a combat, it is suggested that the Attacking Player state his total Attack Strength not including any barraging Artillery while the Defensive Player states his total Defense Strength not including any FPF. Then the Defending Player writes down how many FPF Strength Points he is using in support of his defense from Artillery units within range. Before this number is revealed, the Attacking Player states how many Barrage Points are supporting his attack from Artillery units within range. Next, the Defending Player reveals his FPF number while pointing to the Artillery units providing this support. All Divisional and Corps Artillery integrity rules must be strictly adhered to by both Players. These Artillery Strengths are added to the proper Player's Strength. A final total is calculated and a ratio determined.
[15.2] German Engineers and Bridge Building and Repair
German Engineers had the ability to repair destroyed bridges. This occurred frequently in the Battle of the Bulge, although the delays hindered the German advance tremendously. Using this rule, a German Engineer unit may repair a blown bridge from either of the two hexes the bridge formerly connected (unless the Engineer unit is in a U.S. ZOC). The Engineer unit must remain in this hex for two complete Friendly Movement Phases without moving. In the Bridge Building and Blowing Phase following this second consecutive Movement Phase of immobility the blown bridge marker may be removed. The bridge is considered intact again for all purposes.
[31.0] Morale
The combat rules of Wacht am Rhein allow both Players a complete freedom of choice as to how to retreat and/or take losses among their units suffering a combat result. This is an abstraction. In the heat of battle, high-ranking officers rarely knew the "strategic situation" other than in their immediate area. It usually didn't work that battalion "x" held its position to the last man so that battalion "y" had a more favorable retreat route—especially when both battalions were engaged in fighting at the same time. Battalion commanders could only act in such a situation on the basis of the morale of the men under their command.
[31.1] Given an adverse combat result, the affected Player may always choose to retreat his units without restriction (subject of course to the retreat rules).
[31.2] If a Player wishes to take a step loss in lieu of retreating, he must roll a die and refer to the highest Morale Rating possessed by all of his affected units. If the die roll is equal to or lower than this Morale Rating, the Owning Player has complete latitude as to how he may fulfill his combat result for his affected units in that particular combat (as described in Case 10.75). If the die roll is above this Morale Rating, the Owning Player may not take step losses in lieu of retreating for the duration of his retreat. In this case, the units must retreat the required number of hexes (unless the unit is completely surrounded by Enemy-occupied hexes, in which case the unit would be forced to take step losses instead of retreating). At the moment a Player declares that he wishes to take a step loss instead of retreating, he rolls the die. This die roll will determine his ability or inability to control the rest of the retreat.
[31.3] Morale Ratings (for parent formations):
- U.S. airborne divisions; German SS divisions; British Guards Armored Division: 5
- U.S. armored and infantry divisions (non-green — including those listed in Case 24.6); German 26 VG Division; German fallschirmjäger divisions; German panzer and panzergrenadier divisions; all remaining British units: 4.
- All U.S. green divisions; U.S. corps troops; all non-green German VG divisions: 3.
- German green VG divisions; non-U.S.-U.K. Allied units: 2.
[31.4] All units in a reduced state have their Morale Ratings reduced by one.
[31.5] All U.S. company units have Morale Rating of three.
[31.6] When using Morale rules, U.S. airborne battalions should reduce their Attack Strength to three and their Defense Strength to five. U.S. glider battalions should reduce their Attack Strength to two and their Defense Strength to four. The reduced side of airborne battalions should read 1-3-6 and that of glider battalions 1-2-6.
Charts and Tables
[6.8] Terrain Effects Chart
Movement Point cost (Tactical Mode and March Mode, by Class) and special combat effects:
| Terrain Type | Tactical Class A | Tactical Class B | March Class A | March Class B | Special Combat Effects |
|---|---|---|---|---|---|
| Clear | 1 | 1 | 1 | 1 | NE |
| Broken | 1 | 3* | 1 | 2 | NE |
| Woods | 2 | 6* | P | P | Barrage Strength halved into Woods hexes |
| Town, Village | 1 | 3 | 1 | 2 | Barrage Strength halved into Town, Village hexes. Units in Town or Village hex are not obligated to attack during Friendly Combat Phase |
Leaving a Rigid Zone of Control: one-half of the unit's Movement Allowance plus the terrain cost for the hex entered (round fractions down). May not immediately enter another Rigid Zone of Control.
Leaving a Fluid Zone of Control: two Movement Points in addition to the cost of the hex entered. May immediately enter another Zone of Control.
Explanation:
- NA: Not Applicable - the unit may not use the benefits of that terrain feature in its movement in that Mode.
- NE: No Effect - that terrain type has no effect on combat.
- P: Prohibited - the unit may not cross that hexside or enter that hex for any reason whatsoever.
- *: If there is a Ground Freeze, the cost for Class B units in Tactical mode is 2 MP's for each Broken hex and 4 MP's for each Woods hex.
- (a): If there is a Friendly engineer unit adjacent to a Class A unit in Tactical Mode at the moment it attempts to cross a River hexside, the movement penalty becomes +2, not +4. Mechanized infantry units in Tactical Mode (Class B) may cross River hexsides at +4 penalty, but only if a Friendly engineer unit is adjacent to the mechanized infantry unit at the moment the crossing is attempted. Mechanized infantry is the only type of Class B unit that may perform such a move.
- (b): A Class A unit in Tactical Mode may cross a River hexside containing a Bridge by ignoring the Bridge and paying normal River crossing costs.
CLASSES OF UNITS:
- Class A: All units with six or fewer Movement Points.
- Class B: All units with seven or more Movement Points.
Notes: Any unit that has a Building marker on it may not move that Movement Phase. Any U.S. battalion that has just broken down also may not move that Movement Phase.
[10.76] Combat Results Table
Rows are the Terrain Type (Defender); each column gives the odds ratio on that row. The Die Roll results below apply to the column (ratio position) shown, read across the row for the terrain the defender is in.
| Terrain Type (Defender) | Col 1 | Col 2 | Col 3 | Col 4 | Col 5 | Col 6 | Col 7 | Col 8 | Col 9 | Col 10 | Col 11 | Col 12 | Col 13 |
|---|---|---|---|---|---|---|---|---|---|---|---|---|---|
| Behind River | 2-1 | 3-1 | 4-1 | 5-1 | 6-1 | 7-1 | 8-1 | 9-1 | 10-1 | 11-1 | 12-1 | 13-1 | 14-1+ |
| Town | 1-1 | 2-1 |
Results by Die Roll (the same results apply in each column regardless of terrain row):
| Die Roll | Col 1 | Col 2 | Col 3 | Col 4 | Col 5 | Col 6 | Col 7 | Col 8 | Col 9 | Col 10 | Col 11 | Col 12 | Col 13 |
|---|---|---|---|---|---|---|---|---|---|---|---|---|---|
| 1 | A1 | D1 | D1 | D2 | D3 | D2(1) | D2(1) | D3(2) | D3(2) | D3(2) | D3(2) | D4(2) | D4(2) |
| 2 | A1(1) | A1 |
Explanation of Results:
The number following the letters "A" (attacker) or "D" (defender) indicates the number of hexes the Owning Player retreats his units and/or the number of steps the Owning Player must lose from his participating units (see Case 10.74). This result must be completely fulfilled. The number in parentheses is the number of mandatory step losses incurred by the units of the Player indicated by the letter "A" or "D". These losses must be taken immediately before any retreat result is fulfilled.
* Possible German artillery ammunition depletion. See Cases 11.8 and 13.34.
Shifts awarded on the Combat Results Table (always shift on the same terrain line as the defender is in).
Shift one column to the right for:
- (a) German or U.S. Regimental Integrity if this stack is attacking (see Case 10.4).
- (b) German or U.S. Combined Arms Attack Bonus (see Case 10.5).
- (c) German surprise (see Case 25.14a).
Shift one column to the left for:
- (a) German or U.S. Regimental Integrity if this stack is defending (see Case 10.4).
- (b) An Improved Positions marker is on a unit(s) when it is being attacked (see Case 16.1).
- (c) Combined Arms Defense Bonus (see Case 10.54). This may only negate a Combined Arms Attack Bonus.
Note: All these shifts are cumulative. More than one may be awarded to an attack or defense for a single combat. For example, if an attack is being made at 2-1 on the Broken terrain line and the attacker was awarded three column shifts to the right and the defender was awarded two shifts of columns to the left, the final attack would be resolved on the 3-1 column on the Broken terrain line on the CRT.
[11.68] Artillery Effects Summary
a) The following penalties are applied against individual artillery units before their Barrage or FPF Strength has been allocated against a given hex:
| Condition | Barrage, FPF Effect |
|---|---|
| Out of Communication | Full |
| Unsupplied | Halved |
| Isolation-1 | Halved |
| Isolation-2 | Zero |
| Violating Division or Corp Integrity (See Case 11.1) | Halved |
b) The following penalties are applied against the total number of Barrage Points (not FPF) allocated against an Enemy hex:
| When firing into | Barrage Effect |
|---|---|
| Woods, Town, Village, Improved Positions, Entrenchment | Halved |
(Note: When firing into a hex that fulfills two of the above categories (e.g., an Improved Positions, Town hex) the halving effect is not cumulative. Barrage Points can be halved only once due to the above conditions).
c) The following penalty is applied against the total number of Barrage or FPF Points allocated against an Enemy hex:
| Condition | Barrage, FPF Effect |
|---|---|
| Firing during Night Game-Turn | Halved |
(Note: This penalty is cumulative with the penalties awarded due to firing into certain types of terrain. For example, an artillery unit with a Barrage Strength of seven is firing into a Town hex at Night. The Barrage Points are first halved to three because of the Town hex, and then halved again to one because of the Night Game-Turn.)
[14.68] Supply and Fatigue Effects Summary
| State | Attack | Defense | Movement |
|---|---|---|---|
| Out of Communications | Normal | Normal | Normal |
| Unsupplied | Halved | Normal | Class A: Normal; Class B: Halved |
| Isolation-1 | Halved | Normal | Class A: Normal; Class B: Halved |
| Isolation-2 | One | Halved | Halved |
| Fatigue | Halved | Halved | Halved |
| Recovering | Halved | Normal | Halved |
Notes: A unit that is both Fatigued and Isolated may not move. All other effects on this chart are cumulative. For example, a unit that is in a state of both Recovering and Unsupply would have its Attack Strength halved and then halved again. Always round fractions down.
[24.35] Truppeneinheit Table
| Die Roll | 1 U.S. ZOC entered | 2 | 3 | 4+ |
|---|---|---|---|---|
| 1 | • | • | • | • |
| 2 | • | • | • | • |
| 3 | • | • | • | E |
| 4 | • | • | E | E |
| 5 | • | E | E | E |
| 6 |
Explanation of Results: • = No Effect—move succeeds; the Truppeneinheit unit may remain in the hex occupied at the end of the Movement Phase. E = Eliminated—the Truppeneinheit unit is removed from the map; it may never be brought back into play. (See Case 24.3 for full explanation.)
[24.47] German Parachute Drop Table
| Die Roll | Clear | Mist | Overcast |
|---|---|---|---|
| 1 | 0 | 0 | • |
| 2 | 0 | 0 | • |
| 3 | 1 | 0 | • |
| 4 | 2 | 1 | • |
| 5 | 3 | 2 | • |
| 6 | 4 | 3 | • |
Explanation of Results: The number shown is the number of parachute-commando units that are placed in the indicated drop hex during the German Movement Phase. A "0" means that no units have survived the drop—it has failed and nothing more is done. The parachute-commando units may never drop again.
Drop hex: Must be a Clear or Broken hex. The drop must take place in an AM or PM Game-Turn.
• = Prohibited.
[18.16] Weather Table
| Die Roll | Weather |
|---|---|
| 0 | Overcast |
| 1 | Overcast |
| 2 | Overcast |
| 3 | Mist |
| 4 | Mist |
| 5 | Clear |
| 6 | Clear |
| 7 | Clear |
Explanation of Results: The indicated weather condition will apply to that entire day. Adjust the Weather Track if necessary. See Case 18.1 for full explanation.
Modifiers: Subtract one from the die roll if the weather is currently Overcast. Add one to the die roll if the weather is currently Clear.
[18.26] Ground Table
| Die Roll | Ground Condition |
|---|---|
| 1 | Normal |
| 2 | Normal |
| 3 | Normal |
| 4 | Normal |
| 5 | Ground Freeze |
| 6 | Ground Freeze |
Explanation of Results: The indicated ground state will last for the duration of that day. Adjust the Ground Track if necessary. See Case 18.2 for full explanation.
[19.44] March Mode Interdiction Table
| Die Roll | 1 Air Point | 2 Air Points | 3+ Air Points |
|---|---|---|---|
| 1 | R | E | E |
| 2 | • | R | R |
| 3 | • | • | R |
| 4-6 | • | • | • |
Explanation of Results: • = No result. R = German unit that was the target of the attack is reduced. If the unit is already in its reduced state, it is eliminated. E = The German unit that was the target of the attack is eliminated.
Explanation of use: At the end of the Mutual Supply Determination Stage of the U.S. Player-Turn, the U.S. Player may attack any single German unit that is in March Mode on the map with the same Air Points he used for Interdiction. The U.S. Player may not examine any German units under March Mode markers during this Stage—he must simply point to a marker and state that he is attacking it with a certain number of Interdiction Air Points. The U.S. Player may attack different German units during this Stage, as long as it is with different Interdiction Air Points. March Mode Interdiction may not be performed during Night Game-Turns. Apply all results called for on this Table immediately.
[25.14c] Green Unit Table
| Die Roll | Result |
|---|---|
| 1 | R |
| 2 | R |
| 3 | • |
| 4 | • |
| 5 | • |
| 6 | • |
| 7 | • |
Explanation of Results: • = No result. R = The unit in question is reduced. If it is already in a reduced state, it is eliminated.
Modifiers: Add one if the Green unit is a U.S. unit.
Explanation of use: Each and every time a unit of a green division attacks or defends during the Pre-dawn, AM or PM Game-Turns of December 16, it must roll a die and consult the Green Unit Table immediately before the die roll which resolves the combat. Roll once for every unit which is considered to be green. A combat cannot be called off because the ratio has proven unfavorable due to the results of the Green Unit Table. See Case 25.14c for full details.