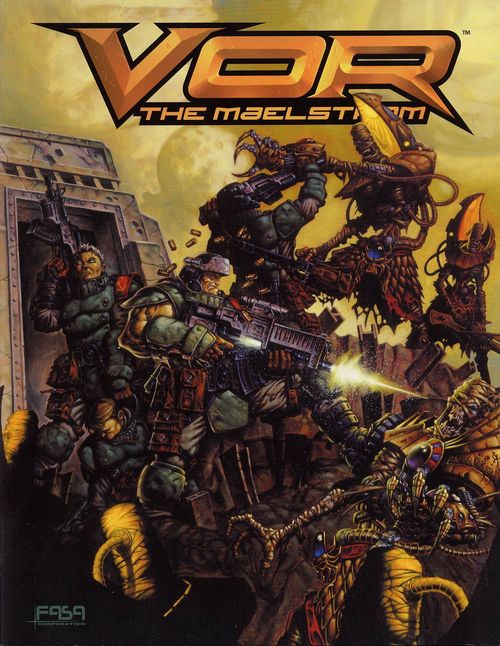
VOR: The Maelstrom
VOR: The Maelstrom Rulebook
Table of Contents
Table of Contents
Introduction
VOR: The Maelstrom is a tabletop war game for two or more players. The forces the players use in their battles represent the survivors of worlds that have been drawn into the Maelstrom. Players build their forces by collecting and painting miniatures.
The rulebook covers Game Concepts, Playing the Game, Movement and Combat, and also includes advanced rules for Vehicles, Scenarios, Campaigns and Custom Force Creation. Finally, the Force Lists provide detailed descriptions of the four factions in the box, including the weapons and powers that each force wields.
Components
The VOR: The Maelstrom boxed set contains everything you need to begin playing VOR:
- 1 rulebook
- 1 book of scenarios
- 9 Union miniatures
- 7 growler miniatures (1 bull, 3 onehorns and 3 pups)
- 3 plastic area-effect templates
- 5 terrain walls
- 2 ten-sided dice
Battlefield Terrain
Terrain is important for war gaming because it creates cover and blind spots that players can use to develop a strategy for a game. The walls included in this game are a good example of useful terrain. Several companies make quality terrain specifically for war gaming. You can also make your own terrain, or simply use common household objects to create a varied landscape. The more terrain you use, the more interesting your games will be.
Dice
This game requires you to use a 10-sided die (abbreviated as D10) to resolve a wide variety of game effects. Most 10-sided dice show a zero on one face. The zero represents a value of ten.
If D10 appears with a modifier (for example, D10 + 1 or D10 - 2), roll the die, then apply the modifier to the die roll to get the result. For example, if told to roll D10 + 2, and you roll a 4, the final result is 6 (4 + 2).
If the rules call for a D100 roll, roll D10 twice, using the first result as the tens value and the second result as the ones value, reading the zero on the die as zero, not ten. For example, a 2 on the first roll and a 3 on the second roll would be 23. A 0 on the first roll and a 7 on the second would be 7. If both dice show zeroes, the result is 100.
A Ruler
The standard unit of measure in VOR is the inch. The range of weapons and the distance you can move your models are both measured using a standard ruler or measuring tape. Flexible fabric measuring tapes are ideal for use with tabletop war games, but a ruler or metal tape measure will also work.
What Is Tabletop War Gaming?
A unique fusion of three distinct elements, tabletop war gaming combines the thrill of tactical conflict, the pleasure of collecting and painting miniatures, and competitive fun!
In general, tabletop war games offer an entertaining way for players to simulate conflicts between forces of varying sizes using miniature replicas of the warriors involved. Players maneuver their miniatures around the battlefield (usually a large, flat surface such as a table or the floor), making use of whatever cover the battlefield's terrain may provide (model trees, ruined buildings and so on) and rolling dice to determine if their models' attacks succeed in defeating their opponent's models. After an agreed-upon number of turns, the players determine a winner based on how well their forces performed.
Game Concepts
This section describes basic concepts of war gaming and concepts specific to VOR. Once you are familiar with these concepts, you should lay out a few pieces of terrain and set up a few models so that you can try various game mechanics as you read the rest of the rules.
At least one person in your playing group should read the rules to grasp the general idea of how things work before you start playing. VOR's game mechanics are intuitive enough, however, that you can easily jump in and start playing, referring to the rules as you go for clarification on any specific questions or problems that arise.
The Golden Rule
No rulebook for a tabletop war game can cover every possible situation that may come up during a game, so it's important for players to be flexible and reasonable when working out solutions to problems. Don't let the game get bogged down in a dispute-agree on an answer to the problem that both players can accept, then after the game is finished you can discuss how the situation should be handled if it occurs again. If you can't agree on a solution after a couple of minutes of discussion, both players should roll a die; the person who gets the highest result gets his or her way. The important thing is to get past the problem as quickly as possible and get back to playing the game!
Models
The term model refers to any miniature used in the game, regardless of its size, shape or type. Each model has unique capabilities defined by its size, statistics and any special abilities.
The Custom Force Creation rules describe how to use miniatures from other games to make forces appropriate for use with VOR.
Model Sizes
VOR models are classified by size as small, medium or large. Each model should be on a base appropriate to its size so that it takes up the proper amount of space on the gaming table. Small and medium models both use standard 1-inch round bases. Large models use 40mm or larger round bases.
Some rules affect different sizes of models differently. The size of each model appears in the Force Lists.
Statistics
The statistics of each model define its usefulness in the game. These characteristics represent a model's strengths and weaknesses and determine how a model interacts with other models and terrain during a game. A model's statistics range from 1-10, with an average statistic of 4. In general, the higher the stat, the more effective the model.
- Move Points (MP): Move Points determine what a model can do during a turn. For example, the distance a model can move and the number of attacks it can make in a turn are both based on this stat.
- Close Combat (CC): Close Combat determines a model's effectiveness in melee fighting. A model fighting unarmed or using melee weapons (for example, clubs, swords and so on) bases its attack on this stat.
- Ranged Combat (RC): Ranged Combat determines a model's effectiveness in making ranged attacks. The use of all firearms and some abilities is based on this stat.
- Power (POW): Power reflects the physical strength of a model. A model's Power is also the basis for the effectiveness of melee combat weapons.
- Body (BOD): Body reflects how resistant a model is to injury. The higher the model's Body stat, the less likely it is to be injured by an attack.
- Brains (BRN): Brains indicates the intelligence of the model, and is used to determine whether a model can understand a specific item or technology.
- Guts (GUT): Guts determines a model's bravery, specifically, whether it will run in the face of danger or stay to the bitter end.
- Lifeforce (LIF): The Lifeforce stat represents the number of points of damage a model can take before dying.
- Armor Rating (AR): The Armor Rating represents the model's defenses. A model with enclosed power armor will have a higher AR than a model wearing normal clothing.
- Point Value (PV): Every model in the game has a Point Value that reflects its effectiveness in the game. The higher the Point Value, the more effective the model.
Abilities
Models in VOR have different abilities that give them various advantages in battle. Each race has unique abilities, and certain units within a race possess specific abilities. Some abilities can be used to attack, while other defensive abilities alter a model's statistics. The description of each ability appears in the force list for that race or force, and provides all the rules needed to use the ability.
Units
Models are organized into units for the purposes of deployment and activation, movement, morale and certain abilities. There are two kinds of unit: individual models and squads. The force lists designate which models are deployed in squads and which models are deployed as individuals.
Individual Models: Some models deploy and fight alone on the battlefield, most often force leaders or large creatures. These are known as individual models.
Squads: A squad is a group of models that work together as a team. To represent this, the models in a squad must remain within a certain distance of each other during a battle (see Squad Coherency). The term squad is used regardless of the actual organization of the models, be it a pack, horde, gang or flock.
Statistic Tests
VOR uses statistic tests, or stat tests, to determine if a model succeeds in an action. For example, if a model makes a close- or ranged-combat attack, the player makes a stat test using the Close Combat or Ranged Combat statistic, respectively. In addition, many of the special abilities of the forces require an opposing model to make a stat test to resist that ability.
To make a stat test, roll D10. A stat test succeeds when the result is equal to or less than the stat being used.
Sometimes modifiers will be applied to the stat before the die is rolled. For example, a ranged combat attack is more difficult if the target is behind hard cover, so the attacker's RC is modified by -2 before the player rolls the die. Modifiers for specific kinds of actions are described in the relevant sections of the rules, and always apply only to a single test; these modifiers are never permanent.
Force Lists
Each race and faction in the game has a force list, which describes the options you can choose when selecting a force. The force list details various unit types and their abilities, the number of models in each unit and the statistics and Point Values of those models. Within these restrictions, you can choose a different assortment of models to field every time you play.
Winning the Game
You can win a game of VOR in various ways, depending on the goals and objectives established before beginning play. In a basic game, victory is determined by Glory Points. Players receive Glory Points for destroying enemy models: at the end of the game, add together the Point Values of all the enemy models your side killed. Models removed from the game by other means, such as the use of abilities or failed morale tests, count as killed for the purpose of determining Glory Points. The side with the most Glory Points wins.
Victory in a game of VOR may also be based on other factors, such as achieving a specific goal, depending on the scenario being played. See the scenario guidelines in Scenario Templates.
Playing the Game
Before beginning the game, the players choose a scenario (either an original one or a scenario published by FASA) or determine victory conditions (see Scenario Rules). Based on the scenario, the players determine the size of the game and choose their forces from the force lists (see Campaign Rules for suggestions for balancing forces). The players then place terrain on the playing area, deploy their forces and begin playing.
Setting Up the Playing Area
The easiest way to set up the playing area is for all players to simply place terrain on the playing area as they wish until the board is sufficiently full, then fine-tune the placement of pieces so that they work well with each other.
Alternatively, each player may roll D10. The player with the highest result places the first piece of terrain, which should be no larger than 12 x 12 inches. Then placement alternates between players (or proceeds clockwise in a multiple-player game) until a player passes on his turn to place a piece of terrain twice in a row or all players are satisfied with the playing area set-up and agree to stop placing terrain. If a player places a piece of terrain larger than 12 x 12 inches, then he misses his next turn to place terrain.
When setting up terrain, place as much terrain as possible in the main playing area and away from the table edges. Most of the action happens in the center of the table, so that is where terrain will come into play most frequently. A section of woods or a hill placed on the table edge will rarely be a factor in the game.
Deployment
Once the playing area has been set up to all players' satisfaction, you can begin putting your models into action.
First, determine where on the playing area the models will be set up. Each player will choose an area of the table, called a deployment zone, on which to set up. The size and shape of deployment zones vary depending on the size and shape of the playing area and the number of players in the game.
The number of possible variations for deployment zones makes it impractical to cover them all in these rules. As a general rule, opposing forces should set up a minimum of 24 inches apart, and the deployment zones for each player should be spaced as evenly as possible around the outside edge of the play area. The deployment diagrams (for 2, 3 and 4 players) show examples of various deployment zone configurations; the zones are 12 inches deep along the table edges. In each case, the lightly shaded areas represent valid deployment zones.
Next, all players roll D10. The player with the highest result may choose a deployment zone. The other players then choose their deployment zones from the remaining available zones in descending order of dice roll results.
After each player has chosen a deployment zone, all players roll D10 again. The player with the highest roll can deploy a unit or may force an opponent to deploy a unit. When the first unit is deployed, players then alternate deploying their units (deployment proceeds clockwise in a multiple-player game) until all units have been placed on the board.
When deploying units, place them behind cover whenever possible, so that they begin the game with a little additional protection. In addition, keep the objectives of the scenario in mind as you place your units on the playing area. For example, if your forces must protect something, place them so that they can achieve that goal.
The Game Turn
Each game of VOR: The Maelstrom is broken down into a number of game turns. This number will vary depending on what kind of battle you're playing (standard mission, scenario and so on). For example, some games are played for a predetermined number of turns; other games are played until one side achieves a specific goal or objective. Each turn will take a varying amount of time, based on the number of units and players involved in the game.
In each turn, players roll for Initiative and activate their units. Each player may activate each unit in his force one time per turn (see Activate Units). The game turn ends when all the units of all the players have been activated, and the next turn begins.
Roll Initiative
At the beginning of each turn, all players roll D10 for Initiative. The player with the highest result wins the Initiative and may choose to activate one of his units, or may force another player to activate a unit. If the player who wins Initiative chooses an opponent to activate a unit first, he may also choose the unit that player activates. Play continues with each player alternating activating a unit, until all units in the game have been activated. In a multiple-player game, play proceeds clockwise.
Activate Units
When a unit is activated, its component models may move, make an attack with a weapon or ability, or hold their action. A model can perform its actions in any order: for example, a model can move, attack, then move again; attack first and then move; move without making an attack; attack without moving and so on (see Move Points and Holding an Action). Each action must be resolved before the model spends any remaining MP for further actions. A model is only limited in its actions by the number of Move Points it has available.
All models within a unit must be activated before moving on to the next unit (though models may hold an action to intervene during another unit's activation, see Holding an Action, below). Any models that are not activated with their unit are not activated that turn.
Move Points
Move Points represent the amount of activity a model may engage in during a turn. A model can use up to its full MP each turn, unused MP do not carry over into the next turn. In order to take an action, a model must have the full MP necessary. The Activation Table lists the actions all models can take; some models may perform other actions (see the Abilities section of each unit type in the Force Lists).
Once a model has finished spending MP, its activation is declared finished and play moves on to the next model. Once an activation is ended, the model may not spend any more MP that turn unless it held an action.
Activation Table
| Action | Move Points |
|---|---|
| Movement | 1 inch/MP |
| Hold an action | All MP (see Holding an Action, below) |
| Use weapon/ability | See MPC in Force Lists |
| Aim | 1/2 ranged attack MP cost, round up |
| Unarmed melee attack | 3 MP/attack (4 MP for large models) |
| Move out of melee | 1 MP |
| Jump | 4 MP |
| Stand up | 3 MP |
| Enter/exit vehicle | 1 MP |
| Moving in Structures: moving between levels | 1 MP per inch of distance between levels |
| Moving in Structures: climbing buildings or terrain | 1 MP per inch of height of obstacle |
Activating a Squad
A squad may be activated as a group or as individual models. All players must agree on the form of activation to be used in the game before beginning play, and all players must use that form of activation for their squads for the entire game.
Individual Activation: When using individual activation, you activate one model at a time as in the standard rules. Because this method allows you to fine-tune your strategy, individual activation of a squad offers the player tactical advantages. However, activating each member of a squad individually will slow down play in large-scale games.
Group Activation: When a squad is activated as a group, the player must announce the number of MP the squad will use for movement (including jumping and standing). All models in the squad spend that MP regardless if they move the full distance. For example, if a player announces that his squad will spend 4 MP on movement, each model in the squad must spend 4 MP on movement, even if some models move less than 4 inches or do not move at all. Each model still moves, attacks and so on one at a time. Group activation speeds up game play because every model in a squad will have a standard amount of MP to use for movement, and therefore the same amount left to use for attacks. This allows players to deal quickly with many squads under their control and accurately represents the behavior of a military unit, but the player loses some strategic flexibility.
Holding an Action
Any model with an MP stat of 8 or more may spend all its MP to hold its action in a turn. A model holding its action may not spend MP on anything else that turn, except intervening (see below). A model may continue to hold its action for subsequent turns, spending all its MP each turn to remain on hold.
A model holding its action receives 5 MP that it can use to intervene at any time, even during an opponent's turn or in the middle of an enemy unit's activation or movement. This is most useful for waiting until a target appears from behind cover and immediately attacking it. When the holding model intervenes, play is temporarily interrupted until the holding model completes its action. Play then resumes normally.
Models that intervene may only make ranged combat attacks or receive a charge (see Charging). Intervening models may not move, melee attack or spend MP for any other purpose. If using the group activation rule, the entire squad must intervene at the same time.
Modify by -1 ranged combat attacks made by models that were holding their action.
Movement
A model moves by spending Move Points. Each MP spent on movement allows the model to move 1 inch in any direction. Terrain and other special effects modify the MP cost of movement per inch.
If a model moves a fraction of an inch, it costs the same MP as a full inch of movement. For example, a model that moves 3.5 inches through open terrain would spend 4 MP.
Models may "stagger" their movement in order to move around obstacles. When a model moves in this manner, total the distance it has moved before rounding off fractions. For example, if a model in open terrain moves 2.25" in one direction, and then another 3.5" in another in order to get around a corner, its total movement would be 5.75", rounded to 6" (costing 6 MP).
Model Placement
A model's exact position on the battlefield is the basis for weapons range, squad coherency and the effects of that unit's or another unit's ranged attacks and special abilities. Because of this, you should not remove a model from the battlefield during the game unless absolutely necessary. If you must remove a model during the game, mark its place with a die or some other item so that you can replace it as close as possible to its original position when you return it to the table.
At the end of a model's movement, the controlling player may place it facing any desired direction (except see Vehicles). A model is normally considered to be facing the direction in which its head is pointed. If a model's pose makes it difficult to determine its facing, the controlling player may designate the model's facing. If the controlling player fails to announce what part of the model will determine its facing, the opponent may choose what part of the model will determine its facing for the remainder of the current game.
Squad Coherency
Squads fight together as a team, and as such the component models of a squad must stay close enough together to effectively communicate and coordinate their attacks. If members of a squad lag behind or get separated from the squad, it weakens the entire squad's ability to perform and increases the likelihood of the models becoming disoriented or panicked.
Unless otherwise noted, all squads have a 3-inch coherency; in other words, each member of the squad must be within 3 inches of one other remaining member of the squad. During a squad's activation, models may temporarily break coherency. Players need only check the coherency of a squad after the squad has been activated and the movement of all its models is finished. If one or more models within a squad exceed the squad's coherency at this point, the squad must make a Morale Test or become panicked (see Morale).
If only one model from a squad survives on the battlefield (the rest of the squad has been eliminated), it does not have to make Morale Tests for breaking coherency.
Melee Combat Exception: Models in base-to-base contact and in melee combat with an enemy model do not need to maintain coherency. As soon as the model breaks from close combat or ends the fight, however, it must regain coherency, so it is to the squad's advantage to maintain coherency at all times.
(Diagram: a model more than 3" away from any other member of its squad is "out of coherency"; the rest of the squad are in coherency.)
Moving Through Models
Models may move through the space occupied by friendly models, but may not end their move in the same space as any other model, nor may their bases overlap. There must be space available for a model to occupy when it moves-you can't move other models out of the way in order to make room. Models may never move through or occupy the same space as enemy models.
Terrain
The Maelstrom offers an unlimited variety of terrain on which to fight. The terrain type on which you're fighting will affect your model's movement and ability to fight. The Terrain Table suggests four types of terrain with modifiers for moving through those terrain types. The players should designate the type of terrain condition each piece of terrain in the playing area represents before play begins.
The nature of the Maelstrom and the countless alien worlds contained within it make many different types of terrain possible. Use the suggestions in the Terrain Table as the basis for creating other terrain conditions, such as dangerous levels of radiation, low gravity and so on. For examples of more terrain features, consult the Battle Terrain Table.
Terrain Table
| Terrain Condition | Modifier |
|---|---|
| Open | No modifiers |
| Broken | 2 MP per inch. No wheeled vehicles. |
| Hazardous | 3 MP per inch. No wheeled or tracked vehicles. |
| Impassable | Flying movement only. |
Terrain Table Notes
Open Terrain: This common surface is relatively flat and stable. Grassy fields, hard-packed dirt, and paved areas are representative of this type of terrain.
Broken Terrain: Broken terrain is rough and unstable. Areas of rocky terrain, deep sand or snow, shallow water and dense ground vegetation are examples of this type of terrain.
Hazardous Terrain: Hazardous ground consists of terrain that is very difficult to navigate through safely. Examples of hazardous terrain include deep water and heavy rubble.
Impassable Terrain: Often the result of heavy fighting, impassable terrain is commonly found on battlefields where the engines of war have deeply scarred the terrain and reduced to heavy rubble any structures in the area. Impassable terrain also includes sheer cliffs, deep gorges, rushing rivers and so on.
Battlefield Structures
Burned-out, blasted and twisted structures are common features on the battlefields of the Maelstrom and can provide important strategic benefits if used to their best advantage. The following rules suggest ways of using structures in your game. Use these as a basis for creating rules for your own, unique types of structures.
The nature of the Maelstrom makes possible an almost limitless variety of structure types and composition. The following list suggests statistics for buildings constructed from different materials. Use these suggestions as a basis for creating stats for structures of other, and unique, materials. Before play begins, each structure in the play area should be defined by type and whether it can be climbed (see Climbing Structures and Terrain, below).
Large Structures: Depending on the type of terrain you set up, some structures may be too large to be destroyed with a single attack. Because it is difficult to designate parts of buildings as being in different conditions or states of repair, players may agree before beginning the game to designate certain large structures as immune to damage.
| Structure Type | Statistics |
|---|---|
| Wood | BOD 5 |
| Brick/Clay | BOD 6 |
| Crystal | BOD 6, AR 3 |
| Bio-Organic | BOD 7 |
| Concrete | BOD 7, AR 3 |
| Metal | BOD 8, AR 5 |
Climbing Structures and Terrain
A model may climb on low buildings or obstacles or move between levels of buildings.
In the case of structures with visible staircases or ladders, climbing or moving between levels costs 1 MP per inch of distance up or down. For example, if the level a model is climbing to is 5 inches above the level it currently occupies, it would cost 5 MP to climb to that level.
In the case of structures or sheer-sided terrain that does not have stairs or ladders, small models can climb structures that are 2 or less inches high. Medium and large models can climb structures that are 3 or less inches high. The cost is the same as for climbing ladders or stairs.
In both cases, a model cannot end its movement halfway between levels. If a model does not have enough MP to make it all the way up or down to a level or platform where it can stand, it cannot begin the climb at all.
Special Movement
Models can do more than just walk around when they move across the playing area. The following rules cover standing up after being knocked down, jumping and falling (for MP Costs, see the Activation Table).
Standing Up from Prone
A prone model is one that is lying on the ground. When a model is knocked prone (see Knockdowns), place it on its side centered on where it was standing. Unless otherwise noted by an ability, a prone model cannot spend MP for any reason while it is prone except to stand up or hold an action. It costs 3 MP to stand up from a prone position. Models may not intentionally go prone unless an ability states otherwise.
Jumping
For a cost of 4 MP, a model may jump a distance up to 2 inches horizontally and 1 inch vertically during its movement. The model must make a Knockdown Test (see Knockdowns) when it lands from a jump. A model that fails this roll lands prone, but is not injured. After a jump, the model may continue to jump or use other movement as long as it has MP available (though it would have to stand up first if it fell down).
Falling
A model that gets knocked off or chooses to jump from a ledge or other high terrain feature must roll D10 to determine if it lands prone. On a result equal to or less than the number of inches the model fell, the model lands prone and takes a hit with a Power equal to the distance fallen in inches. The model cannot make an Armor Test to avoid damage. The falling model takes 1 point of damage for each full 6 inches that it fell (with a minimum of 1 point).
Falling Onto Another Model: If a model falls or jumps onto another model, both models take a hit as described above. If a model falls on a vehicle, the vehicle takes no damage, but the falling model takes a hit. However, if a large model falls on a light vehicle, both take damage as described above.
Combat
There are two types of attacks available to models in VOR: close combat and ranged combat. Close combat (or melee) fighting is when you get up close and personal with your opponent and attack using your fists, a sword, a staff, a bayonet and so on. Ranged combat involves attacking your adversaries from afar with some sort of missile weapon, from guns to energy blasts to thrown rocks and so on.
General Rules
The following rules apply to both ranged and close combat.
Critical Hits and Misses
A result of 1 on an attack to-hit roll is a critical hit. This means the attack automatically hits, and the target of the attack cannot make an Armor Test to avoid the damage.
A result of 10 on an attack to-hit roll is a critical miss. The attack automatically misses, and the attacking model loses any remaining MP for that turn.
The critical hits and misses rule applies to both close and ranged combat.
Using Weapons and Abilities
To use a weapon or ability in combat, the statistics of a weapon or ability are used in place of the wielder's own stats unless noted otherwise.
Knockdowns
Some weapons and abilities may force a model to make a Knockdown Test. Roll D10; on a result of 5 or less, the model is knocked down and goes prone. This is referred to as being knocked down. If a weapon indicates a modifier for knockdown (written as Knockdown +3, for example), add the modifier to 5 before making the Knockdown Test. The result of the Knockdown Test must be equal to or less than that number.
Knocked down models are more vulnerable to melee attacks (see Prone Models).
Ranged Combat
Ranged attacks are attacks made using any weapons and/or abilities that allow a model to affect an enemy model that is not in base-to-base contact with it. Use the following steps to make a ranged-combat attack.
- Subtract the weapon/ability's MP Cost.
- Choose a target for the attack.
- Determine the range to the target.
- Apply modifiers to the attack.
- Roll D10 to hit.
- Determine damage.
1. Subtract MP
Each ranged attack weapon and ability has an MP Cost (MPC) that indicates how many MP the model must spend to use the weapon/ability in an attack. When used, subtract this cost from the model's remaining MP this turn. See the weapon/ability descriptions in Force Lists for MP Costs.
2. Choose a Target
When choosing a valid target, the target must be within line of sight (unless it is an indirect attack, see Indirect Attacks) and within the model's firing arc. Additionally, enemy models that are within immediate proximity must be targeted.
Some attacks affect an area rather than a single target model. See Ranged Attack Templates for determining the results of such attacks.
Splitting Fire: A unit can fire at up to two different targets during the course of its activation. An enemy squad counts as a single target for these purposes.
Firing Arc
Models can see anything that lies in front of them within an arc of 180 degrees, called a firing arc. This field of vision determines the targets against which a model can use ranged weapons and abilities. A model's firing arc lies 90 degrees to either side of a center line based on the model's front (the direction of the model's facing). For models that don't have an obvious facing, you can mark the edge of the base to designate the center of the model's firing arc.
Immediate Proximity
If there is an enemy model within 12 inches of the attacking model and in line of sight, then the model must attack the closest such model when making a ranged attack. Models within 12 inches that have cover can be ignored in favor of models within 12 inches that are in the open.
If no enemy models are within 12 inches of the attacking model, it may fire at any enemy model to which it has LOS and that is within range.
Line of Sight
In order to make a ranged combat attack, the attacking model must be able to see the intended target. If it can see the target, it is said to have line of sight (LOS) to the target. The player need only look toward the intended target from the attacking miniature's perspective to determine if the target can be seen. This can best be done by crouching down to get a "miniature's-eye view" of the battlefield. If this is not possible, use a straightedge. For this purpose, a thin wooden dowel or a narrow but sturdy tape measure is best, because you may need to poke the straightedge through woods or other tight spaces to check for LOS. A high-tech alternative is to use a laser pointer to check line of sight, but such tools are fairly expensive.
LOS should be sighted from the torso of the attacking model (looking over its shoulders), not its feet or the tip of its head. If any portion of the model to be attacked is visible to the firing model, there is LOS. Note that a model isn't frozen in the pose in which it was sculpted, so if a model's limbs are extended very high or wide away from the model, for example, they should not count for LOS. Using the model's base as a guide, consider the model to be encased in an imaginary dome extending from the base to the top of the model's head; anything outside this dome should not count for LOS.
Obviously, the players must exercise fair judgment to determine LOS when conflicts occur. If the players cannot agree whether LOS exists or not, roll a die to resolve the conflict and keep the game moving.
(Diagram: in the Line of Sight example, five models are in the firing model's LOS; three of them, only half visible, are considered "in cover". Two are not visible at all. In the Choosing Targets example, the firing model may shoot at model A or model B; model A is behind cover, so the attacker may choose to shoot at model B instead.)
3. Determine Range
Measure the distance between the attacking model and the target, from base to base. Each weapon and ability lists short (S), medium (M) and long (L) ranges in their individual descriptions (see Force Lists). Compare the distance to these numbers to determine the weapon's range; each range also lists an equivalent range modifier.
4. Apply Modifiers
Apply the appropriate ranged combat modifiers to the attack, as listed on the Ranged Combat Modifiers Table. These modifiers add to or subtract from the model's Ranged Combat statistic for the current attack only.
Targets to whom LOS is partially blocked may receive the benefits of cover (see below).
Ranged Combat Modifiers Table
| Condition | Modifier* |
|---|---|
| Range (short, medium, long) | per weapon/ability (see Force Lists) |
| Aimed shot | +1 |
| Soft cover | -1 |
| Hard cover | -2 (+1 AR modifier to target) |
| Target is a large model | +1 |
| Firing into melee from outside | -1 per combatant |
| Firing within a melee | -1 |
| Attacker using held action | -1 |
| Indirect attack | -1 |
| Full-auto attack | -1 |
| Target is paralyzed with panic | +2 |
| Targeting the ground (blast attacks only) |
* This number modifies the Ranged Combat statistic of the attacker for the current attack only.
Aimed Shots
For an additional MP Cost equal to half the MP Cost of the ranged attack (round down, to a minimum 2 MP), any model making a ranged attack may aim its shot. Modify the Ranged Combat statistic by +1 for an aimed shot. A single attack may only be aimed once; additional MP expenditure will not increase the Ranged Combat stat by more than +1.
5. Roll D10 to Hit
On a result equal to or less than the attacking model's modified Ranged Combat statistic, the attack hits. A roll of 1 is always a critical hit, a roll of 10 is always a critical miss (see Critical Hits and Misses).
6. Determine Damage
If the attack hits, the target may be injured or even killed. See Damage.
Unless the weapon/ability is subject to scattering, or the target is engaged in melee, a missed shot has no effect on the game. See Blast Template for weapons/abilities that scatter and for shooting into melee.
Cover
Some terrain will not block line of sight, but might provide a model some cover, making attacks against it more difficult. In order to receive the benefits of cover, at least half of a model must be behind cover from the attacking model's point of view, and the model may not be more than 1 inch away from the cover.
Note that because some models have strange poses, the same "dome" method for determining LOS should be used to determine cover.
If a situation arises in which it is difficult to determine whether a model has cover, the easiest solution is to assume the model has cover. If the players cannot agree on this, then each opponent should roll D10, with the player who rolled the higher result choosing whether the model has cover. Alternatively, a neutral third party can make the call as long as the players agree to accept that person's judgment.
Cover comes in two general varieties: soft cover and hard cover. Although the distinction between them is clear in most cases, any terrain in the play area that might fall between the categories should be designated as soft or hard before play begins.
Soft Cover
Any cover that makes it more difficult to shoot at a model, but doesn't slow down or stop the attack, is considered soft cover. Soft cover breaks up the outline of the targeted model, but is not big or tough enough to stop the shot. Bushes, piles of leaves and stacks of cardboard boxes are examples of soft cover.
Modify the attacker's Ranged Combat statistic by -1 for soft cover.
Hard Cover
Hard cover is heavy terrain that completely obscures a target's outline and/or prevents a shot from penetrating the terrain feature. Ruined walls, steel barricades, and bunkers are good examples of hard cover.
Modify the attacker's Ranged Combat statistic by -2 for hard cover, and add +1 to the target's Armor Rating. This armor bonus represents the stopping power of the cover.
Firing Into Melee
A model firing into a melee from the outside risks hitting a model other than its target. For each model involved in the melee, modify the attacker's Ranged Combat statistic by -1. For example, a model fires into a melee combat involving a large growler and a human. If the model is targeting the human, modify the attacker's Ranged Combat by -2 for the two combatants. If the model is targeting the large growler, the modifier will be -1 (-2 for two combatants, +1 for a large target).
If an attack misses its target, roll D10. On a result of 5 or less, a different, randomly determined model in the melee is attacked instead. Roll to hit and resolve the attack normally as though the attacker had tried to hit the new target. If this second target is missed, the attack misses entirely.
Ranged Attack Templates
Some attacks affect an area rather than a single model, as noted in the Mode entries in the Force Lists. The area of effect for such attacks are determined by templates as described below.
Blast Template
The blast template is the round template supplied in the game. The template is marked in half-inch increments to indicate different-sized areas of effect. Attacks that use the blast template explode with concussive force. Such attacks automatically force all models in the affected area to make Knockdown Tests.
To use the blast template to resolve a successful attack, center the template over the target model by placing the X in the center of the template at the point of impact. Any model whose base is touched by the radius of the blast is hit by the attack. For example, if an attack has a blast radius of 2 inches, the template would be centered on the point of impact, and every model whose base fell under the template out to the 2-inch mark would be hit by the attack. Each attack that uses a blast radius has a unique radius, listed with the description of the attack.
Targeting the Ground: You may want to aim a blast-radius weapon between several enemy models in order to catch them all within the template of the blast. In this case, you are targeting the ground, which adds a -1 modifier to the attacker's Ranged Combat statistic.
Weapons that use a blast template are the only ones powerful enough to damage structures (see Damaging Structures).
Scattering: When an attack that uses a blast template misses, the effect scatters. To determine the distance and direction of a scatter, roll D10, landing the die as close to the point of impact as possible. The arrow shape of the D10 indicates the direction of the scatter, starting from the missed target point (not the die). The attack scatters for a number of inches equal to the result of the die roll halved (round up).
(Diagram: an attack using a blast template has missed. The scatter roll is an 8, which means that the blast template will move 4" (8 / 2 = 4) in the direction indicated by the arrowhead shape of the scatter die.)
Splash Template
The cone-shaped splash template included in the game is divided into a small and large cone. Any model whose base is touched by the small cone area of the template is automatically hit by the attack. For models whose bases are touched by the large cone of the splash template, roll D10. On a result of 5 or less, the attack hits the model.
To use the splash template to resolve an attack, place the small end (the tip of the template) touching the outside edge of the attacking model's base, with the large end pointing out into the attacking model's fire arc.
(Diagram: models touched by the small cone are automatically hit; models touched by the large cone are hit on a D10 roll of 5 or less; models outside are not affected.)
Zone Template
The rectangular-shaped zone template is used to resolve attacks made with full-auto fire and with special abilities that have a similar area of effect.
To use the zone template to resolve an attack, place the template anywhere within the attacking model's firing arc and LOS, within the range of the weapon. The template must be oriented so that the arrow on the template points directly away from the attacking model. If a model using a zone template weapon is on higher ground than its target, you may turn the template on its side to affect models placed deep in enemy ranks.
When attacking a squad, the template must be placed so the model closest to the attacker in the squad is affected.
Models whose bases are under the template are attacked a number of times based on their size: small, 1 hit; medium, 2 hits; large, 3 hits. Each attack requires a Ranged Combat Test as normal.
Firing Full-Auto
Once per turn, a model armed with a full-auto weapon may attack using full-auto fire, at the same MP cost as the weapon's standard attack. Use the zone template and determine whether the shots hit and injure the target or bypass armor as normal. Full-auto shots ignore soft cover and may never be aimed. Modify Ranged Combat by -1 for full-auto attacks.
Indirect Attacks
Some ranged weapons and abilities can be used to make indirect attacks, launching their effects up and over intervening obstacles in the manner of mortars and thrown grenades. An indirect attack allows a model to attack a target to which it does not have LOS; instead, any friendly model must have line of sight to the target.
A weapon can only be used to make an indirect attack at short or medium range. Indirect attacks cannot be made as an aimed shot, and modify the attacker's Ranged Combat by -1. All indirect attacks use the blast template to determine the area of effect of their shot. Where noted, models may make a Dodge Test to avoid an indirect attack.
Grenades: Grenades can be thrown blind at a target or target area; in other words, thrown indirectly without any friendly model having LOS to the target. Grenades thrown blind can only be thrown at short range, but such an attack can be made as an aimed shot (at short range, a model is close enough to the target to accurately guess its location by listening for movement or using detection equipment).
Close Combat
Use the following steps to make a close-combat (melee) attack.
1. Subtract the MP Cost
Each melee weapon and ability has an MP Cost (MPC) that indicates how many MP the model must spend to use the weapon/ability in an attack. When used, subtract this cost from the model's remaining MP this turn. See the weapon/ability descriptions in Force Lists for MP Costs.
Unarmed models pay 3 MP to make an unarmed melee attack. Large models pay 4 MP to make an unarmed melee attack.
2. Choose a Target
A model must be in base-to-base contact with an opposing model in order to make a melee attack against that model.
3. Compare Close Combat Statistics
Determine whose CC is higher: the attacker or the target's. Modify the attacker's Close Combat by +1 if the attacker has a higher Close Combat. Modify attacker's Close Combat by -1 if the target has a higher Close Combat.
4. Add Other Modifiers
Apply any other appropriate modifiers to the attack, as listed on the Close Combat Modifiers Table. These modifiers add to or subtract from the model's Close Combat statistic for the current attack only.
Close Combat Modifiers Table
| Condition | Modifier* |
|---|---|
| Attacker has higher Close Combat | +1 |
| Target has higher Close Combat | -1 |
| Attacker charging | +1 |
| Receiving a charge | +1 |
| Target prone | +2 |
| Target is paralyzed with panic | +2 |
* This number modifies the Close Combat statistic of the attacker for the current attack only.
5. Roll D10 to Hit
On a result equal to or less than the attacking model's Close Combat statistic, the attack hits.
6. Determine Damage
If the attack hits, the target may be wounded or killed. See Damage.
Charging
If a model has moved into base-to-base contact with the target during the same turn that it is making a melee attack, it has charged and receives a +1 modifier to its Close Combat. This bonus only applies during the turn that you move into contact with the enemy model; melee attacks against that model during subsequent turns do not receive this bonus unless the attacking model moves out of base-to-base contact and then moves in again.
Receiving a Charge
If a model with a held action is charged, that model will lose its held action once the charge attack occurs. The holding model may opt to intervene and make one free melee attack against the charging model once base-to-base contact is made. This attack costs no MP, but uses up the model's held action. The model receiving the charge also gets +1 Close Combat and +1 Power bonuses. The model may use any melee weapon or ability it possesses.
Unarmed Attacks
Small and medium-sized models pay 3 MP to make an unarmed melee attack. Large models pay 4 MP to make an unarmed melee attack. The model's Power is the Power of the attack (see Damage Test). The attack has no Armor Modifier (AM) (see Armor Test). Certain models possess abilities they can use in unarmed melee attacks, as described in the force lists.
Armed Attacks
Any weapon or ability designated as a melee attack may be used in melee combat. The attack's Power is used instead of the model's POW (though sometimes Power is based on a modified POW, see Power in the Force Lists).
Ranged weapons and abilities may not be used in melee combat, unless the attack is designated as Point Blank in its Mode entry (see Force Lists). When using a ranged weapon in melee combat, it is fired at short range using the Ranged Combat statistic and may only be used to attack an enemy model in base-to-base contact. The attack receives a -1 modifier, but the modifiers for shooting into a melee do not apply (as the model is within the fight, not outside of it).
Parrying
Certain melee weapons allow the wielder to parry close combat attacks (whether the attack is unarmed, armed or using an ability). When an attacker makes a successful melee attack, a target who can parry rolls D10. On a result less than the result of the attacker's to-hit roll, the model deflects the blow.
Parrying does not cost MP. Prone models may not parry.
(Grenade Attack diagram: a model behind a wall is attempting to throw a grenade at the models on the other side. He receives -1 RC for the attack because he doesn't have LOS to his intended targets.)
Moving Out of Melee Combat
It costs 1 MP to attempt to move out of melee combat with an enemy model (in addition to movement MP costs if successful). When a model attempts this, each player rolls D10 and adds their model's Power to the roll, re-rolling any ties. If the model attempting to break contact gets the higher result, it successfully breaks contact and moves away from its current position in any direction (paying normal movement MP costs).
If the enemy model rolls higher, the model attempting to break contact fails to do so and automatically takes a hit from the enemy model with whom it is in base-to-base contact. Damage is determined according to the standard rules.
For a model attempting to break contact with more than one opposing model, each enemy model rolls a D10 and adds their Power. Everyone that rolls higher than the fleeing model scores an automatic hit. If the fleeing model gets a higher result than all of them, it breaks away. Ties are only re-rolled by the models that tied.
Damage
Once you have made a successful attack against an enemy model, you must determine if the attack damaged it. The target model first makes an Armor Test to shrug off the attack; in some cases target models may dodge an attack as well. If this fails, a Damage Test is made to determine if the target is actually injured by the hit.
Unless noted otherwise, all attacks inflict only 1 point of damage. A model is killed when it suffers a number of points of damage that equals or exceeds its Lifeforce stat.
Armor Test
A model with an Armor Rating (AR) rolls D10 to avoid the effects of a hit. On a result equal to or less than the model's Armor Rating, the model does not take damage.
Certain weapons and abilities are particularly effective against armor, and have an armor modifier (AM) that temporarily reduces a target's Armor Rating for that particular Armor Test.
Dodge Test
Certain weapons and abilities produce effects that may be dodged (this will be specified in the description of the weapon or ability). A model may try to avoid such an effect by making a Dodge Test. To make a Dodge Test, the player rolls D10 and adds +1 for each point of Close Combat the model has above 5. On a modified result of 6 or higher, the model has successfully dodged the attack or effect.
If a model fails a Dodge Test, or successfully dodges an effect that does not use a template, the model remains in place. If the model successfully dodged a template effect, place the model at the edge of the template nearest to the model's position before the dodge. If it is unclear which edge is closest, the owner of the model gets to choose.
Damage Test
The base target number to inflict damage is 5. If the attack has a higher Power than the Body of the target, it will be more likely to inflict damage. If the attack's Power is lower, it will be less likely to inflict damage. Subtract the Body of the target from the Power of the attack. Apply the result as a modifier to the target number of 5. If the attack's Power is higher than the target's Body, then the modifier will be positive (+). If the attack's Power is lower than the target's Body, then the modifier will be negative (-).
For example, using a ranged weapon that has Power 5, you hit an enemy model. The enemy model has a Body of 4. The difference between the weapon's Power and target's Body is 1 (5 - 4 = 1), which means you add a +1 modifier to the Damage Test's target number of 5. As a result, a roll of 6 or less on a D10 (5 + 1 = 6) would successfully injure the target.
If you use a ranged weapon that has Power 5 and hit an enemy model with a Body of 7, the difference between the weapon's Power and target's Body is -2 (5 - 7 = -2). This modifies the target number of 5 by -2, which means that a roll of 3 or less on a D10 (5 - 2 = 3) would successfully injure the target.
Damaging Structures
Battlefield structures exist in one of three conditions: stable, unstable and destroyed. Unless otherwise noted, at the start of a game all structures are in stable condition.
Structures can be damaged by any weapon that uses the blast template (see Blast Template), or by abilities that specifically state they can damage structures. Whenever a model makes a successful attack against a structure, determine damage according to the standard injury rules. Structures with Armor Ratings ignore all weapon attack armor modifiers, though critical hits still apply.
Each point of damage inflicted by the attack reduces the condition of a structure by one level (i.e., from stable to unstable, or unstable to destroyed). Weapons that inflict more than 1 point of damage may destroy a structure in a single attack. When a structure is destroyed it should be removed from play, or replaced with rubble pieces if you have the appropriate terrain.
Models Caught in Destroyed Structures
Models occupying a structure when it's destroyed are automatically hit by an attack of a Power equal to the Body of the structure. If this attack causes damage, the model is killed regardless of how much Lifeforce it had remaining. Models that survive a structure being destroyed around them should be placed prone on the table as close as possible to their original position prior to the structure being destroyed, and facing in a randomly determined direction.
Morale
In the deadly and unpredictable battlefields of the Maelstrom, even the most seasoned soldiers may fall victim to panic. Units will break apart and flee from the fight for any number of reasons, but most often from heavy casualties. A commander involved in a conflict resulting in heavy casualties may find panic rippling through his ranks, and could eventually lose his entire force. It is during these difficult engagements that leadership and bravery are most required.
Morale Test
At the point when a squad is reduced to 50 percent or less of its starting number of members, or an individual model is reduced to 50 percent or less of its starting Lifeforce, it must immediately make a Morale Test. To make a Morale Test, roll D10. If the result is equal to or less than the Guts statistic of the models in the unit, the unit has kept its nerve and play continues. On a result higher than the Guts stat, the unit panics.
As noted in the Force Lists, some units have a special ability that allows them to use the Guts statistic of a leader or other model when making a Morale Test.
If a squad contains a named model (see Named Models) who has a higher Guts statistic than the other models in the squad, use the named model's Guts for the Morale Test (unless a leader is present, in which case use the highest Guts).
Large Squads: To represent the difficulty of controlling larger units, squads containing 8 or more models must make an additional Morale Test when their squad is reduced to 75 percent of its starting size. For example, a squad consisting of 8 models would make a Morale Test as soon as it was reduced to 6 models, and a second Morale Test upon being reduced to 4 models. It is possible for large squads to be reduced by half twice in the same turn or even in the same attack, requiring two Morale Tests.
Panicked Units
Units that panic on the battlefield act in bizarre and unpredictable ways and are no longer fully under the control of the player. Skilled players can learn to anticipate such situations and create fallback plans. To determine the actions of a panicked unit, roll D10 and consult the Panic Table.
Panic Table
| D10 Roll | Reaction |
|---|---|
| 1-2 | Paralyzed! The unit is immobilized with fear and uncertainty and can do nothing for one turn. When the unit is next activated it can do nothing except recover its nerve; no MP may be spent by this unit for any reason, nor may they parry or dodge. Apply a +2 modifier to the RC or CC of any attacks against a paralyzed unit until after its next activation. |
| 3-9 | Pushed back! The unit is forced to move away from their current position. When the unit is next activated, it must use all its available MP (each model's MP, in the case of a squad) to move toward its deployment zone. If there is an enemy unit between the unit and its deployment zone, it moves toward the nearest available cover instead. If the unit is surrounded and there is no obvious direction in which to flee, use the rules for scatter (see Scattering) to determine the direction in which the unit must move. On its next activation after the pushed-back move, the unit may be used as normal. |
| 10 | Broken! The squad scatters and takes no further part in this battle. Remove the remaining models of the squad from the playing area and consider them all casualties for purposes of determining Glory Points. For an individual model, treat this result as Pushed Back. |
Vehicle Rules
In VOR, vehicles are used on the battlefield for mobility, transport, or as weapon platforms. Nearly all races trapped in the Maelstrom use vehicles to some degree. The extreme diversity of terrain in the Maelstrom restricts most traditional vehicle designs to limited use; as a result, many races altered most of their standard designs to be more efficient in this hostile new domain. Vehicles are usually designed for a specific combat role, and their relatively durable construction increases the length of time they can remain on the field.
This section provides the basic vehicle rules for VOR: The Maelstrom. Note that the term infantry is used to indicate non-vehicle models.
Vehicle Types and Sizes
Vehicles come in four distinct types (wheeled, tracked, walker and flyer) and three sizes (light, medium and heavy).
Wheeled vehicles include cars, trucks, motorbikes and anything else using wheels to get around; these have a lower Point Value, but can only be used in open terrain. Tracked vehicles include tanks, tractors and other vehicles that use rotating tracks to overcome broken terrain. Walkers tend to be humanoid or spider-shaped, and use mechanical legs to maneuver through rough terrain.
Flyers are hovercraft, autogyros, helicopters and other small vertical takeoff and landing craft; jets and other high-speed craft are beyond the scope of this rulebook. Flying vehicles have a higher Point Value as they are not hindered by terrain. Note that flyers are always considered to be hovering just above the terrain, and as such altitude is not a consideration; treat them as other land-based models.
A vehicle's size determines how it moves and turns. The bulk of the vehicles used in VOR are of the medium size category. Light vehicles are designed to move faster on the battlefield, while heavy vehicles are heavily armored or heavily armed, and the corresponding weight limits their maneuverability in combat.
Vehicle units can be either squads or individual.
Transport Vehicles
Some vehicles may also be designated as transport vehicles. Troop transports represent a wide variety of vehicles designed to safely move troops around the battlefield. Most have above-average armor and can carry up to 10 small or medium models; large models may not be transported unless stated otherwise. A transport's carrying capacity is listed in parenthesis after the vehicle type.
For a flat cost of 1 MP, a model may enter or exit a transport vehicle. If a vehicle has an obvious hatch, door, or other access point, that is where models must enter and exit the vehicle. A model may not enter and exit a vehicle during the same game turn. A model may not enter an enemy vehicle and large models may not enter vehicles at all.
A model must be in base-to-base contact with the transport in order to enter it. When a model enters a transport, remove it from the playing area, and set it aside with any other models already inside the vehicle. Models inside a transport can't do anything, though they can be activated in order to disembark.
A model must leave a vehicle during its own activation, not that of the vehicle. You are not allowed to "interrupt" a transport vehicle's movement to deploy a unit it is carrying. When a model leaves a vehicle, simply place the base of the model flush against the vehicle and begin its movement from that point.
When a squad enters or exits a vehicle, all the models in the squad must do so at the same time.
Vehicle Statistics
Vehicles' statistics define their characteristics and allow them to interact with other models during a game.
In VOR, some vehicles are manned by crews, some are autonomous robots and others are remote-controlled drones. Regardless, each vehicle is treated as an individual entity; its stats encompass factors such as crews, artificial intelligence and so on. Note that vehicles do not have Brains and Guts stats (see Brains and Guts, below).
- Move Points (MP): Move Points determine the distance a vehicle may move during a turn.
- Turn Cost (TC): All vehicles must pay a MP Cost to make a turn during their activation (see Turning).
- Close Combat (CC): Walker-type vehicles may possess close combat capabilities.
- Ranged Combat (RC): Most vehicles have one or more weapon systems used to deliver death from a distance. The Ranged Combat stat determines a vehicle's effectiveness with these weapons.
- Power (POW): Power represents the momentum of the vehicle in motion. A vehicle's Power also determines the might of its engine for purposes of moving out of difficult terrain such as deep mud and loose debris.
- Body (BOD): A vehicle's Body indicates how well the chassis or frame will stand up against attacks.
- Lifeforce (LIF): The Lifeforce of a vehicle represents the number of damaging hits it can take before being destroyed.
- Armor Rating (AR): A vehicle's armor helps protect it from attacks. The higher the Armor Rating, the more effective the armor.
- Shielding (SHD): Shielding represents the ability of thick vehicle armor to resist the armor-piercing effects of certain weapons (see Shielding, below). Shielding is listed in parenthesis after the vehicle's Armor Rating.
- Point Value (PV): The Point Value of a vehicle represents the vehicle's effectiveness in the game. The higher the Point Value, the more effective the vehicle.
Vehicle Movement Cost Table
| Vehicle Type | Open | Broken | Hazardous | Impassable |
|---|---|---|---|---|
| Wheeled | 1 MP | - | - | - |
| Tracked | 1 MP | 2 MP | - | - |
| Walker | 1 MP | 1 MP | 2 MP | - |
| Flyer | 1 MP | 1 MP | 1 MP | 1 MP |
Vehicle Movement
In open terrain, a vehicle spends 1 MP for each inch it moves, just like other models. In other terrain, the MP cost for each inch of movement varies depending on the type of terrain and vehicle, as shown in the Vehicle Movement Cost Table above.
Coherency: Vehicle squads have a 6-inch coherency (see Squad Coherency).
Turning
In order to make a turn during its activation, a vehicle must pay a MP Cost based on its size: 1 for light vehicles, 2 for medium and 3 for heavy.
In addition, the size of a vehicle restricts the number of turns it may make in a game turn. Light vehicles may make any number of turns, but medium vehicles are restricted to two turns during their activation. Heavy vehicles are limited to making no more than a single turn during their activation.
When you pay the MP to turn a vehicle, you are allowed to turn it up to 90 degrees. Vehicles always turn as if on a center axis; in other words, spin the model in place as if there were an imaginary nail driven through the center of it. Models are not allowed to make two turns in a row; at least 1 inch of movement must be made before each turn. Vehicles are also not allowed to begin movement with a turn, they must first move at least 1 inch.
Flying vehicles may turn up to 180 degrees each time they turn.
Vehicle Collisions
When a vehicle moves into base-to-base contact with another model, the two models are considered to have collided. No die roll is required to hit; the collision occurs automatically, though infantry models may attempt to dodge out of the way.
Dodging Vehicles
Infantry models may attempt to dodge a vehicle collision when the vehicle moves into base contact but before the effects of the collision are resolved. Success is determined by rolling D10 with a result equal to or less than the dodging model's Close Combat. On a successful dodge, the model's owner places the model to one side of the path of the oncoming vehicle. A model cannot move more than 3 inches in this way; if the distance required to clear the path of a vehicle is more than 3 inches, the model cannot dodge the vehicle.
Collision Damage
Use the Body or Power (whichever is higher) of the vehicle as the Power of a hit against a model or another vehicle struck by a vehicle. The armor modifier (AM) for the collision is half the vehicle's Power (rounded down). A vehicle colliding with a large model or another vehicle takes a hit with a Power equal to the Body of the target. Only a vehicle may make an Armor Test against damage from a collision with another vehicle. If a vehicle collides with a large inanimate terrain feature, such as a bunker, boulder, large tree and so on, the vehicle takes 1 point of damage.
Infantry: If a medium or heavy vehicle collides with an infantry model, the infantry model may not make an Armor Test to avoid damage. Small or medium models injured as a result of the collision are immediately killed (regardless of remaining Lifeforce); larger models take 2 points of damage. Vehicles do not take damage from a collision with small or medium infantry.
If a light vehicle collides with an infantry model, the infantry model makes Armor and Damage Tests as normal. If it is injured as a result, it takes one point of damage.
Vehicle Combat
Because they are designed to move and fire simultaneously, vehicles do not spend MP to fire each weapon. Instead, the number of MP a vehicle uses for movement determines how many of its weapons it can fire in that turn. If a vehicle uses half or less of its MP for movement in a turn, it may fire all its weapons once in that turn. If the vehicle uses more than half its MP for movement, it may fire a single weapon once in that turn. Linked weapons count as a single weapon for this purpose.
Ranged Attack LOS
When determining line of sight for vehicle-based ranged attacks, sight from the center of the vehicle. For large heavy vehicles, sight from the specific point on the model where the weapon being used is mounted.
Damage
Use the standard rules to determine successful attacks and damage against vehicles.
If a vehicle takes damage, it may also suffer additional effects. When a vehicle suffers damage, subtract the damage from the vehicle's Lifeforce as usual. Roll D10 and add the vehicle's current amount of damage to the result, then consult the Vehicle Damage Table. For example, if a tank with a LIF of 5 had already taken 3 hits that inflicted 1 point of damage each, the player would add 3 to the die roll result.
If a vehicle suffers more than one of the same Internal Damage results, the effects are cumulative where applicable, unless the table states otherwise.
Vehicle Damage Table
| Die Roll Result | Effect |
|---|---|
| 1-6 | No additional damage effects. |
| 7-10 | Internal damage. Roll D10 and consult the Internal Damage Table. (See also Damaging Models in Transit, below.) |
| 11+ | Detonation! The vehicle explodes in a huge fireball, sending scrap and debris in all directions. All models within 3 inches take a hit of Power 6, AM -3, and make a Knockdown Test. Each model being transported by this vehicle must make a successful Armor Test or be destroyed. Use the Scatter rules to determine the position of any surviving models, using the center of the vehicle's position as the point of impact. Models thrown clear by the explosion are placed prone. |
Internal Damage Table
| Die Roll Result | Effect |
|---|---|
| 1 | Unlucky shot! The attack did not inflict any additional damage when it pierced the vehicle's armor. No effect. |
| 2-3 | Immobilized! The vehicle is frozen in its current position and may not move for the rest of the game. The vehicle may attack as normal. If vehicle is a transport, then friendly models may enter and exit it as normal. |
| 4-5 | Damaged locomotion! The vehicle's source of locomotion (tracks, wheels, thrusters and so on) is damaged. The vehicle's MP is reduced by half (round down) for the rest of the game. If the player rolls this result a second time, the vehicle becomes immobilized as described above. |
| 6-7 | Destroyed weaponry! This result destroys one of the vehicle's weapons. Roll D10: on a result of 5 or less, the attacker chooses the weapon destroyed; on a 6 or more, the owner of the vehicle chooses which weapon is destroyed. The destroyed weapon cannot be used for the remainder of the game. If the vehicle has no weapons to destroy, then this result has no effect. |
| 8-9 | Haywire electronics! The internal wiring of the vehicle shorts out, wreaking havoc on its targeting and combat systems. Modify all attacks made by the vehicle by -2 until the end of the game. |
| 10 |
Shielding
The basic design of a vehicle allows it to carry substantially more armor than infantry. To reflect this greater durability, vehicle armor also provides shielding. Shielding reduces the armor modifier of an attack made against it by an amount equal to its Shielding statistic. For example, a vehicle with Shielding of 2 would reduce an armor modifier of -3 to -1, and ignore an armor modifier of -2 or less.
Damaging Models in Transit
When a vehicle transporting models takes internal damage (per the Vehicle Damage Table, above), you must determine whether any transported models are affected by the attack in addition to the usual effects of the attack. Before rolling on the Internal Damage Table, roll D10; on a result of 3 or less, the cargo area of the vehicle has been hit and each model in the transport must make an Armor Save. If the Armor Save fails, the model takes 1 point of damage. If the transport has an open cargo area (for example, a pickup truck), the attack hits the cargo area on a result of 6 or less.
Brains and Guts
The pilots, crew and artificial-intelligence chips of vehicles feel more confident in their chances for survival in battle than their infantry brethren, and so automatically succeed in any Brains and Guts Tests they must make during a game, including Morale Tests.
Generic Vehicles
The following examples represent the most common types of vehicle, and can be used as a basis for creating other vehicle designs. See Weapon/Ability Statistics in the Force Lists for an explanation of the weapon stats. (Transcriber's note: the printed stat lines label the turn statistic "TD"; the Vehicle Statistics list calls it Turn Cost (TC). The Tank's MP is printed as "2".)
Armored Personnel Carrier (APC) MP: 25, TD: 5", CC: 0, RC: 5, POW: 6, BOD: 6, LIF: 4, AR: 5 (3) Point Value: 100 Weapons: None Type: Medium Tracked Transport (10)
Tank MP: 2, TD: Full, CC: 0, RC: 6, POW: 6, BOD: 6, LIF: 5, AR: 6 (3) Point Value: 150 Type: Heavy Tracked Weapons: Main cannon (360 degree firing arc); hull-mounted LMG (90 degree forward firing arc)
Attack Helicopter MP: 30, TD: 3", CC: 0, RC: 6, POW: 5, BOD: 5, LIF: 3, AR: 5 (2) Point Value: 200 Type: Medium Flyer Weapons: Chin-mounted HMG (180 degree forward firing arc); for a cost of 50 PV, twin linked quad-missile launchers (180 degree forward firing arc)
Vehicle Weapons Arsenal
These are but a few examples of vehicle-mounted weaponry.
Main Cannon: This heavy assault weapon fires a superplast explosive warhead effective against most targets. [Range: S 20/-, M 40/+1, L 60/-, Power: 7, AM: -5, Damage: 2]
Light Machine Gun (LMG): This light vehicle weapon is useful for mopping up infantry. [Range: S 10/+1, M 20/-, L 30/-1, Power: 5, AM: -2, Mode: full-auto]
Quad Missile Launcher: More effective than normal missiles, quad missile launchers launch four warheads with each shot (treated as one attack only). [Range: S 25/-, M 50/+1, L 75/-, Power: 8, AM: -4, Damage: 2, Mode: indirect, blast radius 2"]
Scenario Rules
In the VOR universe, battles aren't usually fought by forces that just happen to run across each other somewhere and decide to fight. Typically, battles are fought for specific reasons, such as strategically important locations, defense of a critical position, attempts to minimize the supplies of an enemy and so on. Scenarios give a flavor and a theme to games of VOR by creating an interesting situation or event for your battles. There are endless numbers of scenarios that can be created, limited only by your imagination. As an introduction to how scenarios work, we have described the data that you'll find in each scenario and instructions on how to use it in your games. Following this information are a number of basic scenario templates, as well as a detailed Battle Terrain Table for generating random features to customize a battlefield.
Scenario Formats
Although the information contained in each scenario will be different, it will always be presented in the same format for clarity. Each scenario has seven different parts, which are described below.
- Synopsis: The synopsis is a brief description of the plot of a scenario.
- # of Players: The suggested number of players for a scenario can be found here.
- Suggested PV: This is the ideal total Point Value (PV) each player in a scenario should be given to purchase their force with. Players should consult the Force Lists to choose the units they wish to play, keeping in mind force structure limitations.
- Set-up: This entry gives details on setting up the playing field, including any unique requirements the scenario may have for placing terrain or deploying models. This section also contains a diagram illustrating the deployment zones for the scenario.
- Special Rules: If the scenario uses any special rules they will be listed here.
- Objectives: Any additional objects or situations that will gain players additional Glory Points (GP) for the scenario will be listed in this section.
- Time: This section will tell you how many turns the scenario lasts. Most scenarios have a variable number of turns that they can last; when this is the case, roll D10 and consult the table in the scenario to determine game length.
Set-up Diagrams
Each scenario will be accompanied by at least one set-up diagram that shows you the deployment zones for each player, as well as any other pertinent information that might be useful for that scenario, such as specific terrain requirements or the locations of special markers. Scenarios designed to be used with 2, 3 or 4 players will usually supply additional set-up diagrams to cover the inclusion of the extra players.
Deployment Zones: At the start of the game, after players have chosen their table edges, each player will need to know where he is allowed to set up his models. This is the deployment zone's function, to illustrate the region of the board where a player can place his models during the deployment phase. Each player will have his own deployment zone, and the Set-up section of each scenario will state which deployment zone is for which player.
Other Features: Some scenario set-up diagrams will also contain additional information such as important terrain features or special objectives. When these are included on the diagrams, you'll be required to represent them in some manner on your game board. You don't have to use the exact objects described; anything will do as long as all players involved understand the purpose of the terrain piece in the scenario.
Choosing a Scenario
Before you play a game of VOR you'll need to pick a scenario to play; the templates below are a good place to start. If you're not sure which scenario to choose for your game, we recommend using the basic Confrontation scenario; it's the fairest and most balanced scenario of the bunch. If you're looking for a deviation from the norm, then read through the other scenarios and find one that sounds good for what you and your opponent(s) want to play. If the scenario you choose has specific roles defined, such as an attacker and a defender, then you'll need to determine which player will be playing which role for the game.
For examples of more detailed scenarios using the models and terrain included in the VOR boxed set, see the Scenarios Book included in the box.
Making Your Own Scenarios
At some point you're probably going to want to make up some scenarios of your own. This can be fun to do, and it's not too difficult. Initially, you should try altering existing scenarios to make new ones. It's important to keep any scenarios you create as balanced as possible for all the players; this can actually be the most challenging part of creating new scenarios. Once you're comfortable modifying existing scenarios, you should move on to making up completely new ones. If your gaming group is playing a VOR campaign (see Campaign Rules), you may want to playtest new scenarios a few times before using them in campaign games.
Scenario Templates
The following scenarios are a collection of the most basic game set-ups. These templates are recommended for players new to VOR. Once you've played a few basic games using these scenarios, you'll be ready to move on to more advanced custom scenarios. Unless stated otherwise, use the deployment diagrams in Playing the Game for the scenario set-up.
Scenario 1: Confrontation
Synopsis: This scenario represents your basic straight-up battle between two or more opponents. Two-player games using this set-up tend to be well balanced, with each player being on equal ground. Three-player games are not as balanced but usually fun to play. Four-player games are even-odds and intense events that can result in staggering numbers of casualties during any given turn.
# of Players: 2, 3 or 4 players
Suggested PV:
- 2-player game: 500-1000 PV per player
- 3-player game: 500-750 PV per player
- 4-player game: 250-500 PV per player
Set-up: Use the standard rules for setting up terrain and for deploying your forces. Players may use any options allowed by their force lists.
Special Rules: Roll once on the Battle Terrain Table to generate an effect for the game.
Objectives: Players have no additional objectives beyond eliminating their enemies. Use the standard rules for awarding Glory Points and determining a winner.
Time: Roll D10 to determine the length of the game:
| D10 | Length |
|---|---|
| 1-3 | 6 turns |
| 4-7 | 7 turns |
| 8-10 | 8 turns |
Scenario 2: Ambush
Synopsis: This scenario simulates a larger, superior force being ambushed by a smaller, inferior force. This sort of tactic is common in situations where a weaker force is desperate or grossly outnumbered, and they don't have the option to retreat. Pulling off an ambush can be a very dangerous task for the attacking force. The first turn of the battle is the only time the ambushers have a real advantage; they have to cause as much damage as possible right away, or they will be hard-pressed to succeed.
# of Players: 2 players
Suggested PV: Attacking (Ambushing) force: 500 PV; Defending force: 750 PV
Set-up: Use the diagram to determine initial deployment zones (three zones across the table, each 32 inches wide: Attack, Defend, Attack). The defender sets up first; once all models are placed, the attacking (ambushing) player may then place his models. The ambushing player can deploy models in one or both of the designated zones. Use the standard rules for placing terrain.
Special Rules: Roll once on the Battle Terrain Table to generate an effect for the game.
The Ambushing player automatically gets Initiative for the first turn. In addition, each defending unit that is activated has to make a Brains Test to be able to do anything on the first turn. Failing this test means the unit is stunned by the ambush and may not act this turn. This means the Ambushing player may get to use several units in a row if the defending player fails any of his units' Brains Tests.
Objectives: Players have no additional objectives beyond eliminating the enemy. Use the standard rules for awarding Glory Points and determining a winner.
Time: Roll D10 to determine the length of the game:
| D10 | Length |
|---|---|
| 1-2 | 4 turns |
| 3-8 | 5 turns |
| 9-10 | 6 turns |
Scenario 3: Take and Hold
Synopsis: Opposing forces clash for control of a dominant terrain feature present on the battlefield. The force that controls it at the end wins.
# of Players: 2, 3 or 4 players
Suggested PV:
- 2-player game: 500-1000 PV per player
- 3-player game: 500-750 PV per player
- 4-player game: 250-500 PV per player
Set-up: In addition to using the standard rules to set up terrain for this scenario, place a medium or large terrain piece in the center of the playing area as an objective piece. This can be any piece as long as it is of at least moderate size (i.e., 3"-6" square). Some possible ideas for this would be a bunker, power generator, landing pad or supply cache. Use the standard rules for deploying your forces. Players may use any options allowed by their force lists.
Special Rules: Roll once on the Battle Terrain Table to generate an effect for the game.
Objectives: The player that controls the main objective terrain feature at the end of the game wins. For a player to control the feature, he must have at least one model within 6 inches of the objective piece at the end of the last turn. If two or more players have models within 6 inches of the objective at the end of the last turn, the game continues until the end of any turn where only one player has a model within 6 inches of the objective. Even if a player is not involved in such a "tie," he continues to play and may even win the scenario. If this scenario is part of a campaign (see Campaign Rules), a victory here counts as a Solid Victory, and a defeat counts as a Solid Defeat.
Time: Roll D10 to determine the length of the game:
| D10 | Length |
|---|---|
| 1-3 | 5 turns |
| 4-8 | 6 turns |
| 9-10 | 7 turns |
Scenario 4: Resource Raid
Synopsis: Occasionally a battle will be held over resources or supplies. These battles get interesting because the opposing forces must fight off their enemies while simultaneously securing whatever resources or supplies may be present on the battlefield. If players aren't careful in this scenario, they can lose to greed alone.
# of Players: 2, 3 or 4 players
Suggested PV:
- 2-player game: 500-1000 PV per player
- 3-player game: 500-750 PV per player
- 4-player game: 250-500 PV per player
Set-up: Use the standard rules for setting up terrain and for deploying your forces. In addition, each player gets to place 3 resource-pile markers on the board. These markers should be 1-2 inch squares. Players should alternate placing their markers. No marker can be within 6 inches of another or within 12 inches from a table edge. Players may use any options allowed by their force lists.
Special Rules: Roll once on the Battle Terrain Table to generate an effect for the game.
Models may pick up the resource marker by moving on it, expending 2 MP, and making a Power Test. A model may try multiple times to pick up a resource marker, expending 2 MP for each attempt. A model carrying a resource marker has its MP reduced by 2. In addition, a carrying model cannot make any ranged or melee attacks unless it drops the resource marker. If a model that is carrying a resource marker is attacked (melee or ranged), it must make a Power Test to hang on to the goods. A model that dies while holding a resource marker drops the marker where it died.
Objectives: Each resource-pile marker is worth +50 Glory Points to the player whose model is holding it at the end of the game. Otherwise, use the standard rules for awarding Glory Points and determining a winner.
Time: Roll D10 to determine the length of the game:
| D10 | Length |
|---|---|
| 1-3 | 6 turns |
| 4-7 | 7 turns |
| 8-10 | 8 turns |
Scenario 5: Skirmish
Synopsis: It's not unusual for opposing forces to meet unexpectedly within the Maelstrom. As a matter of fact, this is a common occurrence when forces are sent out to scout unknown regions. These conflicts tend to be shorter than most since commanders don't want to unnecessarily deplete their resources in pointless, unplanned battles.
# of Players: 2, 3 or 4 players
Suggested PV:
- 2-player game: 500-1000 PV per player
- 3-player game: 500-750 PV per player
- 4-player game: 250-500 PV per player
Set-up: Use the standard rules for setting up terrain and for deploying your forces. Players may use any options allowed by their force lists.
Special Rules: Roll once on the Battle Terrain Table to generate an effect for the game.
Objectives: Players have no additional objectives beyond eliminating their enemies. Use the standard rules for awarding Glory Points. If, at the start of a player's turn, his force has been reduced to less than 50 percent of its starting size, that player immediately retreats from the battle and suffers a Solid Defeat, regardless of Glory Points (see Campaign Rules). If this leaves only one player on the map, then that player scores a Solid Victory, regardless of Glory Points.
Time: Roll D10 to determine the length of the game:
| D10 | Length |
|---|---|
| 1-3 | 6 turns |
| 4-7 | 7 turns |
| 8-10 | 8 turns |
Scenario 6: Bloodbath
Synopsis: This scenario simulates battles in which neither side is willing to give up or give in. This is most often the case when a force is cornered or is defending a vital locale or structure. These battles are brutal and deadly in the extreme, more often than not resulting in the absolute destruction of one of the forces involved. Be warned that these games can end up being quite a bit longer than normal games of VOR.
# of Players: 2, 3 or 4 players
Suggested PV:
- 2-player games: 500-1000 PV per player
- 3-player games: 500-750 PV per player
- 4-player games: 250-500 PV per player
Set-up: Use the standard rules for setting up terrain and for deploying your forces. Players may use any options allowed by their force lists.
Special Rules: Roll once on the Battle Terrain Table below to generate an effect for the game.
No models may voluntarily leave the table. Panicked models will not run off the table edge. If a "broken" result is rolled for a panicked model, treat it as "pushed back" instead.
Objectives: Players have no additional objectives beyond eliminating their enemies. This is a battle to the death. The battle ends when there is only one player with models remaining on the board. If this scenario is being played as part of a campaign (see Campaign Rules), the winner of the bloodbath scores a Solid Victory, and each loser suffers a Solid Defeat.
Time: There is no time limit for this scenario. Play until you drop.
Battle Terrain Table
The Maelstrom is a vast and diverse region filled with a dizzying variety of worlds and creatures. The Battle Terrain Table allows you to create the same limitless number of terrain types in your own games of VOR.
Using the Battle Terrain Table
Use the Battle Terrain Table before setting up the playing area. Roll D100, and use the die roll result to determine the terrain type for the battle.
If an entry requires a roll at the start of the turn, that roll is made before anything else is determined in that turn. Where applicable, each entry includes notes for campaign effects. Unless otherwise stated, all results from this table remain in effect for the entire game.
If you are playing a campaign in a specific area, for example, the tundra of northern Russia, and roll a terrain effect that doesn't quite fit that terrain, simply tweak the effect to be more appropriate to your setting.
Determining a Random Model
Many terrain types affect a random model. The following steps suggest one way to determine a random model. First, determine which player's model will be affected; then determine which unit will be affected; then which specific model.
- Determine a Player: Assign each player in the game a number or range of numbers from 1 to 10, dividing the numbers between the players as evenly as possible. For example, if there are three players, assign 1-3 to the first player, 4-6 to the second player, and 7-9 to the third player, re-rolling a result of 10. Roll D10; the random model will be chosen from the models of the player whose number matches the result.
- Determine a Unit: To determine the unit affected, assign a number to each unit (remember that both squads and individuals count as a unit). Roll D10 if the player has 10 or fewer units in play, re-rolling any unassigned numbers. If the player has more than 10 units, roll D100.
- Determine a Model: If the unit selected is an individual model, that model suffers the terrain effect. If the unit selected is a squad, again assign a number to each member of the squad as in Step 2, then roll the appropriate dice to determine the model affected.
Determining a Random Spot on the Board
Some events affect a random location on the playing area. To determine a random location, roll D100, measure a number of inches equal to the result from one corner of the long side of the playing area and mark that location with a die or some other object. Roll D100 again, and measure that many inches from the same corner of the playing area, but along the short edge, marking that location. Draw an imaginary line straight out from the edge of the playing area from each of these points; the spot where they intersect is the location affected.
If your playing area is larger than 100 inches on either side, simply roll additional D100s as necessary. Re-roll any values higher than the length or width of the playing area.
(Transcriber's note: the printed Battle Terrain Table has no entries for D100 results 96-99.)
Battle Terrain Table (D100)
01-02 Weird Sky. The sky overhead is an amorphous, swirling mix of colors. This has no effect on game play.
03-04 Phasing Terrain. The terrain in the region has a tendency to phase in and out of this dimension. Roll D10 for each piece of terrain at the beginning of each turn. To save time, roll for smaller terrain features (small boulders, scrub bushes) as a group.
- 1-6: No change. The terrain stays in its current state. If it was phased out last turn, it will stay phased out. If it was solid, it will remain solid.
- 7-8: Solid. The piece of terrain is solid this turn. If it was phased out last turn, then it becomes solid this turn.
- 9-10: Phased out. The terrain piece phases out of existence. If the piece of terrain was solid last turn, it becomes phased out. If it was already phased out, then it stays that way.
Phased out terrain does not modify LOS or ranged attacks. Models may move through phased-out terrain, but if a model ends its movement in a piece of terrain that then becomes solid, that model is removed from play as a casualty.
05-07 Crystal Fields. This area of land has recently been overrun with an unfamiliar crystalline growth. Clusters of crystals dot the immediate landscape. The crystal fields pose the constant threat of new crystal pylons erupting from the ground. Roll D10 at the beginning of each turn. Use a marker or appropriate terrain (if available) to represent the new crystalline growths. The crystal pylons should be no more than 2 x 2 inches; they will block LOS. If a crystal pylon erupts underneath a model, the model makes a Dodge Test to try to avoid it. If the model fails to dodge, it takes a [Power: 4, AM: 0] hit and is placed prone adjacent to the pylon.
- 1-7: No effect.
- 8-9: Minor eruption. D5 crystal pylons erupt from the ground in random locations.
- 10: Massive eruption. D10 + 2 crystal pylons erupt from the ground.
08-09 Ancient Battleground. This battlefield is the site of thousands of previous battles, and the emotional anguish and horror of those past conflicts has saturated the region, burning the sounds of the screams and cries of agony into the terrain forever. Any Morale Tests made during this battle are at -1 GUT. Treat rolls of 1, 2 and 3 on the Panic Table as "Paralyzed!"
10 Acid Rain. Corrosive rain falls in sheets onto the battlefield, pitting and corroding everything it touches. At the start of the game (prior to deployment), roll D10 for each vehicle and heavy/special weapon present in each player's force. On a roll of 5 or less, the vehicle/weapon is unavailable for this game. Models that are deprived of their heavy/special weapons in this way should use their standard weapon(s). Models that have no standard weapons may not be used for this battle.
11-12 Unnatural Darkness. An eerie darkness falls upon the landscape, and so no model can see further than 24 inches. No weapons or attacks may be made beyond this range. The dense shroud of darkness is so unnerving that any Morale Test required by an affected model is at -1 GUT. The unnatural darkness does not affect power armor, vehicles or zykhee.
13 Awesome Presence. As the battle is about to begin, a huge translucent face materializes above the battlefield, staring down accusingly at the combatants gathered below. The battle continues, but every unit on the field is unnerved by the hateful gaze of the being above them. Any unit that fails a Morale Test at any time during the battle is removed as a casualty.
14-15 Atmospheric Phenomena. The sky is filled with multi-colored gases that writhe and twist about as if possessing an alien intelligence. Beyond providing an amazing aerial display, this event has no effect on game play.
16-18 Rainstorm. The battlefield is drenched by a large rainstorm. Roll D10 at the beginning of each turn to determine the intensity of the rainstorm.
- 1-3: Steady rain. The storm is mild and continues to release a fair amount of rain onto the area. This has no effect on game play.
- 4-6: Heavy rain. The storm intensifies, releasing a torrential downpour onto the battlefield. Each model that moves must make a Knockdown Test at the end of its activation.
- 7-9: Lightning storm! This has the same effect as heavy rain, except that a randomly determined model is blasted by a lightning bolt. Each player rolls D10; the player with the highest result randomly determines a model in his force to be struck by lightning. The victim takes a [Power: 6, AM: no test] hit and is automatically knocked prone.
- 10: Rain, rain, go away. The storm disperses and has no further effect on the game.
19 Maw Jettison. The whole battlefield is silenced by the deafening sound of a random jettison of material from the Maw. The brightly glowing jet of deadly plasma rockets out of the Maw at an incredible speed, annihilating one world in its path and melting a hole through the side of another. The intense spectacle ends with the fading plasma debris piercing the Veil and disappearing from view. After a moment the forces shake off the fantastic sight and continue fighting. This result has no effect on game play.
20-21 Scorching Air. The atmosphere of this region is unusually hot and arid, making life difficult for most of the lifeforms present. Make a Body Test for any model that uses all of its available MP when it is activated, after the model has resolved its actions for that turn. If the test fails, the model is overcome with heat exhaustion and is removed from play as a casualty. Vehicles, pharon and Firegut growlers are not affected by the scorching heat.
22-24 Snowstorm. The land is engulfed by a large snowstorm. Roll D10 at the beginning of each turn to determine the effect this storm has on the battle.
- 1-3: Light powder. The snowfall is light and has no effect on game play.
- 4-6: Heavy snow. The snowfall is moderate, hampering movement. Infantry may move no more than 7 inches during their activation because of the intense winds and blowing snow. Vehicles are unaffected by the snow. Modify all ranged attacks made this turn by -1 RC.
- 7-9: Blizzard! Heavy snowfall prevents infantry from moving more than 5 inches during their activation; vehicles may not move more than 10 inches. Modify all ranged attacks made this turn by -1 RC.
- 10: Clear weather. The snowstorm disperses and has no further effect on the game.
25 Temporary Darkness. A massive object has eclipsed the planetoid you are fighting on, casting the battlefield into pitch darkness. Modify all ranged attacks made at 20 inches or more by -1 RC. Roll D10 at the start of each subsequent turn after the darkness descends; on a 5 or less the object has moved on, and play returns to normal.
26-27 Strange Fluff. A bizarre downfall of a soft, brightly colored substance drifts down onto the battlefield. This has no effect on game play.
28-29 Shifting Mudflats. The ground in this region is composed of large areas of shifting mud. Treat all the open areas of the playing area as broken terrain.
30-31 Crystalline Growth. A fine, web-like growth of crystals has overgrown this entire region. The growth gets as high as knee deep in areas, and its sharp edges pose a threat to those who move quickly while on or in this terrain. Any model that jumps or goes prone during this game takes a [Power: 3, AM: 0] hit.
32-34 Dense Fog. The battlefield is covered in a thick fog that hampers long-range attacks. Roll D10 at the beginning of each turn to determine the effect of the fog for that turn.
- 1: Solid fog! The fog is so dense that NO ranged attacks may be made this turn. In addition, each inch of movement costs +1 MP.
- 2-5: Thick fog. An extremely thick fog blankets the area, obscuring all but the nearest features. Ranged attacks may only be made up to 12 inches.
- 6-9: Light fog. A substantial fog covers the battlefield, making long distance attacks difficult. Ranged attacks may only be made up to 24 inches.
- 10: Fog clears. The fog lifts from the battlefield and has no effect for the remainder of the game.
35-36 Shatterstar Bushes. Clusters of shatterstar bushes dot the battlefield. This alien vegetation is composed largely of silicon, and shatters in a violent explosion in response to vibrations caused by the movements of other beings. Before the game, players should take turns placing a total of 6 markers on the playing area indicating the location of shatterstar bushes. These markers must be at least 10 inches apart and 10 inches from the edge of the playing area. At the end of each turn, roll D10 for each bush. For every model within 6 inches of a bush, modify the die roll result as follows: +1 for each medium-sized model, +2 for each large model, +3 for each ground vehicle. A bush will explode on a result of 10 or more. Models caught within 6 inches of an exploding bush take a [Power: 4, AM: -1] hit. A shatterstar bush may explode multiple times and is not removed from play after it explodes.
37 Glassy Terrain. The entire landscape is covered in a glasslike substance, which makes movement very tricky. Make a Knockdown Test for each non-vehicle model at the end of its activation if it moved more than 3 inches. For vehicles, roll D10. On a result of 3 or less, spin the vehicle to face a random direction at the end of their activation. Flying models are not affected by the glassy terrain.
38 Crumbly Ground. The ground in this area is pitted and unstable. Roll D10, and place a number of markers equal to the result on the board to designate points on the battlefield that seem dangerous to cross. When any model moves within 3 inches of a marker, roll D10 and apply the appropriate result.
- 1-5: Relatively stable. Though brittle, the ground is stable enough to travel across. This result has no game effect.
- 6-8: Sinkhole. The area in a radius of 3 inches surrounding the marker is comprised of loose, crumbly dirt that collapses into a large, shallow depression. Treat this area as broken terrain.
- 9-10: Gaping pit. The ground collapses to reveal a deep hole with a 3-inch radius centered on the marker. If an infantry model triggered the collapse, the model makes a Dodge Test to avoid falling in. Vehicles automatically fall in. Models that fall into the hole are removed from the game as casualties.
39 Armageddon Sentry. An Armageddon bot has drifted onto the battlefield. Armageddon bots were used by an unknown civilization to wipe out the inhabitants of densely populated worlds. They are occasionally seen in the Maelstrom, still fulfilling their ancient programming. Most of these bots are in a state of severe disrepair, because it has been decades since their last maintenance. Either scratch-build your own Armageddon bot or use a 2-inch round base to represent it in the game. The Armageddon bots start the game in the center of the board. At the beginning of each turn, use the scatter rules to move the model. If the scatter result is 1 or 10, the Armageddon bot moves a second time after making any available attacks. The bot continues to move as long as it rolls a 1 or 10. If an Armageddon bot moves off the edge of the playing field, it is removed from play. The Armageddon bots are considered hover vehicles, and so they have no terrain restrictions. Any model within 12 inches of the bot when it stops moving is a valid target. Roll D10. On a result of 8 or less, the model suffers a [Power: 6, AM: (no test)] hit. If they survive, they must make a Knockdown Test. The Armageddon bots cannot be damaged; players can only try to avoid them and hope they eventually move off the battlefield.
40 Writhing Weeds. The ground vegetation moves and acts of its own accord. The alien weeds attempt to immobilize any models that fall down so that they can consume them over time. For any models that go prone during the game, it costs 5 MP to stand up.
41-43 Atmospheric Phenomena. The sky is filled with multi-colored gases that writhe and twist about as if possessing an alien intelligence. Beyond providing an amazing aerial display, this event has no effect on game play.
44 Plasma Vents. The surface is riddled with vents hissing and spewing multicolored gases. These vents occasionally erupt violently, ejecting a dangerous blast of searing hot, semi-transparent plasma. At the start of the game (prior to deployment), players should take turns placing a total of 10 markers on the playing area indicating the location of plasma vents. These markers must be at least 10 inches apart and 10 inches from the edge of the playing area. At the start of each turn, roll D10 for each vent to determine which ones erupt. An erupting plasma vent affects all models within 5 inches and inflicts a [Power: 5, AM: -3] hit on each model affected.
45-47 Lightning Storms. The land is being savagely raked by an intense lightning storm. At the start of each turn, each player rolls D10; the player with the highest result randomly determines a model in his force to be struck by lightning. The victim takes a [Power: 6, AM: no test] hit and is automatically knocked prone.
48 Infested Ground. The ground writhes and buckles from the herds of dugger maggots that have infested the soil in this area. These herds can number in the thousands, and they move through the soil like a school of fish. The ground in regions that harbor these creatures is unstable and constantly vibrates, making even mundane tasks difficult to perform. No attacks can be aimed during this game. Any attack roll of 9 or 10 counts as a critical failure.
49 Viral Cloud. A large, dense, greenish-yellow cloud drifts onto the battlefield, endangering all units present. Use some type of marker to represent the viral cloud and place it in the center of the playing area. Any model within 3 inches of a viral cloud marker at any time must make a successful Body Test. On a failed test, the model is dissolved by the multitude of voracious diseases within the cloud and removed as a casualty. Roll D10 at the beginning of each turn to see what happens to the cloud.
- 1: Dispersal. The cloud disperses harmlessly and has no further effect on the game.
- 2-4: Standstill. The cloud remains in its current position.
- 5-7: Drift. The cloud drifts slowly. Use the scatter rules to determine where it moves.
- 8-9: Rush. The cloud moves erratically. Use the scatter rules to determine where it moves, rolling for scatter twice.
- 10: Spawning. The viral cloud remains still and spawns a second cloud; the new viral cloud drifts away. Use the scatter rules to determine where it moves. You must now roll for each cloud at the beginning of each turn.
50-51 Raging Cyclone. An intensely powerful cyclone manifests on the battlefield. Make a 3-inch-diameter marker to represent the cyclone. At the start of each turn, use the scatter rules to determine the cyclone's movement, rolling for scatter twice. If the result of scatter moves the cyclone off the table, it leaves play for the remainder of the game. Whenever a model or any piece of terrain whose base horizontal dimensions are 12 x 12 inches or less is touched by the cyclone, roll D10 to determine its fate.
- Models, 1-3: Near miss. No effect.
- Models, 4-7: Blown aside. The model is thrown D10 + 2 inches, measured from the center of the cyclone marker; use the scatter rules to determine the direction. If this move places the model inside the cyclone template, place the model on the nearest edge of the cyclone, outside the template. Thrown models are automatically knocked prone and take a [Power: 6, AM: 0] hit when they land.
- Models, 8-10: Sucked in! The model is sucked up into the cyclone! Remove the model from the table and set it aside with any other models already in the cyclone. Roll D10 for each model in the cyclone at the start of each turn; on a 5 or less, that model is thrown out of the cyclone per the rules for Blown Aside.
- Terrain, 1-5: Sturdy ground. No effect.
- Terrain, 6-10: Destroyed! If the terrain piece measures 12 or fewer inches wide or deep at its base, remove the piece from the playing area. Larger pieces of terrain are not affected.
52-53 Bitter Cold. The hellishly cold winds ripping through this area are a severe hazard to every living thing. Roll D10 for each model that doesn't move at least 2 inches during its activation. On a roll of 4 or less, the model is frozen solid and removed as a casualty.
54 Intervening Entity. An unknown entity manifests above the battlefield and issues a challenge to the most powerful model on the board (the model with the highest PV). The entity immobilizes all other models present until the conflict is resolved between itself and the challenged model. Roll D10 to determine the outcome of the battle.
- 1-2: Victory! The challenged model manages to best the entity, which vanishes as quickly as it appeared. If playing a campaign game, this model gets an automatic stat increase after the game (player's choice). All rules for increasing stats apply.
- 3-7: Battle on! The combatants continue to fight, locked in mortal combat! Roll again.
- 8-10: Defeat! The entity smites the challenging model. Remove the model as a casualty.
55 Tunneling Terror. The ground shakes from the underground burrowing of the Nioga ram, a 50-foot-long subterranean creature that digs tunnels through the planets it inhabits, consuming the matter it gouges out of the ground. Any vehicle that moves more than half of its available MP must roll D10 to determine if it attracts the creature's attention. On a result of 5 or less, the Nioga ram attacks the vehicle, trying to pull it down and eat it. Roll another D10 and add the vehicle's Power; if the result equals 12 or more, the vehicle manages to pull itself free from the ram's jaws. On a result of 11 or less, remove the vehicle as a casualty.
56-59 Atmospheric Phenomena. The sky is filled with multi-colored gases that writhe and twist about as if possessing an alien intelligence. Beyond providing an amazing aerial display, this event has no effect on game play.
60-62 Earthquake. Worlds within the Maelstrom are frequently unstable and subject to earthquakes and other seismic activity. Roll D10 at the start of each turn to determine if the earth is shifting.
- 1-5: Tremors. Nothing but widespread tremors this turn. This has no effect on game play.
- 6-7: Minor quake. A small quake rocks the region, producing 1 crevasse (see below).
- 8-9: Major quake. A large quake violently shakes the area, creating 2 crevasses (see below).
- 10: Planetquake! A massive, worldwide quake threatens to destroy the entire area. This creates 3 crevasses on the battlefield (see below).
Crevasses: Each crevasse manifests as a 2-inch-wide chasm on the battlefield, crossing the playing area from one side to the other. To determine the placement of a crevasse, choose a long side of the battlefield and roll D100. Measure that many inches from one end of the playing area, and mark the edge. Repeat this for the other long side of the playing area, measuring from the same end of the table. Draw an imaginary line between the two points; anything within 1 inch of either side of the line is caught in the crevasse and must make a successful Dodge Test or plummet to its death. Ground vehicles are automatically destroyed if caught in a crevasse. Flying vehicles are not affected by earthquakes. Terrain caught by a crevasse is destroyed on a D10 roll of 5 or less.
63 Stasis Flux. The area is suffering severe time fluctuations. Each player should roll D10 prior to activating each unit during the game. A result of 1-7 means the unit may be used as normal; on a result of 8 or more, the unit is stuck in a time ripple that prevents it from acting this turn. The unit remains immobile and counts as paralyzed (see the Panic Table) for purposes of melee attacks against it.
64 Steam Vents. Numerous steam vents dot the surface of this area, each puckered mound periodically shooting out a concussive blast of superheated steam. Players should take turns placing D10 markers on the playing area to indicate the location of the steam vents. Assign each marker a number, beginning at 1, as it is placed on the playing area. At the start of each turn, roll D10 to determine which steam vent will discharge (if the result is a number not assigned, no vent erupts that turn). When a steam vent discharges, center the round blast template over the vent marker. Any model caught under the template is pushed directly away from the vent, up to the edge of the template. If the model strikes any terrain or another model, it takes a [Power: 3, AM: 0] hit. When a large number of models are caught under the template, move the models on the outside first and work your way into the models closer to the vent. If a model's path to the edge of the template is blocked by another model, simply push both models directly outward until both are past the edge of the blast. Infantry can only push infantry of the same size or smaller. If a model hits an object that is larger than itself, it is knocked prone.
65 Tectonic Fracture. The ground gives one quick, violent lurch as a major tectonic plate snaps deep underground. All infantry models are knocked prone. Vehicles are not affected by this result.
66-67 Light Gravity. The gravity in this region is extremely light, allowing tremendous leaps. For 8 MP, models may make a low-gravity jump. Small and medium infantry models can jump 6 inches long and 3 inches high; large infantry and walker vehicles can jump 8 inches long and 4 inches high. No models will take damage from falling during this game.
68 Unknown Adversaries. Multiple massive starcraft rip through the sky above the battlefield, exchanging broadside attacks at one another with powerful energy weapons. Roll D10 at the start of the second turn of the game to determine their actions.
- 1-5: Battle moves on. The ships continue on their way, savagely damaging one another with their endless attacks.
- 6-8: Stray shot. A stray blast from one of the ships hits the battlefield. The blast strikes a randomly determined location on the table. The blast has the following stats. [Power: 8, AM: -6, Mode: indirect, blast radius 3", Damage: 2]
- 9-10: Destruction! One of the alien ships is seriously damaged and detonates overhead, showering the battlefield with flaming wreckage. The battlefield is bombarded by D10 pieces of flaming debris, which land at random locations. Each of these impacts has the following stats. [Power: 6, AM: -3, Mode: indirect, blast radius 3"]
69-70 Heavy Gravity. The gravity on this world is so intense that it severely restricts movement on the battlefield. Small and medium models may move no more than 4 inches. Large models may move no more than 6 inches. To move a model further than its restricted movement, make a Power Test. If the model fails the test, it loses all its remaining MP for the turn.
71-72 Cosmic Storm. Cosmic storms of one sort or another are a common occurrence in the Maelstrom. Roll D10 at the start of the second turn to determine the nature of the storm.
- 1-2: No effect. The storm is too weak to have any effect on the game.
- 3-4: EMP storm. All vehicles are rendered useless this turn. Roll D10 for each vehicle at the start of each subsequent turn; on a result of 5 or less, the vehicle may be used as normal.
- 5-6: Gamma storm. All infantry melee attacks are at POW +1 (cumulative) for this game.
- 7-8: Solar storm. All infantry models reduce their BOD by 1 for the rest of this game.
- 9-10: No effect. The storm is too weak to have any real effect on the game.
73-76 Asteroid Field. The planetoid that you are battling on enters an asteroid field. At the end of the first turn, roll D10 to determine the effect of the field.
- 1: Collision! A massive asteroid, hundreds of miles wide, emerges from the asteroid field and slams into your planetoid, utterly annihilating it upon impact. If this is a campaign game, any named models on the field are killed; remove them from your campaign roster.
- 2-3: Meteor storm. The immediate area is pelted by small asteroids piercing the atmosphere. D5 asteroids hit the battlefield in randomly determined locations. Each impact has the following stats. [Power: 8, AM: no test, Mode: indirect, blast radius 3", Damage: 2]
- 4-6: Meteor shower. The battlefield is bombarded by D10 impacts from the debris created as smaller asteroids break apart on entering the atmosphere. This debris lands at randomly determined locations. Each of these impacts has the following stats. [Power: 6, AM: -3, Mode: indirect, blast radius 3"]
- 7-10: No effect. The planetoid passes safely through the asteroid field.
77-78 High Altitude Detonation. Something entering the atmosphere of the planet burns up in a brilliant explosion, illuminating the ground below in a bright blue and green light. This has no effect on game play.
79-81 Stellar Winds. This area of land is subject to powerful interstellar winds that sweep across the landscape blasting everything in their path. Roll D10 at the start of each turn (before determining Initiative). On a result of 7 or less, the battlefield is raked by intense winds. Each unit on the battlefield must make a Knockdown Test. Roll D10 for each piece of terrain. On a result of 3 or less, the piece of terrain is removed from the playing area. See Damaging Structures to determine the fate of any models caught in a piece of terrain that is destroyed.
82-83 Close Proximity to the Veil. This battlefield is on a planetoid located dangerously close to the Veil, and it is subject to being engulfed in the corrosive vapors for brief periods of time. Roll D10 at the start of each turn (before determining Initiative); on a result of 3 or less, the area is partially filled with the choking gasses of the Veil. During a turn in which this happens, the billowing clouds of gas prevent any ranged attacks beyond 12 inches. If the Veil engulfs the board more than once during the game, roll D10 for each model on the board at the end of each such turn after the first; on a result of 1 the model is removed from play as a casualty.
84 Cosmic Deluge. A massive, drifting glob of liquid collides with the planetoid, engulfing the battlefield in a turbulent splash. Roll D10 for each model.
- 1-5: Splash. Though thoroughly drenched, the model manages to maintain its position on the battlefield. This has no game effect.
- 6-9: Flood. The powerful force of the liquid washes the model a short distance. Use the scatter rules to determine the model's new position.
- 10: Washout! The model is washed away in the brief but intense flood that smashes into the region. Remove the model as a casualty.
85-88 Induction. New worlds are periodically pulled into the Maelstrom. There is no rhyme or reason to this; no discernible schedule or pattern can be found. At the beginning of the second turn of the game, roll D10.
- 1-5: Safe distance. The new world enters the Maelstrom far off in the distance, appearing as just a flash in the sky. This has no effect on game play.
- 6-8: Close call! The newly inducted world materializes dangerously close and immediately breaks apart, showering the planetoid you're fighting on with debris. Use the rules for Asteroid Field to determine the outcome.
- 9-10: FUSION! Fusion is what inhabitants of worlds in the Outer Ring most fear. Players alternate replacing up to 2 pieces of terrain with the same number of new pieces. Roll to determine who replaces the first piece of terrain; that person chooses the theme of the new terrain, which the other players must follow. For example, the world being fused may be primarily woods, ice, jungle, crystal, water, alien structures and so on. If a model is on or in a piece of terrain that is replaced in the fusion, that model may make a Dodge Test to jump out of the way before the terrain changes. If the roll fails, the model is removed as a casualty.
89-90 Time Distortion. A nearby "Maw storm" is causing disturbances in the flow of time within this area. The air itself can be seen to ripple and waver as a result. Roll D10 when you activate a unit; on a result of 3 or less, that unit is experiencing slowed time and only gets half (rounded up) its normal MP this turn. Treat a slowed model as having Close Combat 1 for purposes of determining whether it or another model gets a bonus in a melee attack.
91-92 Cosmic Detonation. A massive detonation in space rocks the battlefield! The intense flash from the explosion lights up a portion of the sky, making it difficult to look that direction. Randomly determine an edge of the playing field for the location of the detonation. Any model facing this direction when making a ranged attack suffers -1 RC. In addition, a ranged attack roll result of 9 or 10 will count as a critical failure if the model is facing the designated table edge when it makes the attack.
93-95 Core Roar. A demonic, ear-splitting, bestial roar cuts through the air. The horrible sound seems to come from everywhere at once, and it's impossible to discern the direction of its origin. This result has no effect on the game.
100 Maw Tendril. Second only to the Maw itself for destructive potential, the Maw tendrils are horrifyingly powerful concentrations of energy. The tendrils are known to whip around, raking worlds with their devastating power. Often, the world they touch is destroyed outright, but fantastic and bizarre effects occasionally occur instead. Roll D10 to determine the effect of the tendril.
- 1-6: Mutated landscape. Roll twice on the Battle Terrain Table and combine the effects.
- 7-9: Warped reality. Roll three times on the Battle Terrain Table and combine the effects.
- 10: Annihilation! The world that you're battling on is lashed by a Maw tendril and it blows apart under the stress. In campaign games, all named models on the battlefield are lost. If not playing a campaign game, treat this result as Warped Reality (above).
Campaign Rules
Running a VOR campaign involves building and developing a force over the course of many campaign scenarios. The more battles a campaign force wins, the more skilled and experienced it becomes. A force that consistently loses becomes less effective over time.
Getting Started
To begin a campaign, each player who will be involved chooses a faction or race to play (growlers, zykhee, Union and so on). The player must use a force belonging to that race or faction every time he participates in a campaign game, though specific units used may change for each game. Think of the player's total forces as similar to a football team; during each play (battle) he uses only a fraction of his players on the field, but he can draw from his larger team for future plays.
Any game of VOR can be played as a campaign game if all participants are in the campaign and they all agree to make the game a campaign match. In this case, the game is played as usual, but the players can make use of earned Force Traits and named models, and must follow the other rules found in this section.
At the end of a campaign game, each player's force earns Campaign Points (CP) based on the level of success they achieved (see Campaign Point Awards). These points can be used to purchase Force Traits or improve named models. In the next campaign game, the players must play the same race/faction, but can choose an entirely different force. Whatever units they choose, they will have access to their Force Traits and named models until they decide to retire the force from play or the campaign ends by mutual consent of the players.
Each player will use a campaign record sheet (see scenario book) to keep track of his force's successes and/or failures over the course of the campaign. The campaign record sheet provides space for the following information: number of games played, total Campaign Points, available Campaign Points, Force Traits, named models and notes.
Choosing Forces
At the beginning of each campaign scenario, each player chooses their force for that game. Unless a specific scenario calls for uneven forces, a campaign game should be played with balanced forces. Forces of the same Point Value will be roughly equal. The players should choose a certain Point Value for the game, and each player's starting force should be built with that number of points.
Games can have any Point Value the players want. As a general guideline, a small (and therefore short) game would be around 400 points, a medium-sized game would give each player 600 points and a large (and therefore long) game can be played with 800 points of forces or more. Players may intentionally choose to field a force with a lesser Point Value than they are allowed for the scenario in the hopes of winning an underdog bonus (see below). A force's effective Point Value may be increased or decreased if it has a positive or negative Resources trait; see Resources.
Determining Victory
In standard games of VOR, it's easy to determine the winner and loser of a given battle simply by comparing the Glory Point totals of all the players involved (see Winning the Game). In campaign play, however, it's important to know just how sweeping a victory was or how devastating a loss, since this determines Campaign Point awards and Resources trait increases or decreases.
The Victory Table shows the various levels of victory and how to achieve them. The basic conditions of victory still apply; if you have more Glory Points than your opponent, you are considered to have scored a victory. If you have less, you suffered a defeat.
The specific kind of victory or defeat is determined by how many casualties your own side suffered, in terms of the percentage of your side's total Point Value that was killed. For example, if you had 500 points of units at the beginning of the game, and only 250 points survived at the end, you would have suffered 50 percent losses.
Campaign Point Awards
The Victory Table shows the number of Campaign Points earned based on the level of your force's success or failure. Scenarios may also offer additional victory conditions worth Campaign Points, such as specific goals or objectives.
Underdog Bonus
A player may end up with a lower Point Value total than his enemy, either because of differing Resources traits (see Resources) or because he has lots of bravado and wants to try to win with an inferior force.
Regardless of the reasons, a player who fields an inferior force earns extra Campaign Points provided he scores a victory (nothing extra is gained or lost in defeat). The award is based on the difference between the inferior force's total Point Value and the opponent's Point Value total. Subtract the total Point Value of the inferior force from the total Point Value of the larger force, and compare the remainder to the Point Value of the larger force. For every full 10 percent of the value of the larger army, the inferior force scores 1 extra Campaign Point (if it wins), up to a maximum of +5 Campaign Points.
For example, a player is fielding a 600-point force against his opponent's 800-point force. The difference between the two point values is 200 (800 - 600 = 200). Comparing 200 to 800 yields a result of 25 percent (200 / 800 = 0.25). This is more than 20 percent, but not 30 percent, so if he wins the battle he will score an extra 2 Campaign Points.
Victory Table
| Situation | Victory Level | Campaign Points |
|---|---|---|
| Victory: Glory Point total higher than opponent | ||
| Lost less than 50 percent of your force and Glory Point total double or more than that of opponent | Major Victory | 5 / +1 Resources |
| Lost less than 50 percent of your force | Solid Victory | 4 |
| Lost 50 percent or more of your force | Marginal Victory | 3 |
| Defeat: Glory Point total lower than opponent | ||
| Lost less than 50 percent of your force | Marginal Defeat | 3 |
| Lost 50 percent or more of your force | Solid Defeat | 2 |
| Lost 50 percent or more of your force and Glory Point total is half or less than that of opponent |
Multiplayer Games
For campaign games with more than two opponents, each player receives 1 Campaign Point just for having the courage to get involved in such madness and mayhem.
Only the single highest Glory Point score among all players is considered to have achieved victory. All other players suffer a defeat. To determine if a Major Victory or Defeat was scored, compare your Glory Points to the average Glory Point total of all opponents.
Underdog Bonus: Calculate the average Point Value of the opponents' forces. The result is the value you use when determining an underdog bonus.
Force Traits
Force Traits are qualities that enhance a force's effectiveness in battle. They are purchased with accumulated Campaign Points, and affect your entire force regardless of what units you field. This section defines each trait and describes the advantages they provide in a campaign. Forthcoming force books for each race in the game will describe additional special abilities a force can use in campaign play.
Strategy: Strategy indicates how effective a force is in setting up for a battle. Players add their Strategy to the rolls made to choose a deployment zone and determine the order of set-up. Cost to improve: 10 CP per point.
Tactics: Tactics reflects a force's skill at adjusting their plans and compensating for the actions of their enemies in the heat of battle. Tactics is added to a player's Initiative Roll each turn, making forces with high Tactics the ones most likely to go first each turn. Cost to improve: 20 CP per point.
Morale: The more seasoned a force is, the more likely its units will keep their cool in battle. Each point of Morale allows the player to re-roll one failed Morale Test per game. Cost to improve: 10 CP per point.
Luck: Luck is a deciding factor in many military conflicts. Each point of Luck allows a player to re-roll one failed to-hit roll, roll to inflict damage or Armor Test per game. Cost to improve: 20 CP per point.
Resources: Resources represent a leader's access to reinforcements and supplies. A force with a non-zero Resources Trait will have access to more or less points than the basic point level agreed upon for the game.
After choosing a point level, increase the points available to a player's force by 5 percent for each point of Resources above 0, or decrease it by 5 percent for each point of Resources below 0. For example, if a force has a Resources Trait of 2 and is playing a 500-point game, the player could choose up to 550 points of units. If the force had a Resources Trait of -4, he could choose no more than 400 points of units. If your force's Resources Trait drops into the low negative numbers, you may want to consider retiring the force. Once it drops to -20, you can't field any units at all, so your force is wiped out completely!
Resources cannot be purchased. This force trait can only be earned by winning a Major Victory. Resources can also be lost by suffering a Major Defeat (this trait can have a negative value). Cost to improve: Not applicable.
Named Models
For the cost of 1 Campaign Point, you can name a model. Once a model is named, you can spend additional Campaign Points to improve its stats and increase its effectiveness in the game.
Any model in your force can become a named model, whether it's an individual or part of a squad. Named models that are part of a squad remain with that squad after they are named.
You must give a named model a unique appearance, anything from a dramatically different paint scheme to an actual conversion of the miniature itself, so that your opponent can immediately identify your named models. In order to track its improvements, a named model's stats also must be added to the campaign record sheet.
Developing Named Models
To improve a named model's stats (except MP and LIF), you choose the stat you want to try to improve, spend 1 Campaign Point and roll D10. If the result is higher than the current stat you are trying to improve, you have succeeded and should add 1 to that stat. You can only attempt to raise a single stat on a model each game, though you may attempt to improve more than one model each game.
To increase MP or LIF costs 5 Campaign Points; no die roll to succeed is required.
Only models that participated in your most recent game can be named or, if they are already named, improved. If you want to improve a specific model by spending Campaign Points as described above, you must do so after a game in which that model fought, and before the next game using that force.
Improvement Limits
Though named models stand above the rest, even they have their limits. Use the following limits when improving a named model's statistics.
- All statistics (except MP and LIF) can be increased twice. Even if a model suffers a wound effect that reduces a stat, a stat can only ever receive two increases (you don't get "extra" stat increases to counteract wound effects).
- MP and LIF can only be increased once each. Even if a model suffers a wound effect that reduces MP, the stat can only ever receive one increase.
- No statistic can be raised higher than 10 in any case.
Death and Wounding
Named models are tougher than their more common counterparts, but can also suffer permanent injury. When a named model takes damage equal to or greater than its Lifeforce statistic, it is not necessarily killed. Remove the model from play, but roll D10 and consult the Named Model Damage Table below to see how wounded it actually is. No matter what the result, the model is still counted as a "kill" for your opponent's Glory Points.
Note that the example effects on the Wound Table are based on a humanoid model; equivalent effects can be devised for non-humanoid models, though the stat reductions stay the same.
Named Model Damage Table
| Die Roll Result | Effect |
|---|---|
| 1-3 | Survived! The model somehow managed to avoid death and may be used as normal in future games. Consider the model to have 1 point of Lifeforce remaining. |
| 4-5 | Wounded! The model managed to survive its battlefield ordeal, but at a price. The model can be used in future games, but roll D10 and consult the Wound Table to find the lasting effects of the injury. Wound Table results are permanent changes to the model's stats. |
| 6-10 | Dead! The model succumbed to its injuries and is killed. It must be removed from the campaign record sheet. This model is no longer available for your games. |
Wound Table
| Die Roll Result | Example Wound Effect | Stat Reduction |
|---|---|---|
| 1-2 | Nothing more than scars! | - |
| 3 | Broken Leg | -1 MP |
| 4 | Smashed Hand | -1 CC |
| 5 | Lost an Eye | -1 RC |
| 6 | Back Strain | -1 POW |
| 7 | Internal Bleeding | -1 BOD |
| 8 | Concussion | -1 BRN |
| 9 | Beaten Spirit | -1 GUT |
| 10 |
Custom Force Creation
The Maelstrom has pulled an untold number of worlds into its grasp from across time and space, each populated by unique species that inevitably become locked in struggle with their new neighbors. In the Maelstrom, the potential list of enemies is endless.
Overview
These rules describe how to create a custom-built force using miniatures from other games or of your own design. The box set does not give every conceivable rule necessary to convert every model you may desire, but these rules should be sufficient to get you started. FASA intended to publish a more extensive set of custom force creation rules at a later time.
Your custom-built forces should be able to face FASA-published forces on an equal footing in game play, provided you follow the advice for force creation regarding force composition, model abilities and so on. However, you shouldn't expect the forces you build with these rules to be directly comparable to the forces presented as part of the VOR universe. In order to simplify the whole process, abilities of units had to be generalized, while each force created specifically for VOR has been extensively playtested and tweaked to fine-tune their abilities and point costs.
The process of creating your own force requires you to follow the steps below. First you need to invent a force concept and structure, then you need to define the specific units and their statistics and attack options. By the time you finish with them, you'll have the details necessary to field your new force.
A Note on Race
The forces defined as part of the VOR universe are very race-specific. It is unlikely, for example, that a growler and zykhee combined force would ever come into being. These custom force design rules were created with that principle in mind-each force is intended to belong to a specific race. However, some players may wish to create custom mixed-race forces, which is fine. Though the only thing most species in the Maelstrom have in common is a desire to kill each other, it is possible that rag-tag elements of various races may group together for survival or mercenary purposes. Whatever your force type, the following rules may be used.
Force Concept
The limitless potential of the Maelstrom allows players to create any sort of custom force that sparks their imagination. Any type of race, unit or even individual model that a player ever wanted to field in a miniatures game is now possible. You can approach your force concept in several ways. You may choose to base your force concept on models you already own, models you have seen at your local hobby shop or any appropriately-sized figures that you've always thought would look cool on a game board. You may have a specific background, set of skills or type of weapon in mind, and just need to choose miniatures to make your concept come alive. You may even have a favorite force from another miniatures game that you want to translate to VOR, to see how they stack up.
Once you have chosen your concept and have access to the miniatures, you must determine your force structure.
Example: Stacy has decided that she wants to make her own race/force for VOR: The Maelstrom. She's going to base her new force on a spider theme as she has been collecting spider miniatures for a number of years and she has a substantial collection to select from. The name of the race will be "the Arachnians." The race won't use any technological devices and will rely on their own natural abilities in battle.
Force Structure
Though the elements in each VOR force vary dramatically, each force has a similar composition. In other words, each model may have unique abilities, and each race will have a unique culture and history, but each force will have a leader, unskilled infantry, elite infantry, individual specialists and some type of transportation.
The following information describes the types of units you can create for your force. When you have chosen the types of units your force will include, go to Unit Creation.
Leader: The leader model represents the head of your custom force. It can be the General, King, Lord, Mandarin, Mother, Chieftain or any other historical or fictional leadership title. In keeping with its position as the head of the force, this model should be substantially more deadly in game play than any other model. A leader model is always optional for a force. Your force may include one leader model.
Basic Squad: The basic squad is the defining element of your force. If the force you are creating is representative of a race, then the basic squad should be composed primarily of typical members of that race. If you are creating a mercenary force, each basic squad may consist of a variety of model sizes and races. Your force may include up to 3 types of basic squads.
Elite Squad: An elite squad has the same makeup as a basic squad, but has a higher level of skill and so is more effective. They generally have a higher Point Value, and so you will be able to use fewer of them per game than a basic squad. The Elite squads on the table can never outnumber the basic squads. Your force may include up to 3 types of elite squads.
Individuals: Individual models have specialized abilities and, because they do not need to be part of a squad in order to be effective in battle, offer greater flexibility for use in play. Individuals generally have a higher Point Value than models in basic or elite squads, and as such you can use fewer of them per game than squad models. You can't have more individual models on the board than squads. Your force may include up to 2 types of individuals.
Vehicles: Vehicles fulfill a wide variety of roles in military forces, including transport, support and reconnaissance. Tailor the use of your vehicles to reflect the overall concept of your force. You can never have more vehicles than squads on the table. Your force may include up to 3 types of vehicle.
Example: Based on the models that she has available, Stacy decides to have 1 leader (a big Queen spider), 2 basic squads (small- and medium-sized spiders), 1 elite squad (super-venomous medium-sized spiders), 1 type of large individual (hulking spider) and, last but not least, 1 transport vehicle (this is actually a big, hollowed-out bug creature).
Unit Creation
In this step, you will further define each of your force's units, including size, squad structure, vehicle locomotion and unit statistics.
Determine Unit Model Size
For each unit you have, you must choose a size for the models in that unit. A model may be defined as small, medium or large (see Model Sizes). The size of a model determines its base statistics (see Unit Statistics, below).
All the models in a squad must be the same size, but the same type of squads may have different size models. For example, in a force with two basic squads, one may contain small models and one may contain large models. Each type of individual unit may be a different size. Frequently, but depending on race, leader models are large.
Determine Squad Structure
Choose a squad structure for each squad by determining the number of models that may be in the squad type. Choose either 2-4 models or 5-10 models for structure. All squads have a 3-inch coherency (see Squad Coherency).
Vehicle Classification
Determine if each vehicle moves using wheels or tracks, or walks or flies. Classify each vehicle as light, medium or heavy (see Vehicle Types and Sizes).
You can also designate one or more of your vehicles as a transport vehicle for no additional cost. By designating a vehicle as a transport you limit its weapon load. Transport vehicles can only have 2 basic weapons incorporated into their design. The carrying capacity for these transport vehicles depends on the type of vehicle it is, as shown below:
- Light Transport: 5 small or medium models
- Medium Transport: 10 small or medium models
- Heavy Transport: 15 small or medium models
Unit Statistics
The statistics for each unit type are based on a standard set of stats based on the model's size, as noted on the Base/Maximum Statistics Table. Each model size and unit type also has a stat maximum, listed on the same table. Beginning with the base stat line, you can alter the stats of each unit with either positive or negative adjustments. Each point that you raise or lower a unit's stat will affect the model's Point Value, as indicated on the Statistic Cost Table. An individual stat cannot be lowered to less than 1, nor can it be raised above the value listed on the stat maximum line for its unit type and size.
Remember that a unit's Point Value is the Point Value per model.
Adjust each unit's statistics as desired, then determine the total cost of the changes for each unit. Each unit must have a minimum PV of 5. If the final calculated Point Value of a unit is lower than 5, its Point Value is 5.
Only Basic Attacks: If a model is given no attack options (see Attack Options) other than its basic stats (it makes unarmed melee attacks only), it gets a -3 PV reduction.
Base/Maximum Statistics Table
| Model | MP | CC | RC | POW | BOD | BRN | GUT | LIF | AR |
|---|---|---|---|---|---|---|---|---|---|
| Small Models | |||||||||
| Base Stats | 12 | 3 | 3 | 2 | 2 | 3 | 3 | 1 | 0 |
| Squad Max. |
Statistic Cost Table
| Statistic | Cost to Increase/Decrease 1 point |
|---|---|
| Move Points (MP) | 4/-4 PV |
| Close Combat (CC) | 1/-1 PV |
| Ranged Combat (RC) | 2/-1 PV |
| Power (POW) | 2/-1 PV |
| Body (BOD) | 3/-2 PV |
| Brains (BRN) | 1/-1 PV |
| Guts (GUT) | 1/-1 PV |
| Lifeforce (LIF) | 8/-8 PV |
| Armor Rating (AR) | 3/0 PV |
| Attack options use base stats only (see Attack Options) | (-3 PV) |
Example: Stacy starts to devise stats for her models. Beginning with the Queen (a large model), Stacy writes down the basic stats for a large model from the Base/Maximum Statistics Table. She thinks the Queen should have a higher MP, and decides to take it up to 10 (base 8, plus 2). Looking at the Statistic Cost Table, she sees that each MP increase adds 4 PV, so the Queen is now at +8 PV (4 x 2). Stacy also decides to raise the Queen's CC to 6 (a +3 increase from the base 3, adding 3 x 1 = 3 PV), RC to 4 (a +1 increase, adding 2 PV), POW 6 (a +3 increase, adding another 3 x 2 = 6 PV), BOD 6 (+3 increase, for +9 PV), BRN 6 (+3 increase, +3 PV), GUT 7 (+3 increase, +3 PV), LIF 3 (+1, for +8 PV) and AR 4 (+4, adding +12 PV). When she's finished, she takes a quick sec to check and make sure none of those increases exceed the maximum allowed. So far, she has a total PV of 54 (8 + 3 + 2 + 6 + 9 + 3 + 3 + 8 + 12). The Queen's stats are: MP: 10 CC: 6 RC: 4 POW: 6 BOD: 6 BRN: 6 GUT: 7 LIF: 3 AR: 4 SIZE: L.
Having completed the Queen, Stacy decides to define the stats for a squad next. Stacy's first basic squad is going to be called a skitter squad, and will have 5-10 small models. She decides to give them stats of: MP: 12 CC: 4 RC: 2 POW: 3 BOD: 3 BRN: 4 GUT: 5 LIF: 1 AR: 0 SIZE: S. These changes from the base stats add up to a total of 8 PV (+1 CC = +1 PV, -1 RC = -1 PV, +1 POW = +2 PV, +1 BOD = +3 PV, +1 BRN = +1 PV and +2 GUT = +2 PV). She decides that these cannon fodder squads will have no other attacks besides basic unarmed melee attacks, which applies a -3 PV modifier. This reduces the PV to 5 (8 - 3), which is the minimum PV a unit can have. Stacy then proceeds to define stats for her other units.
Vehicle Stats
Vehicle statistics can be found by referencing the type and size on the Vehicle Statistics Table. Unlike infantry-based units, all vehicle types use standard statistics; they cannot be modified.
The Close and Ranged Combat stats of a vehicle have to be purchased separately from the vehicle itself. Walkers are the only type of vehicle that can have a Close Combat stat. If a vehicle has no weaponry you do not have to purchase a Ranged Combat stat for it. Use the Vehicle Combat Stats Table for determining how much these stats will add to the vehicle's PV.
Vehicle Combat Stats Table
| Type | Value | PV Cost |
|---|---|---|
| Ranged Combat | 3 | +9 |
| Ranged Combat | 4 | +12 |
| Ranged Combat | 5 | +15 |
| Ranged Combat | 6 | +18 |
| Close Combat | 3 | +5 |
| Close Combat | 4 | +7 |
| Close Combat | 5 | +9 |
| Close Combat | 6 | +12 |
Vehicle Statistics Table
| Vehicle | MP | TC | POW | BOD | LIF | AR (SHD) | PV |
|---|---|---|---|---|---|---|---|
| Medium Vehicles | |||||||
| Wheeled | 18 | 2 | 6 | 7 | 4 | 5 (2) | 70 |
| Tracked | 15 | 2 | 7 | 7 | 4 | 5 (2) |
Example: Designing the Arachnian vehicle, Stacy calls it a "tow beetle," as it is basically a large, domesticated beetle with a hollowed-out thorax. Stacy decides to classify it as a medium walker transport, meaning it can transport 10 small or medium models. Since the basic stats can't be modified, she pulls them right off the Vehicle Statistics Table. Since the tow beetle is a walker, Stacy decides to go ahead and give it a CC stat of 5. This adds 9 PV, giving it a total of 84 (base 75 + 9).
Attack Options
Unless a unit engages in combat only using unremarkable unarmed melee attacks, it will have attack options of some sort. These options can range from standard issue equipment (guns, knives or other weapons) to innate capabilities such as optic blasts, huge claws or the ability to create mini-earthquakes. Certain units may have even more esoteric options, such as unique types of movement and shields of flame, or specialized rifles and chemical delivery systems.
You should tailor the attack options you give a model to fit the model's physical design and race. For example, if the model depicts a space troll wielding a combat axe and a laser pistol, the attack options should involve using an axe, using a laser pistol, and/or some other option that makes intuitive sense for a troll. Giving the troll a mental blast attack option doesn't make sense (unless it belongs to a race of psychic space trolls...).
All units can make basic unarmed melee attacks; this is a free attack option and does not count toward a unit's attack option limits.
Attack Options Table
Close Combat:
| Type | Power | AM | MP Cost* | PV Cost |
|---|---|---|---|---|
| Standard | POW | 0 | +0 | 0 |
| Standard | POW | -1 | +1 | 1 |
| Standard | POW | -2 | +2 | 2 |
| Standard | POW +1 | 0 | +0 | 2 |
| Standard | POW +1 | -1 | +1 | 3 |
Ranged Combat:
| Type | Power | AM | MP Cost | PV Cost |
|---|---|---|---|---|
| Standard | 3 | 0 | 3 | 2 |
| Standard | 3 | -1 | 3 | 3 |
| Standard | 3 | -2 | 4 | 5 |
| Standard | 4 | 0 | 4 | 4 |
| Standard | 4 | -1 | 4 | 5 |
| Standard |
Other Modifiers:
| Modifier | PV Cost |
|---|---|
| 1" blast radius | +4 PV |
| 2" blast radius | +8 PV |
| Indirect | +5 PV |
| Splash | +5 PV |
| Full-auto | +6 PV |
| 2 Uses/Turn | +10 PV |
| 2 Damage** | (total PV x 1.5, minimum +10 PV) |
| 3 Damage** | (total PV x 2, minimum +20 PV) |
| Primary attack (see Primary Attack) | -(total PV x .1, minimum value 2) PV |
* Add to MP cost of standard attack. ** Only available for heavy attacks.
Attack Option Limits
Each type of unit can only have a specific number of attack options, as described below. These attacks are classified as standard and heavy, depending on their Power (see the Attack Options Table).
The Leader: Your leader model may have up to 3 attack options. Up to 2 of the leader's attacks may be heavy.
Basic Squad: Each basic squad can have up to 2 standard attack options. All models in the squad must have the same attacks, except that one model may have a different attack, and it may be heavy. This represents the common military doctrine of grouping soldiers with similar abilities in the same unit.
Elite Squad: Each elite squad model can have up to 2 attack options; only one of these attacks may be heavy. Each model in the squad may have different attacks, unlike basic squads.
Individuals: An individual model can have up to 2 attack options. Only one of these attacks may be heavy.
Vehicles: The number of attacks a vehicle may have depends on whether the player chooses standard or heavy attacks. Light and medium vehicles can have 1 heavy attack or 2 standard attacks. Heavy vehicles can have 2 heavy attacks or 4 standard attacks. Transport vehicles, no matter their size, can only have 2 standard attacks. Only walkers may have Close Combat attacks.
Example: Stacy wants to keep her attack options simple. The Queen Arachnian needs to be tough, so she gives the model 2 standard close combat attacks and 1 heavy ranged attack. She's already decided that the skitter squads only have a basic unarmed attack, which fits their role as cheap, expendable troops. The weaver squads are intended to be the "standard" example of an Arachnian, but Stacy doesn't want them to be too expensive either so she can use lots of them in her games. For this reason she gives them only a single standard close combat attack. The venomlords are intended to be the nasty and deadly squad for the force, so they get 2 attacks (1 standard close combat and 1 heavy ranged attack) to make them as versatile as possible. The storm spider is a massive, hulking model, and Stacy decides that a single heavy close combat ability suits it best. With these decisions in mind, Stacy is starting to get a clear picture of how her force is shaping up.
Melee Attacks
The Power of a model's melee attack is based on the POW of the model, plus a modifier. The melee attack Power cannot be less than the model's POW.
Any melee attack with a Power of 6 (calculating the model's POW plus its modifier) or higher is considered a heavy attack.
Attack Range
The Attack Ranges Table provides the available weapon ranges and modifiers. Choose a set of ranges and adjust the weapon cost according to the PV Modifier given. Splash attacks do not use ranges.
Attack Ranges Table
| Range (S/M/L) | Range Modifiers | PV Modifier |
|---|---|---|
| 4/8/- | +1/-/- | -2 |
| 4/8/- | +2/-1/- | -2 |
| 6/12/- | +1/-/- | -1 |
| 6/12/- | +2/-1/- | -1 |
| 5/10/20 | +1/-/-1 | 0 |
| 5/10/20 | -/+1/- | 0 |
| 6/12/24 | +1/-/-1 | +1 |
| 6/12/24 | -/+1/- | +1 |
| 10/20/30 |
Uses Per Turn
All attack options can be used once per turn at no PV change. An attack can be raised to 2 Uses/Turn for +10 PV. Heavy attacks can only have 1 Use/Turn.
Special Characteristics
There are four special characteristics that can be added to ranged attacks: splash, full-auto, indirect and blast. Each one adds to the PV of the attack. If an attack is taken as splash or full-auto, it cannot also have another characteristic. If a weapon is taken as indirect, it must also be taken as blast. However, a weapon taken as blast does not necessarily have to be taken as indirect.
Primary Attack
Each model must select one of its attack options as its primary attack. Any other attack options that the model may have are considered secondary. A primary attack option must be taken with the model whenever it is used in the game. To represent this, the PV of the primary attack is added to the model's total PV.
Because the primary attack option is integral to the model, the attack's PV is reduced by 10 percent (with a minimum modifier of -2 PV). Calculate this reduction after all other PV modifications have been made (including damage).
Secondary attack options are available to a model whenever they are used in a game, but they don't have to be taken. It's the player's choice whether to purchase secondary attacks for a game or not. This allows you to customize the units you make for each battle they play in.
Attack Statistics
The Attack Options Table provides the information you need to choose attack types for your units. Each attack listed gives a Power, armor modifier, type and MP Cost for the attack. The PV Bonus for attacks is added to the PV of the unit (each model, in the case of squads).
All attacks have a minimum PV of 2. Any attack which ends up with a final PV lower than 2 has a PV of 2.
Attack Damage: All attacks (whether standard or heavy) inflict 1 point of damage at no extra PV. You can increase the damage of heavy attacks to 2 points by increasing the attack's PV by 50 percent, with a minimum PV modifier of +10. To increase a heavy attack to 3 points of damage costs double the standard PV (minimum +20). Calculate this PV increase after all other modifications to the attack's PV have been made (except for it being a primary attack).
For example, you create a heavy attack option with a PV of 20. To raise its damage to 2 would add +10 PV (20 x .5 = 10). To raise its damage to 3 instead would add +20 PV for a final attack cost of 40 PV.
Standard attacks can never cause more than 1 damage point.
Example: Now Stacy has to decide exactly what all her units' attack options are going to be. She knows that if she's not careful at this stage she could balloon the PV cost of her units by creating extremely expensive attacks. Starting with the weaver squads, she decides their one standard melee attack will be a vicious bite attack. After examining the table she settles on attack stats of: [Power: POW +1, AM: -2, MPC: 5]. Since weavers have a POW of 4, the Power of the attack is 5, and so classified as standard, not heavy. The PV of this attack is normally 4, but since it is the weaver's primary attack, the PV is reduced by 2. The final attack PV (2, the minimum PV possible), is added to the weaver's Point Value.
Stacy gives her elite venomlord squad the same standard melee bite attack as the weavers, and also makes it their primary attack. For their heavy ranged attack option, she decides they can spit venom. She chooses stats of [Power: 5, AM: -2, MPC: 6] from the table, at +12 PV. She also decides that it will use the splash template (+5 PV). So the venomlords have two attack options: a primary bite (2 PV, added to the models' PV) and a secondary venom spit (+17 PV).
Moving on to the storm spider, she chooses stats of [Power: POW +2, AM: -2, MPC: 6] for its primary melee attack, costing 6 PV. Because the effective Power of the attack is 8 (POW 6 + 2), it counts as a heavy attack. This attack is described as using horrible, serrated mandibles to shred opponents. She thinks this deadly attack should inflict 2 points of damage. This raises its PV to 16 (6 x 1.5 is +3, but the minimum is +10). Because it's the storm spider's primary attack, however, the PV is reduced to 14 (16 - 2).
Finally, for the Queen, Stacy chooses to give it attacks equivalent to the vicious bite and shredding mandibles. She makes the mandibles the primary attack; the attacks have a PV of 4 and 14, respectively. In addition, she gives the Queen a venom spit similar to the venomlords, except that it uses the 2-inch blast template instead of splash (+20 PV).
Here's what Stacy's final Arachnian force looks like on paper:
Arachnian Queen (Leader): MP: 10 CC: 6 RC: 4 POW: 6 BOD: 6 BRN: 6 GUT: 7 LIF: 3 AR: 4 SIZE: L. Point Value: 68. Availability: 1 per force. Attacks: The Queen's primary attack is with her massive mandibles [MPC: 6, Uses/Turn: 1, Power: POW +2, AM: -2, Damage: 2]. Her other attack options include: Vicious Bite (+4 PV): [MPC: 5, Uses/Turn: 1, Power: POW +1, AM: -2]; Venom Gob (+20 PV): [MPC: 6, Uses/Turn: 1, Range: S 5/+1, M 10/-, L 20/-1, Power: 5, AM: -2, Mode: blast radius 2"].
Skitter Squads (Basic Squads): MP: 12 CC: 4 RC: 2 POW: 3 BOD: 3 BRN: 4 GUT: 5 LIF: 1 AR: 0 SIZE: S. Point Value: 5. Availability: Unlimited. Structure: 5-10 models per squad. Attacks: None (only the basic unarmed melee attack).
Weaver Squads (Basic Squads): MP: 12 CC: 4 RC: 3 POW: 4 BOD: 4 BRN: 5 GUT: 6 LIF: 1 AR: 3 SIZE: M. Point Value: 28. Availability: Unlimited. Structure: 5-10 models per squad. Attacks: Vicious bite [MPC: 5, Uses/Turn: 1, Power: POW +1, AM: -2].
Venomlord Squads (Elite Squads): MP: 12 CC: 5 RC: 4 POW: 4 BOD: 4 BRN: 5 GUT: 6 LIF: 1 AR: 3 SIZE: M. Point Value: 31. Availability: 1 per basic squad. Structure: 2-4 models per squad. Attacks: The Venomlord primary attack is the vicious bite [MPC: 5, Uses/Turn: 1, Power: POW +1, AM: -2]; however, many also take the following attack option: Venom Spit (+17 PV): [MPC: 6, Uses/Turn: 1, Range: S 5/+1, M 10/-, L 20/-1, Power: 5, AM: -2].
Storm Spiders (Individuals): MP: 10 CC: 5 RC: 2 POW: 6 BOD: 6 BRN: 3 GUT: 7 LIF: 3 AR: 4 SIZE: L. Point Value: 58. Availability: 1 per squad. Structure: Individual. Attacks: Massive mandibles [MPC: 6, Uses/Turn: 1, Power: POW +2, AM: -2, Damage: 2].
Vehicle (Tow Beetle, Medium Walker Transport): MP: 10 CC: 5 TC: 2 POW: 7 BOD: 7 LIF: 4 AR: 5 (2). Point Value: 84. Availability: 1 per squad. Type: Medium Walker Transport (10).
(Transcriber's note: the printed example lists the Skitter squad's LIF as 1 and in some lines shows OCR-ambiguous values; the figures above follow the printed page. Printed: Queen RC 4 and BRN 6; Venom Gob range printed as "S 5/+1, M 10/-, L 20/-1".)
Force Creation Strategies
It is nearly impossible to be satisfied with your first results when creating a custom element of any game. There's always some strategy that you forgot to consider, or an issue of balance you didn't get quite right. The following suggestions should help you make a force you're fairly happy with on your first try.
The misconception that most people will initially stumble over is that bigger models are better. This simply isn't true. More often than not, larger models are overrun by smaller models-and if those smaller models all have ranged attacks, they quickly overcome any stat advantage the large model possesses. It doesn't matter how tough your large model is; when it's being pelted by two or three dozen ranged attacks each turn, eventually you're going to fail those Armor Tests and lose the model. In general, large models also have difficulty using cover, which can also put a force composed primarily of large models at a serious disadvantage against swarms of smaller models.
That being said, it's just a whole lot of fun to paint large models and to put them on the field of battle. If you give in to the temptation to create an all-big-guy custom force, just keep the rank-and-file units inexpensive so that you can field as many units as possible and reduce the numerical advantage that other types of forces will have against you.
It's a rare person who will be able to resist giving all the units in their first custom force powerful attacks and/or high-level stats. If you've never made your own miniatures army before, it's easy to go overboard. Once you get past this phase, however, you'll be able to see the advantages of including weak and/or cheap units with few or no options in your force. For example, you can keep the point cost low for certain units by focusing their abilities in either melee or ranged combat. By combining several units of each type in your force, you gain both tactical strength and flexibility. If you want to have one or two units that fight well in both types of combat, make such squads Elite, because a single Elite squad can use different attacks.
As you'll discover, your custom units will have higher Point Values than similar units in FASA's force lists. This is because FASA created its forces from a far more detailed set of parameters, which were simplified into these rules. The most significant change in the more in-depth rules planned will be a list of special abilities for you to give your units. Until such a list is available, be inventive and create your own, using the abilities of the units in this book as a guideline. Brainstorming ability concepts with your gaming group can be very productive, and if everyone who plays is involved in the process, the abilities you create are likely to be more balanced.
Force Lists
This section describes the core units of four of the most prominent forces in the Maelstrom: growlers, Union, Neo-Soviets and zykhee. Each force list provides the available composition of the force, the stats for each unit, the abilities of each unit and the general force abilities, as well as weapons and other equipment available for each force. These force lists will be expanded in the force books for each race and faction.
General Information
The following information describes the categories of information provided for each force and unit, including a key for the statistics and other specific points that are important to remember.
Weapons/Abilities: Unless otherwise noted, all weapons and abilities can be used an unlimited number of times in a turn. Unless otherwise noted, all weapons inflict 1 point of damage.
Point Value: The notation "+[a number] PV" indicates that a weapon or ability adds to the Point Value of a unit. For example, if a weapon has the notation "+5 PV," adding that weapon to a unit costs an additional 5 points when building a force for play.
Unit Descriptions
The following categories of information are used to describe each unit type. Not all units require an entry for all categories of information.
- Statistics: See the explanation of model statistics in Game Concepts. Note that any armor listed under Equipment is factored into the unit's AR.
- Point Value: The Point Value represents the cost of the unit, per model, when building a force.
- Availability: Availability indicates the maximum number of units of that type that can be included when building a force.
- Structure: This is the number of models in a squad unit. Some squads contain a specific number of models, others have a number range. In addition, some units require a unit leader.
- Equipment: This lists the standard equipment each unit of this type carries.
- Options: This lists alternate equipment a unit of this type may carry, either in addition to or instead of the standard equipment. If optional equipment costs additional PV, that cost will be noted in parentheses following the equipment.
- Abilities: This section contains both standard and optional abilities for each unit. The description of each unit type specifies the standard abilities and the number of optional abilities allowed for that unit. The PV cost for optional abilities appears in parentheses following the name of the ability.
Weapon/Ability Statistics
- Move Point Cost (MPC): Move Points represent the cost of using the weapon or ability.
- Uses/Turn: If a weapon or ability can only be used a limited number of times in a turn, that number will appear here.
- Range: Range represents the distance at which a weapon or ability may affect its target. Each weapon or ability has a short (S), medium (M) and long (L) range. Each range also has a Range Modifier, a positive or negative number applied to the user's Ranged Combat before rolling D10 for the attack. The range and the range modifier are formatted as follows: Range: S 20/+2, M 30/+1, L 50/-1, with the range appearing to the left of the slash, and the range modifier appearing to the right of the slash. The number given for range is the maximum distance for that range, in inches (i.e., S 20 means the maximum short range is 20 inches).
- Power: The Power of a weapon or ability is used in the same manner as a model's Power stat-to determine whether an attack inflicts damage on a target. If a model is attacking with no weapon, it uses its own Power in close (melee) combat. If a model is attacking with a weapon, the weapon's Power is used instead. If a melee weapon lists its Power in the form of a modifier, such as POW +1, this means the model's own Power is used, and a +1 modifier is added to it.
- Armor Modifier (AM): Some weapons and abilities penetrate armor more easily than others. These have an armor modifier, a number that is subtracted from the target model's Armor Rating before the player makes an Armor Test when hit by that weapon or ability. An AM of "no test" means that the target may not make an Armor Test against that attack.
- Mode: Weapons and abilities that can be used indirectly, in full-auto mode or that have an area of effect, using the splash template or the blast radius template are designated here. Ranged attacks that can be used point blank in melee combat are also indicated here.
- Damage: If a weapon or ability causes more than 1 point of damage, the amount of damage it causes will be listed here.
Growler Force List
Growlers are huge, muscle-bound creatures. Their oversized arms, claws and horns make them brutally efficient hunters, and their main form of communication-a low-level, packmind telepathy-gives them a particularly effective group attack. Strong physiques and the ability to consume almost any substance as nourishment greatly enhances their survivability and allows them to reproduce prolifically. Their lack of technology and rudimentary intelligence appear to be only slight disadvantages.
A growler force may consist of members of a single pack or members from a number of different packs of the same breed, and may range in size from a small hunting pack of a dozen or so individuals to a large war pack numbering in the hundreds. Though multi-breed growler forces do exist, they generally disintegrate quickly due to infighting.
General Rules
All growlers have the following abilities:
- Charging: In the turn that an attacking growler moves into base-to-base contact with a target for a close combat attack, add +2 to the growler's Close Combat rather than the usual +1.
- Brute Force: Unless stated otherwise, all growler melee attacks have an armor modifier of -1; this is cumulative with other melee armor modifiers.
Razorback Growlers
The most numerous and aggressive of all growler breeds, Razorback growlers are named for their metallic bone structure. This characteristic is most prominent in their back spikes, which have the appearance of sharpened solid steel.
Pup
Even at a young age, the steel-like bones of the Razorbacks make the pups tougher and give them greater survivability.
MP: 12, CC: 3, RC: 2, POW: 3, BOD: 3, BRN: 1, GUT: 4, LIF: 1, AR: 1, SIZE: S Point Value: 8 Structure: Up to 24, bought and played in squads of 4 to 6. You can buy an additional squad of pups for every momma in your force.
Abilities:
- Insecure: Growler pups are less gutsy than the older members of the pack, and so have a 2-inch squad coherency.
Onehorn
In addition to being resilient, onehorns are both vicious and relentless. Even though they are not yet full-grown, growlers at this stage of growth pose a serious threat since they are especially proficient at using their horns in battle.
MP: 10, CC: 4, RC: 2, POW: 5, BOD: 5, BRN: 2, GUT: 5, LIF: 2, AR: 3, SIZE: L Point Value: 29 Structure: Up to 12, bought and played in squads of 3. You can buy an additional squad of 3 onehorns for each pup squad in your force.
Abilities:
- Gore Attack: Onehorns specialize in delivering powerful charging hits with their prominent head horn. When a onehorn charges and moves at least 3 inches prior to striking his target, add +3 to the attacker's Close Combat (rather than the standard +2 for growlers) for the attack. If the attack strikes a small or medium model, roll D10. On a result of 7 or less, the model is knocked prone. Large models are knocked prone on a result of 5 or less.
- Steel Horn (+5 PV): Some Razorback onehorns have a particularly tough bone structure which raises the gore attack to POW +1.
Momma
Razorback mommas stomp through their herds of pups like tempests. Because the females of the pack are constantly angry and hostile in defense of their pups, only the bravest bulls dare to approach these terrible beasts.
MP: 10, CC: 5, RC: 3, POW: 4, BOD: 5, BRN: 3, GUT: 7, LIF: 3, AR: 3, SIZE: L Point Value: 40 Structure: Individual, limit of 3 per force. You can buy additional mommas at double their normal cost.
Abilities:
- Maternal Rage: Momma growlers will take revenge against any attackers that harm their pups. If a momma has LOS to a model when it kills a pup, add +2 to her Close Combat for all melee attacks she makes against that model and/or the squad the model belongs to for the rest of the game. Such melee attacks also cost only 1 MP (rather than the usual 4 MP).
- Vicious Claws (+5 PV): Some momma growlers specialize in melee attacks using their vicious claws. [MPC: 3, Power: POW +1, AM: -3]
Bull
Though bulls make up the bulk of most growler packs, they also have the highest death rate. These savage, vicious creatures live to fight and kill, and will attack anything that crosses their paths. Their high mortality rate is a result of nearly constant infighting.
MP: 10, CC: 5, RC: 3, POW: 6, BOD: 6, BRN: 2, GUT: 6, LIF: 3, AR: 5, SIZE: L Point Value: 50 Structure: Individuals, limit 6 per force. You can buy an additional bull for every squad of onehorns in your force.
Abilities: In addition to the Intimidating Presence ability, Razorback bulls also can have up to two of the following abilities.
- Intimidating Presence: When rolling for close combat attacks, any small- or medium-sized enemy model in base-to-base contact with a bull or chieftain makes a critical fumble on a result of 9 or 10.
- Fearsome Roar (+2 PV): The growler can cut loose with a truly fearsome roar of deafening proportions. Choose a target model within 12 inches of the roaring growler to make a Guts Test. If the model fails the test, immediately move the model 2 inches directly away from the offending bull or chieftain (if the model is engaged in melee, it attempts to break free). In addition, the affected model must make a Guts Test in order to move closer to the growler on its next turn. [MPC: 2]
- Shockwave (+10 PV): By slamming his massive fists into the earth, a growler with this ability can produce a shockwave effect that can damage and disrupt enemy models. Choose a target point on the board. The shockwave travels D10 + 6 inches toward the target point. Any model within 1 inch of an imaginary line drawn from the attacker to the target point takes a hit from a Power 3 attack and must make a Knockdown Test. [MPC: 4]
- Rend 'n' Throw! (+10 PV): A growler bull with this ability can dig its paws into the ground and rip up a massive hunk of earth to hurl at an enemy model. Use the standard ranged combat rules. [MPC: 6, Power: 6, AM: -1, Range: 16", Mode: indirect, blast radius 2"]
- Mighty Leap (+8 PV): A growler with this ability may launch himself into the air by virtue of his extraordinary upper body strength and cover an impressive distance to close with his enemies. This is the last action a growler can take in a turn. Any MP remaining after the leap is lost while the growler reorients himself. To use this ability, first choose a direction for the leap. The growler leaps a distance of D10 + 5 inches in that direction. If the leaping growler lands on another model, the victim may attempt to dodge (see Dodge Test). If the Dodge Test fails, the model is automatically knocked prone and takes a hit of [Power: 6, AM: -1]. If the victim survives the hit, place him against the base of the leaping growler in any facing. [MPC: 5]
- Frenzy (+10 PV): Razorbacks with the frenzy ability can go berserk during battle. The growler may use this ability only once per game, and the player must announce the use of frenzy when the model is activated. All melee attacks made by the growler during the turn it is frenzied cost only 2 MP.
Chieftain
Extremely violent and aggressive creatures, chieftains have slashed and chomped their way to the top of Razorback society. They possess an edge over their pack in cunning learned from years of battle experience, making them truly dangerous adversaries.
MP: 10, CC: 6, RC: 3, POW: 7, BOD: 7, BRN: 3, GUT: 7, LIF: 4, AR: 7, SIZE: L Point Value: 83 Structure: 1 per force.
Abilities: In addition to the Intimidating Presence (see above) and Super Tough Frame abilities, growler chieftains may also have up to three of the bull abilities.
- Super Tough Frame (+15 PV): Certain Razorback chieftains have such tough skeletons that they are incredibly resistant to injury. Growlers with this ability always get an Armor Test (even against critical hits). Attacks with an armor modifier greater than -2 and attacks that don't normally allow Armor Tests are treated as having an AM of only -2.
Union Force List
Union soldiers are fierce, determined and intelligent warriors who rely heavily on their advanced military technologies and training to wage war. The bulk of the Union military consists of infantry of varying levels of experience, supported by a wide variety of offensive and defensive armor. The Union's policy of "leave no man behind" has allowed them to maintain a high level of expertise in their ranks, which continues to give them an edge in combat.
Commanders
Commanders have survived many battles relatively intact. Most commanders are war heroes that just can't bear to sit back when there's fighting to be done. Their appearance on the battlefield always gives the troops a significant morale boost.
MP: 10, CC: 6, RC: 6, POW: 4, BOD: 5, BRN: 6, GUT: 7, LIF: 2, AR: 3, SIZE: M Point Value: 50 Availability: 1 per force. Equipment: Kevlon armor, Pitbull rifle, Pug pistol Options: Frag grenades (+5 PV), replace Kevlon armor with power armor (+15 PV), replace Pitbull rifle or Pug pistol with a trench knife, vibro knife or Punisher at no additional cost.
Abilities:
- Commanding Presence: The powerful presence of the commander instills courage in his force. Any Union models within 12 inches and LOS (facing does not matter) of the commander may re-roll any failed Guts Tests; the second result must be used.
- Superior Tactics (+15 PV): This ability adds +1 to all Union Initiative rolls during the game. If a commander with this ability dies, modify all Union Initiative rolls by -1 for the remainder of the game.
Infantry Squads
The heart and soul of the Union forces is the infantryman, a rock-solid soldier in both mind and body. Because the Union force maintains extremely low fatality rates (even in defeats), their infantry squads possess valuable combat experience that gives them an advantage over most of their opponents. You must purchase a sergeant for each squad in your force.
Sergeants
Union sergeants are tough as nails and mean as sin. Sergeants push their men to "be all that they can be" and are a valuable asset on the battlefield.
MP: 10, CC: 5, RC: 6, POW: 4, BOD: 5, BRN: 5, GUT: 7, LIF: 2, AR: 3, SIZE: M Point Value: 38 Availability: Must take 1 per infantry squad in force Structure: Sergeants must be part of a squad and must adhere to squad coherency. Equipment: Kevlon armor, Pitbull rifle, Pug pistol Options: Frag grenades (+5 PV), replace Kevlon armor with power armor (+15 PV), replace Pitbull rifle or Pug pistol with a trench knife, vibro knife or Punisher at no additional cost.
Abilities: In addition to the Leader and Splitting Squads abilities, sergeants may have up to two of the following abilities.
- Leader: For any squad with a sergeant present, use the sergeant's Guts statistic for Morale and Guts Tests made by any member of the squad.
- Splitting Squads: A Union squad may be split into two squads as long as the sergeant is alive. To split a squad, announce that you are splitting the squad when you activate them. Note that models in each half of the squad must be in coherency with the other squad models in their half. To rejoin the two halves of the squad, simply announce before activating the squad that they will be reuniting, then move all members of the squad into coherency. None of the models within a squad may make ranged attacks during a turn in which they split. A split squad may reunite even if their sergeant is killed.
- "Move it! Move it! Move it!" (+10 PV): In any turn in which a sergeant with this ability is alive and the squad only moves (the squad may not attack, hold their action and so on), add +3 to the squad's MP. A squad may split during such a turn.
- "Fire! Fire! Fire!" (+8 PV): In any turn in which a sergeant with this ability is alive and the squad only makes ranged attacks (the squad may not move, hold their actions and so on), the squad may attack any targets within LOS and range (regardless of which target is closest). All shots made this turn are at -1 MP and -1 RC.
- "I ain't got time to die!" (+15 PV): Each time a sergeant with this ability loses his last point of Lifeforce, roll D10. On a result of 5 or less, treat the sergeant as if he still possessed 1 point of Lifeforce. A sergeant who survives by use of this ability is considered a casualty for purposes of calculating Glory Points at the end of the battle.
Standard Infantry Squad
Standard Union infantry represent new recruits and soldiers in their first year of military duty. These men receive the best tactical and strategic training available and they have the success rate to prove it.
MP: 10, CC: 4, RC: 5, POW: 3, BOD: 4, BRN: 5, GUT: 6, LIF: 1, AR: 3, SIZE: M Point Value: 20 Availability: Unlimited Structure: 8 + 1 sergeant Equipment: Kevlon armor, Pitbull rifle, Pug pistol Options: 1 model can replace his Pitbull with a Rottweiler machine gun (+22 PV); 1 model may replace his Pitbull with a Bulldog support rifle (+6 PV). The entire squad may be equipped with frag grenades (+5 PV per model).
Elite Infantry Squad
Elite Union soldiers have two or more years of battlefield experience and carry a more diverse mix of weapons.
MP: 10, CC: 5, RC: 6, POW: 3, BOD: 4, BRN: 5, GUT: 6, LIF: 1, AR: 3, SIZE: M Point Value: 25 Availability: 1 squad per standard squad Structure: 6-8 + 1 sergeant Equipment: Kevlon armor, Pitbull rifle, Pug pistol Options: Up to half (round down) of the models may replace their Pitbull rifles with Bulldog rifles (+6 PV per model). 1 model may replace his Pitbull rifle with a Rottweiler machine gun (+22 PV). The entire squad may be equipped with frag grenades (+5 PV per model).
Brawler Assault Squad
Brawlers are rugged soldiers trained to deal with the enemy up close and personal. These men have expertise in a wide range of melee fighting techniques and weapons.
MP: 10, CC: 5, RC: 4, POW: 4, BOD: 4, BRN: 5, GUT: 6, LIF: 1, AR: 3, SIZE: M Point Value: 22 Availability: 1 squad per standard squad Structure: 6-8 + 1 sergeant Equipment: Kevlon armor, trench knives, Pug pistol Options: Any model may replace its trench knife with a vibro knife (+3 PV per model) or Punisher (+2 PV per model). The entire squad may be equipped with frag grenades (+5 PV per model).
Union Arsenal
This section describes equipment carried by Union forces or offered as optional gear.
Armor
- Kevlon Armor: Major breakthroughs in impact-resistant materials produced an extremely thin but strong substance called Kevlon. This material can be woven into combat fatigues and flak vests, giving the common soldier excellent protection from small arms fire. [AR: 3]
- Power Armor: These sophisticated suits provide excellent protection for troops in battle as well as increased melee-combat effectiveness. Modify unarmed melee attacks made by models wearing Union power armor by AM -1 to reflect the increased strength the suit gives the wearer. [AR: 5]
Melee Weapons
- Trench Knife: A larger version of the classic trench weapon of World War I, the trench knife is a long blade combined with a set of brass knuckles-a fierce weapon in close quarters. The first attack made with this weapon when the model has charged its target is at POW +2, AM -2 (rather than the usual +1/-1). [MPC: 3, Power: POW +1, AM: -1]
- Vibro Knife: The vibro knife is an extremely durable 10-inch blade that vibrates until it becomes white-hot. This weapon is difficult to wield safely; modify attacks made with the vibro knife by -1 CC. [MPC: 3, Power: POW +2, AM: -3]
- Punisher: The Punisher is a truncheon made from a surprisingly strong light steel alloy. Small and medium models must make a Knockdown Test each time they are struck by the Punisher. [MPC: 4, Power: POW +2, AM: 0]
Ranged Weapons
- Frag Grenade: A lightweight explosive designed to be thrown by hand. Frag grenades are most commonly used to clear the enemy out of bunkers, trenches or small rooms. [MPC: 5, Uses/Turn: 1, Range: S 5/+1, M 10/-, L -/-, Power: 4, AM: 0, Mode: indirect, blast radius 3"]
- Pug Pistol: The Pug pistol is the standard-issue handgun of the Union military, favored for its ease of cleaning and repair in the field. [MPC: 2, Uses/Turn: 2, Range: S 6/+2, M 12/-, L -/-, Power: 3, AM: -1, Mode: point-blank]
- Pitbull Assault Rifle: The Pitbull is the standard-issue Union rifle. Small, powerful and accurate, the Pitbull possesses all the qualities a soldier wants in a gun. [MPC: 3, Uses/Turn: 2, Range: S 10/+1, M 20/-, L 30/-1, Power: 4, AM: -1]
Heavy Ranged Weapons
- Bulldog Support Rifle: The Bulldog support rifle can fire as a standard Pitbull rifle (use Pitbull stats), or as a grenade launcher (use the following stats). [MPC: 8, Uses/Turn: 1, Range: S 10/+2, M 15/+1, L 20/-1, Power: 7, AM: -2, Mode: indirect, blast radius 2"]
- Rottweiler Machine Gun: This heavy-duty, high-powered machine gun was originally designed to be fitted to vehicles. Its bulk makes it difficult for a soldier to wield as an infantry weapon, but its superior range and power make up for any other shortcomings. [MPC: 6, Uses/Turn: 1, Range: S 20/+2, M 30/+1, L 50/-1, Power: 7, AM: -3, Mode: full-auto]
Zykhee Force List
The zykhee are the last vestiges of a once-scientifically advanced race of humanoids that nearly destroyed themselves through abuse of technology. Now a spiritually enlightened and highly disciplined warrior race, these tall, slender beings use their advanced understanding of both science and the mystic arts to defend what remains of their people rather than to enslave others.
General Rules
All zykhee have the following ability:
- Darkness: Darkness is a zykhee's natural environment, and so they suffer no penalties given by a scenario for darkness in combat.
Scout Squad
The youngest of the battle-worthy zykhee, the scouts represent the warriors of the future. Trained to observe the enemy and harass opposing forces with low-level attacks, the scouts are responsible for delaying the enemy until the more experienced warriors arrive.
MP: 12, CC: 4, RC: 4, POW: 3, BOD: 3, BRN: 5, GUT: 5, LIF: 1, AR: 0, SIZE: M Point Value: 15 Availability: 1 squad per warrior squad in your force Structure: 3-6 Equipment: Slingstaff kala blade (printed this way in the source) Options: Kala blade (+7 PV)
Abilities:
- Advanced Deployment: Zykhee scouts scan potential battlefields in advance of a zykhee force. To represent this, scout squads deploy last (after all players have placed their models) and may be deployed anywhere on the battlefield. They must be deployed at least 10 inches away from enemy models.
Zykhee Warriors
Upon reaching adulthood, a zykhee's path is chosen for him. The majority become warriors for the defense of their people. There are three primary schools of warrior training: Ra'gha, Kach'ar and Divakk. Each discipline focuses on using different types of weapons and gear, but all warrior disciplines use the mighty Vikoon staff. Made of enchanted metal alloys and forged in mystic fire, this sacred instrument of war is given to each zykhee as he emerges as a warrior. For most zykhee, the staff they receive at Emergence is the staff they use until they die.
As they increase in power and experience, zykhee warriors also receive mystic tattoos that grant them unique and terrifying abilities.
Ra'gha Warrior Squad
Warriors of this discipline focus on the raw potential of the self, increasing the effectiveness of the physical body and the body's expertise with the deadly Vikoon staff. Founded by the legendary warrior Ra'gha, who continues to train zykhee, the discipline of Ra'gha demands that its followers shun ranged weapons and engage the enemy in melee combat whenever possible.
MP: 12, CC: 6, RC: 4, POW: 4, BOD: 4, BRN: 4, GUT: 6, LIF: 2, AR: 2, SIZE: M Point Value: 30 Availability: Unlimited Structure: 3-6 Equipment: Each Ra'gha warrior is equipped with a Vikoon staff and warrior armor, and may choose only close combat tips for their Vikoon staffs. Options: Each warrior may have 1 mystic tattoo (see Mystic Tattoos) and a kala blade (+7 PV per model).
Divakk Warrior Squad
Divakk warriors are trained in ranged combat in order to support front-line zykhee troops. Founded by a zykhee warrior named Divakk-Ka, the Divakk discipline was the first warrior discipline to focus exclusively on ranged fighting techniques. The development of the Divakk discipline created a place for ranged weaponry to be a warrior's weapon of choice, rather than a support weapon.
MP: 12, CC: 4, RC: 6, POW: 4, BOD: 4, BRN: 5, GUT: 5, LIF: 2, AR: 2, SIZE: M Point Value: 30 Availability: Unlimited Structure: 3-6 Equipment: Each Divakk warrior is equipped with a Vikoon staff and warrior armor, and may choose up to 2 ranged combat tips for their Vikoon staffs. Options: Any of the warriors can upgrade to heavy warrior armor (+10 PV per model). Each warrior may have 1 mystic tattoo (see Mystic Tattoos) and a kala blade (+7 PV per model).
Ka'char Warrior Squad
Always striving to strike a perfect balance in their lives, Ka'char warriors seek to become a neutral element in the cosmic scheme. These intelligent and dangerous warriors use both ranged and close combat attacks in battle. The discipline is named for the devastating storm that has ravaged the zykhee homeworld for millennia.
MP: 12, CC: 5, RC: 5, POW: 4, BOD: 4, BRN: 5, GUT: 5, LIF: 2, AR: 2, SIZE: M Point Value: 30 Availability: Unlimited Structure: 3-6 Equipment: Each warrior is equipped with a Vikoon staff and warrior armor, and may choose 1 ranged combat tip and 1 melee tip for their Vikoon staffs. Options: Each warrior may have 1 mystic tattoo (see Mystic Tattoos) and a kala blade (+7 PV per model).
Mystics
Caretakers of the Soul-Flame, the mystics are the ruling force of zykhee culture. Separate and mysterious, the mystics wield extraordinary powers derived from the mind and the flame. The mystics have become darker and more forbidding since the zykhee world was drawn into the Maelstrom.
| Circle | MP | CC | RC | POW | BOD | BRN | GUT | LIF | AR | SIZE |
|---|---|---|---|---|---|---|---|---|---|---|
| First Circle | 12 | 4 | 5 | 3 | 4 | 6 | 6 | 1 | 2 | M |
| Second Circle | 12 | 4 | 5 | 3 | 4 | 7 | 7 | 2 | 2 |
Point Value: Circle 1, 35; Circle 2, 50; Circle 3, 75 Availability: 1 per 2 squads in force, maximum 3 Structure: Individual Equipment: Mystic staff, warrior armor Options: Kala blade (+7 PV)
Abilities: All zykhee mystics possess the Aura of Darkness ability. A mystic may have a number of additional mystic abilities equal to its circle number.
Mystics must make a successful Brains Test when they use a mystic ability (except Aura of Darkness, which is always on) in order for the ability to manifest. A failed Brains Test means that the MP used for the ability is no longer available for that turn and the ability has no effect. A failed attempt at using a mystic ability also counts toward the uses per turn of that ability.
- Aura of Darkness: An aura of darkness surrounds the bodies of all zykhee mystics. Enemies fighting the mystics modify their Close Combat and Ranged Combat by -1 to account for the effects of the aura. Zykhee are immune to this effect.
- Bael Fire Blast (+10 PV): A flood of blue-green Bael Fire erupts from the mystic's hands and scorches those in front of the mystic with its chilling touch. The supernatural flames pass through terrain as if it weren't there, neither affecting nor being affected by terrain. Cover does not modify the attack, and targets receive no Armor Test when hit by a Bael Fire blast. [MPC: 4, Power: 4, Uses/Turn: 2, AM: No Test, Mode: splash template]
- Wall of Souls (+7 PV): The mystic channels the eternal power of long-dead zykhee souls into an ethereal barrier 3 inches wide and 3 inches high. This barrier obscures attackers' vision; modify the Ranged Combat of any model trying to fire through the barrier by -2. The barrier is also unnerving to approach. An enemy model must make a successful Guts Test in order to walk through the Wall of Souls. A failed check means the model stops moving at the barrier and loses all remaining MP for that turn. The Wall of Souls stays in effect until the mystic is next activated, when the player may choose to let the barrier dissipate or spend another 5 MP and make a Brains Test to keep it active. A failed attempt to keep the Wall of Souls active counts as the single use of this ability available per turn. [MPC: 5, Uses/Turn: 1]
- Bael Fire Orbs (+6 PV): A mystic can create orbs of Bael Fire energies to float around the zykhee in a protective pattern; each orb is created separately. Whenever the controlling mystic is hit by ranged weapons, roll D10. On a result of 4 or less, the mystic may sacrifice an orb to deflect the attack (before making an Armor Test). The orbs last until the beginning of the mystic's next activation. [MPC: 3 per orb, Uses/Turn: 3]
- Soul Forge (+9 PV): The very fabric of reality around the mystic tears open, filling with the essence of the mind and body-scorching Bael Fire. Center the blast-radius template on the mystic; all models touched by the 2-inch template (including the mystic himself) must make a successful Guts Test or be destroyed. Victims do not get Armor Tests against this attack. Modify the Guts statistic of enemy models by -1 for this check. Soul forge may be used a number of times per battle equal to the circle number of the mystic using it. [MPC: 5, AM: No Test, Mode: blast radius 2"]
Zykhee Arsenal
The following section contains the statistics for zykhee armor, mystic tattoos and weapons. Depending on the tips chosen, staffs may have multiple attack capabilities.
Armor
- Warrior Armor: Zykhee warrior armor is elaborate and decorated with mystic symbols. [AR: 2]
- Heavy Warrior Armor: A sturdier and denser version of standard zykhee armor. [AR: 3]
Weapons
- Kala Blade: Kala blades are thin plates of metal worn around the neck. Zykhee can quickly remove them, and with a snap of the wrist lock its segments together into a deadly ranged throwing weapon. The circuits built within and the design of the kala blade cause it to return to the thrower like a boomerang. On a critical hit, the kala becomes lodged in the target and may not be used by that model for the rest of the game. [MPC: 4, Uses/Turn: 1, Range: S 8/-, M 16/+1, L -/-, Power: 4, AM: -3]
- Slingstaff: Used primarily by zykhee scouts, the slingstaff is a short, sturdy metal staff with a durable sling at one end and a sharp bladed point on the other. The sling is used to throw small, bladed metal spheres. Sling: [MPC: 3, Uses/Turn: 3, Range: S 3/+2, M 6/+1, L 12/-, Power: POW, AM: 0]. Blade: [MPC: 4, Power: POW, AM: -1]
- Vikoon Staff: The Vikoon staff is the traditional zykhee weapon, given to members of the race when they reach maturity. The weapon is a complex device that appears to be nothing more than a large, well-crafted metal staff. The staff's function can be modified by using various battle tips, one at each end of the staff. Every Vikoon staff comes equipped with standard close combat tips, and each type of warrior can use certain alternate tips, as described in the force list. At the beginning of a battle, the warrior must designate which two tips he is using for that battle.
- Mystic Staff: The mystics carry a more ornate version of the Vikoon staff. This version of the staff comes equipped with two standard close combat blades that cannot be swapped out.
Close Combat Tips
- Standard Blade: Every Vikoon staff comes equipped with two standard blades, available in a wide variety of shapes and sizes. [MPC: 3, Power: POW, AM: -1]
- Heavy Blade (+5 PV): Larger and sturdier than the standard blade, the heavy blade slows the attack slightly, but hits with greater power. [MPC: 4, Power: POW +1, AM: -1]
- Blast (+10 PV): One edge of the blast blade is designed to deliver an explosive energy blast upon impact, increasing the possibility that the attack will punch through the target's armor. On a successful hit, the target must succeed at two Armor Tests or be damaged. [MPC: 4, Power: POW, AM: -1]
- Electro (+7 PV): The electro blade is laced with microscopic circuitry that delivers lethal amounts of electricity to a target upon impact. The next time the target model is activated, the player makes a Body Test. If the check fails, the model gets only half its MP that turn (round down). [MPC: 4, Power: POW, AM: -1]
- Wrecker (+10 PV): This large, wickedly-shaped tip has multiple cutting blades and stabbing points, making it unwieldy but brutally effective against lightly armored foes. Modify the Close Combat of the attacker by -1 when using this blade. [MPC: 4, Power: POW +1, AM: -1, Damage: 2]
- Piercing (+5 PV): The piercing blade is specially barbed and has a sharp thrusting point, designed to penetrate heavily-armored targets. [MPC: 4, Power: POW, AM: -2]
Ranged Combat Tips
All ranged combat tips may also be used as blunt objects for melee attacks, using the following stats. [MPC: 3, Power: POW, AM: 0]
- Stinger (+2 PV): This tip unleashes bursts of low-energy laser fire, used mostly to harass an enemy. [MPC: 3, Range: S 5/+1, M 10/-, L 20/-1, Power: 3, AM: 0]
- Laser (+6 PV): The laser tip uses a reliable, medium-grade laser. [MPC: 4, Range: S 10/+1, M 20/-, L 30/-1, Power: 4, AM: 0]
- Plasma (+10 PV): The plasma tip fires high-powered blasts of superheated plasma. [MPC: 7, Range: S 12/-1, M 24/+1, L 36/-, Power: 6, AM: -2, Mode: blast radius 1", Damage: 2]
- Pod (+15 PV): The pod tip is roughly equivalent to human grenade launchers, designed to fire two kinds of pods: explosive pods, that create a single large blast on impact, and scatter pods that spread numerous bomblets over the target area. Scatter: [MPC: 8, Uses/Turn: 1, Range: S 15/-, M 30/+2, L 45/+1, Power: 4, AM: 0, Mode: indirect, blast radius 1"]. Explosive: [MPC: 8, Uses/Turn: 1, Range: S 15/-, M 30/+2, L 45/+1, Power: 6, AM: -2, Mode: indirect, blast radius 1"]
- Lightning (+8 PV): The lightning blade discharges a lightning-bolt-like blast that is extremely effective against large or heavily armored opponents. Add +3 to Ranged Combat against targets with an Armor Rating of 4 or more. Targets do not get Armor Tests against this attack. [MPC: 5, Uses/Turn: 1, Range: S 5/-, M 10/-, L 15/-, Power: 5, AM: No Test]
Mystic Tattoos
Tattoos are an important aspect of zykhee culture. Zykhee warriors use powerful mystic tattoos in battle for a variety of effects.
- Hypnosis (+10 PV): The hypnosis tattoo may be used once per game against an enemy model within 12 inches and LOS of the attacker. The target model must make a successful Brains Test or be hypnotized. A hypnotized model can do nothing but drool, and is considered prone for purposes of melee combat. The hypnotized model may pay 4 MP to make an additional Brains Test during its activations, and may make a Brains Test for 0 MP when hit by an attack. For each Brains Test the hypnotized model makes after the first, add +1 to the Brains statistic for the test. [MPC: 4]
- Blur (+7 PV): The wearer of this tattoo appears hazy to enemies. Modify all ranged combat attacks against this model by -1 RC. At the end of each turn in which the wearer was attacked in ranged combat, roll D10. On a result of 5 or less, the tattoo has no effect for the remainder of the battle.
- Illusion (+5 PV): Once per battle, when a model with an illusion tattoo is hit by a close or ranged combat attack, the player immediately announces (before making an Armor Test) that the model is using the illusion tattoo and treats the attack as a miss. This tattoo cannot be used to avoid attacks from weapons that use templates to resolve their effects.
- Vertigo (+10 PV): The vertigo tattoo may be used once per game against an enemy model within 12 inches and LOS of the attacker. The targeted model must make a successful Brains Test or be affected by vertigo until the end of its next activation. If the affected model moves in its next activation, all it can do is stagger around in a random direction and distance (use the Scatter rules), and can make no attack or other action. It cannot climb ladders or stairs (between levels of buildings or to get into a vehicle, for example) and will stop moving if it comes into contact with a barrier or obstacle. If the affected model chooses to attack rather than move, or if it is attacked in close combat, modify the affected model's Close Combat and Ranged Combat by -1, and the model cannot parry. [MPC: 5]
- Speed (+7 PV): A model can use the speed tattoo once per battle. Announce that the model is using this tattoo when the model is activated. The model may move 5 inches for 0 MP at any point during its turn.
Neo-Soviet Force List
Rising like a phoenix from the ashes of former Russia, the Neo-Soviets represent everything that their cold-war ancestor believed and much, much more. Though the nation struggles to feed and clothe its people, it has once again established itself as a military juggernaut. The Neo-Soviets use ruthless biochemical weaponry and cruel genetic creations to offset their tactical and technological military shortcomings.
Kommander
These ruthless, battle-seasoned veterans lead the Neo-Soviet forces. Kommanders are selected from the ranks of Neo-Soviet officers who have proven their worth in countless battles.
MP: 10, CC: 6, RC: 6, POW: 5, BOD: 5, BRN: 5, GUT: 8, LIF: 2, AR: 4, SIZE: M Point Value: 50 Availability: 1 per force Structure: Individual Equipment: Viper sidearm, heavy Kevlon armor Options: Kalashnikov assault rifle (+10 PV), rad grenades (+4 PV), power armor (+15 PV); replace Viper pistol with 1 of the following: bayonet (0 PV), rad baton (+5 PV), hammer and sickle (+6 PV).
Abilities:
- Commanding Presence: The Kommander's powerful presence instills courage in his force. Any Neo-Soviet models within 12 inches and LOS (facing does not matter) of the commander may re-roll any failed Guts Tests; the second result must be used.
- Killer Reputation (+15 PV): A steely-eyed glare from a Kommander with Killer Reputation instills fear in the most battle-hardened adversaries. Modify by -1 the Ranged Combat or Close Combat (whichever is appropriate) of any model attacking a Kommander possessing this ability.
Officer
Neo-Soviet officers are extremely violent and capable warriors who push their soldiers to their absolute limits. Officers frequently execute a soldier as an example to the rest of the squad.
MP: 10, CC: 6, RC: 6, POW: 4, BOD: 5, BRN: 5, GUT: 7, LIF: 2, AR: 3, SIZE: M Point Value: 40 Availability: 1 per 2 squads in your force Structure: Individual Equipment: Viper sidearm, Kevlon armor Options: Rad grenades (+4 PV) and/or power armor (+15 PV), plus 1 of the following: bayonet (+2 PV), rad baton (+5 PV) or hammer and sickle (+6 PV).
Abilities: The following ability only affects vanguard and rad squads.
- Execution: Neo-Soviet officers use fear and intimidation to motivate their troops. Once per turn, each officer can execute a member of a squad (within 6 inches of the officer) to give that squad a bonus. The officer can only execute a model during the time the officer is activated. The effect of the execution lasts until the end of the current turn. To execute a model, announce the effect that will apply to the squad, then remove the executed model from the playing area as a casualty with no need to roll dice for success. The executed model counts for the opponent's Glory Point total. Executing a model gives the squad one of the following effects:
- All shots that can be aimed by the squad this turn are aimed without requiring an MP expenditure (see Aimed Shots).
- Add +1 to Close Combat or Power for all melee attacks by the squad.
- Models in this squad may move an additional 3 inches for 0 MP at any point during its activation.
- The squad automatically succeeds in any Guts Tests this turn.
Vanguard Squad
The vanguard squad represents the Neo-Soviets' most dependable and reliable ground troops. Even these troops, however, have high casualty rates, poor health and a general lack of support and supplies.
MP: 10, CC: 4, RC: 5, POW: 3, BOD: 4, BRN: 5, GUT: 5, LIF: 1, AR: 3, SIZE: M Point Value: 20 Availability: 1 squad per rad squad in your force Structure: 6-8 Equipment: Kalashnikov rifle, Kevlon armor Options: Rad grenades (+4 PV per model), bayonets (+1 PV per model), plus 1 model in the squad may be equipped with a heavy machine gun (+25 PV).
Rad Squad
Because they cannot properly maintain their vanguard infantry, the Neo-Soviets are forced to rely on the sickly, irradiated civilians of their radiation-soaked homeland as their front-line troops. These squads carry outdated weapons and are considered quite expendable.
MP: 10, CC: 3, RC: 4, POW: 3, BOD: 4, BRN: 3, GUT: 4, LIF: 1, AR: 0, SIZE: M Point Value: 10 Availability: Unlimited Structure: 5-10 Equipment: SMG or assault rifle Options: Rad grenades (+4 PV per model) or bayonets (+1 PV per model).
Chemgrunts
Chemgrunts carry the feared chem sprayer, a weapon that shoots streams of deadly toxic substances. The exact composition of the toxic soup varies widely because the Neo-Soviet scientists continually attempt to concoct more powerful mixtures.
MP: 10, CC: 3, RC: 4, POW: 3, BOD: 4, BRN: 3, GUT: 5, LIF: 1, AR: 1, SIZE: M Point Value: 20 Availability: 1 squad per rad squad in your force Structure: 2-3 Equipment: Chem sprayer
Cyclops
The cyclops mutant is one of the first successful Neo-Soviet attempts to genetically design a powerful and independent bio-creature for the battlefield. Neo-Soviet troops are still disturbed by the sight of these towering monstrosities marching beside them in battle, even though they've been in use for more than five years.
MP: 8, CC: 5, RC: 4, POW: 5, BOD: 5, BRN: 2, GUT: 6, LIF: 2, AR: 2, SIZE: M Point Value: 35 Availability: 1-3 per officer in your force Structure: 1 (individual), 2-3 (1 squad), 4-6 (2 squads, divided as evenly as possible), 7-9 (3 squads, divided as evenly as possible), and so on.
Abilities:
- Huge Claws: The savage steel claws of the cyclops are extremely deadly and are capable of ripping through most types of conventional armor. [MPC: 3, Power: 6, AM: -2]
- Eye Beam: The cyclops can fire an intense beam of hard radiation from its eye. [MPC: 6, Uses/Turn: 1, Range: S 5/+3, M 10/+2, L 20/+1, Power: 6, AM: -4]
Neo-Soviet Arsenal
Armor
- Kevlon Armor: Major breakthroughs in impact-resistant materials produced an extremely thin but strong substance called Kevlon. This material can be woven into combat fatigues and flak vests, giving the common soldier excellent protection from small arms fire. [AR: 3]
- Heavy Kevlon Armor: An improved, sturdier version of Kevlon armor. [AR: 4]
- Power Armor: These sophisticated suits provide excellent protection for troops in battle as well as increased melee-combat effectiveness. Modify unarmed melee attacks made by models wearing Neo-Soviet power armor by AM -1 to reflect the increased strength the suit gives the wearer. [AR: 5]
Melee Weapons
- Bayonet Blade: A hefty blade that can be attached to the end of a rifle or wielded by hand. The first attack with this weapon when the model has charged is at POW +2, AM -2 (as opposed to the usual +1/-1 for charging). [MPC: 3, Power: POW +1, AM: -1]
- Rad Baton: The rad baton glows a vibrant green given its saturation by concentrated amounts of radiation. Soldiers carry the rad baton in a lead sheath to minimize their exposure to the radiation. Targets do not get an Armor Test against this attack. This weapon is difficult to wield safely, and so modify attacks made with the rad baton by -1 CC. [MPC: 4, Power: POW, AM: No Test]
- Hammer and Sickle: These tandem weapons symbolize the Neo-Soviet nation. A model armed with this weapon package may not use any other weapons during a turn in which it uses the hammer and sickle. [MPC: 4, Power: POW +2, AM: -2]
Ranged Weapons
- Rad Grenade: When a rad grenade detonates, it releases a cloud of radiation that hovers in place until the end of the turn, at which point it dissipates. Center the blast-radius template on the point of impact. Any model caught in the cloud when the grenade explodes and any model that touches the cloud during their movement takes a Power 3 hit. Cover does not modify this attack and targets do not get an Armor Test against it. For example, if a rad grenade detonates at the base of a wall, and models on the other side of the wall are covered by the blast radius template, those models are affected as normal by the rad grenade. [MPC: 5, Range: S 5/+1, M 10/-, L -/-, Power: 3, AM: No Test, Mode: indirect, blast radius 2"]
- Viper Pistol: The Viper is one of the most powerful handguns available. Though it is ineffective at long range, at short range it can easily punch through steel plating. The Viper is the weapon of choice among officers, which adds to its infamy. [MPC: 3, Uses/Turn: 2, Range: S 5/+2, M 10/-, L -/-, Power: 4, AM: -1, Mode: point-blank]
- Kalashnikov Assault Rifle: The Kalashnikov rifle is the premier weapon for the Neo-Soviet military. Chosen as the biggest, most powerful rifle that could be afforded for the vanguard infantry, it can be used as a high-powered semi-automatic rifle and a grenade launcher. Rifle: [MPC: 4, Uses/Turn: 2, Range: S 10/+1, M 20/-, L 30/-2, Power: 5, AM: 0]. Grenade Launcher: [MPC: 8, Uses/Turn: 1, Range: S 10/+1, M 15/-, L 25/-1, Power: 6, AM: -1, Mode: indirect, blast radius 2"]
- Sub-machine Gun (SMG): A fairly old but popular type of weapon used mostly by the rad squads as a close-assault weapon. [MPC: 2, Uses/Turn: 3, Range: S 5/+2, M 10/-, L 15/-2, Power: 3, AM: 0]
- Assault Rifle: Any of a class of outdated weapons used only by the most expendable rad squads for their long-range capabilities. [MPC: 4, Uses/Turn: 1, Range: S 10/+1, M 20/-, L 30/-1, Power: 4, AM: -1]
Heavy Ranged Weapons
- Chem Sprayer: An unstable and dangerous weapon, the chem sprayer is a device that allows its wielder to spray streams of a horrible toxic cocktail, carried in tanks on the soldier's back. The toxic goo generates horrible mutations instantly in any living thing it touches. Use the splash template for attacks with the chem sprayer. Large models touched by the template are automatically hit. For small and medium models caught under the template, roll D10. On a result of 5 or more, the model is hit. Models hit by this weapon that fail their Armor Test must roll D10, add their Body statistic and consult the Mutation Table. Each time a chemgrunt is hit by an attack, roll D10. On a result of 1 or 10, the tank ruptures and explodes. The chemgrunt himself is killed, and all models within 3 inches of the unfortunate chemgrunt are hit by the toxic goo and must roll on the Mutation Table. [MPC: 5, Uses/Turn: 1, AM: -1, Mode: splash template]
- Heavy Machine Gun: The heavy-duty, high-powered machine gun was originally designed to be fitted to vehicles. Its bulk makes it difficult for a soldier to wield as an infantry weapon, but its superior range and power make up for any other shortcomings. [MPC: 6, Range: S 20/+2, M 30/+1, L 50/-1, Power: 7, AM: -3, Mode: full-auto]
Mutation Table
| D10 + Body | Effect |
|---|---|
| 2-9 | Instant Death! The model's body explodes in a chain reaction of massive mutations that leaves a puddle of chunky bubbling ooze. |
| 10-11 | The chemicals only manage to sear and burn the model. Damage: 1. |
| 12+ | No effect. Other than a temporary, slight discoloration of the skin, the model suffers no ill effects from the attack. |