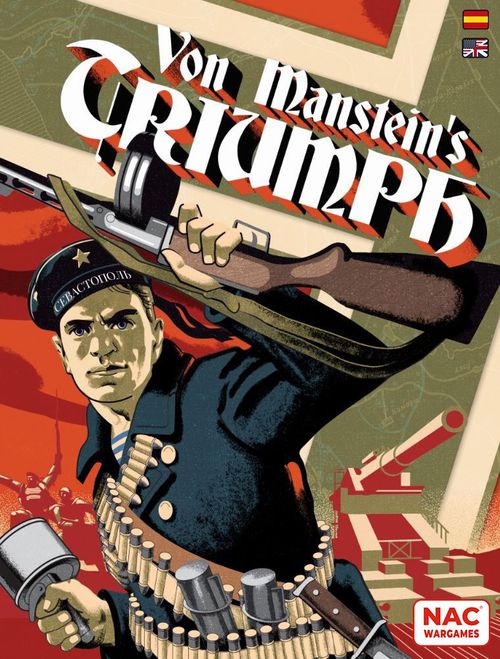
Von Manstein's Triumph
Von Manstein's Triumph Rulebook
Table of Contents
Table of Contents
Game Components
- 1 Map Board.
- 63 Command Cards.
- 6 Player Aid Cards.
- 8 Six-sided Dice.
- 1 Sticker sheet for the wooden blocks.
- 62 wooden blocks: red for the Soviets and gray for the Axis units – both German and Romanian (each block depicts a regiment or brigade).
- 2 Player Aid Charts.
- 1 Countersheet with 113 counters & markers.
Map Board
The Map Board depicts the city of Sevastopol and its surroundings, along with the coastline. The land portion of the Map Board is divided into areas that regulate the positioning and movement of pieces (aka blocks/units). There are two types of areas: clear areas and rough terrain areas. The type of area in which a combat is resolved has its own influence on combat. Several other features are also printed: urban areas, soviet batteries (heavy coastal fortresses), soviet airbases, trenches and ferries. Their effects on gameplay will be explained later. In several areas there is a number printed inside a banner. These zones are key areas that players have to control at the end of play to accrue Victory Points and win the game.
Command Cards
Each player has their own deck of Command Cards from which they draw cards each game turn. Each player will form a discard pile from every card played or discarded. Discard piles are face up and can be inspected by both players at anytime.
Units can only move and fight if they are activated by the play of Command Cards. There are 4 types of Command Cards: Orders, Assault, Reaction and Combat Support.
Dices
6 sided dice are used to resolve combats and some other game effects.
Blocks and Units
Before playing for the first time, the stickers should be affixed to the blocks. Axis unit stickers should be stuck onto the gray blocks and Soviet unit stickers onto the red ones. Blocks, hereafter called units, represent the main infantry units of both sides.
Each sticker shows a symbol and small dots along its sides. These dots are Strength Points (SP) and are printed in groups, of 1 to 4 (some blocks only have 2 or 3 sides with dots, others have them on all four sides). These dots allow players to record the current strength of each unit. The actual strength of a unit is the number of SPs printed on the topmost edge of the sticker.
All units begin the game at full strength (each unit at its maximum). During play, units can lose strength points, which is shown by rotating the block 90 degrees anti-clockwise for each hit taken. If a 1 SP unit suffers a hit it is removed from the Map Board and it is out of play for the remainder of the game.
Blocks are normally placed on their edge, with the label facing the controlling player (thus preventing the enemy player from seeing their strength value).
Most blocks have a background color to their symbol to show they belong to the same division. Other blocks do have white background which shows they are "non divisional". The Axis player has stickers with two backgrounds colors: grey for German units and green for Romanian units. Throughout the rules the terms "unit" and "block" are used interchangeably, both in plural and in singular.
3 blocks are the maximum stacking limit in an area.
Setting Up the Game
- Place the Map Board between both players so that both are faced by the long edge of the map.
- Sort the blocks by color. Each player should place their own blocks upright, with the label facing the controlling player so that the opponent cannot see the block identities and strengths. The blocks should be set up at full strength, with the highest value along the topmost edge. The players should agree on whether to use the "historical set-up" (see the Playbook) or the "free set up", ensuring the stacking limit of 3 blocks per area.
- Give one Player Aid Chart to each player.
- Place the Axis VP marker in the 0 space on the Victory.
- Track and the Soviet VP marker in the 12 space.
- Place the Turn Marker in the first space on the Turn Track (June 7–9th).
- Sort out the Assets (Pioneer and Armor) Counters, Divisional Activation Markers, and Interdiction, Destroyed battery, No Trench, Current Combat and Control markers and place them nearby for easy access during play.
- Sort both decks, shuffle them and place each one near the Map Board. Then, both players draw their full hands: 8 for the Axis player and 6 for the Soviet.
The Axis player begins the game.
Objective of the Game
Victory is determined at the end of the game with the player having most Victory Points (VPs) being the winner. VPs are printed on the Map Board inside the red banners. A player controls the VPs printed in an area if that player controls the area. Initially all VPs are controlled by the Soviet player, so the Axis player has to attack the areas containing them to gain VPs. The Axis player loses VPs when receiving reinforcements as stated in the Reinforcements section of this rulebook. You can keep track of this penalty for the Axis player on the Victory Point Track printed on the Map Board. Subtract the appropriate number from the current Axis VP total at the moment of placing reinforcements on the map.
If both players have exactly the same number of VPs at the end of the game then this results in a draw.
Design Note: The Axis player's objective is to take Sevastopol, but he must do so as quickly as he can and with as few casualties as possible. If not, Hitler will cancel the operation, considering it a worthless effort, and he will start to launch the Summer Offensive - FallBlau.
Sequence of Play
The Axis player starts the game and then the players alternate playing Action Phases. Each turn of 2 Action Phases represents 3 days of real time.
Initial Bombardment: before proceeding with the first turn, the Axis player performs the following:
a) The Axis player can discard as many cards from their hand as desired, but these cannot be the following cards: Air Strike, Heavy Artillery or Super heavy Artillery.
b) Then the Axis player draws as many cards as were discarded.
c) Now the Axis player can play as many of the following cards from their hand as desired: Air Strike, Heavy Artillery or Superheavy Artillery.
d) The Axis player reshuffles all the discarded and played cards back into their own deck.
e) The Axis player draws as many cards as needed to refill their hand up to 8 cards.
f) Then play resumes with the Axis player's first turn of the game.
Design Note: This reflects the previous five days of bombardment Von Manstein forced the defenders to undergo in preparation for the assault on 7 June.
1. Axis Action Phase
In their Action Phase the Axis player can choose one of two available options:
a) Play cards. The Axis player can play as many Order and Assault cards as desired/they have in hand, and also as many Reaction and Combat Support cards as possible/desired. The Soviet player can also play cards from their hand to react to Axis actions.
b) Pass. The Axis player does not play any cards and can discard as many cards from their hand as desired. In addition, every Exhausted Axis block recover and is returned to the "stand up/fresh" position. Also, the Axis player can withdraw from the Map Board any Pioneer and Armor assets for later use. These are set aside to re-enter the game later on their "2 step" sides, if they were not already.
After finishing Axis turn, BOTH players fill their hands by drawing new cards from their respective decks (until the Axis player has 8 and the Soviet player has 6).
2. Soviet Action Phase
The Soviet player resolves their own Action Phase in the same manner as the Axis player. After finishing Soviet turn, BOTH players fill their hands by drawing new cards from their respective decks (until the Axis player has 8 and the Soviet player has 6).
3. End of Game Turn
Every time the Soviet player Action Phase ends, the turn record track is advanced one space to the right.
Playing Command Cards
During your Turn you can play as many Command Cards as you have in your hand to give orders to your units. There is also a special Reaction card called Counterattack that allows you to activate to move and attack during your opponent's Turn.
Play one card in front of you on the table and declare your action. While you are moving your blocks, your opponent can respond to your moves with any Reaction card – including playing a Counterattack card immediately after you have resolved one of your attacks – and both sides can play Combat Support cards in any combat that is initiated. You must complete the action(s) allowed by the Command Card you have just played before playing a new Command Card.
After you finish your actions, and your opponent has finished any reaction, you can continue playing Command Cards as you desire till you have none left or you do not want to play more. This is then the end of your Action Phase.
One Block, group of Blocks or division can act several times in a single Action Phase, as long as you play Command cards to activate them (individually, in groups, or as part of Coordinated Assaults).
Assault Cards (Red label)
This is the most common type of Command Card and enables you to attack enemy–held areas.
An Assault card enables you to:
a) Move a group of (1 to 3) blocks from the same area to one or more adjacent areas. Also you can initiate combat by moving any of these blocks to an adjacent enemy–occupied area. This can be done regardless of the divisional affiliation of the blocks: The blocks just have to begin stacked in the same area. You can simply move, or move and attack with some of the blocks and then move other blocks to other adjacent areas and/or initiate new attacks. Blocks are moved one by one or in groups, as you see fit.
OR
b) Activate ALL the blocks belonging to ONE DIVISION regardless of which areas they occupy PLUS ALL the NON-DIVISIONAL blocks stacked with them in the same area or areas. After playing the card, place on it the Activation Marker of the Division whose blocks you are going to move. Blocks activated in this way can move, or move and attack as in (a) above. This means activated Blocks can go to different areas or start one or more battles by moving to one or more zones occupied by enemy blocks.
This card also enables you to place Assets Counters. You can place ONE Armor AND ONE Pioneer counter, each with any friendly block in an area not already containing one Asset Counter of its type (Armor/Pioneer). Only one counter can be present in an area whatever and you can place them with blocks that are going to move immediately, or with blocks that are not going to move, as you see fit.
Design Note: Players in this game step into the shoes of Army Commanders. Tactical details on this scale fall below the level of resolution of the game system. And so it is critical to understand that, as Commander-in-Chief, in order to succeed you will have to give orders to divisions and you will have to get enough blocks to occupy or attack an area and to do so with the necessary (and available) resources: armor, engineers and combat support cards.
Coordinated Assault
Most of the time, the play of an Assault card enables one group of (1 to 3) blocks to be moved. However when you play an Assault card (activating a division) you can announce a Coordinated Assault. You can do this in one of two ways:
a) If attacking player played an Assault or Counterattack card to activate one division (using method (b) above), plus any non–divisional blocks stacked with that division's blocks, then you can wait to move all the blocks you want into the combat area before resolving the combat.
OR
b) After having played an Assault card to activate one division plus non–divisional blocks, you can play a second Assault card, or even a third to activate a second or third division, plus non–divisional blocks, as long as you have blocks from every activated division stacked together in the same area. You can coordinate a maximum of three divisions as you can only stack 3 blocks per area. You must show which divisions you are activating by placing the corresponding markers on the Assault card that has been played. So, an attacker can temporarily over stack for combat. At the end of combat, if victorious, the attacker can leave up to 3 blocks in the combat area but must return the rest of the blocks to their original areas, this is not a retreat, so they will not be "retreating into an enemy field of fire". However, at all times an attacker must observe the restriction on having no more than one armor and pioneer marker in the same area. Using this procedure, all the activated blocks will move as if activated by the same Assault card, with their movement and resulting combat(s) resolved as normal.
When you activate more than one block, you can move and attack with a single or multiple blocks and the resolution of that combat temporarily halts the activation of the rest of the blocks till the combat is resolved, including any Counterattack played by the opposing player. Through using this method of activation, you can also move blocks from several areas to attack the same enemy occupied area. You decide when to stop moving blocks and resolve a combat. You move and initiate combat as desired with your blocks until all blocks have been moved. Remember that the opposing player can interfere by playing a Counterattack card immediately after every combat has been resolved.
Usually blocks can only move ONE area with each Assault card, but there are some blocks (as shown by a symbol in the top right of their block label) that can move up to TWO areas, and even attack enemy blocks located in the second area they enter, when they are activated by an Assault Command Card.
Example of a Command Card play: The Axis player, in his Action Phase, first plays a "Heavy Artillery" card and uses it against the zone where the Soviet block of the 361st regiment is located. He rolls four dice, which the card allows, and gets no "6", so he does no damage to his target. He hits with a 5 or a 6 if the bombarded area does not contain intact Soviet trenches, but this area does, so he only hits with a 6. The Axis player then plays an "Assault" card to activate the 170th German division, indicating this by placing the "170th" divisional activation marker on the card. He then moves the two blocks of this division into the zone occupied by the Soviet 361st regiment, triggering a combat to be resolved immediately.
Example of Coordinated Assault: The Axis player, in his Action Phase, first plays an "Assault" card to activate the blocks of the 24th German division, placing its corresponding activation marker on the card he just played. He then declares a "Coordinated Assault" and plays a second "Assault" card to activate the German 50th division, placing the divisional activation marker of the "50th" on this new card. The card he has played is a dual use card, and in this case the Axis player decides to use it as an "Assault" card. He is now able to move the 6 blocks of both divisions and firstly moves four of them into the zone occupied by the two Soviet blocks, triggering a combat that must be resolved immediately. The remaining two blocks of the German 50th division have to wait until the combat is resolved. They could then move and even attack.
He then plays an "Assault" card to activate the German 50th division, placing the German "50th" division activation marker on the card. The card he has played has dual use, and the Axis player decides to use it this time as an "Assault" card to declare a "Coordinated Assault", also playing a second "Assault" card to activate the German 24th division (placing the "24th" divisional activation marker on the new card to indicate this). He could now move the 6 blocks of both divisions. Each card also allows him to place an "engineer" and an "armored" marker on the board. He decides to do so with only one of them and places both markers (engineers and armored) in the zone with two regiments of the 50th division. He then moves the 6 blocks to the zone occupied by the Soviet Perekop and 54th regiments and triggers a combat (to be used as an example later).
Example: The Axis player, in his Action Phase, first plays an "Air Strike" card over the zone occupied by the Soviet Perekop and 54th regiments. He rolls 3d6 but gets no hits. And being an area with intact Soviet trenches, only the "6" hits.
He then plays a "Redeployment" card to activate the German 121st and 122nd regiments which move southeast.
After solving the combat, the defeated Soviet troops must retreat. The Soviet player decides to split them up by moving them to different zones. Then, the Axis player must return at least 3 of his blocks to their home zones to avoid overstacking in the conquered zone - the blocks thus moved do not suffer "enemy beaten zone retreat" casualties since they are NOT executing a retreat. After that, the Axis player places a "Trench Disabled" marker to indicate that this zone will never again give the Soviet blocks the advantages of the trench. Next, the Soviet player - having finished solving a combat in the Axis Action Phase - plays a "Counterattack" card which allows him to make an activation in the opponent's turn and temporarily suspends the Axis Action Phase, which will resume when the Soviet activation and any combat it may have generated is over.
Orders Cards (Green label)
This type of cards enables you to perform different actions. See the Cards section of this Rulebook or the Player Aid Chart to learn about those actions.
Combat Support Cards (Orange label)
These can be played only during combat. First the attacker – the player who moved blocks into the area containing enemy blocks – plays FACEDOWN as many Combat Support Cards as desired, then the defender does the same. Once the defender has committed their cards to the combat the attacker cannot change their mind about committing Combat Support Cards; the player cannot remove any of the committed cards nor add any more. In a single combat you can play as many Combat Support Cards as you have in your hand. Both sides simultaneously reveal their Combat Support Cards and apply their effects to the current combat. You can play several cards of the same type in a single combat, with their effects being cumulative, but you must always observe the limit for markers as stated in the Counters & Markers section below and in the description of the cards in the Cards section of this rulebook.
Reaction Cards (Purple label)
You can play these if you fulfill the conditions for their use, which are explained in the Cards section of this Rulebook. The only moment when you cannot play Reaction Command Cards is during combat resolution.
Dual Cards (Two labels)
You can play these cards as either type shown by the labels on the card. At the moment of playing the card, you choose the type you are using and effect.
Counters and Markers
Several Command Cards (Assault and Combat Support Cards) enable the placement of different counters on the Map Board depicting support units and defenses that help your units during the course of play.
-
Assault Command Cards (but not Counterattack Reaction Command Cards) allow you to place ONE Armor AND/OR ONE Pioneer counter into areas with your own block(s) but not already containing a counter of its type (Armor/Pioneer). You do not have to place both counters in the same area and you can place them with blocks that are going to move immediately or blocks that are not going to move.
-
These Armor and Pioneer counters will remain on map till they are destroyed or their owner decides to withdraw them by opting for Pass during their Action Phase. If the counters are withdrawn during a Pass turn, then they are set aside with their "2 step" side upwards, and they can be placed back in any subsequent turn. If they are stacked with blocks and the group splits up, the owner decides which blocks they remain with. They always have to remain with at least one block in an area. These counters can enter an area with some blocks and, in a following activation, move out of the area together with a block that starts in the area. The only condition to move blocks and counters together is that they must BEGIN their activation in the same area. You cannot "pick up" or "drop off" during movement.
-
Armor and Pioneer counters cannot be left alone in an area, with no block from their side present. Mines, Bunker and AT markers CAN be left alone in the area where they are located, without the presence of any Soviet block.
-
At any time, there can only be one type of counter/marker in a single area. Players cannot, voluntarily or involuntarily, stack more than ONE counter/marker of the same type – different Axis Armor counters are considered a single type – in a single area (so you cannot have more than 1 Armor counter in an area or more than 1 Bunker marker in an area). If, due to a retreat after combat, a player is forced to stack more than one counter of the same type in a single area, that player will be forced to eliminate one of them – that player's choice – permanently from the game.
-
Armor and Pioneer counters have a number of black dots printed on their upper left corner on both sides of the counter. The front side shows two (2) and the reverse side shows one (1). A counter can be damaged in combat, but is not affected by any hits suffered by the block(s) it accompanies. The first hit that a counter receives causes it to be flipped to its reverse side, while the second hit permanently eliminates the counter from the game. If all the blocks that are stacked with an Armor and/or Pioneer counter are eliminated due to combat, then the counter(s) is/are put aside for reuse - with the same step strength showing (1 or 2). If the blocks were eliminated due to being unable to retreat after combat, the Armor and/or Pioneer counter(s) is/are also permanently eliminated from play.
-
Antitank and Bunker markers are withdrawn from the Map Board as soon as enemy blocks enter an area they occupy alone, or if the blocks they are stacked with lose a combat and must retreat. They can always be reused and are never eliminated from play.
Historical and design note: The network of bunkers, minefields and gun positions that the Soviets had created, adding new works to the permanent and existing ones at the beginning of the siege in November 1941, made Sevastopol a formidable fortress for any attacker; as the two previous unsuccessful Axis assaults testify.
Bunkers and AT guns in areas the attackers had occupied were put out of use when their defenders were eliminated and their positions overrun; minefields, once located, were marked and left behind, their main use being that they were beaten by the defenders' fire, so that moving through them would be slow and risky for the attackers.
Anti-tank Guns (AT)
The Soviet player can place AT markers by playing certain Combat Support Cards ("Mines" and "Bunkers" cards). Once placed, AT markers do not move from the area. If an AT marker is present during a combat and the Axis player has an Armor counter too, then in Step 2 of the combat resolution procedure the Soviet player rolls 1d6 and inflicts a hit on the Armor marker on result of 5 or 6. If the Axis marker was on its 2-step side then it is flipped to its 1-step side or if it was already on its 1-step side then it is eliminated from play. AT markers cannot absorb any hit inflicted on the blocks they are stacked with. AT markers are withdrawn from the Map Board if they are alone in an area and enemy blocks enter the area or if the blocks they are stacked with lose a combat and must retreat. They can always be reused and are never eliminated from play. The number of AT markers supplied with the game is the maximum number of ATs that can be on map at the same time.
Historical and design note: Given the close range at which most of the fighting in this battle was fought (below 500m), any anti-tank gun could damage any German armored vehicle. Also worth noting was the large number of AT rifles that the Soviets often had in their units, which were extremely annoying and dangerous to the integrity of the armored vehicles and their crews in close-range engagements.
Armor
Both sides have Armor counters to support their blocks in combat. Both Soviet Armor counters represent the same type of tank (model T-26) and they subtract one hit from the hits inflicted by the enemy in combat and add 1 (+1) to the result of one die rolled by the Soviet player in combat (after rolling all dice). Axis Armor has two different models of machines. One counter represents a battalion of Pz-III that has the same effects as the Soviet Armor counters and three counters represent battalions of assault guns (StuG III) that subtract one hit from the hit inflicted by the Soviets and add one extra die to the dice rolled in combat by the Axis player. If both sides have Armor counters present in a combat, then both players roll 1d6 to see if they inflict casualties on the enemy armor, during Step 2 of the Combat Resolution Sequence, and the same is done by the AT markers (if the Soviet player has both AT and Armor, the player will roll 2d6 to inflict casualties, and so could inflict up to 2 steps of losses on the Axis Armor counter, potentially eliminating it). Inflict one hit on the enemy Armor counter on a result of 5 or 6. If the Armor counter was on its 2-step side then it is flipped to its 1-step side and if it was already on its 1-step side it is eliminated from play.
An Armor counter cannot accompany friendly blocks moving or retiring along the Ferry crossing arrows. If a friendly block is forced to retire along a Ferry crossing arrow then the Armor counter accompanying it is permanently eliminated from play.
Historical and design note: The presence of armored fighting vehicles from this battle showed their value by providing support to the infantry. For the attackers, the Axis side deployed three battalions of Sturmgeschütz III assault guns (some with the new 75mm long-barrelled model) and the Panzer abteilung 300 with their Pz-IIIs and demolition Goliaths. The German assault guns and tanks fulfilled their mission as close support artillery to suppress Soviet positions and draw the fire intended for the infantry, saving them casualties and giving them the option of maneuvering to find weak points in enemy defensive positions. The Soviets had two battalions equipped mainly with T-26 tanks that fought mainly in support of the numerous Soviet infantry counterattacks and were operational almost until the fall of the city.
Pioneers
Both sides have markers for Pioneers, but they have different effects: Soviet Pioneers add one extra die to the dice total rolled by the Soviet side in a combat where the marker is present. Axis Pioneers, during Step 2 of the procedure to resolve combat, cause a Mines marker present in the area where the combat is taking place to be removed - even one just placed by the Soviet player through play of the Mines Combat Support Command Card. In both cases, during Step 5 of the combat procedure, the owner of the Pioneer marker must to roll 1d6. On a result of 5 or 6 the Pioneer marker suffers one hit. If the Pioneer marker was on its 2-step side then it is flipped to its 1-step side and if already was on its 1-step side then it is permanently eliminated from play.
Historical and design note: Traditionally combat engineers were the specialist troops for siege operations. When the Great War of 1914-1918 completely changed the combat dynamic, "combat engineers" became the specialist troops to handle explosives and a whole series of gadgets that were added to their arsenal: flamethrowers, demolition charges, smoke and poison gas. The assault on Sevastopol was a battle in which both sides used their services extensively, as the Axis troops needed their participation in order to eliminate the fortress's strong points and permanent fortifications, including the massive naval artillery batteries. In addition to the battalions attached to the infantry divisions that took part in the attack, seven other battalions assigned to the corps took part in the battle. The Soviets also had combat engineers, including flamethrower companies, organic to all infantry divisions. They played an important role in supporting the firepower of the Soviet defenders.
Combat
You can initiate combat by moving activated blocks into enemy occupied areas when you play an ASSAULT card (or a COUNTERATTACK card during your opponent's turn). Normally blocks can move into one adjacent area. Blocks that can move 2 areas are allowed to move and attack into the second area they enter. A combat is resolved at the instant you move a block or group of blocks into an enemy occupied area (see Coordinated Assault above).
Combat Procedure
-
The attacking player announces the attack and then moves the blocks involved onto the Battle board, marking the Map Board area where the combat takes place with the appropriate marker (current combat). On the Battle board, defending blocks are always placed in the center positions and attacking blocks must be placed in the surrounding spaces divided according to how they were stacked in the areas from which they entered the combat (this is important for the attacker's retreat if the attacker loses the combat: attacking blocks must retreat to the area they came from). After this, the attacker can play, facedown, as many Support Cards as desired.
-
Then the defending player can play as many Support Cards as desired. Both sides reveal their blocks and the Support Cards played and apply their effects, including the effects of AT markers, Armor and German Pioneer counters and any AT-ditch crossed.
-
You must calculate the number of dice each player will roll in the combat resolution and any possible modifiers to be applied (a player cannot roll less than one die in combat).
a) Each player rolls 1 die per block taking part in the combat (the presence of the 456th NKVD Regiment in a combat gives the Soviet player 1 additional die in that combat).
b) The player with MORE Strength Points present in the combat rolls 1 additional die.
c) The terrain crossed by the attacker and the terrain where the combat is taking place are taken into account (the terrain effects are cumulative):
- If all attackers crossed a river and/or Ferry crossing arrow (this can only be done by the Germans) you must subtract 1 die from the attacker's total.
- If the combat is taking place in a Rough Terrain area you must subtract 1 die from the attacker's total.
d) The presence of counters/markers can modify the number of dice players roll:
- If there is a Soviet Pioneer counter in the combat, the Soviet player rolls 1 additional die.
- If the German player has an Assault Gun Armor counter in the combat, the German player rolls 1 additional die.
e) Players can also add more dice to their rolls by playing Support Cards (Field Artillery for the German, and Mortars for the Soviet).
-
Then each player rolls the number of dice calculated above and applies the hits obtained. Each result of 5 or 6 is a HIT. However, the following modifiers are applied to the dice after they have been rolled:
a) The presence of a Soviet Armor counter adds 1 (+1) to one die, after all dice are rolled. The same happens if the German Pz-III Armor counter is present in the combat.
b) Soviet defenders add 1 (+1) to one die, after all dice are rolled, if the combat takes place in an undamaged Soviet Trench Area. This modifier is applied in addition to (a) above, so if the Soviet player is defending in an undamaged Soviet Trench Area and has an Armor counter they can add +1 to two dice. However, if the Soviet player only rolls 1 die then only one of these modifiers can be applied. Each side can only benefit from their own Trench Areas.
Historical and design note: One of the ways of trying to dislodge enemy defenders from their position was to threaten their flanks. If they resisted and then wanted to escape, they could be cut down by flank fire from units covering the retreat routes.
Example: The activation of the German 50th and 24th divisions leads to an engagement against the Soviet regiments Perekop and 54th.
-
The first thing to do is to mark the zone where the combat takes place and move the blocks to the respective positions. The defenders are always placed in the central positions and the attackers in the surrounding positions, grouping them as they were in the zones from which they entered the combat zone. Next the attacking player places face down the Combat Support Command Cards of his choice.
-
Then the defender plays the desired Combat Support Command Cards.
After turning the cards over, resolve what they contribute. The Axis player has played a "Campaign Artillery" card and will therefore add 3 dice to his combat roll. The Soviet player's cards allow him to place one AT gun marker, one mine marker and one bunker marker. In addition, with the card "Mortars" he will add 2 more dice to his combat roll. The Axis "engineers" marker allows the Axis to remove the mines marker from combat, and the Soviet AT marker allows the Soviet player to make a roll against the German "armor". The Soviet player rolls a die and rolls a "2", so the German "armor" is unscathed.
-
Calculate the dice that each side will throw for the resolution of the combat: a) The Axis will roll 1d6 for each block (6 dice), 1d6 for having numerical superiority (21 steps vs. 7), 3d6 for the card "Field Artillery". Subtract 1d6 because the combat takes place in an area of rough terrain, for a total of 9d6. b) The Soviets will roll 1d6 for each block (2 dice) and 2d6 more for the "Mortars" card he played, for a total of 4d6.
-
Both sides roll the dice and the casualties are calculated. Axis rolls get 3 hits (5, 5 and 6). The presence of the German "armor" marker allows to raise one die with a result of "4" to "5", obtaining a total of 4 hits. The Soviet rolls are lucky and get two hits (5 and 6). As the combat is taking place in an area with good Soviet trenches, the Soviet can also improve the result of one of his dice from "4" to "5", getting hits (with 4 dice). The Axis player can nullify a Soviet hit since he has an "armored" marker in the combat. He chooses the die with a result of "6" and thus also prevents one of his blocks from being "Exhausted". The Soviet player can nullify an Axis hit because he has a "bunkers" marker. It does not matter which of them is cancelled, because the defenders are never "Exhausted".
-
After calculating the casualties, the next step is to apply them. One of the German 4-step blocks must suffer the first hit. The other can be assigned as the Axis player wishes. The Perekop regiment must take the first Soviet casualty. The Soviet player can then assign the rest as he sees fit. He decides to apply one casualty to each block. Likewise the Axis player must make a roll for his "engineers" marker, since he acted by removing the mines in step 2 of combat resolution. He gets a result of "3" and the engineers suffer no casualties.
The Soviet side has suffered more casualties and must withdraw from the zone, removing the AT and bunker markers from the board.
Exhaustion
Historical and design note: Various studies show that a unit usually loses its ability to attack before it loses its ability to defend. In other words, the number of casualties a unit can sustain before it becomes ineffective on the defensive is much higher than when attacking. When attacking, a unit becomes ineffective sooner with a lower number of losses.
-
Each hit by the defender caused by a modified roll of 6 must to be applied to a different attacking block, if possible. In addition to suffering a casualty, each block to which a 6 result is applied becomes Exhausted. In every combat a number of attacking blocks equal to the number of modified 6s rolled by the defender must become Exhausted. If the attacker has fewer blocks than modified 6s rolled by the defender, then all attacker's blocks suffer a casualty and are Exhausted then the attacker applies the rest of hits as casualties to blocks of the attacker's choosing.
-
An "Exhausted" block is placed facedown to show its status. While face down and Exhausted a block can defend normally, but it is unable to attack, so it cannot enter enemy-occupied areas alone or when accompanying other blocks. If Exhausted blocks are stacked with other Axis blocks that attack an intact Soviet Battery, they do not take part in the combat nor are affected by it in any way.
-
Exhausted blocks can only be rallied by declaring a PASS. Then the owner stand ups the blocks to show that they are no longer Exhausted. Remember that during a PASS, a player can discard any cards in their hand and withdraw from the Map Board any Armor and/or Pioneer counter as wished.
Historical and design note: To find out how strong an exhausted block is, be sure to lay it down with its current strength facing you. When you lift it up, it will show the correct force on its upper face.
Battery
Historical and design note: The batteries printed on the map are heavily armored Soviet shore batteries with their own garrisons. They were prepared to fire on inland targets as well, and their fire was one of the key pillars of the fortress defense in the first two Axis assaults. In order to put them out of action, the Germans brought in massive guns and mortars such as the DORA gun (800mm) and the KARL mortars (600mm).
-
The Axis player cannot take control of an area with a printed battery until that battery is destroyed and no Soviet block is present. Nor can Axis blocks enter an empty area with an undestroyed battery during movement from the play of a Redeployment card. So Axis blocks cannot retreat into an empty area with an undestroyed block printed on it, and any VPs in an area with an undestroyed Battery always count towards the Soviet player.
-
The Axis player can destroy batteries in two ways:
a) By playing the Superheavy Artillery card. This card enables the Axis player to attack the fort in a given area. The player rolls 3 dice and every 6 rolled is a hit. The first hit destroys the batteries and any other hits are applied as casualties to the Soviet blocks, as usual. If all Batteries on the map have been destroyed and the Axis player holds or draws the Superheavy Artillery card, then the Axis player retires the card from play and draws another card.
b) If there is no Soviet block in an area with a printed Battery, then the Axis player can use an Assault card to attack the batteries. A battery can be attacked by activating blocks already in the area and/or by moving blocks into the batteries area. The combat is resolved as usual, except that:
- Batteries roll 2d6 in defense.
- The Axis player rolls 1d6 per block in the area and can benefit from an Armor counter, if there is one present.
- No Combat Support cards are played.
- The Axis player blocks do not have to retreat if they do not destroy the batteries.
- If the Axis player causes at least 1 hit, then the batteries is destroyed and an appropriate marker is placed on the printed batteries. The Area immediately changes to Axis control.
-
The Soviet player can use the "Superheavy Artillery" card as long as there are undestroyed Batteries in play. If all 4 Batteries have been destroyed and the Soviet player holds or draws the "Superheavy Artillery" card then the player retires the card from play and draws another card.
Antitank Ditch
Historical and design note: Sevastopol's fortifications were the largest in the entire Soviet Union and had both permanent, steel and concrete, and temporary, earth and wood works, including minefields and anti-tank trenches to make it difficult for attackers to employ armored assets. These trenches presented a problem for the vehicles' ability to avoid obstacles and, because of the steepness of the slope, exposed their underbelly, the most vulnerable part of their armor, when they emerged from the trench.
There are two AT ditches printed on the Map Board as boundaries between areas. The Soviet player rolls one additional d6 during step 2 of the combat sequence if the Soviet player is the defender and there is an attacking Axis Armor counter that crossed the AT ditch boundary (against the "teeth") to enter the combat area. There is no effect on combat if the attacking Armor crosses the AT ditch in the direction of the "teeth" or if the Armor marker enters the combat area through a normal boundary. If the Soviet player rolls 5 or 6 then a hit is inflicted on the German Armor counter and it suffers a step loss. This effect is cumulative with the presence of a Soviet Armor counter and AT marker. So, the Soviet player could roll up to 3d6 for AT fire in a single combat.
Trenches
The fieldworks of both sides and the Soviet fixed defenses are printed on the areas of the Map Board. These areas provide several benefits to defenders.
a) Soviet defenders in areas with Soviet Trenches:
- Add +1 to one die after all the dice have been rolled.
- German die rolls from Air Strikes and Heavy Artillery cards only hit on a 6.
- Win ties in combat.
b) German and Romanian defenders in areas with Axis Trenches:
- Add +1 to ALL dice rolled, applied after all dice have been rolled.
- Soviet die rolls from Field Artillery cards only hit on a 6.
- Win ties in combat.
Soviet Trenches are placed out of order as soon as an Axis block enters the area when no Soviet blocks are present or wins a combat forcing all the Soviet blocks to retreat from the area. Markers are provided to indicate those areas where trenches have been put out of use. They will provide no benefit to Soviet blocks in defense even if recaptured by the Soviets. As the front line advances the players can agree on which areas the trenches are out of order, to avoid cluttering the Map Board with unnecessary markers.
Axis Trenches are unaffected by Soviet occupation and give full benefits to defending Axis blocks if recaptured.
Ferry
-
Two sets of crossing arrows are printed on the Map Board over Sevastopol bay. These arrows show connections between areas over which blocks can move.
-
Soviet and Axis blocks can use those crossing arrows to move from one side of the bay on play of Assault, Strategic Redeployment and Counterattack cards. The blocks can be accompanied by Pioneer counters but not by Armor counters. Armor cannot move using the crossing arrows.
-
Only Axis blocks, not Soviet, can move using crossing arrows to initiate combat. The effect of moving into the combat area via a crossing arrow is the same as for attacking across a river: the attacker rolls 1d6 fewer in that combat.
-
Blocks can retreat using the crossing arrows. If a block or group of blocks retreats using a crossing arrow, then they suffer one additional loss (as a group not per block) as if "retreating into an enemy field of fire". This penalty is cumulative with "retreating into an enemy field of fire", so retreating blocks could suffer two additional losses if the area they retreat into is in "an enemy field of fire". Soviet retreating blocks could even suffer 3 losses as the penalty is cumulative with the penalty for Soviet retreats into and adjacent to Sevastopol (see Soviet Demoralization below). If the retreating blocks were accompanied by an Armor counter then this is immediately and permanently eliminated from play.
-
Two areas connected by crossing arrows are not considered adjacent for purposes other than movement and retreat.
Control
-
Every area on the Map Board is controlled by one of the two sides (Soviet/Axis). At the start of the game each side controls the areas occupied by their blocks and every area in the rear (for the Axis the areas towards the North, East and South edges, for the Soviets the areas between the frontline and the sea).
-
Control of an area changes at the instant an enemy block is present in an area while it is unoccupied by a block of the side that currently controls it. This can happen during movement or as a consequence of combat when the defending blocks are forced to retreat from the area and the attacker still has at least one block remaining in the area.
-
Area control is very important for determining the available areas for retreating blocks from combat. Some markers are supplied to indicate where control of an area is not clear.
-
The Soviet player must control at least one area with a printed airbase symbol in order to be able to play a Fighter Cover card.
Soviet Demoralization
Historical and design note: As the battle neared its end, Soviet forces withdrew on the last line of defense on the surrounding heights of the city of Sevastopol. Soviet units gradually disintegrated as troop morale collapsed in the sight of the inevitable end: desertions, attempts to escape by sea and surrenders wiped out what was left of the garrison during the final days of the battle.
-
If Soviet blocks have to retreat after combat into one of the two areas of Sevastopol proper or into any area adjacent to those two Sevastopol areas, Ferry crossings do not count for adjacency, they suffer ONE additional step loss (per group of blocks, not per block).
-
This penalty is cumulative with the penalty for retreating via a Ferry crossing and retreating into an enemy zone of fire (See combat rules 7f and 7g).
-
The Soviet player assigns the losses for retreating as they see fit.
Reinforcements
Historical and design note: The German 11th Army, like the entire Wehrmacht on the Eastern Front, had suffered heavy casualties during the winter and its units were well below authorized numbers. After defeating the Crimean Front on the Kerch peninsula, the German 46th Division, which had fought the entire winter campaign there, was garrisoned, as it was severely depleted. The Axis player has to lose VPs in order to introduce reinforcements into the game to reflect precisely the impact that the casualties in the very tough fight for Sevastopol would have on the German war effort in the long run.
The Soviets receive their reinforcements at random to reflect the adventurous and exposed nature of the boat trip from the Caucasus ports to the besieged fortress.
Both sides can introduce new blocks into play.
-
From the second (June 10-12) turn onward, the Soviet player rolls 1d6 at the beginning of their player Action Phase. A result of 1 or 2 enables the Soviet player to move ONE of their reinforcing brigades (blocks) from the Reinforcement boxes where they were set up to the map section of the Map Board. The Soviet player places a reinforcing brigade on any of the areas on the map marked with an anchor, but cannot place the brigade on an area that is Axis controlled or already fully stacked with three Soviet blocks. A Reinforcing block can act normally during the player Action Phase in which it is placed on the map. The first time the Soviet player rolls a 1 or 2, they receive the 138th Brigade and the second time they receive the 142nd.
-
The Axis player can choose to place new blocks onto the map at the cost of losing VPs. The Axis player has three reinforcement groups at their disposal, and these must enter play in the following order:
Reinforcement group Composed of VP cost 4th Romanian Mountain Division 8th & 9th Romanian Mountain Regiments -1 PV 46th German Infantry Division 46th, 72nd & 97th German Infantry Regiments -2 PV 420th German Infantry Regiment — -1 PV Each turn beginning with the third (June 13-15) turn, the Axis player can move ONE group from the Reinforcements boxes where they were set up to the map section of the Map Board. Reinforcing blocks can be placed in any areas on the North, East and/or South map edges - those marked with gray and white diagonal lines where the blocks can legally stack. Reinforcing blocks can be placed together in the same area or separately in different areas, as Axis player sees fit. At game set-up, reinforcing blocks are placed on the appropriate space for them on the Map Board awaiting entry into play. The Axis player has to place reinforcing blocks as their first action in their Action Phase, before playing a card for any purpose. Reinforcing blocks can act normally during the player Action Phase in which they are placed on map.
Victory
-
At the end of the last (July 12-14) turn check the number of VPs controlled by each side (taking into account the number of VP Axis player may have lost due to receiving reinforcements). The player with the higher number of VPs is the winner. In case of an equal number of VPs, the game is a DRAW. The game can end earlier if the Axis player controls every VP area at the end of any turn (after the Soviet player Action Phase). In this case, the Axis player immediately gains an automatic decisive victory.
-
Mark the total number of VPs each side has at any moment using the VP Track printed on the Map Board: The Soviets begin play with 12 VPs and the Axis with 0 VPs. Each time the Axis player takes control of a Soviet-controlled VP area subtract the indicated number of VPs from the Soviet total and add the same number to the Axis total. Each time the Soviet player takes control of an Axis-controlled VP area, subtract the VPs from the Axis total and add them to the Soviet total.
Cards
Assault
This card enables the player to activate a group of blocks stacked in the same area (or all the blocks of a single division, regardless of the areas they are located in, plus any non-divisional blocks stacked with at least one of them) to move and initiate combat. If any area the activated block(s) enter is enemy-occupied then a combat is resolved (see Combat above). Usually blocks can only move ONE area with each Assault card, but there are some blocks (shown at the top right of the block label) that can move up to TWO areas, and even attack the enemies located in the second area they enter, when activated by an Assault card. The Assault card also enables the player to place Assets Counters: ONE Armor and ONE Pioneer counter with any friendly blocks in any area not already containing an Asset Counter of its type (Armor/Pioneer). The two counters do not have to be placed in the same area and can be placed with blocks that are activated by the card: The assets should be placed before moving any of the activated blocks. This card allows for coordinating different divisions (see Coordinated Assault above).
Counterattack
This card can be used in one of two ways: as an Assault (see above) or as a Reaction. As a REACTION card, it can be used during the opponent's turn, immediately after a combat has been resolved. It has the same effect as playing an ASSAULT card during a player's own turn, except it DOES NOT ALLOW the player to place new Armor nor Pioneer counters. Once the activation has been completed then the opponent's turn resumes.
Historical and design note: The Axis deck contains more Counterattack cards to reflect German doctrinal and tactical superiority, which made them much more likely to be able to take advantage of tactical opportunities than their Soviet adversaries.
Fighter Escort
This is a Reaction card that the Axis player can play immediately after the Soviet player has played a Fighter Cover card. Its effect is to negate the effect of the just played Soviet card and eliminate it from play. The Fighter Escort card is then placed in the Axis discard pile. If the eliminated Soviet card was the second and last Soviet Fighter Cover card, then the Fighter Escort card is also eliminated from play, rather than being sent to the Axis discard pile.
Fighter Cover
This card can be used in one of two ways. The Soviet player can play it as a REACTION CARD immediately after the Axis player plays an Air Strike card, to cause the Air Strike to be discarded without its effect being applied. The Soviet player can play it as an ORDER to remove from the Map Board an Axis Interdiction marker - the marker will be available for later use during play. The Fighter Cover card cannot be played if every area with an airfield symbol is Axis controlled. The card must be retained in the Soviet player's hand till the player regains control of at least 1 airfield or Rests and discard the card.
Air Strike
This card can be played in one of two ways. The Axis player can play it as an ORDER card in their own turn. Or it can be played as a REACTION card, at any moment, during either player's turn. Irrespective of when it is played, the Axis player must choose one of its two effects: Attack enemy blocks in a single area with 3d6 OR place an Interdiction marker in any area on the map.
If the former is chosen, then 3d6 are rolled and losses inflicted on results of 5 or 6. Losses must be distributed at random between the Soviets blocks present in the attacked area. However, if the attacked area contains intact Soviet trenches, then the Air Strike only hits on results of 6. If played as a Reaction card the Axis player can attack Soviet blocks entering an Axis occupied area, but must declare the Air Strike as soon as the Soviet block(s) enter the area and before the Combat resolution process begins.
If the latter is chosen, then every Soviet block that enters that area will be targeted with an attack of 1d6 and will suffer a loss on a result of 5 or 6. This also applies also at the moment of placing the Interdiction marker: The Axis player can place the marker at the moment a Soviet block moves or retreats into an area, causing the moving Soviet block to be attacked immediately. Interdiction markers are limited and the Axis player cannot have more on the map than are supplied in the game. An Interdiction marker attacks any Soviet block that enters its area, using movement or retreat after combat. If several Soviet blocks enter an Interdicted area, then 1d6 is rolled separately for each block. If the Axis player has two Interdiction markers already on the map and wants to place another marker, then on play of the card, the Axis player can freely withdraw a marker already on the map in order to relocate it. Once placed, Interdiction markers remain in place till they are relocated.
Redeployment
This card is an ORDER card that enables a player to activate a group of blocks in ONE area (1 to 3 blocks) or ALL the blocks belonging to one division plus ALL non-divisional blocks stacked in an area with at least one of the divisional blocks. The activated blocks can move up to 4 areas, as long as they do not enter enemy-occupied areas. The blocks cannot drop off nor pick up Assets Counters (Armor/Pioneer) in areas they enter. The blocks can enter unoccupied enemy controlled areas using this movement, but Axis blocks cannot enter unoccupied undestroyed Soviet battery areas.
Heavy Artillery
This is an ORDER card that enables the Axis player to attack a Soviet occupied area with 4d6, with each result of 5 or 6 causing a hit. Losses must be distributed at random among the Soviet blocks present in the area. Heavy Artillery only hits on a 6 if the attacked area contains intact Soviet trenches.
Historical and design note: Many games do not properly represent the different roles of artillery in this war. They simply state that heavy artillery pulls more or has larger numbers than field artillery. Indeed, heavy artillery was used for destruction duties - forts, depots, communications... - and the rest for suppression - to cause so many explosions per minute that the enemy had no choice but to keep his head down. That's the reason that in this game the two types of artillery on the Axis side are treated as different types of cards and have different effects: heavy artillery can cause casualties along with field artillery, but mostly it helps to push the defenders out of their way.
Superheavy Artillery
This is an ORDER card that enables the Axis player to attack an area anywhere on the map that contains an undestroyed Soviet BATTERY. The Axis player rolls 3d6 and each result of 6 causes a hit. The first hit obtained destroys the battery; the rest of the hits must be distributed randomly among the Soviet blocks present in the area. If there are fewer Soviet steps than remaining hits, eliminate all of the Soviet blocks but any remaining hits have no effect. If the last battery is destroyed through play of this card, then the card is removed from play. If the Axis player holds in hand or draws the card and there are no undestroyed Soviet battery remaining, then the card should be removed from play and the Axis player should draw a replacement card from their deck.
Historical and design note: This card reflects the presence of legendary artillery pieces such as the 800mm Dora gun and the 600mm Karl model mortars (Thor and Odin). These weapons were much more myth than fact, as they did not have much ammunition and their accuracy left much to be desired. In fact, they were only partially successful, and the German command did not use them well and spread their fire too thinly by aiming them at too many targets. That's why the dice rolled with this card only hit on a result of 6 and, if any are rolled, it puts the battery out of play first, before affecting the troops in the area.
Soviet Coastal Artillery
This is an ORDER card that enables the Soviet player to attack an area occupied by Axis blocks within 3 areas of any undestroyed Soviet battery (you can count areas linked by ferry arrows as adjacent when calculating the range). The Soviet player rolls 2d6 and each result of 5 or 6 causes a hit (even in an area with Axis trenches). The hits should be distributed randomly among the Axis blocks in the area. If there are no Axis blocks in range, then the card may be played just to discard it. If the Soviet player holds in hand or draws this card and there is no undestroyed Soviet battery remaining, the card is removed from play and the Soviet player should draw a replacement card from their deck.
Historical and design note: Soviet coastal artillery was equipped with heavy-caliber pieces (up to 305mm) which could fire at inland targets. They had already played a very important role in previous battles in stopping German advances. On this occasion the remaining ammunition was not much, and the armored turrets and their defensive complexes played more of a moral role than of real help in the defense. That is why the card makes the Soviet player roll only 2 dice. Nevertheless they were important points of support for the Soviet defenders.
Soviet Field Artillery
This is an ORDER card that enables the Soviet player to attack an area anywhere on the map occupied by Axis blocks. The Soviet player rolls 3d6 and each result of 5 or 6 causes a hit. Hits should be distributed randomly among Axis blocks in the area. Field Artillery only causes hits on results of 6 if the attacked area contains Axis trenches printed on it.
Historical and design note: The Soviet artillery park in the battle included 455 pieces, with a greater abundance of light and medium pieces (76mm and 122mm). In any case, the Soviet artillery did a lot of damage to the attackers and was one of the main assets of the defense.
Axis Field Artillery
This is a COMBAT SUPPORT card that enables the Axis player to add 3d6 to their dice rolls in a combat. The card can be used in attack or in defense. If a combat involves Romanian blocks, then the Axis player cannot use more than 1 Field Artillery card to support their troops.
Historical and design note: This card reflects artillery support for infantry assaults. Usually, an assault was preceded by a very intense and short bombardment that allowed infantry assault groups to advance under its cover and assault enemy positions while the defenders were still shocked by the explosions.
Goliath
This is a COMBAT SUPPORT card that enables the Axis player, when attacking only, to remove from the map a Soviet Minefield marker. If there was no Minefield marker and, in the same combat, the Soviet player plays a Combat Support card to place a Minefield, then the Goliath card cancels placement of the Minefield.
Historical and design note: The 300th Armored Detachment was composed of Pz-III model tanks that served as remote control centers for "Goliath" wire-guided vehicles. These small vehicles could hold between 60 and 100 kg of explosive, depending on the model, and were used for demolitions, including clearing paths through enemy minefields.
88mm
This is a COMBAT SUPPORT card that enables the Axis player, when attacking, to remove a Soviet Bunker marker from the map. If there was no Bunker and, in the same combat, the Soviet player plays a Combat Support card to place a Bunker, the 88mm card cancels placement of the Bunker. There can be only one Bunker marker in a given area, so the Axis player cannot play more than one 88mm card per combat.
Historical and design note: The Germans designed the 88mm anti-aircraft gun as a dual-purpose weapon: against air and ground targets. One of its best known uses was as an anti-tank gun, but it was also widely used against bunkers and permanent fortifications, given its accuracy and the war load of its projectile. It was common, therefore, to assign these guns to the assaulting units to fire covering fire against the bunker embrasures so that their occupants had to close them with the metal doors and, thus, suppress their shots. Already at the Meuse crossing in 1940, they used this technique.
Mortars
This is a COMBAT SUPPORT card that enables the Soviet player to add 2d6 to their dice rolls in a combat. It can be used in attack or in defense.
Historical and design note: The Soviet garrison had 918 mortars and their fire was a constant problem for the Axis raiders. The problem with the Soviet artillery park was that it had a limited amount of ammunition and so had to economize on it. Hence this card only provided 2d6 to the Soviet when resolving a combat.
Minefield
This is a COMBAT SUPPORT card that enables the Soviet player, when defending, to place one Minefield and one AT marker in the area where the combat is taking place. There can only be one Minefield marker in a given area, so if there is already a Minefield marker in the area where the combat is taking place, the Soviet player cannot play a Minefield card in that combat, and no more than one Minefield card can be played per combat.
Bunker
This is a COMBAT SUPPORT card that enables the Soviet player, when defending, to place one Bunker and one AT marker in the area where the combat is taking place. There can only be one Bunker marker in a given area, so if there is already a Bunker marker in the area where the combat is taking place, then the Soviet player cannot play a Bunker card in that combat, and no more than one Bunker card can be played per combat.