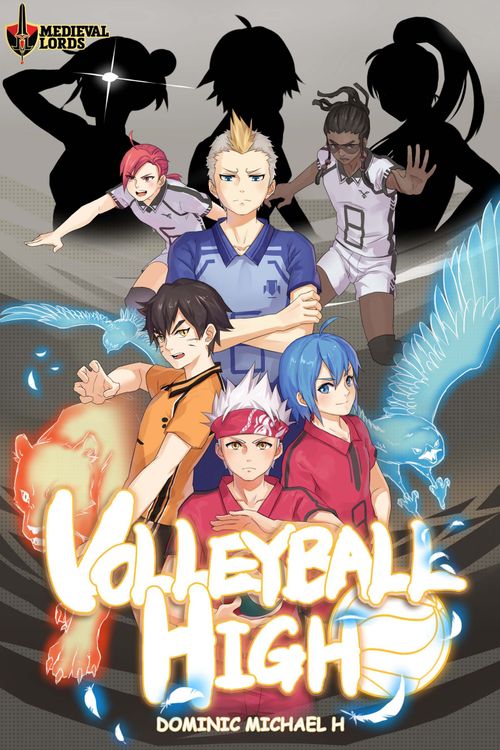
Volleyball High
Volleyball High Rulebook
Table of Contents
Table of Contents
Introduction
In Volleyball High, players control top school teams in an intense tournament for the High School Championships in Japan. Today I will be your personal coach to teach you this game.
Most importantly, the goal of the game is for your team to score 2 points first! Let's look at the various game components so you know which to refer to during explanation. Don't worry if certain terms do not make much sense to you yet, as they will be clearer when we explain the game flow. Just read through to the end and it will all make sense! Do NOT skip any part.
Components
The Play Mat
This represents the battlefield, err... court which the games will be played on. It is even populated with audiences to watch your intense matches!
The Wooden Disc
The wooden white disc in the box represents the ball during a game.
The Red Cubes
These are placed onto the Synergy Tracks on the Play Mat. Each team has its own Synergy Track. These cubes represent the current Synergy level of your team.
The Yellow Cubes
These are used specifically for tracking score in the game.
The Mini Cards
These are the smaller sized cards in the game, and they represent the volleyball players of a team, as well as their coaches:
- Generic Members: Generic members are easily spotted by their common white uniforms. There are 2 such sets in the box, labelled A and B (one for each of the 2 teams during a game).
- Star Members: Star members have specific names, and have a School Team symbol at the bottom right corner of their cards. There should be 3 Star members unique to every school team.
- Coaches: Aside from the Star members, every school also has a coach of their own. Again, they come with their matching School Team symbol so you know which team they belong to.
The Larger Cards
The large cards in the game are all Action cards, basically representing moves that the members execute during a game:
- Generic Moves: This deck consists of all the basic moves that every team should have. There are two such sets in the box, labelled A and B (one for each of the two teams during a game).
- Special Moves: This deck consists of all the signature moves of the star members from a particular team. Each team should have a total of 6 Special move Cards, comprising 2 copies of 3 different Special moves unique to the members from their specific team.
The Basics of the Game
There are 5 types of Generic Moves in the deck with 4 copies each, varying ever so slightly in either HIT value or Distance value. There are even Distance values of '0'. The ball goes up and comes back down on the same space. Better have teammates ready for those! But here's the most important thing about the Move cards: Every single card can be used for either Attacking, Passing or Defending! In other words, even a Set can be played as an Attack. And a Spike can be used as a Defence card or even to simply pass the ball.
All Action cards in the game can be used for ANY purpose. Names of the Actions are purely thematic.
Initial Setup
Separate each School Team into their corresponding decks. Each School Team consists of:
- 3 unique Star Members
- 3 Special Moves (2 copies each Special Move, totalling 6 cards)
- 1 School Coach
Next, locate the two 'Generic Moves' decks and separate them from each other. Use the icons at the bottom right corner of the generic cards to identify which deck they belong to. Then locate the Generic Members - again separating them by their icons at the bottom right. You are now ready to choose and create your teams:
- Choose if you will play as Team A or Team B, putting the yellow score cubes nearby.
- Choose which School Team you wish to play as, and place the matching coach down.
- Combine your 3 Star Members with the 5 Generic Members from your team to form your full team pool of 8 members. Then choose 6 of them from this pool to place onto the play mat as your starting team. There should be 2 remaining Members not placed. All 3 Star Members MUST be on the main court at all times, but in any space you want.
- Place the 2 remaining Generic Members as Reserves at your side of the play mat.
- Combine your 6 Special Moves cards with your 24 Generic Moves and shuffle properly to form your team's Action deck. Place this deck face-down near you.
- Flip a coin to determine if you or your opponent will serve the ball first. (Service Ball)
You are now ready to play the game.
Starting A New Rally
- Ensure both teams have their Synergy meter reset to '0' with the provided Red cubes.
- This is the only time you may choose to swap the position of any of your Members on the court, or even replace one of your 2 Reserve Members with one on the court. (Your 3 Star Members MUST always be on the court though)
- Each player draws cards from their Action deck until they have at least 8 Move cards in Hand. The Hand size limit is 10. If any player exceeds this amount, discard down to 10.
- For the player serving the ball: Place the ball on your 'Serve' space on the play mat. The Serve space is a standalone space (bottom right corner). Then play a card from your Hand that will send the ball over to the opponent's side. If you have no card with a Distance value that can send the ball over to the opposing zone, reveal your entire Hand to your opponent and discard all your cards. Redraw 8 new Action cards and retry. Keep repeating until you have at least one card that can do so. (See "Serving The Ball" for more details)
- After successfully hitting the ball over, push your Synergy meter value up by 1 (as explained in the Turn Breakdown section, you always increase your Synergy value when one of your Members hits the ball).
- Draw 1 card from your Action deck (You draw an amount of cards based on your Synergy value at the end of your turn. As the Service player, your Synergy level should be at one.)
- It is now your opponent's turn.
Serving The Ball
The serving player places the ball at his Service space and plays a card to get the ball over into the opponent's court. Every space on the court counts as 1 Distance.
During Service itself, ignore the Net Line. However once the service is done, the Net Line requires 1 Distance to cross! In other words, it also counts as 1 space, except that the ball can never stop on the Net spaces themselves. If you have no cards with a Distance long enough to send the ball over, show all your cards to your opponent as proof and discard them all. Then redraw 8 new cards from your Action deck and retry. You can keep repeating this until you have at least 1 card that has enough Distance to hit the ball over. This is ONLY allowed for the service ball alone.
Turn Breakdown
We will now run through a full turn as if you were already playing the game. When the opponent hits the ball into your court, you must first defend against it. Simply discard a number of cards from your hand with total DEF value equal to or greater than the HIT value of the opponent's card. No specific member is defending - it is a team thing.
Once successfully defended, you now choose ANY member on your team that is in the Ready position to hit the ball back. Ready members are those who are NOT flipped DOWN yet. If you choose a member who is not on the same space as the ball, discard a card for every space difference. It simulates running to the ball, and causing fatigue. Over time, you will get weaker with lesser cards in hand. (In the manual's first example, you need to discard 1 card from your hand.) Flip that member DOWN in his own space (do not move him away!) to simulate he is now exhausted, and play a card from your hand to hit the ball with. Move the ball that exact amount of Distance stated on the card (in the example, either 1 or 2 Distance). As you are passing the ball to a friendly space in your own court, ignore the HIT value of the played card.
You then choose another member to hit the ball again. This time, your chosen member is already on the same space as the ball. There is no need to discard any cards from your hand to simulate fatigue from running to the ball.
Just like earlier, flip this current member DOWN and play a new card from your hand to hit the ball with. You decide to finally attack and send the ball over the net to the opponent's court. As such, you must take note of the HIT value of your played card. Your opponent must now overcome this HIT value of yours or lose the rally point.
Every time one of your members hits the ball, your Synergy value increases by 1. For the example, your Synergy goes up twice from 0 to 2, since you had two members hitting the ball this turn. Your turn ends now, and you draw a number of cards equal to your Synergy value. You draw 2 cards in this example. It is now your opponent's turn, starting with the part where he must defend the incoming ball by overcoming your HIT value with his DEF.
More Rules
The Synergy Meter: Synergy is always reset to zero at the start of a new rally. Every time one of your Members hits the ball (be it an attack or a pass) your Synergy meter increases by one - Defending a ball does NOT increase your Synergy meter. When your turn ends, you draw back a number of cards into your Hand depending on the value of your Synergy meter. If your team hits the ball when your Synergy level is at 4, it will go back down to 1. You need to consider the momentum of the game, as this part simulates the ebb and flow of game pacing. Try to return the ball immediately, or pass it around so that the Synergy is at its highest when you send the ball over. That way, you get to draw more cards. Heavy Attacks also reset the Synergy meter to value '1'. (See Heavy Attacks.)
Recovering from DOWN Status: At any time, you may discard 2 cards from your hand to flip back up a DOWN member so that he is Ready again. There is a much more efficient way of recovering your DOWN members though - at any point in the game, if all 6 of your members on the court are in DOWN status, you get to freely flip them all back up into Ready pose. This free team flip-up happens immediately as soon as your 6th member gets flipped DOWN.
Ball Trajectory: When you move the ball, you can NEVER move it in a reverse direction. For example you hit a ball to the right, at anytime in this same movement you are not allowed to move the ball left. Similarly if you hit the ball backwards, in that same movement you may not move it to the front. A final example is if you hit the ball forward, and to the right too, in that same movement you may not ever move it left or backwards.
+1 HIT Bonus: As you already know in the Basics, there are 5 types of Generic Moves. What we have not explained yet is that every member has 2 specialisations. Whenever you use a member to hit the ball using a move that matches one of its two specialisations, that move gains a +1 HIT. This is of course, only useful if used to Attack.
Special Moves: Any member can use a Special Move card, even Generic Members. If the Condition of the Special Move is met, then the effect stated in the box will trigger. If a Special Move is used by its matching Star Member, he will gain +1 HIT bonus. Same as the above, this is only useful if the card is used to Attack. A glossary at the end of this manual explains the various Conditions in detail.
Three Touches: You can only hit the ball up to THREE times. If the ball still does not cross the net by the third hit, you lose the Point!
Blocks and Decoys: With a DEF of '4', Blocks are useful for defending. If you have Decoys in your Hand, you can play one to cancel out an opponent's Block when they play it. There are also Special Moves that remove an opponent's DEF cards too. The defending player always has a chance to discard yet more cards to cover up for any DEF shortage after such events.
Heavy Attacks
If you pass the ball from the FRONT ROW to another of your Members in the FRONT ROW, who then hits the ball into the opposing court, the ball is considered a Heavy. Another advanced way of doing this is to pass the ball from the FRONT ROW to another space in the FRONT ROW, then get a Member in the BACK ROW to run to that front space by discarding cards and hitting the ball over. It is the same thing, since the position is always considered from the space of the ball, not from the space of the Member hitting it.
Heavies are like those really powerful spikes you see from the actual volleyball games in real life. They are very fast, and very hard to defend against. When defending against a Heavy, instead of discarding cards from your Hand like usual, you must instead decide how many cards you wish to commit to defending against the Heavy. Then you fan out your Hand of cards and let your opponent blindly pick that amount of cards. All the picked cards are discarded like usual, and you check if the total DEF values of all the discarded cards is at least equal or more than the Heavy HIT value. In this manner, you take a risk if you call out too little cards. At the same time, if you call out a large amount of cards, you risk wasting unnecessary cards. This represents the huge stress on a team's stamina in defending against Heavy attacks.
Example: The incoming Heavy has a HIT value of '5'. Your Hand has 6 cards, with an average of '2' DEF each. You could call out 4 cards, which puts you in a very safe position to defend this Heavy - But you will most likely over-defend. If you call out 2 or 3 cards, your opponent might pick your higher DEF cards and you are safe. Or you could completely lose an entire precious Point if he picked your low DEF cards.
Lastly, whenever a player does a Heavy, their Synergy meter is immediately reset to '1' regardless of where it was. This also means at the end of a turn that a player executes a Heavy, they always only draw 1 card. In this manner, it is better to do a Heavy when your Synergy is at a low value - you don't lose that much momentum anyway.
Winning The Game
A rally ends when a player scores a Point from getting a ball IN or from the opponent not having enough cards to hit the ball back. A player who got the last Point always performs the Serve for the new rally. The game ends when a player wins 2 Points. Use the yellow cubes provided to track the score. You are free to extend the length of the game by mutually agreeing to reach 3 Points instead of the default 2 Points. There are 2 extra yellow cubes provided to allow for this extended gameplay.
2-v-2 Mode
In 4 player Mode, 2 players team together against another 2 players. The setup is exactly the same, except that each player now holds half of the original Hand in a team. Instead of filling back to 8 cards in Hand at the start of every new rally, players now draw back up to 4 cards each. Hand size limit is 5 cards each, instead of 10.
Each player is only able to play cards on their 3 specific Members in the team. Players on the same team should be sitting side-by-side and their opponents facing them from opposite. The 3 Members that the player on the left side can play cards with are the ones highlighted in RED. The 3 Members that the player on the right side of the team can play cards with are highlighted in BLUE. To remember this easily, simply keep in mind that the top right corner is to the player on the right side, as the bottom left corner is to the player on the left side.
Only the corresponding player can control his Members, be it to perform a Move or to discard cards to reach for a ball. Players are NEVER allowed to discuss what cards they have in Hand, and they can ONLY ask for the ball or tell their partner to try to take the incoming ball.
When defending, players on the same team always defend as a whole. It is also the ONLY discussion players are allowed to do on a specific level - that is, exactly how much DEF they can contribute towards an incoming attack.
When defending against a Heavy Attack, each player decides how much they want to commit to the defence from their own hand. The DEF total is combined.
Glossary
Hawk
- Hawk 1: Ukai - This card also counts as a SET type action card. +1 HIT to the next card played this turn.
- Hawk 2: Jamey - When ball is passed from an allied space at the back row to the active member (who is also in the back row) and then to the opponent zone, the attack is a HEAVY.
- Hawk 3: Haruki - When ball is passed from an allied space using a SET move to the active member, and then to the opponent zone, your Synergy meter becomes full this turn.
Panther
- Panther 1: Taro - When ball is passed from an allied space to the active member, +1 HIT to this card for every pass made this turn.
- Panther 2: Kiryu - When discarding this card as a Defence, +1 DEF for every other card discarded together.
- Panther 3: Michael - When ball is passed from an allied space to the active member, Flip Up another member in your team.
Spartan
- Spartan 1: Mirugi - When discarding this card as a Defence, the opponent must Flip Down a member in his/her team.
- Spartan 2: Shima - When discarding this card as a Defence, the opponent must discard a card from his/her hand.
- Spartan 3: Schmidt - When discarding this card as a Defence, the opponent must reset his/her Synergy meter to zero. This happens AFTER the opponent has drawn their cards at the end of that attack.
Volcano
- Volcano 1: Ru - When the active member sends the ball into the opponent zone, you may discard 1 card from your Hand to +2 HIT to this move.
- Volcano 2: Tetsu - When the active member sends the ball into the opponent zone using a HEAVY attack, +1 HIT to this card.
- Volcano 3: Sugatsu - When the active member sends the ball into the opponent zone, the opponent's lowest DEF card used is considered as zero DEF.
Miracle
- Miracle 1: Hitomi - When the active member is passing the ball to an allied space, draw 3 cards.
- Miracle 2: Kyoko - When discarding this card as a Defence, draw 2 cards.
- Miracle 3: Akame - When the active member sends the ball into the opponent zone, you may draw 3 cards.
Solo Game
If you are playing solo, you will be going up against an AI. For yourself, play normally as you would in a game with other humans. As for the AI, it also plays very similarly to how humans would, except that it will follow certain conditions and logic as per laid out here. Choose a team for it to use (Spartan AI is TOUGH).
- At the start of every rally, draw 8 cards from the AI's Action deck to form its hand.
- At the end of every AI turn, it draws a fixed amount of 2 cards from its Action deck.
- At the end of every rally, discard the AI's entire hand.
- The AI NEVER ever passes the ball - It will always hit the ball back at you immediately.
- The AI's members will also flip down. It will always use the closest possible READY member to hit back a ball. If there are similarly distanced members, you decide who.
- The AI always discards only ONE card from hand to have a member run to the ball to hit it. If the ball is where its member already is, then it will not discard any card.
- It will never utilize or trigger any special cards effects.
- The AI's members do get +1 HIT bonus if they match strength or special member card.
When Defending: The AI plays a random card from its hand. The DEF of the played card is DOUBLED, and becomes the value that the AI uses. If this DEF value is not enough to defend your incoming HIT, the AI repeats this step and adds another random card from its hand to increase the DEF value played (remember that all cards it plays in this manner have their DEF doubled). Soon, it will either successfully overcome your incoming HIT or it will run out of cards to play (in which case you win the rally point).
If you perform a HEAVY, the AI defends the same way, but you gain a bonus +3 HIT.
When Attacking: The AI plays a random card from its hand, and always puts the ball into empty spaces in your back row. If there are more than one empty, you decide where. If there are none empty, you also decide. If its card does not have enough Distance to put the ball into your back row, it will play a second random card and add both cards' Distances together. If it still cannot reach your back, it will just aim for your front row with the same priority rules. A second card played also adds its HIT value to the first! Lastly, whenever it hits the ball back to you, increase its Synergy meter by 1. When it hits 4, the AI resets it to zero and its next attack is a HEAVY towards you! You decide how many you wish to commit to DEF and randomly draw from your own hand.
FAQ
- Note that defending the ball does not require you to flip down any Member unless you are utilizing the special effect of the Dig card. Defending does not increase your Synergy meter.
- Serving the ball increases your Synergy value by one, but you do not flip DOWN a member.
- Whenever counting Distance or for purposes of activating Heavy Attacks and Special Moves, the ball is always considered to be hit from its actual space. This means that even if you get a member from the bottom left corner to rush over to the top right corner to hit the ball, for all purposes the ball is considered to be hit from the top right space, not the bottom left space.
- Never forget that the Net Line itself takes 1 Distance to cross after the service ball is done.