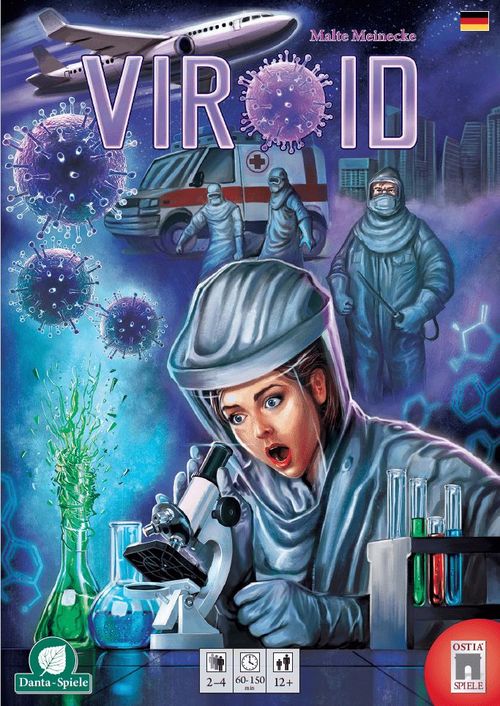
Viroid
Viroid Rulebook
Table of Contents
Table of Contents
Game Components
- 1 gameboard
- 4 pathogen boards (1 per player colour)
- 4 dice D6
- 132 cards, namely:
- 5 starting cards
- 95 event cards (5 × "Massive Research", 9 × A, 27 × B, 27 × C, 27 × D)
- 16 cards "Symptom's Strain"
- 16 cards "Pathogen" (4 per player colour)
- 12 rectangular tiles "Individual Mutation"
- 35 round markers "Countermeasure"
- 1 black research token
- 1 purple remedy token
- 88 small wooden cubes (22 per colour) "Indicator Tokens"
- 160 large wooden cubes (25 per colour plus 60 grey ones) "Population Tokens"
- 42 city cover plates (21 each for 2 and 3 players)
Game Setup
Place the board in the middle of the table so that every player has a good view on it.
Board key:
- Connection by land
- Connection by sea
- Connection by airplane (those connections are not marked as a line because one can travel from any one airport to any other airport via airplane!)
- City field (size of population 2-6)
- Draw pile for event cards
City field key:
- Required cold resistance
- Required medication resistance
- Required heat resistance
- Airport indicator (here Tokio city)
- Sea connection to the next city (in this case a connection crossing the gameboard limits)
- Population of the city
- without population token = healthy
- population token in a player's colour = infected
- grey population token = deceased
- Name of the city
- Continent colour (blue = America, purple = Europe, green = Africa, red = Asia)
Setup steps:
- Put the black research token on the black rimmed space at the top of the research track.
- Put the purple remedy token on the red rimmed space of the research track that indicates the figure according to the number of players.
- Distribute grey population tokens (corpses) to the spaces in the hexagonal continent areas according to the number depicted depending on the player number. Put the remaining grey tokens as a supply next to the board.
A Game with 2 or 3 Players
In a game with 2 or 3 players, take the respective 21 city cover plates (for 2 or 3 players), and use them to cover the according city fields on the gameboard.
Preparing the Event Card Pile
Pick out the 5 cards "Massive Research" (M) and place them aside. Remove all the other event cards from the game without looking at them.
Create four different piles A, B, C, D sorted by the indicated letter on the front side. Shuffle each of the piles facedown separately from the other piles.
Depending on the player count, use the following number of cards from each of the piles:
| Players | A Pile | B Pile | C Pile | D Pile |
|---|---|---|---|---|
| 2 players | 4 | 14 | 14 | 14 |
| 3 players | 6 | 18 | 18 | 18 |
| 4 players | 8 | 24 | 24 | 24 |
Decide on the level of difficulty and randomly choose the according number of "Massive Research" cards face-down as follows: Simple: 3 cards, Normal: 4 cards, Demanding: 5 cards.
- If you decided on a simple game, shuffle 1 "Massive Research" card each into the piles B, C, and D.
- If you decided on a normal game, shuffle 1 "Massive Research" card each into the piles B and D. Divide pile C into 2 piles of equal size. Shuffle 1 "Massive Research" card into each of those two piles and stack both piles upon each other afterwards.
- If you decided on a demanding game, shuffle 1 "Massive Research" card into pile D. Divide piles B and C each into 2 separate piles of equal size and shuffle 1 "Massive Research" card into each of those four piles.
Stack all the piles onto each other beginning with pile D at the bottom, followed by the C and B cards, and pile A as the last one on top of all of them.
Example event cards pile for 4 players playing a demanding game:
- 8 "A" cards
- 12 "B" cards + 1 "Massive Research"
- 12 "B" cards + 1 "Massive Research"
- 12 "C" cards + 1 "Massive Research"
- 12 "C" cards + 1 "Massive Research"
- 24 "D" cards + 1 "Massive Research"
Example event cards pile for 2 players playing a simple game:
- 4 "A" cards
- 14 "B" cards + 1 "Massive Research"
- 14 "C" cards + 1 "Massive Research"
- 14 "D" cards + 1 "Massive Research"
Player Setup
Every player chooses a colour to play with and gets in his colour:
- 1 pathogen board
- 25 population tokens
- 22 indicator tokens
- 1 set of alternative pathogen cards
The first time you play, we recommend you use the pathogen "Bacteria" that is printed on your pathogen board. In following plays, you may collectively choose a different pathogen for players and cover the "Bacteria" with that pathogen's cards.
Important: All players must use the same pathogen!
The player who was ill most recently becomes the starting player. Shuffle the starting cards and distribute one at random to each player. The use of the starting card's constellation speeds up the setup in the first game. In turn order take a random symptom's strain card with the given name, the resistances, spreading types, individual mutation, and the remaining DNA points as indicated on your starting card. Unused starting cards and individual mutation go out of the game.
Place the 22 indicator tokens of your colour on your pathogen board accordingly (see description of the example on the next page):
Pathogen board key:
- Tracks for resistance levels, display of costs, as well as tracks for current values of resistance to cold, medication, and heat (each max. 9)
- Track for infection points (max. 8)
- Tracks for basic spreading type levels, display of costs
- Tracks for enhanced spreading type levels, display of costs
- At the top: track for "mortality" (max. 5), at the bottom: track for "severity" (max. 10)
- Initial ability of the pathogen
- Further abilities of the pathogen
- Course of the game summary
- Symptom's strain (here: cysts) with 4 or 5 symptoms
- bk: space for two additional symptom's strains, display of costs
- bl: indicator track with 2 indicator tokens for a maximum of 40 DNA points – exceeding points are discarded
Setup Example
Example: You (red) get the starting card "London", thus you develop "Small Animal" level 1 and "Medication Resistance" level 2 on your pathogen board. As a result, move your indicator token for "Medication Resistance" to space 6.
The group decided to play with the "Bacteria". Consequently, each of you gets 1 point in mortality and severity 5 as well as 1 infection point, which will be explained later. Additionally, you get a random symptom's strain card named "Cysts" and place it on the left symptom's strains space.
Finally, you place one indicator token on the first symptom "Cysts" and consequently get 1 additional infection point.
As "Individual Mutation" bonus, you get the marker for 15 extra DNA points at the beginning so that you now have, together with the 3 DNA points from the starting card, a total of 18 DNA points which you mark on your DNA point indicator track.
Put one of the population tokens in your colour onto one of London's two "Small Animal" spaces.
Place the countermeasure markers and all the remaining symptom's strains cards next to the board as a supply.
After all players have developed their pathogen in clockwise order, you place one of your population tokens onto an unoccupied space in any city for that you fulfil the conditions. When using starting cards, the first city is predetermined.
Now disaster takes its course…
Game Start for Experts
As an alternative to dealing starting cards, shuffle the "Individual Mutation" tiles and deal one to each player.
Each of you gets 55 DNA points to develop your pathogen with. During setup, you must develop at least 1 basic spreading type, 1 resistance level, and 1 symptom's strain with at least 1 symptom. The rules on how to develop mutations will be explained in detail in Phase 3: Mutation.
The starting player does his development completely first, then the other players follow in clockwise order. It is allowed to discuss with each other – you are playing together as a team!
Together You Are Strong
Since this is a cooperative game, you can always talk to each other and decide on how to go on. But in the end, it's the active player who decides what to do or not to do – there is no democracy!
Object of the Game
As a pathogen you try to delete a considerable part of human kind and be present in the rest of the world. Therefore, any city must either be exterminated or at least infected with one pathogen strain. Additionally, you have to go for a sufficient amount of dead people.
Course of the Game
The starting player begins the round conducting all phases of his turn one after the other. Then the next player in clockwise order takes his turn and conducts all the phases and so on.
- Phase 0: Pathogen (only with certain pathogen types)
- Phase 1: Draw Event
- Phase 2: Infection
- Phase 3: Mutation
- Phase 4: Mortality
Phase 0: Pathogen
Certain pathogens (for example the virus) develop or spread automatically in Phase 0. That happens before Phase 1: Draw Event and is performed by the active player. See "The Pathogens" for details.
Phase 1: Draw Event
As the active player, you draw and reveal the top event card from the pile. The described event is carried out immediately (see separate overview sheet for clarifications). Unless stated otherwise, the event affects all players.
Afterwards the healing stage takes place. There are up to 4 city names on the card. You must take one coloured population token from each city printed on the event card and return it to its owner. You may choose your own colour or any other player colour. Corpses (grey population tokens) cannot be removed by healing.
Each time you remove the last coloured population token (infected) from a city, move the research token one space down. This is a research success for mankind! If this research success was caused by a "Massive Research" card, move the research token an additional space down.
Finally, you earn as many DNA points as it is mentioned at the bottom of the card. Now you can start infecting the population.
Example: You've drawn the "Mild Climate" event. Everyone gets both 1 heat resistance and 1 cold resistance. No city is healed. You get 10 DNA points.
As a result, you are now in possession of heat resistance 1, cold resistance 1 and 28 DNA points in total.
Phase 2: Infection
In this phase, you must use as many of your infection points as possible.
To do so, take the number of population tokens from your supply equal to the number of infection points you have. Now decide how to spread these tokens to your basic spreading types. Place at most 1 population token onto each empty space above the indicator token on basic spreading type tracks. You can also place 1 population token onto an individual mutation showing a basic spreading type.
If you have more infection points than spaces on the spreading type tracks (and the mutation), return the remaining population tokens to your supply.
Now you take one population token after another from a spreading type track or the mutation and place it onto an empty space of a target city with the corresponding spreading type to infect the population there.
The second and all following infections don't have to take place at the same city and may already use any previously infected cities as their points of origin!
For infection, the following rules apply:
- You must have at least the resistance levels (cold, medication, heat) requested in the city where you want to place your token. This applies also if you already have a token in this city.
- You require and use up the spreading type according to the target space.
- You need at least 1 infected population (token) in your colour in the city or a city adjacent by land connection to the city where you want to place your token. You can broaden your options by enhanced spreading types, see rule 4.
- In case of an enhanced spreading, you use and use up an enhanced spreading type "Bird", "Ship", or "Airplane" in addition to a basic spreading type.
- A city with at least one corpse (grey token) and no infected (coloured token) is declared a quarantine area. You cannot infect this city by normal means again.
Example: Due to your starting card, you (red) have 2 infection points, the spreading type "Small Animal" Level 1 and a medication resistance of 6. You placed a red population token in London.
Because of your spreading type "Small Animal" Level 1, you can infect only once although you have 2 infection points.
Using your spreading type "Small Animal", you can now either infect London once more, or you can infect Paris by land connection as an adjacent city for which you meet the requirement for medication resistance (prerequisite is 5 and you have 6).
Put one of your coloured population tokens onto a "Small Animal" in one of those cities. You get 1 DNA point.
You can't use the second infection point because you already used up your only spreading ability.
Status of the Population
The current status of the population is indicated by the population tokens:
- An unoccupied space on the gameboard represents healthy population.
- A coloured population token stands for a population infected with the respective pathogen (but still alive).
- A grey population token means that the population is dead. A city with grey population tokens on all of its spaces is exterminated. Players have to bypass the city by land connection through other cities or fly over by birds.
Exterminated cities are no longer affected by event cards (neither the event, such as corpse removal, nor healing).
Exception from Quarantine
Necrosis
Necrosis is a symptom that can only be developed on two symptom's strains. Once any one player has developed the "Necrosis" symptom, the infection limiting effect of quarantine is nullified for all players!
One-Time Spreading
The only other possibility to infect a city under quarantine is by use of a one-time spreading such as the "Cough" symptom or caused by an event.
In the end, you combine 1 infection point with 1 level spreading type (plus an optional enhanced spreading type level) in order to infect a population. Level 1 of each spreading type allows for the infection of one population with 1 infection point per round, while level 2 allows for the infection of two populations with 1 infection point each per round.
If you can place no more population tokens in accordance to the above rules (e.g. since you don't have the required resistances or spreading types for reachable cities), the remaining tokens go back to your supply.
For each infected population in this phase, i.e. for coloured population tokens you placed right now, you get 1 DNA point!
Phase 3: Mutation
In this phase, you can develop any number of mutations.
You need to first develop level 1 of any specific Spreading Type and Resistance before you may develop the according level 2 ability. You may develop both levels directly after another during one phase. The costs for a level of spreading type or resistancy are printed on the according empty space on your pathogen board. When developing any resistance, you get additional 3 resistance points per level (6 resistance points altogether for both levels).
To develop a new Symptom's Strain, choose one of the symptom's strain cards and place it onto one free symptom's strain space of your pathogen board. The DNA costs to be paid are printed on symptom's strain space (5 DNA points for the first, 10 for the second, and 15 for the third).
Place the indicator token on the card's "Zero" space – in contrary to the setup, you don't get the first symptom for free. You must not own multiple symptom's strains with the same name.
Pathogen Abilities and Symptoms are developed in the same way – from top to bottom, step by step. The DNA costs for the next symptom or next ability is printed beside the name and effect of the same. Pay the DNA costs and move forward the indicator token to the next ability or symptom. When developing, you keep all effects of the previous symptoms and abilities.
All mutations become effective immediately and will be documented (usually via indicator token) on the pathogen board.
You may develop as many mutations as you like in this phase as long as you own enough DNA points. You may save DNA points for the next rounds.
Example: After you spread to Paris, you now own 29 DNA points. You have already 2 infection points but only 1 type of spreading. Therefore, it would be a good idea to develop another spreading type (e.g. domestic animal for 10 DNA points). On the other hand, you will need further resistances to enter certain areas later (in short term, you'll need heat resistance to spread into the region around London and Paris, available for 15 DNA points).
It would also be helpful to have enhanced spreading types by ship, bird, or airplane which costs 14 or 15 DNA points, respectively. Another symptom's strain would be useful as well (e.g. "Cough" on level 1 which allows for one further "Small Animal" spreading for a total of 14 DNA points).
But you can't afford all of these mutations in a single step – so it's up to you to decide about your priorities…
Phase 4: Mortality
During the mortality phase you check whether your pathogen eliminates some of the infected population.
Your severity determines how many dice you may use, and the mortality determines what die results are a success.
You must use all dice according to your severity. If your severity level exceeds the number of dice in the game, you first throw all dice and then throw some of the dice again.
For each success you replace one of your coloured population tokens in a city of your choice on the board with a grey population token (corpse). If possible, you take that corpse from the continent area on the gameboard according to the city (see colour of the city and the continent areas). If the respective continent area is empty, take a grey population token from the common supply. The coloured population token is returned to your supply.
You must use all successful die results according to the rules. You may not dismiss any die successes. You can only let decease infected of your own colour.
If multiple infected decease during one phase, choose different cities for each incident (if possible). If you haven't infected enough cities yet, you may choose multiple infected in the same city by way of exception.
You gain 1 DNA point per population deceased during this phase!
If the last coloured population token of a city deceases, this is NOT deemed to be a research success!
A city with all spaces covered by corpses is declared exterminated. Event cards have no effect on this city from now on. Players cannot spread into this city any more nor may they pass through. They can only fly over the city by birds. Remove all countermeasure markers from the city (extermination of birds, small animals, or domestic animals). Closed sea connections remain closed.
When you have completed the mortality phase, the next player in clockwise order takes his turn beginning with Phase 1 (or Phase 0 if appropriate).
Example: Your pathogen's severity is at level 4 and its mortality at "1 or less". You throw 4 dice and the results are 1 – 2 – 4 – 6. Because of your severity level of just 1, only the die result of "1" is a success. You replace one of your red population tokens (infected) by a grey one (corpse) and gain 1 DNA point.
End of Game
The game ends as soon as one of the following situations arise:
You win, if at the end of Phase 4 of any one player's turn:
- All grey population tokens were taken from all four continent areas
- and –
- In every (not yet exterminated) city there is at least one infected population (any coloured token).
At this stage, we can assume that mankind will not be strong enough any more to defend against your pathogen because it is too widely spread out and too lethal.
You lose the game, however, in any of the following cases:
- At the end of Phase 4 of any player's turn, if 1 player (in a 2 players' game) or 2 players (in a 3 or 4 players' game) have no more infected on the board (they were exterminated).
- or –
- Immediately, if the research token and the remedy token share the same space.
- or –
- Immediately, if a player cannot draw an event card in Phase 1 because the draw pile is empty.
Explanations
Basic Spreading Types
Each level 1 allows you to spread once (1 infected) per turn, each level 2 allows you to spread twice (only if you have enough infection points).
- Small Animal – (Level 1) Costs: 15 DNA points; (Level 2) Costs: 20 DNA points. Allows spreading into cities already infected or adjacent via land connection.
- Domestic Animal – (Level 1) Costs: 10 DNA points; (Level 2) Costs: 13 DNA points. Allows spreading into cities already infected or adjacent via land connection.
- Insect – (Level 1) Costs: 11 DNA points; (Level 2) Costs: 14 DNA points. Allows spreading into cities already infected or adjacent via land connection.
- Blood – (Level 1) Costs: 10 DNA points; (Level 2) Costs: 13 DNA points. Allows spreading into cities already infected or adjacent via land connection.
Enhanced Spreading Types
Enhanced spreading types cannot be used alone but only modify basic spreading types. You always require an additional basic spreading type that corresponds to the space onto which you want to place your population token.
Level 1 can be used for spreading once, level 2 can be used for spreading twice (even with two different basic spreading types).
- Bird – (Level 1) Costs: 15 DNA points; (Level 2) Costs: 18 DNA points. The spreading type "Bird" is used in addition to a basic spreading type and allows you to spread into a city that is up to three land connections away.
- Airplane – (Level 1) Costs: 14 DNA points; (Level 2) Costs: 18 DNA points. The spreading type "Airplane" is used in addition to a basic spreading type and defines all cities with an airport being adjacent to each other.
- Ship – (Level 1) Costs: 14 DNA points; (Level 2) Costs: 18 DNA points. The spreading type "Ship" is used in addition to a basic spreading type and allows you to spread into the next city that is adjacent by one sea connection.
Resistance Levels
Cold
- (Level 1) Costs: 13 DNA points
- (Level 2) Costs: 18 DNA points
Effect: Each level increases the cold resistance by 3 steps.
Medication
- (Level 1) Costs: 13 DNA points
- (Level 2) Costs: 17 DNA points
Effect: Each level increases the medication resistance by 3 steps.
Heat
- (Level 1) Costs: 15 DNA points
- (Level 2) Costs: 20 DNA points
Effect: Each level increases the heat resistance by 3 steps.
Symbols on Cards
Increases will immediately be marked on the pathogen board.
- +1 cold resistance icon – Increases the cold resistance by 1 step
- cold resistance icon with arrow – Increases the cold resistance by 1 level (and consequently also by 3 steps)
- +1 medication resistance icon – Increases the medication resistance by 1 step
- medication resistance icon with arrow – Increases the medication resistance by 1 level (and consequently also by 3 steps)
- +1 heat resistance icon – Increases the heat resistance by 1 step
- heat resistance icon with arrow – Increases the heat resistance by 1 level (and consequently also by 3 steps)
- +1 severity icon – Increases severity by 1
- +1 mortality icon – Increases mortality by 1
- +1 infection points icon – Increases the infection points by 1
- Hexagon icon – Immediate one-time spreading of the depicted type (ignore quarantine)
- 1 down-arrow with remedy icon – Moves the violet remedy token 1 space down
- 1 up-arrow with research icon – Moves the black research token 1 space up
Individual Mutations
These additional spreading types are used in addition to the spreading type tracks. They count as one more respective level (in connection with level 1 on the track, this counts as level 2, and so on).
These additional resistances will immediately be tracked on the regular resistance level tracks.
Once during the whole game, you may pay the DNA points as printed on the marker to develop one level of severity or one level of mortality. Afterwards, turn the marker by 180 degrees to indicate that it has been used and it cannot be used any more.
The pathogen gets 2 additional infection points that will be tracked immediately.
The purple remedy token starts 3 spaces further down.
The pathogen gets 15 additional DNA points that will be tracked immediately.
Countermeasure Markers
You will be instructed by event cards to place these markers on the board. They will make it more difficult for you to spread.
- Small Animal marker: To infect this city using "Small Animal", you must have developed at least "Small Animal" Level 2; however, only one level will be used up.
- Bird marker: To use this city as the starting point, part of your path, or your destination, you must have developed at least "Bird" Level 2; however, only one level will be used up.
- Domestic Animal marker: To infect this city using "Domestic Animal", you must have developed at least "Domestic Animal" Level 2; however, only one level will be used up.
- Virus marker: To infect this city, you use up one additional infection point.
- "Closed" marker (red circle with a line through it): This "Closed" marker is used to close airports and to block sea connections.
The Pathogens
Bacteria (easy)
The bacteria gain one resistance for all three resistance types for each ability level.
Nanites (medium)
The nanites increase their severity by 1 for each additional ability level.
In Phase 0 of your turn, you may give 1, up to 2, or up to 3 DNA points (or less) to one of the other players, depending on the pathogen's ability level.
Fungus (medium)
If you play the fungus, none of you can develop the enhanced spreading ability "Bird". Remove the indicator token from the "Bird" spreading type track and all start cards with the individual mutation "Bird" from the game.
Every time you develop the next ability on the pathogen card, you immediately spread without using infection points one or two times via birds (once combined with small animals and from level 2 on once more combined with domestic animals).
For this spreading, ignore the rules for "Birds" countermeasure markers and for quarantine!
Vibrion (difficult)
The vibrion spreads out by water. You do not have a starting point, but the vibrion spreads out from sea connections into any city with a harbour (at least one sea connection) for 1 infection point. To spread out into a city without harbour (no sea connection) using regular spreading types, you use up 2 infection points.
If you have developed ability level 1, you gain 1 additional DNA point every time you are the first to spread into a non-harbour city.
Starting with ability level 2, you have one additional success in Phase 4: Mortality, if at least one of your dice has a 6 as a result. Use this additional success in a harbour city.
Even vibrion cannot use a closed sea connection as a starting point for an infection. If all sea connections to a city are closed, that city can only be infected using regular spreading via land connection.
Virus (difficult)
The virus doesn't have any starting abilities.
In Phase 0 of each of your turns, throw a die. In case of a "1", you choose to either place a symptom's strain or to develop a symptom, both for free. If you develop further abilities, you get a symptom development (not symptom's strain development) also at a die result of "2", "3", or "4".
In case of an appropriate die result, you must develop one symptom's strain or symptom. You must not decide to forfeit the development.
Frequently Asked Questions
May I discard a symptom's strain?
Yes, but you get no refund, neither the costs for placing the symptom's strain nor the costs for developing its symptoms. Remove that card from the game.
Any symptoms are no longer active, so that after discarding a symptom's strain with necrosis, cities under quarantine can no longer be infected. All infection points and resistances granted by those symptoms are lost, move the indicator token on your pathogen board backwards accordingly.
If an event card requires to put a corpse in a city – may I replace an infected (coloured token) although there is healthy population (=empty spaces) in this city?
No, healthy population deceases first. Only once there's no more healthy population, infected population dies.
If the countermeasure marker "Small Animals" lies in a city and I've developed spreading type "Small Animal" Level 2 – may I infect this city once or twice?
Using "Small Animal" Level 2, you may infect the city twice. A countermeasure token "Small Animals" just means that you must have developed "Small Animal" Level 2 to act in this city. The same applies for countermeasure tokens "Domestic Animals" and "Birds".
Is healing or removing of corpses possible in an exterminated city?
No, corpses may be removed, but not healed (no Zombies in this world). Exterminated cities are never affected by event cards. Therefore, corpses will not be removed. Since exterminated cities can no longer perform countermeasure actions, put the according markers back into the supply.
What happens if I don't have enough population tokens of my colour for infection?
Infection points that you cannot use in your turn for whatever reason are forfeit.
Recommendation: Increase your mortality to get back some of your tokens in Phase 4 of your next turns.
May I use birds to fly over cities where I could not place a population token, because I do not meet the prerequisites?
Yes. Only the prerequisites of the destination city are important. Ignore the requirements of the initial city and all cities you pass. You must, however, abide by the countermeasure token "Birds" at the initial city and during the flight.
What happens if, due to an event, I lose resistance and do not meet the prerequisites of a specific city?
Your population tokens remain unaffected and stay where they are. You are not able to place new tokens there by infection, unless you increase your resistance to the required level again. Your infected will of course be gradually healed by coming events.
What happens if I do have no more infected on the gameboard?
Unless the group decided to play the vibrion, you're exterminated now. In your future turns, you still draw and execute an event card, but you cannot participate any further in the game. Naturally, you may still consult the other players.
How is a "Massive Research" card handled correctly?
First, perform all of its actions except for drawing an event card, then finally draw the next event card and perform those card's actions – independent from the Massive Research.
Annotations on Events
Transcribed from the publisher's separate "Annotations on Events" sheet (English side). The card icons are described in brackets where the text refers to them.
General Events
- Place 1 corpse each from the general supply onto a free population space of your choice in each stated city. If there's no free space, replace any 1 infected of your choice there with 1 corpse. Return the infected to its owner. No DNA points.
- Remove, if possible, 1 corpse of your choice from a population space in each stated city and put it back to the respective continent area. If that area is full, return the corpse to the general supply.
- Place one "Closed" countermeasure marker onto the stated sea connection. It can no longer be used (not even by the Vibrion).
- Place one "Closed" countermeasure marker onto each stated sea connection where there is none already. They can no longer be used (not even by the Vibrion).
- Place one "Closed" countermeasure marker onto the airport in the stated city. In future, this city can neither be reached nor left using an airplane.
- Place the depicted countermeasure marker (small animals icon) onto the stated city. Each future spreading into this city using the respective spreading type requires Level 2 (but uses up only 1). In case of "Birds", you even require Level 2 of enhanced spreading type "Bird" to start in that city or to flyer over it.
- Place the depicted countermeasure marker (virus icon) onto the stated city. Each future infection in this city now uses up one additional infection point.
- Place this card face-up onto the gameboard until the game ends. Any future spreading using "Airplane" now requires Level 2 of the enhanced spreading type "Airplane" (but uses up only 1 level).
- Place this card face-up onto the gameboard until the game ends. Any future spreading using "Ship" now requires Level 2 of the enhanced spreading type "Ship" (but uses up only 1 level). Not applicable to the Vibrion.
The following event cards are symptom-based. Every pathogen with the stated symptom's strain is affected:
- Cysts (–1 virus icon): Every pathogen with a "Cysts" symptom's strain loses 1 infection point. You never have less than 0 or more than 8 infection points.
- Anemia (+1 mortality icon): Every pathogen with an "Anemia" symptom's strain gains 1 mortality. The mortality is never below 0 or above 5.
- Insomnia (–1 severity icon): Every pathogen with an "Insomnia" symptom's strain loses 1 severity. The severity is never below 0 or above 10.
Applies to all similar events respectively.
Specific Events (Alphabetical)
Advanced Mutation
The symptom must be developed at the stated symptom's strain, not at another strain.
Immunodificiency
Each pathogen may freely chose its affected infected.
Malpractice
Once during Phase 2 of your turn, you may infect a city that is under quarantine even if Necrosis is not developed yet. All other rules of Phase 2 still apply.
Olympic Games / Olympic Winter Games
Choose any city with at least one free population space. It may be under quarantine. You must own the required resistances for that city and the spreading type for the free population space there. You get 1 DNA point. Neither spreading types nor infection points are used up.
Spontaneous Expansion
Choose any city with at least one free population space that you can reach. It may be under quarantine. You use a spreading type you own. You must own the required resistances for the destination and the spreading type for the free population space there. You get 1 DNA point. Neither spreading types nor infection points are used up.