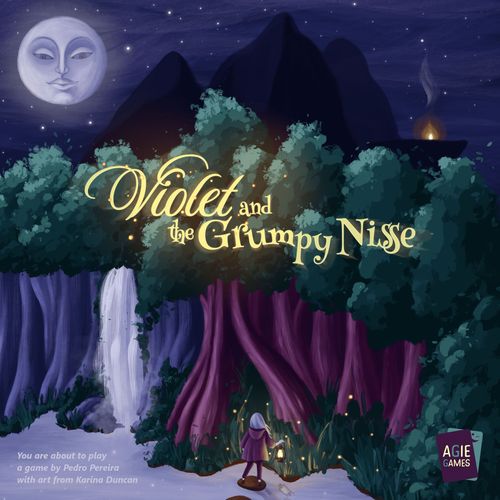
Violet and the Grumpy Nisse
Violet and the Grumpy Nisse Rulebook
Table of Contents
Table of Contents
Setting up
Place the board (A) between the two players a little to the side to allow space to form a card tableau, a draw pile and a discard pile (B).
Place Violet's Pawn on the first space of the Journey Track (C), the Lantern Pawn goes on the starting point of the Lantern Track (D), and the Fear Pawn goes onto the starting space of the Fear Track (E).
On the board place also the four Ordep's Helpers (F) that will help Violet on her journey to meet him. These are placed on the first spaces of each of the four coloured areas of the Journey Track (4th, 7th, 10th and 13th space). Then, place the 4 Advantage Tokens (G) on the board, one near each of those same areas of the Journey Track.
Torech now shuffles his Event Tiles (H) face down and draws 5 random tiles to look at in secret. Next he chooses the 3 he wants to use for the game, placing them face down in any order on the designated spots near the Fear Track (4th, 8th and 12th space). Return the remaining 7 Event Tiles to the box. Note: You may want to place the 3 tiles face up for the first few games.
Finally, Violet shuffles the deck of 36 cards and places 4 face up in the tableau (B). The game is ready to start.
Drafting your starting hand
After analysing the tableau, Violet will choose who will go first. She can choose herself or Torech to take the first card into their hand, after that, the tableau is refilled with a new card, then the other player picks their first card and refills the tableau.
Then, Violet chooses again who goes first to take their second card. This continues until both players have four cards each in their hands and there are four face up cards on the tableau.
Now, the first turn begins with Violet playing the first card, followed by Torech, and players comparing who played the stronger card, resolving the outcome accordingly.
Turn structure
A turn's structure can be broken down into 4 phases (a-d):
a) 1) The first player plays one of their cards face up on the table. 2) The second player plays one of their cards face up on the table.
b) Players compare the two cards to determine the winner of the turn and to check whether their effects are triggered. Note that some effects can influence who wins this turn. Details to card effects and their timings are in the Card effects section.
- General rule: The colour of the card has precedence over the value.
- General rule: A card effect never triggers when matching the colour of Violet's location.
c) Players resolve Violet's journey according to who played the strongest card.
d) 1) The player who played the strongest card chooses a new card from the tableau into their hand and refills the tableau back to 4 face up cards. 2) The player who played the losing card chooses a new card from the tableau into their hand and refills the tableau back to 4 face up cards. 3) The player who played the strongest card now starts again from the top.
a) Playing a card
There is no particular rule or limitation to how players can play their cards. It doesn't matter whether you go first or second, you are always free to play any one of the four cards in your hand. This applies to both players. There is no rule for having to match the colour, value, or effect of the card played by the other player, neither does Violet's current location limit your choice in any way. There is obviously a good reason why a player would rather play one card over another, but how to best make this judgement will come to you with experience.
b) Players compare the two cards
Once both players have played their cards, they now compare who played the strongest, which is influenced by where it is that Violet is currently located on the Journey Track. The general rule is that the colour of the card has precedence over the value. This means that if the first player plays an Orange card, the other player can only beat this card with another Orange card of a higher value. So if Violet goes first and plays a 6 Orange, then Torech will not win with a 7 Pink, but would win with a 7 Orange. In other words, the value matters only if the colours of the cards are the same, if they aren't then the card that was played first wins.
This changes however once Violet enters the first space of the lake area (Mint colour). During the time that she is in this area, all the cards of that colour (Mint) will always be stronger than any other colour. So in this case if Violet goes first playing a 7 Pink and Torech responds with a 2 Mint, Torech will have played the stronger card.
Pay close attention to where Violet is located, as this will determine what colour will win. The first and last areas of the Journey Track are neutral (Yellow) and cards will be resolved as per the general rule explained above: colour has to match before values matter.
Players also check whether their card effects are triggered this turn. Regardless of who played first, of winning or losing, players always resolve the effect of the cards they played. The only exception is if you played a card of the colour matching the area that Violet is in. For example, as long as Violet is in the Orange area, you ignore the effects of all Orange cards.
If both effects are resolved in the same phase, the player who played the strongest card resolves their effect first, then the other player resolves theirs. Card effects and their timings are listed in detail in the Card effects section.
c) Players resolve Violet's journey according to who played the strongest card
- If Violet won: she can choose to advance 1 space on the Journey Track and lose 1 unit of fuel on her Lantern Track; or she can choose to stay put in order to refill her lantern by 3 units instead. Then, regardless of what Violet chose to do, both cards are placed in a face down discard pile.
- Ordep's Helpers: Along the path, Ordep has asked for his little friends to help Violet find the direction she needs to follow. If she wins when standing just before one of them (so she would be on the 3rd, 6th, 9th or 12th space), she will be able to move without losing any fuel for her lantern, being able to see the direction she needs to go from a distance.
- Ordep's Fire: Note that the last space of the Journey Track is Ordep's Fire (Red). Like his Helpers, Violet can see this from a distance, so if she wins whilst attempting to get to the final space, she moves forward without losing any fuel.
- If Torech won: Violet must advance 1 space on the Journey Track and lose 2 units of fuel on her Lantern Track. Furthermore, the two cards do not go on the discard pile, instead, they are placed face down, on the first Fear Slot. If this slot is empty, nothing happens, if it isn't empty, you slide the two cards currently in it, downwards to the second Fear Slot. If the second slot is empty, nothing happens, if it isn't empty though, you slide the two cards currently in it, off the second Fear Slot and reveal these two cards in order to resolve Violet's fear.
- Crossing the Precipice: Note that the last space before Ordep's Fire is over a shaky bridge across a precipice. Unlike the previous spaces on the Journey Track, if Violet loses whilst standing here, she will not be able to advance as it is too shaky for her whilst confronting Torech. She still loses 2 units of fuel though as she is wasting precious time finding the courage to press on.
- Resolving Violet's fear: every time two cards are pushed off the second Fear Slot, Torech reveals them and subtracts the lower value from the higher value card (it does not matter who played what card). The result is the number of spaces Violet's Fear Pawn advances on the Fear Track.
d) Players choose a new card from the tableau and refill the tableau back to 4 face up cards
The player who played the strongest card, chooses any one of the four face up cards on the tableau and draws it into their hand. Then, the tableau is refilled to four cards with the top card from the draw deck. Finally, the player who lost does the same. This concludes a turn.
If the draw deck ever runs out, shuffle the discard pile to form a new one. Please note that the discard pile is not reshuffled when the draw deck is depleted, but only when a new card needs to be drawn and there is none.
The player who played the strongest card now starts again from the top and plays a new card from their hand. Players repeat turns this way until the game is over.
Game end
The game ends in one of three ways:
- Violet reaches the end of her journey and thus wins the game. She sets out with Ordep on exciting adventures through the night. Violet wins the game.
- Violet's lantern runs out of fuel: if this ever happens Violet gets lost on the way to meet with her friend and she will not be able to reach him. Disappointed that Violet never showed up, Ordep journeys on his own and they never meet again. Torech wins the game.
- Violet's fear catches up with her: if this ever happens, Violet is struck by panic caused by her own fears as a result of Torech's relentless attempts at defeating Violet's resolve to be friends with Ordep. Torech wins the game.
Card effects
The card effects are resolved during the indicated phase of the turn structure (attention - effects supersede the flowchart).
- 1: This card will always beat any 9 regardless of what card was played first or what colours were played. If Violet plays a 9 then Torech a 1, Torech wins. If Violet plays a 1 then Torech a 9, Violet wins. Of course, the only exception is when both the 1 and the 9 are of the same colour as the area Violet is currently in, because the card effect is ignored the 9 being higher value beats the 1. Effect breaks general rule: colour has to match before values matter. (Phase b)
- 2: Draw 3 cards from the draw deck into your hand, you now hold 6 cards. Of these 6, keep any 4 and shuffle the other 2 back into the draw deck. In this case, you do not draw any card from the tableau so there is no new card added to it from the deck. (Phase d)
- 3: Look at the top 5 cards of the draw deck and choose one to keep. In this case, you do not draw any card from the tableau so there is no new card added to it from the deck. Place the remaining cards back in their original order. (Phase d)
- 4: You may swap 1 card from your hand of 3 cards with one card in the discard pile. You may freely browse the discard pile and choose a card to keep in your hand. Then choose a card to put back in the discard pile (this could be the one you just chose in case you changed your mind or want to bluff). (Phase d)
- 5: This is a unique card in that its effect is ongoing at all times. It is a wild card and always matches the colour of the area Violet is currently in. If Violet is on a Yellow space, it matches the colour played by the opponent. If both play a 5, the first one wins. (Phase b)
- 6: If played first on a turn this card is shielded against the colour of the area Violet is currently in. For example, if Violet is in the Orange area and a Pink 6 is played first, then there is no Orange card that can beat this one because it is shielded against Orange and was played first. The only way to beat a 6 is to counter with a 7, 8 or 9 of the same colour. Effect breaks area matching rule. (Phase b)
- 7: This card forces the opponent to reveal their hand. After determining who wins the turn, when resolving this card effect, your opponent reveals their hand to you. After drawing their hand back to 4 cards, your opponent hides them from you again. Please note that any cards drawn from effects (the 2, 3 or 4s) are not revealed to you.
Tiles for Torech events
All possible Torech events are explained here (attention - events supersede the flowchart).
- The Faery Ring (immediate on board): Torech immediately places it on any space of the main track not yet reached by Violet. When Violet steps into the Faery Ring she has to stay there when she loses a turn. Her lantern still loses 2 units of fuel though as time keeps passing despite her not moving (she is moving inside the Faery Ring at a different time flow). Once she wins a turn, she then can decide, as usual, to either continue and burn a unit of fuel, or stay there (very bad idea!) to recover 3 units of fuel.
- Off Track (immediate on board): Torech immediately has to place this on any single space of the Journey Track not yet reached by Violet. This event has two spaces, so it makes the track a little longer for Violet. Both spaces on this event are considered to be of the same colour as the one it covers.
- Gust of Wind (immediate): Torech evokes a cold breeze that makes Violet lose two units of fuel. Advance the Lantern Pawn two spaces on the Lantern Track.
- A Storm is Brewing (immediate on board): The night sky is darker than usual and the lantern seems a little bit less effective. Cover the last two spaces of the Lantern Track, Violet loses the game when the Lantern Pawn reaches the new last space of the track (now shorter by one).
- A Howl in the Night (immediate): Torech communicates with the spirits of nature to scare away Ordep's Helpers. Immediately remove all of Ordep's Helpers from the board.
- The Scent of Fear (immediate on board): Torech places it on any space of the Journey Track not yet reached by the Fear Pawn, this can also be on the space Violet is currently on. This has no direct effect on Violet. Instead, it is activated when the Fear Pawn moves on or past it on the Journey Track, immediately triggering another Fear Slot: Torech reveals the cards currently on the second Fear Slot and resolves them as per the usual rules. This may give him the win, but if it doesn't Torech is left with an empty Fear Slot, which gives Violet some space to work with. The colour of the space this event is placed on, remains unchanged.
Advantage Tokens
When a player receives an Advantage Token (with the moon and fireflies on the back), they may keep them to use whenever they feel the timing is right. They are a one-time use token, so place them back in the box once used.
During the game, when Violet is in one of the four coloured areas of the Journey Track, there is only one criterion that determines whether that token goes to her, or to Torech: does she ever stop to refill her lantern? As soon as Violet takes a break to refill her lantern, the Advantage Token immediately goes to Torech. If she reaches the next area without having taken a break, then the Advantage Token immediately goes to her.
What do they do?
Advantage Tokens have the same function as Torech's "Planning Ahead" Event Tile (see above), but these can also be used by Violet. If you have multiple Advantage Tokens, you can use them in the same turn and discard the four cards in the face up tableau multiple times.