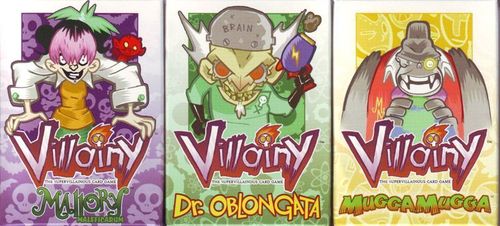
Villainy: The Supervillainous Card Game
Villainy: The Supervillainous Card Game Rulebook
Table of Contents
Table of Contents
Preparing to Play
Each player needs their own deck, their preferred villain. Each deck in the VILLAINY line is cross-compatible, including those from different sets. No matter which supervillain you choose, the basic play remains the same.
VILLAINY supports an almost unlimited number of players, provided each has his own deck, but these rules are written with 2 to 3 players in mind in any given game.
NOTE: While players may choose to each play the same villiain, players must be careful to keep track of their cards when placed on an opposing player's side.
Hide the Master in His Hideout
Each player should find the Master (the character after which the deck is name), the Hideout - Center card, and the Hideout Damage card. Place the Master face up in front of you and place the Hideout – Center card, face up, over the Master. Tuck the Hideout Damage card just under the Hideout – Center card with the "6" visible. As the Hideout takes damage, you will slide the Damage card up (first covering the 6, then the 5, etc.) until all 6 hits have been taken.
Shuffle and Draw Five
Each player then shuffles his deck thoroughly and places it in front of them; that is the Draw pile. All players then draw five cards into their hands from their respective Draw piles.
Playing the Game
The youngest player goes first with play continuing clockwise from her. Each player gets one turn per round. A round is finished when all players have had their turn or a player puts down a Segue card (effectively ending the round). For the purposes of Special Action cards, a "round" is over when it is the player's turn again. At the beginning of each turn, the players fill their hands to five cards by drawing cards from their respective Draw piles.
Actions
A PLAYER GETS THREE ACTIONS PER TURN.
An action can be any one of the following.
Playing a Card: With the exception of Special Action (which is free) and Segue cards (which are played off turn), every card put down costs one action to do so. Any actions a Special Action card allows are free as well unless the card explicitly says otherwise. Specific rules regarding the play of Minions, Monsters, and Gear follow.
While Minion, Master, and Hideout cards have specific places they may be played, other cards can be put anywhere in front of the player. It is recommended that Monster cards are placed to the side of the Minions while Setup cards are placed to the other side.
An overview of the different card types as well as rules and guidelines for card placement can be found on the other side of this sheet. (See "The Card Types" and "Placement and Attacks" below.)
Playing a Minion: Placing a Minion costs one action. Minions may be played in two rows with three cards in each row. Minions do not have to be laid down in any certain order, meaning you can fill whatever spot in those rows you wish.
No more than two rows of three cards are allowed. (See "Placement and Attacks" for more details.)
Placing Minions: A Minion may be played in any of these spots (centered in front of the Master/Hideout).
Playing a Monster Card: As one action, a player may place a Monster card. These cards are placed to the side and do not count as a Minion nor do they follow the "two rows of three cards" rule. They are entirely separate from the Minions. A Monster card is not "in play" until it is completed so no part of it can attack or be attacked unless all four parts are in play.
Playing Gear: Placing a Gear card on a Minion costs one action. That card stays with that Minion until removed, the Minion is discarded, or it is moved to another card (by another player through an allowed action or by the original player). A Minion may not have more than one Gear card at a time. Gear cards may not be played on Master or Monster cards.
Moving a Card: For one action, a player may move a Minion or Master card from its original spot to any available open spot. For a Minion, this means any of the six spaces usually available to Minions. The Master card may only be moved to the left or right of the original position.
As one action, two Minions may swap places. Minions may not occupy the same space.
Gear cards may be moved from one Minion to another as one action.
Attacking: For one action, a player may attack another player's ranks. Only Minions, Monsters, and Masters can attack. (Monsters can only attack, or be attacked, after they are completed.) Hideouts can be attacked and that is covered below.
The attacker compares his card's total Attack (A!), including applicable bonuses or penalties from other cards or Setup, against his target card's total Defense (D!), again including bonuses or penalties. If the attacker's A! is equal to or higher than the target's D!, the target is discarded. If the A! is less than the D!, the attack fails and both cards remain in play.
In general, Minions can only attack cards that are not blocked by other Minions. If the Minion acquires a ranged attack (marked as such on the card), they may attack any Minion in play. Monsters can attack any opposing Minion or Monster in play, regardless of where the card is located. Master cards may never attack or be attacked if there is a Minion in front of them – even by a ranged attack. This is covered on the back of the sheet in further detail. (See "Attacking & Defending" below.)
Attacks Are Not Simultaneous: A player must wait until his turn to attack.
NOTE: Some Minion or Gear cards allow special attacks or special effects from attacks (see individual cards for details).
Attacking the Hideout: Since the Hideout has no defense, any attack on it scores one hit unless the attacked player can interrupt the attack with a Segue or discards an adjacent Hideout card to absorb the hit.
Only the Hideout – Center card may be attacked. The Hideout - Left and Hideout - Right cards may not be attacked directly.
For every successful attack, move the Hideout Damage card up one so the next lowest number appears. For example, if this is the first time the Hideout has been hit, slide the card so the 6 is covered by the Hideout - Center card and the 5 is the highest exposed number. The number shown lets everyone know how many hits the Hideout can take before it is discarded and the Master is exposed.
If a Hideout - Left or Hideout - Right card is discarded to absorb a hit on the Hideout – Center card, any bonus it gives is gone immediately. For Hideout cards that allow a player to have six cards in hand, the player can only have draw up to five the next time he fills his hand.
After the Hideout has taken all six hits, it is removed from play on that player's next turn. The Master is now exposed and follows the rules detailed under Card Types: Master.
Exchanging a Card: A player may discard any one card in his hand and draw a fresh one from his Draw pile as one action.
Winning the Game
When all opposing Masters have been destroyed, the player whose Master remains is the winner.
Reshuffling
If a player runs out of cards during a game, he reshuffles his discard pile and places it as the Draw pile. If he has less than five cards in his hand, he draws a number of cards to get five then play resumes.
About the Cards in This Deck
This sample card is a Minion, the most common type of card in the deck. Other types of cards follow the same structure though some will include rules text particular to that card. Should the rules text contradict anything on this rulesheet, follow the card. Attack and Defend scores are abbreviated as A! and D! on this sheet. A complete breakdown of the different types of cards in this deck can be found on the other side of this sheet.
Card layout (as printed): Card Type, Name of Card, Icon by Leanne Buckley, Attack & Defend Scores, Art by Jon Morris, Funny Text by Jason Blair.
The Card Types
Master: This is the supervillain in question. The Master is the character your opponents are aiming to destroy. If there are any Minions directly in front of the Master, he cannot attack or be attacked. When exposed, which is done on the player's next turn after the Master's Hideout – Center is destroyed, the Master can attack like any other card if there are no Minions directly in front of the Master.
Hideout: The Hideout is what protects the Master at the beginning of the game. There are five Hideout cards total with a sixth used as the damage counter. The Hideout – Center card is played during setup, covering the Master. There are four Hideout addition cards: Two Hideout – Right cards and two Hideout – Left cards. Only one Hideout – Left and one Hideout – Right card may be in play at one time. These cards may be discarded to absorb an attack on the Hideout – Center (meaning the Hideout – Center card takes no damage if one of the additions is discarded instead).
One of the Hideout – Left and one of the Hideout – Right cards gives a bonus to the player. If the player wishes to play one of these cards on a Hideout – Left or Hideout – Right card already in play, he must discard the original first (this costs no actions).
Only the Hideout – Center card can be attacked. It is up to the attacked player to decide if he wants to discard an addition card to absorb any damage. Every time the Hideout – Center is hit, the Hideout Damage card is moved up to reflect the taken damage. If the Hideout – Center takes six hits, it is destroyed, exposing the Master.
If the Hideout – Center card is down to 1 point of remaining damage then any addition cards in play must be discarded (absorbing an attack in doing so) prior to the Hideout – Center card taking its last hit.
It is possible for the Hideout – Center card to be destroyed before any additional Hideout cards are in play. After the Hideout – Center card is destroyed any additional Hideout cards may not be played.
Monster: Monsters are special characters composed of multiple cards. Each Monster has four basic parts. Some parts have two versions (with differing A! and D! scores or providing bonuses while in play). The Monster cannot attack or be attacked until it is completed (meaning one of each "piece" is in play). The arrangment of the Monster card is under "Placement and Attacks" to the far right.
Each piece attacks and is attacked separately and, if defeated, a piece is simply flipped over, becoming inactive. A replacement piece may be played on top of an inactive piece (if they are the same part of the monster) to revive that part and bring that piece of the Monster back into action.
Monster cards that are defeated are never discarded, simply flipped over.
A Monster with inactive parts can still attack with its remaning pieces and those pieces may still be attacked.
Minion: Minions are the bulk of each supervillain's army. They are used to protect the Master and attack the opposing sides. Each supervillain has two types of minions: general minions and special minions. Mugga Mugga has Monkeys and Great Apes; Mallory Maleficarum has Student Body and Greater Nasties; Dr. Oblongata has Lab Assistants and Test Subjects. The two types operate the same and obey the same rules (such as placement) but take note: Some cards affect all Minions (by stating "Minions") while others only affect one of the types (by stating the specific type). These are noted on the individual cards.
All Minion cards have an M in their upper-lefthand corner. This denotes them as a Minion; the type of Minion they are is written next to this icon.
Gear: Each supervillain has a different type of Gear. Mugga Mugga has Weapons; Dr. Oblongata has Gadgets; Mallory Maleficarum has Scrolls. These are played on Minions (take note if only a certain type of Minion) for long-term bonuses or special abilities. (See each Gear card for specifics.) Gear cards are placed beside the Minion they will use them and remain with the Minion until it is either moved to another Minion as one action, removed by an opposing player (through use of a Special Action, for example) or the Minion that is using the Gear card is destroyed (at which point, discard both the Minion and the Gear card, unless noted otherwise on the card).
All Gear cards have a symbol particular to their deck and have the type of Gear they are written next to that symbol.
Special Action: Special Action cards either have immediate effects (meaning they are played then promptly discarded) or only last for one round. Some Special Action cards act as Gear, only temporary, while others allow the player or a character to do the specific move that is detailed on them. Playing a Special Action card costs no actions to do so.
All Special Action cards have a symbol specific to their deck and "Special Action" written next to that symbol.
Segue: Segue cards are played during another player's turn. Doing so ends that player's turn immediately and play shifts to whoever played the Segue. Multiple Segues may be played in succession as players steal control from each other. If a player has declared an attack or just played a card, his turn ends immediately, the attack left unresolved or the card about to be played returns to that player's hand for possible use later. If the player's turn had just started, the player's turn ends immediately—even if he has yet to draw cards to refill his hand.
A player's turn may be Segued by another player leaving his hand with less than five cards. In this instance, the player who lost his turn will fill his hand at the beginning of his next turn.
Setup: Setup cards give bonuses to a supervillain's team. The Setup cards are labeled either A, B, or C and there are two of each type. Setup cards form a chain of three cards; when an A, B, and C card are laid in order, they form a narrative sentence detailing the bonus they allow. Example: +2…D…against Minions. This means that supervillain's team gets a +2D to all attacks by Minions.
Setup cards do not need to be played in order but the bonus does not take effect until all three Setup cards (the "chain") are played.
Each player can only have one chain in play, though may replace the played Setup cards during their turn to alter the sentence and, hence, the bonus.
Bonuses given by Setup cards apply only to Minions, not Master or Monster cards.
Placement and Attacks
Your Play Area
This is how your area may look during play. You can place the Monster, Setup, and Draw/Discard Piles where you like, but the Minions and Master must be laid out as such (though the Master can move to the left or right during play).
Layout diagram (as printed): Vronkenstein (Monster), Minions, Setup Cards (A, B, C), Discard Pile, Master/Hideout, Draw Pile, Minion positions A through H.
Attacking & Defending
Generally, a Minion can only attack if a) he is not blocked by a Minion and b) the opposing Minion is not blocked by another Minion. That is why placement of Minions is so important. If a Minion has a ranged attack, he can attack even if another Minion is in front of him, his target, or both.
The column a Minion is in doesn't matter, only whether or not the Minion is blocked and the target is blocked.
A Monster can attack any row and any column. Monsters are never considered to be blocking any other card.
The Master may never be attacked if a Minion is in front of him - even by a Monster.
Example: The Minions on Dr. Oblongata's side (the yellow side) can make the following attacks: (A) can attack (E) and (F) because they're both in the front row. (A) can attack (G) because no Minion is in front of him. (A) cannot attack (H) since (H) is blocked by (E). (A) can attack any one segment of the opposing Monster as well. (A) could only attack (H) if (A) had a ranged attack because (E) is in front of (H).
(C) and (B) can make the same attacks as (A) because (B) is in the front row and because (C) has no Minions in front of him. (D) cannot attack anyone unless he has a ranged attack.
Vronkenstein could attack any of the Minions and the opposing Monster (but only if both Monsters are completed).
In this example, the Hideouts are both blocked by a Minion. In order for Dr. Oblongata to attack the Hideout, either Vronkenstein or a Minion would have to eliminate both (E) and (H) then attack the Hideout.