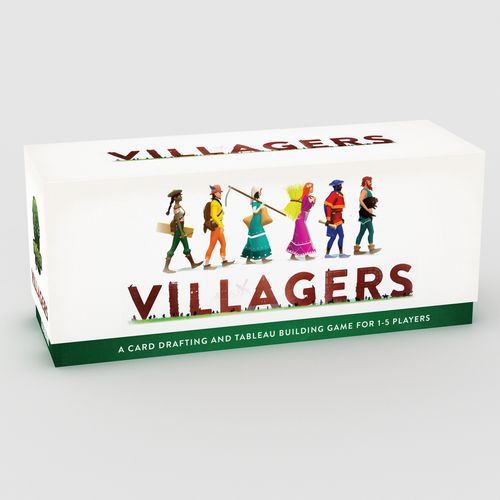
Villagers
Villagers Rulebook
Table of Contents
Table of Contents
Game Contents
- 5 Village Square cards
- 5 Player Aid Cards
- 5 Founders
- 6 Starting Road Villagers
- 30 Basic Villagers: Lumberjacks, Miners and Hayers
- 94 Other villagers
- 2 Market Cards
- First Player Card and End of Draft Phase Card
- 150 Coins
For Solo Mode Only:
- 24 Event Cards
- Countess Card and Jester Card
Game Setup
-
Find the 6 Starting Road Villagers marked with * and place them face-up in a line in the centre of the table. This is the Road.
-
Find the 10 Hayers, 10 Lumberjacks and 10 Miners and place them face-up in separate stacks.
-
Give each player a Founders card and place it with the 2 Gold side facing up. The Founders card forms the start of each Village.
-
Give each player a Village Square and place it next to their Village.
-
Give each player 8 Gold*, this is their starting Supply. Place the rest of the Gold in an area next to the Road to form the Bank.
-
Give the First Player Card to the player who has lived in the same place the longest.
-
If it's a 2 or 3 player game: remove the cards marked with *4+, those are the Wool and Leather suits.
-
Shuffle the rest of the cards and form 6 face-down stacks each with twice as many cards as there are players in the game. In a 5 player game for example you would make 6 stacks with 10 cards in each. Line these stacks up above the Starting Road Villagers.
-
Add the First Market Card beneath the second stack, and the Second Market Card beneath the sixth stack. The Road is now complete.
-
From the remaining cards deal 5 cards face-down to each player. These are the Player Hands.
-
Place the rest of the cards in a stack next to the Road, this is called the Reserve.
Take note of the different rules for 2 players. That's it, the game is now ready to be played.
Gold is the collective term for the currency used in the game, no matter what colour the coins are.
Villager Anatomy
Food Symbol: Each of these lets you draft an extra villager in the Draft Phase.
Builder Symbol: Each of these allows you to place an extra villager in the Build Phase.
Suit Symbol: Tells you which of the 9 suits this villager belongs to. Most villagers need to be placed on top of specific villagers of the same suit.
Card Stacking Hint: Shows how many villagers can be stacked on top of this one if any.
Production Chain Text: Tells you what villagers this one has to be placed on top of, and what villagers can be placed on top of this one, if any.
Villager Name: The occupation of the villager.
Gold Symbol: This tells you how much Gold this villager earns in the Market Phases. Gold is victory points in this game.
Banner: Tells you the name of the suit. Only villagers that can go straight onto the table with no other villagers underneath have banners.
Padlock: Shows you that this villager has a Padlock.
Unlocking Symbol: Names the villager that unlocks the Padlock on this one.
Silver Formula: Describes a conditional amount of points this villager will earn you in the Second Market Phase.
Keyring Symbol: Tells you how many other villagers this one can unlock with the Padlock Mechanic.
Signpost Symbol: Tells you this villager is one of the 6 villagers placed face-up on the Road at the beginning of the game. Only matters when setting up the game, and when packing up.
Card backs: These show what suit the villager belongs to. Useful when you draft face-down villagers or want to guess what the other players have in their hands.
Discard Symbol: Tells you this card is discarded after playing.
Game Rules
The game is played over several rounds until all the face-down stacks of villager cards on the Road have been emptied. Each round is divided into 2 phases carried out in order:
-
The Draft Phase: players draft villagers from the Road.
-
The Build Phase: players play villagers from their hand into their Villages.
In addition there are 2 Market Phases in the game, where players earn Gold. Whoever has the most Gold at the end of the game is the winner.
The Draft Phase
In this phase players take turns to take (or "draft") villagers from the Road. They may draft any of the face-up villagers from the Road, or blindly draft the top card from any of the stacks.
You must draft 2 villagers, plus 1 for each Food in your Village. This is called your Drafting Limit. If you have 1 Food for example, you must draft 3 villagers. You can never draft more than 5 villagers, even if you have 4 or more Food.
Draft one villager, then the next player in clockwise order drafts a villager. The player with the First Player Card goes first. The villagers you draft are placed face-up on your Village Square. Keep drafting in rounds until you have as many villagers on your Village Card as your Drafting Limit, then take your new cards up to your hand. When all players have drafted up to their limit, continue with the next step, Updating The Road.
If the card you draft has a coin (placed, not printed) on it, take the coin to your Supply. When drafting from the face-up cards, immediately replace the card with the top card of the leftmost stack.
Do not draft or move the Market Phase Cards, these should remain in their place until the Market Phase. When a stack is emptied, the stack is no longer in the game.
Near the end of the game when all stacks are emptied, use cards from the Reserve instead to replace the face-up cards on the Road. Players may draft face-down cards from the top of the Reserve only when all other stacks are empty. If the Reserve and all stacks are empty, no cards are replaced.
Draft Phase Example
-
The player takes a villager from the Road to their Village Square. The coin on it goes to their Supply.
-
The villager is replaced with the top card of the leftmost stack. After this it's the next player's turn to draft.
-
As the player has 1 food in their Village, their Drafting Limit is 3. When the player receives their third card, they must pick their new cards up to their hand and stop drafting.
You can take a top card from one of the stacks instead of a face-up villager. Though you draft the card face-down you flip it over and place it face-up on your Village Square for everyone to see.
Updating The Road
After all players are done drafting do the following*:
-
Discard any villagers on the Road with coins on them.
-
Deal new cards to replace the discarded Villagers from the Reserve**. If the Reserve is empty, deal cards from the leftmost stack on the Road instead. This can trigger a Market Phase like regular drafting. If the Reserve and all stacks on the Road are empty, no new cards are dealt.
-
Put 1 Gold coin on each of the face-up villagers on the Road.
-
Start the Build Phase.
In a 2 player game, this works differently (see below). This is the only difference between 2 player and the higher player counts.
*The Reserve is the extra stack outside the Road. Make sure you deal cards from that stack in this step.
Updating The Road in 2 Player Games
After both players are done drafting do the following:
-
Each player in reverse turn order may choose to place 1 Gold from the Bank on a villager on the Road. You are allowed to place Gold on the same villager, or not place any Gold if you wish.
-
Discard all face-up villagers on the Road with no coins on them.
-
Deal new cards to replace the discarded Villagers from the Reserve*. If the Reserve is empty, deal cards from the leftmost stack on the Road.
-
Start the Build Phase.
Cards with coins on them can stay several rounds, and coins can accumulate on the same villager.
*The Reserve is the extra stack outside the Road. Make sure you deal cards from that stack in this step.
Build Phase
In this phase players take turns placing villagers from their hands into their own Villages. Once a villager has been placed, you cannot pick it up again.
The players can by default place 2 villagers, plus one extra for each Builder in their Village at the beginning of the Build Phase. If you have 2 Builders in your Village for example you can place 4 villagers. This is called your Build Limit. You can never place more than 5 villagers, even if you have 4 or more Builders. You can play fewer villagers than your Build Limit if you wish.
Each player finishes all their actions in the Build Phase before passing to the next player.
At the beginning of your Build Phase, tell the other players how many Villagers you're allowed to place. Put all the villagers you intend to use on your Village Square card, before you place them in your Village. This makes it easy for everyone to keep track of how many villagers you're placing, making sure you don't go over your Build Limit.
Production Chains
If a villager has a Production Chain Text on top of the card, it must form part of a Production Chain when placed. Any villagers listed before the villager's own name must be placed beneath it in the order listed. A Cartwright for example, must be placed on top of a Lumberjack and Wheeler.
When placing cards on top of each other, place them so that everything below the name of the card beneath is covered up. Once a card has been covered by another, the symbols below its Villager Name are no longer in play. If you cover your Founders with a Swineherd for example, you can no longer use the Food or Gold on the Founders.
The Production Chain does not have to be finished right away. You could for example place a Lumberjack and Wheeler in turn one, then place the Cartwright on top in a later turn. The cards have to be placed in order though, you have to play the first card in a chain first, then the second and so on.
The first villagers in a Production Chain can have up to 2 villagers on top of them, creating 2 branches in the same Production Chain. A Lumberjack for example can have a Carpenter and a Wheeler on top, and the Wheeler's Production Chain might later be extended with a Cartwright.
You are allowed to have 2 or more of the same villager in your village if you wish.
Build Phase Example
The player wants to play their Cartwright. As the Production Chain Text shows, it must be placed on top of a Lumberjack and a Wheeler.
-
The player has a Wheeler in their hand, and a Lumberjack already placed in the Village, so getting the Cartwright out will not be a problem. They decide to play the Wheeler and Cartwright. As the player has one Builder in their Village, they may also play a third card. They decide to play the Swineherd, as it can be placed on top of the Founders already in the Village. The player places these 3 cards on their Village Square, to show the other players what is going on.
-
The player places the three cards into the Village. The Swineherd goes on top of the Founders as its Production Chain Text demands. The Wheeler goes on top of the Lumberjack already used by the Carpenter, they now share his lumber production. Finally the Cartwright goes on top of the Wheeler.
Villagers that form the start of a Production Chain like the Founders, Lumberjacks and Shepherds can have 2 villagers placed on top of them, branching out into two different (or identical) businesses.
Getting Basic Villagers
In the Build Phase you can also get Basic Villagers. Those are Lumberjacks, Hayers and Miners. All the villagers in the Hay, Ore and Wood suits need to be placed on top of these. To get a Basic Villager, first return a villager from your hand to one of the stacks on the Road, then take a Basic Villager of your choice and place in your Village. You can do this up to three times per Build Phase. You don't have to show the other players the fronts of the returned cards.
If the stacks on the Road are all empty (as they will be in the last Build Phase), return villagers to the top of the Reserve instead. If that is empty as well, discard the returned villagers.
Basic Villagers do not count towards your Build Limit when placed in your Village, and neither do they count towards your maximum Build Limit of 5 villagers. They have nothing to do with your Build Limit!
Getting Basic Villagers Example:
-
The player returns 3 villagers to the stacks of their choice on the Road. Then they place 3 Basic Villagers of their choice into their Village.
-
The player then does their 3 Build Actions, placing a Blacksmith on the new Miner, a Grazier on one of the Hayers, and finally a Chandler. The Chandler is a Solitary Villager and so does not go on top of any other villager.
Padlocks
When playing a villager with a Padlock, you must first unlock it. Check if you or any other player has the villager named next to the Unlocking Symbol in their Village. This is called the Unlocking Villager.
-
If you have the Unlocking Villager in your own Village, place 2 Gold from the Bank on that villager.
-
If another player has the Unlocking Villager, place 2 Gold from your Supply on it.
-
If no one has the Unlocking Villager, you must pay 2 Gold to the Bank to unlock the villager you're placing.
If several copies of the Unlocking Villager are available, you get to choose which one you pay. You cannot choose to pay the Bank if the Unlocking Villager is present in another player's Village. Also note that you could use a villager you just placed in the current Build Phase to unlock another villager you're playing.
Unlocking Padlocks Example:
The player is going to place a Cooper, Brewer, and a Fisher in their Village. They all have Padlocks.
-
First the player places the Cooper. The Unlocking Villager on the Cooper is the Blacksmith, so the player pays another player's Blacksmith 2 Gold.
-
Next the player places the Brewer. This one is unlocked by the Cooper, so the player pays his own recently placed Cooper 2 Gold from the Bank.
-
Finally the player places the Fisher, it requires that a Shipwright gets paid. There are no Shipwrights in any Village, so the player pays 2 Gold from their Supply to the Bank.
The Keyring Symbol
The number in the Keyring Symbol tells you how many villagers there are in the game that have to pay this Villager gold to be unlocked.
The Blacksmith for example can potentially unlock 10 villagers and accumulate up to 20 Gold in this way.
Playing Special Villagers
You can also play the red Special villagers on your turn in the Build Phase. These give you powerful special actions. Their rules are printed on the cards.
Special Villagers that have a Discard Symbol are discarded immediately after use, they do not count towards your Build Limit. You can play as many of them as you want!
Special Villagers that do not have the Discard Symbol, like the Monk, do count towards your Build Limit as they are placed in Villages when played.
Special Villagers cannot be used to steal another player's Founders.
Special Villagers Example:
The player will play a Monk and a Jeweler. This brings them to their Build Limit of 2 villagers. In addition they will play a Smuggler and a Tinner. These two will be discarded after use and so do not count towards the Build Limit.
-
The Monk is kind of a "wild" villager in this game, so the player uses him to take the place of a Spelunker between the Seeker and Jeweler.
-
Next he uses the Tinner to unlock the Padlock on the Jeweler, as it lets you unlock any Padlocks for free.
-
The player also plays the Smuggler to earn half the value of the Jeweler, immediately earning 10 gold. The Smuggler also has a Padlock, the player uses the Tinner to unlock it for free. Finally the player discards the Tinner and Smuggler.
End the Build Phase
When all players are done with their Build Phase, check if any players have no Food in their Village. Players with no Food in their Village after the Build Phase have to flip their Founders Card over to the other side that has one Food on it. Once flipped to that side, the Founders can never be flipped back to the side with Gold on it.
Finally the player with the First Player Card passes it to the player on their left, and the Build Phase is over. Start the next Draft Phase, unless a Market Phase is triggered.
First Market Phase
When the two first (leftmost) stacks on the Road are emptied, the First Market Phase happens after that turn's Build Phase. The First Market Phase Card is a reminder of this.*
In the First Market Phase all players earn as much Gold as printed on the cards in their Village, plus as much as the coins placed on them. Do not pick up the coins placed on the cards, as they will be scored again in the Second Market Phase.
Only the top card of each Production Chain is included, Gold Symbols covered by other cards do not earn any Gold.
Each player in turn order takes the Gold they earned from the Bank and places it in their Supply. Silver Symbols do not give you any Gold in the First Market Phase. When all players are done earning their Gold, the First Market Phase is over. Discard the First Market Card and start the next Draft Phase.
First Market Phase Example:
It's the player's turn in the Market Phase. All they have to do is add up the numbers on the visible Gold symbols in their Village, plus the coins on the villagers. They ignore the Freemason as his Silver Symbol only scores in the Second Market Phase. They earn a total of 23 Gold. They take 23 Gold from the Bank and add it to their Supply. Note that the coins on the villagers are not removed, as they will be scored again in the Second Market Phase.
*Unless the players have played in a very unusual way (exclusively drafting face-down cards) the First Market Phase will happen in the round when the First Market Phase Card is revealed on the Road.
Second Market Phase
When all stacks on the Road have been emptied the Second Market Phase happens after that turn's Build Phase. It is resolved exactly like the First Market Phase, except this time Silver Symbols are also scored. In this final scoring phase, coins placed on villagers can be scored by simply moving them to each player's Supply. But make sure to score the Silver Symbols before moving the coins as it can impact the scoring of cards like the Agent.
Silver Symbols
Some cards have Silver Symbols on them and a description of a conditional amount of Gold to be earned. The rules for each of these villagers are written on the cards. Only your own villagers are taken into account when scoring these. A Grocer for example only scores Food Symbols in your own Village.
The reason these have Silver instead of Gold Symbols is because some card effects only affect Gold and not Silver. A Wood Carver for example scores the value of the Shipwright's Gold Symbol, but it does not score the value of the Log Rafter's Silver Symbol.
Food, Builders and Gold Symbols covered by other cards are not included in the Silver scoring. The Suit Symbols and Padlocks on top of the cards are always included for scoring purposes though, even when not on the top cards of Production Chains.
Some Special and Silver scoring villagers also specify that they earn as much as the printed Gold value, this is to tell you not to include any coins placed on the villagers when you calculate it. For example a Wood Carver used to score a Cartwright will not score more than 9 Gold, even though the Cartwright can have up to an additional 4 Gold in coins placed on it.
Whenever the value of a Silver Symbol is referred to (in Solo Mode Events and some expansion cards for example), use the full calculated value of the Silver Symbol formula on the card as you would when scoring it in the Second Market Phase.
Second Market Phase with Silver Scoring Example:
The player has 2 Grocers. Each of them earns 3 Gold for each Food symbol in the Village. So they earn 9 Gold each. In addition there are 4 Gold printed on the villager cards in the Village. The player takes a total of 22 Gold from the Bank (9+9+4). Finally the coins on the Carpenter are moved to the Supply to be included in the final scoring.
End of the Game
After the Second Market Phase has been resolved, the game is over. The winner is the player with the most Gold in their Supply. If two or more players are tied for the win the player with the fewest villagers in their Village is the winner.
Solo Mode
The Countess is the last living relative of the oppressive Royal Family that used to rule the land. Using her vast fortune and army of soldiers she seeks to restore the nobility to their former glory days, with herself as Queen. She will use everything in her arsenal to stop the local villagers from organizing on their own. What she lacks in goodwill from the people and economic skills she makes up for with bribery, dirty tricks and violence.
The Solo Mode is a way of playing Villagers with just one player. It uses two decks of events and some simple rules changes to simulate playing against an evil Countess. Though you have the advantage of controlling what villagers will end up in each Village, you must react to disastrous Events every round, adapting your strategy around them.
Setup
Set up the game like a 2 player game, except:
-
Remove all cards from the Special suit.
-
There are 5 cards in each stack on the road instead of 4.
-
Place the Jester card next to your Village Square.
-
Shuffle the Winter Events and the Summer Events in separate stacks and place them face-down on the table. Deal the top Summer Event face-up next to the Road. This Event card will be in play the first round of the game.
-
Replace one player with The Countess:
- The Countess Card forms the start of her Village instead of a Founders card. Place it with the side showing 4 Gold facing up.
- The Countess has 1 gold in her Supply.
- The Countess does not have a hand of cards.
Solo Mode Rules
The Solo Mode follows the same rules as a 2 player game, but as there is only one player playing there are some additional rules for each phase:
Draft Phase
Whenever you draft a card from the Road, also place a face-up villager of your choice from the Road into the Countess Village (The Countess builds in the Draft Phase!). This is done before dealing new face-up cards to the Road from the Stacks.
The villagers placed into the Countess Village ignore the rules for Production Chains, every villager is placed separately.
The Countess ignores the Padlock mechanic when villagers are placed into her Village. You still have to pay her villagers to unlock any villagers you play with Padlocks, as per the normal rules for Padlocks. She counts as another player in that regard.
Resolve the End of Draft Phase as you would in a 2-player game, except The Countess does not place Gold on any villager on the Road. If The Countess for any reason gets a villager you placed Gold on during the end of a Draft Phase, she gets the coin(s) placed on it to her Supply.
Event Phase
After finishing the Build Phase, resolve the Event Phase. If there is a Market Phase in the current round, it is resolved after the Event Phase. Carry out the following steps in order:
-
Resolve all the face-up Events. Carry out the effects stated on the cards. You can resolve them in any order you like. Discard the Events as you resolve them. Some Events have rules that apply in a specific phase of the game instead of being resolved in the Event Phase. These cards are also discarded in this phase.
-
When all Events have been resolved, The Countess takes the top card of the Reserve and places it in her village. This is done just like in the Draft Phase, ignoring the normal rules for Production Chains and Padlocks.
Depending on the Gold/Silver value of this villager, a number of new Event cards will be dealt:
- If the villager has a value of 10 Gold or more, deal 1 Event card.
- If the villager has a value between 1 and 9 Gold, deal 2 Event cards.
- If the villager is worth 0 gold, deal 3 Event cards.
If the villager has a Silver Symbol, calculate its current Gold value and deal Event cards according to the rules above. Example: If the villager is an Ore Muler that is currently worth 9 Gold because The Countess has 6 Ore Symbols in her village, you deal 2 Event cards.
Switching From Summer to Winter Events
Events are dealt face-up from the Summer Events deck until the First Market Phase has been resolved. In the rounds after it has been resolved, they're dealt from the Winter Events deck.
The Jester
The Jester belongs to the player and can be played at any time. As described on his card, he allows you to immediately discard an Event. He cannot be used to discard an Event that has already been resolved or is in the middle of being resolved (when The Countess gets a face-down card from the Conscription event for example, you cannot discard the Event after looking at the card!). He is discarded after use, so can only be used once. The Jester is not in the player's hand, and so cannot be traded in for a Basic Villager.
Market Phases
The Countess scores exactly like a player in the Market Phases (including Silver Symbols in the Second Market Phase). The Gold on the Countess Card is included in the scoring.
The Final Round
In the final round, when the Second Market Phase (and the end of the game) has been triggered, the Countess does not place the top card of the Reserve into her Village.
Winning the Game
You win if you have more Gold than The Countess in your Supply at the end of the game.
Beginner Mode
For a more forgiving game (recommended if playing for the first time!), make the following changes:
-
Only deal 1 Event each round, regardless of what villager The Countess gets at the end of the Event Phase.
-
Flip the Countess Card over to the side that has no Gold on it.
-
Remove the "It was you" Event card from the Winter Events.
Hard Mode
For a more challenging game, make the following changes:
-
Deal 2 Event cards at the beginning of the game instead of 1.
-
Remove the Jester from the game.
-
Remove the "It was you" Event from the Winter Events.
-
Give The Countess 10 starting Gold instead of 1.
Additional Solo Mode Rules
Running Out of Events: If you manage to run out of Events in a deck (Summer or Winter), shuffle the discarded Events and create a new stack from them.
Events in Other Phases: Most events do nothing until they are resolved in the Event Phase. The text on these events all start with the word Event in bold letters. Other events affect specific phases of the game, specified in bold letters on the cards. These events have an effect that will remain in play during the specified phase of the upcoming round. The Rats event for example will affect the upcoming Draft Phase. If you get an event like this at the beginning of the game, it will be in play during the first round.
Events Affecting The Road: Some Events let The Countess take villagers from the Road. If it's a face-up card, replace it with one from the leftmost Stack as you would in the Draft Phase. Cards being acquired from The Road in the Event Phase can trigger the Market Phases (and the end of the game!).
Empty Reserve: If you need to draw a villager from the Reserve after it has run out, if you have the Conscription event in the final round for example, shuffle the Discard Pile to create a new Reserve from it.
Villagers with Coins: Sometimes The Countess will steal villagers from your Village. If they have any coins placed on them, they will go to your Supply.
The Founders: Your Founders cannot be removed from your Village by Events.
Running Out of Gold: Many events make you pay gold to the Bank or The Countess. If you don't have enough Gold to pay, you simply pay as much as you can. If you run completely out of Gold you don't have to pay anything.
Kickstarter Expansion Pack: The expansions in the Kickstarter Expansion Pack are not recommended for use with this solo mode, as they're not balanced for it. Having said that, it can be fun to houserule and add parts of the expansions anyway. Perhaps you want an easier game and give yourself a Scoundrel and a Saint. And maybe try to compete with The Countess for a Development or two?
Clarifications
Top Villagers: Some Special villagers and Solo Mode Events refer to Top Villagers. A Top Villager is a villager in your Village with no other villagers placed on top of it. This includes any villagers with no cards beneath them, like Solitary villagers for example.
Apprentice: The Apprentice can swap places with any villager in any Village that is covered by another card in its Production Chain. He can be used in other player's Villages, or in your own. The card he swaps places with must then be placed in your Village immediately, following the normal rules for placing Villagers. Using the Apprentice only uses up one build action, not two. Though the Apprentice cannot be used to steal another player's Founders (as stated in the rules for Special Villagers), he can be used on your own Founders, if they have at least one card placed on top of them. If you do you can choose which side of them you place face-up.
Monk: The Monk can be used as any villager, as long as you don't make him the top card of a Production Chain. This means he will always be placed at the same time as another villager, with the Monk below the other, taking the role as one of the villagers in the Production Chain. The Production Chain he is used in must have all the other cards in correct order. 2 Monks can be used in the same Production Chain.
Monks and Apprentices: These do not act as the cards they are replacing, they are simply villagers with no symbols printed on them, except their Suit Symbol, they belong to the Special suit. Their purpose is to be placed below other villagers. The next villager in the Production Chain must always be on top of the Monk or Apprentice. If for any reason, a Monk or an Apprentice becomes the top card of a Production Chain, it returns back to the hand of the player whose village it was in. If an Apprentice or Monk is the bottom card of a Production Chain, it can have 2 cards on top. They must be of the same suit.
Tinner: The Tinner can unlock several cards even if they have different unlockers. It does not matter if you or some other player has the Unlocking Villagers, they can be unlocked for free by the Tinner as long as they're played in the same Build Phase. Players are allowed to mix and match, unlocking some villagers with the Tinner and some without her (to place coins on your own villagers for example).
Agent: The Agent scores as much as the Gold value of the coins placed on one of your villagers. You choose which one.
Peddler: The Peddler gives you 3 gold for every 2 Gold Symbols, not every 2 Gold. If for example the only Gold Symbols in your Village are on two Jewelers, each giving 20 Gold, a Peddler will score just 3 Gold.
Wood Carver: This one scores the total value of all Gold Symbols on your Wood Villagers. If you have 1 Cartwright and a Cooper for example your Wood Carver will earn 13 Gold.
Horse Trader, Log Rafter, Priest: These include their own Suit Symbols when scored. Some villagers have two Suit Symbols, this makes them more valuable when scoring these.
Round Summary
Draft Phase
Players take turns drafting villagers one at a time up to their Drafting Limit (2 + 1 for each Food, max 5). Players must draft up to their Drafting Limit.
Build Phase
Each player in turn does all their actions for the Build Phase:
- Place villagers into their Villages up to their Build Limit (2 + 1 for each Builder, max 5). Players may choose to play fewer villagers than their Build Limit if they wish. Padlocks must be unlocked.
- Return villagers to the stacks on the Road in exchange for Basic Villagers (max 3).
- Play Special villagers. Those that are discarded do not count towards the Build Limit.
At the end of the Build Phase, the First Player Card is passed clockwise to the next player.
Market Phases
If a Market Phase is triggered, it happens after the Build Phase:
- When the first two stacks on the Road are emptied, the First Market Phase happens. The Gold in each Village (both printed and placed as coins) is scored. Coins are not removed from villagers, and Silver Symbols are not scored.
- When all stacks on the Road are emptied, the Second Market Phase happens. The Gold in each Village (both printed and placed as coins) is scored, as well as Gold earned from Silver Symbols.
Villager Suits
Wood, Hay, Ore: All villagers in these suits are parts of production chains starting with the Basic Villagers. These make up almost half the villagers on the Road. Tip: focus on one of these suits.
Grapes, Wool and Leather: There are just a few villagers in each of these suits, and instead of starting with Basic Villagers the first cards in their production chains must be drafted from the Road. Tip: if you've started collecting these, draft more of them face-down.
Grains: These villagers form production chains starting with the Founders. Remember you can only have 2 villagers on top of the Founders! Tip: all of these provide Food.
Solitary: These villagers do not form Production Chains, instead they can be placed on their own.
Special: These have special rules. Remember that those that are discarded don't cost any build actions to use. Tip: if you don't know what to draft from the Road, draft a face-down Special, it will probably be useful.