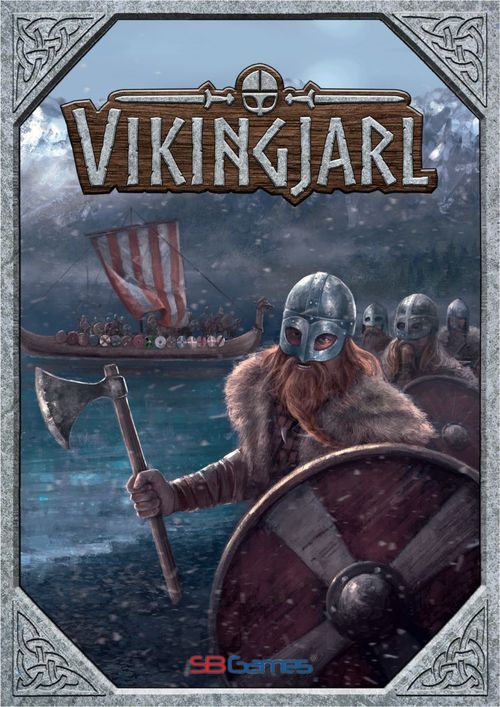
Vikingjarl
Vikingjarl Rulebook
Table of Contents
Table of Contents
Introduction of the Jarls
- Harald Hawkeye is the oldest of the siblings and would normally be first in line to inherit the throne. He is wise and known as a skilled tactician in battle. His name comes from his unusually sharp eye, which often spots enemies at extreme distances.
- Gudrun Ravenheart is the second oldest of the siblings. She is a shieldmaiden and an expert with the bow and arrow, which she uses with deadly precision. Gudrun is said to be one of the best warriors in the Kingdom.
- Eirik Dragonblood is the second youngest of the siblings. He is a strong and ferocious warrior that has conducted himself with honor in battle. His preferred weapon is the battle axe, that he swings mightily and savagely.
- Brage Graywolf is the youngest of the siblings. He is exceptional with sword and shield, but has a tendency to charge headfirst into battle without regard for himself. Brage is either the bravest of his siblings or the most foolhardy.
Overview
The game is turn-based and each of the Jarls each take turns moving their Ship and Army around the game board using Pawns, Dice, and Playing Cards.
To obtain the Victory Points (VP) needed to win the game, you have to Pillage, Trade, Settle, and Fight against the other Jarls. The main goal of the game is to reach a predetermined number of VP.
Each player performs three phases during their turn (see pages 8-12, Gameplay, Phases, and Examples).
- Phase 1: Draw Saga.
- Phase 2: Movement - Action or Action - Movement.
- Action: Pillage, Attack, Trade, and Settling.
- Phase 2.1: Recruitment - Recruiting Vikings at no cost.
- Phase 3: Discard Saga.
Sagas (cards) can be used during the game. Use and rules for Sagas are described on each card (pages 8 and 14-16).
You can also play the game with advanced or alternative rules. More information on this can be found on page 13.
How to Win the Game
The first Jarl (on their turn) who reaches the agreed upon number of VP or more, and returns home to Kaupang with the Ship or the Army (to tell the King), has won the game.
For a standard one-hour game, you should play to 10 VP (page 13).
Game Components
Dice
- 8 Battle dice. Black values: 3 hit - 3 miss. White values: 2 hit - 4 miss. Red values: 4 hit - 2 miss.
- These dice are used for Attack (black) and Defense (white) when you do Battle (pages 9-10). Each dice has values with hits and misses.
- IMPORTANT: The red dice are used only in special cases with Sagas.
Units
- Ships and Armies. These units are used to move around the game board (pages 8-9). Ships can move up to 3 sea zones. Armies can move up to 2 land zones.
- Vikings. These units are used for Pillage, Attack and Defense (pages 10, 12). They can be purchased for 1 Silver each, or can be recruited at no cost.
Silver and Resources
- Silver - Value 1. This is the money you can Pillage and Loot to use for purchasing Resources, Vikings, and Sagas.
- IMPORTANT: You keep your Silver in front of you and the amount is open information.
- Resources (cubes) - 3 types. These are resources you buy in Trade towns to use for Settling (page 11). They can be purchased for 2 Silver each. The three types are Wood, Iron, and Mead.
Cards (Sagas) and Tiles
- Saga. Sagas are cards players use during the game on themselves or their opponents. Sagas are kept secret and their use and rules is described on the individual cards. See page 8, Phase 1 - Draw Saga. Overview and tips of the Sagas, see pages 14 - 16. There are 59 cards in the deck.
- Settlement tiles. These tiles show which Settlements you can build. To build a Settlement, you need to pay one of each Resource: Wood, Iron and Mead. You can store Resources and Vikings in your Settlements, placed on the tile as shown on the tile. See page 11, Phase 2 - Action - Settling.
- First player token. Can be used on the Score Track with alternative rules (page 13).
Shields, Tokens, Towns, and Places
Tokens (Shields)
- Settlement shields (16). Used to indicate Settlements and are placed with crest facing up. Damage shields: used to indicate Settlements that are damaged. To repair a Settlement, you only have to return to it with your Ship or Army, and flip the Settlement shield back over (page 12).
- Orange shields (two different). Indicate the Pillage towns. Here you can pillage Silver. Printed on the map. The front shows the number of defenders (1 defender or 3 defenders). The back shows the amount of Silver per surviving Viking you get after a pillage (1 Silver or 2 Silver).
- White shields (12 VP town shields). Used to indicate the VP towns. Placed facing down. Flipped when attacked. The front shows the number of defenders (1 defender or 2 defenders) and the amount of VP you gain after a successful attack. The back shows the free reward collected from the town (2 free Silver or 1 free Resource), and VP after a successful attack. The white shields are removed from the game board when successfully attacked, or when Resources or Silver are collected.
- Green shields (two different tokens). Used to indicate Trade towns. Placed facing down. Flipped when trading and remain flipped. There are 7 Trade town shields (3 green, 4 green/white).
Towns and Places
VP towns (white shields), shown with their VP value:
- Reykjavik (6 VP)
- Husavik (6 VP)
- Faereyjar (5 VP)
- Iona (5 VP)
- Man (5 VP)
- Cork (5 VP)
- Normandie (5 VP)
- Noirmoutier (5 VP)
- Hjaltland (4 VP)
- Orkneyjar (4 VP)
- Jorvik (4 VP)
- Rouen (4 VP)
These can be attacked for VP, and/or they can be settled for VP.
Pillage towns (orange shields): Gijon, Jomsburg, Lindisfarne, Paris, London. These can be pillaged for Silver, but not settled.
- Paris and London: You gain 1 VP after a successful pillage/attack.
Trade towns (green shields):
- Trade towns 1: Dorestad, Birka, Ribe.
- Trade towns 2 (these have 2 types of Resources): Nidaros, Truso, Dublin, Santiago de Compostela.
In a Trade town you can buy and sell Resources (Wood, Iron, Mead), buy or recruit Vikings, and buy Sagas (Trading, page 11).
- Pillage and VP towns: Only one Jarl may be in a town at one time. If another Jarl is there, you cannot enter it.
- You cannot Pillage the same town two turns in a row. If you lose the battle or want to retreat, you have to move out of the Town to a nearby land or sea zone.
- You cannot take VP and settle the same place in the same turn.
- You do not have to attack a VP town before you settle there (page 10).
- Trade towns: Opposing Ships and Armies may be in the same Town at the same time.
Kaupang (Kaupang Holding Area): In Kaupang (Game board) you can buy or recruit Vikings, and buy Sagas. You can sell Resources (Wood, Iron, Mead). You can store Vikings and Resources on your Player board. You cannot loot or take stored Resources from other Jarls in Kaupang.
Settlements: You can buy Vikings in your own Settlements without having the Ship or Army present there. This can also be done in Kaupang.
IMPORTANT: You cannot attack other Jarls in Kaupang or any Towns, only in land or sea zones and in Settlements. To attack other Jarls in land or sea zones, Armies from both sides must be present (page 11).
Land and sea zones: Opposing Armies and Ships may be in the same land and sea zone without attacking each other.
Game Board
The game board shows a map of Vesterled (Northern Europe). The board has the following map symbols:
- VP Score Track.
- VP Score Track start (0).
- Saga Deck.
- Saga Discard Pile.
- Turn phases.
- Prices.
- Sea zone / River.
- Land zone.
- "This zone" cannot be moved over/through.
- Crossing point - Armies can move across the sea or river without being aboard Ships.
- Battlezone - Place Vikings here during battle (Attack and Defense).
- Vinland - Place a 1 VP token here.
- Midjardarhaf - Place a 1 VP token here. Vinland and Midjardarhaf: the first Jarl to go there gets the VP token (page 13).
- Pillage towns - Marked with orange shields.
- VP towns/Settlement - Marked with white shields. Vikings (white) are used for defense of Towns.
- Trade towns - Marked with green shields.
- Trade towns - Marked with green/white shields.
- Kaupang - Start of the game and home port.
- Ship and Army (Units).
- Settlement tiles.
- Victory Point tokens.
- Resources (Wood, Iron, Mead).
- Silver.
- Player board (Holding Area - See next page).
- Vikings (Units).
IMPORTANT: Towns are considered separate zones, and you must use one move into the Town and one move out of it.
- Pillage towns (orange) and VP towns (white): Only one Ship/Army (one player) can occupy a Town at a time.
- Trade towns (green) and Kaupang: Several Ships/Armies can occupy the same Town at a time.
- Land and Sea Zones: Several Ships/Armies can occupy it at a time, without attacking each other.
Player Board
Ship, Army and Kaupang Holding Area
The Ship and Army Holding Areas (two separate squares) show where you can store your Cargo.
- The Ship has 4 Cargo spaces (shields) that can each hold 1 Viking or 1 Resource, and 1 Cargo space (shield) for the Army.
- The Army has 5 Cargo spaces (shields) that can each hold 1 Viking or 1 Resource.
IMPORTANT: Each Cargo space (shield) can hold one item, which is placed on the Player board as shown on the board.
The player board key:
- a. The Jarl (player)
- b. Ship Holding Area
- c. Army Holding Area
- d. Cargo space
- e. Army Cargo space
- f. Viking (unit)
- g. Resource (cube)
- h. Army (unit)
- i. Turn phases
- j. Prices (trade)
- k. Kaupang Holding Area (here you store Vikings and Resources)
The Army is only considered aboard the Ship if it is placed on the "Army space" e of the Ship Holding Area. With the Army aboard the Ship, you can hold up to 9 items (Vikings and/or Resources) in total.
Preparations and Setup
- Each player takes a set of pieces in their colour (red, blue, yellow, or black).
- Shuffle the white shields face down and place them randomly on the white spaces on the game board.
- Shuffle the green shields and green/white shields face down and place them randomly on the green and green/white spaces on the game board.
- Place a 1 VP token on Vinland and Midjardarhaf.
- Place the Sagas (cards) on the game board. IMPORTANT: See page 14 "How to shuffle the deck".
- Place the Settlement tiles and VP tokens in piles to form a general supply.
- Place the Resources and Silver in piles to form a general supply.
- Place the 3 white Vikings on the game board.
- Each player starts with 1 Ship, 1 Army, 1 Player board and 4 Vikings. Place the Ship and Army in Kaupang, and assign the 4 Vikings to your Ship and/or Army Holding Areas on the Player board.
- Each player places 1 Viking on the VP Score Track start (0).
- Place the rest of the Vikings and the Settlement shields next to the Player board in front of you.
- Who starts the game? The last person that traveled on a boat/ship at sea is first player.
- The first player receives 1 Silver, the second player receives 2 Silver, the third player receives 3 Silver, and the fourth player receives 4 Silver.
- The last player draws Sagas equal to the number of players at the table, plus 1 extra Saga (4 players = 5 Sagas). Pick 1 Saga and pass the rest to the player to the right (card drafting), which will do the same, and so on. The first player picks 1 Saga and puts the last Saga back in the deck.
Gameplay, Phases, and Examples
The game is turn based and each turn, the players move their Ships and Armies around the game board in an attempt to build Settlements (white shields) and reach a predetermined amount of VP. In order to obtain the Resources to build a Settlement, you must first Pillage towns (orange shields) for Silver, which you can later use to buy Resources at the Trade towns (green shields). Once you have the necessary Resources, you can build a Settlement. You can also fight your way to victory by attacking Towns worth VP as well as the other Jarls.
Before you start the game, all the players agree upon a set number of VP needed to win the game.
Each player performs three phases during their turn.
- Phase 1: Draw Saga. You must draw 1 new Saga at the beginning of each turn at no cost.
- Phase 2: Movement - Action or Action - Movement. Move your Ship and Army around the game board to do different Actions: Pillage (page 10), Attack (pages 11, 12), Trade (page 11), and Settling (page 11).
- Phase 2.1: Recruitment. You can recruit Vikings at no cost (page 12).
- Phase 3: Discard Saga. You can only have 3 Sagas in your hand at the end of your turn (page 12).
IMPORTANT: The Ship and Army each have their own separate phases. For example: You can choose to do Movement - Action with the Ship, and Action - Movement with the Army. You can only do one Action at a time with each unit.
Phase 1 - Draw Saga
These can be used anytime during your turn or in a specific phase, as noted on the card. Each player draws 1 Saga at the beginning of their turn and you can have a maximum of 3 Sagas in your hand at the end of your turn.
IMPORTANT: You can only play 1 Saga on each opponent each turn, but you can play as many Sagas on yourself as you like.
IMPORTANT: Sagas can be bought for 2 Silver in every Trade town, Kaupang, or your Settlement and you are limited to purchasing a maximum of 3 Sagas per turn. Use and rules for Sagas are described on each card (pages 14-16).
Phase 2 - Movement
The Ship can move up to 3 sea zones and the Army can move up to 2 land zones. You can move your Ship or Army less than the maximum of movements.
Towns, Kaupang, and Settlements are considered separate zones. Ships and Armies may enter or leave at the cost of 1 move. You must use 1 move into the town, and also 1 move out of it (e.g. the sea outside Ribe is considered a sea zone and the Town of Ribe is a separate zone (see example below).
Opposing Armies and Ships may stay in the same land or sea zone without attacking each other.
Ships cannot move across land and Armies cannot move across sea. An Army can only enter a sea zone aboard the Ship, but there are certain areas that are exceptions: Crossing points.
The Army can only be picked up or dropped off the Ship in Towns, Kaupang, or Settlements. Picking up and dropping off the Army is not considered a move (see example next page).
Example: Movement. Kaupang and the sea zone around it are two separate zones. An Army can only enter a sea zone aboard the Ship, but there are certain areas that are exceptions - Crossing points. For example, Jarl Eirik Drageblod starts the game and can move his Ship with the Army aboard 3 zones to just outside Lindisfarne/Jorvik, or split them up and move the Ship 3 zones to Ribe and the Army 2 zones to just outside Ribe (He could also have moved his Ship with or without the Army aboard into Hjaltland or Jomsborg). Eirik decides to move towards Lindisfarne/Jorvik.
Example: Movement II. "The Midgard Serpent" area is not a sea zone and is considered impassable. You have to move your Ship around it.
Example: Movement III. The Army can only be picked up or dropped off the Ship in Towns, Kaupang, or Settlements on the map. The Army can also move one space from a land zone into the Town and be picked up by the Ship (Fig. 1). The Ship must be in the Town at the beginning of your turn to do this. The Army can only move one space from a land zone, into a Town being picked up.
Example: Movement IV. You can move your Ship into a Town and move the Army further out of the Town to a land zone (Fig. 2). The Army can only move one space out of the Town to a land zone being dropped off. The Ship ends its movement in the Town, even if it has movement remaining.
Example: Movement V. Your Ship can pick up or drop off the Army on its way. You can move your Ship into a Town, pick up the Army, and continue moving your Ship (Fig. 3). To pick up the Army, it must be in a Town, Kaupang, or a Settlement at the beginning of your turn. You can also drop off the Army in a Town. If you drop off the Army it cannot move on, if you want to move your Ship further.
Battle
First, announce what or who you are attacking. Before rolling the dice, both you and your opponent must place the number of Vikings (units) that will participate in the battle in the Battlezone, to determine the number of dice that you will each roll. Both players roll simultaneously (Battle examples see pages 10 and 12).
- The Attacker will roll 1, 2, or 3 black dice, depending on how many Vikings participate in the attack. To roll 3 dice, there must be at least 3 Vikings in the attack. Attackers roll a maximum of 3 dice, even if more than 3 Vikings are declared in the attack. IMPORTANT: Up to 2 of the Attacker's dice apply.
- The Defender will roll 1 or 2 white dice: To roll 2 dice, there must be at least 2 Vikings in the Town or Army that is under attack. Defenders roll a maximum of 2 dice, even if 3 Vikings are declared in defense. 4 Vikings roll 3 dice. Up to 2 of the Defender's dice apply.
Battle resolution. The players compare the dice that they rolled.
- Helmet = Hit/Kill. All dice depicting a Helmet is a Hit/Kill, for both sides.
- Shield = Miss. All dice depicting a Shield is a Miss, for both sides.
- Neither side can lose more than 2 Vikings in each roll.
Battle result examples (as printed):
- 3 Attackers vs. 1 Defender: Result: Defender loses 1 Viking.
- 3 Attackers vs. 2 Defenders: Result: Defender loses 1 Viking and Attacker loses 1 Viking.
- 2 Attackers vs. 2 Defenders: Result: Defender loses 2 Vikings and Attacker loses 1 Viking.
- 1 Attacker vs. 2 Defenders: Result: Attacker loses 1 Viking.
Phase 2 - Action: Pillage and VP
Pillages and attacks are done by moving the Ship and/or Army into the Town you want to attack, marked with an orange shield (Pillage) or white shield (VP) on the game board.
The attacker places the desired number of Vikings in the Battlezone, up to a maximum of 5 Vikings. The same is done by the defender (the number is marked on the shield). The Jarl to your left acts as defender. During the battle, the attacker may resupply Vikings from any Ship or Army present. IMPORTANT: If you lose the battle or you want to retreat, you must move out of the Town to a nearby land or sea zone.
Only one Jarl may be in a Town at any given time. If another Jarl is in a Town, you cannot enter it.
The attacker rolls dice equal to the number of Vikings present in the battle - up to a maximum of 3 dice. The defender rolls the number of dice equal to the number marked on the shield (max. 2 dice) or equal to the number of Vikings in the Army (max. 3 dice). Both sides then arrange their dice and count the Hits (2 best dice apply). The winner of the battle is the player who has killed all Vikings on the opposite side (last man standing). If the Attacker loses or withdraws (in a town), they must move to an adjacent land/sea zone.
IMPORTANT: You cannot attack the same town with your Ship and/or Army in consecutive turns.
The amount of Silver pillaged from an (orange) Pillage town is equal to the number of all your surviving Vikings multiplied by the value on the Town (silver icon). For example, if the Town has a value of 2 and 4 Vikings remain, you pillage 8 Silver. Successfully attacking Paris or London also awards 1 VP as well. The amount of VP awarded from white Towns is equal to the number on the white shield (see "Example: Attack Man" below). You can also get free Silver and Resources in these Towns (see backside of the shield-token).
Example: Pillaging Lindisfarne. Eirik Dragonblood decides to Pillage Lindisfarne with his Ship with 4 Vikings. He moves his Ship into Lindisfarne (Fig. 4). The attack occurs when Eirik puts his 4 Vikings in the Battlezone as shown (Fig. 5), and places 1 defender (white pawn) in the Battlezone for the 1 defender shown on the orange shield. Eirik rolls the maximum of 3 dice and gets 3 Shields (miss). The defender rolls 1 die and gets a Helmet (hit). Lindisfarne wins the first battle (Fig. 5). Eirik removes a Viking that was killed, but can continue attacking with his 3 remaining Vikings. He rolls again and gets a Helmet. The defender rolls and gets a Shield. Eirik wins the second battle, killing Lindisfarne's only defender and successfully pillaging the Town (Fig. 6). Eirik pillages 3 Silver as he has 3 surviving Vikings and the Town's value is 1 (3 x 1) (Fig. 7). He places the Silver in front of himself and places the Vikings back in his Ship's Holding Area (Fig. 8).
Example: Attack Man. Harald Hawkeye decides to attack Man with his Ship with 4 Vikings. He moves his ship into Man (Fig. 9) and flips the VP shield. The attack occurs when Harald puts the 4 Vikings in the Battlezone (Fig. 10), and places 2 defenders (white pawns) in the Battlezone for the 2 defenders shown on the white shield. Harald rolls the maximum of 3 dice and gets 2 hits. The defender rolls 2 dice and gets 2 misses. Harald wins the battle with his 2 hits, killing Man's only defenders and successfully attacking the Town. Harald takes the VP shield, gains 2 VP, and places the Vikings back in his Ship's Holding Area.
Phase 2 - Action: Attack Other Jarls
Armies can attack each other on land. Ships can attack each other at sea if the Armies are on board both Ships. Attacking and defending are the same as when Pillaging (see previous page). The winning Jarl gains 1 VP. The winner can also take 1 Resource (from the Army) or 3 Silver from the defeated Jarl. If you attack an army without Vikings in it, you gain no VP from this battle, but you can still take 1 Resource or 3 Silver. Regardless of the outcome of the battle, both Ships and/or Armies remain in the same land/sea zone (Attacking another Jarl's Settlement, see next page).
IMPORTANT: Only Armies can attack each other. You cannot attack other Jarls in Kaupang or any Towns - only in Settlements and land/sea zones.
Phase 2 - Action: Trading
Several Ships/Armies may occupy the same Trade town at the same time. Trading is done by moving the Ship or Army into the Trade town that you want to trade with (marked with a green or green/white shield). Flip the shield over when you move onto it, to see what type of Resources are available.
You can buy as many Resources as your Ship/Army can hold. The types of Resources are Wood, Iron and Mead, and these cost 2 Silver each. You can also buy up to 3 Sagas for 2 Silver each and as many Vikings as you like for 1 Silver each. You can also buy Sagas and Vikings in Kaupang or in any of your Settlements.
You can sell Resources for 3 Silver each in all Trade towns, but only Resources that the Trade town does not have/produce. You can sell all types of Resources for 3 Silver each in Kaupang, or any of your Settlements.
Example: Trade with Dorestad. Eirik Dragonblood intends to use the Silver he earned from his previous pillage to trade with Dorestad. Eirik moves out of Lindisfarne and moves into Dorestad (Fig. 11). He flips the green/white shield and spends 2 Silver to buy 1 Iron and 1 Silver to buy 1 Viking. He places these in his Ship Holding Area (Fig. 12).
Phase 2 - Action: Settling
This is done by moving the Ship or Army into the place that you wish to settle (the places are marked with a white shield on the game board). To settle, you must have 1 Wood, 1 Iron and 1 Mead. Settling occurs when you pay these 3 Resources and place one of your Settlement shields on the game board. You do not have to fight the VP town before you settle there. Take the Settlement tile and place it face up on the table in front of you. You have now created a Settlement and can store Resources and Vikings here. A maximum of 4 Vikings can defend each Settlement.
You cannot attack and settle the same VP town in the same turn. This must be done in two separate turns.
Example: Settling Jorvik. After much pillaging and trading, Eirik Dragonblood has filled his Ship with the Resources necessary to build a Settlement. Choosing to settle Jorvik, Eirik moves his Ship there, pays the required Resources (Fig. 13), and places a Settlement shield on Jorvik (Fig. 14). He takes the Settlement tile, places it in front of him, and gains 4 VP (Fig. 15). Eirik may now utilize Jorvik to store any amount of Resources and up to 4 Vikings.
Phase 2 - Action: Attacking Settlements
This is done by moving the Ship or Army into the Settlement you want to attack. Attacking and defending of Settlements is the same as Pillaging (see page 10).
An attack on a Settlement is successful when you have killed all of its defending Vikings. After a successful attack, you can take all of the Resources you can carry. The defender loses the amount of VP shown on the Settlement tile. Flip the Settlement shield to indicate that the Settlement is damaged. If the Attacker loses or withdraws, they must move to an adjacent land/sea zone.
IMPORTANT: If a Ship or Army is in the Settlement, you must fight them first. If you lose the battle or you decide to retreat, you lose 1 VP and the defender gains 1 VP, and you have to move out of the Settlement to a nearby land or sea zone. To repair the Settlement and earn the VP back, the defending Jarl must return his Ship or Army back to the Settlement. Once it is repaired, you will flip the Settlement shield back to its crest side (see below). Repairing a Settlement is regarded as an Action.
Example: Attacking Settlement. Eirik Dragonblood has gathered an Army of 4 Vikings and has decided to attack Harald Hawkeye's Settlement of Man (Fig. 16). Harald has 1 Wood that Eirik wants to loot, so Eirik moves from his land zone outside Jorvik into Man. Harald has 2 Vikings defending Man. Eirik rolls 3 dice and gets a hit. Harald rolls 2 dice and gets a hit (Fig. 17). Both Harald and Eirik get one hit, so each removes 1 Viking. Eirik rolls 3 dice again and gets a hit. Harald rolls 1 die and gets a miss. Eirik wins the battle, and Harald removes his last Viking (Fig. 18). Eirik can loot the Settlement, taking the 1 Wood and placing it and his 3 remaining Vikings back into his Army Holding Area (Fig. 19). Harald loses 5 VP (per the Settlement tile) and flips his Settlement shield to indicate that it is damaged.
Example: Repairing Settlement. Harald Hawkeye returns with his Ship to the Settlement of Man to repair it (Fig. 20). He flips the Settlement shield token so that the crest is face up (Fig. 21). The Settlement is now repaired and Harald also regains the 5 VP that he had previously lost. If an opponent is there, he must first fight them and win in order to repair the Settlement. The loser of the battle must move out of the Settlement.
Phase 2.1 - Recruitment
You can recruit Vikings at no cost. Recruiting Vikings can be done in Trade towns, in Kaupang, or in any of your Settlements. Your Ship and/or Army must be there to do this.
You can only recruit 1 Viking in each Trade town and up to 3 Vikings in Kaupang or your Settlements. For example: If your Ship is in Kaupang and your Army is in a Settlement, you could recruit 3 Vikings in both places, for a total of 6 Vikings (you cannot recruit 6 Vikings in one place, it must be done in two different places). The unit that does Recruitment cannot do Movement or Action.
Phase 3 - Discard Saga
In this phase, you discard down to a maximum of 3 Sagas (cards) in hand. You can discard Sagas with the discard symbol at the bottom of the card for 1 Silver, anytime during your turn.
Loading and Unloading Cargo
Loading/unloading Cargo is done by moving the Ship into Kaupang or your Settlement, where you can store all of your Resources and Vikings. The Army must be in a Town, a Settlement, or Kaupang, to be picked up by your Ship (the Army cannot be loaded or unloaded from land zones, page 9). You can move your Ship and Army into a Town without attacking it. You can also move Vikings and Resources between your Ship and Army if they are in the same place. Your Ship can also load or unload Vikings and/or Resources from/to the Army on the way. Loading and Unloading Cargo does not count as an action (free move).
Victory Points
Victory Points (VP) can be obtained in different ways. Here are some examples:
Gain Victory Points
- Pillage London / Paris (victory): +1 VP
- VP towns (victory): +1 or +2 VP
- Building Settlements: +4, 5 or 6 VP (the value shown on the Settlement tile)
- Battle between Jarls (victory): +1 VP
- First Jarl to Vinland and/or Midjardarhaf: +1 VP
IMPORTANT: The ship ends its movement in the sea zone where it picks up the VP.
Lose Victory Points
- Your Settlement is damaged: -4, 5 or 6 VP (the value shown on the Settlement tile)
- Players can also lose VP by some of the Sagas that are played: -1 VP
IMPORTANT: Each player places a Viking on the 0 space of the VP Score Track (Start).
The first Jarl (on their turn) who reaches the agreed upon number of VP or more and returns home to Kaupang with the Ship or the Army, is the winner.
For a standard one-hour game, you should play to 10 VP. The VP tokens are 20 of value 1 and 15 of value 5 (the printed box contents list 14 VP-1 and 16 VP-5; see Box Contents).
Advanced and Alternative Rules
More Victory Points (VP)
For a longer game, play to a higher amount of VP, up to 27 VP.
Two Players
For a 2-player game, each player takes 2 Jarls. The first player to reach the agreed upon amount of VP, with EITHER Jarl, and returns to Kaupang, wins the game. You can combine the Sagas, but not the units (Vikings, Armies and Ships).
Allied Jarls - 2 Players vs. 2 Players
You can also play with four players with two allied Jarls against each other. Pick a total amount of VP, combined for both allied Jarls, to win the game. Either of the two allied Jarls can return to Kaupang.
Suggestions for Two Players and Allied Jarls:
- Team 1: Black and Red - Team 2: Blue and Yellow.
- Order of play: Black (1st player) - Blue (2nd player) - Red (3rd player) - Yellow (4th player).
- Setup, Silver and Sagas: The same amount for each player as the regular game (page 7).
Players Turns
Use the VP Score Track to indicate players' turns instead of VP. Set an agreed upon number of turns, and count the VP at the end of the last Jarl's turn. The Jarl with most VP wins the game.
Use the first player token on the VP Score Track. This can also be used with "Allied Jarls".
Sagas
Sagas can be used at anytime during your turn or in a specific phase as indicated on the Saga. Each player draws 1 Saga at the beginning of their turn. You can only have 3 Sagas in your hand at the end of your turn.
IMPORTANT: You can only play 1 Saga on each opponent each turn, but you can play as many as you want on yourself.
You can buy Sagas for 2 Silver in every Trade town, in Kaupang, or in any of your Settlements. You can only buy a maximum of 3 Sagas each turn. Use and rules for Sagas are described on each card.
How to shuffle the deck. Sagas are shuffled in a special way. Take out the Sagas "The Gods Are Angry" and "Ragnarok" (2+1 cards). Divide the deck into two equal halves (piles). Shuffle the three removed cards into one of the piles - this will be the bottom of the deck. Shuffle the other pile and place it on top of the first pile. DO NOT SHUFFLE THE COMBINED DECK! Place the deck on the game board.
Before you start the game. The last player draws Sagas equal to the number of players at the table, plus 1 extra Saga (4 players = 5 Sagas). Pick 1 Saga and pass the rest to the player to the right (card drafting), which will do the same, and so on. The first player picks 1 Saga and puts the last Saga back in the deck.
The deck contains 59 cards: 2 of each Saga, except Pirates (4), Brage (4), Njord (4), and Ragnarok (1). (The printed card for "Brage" is titled "Bragi".)
Saga Symbols
- Movement.
- Attack.
- Defense.
- Trading.
- Lose VP.
- Discard Saga: you can discard Sagas with this symbol for 1 Silver.
Each card shows when to use the Saga (phase/turn), how to use the Saga (effect), and the discard symbol for 1 Silver.
The Sagas add drama and excitement to the game, but certain ones are more effective in certain situations. As the game progresses, you should be less conservative with your Sagas as "Ragnarok" can come up at any time once you are into the second half of the deck.
You don't play Sagas, you tell them!
Action - Attack Sagas
Pirates (Action - Attack). You can loot an opponent in the same or adjacent sea zone to your Ship. Roll 1 red die: Shield (miss): Your attack is avoided. Helmet (hit): You can take either 1 Resource OR 3 Silver. Use of this card counts as an action. Flavour: Play this Saga to "steal" Resources or Silver from other players. You don't have to be in the sea zone, or adjacent to the sea zone at the start of your turn.
Holmgang (Anytime on your turn). Choose an opponent who may lose 2 Vikings from either their Ship OR their Army. Applies anywhere. Roll 1 red die: Shield (miss): Holmgang is averted. Helmet (hit): Opponent loses 2 Vikings. Flavour: In Old Norse, Hólmganga is a duel to settle disputes. Holmgang can be translated as "to go to (or walk on) a small island". Play this Saga to cause an opponent to lose Vikings. Can be played if you want to attack an Army on land or at sea.
Midgard Serpent (Anytime on your turn). Choose an opponent's Ship in a sea zone to be attacked by the Midgard Serpent. That Ship loses 2 Vikings. Also applies for Vikings in an Army aboard a Ship. Can be played if you want to attack an Army at sea. Flavour: The Midgard Serpent, Jörmungandr in Old Norse, was conceived by Loki and Angerboda, and is the brother of Fenriswolf and Hel. It encircles the entirety of Middle Earth. Play this Saga to cause an opponent to lose Vikings.
Rebellion (Anytime on your turn). The people are rising up in rebellion. Choose an opponent. They lose 2 Vikings from either Kaupang OR one Settlement of your choice. This does not apply to Vikings on a Ship or in an Army. This Saga can be played on an opponent's Settlement to reduce the number of defenders, before you attack it. Flavour: Rebellion: open opposition toward a person or group in authority.
Barbarians (Anytime on your turn). Choose an opponent's Army in a land zone to be attacked by Barbarians. That Army loses your choice of either: 1 Resource OR 3 Silver. When you play this Saga, you don't get to keep the Resources or Silver; they are put back into the General supply on the table. Also applies for Resources in an Army aboard a Ship. Flavour: A Barbarian is a human who is perceived to be uncivilized or primitive.
Thor (Anytime on your turn). Choose an opponent's Ship in a sea zone to be caught in a thunderstorm. That Ship loses your choice of either: 1 Resource OR 3 Silver. When you play this Saga, you don't get to keep the Resources or Silver; they are put back into the General supply on the table. Flavour: Thor is the son of Odin, and married to Sif. He is considered the storm-weather god of sky and thunder and is also a fertility god. He wields the mighty hammer Mjollnir. (Kickstarter backer card.)
Loki the Trickster (Anytime on your turn). Choose an opponent and take 1 random Saga from them. You draw the Saga from your opponent. Play this card to "steal" 1 Saga from other player. Flavour: Loki is deceitful and shrewd. He gets magical powers and is taken up by the Æsir after mixing blood with Odin. Loki is the father of Hel, the wolf Fenrir, and the Midgard serpent. (Kickstarter backer card.)
Movement and Movement/Defense Sagas
Freya (Movement). Choose and move an opponent's Ship and/or Army from a Town OR Settlement you are entering, to an adjacent sea zone and/or land zone of your choice. This Saga can be played to force an opponent's Ship/Army out of a Settlement or Town that you want to attack or move into. Flavour: Freyr, the son of Njord and twin brother of Freyja, guides his magic ship, Skidbladnir, ahead of an ever-favorable wind. (Card title as printed on the card.) (Kickstarter backer card.)
Ægir (On an opponent's turn). Choose an opponent to be caught in a storm. Move their Ship OR Army to an adjacent sea zone or land zone. This Saga can be played to force an opponent one zone back. You can play this card after the opponent is finished with their Movement phase. Flavour: Ægir (Aegir) is a Jotun who rules over the sea. He is married to Ran and has nine daughters who are the waves. Ægir is the brother of wind and fire. (Kickstarter backer card.)
Bragi (Movement / Defense). Your Army is rested and well-fed. Move your Army 1 additional land zone. OR use this to cancel the Saga, Ægir. This Saga can also cancel the card Ægir if you haven't used it on your movement phase (when an opponent plays Ægir on you). Flavour: Bragi, the god of poetry and art, also serves as Valhalla's kitchen master. He is the son of Odin and married to Idunn. (Kickstarter backer card.)
Njord (Movement / Defense). You benefit from favorable seas. Move your Ship 2 additional sea zones. OR use this to cancel the Saga, Ægir. This Saga can also cancel the card Ægir if you haven't used it on your movement phase (when an opponent plays Ægir on you). Flavour: Njord is the god of the winds and the sea. He is the father to Freyja and Freyr. (Kickstarter backer card.)
Trading, Pillaging and Attack Support Sagas
Vikingjarl (Anytime on your turn). Your leadership brings fresh recruits. Choose 1 or 2 opponents. They each lose 1 Viking of their choice. For each Viking lost this way, place 1 of your own Vikings in Kaupang. Applies to Vikings anywhere. IMPORTANT: Exchange and place the Viking(s) of your own colour in Kaupang, not the opponent's Vikings. Flavour: Jarl (Earl): free person of good family and high birth. (Kickstarter backer card.)
Berserk (Action - Attack). Play this before you make your attack. You roll 3 black + 1 red dice the first 2 rounds, regardless of your number of Vikings. 2 best dice apply. You must have at least 1 Viking in the attack. This is an attack card that gives you 1 extra red die. You can play this Saga when you attack London or Paris. Flavour: Berserkers, meaning "bearskin", were warriors that whipped themselves into a frenzied state before battle, and conducted ferocious attacks.
Tyr (Action - Attack). Play this after you make an attack roll. You may change the result of 1 black die to a hit. Can be used anytime during the attack and applies to one roll only. This is an attack card that allows you to change the results of one die. You can change from a miss to a hit. Flavour: Týr, the god of war and victory, reigns over the battlefield. He sacrificed his arm to the wolf, Fenrir.
Valhalla (Action - Attack). Play this before you make an attack. For this entire attack, any of your Vikings that are killed are placed in Kaupang. This is an attack card that lets you keep all of your Vikings that "die" in a battle. You can pick them up in Kaupang. Flavour: Valhalla is the celebratory hall in the great and mighty castle Asgard. Fallen Vikings are brought here by the Valkyries to drink and feast for eternity.
Silver Treasure (Action - Pillaging). Play this after successfully Pillaging a Pillage town. You receive 3 additional Silver. Play this Saga to gain 3 additional Silver after you successfully Pillaged a (orange) Town. Flavour: The Vikings established a "bullion economy" in which weighed silver was used as a means of exchange.
Freyja (Anytime on your turn). Place 2 Vikings for free in Kaupang or one of your Settlements. This Saga can be played to build up your Settlement's defense. Flavour: Freyja is the goddess of love and fertility. The daughter of Njord and Freyr's sister. (Kickstarter backer card.)
Good Trade (Trading). Play this when your Ship or Army is in a Trade town. You receive 1 free Resource of your choice. IMPORTANT: This Saga can only be used in Trade towns. It does not count as an action. You can sell this Resource if you need Silver (3 Silver). Flavour: The Vikings developed several trading centers both in Scandinavia and abroad as well as a series of long-distance trading routes during the Viking Age.
Longships (Anytime on your turn / Defense). You can move 2 Vikings or 1 Resource from Kaupang to a Trade town (your Ship or Army must be present in the Trade town) OR to one of your Settlements. Can be played as Defense of a Settlement. Transport Vikings or Resources from Kaupang. The Ship and/or Army has to be present in the Trade town, but not in the Settlement. If played in Defense you need Vikings in Kaupang. Flavour: A Longship was a type of ship invented and used by the Vikings for trade, commerce, exploration, and warfare. They were long and narrow, with a shallow-draft hull designed for speed.
Defense Sagas
Shield Wall (Defense). Play this when an opponent Attacks you. Roll 3 white + 1 red dice in defense the first 2 rounds, regardless of the number of defenders. 2 best dice apply. The attacker cannot withdraw in the first round. This is a defense card that can be played if you are being attacked. It is useful in defense of a Settlement, and you don't need Vikings there to use it. Flavour: A shield wall is a makeshift fortress of overlapping shields for defensive purposes.
Frigg (Defense). This Saga cancels either: Odin's Wrath OR Freyr. Flavour: Frigg, Odin's wife, is the goddess of love and fate. She is associated with foresight and wisdom. Her power is immeasurable. This is a defense card that cancels some of the Sagas being played against you as specified on the card. (Kickstarter backer card.)
Balder (Defense). This Saga cancels either: Midgard Serpent OR Thor. Flavour: Balder, son of Odin and Frigg, is the god of purity, joy, and the summer sun. He was killed by his brother Hod with an arrow made of mistletoe. This is a defense card that cancels some of the Sagas being played against you as specified on the card. (Kickstarter backer card.)
Heimdall (Defense). This Saga cancels either: Barbarians OR Rebellion. Flavour: Heimdall is the guardian of Bifrost, the rainbow bridge that connects Asgard and Midgard. He will blow his horn, Gjallarhorn, before Ragnarok. This is a defense card that cancels some of the Sagas being played against you as specified on the card. (Kickstarter backer card.)
Stronghold (Defense - Towns). Play this before an opponent's Attack on a Pillage town. Roll 2 white + 1 red dice in defense the first 2 rounds, regardless of the number of defenders. 2 best dice apply. The attacker cannot withdraw in the first round. Flavour: Strongholds were well-defended bastions of safety against Viking attacks. This is a defense card that can be played if another player attacks Pillage- or VP Towns. It is played on your opponent's turn, before they begin their attack (roll).
Odin's Wrath (Anytime on your turn). Choose an opponent. They lose 1 VP. This cannot be used against an opponent with 0 VP. Flavour: Odin, the All-Father, controls Valhalla and is the wisest and most powerful of all the gods. He is often accompanied by the wolves Geri and Freki, and the ravens Huginn and Muninn. This Saga can be played to cause an opponent to lose 1 VP. (Kickstarter backer card.)
The Gods Are Angry (card must be read aloud when drawn; applies to ALL Jarls). All Jarls must remove 2 Vikings (Blót) from the game/player board. If you do not have 2 Vikings, lose 1 VP instead. Flavour: Blót is the term for "sacrifice" in Norse paganism. A blót could be dedicated to any of the Norse gods. The sacrifice involved aspects of a sacramental meal or feast. If you don't have 2 Vikings (1 or less) when this Saga is drawn, you lose 1 VP. This card applies to all Jarls.
Ragnarok (card must be read aloud when drawn; applies to ALL Jarls). All Jarls discard all of their Sagas down to 1 Saga. (Select and keep 1 Saga in your hand.) Flavour: Ragnarok is the ultimate battle, believed to result in countless deaths as well as widespread natural disasters including the drowning of the world. Ragnarok is a special Saga that comes into play when drawn. IMPORTANT: You can select 1 Saga and keep it in your hand. Discard the rest. You do not get silver for these discarded Sagas.
The Viking Age (History)
Printed history section. Included as a short summary of the printed page.
The term Saga originates from the Norse saga (pl. sögur), and refers to "what is said, statement" or "story, tale, history". Sagas are stories about ancient Nordic history, early Viking voyages, the battles that took place during the voyages, about migration to Iceland, and of feuds between Icelandic families. They were written in the Old Norse language, mainly in Iceland.
From around A.D. 800 to the 11th century, a vast number of Scandinavians left their homelands to seek their fortunes elsewhere. These seafaring warriors, known collectively as Vikings or Norsemen ("Northmen"), began by raiding coastal sites, especially undefended monasteries, in the British Isles. Over the next three centuries, they would leave their mark as pirates, raiders, traders and settlers on much of Britain and the European continent, as well as parts of modern-day Russia, Iceland, Greenland and Newfoundland.
The attack on the Lindisfarne monastery in A.D. 793 marked the beginning of the Viking Age. The Norwegian and Danish Vikings conquered Jorvik (York) in 866 AD. Viking raids on England in 851 and after, Wessex resisting, and the Danelaw settlements are described on the printed page. Mid-10th-century Danish dominance under Harald Bluetooth marked a second Viking age. Harold Godwinesson's defeat at Stamford Bridge and William's crowning in 1066 are the events that effectively marked the end of the Viking Age.
Source: www.history.com (as credited on the printed page).
Box Contents
- Game board: 1 pc.
- Dice (custom): 8 pcs. (3 black, 3 white, 2 red)
- Silver coin (money): 40 pcs. (value 1)
- Victory Point (VP token): 30 pcs. (14 VP-1, 16 VP-5)
- First player token: 1 pc.
- Resource (Wood cube): 30 pcs. (10 green wood, 10 grey iron, 10 brown mead)
- Viking (unit): 43 pcs. (10 black, 10 red, 10 blue, 10 yellow, 3 white)
- Ship (unit): 4 pcs. (1 black, 1 red, 1 blue, 1 yellow)
- Army (unit): 4 pcs. (1 black, 1 red, 1 blue, 1 yellow)
- Player board: 4 pcs. (1 black, 1 red, 1 blue, 1 yellow)
- Settlement shield: 16 pcs. (4 black, 4 red, 4 blue, 4 yellow)
- Trade town shield: 7 pcs. (3 green, 4 green/white)
- VP town shield: 12 pcs. (white)
- Settlement tile: 12 pcs.
- Saga (playing card): 59 pcs.
- Rulebook: 1 pc.
The printed index and credits page are omitted from this transcription (the index refers to the printed page layout; the credits are attribution only).