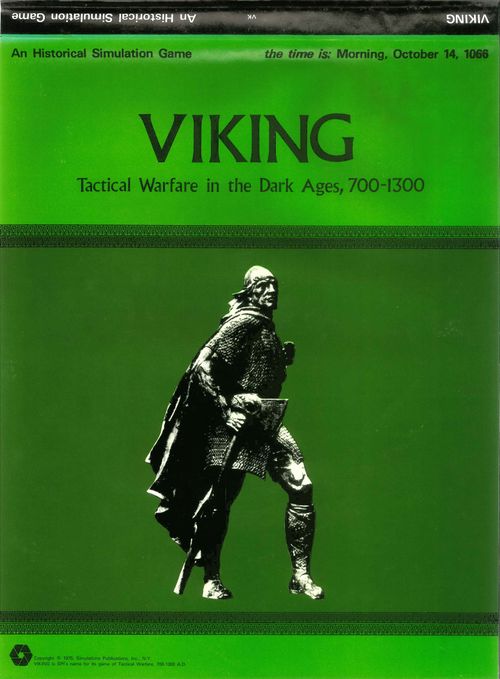
Viking: Tactical Warfare in the Dark Ages, 700-1300
Viking: Tactical Warfare in the Dark Ages, 700-1300 Rulebook
Table of Contents
Table of Contents
- PART ONE: PRESTAGS STANDARD GAME RULES
- 1.0 Introduction
- 2.0 General Course of Play
- 3.0 Game Equipment
- 4.0 Sequence of Play
- 5.0 Movement
- 6.0 Fire Combat
- 7.0 Melee Combat
- 8.0 Combat Results Table
- 9.0 Terrain Effects Chart
- 10.0 Leaders
- 11.0 Scenarios and Victory Conditions
- How to Use the Tracks on the Map
- 12.0 Optional Rules
- 13.0 Panic
- 14.0 Melee Combat and Elevation
- 15.0 Tactical Concession
- 16.0 Facing
- 17.0 Retreat Before Combat
- 18.0 Contact
- 19.0 Simultaneous Movement Sequence
- 20.0 How to Use the Simultaneous Movement Plot Chart
- 21.0 Individual Tasks Summary
- 22.0 Movement Resolution
- 23.0 Defensive Strength Variation
- PART TWO: VIKING EXCLUSIVE RULES AND SCENARIOS
PART ONE: PRESTAGS STANDARD GAME RULES
1.0 Introduction
PRESTAGS (Pre-Seventeenth Century Tactical Game System) is a simulation of the art of warfare from 3000 B.C. to 1550 A.D. Each game in the series covers a segment of that period, and presents the tactical situations faced by the leaders of the great battles of the period. These battles are presented as scenarios, in which are given a mix of units from the counter sheet and their historical posture at the outset of the battle. Similarly, the map represents a typical mix of terrain, and each battle is fought in areas of the map which closely simulate the actual historical terrain.
Two folders are provided. The first contains Standard Rules, which are common to all the games in the PRESTAGS series, and Optional Rules, which may be used in any game at the Players' choice. The second folder contains unique Scenarios for the specific PRESTAGS game you have purchased, and Exclusive Rules for this game only.
2.0 General Course of Play
Each scenario is played in sequenced turns (called Game-Turns) during which Players move their units on the map and engage in two types of combat using Fire (missile) and Melee (contact) weapons. While maneuvering and engaging in combat, they frequently try to achieve certain geographic objectives on the map.
2.1 Game Scale
Each hex in PRESTAGS represents 50 meters from side to side. Each unit represents 100-125 men and/or horses. Each Game-Turn represents five minutes.
2.2 Learning the Game
The army has started using a system called "Peer Group Instruction". The instructor spends a lot of time with only one or two people to teach them how to do a particular job. Once trained, these people go off and instruct others in the job. It is a far more efficient system that takes advantage of the superiority of personal attention in any learning situation. Not to belabor the obvious, but the best way to learn PRESTAGS, or any other conflict simulation, is to learn it from someone who has played already.
If this is not possible and you must learn the game on your own, do the following:
a. Look at all the components.
b. Scan the rules quickly, but read all diagrams and tables word-for-word.
c. Punch out the counters and set-up the simplest scenario (the one with the fewest counters).
d. Play the scenario "solitaire" with the Sequence of Play (4.0) in front of you.
e. After making a few moves, read the rules word-for-word.
3.0 Game Equipment
3.1 Game Map
The 23" by 35" mapsheet represents terrain typical of that on which the battles were fought. Its area is roughly 1.8 by 2.8 kilometers. The different terrain features affect movement and combat. An hexagonal grid is superimposed over this terrain to regulate movement, range, and the position of the playing pieces. In order to make the map lie flat, backfold the creases, and optionally make use of small pieces of masking tape to hold and protect the map.
3.2 Game Charts and Tables
Various visual aids are provided for the Players to simplify and illustrate certain game functions. Chief amongst these are the Combat Results Table (which is used to show the effects of attacks), and Turn Record (to keep track of elapsed time), and the Terrain Effects Chart (showing the effects of the various terrain hexes on movement and combat).
3.3 The Playing Pieces
Two differently colored sets of playing pieces (henceforth known as units) are supplied. The Players are assigned certain of these to represent the opposing armies in each scenario. The playing pieces are distinguished by type, strength, and mobility, as represented by the numbers on the face of the counter. These numbers are always in the same position for a particular characteristic of the unit. On different units, the numbers may change, but it is still the same basic arrangement. Note that fire units have two additional numbers (compared to solely melee units): Range Allowance and Fire Combat Strength.
3.31 Sample Melee Unit
The counter shows, at the top, the unit type code and an identity code (number); at the bottom, from left to right, the Melee Strength, the Class letter, and the Movement Allowance.
3.32 Sample Fire Unit
The counter shows the unit type code and identity code at the top. Beneath, on the left, the Fire Strength; on the right, the Range Allowance; at the bottom, from left to right, the Melee Strength, the Class, and the Movement Allowance.
3.33 Sample Leader Unit
The counter shows the unit type code (the Leader's level, e.g. "3L") and identity code at the top. Beneath are the Combat Bonus (left) and the Movement Control Radius (right); at the bottom, the Melee Strength (a dot), the Class (E) and the Movement Allowance.
3.34 "All-Around" Combat Strength
The Combat Strength of a unit is applicable in all directions. There is no particular direction (usually called "facing") ever assigned to a unit (exception: see Optional Rule 16.0).
3.35 Definitions of Terms
Melee Combat Strength is the number quantifying the basic offensive and defensive power of a unit when engaged in Melee Combat. It is expressed in terms of Strength Points.
Fire Attack Strength is the number quantifying the basic offensive strength of a unit when firing its ranged missile weapons. Note that only a few units have this characteristic.
Range Allowance is the maximum number of hexes through which a fire unit may fire, i.e., apply its Fire Attack Strength, subject to certain restrictions. Range includes the target hex, but not the firing hex.
Fire units are those which have the characteristics of Fire Attack Strength and Range Allowance.
Melee units are those which have no fire characteristics, i.e., they are non-fire units.
Some units have both a Fire Attack Strength and a Melee Combat Strength; these units are considered Fire units.
3.36 Dot Melee Value
Certain units have a dot (*) instead of a Melee Combat Strength. These units may not engage in offensive Melee Combat, and are considered to have a defensive Melee Combat Strength of Zero when stacked with units which do have a Melee Combat Strength. When not stacked with such a unit (and when calculating Victory Points) each unit with a Dot Melee Value is considered to have a Melee Combat Strength of 1.
3.37 Bracketed Melee Combat Strengths
Certain units have a Melee Combat Strength which is enclosed in brackets [ ]. These units have a Melee Defense Strength one-half of the printed number within the brackets. Brackets have no effect upon a unit's Combat Strength in attack. Therefore, a unit with a bracketed Combat Strength of "four" would melee attack with four strength points, but would melee defend with two strength points. Brackets do not affect the Fire Protection Strength of any hex. Fractions are retained in computing one-half of Combat Strength.
3.4 Summary of Unit Types
Pictured in the folder are all of the unit types employed in the PRESTAGS Series, along with a code showing the games in which each type is used. Abbreviations: C = Chariot, S = Spartan, L = Legion, V = Viking, Y = Yeoman. Each entry below gives the printed counter values: Melee Strength / Class / Movement Allowance; for fire units the two extra numbers are given as Fire Strength and Range Allowance (left and right of the counter's center symbol). A dot means a Dot Melee Value; brackets are as printed.
Class A
| Unit | Melee / Class / Movement | Games |
|---|---|---|
| MI Militia Infantry | 2 A 3 | CSVY |
| MS Militia Spearmen | 3 A 3 | CSLY |
| PS Professional Spearmen | 4 A 3 | SLY |
| PP Professional Pikemen | 6 A 4 | SY |
| LT Light Troops | [4] A 5 | S |
| EX Experimental Phalanx | 3 A 5 (printed numbers 2 and 1 beside the symbol) | S |
Class B
| Unit | Melee / Class / Movement | Games |
|---|---|---|
| BI Barbarian Infantry | [6] B 5 | SL |
| SD Swordsmen | 4 B 4 | CSLVY |
| AX Axemen | 3 B 4 | CV |
Class C
| Unit | Melee / Class / Movement | Games |
|---|---|---|
| LC Light Cavalry | 1 C 9 | SLY |
| MC Medium Cavalry | [3] C 9 | CSVY |
| HC Heavy Cavalry | [4] C 7 | SLVY |
Class D
| Unit | Melee / Class / Movement | Games |
|---|---|---|
| VF Viking Fleets | 4 D 15 | V |
| EL Elephants | [8] D 6 | S |
| CH Chariots | dot D 9 | C |
Class E (Leaders)
| Unit | Printed numbers | Games |
|---|---|---|
| 1L | 9 and 2 beside the symbol; dot E 9 | CSLVY |
| 2L | 6 and 2; dot E 9 | CSLVY |
| 3L | 3 and 1; dot E 9 | CSLVY |
| 4L | 3 and 0; dot E 9 | CSLVY |
| 5L | 0 and 2; dot E 4 | C |
| 6L | 0 and 1; dot E 4 | C |
Class Ff (Foot Fire)
| Unit | Fire / Range | Melee / Class / Movement | Games |
|---|---|---|---|
| BW Bowmen | 2 / 2 | dot Ff 5 | CS |
| IB Improved Bowmen | 2 / 3 | dot Ff 5 | CV |
| SK Skirmishers | 2 / 1 | [2] Ff 5 | CSL |
| BL Ballista | 3 / 7 | dot Ff 2 | S |
| CB Crossbowmen | 2 / 3 | dot Ff 5 | VY |
| AE Arquebusiers, Early | 2 / 3 | dot Ff 5 | Y |
| AL Arquebusiers, Late |
Class Mf (Mounted Fire)
| Unit | Fire / Range | Melee / Class / Movement | Games |
|---|---|---|---|
| HB Horse Bowmen | 1 / 2 | dot Mf 9 | CV |
| OC Oriental Cavalry | 1 / 1 | 2 Mf 9 | SL |
| BC Byzantine Cataphracts | 1 / 2 | 3 Mf 9 | LV |
| HA Heavy Artillery | 3 / 7 | dot Mf 2 | Y |
| LA Light Artillery | 2 / 5 | dot Mf 4 | Y |
Unit Types and Abbreviations
AE Arquebusiers, Early; AL Arquebusiers, Late; AX Axemen; BC Byzantine Cataphracts; BI Barbarian Infantry; BL Ballista; BW Bowmen; CB Crossbowmen; CH Chariots; EL Elephants; EX Experimental Phalanx; HA Heavy Artillery; HB Horse Bowmen; HC Heavy Cavalry; IB Improved Bowmen; LA Light Artillery; LB Long Bowmen; LC Light Cavalry; LT Light Troops; MC Medium Cavalry; MI Militia Infantry; MS Militia Spearmen; OC Oriental Cavalry; PP Professional Pikemen; PS Professional Spearmen; SD Swordsmen; SK Skirmishers; VF Viking Fleets; L Leader.
3.5 Game Equipment Inventory
Each complete game in the PRESTAGS series consists of the following parts: one game map; one Standard Rules Folder; one Exclusive Rules Folder; one set of die-cut counters (400 pieces); one box; one die.
If any of these parts are missing or damaged, or if you have any questions concerning the game, please write: Simulations Publications, Inc., 44 East 23rd St., New York, N.Y. 10010. (Questions must be accompanied by a stamped, self-addressed envelope.)
4.0 Sequence of Play
4.1 The Game-Turn
PRESTAGS is played in sequenced Game-Turns: each Game-Turn is composed of two Player-Turns. Each Player-Turn is composed of four phases. Players must strictly follow the Sequence of Play. The Game-Turn proceeds as follows:
4.2 Sequence Outline
1. FIRST PLAYER-TURN
The First Player is designated by the individual scenario. The Player whose turn is in progress is termed the Phasing Player.
A. Fire Combat Phase: The First (Phasing) Player executes Fire Attacks against Enemy units within his own units' Range Allowance.
B. Movement Phase: The Phasing Player may move all of his units up to the limits of the units' Movement Allowance, within the restrictions of the Movement Rules. At the end of this, the non-Phasing Player has the option to execute Defensive Fire (see 6.4).
C. Melee Combat Phase: The Phasing Player executes all melee attacks against adjacent Enemy units, according to the rules for Melee Combat.
D. Mutual Disruption Recovery Phase: All disruption markers are removed, except from those units which suffered disruption in any Phase of the current Player-Turn. This mutual phase occurs at the end of each Player-Turn.
2. SECOND PLAYER-TURN
The Second Player follows the same sequence and procedures as the First Player, using his own units and assuming the role of the Phasing Player.
3. TURN RECORD
One of the Players advances the Game-Turn marker on the Turn Record one position to indicate that one Game-Turn has been completed.
5.0 Movement
GENERAL RULE:
During the Movement Phase of a Player's turn, the Player may move as many or as few of his units as he wishes. Each unit may expend as many Movement Points as desired within the limits of its Movement Allowance.
PROCEDURE:
Each unit is moved by tracing the path of its movement through the hexagonal grid.
5.1 How to Move Units
5.11 Movement is calculated in terms of hexagons. Basically, each unit expends one Movement Point of its total Movement (point) Allowance for each hex entered. To enter some types of hexes, it may be required to expend more than one Movement Point. See the Movement section of the Terrain Effects Chart for a full list of terrain "entry costs".
5.12 In any given Movement Phase of a Player-Turn, the Player may move all, some or none of his units. Movement is never required, it is always voluntary.
5.13 Units are moved individually, in any direction or combination of directions. A unit may be moved as many or as few hexes as the owning Player desires, as long as its Movement Allowance is not exceeded in a single Movement Phase. Unused Movement Points, however, may not be accumulated from Phase to Phase, nor transferred from unit to unit.
5.14 Units may be moved only once each Movement Phase.
5.15 An undisrupted unit may always be moved one hex in any direction into any passable terrain. This is to prevent units from being trapped through loss of Movement Points or terrain entry costs. If this technique is used, the one hex is the only hex to which the unit may move for the turn.
5.2 Movement Prohibitions
5.21 No Enemy movement is permitted during a Player's Movement Phase.
5.22 No fire or melee combat (except for Defensive Fire, see 6.4) occurs during a Movement Phase.
5.23 Units may never enter or pass through a hex containing Enemy units.
5.24 In a given Movement Phase, once a unit has been moved and the Player's hand withdrawn from the piece, it may not be moved again, nor may it retrace and change its move.
5.25 Units may move over different types of terrain hexes in the same Movement Phase as long as they have enough Movement Points to expend as they enter each hex.
5.26 Units may always move through a hex containing Friendly units. Stacking limitations do not apply during the Movement Phase (see Stacking, 5.4).
5.27 In any Movement Allowance adjustment, fractions are retained. A unit without sufficient Movement Points to complete a move may not move into a hex.
5.3 Unit Organization and Compatibility
5.31 Non-fire units are organized into three classes: A, B and C (see 3.4).
5.32 Non-fire units of the same class may occupy the same hex in any combination. Non-fire units of different classes may never be in the same hex.
5.33 Fire units are organized into two classes, Foot Fire (Ff) and Mounted Fire (Mf) (see 3.4).
5.34 Fire units of the same class may occupy the same hex in any combination; fire units of different classes may never be in the same hex.
5.35 Foot Fire units may be mixed with Class A or Class B non-fire units. (They could not be mixed with both in the same hex because of the prohibition against mixing Class A and B, case 5.32.)
5.36 Mounted Fire units may be mixed with Class C non-fire units.
5.37 Miscellaneous units are grouped in Class D. Class D units may mix with their own Class and all other classes as long as no other prohibitions (above cases) are violated.
5.38 Leader units are grouped in Class E. Class E units may mix with their own class and all other classes as long as no other prohibitions (above cases) are violated.
5.39 Unit Capability Chart (See the mapsheet)
5.4 Stacking
Each Player has a certain stacking limitation assigned to him in a given scenario. At the end of the Player's Movement Phase, he may have no more than the stated limit of units in any single hex. Stacking limitations apply at all times except during the Movement Phase. (The restrictions apply at the end of Movement.)
5.41 All units in the same hex always defend as one, indivisible total of Strength Points. The Attacker may not in any way separately attack Enemy units placed on one hex.
5.42 Leader and information counters (Disruption and contact markers) do not count for stacking purposes. They are ignored.
5.43 A stack may be moved together at the movement rate of the slowest Movement Allowance in the stack, or faster units may separate at any point during the move.
5.5 Roads
5.51 A unit which moves from one road hex directly into an adjacent road hex through a road hexside expends only one Movement Point, regardless of other terrain in the hex. (Diagram: entering a road hex by a non-road hexside costs variable Movement Points depending on the terrain of the hex; moving through the road hexside costs 1 point.)
5.52 A unit which moves into a road hex through a non-road hexside must pay the entry cost of the other terrain in the hex.
5.53 Roads have no effect upon combat (consider the effects of other terrain in hex).
5.6 Slopes
5.61 A unit which moves into a Slope hex must always expend two Movement Points to enter the hex (unless it is moving by road). The cost for entering a Slope hex remains two Movement Points whether the unit is moving "up" or "down" or "across" the Slope.
5.62 A unit which moves from a Slope hex, into an adjacent Hilltop hex, through a hexside marked by the Slope splash symbol, expends two Movement Points.
6.0 Fire Combat
GENERAL RULE:
Players engage in Fire Combat during the Friendly Fire Combat Phase. The Phasing Player is considered to be the attacker, and the non-Phasing Player is considered to be the defender. A Fire unit may attack any hex within the number of hexes indicated by the unit's Range Allowance if there is a clear Line of Sight to the target (see 6.34).
PROCEDURE:
During the Fire Combat Phase, the Phasing Player allocates units to attack Enemy occupied hexes. Each attack is resolved by comparing the total of all the attacking units' Fire Combat Strengths to the Fire Protection Strength (given on the Terrain Effects Chart) of the hex the defending units are in. This comparison is stated as a ratio of Attacker's Strength to Defender's Strength; this is simplified to conform to one of the Combat Odds shown on the Combat Results Table. The die is rolled and the result is cross-referenced with the appropriate Combat Odds column, yielding the result. Each Combat result is fully applied before initiating another combat action.
6.1 Which Units May Attack
6.11 Fire units may not engage in offensive Melee Combat in the same Friendly Player-Turn as that in which they have engaged in Fire Combat. They may move.
6.12 Fire units may not engage in Fire Combat in consecutive Player-Turns. Thus, a fire unit engaging in Fire Combat in its own Friendly Player-Turn may not engage in Defensive Fire in the Enemy Player-Turn immediately following (see Defensive Fire, case 6.4).
6.13 Fire units may only fire attack Enemy units within the number of hexes of their Range Allowance (see 6.32).
6.14 Not every unit in a stack need participate in an attack made by a unit or units in their stack. They may engage in other attacks, or none at all.
6.15 No unit may participate in more than one attack per Combat Phase. No unit may be attacked more than once per Combat Phase.
6.16 A unit may not execute a Fire Attack against Enemy units located in two or more hexes.
6.2 Combat Allocation and Resolution
6.21 There is no limit to the number of fire units that may fire into a given hex. Different fire units may attack the same hex, even if they are at different firing ranges, of different unit types, or in different hexes. The Fire Attack Strengths of units attacking into a given hex are always combined.
6.22 The defensive Strength of a unit(s) in a hex under Fire Attack is dictated by the hex's terrain. A Fire Protection Strength is listed for each type of hex on the Terrain Effects Chart. A ratio is arrived at by comparing the Attacker's Fire Attack Strength to the Fire Protection Strength of the Defender's hex. The ratio is reduced to a Combat Odds. The number of units defending against a fire attack has no bearing on the Fire Protection Strength of the hex.
6.23 In Fire Combat, combat results apply to all units in the affected hex.
6.3 Fire Attack Prohibitions and Restrictions
6.31 A single fire unit may never attack more than a single hex, nor may its Fire Combat Strength be split in any way.
6.32 Fire units may not fire through village or woods hexes to reach a target. They may fire into or from village or woods hexes.
6.33 Ff units may not fire from stream or ford hexes. They may fire from bridge hexes, and may fire into river, ford and bridge hexes.
6.34 A Fire unit must have a Line of Sight (LOS) to fire. To determine the hexes of the LOS, lay a straight edge along the centers of the firing and target hexes. If any portion of this line passes through hexes considered "blocking" terrain or through hexes so occupied as to be "blocking", the Fire unit may not fire into that hex.
6.35 Units on a slope may fire into, but not through a hilltop hex.
6.36 Slope hexes block fire unless either the firing or the target unit is on a hilltop hex which is adjacent to the slope hex in question. (Important! Be sure to understand this.) (Diagram: LOS between hexes A and C is blocked; between A and B it is clear.)
6.37 The Line of Sight of a unit may be blocked by a hex occupied by any unit, Enemy or Friendly, depending upon the elevation of the firing unit. There are three possible elevations: Ground level hexes, Slope hexes and Hilltop hexes. When in a Ground level hex, a unit may not fire through any occupied hex. When in a Slope hex, a unit may not fire through an occupied Slope hex or Hilltop hex, but it may fire through occupied Ground level hexes. A unit in a Hilltop hex may not fire through occupied hexes unless its Line of Sight goes through an adjacent Slope hex, in which case it may fire through occupied hexes. If the Line of Sight of a unit in a Hilltop hex crosses a non-adjacent hexside marked by the Slope splash symbol, it is blocked, beyond that point, by occupied hexes. (Diagram: LOS between hexes A and B is blocked.)
6.38 If a Line of Sight falls coincidentally along a hexside between two hexes, the LOS is clear if either hex is unblocked. If both hexes are blocked (for reasons of terrain, occupation, or both), the LOS is blocked. A LOS is blocked by falling along a hexside whose two hexes have two different blocked characteristics. (Diagram: LOS between hexes C and D is clear.)
6.4 Defensive Fire
6.41 All undisrupted fire units have rigid Defensive Fire Zones for movement purposes: when any Enemy unit moves adjacent to a Friendly fire unit, the Enemy unit must stop. The Enemy unit may move no further in that Movement Phase.
6.42 At the completion of all Enemy movement during the Movement Phase, all Friendly fire units have the option to launch Defensive Fire: they may fire at any hex adjacent to them into which Enemy units moved during that Movement Phase.
6.43 Defensive Fire is possible only if a fire unit did not fire attack in the previous Player-Turn. Fire units may never fire in consecutive Player-Turns; they require one full Player-Turn to prepare fire (see 6.12 and 6.52).
Therefore, if a fire unit engaged in an attack during a Friendly Fire Combat Phase, it would be unable to use its Defensive Fire after the ensuing Enemy Movement Phase. But all Enemy units would still have to end their movement if they move adjacent to a Friendly fire unit.
6.44 A fire unit which is incapable of Defensive Fire still forces Enemy units to stop when they come adjacent to the fire unit.
6.45 Fire units stacked together may fire separately, into different hexes. The same hex may never be attacked more than once in Defensive Fire.
6.5 Fire and Melee
6.51 Fire units with a Melee Strength may attack in Melee Combat or in Fire Combat in a Friendly Player-Turn. They may never do both in the same Friendly Player-Turn, and they could not use Fire Attack if it had been used in Defensive Fire during the immediately preceding Enemy Player-Turn.
6.52 It is entirely possible to alternate Melee Attack (on the Friendly Player-Turn) with Defensive Fire (during the Enemy Player-Turn). The conditions are that both Melee Attack and Offensive Fire cannot be used on the same Player-Turn; and that fire may not be employed on consecutive Player-Turns.
7.0 Melee Combat
GENERAL RULE:
Melee combat takes place during the Melee Combat Phase of a Player-Turn. The Phasing Player is considered to be the Attacker and the non-Phasing Player to be the Defender (regardless of their overall strategic position). A unit may only melee attack Enemy units which are in an adjacent hex.
PROCEDURE:
During his Melee Combat Phase, the Phasing Player indicates which of his units will be used to attack Enemy-occupied hexes. Then each separate combat action is resolved in turn, in any order the attacking Player wishes. The attacker need not specify his attacks until they are made, as long as the rules of combat are followed.
Combat is resolved by totalling the Melee Strengths of the attacking units and comparing this to the total of the Melee Strengths of the defender. This comparison is expressed as a ratio of Attacker's Strength to Defender's Strength; this is simplified to one of the Combat Odds on the Combat Results Table. The die is rolled and the number is cross-referenced with the appropriate Combat Odds column to achieve a combat result. Each combat result is fully applied before initiating another combat action.
7.1 Which Units May Attack and Defend
7.11 Not every unit in a stack need participate in the same attack upon the same defending hex, even if one of the units is attacking; the other units may engage in other attacks, or none at all.
7.12 Friendly units stacked in the same hex must be treated as one combined defensive Melee Strength value when attacked.
7.13 Any one hex may be subjected to only one Melee Combat during a Player-Turn. One unit in a stack cannot be singled out and attacked separately.
7.14 No unit may participate in more than one attack per Combat Phase. No unit may be the object of more than one attack per Combat Phase.
7.15 Units disrupted by Defensive Fire Combat may not participate in the subsequent Melee Phase.
7.2 Multiple-Unit and Multi-Hex Combat
7.21 Friendly units in different hexes, adjacent to the same defending hex, may participate in a combined attack against that hex regardless of unit class. In such a case, combine all the Melee Strength Points of the attacking units into one total Strength value. An Enemy-occupied hex may be attacked by as many units as can be brought to bear. Conceivably, as many as six stacks of units could participate in an attack upon a single Enemy-occupied hex.
7.22 A unit or units in a single hex may execute an attack against Enemy units located in two or more adjacent hexes. In such a case, the Defending Strengths are combined for combat resolution.
7.23 Attacks may involve any number of attacking or defending units on different hexes. For the attacks to be resolved as a single combat, however, all the attacking units must be adjacent to all the defending units.
7.24 Examples: (diagrams marking legal combats and an illegal combat, "Illegal to resolve as a single attack"; A = Attacker, D = Defender)
7.3 Combat Resolution
7.31 Attacks may be resolved in any order that the Attacker wishes. The result of each attack must be applied immediately, as the attack is executed.
7.32 Combat Odds are rounded off in favor of the defender to conform to the ratios given on the Combat Results Tables. For example, an attack of 26 Strength Points against 9 Strength Points would be rounded off to a "2 to 1" odds situation.
7.4 Melee Attack Inhibitions
Units may never split their Melee Strength and use it in two or more attacks in the same Combat Phase. The Melee Strength of the unit may never be used in piece-meal fashion. All Melee Strengths are integrated quantities.
7.5 Flanking Attack
7.51 Whenever Melee-attacking units occupy, or are adjacent to, every one of the six hexes around the defending unit(s), the attack is termed a Flank Attack. Units engaged in a flank attack have their Melee Combat Strengths doubled before computing the combat odds of the attack.
Thus, if two units, each with a Combat Strength of "two", were flank attacking a unit with a Combat Strength of "four", the combat odds would be eight to four (2 to 1 on the Combat Results Table).
7.52 The doubling in Melee Flank Attacks is the final correction applied to combat odds (after all other adjustments, such as Terrain, Leader bonuses, etc.).
7.53 A Flank Attack is possible only with units that are actually attacking the "flanked" unit. Mere presence in the necessary position (without attacking) is not enough for Flank-attack purposes.
7.54 Units caught against impassable terrain or mapedges are not flanked unless the full conditions for Flank Attack (case 7.51) are still fulfilled.
7.55 The presence of Enemy units never interferes with Flank attacks by Friendly units.
7.56 Fire combat never benefits from Flank Attack.
7.6 Melee Strength Variation
Melee Strength of all units can be affected by the terrain they occupy. See the Terrain Effects Chart.
8.0 Combat Results Table
(See the mapsheet)
8.1 Explanation of Combat Results
Attacks at odds less than 1 to 2 are not permitted; odds greater than 8 to 1 are treated as 8 to 1. Results only affect defending units.
D = Disruption. The affected units are "tagged" by the placement of a Disruption Marker. See Effects of Disruption (8.2).
1/2E = Half-Eliminated. One-half of the units attacked are eliminated (Defender's choice of units), and the remainder are disrupted (see Disruption). If there are an odd number of units defending, the majority of units would be eliminated. Do not count Leader units when calculating "half" of stack.
E = Fully Eliminated: All of the units attacked are eliminated; remove from the mapsheet.
8.2 Effects of Disruption
Units which are disrupted may not initiate combat, employ fire, or be moved for the duration of their disruption. Disruption never affects Leader units (see 10.3). When disrupted units (or a stack containing at least one disrupted unit) are attacked by Fire or Melee, the Attacker adds "one" to the die roll number before resolving the attack.
8.21 Units may be disrupted during any one of three phases: Enemy Fire Combat, Enemy Melee, or after Friendly Movement (as a result of Defensive Fire).
8.22 Units which are currently disrupted are eliminated if disrupted again.
8.23 All disrupted units return to a normal state during the Mutual Disruption Recovery Phase, except for units disrupted during the current Player-Turn.
8.24 In the event of one Melee Attack upon two hexes, one with disrupted units and the other without, the die roll is increased by "one" for the attack upon the hex with the disrupted unit. The die roll is unaffected for the hex without disrupted units. At most, then, an attack could have two results: one for hexes with disrupted units and one for hexes without disrupted Enemy units.
8.3 Retreat
Retreat is never inflicted on units.
8.4 Advance After Combat
When any hex is vacated as a result of combat, the attacking units may advance at the Owning Player's discretion into the vacated hex. Normal stacking limitations must be observed. The option to advance must be exercised immediately following the combat result.
9.0 Terrain Effects Chart
(See the mapsheet)
10.0 Leaders
GENERAL RULE:
There are four levels of Leaders in PRESTAGS: "1", "2", "3" and "4". Leaders influence both combat and movement of Friendly units. Units stacked with a Leader are never Disrupted. Leaders have two characteristics: Leadership Combat Bonus (the digit printed on the lower left of the counter) and Movement Control Radius (printed on the lower right).
In some scenarios, mounted units are exempt from Leaders' Movement Control Radius and its restrictions. [Mounted units are understood to include all Class C units, Mounted fire units, and Chariot units (with their occupants).] Elephants are not mounted units.
PROCEDURE:
A unit (or stack of units) in the same hex as a Friendly Leader unit, and engaged in Melee Combat, receives additional Strength Points equal to the Leadership Combat Bonus. This bonus may never exceed the Combat Strength of the unit(s) after complete adjustment by all possible modifiers (Terrain, Unit Capability if used, etc.).
Units which begin their Friendly Movement Phase within the Movement Control Radius of a Friendly Leader unit may move normally with their full Movement Allowance. Units which do not begin their Movement Phase within the Movement Control Radius of a Friendly Leader unit may only use one-half their normal Movement Allowance (retain fractions).
10.1 Leadership Combat Bonus
10.11 To gain the Leadership Combat Bonus, units must be stacked with the Leader unit at the instant of combat. If there is more than one Leader unit in a hex, all the Leaders may add their bonus to the other units' Melee Strength. The combined bonus may not exceed the adjusted Combat Strength of all non-Leader units in the hex.
10.12 A Leader may never apply his Combat Bonus to himself or another Leader unit.
10.13 Leadership Combat Bonus applies in Melee Combat only, for both offensive and defensive combat situations.
10.14 Leadership Combat Bonus may be applied to any number of attacks made by Melee Attacking units in the Leader's hex.
10.2 Leadership Movement Control Radius
10.21 Units which begin their Movement Phase within a Leader's Movement Control Radius may move out of this control during their Movement with no ill effects. Being in more than one Leader's Movement Control Radius yields no additional movement bonus.
10.22 Although in some scenarios, mounted units may be exempt from Leaders' Movement Control Radius, the mounted units may still use the Leader Combat Bonus.
10.23 Units which begin a Movement Phase beyond a Friendly Leader's Movement Control Radius have their Movement Allowance cut in half (fractions retained).
10.24 Undisrupted units, regardless of terrain and Movement Control modifications, may always move one hex (non-prohibited) per Movement Phase.
10.3 Leader Reduction
The four types of Leader are rated by steps, from "1" (best) to "4" (worst). Leader units in hexes affected by "Disruption" and "1/2-Elim" results in Melee Combat are replaced with a Leader unit rated one grade lower. A "4" level leader, if reduced, is eliminated.
When a Leader unit receives a "Disruption" or "1/2 Elim" Combat Result due to Melee Combat, the Leader unit is removed and the next lower grade of Leader substituted. An "Elim" result still causes the complete elimination of all units, including Leaders, regardless of level, in the affected hex.
Thus, a "2" level Leader unit in a hex suffering a "Disruption" result due to Melee Combat would be replaced with a "3" Leader. A "4" Leader suffering the same result would be eliminated. Leaders are never upgraded.
10.31 Leaders never suffer any harm from Fire combat. Units stacked with Leaders do not suffer "Disruption" in Fire combat (but they do suffer "1/2-Elim" and "Elim" results from fire). It is entirely possible that all the units in a hex could be eliminated by Fire Combat and the Leader would remain, completely unaffected.
10.32 Leaders nullify "Disruption" of the units they are stacked with from Melee Combat, but they are reduced one level as the "cost" of the nullification. The destruction of a "4" level Leader does "save" his units from Disruption on the turn of the Leader's demise.
10.33 Leaders are reduced and the units suffer the results of "1/2-Elim" and "Elim" from Melee Combat.
10.4 Summary of Leader Characteristics
(See the mapsheet)
11.0 Scenarios and Victory Conditions
11.1 Scenario Format
Each Scenario is presented in the following way:
(0.0) Name of Battle (Date)
A Force (the name or leader of the side which will deploy and move first - unless otherwise specified): Units (the type and number available). VP (the Victory Point Total), PL (the Panic Level). Deployment (a hex identification letter, and distance from that hex that units may be set up). Stacking (the maximum number of units per hex). Leadership (see 10.22; if mounted units are exempt, "Mt.Ex." will appear).
B Force (following the same format as above).
Game Length (in complete Game-Turns).
Victory Conditions (separate, alternate conditions are separated by semi-colons).
Terrain Modifications.
Special Rules.
11.2 Levels of Victory
The Victory Conditions frequently specify geographic objectives, levels of victory, or both. The three levels of victory are: Marginal, Substantive, and Decisive. Victory Levels are calculated in terms of a ratio of Victory Points. For every Enemy unit destroyed, the Victory Point total awarded is one-half the Melee Attack Strength (always rounded up) plus the Fire Attack Strength (if any).
11.21 A Marginal Victory results when one side has a ratio of its own Victory Points to its opponent's Victory Points greater than 1 to 1, but less than 2 to 1.
11.22 A Substantive Victory results when one side has a ratio of its own Victory Points to its opponent's Victory Points of 2 to 1 or better, but less than 3 to 1.
11.23 A Decisive Victory results when one side has a ratio of its own Victory Points to its opponent's Victory Points of 3 to 1 or better.
11.24 For any Victory Condition, a "higher" level of victory is always considered just as good. For instance, a Victory Condition that called for a "Marginal Victory and control of hex 'M'" would be considered fulfilled if hex 'M' was controlled and a Substantive or Decisive Victory had been achieved.
11.25 When Victory Conditions are given in absolute numbers of units, rather than in Victory Levels, Class D and Class E units are not counted.
11.3 Control
Many scenarios call for the "control" of a particular hex or hexes. Control is awarded the Player whose unit occupies the required hex. If there is no unit in the hex, it is controlled by the Player whose unit occupied the hex last. If the hex has never been occupied, neither side controls it, regardless of its geography.
11.4 Exiting Units
11.41 Once units have been moved off the mapsheet in pursuit of a Victory Condition, they may never be brought back, regardless of whether or not the condition is fulfilled.
11.42 To exit a unit from the mapsheet, the unit must have one Movement Point remaining to expend for it to "leave".
How to Use the Tracks on the Map
Each Player keeps track of the Victory Points he has scored on the Victory Point Record. Use the three appropriately colored arrowhead markers to record the Victory Points as they are scored by placing the markers in the appropriate boxes. Players should be careful not to move the markers of the opposing Player. For example, if the current total of Victory Points is "27", there would be a marker in the "000" box, the "20" box, and the "7" box.
To begin the game, one of the Players places the Game-Turn Marker in the first space on the Turn Record Track. The Players follow the Sequence of Play until the first Game-Turn is complete, at which time the Game-Turn Marker is moved to the number two space on the Turn Record Track. This procedure is followed at the end of each Game-Turn, until the final Game-Turn in the scenario being played. [Note that most scenarios end before the Game-Turn Marker reaches the final space, numbered 30, of the Turn Record Track.]
12.0 Optional Rules
Optional Rules are designed to permit a greater depth of realism in the game at the sacrifice of some degree of playability. The following options may be used independently of one another, or in any combination.
Certain ones will be strongly recommended by particular scenarios. Players should be fully conversant with the game system before attempting to add any of the options.
13.0 Panic
COMMENTARY:
Each unit in PRESTAGS has a Victory Point value equal to the unit's Melee Strength divided by two (counting Dot Melee Values as one; all fractions rounded up), plus its Fire Strength (if any). The total of all units' Victory Points is an expression of the army's worth. All armies in the scenarios have a numerical Panic Level, a percentage of its Victory Point total.
When losses in Victory Points attain the Panic Level, the army's organization begins to disintegrate. The Panic Level is reached when Enemy Victory Points (gained through the destruction of Friendly units) reach the Friendly Army's Panic Level.
GENERAL RULE:
For every Movement Phase that a unit is Panicked, it must attempt to move up to its Movement Allowance to a hex as many hexes as possible from the nearest Enemy unit. In so moving, it must always attempt to move from hex to hex, each of which is always further from any Enemy unit.
Units may never move into prohibited terrain, into Enemy-occupied hexes, or adjacent to Enemy fire units. It is possible that units may not move at all, if they were surrounded and no hex would place them further from Enemy units.
If possible, Panicked units must move off the mapsheet; in which case they are counted for Victory Points as if their loss had occurred in regular combat. They cannot return.
PROCEDURE:
Panic is determined the instant one side's Panic Level is equaled or surpassed. The entire army panics at once. The following are not panicked: all units stacked with or adjacent to "1" or "2" level Leaders and all units stacked with "3" or "4" level Leaders.
Panicked units may not attack; they defend at one-half their normal Melee Strength (fractions retained). Panicked units that are attacked by Fire or Melee Attack suffer all combat results and, in addition, are eliminated by "Disruption" results.
13.1 Determination of Panic
13.11 Panic may be attained in the middle of a phase, at the instant losses reach or surpass one side's Panic Level.
13.12 If the exact Panic Level is reached at exactly the same time by both sides, the side which was the Defender in the action is considered to panic. The Attacker does not panic.
13.13 If both sides surpass the Panic Level at exactly the same time, the side which surpasses its Panic Level by the greater number of Victory Points (i.e., lost more in the battle) is considered to be the panicked army. The other side may never panic then or thereafter.
13.2 Rallying
13.21 All units that did not panic at the instant of panic in their army remain unpanicked indefinitely. Once the instant of panic has passed, no more units (of either side) ever panic, regardless of losses to either side.
13.22 Leader units alone may Rally panicked Friendly units. At the end of each Friendly Movement Phase, all panicked units adjacent to or stacked with "1" and "2" level Leaders and all panicked units stacked with "3" and "4" level Leaders are "rallied", i.e., returned to unpanicked state for the remainder of the game.
14.0 Melee Combat and Elevation
GENERAL RULE:
All hexes adjacent to dark-border Slope hexsides are Hilltop hexes. All hexes with Slope markings (see Terrain Effects) are Slope hexes, which are lower than Hilltop hexes in elevation. All other terrain is called Ground-level and is lower than Slope elevation; all Ground-level terrain is considered equal in elevation.
14.1 Attacking Into Higher Elevation
14.11 Any Class A or Class B unit on a Ground Level hex attacking a Slope hex, or on a Slope hex attacking a Hilltop hex, has its Melee Attack Strength cut in half.
14.12 Any fractions caused by this reduction are retained and combat "odds" are calculated in the normal way. Thus, a Class A or B unit with an Attack Strength of five on a slope hex attacking a Hilltop hex would attack with 2 1/2 Combat Strength Points. It would attack a unit defending with two Strength Points at Combat Odds of "one-to-one".
14.13 This elevation penalty is calculated before the addition of any Combat Strength Bonus from Leader units, and before the correction (if any) for Flank Attacks.
14.14 The presence of units not from Classes A and B in no way affects the penalty; it is still assessed.
14.2 Attacks on Slopes
14.21 Any Class A or Class B unit on a Slope hex attacking any unit on another Slope hex has its Melee Attack Strength cut in half.
14.22 Fractions are retained and the penalty is calculated before Leader Bonus is added (see 14.12, 14.13).
14.23 This penalty is extracted regardless of whether the defender's Slope hex is on a contiguous Slope "line" or merely an unconnected, but adjacent, Slope hex.
14.3 Resistance to Disruption
14.31 Class A and Class B units on Slope hexes may ignore all "Disruption" combat results, from Melee or Fire Combat.
14.32 This resistance of Class A and Class B units on Slopes in no way influences any other unit stacked with them on the Slope hex (including Leader units, who must suffer results normally).
15.0 Tactical Concession
GENERAL RULE:
At any time, in any scenario, a Player may move his forces off the map to avoid greater casualties. The withdrawing Player automatically grants his opponent a Substantive Victory (unless the opposing Player has achieved or does achieve a higher level of victory before the withdrawal is completed).
PROCEDURE:
Units must be exited off the mapsheet from road hexes.
CASES:
15.1 Granting a Tactical Concession means the granting Player cannot win the game. His opponent will gain at least a Substantive Victory (despite any printed Victory Conditions in the scenario) and possibly a higher level of Victory (per his Victory Conditions). The Substantive Victory is awarded even if, by some chance, the strategic situation should change after the declaration of "concession".
15.2 The Concession is not complete until all units of the conceding Player are exited, destroyed or immobile. Players may, of course, agree to terminate a game mutually.
15.3 Units once moved off the mapsheet may never return.
15.4 Tactical Concession in no way interferes with the working of the optional rule Panic (13.0). In Panic, there is the chance that the situation can be reversed through rallied units. A Tactical Concession is a final concession of victory, leaving only the winner's level of Victory open to variations.
16.0 Facing
GENERAL RULE:
All units have a particular side which is their front (three hexsides), as indicated by the unit type symbol on each counter. The three rear hexsides are referred to as the "Flank" of the unit. This reflects the battle formation orientation of the particular group of men that the counter represents.
PROCEDURE:
As a unit moves, it may only enter one of the three hexes that are to its front. Before it enters a hex, its facing is reoriented so that the front (top) of the counter is facing the hex to be entered. (Diagram: a counter with the three hexes toward the top of the counter labelled FRONT and the three toward the bottom labelled FLANK.)
A unit may only attack Enemy units in hexes which it fronts upon. A unit may only use its Melee Strength for defense if attacked solely from Front hexes; if it is attacked in part or whole through Flank hexsides, it defends at one-half of its Melee Strength. Obviously, it is extremely important for Players to pay close attention to their units' facing.
16.1 Effect on Movement
16.11 Although units may only move into their Front hexes, they may at any time change their facing within a single hex up to 180 degrees by expending one Movement Point.
16.12 Units stacked together in the same hex need not be faced in the same manner.
16.13 Units found to be ambiguously faced after the Movement Phase may be adjusted by the Enemy Player to one of the two possible hexsides.
16.2 Effect on Melee Combat
16.21 Units attacked through a flank hexside defend at the "Flank" rate; that is, one-half of their Melee Combat Strength. A combination Front and Flank Attack is considered a Flank Attack (supercedes rule 7.5).
16.22 All fractions are retained in computing Flank Attacks.
16.23 Units in the same hex faced differently will frequently defend at different rates, depending upon whether they are Flank Attacked or not. Note that this does not conflict with case 16.21 where a combination attack upon one (or many) units requires a flank reduction.
16.24 The provisions of "Flanking Attacks" are ignored when this rule is used.
16.25 Units with Melee Strength in brackets, when attacked from the Flank, defend at one-half of their Melee Defense Strength. For instance, an HC unit with a Melee Strength of [4], defends normally at "two" Strength Points, and would defend against a Flank Attack with "one" Strength Point.
16.3 Effect on Fire Combat
16.31 Fire units may only attack through their front hexes. This is true of normal Fire Combat and Defensive Fire.
16.32 The flank hexes of fire units do not prohibit Enemy movement (this overrules case 6.41 of PRESTAGS Defensive Fire).
16.33 In defending against Fire Combat of any kind, facing has no bearing whatsoever. Defense against Fire Combat is always based on a Terrain Fire Protection Strength.
17.0 Retreat Before Combat
GENERAL RULE:
If attacked by Melee Combat, any unit in a hex may retreat one hex to an unblocked (i.e., passable) hex if the printed Movement Allowance of all the defending units in that hex exceeds the printed Movement Allowance of the fastest attacking unit by three Movement Points or more. If the retreat before combat option is used, the attacker may advance into the vacated hex and no further.
CASES:
17.1 If a unit is unable to retreat due to terrain or stacking restrictions, it must remain and receive the attack.
17.2 Victorious units advancing after the "retreat before combat" are not subject to Defensive Fire as a result of their advance. The advance is considered to have come about from Combat, not Movement.
17.3 Units that retreat before combat are subject to any attack brought to bear against their new hex. They may not retreat again, nor may any units in the hex to which they retreat; i.e., they force any hex to which they retreat to receive attacks.
17.4 Units that advance into vacated hexes may not attack in that Player-Turn.
17.5 Some units in a hex may retreat, and others may be required to remain, dependent on their individual Movement Allowances.
18.0 Contact
18.1 Units engaged in Melee Attack which does not result in the elimination, half-elimination or disruption of one side or the other remain in Contact.
18.2 Units in contact may not break off the action; i.e., leave the hex they were in at the establishment of Contact, until a decision is reached in some subsequent Game-Turn, nor may they change their facing.
18.3 Additional units may join in an attack with units already in Contact, in which case the reinforcing units must observe the restriction of case 18.2.
18.4 Place a Contact Marker on units involved in Contact situations.
18.5 Contact terminates when one or the other side of the engagement is eliminated, half-eliminated, or disrupted by any combat.
19.0 Simultaneous Movement Sequence
When using this Simultaneous Movement option, there is a new Sequence of Play employed. Each Player plots his movement, or Fire Combat (offensive or defensive), or Melee Combat for each unit simultaneously; and then the units are moved or engage in Combat according to the plot. To use simultaneity, Players should consult 20.0, 21.0 and 22.0.
19.1 Sequence Outline: The Game-Turn
(A) OPERATIONS PLOT PHASE: The Players simultaneously and secretly record the tasks (see 21.1) that each unit will perform on the Game-Turn.
(B) FIRE COMBAT RESOLUTION PHASE: All units plotted to engage in Offensive Fire do so, barring disruption in earlier phases of the current Game-Turn.
(C) MELEE COMBAT RESOLUTION PHASE: All units plotted to engage in Melee Combat now do so, barring disruption in earlier phases of the current Game-Turn (e.g., from Enemy Fire Combat).
(D) MOVEMENT RESOLUTION PHASE: All units plotted to engage in movement now do so, barring disruption in earlier phases of the current Game-Turn (e.g., from Enemy Fire or Melee Combat).
(E) DEFENSIVE FIRE COMBAT RESOLUTION PHASE: All units plotted to engage in Defensive Fire may do so, firing at an Enemy unit of their choice which has moved adjacent to them. Units [sentence ends here as printed]
(F) TURN RECORD PHASE: The Players record the passage of one Game-Turn.
20.0 How to Use the Simultaneous Movement Plot Chart
GENERAL RULE:
During each Operation Plot Phase, both Players must record each unit's task (see 21.1, Individual Task Summary) on his Simultaneous Movement Plot Chart. Each unit may execute only one type of task per Game-Turn.
PROCEDURE:
The Owning Player writes the identity number of the unit in the first column along with the operation code (see 21.1) to be performed. If a unit is moving, the hexes moved through (one-by-one) must be listed. If a unit is firing, it must be specified whether Defensively or Offensively; and if Offensively, the target hex must be given. If a unit is melee attacking, the target hex must be given. If a given hex takes more than one Movement Point to enter, the number of Movement Points expended to enter is also written down.
To make a Plot Chart, divide an ordinary sheet of lined paper into 1/2" wide columns. One unit is listed on each line; hex numbers are listed in the columns to the right. Pre-printed Plot Charts are available from Simulations Publications (see current catalog for details).
20.1 Secrecy and Honesty
Each Player's Simultaneous Movement Plot Chart is to be hidden from the other Player until the end of the game. If there is any question about the other Player's orders, the Player is advised to write them down and compare them with the Simultaneous Movement Plot Chart at the end of the game. A Player who secretly violates the rules to gain an advantage, forfeits the game.
20.2 Order of Combat
Combat occurs in different Phases. All combat in the same Phase is considered simultaneous; all combat in different Phases is strictly sequential and consequently the results are cumulative.
20.21 A unit may always complete an attack if it suffers an adverse combat result in the same phase of its own attack. For instance, a unit which is engaging in Melee combat would complete its attack even if it were disrupted by Enemy combat during the same phase.
20.22 A unit may not perform its plotted task if it suffers an adverse combat result in a phase prior to the phase of its execution. Therefore, a unit plotted to Melee Attack could not do so if it were disrupted in the previous Fire Combat Phase. Strict attention is necessary to the Sequence of Play.
20.3 Simultaneity of Movement
All movement plotted for execution in the same Phase is considered simultaneous. All Movement must be executed; units may never alter their Movement in response to Enemy actions.
20.4 Inviolability of the Plot
Once the Operation Plot Phase is completed for the Game-Turn, the Players must attempt to fulfill the "orders". There can never be any change in the Plot through the volition of the Players once the Operation Plot Phase is completed. The only reason for variation between what is plotted and what is executed is in conditions brought about by enemy operations that render the Friendly Plot impossible. Plots written either indecipherably or with operations impossible to execute within the rules are treated as "no plot"; that is, the unit simply remains stationary for the Game-Turn.
21.0 Individual Tasks Summary
GENERAL RULE:
During a given Game-Turn, each unit may only perform one task.
PROCEDURE:
During the Operation Plot Phase, the Player may write down any of the following tasks of which the unit is capable (obviously, Melee units cannot execute Defensive Fire). Each task is identified by a letter code, which may be used in assigning the task on the Simultaneous Movement Plot Chart.
No more than one of the detailed tasks may be allocated to a single unit in a given Game-Turn. Once the task is allocated, the assigned unit must attempt to execute the task during the appropriate Execution Segment of the various Phases (see 19.1).
21.1 Unit Tasks
OF OFFENSIVE FIRE: a fire unit must identify its target hex.
DF DEFENSIVE FIRE: a fire unit will be capable of using Defensive Fire upon any Enemy unit that moves adjacent to it during the Movement Resolution Phase.
ML MELEE: a Melee unit must identify the hex it is attacking. A fire unit loses its Defensive Fire Zone for a Game-Turn in which it is plotted to Melee (ML). Fire units engaging in Melee Attack are treated only as Melee Units for that Game-Turn.
MV MOVEMENT: a unit must identify all hexes through which it intends to move and its destination hex. A fire unit loses its Zone of Control for defensive purposes for a Game-Turn in which it is plotted to move (MV). Fire units engaging in movement have no Defensive Fire capability, nor do they inhibit Enemy units in hexes adjacent to them.
21.2 Operation Interruption
After the Operation Plot, there are several ways a unit can be deterred from completing its plot: through disruption caused by any activity of phases prior to its own execution phase for the Game-Turn; or through destruction of its "target" as a result of prior phases; or through any combat result (such as advance by its "target" unit out of the "target" hex) that makes its plot impossible to execute.
22.0 Movement Resolution
22.1 Continuity of Movement
22.11 Movement must be plotted continuously, without any pause or "dead" time. The movement must be accomplished hex-by-hex to the destination (by any route) with no gaps between hexes.
Therefore, a Movement Plot calling for three clear hexes of movement, a two Movement Point "pause", and another two clear hexes of movement would not be allowed. If the Player wished the unit to move five hexes, it would have to be plotted continuously on the first five lines of the Plot Chart.
22.12 Movement is executed hex-by-hex. There is no differentiation between the amount of time it takes a "fast" unit to cover the same distance as a "slow" unit. All movement is executed hex-by-hex.
22.2 Opposing Forces Entering the Same Hex
22.21 If units of opposing forces attempt to enter the same hex in the Movement Resolution Phase, the force with the greater number of Melee Attack Strength Points will enter the hex first.
22.22 Bracketed Melee Attack Strength Points are undifferentiated from non-bracketed Strength Points in the Attack Strength Point calculation.
22.23 If opposing forces are of the same Melee Attack Strength Point as they attempt to enter the same hex in the Movement Resolution Phase, the die is rolled and the higher result enters the hex first.
22.3 Opposing Forces Crossing the Same Hexside
Opposing forces that attempt to cross the same hexside or enter the hex of an Enemy unit finished with movement must stop. There is no further movement by either side; and there is no combat (since they were plotted for movement and all combat segments for the Game-Turn are completed).
23.0 Defensive Strength Variation
23.1 Units Attacked When Plotted to Move
23.11 If units are plotted to move and are attacked by Melee Combat, they defend at one-half their normal Defense Strength (fractions retained).
23.12 If units are plotted to move and are attacked by Fire Combat, they defend at their normal Fire Protection Strength (see Terrain Effects Chart for full Fire Protection Strength listings).
23.2 Units Attacked When Plotted to Fire (OF or DF)
If units are plotted to use Fire Combat (Offensive or Defensive) and they are attacked by any means, they defend at full strength (Melee defense or Fire Protection Strength). They may still execute their plot.
23.3 Units Attacked When Plotted to Melee Attack
If units are plotted to Melee Attack and they are attacked by any means, they defend at full strength (Melee Defense or Fire Protection Strength). It is entirely possible that a unit might defend with its Melee Defense Strength and attack with its Melee Attack Strength in the same Melee Combat Execution Phase.
PART TWO: VIKING EXCLUSIVE RULES AND SCENARIOS
1.0 Francisca
GENERAL RULE:
Frankish AX units, in certain scenarios, are considered armed with the "francisca", a spare ax used as a defensive missile weapon. This weapon may be used only once in normal defensive fire fashion.
PROCEDURE:
In scenarios where for the Frankish AX units it is so specified, the Frankish Player has the option to use defensive fire from each of his AX units once per Game. The "francisca" has a fire attack strength of "three" units and may only be used in defensive fire.
CASES:
1.1 Until the defensive fire is actually used for an AX unit, the unit is treated like a fire unit (i.e., has power to stop movement, etc., as specified in 7.4).
1.2 The capability to use the "francisca" may be saved indefinitely. However, once it is used, the unit is no longer treated as a fire unit.
1.3 Under no circumstances may the "francisca" be anything but a defensive weapon with a range only to the adjacent hex of the AX unit.
1.4 Players should list the identification number of all Frankish AX units and check them off as the "francisca" capability is used.
2.0 Terrain Unit Prohibitions
Certain units may be prohibited from entering certain types of hexes, except through road hexsides, as below:
Class Ff units may not enter Stream Hexes; they may, however, enter Ford and Bridge Hexes.
3.0 Vikings
3.1 Viking Fleet Movement
3.11 Each Viking Fleet unit has a Movement Allowance of fifteen Movement Points. A Fleet uses this Allowance for three functions: "sailing", "mooring", and "unmooring".
3.12 A Fleet expends one Movement Point for each sea or river hex into which it moves while sailing. There is never any terrain penalty applied to Fleets.
3.13 Fleet units may move in any direction or combination of directions they desire in the same Movement Phase, as long as they move only in sea hexes or in contiguous river hexes (as shown by the "flow" of the river through the hexes). [There is no facing for Viking Fleets, as dictated in 16.0.]
3.14 A Fleet unit may transport up to three Friendly non-Fleet units at one time. CM units never count against this capacity (and an unlimited number of CM units may be transported by any one Fleet at the same time). Units being transported are placed under the Fleet unit.
3.15 The number of Friendly units transported by a Fleet has no effect upon the Fleet's Movement Allowance.
3.16 Fleet units may never end their Movement Phase in the same hex as another Fleet. They may move freely through one another's hexes during movement.
3.17 In scenarios with fleets, no units may end their Movement Phase on Ford or Bridge hexes.
3.18 A Fleet may unmoor, sail and moor, all in the same Game-Turn.
3.2 Fire Upon Moving Fleets
3.21 When a Fleet unit moves adjacent to an Enemy fire unit, the Fleet is liable to Defensive Fire immediately (i.e., the Enemy Player must state immediately whether or not he wishes to use his Defensive Fire for that Game-Turn). This procedure overrules case 7.4 (Defensive Fire). Defensive Fire used in this manner may not, of course, fire without the requisite one Player-Turn "reloading" time.
3.22 Leader units carried in a Fleet have no effect upon the Fleet. Fleets are always considered in "Movement Control Radius".
3.23 Fleets suffer "1/2-elim" and "elim" Combat Results normally. Fleets that suffer "disruption" have their Movement Allowance cut in half (to seven Movement Points) immediately and for the duration of their Disruption. Any movement that has taken place already is subtracted from the new, seven-Point Movement Allowance. The Fleet may continue to move if it has any left-over Movement Points. If there are no left-over Movement Points, or if movement has already exceeded seven Movement Points, then the Fleet simply stops where it is.
For instance, if a Fleet has moved two hexes and suffers a "disruption" through Enemy Defensive Fire, its remaining Movement Allowance for that Phase is five Movement Points (seven, the new allowance, less the two that have already been used).
3.24 Fleets are undisrupted in the same manner as regular units, during the Mutual Disruption Recovery Phase of the Player-Turn following their disruption.
3.25 Fleets, whether sailing or moored, have a constant Fire Protection Strength of four points.
3.26 Moving adjacent to a fire unit does not stop a Fleet (unlike all other units); only if the Fleet is attacked successfully (and its Movement Allowance halved through disruption) does the Fleet suffer any change. The Fleet may continue to move as long as it has Movement Points.
3.27 A disrupted Fleet that is attacked and suffers another disruption is eliminated, like any other unit.
3.28 An unmoored (i.e., sailing) Fleet cannot be attacked by Melee Combat. The Fleet may "sail" right through an Enemy-occupied ford or bridge hex, subject only to Enemy Defensive Fire. A Fleet may not end its Movement Phase on an occupied ford or bridge hex. Any Fleet that is disrupted and can move no further upon an Enemy occupied bridge or ford hex is eliminated.
3.3 Mooring and Unmooring
3.31 A Fleet must moor in order to take on or leave off units. A Fleet may moor on any river hex; and on any bridge hex unoccupied by Enemy units.
3.32 The act of mooring costs the Fleet seven Movement Points. The Fleet must have the full seven Points available and must complete the mooring in one Movement Phase. It may not split the mooring costs between two Phases. Turn the Fleet counter upside down to indicate its moored status.
3.33 The act of unmooring costs five of the Fleet's Movement Points. Unmooring cannot occur without a unit loaded on the Fleet. Fleets with no units to unmoor them are trapped.
3.34 A disrupted, moored Fleet may not load units, though it may unmoor and sail away at its reduced Movement rate, if the above conditions are met.
3.4 Loading and Unloading
3.41 Once the Fleet is moored, any unit on the Fleet may unload at a cost of two Movement Points. The two Movement Points are the cost for the unloading of the unit and its movement into any adjacent non-river, non-bridge or non-ford hex. Additionally, movement is entirely possible for the off-loaded units, up to the units' Movement Allowance.
Example: A Fleet transporting an SD unit might move 4 hexes up a river, stop, and moor (expending eleven of the Fleet's Movement Points). The SD unit is unloaded at a cost of two Movement Points to its Allowance. The SD unit could remain in the adjacent hex, or it could move two hexes further.
3.42 The instant a unit expends its two Movement Points to unload, it is treated as a normal land unit, subject to all modes of attack (including Defensive Fire). Therefore, it is possible that a unit might be unloaded adjacent to an Enemy fire unit, and be stopped from further movement in that Phase.
3.43 There is a Movement Point cost of two Movement Points for any unit to board a Fleet. The Fleet must be moored and undisrupted for this to happen.
3.5 Attacks Against Moored Fleets
Only when a Fleet is moored may it be attacked by Melee Combat. Its defensive Melee Combat Strength, used only when no Friendly units are loaded, is 4 Strength Points (it is worth 2 Victory Points). It may never make a Melee Attack. A disruption reduces its Movement Allowance to seven Points for the duration of the disruption. A disruption upon an already disrupted Fleet results in elimination.
3.6 Viking Ferocity - First Attack
To simulate the shock ability of Viking units in Melee Combat, the following three changes are made:
3.61 During the Player-Turn in which the Viking Player makes his first Melee Attack of the game, all Melee Attack Combat Odds are increased one level.
Therefore, on the first Player-Turn of Viking Melee Attack, all "2-1" attacks would be treated as "3-1" attacks; all "5-1" attacks would be considered "6-1".
3.62 This advantage is good for as many Melee Attacks as the Viking Player makes on that one Player-Turn only.
3.7 Subsequent Melee Attacks
3.71 In all subsequent Melee Attacks "one" is added to the die roll for each combat result. Thus, a roll of "three" would become a roll of "four" before the Combat Results Table was consulted.
3.72 The addition to the die roll may never produce a sum greater than "six". A die roll of "six" is not increased.
3.73 This rule is used after the "First Viking Attack." It may not be substituted for the "odds column" change of the previous rule, even if this would yield a result more favorable to the Viking Player.
3.8 Subsequent Melee Defense
3.81 In all Defensive Melee Combat following the "First Viking Attack" Game-Turn, "one" is subtracted from the die roll of any Melee Attack made against Viking units. Thus, a roll of "four" would become a roll of "three" before the Combat Results Table was consulted.
3.82 The subtraction from the die roll may never produce a difference less than "one". In effect, a die roll of "one" is not decreased.
3.9 Loss of Ferocity
If the Viking army should panic, all the above advantages of Ferocity are lost; the units are treated as normal units and must obey Panic rules.
4.0 Pre-Millennium Scenarios
4.1 Qadisiya (A.D. 637)
Persians: 10MI, 12HC, 6MC, 2 "3". VP 48, PL 19. Deploy: E-5. Stacking: 2. Leadership: Mt. Ex.
Arabs: 25HB, 2 "2". VP 52, PL 41. Deploy: F-5. Stacking: 2. Leadership: Mt. Ex.
Game Length: 20 Game-Turns.
Victory Conditions: Arabs must win a Marginal Victory. Persians must hold hexes "E" and "G". If both, the game is a draw.
Terrain Modifications: Ignore all terrain except slopes.
Historical Notes: Inspired by the religious zeal of the new religion of Islam, the Moslem Arabs invaded the Persian Empire. There was much fighting from 634 to 637, with neither side gaining a decisive advantage. At Qadisiya, however, S'ad ibn-abi-Waqqas with 30,000 Moslems defeated 50,000 Persians under Rustam. The battle featured much use of archer by both sides, although the Arabs proved to be more mobile. Pursuing, the Moslems took Ctesiphon.
4.2 Tours (A.D. 732)
Arabs: 5IB, 20HB, 1 "3". VP 56, PL 17. Deploy: C-3. Stacking: 2. Leadership: Mt. Ex.
Franks: 10MI, 5AX, 6MC, 1 "1", 1 "3". VP 34, PL 14. Deploy: A-3. Stacking: 2.
Game Length: 15 Game-Turns.
Victory Conditions: Arabs must control hex "A". Franks must achieve a Marginal Victory; or control hex "C". If both sides fulfill a condition, the game is a draw. If the Franks fulfill both conditions, they win regardless of Arab conditions.
Special Rules: Players may employ Viking Optional Rule 1.0, "Francisca."
Historical Notes: The arabs, under Abd er-Rahman, moved north into France, defeating the armies of Aquitane and besieged Tours. Charles Martel, Mayor of the Palace of the Frankish kingdom of Austrasia, brought a mixed infantry and cavalry force to do battle. He seized the high ground and dismounted his cavalry, preferring to let the Arabs batter themselves against his defensive line. As the afternoon drew to an end, the Franks turned the Arab left and the Arabs broke off the battle. The pursuit was short, stopping when the Arab camp was taken, but in the process, Abd er-Rahman was killed. The Franks did not press hard, but the Arabs withdrew from France and set up their border on the Pyrennes.
4.3 Constantinople (A.D. 860)
Byzantines: 10SD, 10IB, 5HB, 10BC, 1 "2", 1 "3". VP 92, PL 37. Deploy: D-4. Stacking: 3. Leadership: Mt. Ex.
Varangians: 20MI, 10AX, 10SD, 5IB, 2 "3". VP 77, PL 31. Deploy: C-3. Stacking: 2.
Game Length: 15 Game-Turns.
Victory Conditions: Byzantines must exit twenty units off the west map edge by Game-Turn Fifteen and: either achieve a Substantive Victory or control hex "C" for two consecutive Game-Turns. Varangians must prevent these conditions.
Terrain Modifications: Ignore all woods, river, bridge, and ford hexes.
Historical Notes: This is the only hypothetical scenario. In 860, the Rus (or Rous, as the Romans called them, or Varangians, as was their Viking name) came out of the Black Sea into the Bosphorus in their long ships. They besieged Constantinople and ravaged the countryside. The Emperor, who had been off fighting Arabs, returned and successfully led the defense. The scenario considers a Roman sortie into the countryside around Constantinople.
4.4 Paris (A.D. 885)
Vikings: 16AX, 4IB, 4VF, 1 "2", 1 "3". VP 54, PL 27. Deploy: F-4. Stacking: 2.
Franks: 8HC, 4MC, 12MI, 3 "3". VP 39, PL 10. Deploy: C-4. Stacking: 2.
Game Length: 20 Game-Turns.
Victory Conditions: Franks must exit eight units off road at northeast map edge to win. Vikings must prevent this or win a Substantive Victory. If both, Vikings win.
Historical Notes: The high water mark of Viking power came when 30,000 Vikings under Siegfried and Sinric sailed down the Seine to besiege Paris. The defenders resisted strongly, although the Vikings were surprisingly adept at siege warfare. While never completely able to invest the city, they did defeat relieving forces under Henry of Saxony and Charles the Fat. Eventually, Charles the Fat persuaded the Vikings that they should go plunder his enemies, the Gascons, instead of Paris, and so, spurred on by liberal application of Charles' gold, the Vikings left Paris for Gascony.
4.5 Lourain (A.D. 891)
Franks: 12HC, 12MI, 1 "2", 3 "3". VP 40, PL 14. Deploy: D-3. Stacking: 2.
Vikings: 9AX, 2VF, 5IB, 2 "2". VP 39, PL 20. Deploy: B-3. Stacking: 3.
Game Length: 15 Game-Turns.
Victory Conditions: Franks must occupy hexes "B" and "E" at the end of the game. Vikings must hold hex "B".
Special Rules: HC may dismount as SD.
Historical Notes: A large Viking raiding party, proceeding overland through west-central France towards Flanders was met by Arnulf of France at the Battle of Lourain. The Vikings were defeated by the French, and as a result there were few Viking raids of this magnitude in the future.
4.6 Hamburg (A.D. 988)
Vikings: 3AX, 7SD, 3IB, 5VF, 1 "2". VP 40, PL 20. Deploy: on VF, on any all-sea hexes. Stacking: 2.
Germans: 24MI, 4MC, 4 "3". VP 36, PL 11. Deploy: 6MI, 1MC, 1 "3" each at A-3, D-3, F-3, G-3. Stacking: 1.
Game Length: 25 Game-Turns.
Victory Conditions: Vikings must control hex "E" for six consecutive Game-Turns, and either achieve a Substantive Victory or have ten units (not counting VF's or Leaders) in all-sea hexes by Game-Turn 25. Germans must prevent these conditions.
Terrain Modifications: Units may enter river hexes only upon Viking Fleets. All units may enter Ford and Bridge hexes at normal Terrain costs; no units may end their Movement Phase in a Ford or Bridge hex.
Special Rules: The Viking Option 2.0, Viking Ferocity, must be used.
Historical Notes: The Vikings raided all along the coast of the North Sea looking for booty. This was one of their successful raids into Germany.
5.0 Post-Millennium Scenarios - West
5.1 Balthusta (A.D. 1014)
Byzantines: 10SD, 5IB, 5HB, 10BC, 1 "1", 1 "2". VP 77, PL 31. Deploy: F-3. Stacking: 3. Leadership: Mt. Ex.
Bulgars: 10MI, 5IB, 20HB, 2 "3". VP 67, PL 20. Deploy: C-3. Stacking: 2.
Game Length: 15 Game-Turns.
Victory Conditions: Byzantines must control hexes "C" and "E". Bulgars must achieve a Substantive Victory. If both sides fulfill these conditions, the Byzantines win.
Terrain Modifications: Ignore all sea, river, bridge, and ford hexes.
Historical Notes: The Bulgars had been giving the Romans a great deal of trouble, expanding southward into the Balkans and displacing Roman control. One of the great soldier-Emperors, Basil II, led a successful counter attack, driving the Bulgars out of Thrace and Macedonia and finally catching them at Balathusta, in modern Bulgaria. There he crushed the Bulgarian army, taking some 15,000 prisoners. He divided the prisoners into 100 man groups, blinding 99 of each group totally and the remaining man in one eye. He then sent them back to their Tsar, Samuel who, it is said, died of the shock, thereby allowing the Bulgarian Empire to collapse. Basil was surnamed Bulgaroctonus - the Bulgar Slayer.
5.2 Clontarf (A.D. 1014)
Vikings: 9AX, 3VF, 1 "2". Deploy: Any all-sea hex. 6AX, 6IB, 2 "3". Deploy: J-2. VP 57, PL 29. Stacking: 3.
Irish: 10BI, 8MC, 1 "1", 2 "3". VP 49, PL 20. Deploy: G-3. Stacking: 2.
Game Length: 15 Game-Turns.
Victory Conditions: Irish must control hexes "G", "J" and "F". Vikings must control hex "J" and exit by land movement ten non-fleet units off the south map edge.
Special Rules: Viking Ferocity Rules.
Historical Notes: Between 1001 and 1010, Brian Boru, King of Munster, had succeeded in unifying the many Irish kingdoms, enabling him to either expell or pacify the Vikings, who had controlled almost all of the kingdoms of Ireland in previous years. In 1014, however, Boru's supposedly loyal ex-Viking subjects revolted, and were reinforced by other Viking groups by sea. Boru engaged the Vikings at Clontarf and defeated the last Viking attempt to control Ireland. The Irish victory was marred, however, as Boru was killed, while praying, in the battle.
5.3 Cannae II (A.D. 1017)
Byzantines: 10SD, 5IB, 10HB, 10BC, 2 "2". VP 87, PL 25. Deploy: H-2 and/or J-2. Stacking: 3. Leadership: Mt. Ex.
Lombards: 20MI, 10SD, 10MC, 10HC, 5IB, 2 "3". VP 97, PL 29. Deploy: G-3. Stacking: 2.
Game Length: 20 Game-Turns.
Victory Conditions: Lombards must control hex "F" and achieve a Marginal Victory. Byzantines must achieve a Decisive Victory.
Terrain Modifications: Ignore all slope, hilltop and woods hexes.
Historical Notes: The Lombards, augmented by the first Norman contingent in Italy, decided to try to push the Romans out of Southern Italy. The decisive battle was fought at Cannae. This time, some 1,200 years after their defeat in the first battle of Cannae, the Romans won and broke the Lombards forever. It was the last time the Normans were on the losing side in Southern Italy.
5.4 Civitate (A.D. 1053)
Normans: 10MI, 5SD, 5MC, 5HC, 3IB, 1 "2", 1 "3". VP 51, PL 15. Deploy: G-3. Stacking: 2.
Papists: 20MI, 5SD, 5MC, 1 "3". VP 41, PL 12. Deploy: D-3. Stacking: 2.
Game Length: 15 Game-Turns.
Victory Conditions: Normans must achieve a Substantive Victory; or control hexes "D" and "E". Papists must control hexes "D" and "E" and prevent Norman victory conditions.
Historical Notes: Robert de Hauteville, surnamed Guiscard, was consolidating Southern Italy under Norman rule. The Pope, Leo IX, realized that unless he moved soon, Robert would be the effective power in the heretofore fragmented south, instead of the Pope. He assembled an army, abetted by the Holy Roman Emperor, who furnished a contingent, and met the Normans at Civitate, where his army was crushed and he was taken prisoner. The Normans were pious, so he was set free and Robert swore allegiance. From then on, the Papacy was under Norman sway, if not outright control.
5.5 Cerami (A.D. 1063)
Normans: 10MI, 10MC, 5HC, 5IB, 1 "2", 1 "3". VP 57, PL 23. Deploy: H-3. Stacking: 2.
Arabs: 10MI, 5IB, 20HB, 2 "3". VP 67, PL 20. Deploy: G-3. Stacking: 2. Leadership: Mt. Ex.
Game Length: 20 Game-Turns.
Victory Conditions: Normans must exit 20 units off the east map edge with at least three going off the south-eastern road. Arabs must achieve a Substantive Victory. If both sides fulfill their Victory Conditions, the game is a draw.
Terrain Modifications: Ignore all woods hexes.
Historical Notes: The Norman conquest of Sicily was a leisurely affair, taking some twenty years and marked, in the main, by several sieges and a good deal of intrigue as Roger de Hauteville, Guiscard's younger brother, steadily advanced his cause against the three principal Arab rulers in Sicily. Cerami was one of the few pitched battles and was won by the Normans.
5.6 Stamford Bridge (A.D. 1066)
Anglo Saxons: 15MI, 6AX, 5SD, 5MC, 6IB, 1 "2", 1 "3". VP 67, PL 20. Deploy: H-5. Stacking: 2.
Vikings: 10AX, 10SD, 5IB, 2 "3". VP 57, PL 23. Deploy: F-2. Stacking: 2.
Game Length: 15 Game-Turns.
Victory Conditions: Anglo-Saxons must achieve a Substantive Victory. Vikings must control the bridge hex between hexes "F" and "H". If both sides fulfill their victory conditions, the game is a draw.
Special Rule: Anglo-Saxon SD and AX units may stack up to three units per hex.
Historical Notes: Harald Hardrada, King of Norway, invaded Northern England, defeating the northern fyrd and had encamped some distance from York. On the morning of the battle, they moved along the Derwent River, without any armor, but with swords, shields, bows and arrows, and set up in a festive mood on the banks of the Derwent to await the city fathers of York and their expected surrender of the city. What they got was King Harold Godwineson, just arrived during the night from a long forced march from London. The Vikings withdrew across the Derwent, at the point of Stamford Bridge. Instead of defending just on the far side, they pulled rather far and once the English had forced the bridge, they had room to deploy on the far side and proceeded to attack the Vikings, eventually destroying them. Just as the victory had been assured, the Viking contingent which had been left at base camp to guard the boats arrived, practically dead with exhaustion. The rest of the battle was a turkey shoot with the English ending up giving Hardrada six feet of English soil, as Harold had promised.
5.7 Hastings (A.D. 1066)
Normans: 24MI, 5SD, 6MC, 4HC, 10IB, 1 "2". VP 85, PL 26. Deploy: C-3. Stacking: 2.
Anglo-Saxons: 20MI, 10AX, 10SD, 5IB, 1 "2", 1 "3". VP 77, PL 23. Deploy: A-3. Stacking: 2.
Game Length: 20 Game-Turns.
Victory Conditions: Normans must exit 25 units off the north map edge within four hexes of hex "A"; or achieve a Marginal Victory and control hex "A". Anglo-Saxons must prevent these conditions.
Historical Notes: Scarcely had Hardrada been defeated when William of Normandy landed in southern England and began to pillage Harold's ancestral lands of Wessex. Harold about faced and forced march south to meet William near Hastings. Harold deployed on a hill, William attacked up hill. The battle lasted all day with the Norman attacks being easily passed off by the English shield wall, which shields also easily caught the arrows being shot up at them from below, thereby preventing the usual disorder from a strong arrow attack. The English had been depleted during the day due to some unordered, spontaneous charges when it appeared that the Normans were fleeing (flight being feigned) and with the result that they were badly chopped off each time before regaining their ranks when the Normans counter attacked. The final attack was probably to be the last of the day, what with night drawing on, and William tried the novel tactic of firing his arrows into the air in an indirect fire manner, rather than firing straight uphill into English shields. A chance arrow hit Harold in the eye, mortally wounding him and taking him out of battle. Many more in the line were similarly injured and the Norman cavalry was able to charge and break the English line, routing them.
6.0 Post-Millennium Scenarios - East
6.1 Manzikert (A.D. 1071)
Byzantines: 10SD, 10IB, 5HB, 10BC, 2 "3". VP 92, PL 28. Deploy: C-3. Stacking: 3.
Seljuq Turks: 10SD, 5IB, 20HB, 1 "2", 1 "3". VP 77, PL 31. Deploy: D-3. Stacking: 2. Leadership: Mt. Ex.
Game Length: 25 Game-Turns.
Victory Conditions: Byzantines must achieve a Marginal Victory and control hex "D". Seljuq Turks must achieve a Marginal Victory and control hex "C".
Terrain Modifications: Ignore all river, bridge and ford hexes.
Historical Notes: The Seljuq Turks under Alp Arslan, invaded Roman Anatolia and Romanus IV, the Emperor, took his army out to meet Alp. After a meeting engagement which resulted in a Turkish victory, Romanus withdrew to a position near Manzikert. The Romans managed to press the Turks back and ended up taking the Turkish camp. At that point Romanus, overjudging the ability of his troops to react (having declined badly since the days of Basil II) tried to withdraw. Seeing the standards reverse direction, some of the troops in the rear started to panic. Romanus therefore decided to stand fast and reorganize. At that point, Andronicus Ducas, leading a wing of the army continued his withdrawal. Alp Arslan, seeing part of the Roman army leaving the field, fell on Romanus and, before the day was over, had captured or killed the whole of the main body. Although Romanus made some mistakes, and though victory might not have been his that day (had Andronicus not been more interested in furthering his family at the expense of Romanus and stayed to help), the Roman army would have gotten away in one piece. As a result, there was no effective Roman army left in Anatolia and, by the time the civil strife had settled in Constantinople and the frontier was stabilized, all of Anatolia, except for the Aegean and Black Sea coasts, was in Turkish hands.
6.2 Durazzo (A.D. 1082)
Byzantines: 5AX, 5SD, 5IB, 5HB, 10BC, 1 "3". VP 76, PL 30. Deploy: A-2. Stacking: 2. Leadership: Mt. Ex.
Normans: 5MI, 5SD, 15HC, 3CB, 1 "2", 1 "3". VP 56, PL 17. Deploy: C-3. Stacking: 2.
Game Length: 20 Game-Turns.
Victory Conditions: Normans must exit fourteen units off the north map edge within four hexes of hex "A"; or control hex "A" and achieve a Marginal Victory. Byzantines must control hex "C". If both sides fulfill their victory conditions, the game is a draw.
Special Rule: Norman HC and Byzantine BC units may stack up to three units per hex.
Historical Notes: Robert Guiscard decided to take on the Romans and landed his army near Durazzo. Alexis I Comnenus assembled an army to meet him. Alexius' main force was the Varangian Guard, formerly made up of Varangians, but now heavily manned by emigre English, still smarting from Hastings. Although well conducted and initially successful for the Romans, the battle turned against them when the Normans, in a situation very like the feigned flight at Hastings, drew the Varangian Guard into an ill-timed attack which took the Varangian Guard out of friendly lines. The Normans fell upon them and cut them to pieces. After that, Alexius had no alternative but to flee, being pursued into Greece until Robert Guiscard was called back to Italy to settle some new problems.
6.3 Dorylaeum (A.D. 1097)
Crusaders: 10MI, 5SD, 15HC, 8CB, 1 "2", 1 "3". VP 76, PL 38. Deploy: One-half of Victory Point value at E-3; and remainder of force enters on the first Game-Turn on the east map edge. Stacking: 2.
Seljuq Turks: 5SD, 5IB, 25HB, 10MC, 1 "3". VP 96, PL 38. Deploy: C-2 and/or D-2. Stacking: 2. Leadership: Mt. Ex.
Game Length: 20 Game-Turns.
Victory Conditions: Crusaders must achieve a Substantive Victory. Seljuq Turks must completely eliminate the Crusader initial deployment (E-3) force. If both sides fulfill their Victory Conditions, the game is a draw.
Terrain Modifications: Ignore all terrain and effects except for slope and hilltop hexes.
Historical Notes: The left hand column of the Crusader army was attacked by a superior force of Turks, led by Kilij Arslan. The mobility of the Turks allowed them to run rings around the Crusaders and the battle was going in the Turks' favor until the right wing of the Crusaders arrived and sandwiched the Turks between the two Crusader elements. Deprived of their mobility, the Turks were cut to pieces. A good example of the relative merits of the Crusader and Saracen systems.
6.4 Hattin (A.D. 1187)
Crusaders: 20MI, 6HC, 10CB, 5HB, 1 "2", 1 "3". VP 74, PL 30. Deploy: B-4. Stacking: 2.
Moslems: 20HB, 5MC, 3 "3". VP 53, PL 16. Deploy: A-3 and/or C-3. Stacking: 2. Leadership: Mt. Ex.
Game Length: 20 Game-Turns.
Victory Conditions: Crusaders must exit sixteen units to sea hexes by Game-Turn Ten; or control hex "F" at the end of the game. Moslems must achieve a Substantive Victory. If both sides fulfill their Victory Conditions, the game is a draw.
Terrain Modifications: Ignore all woods, swamp, river, bridge and ford hexes.
Historical Notes: Saladin proclaimed a jihad (holy war) and retook Palestine. At Hattin (or Tiberias, as it is sometimes called) the King of Jerusalem, Guy de Lusignan, had an army made up of the garrisons of the principal Crusader cities. Saladin separated the Crusader infantry from the cavalry and defeated them in detail, capturing the True Cross in the process and leaving the Crusader forces in disarray in Palestine. This led to the raising of the Third Crusade.
6.5 Liegnitz (A.D. 1241)
Mongols: 10MC, 10HC, 20HB, 1 "1", 1 "3". VP 82, PL 33. Deploy: D-3. Stacking: 3. Leadership: Mt. Ex.
Germans: 25MI, 10HC, 15CB, 2 "3". VP 92, PL 37. Deploy: G-3 and/or E-3 not south of the river. Stacking: 2.
Game Length: 20 Game-Turns.
Victory Conditions: Mongols must achieve a Substantive Victory. Germans must control hexes "C" and "E". If both sides fulfill their Victory Conditions, the game is a draw.
Historical Notes: The Mongols, led by Subotai, marched into Europe. Kaidu, one of their generals, was charged with the right flank. Prince Henry the Pious of Silesia moved on the Mongols and set up a defensive position at Liegnitz. King Wenceslaus of Bohemia marched north to aid him, but Kaidu moved first, crushing Henry and routing all resistance north of the Carpathians. Wenceslaus returned to Bohemia and the Mongols moved to Vienna, only to be stopped by the death of Ogatai, Ghengis Khan's son, which led to their withdrawal from Europe.
6.6 El Mansura (A.D. 1250)
French: 12MI, 12HC, 6MC, 2 "2". VP 50, PL 35. Deploy: H-3. Stacking: 2.
Arabs: 12HB, 8CB, 9MC, 6MI. VP 72, PL 36. Deploy: E-3, F-3, or G-3. Stacking: 2. Leadership: Mt. Ex.
Game Length: 15 Game-Turns.
Victory Conditions: The French must exit twelve units off the north map edge. The Arabs must prevent this and control all three deployment hexes listed. If neither condition is achieved, the game is a draw.
Terrain Modifications: Ignore all Stream hexes.
Historical Notes: Louis IX of France led the Seventh Crusade, landing in Egypt. The Moslems blocked the Crusaders' advance at a canal north of Cairo. The Count of Artois, Louis' brother, led the French knights across an unguarded ford, on 8 February, 1250, and drove the Turks into the village of El Mansura. The knights pursued them into the village, where they were easy targets and soon wiped out. Meanwhile, Louis' forces had forced a crossing of the canal, but were so weakened that they could not continue. Two months later, the Crusaders' Line of Communications was cut, and they were forced to withdraw.
7.0 Designer's Notes
7.1 General System Comments
PRESTAGS is, of course, an attempt to unify five older games, namely Armageddon, Phalanx, Centurion, Dark Ages and Renaissance of Infantry into one compatible system. Many of the older games differed widely in their levels of complexity and their attempts to simulate the various periods of warfare. For example, in the original Phalanx system, each counter had an actual stacking point value and it was necessary to compute these values not only at the end of the Movement Phase, but also during the course of movement, in the Movement Phase. There were also more restrictive leadership rules, that forbade a unit from effectively doing anything outside of leadership control radius (which was also more limited). In that game, a unit could not even turn facing to meet an enemy attack without leadership.
During this series we gradually realized that SPI had made a number of mistakes, both in the actual production and the game design conceptions. Insufficient quality of development and basics such as proofreading made these games suffer. Additionally, although people (some of them at least) enjoyed many of the game restrictions (leadership, feudal cavalry, etc.), this could be overdone. They wanted the flavour of the rules, but still demanded a functional game.
In this latest attempt, PRESTAGS is attempting to satisfy almost all the people who will buy these games. There are at least two or more levels of complexity in every game. The scenarios have been checked for accuracy at least three times. Many of the inhibiting rules have been changed to moderate their influence. New scenarios have been included, and others revised.
Most importantly, these games are also completely homogeneous. Although many people independently have "linked" the previously published games, this system has been designed from the ground up to demonstrate the ebb and flow of military systems, throughout most of recorded history, and to permit the game player to match them in any way desired. For the first time it is possible to match the pharaoh's armies against a Spanish tercio, or Alexander the Great against Scipio Africanus. This is possible only due to the earlier games, and the advance of the state of the art.
7.2 Viking Designer's Notes
The Viking Period was one of the more interesting in terms of weapon systems. This was due mostly to the devolution of warfare from any large center of power expanding to a series of competing systems. Actually, very few long-lasting, coherent systems evolved in Western Europe during this period. The best of them were the various "barbarians" (Arabs, Norsemen, eastern horsemen), and the declining Byzantines.
Obviously, a whole new section was needed to cover the Vikings. Their unique use of primitive sea mobility, and amphibious operations is reflected. Less well-known were the "berserkers", both as individuals and as a mentality. These people would work into a frenzy (frothing, etc.) and give an incredible initial impact. The Vikings were not well-armed, per se, only comparatively, but they were highly motivated.
The early Franks were trained to throw their battle axe in what passed then for a volley. Again, this gave them tremendous impact. Warfare of the period very often depended on the first clash, especially among infantry, and these two systems were about the best.