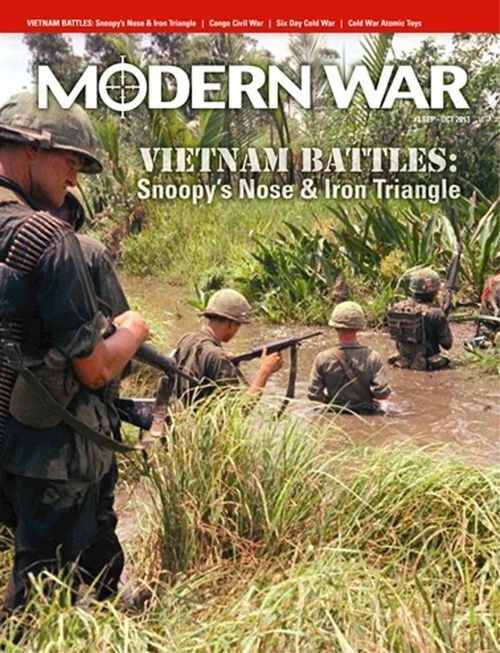
Vietnam Battles: Snoopy's Nose & Iron Triangle
Vietnam Battles: Snoopy's Nose & Iron Triangle Rulebook
Table of Contents
Table of Contents
- Standard Rules
- Exclusive Rules
Standard Rules
1.0 INTRODUCTION
Each folio game represents an actual or hypothetical battle, as included at the end of the Standard Rules section (known as the Exclusive Rules). The map included with the game represents that actual battle's terrain, and the pieces represent the actual units which participated in the battle. The Standard Rules are rules that generally fit all of the folio games, and the Exclusive Rules are specific to each battle represented.
This rules system uses the Decision Games' Folio Fire & Movement game system.
2.0 GAME EQUIPMENT
This game should include the following components:
- 1 Standard Rules booklet
- 1 Exclusive Rules booklet
- 1 Map
- 1 Counter sheet of playing pieces
If any parts are missing or damaged, please write to:
Decision Games P.O. Box 21598, Bakersfield, CA 93390-1598
2.1 THE GAME MAP
The 22x17" mapsheets portrays the battle area. A hexagonal grid is superimposed over the terrain features to regulate the movement and positioning of the game pieces throughout the game.
Note: River hexes where no bridge symbol is printed is a non-bridged hexside, even if a road symbol (without a bridge) crosses over that hexside.
2.2 CHARTS & TABLES
Various visual aids are provided for the players to aid, simplify and illustrate certain game functions. They are the Combat Results Table, the Terrain Key, and the Game Turn Record Track. Some Exclusive Rules will mention additional charts, occasionally.
2.3 THE PLAYING PIECES
The cardboard pieces represent the actual military units that took part in the battle. The numbers and symbols on the pieces represent the strength, movement capability, and type of unit represented by each piece. Those pieces will hereafter be referred to as "units."
2.3.1 HOW TO READ UNITS
Most units contain identifiers or names, and sizes. The identifier or name of a unit generally has no bearing on play, except as part of some set-up and reinforcement rules. An identifier that lists two numbers separated by a slash represents the battalion # and then the regiment # from which that battalion derives (though that parent regiment may or may not be included in the game). For example, a unit printed with 4/47 is referring to the 4th Battalion of the 47th Regiment. A single # identifier typically refers to a single formation of its type (for example, 9 could refer to the 9th Division). Unit sizes are identified by a roman numeral:
- I = Company
- II = Battalion
- III = Regiment
- X = Brigade
2.3.2 DEFINITION OF TERMS
Attack Strength is the relative strength of a unit with regard to attacking other units, expressed in terms of attack strength points.
Defense Strength is the relative strength of a unit with regard to defending against the attacks of enemy units, and is expressed in terms of defense strength points.
Combat Modifier is the strength of support fire markers (representing everything from corps artillery, naval support, aerial bombardment, organic mortars, etc.) used to attack enemy units, and is expressed in terms of a "+" value that may be added to the strength of a friendly unit during combat or as a bombardment value.
Movement is the maximum number of clear terrain hexes through which that unit may be moved during a single movement phase; each such hex requires one movement point of the movement allowance. More than one movement point will be required for other types of (non-clear) hexes, though road and trail hexes will negate terrain costs.
Leg unit is a unit that is not a "mobile" unit, which generally represents any type of unit that lacks conveyance or transport.
Mobile unit is a unit that is not a "leg" unit, which generally represents any type of unit that moves by a means other than human feet. A "mobile" unit can be anything from tanks to wagons. Only "mobile" units are permitted to move during the mobile movement Phase (see 4.1).
2.4 GAME SCALE
Each hexagon on the mapsheet represents from several hundred to several thousand yards from side to side. Each game turn is equivalent to one or many days of real time.
3.0 SETTING UP THE GAME
The cardboard playing pieces should be punched out of the counter sheet; the differently colored units represent forces of opposing sides. Players should determine which side each will play. Then the players consult their respective set-up found in the Exclusive Rules. Those charts list the strength of each unit in play on the map during the first game turn. Unit values are listed as follows.
For example, a 5-6-8 is a unit whereby "5" is the unit's attack strength, "6" is the unit's defense strength, and "8" is the unit's movement allowance. Support fire markers simply list a single modifier (such as the "+2" above).
Units may be assigned specific set-up hexes, or the players may be instructed to choose the set-up hexes for their units, in which case one player or the other will be instructed to deploy his units first. Units specified as reinforcements are to be placed in a space on the Game Turn Record Track. The Exclusive Rules for each battle will specify the quantity of reinforcement units that arrive and on which game turn. Other information printed on the Turn Record Track / Reinforcement Track appears as follows:
The support fire # is the allotment of support fire markers (not points) per game turn. Generally, the support fire allotment represents such things as naval gunfire from ships far offshore, or bombers flying in from distant bases or aircraft carriers, as well as artillery units of all types and sizes (which are not represented as units in the game). The support fire allotment number equals the total number of support fire markers a player will receive at the beginning of that current game turn.
The Exclusive Rules indicate which player is the first (starting) player. The victory conditions indicate how the game can be won. Play proceeds according to the sequence of play for the number of game turns specified by the Exclusive Rules.
4.0 SEQUENCE OF PLAY
This game is played in successive game turns, each of which is composed of alternate player turns. During each game turn the players maneuver their units and resolve combat according to the sequence outline, and within the limitations provided by the rules. At the conclusion of the last game turn, the victory conditions are consulted and a winner is determined.
4.1 SEQUENCE OUTLINE
Each game turn is divided into a "First Player Turn" followed by a "Second Player Turn" (one player takes the First Player Turn while the other player afterward plays the Second Player Turn). The turn track on the map indicates which player is the "first" player. Each of the player turns must be played through according to the following sequence.
Movement Phase. The current player may move all, some or none of his units as he desires within the limits and restrictions of the rules of movement, zones of control, terrain effects and any exclusive rules. The current player may bring reinforcements onto the map as allowed by his reinforcement schedule and the reinforcement rules. The other player may not move any of his units at this time.
Any mobile units that move during this phase will not be eligible to move during the upcoming mobile movement phase.
Combat Phase. After all movement is completed, the current player uses his units to attack the other player's units. The current player may execute his attacks in any order he desires, but each attack must follow this sub-sequence.
A) The current player states the quantity and the strength of his attacking units, and what enemy unit is being attacked by them.
B) The current player assigns available support fire markers (if he wishes) to add to the combat strength of his attack (as described in 8.3).
C) The opposing player assigns available support fire markers (if he wishes) to add to the combat strength of his defense (as described in 8.3).
D) Calculate the combat differential: the total attacking strength value minus the total defending strength value. Adjust that differential according to the type of terrain occupied by the defending unit. Then consult the column on the Combat Results Table that corresponds to that final combat differential. Roll a six-sided die and cross-reference that result within the chosen combat differential column on the CRT, and apply the results immediately.
Mobile Movement Phase. After combat, mobile units (only) are permitted to move during this phase if such units did not already move during the preceding regular movement phase. Mobile movement is identical to regular movement, except that only mobile units (not leg units) may move during this phase.
Mobile Combat Phase. After the mobile movement phase, mobile units (only) are permitted to attack this phase if such units did not already attack during the preceding combat phase. Mobile combat is identical to regular combat, except that only mobile units (not leg units) may attack during this phase.
After all movement and combat by the first player have been completed, the second player begins his movement and combat, using the procedure described above. After the second player has completed his movement and combat, the game turn ends. Remove all Support Fire markers (whether used or not) from the map, but keep them handy to be available for support fire allocation during the next game turn. Then advance the Turn marker one space along the Game Turn Record Track, signaling the start of a new game turn.
5.0 MOVEMENT
During the movement phase, the current player may move as many or as few of his units as he wants. The units may be moved in any direction or combination of directions (into non-prohibited terrain) up to the limits of each unit's printed movement allowance. Units are always moved one at a time, tracing a path of contiguous hexes through the hex grid. As each unit enters a hex, it pays one or more movement points (MP) from its movement allowance (MA).
During the mobile movement phase, the current player may move as many or as few of his mobile units as he desires, but only those that hadn't already moved during the preceding movement phase of the same player turn.
The mobile units may be moved in any direction or combination of directions (if into non-prohibited terrain) up to the limits of each mobile unit's printed movement number (in hexes). Mobile units are always moved one at a time, tracing a path of contiguous hexes through the hex grid. As each mobile unit enters a hex, that unit pays one (or sometimes more) movement points from its printed movement allowance.
5.1 MOVEMENT RESTRICTIONS
Movement may never take place out of sequence. A player's units may only ever be moved during his own movement phase (or mobile movement phase, if a mobile unit). During the combat phase, a unit that has either attacked or defended may possibly advance or retreat, but that is not considered a move, and does not require the expenditure of any movement points. Neither player may ever conduct movement during the opposing player's movement phase and/or mobile movement phase.
A unit may never enter any hex containing an enemy unit, nor enter any prohibited terrain hex (such as an all water hex). No unit may ever leave the map.
A unit may never expend more movement points than its total printed movement allowance during any one turn. A unit may expend all, some or none of its movement points during any single turn, though any unused movement points may not be accumulated from phase to phase or from turn to turn, nor ever transferred to another unit.
When any unit's movement has been completed, it may not be moved again during that same turn, except as a retreat or an advance after combat.
5.1.1 ZOC MOVEMENT EFFECTS
Any leg unit that begins its movement in a hex not in an enemy zone of control (EZOC; see 6.0) and enters a hex adjacent to an enemy unit must stop its movement immediately, regardless of how many MP it has remaining.
A mobile unit must expend half of its printed MA (plus the normal cost of terrain) when it both exits and enters an EZOC during the same Movement Phase. However, when a mobile unit exits an EZOC and enters a non-EZOC hex (or exits a non-EZOC hex and enters an EZOC hex), only the normal cost of terrain applies.
Any leg unit that begins its movement in an EZOC may move into an adjacent hex that is not in an EZOC per the normal terrain cost, and may continue movement normally. However, that leg unit must halt its movement if it enters another EZOC.
A mobile unit does not expend half its MA to leave an EZOC, but would be required to expend half of its MA if it then entered another EZOC during that same movement (as well as the normal cost of terrain in each entered hex).
5.1.2 INFILTRATION
Any leg unit that begins its move already adjacent to any enemy unit (in an EZOC) may move into one adjacent EZOC hex if it expends all of its MA (disregard the normal movement cost in that adjacent hex).
Any mobile unit that begins its move already adjacent to any enemy unit (in an EZOC) may move into one adjacent EZOC hex if it expends half of its printed MA (rounded down) plus the normal terrain movement cost of the hex it enters. It may continue moving if it has MPs remaining.
In either case, it's therefore possible to move any unit from one EZOC to an adjacent EZOC. Mobile units may be able to infiltrate from one EZOC to another, move out of EZOC, move several more hexes, and enter another EZOC.
Exception: Unit may generally not move from EZOC to EZOC across a minefield hexside or to enter a fortification hex; however, this restriction doesn't apply to commandos. Commandos don't pay any additional movement costs to enter or exit EZOC.
None of the above applies to retreat or advance after combat, which isn't considered "normal" movement.
5.2 EFFECTS OF TERRAIN
Any unit must expend one movement point to enter a clear terrain hex. To enter other types of hexes, a unit must expend more than one movement point; see the Terrain Key printed on the map for the movement cost for each type of terrain entered (for example, 2 MP = 2 movement points required to enter that hex). Additionally, some hexsides are printed with other types of hexside terrain features (such as a river), which also require movement points to cross in addition to the movement points required to enter the hex itself. That cost is in addition to the terrain cost for entering the hex. All movement point costs are cumulative.
No unit may enter a hex if that unit does not possess sufficient movement points remaining to pay for the cost to enter, as well as the cost of any crossed hexside terrain feature, if any.
5.2.1 ROAD MOVEMENT
Any unit that moves from one road hex directly into an adjacent road hex through a road hexside expends only ½ movement point, regardless of other terrain in the hex.
5.2.2 TRAIL MOVEMENT
Any unit that moves from one trail hex directly into an adjacent trail hex through a trail hexside expends only one movement point, regardless of other terrain in the hex.
5.3 STACKING RESTRICTION
No unit may ever end its movement stacked with any other unit (although a unit may move through hexes occupied by any other friendly units at no extra MP cost). Stacking is prohibited.
6.0 ZONES OF CONTROL
The six hexagons surrounding each hex constitute the zone of control (ZOC) of any unit in that hex. Hexes into which a unit exerts a zone of control are called zone of control hexes. All units exert a zone of control at all times, regardless of the phase or the player turn, during the entirety of every game turn.
Zones of control extend into all types of terrain and across all types of terrain hexsides. However, some fortifications (for example, the West Wall) will negate enemy zones of control into the fortification's hex.
The presence of zones of control is never affected by other units, enemy or friendly. If enemy and friendly zones of control extend into a hex, they have no effect upon each other; both co-exist, and the hex is mutually affected by both ZOC. If a unit is in an enemy ZOC, the enemy unit is also in that unit's ZOC.
6.1 EFFECTS ON MOVEMENT
Zones of control inhibit the movement of enemy units, as explained under 5.1.1.
6.2 EFFECTS ON RETREAT AND ADVANCE AFTER COMBAT
Units retreating after combat are prohibited from retreating into hexes in an enemy ZOC (see 7.7). Units advancing after combat ignore enemy ZOC (see 7.9).
7.0 COMBAT
Combat is only ever possible among opposing units that are presently adjacent, but is not mandatory. Any support fire markers being used as bombardment are exceptions (being adjacent is not a requisite), though bombardment is not considered to be combat.
The current player (of the current player turn) is the "attacker;" the other player is the "defender." Combat only ever occurs during the current player's combat phase, per the steps outlined under rule 4.1.
The current player is not required to declare all of his intended attacks at the outset of the combat phase; he may decide each attack as he reviews the map, though all attacks must be resolved to completion one at a time. Separate combats can be resolved in any order the attacker wishes, provided each combat is resolved before the next combat is declared.
7.1 WHICH UNITS ATTACK
Among all of the opposing units adjacent to each other, the attacking player may decide which of his units will be participating in an attack on which defending units, as well as which of his units will not be participating in any attack. A defending unit can be attacked by as many (or as few) attacking units as the attacking player desires, as long as all the attacking units are adjacent, and provided each of the attacking units is not attacking across prohibited or restricted terrain (such as a sea hexside).
The type of terrain the attacking unit(s) are in has no effect on their eligibility to attack, except in the case of a prohibited hexside between the attacker and the target hex.
Eligible attacking units from two (or more) hexes (if they are each adjacent to the defender's hex) can add their printed attack values together to attack as a combined value. Support fire may be added per 8.0.
The current player may conduct as many attacks (only during his own combat phase) as there are existing enemy units on the map to be attacked (by the current player's adjacent eligible units, if any).
7.2 COMBAT PARAMETERS
No particular unit may attack more than once during the same combat phase, and no enemy unit may ever be attacked more than once during the same combat phase (though an enemy unit may be subjected to bombardment by support fire and then a normal attack during a combat phase).
7.3 COMBAT DIFFERENTIAL
The combat differential is merely the net quantity of attack strength points (including any support fire) compared to the net quantity of defense strength points (including any support fire). The differential is the sum of the total defense value subtracted from the sum of the total attack value.
After calculating the combat differential (see 4.1), consult the Combat Results Table and cross-reference the column indicating the terrain type in that combat hex (the defending unit's hex) with the die roll. In other words, the intersection of the die roll line and column yields a combat result. Implement the indicated combat result immediately (before resolving any additional attacks).
Note: Support fire, if available, may be added by a player during his own combat phase. The defending player may also add his own support fire markers, if available, to combat during the other player's combat phase. In any case, support fire markers used during a player's own combat phase are not available to be used during the enemy combat phase, nor vice versa, during the same game turn.
Note: all attack and defense strengths are always unitary. That is, a unit's strength may not be divided among different combats, whether as the attacker or the defender. Likewise, a unit may not have its attack and defense strengths combined for any reason.
7.4 EFFECTS OF TERRAIN
Defending units, only, benefit from the terrain in the hex they occupy and/or that hex's perimeter hexside terrain feature. The terrain within the hexes occupied by attacking units has no effect upon combat.
Defending units do not benefit from river or ditch hexsides unless all of the attacking units are attacking that defending unit across a non-bridged river or ditch hexside into that hex.
The effect of terrain on combat has been integrated into the Combat Results Table. Simply refer to the terrain in which the defending unit is present, and cross-reference that terrain type with the combat differential per 7.3. The combat die roll result must correspond to that column.
Terrain benefits for combat are never cumulative; a defending unit always benefits only from the most defensively advantageous terrain type in its hex. For example, a unit in rough terrain surrounded by a river hexside would benefit only from the rough type of terrain.
7.5 FORTIFICATIONS
If a particular game includes fortifications (whether printed, or as game pieces), the printed defense strength of any unit in a fortification hex is doubled while that unit is in that hex. Moreover, the combat modifier (the "+" value) of any attacker's support fire or bombardment marker applied to a fortification hex is halved (round down). This rule does not apply to support fire markers applied by the defending player.
7.6 COMBAT RESOLUTION
The combat results, as printed on the Combat Results Table, are explained as follows:
- De = The defending unit is entirely eliminated.
- D3 = The defending unit must retreat three hexes.*
- D2 = The defending unit must retreat two hexes.*
- Ex = One attacking unit and the defending unit must be flipped to their depleted side (or eliminated if already depleted). Among multiple attacking units, the attacker chooses which unit becomes depleted.
- A1 = The attacking unit(s) must retreat one hex.*
- A2 = The attacking unit(s) must retreat two hexes.*
- A3 = The attacking unit(s) must retreat three hexes.*
- (A) = One attacking unit must be depleted (or be eliminated if already depleted), of the attacker's choice among multiple units.
- Ae = All attacking units are eliminated.
* The retreating player may choose to ignore his retreat requirement by choosing to deplete his own unit instead (see 7.8).
Note: A dot combat result is no effect.
If the combat result is a retreat, the retreating player retreats his own unit in accordance with the retreat rules (see 7.7).
7.7 HOW TO RETREAT
When a combat result requires a unit to be retreated, the owning player must immediately attempt to move that unit the indicated number of hexes away from their combat position. This movement is not normal, and therefore requires no movement points to be expended.
A retreating unit must retreat a path of hexes that is farther away from the enemy unit(s) that caused the combat result (or, farther away from the defending unit that caused an attacker retreat).
If possible, a retreating unit must retreat along a path of vacant hexes (that is, not occupied by other friendly units), though a unit may retreat through friendly occupied hexes if no other retreat route of vacant hexes is possible. Under no circumstances may a unit retreat into or through any hex presently occupied by an enemy unit or in an EZOC.
A unit may not retreat into or through any prohibited terrain (such as an all-sea hex). Seaborne units that are required to retreat to a sea hex must be depleted (or eliminated if already depleted or a one-sided unit).
While retreating, a unit may not enter any hex in an EZOC. Friendly units and friendly units with a zone of control into a particular hex do not negate any EZOC into that same hex for the purposes of retreat.
Any unit that must retreat must terminate its retreat movement the number of hexes away required by the combat result retreat number (from its original combat hex). If it can not, it is depleted in the last hex it can legally retreat to, or is eliminated if already depleted or is a one-sided unit. In that case, the retreat path is considered to be the last hex that eliminated unit could legally retreat into; see 7.9.
If any unit is unable to retreat per those restrictions, it is eliminated instead.
7.7.1 BOMBARDMENT RETREAT
A unit that must retreat because of a bombardment must retreat farther away from the closest enemy unit, or toward a friendly unit of the owning player's choice if there are no enemy units on the map. If such a retreat will cause a unit to inevitably retreat closer to an enemy unit, it may retreat toward either one, but must then be depleted. If any unit is unable to retreat after bombardment, it is eliminated.
7.7.2 DISPLACEMENT
If a retreating unit's only available final hex in a retreat path is occupied by another friendly unit (not involved in that same attack), the retreating player may choose to "displace" (move) that other friendly unit from its hex (in order to allow the retreating unit to occupy its hex) to one adjacent hex as if that other friendly unit was also retreating as a result of combat. Such displacements may never be made into a prohibited hex, nor into an EZOC, nor into a hex in which the retreating unit would be stacked with another unit. After the displaced unit has moved, the retreating unit may retreat into that other friendly unit's formerly occupied hex.
Additionally, a displaced unit is also permitted to displace another friendly unit using that same procedure, and that other displaced unit may displace yet another friendly unit, and so forth (a given unit may be displaced more than once). Note, however, any unit displaced is assumed to have suffered a retreat (as if a normal combat result), and is thus ineligible to conduct any attack during that turn.
Displacement is voluntary; a retreating unit unable to retreat because of the presence of other friendly units may be depleted or eliminated instead of displacing, as described in 7.7, rather than displace another friendly unit.
A retreating unit may not displace another friendly unit if any eligible vacant hex is available. Similarly, a retreating unit doesn't displace another friendly unit when merely moving through that other unit's hex during the course of a retreat.
7.8 STIFF RESISTANCE
Instead of obeying a retreat combat result, a player may declare "stiff resistance" instead, whereby that unit is not required to retreat at all; however, that unit must then be immediately depleted. A player may opt to declare a depleted or one-sided unit to offer "stiff resistance" to avoid the retreat combat result. (The depleted or one-sided unit must be eliminated in that case, but the retreat result is thereby nullified.) That prevents any advance after combat into that combat hex; see below.
7.9 ADVANCE AFTER COMBAT
Attacking units are only permitted to advance after combat following a retreat combat result on an attacked (defending) enemy unit. No defending unit may ever advance after combat, even after an "A1," "A2" or "A3" combat result.
Whenever an enemy unit is forced to retreat or is eliminated as a result of combat, it will leave a path of vacant hexes behind it called the path of retreat (this includes units that were eliminated when unable to complete the entire retreat; see 7.7). Any or all units that participated in the combat that caused the retreat are then eligible to advance along that path of retreat. The decision to advance after combat must come immediately after the retreat is completed, but no unit is ever forced to advance after combat. Advance after combat is special insofar as all of the advancing units that caused the retreat may ignore enemy zones of control along the entire path of retreat.
Any unit(s) advancing after combat may end their movement in any of the hex(es) along that path of retreat, but they may not stray from the path of retreat while moving. If multiple units advance after combat, no more than one may end its movement in any one hex of the path of retreat.
After an advance after combat, an advancing unit isn't eligible to attack or perform any other activity during that player turn (unless specified otherwise by a particular Exclusive Rule). An advanced unit is subject to attack by any eligible enemy units as of the immediately following enemy combat phase.
8.0 SUPPORT FIRE
Support fire represents indirect fire assets not represented in the game by actual game pieces. As such, support fire exists as markers players are allotted from a chit pool, which may only appear on the map during the resolution of combat. In other words, support fire markers do not exist on the map as units; they simply represent the incoming fire from such supporting assets.
Each side is provided with its own pool (chit pool) of support fire markers, which are allotted by the support fire allotment number printed on each space of the Game Turn Record Track. The support fire # is the allotment of support fire markers (regardless of their value) per game turn. The support fire allotment number equals the total number of support fire markers a player will receive at the beginning of that game turn. If two numbers are listed, the first number is the support fire allotment for the first player, whereas the second number is the support fire allotment for the second player. The Exclusive Rules indicate which player is the first (starting) player.
For example, "8/9" printed in the first game turn space of the Crusader game map indicates the British player (who is the first player) is allotted 8 support fire markers, and the German player (who is the second player) is allotted 9 support fire markers (see 3.0).
8.1 ALLOTTED SUPPORT FIRE MARKERS
If the allotment of support fire markers indicated on the Game Turn Record Track is less than the total quantity of markers in the pool for that player's side, that player must select from the lowest-valued markers before selecting higher-valued markers. That is to say, selected support fire markers must be selected in order from lowest to highest.
8.2 SUPPORT FIRE LIMITLESS RANGE
Support fire markers have no range limits; they may be added to any combats occurring anywhere on the map unless stated otherwise by the Exclusive Rules.
8.3 SUPPORT FIRE APPLICATION
All support fire markers function the same, though some markers have different printed "+" values (the combat modifier). The value represents combat strength players may apply to combats that occur during the course of the turn. Naturally, the higher valued support fire markers are more powerful than the lower valued markers. A support fire marker may only be used once during each game turn.
When any combat is announced, the attacking player may declare his intention to apply support fire to that combat, as may the defending player. However, the attacking player must always apply the first support fire marker, if he chooses to do so. Then the defending player may decide to also apply a single support fire marker of his own. Thereafter, the attacker may apply his second support fire marker to that combat, if he chooses (whether or not the defender applied a support fire marker of his own). Finally, the defender may apply the last support fire marker, if he chooses (even if no support fire markers had been applied by either player until then). In other words, the attacker and the defender alternate applying their own support fire markers, if they choose, to each announced combat.
If the attacking player declines to play a second support fire marker, the defending player may apply his second support fire marker nonetheless, although the attacking player may not then play any additional support fire markers after-the-fact.
If the defending player declines to play his first support fire marker, he is nonetheless eligible to apply his second support fire marker, though the defending player may not then retroactively play his first support fire marker. Once a player declines to apply his first or second support fire marker, his opportunity is forever lost during that announced combat.
Applying support fire is always voluntary, though once declared, a player may not change his mind, nor may the announced combat be cancelled.
As implied, a player may add up to a maximum of two support fire markers to an attack or defense from among the markers he has been allotted that game turn to any particular combat. Once used, they are then returned to the player's chit pool.
Whether as the attacker or the defender, the applying player simply places his support fire marker(s) in the combat hex (the target hex of the declared attack), and then adds the support fire markers "+" number to his total attack value (for example, if two 4-4-10 units are attacking a 2-3-8 unit, the total attack value is "8"; if the attacking player then adds two "+2" support fire markers, the final attack value becomes "12." If the defending player adds a "+6" support fire marker to that same combat, the final defensive value would then become "9," that is, a defending 2-3-8 unit +6 = "9").
8.4 BOMBARDMENT SUPPORT FIRE
Prior to resolving any announced combats, Support Fire markers may be used alone to attack enemy units (that is, not in concert with any actual ground attack), in a process known as a "bombardment." To conduct a bombardment, the current player may select any enemy unit(s) anywhere on the map as the target of each bombardment (only during his own combat phase and prior to the resolution of the first regular ground attack). He then conducts each bombardment exactly as if a normal attack using the Support Fire marker's "+" value ("combat modifier") to calculate the differential (minus the targeted unit's defense strength). In such a case, a bombardment is resolved like normal combat, except "Ex" results only affect the target never the bombarding marker. Further, an A1, A2 or A3 result is always ignored.
Each Support Fire marker may only target one enemy occupied hex. Further, a maximum of two markers may be used to bombard the same hex during the same player turn, though both the markers may be of any value from among the markers drawn from the chit pool. Once a marker is used, it's returned to the chit pool where it's eligible for reuse as described in 8.1.
8.4.1 COUNTER-BATTERY FIRE
A player may also add (a maximum of two) support fire markers (per the same alternating procedure as 8.3) to the defense of any friendly unit that is the target of a bombardment. The value of the defending player's own support fire marker(s) thus simply reduces the bombarding player's total bombardment value by an equivalent amount. (For example, if the bombarding and the defending player's support fire markers are each "+6," then the bombardment value is thus "0").
8.4.2 FRIENDLY FIRE
After resolving a bombardment, if the Combat Results Table indicates any type of "(A)" result, the bombarding player must apply that result to a single friendly unit that is closest to that originally targeted enemy unit. If there are multiple friendly units equidistant to that enemy unit, the bombarding player may choose which of his own friendly units is affected by the "(A)" result.
8.5 TERRAIN EFFECTS
Support fire may be used anywhere on the map, regardless of intervening terrain or units (enemy or friendly). Support fire is not subject to 'line of sight' restrictions, except when stipulated differently by the Exclusive Rules.
In all cases, the defending units benefit fully from the terrain in the hex they occupy when attacked by any support fire, per the adjustment integrated into the Combat Results Table.
8.6 SUPPORT FIRE RESTRICTIONS
Combat results have no effect on the allotment of support fire markers during the current or any future game turn, except when stipulated differently by the Exclusive Rules.
A player may not divide or split the "+" value of any support fire marker among different targets. Each support fire marker must be applied to one particular target hex only.
Support fire markers may never be accumulated from game turn to game turn. If they are not used during the game turn that they are allotted, they are returned to the chit pool.
No individual hex may be subjected to more than one bombardment (see 8.4) per game turn.
9.0 SUPPLY
There are no supply rules (unless otherwise noted in a specific game's Exclusive Rules). All units are always considered in supply. Isolated or surrounded units suffer no penalties.
Exclusive Rules
Note: The following rules apply to one or both maps (Snoopy's Nose and/or Iron Triangle). Each rule header will indicate which map (and thus scenario) it applies to, and therefore does not apply to the other map. Some (most) rules apply to both (such as Helicopter Transport below), and are not specified as applying to only one map or the other.
10.0 HELICOPTER TRANSPORT (SLICKS)
The US player is provided with helicopter "Transport" chits, which can be used to move friendly units any distance of hexes across the map during his own Movement Phase (but not during any Mobile Movement Phase). Helicopter transport chits are set off to the side of the map until they are used for this purpose.
To do so, the US player may simply nominate any friendly non-mobile type unit that is not presently occupying a jungle or an all-water Mekong River hex, and he then selects one available helicopter transport chit, placing it in that unit's hex. Each friendly non-mobile unit, regardless of its actual type, may be transported by one helicopter transport chit. If no helicopter transport chits are available, no further helicopter transport may be conducted during that turn.
Once nominated, the US player then places one helicopter transport chit in the same hex with the unit he intends to move (or with the unit, if beginning off-map). If that hex is within any enemy unit's or units' ZOC, the unit to be moved must be immediately and automatically depleted (or eliminated if already depleted). In any case, the helicopter transport chit itself is not affected.
The US player may thus pick up the helicopter transport unit and the unit to be moved, and then place them in any other non-jungle, non-all water Mekong River hex anywhere on the map (if that hex is not currently occupied by any other unit, friendly or enemy).
Note: A Viet Cong Base Camp or Supply Cache chit is not a unit, and does not prohibit a helicopter transport into its hex (unless it occupies terrain in a hex that is prohibited to helicopter landings).
Once placed, that helicopter transport chit is then flipped to its "Landing Zone" side, indicating that it isn't available for the remainder of that same game turn.
No unit is depleted, however, if it is moved via helicopter transport to a hex within any enemy unit's EZOC.
A unit that has conducted a helicopter transport movement may not move further during that same game turn (it must remain in the Landing Zone hex until the next friendly Movement Phase). A unit that is adjacent to an enemy unit may conduct an attack normally during the Combat Phase, however it is penalized per 10.1 below. Furthermore, the attacking unit is ineligible to advance after combat during that same game turn, regardless of the combat result.
10.1 Landing Zone
The US player may only apply a maximum of one Support Fire marker to any friendly unit that participates in combat during the same game turn that it conducts a helicopter transport move.
11.0 RIVERINE TRANSPORT (TANGOS)
The US player is provided with riverine "Transport" chits, which can be used to move friendly units any distance of hexes across the map during his own Movement Phase (but not during any Mobile Movement Phase) if along a connected and contiguous path of Mekong River hexes and/or river hexsides, or Saigon River hexsides. Riverine transport chits are set off to the side of the map until they are individually used for this purpose.
To do so, the US player may simply nominate a friendly non-mobile type of unit that is presently occupying a Mekong River coastal hex, or a hex that is adjacent to a river hexside, and he then selects one available riverine transport chit, placing it in that unit's hex. Each friendly non-mobile type of unit, regardless of its type, may be transported by one riverine transport chit. If no more riverine transport chits are available, then no further riverine transport may be conducted during that turn.
Unlike helicopter transport, a unit is not depleted if it is transported from a hex within any enemy unit's EZOC.
The US player may thus pick up the riverine transport chit and the unit to be moved, and then place them in any other Mekong River coastal hex, or a hex that is adjacent to a river hexside anywhere on the map, providing the US player can demonstrate a connected and contiguous path of Mekong River hexes and/or river hexsides or Saigon River hexsides between the starting (origin) river hex or river hexside, and the ending (destination) river hex or river hexside for that particular transport move. No type of terrain in any hex prohibits a riverine transport into that hex, but the ending (destination) hex cannot be occupied by a known Viet Cong unit (i.e., any Viet Cong unit already revealed and present on the map).
Note: Bridges, demolished or otherwise, have no effect on riverine transport.
Once placed in the ending (destination) hex, that riverine transport chit is then flipped to its "Landing Beach" side, indicating that it is not available for the remainder of that same game turn.
A unit that has conducted a riverine transport movement may not move further during that same game turn (it must remain in the Landing Beach hex until the next friendly Movement Phase). A unit that is adjacent to an enemy unit may conduct an attack normally during the Combat Phase, however it is penalized per 11.1 below. Furthermore, the attacking unit is ineligible to advance after combat during that same game turn, regardless of the combat result.
11.1 Ambush (Snoopy's Nose)
If the ending (destination) hex of a riverine transport movement is revealed to be occupied by a hidden Viet Cong unit (not a lone Viet Cong Base Camp), the debarking unit is considered ambushed, and must be immediately bumped (moved) to an unoccupied adjacent hex (of the Viet Cong player's choice). If no unoccupied adjacent hex is presently available, that ambushed unit must be immediately eliminated.
Note: A unit cannot be bumped into any all water Mekong River hex, or across any Mekong River hex whereby the water depiction is between that unit and the intended ending (destination) hex.
If an ambush has occurred, the ambushed unit must immediately conduct a singular attack upon the Viet Cong unit revealed to be in that intended ending (destination) hex, per the normal rules. However, in such a case, the US player is not eligible to apply any Support Fire markers to an ambushed unit.
Note: The US player may not intentionally choose an ending (destination) hex that is occupied by a known VC unit. This restriction does not apply to Base Camps or Supply Cache chits.
After conducting that mandated attack, the results are applied normally, though no other effect occurs beyond the result stipulated by the CRT, and therefore the US player may continue with his Movement Phase normally.
11.2 Landing Beach
The US player is limited to applying only one support fire marker to a unit during the same game turn that it conducts a riverine transport move.
12.0 RIVERINE UNITS (MONITORS)
Riverine units (monitors) are signified by a circled "R" printed in their upper righthand corner. They are completely different from riverine transport chits in that they function exactly like normal combat units instead, although they are not eligible to be moved during the Mobile Movement Phase (only during the Movement Phase, normally). Moreover, riverine units may only ever move via Mekong River hexes or river hexsides or Saigon River hexsides during movement. Riverine units may not move via the Thi Tinh River on the Iron Triangle map.
Riverine units exist as two-step units, with a full-strength side and a reduced-strength side, exactly like normal units. If a riverine unit becomes depleted, it is flipped to its reduced-strength side normally. If a reduced-strength riverine unit becomes depleted, it is eliminated and removed from the map permanently.
Riverine units may only be moved along a contiguous path of Mekong River hexes and/or river hexsides, or Saigon River hexsides, up to the limit of each riverine unit's printed movement number (in hexes). Riverine units are always moved one at a time, tracing a path of contiguous water hexes through the hex grid. As each riverine unit enters a new hex, that unit pays one movement point from its printed movement allowance. Mekong River hexes and river hexsides always cost one movement point per hex/hexside traversed.
When moving via river hexsides, specifically, a riverine unit must be placed in an adjacent hex, with its black arrow symbol (printed to the left of the circled "R" symbol) pointed at a specific river hexside. In such a case, that riverine unit is not considered to be occupying the hex it is in, but is considered to occupy the river hexside that it is pointed at. This is the only instance in which any unit can actually occupy a hexside. As any riverine unit moves along a river, it may only be moved from a connected Mekong River hex and/or a connected river hexside, or Saigon River hexside, and only if the entered hexside is not interrupted by a bisecting land depiction.
Note: Bridges, demolished or otherwise, have no effect on riverine unit movement.
In hexes where a Mekong River hex and a river hexside exist together, a riverine unit must pay the movement cost to enter the Mekong River hex and the river hexside if it intends to transit both locations. Entering a Mekong River hex or a river hexside, or Saigon River hexside does not imply the occupation of the other location in that hex. A riverine unit would be required to expend an additional movement point to enter that other location in that same hex, at which time it is no longer considered to be occupying the former location.
As per the normal stacking restrictions, no more than one riverine unit may ever occupy the same Mekong River hex or river hexside, or Saigon River hexside as of the end of the Movement Phase. This restriction does not, however, prohibit any riverine units from moving through a hex or hexside that is already occupied by another riverine unit.
Exception: Riverine transport chits (Tangos) are not considered units and may be stacked in the same hex as any riverine (monitors) unit.
A riverine unit that occupies a Mekong River hex or a river hexside, or Saigon River hexside merely controls that hex or hexside, respectively. A riverine unit does not project any zone of control, but it does prohibit the movement of any enemy unit across a hexside it presently occupies, or into a Mekong River coastline hex it presently occupies (i.e., if a land depiction is printed in that same hex). In a case where an enemy unit was already present in a Mekong River coastal hex (i.e., where a land depiction is printed), that enemy unit in that hex is permitted to exit that hex from either side of the water depiction in that hex without restriction. It may not, however, reenter that hex if any riverine unit is currently present there.
The presence of a riverine unit in a hex or a hexside does not prohibit or interfere with the occupation or movement of any other friendly non-riverine unit. No more than one riverine unit (monitors) may occupy the same hex or hexside, although a riverine unit may displace another riverine unit normally, per 7.7.2.
Note: A riverine transport chit (Tangos) may occupy the same hex as a riverine unit (monitors) without restriction.
A riverine unit may conduct or participate in a normal attack against any adjacent enemy unit, but it is not eligible to advance after combat thereafter under any circumstances. If a combat result imposes a depletion, a riverine unit may be chosen to fulfill that mandated depletion, as if it is a normal unit. Furthermore, if a combat result imposes an "AE" result, a riverine unit that participated in that attack must be eliminated along with any other attacking unit(s), if any.
Conversely, any eligible Viet Cong unit(s) may conduct an attack upon an adjacent riverine unit, normally (or upon a monitor occupying the attacking enemy unit's hex), although a combat result that eliminates a riverine unit or imposes a retreat result does not allow the attacking Viet Cong unit to advance after combat, in contravention to rule 7.9.
If a combat result imposes a retreat upon a riverine unit, that riverine unit must retreat normally (a retreating riverine unit occupying a river hexside must retreat the required distance in terms of hexes, not hexsides), although the US player may implement rule 7.8 to nullify a mandated retreat, normally, if he prefers.
Note: Bridges do not inhibit a riverine unit's retreat.
Riverine (monitor) units have no capability to transport any units whatsoever.
12.1 Riverine Unit (Monitor) ZOC
Riverine units do not project any ZOC, but neither are they inhibited by any Viet Cong unit's EZOC in any way, even if occupying the same hex as a Viet Cong unit.
13.0 ZERO-STRENGTH UNITS (Snoopy's Nose)
Units that are printed with a zero attack strength or defense strength number are eligible to attack or defend normally, but do not add a value to the differential equation when calculating combat. In any case, support fire may be applied normally, and is simply added to a base value of "0" in such a case.
14.0 SUPPORT FIRE DIMINISHMENT
The Viet Cong player's allotment of Support Fire chits is immediately reduced by one (-1) per each Viet Cong Base Camp or Supply Cache chit that is occupied (eliminated) by any enemy unit (see 16.0).
14.1 Support Fire Random Draw
Instead of the normal procedure of selecting Support Fire markers (per rule 8.1), each player must draw his eligible allotment of Support Fire markers randomly from his own Support Fire chit pool.
This rule is, of course, not applicable when a player is allotted his entire pool of Support Fire markers.
14.2 Support Fire Coordination
The US player may allocate his Support Fire markers per 8.3 normally, regardless of the type of unit or nationality of friendly units involved in combat (whether attacking or defending).
15.0 FINDING THE VIET CONG (Snoopy's Nose)
The Viet Cong player must immediately reveal the location of any hidden Viet Cong unit at the instant it moves to any new hex, or at the instant that any US or ARVN unit enters a hex adjacent to that Viet Cong unit.
EXCEPTION: Transit movement via helicopter or riverine transport does not reveal the location of any Viet Cong unit, except when a landing zone or landing beach hex is adjacent to a hidden Viet Cong unit, and only if a US or ARVN unit is thus placed in that hex (and not bumped to another non-adjacent hex because of an ambush). This exception does not apply to riverine units (monitors), however, which are considered units (not transports), and thus do indeed reveal the location of any hidden Viet Cong unit when moving adjacent.
16.0 VIET CONG BASE CAMPS (Snoopy's Nose)
The Viet Cong player is provided with five "Viet Cong Base Camp" chits which he does not place on the map initially; instead, he secretly chooses five hexes where each one will conceptually be present throughout the game, and writes down their respective hex locations on a piece of paper, which he must conceal from the US player.
Viet Cong Base Camp chits remain off the map, undisclosed, until any US or ARVN unit has moved adjacent to its recorded hex. At that time, the Viet Cong player must reveal that Viet Cong Base Camp chit's location (temporarily halting the moving US or ARVN unit, if necessary), and places it in its recorded hex. If that hex is not occupied by any other Viet Cong unit, it may be occupied by any moving US or ARVN unit that retains sufficient movement points to enter that hex during that same Movement Phase.
Viet Cong Base Camp chits are not units, and can be stacked with any other unit, although no more than one Viet Cong Base Camp may ever be placed into the same hex.
Each Viet Cong Base Camp only functions as an objective for the US player. They do not tangibly aid the Viet Cong player in any way, except to avoid the penalty of capture. If a Viet Cong Base Camp's hex is captured (occupied) by any non-riverine US or ARVN unit, the Viet Cong player's allotment of Support Fire chits is permanently reduced each game turn thereafter by -1 chit. Place a captured Viet Cong Base Camp chit on the turn track to signify that the Viet Cong player's Support Fire allotment is reduced as of the next turn (the turn following the game turn).
Note: A Viet Cong Base Camp chit that exists in a coastal hex is not considered captured by any riverine unit in that same hex, or by any US or ARVN unit that is currently being transported by a riverine transport (Tango) chit. Similarly, a Viet Cong Base Camp chit is never considered captured by any unit that is simply over-flying its hex via a helicopter transport (Slicks) chit.
A Viet Cong Base Camp itself is not affected by any combat result, but will be immediately eliminated if any enemy unit occupies the hex where it is present (whether moving through, or ending its movement in that hex). In such a case, a Viet Cong Base Camp chit cannot ever be rebuilt thereafter. It is placed on the turn track to remind players of the Viet Cong support fire reduction throughout the remainder of the game.
Designer's Note: As an optional expediency in lieu of having to secretly set up and then having the US player search innumerable jungle hexes for hidden base camps (though this does give an accurate presentation of the conflict in Vietnam), players can instead utilize the "Supply Cache" chits from the Iron Triangle counter mix—adding them to the Base Camp chits, and instead place all of them on the Snoopy's Nose map in any hexes of the VC player's choice. Then, only one of those eight chits is secretly recorded by the VC player to be an actual (genuine) victory objective (all of the other chits are considered to be worthless if captured), and victory is then contingent solely upon the US player capturing the one genuine VC base camp or supply cache chit (as had been secretly assigned and recorded by the VC player) before the end of the scenario. Note that this alteration favors the US player in terms of play balance.
16.1 Viet Cong Supply Caches (Iron Triangle)
The Viet Cong player is provided with three Supply Cache chits; these chits function the same as Viet Cong Base Camp chits, except that the VC player does not secretly set them up when he is placing his pieces on the Iron Triangle map. The US player is entitled to see and know where each Supply Cache chit is on the map. Otherwise, all other Viet Cong Base Camp rules apply the same.
17.0 SUPPLY
Units of both sides are always considered to be automatically in supply throughout the game. No unit can ever be out-of-supply, even if it is completely surrounded by enemy units.
Designer's Notes: US units were rarely out of supply, due to the ubiquitous helicopter, and the VC could rely on sanctuaries within Cambodia, the Ho Chi Minh Trail, and the indigenous population to keep them mostly supplied even in difficult terrain.
18.0 BRIDGE DEMOLITION
As of the instant any unit enters a hex that is adjacent to any bridge hexside, the owning player may announce that bridge to be automatically demolished (and no longer present on the map, for all game purposes). Nevertheless, any unit that demolishes a bridge must end its movement for the duration of that game turn.
A bridge demolition is entirely optional, although once any bridge is demolished, it is considered to be demolished until repaired by the US engineer unit (see 18.2). The Viet Cong player may never repair any demolished bridge.
18.1 Demolished Bridges
A demolished bridge immediately becomes a river hexside. All normal combat and movement restrictions then apply to that hexside as if a normal river hexside.
18.2 Bridge Repair
During the US player's Movement Phase or Mobile Movement Phase, the US player is eligible to repair any demolished bridge that is within movement range (in terms of hexes, not MP) of the US engineer unit, but only if the bridge to be repaired is not presently adjacent to any Viet Cong unit, or within any Viet Cong unit's EZOC.
To do so, the US player rolls one die per bridge within the engineer unit's movement range; that bridge is considered to be repaired if the die roll is a 5-6. Repair is entirely optional, but if repaired, the repair remains in effect for the duration of the game (though an eligible unit may attempt another demolition of a repaired bridge as of any subsequent game turn, per 18.0). No Viet Cong unit may ever repair any demolished bridge.
18.3 River Crossing
An engineer unit may employed by the US player to permit any US units (including the engineer unit itself) to cross any river hexside or in-hex Mekong River depiction (that is not within any Viet Cong unit's EZOC) as if it was a bridge hexside. To do so, the US engineer unit must be within movement range (in terms of hexes, not MP) of one (only) specific river hexside (either side of the hex) during the US player's Movement Phase or Mobile Movement Phase. That specified river hexside or in-hex Mekong River depiction is therefore considered a bridged hexside for the entirety of that same game turn.
If that hexside or hex is a demolished bridge hexside, it is only considered a bridged hexside or hex per this rule; i.e., the demolished bridge across that hexside or hex, respectively, is not considered to be repaired by virtue of this rule—a demolished bridge will remain "demolished" until repaired per 18.2. Nevertheless, a bridged hexside or hex (even if also a demolished bridge hexside that has not been repaired) permits movement across that river hexside or Mekong River hex in the same exact way. Indeed, the trail movement bonus is not interrupted when moving into a river hexside that is currently bridged by the US engineer unit, if within its movement range (in terms of hexes, not MP).
A bridged hexside or hex may remain as a bridged hexside or hex until the US player has designated a different specific river hexside or Mekong River hex (within the engineer unit's movement range) as a bridged hexside or hex. The US player may opt to designate a different river hexside or Mekong River hex to be bridged at any time, but no two different river hexsides or Mekong River hexes may ever be utilized as bridged hexsides or hexes during the same game turn.
A bridged hexside permits any unit (including Viet Cong) to attack across that hexside per the bridge terrain type, if the US player had designated or utilized that hexside as bridged during that same game turn.
19.0 MEKONG RIVER HEXES (Snoopy's Nose)
No non-riverine unit may ever enter any all-water Mekong River hex (except via riverine transport). Moreover, when occupying a hex wherein the Mekong River is bracketed by two parallel land depictions within that same hex, a land unit may only be considered as occupying either side, but never both (which side being determined by the adjacent land hex from where that unit entered, or by the owning player during set-up).
A land unit may cross over from one side of a Mekong River depiction within a hex to the other side, but that land unit must expend all of its printed movement allotment to do so. In such a case, a unit must begin the Movement Phase within such a hex to eligibly cross over from one side to the other.
Exception: No mobile units may ever cross over a Mekong River depiction, unless that Mekong River depiction is currently bridged by the US engineer unit per 18.3.
In no case, however, may any unit cross a Mekong River depiction during a retreat, even if that unit began its retreat from within such a hex.
Under no circumstances can any land unit attack across any Mekong River depiction. It is possible, however, for two opposing land units to occupy the same Mekong River hex, but only when existing on opposite sides of the Mekong River depiction. In such case, the two opposing units are stacked together, but they do not interfere with one another, or even project any ZOC across the Mekong River depiction.
An attack against a unit occupying a Mekong River coastal hex (if not from across the Mekong River depiction) is simply resolved as per the other terrain in that same hex.
20.0 SPECIAL FORCES
All Special Forces units (any unit printed with two crossing arrow symbols) ignore EZOC in all circumstances. Otherwise, they function as normal units in all other respects.
21.0 BODY COUNT (Snoopy's Nose)
The length of the game is decreased by one complete game turn per each US unit (but not ARVN unit) of any kind or size that has been eliminated (not merely depleted). For example, if the US 4/47th "A" unit has been eliminated (not merely depleted), the game will end at the end of Game Turn 12 (instead of Game Turn 13). Victory is determined normally whenever the last game turn has been completed.
If the current game turn is after a prematurely ended game, the scenario ends immediately, and victory is thus determined immediately. No other phases, movement or combat may be conducted by either player.
22.0 CU CHI TUNNELS (Iron Triangle)
The tunnel hexes south of the Saigon River are not terrain hexes, but simply have the effect of negating enemy (US and ARVN) ZOC; VC units may therefore move adjacent to US and/or ARVN units without becoming impeded by any EZOC.
Additionally, any attack against any VC unit that is occupying a tunnel hex is limited to a single support fire chit instead of the normal two chits per 8.3. The Cu Chi tunnels have no other effect on movement or combat.
23.0 B-52s (Iron Triangle)
The US player is provided one B-52 air unit which he may employ one time per each game turn (at any time during the US player's movement phase). The B-52 may target any single hex within the map area designated as the "Iron Triangle", except any city or village hex (which may never be the target of any B-52 strike). The US player may directly place his B-52 unit in any enemy occupied hex; that B-52 conducts a single strike upon that hex, which automatically depletes the VC unit in that hex (no die roll is necessary). If a VC unit was already depleted, a B-52 strike upon that unit automatically eliminates it. A B-52 strike does not ever, however, affect a VC Supply Cache chit.
The B-52 unit has no other function during the game.
24.0 BEN SUC VILLAGE (Iron Triangle)
The village of Ben Suc (hex 1210) produces a game length penalty to the US player if it is occupied by any US (or ARVN) unit, or if any VC unit is attacked or bombarded (regardless of the result) while occupying hex 1210, even if hex 1210 is not subsequently occupied by any US or ARVN thereafter.
Designer's Note: This rule represents the US' relocation of the village of Ben Suc. Though the relocation was well-intentioned, it was portrayed negatively by the press, and it thus became a public relations nightmare for the United States.
In such a case, the VC player may roll one 6-sided die, and then announce either an extension of the turn track (beyond Game Turn 13), or a reduction of the turn track (before Game Turn 13), thereby ending the game on a different game turn. The die roll result determines the quantity of game turns that will be added to or subtracted from the last (13th) game turn. The VC player may decide whether to extend or reduce the length of the game after he observes the die roll, but he must announce his decision immediately after he has rolled the die.
Note: The decision to extend or reduce the game length is relative to the VC player's chosen victory condition (see 27.0); in some cases, it may behoove the VC player to end the game prematurely, but in other cases it may behoove the VC player to extend the game.
The VC player is not required to roll a die to extend or reduce the game length, but if he chooses to do so, he must then immediately announce his choice to the US player, and he may not alter his choice thereafter. If the game is extended or reduced, the game will therefore end as of the end of that different game turn, per the die roll result. In no case may the game be ended sooner or later than the different game turn as determined by the die roll.
If the turn track is extended, the Support Fire allotment continues as printed in the turn 13 box of the turn track (10/5). The US player is not entitled to employ his B-52 unit after Game Turn 13, however.
25.0 THE BOYS OF '67 (LEARNING SCENARIO)
Date: 15 May, 1967 Scenario Length: Game Turns 1 to 4 Map: Snoopy's Nose Support Fire: Per the Turn Track First Player: The US player moves first
Background: Intelligence had discovered the presence of sizeable Viet Cong forces operating between the Rach Ba Rai and the Rach Tra Tan rivers. Elements of two US Army battalions of the 9th Infantry Division (the 3/47th and the 4/47th) converged to surround the area, brought in by helicopter and riverine. Charlie company of the 4/47th ("The Boys of '67") was the first to encounter "a numerically superior Viet Cong force" that had set up a classic "L" shaped ambush along a natural angle in the jungle tree line.
VIET CONG SET-UP
| Unit | Hexes |
|---|---|
| 3-5-6 (514/1) | Hex 0717 |
| 3-5-6 (514/2) | Hex 0816 |
Viet Cong Replacements: None
UNITED STATES SET-UP
| Unit | Hexes |
|---|---|
| 3-4-5 (4/47 C) | Hex 0616 |
| 3-4-5 (4/47 B) | Hex 0615 |
| 2-4-5 (3/47 C) | Hex 0711 |
| Landing Beach | Hex 0711 |
| 1-2-6 (5 Cav/3) | Hex 0618 |
| Landing Zone | Hex 0917 |
| 2-4-5 (3/47 B) | Hex 0917 |
| Landing Zone | Hex 1215 |
| 2-4-5 (3/47 A) | Hex 1215 |
| 1-4-11 (Monitor) | Hexside 0717/0718 |
| 0-2-12 (Monitor) | Hexside 0712/0811 |
United States Replacements: None
Victory Conditions: The US player will win the scenario if he eliminates both Viet Cong units. If at least one of the Viet Cong units is eliminated, or if both are at least depleted, the scenario ends as a draw. A draw will be downgraded as a US defeat, however, if any US unit is eliminated. Any other result is considered a Viet Cong victory.
Historical Outcome: Charlie Company of the 4/47th had unknowingly walked into the Viet Cong's field of fire—completely exposed in an open rice paddy. A half-dozen GI's were immediately gunned down, but fortuitously the rice paddy field had been drained, allowing the GI's to take cover behind a dike in the middle of the field. Pinned there, the other GI's of Charlie Co. returned fire with machine guns, grenade launchers and even LAWs, and some of the soldiers braved the VC fire to run out and retrieve their wounded buddies. Soon thereafter, Huey gunships, artillery, and even jets came in to pulverize the tree line, killing scores more of the Viet Cong. In spite of the well-executed ambush, US firepower dominated the firefight, forcing the VC to disengage; Charlie Company of the 4/47th had only suffered one K.I.A. (Spc. Don Peterson) during the engagement, as well as over a dozen wounded. Viet Cong losses were estimated to be over 90 killed, plus countless more wounded.
26.0 SNOOPY'S NOSE
Date: May-September, 1967 Scenario Length: Game Turns 1 to 13 Map: Snoopy's Nose Support Fire: Per the Turn Track First Player: The US player moves first
Background: Snoopy's Nose simulates the US 9th Infantry Division's operations in the Cam Son and Ban Long provinces of South Vietnam during the Spring and Summer of 1967. Deploying both riverine and airmobile assets, the US Army's campaign intended to curtail infiltration by the Viet Cong into the Mekong River environs from Cambodia. To that end, the operations by the 9th Infantry Division (The Old Reliables) were among the most successful of the Vietnam War, and demonstrated the utility and flexibility of coordinated riverine and helicopter forces. Indeed, when the Tet Offensive began in early 1968, Viet Cong attacks in the theater were comparatively anemic, and suffered staggering losses for no appreciable result.
VIET CONG SET-UP
The VC player receives no reinforcements during the game; all Viet Cong units begin the game in play, most of them hidden from view, and some on the map, explained as follows.
When setting up the Viet Cong game pieces, the Viet Cong player must first secretly record five separate jungle hex locations on a notepad for each of his five base camp pieces. All of his base camp chits are therefore set aside, off of the map, until they are individually discovered by the US player's units during the course of the game (at which time, each discovered base camp is placed on the map, where it must remain throughout the game). No base camp may ever be set up in any non-jungle hex.
Note: Viet Cong Base Camp chits can neither move or be moved.
Likewise, when setting up Viet Cong units, the Viet Cong player must also secretly record the hex locations of a certain quantity of Viet Cong units, to be determined by a dice roll, explained as follows.
The Viet Cong player must roll two 6-sided dice; the number rolled is the minimum quantity of Viet Cong attack strength points that must be set up on the map (not recorded secretly). Whatever that quantity, the Viet Cong player may choose any of his Viet Cong units to be set up on the map, so long as the units collectively comprise of attack strength points at least equal to that dice roll. The Viet Cong player may set up more Viet Cong units than the minimum required quantity of attack strength points, or even all of his units (he is never required to secretly record the hex locations of any of his units), but once any unit has been set up on the map, it is never eligible to be hidden again throughout the game, regardless of the terrain in the hex they occupy.
Viet Cong units may not be set up secretly in any non-jungle hex. This restriction does not actually require any particular Viet Cong unit(s) to be set up in a jungle hex, but rather that only Viet Cong units in jungle hexes are eligible to be set up as hidden in secretly recorded hex locations.
In any case, no Viet Cong unit may be set up in any village hex, in hex 3929 (To Dong Tam), in hex 4601 (C.P.), or in any all-water Mekong River hex. Moreover, per the standard rules, no two Viet Cong units of any type may be set up in the same hex (although any Viet Cong unit may be set up in the same hex as any base camp normally).
Viet Cong Replacements: None
UNITED STATES SET-UP
Only one US unit begins that game on the map; all other US and ARVN units must enter the map as reinforcements.
Set up the US 1-8-4 (15) engineer unit in hex 1606 (Checkpoint).
Historical Note: C.P. = Command Post
Game Turn ONE
| Unit | Entry |
|---|---|
| 2-2-6 (Rngr) | Enter on an east map edge hex. |
| 1-1-6 (50) | Enter on an east map edge hex. |
| 2-4-5 (3/60 A) | Enter via hex 0734 or 0833 as a riverine transport. |
| 2-4-5 (3/60 B) | Enter via hex 0734 or 0833 as a riverine transport. |
| 2-4-5 (3/60 C) | Enter via hex 0734 or 0833 as a riverine transport. |
| 2-4-5 (2/47 A) | Enter on an east map edge hex. |
| 2-4-5 (2/47 B) | Enter on an east map edge hex. |
| 2-4-5 (2/47 C) | Enter on an east map edge hex. |
| 2-4-5 (3/47 A) | Enter on an east map edge hex as a helicopter transport. |
| 2-4-5 (3/47 B) | Enter on an east map edge hex as a helicopter transport. |
| 2-4-5 (3/47 C) |
Historical Note: D.T. = Ding Tuong
| Unit | Entry |
|---|---|
| 3-5-8 (5/60 A) | Enter on an east map edge hex, north of the Mekong River. |
| 3-5-8 (5/60 B) | Enter on an east map edge hex, north of the Mekong River. |
| 3-5-8 (5/60 C) | Enter on an east map edge hex north of the Mekong River. |
| 3-5-8 (1/60 A) | Enter on an east map edge hex north of the Mekong River. |
| 3-5-8 (1/60 B) | Enter on an east map edge hex north of the Mekong River. |
| 3-5-8 (1/60 C) | Enter on an east map edge hex north of the Mekong River. |
| 1-2-6 (5/Cav) | Enter on an east map edge hex, north of the Mekong River. |
Game Turn NINE
| Unit | Entry |
|---|---|
| 1-1-5 (7) | Enter on an east map edge hex as a helicopter transport. |
Game Turn ELEVEN
| Unit | Entry |
|---|---|
| 2-4-5 (3/39 A) | Enter on an east map edge hex as a helicopter transport. |
| 6-12-5 (2) | Enter on an east map edge hex as a helicopter transport. |
| 2-4-5 (3) | Enter on an east map edge hex as a helicopter transport. |
United States Replacements: None
Victory Conditions: The US player wins the game immediately if he can either eliminate all Viet Cong units and/or eliminate all Viet Cong Base Camps before the end of the last game turn. If the US player fails to eliminate all Viet Cong Base Camps, the VC wins the game, unless all Viet Cong units had been eliminated. There is no draw possibility.
Historical Outcome: The military campaign in the Mekong River region of South Vietnam was arguably the most successful of the war. From 1967 to 1971, US forces consisting of airmobile, riverine and even some mech units diminished the Viet Cong's ability to operate in the area, and even began to win over the Vietnamese population. Most significantly, the Viet Cong began to have great difficulty maintaining reliable supply routes, especially via the Mekong River (which was heavily patrolled by US riverine forces), such that when the Tet Offensive began in 1968, its impact south of Saigon was negligible. Until US troops withdrew three years later, the Mekong was one of the most secured zones throughout South Vietnam.
27.0 THE IRON TRIANGLE
Date: January-February, 1967 Scenario Length: Game Turns 1 to 13 Map: Iron Triangle Support Fire: Per the Turn Track First Player: The US player moves first
Background: There had been reports of much VC activity in the jungles to the northwest of Saigon, and the presence of organized VC units eventually compelled the US Army to converge upon the area in force to surround and destroy Viet Cong bases in the so-called "Iron Triangle".
Designer's Note: The reverse sides of the US and VC units are not misprinted (having the same ratings as the front sides); during the entirety of the operation, the US only suffered less than 80 KIA (which would otherwise be out of proportion to the many depletions that the US player is likely to incur during play). The VC had suffered about ten times as many casualties, many of those having been caused by very effective B-52 strikes, but the VC did not generally stand and fight during this particular operation, preferring to break off contact and retreat whenever possible. In that regard, the VC player may lack the same sensibility to avoid a fight, and so any VC unit that incurs a depletion during the game is not assumed to have necessarily suffered many combat casualties as much as having simply been compelled to break contact and withdraw without appreciable losses. Nevertheless, once any VC unit is actually eliminated, then it can be assumed that significant casualties have occurred.
Viet Cong Set-Up
The Viet Cong player sets up all of his units and Supply Cache chits on the map, in any hexes within the Iron Triangle, but not west of the Ben Suc village (1200 hex row).
Viet Cong Replacements: None
United States Set-Up
The six US units of the 25th Infantry Division's 2nd Brigade (65/A, 1/2, 3/2, 2/2, 1/1) are to be set up in any hexes south of the Saigon River, but not in any hex west of the Fil Hol Plantation. The seven US units of the 196th Infantry Brigade (printed with "196" to the right of the chit's icon) are to be set up in any hexes south of the Saigon River, but not in or east of any Fil Hol Plantation hex.
The US riverine unit, and riverine transport, which includes the ARVN "5" unit aboard the transport (not landed), begin in the Saigon River hexside 4223/4323.
All other US units enter the map during the movement phase of the first game turn, per the following strictures.
A maximum of seven non-mobile type US units may enter the map transported aboard helicopter transport chits (i.e., flying; one unit per helicopter transport chit) to be landed in any eligible clear hex anywhere on the map during that same movement phase.
All other US units may enter the map via any east map edge hex.
United States Replacements: None
Victory Conditions: There are three different possible victory conditions, of which the Viet Cong (VC) player must secretly choose one before either player sets up his units (recording his choice on a piece of scrap paper). Once chosen, the victory condition cannot be changed, but is only revealed to the US player at the end of the game. The three victory condition choices and qualifications are listed as follows.
- Escape: The Viet Cong player wins the game immediately if enough VC units (whether full-strength or depleted units) successfully exit the map via any red map-edge hex (along the west and/or north side of the map). When a VC unit moves off of the map, the VC player must roll one 6-sided die; if the die roll is less than (<) the quantity of VC units that have been exited off of the map throughout the game, the VC player wins the game.
- US Casualties: The Viet Cong player wins the game immediately if enough US units are eliminated (not merely depleted.) When any US unit is eliminated, the VC player must roll one 6-sided die; if the die roll is less than (<) the quantity of US units eliminated, the VC player wins the game.
- Hold the Field: The Viet Cong player wins the game if, as of the end of the last game turn, enough VC units (whether full-strength or depleted) remain on the map within the hex area printed as the Iron Triangle. As of the end of the last game turn, the VC player must roll one 6-sided die; if the die roll is less than (<) the quantity of VC units remaining on the map (in the Iron Triangle), the VC player wins the game.
There is no draw possibility.
Historical Outcome: Except in one instance, The Viet Cong chose not to stand and fight the US forces that were converging upon the Iron Triangle. The Viet Cong's only attempt to openly confront American forces had ended disastrously for the VC, and convinced them of the futility of trying to face off against superior US firepower. Thereafter, the VC retreated out of the Iron Triangle, into their elaborate Cu Chi tunnel complex south of the Saigon River. Pursuing US forces uncovered and excavated some of the tunnel network, capturing vast quantities of enemy supplies, but the majority of the Viet Cong escaped into Cambodia. When US units departed the area weeks later, VC units began to infiltrate into the region again, reoccupying and even resupplying the Cu Chi tunnels. However, it would not be the last US operation into area during the war. The Viet Cong had suffered ten times as many casualties as the US, and would not attempt to directly confront US units again until the Tet Offensive a year later.