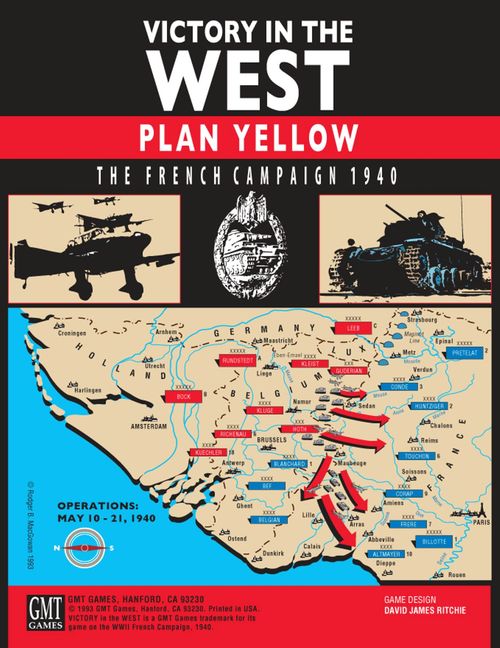
Victory in the West: Plan Yellow, The French Campaign 1940
Victory in the West: Plan Yellow, The French Campaign 1940 Rulebook
Table of Contents
Table of Contents
- [1.0] Introduction
- [2.0] Game Parts
- [3.0] How to Start
- [4.0] How to Play
- [5.0] Weather
- [6.0] Movement
- [7.0] Stacking
- [8.0] Zones of Control
- [9.0] Combat
- [10.0] Panic
- [11.0] Disruption
- [12.0] Reaction
- [13.0] Refugees
- [14.0] HQ Units
- [15.0] Supply
- [16.0] Replacements
- [17.0] Reinforcements
- [18.0] Air Power
- [19.0] Paradrops
- [20.0] Bridges
- [21.0] Coups de Main
- [22.0] Evacuation
- [23.0] Special Rules
- [24.0] Neutrals
- [25.0] Surrender
- [26.0] How to Win
- [27.0] Scenarios
[1.0] Introduction
Victory in the West is a divisional-scale game simulating the German invasion of France and the Lowlands in 1940. There are two players:
- The Allied player controls playing pieces representing the British and French Armies, including Canadian troops serving with the British and French colonial and Foreign Legion troops and Polish and Czech forces in the French Army. He also controls Belgian and/or Dutch units when those countries are invaded.
- The Axis player controls playing pieces representing the German Wehrmacht (Armed Forces), including Army, Waffen SS and Luftwaffe units.
You play the game in turns; each turn represents two days of real time. During each turn, each player moves his pieces across the map and uses them to attack enemy pieces as described in 4.0 (How to Play).
[2.0] Game Parts
[2.1] Parts Inventory
The game includes:
- One full-size map (Map A)
- One half-size map (Map B)
- Three sheets of 240 playing pieces each (720 pieces total)
- Rules booklet
- Campaign Booklet
- Operations Card
- Strategy Card
- Summary Card
- Allied Command Card
- Axis Command Card
- One ten-sided die
- Game box
[2.2] The Game Map
The map shows the area where the 1940 campaign was fought. It consists of two mapsheets (A and B). When using both, Map B's south edge overlaps the center of Map A's north edge. Each mapsheet is divided into hexagons (hexes) that regulate movement and combat. Each hex is 11 kilometers across, and each has its own four-digit number that identifies it for game purposes.
The mapsheet includes the following terrain features:
- Clear Terrain. Clear terrain is mainly rural countryside, dotted with small towns and villages, modest orchards and woodlots, farms, pastures and open fields. Clear terrain is typically criss-crossed by unimproved roads and country lanes (not shown on the map). Fields of fire are excellent, and movement is virtually unrestricted. This is just about ideal tank country.
- Wetlands. The game treats all marshes, bogs and canal-intensive areas as wetlands. Wetlands resemble clear hexes, except that the ground is cut by numerous watercourses that restrict maneuver, and there aren't many roads and lanes to speed tactical movements. Motorized units have problems moving through and maneuvering in wetlands after a heavy rain. This is not good tank country!
- Woods. Forests, nature preserves and heavily wooded parklands are all forms of woods. The ground cover here makes for poor fields of fire, but it offers excellent cover for units trying to hide from enemy recon aircraft. Woods are also pretty good places to defend against tanks. Most wooded areas have enough local roads and trails (not shown) so that movement is only slightly restricted.
- Rough Terrain. Rolling hills, broken country and the heights above some river valleys are all rough terrain. Rough terrain hampers both operational and tactical movement, but fields of fire are generally good, giving leg units an advantage when defending in such country.
- Wooded Rough Terrain. Rough terrain covered by woods or forest is called wooded rough. This country combines the cover advantages of wooded terrain and the defensive advantages of rough terrain, with more severely restricted attacker mobility being offset by the more restricted fields of fire with which the defender has to contend.
- Mountains. The steep-sided prominences of the Vosges are the only mountains in the game. They're not exactly alpine peaks, but they're impassable to vehicles except in a few constricted valleys poorly provided with roads. The resulting limitations on movement and supply would have kept any right-thinking commander of this era from trying to advance into this terrain against even the most feeble opposition, and motorized operations in these mountains with the equipment available in 1940 were simply out of the question.
[2.3] Playing Aids
The game includes the following playing aids:
- Options Chart, describing options that you can use to change the rules and orders of battle. Each option has a value representing the number of VP's you add to or subtract from the Axis VP total when using the option. See Strategy Card.
- Course of Play Outline, outlining the order in which you do things. See Strategy Card.
- OKH Box, showing what reserves the Axis player has and when he can commit them. See Axis Command Card.
- GQG Box, showing what French reserves the Allied player has, their location and when he can commit them. See Allied Command Card.
- Britain Box, showing what British reserves the Allied player has and when he can commit them. This box also has an Evacuated Units section for holding units evacuated from the continent. See Map B.
- Dead Box, used to store eliminated units. See Map B.
- Weather Table, used to find the weather for the current turn. See Summary Card.
- Supply Chart, showing all general and special supply sources available to each side. See Summary Card.
- Reinforcement Chart, showing the number of reinforcements that can arrive each turn and where they appear. See Summary Card.
- Die Roll Summary, summarizing how to use the die to determine the success or failure of various operations.
- Map Key, showing what the colors and symbols on the map mean. See Map A.
- Terrain Effects Chart (TEC), showing the number of Movement Points (MP's) it costs to enter each map hex and noting other significant terrain features. See Operations Card.
- Fortification Summary, summarizing the most important characteristics of two types of fortifications (fortresses and fortified zones). Both fortification types are printed on the map.
- Combat Table, used to find the outcome of combat between opposing units. See the Operations Card.
- Combat Summary, listing combat-related column shifts, strength multipliers and die roll modifiers. See Operations Card.
[2.4] The Playing Pieces
There are two types of playing pieces:
- Units. Units are the military formations that actually fought or could have fought in the 1940 campaign. There are two types: combat units and Headquarters (HQ's). Cadres are a special subclass of combat unit that appear only when non-cadre combat units sustain losses and that represent those units at reduced strength. The numbers and letters on the units identify them and show their size, strength and capabilities.
- Markers. Markers are purely informational devices. You use them to show unit, bridge and fortification status, air interdiction and supply, the presence of refugees, bridgeheads and landing zones, the passage of time and how many TAP's, SAP's, LRP's, MRP's, CP's and VP's the players have.
[2.41] How To Read the Units
Combat unit counters are two-sided: the front shows the unit at full strength, the back shows it at reduced strength. Each combat unit shows: Name, Size, Type, Stacking Value, Attack Strength, Defense Strength, Movement Allowance, a Motorization band, a Blitzkrieg symbol and an Efficiency Rating.
HQ units are also two-sided: the front is the HQ, the back is the Replacement HQ. Each HQ shows: Name, Corps, Type, Stacking Value, Command Radius, Command Bonus, Movement Allowance, a Motorization band and an Efficiency Rating.
[2.42] Unit Names
A unit's name is its actual historical designation. When the name has a slash (/), the numbers and letters to the left of the slash are the unit's own individual military designation; those to the right show the division to which the unit belongs.
The unit names employ the following terms and abbreviations: a = Armored or air landing (depending on unit type); Afrq = Afrique (African); BCP = Brigade de Cavaliers Portes; BEF = British Expeditionary Force; Brnd = Brandenburg; c = Cavalry; CA = Chasseurs Alpins; Chc = Chasseurs a Cheval; Can = Canadian; CAr = Chasseurs Ardennais; C du N = Chasseurs du Nord; CM = Corps Mobile; Col = Coloniale; CP = Chasseurs Pyreneens; cy = Cyclists; CyF = Cyclists du Frontier; Czech = Czechoslovakian; DC = Division Cavalerie (Cavalry Division); DCR = Division Cuirassee Rapide (Fast Cavalry Division); DF = Der Fuhrer; DLC = Division Legere Cavalerie (Light Cavalry Division); DLM = Division Legere Mechanique (Light Mechanized Division); Dlnd = Deutschland; Ffr = Fallschirmjaeger; GD = Gross Deutschland; Gde = Guides; Gds = Guards; GK = Group Kayaerts; Ger = Germania; Gren = Grenadiers; Hrzgnau = Hagenau; Hus = Hussars; IN = Ijssel North; IS = Ijssel South; L = Lancers; LE = Demi-Brigade de Legion Etrangere (Foreign Legion Half-Brigade); Lgr = Legere (Light); LSSAH = Leibstandarte SS Adolf Hitler; m = Motorized; MC = Mobile Corps; Mrc = Marocains (Moroccan); NA = Nord Afrique (North African); Nth = Netherlands; Obr = Oberbayern; p = Panzer; PC = Chasseurs a Pieds; Polizei = Police; REI = Regiment Etrangere d'Infanterie (Foreign Legion Infantry Regiment); REP = Regiment Etrangere de Parachutistes (Foreign Legion Parachute Regiment); RTR = Royal Tank Regiment; RVE = Regiment de Volunteer Etrangere (Foreign Volunteer Regiment); s = Static; Thr = Thuringen; Tot = Totenkopf; Vfg = Verfuegungs; xxxx = Army; xxx = Corps.
[2.43] Unit Types
A unit's type helps determine what it can do. Types are shown by symbol: Tank/Panzer/Armored, Infantry, Motorized Infantry, Mechanized Infantry, Mountain, Cavalry, Motorcycle, Corps HQ, Fortress, Static, Paratroop, Air Landing, Siege Artillery and Bicycle. National flags (Britain, France, Germany, Belgium, Netherlands) are used on Army HQ's.
[2.44] Unit Sizes
All combat units have a size; HQ's don't. Sizes include: II = Battalion; III = Regiment; X = Brigade; XX = Division; BG = Battlegroup (non-German cadre); KG = Kampfgruppe (German cadre); G = Artillery Group. Note: a "+" indicates that the unit has been reinforced.
[2.45] Unit Values
- Attack Strength (AS) is the value the unit uses when attacking. It can be modified for divisional integrity, lack of supply, disruption, being in a causeway, attacking a fortress or clear hex and attacking across a river.
- Defense Strength (DS) is the value the unit uses when defending. It can be modified for divisional integrity, lack of supply, disruption and defending a clear hex or causeway.
- Movement Allowance (MA) is the maximum number of Movement Points (MP's) that a unit can spend to move in each friendly Movement Phase.
- Stacking Value (SV) is a unit's relative size measured in Stacking Points (SP's). Unit SV's determine how many units can be in a hex at the same time.
- Efficiency Rating (ER) is a measure of a unit's relative efficiency fighting a 1940's-style mobile battle. ER's determine whether HQ orders units to react, how far units can move during their Exploitation Phase and whether units panic in specific situations.
- Command Radius (CR) is the range (in hexes) over which an HQ can support friendly units.
- Command Bonus (CB) is the number of column shifts an HQ can add to combats involving units that are within its Command Radius.
[2.46] Unit Nationality
The units' colors show their nationality or branch of service:
- Black on Field Gray = German Army
- White on Black = Waffen SS (German Army)
- Black on Purple = German Luftwaffe
- Black on Tan = British Army (including Canadian troops)
- Black on Horizon Blue = French Army
- White on Royal Blue = French Colonial Troops
- White on Red = French Foreign Legion
- White on Dark Blue = Polish troops in French Army
- Black on Dark Green = Czech troops in French Army
- Black on Forest Green = Belgian Army
- Black on Light Green = Dutch Army
[2.47] Other Unit Information
Some pieces have other information showing unit capabilities:
- Motorization Band. Motorized units have a Motorization band across the bottom of their piece. Motorized units have extra movement capabilities and are especially powerful when fighting in clear terrain.
- Corps Band. Corps HQ's have a Corps band that is the same color as their Motorization band across the top of their piece. HQ's without this band are army HQ's. Corps HQ's can support units that are performing overruns; Army HQ's can't.
- Blitzkrieg Symbol. Blitzkrieg-capable units and units that can be made so have a Blitzkrieg symbol to the right of their unit type. A circle shows that the unit is always Blitzkrieg-capable. A square or triangle shows that it is made blitzkrieg-capable by option 15 or 18, respectively. Only Blitzkrieg-capable units can make Blitzkrieg attacks and overrun enemy units while moving.
- Setup Color. Combat units and Corps HQ's that set up on the map or in a holding box have a setup color inside their Unit Type box. Army HQ's have a band showing their setup color at the top of their piece. Units of the same nationality that have the same setup color set up together.
[2.48] Unit Steps
Each unit has one or more strength levels called steps. Most combat results require units to lose steps.
- HQ's and units whose backs are blank or have a refugee printed on them have one step. A one-step unit is eliminated when it loses a step.
- Combat units printed on both sides have two or more steps. Their first step is their front (full-strength) side; their second their back (reduced-strength) side. When a full-strength, two-step unit loses a step, flip it over to its reduced side; if its reduced side is already showing, eliminate it or replace it with a cadre, as appropriate.
- Some units have more than two steps. When they lose their second step, replace them with a cadre. A cadre is a combat unit representing a battlegroup (or German kampfgruppe) formed from a weakened division. The following units have cadres:
- German. All infantry xx's = 2-3-6 cadre; 1 Mountain xx = 2-3-8 cadre.
- French. All infantry xx's with an MA greater than 5 = 1-2-6 cadre; all Mountain xx's = 1-2-8 cadre; all motorized infantry xx's = 2-3-8 cadre; all cavalry xx's = 1-1-9 cadre; all mechanized xx's = 2-3-10 cadre.
- British. All infantry xx's = 2-3-8 cadre; 50 Motorized Infantry xx = 2-2-8 cadre.
- Belgian. All infantry xx's with an MA of 6 = 1-3-6 cadre.
- Dutch. All infantry xx's = 1-2-6 cadre.
[2.49] Markers
Markers include: VP marker (with negative VP's and x10 sides); AP Assets marker; Unused AP's marker (Unused TAP's / Unused SAP's); CP marker (French CP's, +10); German TF and Allied TF markers; RP marker (Allied Leg RP's, +10); Movement marker (No Move, No Supply, Disruption markers); Turn marker; Lake marker; Interdiction marker; Damage marker; Bridge marker; Bridgehead marker; Ruin marker; Refugee marker.
[2.5] Game Terms
- Unless it's necessary to distinguish nationality or service, units controlled by the Allied player are called Allied units; the Axis player's units are Axis units. Hexes controlled by the Allied player are Allied hexes; those controlled by the Axis player are Axis hexes. This terminology also applies to terrain features like cities and bridges.
- The terms friendly, enemy and neutral also distinguish units, map features and other game elements.
- All units controlled by the same player are friendly to each other. The opposing player's units are enemy units. Units controlled by neither side are neutral.
- Phases in which a player's units are active are friendly phases. Those in which they are inactive are enemy phases.
- All hexes in Germany are friendly to the Axis player at the game's start; those in France are friendly to the Allied player. Hexes in Belgium, Luxembourg and the Netherlands are neutral; they become friendly to the Allied player when the Axis invades their country. A hex stays friendly until a stack of enemy units with a total Stacking Value of 1 or more is in the hex when there are no friendly units present. The hex then becomes friendly to the side that occupies it. Hexes can go back and forth between being friendly and enemy any number of times during play.
- Making a hex friendly causes all of that hex's man-made features to be captured. Ports, cities, bridges, roads and railroads can be captured and recaptured repeatedly without permanent effect. Fortified zones and fortresses (referred to collectively as fortifications) must be permanently destroyed (along with their IDS) before their hex can be captured.
[2.6] Die Rolls
When rolling the game's ten-sided die, always read the 0 (zero) face as the number 10.
[2.7] Die Roll Summary (Summary Card)
(The Die Roll Summary is printed on the Summary Card, not in the rules booklet.)
[3.0] How to Start
[3.1] Set-up Procedure
- Pick a scenario from the four included in the game.
- If you're playing 27.1 (The Cape), skip this step. Otherwise, choose from the Option Chart any options you want to use, note any resulting changes to such printed information as unit ER's and adjust the VP total to reflect your choices per 23.5 (Options).
- The Allied player sets up Allied and neutral units at full-strength within stacking limits per the scenario instructions. Units of the same nationality with the same setup color set up together.
- The Axis player sets up Axis units at full-strength within stacking limits per the scenario instructions. Units of the same nationality and setup color set up together.
- Place the TAP and SAP Assets markers on the Air Track to show AP availability at the scenario's start. Place the Unused SAP's and Unused TAP's markers in the same Air Track boxes as the Assets markers. In all scenarios except 27.1 (The Cape), place the RP markers on the Replacement Track to show RP availability at the scenario's start. Place the CP markers for nations that can surrender in the Surrender Track's zero box. In all scenarios except 27.1 (The Cape), place the VP markers on the VP Track to show the scenario's starting VP total.
- Place the Turn marker in Turn Track box 1.
[3.2] Option Chart (Strategy Card)
(The Option Chart is printed on the Strategy Card, not in the rules booklet; see 23.5.)
[4.0] How to Play
You play Victory in the West in turns, each of which represents two days of real time. Depending on the scenario you choose, a complete game can last 2-21 turns. Each turn has six segments: Weather, Supply, Recovery & Replacement, Air, Operations and Turn. Each segment has one or more phases given over to activity by one player. The player who is performing activity in a phase is the active player; the other player is the inactive player. The Course of Play defined in 4.1 shows the order in which the players perform game activity. You can perform only those actions allowed by the Course of Play and only in the order shown.
[4.1] Course of Play
A. Weather Segment
- Weather Phase. Skip this phase on Turns 1 and 2. Starting Turn 3, roll the die and find the result on the Weather Table to determine the weather for the entire turn.
- AP Availability Phase. Reposition the Unused SAP's and Unused TAP's markers to show how many available AP's of each type you can actually use this turn.
B. Supply Segment
- Axis Supply Phase. Skip this phase on Turns 1 and 2. Starting Turn 3, the Axis player determines which of his HQ's are supplied per 15.0 (Supply). He then determines which of his combat units are supplied.
- Allied Supply Phase. Skip this phase on Turns 1 and 2. Starting Turn 3, the Allied player determines which of his HQ's are supplied per 15.0 (Supply). He then determines which of his combat units are supplied.
C. Recovery & Reinforcement Segment
- Axis Reinforcement Phase. The Axis player removes all Movement markers from his units. He then uses Replacement Points to strengthen his reduced-strength units per 16.0 (Replacements). After adding replacements, he enters reinforcements per 17.0 (Reinforcements) and conducts paradrops and air transport per 19.0 (Paradrops).
- Allied Reinforcement Phase. The Allied player removes all Movement markers from his units. He then disbands French units and uses Replacement Points to strengthen his reduced-strength units per 16.0 (Replacements). After disbanding units and adding replacements, he enters reinforcements per 17.0 (Reinforcements) and conducts paradrops per 19.0 (Paradrops). The Allied player can declare an emergency any time during this phase per 23.3 (Declaring an Emergency).
- Disruption Recovery Phase. All units that aren't fatigued recover from disruption per 11.0 (Disruption). Then, if it is Turn 8 or later and Axis motorized units are fatigued, the Axis player makes a fatigue check, causing fatigued units to become disrupted or recover from disruption.
D. Air Segment
- Mission Recovery Phase. Remove all Interdiction markers.
- Bridging Phase. Repair damaged bridges per 20.0 (Bridges).
- Axis Air Phase. The Axis player uses any or all of his AP's to bomb Allied bridges and/or cities, make ground attacks and interdict hexes per 18.0 (Air Power). At the end of the phase, he makes an attrition check per 18.52.
- Allied Air Phase. Skip this phase on Turn 1 and when playing 27.1 (The Cape). Starting Turn 2 in other scenarios, the Allied player uses any or all of his AP's to bomb Axis bridges and/or cities, make ground attacks and interdict hexes per 18.0 (Air Power). At the end of the phase, he makes an attrition check per 18.52.
E. Operations Segment
- Axis Movement Phase. The Axis player moves any or all of his eligible units per 6.0 (Movement).
- Axis Combat Phase. The Axis player attacks any or all eligible enemy units per 9.0 (Combat).
- Axis Exploitation Phase. The Axis player moves refugees per 13.0 (Refugees). He then moves any or all of his undisrupted, supplied motorized units per 6.0 (Movement).
- Allied Movement Phase. The Allied player moves any or all of his eligible units per 6.0 (Movement).
- Allied Combat Phase. The Allied player attacks any or all eligible enemy units per 9.0 (Combat).
- Allied Exploitation Phase. The Allied player moves refugees per 13.0 (Refugees). He then determines which of his undisrupted supplied motorized units can use their full MA to move and moves any or all of his eligible units per 6.0 (Movement).
F. Turn Segment
- Surrender Phase. Make a surrender check for each nation that can surrender to the Axis per 25.0 (Surrender). The Allied player can then declare Paris an "open city."
- Pursuit Phase. Add/subtract VP's for off-map pursuit per 26.39. Skip this phase when playing 27.1 (The Cape).
- Victory Phase. Determine whether the game is over and who won per 26.0 (How to Win) and the scenario instructions. If the game isn't over, advance the Turn marker one Turn Track box to indicate the start of the next turn.
[4.2] Turn Track (Map B)
[4.3] Course of Play Outline (Strategy Card)
[4.4] Example of Play (Campaign Booklet)
(The Turn Track is on Map B, the Course of Play Outline is on the Strategy Card, and the Example of Play is in the Campaign Booklet; none is part of the rules booklet.)
[5.0] Weather
Weather played a limited role in the 1940 campaign. In Victory in the West, it mainly affects the percentage of available Air Points that each side can use and whether units can paradrop or be transported or supplied by air. Rain also has a limited effect on ground conditions.
[5.1] Determining Weather
The weather on Turns 1 and 2 is always clear. Starting Turn 3, determine the weather each turn by rolling a die during the Weather Phase. Find the die roll result in the left column of the Weather Table. The right column shows the weather for the entire turn.
[5.2] Weather Effects
There are four Weather Table Results:
- Same. The weather this turn is the same as last turn.
- Clear. During clear weather, you can use all available AP's and can paradrop and use air transport and air supply.
- Overcast. During overcast weather, you can use only half of your available TAP's (rounded down) and half of your available SAP's (rounded down). You can still paradrop and use air transport and air supply.
- Rain. During rain, you can use only one-quarter of your available TAP's (rounded down) and one-quarter of your available SAP's (rounded down). You can't paradrop or use air transport or air supply. Motorized units pay 4 MP's (instead of 2) to enter wetlands and can't use their Blitzkrieg capability to overrun wetlands hexes or make Blitzkrieg attacks against units defending in wetlands.
[5.3] Weather Table (Summary Card)
(The Weather Table is printed on the Summary Card.)
[6.0] Movement
The active player can move any or all of his units in each of his Movement Phases. He can move any or all of his eligible motorized units in each of his Exploitation Phases. Each phase, you can move each unit any number of hexes in any direction(s) up to the limit of its Movement Allowance (MA) and can use all or some of each motorized unit's MA to conduct overruns. Move units individually or stacked with other units that started the phase in the same hex, tracing a path of connected hexes through the hex grid. When you stop moving a stack and move a unit that wasn't part of that stack at the start of the phase, the original stack's movement is over; the units in that stack can't move again in the current phase.
[6.1] How to Move Units
[6.11] Each phase that movement is allowed, the active player moves all, some or none of his eligible units. The inactive player's units can't move, and combat can't occur, though combat-like activity can result from overruns.
Note: A unit that moves in an Exploitation Phase is said to be exploiting. There's no difference between exploiting and moving, and the latter term is used only when referring specifically to movement in an Exploitation Phase. Unless otherwise noted, movement always means movement in both Movement and Exploitation Phases.
[6.12] Each unit has a number of Movement Points (MP's) equal to its MA. As it enters a hex, the unit spends the number of MP's shown for its mobility class on the TEC to enter the terrain in the hex and cross the terrain in the hexside through which it's moving. If the TEC has a P instead of an MP cost, the terrain is prohibited to units of that mobility class; they can't enter it.
[6.13] All units have a mobility class. There are two classes:
- Leg
- Motorized
[6.14] All HQ's and some combat units (shown by a color band across the bottom of the piece) are motorized. They pay the MP costs in the TEC's Mot column.
[6.15] Combat units that don't have a motorization band are leg units. They pay the MP costs in the TEC's Leg column.
[6.16] You can move units individually or in stacks. You can move all units that start a phase in the same hex as one stack, as if they were a single unit. Each unit in the stack must pay the required MP cost for its mobility class to enter each hex.
[6.17] A stack can stay together throughout its movement, or it can break up, and the individual units can finish moving separately. Once you move one or more units separately from the other units in the stack, they can't rejoin the original stack. Instead, they move separately as a discrete stack in their own right; they can, however, end their movement in the same hex with the units with which they were originally stacked, thus reforming the stack for next turn's movement. When you move a unit that wasn't originally part of a given stack, that stack's movement is over.
[6.2] Movement Restrictions
[6.21] A unit can move only in friendly Movement and Exploitation Phases. Advances, retreats and reactions during combat aren't movement and don't use MP's.
[6.22] A unit can't spend more MP's in a phase than it has in its MA. If it doesn't have the MP's to pay all of the MP costs to enter a hex, then it can't do so.
Exception: A unit can always move one hex per Movement (but not Exploitation) Phase unless it is trying to overrun the hex, move directly between two hexes in enemy ZOC's or enter a prohibited hex.
[6.23] A unit doesn't have to spend any or all of its MP's. Unused MP's can't be saved for later use or transferred to other units. A unit loses any unused MP's at the end of a phase.
[6.24] A unit can't enter a hex containing an enemy unit except by paradrop, air transport or coup de main or as a result of a P or R combat result during combat resolution.
[6.25] Only undisrupted, supplied motorized units can move in an Exploitation Phase.
[6.26] Allied motorized units can't automatically move their full MA in their Exploitation Phase. Instead, the Allied player makes an exploitation check by rolling the die at the start of the phase; he adds 2 to the die roll result on Turn 3. Only units whose ER is greater than or equal to the modified die roll result can use their full MA to move that phase; all other Allied units have their MA reduced to the value of their ER for that phase.
Exceptions: Allied HQ's ignore this rule when using option 14 (Better French Command Structure). French units ignore this rule when using option 15 (French Blitzkrieg Doctrine). The British MC HQ, 1a, 5 and 50 xx's and 30 x ignore this rule when using option 18 (British Experiment With Armored Idea). Units that ignore this rule always move their full MA when eligible to move in an Exploitation Phase.
[6.27] Units can exit the hex map by sea evacuation or by spending 1 MP to exit a mapedge in their Movement or Exploitation Phase. Units can't exit the map by retreating, advancing or reacting off a mapedge during combat; they are eliminated (and placed in the Dead Box) when they try to do so. Once a unit exits the map, it is permanently out of play; it never reenters the game.
[6.28] When an Axis or Allied unit exits the map from a hex in Germany, place it in the OKH Box's Off-Map Units section. When an Axis or Allied unit exits the map from a hex in France, place it in the GQG Box's Off-Map Units section. Units can't exit a mapedge from Belgium or the Netherlands.
[6.29] Units also have their movement restricted per 16.26.
[6.3] Terrain and Movement
[6.31] The Terrain Effects Chart (TEC) lists the MP costs to transit various terrain. Units pay different MP costs to enter or cross terrain, depending on their mobility class per 6.13.
[6.32] There are nine types of hex terrain into which units can move: clear, wetlands, woods, rough, wooded rough, minor city, major city, mountain and causeway.
[6.33] Units that enter a hex by crossing a river hexside or bridge pay the MP cost to cross the hexside in addition to the cost to enter the terrain in the hex.
Note: The TEC's bridge-crossing costs apply only to causeway hexsides and to bridges that are intact. When crossing a hexside whose bridge is damaged, units pay the MP cost to cross the major or minor river in the hexside, not the bridge. When the bridge is repaired or one of the hexes linked by the bridge contains a bridgehead, units pay the bridge MP cost to cross the hexside. See 20.0 (Bridges) for details.
[6.34] Units that enter a hex by moving along a road (e.g., through a hexside with a road symbol) ignore other hex terrain and pay the road MP cost to enter the hex, at the owning player's option. Roads have no effect on hexside MP costs.
Note: A road exists wherever you see a rail symbol.
[6.35] Fortifications have an Intrinsic Defense Strength (IDS) printed in their hex. Treat enemy hexes with an IDS as if they contain an enemy unit without a ZOC. Your units can't normally enter such hexes until the IDS is destroyed in combat or by an overrun. Place a Ruin marker on each fortification that is destroyed and that is in a nation that hasn't surrendered. The effect of fortifications on movement and other game activity is summarized in the Fortification Summary.
[6.35] (numbered 6.35 a second time in the printed booklet) Units can't enter sea hexes or cross sea hexsides except on causeways or during evacuation.
[6.4] Overruns
[6.41] Stacks composed entirely of Blitzkrieg-capable combat units (which may be accompanied by corps HQ's) can try to enter enemy-occupied hexes and/or fortified zones in their Movement and Exploitation Phases. The mechanism by which units do this is called overrun. A stack can conduct any number of overruns during its movement and can even overrun the same enemy unit(s) multiple times in the same phase.
[6.42] When you move a stack of Blitzkrieg-capable units (with or without an accompanying corps HQ) next to an enemy-occupied hex or fortified zone that you want to enter, you must announce an overrun. Units entering a hex by overrun ignore the MP costs in the TEC's Mot column. Instead, all eligible units in the stack pay the MP costs in the Overrun column for the terrain in the target hex and in the hexside through which they are trying to enter the hex. Overrunning units ignore enemy ZOC's throughout the overrun.
[6.43] Army HQ's, combat units that aren't Blitzkrieg-capable and units (including corps HQ's) that can't pay the overrun MP cost can't participate in an overrun and cease to be part of the overrunning stack. They stop in their current hex when you announce the overrun. They can continue moving separately after the overrun is resolved and the units that participated in the overrun have finished moving.
[6.44] If all units in a hex being overrun are eliminated or forced to retreat as a result of a pre-overrun Panic Check per 10.11, the overrun is automatically successful. Any fortified zone in the hex is destroyed, and the overrunning stack makes the hex friendly.
[6.45] Resolve each overrun using the combat resolution procedure in 9.0 (Combat), with the following exceptions:
- Only Blitzkrieg-capable units that paid the MP cost to initiate the overrun can attack. Only the units in a single target hex can defend. Corps HQ's that are part of the overrunning stack can't attack (but can still use their CB's to support the overrun).
- Only the attacker can use AP's to support his units, and he is limited to 2 AP's per overrun. Don't make a mission strength check during overruns; the attacker can automatically commit up to 2 unused AP's to each overrun.
- If the attacker uses any TAP's, treat the overrun as a Blitzkrieg attack (+2 column shift) per 9.53.
- Only corps HQ's can use their CB's to support units in an overrun; army HQ's can't provide support.
- Units that retreat during an overrun are disrupted.
- There's no Reaction Movement at the end of the combat resolution procedure.
[6.46] If, after an overrun is resolved, the target hex is vacant and its IDS (if any) is destroyed, the overrunning units must advance into the hex (at no additional MP cost). They can then resume their normal movement. If the target hex is still occupied or has an IDS, then the overrunning units don't advance. They stop in the hex they're in, and their move is over.
[6.47] You can overrun any adjacent hex except:
- Hexes containing major cities, mountains, fortresses or enemy bridgeheads.
- Wetlands when the weather is rain.
- Hexes being entered through a hexside with a major or minor river unless the hexside also has a bridge and you stage a successful coup de main per 21.0 (Coups de Main).
[6.5] RR Movement
[6.51] RR movement is a special form of movement that you can use only in Movement (not Exploitation) Phases in place of normal movement. During each Movement Phase, the active player can use RR movement to move up to 12 Stacking Points of friendly units. For this purpose, each Stacking Point of motorized units counts as 2 Stacking Points.
[6.52] Any undisrupted, supplied unit that starts its Movement Phase in a friendly railroad hex that isn't in an enemy ZOC can use RR movement. The unit spends its entire MA to move by RR. It can move up to 40 hexes along a connected path of railroad hexes. All hexes entered (including the destination hex) must be friendly railroad hexes free of enemy units, IDS's and ZOC's; for purposes of RR movement, a friendly unit negates an enemy ZOC in the hex it occupies.
[6.53] Units can cross a damaged bridge using RR movement. Each time a unit does so, decrease the number of hexes it can move by five or by the number of hexes of RR movement remaining, whichever is less. This rule represents the time required to change trains at the damaged bridge.
[6.54] Units using RR movement ignore stacking limits and the presence of refugees. They must observe stacking limits at the end of their RR movement, and Allied units must make a panic check when they end RR movement in a hex containing refugees.
[6.55] Units can use RR movement only in their own countries, countries that are allied with their side or (in the case of the Axis player) countries that have surrendered.
[6.6] Hidden Movement (optional)
[6.61] The Axis player has eight Task Force (TF) markers he can use to represent unit stacks. The Allied player gets five TF markers of his own when using option 14 (Better French Command Structure). TF markers offer limited hidden movement for stacks whose composition you want to keep secret. Use this option if both players agree during setup.
[6.62] Use a TF marker by placing it with its numbered side down in the hex with the stack it represents (or, if you're setting up the game, in the hex where you would have set up that stack if you weren't using the TF marker). Place the unit stack represented by the marker on your Command Card in the TF box with the same number as the TF marker you used. You then move the TF marker just as if it were the unit stack.
[6.63] You can only place a TF marker in a hex whose contents the opposing player can't examine per 7.3 (Inspecting Stacks).
[6.64] You can freely detach units from or add units to a stack being represented by a TF marker. Place units being detached from the stack on the map. Remove units being added to the stack and place them in the stack's TF box.
[6.65] The units represented by a TF marker must still observe stacking limits, pay appropriate movement costs and follow all other game rules just as if they were on the map.
[6.66] Keep your Command Card hidden from the opposing player by using the game box to cover the card. Players can't examine each other's Command Cards.
[6.67] When the opposing player asks to look at the stack represented by a TF marker per 7.3 (Inspecting Stacks), remove the TF marker and replace the stack on the map.
[6.68] TF markers are not units. They are merely tokens used to represent stacks of units. They are never destroyed. If the units a TF marker represents are destroyed, you can reuse the marker to represent another unit stack.
[6.7] Map Key (Map A)
[6.8] Terrain Effects Chart (Operations Card)
[6.9] Fortification Summary (Summary Card)
(The Map Key is on Map A; the Terrain Effects Chart is on the Operations Card; the Fortification Summary is on the Summary Card.)
[7.0] Stacking
Having more than one unit in a hex is called stacking. Victory in the West places restrictions, called stacking limits, on your ability to stack more than one unit in a hex.
Extremely Important: You must observe stacking limits at all times, including during movement, exploitation, advances, retreats, reaction and when putting reinforcements in play. The only time a unit can violate stacking limits is when it's using RR movement per 6.5 (RR Movement).
[7.1] Stacking Limits
[7.11] Each unit has a Stacking Value printed on its piece. This value consists of a number of Stacking Points (SP's). You can stack up to 6 SP's per hex in all hexes except causeways; you can stack only 4 SP's in a causeway hex.
[7.12] All friendly units including HQ's count toward their hex's stacking limit. Ignore fortified zones and fortresses for stacking purposes.
[7.13] Markers don't count toward a hex's stacking limit.
[7.14] When the presence of an LZ or bridgehead allows opposing units to temporarily occupy the same hex, compute stacking limits for each side separately. The presence of enemy units never affects the number of friendly units that can be in the hex.
[7.2] How to Apply Limits
[7.21] You can't move a unit/stack into or through a hex during a Movement or Exploitation Phase if the combination of the moving units and the units already in the hex would exceed stacking limits, even momentarily.
Note: While all units in a stack might not be able to enter a hex simultaneously due to the presence of other units, you could break up the stack and move the units through the hex individually. If you do so, you can't recombine the stack in the same phase.
[7.22] You can't retreat, advance or react into a hex during combat in violation of stacking limits. See 9.0 (Combat).
[7.23] You can't set up units or place reinforcements on the map in violation of stacking limits. If a reinforcement can't arrive due to this rule, then you must withhold it and bring it into play later per 17.34.
[7.24] If you or your opponent find that you're accidentally violating stacking limits, you must immediately remove enough units so that you conform to those limits. Treat units removed for this reason as if they were eliminated in combat.
[7.3] Inspecting Stacks
[7.31] You can inspect enemy stacks in only three situations:
- The enemy stack is involved in combat in a friendly or enemy Combat Phase.
- The enemy stack is in the ZOC of one or more friendly units at any point during a friendly Movement, Exploitation or Combat Phase.
- The enemy stack is within 30 hexes of an eligible base (as defined in 18.44) and isn't hidden during a friendly Air Phase. This rule represents the use of air recon to locate enemy troops.
[7.32] Units are hidden when they are in a woods, wooded rough, major city or fortress hex. Units aren't hidden and can be seen from the air when they are in clear, wetlands, rough, mountain and minor city hexes that aren't also fortresses.
[8.0] Zones of Control
The hex a unit occupies and the six surrounding hexes constitute that unit's Zone of Control (ZOC). The presence of a ZOC inhibits movement and retreat by enemy units and the tracing of enemy supply and command.
[8.1] Who Exerts a ZOC
All units (including HQ's) exert a ZOC into all six surrounding hexes at all times except as noted below:
- Combat units with an SV of less than 1 have no ZOC.
- Disrupted units and units in an LZ or bridgehead have no ZOC.
- Inactive units temporarily lose their ZOC when the active player announces an overrun; they regain their ZOC once the overrun is resolved and the overrunning units occupy the target hex or end their movement because the overrun failed.
[8.2] Extent of ZOC's
[8.21] ZOC's extend into all adjacent hexes except mountains, major cities and enemy fortresses. ZOC's extend out of all types of hexes.
[8.22] ZOC's extend across all types of hexsides.
[8.23] Friendly and enemy ZOC's coexist in the same hex. A ZOC's effectiveness doesn't change just because an enemy ZOC also exists in the same hex.
[8.24] There's no additional effect if more than one friendly or enemy unit exerts a ZOC in a hex.
[8.3] ZOC Effects
[8.31] Units aren't affected by friendly ZOC's.
[8.32] It costs 1 MP to enter and 2 MP's to leave an enemy ZOC. The MP costs to enter/leave hexes in enemy ZOC's are added to terrain costs. Units without enough MP's to pay all the terrain and ZOC costs for a move can't make that move.
[8.33] Units can both enter and leave any number of ZOC's in a Movement Phase if they have enough MP's.
[8.34] Units can't trace supply or command through a hex in an enemy ZOC.
[8.35] ZOC's affect post-combat advances, retreats and reaction per 9.0 (Combat).
[8.36] A friendly combat unit or HQ negates enemy ZOC's in its hex when tracing supply and command and when retreating or using RR movement. It does not do so when using normal movement.
[8.37] Generally, when a unit is in an enemy ZOC, then the enemy unit exerting that ZOC is also in the friendly unit's ZOC (if any). The two units are equally and mutually affected.
[9.0] Combat
Combat occurs between adjacent opposing units at the active player's discretion. The active player is the attacker; the inactive player is the defender. The attacker announces attacks in any order he chooses. As he announces each attack, he immediately resolves that attack using the procedure in 9.1 before announcing another attack. When he has made all of the attacks he wants, the phase is over.
[9.1] Combat Procedure
- Modify the AS of each attacking unit per 9.3 (Combat Strength Modifiers). Then total these modified strengths into a single, combined AS.
- Modify the DS of each defending unit per 9.3 (Combat Strength Modifiers). Then total these modified strengths into a single, combined DS and add to the total the IDS of any fortification in the hex.
- Compare the attacker's total to the defender's total and state the comparison as a ratio: attacker's strength to defender's strength. Round this ratio down (in the defender's favor) so that it conforms to the simplified odds ratios (1-1, 2-1, 3-1, etc.) on the Combat Table. The result is called the combat ratio.
- The attacker finds the line at the top of the Combat Table for the terrain in the defender's hex and reads across the row of entries in that line until he comes to the combat ratio from step 3. If the ratio of attacker's strength to defender's strength is smaller than that in the terrain line's leftmost Combat Ratio column, the attack is prohibited (and the attacking units can't make any other attacks); if the ratio is greater than that in the terrain line's rightmost Combat Ratio column, use the rightmost column.
- The players commit support from HQ's and AP's. First the attacker and then the defender announces which HQ (if any) is using its CB to benefit his units per 9.4 (Column Shifts). The attacker then makes a mission strength check and commits any AP's he wants to a support mission benefiting the attacking units per 18.3 (Air Missions). When he is done, the defender makes a mission strength check and commits any AP's he wants to a support mission benefiting the defenders per 18.3 (Air Missions).
- The attacker totals the number of column shifts he gets for his HQ and AP's while the defender separately totals the number of column shifts he gets for his HQ and AP's and for defending a fortified zone or Siegfried Line hex per 9.4 (Column Shifts). Subtract the lesser total from the greater total. If the result is zero, take no further action. Otherwise, the player with the greater total shifts the Combat Ratio column from step 4 a number of columns equal to the result. He can't shift further right than the rightmost Combat Ratio column on the terrain line found in step 4 or further left than the Combat Table's leftmost column; ignore excess column shifts.
- The attacker rolls the die and modifies the result for making a Blitzkrieg attack or defending in a fortress and for French AA and AT Gun bonuses per 9.5 (Die Roll Modifiers). He then finds the result in the Combat Table's leftmost column and reads across the row containing that result to the entry in the column found in step 6. This is the final combat result.
[9.2] Who Can Attack
[9.21] Undisrupted units can attack any and all enemy units, fortified zones and fortresses that they are next to at the start of a friendly Combat Phase. Units can't attack in other phases; overruns executed during Movement and Exploitation Phases are a form of movement even though you use the combat procedure to resolve them. Only units directly next to an enemy unit or hex can attack it.
Exception: The 6xxxx Artillery Group can attack units at a range of two hexes; there can be one intervening hex between it and its target. The 6xxxx Artillery Group can't attack alone; at least one other friendly combat unit must also participate in the combat.
[9.22] Attacking is voluntary; units are never forced to attack, and not every unit that is next to an enemy unit must attack. Units stacked in the same hex with an attacking unit needn't participate in the same combat with it (or in any combat, for that matter). When one unit in a stack is attacking, the other units in the stack could attack the same hex, one or more other hexes or no hex at all. A unit that isn't involved in an attack isn't affected by its results.
[9.23] Units can attack into all terrain and across all hexsides.
Exception: Motorized units (including those motorized per the Options Chart) can only attack out of or into mountain hexes along a road.
[9.24] You can attack an enemy-occupied hex using as many units as you can bring to bear from the six adjacent hexes (plus the German 6xxxx Artillery Group).
[9.25] No unit can attack or be attacked more than once per Combat Phase.
[9.26] All units in a stack defend as a single, combined DS. You can't withhold a unit from the defense, nor can you attack a unit without attacking all other units in the same stack.
[9.27] If a unit is next to more than one enemy-occupied hex, it can attack all of them in a single combat. The German 6xxxx Artillery Group can attack all enemy units within two hexes in a single combat. Any number of units and hexes can be involved in a given combat. No matter how many units or hexes are involved, all attacking non-artillery units must be next to all defending units, and the 6xxxx Artillery Group must be within two hexes of all defending units.
[9.28] When you attack two or more hexes with different terrain in a single combat, use the Combat Table terrain line most favorable to the defender (the line closest to the bottom).
[9.29] You can't divide a unit's Attack and Defense Strengths among different combats in the same phase.
[9.3] Combat Strength Modifiers
[9.31] Modify the strengths of attacking and defending units per 9.32 through 9.36. All modifications are cumulative, and you apply them in the exact order they are listed. Thus, you apply a unit's Divisional Integrity Bonus before halving the unit for attacking across a minor river. Retain fractional strengths from halving and quartering until you finish making all strength modifications. Then total all strengths and round fractions down. This process can result in a combined strength of zero. However, see 9.37.
[9.32] Some divisions consist of two or more units. When all of a multi-unit division's surviving units are stacked in the same hex, they get a Divisional Integrity Bonus. Increase the AS and DS of each supplied undisrupted unit by 1. If all but one of a division's constituent units is eliminated, the surviving unit gets a Divisional Integrity Bonus at all times (even when alone in a hex).
[9.33] Double the individual DS of each motorized combat unit defending in a clear hex and the AS of each such unit attacking enemy units occupying only clear hexes.
Exception: The attacker ignores this modifier when attacking through a bridge or river hexside in a Combat Phase. Both sides ignore this modifier when any of the clear hexes being attacked has a fortress.
[9.33] (numbered 9.33 a second time in the printed booklet) Quadruple the AS of the German 6xxxx Artillery Group when any of the hexes it is attacking is a fortress.
[9.34] Halve the individual AS/DS of each combat unit that is unsupplied and/or disrupted.
[9.35] Quarter the individual AS/DS of each combat unit in a causeway hex.
[9.36] Modify the individual AS of each non-artillery unit that is attacking into a hex that doesn't have a friendly LZ across any of the following hexside terrain:
- Halve the AS when attacking across a minor river or bridge.
- Quarter the AS when attacking across an unbridged major river.
Important Note: When a major river hexside has a bridge, ignore the Major River modifier and use the Bridge modifier. This rule applies even when the bridge is damaged. The less severe modifier applies because the presence of roads, paved approaches, abutments, etc., makes the river crossing easier, even when the bridge, itself, is down.
[9.37] Regardless of actual Attack and Defense Strengths, each side has a minimum strength of "1" for purposes of combat ratio calculation. If, after combining the strengths of all units in a hex together with any active IDS in the hex, the stack's final strength is zero, then the hex has a total combined strength of "1" for combat purposes, regardless of its true strength. Under this rule, units with an AS of zero can attack.
[9.38] Regardless of the opposing sides' strengths, always round the final combat ratio down (in the defender's favor).
Example: An attack with a combined AS of 26 against defending units with a combined DS of 9 has a combat ratio of 26-to-9. To get a ratio closer to one on the Combat Table, divide the greater strength by the lesser and express the result as a ratio of attacker's strength to defender's strength. The lesser of the two is always "1." The result, in this example, is 2.8 (attacker's strength) to 1 (defender's strength, which is less). Since there's no 2.8-to-1 ratio on the Combat Table, round down to the next lowest combat ratio shown (in this case, 2-to-1). Use the 2-1 column to resolve the combat.
[9.4] Column Shifts
[9.41] The Combat Table has 13 columns of results. The further right a column is, the more it favors the attacker; the further left it is, the more it favors the defender. Air power, support from headquarters and some fortification benefits are represented by column shifts. This section describes all column shifts; they are also summarized on the Operations Card. All shifts are cumulative. However, you can't apply more shifts than there are columns available. Once you shift as far right or left as you can on a combat's terrain line, ignore further shifts.
[9.42] Both players can use Air Points to shift the combat ratio column per 18.0 (Air Power).
[9.43] Both players can use their HQ's to shift the combat ratio column per 14.0 (HQ Units).
[9.44] The defender gets extra column shifts for defending in fortified zones. If one or more defending hexes has an Allied fortified zone, shift left 1 column. If one or more defending hexes has a German fortified zone (part of the Siegfried Line), shift left 2 columns.
Exception: The defender gets no column shift for defending in a fortified zone that contains an enemy LZ.
[9.5] Die Roll Modifiers
[9.51] Modify the combat resolution die roll per 9.52 through 9.56. All die roll modifiers are cumulative. If the final modified die roll is less than zero, treat it as zero.
[9.52] Subtract 2 from the die roll if any defending hex is a fortress.
Exception: Ignore this modifier when Axis non-artillery units are attacking a French fortress hex adjacent to the French border from a non-fortress hex in France. All hexes subject to this exception are part of the Maginot Line, and this exception represents the fact that the French purposely built these fortifications so that they could be easily broken into from behind.
[9.53] Add 2 to the die roll when the attacker makes a Blitzkrieg attack. Blitzkrieg attacks occur automatically whenever a supplied Blitzkrieg-capable unit that isn't attacking through an unbridged major or minor river participates in an attack or overrun against enemy units that aren't in any mountain, major city or fortress hexes (or wetlands hexes during rain), and at least 1 TAP supports the attack.
[9.54] Add 2 to the die roll when the British 4/RTR and/or 7/RTR Tank II's are participating in an attack that isn't a Blitzkrieg attack. Ignore this modification when making a Blitzkrieg attack.
[9.55] If you are using option 11 (More French AA Guns), subtract 1 from the die roll when resolving a Blitzkrieg attack against a defending force that includes one or more French units. This bonus partly offsets, but doesn't negate the enemy Blitzkrieg Bonus, which still applies.
[9.56] If you are using option 12 (More French AT Guns), subtract 1 from the die roll when resolving a Blitzkrieg attack against a defending force that includes one or more French units. This bonus partly offsets, but doesn't negate the enemy Blitzkrieg Bonus, which still applies.
[9.6] Combat Table (Operations Card)
[9.7] Combat Summary (Operations Card)
(The Combat Table and Combat Summary are printed on the Operations Card.)
[9.8] Explanation of Results
[9.81] Combat results include strength losses, retreats, eliminations and panic checks. Each HQ and each fortified zone has one step; combat units have one to four steps, depending on the unit. Most Combat Table results represent steps lost. Losing steps or being unable to retreat when required to do so can cause a unit's elimination (removal from the game). Losing steps can also cause a combat unit to be replaced by a cadre per 2.48 (Unit Steps). When a unit is eliminated or replaced by a cadre, place it in the Dead Box. When a fortified zone loses a step, it's destroyed; place a Ruin marker on it to show this fact.
[9.82] The number of cadres in the counter mix is an intended design limit. If there aren't enough cadres to replace a unit with a cadre of the correct type, the unit is eliminated. Add to your RP total a number of RP's of the appropriate type equal to the number of steps in the unit's cadre. If you can't do this because you have too many RP's accumulated, then you lose the excess RP's.
Note: When a cadre is eliminated or evacuated, you can recycle the cadre piece for reuse to represent a new cadre in another situation. Simply remove the cadre from the Dead Box (or Britain Box, if evacuated) and adjust the Victory Point total per the VP Summary.
[9.83] Fortresses don't have steps and aren't affected by step losses. They are permanently destroyed along with their IDS when the defender gets a Bold result and there are no defending units in their hex after applying all other defender results.
[9.84] Each Combat Table result consists of two parts, separated by a slash. The part before the slash applies to the attacker; that after the slash applies to the defender. There are six types of printed results:
- No Effect. A "-" is a No Effect result; nothing happens.
- Eliminated. An "E" is an Eliminated result; all participating units are eliminated, and any defending fortified zones are destroyed.
- Retreat. An "R" is a Retreat result. After removing any required step losses, the owning player retreats all of his involved units that aren't in a bridgehead or LZ one hex. Units that retreat during a Blitzkrieg attack/overrun are disrupted when they finish retreating. Any defending fortified zones are destroyed.
- Panic. A "P" is a Panic result. After removing any required step losses, the owning player makes a panic check and applies the results per 10.0 (Panic) to all units with an ER less than 6 that aren't in a fortress, LZ or bridgehead. Units can lose additional steps, become disrupted or retreat as a result of this check; units that retreat due to panic are disrupted at the end of their retreat. If all units in a hex are eliminated and/or retreat due to panic, any defending fortified zone in that hex is destroyed.
- Step Loss. A number result (1, 2, etc.) is a Step Loss. You must remove that number of steps from one or more of your affected units (not fortified zones). The player who controls the units affected by a result can apportion losses among his units however he wants so long as the total number of steps removed equals the combat result. If all defending units are eliminated and unsatisfied step losses remain, subtract the remaining steps from the defending fortified zones.
- Destruction. A bold outcome is a Destruction result. After applying all other results, any defending fortresses that don't contain at least one surviving defending unit are destroyed.
Each combat outcome includes two or more printed results.
[9.85] Most results are split results (e.g., 1/1), in which both sides are affected. In a split result, the defender sustains his result (step loss, retreat, panic check or elimination) first. Once he satisfies all combat result requirements, the attacker sustains his result. If any attacking units are still in their original hex after the attacker satisfies his result and any of the defender's hexes are vacant and don't have an intact IDS, then the attacker can advance any or all surviving units into the vacated hex(es) per 9.9. The defender never advances in a split result, though he can do so if the combat result affects only the attacker.
[9.86] Only units that were directly involved in a combat are affected by it. Supporting HQ's aren't affected by combat results, and the 6xxxx Artillery Group is only affected if it started the combat next to an enemy hex that was being attacked. You can apportion losses only among involved units, and only those units can retreat. Only units actually involved in a combat can advance into a vacated enemy hex.
[9.87] Whenever the 4/RTR and/or 7/RTR Tank II's participate in an attack and the Allied player loses any steps, at least one loss must be satisfied by removing one of these tank battalions.
[9.88] Units in fortresses can ignore retreats, at the owning player's option. They must still lose steps if the printed result also includes a step loss number. Other defending units that aren't in fortresses must still retreat.
[9.9] Advances And Retreats
[9.91] Units may have to retreat due to combat and/or a panic check. They can advance as a result of combat. Retreats are mandatory; units that can't make a required retreat are eliminated. Advances are voluntary; a unit doesn't have to advance after combat unless the attacker chooses to establish a bridgehead in one or more target hexes. The player who controls a unit always decides whether it advances and determines the path that it follows.
[9.92] Units advance and retreat individually. Units stacked together can retreat in different directions if desired. If retreating units leave more than one retreat path (per 9.97), advancing units can enter any and all hexes vacated in those retreats; they aren't restricted to following any one retreat path.
[9.93] Units must observe the following restrictions when advancing and retreating:
- A unit can only retreat into hexes that it could legally enter in a Movement Phase (assuming it had enough MP's). It can't advance or retreat into prohibited terrain or across prohibited hexsides.
- Retreating units can't enter hexes containing enemy units or intact IDS's. Advancing units can only enter such hexes by establishing a bridgehead.
- Units can't advance or retreat into neutral countries or off map.
- Units must observe stacking limits during advances/retreats. Within this restriction, advancing and retreating units can freely enter, exit and/or pass through friendly-occupied hexes during their advance/retreat.
- Units that advance/retreat into an interdicted hex undergo an immediate ground attack.
- Units with an ER less than 6 that retreat into a hex containing refugees are disrupted.
- Units can't retreat into a hex in an enemy ZOC unless that hex also contains a friendly unit or IDS. Advancing units ignore enemy ZOC's.
- If, due to any combination of prohibited terrain, enemy ZOC's, or the presence of friendly or enemy units, a unit can't retreat as required it is eliminated.
[9.94] If a unit retreats into a friendly-occupied hex that is then attacked in the same phase, the retreated unit doesn't add its strength to the hex's defense. However, if the units with which it's stacked suffer any result except "-" (No Effect), the unit is eliminated. Eliminating units for this reason doesn't count toward satisfying combat losses.
[9.95] When a unit retreats as a result of combat and/or panic, any or all of the (attacker's or defender's) victorious units that participated in the combat can advance into the hex it vacated. You must exercise the option to advance immediately, before resolving any other combats.
[9.96] If all units in a hex are eliminated in combat, any victorious units can advance two hexes. The first hex entered must be that formerly occupied by the defender's eliminated units. The second hex can be any adjacent vacant hex that the advancing units can enter without crossing a river or bridge.
[9.97] Units can't attack or be attacked for the rest of the Combat Phase after making a post-combat advance. Even if their advance puts them next to enemy units that aren't being attacked or whose combat hasn't been resolved, they can't participate in further combat.
[10.0] Panic
Panic represents the effect of the Blitzkrieg on soldiers unprepared for the new warfare. Troops with a low Efficiency Rating (ER) may panic when they undergo combat (especially Blitzkrieg attacks), are subjected to intense air attack or encounter mobs of refugees and stragglers from friendly forces. Make a panic check to determine the effects of panic. These can include retreat, disruption, step losses and the creation of stragglers (represented by Refugee markers).
[10.1] When to Check for Panic
[10.11] Make a panic check in the following situations:
- Make a panic check for each unit with a modified ER less than 6 that gets a "P" combat or ground attack result.
- Make a panic check for each unit with a modified ER less than 6 when an enemy stack initiates an overrun against its stack (and before resolving the overrun).
- Make a panic check for each Allied unit with a modified ER less than 6 each time a Refugee marker enters its hex. This rule can lead to multiple panic checks during refugee movement. It doesn't apply to placing a new Refugee marker on the map, only to moving one that was previously put in play.
- Make a panic check for each Allied unit with a modified ER less than 6 when it enters a hex with one or more Refugee markers. Ending RR movement in such a hex or appearing there as a reinforcement counts as entering the hex.
- Make a panic check for each defending Axis unit in a combat where the British 4/RTR and/or 7/RTR Tank II's are attacking for the first time. Resolve this check before resolving the combat. For purposes of this check, subtract 2 from each Axis unit's ER.
The Panic Summary also explains when to make panic checks.
[10.12] Units with a modified ER of 6 or greater aren't affected by panic checks. Ignore a required panic check when all units that could be affected have a modified ER of 6 or greater.
[10.13] Units in fortresses, bridgeheads and LZ's ignore panic checks. Ignore a required panic check if all units that could be affected are in such hexes. Units in fortified zones are subject to panic, but fortified zone IDS's aren't directly affected by panic checks.
[10.2] How to Check for Panic
- Roll the die. The result is the panic number that applies to all units affected by the panic check. Find the panic number in the Panic Table's leftmost column.
- For each unit affected by the panic check, read across the row containing the panic number (from step 1) to the column with the unit's modified ER at the top. The entry where ER column and panic number row meet is the result affecting that specific unit (only).
- Apply results individually to each unit as you determine them.
[10.3] Panic Check Results
[10.31] The Panic Table includes the following results:
- No Effect. The unit continues to function effectively.
- Retreat. The owning player retreats the unit one hex per 9.9 (Advances and Retreats). The unit is then disrupted.
- Disrupted. The unit is disrupted.
- Step Losses. A number indicates that the unit loses either one or two steps in addition to other results.
[10.32] Some Panic Table outcomes include multiple results. In such cases, remove step losses before applying Retreat and Disruption results.
[10.33] When an Allied unit loses a step during a panic check, the Axis player places a Refugee marker in the unit's hex or in any adjacent hex per 13.1 (How Refugees Appear).
[10.34] When the units in a stack undergo a panic check because they entered a hex with a Refugee marker, their movement is interrupted while resolving the check. Units that sustain any panic check result except No Effect automatically end their movement in the hex with the Refugee marker. Units that get a No Effect result or that aren't affected by panic can keep moving in a single stack after the panic check is resolved.
[10.4] Panic Summary (Summary Card)
[10.5] Panic Table (Summary Card)
(The Panic Summary and Panic Table are printed on the Summary Card.)
[11.0] Disruption
Disruption represents loss of operational readiness due to loss of command, control and communications during combat or to a change in unit posture. Units disrupted by combat, panic, fatigue and/or air operations are severely limited in what they can do.
[11.1] How Units Become Disrupted
Units become disrupted in the following situations:
- The unit gets a "D" or "R" result in a ground attack or panic check.
- The unit retreats due to a panic check, overrun or Blitzkrieg attack.
- The unit has an ER less than 6 and retreats into a hex containing one or more Refugee markers.
- The Axis player disrupts the unit per 12.4 (Fatigue).
[11.2] How Units Recover From Disruption
Units automatically recover from disruption in the Disruption Recovery Phase.
Exceptions: Axis motorized units can't recover from disruption while fatigued. No Axis units can recover from disruption during a halt.
[11.3] Disruption Effects
[11.31] Place a Disruption marker on a unit to show that it's disrupted. To show that multiple units in a hex are disrupted, place disrupted units on the bottom of the stack and put a Disruption marker on the topmost disrupted unit. Remove the Disruption marker when the unit(s) recover from disruption.
[11.32] Disrupted units suffer the following restrictions:
- Disrupted HQ's have no CR or CB; units can't trace command or supply to them.
- Disrupted units can't overrun, attack, advance, react or receive replacements. They can retreat.
- Disrupted units can move only in a friendly Movement Phase. They can't move in an Exploitation Phase.
- Supplied disrupted units have their DS's halved for both combat and overrun. Unsupplied units suffer no decrease in their DS from being disrupted.
- Disrupted units get no Divisional Integrity Bonuses for having all of a division's units in the same hex.
[11.33] If a disrupted unit is disrupted again, it loses a step. This is the only additional effect from suffering a disruption result while already disrupted.
[12.4] Fatigue
Historical Note: The German Panzerwaffe (Tank Arm) of 1940 wasn't organized and equipped to fight for very long without a break, which is one of the reasons that the campaign developed in two distinct phases. The need to rest tired crews, retrieve and repair broken-down equipment overstressed in the early days of the campaign and generally let the logistical system catch up all contributed to forcing a halt in the panzer battle after a couple of weeks of full-tilt campaigning.
[23.41] Axis motorized units other than Army HQ's and the 6xxxx Artillery Group become fatigued on Turn 8. Fatigued motorized units no longer automatically recover from disruption. In addition, starting on Turn 8, the Axis player must make a fatigue check at the end of each Disruption Recovery Phase until his motorized units are rested as a result of an Axis halt.
[23.42] Make a fatigue check by rolling the die and modifying the result as follows: Until the Axis calls a halt per 23.43, +1 for each additional turn after Turn 8 that no halt is called; once a halt is called, +1 for each full turn since calling a halt. The modified die roll is the current turn's fatigue number. It has the following effect on play:
- Pre-halt Fatigue Number. Prior to a halt being called, the fatigue number is the total number of undisrupted Axis motorized units other than Army HQ's and 6xxxx Artillery Group that are immediately disrupted. The Axis player chooses which units disrupt.
- Post-Halt Fatigue Number. Once the Axis player calls a halt, the fatigue number is the total number of fatigued motorized units that recover from disruption. The Axis player chooses which units recover.
[23.43] The Axis player can call a halt at the end of any Disruption Recovery Phase after his motorized units become fatigued. Whenever he does so, all his undisrupted fatigued motorized units are immediately disrupted. Once the Axis player calls a halt, the number of fatigued disrupted Axis units that can recover from disruption each phase is equal to the current turn's fatigue number.
[23.44] When a post-halt fatigue check yields a modified result greater than 10, all Axis units stop being fatigued and become rested. They automatically recover from disruption during the next and all succeeding Disruption Recovery Phases, and the Axis player makes no further fatigue checks.
[23.45] Allied units, Axis Army HQ's and leg units and the 6xxxx Artillery Group aren't affected by fatigue. They always automatically recover from disruption during each Disruption Recovery Phase.
[12.0] Reaction
Reaction represents the ability of both sides to respond in a limited way to a developing battlefield situation. Units react as a result of a reaction check at the end of each combat. All eligible inactive units react first; then eligible active units react.
[12.1] When to Check for Reaction
Check for reaction after resolving combat and applying results. Reaction occurs in step 9 of the combat procedure.
[12.2] How to Check for Reaction
- Determine which friendly HQ controlled the combat just resolved. This HQ is always the one that used its CB to support the units in the combat. If no friendly HQ used its CB for this purpose or if the HQ that did is disrupted, then use any friendly undisrupted HQ to which any of the units involved in the combat can trace command.
- Compare the ER of the HQ from step 1 to the unmodified combat resolution die roll result.
- No Reaction. If the ER is less than the die roll result, the HQ fails to issue timely orders and no units react.
- Reaction. If the ER is greater than or equal to the die roll result, the HQ orders one or more units to react.
[12.3] Who Can React?
[12.31] When a reaction occurs, you can move either one unit of any size or all of the units in one division.
[12.32] Only undisrupted combat units that are within the CR of the HQ that controlled the combat and that are the same nationality as that HQ can react. HQ's and disrupted units can't react.
[12.33] Units in an enemy ZOC can react only if they have an ER greater than 6.
[12.34] Reaction is always voluntary. Units aren't forced to react, and you don't have to use any or all of the reaction capacity defined in 12.31.
[12.35] Units can react multiple times per turn, but each unit can react only once per phase.
[12.36] An HQ can be used to spark reaction in any number of combats during a single phase.
[12.4] Reaction Movement
[12.41] Reacting leg units move one hex (ignoring MP costs).
[12.42] Reacting motorized units move up to two hexes (ignoring MP costs).
[12.43] Reacting units can't enter prohibited hexes or cross unbridged river hexsides. They can't cross a bridge into an enemy hex unless they are entering a friendly bridgehead.
[12.44] Reacting units can't move directly between two hexes in an enemy ZOC. If they occupy or enter a hex in an enemy ZOC, they must move into a hex that isn't in an enemy ZOC before entering another hex in an enemy ZOC.
[12.45] Reacting units can't attack or overrun while reacting.
[12.5] The Ghost Division
Rommel's 7th Panzer Division earned the sobriquet "Ghost Division" in the 1940 campaign because of the speed and decisiveness with which it moved and reacted. Except when they temporarily lose their reaction eligibility due to disruption, this division's units can always react three hexes per phase within the limits of 12.35, regardless of the outcome of reaction checks. Units of the Ghost Division don't count against the reaction capacity defined in 12.31.
[13.0] Refugees
[13.1] How Refugees Appear
[13.11] Use Refugee markers to represent Allied refugees and stragglers. Only Allied units and cities produce refugees. Refugees appear in three ways:
- When an Allied unit loses a step as a result of a panic check, the Axis player places a Refugee marker in the unit's hex or in any adjacent hex.
- When the Axis player gets a number result while executing a Terror Bombing mission, he places the indicated number of Refugee markers (+1 if the target was a major city) in or next to the city that he bombed.
- When a German combat unit or a Refugee marker enters an Allied city in France or Belgium, the Axis player places another Refugee marker in or next to the city.
[13.12] When placing a Refugee marker, observe the following restrictions listed in the order in which you apply them:
- You can only place markers in Allied hexes. You can't place them in Axis or neutral hexes. For this purpose, treat hexes with bridgeheads and LZ's as Axis (no matter who controls the bridgehead/LZ).
- You can't place the marker next to Axis units if there is an eligible hex available that isn't next to an Axis unit.
- You must place the marker in a road or railroad hex, if possible.
- If you can't place a Refugee marker within these limits, the refugee can't appear.
[13.2] How Refugees Are Eliminated
[13.21] Refugee markers are eliminated in three ways:
- Dispersal. Any time a Refugee marker is in a hex with an Axis unit that isn't in a bridgehead or LZ, Axis troops disperse the refugees; remove the Refugee marker.
- Straggler Collection. When an Allied unit successfully collects stragglers per 13.44, the Allied player removes a Refugee marker.
- Moving Out of Play. When either player moves a refugee off the map or into a neutral nation, remove the Refugee marker.
[13.22] Set aside any Refugee markers you remove. You can reuse them to represent new refugees.
[13.3] How Refugees Move
[13.31] Refugee markers move during both the Axis and Allied Exploitation Phases, even though they represent only Allied refugees and stragglers. Each player must try to move every Refugee marker that starts his Exploitation Phase on the map exactly 3 hexes (or as far as possible up to that limit) at the start of the phase. Move each marker individually, not in stacks.
Note: You can't move Refugee markers in the phase they appear; you can only move markers that start the Exploitation Phase on the map.
[13.32] Refugee markers aren't units. They don't spend MP's to move. They can't enter or cross prohibited terrain, but they are otherwise unaffected by terrain effects.
[13.33] Refugees can leave but can't enter an Axis ZOC. They ignore Allied ZOC's.
[13.34] You can't move a Refugee marker any closer to the nearest Axis unit than it already is. If two Axis units are equidistant, arbitrarily designate one as the closest Axis unit for purposes of this rule.
[13.35] You can't move a Refugee marker into Germany from another country.
[13.36] You can't move a Refugee marker into Belgium from France unless Belgium is neutral.
[13.37] Once a Refugee marker is placed on or moves onto a road or railroad, it can move only along roads/railroads.
[13.38] You can move Refugee markers off the map and into neutral nations. This counts as one hex of movement. Remove the Refugee marker when the move is done.
[13.4] Refugee Effects
[13.41] Combat units and HQ's can freely enter hexes containing Refugee markers and vice versa.
[13.42] Units pay 1 additional MP per Refugee marker to enter a hex containing one or more Refugee markers. This penalty affects only normal movement. Refugee markers do not affect overrun costs or RR movement.
[13.43] Refugee markers inhibit retreat per 9.93 and cause Panic Checks per 10.11.
[13.5] Collecting Stragglers
The Allied player can try to gain extra RP's by collecting stragglers during his Movement and Exploitation Phases. When an Allied unit stack is in the same hex with one or more Refugee markers, the Allied player can collect stragglers after resolving all required panic checks. Each unit in the stack spends 2 MP's for this purpose. Roll the die and add 1 for each Refugee marker after the first that occupies the hex.
- If the modified die roll result is less than 10, the attempt fails.
- If the modified die roll result is 10 or greater, remove one Refugee marker and add 1 LRP to the Allied RP total.
Units can try to collect stragglers any number of times per turn, but each unit can try to collect stragglers only once per hex per phase.
[14.0] HQ Units
HQ's are motorized units representing army and corps command and support infrastructures, plus non-divisional artillery, anti-aircraft and combat engineer units that can be temporarily assigned to support combat units. Combat units that are within the Command Radius (CR) of an undisrupted supplied HQ can draw supply from that HQ and benefit from its Command Bonus (CB). Combat units that are within the CR of an undisrupted HQ can react.
[14.1] HQ's and Command
[14.11] All combat units benefit from being in command. A unit is in command if it can trace a Line of Command (LOC) to any undisrupted friendly HQ.
[14.12] An LOC is a continuous chain of hexes equal to the HQ's Command Radius traced from the unit back to the HQ. It includes the HQ's hex, but not the combat unit's hex. Observe the following restrictions when tracing an LOC:
- You can't trace an LOC into a hex or across a hexside prohibited to the unit tracing the LOC during normal movement.
- You can't trace an LOC across an unbridged river or a damaged bridge.
- You can't trace an LOC into a hex containing an enemy unit or IDS; Refugees and Interdiction markers don't affect LOC's.
- You can't trace an LOC into a hex containing an enemy ZOC unless that hex also contains a friendly unit.
[14.2] Command Benefits
[14.21] Combat units that can trace an LOC to a friendly supplied undisrupted HQ in the Supply Segment are supplied for the rest of the turn per 15.0 (Supply).
[14.22] If one or more combat units and/or fortified zones/fortresses involved in a combat can, at the moment of combat, trace an LOC to any supplied, undisrupted HQ of the same nationality (including an HQ with which it is stacked), then the owning player can shift the combat ratio a number of columns in his favor equal to that HQ's Command Bonus. If the units are attacking, shift right; if defending, shift left. The following restrictions apply:
- Each combat can be affected by only one HQ.
- Each HQ can use its CB only once per phase.
- An HQ can use its CB to affect a combat only if it's supplied.
- An HQ can't affect a combat involving only friendly HQ's (including itself).
[14.23] Combat units that can trace an LOC to the HQ that controlled the combat just resolved can react per 12.0 (Reaction) if they are of the same nationality as the HQ.
[14.24] A unit can get supply, support and/or orders enabling it to react from any available HQ and can switch from one HQ to another in different phases of the same turn, but it must be able to trace an LOC to each HQ providing these benefits.
[14.3] Special Characteristics
[14.31] HQ's do exert a ZOC. Note that this is an exception to how most wargames operate.
[14.32] HQ's have no AS or DS; they can't attack themselves or participate in overruns. If attacked while stacked with one or more friendly combat units (or in a hex with an IDS), an HQ adds nothing to the hex's defense; it's still affected by the combat result. If attacked in a hex that doesn't contain a friendly combat unit (or IDS), an HQ has a nominal DS of "1."
[14.33] Each HQ has one step, which can be eliminated to satisfy a one-step loss when the HQ is attacked. HQ's never sustain losses or suffer other results from combats where their involvement consists solely of using their CB to provide column shifts. An HQ can voluntarily retreat if all of the combat units with which it is stacked are eliminated or vacate the hex due to retreat or panic.
[14.34] Printed on each HQ's back side is a replacement HQ. When an HQ (including a replacement) is eliminated, put it in the Dead Box. The HQ never reenters play. However, in the next or any succeeding friendly Reinforcement Phase, you can recycle its piece and use it to represent a new replacement HQ. Place the HQ with its back side showing two turns ahead (one intervening box) on the Turn Track. When you move the Turn marker into the box containing the replacement HQ, add the unit to your Command Card (Axis = OKH Box; Allied = GQG Box); it enters play as a reinforcement with its replacement (back) side showing.
Note: Each HQ piece can be eliminated and recycled any number of times, but each time it gets recycled, treat it as a brand new (not rebuilt) HQ. Entering a previously recycled HQ piece as a reinforcement never affects VP or CP totals.
[15.0] Supply
There are two possible supply states: supplied and unsupplied. Units must be supplied to operate up to their potential. Fortresses and fortified zones aren't affected by supply.
[15.1] When to Check Supply
[15.11] The Allied player determines which of his units are supplied in the Supply Segment's Allied Supply Phase.
[15.12] The Axis player determines which of his units are supplied in the Supply Segment's Axis Supply Phase.
[15.13] Units that are supplied in the Supply Segment are supplied for the rest of the turn, regardless of any changes in the battlefield situation. Units that are unsupplied in the Supply Segment stay unsupplied for the rest of the turn even if they subsequently satisfy the conditions for being supplied.
[15.14] Units are automatically supplied on Turns 1 and 2.
[15.2] Supply Determination
[15.21] An HQ is supplied if it occupies a friendly special supply source or can trace a supply line from the hex it occupies to a friendly general supply source. Trace supply from the unit's hex (exclusive) to the supply source (inclusive).
[15.22] A combat unit is supplied if it occupies a friendly special supply source or can trace an LOC to an undisrupted friendly HQ that is itself supplied.
[15.23] A supply line can be of any length, but you must trace it within the following restrictions:
- All hexes in the supply line except the first must be friendly to the unit tracing supply.
- All but three hexes of the supply line must be traced along roads and/or railroads.
- You can't trace supply into a mountain hex except on a road.
- You can't trace supply across an unbridged river or a damaged bridge.
- You can't trace supply into a hex or across a hexside that the unit tracing supply couldn't enter during normal movement.
- You can't trace supply into a hex containing an enemy unit or IDS; you can trace supply out of such hexes. Refugees and Interdiction markers don't affect supply.
- You can't trace supply into a hex in an enemy ZOC unless that hex contains a friendly unit.
[15.3] General Supply Sources
[15.31] The Supply Chart lists the general supply sources to which units of the different nationalities can trace supply. Units can't trace supply to other nations' sources except as specified on this chart.
[15.32] General supply sources stay friendly to the player to whom they belong until captured by enemy units. If captured, they stop being supply sources. If recaptured by friendly units, they once again function as supply sources.
[15.33] Each friendly general supply source can supply any number of HQ's and units.
[15.4] Special Supply Sources
[15.41] The Supply Chart lists the special supply sources to which units of different nationalities can trace supply.
[15.42] Special supply sources stay friendly to the player to whom they belong until captured (entered) by enemy units. Most can be captured and recaptured repeatedly just like general supply sources, but fortresses and Siegfried Line hexes are permanently destroyed (and cease to exist as supply sources) when captured.
[15.5] Supply Effects
[15.51] Place a No Supply marker on a unit to show that it is unsupplied. To show that more than one unit in a hex is unsupplied or that only some units are unsupplied, place all unsupplied units on the bottom of the stack and put a No Supply marker on the topmost unsupplied unit.
[15.52] Unsupplied HQ's operate under these restrictions:
- They can't use their CB to support friendly units in combat.
- They can't move in their Exploitation Phase.
[15.53] Unsupplied combat units operate under these restrictions:
- They can't get replacements.
- They can't move in their Exploitation Phase.
- They get no Divisional Integrity Bonus.
- They have their Attack and Defense Strengths halved (round down). Treat strengths of less than 1 as zero.
- They can't conduct overruns or blitzkrieg attacks.
[15.6] Axis Air Supply
[15.61] The Axis player can supply up to 8 SP's of units per turn by air. After tracing supply, simply designate the unsupplied units being supplied by air and remove their No Supply markers. Supplying units by air doesn't use AP's.
[15.62] Units are eligible to be supplied by air only if they are within 30 hexes of an Axis air base (as defined in 18.44).
[15.63] The Axis player can use his air supply capability only in clear and overcast turns in which he doesn't use any TAP's to perform missions at extended range per 18.46 or paradrop or air transport any units per 19.0 (Paradrops).
[15.64] When using option 8 (French Paratroops), the Allied player gains an Air Supply capability identical to the Axis except that he can use it to supply only 2 SP's of units per turn.
[15.7] Supply Chart (Summary Card)
(The Supply Chart is printed on the Summary Card.)
[16.0] Replacements
Each player gets replacements, represented by Replacement Points (RP's), that he uses to strengthen reduced-strength units (including cadres). RP's come in two flavors: Leg Replacement Points (LRP's) and Motorized Replacement Points (MRP's).
[16.1] Getting RP's
[16.11] Each player starts the game with RP's accumulated per the scenario instructions. Both players get additional RP's during play:
- During each Reinforcement Phase, the active player gets the number and types of RP's shown in his RP row on the Turn Track.
- The Allied player gets extra LRP's for collecting stragglers per 13.44, recycling evacuated units per 22.4 (Evacuation Effects), disbanding French units per 16.3 and declaring an emergency per 23.3 (Declaring an Emergency).
[16.12] You can immediately use any or all of your RP's, or you can save all or some of them for later use. There's no limit to how long you can save RP's.
[16.13] Victory in the West uses a Replacement Track and four RP markers (Allied LRP, Allied MRP, Axis LRP and Axis MRP) to track RP additions and expenditures. As you get and spend RP's, place each marker in the Replacement Track box representing the total number of RP's of that type that you have. If you have more than 10 RP's of a given type, flip the marker over to its +10 side.
[16.14] You can't accumulate more than 19 RP's of a given type. When you have 19 RP's of one type and get an additional RP of that type, you must use the new RP in the current Reinforcement Phase. If you can't or won't do so, you permanently lose the new RP.
[16.2] Using RP's
[16.21] During your Reinforcement Phase, you can use RP's to strengthen eligible reduced-strength units by spending 1 RP for each step worth of strengthening:
- For each LRP expended, flip one reduced-strength leg combat unit/cadre over to its full-strength side or replace a full-strength cadre with a non-cadre leg combat unit of the same nationality and type.
- For each MRP expended, flip one reduced-strength leg or motorized combat unit/cadre over to its full-strength side or replace a full-strength leg or motorized cadre with a non-cadre combat unit of the same nationality and type.
[16.22] There's no limit to the number of RP's that you can use in a turn. However, you can't use more RP's than you have available, you can't strengthen a unit without spending RP's to do so, and you can't strengthen a unit by more than one step per turn.
[16.23] You can strengthen a reduced-strength unit/cadre by spending 1 RP to flip it over, adding one step to the unit and raising it to full strength. You can strengthen a full-strength cadre by spending 1 RP to replace it with a non-cadre unit piece of the same nationality and unit type (see 9.83).
[16.24] You can only strengthen units on the map. You can't strengthen units on Command Cards or in the Britain Box.
[16.25] You can only strengthen units/cadres that meet all of the following conditions:
- The unit is supplied.
- The unit is undisrupted.
- The unit isn't in an enemy ZOC.
- The unit is British, French or German; Dutch and Belgian units/cadres never get replacements.
[16.26] Units can't move, react, exploit or attack on the turn they get replacements; they defend normally and can retreat. Place a Movement marker on top of units that get replacements to show that their capabilities are restricted; remove the marker at the start of their next Reinforcement Phase.
[16.27] You can't rebuild units that have been totally eliminated. Once you place a cadre or a unit that has no cadre in the Dead Box, it's gone for good.
Exception: See 23.3 (Declaring an Emergency).
[16.28] There are two ways that you can remove a unit from the Dead Box without rebuilding:
- You spend an RP of the appropriate type to strengthen a cadre by replacing it with a combat unit of the same nationality and type. Since the cadre represents the combat unit at a lower strength, this isn't considered rebuilding.
- You can recycle cadres and HQ's and reuse them to represent new cadres/HQ's by paying the VP's listed on the VP Summary.
[16.29] You can use RP's to strengthen only one British unit per turn. There's no restriction on the number of French and German units that can be strengthened in a turn.
[16.3] Disbanding Units
[16.31] The Allied player can disband eligible French combat units (including cadres) in his Reinforcement Phase.
[16.32] A combat unit is eligible to be disbanded if it meets both of the following criteria:
- It's supplied from a French general supply source.
- It's not in an enemy ZOC.
[16.33] When you disband a unit, add to the Allied RP total a number of RP's of the appropriate type equal to the number of steps (including cadre steps) the unit had left when you disbanded it. Put the unit (together with an appropriate cadre, if it has one) in the Dead Box. If the disbanded unit has cadre steps remaining and there are no cadres of the right type available, add VP's to the Axis total for those steps as if they belonged to a cadre being recycled from the Dead Box.
[16.4] Replacement Track (Map B)
[17.0] Reinforcements
Each player starts the game with a pool of reserves that he sets up in one of three holding boxes: the OKH Box (German units), GQG Box (French units) or Britain Box (British units). You commit these units to the game as detailed in this section. Reserves being committed to the game are called reinforcements. In addition, each player gets AP's as reinforcements per 18.2 (Air Point Availability).
[17.1] How They Appear
Each friendly Reinforcement Phase, reinforcements arrive (are placed on the map) in the numbers and at the locations shown on the Reinforcement Chart. They have no effect on play until they are on the map. Then, they immediately function just like units already in play. Reinforcements are automatically supplied on the turn they enter play.
[17.2] Restrictions
[17.21] Except when arriving by paradrop or air transport, reinforcements appear in friendly hexes. If the enemy controls all of a reinforcement's entry hexes, it can't arrive. It can arrive later if an entry hex becomes available.
[17.22] Reinforcements can arrive individually or in stacks.
[17.23] You can't place reinforcements on the map in violation of stacking limits. See 7.0 (Stacking).
[17.24] Some reserves can only arrive on or after a specific turn. See the OKH, GQG and Britain Boxes for details.
[17.25] Units in the GQG Box's Alps, North Africa and Norway sections can't arrive until the turn after the Allied player declares an emergency per 23.3 (Declaring an Emergency).
[17.26] You don't have to enter reserves as reinforcements. You can keep any or all of them in their holding box throughout the game.
[17.3] Reinforcement Chart (Summary Card)
[17.4] OKH Box (Axis Command Card)
[17.5] GQG Box (Allied Command Card)
[17.6] Britain Box (Map B)
(The Reinforcement Chart is on the Summary Card; the OKH, GQG and Britain Boxes are on the Command Cards and Map B.)
[18.0] Air Power
Victory in the West abstracts the air war in 1940, using Air Points (AP's) to represent the air assets you can use to fly missions in support of ground operations. Non-combat air operations (supply, paradrop, transport and recon) are discussed elsewhere.
[18.1] Air Point Types
There are two types of AP's:
- Tactical Air Points (TAP's) represent ground attack aircraft, dive bombers and fighters used in a light bomber role. Most of these aircraft are designed to deliver small bomb loads accurately at low altitude. TAP's have a limited range. They are best suited to support, ground attack and interdiction missions and are doubled when flying those missions.
- Strategic Air Points (SAP's) represent heavy and medium level bombers designed to deliver a lot of ordnance without much accuracy, usually from medium to high altitude. SAP's have more range than TAP's and are best suited to bombing fixed targets. They are doubled when bombing cities; they can't fly interdiction.
[18.2] Air Point Availability
[18.21] Each player starts the game with the AP's listed in the scenario instructions. This is the number of AP's the player can use each turn.
[18.22] Players can lose AP's from air attrition and by flying missions. They gain AP's in their Reinforcement Phases per the Turn Track's Air Points entry. The Allied player gets additional AP's per 23.3 (Declaring an Emergency).
[18.23] You use AP's to fly missions in an Air or Combat Phase. Each AP can fly one mission per turn. You can't save an AP's mission capability for use on a later turn.
[18.24] The percentage of AP assets that can actually fly missions each turn is governed by the weather per 5.2.
[18.25] Victory in the West uses an Air Track and eight AP markers (four per player) to track SAP and TAP availability and use. These markers measure two types of availability:
- Use the SAP Assets and TAP Assets markers to show how many SAP's/TAP's you have (no matter how many you can actually use in a turn). As you gain/lose AP's, place the appropriate "Assets" marker in the Air Track box representing the total number of AP's of that type that you have. If you have more than 10 AP's of a type, flip the marker over to its +10 side.
- Use the Unused SAP's and Unused TAP's markers to show how many SAP's/TAP's you can actually use in the current turn. As you use SAP's/TAP's to fly missions during the turn, move these markers to show a decrease in the number of SAP's/TAP's that are unused.
[18.26] You can't have more than 19 AP's of a given type. Any SAP's/TAP's you get in excess of 19 are permanently lost.
[18.3] Air Missions
You use Air Points to fly missions against enemy units, cities, bridges and hexes.
[18.31] Mission Types
You can use AP's to fly four air missions:
- Support
- Interdiction
- Ground Attack
- Bombing
You can fly any number of missions of each type each turn, within the limits of your available AP's and can mix SAP's and TAP's in the same mission. Rules 18.33 through 18.36 describe the different mission types; the Mission Summary outlines these rules for quick reference.
[18.32] Mission Strength
Each mission type has a strength equal to the modified value of the AP's committed to it: Bombing mission = bombing strength; Support mission = support strength; Ground attack mission = attack strength; Interdiction mission = interdiction strength. Rules 18.33 through 18.36 describe strength modifications for different missions. Each mission's outcome depends, in part, on the strength assigned to it.
Bombing missions can have a maximum strength of 6; you can assign SAP's and TAP's with a total combined bombing strength of 6 to each bombing mission. Support missions during overruns have a maximum strength of 2-4; you can assign only 2 AP's to support each overrun, but TAP's are doubled. For all other missions, make a mission strength check by rolling the die. Add 1 to the result if you are using Option 10 (Expanded French Air Force); subtract 1 on Turns 1 and 2. Find the modified result in the Air Table's leftmost column. Read across the line from that die roll result to your side's column in the Strength section (AL = Allies; AX = Axis). The number in that column is the maximum mission strength of the AP's you can assign to that mission. If you are flying an interdiction mission, and the number is odd, increase it by 1 (to the next highest even number).
You don't have to make a mission as strong as the mission strength check die roll indicates. If you want, you can make it weaker. However, if any AP's are available for the mission, then you must fly it. You can't "scrub" missions.
[18.33] Support Missions
Each player can use AP's to support friendly German, French and/or British units and fortified zones/fortresses in each combat in a Combat Phase. The active player (only) can use AP's to support overrunning stacks of German, French and/or British units in other phases. You can fly only one support mission per combat/overrun. You can't use AP's to support Dutch or Belgian units or fortifications that aren't stacked with friendly German, French or British units.
Exception: The Allied player can use AP's to support Belgian units and fortifications when using Option 5 (Anglo-French-Belgian Alliance).
The total strength of each support mission is equal to the number of columns you can shift the combat ratio in your favor. TAP's are doubled in strength when flying support missions. Using one or more TAP's (with or without SAP's) to support an attack/overrun that includes at least one supplied Blitzkrieg-capable unit automatically makes that attack/overrun into a Blitzkrieg attack per 9.53.
[18.34] Interdiction Missions
You can fly any number of interdiction missions in an Air Phase, but you can fly only one mission per hex per phase, and only TAP's can fly interdiction. Each interdiction mission has an interdiction strength equal to twice the number of TAP's flying the mission. For each mission, place in any one friendly or enemy hex an Interdiction marker equal in value to the interdiction strength. The marker stays in the interdicted hex until the next Mission Recovery Phase. You can interdict the same hex as the opposing player, but you can't increase the hex's interdiction strength above 6.
Each stack that enters an interdicted hex interrupts its movement in that hex and undergoes a ground attack by the interdicting AP's per 18.35. Each stack that enters or leaves an interdicted hex while being evacuated undergoes a ground attack. In each case, the attack strength equals the hex's interdiction strength. If a ground attack results in an AP loss, reduce the interdiction strength by 2 and subtract a TAP from the Available TAP total of the player who placed the marker. If the interdiction strength falls below 2, remove it.
Interdiction has no effect on stationary units, including those that start a Movement or Exploitation Phase in a hex with an Interdiction marker. Units that paradrop into an interdicted hex ignore the interdiction during their paradrop. Except when determining AP losses from ground attacks performed as part of interdiction, it doesn't matter who placed the Interdiction marker in a hex; the marker affects both sides equally.
[18.35] Ground Attack Missions
You can fly any number of ground attack missions per Air Phase. You can only fly one ground attack mission per stack per phase (though you can resolve multiple ground attacks against a stack as a result of interdiction). Each mission consists of a single attack against all enemy units in a target stack. Fortifications aren't affected by ground attack, though the units inside them are. TAP's are doubled when flying ground attack missions.
Resolve each ground attack as a single attack against all units in the stack by rolling the die, modifying the result for flak and finding the modified result in the Air Table's leftmost column. Read across the row containing that die roll result to the column in the table's Ground Attack section representing the attack strength. Shift right 2 columns when attacking units in a causeway hex; shift left 1 column when the target is hidden per 7.32 and isn't being evacuated by sea when the attack occurs. You can only shift as far as the Ground Attack section's leftmost column; ignore excess column shifts. The entry where row and column meet is the ground attack's result. Results include:
-
- = No Effect.
- L = Loss. Subtract 1 AP from your AP assets.
- H = Heavy Flak. Subtract 1 AP from your AP assets if (and only if) the target is protected by heavy flak per 18.5 (Air Point Losses).
- D = Disrupted. All combat units in the stack are disrupted; HQ's are unaffected. Ignore this result if the stack under attack is being evacuated.
- P = Panic Check. All combat units in the stack are first disrupted; then make an immediate panic check for combat units with an ER less than 6. HQ's are unaffected. Ignore this result if the stack under attack is being evacuated.
-
= Step Loss. The combat units in the stack lose the indicated number of steps (total, not per unit); HQ's never lose steps from ground attack.
- Bold # = MP Penalty. All units (including HQ's) that aren't being evacuated must pay this number of additional MP's to enter the next hex into which they move. Units that don't have the MP's to pay this penalty must end their movement in their current hex. This result applies only to units attacked by AP's flying interdiction.
[18.36] Bombing Missions
You can fly any number of bombing missions in an Air Phase, but can only attack each target once per phase. Each mission consists of an attack on one enemy city or bridge hexside; units and fortifications aren't affected by bombing missions. When initiating a Bombing mission, you must clearly state whether you are bombing a city or a bridge; you can't do both in the same mission. If you are commanding the Axis and are bombing a city, you must also announce whether you are using strategic bombing or terror bombing; only the Axis player can use terror bombing.
Resolve each Bombing mission by rolling the die, modifying the result for flak and finding the modified result in the Air Table's leftmost column. Read across the row containing that die roll result until you come to the column in the table's Bombing section representing the mission's bombing strength. SAP's are doubled when bombing cities; TAP's are doubled when bombing bridges. The entry where row and column meet is the mission's result. Shift right 1 column if the target is a major city; you can't shift further right than the Bombing section's rightmost column. Results include:
- L = Loss. Subtract 1 AP from your AP assets.
- H = Heavy Flak. Subtract 1 AP from your AP assets if (and only if) the target is a Heavy Flak target.
- B = Bridge Damaged. The bridge you are bombing is damaged. Place a Damage marker in an adjacent hex with the arrow pointing at the bridge. Ignore this part of the result when bombing a city.
-
= Damage. When engaged in strategic bombing, add this number of VP's to the VP total if you are the Axis player or subtract it if you are the Allied player. When terror bombing, place this number of Refugees (+1 if the target is a major city) in or next to the target per 13.0 (Refugees); multiply the number of Refugees generated by 5 and subtract the result from the VP total.
[18.37] Mission Resolution and Flak
The quantity and type of anti-aircraft artillery (flak) around a target affects mission resolution as follows:
- Light Flak. Cities, Allied bridges that aren't part of bridgeheads and French, Belgian and Dutch units that aren't being evacuated and aren't in bridgeheads are protected by light flak. You get a Light Flak Bonus of +1 to the mission resolution die roll when resolving a ground attack against only units protected by light flak and when resolving a Bombing mission against a target protected by light flak.
- Medium Flak. British units that aren't being evacuated and aren't in bridgeheads are protected by medium flak. The effects of medium flak are built into the Air Table; apply no Light Flak Bonus when resolving a ground attack (including an attack as part of interdiction) against a stack that includes any units protected by heavy flak.
- Heavy Flak. Axis units and bridges (including bridges built by placing bridgeheads), all bridges that are part of bridgeheads and units that are inside bridgeheads or that are being evacuated are protected by heavy flak. Apply a Heavy Flak Penalty of -1 to the mission resolution die roll when resolving a ground attack (including an attack as part of interdiction) against a stack that includes any units protected by heavy flak. Apply the same penalty when resolving a Bombing mission against cities and bridges protected by heavy flak. In addition, you can lose AP's due to an H result when resolving missions against targets defended by heavy flak.
[18.4] Range to Target
[18.41] All AP's and all non-combat air operations (supply, paradrop, transport and recon) have an operational range measuring the distance they can fly to reach a target. The Range Chart lists these ranges.
[18.42] Each individual air mission has a range to target determined by tracing a path of hexes from an eligible base (exclusive) to the target hex (inclusive). The number of hexes in the range to target can't exceed the operational range of the AP's flying the mission.
[18.43] When a target consists of more than one hex (as sometimes happens in support missions), count the range to target to the hex nearest an eligible base.
[18.44] Eligible bases include the following:
- Axis. Any friendly city in Germany. Any other city that has been friendly for at least one full turn.
- Allied. Any friendly city in France. Any west mapedge hex.
[18.45] Reduce by 10 the range of Allied AP's flying from the west mapedge. This rule represents off-map flying time from bases in England.
[18.46] The Axis player can use up to half of his available TAP's each turn to fly missions at an extended range of 30 hexes. He can't make paradrops or use air supply on turns in which he uses this option. This rule represents the Luftwaffe's ability to rapidly relocate tactical aircraft to forward fields.
[18.5] Air Point Losses
[18.51] You can lose AP's when resolving Ground Attack and Bombing missions and ground attacks stemming from interdiction per 18.35 and 18.36. You can also lose AP's from air attrition per 18.52.
[18.52] At the end of each Air Phase, the active player makes an attrition check for his air assets by rolling one die. The Allied player loses an AP on a result of 8-10. The Axis player loses an AP on a roll of 10. Other results have no effect.
Exception: When using option 10, both players lose an AP on a 9-10 result.
[18.53] Generally, the player who loses an AP decides whether to lose a TAP or an SAP. However, certain restrictions apply:
- When resolving missions, you can only lose the type of AP that is flying the mission. If only TAP's are flying, you can only lose TAP's; if only SAP's are flying, you can only lose SAP's.
- When any TAP's make a ground attack, bomb a bridge or terror bomb a city (alone or with SAP's), you must subtract any AP losses from your TAP assets.
[18.54] Only AP Assets are affected by air losses, not unused AP's; for each loss, adjust the TAP Assets or SAP Assets marker (as appropriate) to show one less AP. Never move the Unused TAP's or Unused SAP's markers to reflect AP losses.
[18.6] Mission Summary (Operations Card)
[18.7] Air Table (Operations Card)
[18.8] Air Track (Map B)
[18.9] Range Chart (Summary Card)
(The Mission Summary and Air Table are on the Operations Card, the Air Track is on Map B and the Range Chart is on the Summary Card.)
[19.0] Paradrops
The Axis player has five paratroop units. When using option 8 (French Paratroops), the Allied player also has two paratroop units. Paratroop units function like other combat units except that they can enter the game as reinforcements by appearing in enemy hexes. They do this by making a paradrop.
[19.1] Who Can Paradrop?
[19.11] Only paratroop units in the OKH or GQG Box can paradrop.
[19.12] Units can paradrop only in clear or overcast weather.
[19.13] Any or all paratroop units can paradrop on the same turn. Alternatively, you can paradrop on multiple turns in which you have eligible paratroop units available.
[19.14] Multiple units can paradrop into the same hex on the same turn. Each unit drops individually.
[19.15] Each paratroop unit can paradrop only once per game.
[19.2] Drop Procedure
-
After entering all other reinforcements during his Reinforcement Phase, the active player places any or all paradropping units in any enemy city, clear, wetlands or woods hexes without a bridgehead that are within 30 hexes of a friendly city in the unit's home country. Units can't paradrop into friendly hexes or hexes that have a bridgehead belonging to either side.
-
The active player makes a paradrop survival check for each paradropped unit by rolling the die and modifying it as follows:
- Add 1 if the target is a woods or city hex.
- Add the SV of each enemy unit in the hex.
- Add the hex's IDS, if any.
There are three possible paradrop survival check results:
- 1-9 = The unit lands safely.
- 10-11 = The unit is disrupted.
- 12+ = The unit is eliminated.
-
The hex a unit paradrops into becomes friendly at the end of its paradrop survival check if all of these conditions apply:
- The paradropping unit survives its paradrop survival check (even if it's disrupted).
- There's no IDS or enemy unit in the hex.
- The total combined SV of the friendly units in the hex (exclusive of paradropping units whose survival checks haven't been resolved) is at least 1.
If the hex doesn't become friendly, the unit forms a Landing Zone (LZ), if no friendly LZ is present, or enters an existing friendly LZ, if there is already one in the hex. Place an LZ marker on the friendly units in the hex to show that they are inside the LZ. The hex containing the LZ remains an enemy hex.
[19.3] Landing Zones
[19.31] LZ's represent secured landing areas that form footholds in enemy country. Once an LZ is established, all units that enter the hex by paradrop or air transport are said to be in the LZ. Units can stay in an LZ indefinitely. You can't voluntarily remove an LZ; it disappears automatically when the following conditions occur:
- All units inside the LZ are eliminated.
- The LZ's hex becomes friendly to the side that formed the LZ.
- You place a bridgehead in the hex.
When you place a bridgehead in an LZ's hex, the LZ is permanently absorbed by the bridgehead, and the units in the LZ enter the bridgehead.
[19.32] Treat each LZ as if it was a separate hex within the hex it occupies.
[19.33] LZ's have the following effects on the units in them:
- The units have no ZOC.
- The units ignore Retreat and Panic results from combat and ground attacks. They never make panic checks.
- The units are automatically supplied on the turn they arrive. On succeeding turns, they must be supplied by air before any other friendly units can be air-supplied.
- The units can't move, react or attack enemy units or IDS's in adjacent hexes.
- The units can't attack or be attacked by enemy units in adjacent hexes. They can attack and be attacked by enemy units in the same hex.
[19.34] LZ's have the following effects on their hexes:
- Ignore both sides' fortified zone combat ratio column shifts and fortress die roll modifiers in hexes with an LZ.
- Enemy units in a hex with an LZ can't react and can't attack or overrun adjacent hexes.
- Units attacking a hex containing a friendly LZ don't modify their strengths for minor rivers and bridges. Their strength is halved (instead of quartered) when attacking across unbridged major rivers.
[19.4] 22nd Air Landing Division
Historical Note: The three regiments of 22nd Air Landing Division were trained and equipped for air transport. They were supposed to be flown into airfields previously captured by paradrop.
[19.41] In the Axis Reinforcement Phase of each clear or overcast turn, the Axis player can air transport any or all 22nd Air Landing xx units that start the phase in the OKH box. After executing all paradrops, he picks up each air landing regiment that he wants to air transport and places it in any major city hex that is friendly or that has a friendly LZ and that is within 30 hexes of a friendly German city.
[19.42] The Axis player can transport an air landing unit to an LZ on the turn he establishes the LZ or on a later turn.
[19.43] The Axis player can transport any number of air landing regiments to the same hex or can transport some or all regiments to different hexes.
[19.44] You can transport each air landing regiment only once per game.
[19.45] Once transported to an LZ, an air landing unit either makes the hex friendly and eliminates the LZ (if the hex has no IDS or enemy units in it) or enters the LZ (if the hex contains an IDS or enemy units).
[20.0] Bridges
Bridges span rivers and sea hexsides wherever you see a bridge symbol or where a road/railroad crosses the water; bridges that cross sea hexsides are called causeways. Bridges and causeways speed movement and permit overruns per 6.0 (Movement), make attacking across a sea hexside possible and attacking across a major river less difficult per 9.0 (Combat) and help units trace command and supply per 14.0 (HQ Units) and 15.0 (Supply). Bridges are damaged by bombing per 18.0 (Air Power) and by demolition per this section. They are repaired per this section. Treat river hexsides without a bridge or with a damaged bridge as unbridged river hexsides.
[20.1] Causeways
[20.11] A causeway is a bridge spanning sea hexes and hexsides. All bridges that cross sea hexsides are causeway hexsides. Hexes B0410, B0509 and B0510 are causeway hexes.
[20.12] Units pay the MP costs on the TEC's Causeway line to enter causeway hexes and use the Combat Table's Clear/Causeway terrain line to resolve attacks against units in causeway hexes. Causeway hexes are never damaged; you can't demolish or bomb them.
[20.13] Treat causeway hexsides as bridges except that units don't pay MP's to cross a causeway hexside that's part of a causeway hex. Damaging a causeway hexside by demolition or bombing makes the hexside impassable until the causeway is repaired.
[20.2] Bridge Control and Status
[20.21] A bridge is friendly to a player when both hexes linked by the bridge are friendly or when one hex is friendly and the other contains a friendly Bridgehead marker pointing directly away from the bridge. If only one hex is friendly and there's no friendly bridgehead in the other hex, then both sides treat the bridge as friendly for purposes of demolition and enemy for purposes of bridge bombing and repair.
[20.22] Bridges are either intact or damaged. Intact bridges are usable by the side that controls them. Damaged bridges are unusable by either side until repaired.
[20.23] All bridges except the French Rhine bridges start the game intact. The Rhine bridges (hexsides A5607-A5707, A5608-A5709, A5610-A5710, A5612-A5712, A5815-A5915, A5916-A6015 and A6018-A6118) are demolished at the game's start; use Damage markers to show their status.
[20.24] Bridges are damaged in two ways:
- Demolition. A player can automatically demolish a friendly bridge when an enemy unit tries to cross it during movement, exploitation, post-combat advance or reaction or when a paratroop unit passes its survival check and lands undisrupted next to the bridge.
- Bombing. A player can try to damage an enemy bridge by bombing per 18.36 (Bombing Missions).
[20.25] Whenever an enemy unit tries to cross a bridge during movement or exploitation or during a post-combat advance/retreat, the player to whom the bridge is friendly can demolish it before the movement occurs. If he chooses to do so, the units' movement is temporarily suspended before they actually cross the bridge. After the opposing player places a Damage marker next to the bridge with the marker's arrow pointing toward it, the units can continue moving. Demolishing bridges is voluntary. You're never forced to demolish a bridge. However, once a unit makes a bridge friendly when it moves across it, the former owner can no longer demolish it.
Note: Since it's sometimes hard to tell which bridges are captured intact (especially when panzer columns are making deep advances along narrow axes), the game includes a set of Bridge markers you can use to show which bridges are intact. Whenever confusion might arise over an intact bridge's status, place one of these markers next to the bridge with the marker's arrow pointing at it. Remove the marker when the bridge's status is no longer in doubt.
[20.26] When a bridge is demolished during a Movement or Exploitation Phase, any units whose non-overrun movement triggered its demolition can keep moving, but they can't use the bridge. When a bridge is demolished during a Combat Phase, the units whose reaction or advance triggered the demolition must stop their advance/reaction in the hex they occupy when the bridge is demolished. You can't use coups to capture bridges during post-combat movement.
[20.3] How Bridges Are Repaired
[20.31] During each Bridging Phase, each player can automatically repair:
- One friendly bridge within the CR of each supplied corps HQ.
- Up to two friendly bridges within the CR of each supplied army HQ.
- Up to two friendly bridges anywhere on the map.
[20.32] Repairing bridges is voluntary. You're never forced to repair a bridge.
[20.4] Bridgeheads
[20.41] Bridgeheads are tenuous footholds on the enemy side of a river. Place a Bridgehead (BH) marker representing a bridgehead next to a river or bridge as a result of combat or overrun per 20.42.
[20.42] You establish bridgeheads in enemy hexes in two situations:
- You stage a successful coup during an overrun per 21.0 (Coups de Main).
- You attack across a river or bridge and the defender is eliminated for any reason or sustains a printed result of "P" or "R."
You must advance at least one combat unit into the bridgehead as soon as it is formed; if you can't or won't do so, the bridgehead ceases to exist. When advancing into a friendly bridgehead, ignore any enemy units and fortifications in the bridgehead hex.
[20.43] Use a Bridgehead (BH) marker to show a bridgehead's location. Place the marker so that its top faces away from any one hexside through which you attacked/overran the hex. Stack units under the BH marker to show that they're inside the bridgehead. Bridgeheads and the units inside them coexist with enemy units and fortifications in the same hex. Treat them as if they are in a separate hex within the bridgehead's hex.
[20.44] Only one player can have a bridgehead in a hex, and that player can have only one bridgehead per hex. The opposing player can't engage in any activity that could result in placing a new bridgehead in the hex. The player who has a bridgehead can engage in such activity, but if he gets a new bridgehead, he must consolidate all of his units in the hex into a single bridgehead (either the old one or the new one, his choice).
[20.45] You can freely move units into a hex with a friendly bridgehead through the bridge that is part of the bridgehead per 20.48. Units that enter a hex with a friendly bridgehead are automatically inside the bridgehead.
[20.46] Units inside bridgeheads operate under special conditions:
- They have no ZOC.
- They can't react.
- They can't attack or overrun units in adjacent hexes; they can overrun and attack enemy units/fortified zones in the bridgehead hex.
- They can exit the bridgehead during their Movement and Exploitation Phases, but only through the hexside that the BH marker is pointing away from.
- They ignore Retreat and Panic results from combat and ground attacks. They never make panic checks.
[20.47] Units can freely enter and exit hexes containing enemy bridgeheads and can attack (but not overrun) enemy units inside a bridgehead in their hex. However, units in hexes with enemy bridgeheads operate under special restrictions:
- They have no ZOC.
- They can't react.
- They can't attack or overrun units in adjacent hexes; they can attack (but not overrun) enemy units in the bridgehead.
[20.48] Treat the hexside that the BH marker faces away from as an intact friendly bridge even if there's no road, railroad or bridge symbol present. This bridge is part of the bridgehead. It can't be demolished, but it can be bombed by enemy aircraft. If the bridge is damaged, place a Damage marker in the hex across the river from the bridgehead with the marker's arrow pointing toward the bridgehead.
[20.49] Bridgeheads are destroyed in two ways:
- Consolidation. A bridgehead's hex becomes friendly when there are no enemy units or fortifications left in the hex and there is at least 1 SP worth of friendly units in the bridgehead. When a bridgehead's hex becomes friendly, the bridgehead is consolidated. Remove its marker. If the hexside through which the bridgehead was established has a bridge, the bridge is intact (or repaired, if it was previously damaged). If the hexside has no bridge, place a Bridge marker with the arrow pointing at the hexside to show that there is a temporary bridge in place there. You can leave that Bridge marker on the map indefinitely.
- Elimination. A bridgehead is eliminated when all units inside it are eliminated or vacate the bridgehead before it's consolidated. The hexside the BH marker points away from becomes an unbridged river hexside if it has no bridge; if it has a bridge, the bridge is damaged.
[21.0] Coups de Main
Historical Note: A coup de main (coup) is a surprise stroke, usually accompanied by subterfuge. For example, a commando team might try to capture an enemy-held bridge wired for demolitions by posing as a party of enemy soldiers guarding a POW column. Once the column crosses the bridge, the commandos shed their disguises, subdue the bridge guards and cut the wires so that the bridge can't be blown. The Germans developed this sort of thing to a high art, often using teams of the Abwehr's elite Brandenburgers, who were specially trained to mount such coups on the fly.
[21.1] What is a coup?
In Victory in the West, a coup is a procedure that Axis units use to capture a bridge intact before the enemy demolishes it.
[21.2] Who Conducts Coups?
[21.21] The Axis player conducts coups in three situations:
- Movement. Up to four times per turn (eight times on Turn 1) the Axis player can try using a coup to capture a bridge that one of his stacks is crossing into a hex with no enemy units, fortresses or fortified zones. Each Axis stack must have at least one combat unit (of either mobility class) and must be conducting non-overrun movement in its Movement or Exploitation Phase.
- Overruns. Any number of Axis stacks per turn automatically try using a coup to capture any bridge through which they are conducting an overrun.
- Paradrops. Any number of paradropping Axis units per turn automatically try using a coup to capture any one bridge next to their landing hex, provided that they land undisrupted. Units that are destroyed during a paradrop or that land disrupted don't attempt coups.
[21.22] Each unit can conduct an unlimited number of coups during a phase, restricted only by the four-coup limit (eight on Turn 1) for coups during non-overrun movement for the entire Axis Army.
[21.23] Stacks that are advancing or reacting during post-combat activity never conduct coups.
[21.3] Coup Procedure
- The Allied player announces that he is demolishing a bridge, or the Axis player initiates an overrun or makes a successful paradrop that automatically triggers a coup.
- The Axis player announces the coup and indicates its target bridge. If the stack attempting the coup is conducting non-overrun movement, it spends 1 MP for the coup attempt in addition to the other costs to enter the hex.
- The Axis player rolls a die and modifies it as follows: He subtracts 2 if it is Turn 1; he subtracts 1 if the coup is occurring during a Movement or Exploitation Phase and he placed an LZ next to the bridge during the turn's Reinforcement Phase.
- If the result is less than 6, the coup succeeds; if 6+, it fails.
[21.4] Coup Results
There are two possible coup results:
- Success. If the coup succeeds, the bridge is captured intact, and the enemy player can't demolish it. Place a Bridge marker next to the bridge, with the marker's arrow pointing at it. If the coup was part of non-overrun movement, the moving units must cross the river; they pay the Bridge MP cost to do so. If the coup was part of an overrun, place a BH marker in the hex being overrun and place the stack conducting the overrun under the marker. That stack now conducts its overrun; its AS isn't halved for crossing the river.
- Failure. If the coup fails, the bridge is damaged. Place a Damage marker next to it, with the marker's arrow pointing at the bridge. If the coup was part of non-overrun movement, the moving units can keep moving, but must either pay to cross the (now unbridged) river or enter another hex. If the coup was part of an overrun, the overrunning units end their movement in the hex they are in. Once a coup fails and the bridge is damaged, you can't try a new coup against the same bridge until it is repaired.
[22.0] Evacuation
The Allied player (only) can evacuate units to Britain by sea.
[22.1] Who Can Be Evacuated?
[22.11] You can evacuate any undisrupted Allied unit that is in a friendly port with unblocked access to the sea at the start of its Movement Phase. This port can contain an enemy ZOC or bridgehead, but not an enemy LZ.
[22.12] Each turn, the Allied player can evacuate from each port up to 8 SP's of units, minus the interdiction strength in the port, if any.
[22.13] The Allied player can evacuate a maximum of 12 SP's of units per game turn from all ports that he is using for evacuation. Subtract from this total for each SP of reinforcements that arrive from the Britain and Norway Boxes during the Allied Reinforcement Phase.
[22.2] Evacuation Procedure
[22.21] During each friendly Movement Phase, move the units you are evacuating along a path of sea hexes and/or shipping channel hexes from the hexes they occupy to the west mapedge. When they exit the map, place them in the Britain Box's Evacuated Units section.
[22.22] Units being evacuated are considered to be loaded on ships. Because it is the ships that are moving, the units don't pay MP's to move, and they can enter sea hexes. They can't enter land hexes that aren't next to a major river that is part of the shipping channel between the sea and the port where they started their evacuation.
[22.23] Except as noted in 22.3 (Shipping Channels), units being evacuated ignore enemy units and ZOC's.
[22.24] Units being evacuated by sea undergo a ground attack per 18.34 (Interdiction Missions) when they enter or leave an interdicted hex. Resolve this attack using the procedure in 18.35 (Ground Attack Missions).
[22.3] Shipping Channels
The ports of Antwerp, Vlissingen, St. Valery and Rotterdam are located on shipping channels that connect them to the sea per 2.2 (The Game Map). The Allied player can only use these ports if their channels are unblocked. A shipping channel is blocked when any of the hexes along its length are occupied by enemy units with a SV of 1 or more that aren't in an LZ or bridgehead. Refugees, Interdiction markers, bridgeheads and LZ's never block access to the sea.
[22.4] Evacuation Effects
[22.41] Place evacuated units (including cadres) in the Britain Box's Evacuated Units section. Having lost their heavy equipment, these units spend the rest of the game reorganizing and reequipping. Except as noted in 22.42, they stay in the Britain Box for the rest of the game; they never reenter play.
Exception: Immediately recycle evacuated British cadres.
[22.42] On any turn after a non-British unit is evacuated, the Allied player can remove it from the Britain Box and place it in the Dead Box (or recycle it, if it is a cadre). The unit is eliminated, but the Allied player gets a number of LRP's equal to the number of steps (including cadre steps) that the unit had left. This rule represents the salvaging of personnel from units that have lost their heavy equipment during evacuation.
[23.0] Special Rules
This section details the handling of several historically significant situations that occur only once per game, but that are critical to play.
[23.1] Sturmabteilung Koch
Historical Note: During the 1940 campaign, the specially trained Sturmabteilung Koch descended by glider onto the roof of the Belgian "super-fortress" at Eben Emael and used newly developed hollow charges to wreck its guns and smash their way inside. By defanging Eben Emael, this detachment made possible a German advance across the Albert Canal, whose bridges were guarded by the fortress.
Once per game, on Turn 1 or 2, the Axis player can try to overrun a hex containing a fortress (normally prohibited). As part of this overrun, he conducts a special coup against both the fortress and the bridge across which the overrun is being made (if any). The Axis player resolves the coup per 21.3 except as noted below:
- Success. If the coup succeeds, then the fortress is destroyed and the bridge is captured intact. Place a Ruin marker on the fortress and a Bridge marker next to the bridge. If there are no enemy units in the hex, the destruction of the fortress represents a successful overrun outcome. If there are enemy units in the hex after the coup succeeds, place a BH marker in the hex and stack the overrunning units under it. Then resolve an overrun, ignoring both the destroyed fortress and the river that the stack crossed to enter the hex.
- Failure. If the coup fails, the fortress is intact, the bridge (if any) is demolished, and the overrunning units end their movement in the hex they are in. The Axis player can't try another coup against the hex. He can attack the hex in his Combat Phase.
[23.2] The Zone of Inundation
Historical Note: Especially dry weather in 1940 kept the flooding of the Zone of Inundation from being fully effective, and Axis forces were able to advance through this gap in the Maginot Line late in the campaign. With better weather, things would doubtless have been considerably different.
[23.21] Hexes A4709 and A4809 are the center of the French Zone of Inundation (ZOI). Treat them as wetlands hexes that are surrounded on all sides except the A4709-A4809 hexside by a minor river. The minor rivers printed on the boundaries of these hexes have no additional effect on their status.
[23.22] When playing the Alternate Histories scenario, the Allied player can announce that he is flooding both hexes of the ZOI whenever an Axis unit first tries to enter either hex during movement or combat or by paradrop. If he doesn't exercise this option the moment an Axis unit first tries to enter the hex, he permanently loses the option to flood any hex.
[23.23] Flooding affects both ZOI hexes; the Allied player can't flood one and not the other. Flooding the ZOI changes its hexes as follows:
- Treat both wetlands hexes as if the weather were rain for the rest of the game, regardless of the actual weather.
- Treat both hexes as if all of their hexsides except the A4709-A4809 contained major rivers (instead of minor rivers).
- Place a Lake marker in each ZOI hex to show that it is flooded.
[23.24] Axis units can try to overrun a ZOI hex, but the Allied player can flood the hex the moment the overrunning units try to enter it. If the Allied player floods the hex, the overrun fails, and the overrunning units' movement ends in the hex they occupy.
[23.25] If a German unit paradrops into the ZOI before it is flooded and survives to form an LZ, the Allied player permanently loses his option to flood the hex; commandos dropping with the paratroop unit are assumed to have captured or sabotaged the system of dams needed to flood the area. If the paratroop unit doesn't survive, the Allied player must immediately flood the hex or permanently lose the option to do so.
[23.3] Declaring an Emergency
[23.31] The Allied player can declare an emergency in the Allied Reinforcement Phase of any turn in which France has a CP total greater than 12 or when there are fewer than 12 British SP's on the map.
[23.32] When the Allied player declares an emergency, he gains the following benefits:
- He increases the ER of all French units without a motorization band by one. This represents the strengthening of surviving units by distributing to them over 5000 World War I-vintage French 75's for use as heavy AT weapons.
- He immediately adds 15 LRP's and 5 MRP's to his RP total but ignores all further Allied RP awards listed on the Turn Track. He can still get RP's from disbanding/evacuating units and collecting stragglers. This represents the commitment of entire training cadres to the battle and the consequent decimation of the French training command.
- He immediately adds 1 SAP and 1 TAP to his Air Track. This represents the commitment of more British air assets to the fight.
- He can bring in extra reinforcements per 17.36. This represents the stripping of other theaters to feed the battle in the West.
- He gains the ability to build any number of new full-strength "light divisions" at a cost of 3 LRP's per unit. For this purpose, recycle from the Dead Box French Infantry xx's with an MA of 4, paying 1 VP per step for each two-step unit recycled. These units become part of the French reserve in the GQG Box and can immediately appear as reinforcements. These units represent ad hoc divisions hurriedly cobbled together for the second phase of the campaign.
[23.33] You can declare an emergency once per game.
[23.4] The "We'll Always Have Paris" Rule
Historical Note: To the French, Paris was one huge cultural artifact that only the worst criminal would subject to the ravages of modern war. So when the Germans approached, the government decided to abandon the capital, pulling out its troops and declaring Paris an open city. The decision wrecked what remained of French morale, but it saved one of the world's great treasures.
[23.41] During any Surrender Phase in which there are one or more Axis units within five hexes (four intervening hexes) of any Paris hex, the Allied player can declare Paris an "open city." Once he makes this declaration, Paris remains an open city for the rest of the game.
[23.42] The moment that Paris is declared an open city, the following events occur:
- All fortified zones in Paris are destroyed.
- All Paris hexes cease to be supply sources.
- The Allied player must remove all Allied units from Paris and place them within stacking limits in any friendly hexes of his choice that are next to a Paris hex. Don't worry about adhering to the movement rules; simply pick the units up and place them in an eligible hex. Any units that can't be removed from Paris in this fashion are eliminated.
- When all Allied units are outside the city, the Allied player places two Refugee markers in each Paris hex that doesn't contain an Axis unit.
[23.43] When Paris is an open city, Allied units can no longer enter it by movement, exploitation, advance, retreat or reaction and can't trace supply or command into or through Paris hexes. The hex effectively becomes prohibited terrain to the Allies. Axis units can freely enter Paris hexes and can trace supply and command through them.
[23.44] When Paris is an open city, the Allied player can't use it as an air base. The Axis is unaffected by this restriction.
[23.5] Options
Historical Note: The 1940 campaign resulted in the catastrophic failure of the Allied war machine. But things need not have ended the way they did. France could have developed a war machine similar to that developed by Germany, the British could have continued their armored experiments, the Belgians could have stuck with the alliance, and Allied reserves could have been better deployed. Any of these changes would have made for a very different campaign.
The Strategy Card's Options Chart lists 18 options available to the Allied player. Each numbered option is followed by a value, which is the number of VP's added to or subtracted from the Axis VP total when the option is used. Some options also include one or more restrictions on their use. Except as noted in those restrictions and in scenario instructions, the Allied player can choose to use any options he wants at the start of The Sickle and The Blitz. He must announce which ones he's using and note their effects before starting play. At the start of the Alternate Histories scenario, the players together choose the options they want to use.
[24.0] Neutrals
Belgium and the Netherlands (Holland) are neutral at the start of most scenarios. As long as they remain neutral, their territory and military forces can't be used by either player. Nations stop being neutral and join the Allies when the Axis player invades them.
[24.1] Who is Neutral?
[24.11] The Netherlands is neutral at the start of each game unless the scenario instructions say otherwise.
[24.12] Belgium is neutral at the start of each game unless the scenario instructions say otherwise or you are using option 5 (Anglo-French-Belgian Alliance).
[24.13] Luxembourg is part of Belgium for all game purposes. When Belgium is neutral, so is Luxembourg. Invading Luxembourg is the same as invading Belgium and vice versa.
[24.2] Neutrality Effects
[24.21] You can't move, exploit, react, retreat or paradrop into a neutral nation. Units that try to do so are eliminated.
[24.22] Both sides treat hexes in a neutral nation as if they were enemy hexes for all purposes.
[24.23] You can't conduct air missions inside neutral nations or trace air mission ranges to target through hexes in a neutral nation.
[24.24] Refugees are interned (and the markers representing them are eliminated) when they enter a neutral nation.
[24.25] Neutral units have no ZOC and can't move, exploit, react or attack. They have no effect on play.
[24.3] How to Invade Neutrals
[24.31] The Axis player invades a neutral at any time during his turn by simply announcing that he is doing so. From that moment, the former neutral becomes an Allied nation. Its hexes are friendly to the Allied player, and he controls its units.
[24.32] The Axis player can invade Belgium and the Netherlands on the same or different turns or not at all. There is no restriction on when he can invade either nation, and invasion is always voluntary.
[24.33] The Allied player can't invade anybody.
[25.0] Surrender
Allied nations surrender to the Axis if they fail a surrender check in the Surrender Phase. The need for a surrender check and the chances that it will lead to surrender are governed by how many Capitulation Points (CP's) a nation has. Nations that surrender lose their armies and fortifications, and their territory becomes friendly to the Axis.
[25.1] Who Can Surrender?
[25.11] France, Belgium/Luxembourg and the Netherlands can surrender to the Axis.
[25.12] An Allied nation surrenders when the Allied player rolls an adverse surrender check result for that nation in a Surrender Phase.
[25.13] Only Allied nations can surrender, and only to the Axis player. Axis nations (including Germany) and uninvaded neutrals don't surrender. Nobody ever surrenders to the Allied player.
[25.2] Capitulation Points
[25.21] Victory in the West uses Capitulation Points (CP's) to gauge war weariness and the shock of the Blitzkrieg on Western nations. France, Belgium and the Netherlands each gain/lose CP's during play per 25.23. Keep a running total of each nation's accumulated CP's.
[25.22] A nation accumulates CP's during play even when neutral, but you don't make any surrender checks for it until it joins the Allies.
[25.23] Each nation gains/loses CP's during play as shown on the CP Summary. When a condition shown on the CP Summary no longer applies, adjust the CP total accordingly.
[25.24] Victory in the West uses a Surrender Track and three CP markers (one each for France, Belgium and the Netherlands) to track CP accumulation. As each nation's CP total changes, place each marker in the Surrender Track box representing the total number of CP's it has. If a nation has more than 10 CP's, flip the marker over to its +10 side.
[25.25] A nation can't have more than 19 CP's. Once it has 19 CP's, stop adjusting its CP total; the total stays at 19 for the rest of the game. The nation's morale is shattered at this point and it never recovers.
[25.3] When to Make Surrender Checks
Each Surrender Phase, make one check each for the Netherlands, Belgium and France (in that order) when both these conditions apply:
- The country is an Allied nation.
- The nation's CP total makes it possible to get a surrender result on the Surrender Table (France = 19 CP's; Belgium = 11 CP's; the Netherlands = 3 CP's).
[25.4] How to Make Surrender Checks
- Roll the die and modify it as follows: -1 when rolling for Belgian surrender if you are using option 5 (Anglo-French-Belgian Alliance); +3 when rolling for French surrender if all Paris hexes are currently friendly to the Axis; +5 when rolling for French surrender if fewer than four French major city hexes are currently friendly to the Allies.
- Find the modified die roll result in the Surrender Table's left column.
- Read across the row you found in step 2 to the column containing the span within which the nation's CP total falls. The entry where row and column meet is the surrender check result.
[25.5] Surrender Check Results
There are four possible surrender check results:
- "-" = No Effect. The nation keeps fighting.
- B = Belgium. If you're making a surrender check for Belgium, it surrenders; otherwise, there is no effect.
- N = Netherlands. If you're making a surrender check for the Netherlands, it surrenders; otherwise, there is no effect.
- F = France. If you're making a surrender check for France, it surrenders; otherwise, there is no effect.
Results N, B and F can exist in combination (as results NB or NBF), but you apply only the part of the result affecting the nation for which you are actually making the surrender check. Ignore the parts that don't apply.
Note: The Netherlands automatically surrenders when it undergoes a surrender check while its CP total is greater than 14. Don't bother rolling for surrender in this case.
[25.6] Surrender Effects
[25.61] All of a surrendered nation's units that aren't in the Britain Box are eliminated. Place them in the Dead Box; they never reenter play.
[25.62] All of a surrendered nation's fortified zones and fortresses (including those occupied by other nations' units) are destroyed. They have no further effect on play.
[25.63] All of a surrendered nation's general supply sources stop working. Ports still function as special supply sources.
[25.64] When France surrenders, the game is over.
[25.65] After applying all other surrender effects, the Axis player must remove 9 SP's of supplied German units from the map or from his available reinforcements and place them in the Off-Map Units portion of the OKH Box. These units never reenter play. They represent the garrison required to maintain security inside the surrendered nation.
[25.7] Surrender Table (Summary Card)
[25.8] Surrender Track (Map B)
[25.9] CP Summary (Strategy Card)
(The Surrender Table is on the Summary Card, the Surrender Track is on Map B and the CP Summary is on the Strategy Card.)
[26.0] How to Win
The Axis player gets Victory Points (VP's) at game's end for controlling enemy fortresses and major cities and for inflicting casualties on the enemy; he loses VP's for failing to control German major cities and for sustaining casualties himself. The Axis player can also gain/lose VP's during play for forcing Allied nations to surrender and as a result of strategic bombing, off-map exploitation and the recycling of pieces from the Dead Box. The VP total at game's end determines who wins. Alternatively, the game can end early without any need to find a victor if one player wins an automatic victory.
[26.1] Ending the Game
The game ends in one of three ways:
- France Surrenders.
- It is the end of the last turn in the scenario.
- One player wins an automatic victory per 26.4 (Automatic Victory).
[26.2] Tracking VP's
Move the VP markers along the Victory Track to show the number of VP's gained or lost by the Axis player. If the Axis VP total falls below zero, flip the markers over to their back (negative) side; if the total again rises to zero, flip them back to their front (positive) sides. Find the game's winner and his victory level by comparing the VP total at game's end to the VP totals on the Victory Table. The entry next to the span of numbers within which the game's VP total falls shows the winner and his victory level.
[26.3] VP Accumulation
[26.31] The Axis player starts each game with the number of VP's listed in the scenario instructions. He gains/loses VP's per 26.32 through 26.37. These adjustments are summarized on the VP Summary.
[26.32] Adjust the Axis VP total during play per the VP Summary when nations surrender, cadres are recycled from the Dead Box and refugees are created by terror bombing.
[26.33] In addition to the adjustments in 26.32, each Pursuit Phase, the Axis player gets 1 VP for each Axis Stacking Point (SP) in the GQG Box that isn't matched by an Allied SP in the same box; he loses 1 VP for each Allied SP in the OKH Box that isn't matched by an Axis SP in the same box. Motorized SP's must be matched by motorized SP's or by twice that number of leg SP's. For this purpose, ignore units in the GQG Box's Norway, Alps and North Africa sections. The Axis player gets no VP's for having units in the GQG Box once France surrenders. This rule represents off-map pursuit operations by units that previously exited the hex map.
[26.34] Adjust the VP total at game's end for control of fortresses and major cities per the VP Summary. If a hex is both a major city and a fortress, the player gets VP's for both features.
[26.35] Adjust the VP total at game's end for units in the Dead Box per the VP Summary. Don't forget to include cadres.
[26.36] Add 50 to the VP total at game's end if Axis units other than paratroop or air landing units entered or attacked any Paris hex (A1928, A1929, A2027, A2028, A2029, A2128) before Paris was declared an open city per 23.4 (The "We'll Always Have Paris" Rule).
[26.37] Add 50 to the VP total at game's end if the Allied player declared an emergency per 23.3 (Declaring an Emergency).
[26.4] Automatic Victory
[26.41] If, during any Turn Segment, one player has units anywhere on the map and the other player doesn't, the game immediately ends in an Automatic Decisive Victory for the player with units on the map.
[26.42] If, at any time, the VP Track total exceeds 999, the game ends immediately. The Axis player wins an Automatic Decisive Victory if the total is positive. The Allied player wins an Automatic Decisive Victory if it's negative.
[26.43] If the Axis player is unable to provide a required garrison for any surrendered nation per 25.65, the game ends in an Automatic Decisive Victory for the Allied player.
[26.5] Victory Track (Map B)
[26.6] Victory Chart (Summary Card)
[26.7] VP Summary (Strategy Card)
[26.8] Dead Box (Map B)
(The Victory Track and Dead Box are on Map B; the Victory Chart is on the Summary Card; the VP Summary is on the Strategy Card.)
[27.0] Scenarios
Victory in the West includes four scenarios, described in 27.1 through 27.4. All four begin on Turn 1, but their length varies, and they use different units, maps and playing aids.
[27.1] The Cape
The German advance into Holland and northern Belgium was designed to work like a matador's cape, fixing the attention of the bull on flash and color while the real danger lay elsewhere. Certainly, landing strong airborne forces in Holland and capturing the world's strongest fortress (Eben Emael) by a coup de main conveyed the right amount of flash. And the Allies bought it. While Hoth and Guderian crashed through the dense Ardennes to the Meuse, the Allied left wing, all unknowing, sped deep into Belgium and even tried to link up with Dutch forces at Breda.
This learning scenario deals with the trailing German cape in Holland. It takes just two turns to play and uses only the half-sized northern map and a limited number of units.
[27.11] Game Length
The scenario starts on Turn 1 and ends at the end of Turn 2 or when the Netherlands surrenders, whichever comes first.
[27.12] Maps & Playing Aids
Use only Map B. Only full hexes are playable; treat half-hexes as part of the map border. Use all playing aids except the Allied Command Card and the Options Chart.
[27.13] Allied Setup
- Set up these Dutch units anywhere in the Netherlands: Nth HQ; 1, 2, 3, 4, 5, 6, 7 and 8 Infantry xx's; Light xx (bicycle); 1 Hus, 2 Hus, 4 Hus and 5 Hus Bicycle III's; Groningen, IN, Assen, IS, Betuwe and Maas-Waal Static x's; A, B, Z and G Infantry x's; Peel Infantry xx (three units). At least 15 units must set up outside of and at least two hexes away from any hex of Fortress Holland.
- Set up these Belgian units anywhere in Belgium west of hexrow B22xx: 4, 7, 11, 12, 13, 17 and 18 Infantry xx's; BCP Motorcycle x; CyF Bicycle x; 1 Cy/1DC Bicycle III; 1 Cac/2DC Motorcycle III.
[27.14] Axis Setup
- Set up these German units in Germany north of hexrow Bxx18: 18xxxx and 39p xxx HQ's; 207, 208, 225, 227, 254 and 256 Infantry xx's; 21 Cavalry III; 1 Cavalry xx (three units); 9 Panzer xx (three units); SS Vfg Motorized xx (three units); SS LSSAH Motorized III.
- Set up these German units in Germany within six hexes of hex B2421: 6xxxx and 16p xxx HQ's; 1, 7, 11, 14, 18, 19, 30, 31, 35, 56, 61, 216, 223, 253, 255 and 269 Infantry xx's; 6xxxx Artillery Group; 3 Panzer xx (three units) and 4 Panzer xx (four units); 20 Motorized xx (two units).
- Set up these German units in the OKH Box: 22 Air Landing xx (three units); 1/1FJr, 2/1FJr, 3/1FJr, 1/2FJr and 2/2FJr Paratroop II's. These are the only reinforcements available to either player.
[27.15] Starting Values
- Axis SAP's = 6
- Axis TAP's = 4
- Allied SAP's = 0
- Allied TAP's = 0
- Netherlands CP's = 0
- You don't track VP's, RP's or French or Belgian CP's in this scenario.
[27.16] Special Rules
- Don't use any Options Chart options. This scenario uses the historical game mechanics and orders of battle.
- Units can't exit the map, and Belgian and Dutch units can't leave their own countries.
- The Allied player gets no reinforcements; there are no British or French units or Allied Air Points in this scenario. The Axis player can take five paratroop units and three air landing units from the OKH Box as reinforcements; he has no other reserves.
- There's no strategic bombing in this scenario. Axis AP's can still fly Terror Bombing missions.
- There are no evacuations in this scenario. Ignore 22.0 (Evacuation).
- The Netherlands and Belgium start the scenario as Allied nations. Ignore 24.0 (Neutrals). Only the Netherlands accumulates CP's or surrenders.
- Don't determine victory per 26.0 (Victory). Instead, the Axis player wins if the Netherlands surrenders by the scenario's end. Otherwise, the Allied player wins. Ignore all references to VP's in the rules.
[27.2] The Sickle
While the Allies charged at the cape that the Germans were trailing through Holland and northern Belgium, the matador's sword struck in the Ardennes. Only it wasn't a sword, but a sickle. The German plan was to force multiple crossings of the Meuse between Sedan and Dinant and then wheel north toward the channel. This "sickle cut" would slice through the feeble French 2nd and 9th Armies and trap the Belgians, the BEF and the French 1st and 7th Armies in Belgium. These powerful armies not only represented half of the Allied forces on the continent, they represented by far the best half. A successful dash to the channel behind the Allied left wing could thus win the war at a stroke.
This scenario deals with the main German thrust through the Ardennes. It covers events from the start of the offensive on 10 May through the end of the Dunkirk evacuation on 4 June. The scenario takes 12 turns to play and uses only the southern map (Map A). Most of the forces that fought in the campaign are present in this scenario.
[27.21] Game Length
This scenario starts on Turn 1 and ends at the end of Turn 12 or when one player wins an automatic victory, whichever comes first.
[27.22] Maps & Playing Aids
Use only Map A. Use all playing aids (including the Options Chart). Fold Map B in half and place it conveniently so that you can use its tracks and boxes, but don't overlap Map A's playing area.
[27.23] Allied Setup
- Set up these Belgian units in Liege (A2902, A3001 and A3002) and/or anywhere in Belgium west of the Meuse River: Belgium HQ; 1, 3, 5, 6, 8, 9, 10, 14, 15 and 16 Infantry xx's; 1 Lgr and 2 Lgr Infantry III's; 3L/1DC Motorcycle III; 4/2 CAr, 5/2 CAr and 6/2 CAr Motorized III's. Units outside Liege must set up with at least one hex between each unit and the north edge of Map A.
- Set up these Belgian units in the hexes in parentheses: Group K HQ (A3309); 2 Infantry xx (A3001); 2 Cy/2DC Bicycle III (A2502), 3 Cy/1DC Bicycle III (A3005) and 4 Cy/2DC Bicycle III (A3003); 2 Cac/2DC Motorcycle III (A3004), 1L/2DC Motorcycle III (A3302), 1 Gde/1DC Motorcycle III (A2905) and 2L/1DC Motorcycle III (A2804); 1/1 CAr Motorized III (A3709), 2/1 CAr Motorized III (A3407) and 3/1 CAr Motorized III (A3404).
- Set up these British units in France next to the Belgian border and within four hexes of Lille (A1410): BEF HQ; 1, 2, 3, 4, 5, 42, 44 and 48 Infantry xx's; 50 Motorized xx; 25 Infantry x; 4/RTR and 7/RTR Tank II's.
- Set up all 14 French fortress divisions (101, 102, 103, 104, 105, Montmedy, Thionville, Crusnes, Boulay, Faulquemont, Rohrbach, Sarre, Hagenau and Vosges) in any French fortresses or fortified zones next to the German border. At least 12 units must set up east of hexrow A36xx.
- Set up these French units in France next to the Belgian border and within four hexes of Hazebrouck (A1011): 7xxxx HQ; 4, 21, 60 and 68 Infantry xx's; 9 and 25 Motorized xx's; 1 DLM Mechanized xx.
- Set up these French units in France next to the Belgian border and within four hexes of Cambrai (A1813) and west of the Sambre River: 1xxxx HQ; 1 Mrc, 2 NA, 5 NA and 32 Infantry xx's; 1, 15 and 12 Motorized xx's; 2 DLM and 3 DLM Mechanized xx's.
- Set up these French units in France next to the Belgian border and within four hexes of Hirson (A2513): 9xxxx HQ; 18, 22, 53, 61 and 4 NA Infantry xx's; 5 Motorized xx; 1 DLC and 4 DLC Cavalry xx's; 3 Spahi Cavalry x.
- Set up these French units in France within four hexes of Sedan (A3211): 2xxxx HQ; 41, 55, 71, 1 Col, 3 Col and 3 NA Infantry xx's; 2 DLC and 5 DLC Cavalry xx's; 1 Cavalry x.
- Set up these French units in France within four hexes of Metz (A4312): 3xxxx HQ; 2, 6, 7, 20, 26, 42, 51, 56 and 58 Infantry xx's; 3 DLC Cavalry xx; 1 Spahi Cavalry x. Set up the British 51 Infantry xx with these French units.
- Set up these French units in France within four hexes of Sarreguemines (A4909): 4xxxx HQ; 11, 45, 47, 52, 82 Afrq and 87 Afrq Infantry xx's.
[27.24] Axis Setup
- Set up these German units in Germany within three hexes of hex A3702: 4xxxx and 15p xxx HQ's; 4, 8, 12, 28, 32, 62, 87, 211, 251, 263 and 267 Infantry Divisions; 5 Panzer xx (four units) and 7 Panzer xx (three units).
- Set up these German units in Germany within three hexes of hex A3803: 12xxxx and 41p xxx HQ's; 3, 5, 9, 16, 21, 23, 24, 25 and 27 Infantry xx's; 1 Mountain xx; 6 and 8 Panzer xx's (two units each).
- Set up these German units in Germany within three hexes of Trier (A4205): 16xxxx, 19p xxx and 14m xxx HQ's; 6, 15, 17, 26, 33, 34, 36, 52, 58, 68, 71, 73 and 76 Infantry xx's; 1 and 2 Panzer xx's (three units each) and 10 Panzer xx (four units); 2, 13 and 29 Motorized xx's (two units each); GD Motorized III.
- Set up these German units in Germany east of hexrow A44xx and west of the Rhine (Rhein) River: 1xxxx HQ; 75, 79, 93, 94, 95, 98, 215, 246, 252, 257, 258, 262 and 268 Infantry xx's.
- Set up these German units in Germany east of the Rhine (Rhein) River: 7xxxx HQ; 554, 555, 556 and 557 Static xx's.
- Set up all other German units not listed in 27.14 or 27.26 on their pictures in the OKH Box.
[27.25] Starting Values
- Axis LRP's = 10
- Axis MRP's = 10
- Allied LRP's = 15
- Allied MRP's = 15
- Axis SAP's = 8
- Axis TAP's = 6
- Allied SAP's = 2
- Allied TAP's = 2
- French CP's = 0
- Belgian CP's = 0
- VP's = -100
- Don't track Netherlands CP's in this scenario.
[27.26] Special Rules
- At the scenario's start, the Allied player can choose options from the Options Chart that increase the net Axis VP total by up to 100 VP's. By choosing option 1 (No Maginot Line), which has a negative VP value of 150, he can choose options having a total positive VP value of 250.
- Belgium and the Netherlands are Allied nations at the game's start. Ignore 24.0 (Neutrals).
- The Netherlands automatically surrenders (+125 VP's to the Axis player; +3 CP's each to the Belgian and French CP totals) at the start of Turn 2's Surrender Phase.
- The Axis player gets 6 SAP's and 4 TAP's during his Reinforcement Phase on Turn 4. These points represent air assets redeployed after the conquest of the Netherlands.
- Eben Emael (hex A2901) starts the game destroyed.
- These Belgian units arrive as reinforcements in any friendly north mapedge hex between A1701 and A2501 (inclusive) on the turn after the Netherlands surrenders: 4, 7, 11, 12, 13, 17 and 18 Infantry Divisions; BCP Motorcycle Brigade; CyF Bicycle Brigade; 1 Cy/1DC Bicycle Regiment; and 1 CaC/2DC Motorcycle Regiment. The Allied player can withhold these reinforcements indefinitely, but any time all of their entry hexes are friendly to the Axis, they are automatically eliminated as if by combat.
- These German units arrive as reinforcements in any unoccupied friendly or enemy mapedge hex on the north mapedge between A2601 and A3401 (inclusive) on Turns 1-4: 6xxxx and 16p xxx HQ's; 1, 7, 11, 14, 18, 19, 30, 31, 35, 56, 61, 216, 223, 253, 255 and 269 Infantry xx's; 6xxxx Artillery Group; 3 Panzer xx (three units) and 4 Panzer xx (four units); 20 Motorized xx (two units). Up to 12 SP's can arrive each turn; when they arrive under this rule, they don't count against the number of reinforcements that can arrive from the OKH Box. At the end of Turn 4, suspend this rule and place any of these units that haven't yet arrived in the OKH Box. They can arrive as normal reinforcements.
- On Turns 1 and 2, the following HQ's and the units that set up with them must move as close as they can toward the objectives listed and cannot increase the distance separating them from those objectives until Turn 3:
- French 7xxxx = Any hexes of Antwerp.
- BEF = Any Belgian optional fortified zones north of the Axx04 hexrow.
- French 1xxxx = Any Belgian optional fortified zones west of the Sambre River; these units can't cross the Sambre until Turn 3.
[27.3] The Blitz
This scenario combines The Cape and The Sickle into a single vast historical panorama of the entire 1940 campaign from the initial attack through the Dunkirk evacuation, the capture of Paris and the opening of armistice negotiations. It takes up to 21 turns to play and uses all maps and most playing pieces. This scenario uses only historical deployments and capabilities, and the game's outcome will generally mirror the outcome of the historical campaign.
[27.31] Game Length
This scenario starts on Turn 1 and ends at the end of Turn 21 or when one player wins an automatic victory, whichever comes first.
[27.32] Maps & Playing Aids
Use all maps and playing aids.
[27.33] Allied Setup
- Set up Allied and neutral units on Map B per 27.13 except that the Belgian CyF Bicycle x can set up anywhere in Belgium.
- Set up Allied and neutral units on Map A per 27.23.
- Set up the French units shown in the GQG Box on their pictures; some of these units are reduced.
- Set up the British units shown in the Britain Box on their pictures.
[27.34] Axis Setup
- Set up German units on Map B per 27.14.
- Set up German units on Map A per 27.24.
- Set up all other German non-cadre units on their pictures in the OKH Box.
[27.35] Starting Values
- Axis LRP's = 10
- Axis MRP's = 10
- Allied LRP's = 15
- Allied MRP's = 15
- Axis SAP's = 14
- Axis TAP's = 10
- Allied SAP's = 2
- Allied TAP's = 2
- Netherlands CP's = 0
- French CP's = 0
- Belgian CP's = 0
- VP's = -500
[27.36] Special Rules
- At the scenario's start, the Allied player can choose options from the Options Chart that increase the net Axis VP total by up to 100 VP's. By choosing option 1 (No Maginot Line), which has a negative VP value of 150, he can choose options having a total positive VP value of 250.
- On Turns 1 and 2, the French 7xxxx, 1xxxx, and 9xxxx, the BEF and the Allied units that set up east of the A36xx hexrow must observe the movement restrictions listed in 27.26.
[27.4] Alternate Histories
This scenario covers the same situation as The Blitz and uses the same maps and pieces. However, it adds variable setups and historical options that explore most of the campaign's "what-if's." Everything from better Franco-Belgian cooperation to the development of a French Blitzkrieg doctrine is covered in this scenario's options.
[27.41] Game Length
This scenario starts on Turn 1 and ends at the end of Turn 21 or when one player wins an automatic victory, whichever comes first.
[27.42] Maps & Playing Aids
Use all maps and playing aids.
[27.43] Allied Setup
Set up Allied and neutral units per 27.33 except that French, Belgian and Dutch units that start on the map can set up anywhere in their home countries, and British units that start on the map can set up anywhere in France.
[27.44] Axis Setup
Set up Axis units per 27.34 except that units that start on the map can set up anywhere in Germany.
[27.45] Starting Values
Same as 27.35 except that the Axis starting VP total is -300.
[27.46] Special Rules
At the scenario's start, both players must agree on which Options Chart options they are using. There are no other special rules.