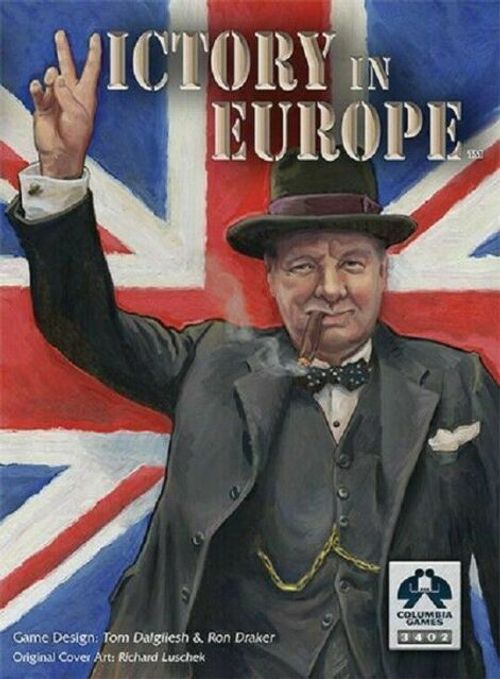
Victory in Europe
Victory in Europe Rulebook
Table of Contents
Table of Contents
- Introduction
- The Game Turn
- Map Symbols
- Solitaire
- 1.0 Mapboard
- 2.0 Units
- 3.0 Card Phase
- 4.0 Movement Phase
- 5.0 Battles
- 6.0 Air Operations
- 7.0 Naval Operations
- 8.0 Supply
- 9.0 Victory
- 10.0 Diplomacy
- 11.0 Production
- 12.0 Three Player Game
- 13.0 Gazetteer
- Scenario Setups (Orders of Battle)
- Play Chart (Back Cover)
Introduction
The game starts in 1939-3, third quarter of the year. Britain, France, and Poland are at war with Germany. Even if Germany declines to actually invade anyone, it is assumed that "border incidents" have triggered war.
Italy, the Soviet Union, and the USA are neutral major powers who enter the war later. All smaller countries are neutral.
Deployment
The Axis, Allies, and Soviets each have their own Order of Battle (OB). These show the starting forces and strengths for 1939, and available forces to be built at later dates as desired.
Poland, France, and Great Britain setup first, deploying as noted on the Order of Battle (OB) charts. Deploy units in the locations given; otherwise, subject to stacking within homeland areas. OBs for starting play in 1941, 1942, 1943, or 1944 begin on page 12; also see our website.
The Game Turn
- Card Phase
- Move Phase
- Combat Phase
- Supply Phase
- Diplomacy Phase
- Production Phase
[1] Card Phase
There are two decks of 54 cards, one for the Axis and one for the Allies. Players separate their decks into the seven different years.
There are four Game Turns per year, except 1939 has two. Players draw and examine 4 of their available 8 cards, but only 2 of 6 in 1939. Each Game Turn, both players simultaneously choose and play 1 card face-down. Highest Command (CM) number (upper left corner) is player 1 for the Game Turn. Axis win ties.
The first card play of each year is a Winter turn everywhere and the last card play of each year is a winter turn in Russia and Finland [3.4].
[2] Move Phase
Player 1 moves any/all units, subject to their move rating and area/border limits. Moving into the same area as enemy or neutral units causes a battle and each battle (not each move) requires 1cm. Players can also use CMs for Strategic Movement [4.7].
After Player 1 has completed his moves, Player 2 can move any unpinned units. Player 2 units that start a new battle, or reinforce a battle started by Player 1, also require 1cm per battle.
[3] Combat Phase
Player 1 determines the order of battles to be fought, but must resolve air raids first. Each battle has two (sometimes more) rounds of combat.
Each unit fires or retreats on its battle turn. The Attacker must retreat at the end of the battle if a Defending army unit survives.
A leader in a battle may spend 1-Step to extend a battle by one round.
If a battle is won, a leader in the victory area may conduct BLITZ movement and combat with victorious units. See 5.9.
[4] Supply Phase
Check supply for all units, player 1 first. Unsupplied units are subject to Supply Attrition [8.7].
[5] Diplomacy Phase
Both players try to "persuade" neutral powers to join the war. Player 1 rolls first. Each player chooses one neutral country from the Diplomatic Table (back cover) and rolls 2d6 (two six-sided dice); modifiers apply. If the roll equals or exceeds the listed target number that country becomes an ally. Diplomacy Rolls end with USA entry into the war.
[6] Production Phase
Both sides conduct production at the same time. A country's production (PP) equals the lesser of its supplied Factories and available Resources. Production can be modified by supply and convoy effects, and various Command cards.
Units have a cost per step that varies with type. Players expend their available Factory PP to build new units and add steps to existing supplied units.
Map Symbols
Capital; Major City (number value); Minor City; Capital & Major City; Naval Base; Mideast Port; Resource (value); Forest; Mountain; Alpine (Impassable); Desert; Strait; Fortified Border; River; Supply Sources; Lake Supply.
Solitaire
Block games make excellent solitaire games. Players have two essential choices:
- Play with the units face up just like most other wargames.
- Play with blocks standing upright. You may not remember exact enemy strengths or types.
To provide more fog-of-war, deal enemy command cards face-down and choose one randomly for each Game Turn. A variation is to deal enemy cards 2 down and 2 up, allowing more control of enemy play.
1.0 Mapboard
The mapboard depicts Europe, North Africa, and the Middle East. The Axis player sits at the southern edge of the map and the Allied player opposite.
The Major Powers are Germany, Italy, Britain, France, United States, and the Soviet Union.
1.1 Areas & Borders
Areas govern location and movement. The terrain of land areas affects army stacking and border limits. Air & Naval stacking are extra, see 6.12 and 7.12. See page 2 for map symbology.
Border Limits (4.6) are set by border terrain, not the areas moved to/from. Border terrain is not cumulative; the more restrictive terrain applies.
- 1.11 Clear: Stacking 3, Border 2.
- 1.12 Forest: Stacking 2, Border 1. Entering Forest areas (not borders) require enemy units to STOP. Defending infantry in forest areas are +1 (D2=D3). Forest includes taiga and marshland.
- 1.13 Mountain: Stacking 2/Border 1. Entering mountain areas or crossing mountain borders require all army units to STOP. Defending infantry are Double Defense (5.5) in a mountain area.
- 1.14 Desert: relatively clear terrain, but stacking 2 because of supply problems. Border limit remains at 2, except 1 where noted in Tunis (Mareth Line), and in Egypt (Qattara Depression).
- 1.15 Islands: Gibraltar, Malta, Majorca, Rhodes, and Scapa Flow are playable with stacking of 1. All other playable islands have normal army stacking.
- 1.16 Homelands: German homeland includes Austria and Czechoslovakia. British homeland includes Northern Ireland (Belfast), Canada, and Newfoundland. Soviet homeland is Russian territory at the start of play in 1939, excluding the Baltic States and Bessarabia.
- 1.17 Control Markers establish a vacant land area as being friendly. Place a marker in enemy territory you leave vacant. Markers do not stop enemy movement and have no combat ability - remove them when an enemy Army unit enters a marker area. Control markers are not used at sea.
1.2 Fortified Border
The French Maginot line, Tunisian Mareth line, and the German WestWall are fortified borders, border limit 1.
1.3 Rivers
River (blue) borders are limit 1, but 2 where rivers freeze in winter. Frozen rivers that are tree-lined, stay at border limit 1. Also see 3.44.
1.4 Cities
Most areas contain named cities:
- 1.41 Capitals are shown with a star. Occupation of a capital conquers a minor power, but not necessarily a major power. All major and minor powers trace supply to their capital, but see 1.8.
- 1.42 Major Cities have a number value, which is the maximum number of factory steps allowed in that area.
- 1.43 Ports are named towns on coasts; most areas and islands have at least one port.
- 1.44 Naval Bases are ports critical to the game for naval building and supply. Two navies can defend a naval base.
- 1.45 Mideast Ports are red ports that cannot be unsupplied except by enemy occupation. See 8.8 for their use.
1.5 Resources
Resources are shown as yellow triangles valued from 1 to 16.
1.6 Seas & Oceans
Seas & Oceans are friendly only when occupied by friendly air or naval units. Stacking limits are 3 navies, plus 1 air unit. There are no Border Limits for navies.
- 1.61 Convoy Zones: 4 zones within Oceans that can each hold 1 convoy unit. See 7.8.
- 1.62 Norwegian Leads: Norway has a sea channel between offshore islands and the mainland from Narvik south to Bergen. Navies may move or retreat along the west coast of Norway (Bergen-Trondheim-Narvik) provided all areas entered are friendly.
1.7 Straits
Straits allow army movement across narrow bodies of water (border limit 1). Attacks are 1 round battles, unless extended by a card event or leader.
Straits prevent naval and sea movement (including retreats and regroups) and sea supply if either side is enemy-controlled. See 7.14.
1.8 Alternate Supply Source
This symbol indicates an alternate supply source. Britain can trace supply to Canada if London is Axis occupied. Russia can trace supply to the Urals if Moscow is Axis occupied. For details, see Gazetteer. France, Germany, Italy, and USA do not have alternate supply.
1.9 Lake Supply
The Soviets can trace supply from Leningrad across Lake Ladoga to Kalinin, then to Moscow/Urals. Lake Supply, prevents supply attrition for Leningrad, but does not allow transfer of PPs in or out of the city; units there must be built with Leningrad factory PPs. Lake Supply cannot be traced through Leningrad.
1.3 Changes (v1.3)
- 7.5 Sea Invasions: The timing for Sea invasions is now a special Landing Phase just before any ground units fire. Up to that moment, invading units are naval targets. Ground combat proceeds normally after the Landing Phase.
- 10.3 Attacking Minors: Attacking a neutral minor is not a DoW on any major power. Attacks on neutral minors must be maintained every Game Turn, otherwise it stays neutral. Attacking neutral minors allows the opposing player to make a diplomatic roll at +2 for that minor.
- Gazetteer (Malta): Anchor symbol indicates that primary target type is Naval.
- Gazetteer (Poland): Rule 10.3 now applies to western Poland if undefeated. A diplomatic roll can now be made for a neutral Poland.
- Gazetteer (Soviets): The Soviets have two restrictions on the Urals if they DoW Germany before 1942.
- Gazetteer (Turkey): Istanbul and Mysiia are now two areas separated by the Dardanelles strait. The unnamed Sea of Marmara between them is a new sea zone linking the Black and Aegean seas.
2.0 Units
Two sheets of die cut labels are included, one with major power units and the other with markers and minor powers. Lightly position a label, ensure it is centered and straight, then press firmly.
| Nation | Block | Label |
|---|---|---|
| Britain | Blue | Khaki |
| France | Blue | Blue |
| USA | Blue | Olive-Green |
| Germany | Black | Gray |
| Italy | Black | Gray-Green |
| Soviets | Red | Tan |
| Neutrals | Orange | Varies |
Yellow Markers: Labels are applied to both sides of the markers, except for battle markers. First mount the Axis control markers to one side of a marker, then the Soviet (red star) OR Allied (blue star) labels to the other side. Mount Factories 1/2 on opposite sides of the same marker, and 3/4 on opposite sides of another marker. Markers "A" "B" "C" "D" and "E" are one-sided, and there are two of each. They are used as "Army Group" markers or as Battle Markers.
2.1 Orders of Battle
The Axis, Allies, and Soviets each have their own Order of Battle (OB) card which also serves as a Force Pool. These show the starting forces and strengths for 1939. Units with a year date in the upper right can be built with production points (PP) on/after the applicable date. Keep neutrals in the Force Pool until they are attacked or ally with a major power.
2.2 Unit Strength
The declining numbers 4-3-2-1 or 3-2-1 along the edges of blocks are the number of steps available when upright. Units in battles roll as many dice as their strength. That is, for a strength 3 unit, roll 3 dice.
For each hit taken in combat, strength is reduced by rotating the unit 90 degrees counter-clockwise. The diagram shows the same French unit at strength 3-2-1. Units reduced below strength 1 are eliminated. Return them to the player's pool. They can be rebuilt in the Production Phase.
IMPORTANT: Airborne, BBs (not BCs), and Fortresses cannot be rebuilt if eliminated, but steps can be added to them normally.
2.3 Firepower
Firepower is a letter and number such as A2 or D1. The letter determines when a unit fires, the number is the maximum roll that scores a hit in combat.
EXAMPLE: a unit rated C2 scores a hit for each 1 and 2 rolled. C3 scores a hit for each 1, 2, or 3 rolled.
Firepowers can be modified by target type, terrain, and weather.
2.4 Movement Rating
A unit's movement rating (lower-right) is the number of areas a unit can move in good weather.
2.5 Production Cost
The number (bottom-left) is the cost per step in Production Points (PP). Players receive a varying amount of PP each Production Phase to build new units or add steps to existing units.
2.6 Unit Types
Air Units
- Fighters include a variety of tactical air. Primary target is Air; secondary targets are Army and Naval.
- Bombers include heavy (HB), medium (MB), naval (NB) and dive (DB) bombers. See Target Type table (back cover) for targets.
Naval Units
- Aircraft Carriers (CV) include CVL, CVE, and escorts. They attack units in the same sea, convoy zone, or coastal area.
- Submarines attack convoys (B2) and navies (B1). They cannot fire on army/air units. They have double defense in naval bases.
- Battleships (BB) cannot be rebuilt if eliminated. Britain and Germany each have one Battlecruiser (BC) which function as BBs.
- Cruisers (CA) include heavy and light cruisers, and destroyer escorts.
- Convoys transport extra Resources and Lend-Lease PPs across the Atlantic. They can be attacked by Axis air and navies.
Army Units
- Leaders are a selection of key commanders. They are army units with special command abilities. They have a zero step and are eliminated if this step is lost (which costs 2PP to rebuild). Leaders do not count for stacking and ignore border limits. Maximum 1 leader per area.
- Panzer/Tank armies. Only the Germans and Soviets have tank armies. British 8A and US 3A armies were heavily armored, but are still infantry for all uses.
- Infantry "armies", are roughly one step per Corps. Airborne, and Soviet Shock, Marines, and Cavalry are treated as infantry.
- Airborne can fly 1 or 2 areas, ignoring border limits and enemy units, but can only airdrop to support friendly army unit(s). They airdrop (and fire) on their first battle turn, but are an air target (ignore air stacking) until then. After dropping, airborne function as an army unit. Airborne can airdrop to reinforce a battle, arriving on Round 2, but cannot airdrop on a Blitz. Eliminated airborne cannot be rebuilt.
- Fortresses cannot move. They are army units with Double Defense (5.5), and immune to supply attrition. Eliminated fortresses cannot be rebuilt.
Unit diagram labels: Strength (4-3-2-1); Firepower (D2); Entry Year (1942); Nation (Soviet); Type (Guard, Infantry); Cost per Step (2PP); Move (2).
3.0 Card Phase
3.1 Game Years
Each year (except 1939) has 4 game turns: Winter, Spring, Summer, Fall. Each player shuffles and draws 4 of the 8 cards from the current year, except for 1939 draw 2 of the 6 cards.
3.2 Commands
Each Game Turn, players play one card of their choice. The number (top-left) on cards is Commands (CM). High CM card is Player 1; Axis win the initiative on ties. Axis CMs are shared between Germany and Italy as desired, but German (black) and Italian events (green) are country specific.
Allied and Soviet cards are played as desired until the Game Turn after Soviet entry when CMs must be shared equally, fractions rounded to the card color. That is, before Soviet entry a red 3 is played as any combination of three Allied or Soviet commands, but becomes Soviets 2, Allies 1 after Soviet war entry. Similarly, a blue 3 is played as Allies 2, Soviets 1 after Soviet war entry. The card event always applies to the applicable country.
Each command allows a player to support and fight 1 Battle. Hence, although all units can move in one turn, the number of commands available limit the number of possible battles, including air and naval battles.
3.3 Card Events
Card events are effective on their appropriate phase. That is, Movement effects in the Move Phase, Combat effects in the Combat Phase, Supply effects in the Supply Phase, and Diplomacy effects in the Diplomacy Phase. Step gains and deployments apply in the Production Phase; step losses at the start of the Combat Phase. Most events are optional.
Card events are subject to normal rules, except always allow the card event if there is a conflict. Hence the 1941 card may bring Shock 41 and Zhukov out of the Urals early. Events cannot be saved.
Battle choice for a card event must be determined (Player 1 first) after movement, but before any combat is resolved. That is, player 1's event is allocated to a battle before any combat; player 2 can choose the same or a different battle. Events never continue into Blitz movement or combat.
Cards giving Firepower bonuses apply after weather and terrain effects.
Card events may apply to minor powers if located with at least one major power unit. Hence, two Hungarian infantry with one German infantry all get the benefit of a +1F infantry Axis event. However, if a card specifies a country (such as USA only) the event applies only to that country.
3.31 Card Color not only determines which nation gets the card event, but also which gets the Diplomacy roll. Hence the Diplomacy roll is always Soviet with red cards.
3.4 Winter
The first card play of each year (except 1939) is a Winter turn everywhere, and the last turn of a year is also Winter in Russia (homeland) and Finland.
- 3.41 Movement: all army units move 1 area in winter, including if they move in or out of the winter region. Air and naval movement is not affected by Winter. Sea Invasions are prohibited within or in/out of winter regions.
- 3.42 Firepower: weather combat (effects determined by battle location) is 1F for all units (primary), and ØF (secondary). Card and terrain bonuses still apply, meaning infantry defending forest in winter have 2F primary and 1F secondary.
- 3.43 Freezing Seas: The Gulf of Bothnia, Gulf of Finland, and White Sea freeze in both winter turns, preventing naval movement, strategic movement, resource supply, and sea supply. Ships located in a frozen sea when winter arrives lose 1-Step.
- 3.44 Freezing Rivers: Russian rivers freeze (border 2) in winter (both turns). Rivers on a border between a winter and non-winter area (such as the River Dniester) do not freeze.
4.0 Movement Phase
4.1 Area Control
Friendly areas contain your units or markers, or are vacant Homeland areas; enemy areas are those friendly to your opponent; contested areas are pending battles and friendly to neither side.
Areas can be Friendly, Enemy, Neutral, or Contested. Area control includes its cities/resources.
Only army units can change control of areas; changes are effective immediately, even during rounds. Moving through an area changes control - leave a marker. See Air (6.13) and Naval (7.13) control.
4.2 Moving Units
Player 1 moves any/all units up to their movement allowance, subject to stacking and border limits. Player 2 then moves, subject to pinning. Except for submarines and aircraft, units must stop when they enter enemy-occupied or contested areas or seas.
4.3 Pinning
Attacking units (all types) of Player 1 prevent an equal number of Player 2 units in a Contested area from moving in the Move Phase. The defender chooses which units are pinned; factories are not units. Unpinned units may move/attack normally, but cannot cross a border used by the pinning units. Unpinned units can move strategically.
4.4 Reinforcements
Player 2 units that move to a contested area are reinforcements and require 1cm per battle. They are not revealed and cannot fire or take hits until Round 2. Also see note in 5.2.
4.5 Stacking Limits
Stacking is the maximum number of units allowed in an area; both players can have this many units for a battle. Stacking is enforced after all movement is done. Stacking for army units varies with terrain type. See Terrain Effects (back cover). Air and Navies have separate and extra stacking. See: 6.12 and 7.12.
EXAMPLE: In clear terrain, a player can have 3 army units, plus 1 leader, 1 air, and 1 navy.
4.6 Border Limits
Border Limits apply when moving army units in/out of a battle, including Retreating and Blitzing.
4.7 Strategic Movement (Armies)
Strategic Movement (SM) is controlled by Commands. Each SM costs 1cm. Units cannot combine SMs with normal moves.
Destinations for SM must be friendly at the start of the current Move Phase. Armies can SM by land any distance via friendly areas, but not into/through enemy, contested, or neutral areas. Armies can SM by sea any distance to a friendly port, moving only through vacant or friendly seas, and not bypassing enemy straits (7.14).
Army units cannot combine SM by Land and Sea in the same turn.
Air/Naval units also have strategic rebasing, see 6.14/7.17.
5.0 Battles
5.1 Combat Rounds
Battles occur when opposing units occupy the same area. Player 1 decides the order of battles to be fought, resolving each one by one, but see 6.21. Each battle is fought for one or two battle rounds. The Attacker must retreat after round 2, unless the battle is extended by a leader or a card.
EXCEPTION: At the end of a battle, if the defender has no army units, he must retreat from attacking army units.
5.2 Battle Turn
Per battle round, each unit has a battle turn in A, B, C, D class order with Defender going first if the same class. A unit may fire or retreat.
NOTE: An attacking player gains control of an area if there are no defending army units at the end of any Battle Round. If this happens in Round 1 before reinforcements arrive, the Attacker is now the Defender.
5.3 Firepower
To fire a unit, roll a number of dice equal to its strength in steps. That is, a 3-step unit rolls 3 dice. A hit is scored for each die roll equal to or lower than the unit's firepower. Units modified to Ø firepower cannot fire, but take hits.
- 5.31 Terrain Modifier: Defending infantry in forest are +1 fire (D2=D3).
- 5.32 Weather Modifier: all units have 1F Primary, and ØF secondary (See 3.42).
5.4 Targets
All units have a primary target type (see back cover). They have normal firepower when firing at their primary targets, but are -1 (D2=D1) firing at secondary targets. A1, B1, C1, and D1 units cannot fire on secondary targets.
Each unit fires at a declared target type. Each hit is applied separately to the strongest enemy unit within the target type at that instant. When two or more enemy units share the highest strength, the owner chooses which to reduce first. Surplus hits on a target group are forfeit.
5.5 Double Defense
Units with double defense need 2 hits per step loss. They take hits normally but the second "half-hit" must be taken on the unit with the "half-hit". A half-hit carries over between rounds; it is recovered if the battle is won, but becomes a full-hit if the unit retreats.
5.6 Retreats
Each unit may retreat on its battle turn instead of firing. All units that retreat during Round 1 lose one step. Army units retreat to any friendly, adjacent area(s), except via borders used by the enemy to attack or reinforce. Border limits apply each Combat Round. Retreating units may not overstack. Units are eliminated if they cannot retreat.
NOTE: Player 1 must be aware that moves by Player 2 can change available retreat locations. Guard your rear!
Air Retreats: 6.4; Naval Retreats: 7.3; Amphibious Retreats: 7.7
5.7 Leaders
Leaders do not count for stacking and ignore border limits, but cannot exceed 1 per area. They are functional army units that fire and take hits like any other army units. Their maximum strength is 2 but they are only eliminated when their zero step takes a hit.
5.71 Battle Extensions: An attacking leader (only) may reduce itself 1-Step and extend its battle by one combat round. A full strength leader may extend a battle twice, but cannot eliminate itself. Card effects continue into extended combat rounds.
NOTE: Some cards allow a battle to be extended for a third round. In such cases a leader may extend for a 4th or 5th combat round.
5.8 Regroups
The victor in a battle or air raid (attacker or defender) has the option to Regroup (move) units in the victory area to any friendly or vacant (not neutral) adjacent areas. Border limits apply.
5.9 Blitzes
Instead of regrouping, the attacker or defender have the option to reduce a leader in the victory area by 1-Step and Blitz with any/all units in that area. Naval units can never Blitz.
Blitzing units earn a full normal move, but can only start one new battle (two rounds) or reinforce one contested area, arriving in round 2 (4.4). Border limits apply. A Blitz battle, (new or reinforced) must be resolved immediately. Units that retreat in round 1 are -1 step as normal.
Each Leader can only Blitz once per Game Turn. However, the Blitz battle can be extended by a leader (5.71). Leaders cannot blitz at Step-0.
NOTE: Blitzing cannot be used for Airdrops, Sea Invasions, Naval Movement, Strategic Movement, or Rebasing. Normal air movement is allowed to support combat (no air raids) or to a friendly area.
Battle Example (Soviets Defending)
Round 1: German Air 3A2 targets Soviet air 1B1 for 2 hits. Soviet air eliminated and extra hit is forfeit. Soviet tank 2C2 targets enemy ground, scoring 1 hit on the 4D2 infantry (highest strength ground unit). German tank 3C2 scores 1 hit, which must be taken on Soviet 3D2 guard. Soviet 2D2 guard misses. German 3D2 infantry misses.
Round 2: German Air bombs at 3A1 (-1F for secondary fire) for 1 hit, taken on 2D2 guard. Soviet tank 2C2 scores 1 hit, taken on 3D2 infantry. German tank 3C2 scores 1 hit, taken on Soviet Tank. Soviet 1D2 guard fires for 1 hit which must be taken on German tank. German 2D2 infantry scores 1 hit taken on the 1D2 guard (eliminated). Round 2 ends. Soviet 1C2 tank survives. Germans must retreat.
6.0 Air Operations
6.1 Air Movement
Air units can fly their Move distance, engage in combat, and then land the same distance to any friendly area, including one conquered this Game Turn.
EXAMPLE: Medium Bomber with Move 4, can fly up to 4 areas to attack and then fly up to 4 areas to land.
Air units can fly over enemy units but not neutral areas.
- 6.12 Air Stacking: only one (1) air unit per area or sea, allowed to both players in battle. Air units ignore Border Limits.
- 6.13 Air Control: an air unit may occupy an enemy area, but cannot change control of an enemy area; air units must land in friendly areas (see 6.22).
- 6.14 Air Rebase: Air units that do not engage in combat may move (CM free) any distance via friendly, enemy, or vacant areas/seas to any area friendly at the start of your Move Phase.
6.2 Air Battles
Air units must decide at the beginning of each battle turn if they are attacking enemy air, or bombing.
- 6.21 Air Raid: an attack by a solitary air unit. They cost 1cm, and Player-1 air raids must be resolved first in the combat sequence.
- 6.22 Landing Air: Air units land at the end of their battle, but if not engaged, they land at the end of the Move Phase (after both players have moved). Air must always land in a friendly area within range (6.1), including areas conquered this turn.
6.3 Bombing
Three of the four bomber types have primary/secondary target types. Bombers must declare one target type at the beginning of each round; all hits apply to target units only and excess hits are forfeit. A bomber may change its target type each round. Fighters that target ground units use bombing rules.
Bomber Target Symbols: Army (B2); Factory (B2); Factory/Army (B1 secondary); Naval (B2). Symbols indicate primary target type.
NOTE: Bombing cannot eliminate the last step of army units, but can eliminate factories and naval units.
6.4 Air Retreats
Air units retreat to a friendly area within their normal Move, including an area made friendly this turn; the sequence of battles may be important.
7.0 Naval Operations
7.1 Naval Movement
-
7.11 Oceans are the four Atlantic seas and the four Convoy zones. They have the same rules as Seas except they cost 2mp to enter.
-
7.12 Naval Stacking for Seas is 3 units (includes convoy), but only 1 unit per coastal area, except for Naval Bases (7.22). Sea borders are unlimited.
-
7.13 Naval Control: Seas are friendly only when occupied by friendly air or naval units. A naval unit may never occupy or change control of an enemy coastal area. Pending naval battles are friendly to neither player.
-
7.14 Straits cannot be traversed by naval units (except submarines) if either shore is enemy controlled at the instant of movement or retreat. Also see Denmark and Turkey (Gazetteer).
-
7.15 Coastal Areas: Navies cannot move to (or through) enemy coastal areas, except to support a battle involving friendly army units. Navies located in a coastal area cannot move directly to another adjacent coastal area (even if friendly) such as from Rome to Naples. Their first move must be to an adjacent sea. Exception: see 1.62.
-
7.16 Two Coasts: Some coastal areas, such as Grenada in Spain, or southern Sweden, have two coasts. Ships cannot move overland between two separate coasts. Hence a naval unit entering the port of Gothenburg from the Skaggerak cannot move directly into the Baltic. It must first move back into the Skaggerak, then to Denmark. To clarify coasts, locate naval units in ports; navies can only fight naval or invading units on the same coast.
NOTE: Some ports (like Brest) connect with two or more adjacent seas. Ships can enter/leave Brest via either sea, and fight enemy ships on either coast.
7.2 Naval Battles
Navies must stop if they enter an enemy-occupied sea or ocean, except submarines may move through. Naval battles may occur in coastal areas.
A naval battle is fought for two rounds. The defender rolls first for same class units. Units must declare one target type (5.4) each round; air, surface ships, or submarines. Default is surface ships.
- 7.21 ASW: Surface warships BBs, BCs, and CAs target submarines at C1. CVs are B2 (normal). Submarines target surface warships at B1, Convoys at B2.
- 7.22 Naval Bases can hold 2 defending navies. Both fire and take hits normally, but only one enemy ship may attack. Submarines defending a Naval Base cannot fire, but have Double Defense.
7.3 Naval Retreats
Navies retreat to friendly ports and seas within their move range. Only submarines can retreat through enemy seas. Navies that cannot reach a friendly port or sea within range, lose 1-Step (elimination possible) and then move to the closest friendly port (in MPs); otherwise they are eliminated.
7.4 Naval Regroup
Ships that win a naval battle may immediately move to any friendly port or sea/ocean within their move range, or to any adjacent vacant sea/ocean. Only submarines may regroup via enemy seas.
7.5 Sea Invasions
Sea Invasions are made into an enemy coastal area; they cost 2cm to attack, but only 1cm when the landing area is vacant. Only 1 infantry can invade, supported by 1 Leader, 1 Airborne, 1 Navy, and 1 Air. Maximum of 1 Sea Invasion per Game Turn per player (Soviets and Allies get 1 each). Invasions are made across seas that were friendly at the start of your Move Phase. At least one controlling navy per Sea cannot move on the invasion turn.
RESTRICTIONS: The Netherlands, and German North Sea coast cannot be sea invaded. This does not prevent Axis sea invasion from these areas. North America (USA, Canada, and Newfoundland) cannot be sea invaded.
Invading armies and leaders are naval targets until they land ashore. A landing is made in a special phase before any ground units fire. Invading units fire normally on the turn they land. An invasion can be combined with land attack(s) for an extra 1cm.
7.6 Shore Bombardment
Battleships (BB), Battlecruisers (BC), and Aircraft Carriers (CV) may target army units as secondary targets, but only to support a sea invasion or a coastal land battle. Shore bombardment cannot target factories nor eliminate armies.
7.7 Amphibious Retreats
Armies located in a coastal area or making a Sea Invasion, may retreat via friendly seas to a friendly coastal area. Areas and seas must be friendly at the instant of retreat.
7.8 Convoys
Convoy zones are separate "zones" within oceans (see 7.11). Convoys count for stacking, meaning a maximum of 1 convoy and 2 navies, plus 1 air per Convoy zone. Convoy units take hits normally from any surface ships and air, but may be targeted by submarines at B2.
Each convoy zone has an associated convoy unit. Convoys [A] and [B] provide Lend-Lease PP and Convoys [C] and [D] provide Resources, both equal to their current steps. Players add steps or build convoys in their own zone (which must be friendly or vacant); they cost 1pp per step.
- 7.81 Lend-Lease Convoys: convoys [A] and [B] are built by the USA and require USA resources. These convoys are actual PP for the Soviets [A] or Britain [B] as if they were factories. Convoy [A] cannot be built until the USA and the Soviets both enter the war. Convoy [B] can be built starting 1941 even if the USA is not at war. Attacking this convoy is not a DoW. The USA player can take Lend Lease PPs for their own production as desired.
- 7.82 Resource Convoys: convoys [C] (British) and [D] (French) are built by their nation. They provide imported resources to build extra factories in Britain or France. The French convoy [D] is eliminated on French surrender.
EXAMPLE: Britain starts game with 7 Resources: 4 Domestic, 2 Canada, and 1 Convoy "C" for a total of 7. These will support up to 7 Factory steps, 2 of which could be in Canada. The Axis can reduce British resources (hence PPs) by attacking and reducing the Convoy "C" unit, but does not gain any for Axis use.
8.0 Supply
Supply is assessed for both sides in the Supply Phase, Player-1 first.
8.1 Supply Lines
Major power units trace supply via a chain of friendly areas and/or friendly and vacant seas (8.3) to their friendly capital or (Britain and Soviet Union only) their alternate supply source (1.8).
Minors trace supply to their own capital. See 11.5 for building minor units. Also see Vichy under France in Gazetteer.
8.2 Fortress Supply
Fortresses ignore supply attrition, but unsupplied fortresses cannot be built-up. Units within a fortress do require supply and are subject to supply attrition.
8.3 Sea Supply
Army/Air units can trace supply from a friendly port to another friendly port via a chain of friendly or vacant seas. Supply cannot trace via an enemy strait or frozen sea. Land and sea supply lines can be combined.
8.4 Naval Supply
Navies and Convoys do not require a supply line and ignore supply attrition. However, Navies cannot be built in unsupplied naval bases; see: 11.41.
8.5 Resource Supply
To be counted, resources must trace supply like units (8.1) but (unlike units) may also trace via neutral areas.
8.6 Factory Supply
Factories trace supply like units (8.1). Unsupplied factories ignore supply attrition, but cannot produce.
8.7 Supply Attrition
Unsupplied air/army (except fortresses) units are each reduced 1-Step in the Supply Phase. Units can be eliminated by supply attrition. Units defending a capital are surrounded and subject to supply attrition if all adjacent areas to the capital are enemy areas or seas, or frozen seas.
8.8 Middle East
This region consists of Egypt, Iran, Iraq, Palestine, and Syria. Allied armies can SM to/from any red port for the normal 1cm per unit. Air and naval units rebase normally to/from red ports. Red ports cannot be invaded by sea.
Friendly red ports are Allied supply sources, but building cost with such supply is +1pp. SMs and supply to red ports cannot be interdicted.
Axis units in the Middle East and in North Africa cost +1pp if Malta is enemy. This also applies to Italy when at war.
9.0 Victory
Victory is determined after the Supply Phase of any Game Turn.
9.1 Axis Decisive Victory
The Axis win by holding Berlin, plus:
- Paris, London, and Cairo, or
- Leningrad, Moscow, and Baku, or
- London, Paris, Moscow.
9.2 Allied Decisive Victory
The Allies/Soviets both win if they collectively hold all five capitals: London, Moscow, Paris, Berlin, and Rome.
9.3 Berlin Über Alles
"Berlin, Above Everything Else". If neither side has a Decisive Victory by the end of 1945, a Minor Victory is won by the player holding Berlin.
NOTE: Except for Italy, enemy capture of a major power's capital city does not eliminate that power. Britain and the Soviet Union fight on with alternate supply. The USA can never be invaded. Germany also continues to fight, but loses 1 step per unit each Supply Turn; quick recapture of Berlin is essential.
Operation Sealion (Example)
Germany has played a CM3 card; the Allies a CM2 card. Germany has previously occupied the English Channel with a UB2 and seeks to invade Portsmouth.
Germany (Player 1) invades Portsmouth from Le Havre with Infantry 4 and a Leader 2 (Rundstedt). CM2 is required for the invasion. Germany moves CA3 from Brest to the English Channel to help defend the UB2 there, and a Fighter 3 (FA3) from Le Havre to Portsmouth to support the invasion.
Britain defends Portsmouth with Infantry (BEF) 2 and Cruiser 2. FA2 from London reinforces Portsmouth, and a BB3 from Scapa Flow attacks the English Channel. These two moves require CM2. Germany is attacking Portsmouth, but on defense in the English Channel. Germany, as Player 1, chooses to resolve the English Channel first, because if the invasion fails, a retreat via the embattled channel would be prohibited.
English Channel:
- Round 1: UB2 scores 1 hit on BB; Cruiser 3 misses. British BB2 scores 1 hit on Cruiser.
- Round 2: UB2 misses; CA2 scores 1 hit. BB1 scores 1 hit, taken on the Cruiser (now CA1). This ends the naval battle and the attacking BB1 must retreat. Returns to Scapa Flow.
Battle of Portsmouth:
- Round 1: British FA2 is a reinforcement and unavailable round 1. German FA3 targets defending BEF (secondary A2) but misses. British CA2 targets invasion force but misses.
- Landing Phase: German infantry and leader land before any ground combat. BEF fires scoring 1 hit on German infantry 4. German Infantry 3 and Leader 1 fire scoring 1 hit on BEF.
- Round 2: British FA2 arrives and targets German Army for 1 hit (secondary fire). German FA3 targets British FA2 but misses; ignoring the BEF 1 which it cannot eliminate. CA fires at the German Air but misses. BEF 1 misses. German leader fires on BEF but misses. German infantry 3 scores 1 hit, eliminating the BEF infantry.
Result: German invasion succeeds. British FA2 retreats to London. British CA must retreat, but cannot to an adjacent coastal area or the English Channel, and is therefore scuttled (eliminated). Because a German Leader is present, a two round Blitz on London is now possible.
10.0 Diplomacy
Minor powers (except Poland) all start the game neutral. Players may attack or seek an alliance with neutral minors. Diplomacy gives a player control of a minor's units. Conquest results in their permanent elimination.
Minor powers surrender (Player-1 first) if their capital is enemy-occupied at the end of the Supply Phase. All units of the conquered minor are permanently eliminated except free forces (11.42). The victor controls all areas of the minor power except enemy-occupied areas.
10.1 Minor Powers
Neutral minors may not leave their borders; but allied minors can move as desired.
10.2 Diplomatic Rolls
Each Diplomacy Phase, both players get one Diplomatic Roll, Player-1 first. A blue command card is an Allied player roll; red is a Soviet roll. A black card is an Axis roll for Germany; green is an Axis roll for Italy.
Choose one country (with a target number) from the Diplomatic Table (back cover) and roll 2d6. If the roll equals or exceeds the listed target number that country becomes an ally. There are 3 modifiers, and all may apply:
- Proximity +1 if the neutral is adjacent to an existing friendly area or sea.
- Rebuff +1 to Player-2 for a country that "rejected" Player-1 this turn.
- Defender +2 to the opposing player if a neutral minor survives an attack. This modifier applies only the first time it is used.
With a successful Diplomatic Roll, you deploy and control the minor's units in that country, and their area(s) are now friendly, except areas already occupied by the enemy player. Resources are available immediately. See also 11.5.
IMPORTANT: Diplomatic rolls terminate immediately when the USA enters the war.
10.3 Attacking Minors
A player may issue a DoW during the Move or Blitz phases. Attacking a minor does NOT cause it to join the enemy. The opposing player sets-up the neutral's forces within the country's borders with at least 1 unit in the capital.
NOTE: When the Axis attack a neutral minor, the enemy player is always the Allies, never the Soviets. When the Soviets attack a neutral minor, the enemy player is always the Axis.
The attacking player must attack the minor with at least 1 unit every turn otherwise the minor returns to neutral status. Surviving minor forces are removed from play (they return at full strength if attacked again).
11.0 Production
Each Major Power starts play with a given number of factories, deployed in homeland major cities.
EXAMPLE: Germany starts the war with 10 factories and 11 resources, including Swedish and Romanian resources. Production is thus 10pp, the lesser of factories and resources.
Factory markers are two-sided, some having Step-1/Step-2 on reverse sides, others Step-3/Step-4.
11.1 Production Sequence
Both sides produce at the same time. Production (PP) equals the lesser of supplied Factories and supplied Resources. Production can also be increased by Lend-Lease and some Command cards. Follow this sequence of steps in the Production Phase:
- Tally supplied Resources: Remember to include Resource convoys.
- Tally supplied factories (11.3): Add Lend-Lease PPs.
- Build units: PPs cannot be saved.
11.2 Resources
Resources are located on the map. They limit the number of factories that can produce. To be counted, a resource or convoy must trace via friendly or neutral areas or seas to a power's capital.
IMPORTANT: Conquered Resources are not available until the next Game Turn, but Resources gained by Diplomacy are available immediately.
11.3 Factories
- 11.31 Build Factories (as many as desired) only in homeland major cities, one factory marker per area, except two in the Urals and four in the USA. Only one step can be built per factory marker per game turn. Factories cost 2pp per step. Factory markers do not count for stacking. Building factory or convoy steps does not increase PPs in the same turn.
- 11.32 Move Factories only of powers at war to any friendly major city, including a conquered major city (like Paris). City limits apply, as does the normal limit of one factory per area. Cost is 1sm per factory step. Factories cannot be moved out of battles. Moved factories may not produce in the Game Turn they move.
- 11.33 Factory Combat: Factories can only be attacked by medium and heavy bombers; they defend with Flak A1 at their current strength. Factories do not take hits in land combat, but are immediately eliminated if alone with an enemy army.
11.4 Unit Costs
The PP cost for each unit step is given in its bottom left corner. All units (and factories) are subject to a maximum increase of one step per Production. Players expend available PP to build new 1-Step units from the Force Pool in friendly, supplied homeland factories, and/or add 1-Step to supplied units anywhere.
IMPORTANT: unit costs increase in certain cases: See 8.8.
- 11.41 Navies: new ships must be built in a supplied, homeland, naval base with a factory. Steps can be added to existing ships in any friendly, supplied naval base, maximum 1-Step per unit. EXCEPTION: Convoy units and steps are built in Convoy Zones.
- 11.42 Free Forces: Polish infantry (1A) and two French units (infantry 3a and CA) are deployed in Britain at 1-step when their nation is first conquered. Free forces can be built/rebuilt with British PPs.
11.5 Minor PPs
Minor powers have no production. Adding steps to minor units are financed by PP from a major power; a supply line to the major power capital is required. Eliminated Minor units cannot be rebuilt.
12.0 Three Player Game
Start play in 1939 or with Barbarossa 41 (recommended). Deal 1 card each to the Allied and Soviet players for 1939; 2 cards each for 1941. Players may exchange cards with each other as desired. The Allies and Soviets consult to determine who plays first, then alternate one card per Game Turn thereafter.
Before Soviet entry into the war, Commands (CM) are shared as desired, but card color determines who has the final decision each turn. Card color played also determines who moves first between the Allies and Soviets, and which of them gets the Diplomatic roll that Game Turn.
Victory conditions are normal. The winner between the Allies and Soviets is the player who occupies Berlin.
13.0 Gazetteer
The Gazetteer collects rules applicable to all major and most minor countries. Words in Small Capitals have their own entries. Invasion of a neutral minor triggers rule 10.3. Invasion of an allied minor is a DoW on the major allied power.
ALBANIA mountainous state occupied by Italy in April 1939 for its minerals.
ALGERIA French colony that becomes part of Vichy France. Resource goes to Germany if Vichy.
BALTIC STATES two areas that include Estonia, Latvia, and Lithuania given to the Soviets by the Nazi-Soviet Pact of 1939. Place Soviet markers in these areas.
BESSARABIA province of Romania given to the Soviets by the Nazi-Soviet Pact of 1939. Place a Soviet marker in this area.
BRITAIN starts at war with Germany, allied with France and Poland. Britain includes England, Scotland, Northern Ireland, and Wales (but not neutral Eire). Scotland and Wales are mountain areas. Newfoundland, Cyprus, Egypt, Gibraltar, Malta, and Palestine are colonies. Canada is an ally and alternate British supply source (1.8). The first time London is Axis occupied or surrounded, ALL British, French, or USA units located in Britain (defined above) lose 1-Step. They are then supplied via Canada. This is a permanent change even if London is recaptured.
BULGARIA minor neutral. King Boris is reputed to have said that "he preferred the Soviets, his army the Nazis, and his wife the Italians". Bulgaria joined the Axis in 1940 and helped conquer Greece in 1941.
CANADA starts the war allied with Britain and is a alternate supply source (1.8) should London be Axis-occupied or surrounded. Canada has no stacking restrictions and cannot be attacked. The Resource 2 supports a Factory 2 in Canada. If Canada does become an alternate supply source for Britain, Convoy [B] PPs and Convoy [C] resources are now available to the USA. The USA may transfer up to 4pp per Game Turn to Canada for production of Canadian or British units. The two Canadian units are always supplied from Britain or Canada. Newfoundland was not part of Canada until 1949; it is a separate playable island, for the Allies only.
DENMARK minor neutral. Jutland and the three main islands shown are one land area with three coasts. Denmark must be counted by navies moving between the Skaggerak and Baltic Sea, but transit and supply is allowed only if Denmark is friendly. Resource supply can be traced through Denmark if neutral. Movement from Denmark to Sweden crosses the strait.
EGYPT a British Protectorate. The El-Alamein border limit 1 is because of the Qattara Depression. The Nile river is a border, but the Suez Canal is within the Suez area. Ships may traverse a friendly Suez area without stopping counting the canal area in their move. A ship located in Suez can move into the Mediterranean, or rebase to/from any other friendly port. Units deploy in Egypt in any of its three areas.
FINLAND minor neutral, independent from Russia since 1917. The Soviets attacked in 1939, and defeated the Finns in 1940 after earlier repulses. Finland has a longer winter (3.4).
FRANCE is allied with Britain and Poland, and at war with Germany. She has colonies in Tunisia, Algeria, and Morocco. French controlled resources are for French production. France may get 1pp per Production from the British PP total if there is a supply line London to Paris. The French surrender to form Vichy France at the end of a Supply Phase if Paris falls and there are no British units in mainland France. Vichy France consists of Lyon (capital), Marseilles, Montpellier, Corsica, Tunisia, Algeria, and Morocco. Remove all French units and factories, except the "F" infantry and cruiser are deployed in Britain at 1-Step as "Free French". See 11.42.
Vichy is a neutral minor; both sides can trace resource supply through Vichy areas while neutral. If attacked, Vichy joins the other side, deploying Infantry 3 (1A) in Lyon, Cruiser 2 in Toulon, and Algiers 2 and Tunis 2 in their respective cities. Eliminated Vichy units cannot be rebuilt.
Vichy surrenders with conquest of Lyon (by either side) or Allied conquest of Paris. All Vichy territories surrender except those that are enemy-occupied. Germany gains control of all non-Vichy French areas - place Axis markers. The resource in Algeria goes to Germany.
GERMANY starts at war with Britain, France, and Poland. Resources are imported from Romania, Sweden, and the Soviet Union. For German defeat, see Victory (9.0). German navies may move through the Kiel Canal counting the canal area (Hamburg) in their move. Axis units may also SM through the canal if friendly.
GIBRALTAR British colony that stops Axis naval movement through the Straits of Gibraltar, even if Spain is Axis. Exception: submarines may transit. Gibraltar connects to both adjoining seas, and to Granada or across the straits to Spanish Morocco (border limit 1 in either case). Island stacking (1.15) applies.
GREECE minor neutral. Greece has two areas; one mainland area, and the separate island of Crete. Both are mountain areas.
HUNGARY minor neutral. Note the resource at Balaton. Hungary allied with Germany in 1940.
IRAN minor neutral whose resource can only be counted by the Axis; the Allies used it for the Pacific War. If the USA and Soviet Union are at war, the Soviet Union may receive 1pp lend-lease from the USA total per Production provided a supply line can be traced from a friendly Iran to Moscow.
IRAQ minor neutral with rich British oil assets. A pro-German government triggered a 1941 British invasion from Palestine. Iraqi oil was used for the Pacific War; only the Axis can count it as a resource.
ITALY neutral power that cannot attack or be attacked until she joins the war. Italy includes Sicily, Sardinia, Albania, and Libya. The Axis player builds Italian forces with Italian PPs, and can move Italian units within Italy, but is not an ally until Italy joins the war. Italy enters the war on the Axis side by Axis diplomatic roll; or immediately if London, or Paris, or Moscow is captured by Germany. Italy at war may receive 1 or 2pp per Production from German PP total, if a supply line exists from Rome to Berlin. Italy surrenders after the Supply Phase if the Allies occupy Rome, or all of Libya and one area adjacent to Rome. Remove all Italian units and factories. The Allies now control all Italian areas and minors except those that are German occupied.
LUXEMBOURG on the Franco-German border is shown only for interest; units cannot deploy there and the country is ignored for movement.
MALTA British naval base with Island Stacking (1.15). Axis units cost +1 in North Africa and the Middle East when Malta is enemy controlled. Anchor on the block means C3 versus naval targets (5.4).
MOROCCO French colony that became part of Vichy France.
NORWAY minor neutral. Swedish resources for Germany are shipped via Norway when the Gulf of Bothnia freezes. See 3.4 and 8.5.
POLAND a minor power allied with Britain and France. The 1939 Nazi-Soviet Pact divided Poland between Germany and the Soviet Union (Partition Line). Place Soviet control markers in the three eastern areas and deploy the Poles in western Poland, with at least one unit in Warsaw. Germany must attack Poland with at least one (1) unit every Game Turn, otherwise Poland becomes neutral (10.3) and can now rejoin the war via a Diplomatic Roll. If Poland is defeated, Poland's 1A infantry is deployed in Britain at 1-step as a "Free Pole". See: 11.42.
PORTUGAL minor neutral. The Axis roll for Spain is +1 if Britain allies with Portugal.
ROMANIA minor neutral that provides Resource 2 (Ploesti Oil) to Germany by prewar treaty.
SPAIN minor neutral. Although pro-Axis, General Franco kept Spain neutral throughout the war.
SOVIET UNION is a major neutral power, defensively allied with Germany. Placement of Soviet control markers in the Baltic States, eastern Poland, and Bessarabia reflect the Nazi-Soviet Pact of 1939. Britain, France, and the USA may never enter Soviet occupied or controlled areas, and vice-versa.
Lend-Lease convoy [A] is available only after the USA and Soviets both enter the war. Convoy PPs are shipped via Murmansk or Archangel (when the White Sea is not frozen) and are forfeit if they are blocked from reaching Moscow. The Soviets can trace supply across the Caspian Sea, port to port. Russia has a double winter (3.4).
The Urals area is prohibited to Axis units. Movement of Soviet units in/out of the Urals requires 1sm per unit; they may attack into adjacent areas (border limit 1). Urals PPs can only be used to build new or existing units in the Urals. Soviet stacking in the Urals is unlimited.
The Urals is an alternate Soviet supply source (1.8). The first time Moscow is Axis occupied or surrounded, all Soviet units outside the Urals (except fortresses and the Soviet cruiser) lose 1-Step in the Supply Phase, but are then supplied via the Urals. This is a permanent change even if Moscow is recaptured.
CAUTION: The Urals has two restrictive rules that apply until the Game Turn after a German DoW on the Soviets, or the year 1942, whichever comes first. These restrictions exist because Soviet war development of the Urals did not occur before the 1941 German invasion.
- Urals units may not move.
- Urals factories cannot be increased above the initial 2pp, nor can factories be moved there.
The Soviet resource to Germany ends when they are at war with Germany.
TURKEY minor neutral power. Istanbul and Mysia are two areas separated by the Dardanelles strait. The Sea of Marmara (unnamed) is between Istanbul and Mysia. It is a separate sea zone counted for Naval movement between the Aegean Sea and the Black Sea. Unit transit and supply through the Sea of Marmara require Turkey to be friendly, but resource supply can be traced through while neutral.
UNITED STATES starts the war as a neutral major power. She may not join the Axis, nor can the USA ever be invaded by the Axis. The USA mobilizes by deploying the indicated forces (see Allies chart) at the start of 1941-1. These units cannot move from the USA, but can build up during 1941. The USA area has no stacking limits for units. Factories are limited to 8 steps until the USA enters the war.
The USA may enter the war on the Allied side in 1941 with a Diplomacy Roll, or automatically at the start of 1942 because of the war with Japan.
The USA may start building British Convoy [B] in 1941, spending 1pp per step. Convoy [B] steps that can trace to London are British lend-lease PPs. These PPs can also build units in Canada if desired. The Soviet Lend-Lease Convoy [A] can only be built after both the USA and Soviets are at war. Each convoy step costs the USA 1pp. These PPs must trace to Moscow (or Urals) to be used.
SWEDEN minor neutral. Ships two (2) resources (pre-war treaty) to Germany via the Baltic Sea. In winter, when the Gulf of Bothnia freezes the ore is shipped via Narvik (Norway). Enemy control of any area of Norway or Denmark suppresses Swedish resources for both Winter Turns, but does not increase the Allied total.
SWITZERLAND neutral minor throughout the war, although she had a secret military treaty with France. The Axis considered invading in 1940, but decided the likely cost was too high.
SYRIA neutral minor, not part of Vichy. Because of pro-Axis activity, Britain invaded Syria from Palestine in 1941.
TUNISIA French colony that becomes part of Vichy France. Border limit 1 with Libya because of the fortified Mareth Line.
Scenario Setups (Orders of Battle)
The tables below list starting deployments for the scenarios beginning in 1941, 1942, 1943 and 1944. A bullet in the Steps column indicates a marker or leader with no step count.
Scenario: Barbarossa 1941
Axis
| Location | Unit | Steps |
|---|---|---|
| Helsinki | Finn 1A | 2 |
| Viipuri | Finn 2A | 3 |
| Oslo | Infantry 20A | 1 |
| Konigsberg | Infantry 16A | 4 |
| Konigsberg | Infantry 18A | 3 |
| Konigsberg | Panzer 4A | 3 |
| Konigsberg | Manstein | 0 |
| Warsaw | Guderian | 2 |
| Warsaw |
Allies
| Location | Unit | Steps |
|---|---|---|
| London | Infantry BEF | 3 |
| London | FA Spitfire | 3 |
| London | Montgomery | • |
| London | Factory | 3 |
| Birmingham | Home Guard | 3 |
| Birmingham | Polish 1A | 1 |
| Birmingham | FA Spitfire | 2 |
| Birmingham | Factory | 2 |
| Wales |
USA
| Location | Unit | Steps |
|---|---|---|
| USA | Infantry 1A | 1 |
| USA | Infantry 3A | 1 |
| USA | BB Washington | 1 |
| USA | Cruiser | 2 |
| USA | Heavy Bomber (B-17) | 1 |
| USA | Factory | 5 |
ITALY
| Location | Unit | Steps |
|---|---|---|
| Milan/Genoa | Infantry 1A | 4 |
| Milan/Genoa | Factory | 2 |
| Venice | Infantry 2A | 3 |
| Rome | Infantry 8A | 1 |
| Rome | Factory | 1 |
| Tripoli | Infantry 5A | 3 |
| Sicily | FA C.202 | 2 |
| Sicily | Submarine | 2 |
| Taranto |
VICHY FRANCE
| Location | Unit | Steps |
|---|---|---|
| Lyon | Infantry 1A | 2 |
| Marseilles/Toulon | Cruiser | 1 |
| Algiers | ALG Infantry | 1 |
| Tunis | TUN Infantry | 1 |
Soviets
| Location | Unit | Steps |
|---|---|---|
| Belomorsk | Infantry (3-Step) | 2 |
| Leningrad | Fortress | 2 |
| Leningrad | Factory | 1 |
| Lithuania | Infantry (3-Step) | 3 |
| Lithuania | Infantry (4-Step) | 3 |
| Vilna | Tank T-34 | 3 |
| Vilna | Infantry (4-Step) | 3 |
| Brest-Litovsk | Tank T-34 | 3 |
| Brest-Litovsk |
Scenario Notes
Scenario begins in Spring 1941. Players start with 3 cards. In a 3-player game, divide the Allied cards, 2 Soviet and 1 Allies. German airborne eliminated (at Crete) but island taken by Axis. Italian naval strength reflects their defeat at Cape Matapan in March 1941. Italian 10A destroyed. Add to pool. Free Deployment: Switch units as desired, keeping the same number of units in each deployment location. Victory Conditions: same as the campaign game.
Scenario: Stalingrad & Africa 1942
Axis
| Location | Unit | Steps |
|---|---|---|
| Oulu | Infantry 20A | 2 |
| Viipuri | Finn 1A | 3 |
| Helsinki | Finn 2A | 2 |
| Oslo | Marker | • |
| Trondheim | Battleship | 1 |
| Berlin | Infantry 8A | 2 |
| Berlin | Panzer SS | 1 |
| Berlin | Factory | 4 |
| Prague | Factory |
Allies
| Location | Unit | Steps |
|---|---|---|
| London | FA Spitfire | 3 |
| London | Infantry BEF | 3 |
| London | Factory | 4 |
| Birmingham | MB Wellington | 2 |
| Birmingham | Home Guard | 3 |
| Birmingham | Polish 1A | 2 |
| Birmingham | Factory | 2 |
| Southampton | Canadian 1A | 2 |
| Southampton |
USA
| Location | Unit | Steps |
|---|---|---|
| USA | Patton | 0 |
| USA | Infantry 1A | 2 |
| USA | Infantry 3A | 1 |
| USA | Infantry 7A | 1 |
| USA | BB Washington | 2 |
| USA | CV Ranger | 1 |
| USA | Cruiser | 3 |
| USA | FA P-47 | 1 |
| USA | NB Catalina |
ITALY
| Location | Unit | Steps |
|---|---|---|
| Milan/Genoa | Factory | 2 |
| Milan/Genoa | Infantry 1A | 4 |
| Milan/Genoa | Battleship | 2 |
| Venice | Infantry 2A | 3 |
| Rome | Infantry 10A | 1 |
| Rome | Factory | 1 |
| Athens | Infantry 9A | 3 |
| El Agheila | Infantry 5A | 3 |
| Taranto |
VICHY FRANCE
| Location | Unit | Steps |
|---|---|---|
| Lyon | Infantry 1A | 2 |
| Marseilles/Toulon | Cruiser | 1 |
| Algiers | ALG Infantry | 1 |
| Tunis | TUN Infantry | 1 |
Soviets
| Location | Unit | Steps |
|---|---|---|
| Murmansk | Infantry (3-Step) | 2 |
| Kalinin | Infantry (3-Step) | 3 |
| Kalinin | Guard | 1 |
| Vologda | Infantry (3-Step) | 3 |
| Leningrad | Fortress | 3 |
| Leningrad | Factory | 2 |
| Moscow | Zhukov | 2 |
| Moscow | FA Yak-1 | 2 |
| Moscow |
Scenario Notes
Scenario begins in Spring 1942. Players start with 3 cards. In a 3-player game, deal the Allied cards, 2 Soviet and 1 Allies. Italian 8A: Located in Kharkov. American Entry (optional): USA entry into the war is not automatic in 1942. Continue to roll for USA entry at 7+ for 1942. Entry is automatic in 1943. Delayed USA entry does not affect Soviet 1942 rules. Free Deployment: Switch units as desired, keeping the same number of units in each deployment location. Victory Conditions: same as the campaign game.
Scenario: Kursk & Italy 1943
Axis
| Location | Unit | Steps |
|---|---|---|
| Oulu | Infantry 20A | 2 |
| Viipuri | Finn 1A | 3 |
| Helsinki | Finn 2A | 2 |
| Oslo | Marker | • |
| Trondheim | Battleship | 1 |
| Bergen | MB He-111 | 3 |
| Riga | FA Me-109 | 3 |
| Warsaw | Marker | • |
| Novgorod | Infantry 18A |
Vichy France
| Location | Unit | Steps |
|---|---|---|
| Lyon | Infantry 1A | 2 |
| Marseilles | Cruiser | 1 |
Allies
| Location | Unit | Steps |
|---|---|---|
| London | FA Spitfire | 3 |
| London | Canadian 1A | 3 |
| London | Factory | 3 |
| Southampton | Cruiser | 4 |
| Southampton | Infantry BEF | 3 |
| Liverpool | HB Lancaster | 3 |
| Liverpool | Factory | 1 |
| Liverpool | BB Nelson | 3 |
| Wales |
USA
| Location | Unit | Steps |
|---|---|---|
| USA | Factory | 12 |
| Convoy A | Convoy A | 1 |
| Convoy A | Cruiser | 3 |
| Convoy B | Convoy B | 3 |
| Convoy B | Cruiser | 3 |
| Convoy B | CV Ranger | 2 |
| USA | Infantry 1A | 2 |
| USA | Infantry 3A | 2 |
| USA | FA P-47 |
ITALY
| Location | Unit | Steps |
|---|---|---|
| Milan/Genoa | Factory | 2 |
| Milan/Genoa | Infantry 1A | 4 |
| Milan/Genoa | Battleship | 3 |
| Venice | Infantry 2A | 3 |
| Rome | Factory | 1 |
| Athens | Infantry 9A | 3 |
| Sicily | Infantry 10A | 2 |
| Taranto | Cruiser | 3 |
| Sardinia |
Soviets
| Location | Unit | Steps |
|---|---|---|
| Murmansk | Infantry (3-Step) | 2 |
| Belomorsk | Infantry (3-Step) | 3 |
| Kalinin | Guard | 4 |
| Leningrad | Fortress | 3 |
| Leningrad | Factory | 2 |
| Moscow | Zhukov | 2 |
| Moscow | FA Yak-1 | 3 |
| Moscow | Guard | 4 |
| Moscow |
Scenario Notes
Scenario begins in Summer 1943. Players start with 2 cards. In a 3-player game, deal the Allied cards, 1 Soviet and 1 Allies. DAK: Surrendered in Tunis, May 1943, along with Italian 5A. These units cannot be rebuilt. Free Deployment: Switch units as desired, keeping the same number of units in each deployment location. Victory Conditions: same as the campaign game.
Scenario: Bagration & Normandy 1944
Axis
| Location | Unit | Steps |
|---|---|---|
| Oulu | Infantry 20A | 2 |
| Viipuri | Finn 1A | 3 |
| Helsinki | Finn 2A | 2 |
| Oslo | Marker | • |
| Bergen | MB He-111 | 3 |
| Trondheim | Battleship | 1 |
| Riga | Infantry 18A | 2 |
| Riga | Infantry 16A | 3 |
| Vilna | Infantry 3A |
Allies
| Location | Unit | Steps |
|---|---|---|
| London | FA Spitfire | 3 |
| London | Canadian 1A | 3 |
| London | Factory | 4 |
| Birmingham | Polish 1A | 3 |
| Birmingham | Factory | 1 |
| Southampton | Montgomery | 2 |
| Southampton | Infantry BEF | 3 |
| English Channel | BB Nelson | 4 |
| English Channel |
USA
| Location | Unit | Steps |
|---|---|---|
| USA | Factory | 12 |
| USA | NB Catalina | 2 |
| USA | MB B-26 | 1 |
| USA | FA P-51 | 2 |
| USA | Infantry 9A | 1 |
| Convoy A | Convoy A | 1 |
| Convoy A | CV Ranger | 2 |
| Convoy B | Convoy B | 3 |
| Convoy B | Cruiser |
Soviets
| Location | Unit | Steps |
|---|---|---|
| Murmansk | Infantry (3-Step) | 2 |
| Belomorsk | Infantry (3-Step) | 3 |
| Leningrad | Fortress | 3 |
| Leningrad | Infantry (3-Step) | 3 |
| Leningrad | Factory | 2 |
| Novgorod | Guard | 4 |
| Novgorod | Infantry (4-Step) | 3 |
| Smolensk | Zhukov | 2 |
| Smolensk |
Scenario Notes
Scenario begins in Spring 1944. Players start with 3 cards. In a 3-player game, deal the Allied cards, 1 Soviet and 2 Allies. Germany controls Vichy France: no Vichy units in play. Italy has surrendered; Germany occupies Rome. Free Deployment: Switch units as desired, keeping the same number of units in each deployment location. Victory Conditions: same as the campaign game.
Play Chart (Back Cover)
The Game Turn
[1] Card Phase: Play 1 card simultaneously. High card is player 1. Axis win ties. The first card play of each year is a winter turn (except in 1939). The last card of each year is a winter turn in Russia and Finland.
[2] Movement: Player-1 moves any/all desired units. Each battle requires 1 command. Player-2 moves any/all desired units, except pinned units. New battles by Player-2, and reinforcements to a battle started by Player-1 also require 1 Command.
[3] Combat: Player-1 determines the order of battles - Player-1 Raids first. Each battle has two (sometimes more) rounds of combat. Units of Player-2 that reinforce are not available for combat until Round 2. Units can retreat or fire on any battle turn, but are subject to 1-Step loss if they retreat during the first round. Retreats are to adjacent, friendly areas, subject to border limits. Blitz: Instead of a Regroup, a leader in a victorious battle may expend 1-Step to move and attack. Blitzing units can start one new battle (2 rounds), or reinforce one contested area. A Blitz battle is resolved immediately.
[4] Supply: All units, factories, and resources require valid supply. Check all necessary supply lines, Player 1 first. Unsupplied air/army units (except fortresses) are subject to 1-Step loss.
[5] Diplomacy: Player 1 Diplomatic Roll (2d6). Player 2 Diplomatic Roll (2d6). None after USA entry into war.
[6] Production: Tally supplied Resources. Convoys do not need supply. Determine net PPs (the lesser of factories or resources). Remember to add Lend-Lease PPs. Build Units. New units only in Homeland factories or naval bases.
Terrain Effects
| Terrain | Move | Stacking Area/Border | Combat |
|---|---|---|---|
| Clear | Normal | 3/2 | Normal |
| Forest | STOP (enemy only) | 2/1 | Infantry +1F Defense |
| Desert | Normal | 2/2 | Normal |
| Mountain | STOP (area or border) | 2/1 | Infantry Double Defense |
| River | Normal | •/1* | Normal |
| Strait | STOP (after crossing) | •/1 | Normal |
| Fortress (Unit) |
* Russian Rivers freeze in both winter turns (border limit 2).
Diplomatic Table
Proximity +1, Rebuff +1, Defend +2. A bullet means no diplomatic roll allowed.
| Country | Axis | Allies | Soviets |
|---|---|---|---|
| Belgium | 9+ | 7+ | • |
| Bulgaria | 7+ | 10+ | 9+ |
| Denmark | 8+ | 9+ | • |
| Eire | 10+ | 9+ | • |
| Finland | 8+ | 9+ | 10+ |
| Greece | 9+ | 6+ | 10+ |
| Hungary | 7+ |
(1) 1941 only; USA entry automatic 1942. Ignore proximity bonus for ITALY & USA.
Target Type
| Unit | Primary | Secondary |
|---|---|---|
| Fighter | Air | Army/Naval |
| Heavy Bomber | Factory | Air/Army |
| Medium Bomber | Factory/Army | • |
| Dive Bomber | Army | Air/Naval |
| Naval Bomber | Naval | Air/Army |
| Carrier | Naval | Air/Army |
| Submarine | Convoy | Naval |
| Battleship (1) | Naval (2) | Air/Army |
| Cruiser |
(1) Includes Battlecruiser (BC). Secondary shore bombardment against Army only to support sea invasions and land combat. (2) BB & BC are C1 against Submarines.