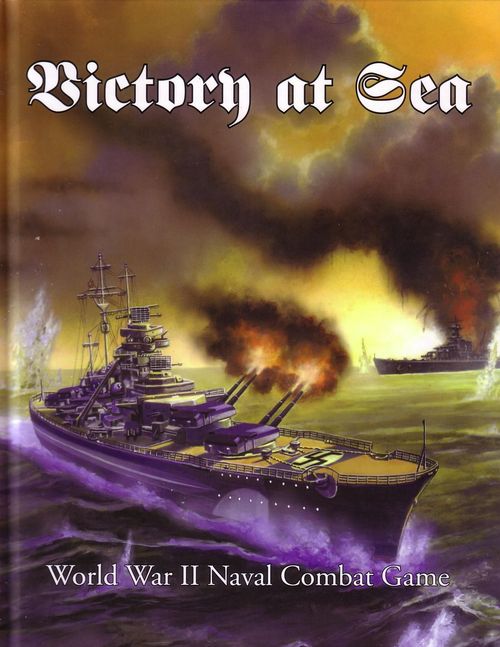
Victory at Sea: World War II Naval Combat Game
Victory at Sea: World War II Naval Combat Game Rulebook
Table of Contents
Table of Contents
Introduction
This game is divided into several chapters each of which will seem to contain a lot of rules to remember. No need to worry, the game is far easier than it looks! The core rules of Victory at Sea are detailed in the following chapters:
- The Turn: A short description of how players take turns moving and attacking with their ships
- Movement Phase: Describes how ships move on the ocean
- Attack Phase: Once a player's ships have moved into positions of advantage, he will want to know how to target his enemies and sink them!
- Special Actions: Ships need not only manoeuvre and fire - there are a whole range of Special Actions that players can choose from to enhance their tactics.
- Special Traits: Many ships and weapon systems have special rules that make them different from the norm - these are described in this chapter.
These chapters contain all the necessary information to begin playing Victory at Sea, though players need only consult Special Actions and Special Traits as references, rather than try to memorise them from the outset. Once players are familiar with the basics, they can proceed to the Advanced Rules and beyond to experience the full dynamics of naval combat in the Second World War.
What Players Will Need
As well as this book, there are several other things required in order to play Victory at Sea properly. A minimum of two players are required, each with his own fleet of ships (players can readily use the counters included with the book, though if the players have miniatures, keep on reading). Players will also need a flat playing surface - the kitchen table will do, though the scenarios included in this book assume a playing surface of six feet by four feet in size. In addition to this, players will also need pens and scrap paper to jot down notes, a measuring device marked in inches and several six-sided dice. That is everything players need to begin fighting on the oceans of the Second World War.
Scale
Though counters for many ships used in World War II have been provided with this book, veteran players may possess entire fleets of miniatures. Regardless of the scale of players' miniatures, they can be used freely in Victory at Sea. However, we have assumed that miniatures of 1/6000-1/2000 scale will be used for most of the battles featured in this game. All distances in Victory at Sea are measured from the very centre of a counter or ship miniature and are measured in inches.
Re-Rolls
Some special situations may call for a player to re-roll a die. This simply means the player ignores the first result he rolled and rolls again. The player must always accept the result of the second roll, even if it is worse than the first - re-rolls can be used to get out of a tricky situation but they are never guaranteed! A player may only re-roll a die once, no matter what the circumstances.
Pre-Measuring
A player is never allowed to pre-measure distances and ranges in Victory at Sea. Captains and admirals of the Second World War did not have sophisticated fire computers tied into radar and satellite surveillance to rely upon, trusting instead to their own judgement - players will have to do the same when trying gauge just how far they can move or the range to the nearest enemy vessel.
Movement & Firing
Every ship in Victory at Sea has a number of firing arcs, all of which are marked out on the Fire Arc Counter. These are the areas that various weapons can fire into, as noted in their descriptions.
- Fore Turrets (A and B) - Forward, Port and Starboard Arcs
- Aft Turrets (X and Y) - Aft, Port and Starboard Arcs
- Q Turrets - Port and Starboard Arcs
- Secondary Weapons - All Round
- Anti-Aircraft Weapons - All Round
- Torpedoes - Port or Starboard
- Submersible Torpedoes - Forward or Aft
Ships in Victory at Sea
Every ship in the game is defined by its roster sheet, though players will also find plenty of information in the fleet lists covering its general statistics, history and the tactics involved in its use.
A ship's roster looks like this - the example given here is of HMS Warspite, one of the stalwarts of the Royal Navy, and a vessel with a renowned history dating back to the Great War.
| Name: | HMS Warspite | Class | Queen Elizabeth |
| Speed: | 5 | Priority Level: | Battle |
| Turning: | 1 | Command: | 4 |
| Target: | 4+ | In Service: | 1915 |
| Armour: | 5+ | Aircraft: | — |
| Damage: | 34/11 | Special Traits: | Aircraft 2, Torpedo Belt |
| Crew: |
| Weapon | Range | AD | DD | Special |
|---|---|---|---|---|
| A Turret (2 x 15 in) | 33 | 2 | 3 | AP |
| B Turret (2 x 15 in) | 33 | 2 | 3 | AP |
| X Turret (2 x 15 in) | 33 | 2 | 3 | AP |
| Y Turret (2 x 15 in) | 33 | 2 | 3 | AP |
| Secondary Armament | 14 | 4 | 1 | Weak |
- Ship Name: What a ship is called is up to the player, but it has been noted in our playtesting that ships with names always seem to last longer! Many players may prefer to use names of ships that actually existed in history but this is not a requirement.
- Speed: This is the maximum distance in inches a ship can usually move in a single turn.
- Turning: As described in the Movement Phase chapter, this reflects how quickly a ship can turn to come about on its enemies.
- Target: Large or particularly cumbersome ships are much easier to hit than small nimble ones. This is the base number needed to score a hit on this ship.
- Armour: The higher the value here, the better armoured a ship will be to withstand incoming fire.
- Damage: The first figure shows how many points of damage a ship can withstand before being destroyed. The second marks the point at which the ship becomes Crippled. In the example above, once the Warspite takes 23 points of damage, reducing it to 11 overall, it becomes Crippled.
- Crew: Much the same as Damage, this shows how many Crew are on board the ship. The second figure shows how far the Crew can be depleted before they become a Skeleton Crew. In the example above, once the Warspite loses 32 Crew, reducing it to 15 overall, it is crewed by a Skeleton Crew.
- Class: This is the actual type of ship, as shown in the fleet lists.
- Priority Level: Every ship has a Priority Level ranking which is used to construct fair-sized fleets to meet in battle, as described in the Fleet Lists chapter.
The Turn
During each turn of Victory at Sea, players will make many tactical decisions and ships will move and then launch devastating attacks upon one another. Due to the huge range of options and strategies available, each turn is split into four distinct phases to make the process of naval combat a lot easier. Players will run through each phase together and, when each turn is complete, every ship on each player's side will have had a chance to act and affect the outcome of the battle.
The four phases are played in order - Initiative Phase, Movement Phase, Attack Phase and End Phase. When the End Phase has been completed, the turn ends and the next one begins with the Initiative Phase.
Initiative Phase
The Initiative Phase is used to resolve any actions that do not require players to make any choices and to decide who will have the initiative for the turn - in other words, who has gained a position of tactical advantage.
At the start of each turn, both players roll for initiative using 2d6. Any ties are re-rolled.
If a fleet has any civilian shipping, it will suffer a -1 penalty to its initiative roll. If a fleet is comprised entirely of civilian shipping, it will suffer a -2 penalty.
Movement Phase
The player who wins the Initiative Phase by rolling higher than his opponent will decide whether to move a ship first or force his opponent to do so. Players then alternate moving their ships. First, a player nominates one of his ships and moves it, then his opponent nominates one of his own and moves that. This continues until all ships have been moved. Note that a particularly large fleet may still have ships to move after its enemy's ships have finished moving. In this case, the larger fleet will carry on moving ships until they have all had a chance to move.
Attack Phase
Once ships have been moved into position, they are allowed to fire their weapons in an effort to destroy their enemies. Players then alternate firing their ships. The player who wins the Initiative Phase nominates one of his ships and then attacks with it, immediately resolving all damage dealt. His opponent then nominates one of his ships and attacks. This continues until all ships have attacked, or had a chance to attack. Note that it is not compulsory for a ship to attack, even if it has a viable target. The player may simply nominate it and choose not to fire. However, he may not select it again within the same turn and choose to fire - he must make the decision to attack then and there, and not hold back!
End Phase
The End Phase is used to 'tidy up' the battlefield and make sure all players know what is happening. This is the time Damage Control and other book-keeping tasks are performed. Once the End Phase is complete, a new turn begins.
Movement Phase
The ability to manoeuvre a ship into a position of advantage is vital. By outwitting an opponent, a player will gain the chance to keep his ships at optimum range for their weaponry while keeping out of his opponents' most dangerous fire arcs.
Once it has been determined who has the initiative for the current turn (see last chapter), players take turns to move their ships. A ship may only be nominated to move once in every turn and every ship must be nominated. Players are not allowed to skip ships, even if it means they will have to move into a position of disadvantage!
Moving Ships
When nominated to move, every ship must be moved a distance in inches up to its Speed score. Unless the ship has had its Speed reduced to zero due to damage, it must move at least one inch. All movement must be in a forward straight line.
Once a player's ship is in motion, he will at some point want to change the direction of its movement. All ships have a Turning score, which rates how quickly they can turn.
A ship may only turn once in each Movement Phase and it can only do so when it has moved at least half its Speed in a straight line. This means no ship can simply turn on the spot - warships are extremely heavy and despite having very powerful engines, inertia will carry them forward before their immense bulk can be redirected. At any point thereafter, a player may opt to turn either left or right (port or starboard to nautical types).
A player should place the Turning Counter next to his ship on the side he wishes to turn. He may then move the bow (front part) of his ship a number of 'points' equal to its Turning score. Obviously, the higher the Turning score of a ship, the more points it can turn to face and so the tighter it can turn.
A ship is never required to turn the maximum number of points its Turning score allows - it can turn at any lesser rate as well.
Ships may never be stacked on top of one another. A player may never end his movement 'on top' of another ship.
Those are all the rules players will need to know in order to move ships and begin attacking with them. However, there are a range of Special Actions players can attempt instead of moving normally, from forcing an enemy ship to surrender to cranking up the engines in order to increase speed. See the Special Actions Chapter for a list of these Special Actions.
Aircraft
Fleets with aircraft (such as fighters or torpedo bombers) operate in a slightly different initiative order. All ships are moved in initiative order as normal. Once the ships of all fleets involved in the battle have been moved, the player who won the initiative must then choose whether to move his Aircraft counters first or force his opponent to do so. Once this decision has been made, all counters of aircraft of the same type in a fleet are moved at the same time. The opposing fleet then does the same with its aircraft. This is done to reflect the relative freedom of movement aircraft have in battles involving huge warships and also keeps things quick and easy in battles featuring many aircraft.
Further details on using aircraft can be found in the Advanced Rules chapter.
Movement Example (Figures 1-4)
HMS Ajax is in a position to attack the battlecruiser Scharnhorst. Ajax moves forward half her move (three and a half inches for a Leander class cruiser). Using the Turning Counter Ajax then turns 2 points to line her up on a parallel course to the Scharnhorst. The Ajax moves forward finishing her move and allowing her to unleash her full armament, including her torpedoes.
Attack Phase
Now that players have moved their ships, no doubt they will be wanting to unleash their raw firepower and reduce their opponent's ships into sinking chunks of burning metal! From the torpedoes of fast attack boats to the immensely powerful main guns found on board the largest battleships ever to sail the oceans, there are dozens of different ways in which a player can destroy his enemy.
As described in the Turn chapter, players alternate firing their ships, calculating all damage and resolving its effects before moving on to another attacking ship. This, of course, can make gaining the initiative very important in some turns.
Once a ship has been nominated to fire, the player follows this process:
- Nominate targets for each weapon that will be fired
- Check ranges
- Resolve firing
- Resolve damage
Eligible Targets
For a target to be attacked successfully, two conditions must be met. First, it must lie in the appropriate fire arc of the weapon that will be firing at it, as shown on the attacking ship's roster. Second, it must be within the range of the weapon, as also shown on the ship's roster. A player must nominate a target for every weapon he intends to fire from his ship at the same time, before any attacks are made. In addition, all targets must be nominated before he checks whether they are indeed within the correct fire arc and within range - players are not allowed to check or pre-measure beforehand!
Players must always measure from the centre point of their ships to the centre point of their targets when checking for both range and whether a target lies in an appropriate fire arc. If players are using miniatures, pick a point common to all ships (such as the bridge) and use that as the centre point instead.
Unless a ship has rules to the contrary, a player may fire each weapon system once during every turn.
Ships do not block the line of sight of other ships in Victory at Sea. It is assumed that ships will have enough time to manoeuvre sufficiently to get a clear shot.
Firing
Each weapon listed on a ship's roster has an Attack Dice (AD) score listed. This is the number of dice rolled every time the weapon is fired.
When Attack Dice are rolled, the resulting number on each die is compared to the target's Target score. For every Attack Die that equals or beats the Target score, a hit has been scored. However, each Attack Die will be modified as follows.
- Extreme Range (target is more than 30 inches away): -2
- Long Range (target is more than 20 inches away): -1
- Fast Moving Target (target moved more than 7 inches in the current turn): -1
- Large Silhouette (target has its beam facing attacker): +1
A '1' is always considered to be a miss. However, a natural '6' is not always considered to be a hit.
Once a player has scored an amount of hits on a target, it is time to see what damage he has caused. Every weapon has a Damage Dice (DD) score listed. This is the number of dice rolled for every Attack Die that successfully hit the target.
When Damage Dice are rolled, the resulting number on each die is compared to the target's Armour score. For every Damage Die that equals or beats the Armour score, one point of damage is deducted from the target's Damage score.
Any roll of six may also cause a critical hit. If a player rolls a six, he must immediately roll the die again. If he then rolls a four or higher, in addition to causing damage as normal, he will also have scored a critical hit! More details on critical hits are given below.
A natural '6' is always considered to cause damage, whereas a natural '1' is always considered to simply bounce off the target's armour.
Long and Extreme Ranges
Weapons fired at ranges of greater than 20 inches have a penalty applied to their Attack Dice, as described above, as faraway targets away are far more difficult to hit. However, shells fired at these ranges do not travel in a straight line to their target - instead, they are fired upwards and travel in an arc to dive down upon their target. This usually means shells fired in this way do not strike the thick hull armour of a ship but tend to plough down towards its much weaker deck armour.
Weapons fired at long or extreme ranges gain a +1 bonus to their Damage Dice.
Weapons
There are several types of weapons used in Victory at Sea, though not all ships will possess all of them.
- Main Guns: These are the main turreted weapons that made battleships famous. They are noted in the ship descriptions as being mounted on turrets, though their actual names and types may vary. Main guns use the Fire Arc template in order to decide whether a target is in view.
- Secondary Weapons: These represent the multitude of smaller weaponry that ships commonly carry. They may be used to attack any target in range on any heading. Note that smaller ships may possess only secondary weapons and no main guns - while these smaller weapons may, technically, be the ship's primary weapons, they are counted as secondary for the purposes of these rules.
- Anti-Aircraft Batteries: Also known as AA guns, these weapons are the only defence a ship has against aircraft. Anti-aircraft batteries may target any aircraft within range and fire at the start of the Attack Phase before players get a chance to do anything else. The use of these weapons is described in the Advanced Rules chapter.
- Torpedoes: Mounted mainly by submersibles and fast attack craft, as well as some aircraft, torpedoes are designed to attack ships below the waterline, where they are most vulnerable. Torpedoes are launched from the port or starboard of a vessel, or from the front if it is a submersible. Full details of torpedo use can be found in the Advanced Rules chapter.
- Depth Charges: The only weapons capable of attacking a submerged vessel, depth charges use the same fire arc as rear-mounted turret guns. Full details of their use can be found in the Advanced Rules chapter.
- Bombs: Carried by aircraft, some bombs are capable of smashing right through armoured decks to explode within a ship's most vulnerable areas.
Splitting Fire
Only secondary and anti-aircraft weapons may split their fire. Such weapons with multiple AD are allowed to split their dice between different targets. This is done when targets are being nominated. The amount of AD allocated to each target must be declared before any firing takes place.
Damage
If a ship's Crew score is reduced to zero, it is considered to be Abandoned. The ship may not move for the rest of the game.
If a ship's Damage score is reduced to zero, it is considered to be destroyed and sinking. It may be removed from the battlefield.
Crippled Ships and Skeleton Crews
Both Damage and Crew scores have secondary figures, as noted on each ship's roster. For example, the HMS Warspite has Damage 34/11. This means that it can take 34 points of total Damage, but when it has been reduced to 11 points, a threshold has been reached.
Crippled
If the Damage score is brought to this threshold level, the ship is considered to be Crippled. Turning will be reduced to one point and Speed will be permanently reduced by half. In addition, the AD of the ship's secondary and anti-aircraft weapons will be halved (rounded down). Roll a die for every main gun turret and every special trait the ship possesses. On a 4+ the turret or trait is destroyed.
A Submersible that has become Crippled must rise to the surface in its next turn. It may not submerge again for the rest of the battle.
Skeleton Crew
If the Crew score is brought to this threshold level, the ship is considered to be running on Skeleton Crew. No Special Actions may be attempted and only one weapon system may be fired in each turn. In addition, the ship will suffer a -2 penalty to all Damage Control checks.
Critical Hits
If a critical hit is scored, roll 2d6 on the table below to determine exactly what has been hit.
| 2d6 | Critical Location |
|---|---|
| 2 | Vital Systems |
| 3-5 | Crew |
| 6-8 | Engines |
| 9-11 | Weapons |
| 12 | Vital Systems |
Once the location of a critical hit has been determined, roll on the appropriate table below. The special effects of critical hits are not cumulative but players should note each critical hit scored, as each must be repaired separately during Damage Control.
For example, if a ship suffers both the Turbine Damaged and Props Damaged critical hits, its speed will drop by -2 (the effect of the props being damaged being more severe than that of the turbines). However, once the props are repaired, the ship will still suffer a -1 penalty to speed, as the turbines will still be damaged and thus still in effect.
Critical hits often cause extra hits to Damage and Crew, as noted in their descriptions in the tables below.
Crew
| d6 | Area | Damage | Crew | Effect |
|---|---|---|---|---|
| 1-2 | Fire | +0 | +2 | Fire starts |
| 3-4 | Multiple Fires | +0 | +3 | 1d6 fires start |
| 5 | Hull Breach | +2 | +5 | — |
| 6 | Multiple Explosions | +1d6 | +2d6 | 1d6 fires start |
Engines
| d6 | Area | Damage | Crew | Effect |
|---|---|---|---|---|
| 1-2 | Turbine Damaged | +1 | +1 | -1 Speed |
| 3-4 | Props Damaged | +1 | +1 | -2 Speed |
| 5 | Fuel Systems Ruptured | +2 | +2 | -3 Speed, fire starts |
| 6 | Engines Disabled | +3 | +3 | Speed to zero, no Special Actions allowed, Target score drops by one |
Weapons
| d6 | Area | Damage | Crew | Effect |
|---|---|---|---|---|
| 1-2 | Anti-Aircraft Weapons Damaged | +1 | +1 | AA weapons lose -1 AD |
| 3-4 | Secondary Weapons Damaged | +2 | +0 | Secondary weapons lose -1 AD |
| 5 | Turret Destroyed | +3 | +4 | Random turret destroyed, fire starts |
| 6 | Magazine Explosion | +4 | +6 | No weapons can fire for 1d3 turns, 1D6 fires start |
Vital Systems
| d6 | Area | Damage | Crew | Effect |
|---|---|---|---|---|
| 1 | Bridge Hit | +0 | +1 | No Special Actions permitted |
| 2 | Rudder | +2 | +1 | No turns are permitted |
| 3 | Engineering | +2 | +4 | No Damage Control permitted |
| 4 | Fire Control | +3 | +4 | Each weapon system may only fire on a roll of 4+ |
| 5 | Secondary Explosions | +1d6 | +1d6 | 1d6 fires start |
Note that Vital Systems and destroyed turrets cannot be repaired through Damage Control (see the End Phase chapter for details).
End Phase
Once all players have moved and attacked with all their ships, the End Phase is played out to complete the turn. The End Phase is used to complete any bookkeeping needed for special rules, as well as a to provide a vital chance for players to repair any damage their ships have sustained from critical hits.
Damage Control
During the End Phase, players can repair their ships through Damage Control. The player who won the initiative during the turn does this first, for all of his ships that have been damaged.
Many critical hits have special effects that further debilitate a ship beyond the raw damage they cause. Weapons can be put out of commission, sections can be flooded and propellant fires from burning magazines can cause terrible harm. These special effects are the only things Damage Control can repair - it cannot be used to restore Damage or Crew points. A player may only attempt to repair one critical hit on each of his ships in a turn.
To repair a critical hit by Damage Control, select one effect a ship is currently suffering from and roll 1d6, adding the ship's Command score. On a roll of nine or more, the effect has been repaired and the ship can continue to operate normally. If less than nine is rolled, the effect persists until the End Phase of the next turn, when the player may try again to repair it.
Critical hits to Vital Systems may never be repaired.
Fire
Lethal in the enclosed environment of a warship, uncontrolled fires are capable of sweeping through decks rapidly, creating an inferno that is impossible to survive.
Certain critical hits will start fires in addition to other damage they cause. In each End Phase, roll 1d6 for each fire currently raging on a ship, adding the ship's Command score. For every score of seven or more, one fire will be extinguished.
For every fire a player fails to extinguish on a ship, he will lose two Crew. The fire will remain and the player will have another opportunity to extinguish it in the next End Phase.
Special Actions
Special Actions are a vital part of Victory at Sea, as they permit players and their ships to do some extraordinary things, much like many crews did in real life. Whether it is bracing for impact against inevitable attacks or attempting to evade torpedoes, Special Actions greatly increase the tactical options available for all players.
Performing Special Actions
When a ship is nominated to move, a player can also choose to perform a Special Action. Some of these are automatic, while some require a Command check for success. Each ship may only attempt one Special Action in every turn, though any number of ships may attempt them every turn. A Special Action must be chosen and attempted before the ship begins to move.
A Command check is performed by rolling 1d6 and adding the ship's Command score. If the total matches that listed in the Special Action's description, the action is successful. If the check is failed, the ship moves as normal.
The range of Special Actions that may be attempted are described below.
All Hands on Deck!
Command Check: Eight
Effect: The captain orders the entire engineering section to alert. If successful, the ship gains +1 modifier when attempting Damage Control and can attempt to repair any number of critical hits in this End Phase.
Come About!
Command Check: Nine
Effect: Pushing the ship's rudders to maximum deflection, the captain orders his ship to turn hard to gain a position of advantage. The ship adds +1 to its Turning score for this turn.
Create Smoke!
Command Check: Automatic
Effect: Burning oil, the ship begins to belch thick clouds of black smoke, cloaking the entire area. Place a Smoke Counter on the ship, with its leading edge on the centre point so it trails behind the vessel. No attacks that draw a line through this counter may be made at all except for ships equipped with Radar (see Radar in the Advanced Rules Chapter). The Smoke Counter is removed in the End Phase. This Special Action may not be performed in Bad Weather.
Evasive!
Command Check: Eight
Effect: Turning hard, the ship tries to throw an attacker off-guard, causing weapons to miss simply by not being where it was predicted they would hit. If successful, all attacks (including those from aircraft and torpedoes) which hit the ship in this turn must be re-rolled. However, all attacks the evading ship makes which are successful must also be re-rolled.
Flank Speed!
Command Check: Automatic
Effect: Straining the engines, the captain orders his crew to make best speed. The ship adds +50% to its Speed for this turn. All Attack Dice of weapons fired from this ship suffer a -1 penalty.
Rig for Silent Running!
Command Check: Nine
Effect: In an effort to avoid detection, the captain of the submersible orders his engines to be throttled right back and all other systems made silent. Vessels attempting to detect the submersible suffer a -1 penalty for this turn. The submersible may only move a maximum of half its full Speed and may not make any attacks.
Special Traits
In Victory at Sea, Special Traits are applied to both ships and weapons. Special Traits are special abilities that in some way alter the core rules of the game. For example, an Agile ship will prove very nimble at sea, able to literally run rings around clumsier vessels. In the same way, there are weapons that are exceptionally powerful compared to others and those that are markedly less effective.
Special Ships
Ships with Special Traits can affect the game in all kinds of ways, including movement, firing and the ability to resist damage, as well as wholly new effects that can take place outside of normal combat. Special Traits are one of the ways that vessels from different fleets distanced themselves in the ongoing technological race throughout the Second World War.
- Agile: Some ships are very manoeuvrable, either by virtue of speed and size or advanced rudder systems. An Agile ship may turn twice during its movement. The first turn must take place once the ship has moved half of its Speed in a straight line. The second turn must take place at the end of the ship's movement once the ship has moved its full Speed.
- Aircraft X: Though not proper carriers in the true sense, many ships carry a small number of aircraft that are launched from short catapults or slings, to be used as observation and reconnaissance craft. These observation aircraft are detailed in the Advanced Rules chapter.
- Armoured Deck: The ship has reinforced armour lining its deck. Attackers firing upon this ship do not get the +1 bonus to their Damage Dice at long and extreme ranges. In addition, aircraft dropping bombs on the ship suffer a -1 penalty to their Damage Dice.
- Carrier: The ship is an aircraft carrier and serves as a mobile airbase. It may launch or collect two flights per turn so long as it does not perform any Special Actions. See the Advanced Rules chapter for more details.
- Radar: The ship is fitted with a surface radar system that allows it to operate effectively at long ranges and at night. See the advanced rules for the use of radar.
- Silent: This submersible is exceptionally quiet, making it hard for surface ships to detect. A roll of five is required to locate this vessel while submerged, rather than a four.
- Sub-Hunter: A few ships have upgraded ASDIC/sonar systems that allow them to hunt submersibles with great effect. The ship gains a +1 bonus when attempting to detect a Submersible. The ship may also engage in Long-Ranged Detection (see the Advanced Rules chapter).
- Submersible: Submersibles have the ability to render themselves all but invisible to their enemies when submerged. A ship with this trait may use the Submersible rules detailed in the Advanced Rules chapter.
Special Weapons
The Special Traits used for weapon systems typically revolve around the capabilities of the weapon itself and what it can do in battle. Some weapons are made vastly more superior by these traits, while others have their effectiveness reduced.
- AP: These armour-piercing weapons are adept at blasting through the thick armoured hulls of warships to do great damage to the decks below. Add +1 to the rolls of all Damage Dice made for these weapons.
- One-Shot: This trait normally is only possessed by weapons carried on aircraft. Ammunition or payload is limited for these weapons and so once they are used, they may not be used again for the rest of the game.
- Slow-Loading: Some weapons take an inordinate amount of time reload. These weapons may only fire every other turn.
- Super AP: Among the most powerful weapons found in Victory at Sea, these will literally shred the armour of warships. Add +2 to the rolls of all Damage Dice made for these weapons.
- Twin-Linked: These weapons are mounted in pairs or even quads, concentrating the available firepower. The hail of fire these weapon systems can unleash is awesome to behold and very difficult to avoid. Any Attack Dice for these weapons that do not successfully strike their target may be re-rolled.
- Weak: Due to small shell size or design, some weapons are simply not as powerful as others. All Damage Dice rolled for these weapons suffer a -1 penalty and cannot cause critical hits.
Advanced Rules
Once players have got the rules in the previous chapters under their belts, it is time to expand for them to expand their games to include the advanced rules in this chapter. These rules will add a lot more depth to Victory at Sea and allow players to simulate the full range of Second World War engagements on their tabletops.
Aircraft
The appearance of aircraft changed the face of warfare forever and nowhere was this more true than at sea. With an aircraft carrier, a fleet gained the ability to strike at targets hundreds of miles away with relative impunity. Despite the advance of anti-aircraft weaponry and the presence of defending fighters, aircraft spelled the doom of the battleship.
A fleet may have supporting aircraft directed to its position from land-based airfields, or it may possess its own aircraft carrier. If any flights of aircraft are bought individually from the fleet lists (that is, they did not come free with an aircraft carrier), they are considered to be land-based for the purposes of these rules, though they could also conceivably have been launched from another aircraft carrier far from the battle.
In theory, an entire 'fleet' could compose of nothing but aircraft (and battles of this nature certainly took place in the Second World War). Each scenario in this book will detail whether players can use land-based aircraft and also how many aircraft carriers present may have in the air at the start of the game. All aircraft used from land-based airfields will, of course, start the game in the air. An aircraft carrier may always start the game with at least one flight in the air, regardless of the scenario rules. These flights may be placed anywhere in the deployment zone.
Aircraft Flights
An aircraft's flight is represented by an Aircraft counter of the appropriate type. As described in the Movement Phase chapter, all flights in a fleet are moved at the same time, after all ships on the table have been moved, as shown below.
- The player who wins the Initiative chooses who moves a ship first.
- Players alternate in moving all ships.
- The player who wins the initiative chooses who moves his aircraft first.
- The player chosen moves all flights of the Fighter type.
- His opponent(s) move(s) all flights of the Fighter type.
- The first player moves all other flights.
- His opponent(s) move(s) all other flights.
A flight can move in any direction, taking as many turns as it wishes, reflecting the relative manoeuvrability even the slowest bomber has compared to a surface-bound ship.
Ships with the Carrier trait may launch or recover two flights every turn, as long as the ship is not crippled. For this to happen, the ship must move in a straight line without turning and may not choose any Special Actions. The two flight counter models are placed in the forward arc of the ship, touching the ship counter or model. The flight can be moved later in the same turn, when all other flights of the same type are moved.
Aircraft Types
Many types of aircraft were used at sea in the Second World War, but the following types are used in Victory at Sea.
- Fighter: Dedicated to gaining air superiority by annihilating an enemy's air force, fighters are tasked with defending the fleet. They may be capable of carrying bomb loads, but these will be too small to have much effect in Victory at Sea and so are ignored.
- Bomber: Covering a multitude of aircraft from attack planes to full-blown heavy bombers, these aircraft pose a great threat to any fleet.
- Dive-Bomber: First fully exploited by the Luftwaffe but quickly finding favour across the world, dive-bombers use speed and height to gain phenomenal accuracy as well as impart enough kinetic energy to their bombs so they are capable of piercing armoured decks.
- Torpedo-Bomber: Perfected by submersibles, it was inevitable that these destructive weapons would also be mounted on aircraft. However, the technology of the Second World War had trouble catching up to the task and air-launched torpedo attacks were notoriously difficult to use effectively.
Attacking with Aircraft
Only aircraft armed with bombs or torpedoes may attack ships. Rules for using torpedo-bombers can be found later in this chapter. Only three flights (of any type) may attack a single ship in the same turn.
All attacks made by aircraft, be it by bomb, torpedo or dogfighting (see below) are made at the same time in a turn. A player may nominate all his aircraft to attack instead of a ship at any point in the Attack Phase.
Aircraft example (Figures 1-4): Three flights of Japanese aircraft encounter an American picket, a Clemson class destroyer with two flights of P-39s on Combat Air Patrol. The destroyer has already moved. The Japanese player has initiative so moves his flight of Zero fighters into contact with one of the American fighters, engaging it in a dogfight. The American player can now only move his second flight of fighters and does so, choosing to attack one of the dive bomber flights. With only one of the Kate dive bomber flights being able to be moved the Japanese player uses it to attack the American destroyer, placing it adjacent to the ship's counter. Now that every aircraft flight has been moved all combat (both dogfights and the dive bomber attack on the destroyer) will be resolved simultaneously.
To use bombs, an Aircraft counter must be moved into contact with the target ship. Roll Attack and Damage Dice as normal to resolve the attack.
The usual modifiers to Attack Dice are not used for aircraft. Instead, if an aircraft is noted as being a bomber, a -1 penalty is applied to its Attack Dice, representing the inherent inaccuracy of such attacks. Dive-bombers, while avoiding this penalty, are much easier for anti-aircraft fire to track and so any anti-aircraft attack made against a dive-bombing aircraft attacking a ship in the same turn gains a +1 bonus to its Attack Dice.
Shooting Down Aircraft
Aircraft may only be attacked with AA weapons or in dogfights with other aircraft. If a flight is hit by an AA weapon, it may try to dodge the attack by rolling one die equal or greater than its Dodge score for each hit. If successful, the attack is completely ignored. Aircraft have far less armour than ships, however, and so any successful hit will automatically remove a point of Damage from a flight.
Most ships have some form of defence against aircraft in the form of AA weaponry, as listed on their rosters. If enemy aircraft are in range, a ship's AA weapons are fired automatically at the beginning of the Attack Phase before anything else happens. This happens outside of the normal turn sequence because the ship's crew are expecting battle and aircraft will rarely have an easy time trying to attack a ship.
AA weapons may freely split their fire among multiple targets if necessary, but they may never fire into a dogfight.
Dogfighting
Once one Aircraft counter moves into contact with another, they are said to be dogfighting. Neither may move until its enemy has been destroyed and it is no longer in contact with an enemy.
Every flight in contact with an enemy flight must engage in dogfighting. Both players roll one die each and add their flights' Dogfight scores.
The winner of this roll deducts a point of Damage from the enemy flight.
If the dogfighting roll is a draw or if the enemy survives the attack, both flights are left in place. They are locked in the dogfight and may not move next turn. A flight that is dogfighting may not drop bombs or torpedoes.
Observation Aircraft
Ships often carried small numbers of observation and reconnaissance aircraft to effectively extend their eyes and ears over an ocean. Any vessel with the Aircraft X trait will carry a number of aircraft indicated in its roster.
These observation aircraft are launched in the same way as described for Aircraft Flights but cannot be recovered during a battle - the process takes too long, as the plane either lands on floats next to its parent ship or else ditches in the sea and has to be winched back on board.
Observation aircraft provide a +1 bonus to the Attack Dice of the ship's main guns so long as it is within 6 inches of the target being attacked. This bonus only applies to the ship that launches the observation aircraft and the effects of multiple observation aircraft do not stack.
In addition, a fleet with at least one observation aircraft in the air at the start of a turn will gain a +1 bonus to Initiative.
While there were many different types of aircraft used in this capacity, many were very similar and as they represent just one aircraft instead of an entire flight, all observation aircraft in Victory at Sea use the following profile. No weapons are carried.
| Type | Special |
| Speed | Seven inches |
| Target | 5+ |
| Dodge | 4+ |
| Dogfight | Will be destroyed automatically in a dogfight. |
| Damage | One |
| In Service | All periods. |
Bad Weather
Churning seas, heavy rain and high winds will all cause a problem for warships, greatly reducing their ability to fight effectively. Many admirals have lamented not having control of the weather.
In Victory at Sea, weather is defined as either Good or Bad. Up to now, the rules assume players will be fighting in Good Weather. However, if a scenario calls for Bad Weather, the following changes are made.
All attacks made by both ships and aircraft suffer a -1 penalty to hit, in addition to other modifiers. A -1 penalty is also applied to all Command checks. Submarines are additionally affected by bad weather if they are on the surface, they will be unable to fire any weaponry other than their torpedoes as they were very unstable firing platforms.
In addition, Bad Weather affects visibility, giving rise to the possibility that a ship will not spot an enemy until it is too late. Ships at extreme range may not be attacked at all in Bad Weather. Those at long range must be Spotted before they can be attacked.
Once an enemy ship is within long range of a friendly vessel, make a Command Check (as described in the Special Actions chapter) with a target number of eight. Success means the enemy ship has been spotted and may be attacked normally by any friendly ship within long range, as its location will be communicated to allies. Once a ship has been spotted, it will remain so until it moves to extreme range once more.
Ships that fire turret guns will automatically be spotted.
Command
By default, all ships are considered to have Military-Grade crew (Command 4) on board. However, players may like to try variant Command scores in order to reflect a force of green recruits being thrown into the fire of war, or a ship of battle-hardened veterans able to take on several other vessels with ease. Variant Command scores are used most often in campaign games but are summarised below.
| Crew | Crew Quality Score |
|---|---|
| Elite | 6 |
| Veteran | 5 |
| Military-Grade | 4 |
| Conscript | 3 |
| Green | 2 |
Multiplayer Games
When players begin creating their own scenarios, it may cross their minds to have more than one fleet present in the same battle. Perhaps the Royal Navy, Italian Navy and Kriegsmarine are all fighting over the same Mediterranean island. Maybe the Kriegsmarine decided to aid the Japanese against an American attack. Whatever the reason, players may find it exciting to try a game with three or more players.
In order to introduce additional players, very few changes are required to the standard rules. During the Initiative Phase, players roll for initiative as normal, re-rolling any ties. Play can then begin in this order, with multiple players simply taking their turns.
For example, suppose in an Initiative Phase the US Navy player scored seven for initiative, the Kriegsmarine player six and the Royal Navy player nine. The Royal Navy player has the choice of whether to move first or wait his turn. If he declines the first move, the same choice is presented to the US Navy player. If he too declines the first move, the Kriegsmarine player will be forced to move first, followed by the US Navy and finally the Royal Navy. Each moves one ship after the other, before it is the Kriegsmarine player's turn to nominate another ship to move.
Play continues in this pattern. In the example above, the Royal Navy player would nominate a ship to attack first, and the US Navy player and the Kriegsmarine would do the same before the Royal Navy player would get to choose a second ship to attack.
Players will find it much easier to create multiplayer scenarios if they either have very strongly defined objectives for each fleet or if fleets are allied into two separate forces, with the fleets on each side pursuing the same objective. In this way, players will avoid the natural inclination to instantly 'gang up' on a single fleet and thus remove it from the game quickly.
Night Battles
The time and place of a battle is not always suited to an admiral's best wishes and many duels at sea have taken place at night. Far from land, it can be difficult to appreciate just how dark the night at sea is or the effect of darkness on battles.
If a scenario is set at night, the following changes are made:
All attacks made by both ships and aircraft suffer a -1 penalty to hit, in addition to other modifiers, such as for range and Bad Weather.
In addition, ships at extreme and long ranges may not be attacked at all at night. Those at closer ranges must be Spotted before they can be attacked.
Once an enemy ship is within 20 inches or less of a friendly vessel, make a Command Check (as described in the Special Actions chapter) with a target number of eight. Success means the enemy ship has been spotted and may be attacked normally by any friendly ship within 20 inches, as its location will be communicated to allies. Once a ship has been spotted, it will remain so until it moves more than 20 inches away.
Ships that fire turret guns will automatically be spotted.
Radar
A new development for World War II, the use of radar quickly spread to the sea where it was used to locate enemy ships at great ranges and direct the fire of turret guns, enhancing their accuracy. Radar also made fighting battles at night or in bad weather a little easier.
A ship with the Radar trait will detect any enemy ship placed on the table on a roll of three or more. Once detected, an enemy ship will remain so.
If an enemy ship has been detected by radar, the ship that detected it may launch attacks against it at any range up to its normal maximum, regardless of visibility conditions for Smoke, Bad Weather or Night. If an enemy has been detected by radar in Good Weather and during the day, the penalty for attacking it at long ranges is ignored, while the penalty for attacking it at extreme ranges is reduced to -1.
A ship that is detected at Night or during Bad Weather will automatically be spotted by the ship that detected it as soon as it moves into spotting range.
Note that a ship that detects an enemy ship with radar may not pass this information along to other ships to allow them to fire at it - all ships must detect the enemy for themselves before they may attack.
Squadrons
In larger fleet engagements, admirals will often place several ships together in the same squadron in order to concentrate firepower and allow tactical objectives to be decided with greater speed. Players may also find combining ships into squadrons a good way of playing huge battles involving dozens of vessels.
If squadrons are used, players must organise any ships into them before a scenario begins. Up to six ships may be placed in a squadron, though they need not all be of the same type. However, as players will quickly find, some ships complement each other better than others, so be prepared to experiment!
Once ships have been placed into a squadron, they must always remain within four inches of at least one other ship in the squadron, unless they become Crippled or are destroyed. If either of these events happen, the ship automatically drops out of the squadron and is treated as a single ship. Players may also choose to split the squadron apart at any time, simply by moving the ships independently instead of as a whole squadron.
While in a squadron, all ships are moved and fire at the same time. In effect, a player nominates the entire squadron to move or fire, rather than just one ship. Players are under no restrictions to use the same Special Orders or target the same enemy ships with the entire squadron - the only requirement is that all ships are kept within four inches of each other at all times and make every effort to maintain this formation if they are ever split up. By the same token, enemy ships will still choose one ship as a target for their weapons, rather than selecting the squadron as a whole.
Ships use the highest Command score of all ships within the squadron for all purposes. It is assumed the highest ranking commanding officer will be issuing all sorts of orders and 'suggestions' to his lesser captains in an effort to make the squadron operate as efficiently as possible.
Submersibles
Submarines began to affect the way fleets were deployed during the First World War, but it was during the Second World War that they truly came into their own. From midget submarines to the roving Wolf Packs of the Atlantic, the proliferation of submersibles served to bring an end to the dominance of the battleship as much as did the widespread use of aircraft.
Submersibles require some new rules to properly reflect their role on the oceans of the Second World War. All vessels capable of using these rules will have the Submersible trait, as described in the Special Traits chapter.
Deployment
Submersibles may be deployed as normal with the rest of a fleet, but players may find it more advantageous not to. Instead, divide the table up into squares of 24 x 24 inches. Secretly record which square each submersible is within (any number of submersibles may be placed in one square).
A player may reveal a submersible at the start of any Movement Phase, placing it anywhere he wishes within its square. He may not take any action with the submersible until it is revealed.
Movement Phase
Once a submersible has been revealed, the player may decided whether each submersible in his fleet is submerged or on the surface. Players will quickly find that submersibles on the surface of the ocean usually move much quicker and can use any weapon they possess but those submerged are far harder for surface vessels and aircraft to attack.
Before a player moves a submersible, he may choose to either bring a submerged vessel to the surface or push a surfaced vessel beneath the waves. A submersible performing either of these actions may not attack or choose any Special Actions during the same turn.
Submersibles have two Speed scores. The first is used while the vessel is travelling on the surface, the second while it is submerged. Place a Submerged counter next to any submersible beneath the waves as a reminder of its position.
Attack Phase
While a submersible is on the surface, it is treated as a normal ship in all respects. While submerged, a submersible may only attack using its torpedoes. However, other ships may only attack it with depth charges and then only once the submersible has been detected.
In order to detect a submerged submersible, a ship must be within eight inches of it. A single die is rolled before the ship declares its attacks. If the die rolls a four or higher, the submersible has been successfully detected and any friendly ship with depth charges may attack it freely. Players may place a Detected counter next to the submerged vessel as a reminder, though this must be removed during the End Phase - players will have to detect the submersible once more in order to attack it next turn.
Depth Charges
The only weapon that may be used to attack a submerged vessel is the depth charge. By the same token, a depth charge may only be used to attack a submerged vessel.
Depth charges use the same fire arc as a ship's rear main guns but, as will become apparent, their range is much shorter. Attacks are performed in the same way as for any other weapon but Attack Dice are never modified by any bonuses or penalties.
Long-Ranged Detection
Ships with the Sub-Hunter trait may try to detect any submersibles that have not yet been revealed. Whenever a Sub-Hunter ship moves into a new square on the table, roll a die. On a six, all submersibles within that square will automatically be revealed. The submersible player will place the submersible anywhere within the square as normal.
Crash Dive
A submersible can try to fill its ballast tanks quickly if an enemy approaches, in an effort to hide under the waves. If an enemy ship or aircraft approaches within 10 inches of a submersible while it is on the surface, it may try to crash dive. Make a Command check with a target score of nine - if it is successful, the submersible immediately submerges.
Tactical Withdrawals
Any ship may choose to retreat from the battleground by simply moving off a table edge. By doing so, the ship escapes safely but the opposing player will receive one quarter of its normal Victory Points at the end of the game. Note that some scenarios may have restrictions on which table edges may be exited safely. If one of these edges is not chosen, the ship that goes over it will count as destroyed and thus give up it full Victory Points.
Torpedoes
Used as unguided underwater missiles, torpedoes are unusual weapons in that they are fired in salvoes and operate a little differently from other attacks. However, their effects upon a ship can be devastating.
A torpedo attack is declared in the same way as any other. When a torpedo attack is made, place a Torpedo Spread counter in contact with a single target vessel that is within 10 inches and in the attacker's torpedo arc, as appropriate. The counter should be placed along the target's beam (against the side of the ship) only if the vessel making the torpedo attack would normally be making beam attacks against it.
In the End Phase, roll Attack Dice for the torpedo spread. These Attack Dice do not use the normal modifiers detailed in the Attack Phase chapter. Instead, a +1 bonus is granted if the Torpedo Spread counter is placed on the target's beam.
Damage Dice are then rolled as normal and the effects of the hit are worked out accordingly.
Air-Launched Torpedoes
Aircraft noted as being Torpedo Bombers use torpedoes in the same way as described above. However, using torpedoes from the air is notoriously difficult. The torpedo will only have a range of four inches. In addition, aircraft intending to make a torpedo attack must declare this after they have moved. AA weapons attacking an aircraft that is using air-launched torpedoes will gain a +1 bonus to their Attack Dice.
Critical Hits
If a torpedo attack scores a successful critical hit, the attacking player may choose to re-roll one of the 2d6 rolled to determine what has been affected.
Scenarios
Rarely do two fleets happen to meet on the ocean and begin taking pot shots at one another. More likely, each will have its own tactical or strategic objective to meet, handed down from its High Command. Fighting a battle in Victory at Sea is about far more than simply annihilating the enemy. Players have to be cunning, cautious and able to keep their own objectives in mind even as the enemy accomplishes his.
Using Scenarios
These objectives are represented in the game by playing scenarios. Each scenario detailed over the next few pages provides a comprehensive list of objectives that each player must meet in order to claim victory. Whether it is an initial clash of patrols at the start of a war or a desperate attack on a convoy, players will have to think carefully about which ships they will use and how they will manoeuvre them to gain victory.
Players may simply agree to play any selected scenario listed in this book, or they may roll for one randomly on the table below. It is suggested that first time players try the Victory at Sea scenario. This is designed to get players fighting as quickly as possible with balanced forces that use as many or as few advanced rules as players wish.
Players generally have five Fleet Allocation Points with which to choose their forces (though some scenarios may offer one side fewer points, or restrict one or both sides in how these are spent). The use of Fleet Allocation Points is described in detail in the Fleet Lists chapter. The Priority Level of a particular scenario is either determined randomly (see the Campaigns chapter) or can simply be chosen and agreed upon by all players.
Each scenario has a number of entries that describe how players should approach it. These entries are covered below.
- Fleets: Some scenarios may impose limitations on one or both fleets in a battle. For example, one scenario may require that fleets have a certain Fleet Allocation Points value, while another may require a player to take certain types of ships.
- Pre-Battle Preparation: This entry covers everything players need to do before play begins, including how to set up the battlefield and where fleets should be deployed. All scenarios in this book assume the game will be conducted on a standard six by four foot table.
- Aircraft: Defines what role aircraft can play in battle.
- Conditions: Lists whether the battle uses the Bad Weather or Night Battle rules.
- Scenario Rules: Defines some very special scenarios that may have unique rules not covered elsewhere in these rules.
- Game Length: Specifies game length. While most games will continue until one side gains victory, some scenarios have strict time limits.
- Victory and Defeat: Lists the conditions required for players to win the scenario.
Victory Points
Many scenarios use Victory Points in order to determine who has won. Victory Points can be earned in many ways specific to each scenario but, unless otherwise stated, they are always gained for damaging an opposing fleet. Specifically, Victory Points (VP) are earned for the following.
- Destroying an enemy ship: Gain VP equal to the value shown on the Victory Point Table
- For each enemy ship that executes a Tactical Withdrawal: Gain VP equal to one quarter of the ship's value on the Victory Point Table, rounding up
- For each enemy ship that is Crippled or reduced to a Skeleton Crew: Gain VP equal to half of the ship's value on the Victory Points table, rounding up
Note that a player can only gain VP from an enemy ship once. If a player reduces an enemy ship to a Skeleton Crew and then Cripple it, he will gain half VP once, not twice.
Attacking and Defending
Many scenarios require the players to decide who is the attacker and who is the defender. If players do not want to decide between themselves who is who, they should roll one die each, re-rolling ties. The highest scoring player will be the attacker.
Scenario Type
| 1d6 | Scenario |
|---|---|
| 1 | At All Costs |
| 2 | Blockade |
| 3 | Carrier Clash |
| 4 | Convoy Duty |
| 5 | Supply Ships |
| 6 | Victory at Sea |
Victory Points Table
| Difference in Priority Level of Ship and Scenario | Victory Points |
|---|---|
| Ship is same Priority Level as scenario | 16 |
| Ship is one Priority Level higher than scenario | 25 |
| Ship is two Priority Levels higher than scenario | 50 |
| Ship is one Priority Level lower than scenario | 8 |
| Ship is two Priority Levels lower than scenario | 4 |
| Ship is three Priority Levels lower than scenario | 2 |
| Ship is four Priority Levels lower than scenario | 1 |
(The scenario deployment maps printed in the book are not reproduced.)
At All Costs
For those safe in the headquarters of High Command, wars at sea are slow, studied affairs, a far cry from the terror and unleashing of mighty guns that make up the typical battle. There have been times in history, however, when the raw emotion of the fight has worked its way up to the highest levels. During these times of total war, it is not enough that a strategically important objective be taken. Nothing less than the total and utter destruction of the enemy will do, to wipe their fleets from the map and annihilate their ports with mass bombing.
Fleets: Players are free to decide on a points value for the battle and choose their fleets freely. Roll one die - on a roll of a four or more, land-based aircraft may be used by either fleet.
Pre-Battle Preparation: Roll for Initiative as normal - the losing fleet will be forced to set up first. The fleets are deployed anywhere in their own deployment zones as shown on the scenario map.
Aircraft: Carriers may start with up to half their flights in the air at the start of the game. Land-based aircraft, if present, may be used as normal.
Conditions: Roll a die. On a five or more, the battle takes place using the Bad Weather rules. Roll a second die. On a six, the battle takes place using the Night Battle rules.
Scenario Rules: None
Game Length: The game continues until the victory conditions have been met
Victory and Defeat: For the fleets involved in this battle, damage sustained by their own ships is of little importance so long as the enemy suffers more. This battle will continue until all ships on one side have been destroyed. The winner is the fleet with at least one ship remaining on the table.
Blockade
Rather than take the time and trouble to bring the enemy to battle, a large fleet will often simply blockade a port or other strategically important target. Forcing the enemy to run through this blockade, the fleet will have the chance of destroying its enemy piecemeal. For their part, the blockade runners have the chance of defeating the blockade and making their way through without engaging the larger fleet in a full-scale battle.
Fleets: The attacking player (blockader) has five Fleet Allocation Points but may not use land-based aircraft. The defender (blockade runner) has two Fleet Allocation Points of which no more than one point may be used on land-based aircraft.
Pre-Battle Preparation: The blockader deploys his fleet first. For every ship or squadron he places, he must go through the following system: He places the ship anywhere on his left hand short table edge, up to 24 inches away from his long table edge. He then rolls one die and multiplies the result by 12 inches. The ship must be moved to the right this many inches. He may deploy the ship anywhere within six inches of this final position. This must be done for all ships and squadrons and, when complete, all ships must be facing in the same direction. The blockade runner will move all his ships and aircraft from anywhere along the opposite long table edge in the first turn.
Aircraft: Carriers may start with up to two of their flights in the air at the start of the game. Land-based aircraft, if present, may be used as normal.
Conditions: Roll a die. On a five or more, the battle takes place using the Bad Weather rules. Roll a second die. On a six, the battle takes place using the Night Battle rules.
Scenario Rules: The blockade runner has one 'free' turn at the beginning of the battle. In effect, he may move and attack with his ships normally but the blockading fleet may do nothing - its ships may not move, fire, take Special Actions or perform Damage Control. They must simply take any damage dealt during this turn. After this first turn, initiative is rolled normally.
Game Length: The game continues until the blockade runner has either been destroyed or has left the table
Victory and Defeat: This scenario uses Victory Points to determine who wins. The blockading player scores Victory Points normally. The blockade runner player only scores Victory Points for moving ships off the blockader's long table edge. He gains the full point value of every ship moved off the table in this way, regardless of its condition. The blockader's long table edge and the two short table edges are considered to belong to the blockader for the purposes of tactical withdrawal. The opposite long table edge is considered to belong to the blockade runner.
Carrier Clash
Costing millions of dollars, aircraft carriers became some of the most valued components in a fleet during the Second World War. Forming carrier groups with several escorting vessels, their captains were expected to be able to win entire battles by themselves. To become the captain of a carrier is to gain a position of immeasurable trust and responsibility and only the most tactically astute can ever hope to be rewarded in this way. When two carrier groups meet in battle, observers will be treated to some of the most exciting action possible in naval combat.
Fleets: Players have five Fleet Allocation Points. Both fleets must have at least one aircraft carrier as defined in the fleet lists. All other ships in the fleet must be of equal or lower Priority Level than the scenario. Neither fleet may use land-based aircraft.
Pre-Battle Preparation: Roll for Initiative as normal - the losing fleet will be forced to set up first. The fleets are deployed anywhere in their own deployment zones as shown on the scenario map.
Aircraft: Carriers may start with all of their flights in the air at the start of the game.
Conditions: Roll a dice. On a five or more, the battle takes place using the Bad Weather rules.
Scenario Rules: None
Game Length: 10 turns
Victory and Defeat: This scenario uses Victory Points to determine who wins. The short table edges are considered to belong to the player who has his deployment zone there for the purposes of tactical withdrawal. The long table edges are considered to be neutral.
Convoy Duty
These two words can often fill a captain with dread, for he is likely to look forward to nothing more than days or even weeks of mind-numbing boredom, shepherding a group of slow moving merchantmen across the ocean. However, civilian ships are vital during war time, for they are used to carry supplies, weapons and even troops between battle zones, and their safe arrival may be imperative to the overall effort.
Fleets: The defending player has five Fleet Allocation Points. In a Priority Level: Patrol game, he will also have four civilian ship points chosen from the Civilian Shipping chapter. For every increase in Priority Level above Patrol, he receives another four civilian ship points. A Priority Level: War fleet would therefore have 20 civilian ship points in the convoy. The attacker has three Fleet Allocation Points. Neither fleet may use land-based aircraft.
Pre-Battle Preparation: The defending fleet is placed in the deployment area marked on the map. The attacker does not start on the table. Instead, he may move his ships on from either long table edge during any turn he chooses. He is not required to move all his ships on from the same table edge, nor is he required to move them all on in the same turn. Both fleets may start the game with no more than four aircraft counters in the air.
Aircraft: Carriers may start with up to two of their flights in the air at the start of the game.
Conditions: Roll a die. On a five or more, the battle takes place using the Bad Weather rules. Roll a second die. On a six, the battle takes place using the Night Battle rules.
Scenario Rules: None
Game Length: The game continues until all the civilian convoy ships have either been destroyed or have left the table.
Victory and Defeat: This scenario uses Victory Points in order to determine who wins. However, the attacker will gain a five point bonus for every civilian ship point he manages to completely destroy. The defender gains a five point bonus for every civilian ship point he manages to move off the exit edge marked on the map. For the purposes of tactical withdrawal, the short edges are considered to belong to the defender while the long table edges belong to the attacker.
Supply Ships
Supplies and logistics win wars, not superior tactics and firepower, as anyone in High Command knows. The protection of supply ships is therefore of the utmost importance in any war and the destruction of an entire supply fleet is considered a great coup.
Fleets: Players have five Fleet Allocation Points and choose their fleets freely. In a Priority Level: Patrol game, the defender will also choose five civilian ship points from the Civilian Shipping chapter. For every increase in Priority Level above Patrol, he receives another five civilian ship points. A Priority Level: War fleet would therefore have 25 civilian ship points. The attacker has three Fleet Allocation Points. The defending fleet may use land-based aircraft; the attacker may not.
Pre-Battle Preparation: The defending player deploys his entire fleet. The attacker then deploys his entire fleet in the surrounding area.
Aircraft: Carriers in the attacker's fleet may start with all of their flights in the air at the start of the game. Carriers in the defending fleet may start with only one of their flights in the air at the start of the game. Land-based aircraft, if present, may be used as normal.
Conditions: Roll a die. On a five or more, the battle takes place using the Bad Weather rules. Roll a second die. On a six, the battle takes place using the Night Battle rules.
Scenario Rules: None
Game Length: 10 turns.
Victory and Defeat: This scenario uses Victory Points to determine who wins. The attacking player gains a five point bonus for every civilian ship point he destroys. The defending player gains a five point bonus for every civilian ship point that survives the battle. If the civilian ships make a tactical withdrawal, they are considered to be destroyed with regards to Victory Points - if the attacker manages to force the ships out of the area, he will have done a great deal of damage to the defending player's logistics in that region of the globe.
Victory at Sea
Every war has its first shots fired. At sea, this often happens when two fleets have been put on high alert and hostilities are expected. Many patrols are sent out to gain intelligence on the enemy and when two opposing patrols meet, though neither are likely to ask questions. The war begins with the small clash of these patrolling ships.
Fleets: Both players have five Fleet Allocation Points and choose their fleets freely. However, players might like to experiment with far larger or smaller forces in this 'general battle' scenario. Land-based aircraft may be used.
Pre-Battle Preparation: Roll for Initiative - the losing fleet will be forced to set up first. The fleets are deployed anywhere in their own deployment zones as shown on the scenario map.
Aircraft: Carriers may start with up to half their flights in the air at the start of the game. Land-based aircraft, if present, may be used as normal.
Scenario Rules: None
Game Length: 10 turns
Victory and Defeat: This scenario uses Victory Points to determine who wins.
Historical Scenarios
Once players have played a few of the scenarios in the previous chapter, perhaps matching up enemies that never met in real life, they will be dying to try the historical scenarios presented here. These will give players a chance to fight in some of the most famous naval battles in history and perhaps prove that they could have been better captains or admirals! From early battles such as that which took place at the River Plate to later engagements like Leyte Gulf which sealed the fate of whole nations, players can take part in these engagements and gain a small measure of appreciation of the tactics and capabilities of the navies involved.
Each of the scenarios presented here is laid out in much the same way as those of the previous chapters. The main changes are that players will have set fleets of specific ships and, often, will start in set positions on the battlefield. However, once players have played through an historical scenario they may choose to alter it slightly and play out a number of 'what-if' scenarios. For example, players might like to play around with the Sink the Bismarck scenario. How would things have changed if the Royal Navy had different ships at its disposal? How would the Kriegsmarine have fared if the Scharnhorst had been present instead of the Bismarck? Or, in a really fanciful scenario, how would the Yamato have performed were it in the Bismarck's position? There are many different possibilities to be played out, even if they could never have really happened in history. At the end of the day, the whole point of playing Victory at Sea is to have fun!
(The scenario maps showing starting positions are not reproduced.)
Battle of the River Plate
The first major naval engagement of the war, the Admiral Graf Spee had been successfully raiding merchant ships in the South Atlantic but the Royal Navy's South American Division was closing in. On December 13th, 1939, three British cruisers engaged the pocket battleship - on paper, they were hopelessly outgunned. However, the German captain, Langsdorff, came to believe there was a far greater British force close by and ran for port at Montevideo.
Fleets: The Kriegsmarine player starts with one Deutschland-class pocket battleship (the Admiral Graf Spee). The Royal Navy player begins with two Leander-class cruisers (HMS Ajax and HMS Achilles) and one York-class (HMS Exeter).
Pre-Battle Preparation: The two fleets are positioned on the battlefield as shown on the map. The Admiral Graf Spee is placed in the centre of the table, 24 inches away from the nearest short edge. The Ajax and Achilles are placed within 18 inches of one long table edge and the Exeter is placed within 18 inches of the other long table edge. No Royal Navy ship may be placed more than six inches from the nearest short edge.
Scenario Rules: The Royal Navy may use aircraft in this scenario, but the Kriegsmarine may not.
Game Length: the game continues until either fleet has withdrawn or been destroyed. Alternatively, the game ends when the Admiral Graf Spee leaves the table from the opposite short edge from which it started, as shown on the map.
Victory and Defeat: If one fleet manages to destroy the other or force a tactical withdrawal, it will gain victory. If the Admiral Graf Spee leaves the table from the opposite short table edge, victory will go to the fleet that caused the most points of total Damage to the other fleet's ships.
Historical Note: The Graf Spee managed to escape the British cruisers and reached Montevideo. Both the Exeter and the Ajax were heavily damaged but Langsdorff, told that he must leave the neutral port, scuttled his ship rather than face inevitable destruction against a superior enemy he mistakenly believed awaited him at sea.
Battle of the Denmark Strait
In May of 1941, the Bismarck and the escorting Prinz Eugen finally broke out into the Atlantic and were free to begin their commerce raiding cruise. Just two ships of the Royal Navy stood in their way. The resulting battle would prove to be disastrous to the Royal Navy and lead to one of the most greatest confrontations at sea the world had seen.
Fleets: The Kriegsmarine player starts with one Bismarck-class battleship (the Bismarck) and one Admiral Hipper-class heavy cruiser (the Prinz Eugen). The Royal Navy player begins with one Hood-class battlecruiser (HMS Hood) and one King George V-class battleship (HMS Prince of Wales).
Pre-Battle Preparation: The two fleets are positioned on the battlefield as shown on the map.
Scenario Rules: The Royal Navy player has the Initiative in the first turn. No aircraft are used.
Game Length: The game continues until either fleet has withdrawn or been destroyed.
Optional Rules: The HMS Prince of Wales was a new ship with civilian technicians still on board when she engaged the Bismarck. If a 1 is rolled on an AD for the main 14" armament, roll a 2nd d6. If a second 1 results, a gun has failed in that particular turret. Reduce the turret AD by 1. The gun may not be repaired during the course of the scenario.
Victory and Defeat: If one fleet manages to destroy the other or force a tactical withdrawal, it will gain victory.
Historical Note: Eleven minutes into the battle, a salvo from the Bismarck penetrated the Hood's armour and caused a massive explosion. Splitting in two, the Hood sank, taking all but three crewmen with her. The Prince of Wales was badly damaged before the Bismarck and Prinz Eugen managed to shake her off, ending the battle.
The Final Battle
Having destroyed the HMS Hood, for twenty years the pride of the Royal Navy, the Bismarck could not be permitted to survive and every warship that could reach the area was dispatched to hunt her down. Though the Bismarck's commander, Admiral Lutjens, had been cunning enough to shake the radar-assisted pursuit of the Royal Navy, the Prinz Eugen had left his ship and he could not outrun Fairey Swordfish launched by the Ark Royal. Their attack, miraculously, managed to score a lucky hit that seriously damaged the Bismarck's rudder, effectively immobilising it. As the British approached, Lutjens gave one last address to his crew: 'Ship unable to manoeuvre. We will fight to the last shell. Long live the Führer.'
Fleets: The Kriegsmarine player starts with one Bismarck-class battleship (the Bismarck). The Royal Navy player begins with one Nelson-class battleship (HMS Rodney) and one King George V-class battleship (HMS King George V). In addition, two Norfolk-class cruisers (HMS Dorsetshire and HMS Norfolk) will appear during the battle.
Pre-Battle Preparation: The two fleets are positioned on the battlefield as shown on the map.
Scenario Rules: The Royal Navy player has the Initiative in the first turn. No aircraft are used. The Bismarck has a maximum speed of one inch and may only make turns to the left. The HMS Norfolk will join the battle at the position indicated on the map on turn two and the HMS Dorsetshire will make an appearance on turn three.
Game Length: The game continues until either fleet has withdrawn or been destroyed.
Victory and Defeat: If one fleet manages to destroy the other or force a tactical withdrawal, it will gain victory.
Historical Note: This battle was a foregone conclusion before it began. The Bismarck was, inevitably, sunk but its crew fought valiantly against the Royal Navy's best ships before their own vessel succumbed.
Clash of the Giants
On their first sorties, the German battlecruisers Scharnhorst and Gneisenau achieved little except the destruction of the Armed Merchant Cruiser Rawalpindi. In April 1940 they put to sea again, this time as part of the naval force covering the invasion of Denmark and Norway. After parting company with the rest of the force, the two battlecruisers headed northward to the Arctic Circle. Conditions were poor, with heavy seas making life difficult for smaller ships.
During a brief break in the weather, the battlecruisers were sighted by HMS Renown, which closed the range and opened fire as soon as she was able. In the ensuing action, gunnery radar aboard the German ships conferred an advantage which was countered by the bigger guns of the British battlecruiser.
The German force was not inclined nor required by its mission to fight a British heavy warship, and after an exchange of fire in which Gneisenau was damaged, increased speed to escape under cover of the heavy weather. So bad were conditions that the battlecruisers suffered flooding of the forward turrets and some hull damage in their flight.
Fleets: The Kriegsmarine player starts with two Scharnhorst-class battlecruisers (the Scharnhorst and Gneisenau). The Royal Navy player begins with one Renown-class battlecruiser (HMS Renown).
Pre-Battle Preparation: The two fleets are positioned on the battlefield as shown on the map.
Scenario Rules: The Royal Navy player has the Initiative in the first turn. German ships are caught unawares and may not return fire until turn two. No aircraft are used. The battle takes place in bad weather.
Game Length: The game continues until either fleet has withdrawn or been destroyed.
Victory and Defeat: If one fleet manages to destroy the other, or the German player manages to withdraw off the indicated map edge, that side will gain victory. If either German ship is Crippled, the Royal Navy player may claim a partial victory.
Historical Note: The battlecruisers were able to make their escape and continue their mission, albeit with some damage.
Arctic Skirmish
After their brush with HMS Renown, the German battlecruisers Scharnhorst and Gneisenau had various adventures including the sinking of the British aircraft carrier HMS Glorious, a raid into the Atlantic and an incredibly cheeky dash for safety through the English Channel. Although damaged several times and suffering from various defects in her machinery, Scharnhorst was considered a lucky and happy ship. Her luck ran out on Christmas Day 1943.
Making a sortie into the Arctic to disrupt the Allied convoys to Russia, Scharnhorst was initially accompanied by five destroyers which due to heavy weather conditions played almost no part in the forthcoming events. While searching for the convoy, Scharnhorst encountered three British cruisers (HMS Belfast, HMS Norfolk and HMS Sheffield), which opened fire. Caught unawares, the battlecruiser attempted, by steering south-east and using her excellent speed, to evade the Royal Navy.
Fleets: The Kriegsmarine player starts with one Scharnhorst-class battlecruiser (the Scharnhorst). The Royal Navy player begins with one Edinburgh-class cruiser (HMS Belfast), one Southampton-class cruiser (HMS Sheffield) and one Norfolk-class cruiser (HMS Norfolk).
Pre-Battle Preparation: The two fleets are positioned on the battlefield as shown on the map.
Scenario Rules: The Royal Navy player has the Initiative in the first turn. German ship is caught unawares and may not return fire until turn two. No aircraft are used. This battle takes place at night and in bad weather.
Game Length: The game continues until either fleet has withdrawn or been destroyed.
Victory and Defeat: If one fleet manages to destroy the other, that side will gain victory. If the Scharnhorst makes a tactical withdrawal, the game is a draw.
Historical Note: Although hit and damaged, the German battlecruiser was able to make her escape and continue the mission. This led to a second encounter with heavier forces and her ultimate demise.
Death of a Giant
After escaping a British cruiser group the German battlecruiser Scharnhorst continued her mission to harass Allied convoys to Russia. However, alerted by reports from the cruisers, a heavy British force centred on the battleship Duke of York was on its way to intercept. Meanwhile, the cruisers had astutely placed themselves between Scharnhorst and the convoy they were protecting.
The action re-opened just after noon, when HMS Belfast detected Scharnhorst on radar and opened fire soon after. Although it scored some hits on the British cruisers, Scharnhorst again attempted to break contact. This move brought her into range of the British force's heavy guns. Caught between two enemy forces, Scharnhorst fled eastward with the British in pursuit.
As the range gradually opened, it seemed that Scharnhorst might again be lucky and escape.
Fleets: The Kriegsmarine player starts with one Scharnhorst-class battlecruiser (the Scharnhorst), which does not have access to radar in this battle. The Royal Navy player begins with a force of one Edinburgh-class cruiser (HMS Belfast), one Southampton-class cruiser (HMS Sheffield) and one Norfolk-class cruiser (HMS Norfolk) and a second force of one King George V-class battleship (HMS Duke of York) and one Fiji-class cruiser (HMS Jamaica). Historically, several British destroyers were present but these played little part in the action until the very end, at which point Scharnhorst's fate was sealed.
Pre-Battle Preparation: The German ship and both British forces are positioned on the battlefield as shown on the map.
Scenario Rules: The Royal Navy player has the Initiative in the first turn. The Scharnhorst may not change course until turn two. No aircraft are used. This battle takes place at night and in bad weather.
Game Length: The game continues until either fleet has withdrawn or been destroyed.
Victory and Defeat: If one fleet manages to destroy the other, that side will gain victory. If the Kriegsmarine player manages to withdraw off the indicated exit point without suffering any speed loss, he will win.
Historical Note: Desperately outnumbered and outgunned, Scharnhorst fought back valiantly and was able to draw away from pursuit for a time. Eventually she was slowed and crippled by damage, at which point she was finished off by torpedoes from the British cruisers and destroyers.
Prelude to Matapan: Part One
The Italian Navy was powerful and equipped with modern warships, but lacked aggressiveness and resolve. At Hitler's insistent urging, a sweep into the eastern Mediterranean was undertaken in March of 1941 by a force comprising one battleship and a heavy cruiser squadron. Warned by naval intelligence sources that something was afoot, the Royal Navy was at sea and looking for a fight. The result was the battle of Cape Matapan.
The main action was preceded by two smaller clashes. First contact was made between part of the British force, four cruisers and four destroyers, and the cruiser Trieste which was a little behind the rest of the Italian formation. The main British force was supposed to be in close support but had been delayed. Nevertheless, the British cruisers increased speed to close the range and then, when they were certain they had been sighted, withdrew in the hope of drawing the Italians into a trap.
A stern chase then developed as the faster Italian cruisers gave chase, firing on the fleeing British.
Fleets: The Italian player starts with a force of three Trento-class cruisers (Trieste, Bolzano and Trento) and three destroyers. Other Italian forces were in the area but were not involved in this stage of the action. The Royal Navy player begins with a force of two Leander-class cruisers (HMS Ajax and HMS Orion), one Perth-class cruiser (HMAS Perth) and one Gloucester-class cruiser (HMS Gloucester), plus four J, K and N-class destroyers.
Pre-Battle Preparation: The Italian and British forces are positioned on the battlefield as shown on the map.
Scenario Rules: The Italian player has the Initiative in the first turn.
Game Length: Six turns
Victory and Defeat: If one fleet manages to destroy the other, that side may claim victory. If the British player has any ships afloat after six turns and has sunk at least as many ships as he has lost, he is assumed to have reached the support of the main force and escaped.
Historical Note: The Italian force, despite its advantage in gunpower, was reluctant to close to decisive range. Eventually the Italian admiral became uneasy about the situation and reversed course before his cruisers entered the gun range of the supporting British force. The situation was then reversed, with the Italians fleeing westward and the British in pursuit.
Prelude to Matapan: Part Two
After pursuing the fleeing British cruiser squadron for a time, though without achieving a decisive exchange, the Italian cruiser force fell back on the support of the battleship Vittoro Veneto and began to withdraw. Unaware of the presence of a capital ship, the British gave chase.
Everything seemed to be going well for the British until the Italian battleship appeared on the horizon and 15-inch shells burst around the pursuing vessels.
Fleets: The Italian player starts with a force of three Trento-class cruisers (Trieste, Bolzano and Trento) and three destroyers, plus a separate force of one Littorio-class battleship (Vittorio Veneto) and four destroyers. A third force of five cruisers and six destroyers was in the vicinity but took no part in this stage of the battle. The Royal Navy player begins with a force of two Leander-class cruisers (HMS Ajax and HMS Orion), one Perth-class cruiser (HMAS Perth) and one Gloucester-class cruiser (HMS Gloucester), plus four J, K and N-class destroyers.
Pre-Battle Preparation: The Italian and British forces are positioned on the battlefield as shown on the map.
Scenario Rules: The Italian player has the Initiative in the first turn.
Game Length: Eight turns
Victory and Defeat: If one fleet manages to destroy the other, that side may claim victory. If the British player can survive for eight turns, he may claim a partial victory if he has sunk or damaged at least as many ships as he has lost.
Historical Note: The British cruisers made smoke and fled rapidly southwards with the Italians in pursuit. The Italian admiral was unwilling to press his pursuit and broke off, at which point the British cruisers rejoined the main force and began advancing once again.
Battle of Cape Matapan
After a certain amount of to-and-fro skirmishing, which proved entirely without result despite the disparity in vessel power involved, the Italian fleet withdrew northwards with the British force in pursuit. The Italian fleet was much faster and had every chance to escape. However, the British were able to slow the Italian force with an air strike.
Despite air attacks by Blenheims flying out of Greece and Albacore torpedo bombers from HMS Formidable inflicting some minor damage it looked as though the Italian force would escape. As the daylight (along with any hope of bringing the enemy to action) was fading, six Albacores from HMS Formidable made a final attack. The cruiser Pola was hit and brought to a stop.
Thinking that the British were far away and expecting Luftwaffe air cover in the morning, the Italian admiral left the cruisers Fiume and Zara to stand by Pola, taking the rest of his force homeward. The pursuing British made contact with the Pola and her consorts by radar. While part of the British force continued to pursue the retreating main Italian group, the battleships and their escorting destroyers moved in to the attack.
Fleets: The Italian player starts with three Zara-class cruisers (Fiume, Pola and Zara) plus four destroyers. The Royal Navy player begins with three Queen Elizabeth-class battleships (HMS Valiant, Barham and Warspite) plus nine destroyers. A British cruiser group was nearby but took no part in the action.
Pre-Battle Preparation: The Italian and British forces are positioned on the battlefield as shown on the map.
Scenario Rules: The British player has the Initiative in the first turn. The Italian cruiser Pola has damaged engines and cannot move at all. This battle takes place at night. The Valiant has been equipped with the Special Trait: Radar.
Game Length: The game continues until either fleet has withdrawn or been destroyed.
Victory and Defeat: If one fleet manages to destroy the other, that side may claim victory. If the Italian player can get any ship off his exit edge, he may claim a partial victory for salvaging something from a truly appalling situation.
Historical Note: Although the Italian battleship had escaped, this part of the action was a total success for the British. Caught unawares, the Italian cruisers were engaged at almost point-blank range by a force of capital ships. None of the Italian cruisers fired a shot before being wrecked or sunk. The Italian destroyers made a gallant attempt to fight back with torpedoes, but were met by their opposite numbers.
Cruiser Action off Guadalcanal
As the fighting on Guadalcanal dragged on, Japanese ships made nightly supply runs into the island through the 'The Slot,' a narrow passage between Savo Island and Cape Esperance. Along the way Japanese destroyers bombarded American positions on Guadalcanal. Determined to put an end to the so-called 'Tokyo Express,' the United States Navy put to sea in October 1942 with a force of cruisers and destroyers. By coincidence, the Imperial Japanese Navy was also at sea in force.
US and Japanese forces did not detect one another until they were very close. US spotter aircraft found the Japanese first, but both sides were surprised and some confusion reigned. The battle was short and savage, with the Japanese force mauled and forced to flee back up the Slot.
Fleets: The Japanese player begins with a force of two Aoba-class cruiser (Aoba and Kinugasa), one Furutaka-class cruiser (Furutaka) and two Fubuki-class destroyers. The US player begins with a force of one New Orleans class cruiser (USS San Francisco), one Pensacola-class cruiser (USS Salt Lake City), two Brooklyn-class cruisers (USS Helena and Boise) and five Fletcher-class destroyers.
Pre-Battle Preparation: The Japanese and US forces are positioned on the battlefield as shown on the map.
Scenario Rules: The US player has the Initiative in the first turn. This battle takes place at night.
Game Length: The game continues until either fleet has withdrawn or been destroyed.
Victory and Defeat: If one fleet manages to destroy the other, that side may claim victory.
Historical Note: Although both sides were surprised, the Americans were less so and managed to open fire first. One Japanese cruiser, Furutaka, and the leading destroyer were sunk. US forces accidentally fired on one another, resulting in the loss of a destroyer, while Boise was badly mauled by Furutaka before she was sunk.
Bombardment of Guadalcanal
As the situation on Guadalcanal worsened for the Japanese, it was decided that drastic action must be taken. In November, 1942, a large force aboard eleven transport ships was assembled, for the ground campaign, Japanese High Command assigned two battlecruisers, a light cruiser and fourteen destroyers to escort them and bombard US positions. Warned by intelligence sources, the US Navy planned to intercept this force with a battle group centred on two powerful new battleships and another containing an aircraft carrier.
In the event, nothing went according to plan for either side. The Japanese forces became lost in bad visibility and almost missed the target, losing some of their destroyers in the process. The heavy US forces were still some hundreds of miles out of position when the Japanese reached The Slot, leaving the defence of the islands in the hands of a cruiser force.
Led by two heavy cruisers, the US force moved to intercept the Japanese and might have inflicted serious damage under other circumstances. However, the Japanese became aware through radio intercepts of the US forces bearing down upon them. Action was opened at the point-blank range of just two miles, and in the chaotic action that followed, US ships fired upon one another as well as the enemy.
Fleets: The Japanese player begins with a force of two Kongo-class battlecruisers (Hiei and Kirishima), one Nagara-class cruiser (Nagara) and , five Kagero-class destroyers and six Fubuki-class destroyers. The US player begins with a force of one New Orleans class cruiser (USS San Francisco), one Portland-class cruiser (USS Portland), one Brooklyn-class cruisers (USS Helena) and two Atlanta-class cruisers (USS Atlanta and Juneau) in company with eight Fletcher-class destroyers.
Pre-Battle Preparation: The Japanese and US forces are positioned on the battlefield as shown on the map.
Scenario Rules: The Japanese player has the Initiative in the first turn. This battle takes place at night.
Game Length: The game continues until either fleet has withdrawn or been destroyed.
Victory and Defeat: If one fleet manages to destroy the other, that side may claim victory.
Historical Note: In the resulting melee, the US force was roughly handled by the Japanese battlecruisers and their escorting destroyers. During their retreat, the surviving US cruisers ran afoul of a submarine and Juneau was torpedoed. However, the Japanese suffered as well. Hiei was hit by over 80 shells, and although her armour protected her well she was heavily damaged. She was sunk by bombers flying out of Henderson Field on Guadalcanal before she could reach safety.
Guadalcanal Finale
After suffering at the hands of the Imperial Japanese Navy off Guadalcanal, the US Navy was determined to reverse its fortunes. Two powerful new battleships were moved into the battle area, and when the Japanese came back for another attempt they were intercepted and brought to battle.
Even now, fortune was against the US. One of the two battleships, South Dakota, suffered an electrical failure that rendered her unable to shoot just as the action opened. She regained power after a time and was able to join the action.
Fleets: The Japanese player begins with a force of one Kongo-class battlecruiser (Kirishima), two Takao-class cruisers (Takao and Atago) one Nagara-class cruiser (Nagara), one Sendai-class cruiser (Sendai) and , eight Fubuki-class destroyers and one Kagero-class destroyer. The US player begins with a force of one North Carolina class battleship (Washington), one South Dakota class battleship (South Dakota), and four Fletcher-class destroyers.
Pre-Battle Preparation: The Japanese and US forces are positioned on the battlefield as shown on the map.
Scenario Rules: The US player has the Initiative in the first turn. This battle takes place at night.
Game Length: The game continues until either fleet has withdrawn or been destroyed.
Optional Rules: Each time the South Dakota rolls an Attack Dice for her primary armament or attempts to use her Radar (makes a Detection roll), on a roll of a 1, roll a second d6. If another 1 is rolled, the South Dakota suffers a massive electrical failure. Her Radar may not be used and her primary and secondary armaments suffer a -1 to their Attack Dice for the remainder of the battle.
Victory and Defeat: If one fleet manages to destroy the other, that side may claim victory.
Historical Note: Although South Dakota was hit hard and damaged, US forces had the advantage of radar and were ultimately able to drive off the Japanese force after a hard-fought action at close range. Kirishima was wrecked and had to be scuttled.
Campaigns
By now, players should be familiar with all the rules used in Victory at Sea and will have played through many of the scenarios presented in this book. Players will now be ready to embark on an entire campaign, a set of scenarios that depict the war for an entire region of the world, where every battle can have a profound effect upon the next, and heroes can be created among players' own crews.
There is little more exciting in Victory at Sea than playing through an entire campaign. Players will find it far more engaging than a single scenario as they will always be aware that a defeat in their current game could spell disaster down the road. In addition, players will have a chance to watch their ships and crews grow with battle-hardened experience, yank desperate victories out of the jaws of utter defeat and have the satisfaction of booting their enemy clean out of the sea!
Beginning the Campaign
Before beginning a campaign, players need to do several things. First off, at least two players with complete fleets are required, though the campaign system here can support many more - an entire club can involved in a world-sweeping campaign!
Every player should have at least 10 Fleet Allocation Points worth of ships (whether using counters or miniatures) chosen at Priority Level: Battle. Ideally, every fleet should be different, so the Royal Navy, Kriegsmarine, IJN and so on may be represented, but it is okay to have the same type of fleet on differing sides, with one representing a rogue faction of their government, perhaps.
Players then choose the campaign map showing the area all the players are attempting to control. These comprise a number of Strategic Targets, which are considered important by the invading fleets. In this rulebook, we present two campaign maps, one covering the Mediterranean and the other the Pacific, though players are welcome to create their own covering other regions of the world. In addition, new campaign maps will also appear in our magazine, Signs & Portents, along with new rules, ships and fleets for players to add to their games.
Unlike other games, the campaign system in Victory at Sea does not use a map for fleet movement, with each Strategic Target linked to one or more others. Fleets are highly manoeuvrable and, given time, have the ability to strike almost anywhere within the region. In theory, the available Strategic Targets could be listed on a scrap piece of paper, playing an entire campaign using nothing more elaborate. However, players like to see what they are fighting for, so the campaign maps presented in this rulebook should serve as valuable visual aids to what is happening in the games. Players will enjoy crossing off their enemies name from Malta, for example, when they win the island, placing their own flag on the map. They will also get the feeling that they have accomplished something with each target they acquire in battle.
(The Mediterranean and Pacific campaign maps themselves are not reproduced.)
A Note on Authenticity
It should be noted that by using these campaign rules 'as is,' players may run into situations that simply never happened during the Second World War. For example, two players using the Mediterranean campaign map may well choose Italian and Royal Navy fleets. However, once more players show up to join in, American, French and Japanese ships may enter the campaign as well.
Players can limit things, of course, by grouping the players into teams and assigning them the same fleets. However, we suggest players go ahead and play 'what if' type battles, especially if they have a player in the group (and there is always one!) who is just dying to see what the Yamoto (or whatever ship) is really made of!
Starting Fleets
Every player creates a fleet roster (one is available to download at www.mongoosepublishing.com) and generates a fleet, using 10 Fleet Allocation Points worth of ships chosen at Priority Level: Battle.
However, an admiral can never be sure exactly what he is getting when he requisitions vessels from the High Command and the worth of many fleets is not in their ships but in their crews and officers. To this end, players must randomly roll for the Command score of every ship in their fleet on the table below.
| 2d6 | Crew | Command Score |
|---|---|---|
| 2 | Green | 2 |
| 3-4 | Conscript | 3 |
| 5-8 | Military-Grade | 4 |
| 9-10 | Veteran | 5 |
| 11-12 | Elite | 6 |
Players are allowed to swap Command scores between two of their ships - this allows them to have a decent crew on whatever they will regard as their flagships. Other than this, players are stuck with the crew they roll for, though they will have a chance to improve during the campaign. All carrier-borne aircraft counters have the same Crew Quality scores as their parent ships. Land-based aircraft have their Command scores rolled for each wing purchased from the fleet list. Once the players are gathered, the fleets ready and the campaign map chosen, it is time to start the campaign.
The Campaign Turn
Just as with normal games in Victory at Sea, campaigns have turns that are divided up into phases, each of which must be played out before the next can begin. By the end of each campaign turn, it is quite possible that every player would have fought a battle (sometimes more than one!) and several Strategic Targets are likely to have changed hands.
Each Campaign Turn consists of the following phases.
- Initiative
- Select Targets
- Generate Scenario
- Fight Engagement
- Ship Experience
- Repairs and Reinforcements
Once every player has performed the Repairs and Reinforcements phase, a new Campaign Turn begins, with players ready to fight a new round of battles in an attempt to dominate the campaign map.
Initiative
As with the main game, initiative is rolled for by using 2d6, re-rolling all ties. However, a -1 penalty is applied to a player's initiative roll for every Strategic Target he currently holds. Possessing a Strategic Target brings all sorts of benefits but also requires the fleet dedicate a certain portion of its resources to maintaining patrols and security watches on the facilities, which in turn makes it less flexible in responding to the actions of the enemy.
Select Targets
The player who wins the Initiative phase selects any one Strategic Target that he does not currently possess. If this target belongs to another player, he moves to the next phase, fighting a battle with that player's fleet.
If the target is currently unoccupied, the next player in the initiative order may also decide to occupy it, in which case, both players move to the next phase in order to fight a battle. If the second player chooses not to occupy a target, the choice falls to the next player in the initiative order, and so on. If the attacking player is not challenged in this way, he gains the Strategic Target automatically without a fight!
Once it has been decided what the player who won the initiative is doing, the next player in initiative order chooses a Strategic Target and follows the same process. He may not choose a Strategic Target that has already been nominated by a previous player in a turn.
In this way, a Campaign Turn may be fairly light in combat if most players choose to occupy spare Strategic Targets and do not challenge one another much. On the other hand, a player may find himself having to fight multiple battles in the same turn if the other players all turn against him and launch attacks on several Strategic targets he possesses!
Before planning an ocean-spanning offensive, however, there is one golden rule to bear in mind. Every ship on a fleet roster may only take part in one engagement during every Campaign Turn. Once ship has been used it in one engagement it may not be used in another during the same turn. This means as the campaign draws on and casualties increase, players will have to be very careful about who they fight and with what.
Generate Scenario
Once it has been determined that two players will fight, the player who nominated the Strategic Target to be fought over must roll on the table below to determine which scenario will be played. During this scenario, he will be regarded as the attacker.
| 1d6 | Scenario |
|---|---|
| 1 | At All costs |
| 2 | Blockade |
| 3 | Carrier Clash * |
| 4 | Convoy Duty |
| 5 | Supply Ships |
| 6 | Victory at Sea |
* If either fleet lacks a suitable aircraft carrier, re-roll this scenario.
The Priority Level of the scenario is also randomly decided, using the table below. However, both players may influence the result of this roll if they wish. Before rolling, each may secretly mark down a modifier from -3 to +3 on a scrap piece of paper. Once the die is rolled, both players reveal their modifiers and apply them to the die roll for a final result.
| 2d6 | Priority Level |
|---|---|
| 4 or less | Patrol |
| 5-6 | Skirmish |
| 7-8 | Raid |
| 9-10 | Battle |
| 11 or more | War |
As usual, each player has five Fleet Allocation Points to spend, though the specific scenario may force alternate points values. Players choose ships from their fleet rosters to use in the scenario but may not take a fleet that has a greater value than that rolled for.
Players should also be warned that if they are fighting multiple battles in a turn or have a battered fleet after several losses, they may not be able to field a large enough force to use all their Fleet Allocation Points. In this case, a smaller fleet will be taken to the battle and will have to fight that much harder! Players are never required to field a fleet that uses all their Fleet Allocation Points, even if their opponent does.
One player should roll a die - on a five or more, the scenario will be fought using the Bad Weather rules. This roll cannot be modified in any way, as players do not have control of the weather!
However, they can influence when the battle is fought. If one player wishes to fight at night but the other does not, both roll a die. If the one hoping for night rolls higher, then the Night Battle rules are used. If both players wish for a Night Battle, it occurs automatically.
Fight Engagement
Once it has been decided who is fighting whom and which scenarios are being used, it is time to hit the tabletop and begin playing Victory at Sea. If players find that they are waiting for a battle because their opponent is currently fighting someone else, take the opportunity for a break and a quick snack or, alternatively, start heckling the others as they play! Every player will get to fight soon enough. . .
The victor of the battle will either retain or gain the Strategic Target over which he and his opponent were fighting. This is immediately added to his fleet roster and may be used in later phases of the same turn. If a battle ends in a draw, the Strategic Target remains in the possession of the player who possessed it originally (or remains unoccupied if no player had it on his fleet roster).
Any ships destroyed during the battle are crossed off the fleet roster. All existing damage (including effects of critical hits) are also noted on the fleet roster.
Players should collaborate to form a strong narrative for the campaign - it is all very well rolling up scenarios and Strategic Targets randomly but it is much more fun devising reasons why fleets are fighting at any one particular time. For example, a Kriegsmarine fleet may have decided to attack a Royal Navy-held harbour at Gibraltar. Generating a scenario results in a Raid level Blockade. After a brief discussion, the two players may decide the Kriegsmarine are attempting to stop all supplies to the main fleet in Gibraltar and it is vital that several Royal Navy warships, loaded with food and ammunition, break through the blockade to enable the rest of the fleet to continue fighting. If they fail, the rest of the fleet will go be forced to conserve food and ammunition and the harbour will have to be relinquished to the Kriegsmarine as an alternative supply post must be found. Once players get into the swing of the campaign, they will find it relatively easy to continually come up with reasons for fleets to fight, no matter what scenarios are generated.
Once all battles have been fought and won, it is time for the victor to enjoy the spoils and for the loser to count the cost.
Ship Experience
Battle is a crucible through which crews learn or die and the greenest crew may become battle-hardened veterans before the campaign is through.
During every battle, ships will acquire Experience Point (XP) Dice for various actions they successfully perform. These actions are summarised in the table below.
| Action | XP Dice Gained |
|---|---|
| Destroys enemy ship of lower Priority Level | 1 |
| Destroys enemy ship of same Priority Level | 2 |
| Destroys enemy ship of Priority Level one higher | 3 |
| Destroys enemy ship of Priority Level two higher | 4 |
| Destroys enemy ship of Priority Level three higher | 5 |
| Destroys enemy ship of Priority Level four higher | 6 |
| Crippling an enemy ship | Half XP Dice for destroying it (round down) |
| Reducing an enemy ship to a Skeleton Crew | Half XP Dice for destroying it (round down) |
| Being on the winning side in the battle | 2 |
| Being on the losing or drawing side in the battle | 1 |
| Being reduced to a Skeleton Crew |
To destroy an enemy ship, a ship must deliver the killing blow - the attack that actually destroys the enemy vessel. By the same token, to gain XP Dice for crippling an enemy ship or reducing it to a Skeleton crew, a ship must have delivered the attack that caused this to happen.
A ship may earn XP Dice for both crippling an enemy ship and reducing it to a Skeleton Crew. It may not earn XP Dice for both this and destroying the enemy ship. In this case, only the XP Dice for destroying the ship are gained. However, it is perfectly possible for one ship to gain XP Dice for crippling an enemy ship, and another gain the full XP Dice reward for destroying it in a later attack.
A ship may never be reduced to less than zero XP Dice.
XP Dice may be saved for future Campaign Turns or they may be spent immediately as shown below. A ship may only benefit from its own XP Dice and the effects may never be applied to another ship.
Increase Command
Players may spend one XP Dice in an attempt to improve the Command score of a ship. Roll the XP Dice. If the score is higher than the player's current Command score, it will be raised by one point. Players may only attempt this once every Campaign Turn for each ship on their fleet rosters.
Repair Ship
Any number of XP Dice may be expended trying to apply makeshift repairs to a ship, making it battle worthy once more. Roll any number of XP Dice and multiply the result by five. This is how many Damage points can be recovered on the ship. Note a ship's Damage points cannot be increased to above their original number. Ships which have been Crippled may not use XP Dice in this way and must await full-scale repairs, as detailed below.
Tactical Judgement
Any number of XP Dice may be kept aside, ready for use in future battles. Each XP Die spent allows a player to re-roll one die that directly affects the ship. This may be an Attack Die (either fired by or at the ship), a Damage roll, a Command check - anything that may directly affect the ship expending XP Dice. The rules governing re-rolls may be found in the Introduction.
Refitting
An experienced crew instinctively knows how to get the best performance out of their ship, how to requisition the best materials and how to improve upon a basic design. For every two XP Dice a player expends, he may roll once on the table below. This may be done any number of times, so long as the player has enough XP Dice. Effects are not cumulative (for example, a +2 bonus cannot be applied to Command checks by getting Superior Rudder Control twice). If any results cannot be applied to a ship for any reason, re-roll them.
| 1d6 | Refit |
|---|---|
| 1 | Reinforced Superstructure: The ship gains an additional point of Damage for every 10 points of Damage (round down) it already possesses. |
| 2 | Radar: The ship gains the Radar Special Trait. See the Radar rules in the Advanced Rules chapter. (German ships who receive this advantage that already have Radar are no longer limited by the German Special Rules for Radar.) |
| 3 | Improved Anti-Aircraft Batteries: The ship's Anti-Aircraft weapons gain an additional one AD. |
| 4 | Additional Weapons Fitted: The ship's Secondary Weapons gain an additional one AD. |
| 5 | Superior Rudder Control: Add a +1 bonus to any Command checks made during a Come About! action. |
| 6 | Auxiliary Hanger: The ship immediately gains Aircraft one (or +1 if it already possesses the trait). |
Other Duties
An experienced crew can usually be assured of getting the best missions when not in direct battle - 'sweet' or 'plum' assignments, they are called. For every two XP Dice expended, player may roll once on the table below. This may be done any number of times, so long as the player has enough XP Dice. Effects are not cumulative (for example, a New Captain cannot twice gain more than two Special Actions in a turn). If any results cannot be applied to a ship for any reason, re-roll them.
| 1d6 | Other Duty |
|---|---|
| 1 | New Captain: A new Captain takes command of the vessel - a highly decorated, even legendary Captain. Once per battle, the ship may attempt to take two Special Actions in the same turn. |
| 2 | Now You See Me. . .: This ship has been conducting scouting exercises all over the region, forcing other fleets to chase it as it gathers crucial information. Player gains a +2 bonus to his Initiative for the next Campaign Turn. |
| 3 | Commerce Raid: A successful strike at an enemy's supply convoy nets good results. Choose one enemy fleet. He immediately loses 1d6 RR points. |
| 4 | Diverting Strike: Launching a lightning attack, the ship strikes at the heart of an enemy's territory, causing him to draw ships away from his main force. Choose another player's fleet. In its next battle, it has one less Fleet Allocation Point available. |
| 5 | Elite Engineers: The elite engineering officers of another ship have been assigned to serve aboard this vessel. Add a +1 bonus to any Command checks made during Damage Control. |
| 6 | Assistance Rendered: A timely rescue mission to an Allied ship in distress is well rewarded. Player may immediately add any one ship of his choice of Raid level or less to his fleet roster. This ship may be drawn from a fleet list other than his own, either Axis or Allies, as appropriate. |
Repairs and Reinforcements
Even after just one battle, players are likely to have several badly damaged, maybe even crippled warships in their fleets. After a few more campaign turns, a fleet is going to begin looking more like a floating junkyard!
This, of course, will never do and players will be interested in keeping their ships as battle worthy as possible. They will also look to reinforce their positions in the campaign by bringing in entirely new ships and, potentially, expanding their fleets beyond their original size.
During this phase, every player will automatically receive 10 Repair and Reinforcement (RR) points, which will be used to repair damaged ships, replace lost crew and call for reinforcements from the High Command. The total number of RR points each player will receive is modified by the events listed below.
| Event | RR Points |
|---|---|
| Player captures a new Strategic Target this turn | +10 |
| Player loses a Strategic Target this turn | -15 |
| For every Strategic Target the player possesses | +10 |
These RR points may be spent in the following ways. It is not compulsory for a player to spend all his RR points every turn, and they may be saved for spending in future turns.
Repairs
Each RR point may be expended to replace five lost Damage points from any ship in the fleet. A ship that has been Crippled must have an additional five RR points spent on it before any repairs may be performed.
Two RR points may be spent repairing any critical hits to vital systems. Other critical hits will cost one RR point to negate.
In addition, a player may voluntarily send a ship back to the High Command for complete repairs, no matter what its condition. The ship will be out of commission for a two full Campaign Turns but after this period, it will be returned to its fleet roster as normal, fully repaired of any damage.
Recruiting
Each RR point may be expended to replace 10 lost Crew points from any ship in the fleet.
If a ship has been reduced to a Skeleton Crew, the player may recruit crew for it as normal but it will have its Crew Quality score permanently reduced by one, as many experienced officers and ratings will have been lost.
Reinforcements
A player may purchase new ships for his fleet roster by spending an amount of RR points shown on the table below. Players may only purchase ships from the same fleet list that was originally selected.
| Priority Level of Ship/Wing | RR Points |
|---|---|
| Patrol | 5 |
| Skirmish | 10 |
| Raid | 15 |
| Battle | 20 |
| War | 25 |
Aircraft
Gather all flights of aircraft lost in battle and roll a die for each one. On the roll of a four or more (five or more for the player who lost the battle in which the flight was destroyed), the flight was only damaged and/or driven away. It can be re-added to its fleet roster immediately.
Players may also purchase flights as normal in order to replace losses their aircraft carriers might suffer. A carrier may never take on more flights than it started the campaign with, and so any 'spare' flights from a player's purchases must be kept 'spare' until he suffers more losses and can use them.
Furthermore, a player can use flights based on aircraft carriers as land-based aircraft where allowed, reflecting that a carrier need not be with a fleet in order to support it with aircraft - it can be many miles away. Players need not take the aircraft carrier itself in a fleet but instead use flights of aircraft as if they were land-based, taking three flights of Swordfish from the HMS Ark Royal, for example, as a Patrol level choice, rather than the entire carrier as a Raid level choice.
Victory and Defeat
After many battles have been fought and won, it will be time for one fleet to claim victory over all others.
The winner of the campaign is the player who can capture all available Strategic Targets first. He can lord it over his fellow players and boast that he will do twice as well in the next campaign. A player automatically loses the campaign if every ship on his fleet roster is destroyed. We suggest he just slink away and hope no one notices him. . .
Special Strategic Targets
Some Strategic Targets on our two example campaign maps have special properties. Rather than being simple harbours or ports, they have some greater value to the fleet that possesses them. When creating personalised campaign maps, players may place similar Strategic Targets or create new ones with their own special rules.
- Home Port: This port belongs to the listed fleet at the beginning of the game and represents, if not its actual homeland, its main base of operations in the area. This port is extensively defended and is likely to be garrisoned by thousands of soldiers, making it quite impossible to capture during the time frame of the campaign. A Home Port may never be taken from the owning player unless his fleet has been completely destroyed.
- Supply Line: This Strategic Target forms a vital link to the wider world outside the campaign map, allowing the possessing fleet to bring in supplies far more easily. The fleet that holds this Strategic Target will earn a bonus 1d6 RR points in the Repairs and Reinforcements phase of every campaign turn.
The Fleet Lists
This book details all the ships available to the various fleets of the world, as well as the fleet lists by which players can pick fair and balanced forces for the scenarios in this book. Though players are not restricted to using these fleet lists for their own games (they may want to re-enact a battle from history, for example), when using them they can be reasonably certain that every fleet in a game has a reasonable chance of defeating any other.
(Transcription note: the per-ship roster statistics, ship histories, aircraft profiles, Order of Battle counter sheets and Civilian Ships roster entries that follow in the printed book are not transcribed here. The fleet lists by Priority Level and each fleet's special rules are included below.)
Priority Levels
Every ship detailed in this book has a Priority Level, which is derived from how powerful the ship is in game terms and for what engagements the vessel is commonly used. Ships with heavier armour, greater speed and more weapons have a correspondingly higher Priority Level. In the Royal Navy fleet list, for example, a Queen Elizabeth-class battleship is Priority Level: Battle while a Southampton-class cruiser is Priority Level: Raid. This means that, all else being equal, a Queen Elizabeth is twice as capable as a single Southampton.
When playing a scenario, such as those detailed in this book, players will need to decide on a set number of Fleet Allocation Points that every fleet is allowed to spend. Players may buy ships at their listed cost but their total may never exceed this fixed value. The default number of Fleet Allocation Points given in this book is five, though players are free to experiment with larger or smaller forces in their games.
In addition, the type of engagement can have a profound effect on the types of ships available. After all, no navy will send a huge battleship on routine patrols around home waters. Such vessels are expensive to construct and run, and will never go to battle unless supported by a fleet of escorts. The chance of losing such a mighty ship to a freak accident or attack is just too great.
There are five Priority Levels in Victory at Sea. They are, in ascending order, Patrol, Skirmish, Raid, Battle and War.
Each Fleet Allocation Point will buy one ship of the same Priority Level as chosen for the scenario. However, players may also purchase ships of a higher Priority Level (though they will have fewer of them) or ships of a lower Priority Level (and thus have more), or any mix of the above. The Fleet Allocation table demonstrates how many Fleet Allocation Points may be spent on purchasing ships of different Priority Levels to the scenario being played. A ship more than two Priority Levels higher than the scenario being played can never be purchased.
Fleet Allocation
| Difference in Priority Level | Points Cost |
|---|---|
| Ship is same Priority Level as scenario | One per ship/squadron |
| Ship is one Priority Level higher than scenario | Two per ship/squadron |
| Ship is two Priority Levels higher than scenario | Four per ship/squadron |
| Ship is one Priority Level lower than scenario | One point buys two ships/squadrons |
| Ship is two Priority Levels lower than scenario | One point buys three ships/squadrons |
| Ship is three Priority Levels lower than scenario | One point buys four ships/squadrons |
| Ship is four Priority Levels lower than scenario | One point buys six ships/squadrons |
Once the Priority Level of the scenario has been decided, players can start choosing ships from the relevant sections of their fleet lists. When choosing ships, players should make sure they can represent each one properly on the tabletop, whether they are using counters or miniatures. There is nothing worse than a player finding out that the Kirisima he was about to attack is, in fact, supposed to be the Yamoto.
Command
The fleet lists included in this book assume that all ships have a Military-Grade crew - that is, a Command score of four. However, players might like to experiment with random Command scores, as detailed in the Campaigns chapter. This will lead to far more realistic battles and should be the natural choice of all advanced players.
In Service Dates
Every ship within the fleet lists has an In Service Date, a range of years during which the ship can be used. As an optional rule, players might like to decide on a specific year for each scenario or campaign.
Squadrons
Once players have chosen their fleets for the upcoming scenario, they are free to organise two or more of their ships into squadrons. Using squadrons allows players to move large numbers of ships quickly and tends to concentrate firepower in specific parts of the battlefield. The full rules for using squadrons are covered in the Advanced Rules chapter.
The Royal Navy Fleet List
The following forms the entire fleet and aircraft list for the Royal Navy:
- Priority Level: Patrol: J, K and N-class destroyer; S-class submersible; Tribal-class destroyer; Fairey Fulmar squadron (three flights); Fairey Swordfish squadrons (four flights); Grumman Martlet (three flights - use Wildcat); Hawker Hurricane squadron (two flights); Supermarine Seafire squadron (two flights)
- Priority Level: Skirmish: Leander-class cruiser; Perth-class cruiser; T-class submersible; York-class cruiser; Bristol Beaufighter squadron (three flights); Illustrious-class aircraft carrier
- Priority Level: Raid: Ark Royal-class aircraft carrier; Edinburgh-class cruiser; Fiji-class cruiser; Gloucester-class cruiser; Norfolk-class cruiser; Southampton-class cruiser
- Priority Level: Battle: Queen Elizabeth-class battleship; Renown-class battlecruiser
- Priority Level: War: Hood-class battlecruiser; King George V-class battleship; Nelson-class battleship
The Kriegsmarine Fleet List
The following forms the entire fleet and air list for the Kriegsmarine:
- Priority Level: Patrol: Type-VII U-boat; Type-IX U-boat; Zerstörer 1936-class destroyer; Junkers Ju-87 (three flights); Messerschmitt Me-109 squadron (two flights)
- Priority Level: Skirmish: K-class light cruiser; Type-XXI U-boat; Focke-Wulf Fw-190 squadron (three flights)
- Priority Level: Raid: Admiral Hipper-class heavy cruiser; Deutschland-class pocket battleship; Graf Zeppelin-class aircraft carrier
- Priority Level: Battle: Scharnhorst-class battlecruiser
- Priority Level: War: Bismarck-class battleship
Kriegsmarine Special Rules
The following special rules are applied to fleets of the Kriegsmarine:
- Improved Rangefinders: The Kriegsmarine was noted for the training of its gunners and the optics it used. All Kriegsmarine ships gain a +1 bonus to all Attack Dice rolled for main turret guns against targets at Long or Extreme ranges.
- Radar: German radar lagged somewhat behind that of the British at the start of the war and, as their technology progressed, operating procedures started to hamper its use later on. Radar on Kriegsmarine ships will only detect enemy vessels that are within the ship's forward arc.
The US Navy Fleet List
The following forms the entire fleet and aircraft list for the US Navy:
- Priority Level: Patrol: Clemson-class destroyer; Fletcher-class destroyer; Bell P-39 Airacobra squadrons (four flights); Curtiss P-40 Kitty Hawk squadron (three flights); North American P-51 Mustang squadron (three flights); Douglas SBD Dauntless squadron (three flights); Douglas TBD Devastator squadron (three flights); Grumman F4F Wildcat squadron (three flights); Vought F4U Corsair squadron (two flights)
- Priority Level: Skirmish: Atlanta-class cruiser; Gato-class submarine; New Orleans-class cruiser; Pensacola-class cruiser; Portland-class cruiser; Grumman F6F Hellcat squadron (three flights); Grumman TBF/TBM Avenger squadrons (four flights); Curtiss SB2C Helldiver squadrons (four flights)
- Priority Level: Raid: Brooklyn-class cruiser; Yorktown-class aircraft carrier
- Priority Level: Battle: New York-class battleship; Essex-class aircraft carrier
- Priority Level: War: Colorado-class battleship; Iowa-class battleship; North Carolina-class battleship; South Dakota-class battleship
The Imperial Japanese Navy Fleet List
The following forms the entire fleet list for the Imperial Japanese Navy:
- Priority Level: Patrol: Fubuki-class destroyer; Kadai-7-class submarine; Aichi D3A Val squadrons (four flights); Mitsubishi A6M Zero squadron (two flights); Mitsubishi G4M Betty squadron (three flights); Nakajima B5N Kate squadron (three flights)
- Priority Level: Skirmish: Aoba-class cruiser; Furutaka-class cruiser; Hei-Gata-class submarine; Kagero-class destroyer; Nagara-class cruiser; Sendai-class cruiser; Kawanishi N1K1-J squadron (three flights)
- Priority Level: Raid: Mogami-class heavy cruiser; Shokaku-class aircraft carrier; Takao-class cruiser
- Priority Level: Battle: Kongo-class battlecruiser; Nagato-class battleship
- Priority Level: War: Yamato-class battleship
Imperial Japanese Navy Special Rules
The following special rules are applied to fleets of the Imperial Japanese Navy:
- Weak Sonar: Japanese sonar was never quite the equal of the Allied systems. Japanese ships require a 5+ to detect a submerged submersible, rather than the normal 4+.
- The Long Lance: The Japanese were responsible for some of the most accurate, long-ranged and powerful torpedoes of the war. Japanese ships (not submersibles) may either use the torpedo rules as normal, or they may choose to target an enemy ship up to 20 inches away. If they do this, however, the attack will be made in the next End Phase, with the Torpedo Counter moving with the ship if necessary.
The Italian Navy Fleet List
The following is the entire fleet list for the Italian Navy:
- Priority Level: Patrol: Navigatori-class Destroyer; Adua-class Submarine
- Priority Level: Skirmish: Trento-class cruiser; Zara-class cruiser
- Priority Level: Battle: Ciao Duilio-class battleship
- Priority Level: War: Littorio-class battleship
The French Navy Fleet List
The following forms the entire fleet list for the French Navy:
- Priority Level: Patrol: Bourrasque-class destroyer; Le Fantasque-class destroyer; Dewoitine D.520 squadrons (four flights); Loire Nieuport LN.411 squadrons (four flights)
- Priority Level: Skirmish: Algerie-class cruiser; Bearn-class aircraft carrier; Duguay Trouin-class cruiser; Duquesne-class cruiser; Emile Bertain-class cruiser; Jeanne d'Arc-class cruiser; La Galissonniere-class cruiser; Suffren-class cruiser
- Priority Level: Battle: Dunkerque-class battleship
- Priority Level: War: Richelieu-class battleship