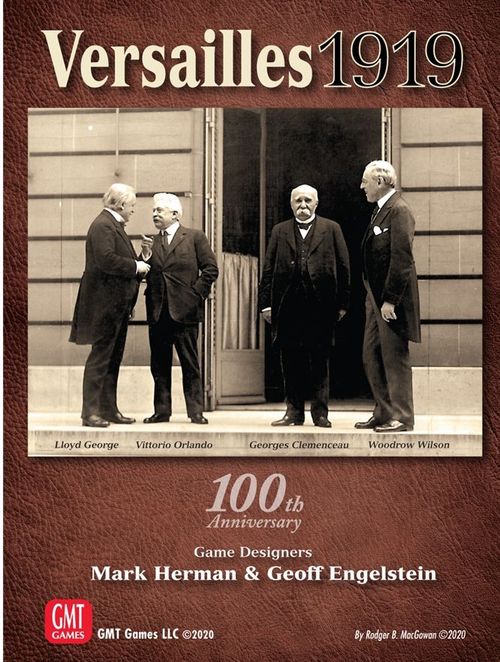
Versailles 1919
Versailles 1919 Rulebook
Table of Contents
Table of Contents
- Introduction
- Components
- Number of Players
- Terms and Components
- Setup
- Game Play
- Turn Sequence
- Political Actions in Detail
- Issue Card Icons
- Military Actions in Detail
- Uprising Checks and Uprisings
- Comprehensive Uprising Check Example
- Strategy Cards
- Negotiations
- Game End (Rush to the Finish)
- Two-Player Rules
- Solitaire Rules
- Player Aid Summary
Introduction
Versailles 1919 is a 1-4 player game that puts you in the role of the National Leaders (President Woodrow Wilson, Prime Minister George Clemenceau, Prime Minister David Lloyd George, or Prime Minister Vittorio Emmanuelle Orlando) negotiating the end of the Great War in Paris in 1919. Also, present was a Japanese delegation that is handled as a non-player delegation but has impact on the outcome.
The rest of the world holds its breath as these closed-session negotiations take place in a small set of rooms in a French Foreign ministry room (Salle de l'Horloge). Outside these rooms sit various advisors and Committee delegations attempting to Influence the proceedings in their favor.
As various Issues become 'Settled' information leaks out through newspaper articles and rumor. As this information circulates, various national actors and people in their region react, often producing Unrest and on occasion Uprisings that the negotiators need to deal with as they proceed to write a treaty. At some point time runs out and you must deliver a treaty for the world to consider and sign in the Hall of Mirrors at Versailles on June 28, 1919. The winner of the game is the most successful negotiator with the most national Influence at the end of the game.
Components
- Game board
- 1 Countersheet
- 46 Event cards
- 53 Issue Cards
- 10 Strategy cards
- 1 Active Player card
- 60 Influence cubes (15 per player, in blue, white, red, and yellow)
- 12 Military Unit discs (3 per player, in blue, white, red, and yellow)
- 1 six-sided die
- 4 Player Reference cards
- 1 Scoring Pad
Number of Players
The game is designed for one to four players. The basic rules described below are for the 3- and 4-player game. Rules changes for the solo and 2-player version are described afterward.
Terms and Components
Active Player: The player whose turn is being executed is the Active Player. Various game functions default onto the Active Player. For highly interactive situation, we have supplied an Active player card that is temporarily taken by the Active player as a mnemonic and returned when that player is no longer the Active player.
Available Influence and Military: The area off board that is near the player where they openly show the number of Influence cubes and Military Units they have Available for use. A player's Available Military Units are either Active, Exhausted, or Deployed in a Region. A player may never have more Available Military units than are indicated on the Happiness track.
Available Pool: A pile of Influence and Military tokens in front of each player which are Available for immediate use.
Board Locations: There are 6 locations on the board (see the Board Locations diagram, below):
- On the Table: (lower left) This is where the Issues that can be Settled are located plus one Event card (named for an historical personage or event).
- Waiting Room: (upper left) This is where Issues and Event cards that are 'on deck' to come onto the table sit until moved during a Settle Issue action.
- Region Tracks: (upper right) This is where Regional Unrest and all actions associated with Unrest are evaluated and implemented.
- Demobilize Track: (lower right) This is where Military Units are demobilized.
- National Happiness Track: (lower right) This is where the National Happiness markers are moved to record each powers Happiness level.
- Exhausted Box: (lower right) This is where Influence cubes and Military Units that become Exhausted through various game procedures are placed.
Control: An Issue is Controlled by the player who has the most Influence cubes on the Issue when it is Settled. An Event on the Table is Controlled by the player who has an Influence cube placed on it. Controlled Issues are placed in front of the Controlling player when they are Settled.
Exhausted Pool: After an Issue is Settled or Military Units are used, they are placed in the Exhausted box from whence they can be recovered with a player action. Tokens in the Exhausted Pool must be returned to the Available Pool before they can be used again.
Event Card: These cards represent the people that attended or influenced the conference, and world events that the key players needed to deal with. (An Event card shows: the Crisis Event or Conference Event banner, an Influence Icon, and the Historical Figure.)
Some Event cards have an Influence icon next to the picture. When a player moves an Event with this icon onto the Table, they may place an Influence there to Control the Event. See Settling an Issue for full details.
Happiness: A measure of how happy the populace of a nation is with the treaty negotiations. The five nations leading the Conference (UK, France, USA, Italy, and Japan) each have a Happiness value that is represented by a marker on the Happiness track. Happiness determines how many Military Units a nation may field and may give bonus Victory Points at the end of the game.
Influence Cube: Used to represent the ability of a Nation's leader to exert Influence over different areas. An Influence cube will often transition between being used on an Issue or Event and then being placed in the Exhausted Box where it can be retrieved for additional use. Influence that is in front of the player is said to be Available.
Design Note: Consider the use of an Influence cube to represent political capital that has been used to gain leverage in the negotiations that must subsequently be reestablished before it can be redeployed into another situation.
Issue: A geographic area (called a Region) or principle being debated at the Versailles conference. Each Issue card shows Victory Points that are earned by the player who Controls the Issue. It also shows the Issue options that may be selected when the Issue is Settled, and the options' impact on play. (An Issue card shows: Issue Name, Options, Region, VP Value, and the Sidebar.)
Play Note: To save table space, Issue cards are designed so that only the sidebar needs to show. When you have more than one Issue, you can overlap them so only the sidebar of each lower card is visible.
Overlapped Issue cards with a strategy counter placed on each Issue sidebar.
This Issue card has the No Military symbol in the lower left, so only Influence may be used to Bid for Control (see Uprising and Unsettled Issues for details).
Issue Card Icons: These icons represent the addition or removal of Unrest and Happiness from nations, or placement of Strategy counters. The number of Unrest or Happiness gained or removed is indicated by the number of times the icon is repeated and the nation or region to gain or lose the status is depicted to the left of it.
| Icon | Meaning |
|---|---|
| EU + 2 masks — Add 2 Unrest | Example: Europe adds two Unrest to their current Unrest total. |
| EU + red X — Remove 1 Unrest | Example: Europe removes one Unrest from their current Unrest total. |
| Italy flag + mask — Lose 1 Happiness | Example: Italy loses one Happiness from their current Happiness total. |
| USA flag + 2 masks — Gain 2 Happiness | Example: USA adds two Happiness to their current Happiness total. |
| Factory — Industrial Growth | Example: Place an Industrial Growth Strategy counter on the Issue. |
| Warship + USA flag — USA Naval Squadron | Example: Place a USA Naval Squadron Strategy counter on the Issue. |
| Warship + UK/USA flags — UK/USA Naval Squad | Example: Place either a USA or UK Naval Squadraon Strategy counter on the Issue. |
| Two hammer-and-sickles — Bolsh | Example: Place two Bolshevik strategy counters on the Issue. |
Military Unit: Military Units may be Deployed to attempt to mitigate Unrest and quell Uprisings in Regions and may be Demobilized to improve National Happiness.
Powder Keg: Each region is represented as a track (row). Each region's Unrest is measured by the number of columns its counter moves on this track. The first three columns show the Powder Keg symbol. The Powder Keg counter cannot move further on the track than the rightmost Powder Keg column 3. The Unrest counter can never be on or left of the Powder Keg counter.
Design Note: Powder Keg represents residual discontent after an Uprising has been resolved.
Random Region: Some Events affect a « Random Region ». To select a Random Region, roll a die. The Region with that number on the right side of the Region Track is affected. On a roll of 6, the Event does not occur.
Settled Issue: An Issue that has been resolved and one of its options has been chosen.
Strategy Card: Strategy cards represent your vision for how you want the treaty to affect the future. The title conveys a general sense of what your strategy agenda is trying to accomplish.
Strategy counters: These counters are…
- Industrial Growth
- German Containment
- Self Determination
- German Reparations
- Naval Squadron (USA shown)
- Bolshevik Containment
- Empire (Italy shown)
Table: Visually imagine you are sitting inside a conference room with a table in the French Foreign Affairs Ministry. On this table are two Issues that are eligible to be Settled, and the next Event card (Personage with an agenda) that will be resolved.
Unrest: Each Region may gain and lose Unrest, which shows how likely it is for there to be an Uprising. Resolving Issues and Events may change the amount of Unrest on a Region. Players may also use try to use Military to reduce Unrest in a region or the chance of an Uprising, via the Quell Unrest action.
Uprising: An Uprising may Unsettle an Issue from the Control of a player. When this happens, there is a special Influence/Military bidding round to see who (if anyone) puts down the Uprising and takes Control of the Issue, which can be the original owner.
Unsettled: An Issue that was Controlled but is now up for bid by the players. Issues are most typically Unsettled by an Uprising but certain Events may also Unsettle an Issue.
Use: An Influence or Military token is used when it is taken from Available and placed on another location. An Influence token is always in one of four locations: Available, on an issue card, on an Event card, or in the Exhausted Box. A Military token is always in one of four locations: Available, deployed to a region, demobilized, or in the Exhausted Box.
Waiting Room: Imagine you are sitting in a Conference room that has an antechamber or waiting room, where individuals (Event cards) and Committee officials with papers for other Issues sit waiting to be called. This situation is represented by three Issues and two Events that are waiting to be placed onto the Table. The players may place Influence on these Issues, but they may not be Settled until they are moved onto the Table.
Setup
Place the board in the middle of the play area.
Player Assignments: Randomly determine a starting Active Player. Determine the number of players and, beginning with the Active Player, each player selects a country to represent:
| 2-Player Game | 3-Player Game | 4-Player Game |
|---|---|---|
| UK | UK | UK (red) |
| France | France | France (blue) |
| USA | USA (white) | |
| Italy (yellow) |
Play Note: When playing Versailles 1919 with three players, the active sides are the UK, France, and the USA. Italy and Japan are non-player actors whose National Happiness is tracked to determine whether they will or will not sign the Treaty. The two grey Demobilization boxes are not used.
Reminder: Both the solo and two-player games use special rules that are detailed at the end of this booklet.
Players take all of their (15) Influence and (3) Military Unit tokens and place them in front of themselves.
Issue Cards: Gather all the Issue cards, set aside the GAME END (RUSH TO THE FINISH) card and shuffle the remaining cards. Deal two cards of this deck to the On the Table space on the board, three to the Waiting Room, and one into the Issue Discards space, all face-up.
The Game End (Rush to the Finish) Issue card
From the remaining Issue cards, deal 20 cards face-down to the Issue Draw Deck space. Place the Game End (Rush to the Finish) card face-down on top of this stack, then place the remaining Issue cards on top, face-down, to complete the Issue Draw Deck.
Optional:
- Once you are familiar with the game—for a more intense experience—deal 15 cards below the Game End (Rush to the Finish) card instead of 20.
- For an even longer game, deal only 10 cards below the Game End (Rush to the Finish) card instead of 15.
- For the longest game, take the Game End (Rush to the Finish) card and shuffle it with five random Issue cards and place them on the Draw Deck space. Then take all remaining Issue cards and place them on top of these six cards.
Event Cards: Gather up all the Event cards and shuffle them. Place one in the On the Table space and two into the Waiting Room, all face-up. The remaining cards form the Event Draw Deck, which is placed face-down into its space on the board.
Active Player Card: Place the Active Player card on the indicated space on the board.
National Happiness: Place all five National Happiness markers (whether they are being represented by players or not) on the '20' space of the Happiness track on the board.
Play Note: For two of the optional longer games, players start with higher Happiness. If 10 cards are dealt below Game End (Rush to the Finish), Player Happiness starts at 22. For 5 cards, Player Happiness starts at 24. Note that Non-player Happiness (Japanese and possibly Italian) should always start at 20.
Strategy Cards: Deal out one more Strategy card than the number of players face-up to the side of the board. Players select their Strategy at the conclusion of the first Uprising in the game. These will offer potential bonus victory points at the end of the game.
Powder Kegs and Unrest: Place one Powder Keg counter per region at the far left of the Region Track. Place one Unrest counter in column 1 (with the fist icon) of each track. So, each Region Track gets one Powder Keg and one Unrest counter.
Game Play
Players are trying to manipulate the treaty terms to shape the world to match their strategic vision. This is represented by earning 'Stars' ("Victory Points"). Stars will come primarily from Controlling Issues, but may also come from their chosen Strategy card, Strategy icons, and having more National Happiness than the other players.
Most frequently the game will end when the Game End (Rush to the Finish) Issue is Settled. See Game End and Victory for full details.
Turn Sequence
Beginning with the starting Active Player and proceeding clockwise until the end of the game, each player turn consists of a mandatory Political Action and an optional Military Action.
MANDATORY: Political Action
- Place Influence, or
- Reclaim Influence and Military, or
- Settle an Issue
Important Note You must perform a Political action, so if you cannot legally place Influence and you have no Influence or Military that you can reclaim then your only legal choice is to Settle an Issue whether it is in your best interests or not.
OPTIONAL: Military Action
- Deploy, or
- Demobilize
Important Note Demobilized Military can never be used for any action. They are permanently out of the game.
Either the Military or Political action may be performed first, but the chosen action must be fully completed before doing another action. The Military Action may be performed with one Military Unit.
Example: Once a player has begun the Political Action Settle, an Issue must be fully completed before a Military action may be performed.
See details on each of these steps below.
The turn then passes clockwise to the next player. The game ends when the Game End (Rush to the Finish) Issue is Settled or the last Issue is drawn from the Draw deck.
Political Actions in Detail
The Active Player must perform one of the following options:
Political Action #1: Place Influence (Cubes)
You must be able to comply with all three conditions below or this option may not be selected:
- You must place Influence onto exactly two Issues. The chosen Issues can be On The Table, in the Waiting Room, or one of each.
Play Note: You may place Influence onto an Issue where you already have the most Influence in order to meet the requirement to play onto two Issues.
- After placing your new Influence, you must be the player with the most Influence on both of the Issues.
- All Influence placed must come from your Available pile. It may not be pulled from another Issue, the Exhausted Box or anywhere else.
Place Influence Example (above image):
It is France's turn (blue) and they have decided to place Influence. If they want to place on Byelorus (left-most Issue On The Table) they would need to place at least four, since the USA (white) has the most with three Influence. The single UK Influence does not impact how many France would need to play here.
On Smyrna (right-most Issue On The Table), the UK (red) has 3 and France already has 1, so they would have to place at least 3 more.
In the Waiting Room, they would need to place at least two Influence on New Guinea & Samoa, and one on Somalia (which is currently empty). France can place an Influence on the top Issue, Rheinland, even though they are currently in the lead. They would need to add at least one Influence.
France decides to place 2 Influence on New Guinea & Samoa, and 4 more on Smyrna. The extra on Smyrna is to hopefully dissuade the UK from competing with France further on this Issue.
Political Action #2: Reclaim Influence and Military
When selecting this option, you may take up to six Influence from your Exhausted Pool (not from Issues) and return them to your Available Pool.
You must take back any Military units in the Exhausted Pool and may take back any Deployed Military units.
You must reclaim at least one Influence or Military if you take this option.
Example: Italy takes a Reclaim Influence and Military action. They have 8 Influence and 1 Military in the Exhausted Pool and 1 Military on the Balkans track. Italy takes back 6 Influence (leaving 2 in the box) and the Military from the Exhausted Pool. They decide to leave their other Military on the Balkans track.
Political Action #3: Settle an Issue
Only Issues On The Table with at least 1 Influence on them may be Settled. You may Settle an Issue where you do not have the most Influence. This is often good strategy as you can recover all of your Influence on the Issue and gain control over the agenda by deciding which Issue and Event go on the Table next.
When an Issue is Settled, conduct these steps in the order shown (see details on each step below):
- Resolve Issue (conducted by the player who Controls the Issue)
- Resolve Conference Event (conducted by the Active Player unless another player has Influence on Event)
- Move Issue and Event from the Waiting Room to the Table (Active player)
- Place new Issue into the Waiting Room (Active player)
- Draw an Event card and place it into the Waiting Room and immediately perform Crisis Event (Active player)
Play Note: Remember, if the Active player Settles an Issue that he/she does not Control then Steps 3, 4, and 5 are performed by the Active player NOT the player who Controlled the Issue. Step 2 is also conducted by the Active player unless another player has the most Influence on the Event.
These steps are also numbered on the game board as a reminder.
Here are more details on each step:
STEP 1: Resolve Issue
a. The Active Player takes the Active Player card and places it face up in front of them as a reminder of whose turn it is. b. All the Influence on the Issue from the player who Controls the card is placed in the Exhausted Pool. c. If the Active player who chose to Settle the Issue is not the player who Controls this Issue (most Influence), all of the Settling player's Influence is returned to Available. d. The other players with Influence on the Issue place half their Influence into the Exhausted Pool (rounded down, so if one cube it goes back to the player) and return the balance to Available. e. The player Controlling the Issue places it in their player area, and selects which option listed on the card they will implement. Adjust Unrest, and increase or decrease any Happiness, based on what is shown for the option selected. (see below for more details). If the option has any Strategy Icons, place matching Strategy counters on the card.
Play Note: The Strategy counters remain with the Issue until the game is scored OR if the Issue later becomes Unsettled, in which case the Strategy counters can change.
Example: France decides to Settle the Smyrna Issue. They have 5 Influence and the UK has 3, so France will Control the Smyrna Issue. All five French Influence is placed in the Exhausted Box. Half of the UK Influence (rounded down) is also moved to Exhausted, so 1 UK Influence is placed there and the other 2 are returned to the UK player.
France chooses to award Smyrna to Greece (the middle option). UK Happiness is decreased by one, and Middle East Unrest is increased by two. In addition, a Naval Strategy counter is placed, which will either be USA or UK at France's option. The UK appears to be ahead, so France chooses to place a USA Naval Strategy counter on the card.
Play Note: If the UK player was settling the Issue, France would still Control it and select an option. However, the UK would recover all three of their Influence placed on the Issue.
STEP 2: Resolve Conference Event
a. The Conference Event text on the Event card that is on the Table is resolved. b. If there is a player cube on it, that player decides how it is resolved. c. If there is no player cube on it, the Active player makes the decision. d. After resolving the Conference Event, discard it, and if there was an Influence cube on it, place it in the Exhausted Pool. e. Conference Events that say "Optional" may be performed or not. If it does not say "Optional" it must be done.
Example: Continuing our example, the Conference Event On The Table is resolved. It is Ho Chi Minh and there is a USA cube on the card. The USA decides they want to perform the Optional Event and so they advance the Powder Keg one space on the Pacific Track, which in turn displaces the Unrest counter one space to the right. The Ho Chi Minh card is discarded and the USA Influence cube goes to the Exhausted Pool.
STEP 3: Advance Issue and Event Cards
These two steps can be done in either order as they occur simultaneously.
a. The Active player chooses one of the Issues in the Waiting Room to be moved to the Table. All Influence on the Issue moves with it. b. The Active player chooses one the of the Event cards in the Waiting Room to be moved to the Table. If there is an Influence icon on the card, they may place an Influence cube there (from Available, as normal) to control the Personality and be able to perform the Conference Event when the next Issue is Settled.
Play Note: If the Event does not have an Influence icon or you do not have an Available Influence or you do not want to place an Influence on the Event, none is placed.
Example (continued): After resolving Ho Chi Minh, the French decide to move down New Guinea & Samoa as the new Issue since they are leading on it. They also bring Arthur Balfour onto the Table and place an Influence cube on the card as they would prefer to have some additional Unrest on the Middle East rather than making the Uprising Check that Weizmann would require.
STEP 4: Add an Issue to the Waiting Room
The Active Player either:
a. Moves either the first, second, or third card from the top of the Discard pile to the Waiting Room, paying 0, 1, or 2 Available Influence respectively to the Exhausted Pool, OR b. Draws the top two Issue cards from the deck, and chooses one to place face-up in the Waiting Room and one to place face-up in the Discard pile.
Example (continued): France chooses to select new Issues from the deck rather than drawing from the Discard pile. They draw Women's Suffrage and Disarmament. They choose Disarmament and place it in the spot previously occupied by New Guinea & Samoa, and place Women's Suffrage on the Discard pile.
Play Note: You can examine the Discard pile anytime you desire. The top card costs 0 Influence to retrieve for placement into the Waiting Room and 'dumpster diving' to the second or third card at the top of the discard deck costs 1 and 2 Influence respectively. Whether examining or choosing from the Discard pile, you must maintain the order of the cards.
Play Note: Just in case it was not clear, you cannot draw two cards and then decide to pick an issue from the discard pile. Once you pick two Random Issues, you have to choose one of them and place the other one in the discard pile.
STEP 5: Place Event Card into Waiting Room and Perform Crisis Event
a. The top card in the Event Deck is drawn and placed face-up in the Waiting Room. If the Event Deck is empty, shuffle the discards to form a new Event Deck. b. Immediately perform the Crisis Event text on the top of the Event card.
Example (continued): The top card of the Event deck is turned over and placed into the empty space in the Waiting Room. It is Bela Kun, the Hungarian Communist leader. The Crisis Event is "Uprising Check". An Uprising Check is immediately performed, as described later.
After the Settle process is completed, the Active Player returns the Active Player card to the Table.
Issue Card Icons
Happiness
If the selected option shows that Happiness changes for any player, move their marker on the Happiness track by the amount shown. This may trigger a Mutiny (see page 12).
(Italy flag with one mask) Indicates Italian Happiness is decreased by 1. (Japan flag with two masks) Indicates Japanese Happiness is increased by 2.
Happiness at 0: If a Happiness marker ever reaches the "0" box, it remains there for the rest of the game and all Happiness adjustments for that nation are ignored.
Happiness at 30: If a Happiness marker would move above 30, it simply stops at 30. Happiness decreases would still affect the marker as normal.
Regional Unrest
When the option selected on an Issue card shows Add Unrest or Remove Unrest icons for a Region, it signifies that leaders from that Region have been impacted by the negotiations.
For each Region which has Add Unrest, move the Unrest counter to the right one space for each icon shown. For Remove Unrest results, move the Unrest counter to the left one space for each icon shown. The Unrest counter can never move into the space containing the Powder Keg counter, or into a space containing a player Military Unit. If that would happen, or if it would move off the track, the excess result is ignored.
(EU flag with two masks) Indicates to add 2 Unrest to European Region. (EU flag with red X) Indicates to remove 1 Unrest from European Region.
Play Note: Powder Keg counters are moved by Uprisings and Events.
Strategy Icons
There are seven Strategy icons on Issue cards that may award bonus points at the end of the game: Self Determination, German Containment, German Reparations, Naval Squadron, Empire, Industrial Growth, and Bolshevik Containment.
Naval and Empire icons are accompanied by a national flag. When placing the strategy counter, make sure to select the one with the correct flag. There are some Naval icons that give the player the choice of placing a UK or USA Naval icon.
Play Note: Strategy counters with your flag that are on issues that you control score one VP per flag at the end of the game.
Region Tracks
The Region Tracks are where the Unrest in various parts of the world is tracked, and where players may send Military Units to help shape events on the ground and control the course of the treaty negotiations.
The track has one row for each region, which is color-coded to match the Regions on the Issue cards. The left-hand side shows the name of the Region. The right-hand side shows the Region number, which is used when determining a random Region for Events. To select a random Region, roll a die and use the indicated Region. On a roll of 6, the Event is skipped.
Unrest counters: Each row of the Region chart has an Unrest counter to show the current Unrest level. This marker is never removed.
Powder Kegs: Uprisings and Events may add Powder Kegs to a track for a Region. Powder Kegs start on the space shown for them to the left of the Region Tracks. If additional Powder Kegs are added, move the Powder keg marker to the right.
A Powder Keg counter if moved left of column 1 goes back to its start location. If an Event would do so, it is ignored. Removing a Powder Keg does not move the Unrest counter unless it is noted by the Event.
The Unrest Token can never move into the same space or left of the Powder Keg counter. It must always be to the right of the Powder Keg. If the Powder Keg counter is moved into the same space as the Unrest counter, move the Unrest counter up one more to the right.
Example: The Europe Unrest counter is in the second column, and the Powder Keg counter is in the first. Europe gets a Powder Keg result, which moves the Powder Keg counter to the second column. Since the Unrest counter is there, it is moved to the third column.
Military Actions in Detail
Either before or after the Political Action, a player may perform one Military Action.
Important Note You cannot substitute an optional Military Action for a mandatory Political Action. You must always perform a Political Action.
Military may either be Available (in front of the player), in the Exhausted Box, or Deployed on the Region Track. The Actions a Military Unit may perform depend on its location.
There are two available Military Actions:
- Deploy
- Demobilize
Deploy
Military Units may be placed onto a Region Track by using the Deploy Military action. Exhausted and Demobilized Military may not be Deployed.
Exactly one Military unit may be placed in an empty space in columns 5, 6, 7, or 8 of a Region track that does not already contain that player's Military Unit. If the Military unit is placed in columns 5, 6, or 7, there are Happiness and Influence affects.
A Military Unit that is already Deployed in a Region can be moved to another space in that Region or another Region track with all appropriate Happiness and Influence affects.
Example: The UK has one Available Military, one in Exhausted, and one on the Pacific track. If they wish to Deploy to Europe, only the Available unit or the one already on the Pacific track may be used.
The player places the Military being Deployed in any space of the blue columns (four right-most columns) and gets the benefits/penalties shown in the column header. Immediate effects are shown in the top part of the box. Permanent benefits are shown in the bottom. Military may not be placed in a box already containing another Military. Units of different players may be in the same Region track, but they must all be in different spaces.
Play Note: The further left a Military is placed, the more power it is exerting in the region but the more it will decrease National Happiness
The Unrest counter can never be in the same space or to the right of a Military Unit. If it is, shift it back towards the left until it is no longer in the same space. In essence, Military form a 'cap' beyond which the Unrest counter may not advance.
Region Column Bonuses and Penalties
From right to left:
- 2x BID: Military placed in this column or to the left are counted as a strength of 2 when bidding for an Unsettled Issue (see Uprisings, below).
- +/–1: Military placed in this column or to the left give the owner the ability to add or subtract 1 to an Uprising die roll in that region.
- Black Square: Move that much Influence from Exhausted to Available.
- Discontent: Decrease Happiness by the amount shown.
Example: The UK places a Military Unit from Available into the Middle East region, in column #6 (the one that shows three squares and two Unhappiness). They immediately gain three Influence back from Exhausted and decrease Happiness by two. Also, for as long as the Military Unit remains in the Middle East, they may modify Uprising die rolls in the Middle East and count that Military as strength of two for any Middle East Issues that are Unsettled. In addition, the Unrest counter was in the right-most column on the chart. It is shifted back three columns so that it is just to the left of the UK Military Unit.
Play Note: Moving Military into a Region can recover Influence at the cost of Happiness. Since you can do a Military Action before your Political Action, if you need a few more Influence to try to control an Issue, consider sending troops into the field to gain some leverage at the Conference.
Limits on Military Units Per Region
- Each player may have a maximum of one Military Unit in each region.
- Multiple players may have Military Units in the same region, but they must be in different spaces.
- A Military Unit being placed into a Region must go into an unoccupied space. (This is important for Uprising tiebreakers.)
Demobilize
To Demobilize a Military Unit, place it on the highest-numbered available space on the Demobilize track. All players share this track and only one Military Unit may occupy each space.
Historical Note: At the end of World War I, the public was anxious for troops to come home. This action allows players to bring back troops to increase National Happiness.
Important Note Any number of Military Units may occupy the '1' box.
Note: The spaces shown in grey are only used in the four-player game.
The player then increases their National Happiness by the amount shown. Military Units that are demobilized early will increase Happiness by larger amounts.
The Military Unit chosen to be Demobilized may come from anywhere—Available, Exhausted, or the Region track.
Once a Military Unit has been Demobilized, it may not be used for any purpose. It is effectively out of the game.
Play Note: If a Nation's Happiness level ever reaches zero, it can never be increased. It will be zero for the rest of the game.
Mutiny
Sometimes a player may be forced to Demobilize a Military Unit. This is called "Mutiny".
The Happiness Track is broken up into sections. Each section of the track illustrates the number of Available Military units each player is allowed to have in play. A player may never have more Available Military units than are indicated on the Happiness track. This includes Military Units that are Active, Exhausted, or Deployed in a Region.
If a player's Happiness marker advances to a new zone on the track, they must immediately check to see if they have too many Military units. If they do, they must immediately demobilize a Military piece.
The normal Demobilize rules are used for this, but the Military piece must be placed in the '1' box, so Happiness will only be increased by 1.
If a player subsequently moves to a higher section of the Happiness track that allows more Military units than they currently have, there is no effect. Military may never be removed from the Demobilize track.
Example: The UK still has three mobilized Military Units and is very close to the boundary. They decide to use their Military action to demobilize. They are the second player who demobilized—the USA already did so. So, UK increases Happiness by 4, going from 11 to 15.
If they did not, and the UK Happiness dropped to 10 or below, they would have to forcibly demobilize a Military, which would only increase their Happiness by 1.
Let's say the USA only has two Military. So even if they enter the yellow section starting with the 10-track box, they are fine. They would not have a mutiny until National Happiness dropped to four or less.
Uprising Checks and Uprisings
If an Uprising Check occurs, an Issue aligned to that Region may change Control, and/or the Issue Option chosen. Uprising checks are triggered by Crisis or Conference Events. The location of the Unrest marker at the time of the Uprising check and the impact of any Military Units is judged at this time.
Follow these steps (conducted by the Active Player):
- Determine Region(s)
- Check for Uprising
- Determine Unsettled Issue
- Bid for Control
- Reset Region Unrest
- Select Issue Option
- Select Strategy Cards (after first Uprising of the game only)
Here is each step in more detail:
1. Determine Region(s): Use the Region specified in the Uprising Check. If none, then check the Region (or Regions, if tied) whose Unrest markers are highest (furthest right) on the track. If there is a tie, use separate die rolls for each Region.
2. Check for Uprising: The column containing the Unrest counter establishes the Unrest level for that region. If the column has an 'X' for Uprising, no Uprising occurs and no Uprising Check die roll is made. For each Region requiring an Uprising Check, roll a die. If the number is equal to or greater than the Unrest level, there is an Uprising in that Region.
a. Modifying the Uprising Die Roll: If a player has a Military Unit in the Region in columns 5, 6 or 7, they may modify the die roll. Before making the die roll, the player must announce if they are adding or subtracting one from the roll, or choosing not to modify the roll. If multiple players have Military there, they each announce their intention in turn, with the Active player going last. The die roll is modified by the net result for all decisions.
Design Note: Having 'boots on the ground' in a Region gave the major powers the ability to Influence regional events.
b. If Uprising Checks need to be made for multiple Regions, make each of the die rolls now. Then perform steps 3-7 below for each Region in order from the top of the chart downward (i.e., Europe first, and then down the list). c. If no Uprising occurs, then the Uprising Check ends here.
3. Determine Unsettled Issue:
a. Select Player: The player with the most Issues in that Region is subject to the Uprising. If multiple players are tied for the most, the player with the Military Unit furthest to the left in that Region chooses the affected player. It is possible the player making the choice is not one of the tied players. If there is no Military in the region, the possibly-affected players each roll a die, and high roller is subjected to the Uprising. Reroll ties until a single player is selected.
Important Note If no one Controls any Issues in the Region, the Uprising check ends; however, this will still trigger Strategy Card selection if it is the first Uprising and a Powder Keg counter still moves to the right into columns 1, 2, or 3.
b. Select Issue: The highest star-value Issue Controlled by the selected player is the subject of the Uprising and will be Unsettled. If there is a tie, the chosen player decides which of their Issues will be Unsettled.
4. Bid for Control:
a. Starting with the player who controls the Issue and proceeding clockwise, each player may pass, or bid Military and/or Available Influence cubes. b. Military cannot be used on Issues with the No Military symbol. c. Only Military that is either Available or in the same Region as the Issue may be used.
Important Note Military that is in the Region where the Uprising occurs count as 2 Military for bidding purposes.
d. If a player passes, they may not later re-enter the bid. e. A player's bid must match or exceed the number of Military units each other player has bid on the card. However, if the bid equals another player's Military, they must bid more Influence cubes. (In essence, Military is the main thing you are bidding. If Military is tied, Influence is the tie-breaker). f. When all players have passed, the Issue is given to the player with the most Military on the Issue. g. If there is a tie for Military, the tied player with the most Influence wins the bid. h. The winning bidder moves their bid Military and Influence to Exhausted. All other players' bid Influence remain Available and their Military either remain Available or in the Region (in the same space on the track) where it was prior to the Uprising check. i. The winning bidder (only) loses 1 Happiness for each Military unit in their bid. j. If no one bids on an Issue, it is placed on the top of the Discard pile.
Example: This Issue has the 'No Military' symbol in the lower left, so only Influence may be used to bid for Control.
5. Reset Region Unrest:
a. Increase the Powder Keg level in the Region by 1. (If there is no Powder Keg counter on the track, move one from its starting location to column 1.) b. Then move the Unrest counter in that Region so that it is one space to the right of the Powder Keg counter.
Important Note Remember that the Powder Keg counter may never be further right than shown on the top of the chart.
6. Select Issue Option: Any existing Strategy counters on the Issue are discarded. The winner of the bid for Control of the Issue selects one of the options on the newly won (re-won) Issue, places Unrest and Strategy counters, and adjusts Happiness as normal.
Play Note: If the original Controller retains Control of the Issue, they may select the same or a different option. If they select the same option, Happiness and Unrest adjustments happen again.
7. Select Strategy Cards: If this is the first Uprising, each player must declare which Strategy card they are choosing. (See the Strategy Cards section below for details.)
Play Note: It can be the case that that one player in a volatile Region has all or most of the Issues and therefore the same high-value Issue can repeatedly become Unsettled. This situation is intended and should force the affected player to deploy Military Units or attempt other tactics to mitigate the situation.
Design Note: Some Issues became major sticking points and continued to come back up in conversation (e.g., Reparations) even after one party thought they were Settled.
Comprehensive Uprising Check Example
The Smyrna Issue is being Settled. The last step is to add the top card in the Event Deck to the Waiting Room and resolve the Crisis portion of the card. It is Bela Kun and the Crisis is Uprising Check. The Region Tracks look like this:
Determine Regions and Check for Uprising
Europe and Middle East are tied for the highest Unrest, so both will be checked for Uprising. The bottom row of the chart shows that an Uprising will happen on a die roll of 4 or higher.
Europe, at the top of the chart, is rolled for first. The result is a '2', so there is no Uprising.
Next the Active Player rolls for the Middle East. As the UK has a Military Unit in the Middle East in column 6, the UK can modify the die roll. Since they have more Middle East Issues than any other player, they announce their choice to subtract one from the die roll. Unfortunately for them, the roll is a '5', so the Uprising occurs even with the –1 modifier.
If the roll for the Middle East had been a 4 or less, there would be no Uprising and the Uprising Check would end here.
Determine Unsettled Issue
The UK controls two Middle East Issues, France one, and the USA none. Therefore, the UK is subject to the Uprising. The UK has Constantinople (6 stars) and Arabia (3 stars), so Constantinople is the Unsettled Issue.
If both the UK and France controlled two Middle East Issues, the player with Military furthest along the Region Track decides. In this case it's the UK, so they will decide. If there was no Military at all in-Region, the UK and France would roll off to see who will be impacted.
Bid for Control
Constantinople is subject to the Uprising. In this example, here are the Military Units and Influence available to each player:
- UK: 1 Military in the Middle East, 6 Influence Available (they also have 1 Military in the Pacific, and 1 in Exhausted. Neither can be used for this bid.)
- France: 2 Military and 10 Influence Available, 1 Military in Exhausted
- USA: 3 Military and 5 Influence Available
The UK starts the bidding since they Controlled the Issue. They bid 2 Military and 2 Influence. They can bid 2 Military since the Military in the Region counts double. France counters with 2 Military and 4 Influence. The USA bids 2 Military and 6 Influence. The UK now has to Pass, since they can't beat the USA bid. France increases their bid to 2 Military and 7 Influence. The USA would have to go to 3 Military to beat the French bid since they can't go to 2 Military and 8 Influence. However, they are concerned about National Happiness and decide to Pass. France moves both of their Military Units and 7 Influence to Exhausted and reduce their Happiness by two.
Reset Region Unrest
The Middle East Powder Keg counter is advanced one box to the right from column 1 to column 2 and the Unrest counter is reset to the space to the right of the Powder Keg counter (column 3).
Select Issue Option
France decides to award Constantinople to Turkey. The UK Naval counter that was there from the UK choosing to make it an Open City is removed, and Balkans Unrest is increased by one. This is now the situation:
Select Strategy Cards
There previously was an Uprising and Strategy cards were selected, so the players skip this step for the rest of the game.
Strategy Cards
During set up, a number of Strategy cards were dealt out onto the table. At the conclusion of the first Uprising(s) only, in low-to-high score order, players will each select one Strategy card and attempt to accomplish its conditions by the end of the game to score additional stars (points) for accomplishing or avoiding their Strategy card conditions.
Strategy Card Choice Order
- Each player calculates the sum of the Star values of their controlled Issues. (Strategy counters or Happiness do not count for this calculation.)
- The player with the lowest Star total selects a Strategy card and marks it with their National marker. If there is a tie, the player closest (clockwise) to the current Active Player picks first. (The Active Player would therefore always win this tie.)
- Then the player with the next-lowest Star total chooses from the remaining unchosen Strategy cards and places their National marker on it.
- Selection continues in this manner until the player with the highest Star total selects from the remaining two Strategy cards and places their National Strategy marker.
- The unchosen Strategy card is set aside and will not be used in this game. The chosen cards and the National markers on them remain face-up for all players to see.
Design Note: Your chosen Strategy cards represent your post-war global vision. You score stars for icons and Issues controlled by any player. This means that, at times, you will support another player to choose Issue options that favor your Strategy card conditions, such as getting Japan to sign the treaty or not. This is an important element of the game that will likely require more than one play to optimize.
Negotiations
Negotiation decisions are public and binding but only for the immediate transaction. Future promises are not binding.
- Players are free to negotiate deals, but they may not directly exchange any game materials.
- A player can agree to Settle an Issue if the winner selects a specific option (binding).
- Any deal conditions that will be performed during that player turn are binding.
- Any conditions that apply to future turns are not binding.
- IMPORTANT: As part of any deal and at any time, a player may move up to 6 Influence from Available to the Exhausted area to allow another player to withdraw an equal number from Exhausted back to their Available stock.
Example: The USA Settles Syria and agrees to select British Mandate in exchange for the British sending three Influence to Exhausted so the USA can retrieve 3 Influence. If the deal also included a promise for the British to not place Influence on the Mesopotamia Issue, that part of the deal would not be binding.
Game End (Rush to the Finish)
Historical Note: As 1919 wore on, the defeated powers became more and more anxious to see the final treaty. The Major Powers negotiating the terms found themselves rushing through many Issues towards the end of the treaty drafting. To simulate this, when the Game End issue is drawn, the game enters a special Endgame phase.
Alternate Game End
When the Game End (Rush to the Finish) Issue is Settled or a player wishes to take Issues from the Draw deck but none are available, the game ends and final scores are determined.
Settling the Game End (Rush to the Finish) Issue
- When the Game End (Rush to the Finish) Issue is drawn from the Issue deck it must be placed in the Waiting Room, and the game continues as normal.
- When the Game End (Rush to the Finish) Issue is Settled, the player who has the majority takes the Issue (worth 7 victory points) and the game ends immediately.
- Do not conduct any of the normal steps for Settling an Issue and immediately proceed to the final scoring.
Final Scoring
Players gain points for several items:
- Controlled Issues
- Strategy Tokens
- Strategy Card
- National Happiness
Each player adds up their total scores as follows:
Controlled Issues: Gain the Victory Point value shown on Issues they Control. The Game End (Rush to the Finish) Issue, if Settled, is worth 7 VP.
Flag Strategy Tokens: Gain 1 VP each Strategy counter with your national flag on Settled Issues that you control.
Strategy Cards: Gain VPs based on the conditions of their Strategy Card (if any).
Play Note: Flag Strategy Tokens on your controlled issues score 1 VP. Strategy Tokens associated with your Strategy count on ALL issues whether controlled by you or other players. It is possible that a Flag Strategy Token could be counted once under each VP category.
Regional Unrest Condition: If the Strategy card has a Regions ≤ 3, it means that for each Region where the Unrest counter is in the 1, 2, or 3 column, the player scores the indicated VPs. If the icon is Regions ≥ 4, it means that an Unrest counter in columns 4 through 8 scores the indicated VPs.
Military Disc Icon: For each Military Unit that is not demobilized, receive the indicated VPs for each Military unit.
Happiness x2: The player doubles whatever his Happiness VPs (see below).
Play Note: You double your Happiness VPs in total. You do not get x2 Happiness for the Strategy card and then receive your Happiness points again for Happiness; it's x2 in total.
Play Note: Some Strategy Cards award points based on whether or not Japan and Italy sign the Treaty. Japan and Italy will sign the Treaty if their Happiness is 15 or higher. If their Happiness is 14 or lower, that country refuses to sign.
Happiness: Gain VPs based on relative position on the Happiness track
a. The player with the greatest Happiness receives the most points. b. Points are awarded based on number of players:
- For two-player game: 6 / 0
- For three-player games: 6 / 3 / 0
- For four player games: 6 / 4 / 2 / 0 c. If there is a tie, both tied players score the higher level of points and the next place points are skipped over. d. Any player with Happiness in the zero box loses five points.
Example 1: UK has 22 Happiness, USA has 20, and France has 18. UK scores 6, USA 3, and France 0. If the UK and USA each had 22, they would each score 6 and France would score 0, skipping the second place points.
Example 2: If UK has 22 and USA and France each had 18, UK would score 6 then USA and France would each score 3.
The player with the most total points is the winner.
Tie Breaks
If there is a tie, the tied player with the highest National Happiness is the winner. If there is still a tie, the tied player Controlling the most Issues is the winner. If there is still a tie, the victory is shared.
Two-Player Rules
When playing with two players, all main rules are followed unless otherwise noted below.
Overview
The player nations in the 2-player game are France and the UK. The USA is also present as a faction, its actions controlled by the players. Italy is not in the game, although it's Happiness is still tracked as normal.
The USA may Control Issues, but it cannot win the game even if it has the most points at the end.
Setup
Setup as normal except that the USA receives only Influence cubes. Do not place its Military Units or the USA Happiness marker. The Happiness markers for Japan and Italy are placed as normal. Any results that would change USA Happiness are ignored. Set up an area for the USA to place their Influence cubes and any Issues that they take control of during the game.
USA Rules
At the end of each player turn, that player must take a USA Political Action. Thus, the USA will get twice as many Political Actions as the players. The USA action is considered part of the turn for the Active Player.
Example: France's turn will consist of France taking a Political Action, possibly a Military Action, and then selecting and completing a USA Political Action. It is considered 'France's turn' for the entire time.
The USA is considered controlled by the player whose turn it is. So, if France Settles an Issue controlled by the USA, France will make the Issue Option selection (although see below for rules on how this is performed).
Example: If France is going first, the sequence will be French Action(s) – USA Political Action (performed by France) – UK Action(s) – USA Political Action (performed by UK) – French Action(s) – etc.
USA Political Action Options
The USA must take one of the three standard Political Actions on its turn:
- Place Influence
- Settle an Issue
- Reclaim Influence
The decision may be freely made by the controlling player, following these rules:
Place Influence: The controlling player may freely place Influence on any Issues of their choosing, as long as they can follow the normal Place Influence rules (place on exactly two Issues, must be winning on both). However, the USA will always place the minimum required Influence to be in the lead (i.e., if placing on an Issue where there is no Influence or the USA is already in the lead, it will only place 1 Influence).
Example: France takes their turn normally. For their USA turn, they choose to Place Influence on Reparations and Korea. On Reparations, the USA has 1 Influence and the UK has 3. On Korea, the USA is the only one with Influence with 1. France places 3 USA Influence on Reparations (so the USA is winning 4 to 3) and 1 onto Korea (so it now has 2). France may not choose to have the USA place more or less than 3 Influence onto Reparations and not more than 1 on Korea.
Settle an Issue: The USA will never Settle an Issue in favor of the controlling player. It may Settle an Issue where the USA or the other player is in the lead.
Any time an Issue is Settled and the USA wins the Issue, the Issue Option chosen will be the one that has the least USA Unhappiness. If there is a tie, the controlling player chooses. Issues Settled by the USA are placed in the USA area.
If the USA Settles an Issue, the player controlling the USA makes all decisions about how it is performed with the exception of Issue Option as discussed above.
When resolving Events, the player whose turn it is makes the decision for the USA. The USA may be nominated for "Select a Player" events. As the USA has no Military Units, if an Event gives the USA a choice of doing something to Military Units, that choice is still an option but it has no effect. USA Happiness is also not tracked, so if that choice is selected it has no effect.
When bringing an Event onto the Table, if the USA is Settling it may place an Influence cube to control the Event if desired, as normal.
Example: The Conference Event for Jan Smuts is being resolved. The text is "Choose a player. They either decrease Happiness by 2 or add 2 Unrest to Africa." The USA is currently being controlled by France. If the USA is selected to perform the Event, then France decides whether to decrease Happiness (which has no effect) or increase Unrest in Africa.
Reclaim Influence: If a player cannot take either Place Influence or Settle for the USA, they must take this action. This action can also be taken voluntarily. In either case, these special rules apply:
- The USA must recover as much Influence as they can (up to the normal 6).
- The player controlling the USA may also recover their own Influence, up to the same amount recovered by the USA.
Example: The USA has 9 Influence in Exhausted and France has 3. France is controlling the USA and takes the Reclaim action. 6 USA Influence are returned to Available. France could take up to 6 back as well, but only has 3 and takes those back. On a future turn, the UK is controlling the USA and chooses a Reclaim action. Now the USA only has 3 Influence in Exhausted, and the UK has 12. All 3 USA Influence are returned to Available, along with 3 UK Influence.
Uprisings: The USA does not bid on Uprisings. Only the UK and France may. After the first Uprising, the UK and France select Strategy cards as normal. The USA does not select Strategy cards.
End Game and Victory: The game ends as normal and victory points are calculated as normal. Victory points from Issues controlled by the USA are not awarded to either player. The USA receives no points and cannot win.
Solitaire Rules
Overview
There are three factions in the solo game: the UK, France, and the United States. At all times during the game, the player will represent one faction, and the other two will be controlled by automated rules ("bots"). The faction the player represents may change during the course of the game. Whenever an Issue is Unsettled the player takes control of the Faction with the lowest Faction Strength. But there will always be one player-controlled faction and two Bot factions.
At the start of the player turn, if their faction is the sole strongest, the player gains a Victory Point. To win the game the player must have 20 or more VP. Players can also try to beat their high score.
Definitions
Faction Strategy Icons: Unlike the normal game, Strategy cards are not used. Instead, each faction has three icons, each of which scores it one point regardless of which faction controls the Issue they are on.
These are:
- France: Containment, German Economy, French Empire
- UK: UK Fleet, Anti-Bolshevik, UK Empire
- USA: Self-Determination, Industry, USA Fleet
Play Note: These icons are shown on the Solo Player Aid.
Issue Value: Each Settled Issue has a value to each faction equal to the Star value of the Issue plus the value of the Strategy counters to that faction. This means that Issue Value will often vary for each faction. For example, if the Rheinland (star value of 6) has an Industry counter on it, it is worth 7 to the USA, and 6 each to the UK and France.
Potential Issue Value: When evaluating an Issue that has not been Settled yet, the Potential Issue Value is equal to the value for the best option for that faction. For example, the Rheinland has a PIV of 7 for the USA and France, and 6 for the UK. The PIV is used when determining Bot actions.
Faction Strength: The strength of each Faction is equal to the sum of all the Star values on the Issues it controls, plus one for each of their Faction Strategy Tokens that are in play, regardless of who controls the issue. After each Issue is Settled, the Faction Strength markers on the Happiness Track should be updated.
Play Note: The Faction Strength can be determined at any time by looking at the currently-controlled icons and counters. However it is useful for the player to have that information easily accessible on the Happiness Track rather than have to constantly be adding up the values on the table.
Solitaire Setup
Set up as normal for three players, placing twenty cards below the Game End (Rush to the Finish) card, except as noted below:
Only two Issue spaces in the Waiting Room are used, instead of three. This is indicated on the board by the "not for solo" icon on the top-most Waiting Room space.
The Solo game does not use the Strategy cards, or the Japanese or Italian Happiness marker. Return those to the box.
Place the Player VP marker and the Faction Strength markers on the zero space on the Happiness Track.
The faction materials should all be placed in front of the player in three separate areas. The order may be randomized or set by the player, at their option. The player will start by controlling the faction that will go last in the turn order.
Place the US, UK, and France Happiness markers on the Happiness Tack 20 space.
Sequence of Play
Play follows the same order as normal—proceeding from one faction to the next in order. This is true even when the player changes factions. Because of this the player may take multiple turns in a row or miss a turn in some rounds.
There is one addition to the sequence of play: At the beginning of the Player Faction turn, if their Faction Strength is the sole highest (no ties), the player scores a VP.
Important Note The player may only score a VP if each faction controls at least one Issue.
When a player faction takes its turn, the player makes all decisions for their turn. The Bot rules below are not applied.
Exception: If the player has the most Influence on both Issues on the Table, they must Settle one of them.
Bot Opponent Priorities
When a Bot faction takes a turn, follow these priorities:
Military Action
The Bot will take a Military action based on these priorities:
- If Unrest in the region is on the 4 or higher column and the Bot might have an Issue Unsettled if that region has an Uprising (so most or tied for most Issues in that region), the Bot will place a Military in the region. If so, place the Military on the 7 column unless that will cause a forced demobilization or the space is occupied. If so, then place it on the 8 column, unless that is also occupied (in which case no Military is placed).
- If a Bot is 1 or 2 Happiness away from forced Demobilization, they will Demobilize if there is a space that gains 2 or more Happiness.
- If a Bot has a choice between Demobilizing or placing onto the Region track, they will place onto the track. If there are more than 2 Regions where a Bot wants to place, place where the Bot has the most Issues or, if tied, the region with the Issue with the highest Star value. If still tied, roll a die for each Region and place in the Region with the higher die roll.
- If any of these criteria hold at the start of a Bot's turn, it will take a Military Action before Political. If it does not take a Military Action before the Political phase, check to see if any of these criteria apply after the Political Action. As normal, a Bot can only conduct one Military action per turn.
Political Action
The Bot will take a Political Action based on this priority:
- Settle an Issue: If a Bot is winning an Issue, it will Settle. If there is a choice, the Bot will Settle the Issue with the highest PIV. If there is still a tie, it is player choice which to Settle. If it is not winning an Issue, it will not Settle.
- Place Influence: The Bot will place Influence on the two Issues selected by the Player; however, it must be possible for the Bot to be winning on both. The Bot will always place the minimum Influence to be winning. If the Bot does not have enough Influence to be winning on any two Issues, it will Recover Influence instead.
- Recover Influence: The Bot will recover six Influence and all Military, as normal.
- If none of the above apply (if there are no Influence or Military to recover), the Bot will Settle an Issue that the other Bot is winning on the Table. If there is none, the Bot will not perform a Political Action.
Play Note: Solitaire Common Sense: This is not a typical optimization Bot where you are always trying to make the best Bot move. If the Bot instructions do not specifically state a forced choice, you choose. You will need to manipulate the system within the limits that we have set if you are to win. Basically when in doubt you choose.
Settling an Issue
When a Bot Settles, the normal settling process is followed, with the following caveats:
- The Bot will always pick the highest PIV option. If there is a tie, select the one with the lowest Unhappiness increase for the faction. If it is still tied, player chooses the option.
- Event: The player decides how to implement Conference Events even if the Issue was Settled by a Bot. However: Optional events must be performed by the player. There is no choice. If the Conference Event has any other choices (like selecting an Issue to be Unsettled or a faction is to be selected), the player has complete rein over whether and how to implement it.
- Bringing down an Issue: The Bot will bring down an Issue that it is winning on (player choice if there are two). If there are none, then bring down an Issue with no Influence at all (player choice if multiple). Otherwise, player choice.
- Player selects which Event to move from the Waiting Room to the Table. Since the player always chooses the results of a Conference Event, Influence may not be placed to Control an Event.
- When the Bot adds an Issue to the Waiting Room, place the top card from the Issue draw deck into the Waiting Room, then place a card from the Issue draw deck to the discards.
Play Note: If the Game End (Rush to the Finish) card is discarded in this way, swap it for the card that was just added to the Waiting Room.
- The Crisis is resolved as normal.
Uprisings
When an Uprising roll needs to be made, if Bots have a Military In Region and can modify the die roll, they will apply as follows: If there is an Uprising and they would be the affected faction, then they will apply –1 to the die roll. Otherwise, they will apply +1.
Bidding for Unsettled Issues
When there is a bid for an Unsettled Issue, first the player needs to determine how much each Bot will bid for the Issue. Then the player needs to decide if they are willing (or able) to beat that with their controlled faction.
The Military Units that a Bot will bid is based on this chart:
| Total Military Units | Bid |
|---|---|
| 3 | 2 units |
| 2 | 1 unit |
| 1 | 1 unit |
Note that this is units, not strength. If possible, the Bot will use an In-region Military for the bid. So a Bot bid could be as high as 3 Military (2 for the in-region Military, and 1 for the other). Note that Exhausted Military and Military in other regions cannot be used (as per normal rules), so the Bot may not be able to bid as much Military as it wants to.
Influence: The amount a Bot will bid is equal to the PIV of the Issue. If that is more Influence than the Bot has, it will bid the maximum.
If both Bots would make the same bid, then the Bot with more Influence will bid 1 more Influence. If both Bots are tied in Influence, they will just bid their PIV.
Once the Military/Influence bids for the Bots are determined, the player will decide if they wish to beat the highest bid. If they do, they take the Issue and spend their bid. If not, the Bot with the highest bid gets the Issue (player choice if tied). The Influence and Military bid are Exhausted and Happiness decreased, as normal.
Changing Factions
Whenever an Issue is Unsettled, either through an Uprising or an Event, the player immediately switches to controlling the faction with the lowest Faction Strength. If there is a tie, the player may choose which Faction they wish to control.
This means that the player will be in charge of their new Faction for the bid for control of the Unsettled Issue.
End Game and Victory
The game ends normally when either the GAME END (RUSH TO THE FINISH) Issue is Settled or the Issue Draw Deck is emptied.
First Game: If the player has 20 or more VP they win.
Second and subsequent Games: Once you win one game at the 20 VP level, increase the total by 5 until you are defeated twice. Then lower it by 1 VP until you find your personal solo balance. If for any reason you cannot win at 20 VP, lower it by 5 VP until you win. Once you win twice in a row then begin to increase the level.
Design Note: Balancing a solitaire game is more about you than the game as there is no objective standard. In your early contests you should struggle with 20 VP, but as you become more experienced 20 is achievable and then it's just a matter of finding the sweet spot for you current level of experience.
Player Aid Summary
Turn Options
MUST do exactly one Political Action
- Place influence on two Issues
- Settle an Issue
- Reclaim infl/mil from Exhausted
May do one Military Action (before or after)
- Deploy
- Demoblize
SETTLING AN ISSUE (all done by Active player, except for selecting and resolving option)
- Award Issue, Remove Influence — All from winner, 1/2 from others (FRD). If Active is not Winner, Active gets back all influence on Issue. Winner selects and resolves Option.
- Conference Event
- Advance Issues + Event.
- Add Issue to Waiting Room
- Add Event / Resolve Crisis
Uprising Check
- Determine Region — Most Unrest. All if tied.
- Roll for Uprising — DR > Uprising #. Military may give +/-1
- Determine Player — Most controlled issues. If tied, player with most advanced military on region track picks. Highest star issue from selected player.
- Bid for Control — In-region military = 2. Current owner bids first. Winning bid to Exhausted.
- Region Unrest — Increase Powder Keg level and reset Unrest.
- Select Issue Option
After First Successful Uprising: Draft Strategy Cards
Icon Reference
- German Reparations
- German Containment
- Empire (Italy, France, Britain)
- Unhappiness
- Happiness
- Unrest
- Powder Keg
- Industrial Growth
- Military
- Self Determination
- Bolshevik Containment
- Influence
- Signatory
- Region — Balkans, Middle East, Europe, Africa, Pacific.
- Naval Squadron
- VP
- No Military Influence allowed
Issue Color Chart: Africa, Europe, Pacific, Middle East, Balkans, League.
GMT Games LLC — P.O. Box 1308, Hanford, CA 93232 — www.GMTGames.com