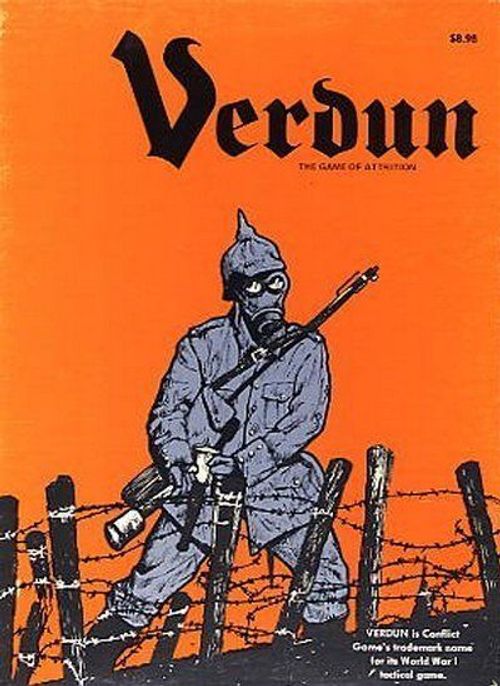
Verdun: The Game of Attrition
Verdun: The Game of Attrition Rulebook
Table of Contents
Table of Contents
- An Introduction to the Rules
- Victory Conditions
- Initial Set Up
- Sequence of Movement
- Use of Artillery
- Terrain Consideration
- Zone of Control
- Stacking
- Demoralization
- Isolation and Supply
- Rally of Demoralized Units
- Railroads
- Effect of Flamethrower Battalions
- Effect of Surrounds
- Use of Tunnel
- French Fanaticism
- Strategic Movement
- Phosgene Gas
- Weather
- Rule Clarifications
- Questions
- The Art of Wargaming
- The French Order of Battle
- Alternate French Order of Battle
- The German Order of Battle
- Verdun Combat Results
An Introduction to the Rules
This part of the BATTLE MANUEL assumes that you have played war games before and are familiar with such terms as "zone of control", "movement point", "combat factor", and so forth. If this is not the case, go back and study the insert, The Art of Wargaming, which will give you a working knowledge of the vocabulary and mechanics that most war games have in common.
Victory Conditions
GERMAN TACTICAL VICTORY: kill at least 50 French units and have the French losses at least 25% higher than yours.
GERMAN STRATEGIC VICTORY: kill at least 70 French units and have the French losses at least 50% higher than yours.
FRENCH TACTICAL VICTORY: prevent both of the above and hold all of the Verdun hexs.
FRENCH STRATEGIC VICTORY: kill at least 25% more of the Germans than they do of you, and hold all the Verdun hexs.
Notice that it is impossible for both sides to win, but it is possible for both sides to lose; meaning that each side failed in their objectives. In the actual battle the French barely won a tactical victory, or the Germans barely won a tactical victory, depending at which source you use for your casualties. It was that close.
Initial Set Up
First of all, place all units on their appropriate space on the ORDER OF BATTLE SHEETS. Notice that the French rate of re-inforcement is much more fixed than the German. This is true, because while the French poured in the men and equipment as fast as possible, the German High Command was erratic in its releasing of the reserve units. Needless to say, this was a constant source of frustration with the German tactical commanders.
All German units set up north and east of the barbed wire entanglements, while the French set up south and west. Each side sets up on his side of its own wire. French sets up first.
Sequence of Movement
Each turn is composed of the following steps:
- GERMAN MOVEMENT: German moves all his combat units; allocates attacks.
- GERMAN BOMBARDMENT: German fires all his artillery he wishes.
- FRENCH COUNTER BATTERY: French fires his supporting "75's" in attempts to break up any German attacks.
- GERMAN INFANTRY COMBAT: German resolves any and all of his allocated infantry assaults.
- FRENCH MOVEMENT: French moves all his combat units; allocates attacks.
- FRENCH BOMBARDMENT: French fires all his artillery he wishes.
- GERMAN COUNTER BATTERY: German fires his supporting "77's" in attempts to break up any French attacks.
- FRENCH INFANTRY COMBAT: French resolves any and all of his allocated infantry assaults.
Use of Artillery
In World War I artillery was responsible, either directly or indirectly, for at least 60% of the total casualties. And the battles were usually won by the side that made the most efficient use of their guns.
In the game, VERDUN, artillery will be the key to victory. First of all, examine your pieces:
[Counter diagram: the artillery counter shows the Range (upper left), the Caliber (upper right), the Shell Factor (lower left, e.g. 5) and the Movement Factor (lower right, e.g. 2), printed as "5-2". A second counter shows "7-(5)" with "RR" marking a railroad gun: the number in parentheses is the Movement on RR Only.]
Now, your artillery fires during the bombardment portion of your turn, and if it's either a "75" or "77" battery it can also fire a counter-battery shelling during that part of a turn.
Let us first examine how it is used during the bombardment portion of a turn. There are three types of barrages that may be used: the standard, the intermittent, and the saturation barrage. Each has advantages and disadvantages.
The standard barrage is just what the name implies. A target would be registered, the guns assigned, and it would be hammered until the specified shell allotment had been expended. To reflect this type of bombardment simply add up all the shell factors of all the guns firing on a specific target and roll it on the ARTY SHELL TABLE as one big shoot.
The intermittent barrage was more subtle. The guns would hammer at a position, then cease firing. The defending troops would then come up out of their bunkers and prepare to repulse the expected infantry assault. At this point the guns would open up again and hopefully catch the defenders out of the entrenchments and masacre them. Sometimes it worked, but sometimes the lull in the bombardment would be the break the defenders needed to keep up their morale. When it worked it was better than the standard barrage, when it didn't, it was worse. To reflect this type of barrage have each battery fire seperately at the target with the results noted after each shoot. Should a unit be demoralized by one battery and then have another "demoralized" put on it, it is assumed that it fell for the trick and was eliminated.
Obviously the player who's shooting must specify the type of barrage he is firing against each target hex before he starts rolling the die.
The saturation barrage was just what the name implied. The guns would be assigned their targets and the shells would be cranked out as fast as they could be loaded with little regard for correction of fire. While this type of barrage could be frightening, it also was a gross waste of ammunition. To reflect this, any battery firing saturation would double its shell factor, but would triple its ammunition usage. As an example, a German 420 mortar would normally fire an "8" shell factor and use up "8" ammo factors. However if it fires "saturation" it would have a shell factor of "16", but would use up "24" ammo factors.
Now, there is no reason why you couldn't fire either saturation barrage with either the standard or the intermittent technique. Or you could have some batteries firing saturation and others firing normally. Counter-battery fire can also fire saturation.
On counter-battery fire, since it is called in by the infantry it can only be dumped on a unit that is adjacent to one of your own units. Its main purpose is to break up infantry assaults.
Now the weak link in the artillery mincing machine was ammo supply. Often a good offensive would stall simply because the supporting guns were out of shells. So every time a gun fires its shell factor it uses up an equal ammo factor. Consult the ORDER OF BATTLE sheets for each sides ammo allotments for the game.
Terrain Consideration
Terrain affects movement and combat as follows:
| Terrain | Effect |
|---|---|
| PLAIN TERRAIN | Costs 1 MP (movement point) to enter, no effect on combat. |
| UP SLOPES | Costs 1 additional MP to cross, if you attack "up slope" your attack factor is halved. |
| DOWN SLOPES | No effect on movement. However any unit that attacks "down slope" against a unit in plain terrain doubles its attack factor. |
| BARBED WIRE | Costs 3 additional MP to cross enemy wire. If you attack across enemy wire your attack factor is halved. After a successful attack through enemy wire, the wire is considered to have been destroyed. |
| ROADS | Costs 1/2 MP to move along. No effect on combat. |
| TOWNS | Costs 1 MP to enter. Doubles a unit's defense factor against infantry assault. |
| FORESTS | Costs 3 MP's to enter and doubles a unit's combat factor on both defense and offense. |
| FORTS | Costs 2 MP to enter and if "target" of artillery is in fort then the shell factors hitting him are halved. Also on defense a unit is tripled against infantry assault. |
| RIVERS | Costs 7 additional MP's to cross and infantry attacking across it are cut in 1/4. Also no zone of control of any kind extends across a river. |
All movement and combat penalties or benefits are cummulative. As an example to move "up slope-across enemy wire-into a forest hex" would cost 7 MP's though the unit only went one hex. In combat, the same applies. As an example of this would be two German battalions attacking "up slope" against a single French battalion in a forest hex. The French battalion would be tripled, and the two German battalions would be halved, so the net result would be a 4 to 12 suicide attack.
Zone of Control
You must stop as soon as you enter a zone of control of an enemy unit. However you do not have to attack. Also, you may move through an enemy's zone of control at the rate of one hex per turn, provided that it is your only movement that turn and you are not isolated at the end of said movement.
Stacking
No more than the following units may be stacked per hex:
| Terrain | Limit |
|---|---|
| PLAIN TERRAIN | 6 units |
| FOREST | 2 units |
| ALL OTHERS | 4 units |
EXCEPTION: On the opening German turn's initial placement the German may stack up to 2 more than the stated limit.
Demoralization
Demoralization can occur either as a result of artillery fire or isolation. If this occurs the unit in question is turned over, and moves and fights at half-factor.
Isolation and Supply
If you cannot trace a supply line unhindered by enemy zones of control back to your own lines you are isolated. If any of your units are isolated at the end of your complete turn they must have a morale check. Roll the die individually for each unit; a roll of "5" or "6" means that a good order unit is demoralized. If the unit was already demoralized then it surrenders and is removed from the board.
Rally of Demoralized Units
A demoralized unit can be rallied and become a good order unit if it is withdrawn from the front area (off the board); sits off the board one complete turn and then brought back in the following turn. There is no limit to the number of times a unit can be demoralized and then rallied, provided the aforementioned procedure is followed.
Railroads
The French may elect to bring in re-inforcements by rail, or shift units around by rail. For a unit to have "rail bonus" it must start and end its movement on a railroad. It may not initiate an attack. Only one unit may be moved per rail line per turn. If all these conditions are met then the unit in question may move as far along the railroad as it wishes.
Effect of Flamethrower Battalions
Only the German has these specially equipped units. They are the six infantry battalions with the "F' on the counter. Any time they are used in an attack the battle is read on the DEFENDER DEMORALIZED TABLE. If the defender was already demoralized then subtract "two" from the die roll. However, any time a flamethrower battalion is used in an attack it always takes losses first. As an example, should the German launch an attack with five battalions and one was a flamethrower and the combat results called for the German to lose one battalion, he would have to give up the flamethrower battalion. A demoralized flamethrower battalion is treated as a normal demoralized infantry battalion; it is incapable of conferring special benefit.
Effect of Surrounds
If a unit is surrounded by units that are all attacking it then the battle is resolved on the DEFENDER DEMORALIZED TABLE if the defender was in good order. If the defender was previously demoralized, and is surrounded, then subtract two from the die roll.
Use of Tunnel
The tunnel is located next to Fort Travannes. A unit could go under another unit by using it in the following manner. When you move into the tunnel the entrance you use cannot be in an enemy zone of control. When you pop out the other side you may appear in an enemy zone of control, but you must stop immediately. A maximum of two units may use the tunnel per turn.
French Fanaticism
The French were frantic in their passion to hold Verdun. To reflect this allow any French unit defending against infantry attack to be tripled defensively, rather than the normal doubling for a town hex. However, should a German unit manage to get into a Verdun hex it must be immediately counter-attacked and thrown out. No boche may be allowed to sit in Verdun. Remember, "They shall not pass!"
Strategic Movement
This applies only to artillery units. Their given movement allowances is based both on move and set up time. So an artillery unit may move at double its normal movement rate if it does not fire in the immediately following bombardment portion of the turn. If the unit in question was a "75" or a "77" it would also lose it's counter-battery option in the following enemy turn.
Phosgene Gas
Phosgene gas was another new surprise the Germans had for the French at VERDUN. Unlike the other gases presently in use, phosgene could penetrate the then existing French gas masks. Fortunately, for the French the appropriate gas shells did not arrive until after the offensive had bogged down. Consult the German Order of Battle to see when the German gets the phosgene shells. When he gets them the effect is calculated as so:
[FIG. 1: a hex diagram with the "FOCUS OF ATTACK" hex in the centre, the six surrounding hexes numbered 1 to 6 (die roll for wind direction), and a "North" arrow. FIG. 2: the dispersion pattern, a "Wind Direction Line" running from the focus of attack hex (marked 12) downwind; the hexes in the pattern carry the numbers 12 (focus), 8, 8, then 4, 4, 4 in the furthest row.]
First, The German selects a focus of attack, Then he rolls to see which way the wind carries the gas. Fig. 1 indicates the die roll for the wind direction line. Fig. 2 is the gas dispersion pattern. The numbers in the "dispersion hexs" indicate how many equivilent "shell factors" hit the area and the effect is rolled on the arty shell table. Also, due to the psychological effect of the new gas all German attacks that turn are rolled on the DEFENDER DEMORALIZED TABLE. If the defender was already demoralized then subtract two from the die roll.
Since the gas shells arrived over and above the normal shell allotment the phosgene gas attack does not cost the German any ammo factors.
The Germans are allowed only one phosgene gas attack per game. Also, the attack cannot be made if the weather is heavy snow.
Weather
On the beginning of each turn roll the die to see what the weather is for this turn. The results are as follows:
| Die roll | Weather |
|---|---|
| 1 or 2 | clear skies, no adverse effects. |
| 3 or 4 | light to medium snow, halve all movement factors. |
| 5 or 6 | heavy snow, halve all movement factors and halve all artillery factors firings due to sleet blinded range finders and no air spotting. |
Weather is also assumed to be clear on turn one.
Rule Clarifications
Commulative Effect of Benefits
In all cases both benefits and penalties are commulative. As an example should a German unit be hitting a demoralized French battalion, with a flamethrower battalion in on the attack, in a surrounded configuration, the battle would be fought on the DEFENDER DEMORALIZED TABLE with a total of "four" subtracted from the die roll. However the defending French unit would still be entitled to all benefits terrain and/or position would give him. So a demoralized unit in a fort would be worth a "six" in defense factors.
Another problem that occurs is what if a "1" is rolled and the attacker was entitled to "minus two" on the die roll. Then what? Then take the difference horizontally across the odds table. In this case if the battle had been a "1 to 1" and the attacker was entitled to a "minus two" and a one was rolled, the battle would be read on the "3 to 1" table. If a "two" was rolled, then read the results on the "2 to 1" table, and so forth.
Artillery Under Infantry Assault
Obviously if artillery is assaulted directly by infantry it would have a combat factor different than its shell factor. After all, a railroad gun is not very effective against infantry climbing all over it. To reflect this all artillery units defend with a "1" against direct infantry assault if they are in good order, and a "1/2" if they are demoralized.
Demoralized Artillery
Demoralized artillery units fire with half shell factor. Also if the unit is a "75" or "77" it would lose its counter battery option.
Defender Destroyed, Results Of
Should a defending unit be completely destroyed by the arty prep, any battalions that had been scheduled to attack him, still make their attack against the hex where the defender "used-to-be" with the attack being resolved as an automatic rout. If after an infantry assault the defender is completely destroyed the attacking battalions may occupy the hex where he "used-to-be."
Off Board Artillery
Your artillery may be stationed off the board. You simply tell your opponent which batteries are being held out and how many hexs away from the edge of the board they are. As an example, a battery that shoots with a range of "ten" could be stationed four hexs off the board, then it's range would be six hexs from the board edge. All French "off board" arty is figured from the south edge, while all German arty is figured from the north edge. Off board arty can be shelled like any other target using the same arithmetic.
Effects on Germans of Phosgene Gas
If the wind blows the gas back in the Germans "faces" on the gas attack the effect is as follows. Any German unit caught in the dispersion pattern is not affected since they had suitable gas masks; however due to the resulting confusion of the gas going the wrong way it cannot make any attacks it was scheduled to that turn.
Questions
On Victory Conditions are losses 25% higher in factors or total units? In total units, not factors.
Who sets up first? The French always set up first.
If you attack the "wrong way" across barbed wire do you still suffer the penalty? Yes, until a successful attack has been made across the wire.
In odds figuring who are factors rounded off in favor of? Always the defender.
May demoralized units move through ZOC as outlined under "Zone of Control" rules? No, only "good order" units have this option.
Does the presence of a friendly unit in a hex negate an enemy ZOC? No, you still must stop upon moving adajcent to an enemy unit. However, you could supply "through" your own unit to avoid an isolation.
Is it true that if the defender is in plain terrain and the attacker is simultaneously attacking "down slope" and out of a forest then the attacker has his attack factor quadrupled? That seems a bit gross. Yes, it is true. The attacker gets "doubling" both for the down slope due to the increased attack impetus and the "doubling" due to the forests concealment and protection. Also, any idiot who sets up a defense at the base of a hill with a forest in front deserves anything that happens to him.
Why do the turns increase in time span from one day to two, and then three? This represents the "bog" factor that sets in on the battlefield due to the churned up ground and general weariness of the troops. It was either lengthen the time span or decrease the units movement points. I felt the former detracted from playability the least.
For rallying purposes can you withdraw off any edge of the board? No, you can only withdraw off an edge of the board that is "behind" your lines.
May a unit stay, and/or fight "In" the tunnel? Yet, but any unit that fights from "inside" the tunnel is automatically eliminated no matter what the odds. However, losses on the opponent are figured as in normal combat.
Under "French Fanaticism" in regards to counter-attack is there a minimum stipulation? Yes, the French must make the attack at least "1 to 1" if at all possible.
Can you "blow-up" the bridges across the river? Yes, if a unit sits adjacent to the bridge for one complete turn it can destroy the bridge at the end of its combat turn.
In the initial German set up the OB calls for the units to be placed on the hexs immediately behind the German wire. Does this include the partial hexs on the north edge? No, to fulfill the "fixed" set-up requirement the German only "has to" set up on each full hex immediately behind the German wire. However, should the German player wish to set up on the partial hexs in order to attack at this point he may do so.
If the turns "lengthen" to three days wouldn't the French replacements increase to nine battalions rather than three per turn? While it is true that in general the French pumped in three battalions a day, the net increase in usable battalions would really be closer to one.
This is why. In a three day period nine battalions would be brought in, but in the same time span three would be rendered "unfit" due to disease and another three would simply dissolve or be absorbed into other battalions. Hence, the net increase would be three.
Should other questions either on game design or rules interpretations arise, feel free to write, but please enclose a stamped self-addressed envelope. In the meantime, have fun.
The Art of Wargaming
Welcome to the world of conflict simulation, or as it's more popularly called, wargaming. It is indeed a fascinating hobby, however for the beginner it can often seem incredibly complex. In some respects it is, but then again warfare is a complex art. The purpose of this little sheet is to acquaint you with the basic methodology that most wargames have in common, and to introduce the language of wargames.
The Board
Wargame boards are usually composed of hexagons, or "hexs" onto which various symbols are placed to denote different types of terrain. Look at your VERDUN board, you can probably figure out what everything is by common sense, but to help, here are the definitions.
[Diagram of board features: barbed wire, fort, slope line, river (usually in blue), road, city or town.]
Forest areas are usually shown by coloring the hex with some shade of green.
Now each one of this terrain features usually affects both movement and combat. However the actual effect will vary from game to game. In VERDUN the specific effects are delt with under "Terrain Considerations" in the main rules.
The Counters
[Diagram of an infantry battalion counter, "4-8": the first number is the Combat Factor, the second the Movement Factor.]
The two main numbers on a combat unit are its "combat factor" and its "movement factor". Let's talk about movement first. The "8" movement factor means that the unit has 8 "movement points" or MP's as it is often abbreviated. Now each terrain hex to enter usually costs so many movement points. Also border features, like rivers, slopes barbed wire, cost so many MP's to cross. Exactly how many movement points each move costs varies from game to game. Things like roads often speed up, or increase your MP's while weather can often cut them in half. In any case, a unit can never make a move that would use up more MP's than it has.
Almost always, in every game, all units may move their full MP's worth of movement every turn. It is not like chess where only one piece at a turn moves.
Zone of Control
In general a combat unit in one hex exerts an influence on the hexs immediately around it. This ring of hexs around a unit is called it's "zone of control". The effect of the "zone of control" is usually different from game to game. In VERDUN your unit must stop immediately upon entering the zone of control of an enemy unit. "Zone of control" is often abbreviated "ZOC".
Combat
Combat is figured on the basis of "combat factors" and "odds". You may attack a unit any time you are adajcent to it. Usually, a unit may launch only one attack a turn.
Now let us consider a typical attack; as below:
[Diagram: two "white" 4-8 infantry battalions attacking the gray "4-8" battalion.]
Since there are a total of "eight" combat factors attacking "four" factors the battle would be a "two-to-one" in figuring battle odds. If three units had been attacking it would be a "3 to 1". However if three units had been attacking two units it would be a "1 to 1" since odds are always rounded off in favor of the defender.
After the correct odds on the basis of combat factors have been figured, resolve the battle by rolling the die and finding the result under the appropriate "odds" ratio.
Often a unit's combat factor is altered by terrain. For instance in VERDUN if you attack across a river your combat factor is "1/4" so it would take four infantry battalions against one to get a "1 to 1" attack. On a combat results table the odds are often abbreviated such as "4-1" meaning a "four-to-one".
Summary
These then are the basic mechanics that most war games have in common. Now, you are ready to dive into the actual rules of play. At first it may seem complicated, but after a few games you should get the knack of it.
The French Order of Battle
Notation: infantry battalions are printed 4-8 (combat factor 4, movement factor 8). Artillery counters are listed as printed: range / caliber, then shell factor-movement factor (a movement factor in parentheses is movement on railroad only; "RR" marks a railroad gun). "75" = 75mm.
| Date | Units | Ammo |
|---|---|---|
| AT START | 36 infantry battalions 4-8. MUST BE PLACED ON LINE IN THE HEXS IMMEDIATELY BEHIND THE FRENCH BARBED WIRE. | |
| FEB. 21 | IN VERDUN: 6 infantry battalions 4-8. ANYWHERE: 4 batteries, range 7 / 75, 1-4. IN FORTS: range 6 / 293, 6-1; range 7 / 370, 7-1; range 12 / 210, 4-2; range 12 / 210, 4-2; range 12 / 210, 4-2; range 6 / 280, 5-2. | 30 AMMO |
| FEB. 22 | 16 infantry battalions 4-8; 2 batteries range 7 / 75, 1-4 | 10 AMMO |
| FEB. 23 | 1 infantry battalion 4-8; 2 batteries range 9 / 155, 3-3; 2 batteries range 7 / 75, 1-4 | 20 AMMO |
| FEB. 24 | 1 infantry battalion 4-8; 1 battery range 9 / 155, 3-3 | 10 AMMO |
| FEB. 25 | 1 infantry battalion 4-8; 1 battery range 7 / 75, 1-4 | 10 AMMO |
| FEB. 26 | 2 infantry battalions 4-8; 1 battery range 7 / 75, 1-4 |
ALL FRENCH REINFORCEMENTS APPEAR ON THE ROAD TO SOUILLY.
Alternate French Order of Battle
| Date | Units | Ammo |
|---|---|---|
| AT START, FEB. 19 | 36 infantry battalions 4-8. ONE BATTALION MUST BE PLACED IN EACH OF THE CITY OR TOWN HEXS. THE REST MAY GO ANYWHERE. IN FORTS: range 6 / 293, 6-1; range 7 / 370, 7-1; range 12 / 210, 4-2; range 12 / 210, 4-2; range 12 / 210, 4-2; range 6 / 280, 5-2. | 10 AMMO |
| FEB. 20 | 6 infantry battalions 4-8; 4 batteries range 7 / 75, 1-4 | 10 AMMO |
| FEB. 21 | 8 infantry battalions 4-8; 1 battery range 7 / 75, 1-4 | 10 AMMO |
| FEB. 22 | 8 infantry battalions 4-8; 1 battery range 7 / 75, 1-4 | 10 AMMO |
Reasons For
While it is true that the German attack on Verdun actually started on February 21, it is also true that the Germans were completely ready to attack on February 19. The reasons they delayed until the twenty-first was that on both the 19th and the 20th the battlefield was blanketed by heavy snows which would've severely hindered their artillery.
It was a fatal delay. In that time span the French High Command finally put the pieces together and realized the scope of the storm that was about to hit Verdun. The troops were rushed into the line and some reserves were scrounged up. And while the French weren't in good position on the 21st, it was considerably better than on the 19th. And that is where the standard game begins.
However, it is perhaps unfair to assume that since the Germans chose to wait, the German "player" must also wait. It would be just as historically correct to start the game on the 19th and assume "heavy snow". Or, start on the 19th and roll the die for the weather, since in reality the weather was random.
The Use Of
It is very simple to use the alternate OB. Simply place it over the original one covering up the turns up to Feb. 23. After Feb. 23 simply follow the standard OB as it would normally be done.
For the Germans, the only change in their OB would be that they start with 160 ammo factors, rather that the 180.
Effect on Balance
With the Feb. 21, standard OB, the game is strongly pro-French. With the Feb. 19, alternate OB, the Germans take a very slight edge. It is our recommendation, that between players of equal ability the Feb. 19 OB be used and the die rolled for the weather. In any case, both OB's are historically right for the "start times" they portray.
Earlier editions of VERDUN did not have this alternate French Order of Battle.
The German Order of Battle
Notation as for the French Order of Battle.
Feb. 21 - Units at Start
180 AMMO FACTORS. ONE UNIT IN EACH HEX IMMEDIATELY BEHIND THE GERMAN BARBED WIRE. THE REST GO ANYWHERE.
- 6 flamethrower infantry battalions 4-8 (marked "F").
- 45 infantry battalions 4-8.
- 36 artillery units, as follows (range / caliber, shell factor-movement factor):
| Count | Unit |
|---|---|
| 6 | range 5 / 77, 1-4 |
| 4 | range 14 / 100, 2-3 |
| 3 | range 12 / 105, 2-3 |
| 2 | range 16 / 105, 2-3 |
| 3 | range 17 / 130, 3-3 |
| 4 | range 8 / 150, 4-3 |
| 2 | range 18 / 150, 4-3 |
| 2 | range 10 / 210, 4-2 |
| 3 | range 12 / 280, 5-1 |
| 2 | range 10 / 305, 5-1 |
| 3 | railroad guns (RR) range 18 / 380, 6-(5) |
| 2 | range 15 / 420, 8-1 |
Reserve Divisions
- 9 infantry battalions 4-8.
- 2 batteries range 5 / 77, 1-4.
- 30 AMMO FACTORS.
THE ABOVE IS A GERMAN RESERVE DIVISION. THE GERMAN PLAYER MAY BRING ONE OF THESE IN ON ANY GERMAN ROAD ANY TIME HE ROLLS A "6". HE ROLLS AT THE BEGINNING OF EACH TURN.
ON EACH TURN IRREGARDLESS OF OTHER RE-INFORCEMENTS THE GERMAN GETS 10 AMMOS.
STARTING ON MAR. 1 - MAR. 2 GERMAN ROLLS FOR PHOSGENE GAS. A "5" OR "6" HE GETS IT, ANY MAY USE IT.
Verdun Combat Results
Infantry Assault Table
Defender in Good Order (columns are battle odds; each cell is attacker losses-defender losses; R = rout):
| Die | 1-2 | 1-1 | 2-1 | 3-1 | 4-1 | 6-1 | 8-1 | 10-1 |
|---|---|---|---|---|---|---|---|---|
| 1 | 1-1 | 1-1 | 1-1 | 1-1 | 1-1 | R | R | R |
| 2 | 1-0 | 1-0 | 1-1 | 1-1 | 2-1 | 2-1 | R | R |
| 3 | 1-0 | 1-1 | 1-0 | 2-1 |
Defender Demoralized:
| Die | 1-3 | 1-2 | 1-1 | 2-1 | 3-1 | 4-1 | 6-1 | 8-1 | 10-1 |
|---|---|---|---|---|---|---|---|---|---|
| 1 | 1-1 | 1-2 | 0-1 | 0-1 | R | R | R | R | R |
| 2 | 1-1 | 1-1 | 1-2 | 1-1 | 0-1 | R | R | R | R |
| 3 | 1-0 |
Use of the Infantry Assault Table
First of all, the correct table is chosen on the basis of the defender's morale. If the defender is "stacked", all units in the stack must be in the demoralized configuration to use the DEFENDER DEMORALIZED TABLE. The odds are computed, and the die rolled and the results interpreted as follows: all losses are in battalions knocked out, (removed from board), with the defenders losses on the right and the attackers losses on the left. A combat result of "R" signifies a rout and all the defending units are removed with no loss to the attacker. Also the attacking units have 4 MP's in which to move and initiate another attack. If a second rout occurs the attacker has an additional 2 MP's to move, but due to exhaustion may not initiate another attack.
If a unit is surrounded by units that are ALL attacking then the battle is fought on the DEFENDER DEMORALIZED TABLE, if ALL of the defending units are already demoralized then subtract two from the die roll. If both "good order" units and "demoralized" units are participating in an attack losses are always taken on the "demoralized" units first.
The Numbers in Heavy Boxes refer to the Battle Odds, while the other numbers are losses. NOTE: This second edition "Assault Table" has minor changes in the "Defender Demoralized" chart.
Arty Shell Table
Columns are the arty factors firing. A blank cell means no effect.
| Die | 2 | 3 | 4 | 5 | 6 | 7 | 8 | 10 | 12 | 14 | 18 | 24 | 30 |
|---|---|---|---|---|---|---|---|---|---|---|---|---|---|
| 1 | D | D | D | D | E | E | E | E | E | E | E | E | E |
| 2 | D |
Use of Arty Shell Table
The effect of artillery was basically a function of the tonnage of shells being dropped on a target hex. The number of shell factors firing is read across the top, the die rolled and the result read on the table for EACH unit in the target hex. If four units are in the target hex, then the die is rolled four times as results on each unit could be different. A result of "D" menas the unit is demoralized and moves and fights at half factor effective immediately. A result of "E" means the unit was erased and is removed from the board. A demoralized arty unit cannot fire counter-battery.