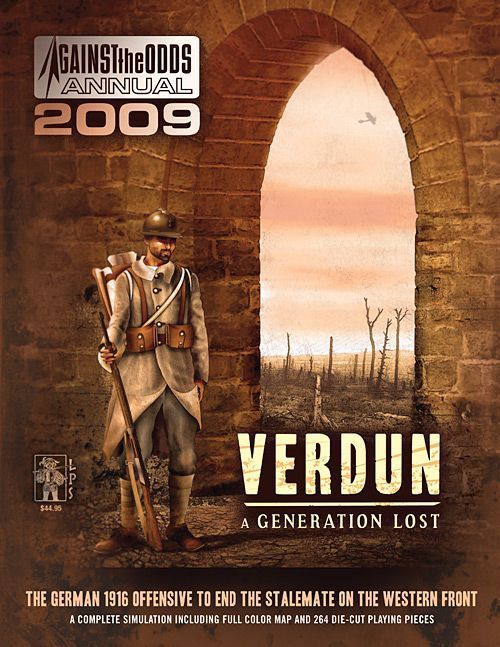
Verdun: A Generation Lost
Verdun: A Generation Lost Rulebook
Table of Contents
Table of Contents
- Read This First
- 1.0 Introduction
- 2.0 Game Equipment
- 3.0 Important Definitions
- Counter Reference
- 4.0 Sequence of Play
- 5.0 Weather
- 6.0 Somme Withdrawal
- 7.0 Lull Turn
- 8.0 Bombardment
- 9.0 Units, Steps, Step Losses, Breakdowns and Rebuilds
- 10.0 Stacking
- 11.0 Zones of Control (ZoC)
- 12.0 Movement
- 13.0 Assault Commitment and Closing In
- 14.0 Command Resources
- 15.0 Defensive Fire
- 16.0 Assault Resolution
- 17.0 Mutual Reorganization
- 18.0 Victory
- 19.0 Scenarios
- 20.0 Verdun Campaign Game
- Players Aid Card Charts
Read This First
We've organized the overall structure of the rules of this LPS simulation game to follow this game's sequence of play in introducing concepts. The rules themselves are written in a format known as the Case System. This approach divides the rules into Modules (each of which deals with a major important aspect of play). Modules are numbered sequentially as well as possessing a title. Each Module is divided into Sections (that deal with a major sub-topic inside the Module) which are also numbered sequentially. Modules and Sections are introduced by some text that briefly describes the subject covered by that particular Module or Section. Finally, the majority of each Section consists of Cases. These are the specific, detailed rules that govern play.
Each Case is also numbered sequentially. The numbering follows a logical progression based upon the number of the Module of which the Cases are a part. A Case with the number 7.51, for example, is the first Case of the fifth Section of the seventh Module of the rules.
Each Module can have as many as ninety-nine Sections and each Section can have as many as ninety-nine Cases. The numbering system is designed as an organizational aid. Use it to determine where a Case is located in the rules.
3.1.4
The example above is the number of the fourth Case of the first Section of the third Module of the rules.
Learning to Play the Game
Begin by familiarizing yourself with all of the components listed for this game. Then skim through the charts and rules, reading all of the titles of the Modules and Sections. Set up a game scenario or portion of a scenario (after reading the applicable Module) and play a trial game against yourself. During this trial game, try referring to the rules only when you have a question and remember the numbering system we employ makes it easy to look up rules when you do. While a trial game may take you an hour or two, it is the quickest and most pleasant way to learn (short of having an experienced friend teach you). We also don't recommend attempting to learn the rules word-for-word. Memorizing all the details is an effort that few can do. We've written these rules to be as comprehensive as possible – but they are not designed to be memorized. Taking in the rules in this way (as you play along) is the best approach to mastering this game. We're always open to suggestions on how to improve the comprehension of our rules. Write to us (see addresses below) if you have an idea on how we can communicate better with you.
1.0 Introduction
Verdun: A Generation Lost spans the monster battle of Verdun fought in the winter-fall of 1916. It appears as the second game in ATO's The Great War Series, following The Big Push.
Players who are familiar with The Big Push will find many of the same concepts here. Also appearing are several new features unique to this battle.
After the German command saw their chances of early victory slide into defensive stalemate on the Western Front, Field Marshall Erich von Falkenhayn took over the reins in fall 1915. Falkenhayn was a solitary thinker who schemed how to break the deadlock. By late 1916, he hit upon an idea to end the war in a single brilliant blow. He would attack and bleed France white at Verdun, a sacred place that she must defend. German assault troops would soon run into desperate French defenders, led by General Henri Pétain, who vowed not to let them get through.
Verdun: A Generation Lost is a game for two players, one commanding German forces and the other commanding French forces. The armies portray German regiments and French divisions. Regiments step-reduce to battalions. Divisions step-reduce to brigades. Unit identifications are for historical purposes only.
2.0 Game Equipment
Each copy of Verdun: A Generation Lost includes the following:
- One 22" by 34" map
- 352 die-cut ⅝" counters
- This rule book
- 4 pages of charts and tables
Note: Players will also need one or two six-sided dice to play the game.
If any of the supplied parts are missing or damaged, write to:
Against the Odds Magazine PO Box 165 Southeastern, PA 19399-0165 USA Attn: Verdun: A Generation Lost
Or e-mail us at: [email protected]
We hope you enjoy this game. Should you have any difficulty interpreting the rules, please write to us at the above postal address, or send an e-mail to: [email protected], phrasing your questions so that a simple sentence, word, or number can answer them. If you send a letter by mail, you must enclose a stamped, self-addressed envelope to receive a reply. We recommend e-mail as the best way to resolve a query. Although we welcome comments and suggestions about the game's interpretation of events, we cannot promise to respond to questions on theory or design intent. Additionally, check out the Against the Odds and Verdun: A Generation Lost discussion folders at www.consimworld.com.
2.1 Game Length
Each Game Turn simulates seven days of real time. The complete Campaign Game of Verdun: A Generation Lost covers 44 Game Turns, from 21 February 1916 to 18 December 1916. At first glance, this may seem long; however, six Scenarios divide up the campaign into shorter stages of the battle, and a Lull Game Turn may further shorten playing time.
2.2 Game Map
A rectangular map depicts part of Lorraine province in northeastern France. The Verdun sector is situated about 130 miles northeast of Paris. Rough, rolling and wooded terrain dominates the area. Cutting through this region is the Meuse River. The ancient citadel town of Verdun lies along its banks. Smaller French forts ring the town.
Terrain on the map portrays the geography of the time. A checkerboard grid of squares defines spaces on the map to regulate movement and range of fire. Map scale runs 1,100 yards per square.
2.3 Charts and Tables
Several Charts and Tables assist playing the game. Some of these play-aids are found on separate sheets, while others appear on the map edge. Specific rules explain their use.
2.4 Units and Markers
The two back-printed counter sheets contain the units and markers of Verdun: A Generation Lost. The units are the various land and air units that took part in the battle. Assorted information markers are included to keep track of such things as disruption, losses, command resources, and victory points. Remove the units carefully from the sheets and sort them by side and type.
2.4.1 Combat Units
These represent the historical units that took part in the campaign. Each infantry strength point varies between 700 to 1500 men, depending on nationality and fighting effectiveness. Artillery units, from batteries to regiments, focus on their relative size and firepower. Various colors are used to help distinguish the combat units in the game. Most combat units have two sides. All artillery and French infantry units are full-strength on their front and step-reduced (French units with red numbers) on the back. German infantry units appear differently. On the front, they are mobile; on the back, they are entrenched (with hash markings across the top of the counter).
2.4.2 Information Markers
These either go on the map or on the various game charts. Both players use certain markers; others are unique to one side. The Game Turn Track text and Game Turn Marker main color are color-coded black for the first half of the battle and blue for the second.
The markers shown in the rulebook's marker reference are:
- Fort Garrison
- Dummy Fort
- Garrison Unit
- Disrupted
- Suppressed
- Engaged
- Artillery Interdiction
- Air Interdiction
- Air Bombardment
- Mine (see 19.1.5)
- Detonated Mine
- Command Resource (14.2)
- Victory Points
- Replacements
- Tally (17.2)
- Weather
- Turn
3.0 Important Definitions
Air Bombardment Supplemental Air Bombardments added into end of bombardment phase.
Air Observation Air scouting to enhance artillery accuracy. Bad weather can hinder.
Artillery Bog Devastated ground that slows artillery movement.
Assault An infantry attack against enemy ground troops. It may be primary or secondary.
Bombardment A barrage of good order artillery firing on enemy targets.
Breakthrough Major breach opened in defender's line. Attackers can move on to a new assault.
Citadel A fort inside the town of Verdun.
Closing In Pressing an assault with greater risk of loss.
Column Shift Changing columns upward/to right or downward/to left on the tables. These are noted by a number preceding the direction of the shift. i.e. 2R is a two column shift to the right, 1L means a 1 column shift to the left.
Combat Bombardment or Assault against enemy forces.
Combat Factors Numerical fighting strength of infantry, command headquarters and artillery.
Command Resource Ability to command effectively by using the best tactics available out of the Command Center. They are:
- Consolidate option to advance neighboring units in assaults.
- Creeping Barrage Bombardment that moves just ahead of assaulting troops.
Flamethrowers German portable weapons that spray flaming oil in assaults.
French 75s Rapid-firing French field artillery to support infantry in attack or defense.
Gas Deadly bombardment that throws poison gas onto defenders.
Lifting Barrage Bombardment that fixes on defensive positions and "lifts" from front to back.
Night Attack Complex assault in darkness.
Secondary Attack New assaults usually using the unit's lower strength.
Smokescreen Bombardment that lays down smoke to shield assaults. Wind can influence outcome.
Command Mode Headquarters operating with flag side up to command assaults and rally units.
Counter Reference
The rulebook's counter reference, as printed, shows the following layouts.
French infantry unit – Front: Full Strength; Back: Reduced Strength. Parts labelled: Unit Type, Unit Size, Unit ID, Primary Combat Factor (CF), Secondary / Defensive CF, Movement Points.
German infantry unit – Front: Mobile Mode; Back: Entrenched Mode. The counter's numbers and text are as in the French example.
Infantry unit types: Infantry, Engineer, Infantry, Chasseur.
Unit sizes: Division, Brigade, Regiment, Battalion (shown as XX, X, III, II).
Artillery unit – Front: Full Strength; Back: Reduced Strength. Parts labelled: Unit Type, Range, Unit ID, Bombardment CF, Counter-Battery CF, Movement Points.
Artillery unit types: Field, 75mm, Heavy, Rail.
Headquarters unit – Front: Command Mode; Back: Supply Mode. Parts labelled: Type, ID, Movement Points, Defensive CF.
Counter Attack A combat result in which the defender makes a return attack in an assault combat.
Counter-Battery Return fire from defending artillery to reduce the attacker's bombardment. The Counter Battery Combat Factor is the (small) middle number on the counter.
Defense Works French field structures which aid defense but are weaker than forts.
Defensive Fire Defender's infantry fire against the assaulting attacking troops.
Defensive Fire Factors The middle combat number on infantry counters; the sole combat number on command status HQ counters.
Demoralized Artillery and smaller unit defeats that may cause surrender.
dr/DR Roll of one d6/Roll of two d6.
DRM Die Roll Modifier that affect a die roll resolution.
Disrupted General term referring to units that are disordered and thus fight poorly.
Engaged Attacking and defending units are locked in combat. Attacker must make the attack again in next game turn unless the defender institutes his own combats by performing his own assaults.
Entrenched Units occupying the original trench start line or in defense works, or German infantry in trench mode.
Field Artillery French 75mm and German 77mm pieces. They have no effect alone against entrenched targets.
Forts Pre-war concrete buildings with strong walls and armament capacity.
Fort Garrison Real or dummy French occupiers of forts.
Game Turn One week of the battle, played as a Regular Game Turn or as a Lull Game Turn.
Good Order The normal status of combat units, without disruption or suppression markers.
Heavy Artillery Any guns with a range of seven or more squares, and the German 105H howitzer unit with a six range. They can damage entrenched units.
Infantry Garrison, Battalion, Regiment, Brigade and Division unit counters.
Interdiction Bombarded effect on a square that costs more movement points and imposes adverse die roll modifiers in assault.
Larger Regiment A German 636 or 756 regiment. These are made up of 3 battalions (see Module 9.0).
Lull Game Turn A shorter-length game turn offering only bombardment and reorganization.
Map Entry North edge or specified squares for Germans; south edge or specified squares for French.
Mobile Mode German infantry operating in a faster, but weaker status.
Mode One of two ways that Headquarters and German infantry operate. Headquarters use supply or command. German infantry use trench or mobile.
Movement Allowance (MA) The total number of movement points a unit has when it begins its movement. This can be modified due to the unit's status.
Movement Point(s) (MP(s)) The cost to enter a square. These costs can be modified.
Numbers Track A row of numbered boxes on the map to mark Command Resources, assaults, disrupted units, losses, surrenders, replacements and victory points. Each side has one.
Operations Options Choices that players make to enhance fighting ability in the campaign game. Options cost victory points.
Operations Reserves A portion of Army replacements held by High Command.
Phosgene New and deadlier gas fired by German artillery.
Player Turn The active player's half of a Game Turn.
Primary Attack Factors The left combat number on infantry counters.
Rally The game action of restoring disrupted or suppressed units to good order.
Regular Game Turn A non-lull full-length Game Turn.
Replacements Returning units that cost replacement points and enemy victory points.
Secondary (2nd) Trench Map squares not part of the Start Line which are occupied by entrenched German infantry.
Secondary Attack Factors The smaller combat number on infantry counters.
Smaller Regiment A German 326, 426 or 536 regiment. These are made up of 2 battalions (see Module 9.0).
Start Line Original mapped trench lines at start of offensive. They give maximum protection and cancel road rates.
Step Reduce Strength loss from combat.
Supply Mode Headquarters operating with supply symbol face-up to provide assault supply or artillery supply.
Surrender Permanent loss of certain units who defended against secondary attacks.
Trench Mode German infantry flipped to their back side, operating in their defensively stronger, but slower status.
Victory Conditions Ways to win, usually through multiple events defined in a Scenario or the Campaign Game.
Victory Points (VP) Scoring points for achieving certain goals.
Withdrawal Defender's voluntary retreat from engagement.
Working Total A calculation to determine replacement levels, based on combat activity in the Game Turn.
4.0 Sequence of Play
The following sequence is followed in each turn of the game:
-
Weather Phase At the start of every turn, the German player checks for weather by rolling on the Weather Determination Table (WDT) (Module 5.0).
-
Somme Withdrawal (Only during July) (Module 6.0 and Case 19.4.3).
-
Lull Turn Determination Except for turns 1 and 2 of Scenario 1 or the Campaign Game and the last two turns of any scenario or the Campaign Game, check to see if this will be a Lull Turn. If it is, players will only perform their Bombardment Segments of their phase and then perform a modified Mutual Reorganization Phase (Module 7.0).
-
German Player's Phase
a) Bombardment Segment Friendly good order artillery units may fire at enemy targets within range. Enemy artillery units may do counter-battery fire to try and stop the declared bombardment attacks. German air bombardment completes the phase (Module 8.0).
b) Movement Segment Roll for Reserves entry first. Friendly reinforcements that are available this Game Turn may be entered where indicated on the map. Friendly units are then moved (Module 12.0).
c) Assault Commitment and Closing In Segment The phasing player announces and commits all assaults he intends to conduct and performs Closing In rolls for desired units (Module 13.0).
d) Command Resources Segment Assaulting player determines what Command Resources he has available and then allocates them to the desired assaults (Module 14.0).
e) Defensive Fire Segment The defending player conducts his defensive fire at the attackers (Module 15.0).
5.0 Weather
Weather influences air observation, movement capability, and supply range. The weather conditions will last until the next Game Turn.
5.1 Weather Determination
The German player rolls a die on the WDT, increasing the dr by any applicable DRMs listed under the Table. He then matches the number rolled with the weather column to find the current turn's weather. In drizzle, rain or snow, the German player rolls a second die to see if air observation is available. The result applies to both sides.
5.1.1 Fair Weather
The best conditions prevail for air observation, movement and supply. Air Observation is in effect for this turn. February 21 is a fair weather Game Turn.
5.1.2 Drizzle
This weather actually is a varying composite of mist, light rain and fog. Air Observation is less likely, movement reduces, and supply range tightens (see Section 12.1). Make a 2nd dr to see if Air Observation is in effect (see WDT).
5.1.3 Rain
This weather produces mud. Both ground movement and attack supply range diminish. Artillery cannot move at all except with an engineer (see Case 8.1.4). German infantry may not entrench in new locations. Make a 2nd dr to see if Air Observation is in effect (see WDT). Assaults suffer a -2 DRM.
5.1.4 Snow
After the first Game Turn on February 21, in the next three and in the last five Game Turns, rain becomes snow. The turns are: Feb. 28, March 6, March 13, Nov. 20, Nov. 27, Dec. 4, Dec. 11, and Dec. 18. In snowy weather there is no Air Observation in effect. Artillery cannot move at all except with an engineer. German infantry may not entrench in new locations. Assaults suffer a -2 DRM.
Game Play Note: Air Bombardment can still occur even when the Game Turn has no Air Observation.
6.0 Somme Withdrawal
Hells Doorway and Campaign Game Scenarios only
Immediately after the weather is determined for each July Game Turn, the German player executes Somme Withdrawal (Case 19.4.3).
7.0 Lull Turn
At Verdun, lulls in the fighting occur. Except for incessant artillery, it is a time for both sides to forego movement and attacks, and to concentrate on reorganization.
7.1 Availability
7.1.1 No Lull can be called for on Game Turns 1 or 2 of Scenario 1 or the Campaign Game. Initially, those starting forces were committed and/or ready for operations.
7.1.2 No Lull Turn can be called for on the last two game turns in any Scenario or the Campaign game. The battle's momentum drives forward to a conclusion, without pause.
7.2 Lull Turn Determination Procedure
After weather is set, the German player first declares if he wants a lull. Then the French player responds. Three outcomes are possible:
-
The German player wants a lull and the French player agrees; the modified Lull Game Turn follows.
-
The Germans states his desire and the French player disagrees. Both players roll two dice; the player with the highest roll decides. Ties re-roll. There is a -2 DRM to the player's DR who is pro-Lull when the previous Game Turn was a Lull Game Turn.
-
Both sides say no to a lull turn. The Game Turn continues normally.
7.3 Lull Turn Execution
Only the Bombardment Segment of both player's phases and the Mutual Reorganization Phase is performed during a Lull turn. Each player's Bombardment Segments are performed normally but the Mutual Reorganization Phase is modified as detailed below. All other player segments are bypassed. Units which are Engaged do not fight and remain in place still marked as Engaged.
7.3.1 Mutual Reorganization Phase Modifications
This phase is still performed simultaneously.
a) All incoming reinforcements and replacements are placed off-board adjacent to their entry points. They will be able to move and enter the next regular Game Turn.
b) Current replacements do not divert to reserves; they are fully available. Taking the replacements is still optional and costs the usual VPs (Section 17.3).
c) One third (player's choice) of accrued reserves units release and return from their Operations Reserves Box. They will be placed off board at their entry points. Any fractions round down. Example: seven reserve units are in the Box. Two will release and return.
d) All friendly HQs who were delayed to a later date on the Turn Record Track immediately reappear as replacements. An HQ supply unit used for artillery supply in the current Lull Game Turn also immediately reappears as a replacement. They are placed similarly to the reinforcements, replacements, and reserves.
e) All Rally from disruption and suppression is automatically successful. Disrupted units from the current artillery fire should still be noted for figuring replacements (Section 17.3).
7.4 Solitaire Play
If a Lull Turn is available under Section 7.1, roll two dice. If the total is 10+, a Lull Turn is performed. If the total is less than 10, perform a regular turn.
8.0 Bombardment
Armies use artillery bombardment to support assaults, weaken potential enemy assaults, slow down enemy movement, and to strike at targets behind the enemy's lines. Counter-battery fire by the defending player may reduce the effectiveness of bombardment.
One or both sides may be able to perform air bombardment.
8.1 Procedure
In his Bombardment Segment, the phasing player first chooses a supply headquarters to expend. He then indicates the units attacking and the target square for the bombardment attack. The defending player then can perform one counter-battery fire before resolving the bombardment. With guns that survive the counter-battery, the phasing player then resolves the bombardment, if still eligible, by rolling one die and checking the outcome on the Bombardment Table. New bombardment attacks continue in the same manner, until all eligible units have fired, or the phasing player voluntarily decides to end the Phase. After all ground bombardments are done, the phasing player removes the spent supply headquarters and then resolves any air bombardment he chooses to perform.
8.2 Bombardment Table
Appearing on the Bombardment Table are rows displaying various target terrains. These rows vary from most vulnerable (Clear) to the strongest (Start Trench, Fort, and Hill). Each column shows the minimum fire power, expressed in bombardment factors needed for resolution on that column for that terrain type.
8.2.1 Terrain Effects
The terrain in the square with the highest minimum firepower requirement value in bombardment factors is always used. Example: A square with woods and ridge is treated as ridge terrain. All occupying units benefit from the man-made defenses appearing on the map: Fort, Start Trench, and Defense Works.
Start Trench This is the original trench line depicted on the map, shown in red for the French and in dark gray for the Germans.
2nd Trench German infantry units in their trench mode while not on their start line and any additional mobile status friendly units stacked with them are considered entrenched.
8.2.2 Fort Targets
A unit inside a fort has maximum protection from bombardment. Only German 420s and French 400s can fire at forts. All other calibers and air bombardment are too light to affect the fort. A unit in a fort can only be disrupted (no matter how many times hit). Fort garrisons are not revealed due to bombardment. A unit outside the fort uses the terrain that is in the square instead. If two targets are in a fort square (one in the fort), the attacking player must designate which target is being bombarded before resolving the attack. The other target(s) are ignored for the bombardment.
8.3 Bombardment Eligibility
To bombard or perform counter-battery fire, the artillery unit must be in range and in good order. Each eligible unit may then fire once per bombardment phase. Artillery may bombard vacant squares to interdict them. Engaged units may not be bombarded.
To bombard, a player must allocate fire factors at least equal to the minimum number of factors for the terrain in question (left most numerical column of the Bombardment Table on the PAC). Any amount allocated that is less prohibits the bombardment. Example: ≥8 factors must fire at a ridge on the Bombardment Table; ≤7 factors would not qualify. Factors that fit between the fire column numbers always fire on the lower column (9 factors would use the 8 column). Factors whose total exceeds the far right column will still use that column.
8.3.1 Artillery Range
Each artillery unit has its range printed in the gun symbol's wheel. This is the maximum distance the unit can fire. If the target is in range, the artillery unit can perform bombardment or counter-battery against it. The distance can run diagonally. The range excludes the firing square but includes the target square. All bombarding or counter-battery firing units that combine their fire at a particular target square must be within range of the target. Different calibers of artillery units may combine fire.
[Diagram caption] Firing unit A, with a range of 6, can bombard targets B or C because they are 3 and 4 squares away. A may not fire at D, 7 squares away.
8.3.2 Artillery Fire Restrictions
a) Artillery units that are disrupted, suppressed or interdicted may not fire.
b) An artillery unit's combat factor can only be applied to one attack (cannot be split).
c) A target square can be subjected to more than one bombardment attack in the same Phase, but a specific bombardment attack can only be counter-battery fired upon once.
d) Bombardment can never target engaged units.
e) French 75s and German 77s cannot harm or interdict entrenched targets. They have a 0 CF versus entrenched units.
8.3.3 Interdiction Fire
Artillery may bombard vacant squares to slow down (interdict) enemy movement. Any "I" or adverse result on the Bombardment Table results in an Interdiction Marker being placed on the target square.
8.4 Bombardment Supply
Guns at Verdun devour heavy stockpiles of shells. Bombardment requires supply and consumes a good order headquarters supply unit. Attack bombardment can not be performed if there is no good order friendly HQ on the map.
8.4.1 Bombardment Supply Path
The artillery unit must trace a supply path to a friendly HQ which is free of enemy units or their ZOCs (unless occupied by a friendly unit). This path can run any distance from the bombarding unit to supply unit. Because the distance is unlimited, a single HQ can support all the bombardment attacks during the phase.
8.4.2 Expending Artillery Supply
At the very start of the Bombardment Phase, the bombarding player picks one on-board good order HQ (in supply mode) to provide supply to all the firing artillery. It may be taken from either side of the Meuse River. At the end of the bombardment, the HQ is removed from the board. This HQ is placed on the next game turn box. It returns as a mobile Headquarters the next Game Turn as a reinforcement.
8.4.3 Unsupplied Bombardment
Only if an artillery unit is unable to trace a supply line can unsupplied bombardment occur. There is a +1 DRM per unsupplied unit that is firing in a bombardment attack. Mixing supplied and unsupplied artillery will still consume the supply HQ and impose the DRM per unsupplied unit.
[Diagram caption] Supply unit S supports bombardment. Unit A is unsupplied because zones of control from enemy units G and H block the supply path back to S. Firing A alone imposes a +1DRM, or A may instead combine fire with B and C, who do get supply from S. The three together fire at D with a +1DRM and burn artillery supply unit S.
Note In the event that friendly unit C was in square 1 and thus adjacent to enemy G, then A would be in supply with a good supply path and there would be no +1 DRM.
8.5 Counter-Battery Fire
Counter-battery units use the middle CF on their counters. Right after the firing player announces a specific bombardment attack, the defending player declares which unit(s) will perform counter-battery fire against one square of the attacking units. The bombardment attack pauses for a moment, to resolve the counter-battery. The counter-battery uses the Counter-Battery Table to resolve its fire.
Counter-battery is not mandatory. Whenever the defending player passes on a specific counter-battery opportunity, that bombardment is free to be executed normally.
8.5.1 Counter-Battery Table
The top row indicates the total of the CFs performing the fire. If the total is in between the values in this row, use the value which is lower to the left. The number located below this value is the success value. If < 3 factors firing, the attack automatically misses. Use the 18 factor column if more than 18 factors are firing.
8.5.2 Fire Procedure
The defending player indicates a target square. He totals all eligible counter-battery CFs from the units he chooses to fire. He rolls two dice and compares the roll's sum to the success value for each artillery unit in the target square which is participating in the bombardment attack.
- DR sum is ≤ the success value: The targeted unit is marked Disrupted and can not participate in the bombardment attack.
- DR sum > the success value: The counter-battery fire has no effect.
8.5.3 Adjusting Fire Results
Friendly air observation provides a -1 DRM to the counter-battery fire. If the targeted unit(s) are on a ridge square, a 2L column shift applies for the counter-battery fire (to a minimum column of 3). Example: 15 factors would fire counter-battery fire against targeted bombarding artillery in a ridge square on the 9 factors column.
8.5.4 Counter-Battery Supply
Counter-battery fire does not require supply expenditure; it is considered shorter and more pinpointed than bombardment.
8.6 Bombardment Resolution
After counter-battery fire, the bombardment attack will be resolved. The firing player rolls a die on the Bombardment Table, applying any applicable DRMs and/or column shifts and carries out the result.
8.6.1
For every target square, the bombarding player refers to the Bombardment Table and rolls one die.
8.6.2
Apply any modifiers shown beneath the Table. All applicable DRMs are combined to yield a net modifier.
Example: The German player bombards with three artillery units. Two are heavy guns (-1 DRM), one unit is out of supply (+1), and the Germans enjoy air observation (-1). When these modifiers are combined, they produce a net -1 DRM.
8.6.3
Cross-reference the modified die-roll with the attack column on the Bombardment Table to get a result.
8.6.4
The defending player immediately applies the given result as follows:
- ST, #ST = Step loss or Number of Step Losses. The defender selects which unit or units will take the step losses. Note: Good order single step units can become disordered instead of taking a single step loss.
- D = Disrupted. The defending player places a disruption marker on top of the square to indicate all units within are disrupted.
- S = Suppressed. A suppression marker is placed on top of the square. All units therein are suppressed. Also, entrenched German infantry flip over to their mobile side and remain that way until they rally.
- I = Interdicted. An Interdiction marker is placed on top of the square. This will affect all units by increasing the cost to enter or leave the square. When a vacant square is the target, any adverse result on the Bombardment Table is treated as an interdict result. Only one interdiction marker can affect a target square.
- "-" = Miss. Bombardment has no effect.
Gameplay Note: Surviving targeted units do not retreat from bombardment.
8.7 Air Bombardment
Two air counters for each side reflect this tactical strike capability. The counters actually represent an abstracted grouping of various planes and balloons.
Historical Note: Initially the German Air Service dominated the skies over the Meuse. Keeping the French air power at bay, the German planes harassed enemy ground troops, communications, and supply. Later the French caught up with the German strength and contested the air.
8.7.1
The Germans begin the game with their air units. A scenario's instructions will tell when French air arrives.
8.7.2
Unlike Air Observation, Air Bombardment occurs in all weather types.
8.7.3 Air Bombardment Phase Procedure
a) At the start of a phasing player's Ground Bombardment Phase, the phasing player places his available air units onto any target squares he chooses.
b) After the phasing player has assigned his air units and if his opponent has any available air units, he may place his air units on top of the phasing player's air units to indicate air combat. These units can be held back and not placed so that they can perform Air Bombardment during their player's turn.
c) For each air combat square, each player selects one of his air units in the square and makes a DR. High roll wins. On ties, players re-roll. Continue pairing air units and making roll comparisons until only one player's air units remain in the square.
i) The losing player of a roll comparison performs a DR for their air unit.
  - **2-7** = Air unit is eliminated. Place unit in Replacement Pool. Enemy player awarded 1 VP.

  - **8-12** = The air unit survives. The air counter is available in the next Mutual Bombardment Phase.
ii) The winner stays in the square to continue Air Combat (if opposing air units are still there) or if only one player's air units remain in the square, executes an Air Bombardment.
Example: Two French units face one German unit in a square; the French roll a 6 and the Germans roll an 8. The French lose the first air battle. Then the French roll a 10 and the Germans roll a 9. The French unit wins.
d) At the end of the phasing player's Bombardment Phase, the phasing player performs his Air Bombardment. For each air unit, he rolls two dice.
- 2-10 = The bottom row of the Bombardment Table lists these values. This result is the column that is used to perform the Air Bombardment. Make another 1d6 roll. Cross-reference the roll's result with this column to determine the Air Bombardment result. Germans apply damage the same as normal bombardment and if this square is not already interdicted, flip the air unit over to its interdiction side as well. French bombardment can only Interdict the square. Interdiction markers remain in place until the end of the opposing player's Assault Phase. Gameplay Note: This means the ground units are affected by this interdiction the whole player turn.
- 11, 12 = The bombing missed and has no effect. The air counter is removed for the current Game Turn.
Example: A 6 is rolled for the air column, which puts the Air Bombardment on the "8 clear" column. The damage roll then produces a 3, for a Suppress result.
9.0 Units, Steps, Step Losses, Breakdowns and Rebuilds
9.1 Steps
9.1.1 German Units
Small Regiments These are the 326, 426 and 536 regiments. They have 2 steps and break down into the following distributions:
- 536 or 426 = two 216 battalions
- 326 = one 216 and one 116 battalion
Larger Regiments These are the 636 and 756 regiments. They are the best units of the German Army and last longer. They have 3 steps and breakdown into three 216 battalions.
9.1.2 French Units
French Divisions have 5 steps and break down into 2 full brigades and 1 reduced brigade whose total combat factors of replacing brigades cannot exceed the printed attack factor of the division. The inverted side of the brigades can be used to facilitate this. French brigades have 2 steps.
Examples: 1066 Division is replaced with 2 x 436 and 1 x 216 (inverted 326). 866 Division is replaced with 2 x 326 and 1 x 216 brigade.
9.2 Step Losses
9.2.1 German Units
When battalions are placed on the board to satisfy German losses, they are placed down in the same mode that the regiment was in. Only battalions that are available in the Replacement Pool may be used. The counter-mix is the limit. The regiment is placed into the Replacement Pool.
a) Small Regiments
i) One step loss eliminates one battalion and has one battalion placed in the square or disrupts two battalions.
ii) Two step losses either will reduce the regiment to one disrupted battalion in the same mode or eliminate the regiment, at the option of the German player.
iii) Three infantry step losses eliminates the regiment.
b) Large Regiments
i) One step loss eliminates one battalion and has two battalions placed in the square or has 3 disrupted battalions placed in the square. The German player removes the regiment, places it in the German Replacement Pool, and substitutes the surviving battalions from the Replacement Pool.
ii) Two step losses either eliminates two battalions and has one battalion placed in the square or eliminates one battalion and disrupts two battalions in the same mode, entrenched to entrenched and mobile to mobile. The German player removes the regiment, places it in the German Replacement Pool, and substitutes surviving battalion/s from the Pool.
iii) Three infantry step losses will eliminate two battalions and disrupt the third battalion for the third step. The German player removes the regiment, places it in the German Replacement Pool, and substitutes the surviving battalion from the Replacement Pool.
iv) Four infantry step losses eliminates the regiment.
c) German Battalion Loss A step loss either disrupts or eliminates a lone good order battalion. A step loss on a lone disrupted battalion will eliminate it and it is placed in the Replacement Pool (Engineers are removed from the game).
9.2.2 French Units
French infantry units are larger and have more absorption power in taking step losses than German infantry.
a) French divisions take their first step loss by flipping over to their reduced side.
b) Reduced divisions further reduce to the next largest brigade.
Example: a 756 division has flipped over to its reduced 536 side. Another step loss decreases the division to a 436 brigade.
c) A step loss for a brigade inverts the unit to its weaker (red values) side. After a brigade has flipped over to cover the step loss, a new loss will disrupt the brigade.
d) There is no further step loss for a disrupted reduced brigade. Whenever it suffers a hit, it is eliminated and placed in the Replacement Pool (Chasseurs are removed from the game).
9.2.3 All Artillery and HQs
a) Artillery flips to its lower strength as shown on its reverse side. A step loss on already reduced artillery disrupts it. A step loss on disrupted reduced artillery unit eliminates it.
Gameplay Note: A 225 reduced French 75mm artillery intentionally has its full-strength combat factors on its reduced side. They were the most resilient guns at Verdun.
b) An initial step loss will disorder a Corps HQ, shown by placing a "D" marker on top of it. Another step loss on a disrupted HQ eliminates the unit.
9.2.4 Fort Garrisons
French fort garrisons, real and dummy, start inverted and always stay in forts, one per fort.
a) They cannot move.
b) Garrisons are only revealed when a German unit assaults them.
c) Discovered dummies are immediately removed from play.
d) Revealed actual garrisons remain face up once revealed.
9.3 Voluntary Breakdown and Rebuilds
A player can voluntarily breakdown and rebuild their regiments/divisions during their turn. Enemy unit's ZOCs do not affect this ability.
9.3.1 Breakdowns
Anytime during movement, a player can decide to breakdown a good order regiment/division into its component battalions/brigades that is not in an interdicted square.
a) If the counter mix of replacement units does not permit the regular exchange (see Section 9.1), then any lesser quantity of available units can be used instead.
Gameplay note: This is a restriction to have players keep their units at full strength as much as possible.
b) The replacement units start in the same mode as the parent unit.
c) Any movement that is remaining to the parent unit may be used by the replacing breakdown units.
d) The parent unit is placed into the Replacement Pool.
Gameplay note: when a German 756 or 536 Regiment breaks down into 3 Battalions, they lose 1 CF.
e) Special Breakdown Restrictions:
i) Engineer or Chasseur battalions cannot be used for regimental/divisional breakdowns.
ii) When a French Division is step reduced, the current combat factors apply.
iii) Brigades cannot be broken down.
Example 1: The French player wishes to breakdown an 886 division. Only a 436 and 326 brigades are available. He could exchange the division for these two and the 1 CF is lost.
Example 2: The German player wishes to breakdown a 756 regiment into battalions. Only 2 x 216 battalions are available. He can perform the breakdown and only take the two battalions or not breakdown.
9.3.2 Rebuilds
Brigades/battalions in good order may combine into a full strength division/regiment if they begin stacked together at the start of their movement phase.
a) The division/regiment must be available in the Replacement Pool to be rebuilt.
b) Special Rebuild Restrictions:
i) German Larger Regiments require 3 battalions and Smaller Regiments require 2 to be rebuilt.
ii) The lowest CF German Regiment type (Large or Small) in the pool must be rebuilt first for each individual rebuild as it occurs.
iii) The French player must have brigades in place whose attack CF equals or exceeds the attack CF of the division.
iv) Battalions/brigades cannot combine into stronger battalions/brigades.
10.0 Stacking
Stacking is the term used to refer to more than one unit occupying a square.
10.1 Stacking Restrictions
10.1.1 Opposing units cannot stack together except during an assault.
10.1.2 Stacking applies at the end of a phase.
10.1.3 During movement units may pass through friendly units with a +1 MP passage cost. Stopping or starting movement in a friendly-occupied square imposes no passage cost.
Gameplay Note: In the set up for a Scenario or the Campaign Game, over-stacking may be called for. This is temporary and must be reduced in the next friendly movement phase.
10.2 French Stacking
One French division or two French brigades may stack in a square. A French artillery unit is considered a brigade-size unit.
10.3 German Stacking
The German player may stack up to two regiments or their equivalent in a square. German battalions are considered half-regiments for stacking purposes. A German artillery unit is considered a regimental-size unit.
10.4 HQ Stacking
Corps Headquarters vary depending on their mode.
- In command mode (Flag-side up) HQs may end a phase stacked freely with their brigades or regiments. French Headquarters never end a phase stacked with a division.
- In Supply Mode (Supply symbol showing) HQs may not end a phase stacked.
10.5 Fort Stacking
10.5.1 Other than fort garrisons (which cannot move), only German battalions, French chasseurs battalions, and French red-valued 216 brigades may occupy forts and fort squares, including the Citadel (Q18).
10.5.2 The stacking limit is two units per fort square, one in the fort and one in the square.
10.5.3 All other units may only pass through fort squares at its terrain cost, and a +1 MP cost for passage through if any friendly units are present.
10.5.4 If a unit does not have sufficient movement points left to pass through a fort square and enter an adjoining square, it may not enter the fort square.
10.5.5 When only one friendly unit occupies the square, the owning player declares if it is in or outside the fort. Rotating the units in an agreed manner is recommended to indicate the unit in the fort.
10.5.6 When two non-garrison eligible friendly units occupy the square, the owning player designates which unit is inside and which is outside the fort.
10.5.7 Garrisons must always be in the forts, so as long as a garrison unit, inverted or face-up, occupies a fort, any other eligible French unit can not be inside the fort.
11.0 Zones of Control (ZoC)
11.1 ZOC Particulars
11.1.1 Every combat unit in good order exerts a ZOC into the square it occupies and all surrounding squares.
[Diagram caption] A ZOC appears in this way: in the example above, good order G exerts its ZOC into all "X" squares.
11.1.2 Engaged units exert ZOCs into their surrounding squares.
11.1.3 An HQ unit in supply mode only exerts a ZOC into the square it occupies.
11.1.4 Disrupted, suppressed and interdicted units do not exert ZOCs into their surrounding squares, only the square they occupy.
Gameplay Note: Units in good order can protect disrupted units by stacking with them.
11.1.5 Opposing units can both simultaneously exert a ZOC into the same square. The presence of a friendly unit in a square does not negate an enemy unit's ZOC into a square for movement purposes. For example: in this case, unit A may not move directly to unit B, and vice versa. Enemy unit F shares ZOC over both these squares.
11.2 Movement and ZOCs
11.2.1 Units pay no extra movement points for entering or exiting an enemy ZOC.
11.2.2 A moving unit must stop as soon it enters an enemy ZOC.
11.2.3 Whenever a unit begins movement already in an enemy ZOC, it may not move directly to another square in enemy ZOC; the unit must first move to a square free of enemy ZOC before it may enter another controlled square.
[Diagram caption] In this instance, F is moving and good order G exerts a ZOC. F has to back out of square "1" and enter Square "2" or "3", assuming both are free of other enemy ZOC, before it may enter Square "4".
[Diagram caption] In this case, French unit A is suppressed and B is in good order. German unit G can move into Squares "1" or "2" because A has no ZOC. If G moves into Square "3", however, G must halt; B exerts control over Square "3" and protects A in the square controlled.
Gameplay Note: Other nearby enemy units, in good order, can exert a ZOC and protect these disrupted units.
11.3 Forts and ZOC
11.3.1 Good order fort occupants, including inverted dummy garrisons, exert normal ZOCs into all surrounding squares.
11.3.2 Disrupted fort occupants have no ZOC (i.e. enemy units can move through the square).
12.0 Movement
During his Movement Phase, a player may move his units within the limits of the weather, their movement allowance, their location, terrain and movement restrictions. Reinforcements, replacements and freed reserves enter from their friendly map edge during the owning player's movement phase.
12.1 Movement Particulars
12.1.1 A player moves his units one at a time, expending some or all of their MA.
12.1.2 The right-most lower number on a unit is its movement allowance (MA).
12.1.3 Enemy units do not move at this time.
12.1.4 A player may not transfer unused MPs to another unit or save them for the next turn.
12.1.5 Unit Orientation within a Square
During movement, a unit always occupies the interior of a square. The unit does not end on the line of a square. Moving a unit to the line of a square is a function of assault commitment, not movement (see Module 14.0).
12.1.6 Map Grid and Movement
Using the square grid on the map, a unit can move straight and diagonally. Straight movement is north, south, east or west into a new square. Diagonal movement traverses a 45° angle, moving northeast, northwest, southeast or southwest into the new square. A unit expends more movement points to go diagonally (see the Terrain Key).
12.1.7 Facing
The top of the counter is its front and a unit may move into any one of the 3 squares to its front (Exception: Terrain prohibitions). Rotating square-sides does not cost MPs. Rotating in an enemy occupied square is only permitted when leaving the square or to conduct assault. At the end of movement, the top of a unit must face a square-side. All units stacked at the end of movement or retreat must face the same square-side.
12.2 Movement Point Costs
12.2.1 When a unit moves across the map, it expends one or more MPs to enter each new square, as shown on the Terrain Effects Chart on the PAC.
12.2.3 No unit may move into a square unless it has the requisite MPs remaining to enter.
Example: A French brigade with an MA of six points moves diagonally into woods (three points), then straight onto a ridge (two points). The brigade cannot enter a new woods square straight on because two points are needed and the brigade has only one left.
12.3 Terrain and Movement
12.3.1 The unit pays the single highest cost in MPs to enter a mixed terrain square, unless the unit is moving along a major or minor road.
12.3.2 Meuse River
Squares containing the Meuse River dictate movement in a special way. Units can cross the river only on major roads. There are just five crossing points: A10-11, D12-C13, K18-K19, and at Verdun P19-P20, and Q19-Q20. Crossings do not occur over minor roads.
Diagonal lines in the square along the Meuse River are its banks. These squares may not be entered.
Example: The river square at Samogneux, G16, shows gridlines on the west bank. In this square, units may only move on or occupy the east bank.
12.3.3 Other Waterways
Minor rivers and streams, such as Esnes Brook, also appear on the map. A unit may freely enter and occupy these squares, except where they share space with the Meuse River. In a shared space, the Meuse River gridlines have priority.
Gameplay Note: Streams are shown only for historical/geographic interest and have no effect in the game.
12.3.4 Artillery Bog Area
Due to barrages and counter-barrages which severely devastated the ground, artillery movement slowed to a crawl.
a) Artillery moves normally on the February 21 Game Turn.
b) Beginning on Game Turn Two and all times afterward from the German start line to the south map edge, artillery moves one square per movement phase.
c) Exception: French guns along the Voie Sacrèe have normal road movement between the south edge and Verdun, inclusive.
d) North of the German start line all units, including artillery, move normally and may use road rates. Weather restrictions still apply.
Gameplay Note: Non-artillery units move normally in the bog area and may use road rates.
12.3.5 Road Movement
Minor roads negate ridge and forest terrain. They permit units to move as though these squares contained only clear terrain.
[Diagram caption] Unit A crosses from square "1" to square "2," paying one movement point. Without the minor road, A would pay three movement points to enter square "2."
Except for start line trenches, major roads negate surrounding terrain and cost ½ MP to enter along the road.
[Diagram caption] Unit A travels the major road from square "1" to square "3". It spends ½ movement point, ignoring the three movement points normally paid for a diagonal move into ridge squares. Note that moving from square "1" to square "2" is off-road and would cost two points.
To use the major or minor road rates, a unit must enter the square through a side or vertex containing the road. Any unit may freely combine major road or minor road movement with off-road movement.
Squares containing start line trenches cancel road rates.
12.4 Weather and Movement
12.4.1 Fair or Drizzle
a) Mobile mode German infantry may entrench.
b) German infantry in entrenched mode can move without changing to mobile mode.
12.4.2 Rain or Snow
a) Artillery halts everywhere (see Weather Table), except for a German artillery unit stacked with an engineer throughout its move. The stack moves at the artillery's rate.
b) Mobile infantry may not entrench. Existing entrenched infantry can remain as they are where they are. If they move, their entrenchment is lost and they flip to mobile mode.
12.5 Channeled Movement for Heavy Artillery
Besides terrain and weather restrictions, the larger caliber guns have very limited movement.
12.5.1 All units with a "1" MA must stay on major roads, and they never enter start line trench squares.
12.5.2 The German 380H with an R allowance moves only on rail north of the German start line.
12.5.3 Both French 400H units with an R allowance move only on West Bank rails south of Verdun. They may enter the town but do not cross onto the East Bank.
12.5.4 All other heavy artillery, those units with a 7 or higher range and the German 105H howitzer unit with a 6 range, must first check before entering any start line trench square. The owning player rolls a die for each such unit; on a 1 they may enter and stop. On a 2-6 they fail and end movement. Normal terrain costs do apply.
12.6 Interdiction and Movement
12.6.1 Every unit pays +1 movement point to move into or out of an interdicted square. Doing both would therefore cost +2 movement points.
12.6.2 Interdiction markers from either side impose the same movement penalty on all ground movement.
12.6.3 Anytime an interdicted square is vacated, the marker remains behind and continues the interdiction penalty.
12.7 Map Entry
Units pay the terrain cost of their entry square when entering the board.
12.7.1 All reinforcement and/or replacement units entering the same square that turn will pay the same cost as the first unit.
12.7.2 All artillery with a "1" allowance must enter and stay on major roads.
12.7.3 Railroad artillery, with an "R" in their allowance, must enter and stay on the rail line.
12.7.4 Reinforcements Consulting the Reinforcement Schedule found in the particular Scenario or Campaign Game, a phasing player enters the units onto the map at a friendly board edge behind his line.
a) German units enter on the north edge. Infantry may enter in mobile mode or entrenched mode depending on the scenario. French units enter on the south edge.
b) Some reinforcement units enter at designated squares along the edge of the map. Others may enter anywhere on the owning player's map edge.
c) Scheduled reinforcements can come into play anytime during a player's Movement Phase.
d) Players may delay reinforcements to later Game Turns at their option.
e) Reinforcement units can execute off-front movement, provided they maintain the required distance away from enemy forces at all times.
12.7.5 Reinforcement Corps HQs These units must enter in command mode. The HQ can flip to its supply mode side at the end of its reinforcement entry movement. This is the only exception to the rule preventing HQs from moving and flipping to Supply Mode in the same turn.
12.7.6 German Battalion Reinforcements Scenarios may list battalions as reinforcements. They can be rebuilt into a regiment prior to entry (see Case 9.3.2). The rebuilt regiment enters as a reinforcement and the substituted battalions stay in the German Replacement Pool.
It is permitted to mix battalions and regiments to equal the reinforcement number.
Example: The Germans receives 5 battalions as reinforcements in a turn. They may take a 636 regiment for three battalions and two battalions for the last two.
12.7.7 Lull Turn Reinforcements A Lull Game Turn has no movement phase so reinforcements only appear at their entry square (up to stacking limits). Remaining units are placed at the board edge just by their entry square and must remain there for that Game Turn. They will enter the next normal game turn.
12.8 Dual Mode Units
Good order German infantry and all HQs have dual modes of operation.
12.8.1 German Infantry Modes
German infantry units operate in mobile mode or entrenched mode. Their front side is mobile. Their reverse side is entrenched. By entrenching infantry, the German player is able to build stronger defenses off the start line.
a) The German player can flip over each infantry unit once during movement. Going from mobile to entrenched costs two movement points, shown as having a 4 movement allowance (MA) on the entrenched side. Going from entrenched to mobile mode costs nothing, shown as having a 6 MA on the mobile side.
b) Weather affects their movement abilities (see Section 12.4).
c) Infantry may change mode in an enemy ZOC.
d) Interdicted, disrupted and suppressed infantry must stay in their current mode; they may not change modes during movement.
12.8.2 Corps HQ
HQs operate in command mode or supply mode.
a) Command Mode is their mobile side and has a flag and an MA. HQs in command mode must conform to facing, may not assault but can defend against an assault.
b) Supply Mode shows a supply symbol. While in supply mode, HQs have no facing and surrender if assaulted and alone in a square. They may not move.
c) An HQ may change mode at the start of the bombardment or movement phase only. There is no movement cost for changing modes. When it changes to command mode, the full movement allowance is available.
12.9 Off-Front Movement
A unit behind the front lines may increase movement through the use of off-front movement.
12.9.1 To be eligible for off-front movement, the unit must stay at least three squares away from any enemy unit at all times. For counting distance, the square of the moving unit is excluded, and the square of an enemy unit is included.
12.9.2 A unit eligible for off-front movement doubles its printed allowance.
12.9.3 In bad weather, the point deduction comes first before doubling.
Example: A mobile German unit moves in rain. Its four points (six less two) doubles to eight points.
12.9.4 A unit executing off-front movement has to observe all other movement rules.
12.9.5 Isolated enemy units (those totally surrounded by friendly units and/or their ZOCs) do not stop off-front movement.
13.0 Assault Commitment and Closing In
Assaults go through a sequence of phases. There are four steps:
a) Assault Commitment
b) Command Resources
c) Defensive Fire
d) Assault
Certain friendly forces may assault adjacent, enemy-occupied squares. To commit assaults, the phasing player advances eligible units onto the lines of defending squares. When he has finished advancing all the friendly units chosen for assaults, the phasing player may try to press attacks by closing in.
13.1 Eligible Units
13.1.1 Only good order, not suppressed, and in command infantry may assault (Exception: Engaged units, see Case 16.5.1). Artillery and Headquarters may not assault. Artillery and HQs in command mode when alone in a square defend against assault with a defense value of 1.
13.1.2 Units may only assault across the Meuse River at major road crossing points (Case 12.3.2).
13.1.3 All units involved in an assault must be within command range of a friendly Corps HQ that is in command mode (flag side up). Engaged units are exempt from this (automatically considered in command).
13.1.4 Command Range
a) A good order command HQ's range extends up to eight squares. If disrupted, its range shortens to five squares. HQs which are Engaged may only provide command support to the square they occupy.
b) In counting the path of squares, the phasing player excludes the Headquarters square and includes the assault unit's square.
c) The path must be free of enemy units and enemy ZOC. For purposes of tracing this path, a friendly unit negates an enemy's ZOC in its square.
d) Command Assault DRM Each Assault will have a Command Assault DRM depending on the distance that the furthest assaulting unit is from the closest Command HQ. First determine the HQ's status on the top row of the chart below. Then go down the column to the appropriate distance bracket. Then reference the same row box in the Assault DRM column to find the Command Assault DRM. A unit may not assault if it is beyond the maximum range for the HQ's status (Exception Case 16.5.1: Engaged Units).
| Good Order HQ distance in squares | Disrupted or Suppressed HQ distance in squares | Assault DRM |
|---|---|---|
| 0-3 | 0-2 | +1 |
| 4-5 | 3-4 | None |
| 6-8 | 5 | -1 |
e) Bad weather does not affect command support range for assaults.
f) A given command mode HQ may place any number of friendly units "in command" that are in its range.
g) HQs which are used to place units "in command" are not removed from the board.
13.2 Assault Supply
Units may assault even if out of supply, but suffer a -2 DRM if any unit in the assault is out of supply. Defenders are always considered in supply.
13.2.1 A supply path must run from the assaulting units back to a good order Corps HQ in supply mode at the moment of assault.
13.2.2 The distance in squares excludes the jump-off square but includes the supply unit's square.
13.2.3 The path must be free of enemy units and their ZOC (unless occupied by a friendly unit).
13.2.4 Assault Supply Range
The distance a supply mode HQ can supply units is dependent on the weather and the HQ's status.
a) Weather Effects Supply range varies with the weather, as shown on the WDT:
- Fair = 8 squares
- Drizzle = 6 squares
- Rain = 5 squares
- Snow = 4 squares
Within these ranges, a good order supply unit can furnish assault supply to any number of assaulting units. Outside these ranges, the unit is unsupplied.
b) HQ Status Disrupted or suppressed supply mode HQs can provide unlimited assault supply to units within a 3 square range, no matter the weather. Interdiction on an HQ has no effect on its supply range.
13.2.5
A supply mode HQ which supplies any units is removed from the board at the end of the Assault Resolution Phase and will return to the game during the Mutual Reorganization Phase as a replacement as determined by a dr. Add +1 to the dr if the weather is currently rain or snow.
| Die Roll | Result |
|---|---|
| 1-3 | HQ returns next turn |
| 4-6 | HQ returns 2 turns from this turn |
Place the removed supply HQ unit on the designated Game Turn space on the Turn Record Track. These returning HQs arrive back in command mode.
Gameplay Note: Command and supply are two different matters in Assault. Command is mandatory, supply is preferable.
13.3 Advancing to Commit and Closing In Phase
All units committing to an assault will be advanced onto the square's border line and face directly toward the defender they wish to Assault.
[Diagram caption] In this situation, A advances and faces straight ahead. B advances and faces diagonally. By advancing from their jump-off squares, both A and B have committed to assault H.
13.3.1 Stacking limits do not restrict how many units can be committed to assault a particular enemy square (i.e. two divisions may commit to assault the same square).
13.3.1 Fort Assault Commitments Only a single German battalion or a French 216 Brigade may attack forts and fort squares. Larger units must break down prior to the Assault Segment.
a) A non-garrison enemy unit in a fort square must first be retreated or eliminated before the enemy-held fort itself can be assaulted.
b) When an assaulting unit clears the fort square, it must then immediately assault the enemy-held fort or retreat back to its jump-off square.
c) The attacker uses the same attack factor against both the square and the fort, primary during primary assault or secondary during secondary attack.
d) If the fort square has only a garrison unit, the attacker only needs to assault the fort.
e) If the fort square has no enemy units occupying it, the attacker commits to assault the fort and then automatically occupies the fort during the Assault Combat Phase.
13.4 Closing In
Once the player has committed a unit to an Assault, he may choose to press it forward and "Close In" with the enemy to inflict greater losses. This comes with a risk that the closers themselves may suffer more losses from Defensive Fire. Closing in is always optional.
13.4.1 Procedure
Make a dr test:
- dr is ≤ the unit's primary attack factor: Unit may close.
- dr is a 6 or > unit's primary attack factor: The close attempt fails. Unit stays on the square line.
Gameplay Note: Some chosen units may go in while others may not, a vagary of wartime command at the lower levels.
13.4.2 Secondary attacks may also try to close. They use their primary attack factors for this test.
13.4.3 Marking Closers
To keep track of closing attackers, the attacking player places them on the top edge of the defender's unit, facing in the direction of the original advance.
[Diagram caption] In this situation, following the previous diagram where A and B committed to assault H, the attacking player then decides he will try to close with both units. In their respective drs, A fails and stays on the square line. B succeeds and rests on the edge of defender H.
13.4.2 Closing In Effects
a) Defensive The defender receives a -1 DRM for their defensive fire versus attacking closers.
b) Offensive A +1 DRM bonus for each surviving closer over one is received in the assault. Closers must absorb all the step losses first (even if it eliminates them) before assigning step losses to non-closers.
c) Losses All losses (attacker or defender) are doubled. An AR result incurs an attacker step loss. A DR, Eng or CA result has the defender incur a step loss.
13.4.3 Closing units can also execute flank attacks to earn the flank DRM per unit.
14.0 Command Resources
Assault combats can be assisted by command resources made available through the Command Center Table. These resources represent the ability to apply the best available tactics.
14.1 Command Center Table
After all Assault Combats have been committed and closers determined, the phasing player refers to the Command Center Table and makes a DR, adjusting the roll's result with any modifiers that apply. Several columns appear on the Command Center Table. These display various command resources that mainly benefit the phasing player. From top to bottom, within each column, the particular resource goes from zero to the highest number available.
A result of zero in a column signifies that the resource is not available this turn. Example: A roll of five on the Table wipes out any chance for night attacks (0 in their column).
A resource result above zero means the indicated number of assaults (player's choice) can benefit from that resource. There are nine command resource markers, since barrage divides into Lifting and Creeping Markers. Both sides mostly use the same markers. The phasing player places the designated resource marker on their Numbers Track at the value indicated.
Example: A roll of seven allows the phasing player two secondary attacks; place the marker on the 2 space.
14.2 Available Resources
Most resources will provide favorable DRMs or column shifts when allocated to an Assault, to the extent the resources are available. There are nine different resources possibly available. Resources are only available the player turn they are rolled for.
14.2.1 Secondary Assaults
These represent a second assault wave. While secondary attacks show attacker persistence, they also reflect lower strength from fatigue and failed support. Eligible units always use their lower combat number. See Section 16.8 for details about conducting Secondary Assaults. You can only assign 3 other Command resources to an initial assault for which you hope to perform a Secondary Assault. You can not assign a secondary Assault resource to a Secondary assault being performed.
14.2.2 Barrage Level
These represent advanced barrage techniques.
a) Lifting Barrage (L) jumps forward to various pre-determined fixed points during an attack. To use a Lifting Barrage, a player must have at least one friendly, good order artillery unit in bombardment range of the assault square target. He figures range as in bombardments. Lifting Barrage provides a +2 DRM to the assault.
b) Creeping Barrage (C) walks ahead of assaulting troops. To use a Creeping Barrage, a player must have a good order artillery unit in bombardment range of the assault square target. He figures range as in bombardments. The same artillery unit may provide Creeping Barrage support against different assault squares in range of the guns. Creeping Barrage shifts the differential column 2R.
A player can use only one type of barrage for an assault and this support can only be applied once per assault.
14.2.3 Smoke Screen
This represents massed smoke from artillery shells to hide assaulting troops. When allocated to an assault, perform a dr. On a die-roll of 1-3, the smoke blows at defending forces and provides a +2 DRM to the assault. On a die-roll of 4-6, the smoke blows back towards the attackers and does not help. Whether successful or not, reduce the smokescreen marker value by one on the player's Numbers Track.
14.2.4 Dual-Purpose French 75s (available to French Player only)
This represents the French field artillery rapid-firing with their ability to pinpoint fire like an artillery "machine gun." A good order un-used French 75 artillery unit within range of the French unit (if defending) or target unit (if assaulting) is required to be able to allocate this command resource. Each artillery unit can support only one assault and is flipped to its used side after use. The artillery unit chosen may also be used as the required unit for Gas, Creeping or Lifting Barrage on the same assault. This resource may not be allocated to an Engaged assault.
a) Offense If used to support a French assault, a 1R column shift is applied.
b) Defense When the German player rolls his Command Resources, the French player will receive the value of this resource as determined by the German's roll for use during the German assault phase to support French defenders. Example: A German die roll of 8 provides the French two 75s to use for defense. Place the French marker for these along with the German resource markers on the General Track at the value determined. They cannot be saved from one player turn to the next player's turn. The French player declares the resource after the German player has declared his command resources and before that German assault die roll occurs. When used in defense versus German assaults, a 2L column shift is applied.
14.2.5 Flamethrowers (available to German player only)
German infantry carries canisters of burning oil to spray at French defenders in close quarters. Due to their short range, flamethrowers can only be allocated when one or more of the attackers have closed in. Flamethrowers shift the differential column 1R.
14.2.6 Gas Attacks
These represent poisonous fumes from artillery shells that weaken, daze, and kill defenders. To use Gas, a player must have at least one friendly, good order un-used artillery unit in bombardment range of the assault square target. Range is calculated as in bombardments. It shifts the differential column 1R.
From Game Turn June 19 and for some time afterward, the German player may declare and add phosgene into the Gas resource for an extra 1R shift, raising the total to 2R and a +2 DRM. Both the additional column shift and DRM reflect the devastating effect the use of this weapon had.
14.2.7 Night Attacks
A difficult, but promising time for assaults. Complex planning and execution makes their occurrence less frequent. When a Night Attack resource is allocated to an assault, it provides a 1R column shift to the assault.
14.2.8 Consolidate
The ability to advance neighboring forces who did not participate in the successful assault. A top priority to force breakthroughs, consolidation is the rarest command resource. Whenever defenders retreat or are eliminated from an assault, including a breakthrough (Case 16.5.4), the assaulting player may use this command resource. When used, the assaulting player may advance one or more friendly units (observing stacking limits) who have not participated in the assault into the assault square. Units chosen to consolidate must be adjacent to the assaulted square, in good order, and not committed to another unresolved assault. Units which have already completed an assault earlier in the phase are eligible to consolidate. A player must immediately declare consolidation for the particular assault before moving on to the next assault.
[Diagram caption] For example: in this case, A wins the assault against H, who has retreated from square "2" into "3". Nearby units B and/or C may consolidate into the assault square ("2") if they satisfy stacking. Unit D has committed to assault unit J and therefore cannot advance. But if unit D has already resolved its assault against J or is not assaulting and is still in good order, it could consolidate into square "2". Unit E cannot consolidate, since it was not adjacent to the H assault square. If A yields the consolidation advance to B and/or C, A would return to its jump-off square "1".
14.3 Spending Resources
During the Assault Resolution Phase, the active player will allocate and expend his available Command Resources as he resolves each individual assault.
14.3.1 A player may use up to four types of available resources for each single assault.
14.3.2 Use of any available resource in a particular assault is always optional.
14.3.3 As the resource is allocated to an assault, reduce that resource marker on the player's number track by one. The supply of these resources will dwindle until each category is consumed.
14.3.4 Secondary attacks may use up to 3 command resources from the remaining resources left after the initial assaults.
Gameplay Note: This is due to Case 14.3.1; Secondary Assault is also considered the first command resource used for this new assault.
15.0 Defensive Fire
Before any units assault, defending units will have an opportunity to fire at their attackers. Play action momentarily shifts to the defending player, who resolves fire combat on the Defensive Fire Table and carries out all results before the assaults take place. Taking one assaulted square at a time, the defending player totals friendly fire factors and finds the corresponding column on the Defensive Fire Table. He makes a DR, applies relevant modifiers, and checks the results of the Table. The assaulting player then carries out the results, which may or may not leave surviving attackers to conduct the assault.
Defenders are always in supply and command. They do not require friendly HQs to fire or to defend against assaults.
15.1 Defensive Fire Factors
15.1.1 Infantry's and artillery's defensive fire factors are always the middle number on the unit. The single value on an HQ in command mode is its defensive fire factor. Headquarters in supply mode do not possess any defensive fire ability.
15.1.2 Only defenders in good order may fire at their attackers.
15.2 Defensive Fire Execution
15.2.1 A defending player points out one assaulted square, totals his fire factors, and makes a DR on the Defensive Fire Table. Apply all applicable DRMs found in the DRM section of the Defensive Fire Table and then cross-reference the modified roll result with the appropriate column for the total number of factors firing to get the defensive fire combat result.
15.2.2 A defending player needs at least one factor to roll on the Table.
15.2.3 If more than 10 factors are firing, use the 10 column to resolve the fire combat.
15.2.4 Disrupted defenders cannot fire at assaulting forces. Good order units stacked with them may still fire.
15.2.5 Engaged defenders cannot perform defensive fire.
Example: A defending force with 4 factors fires at their attackers, who have among them an interdicted unit -1 (launching from an interdicted square), and another unit who closes in -1. The attack takes place in rain weather +1. The defending player rolls a 5, modified to a final roll of 4. Assaulting forces suffer 1, a single step loss.
15.2.6 Defensive Fire Results
One of four different outcomes is possible:
- # = Number of step losses inflicted on assaulting troops. Any survivors left in good order will carry on.
- R = Attacking player retreats all units back to where they originated, facing in the same original direction before committing to assault.
- D = Same as R result and all attackers are disrupted.
- ne = No effect; the defenders missed.
Game play Note: Closing In units must take all losses first, even to the point of elimination.
16.0 Assault Resolution
During the Assault Resolution Phase, each assault will be resolved one at a time. Once all regular assaults are resolved, the active player may perform any available secondary assaults at his option. He checks the strength differential between assaulting and defending forces. Locating the number on the proper column of the Assault Table, he shifts that column up or down if shifting applies. He next declares which command resources he will put in, and makes a DR. He alters the die-roll by applicable DRMs listed with the Table, and carries out the result immediately before going on to the next assault of his choice. Repeating the process until all assaults are done, the phasing player then executes available secondary attacks, at his option, in the same manner.
16.1 Assault Differential
The first part of resolving an assault is to determine the assault differential.
16.1.1 Defending units use the second number on their counter.
16.1.2 Attacking units use their first number on their counter. Subtract the defenders' total combat factors defending in the assaulted square by the combined total of all attackers still assaulting the square. This result is the combat differential.
Example: 2 German entrenched regiments, totaling 4 attack factors, assault a French division with 7 defense factors. The Germans assault differential begins at -3, so if there were no column shifts, the assault against the division would be performed on the -3 column.
16.1.3 A suppressed defending unit's defense combat factor is halved (rounded up).
16.1.4 The +5 and -3 columns are the maximum and minimum columns which can be used in assault attacks. Assaults which begin with a differential value higher than the maximum or lower than the minimum column value will start on those columns.
16.2 Assault Column Shift Modifiers
Next, the attacking player will apply any column shifts to the combat due to Terrain, Command Resources and special units.
16.2.1 Terrain
These occur once per assault. The defender uses only the strongest defensive terrain present in his square.
Example: An assault into a wooded ridge square imparts a 2L column shift. Since the ridge is the stronger terrain with a 2L, the presence of woods, with just a 1L, is ignored. Consult the Terrain Effects Chart to find the assault shift modifiers with the following restrictions:
a) Shifts for units attacking across a river are in addition to any other terrain the defenders occupy. So, an attack across a minor river produces an additional 1L shift whenever the defender occupies a square containing the river. An attack across the Meuse River is allowed only at major road crossings and causes an additional 1L shift.
b) An attack into any start trench square causes a 2L shift for all defenders. Original ownership of the trench does not matter.
c) An attack against defense works brings a 3L shift for defending infantry only. Infantry will still allow the benefit when non-infantry units are stacked with them.
d) Attacking a fort causes a 2L shift for defending garrisons, battalions and reduced brigades.
16.2.2 Command Resources
It is at this point that the player spends his available Command Resources and applies any column shifts incurred (Module 14.0). A maximum of 4 Command resources can be allocated to an assault. A maximum of 4 column shifts can be induced for an assault.
Example: The French player may commit a creeping barrage, a French 75, and a gas attack, but he may not add a night attack. Use of the first three already totals the 4R limit, a four-column shift to the right. Adding in the night attack would put the shift to 5R and exceed the limit.
Certain Command resources provide DRMs. These will be addressed in the following section.
Game-play Note: Also keep in mind that only 4 Command resources can be spent for an individual assault. So if you are hoping to perform an available "Second Assault" resource, you can only use 3 other Command Resources on both the Initial Assault and the second Assault.
16.2.3 German Engineers
When attacking a fort, an engineer battalion shifts the differential column two to the right (2R). They in effect cancel out the defender's 2L shift.
16.3 Assault DRMs
Once the final Assault column has been determined, the assaulting player needs to determine any DRMs which are applicable to the assault. Two types of DRMs are possible, one for Command Resources and the other for situations on-map. Consult the DRMs section of the Assault Table to determine the DRMs which will apply.
16.3.1 Command Resource DRMs Certain allocated Command Resources impart a DRM. The restriction noted in case 14.3.1 is still in effect.
16.3.2 Situation Modifiers Eight different situations can provide DRMs: Supply (Section 13.2), Command Range (Case 13.1.4d), Weather (Section 5.1), Closing In (Case 13.4.2), Secondary Trenches, Flank attacks, disrupted/suppressed defender and interdiction. The first four have already been detailed (as noted by the rules reference), the following four are detailed below.
a) German Secondary Trench It imposes a -1 DRM when one or more German infantry defend in trench mode while not on a German Start Line Trench. Mobile German units stacked with the entrenched infantry do not negate the modifier.
b) Flank attacks They provide a +1 DRM to assault die rolls. To qualify as a flank attack, the attackers must commit from at least two squares.
[Diagram caption] In this situation, G faces north. A and B commit a flank attack.
A flank attack modifier is not possible when the defender covers that flank with at least one other unit in good order at the moment of assault. The units also cover by extending ZOC into the assault jump-off square. Disrupted units and interdicted units may not cover flanks.
[Diagram caption] In this case, units A and B assault K. Unit J covers A and prevents a flank modifier. Unit L covers B and prevents that flank modifier. The attacker first has to dispose of J or L (by retreat, disruption or elimination) to get at K with a flank modifier.
c) Disrupted or Suppressed Defender provide a +1 DRM to the attacker. At least one defender in the defending square must be disordered or suppressed for modifier to apply.
d) Interdiction Air or Artillery Interdiction adversely affects the interdicted side. An assault from each interdicted square imparts a -1 DRM. An interdicted defending square imparts a +1 DRM.
16.4 Resolution
Once all DRMs are tabulated into a net DRM, the assaulting player makes a DR, applies the net DRM and cross references this modified die roll with the assault's modified column to obtain the result.
16.5 Results
A Results Key is printed beneath the Assault Table on the PAC which in brief explains the results. Many are A results, affecting the attacker, while several others are D results, affecting the defender. A few are Eng, for engaged, CA, for counter-attack, E for elimination and Bt for breakthrough.
16.5.1 Engaged
A result of Eng applies to all units of both sides that occupy the assault square. An engaged (arrowed) marker (blue for French assaults and black for German assaults) goes on top of the stack. All units must re-fight the assault in the same player's Assault Phase of the next Game Turn. The attacker may use the current turn's command resources normally in each Eng assault combat that is resolved.
As an option, the defenders may break off the engagement and withdraw in their next movement phase. Withdrawal yields the square to the opponent.
Engaged units fight a new assault in supply and at their current strength. Neither side may send reinforcements into the battle. Another engaged result will require another automatic commitment to assault in the next Game Turn. Automatic commitments to assault combats continue until the engaged result ends by rolling another result. Example: The attacker rolls three straight Eng results on Game Turns One, Two and Three for a particular assault. Finally, on Game Turn Four, he rolls an ASr, takes a step loss and retreats.
16.5.2 Counter-attack
A result of CA requires the defending player to immediately perform a counter-attack with only good order defending units that were assaulted. Terrain shifts do apply, as well as DRMs for command range, interdiction, and weather. No Command Resources are available.
Example: A CA takes place on a ridge for a 2L shift, in the rain for a -2 DRM, from an interdicted square for a -1 DRM, and four squares from the nearest command HQ for a +1 DRM.
a) If the original assault had no closers, the CA player attacks a like number of enemy units. Example: Three French brigades assault two stacked German regiments. None closed. The German player chooses two of the French brigades to counter-attack against.
b) In the event a new CA is rolled, the defending player will again counter-attack until the CA chain is broken.
c) Where the original attack had one or more closers, the CA player must counter-attack them as a group after taking the one step loss (see Case 13.4.2c). Example: Three German units assault a French division. Two are closers. The French division must counter-attack the two closers together. In counter-attack, no closer modifiers apply.
d) All counter-attack units are in supply, since defenders always are supplied.
e) A CA result is not possible when the defenders are disrupted, or are an HQ or artillery unit; they retreat instead. Good order infantry units mixed with them must still counter-attack.
f) A CA for a French garrison defender is re-rolled, since they are 0 attack strength.
g) An Eng result for a CA means the counter-attacker will again assault in the next friendly assault phase.
16.5.3 Eliminated
On an E result all affected units are eliminated. The E will be prefaced with an A or D indicating Attacker or Defender.
16.5.4 Defender Eliminated Breakthrough
On a result of DEBt the defending units are eliminated and the assaulting player achieves the ultimate success: a breakthrough. The assaulting player may advance assaulting units one or two vacant or friendly-occupied squares past the assault square, in any direction he chooses. He can ignore enemy ZOCs. A breakthrough advance must be made immediately after the result is known, or it is waived.
[Diagram caption] The above example shows infantry B and C attacking G, a much smaller defender. On a DEBt result, G suffers elimination. The attackers can then advance into squares 1-6, all vacant, or square 8, friendly-occupied. They may not advance into square 7 since the space is still enemy-occupied by H.
16.5.5 Step Loss
An S or 2S in the result causes a 1 or 2 step loss on the owning player's choice of units. Assault step losses must always reduce units (Module 9.0). There can be no disruption substitution like in bombardment. Battalions, reduced brigades and reduced artillery that take a step loss will be eliminated.
16.5.6 Retreats
Any result with an R stands for retreat. The owning player moves all his surviving units in the assault square back one square.
a) Retreating multiple defenders can retreat to separate squares. Vacant squares closer toward a friendly map edge are priority destinations (south for French, north for Germans).
b) Retreating attackers go back to their original jump-off squares. The defending units do not advance.
c) Upon finishing a retreat into a vacant square, units may rotate and face any square side, provided all units in a square face the same square side.
d) Units retreated into an occupied square must face the same direction as the other units already present.
e) Retreats that cause over-stacking will displace the original units backwards, towards friendly lines, until the limits are satisfied.
[Diagram caption] In this example, units B and C have just retreated from square 1 into the square with unit D. This has caused an over-stack situation. The owning player now must displace unit D to square 2 so that the square unit D started in is legally stacked.
f) Retreats into vacant, enemy ZOC squares do not impose any additional step losses because of the path.
g) An R against a French garrison unit eliminates it because it is tied to the fort and unable to move.
h) Whenever any units are forced to retreat off a friendly-map edge (north for Germans and south for French), the enemy player is awarded VPs equal to the number of steps retreated and the units are placed beside the board edge square they retreated off. They may return any following turn from their friendly board edge behind their friendly lines. If forced to retreat off any other board edge they are eliminated permanently from the game.
16.6 Attacker Advance
If the defending units retreat from their square, or are eliminated, leaving the square vacant, the assaulting unit(s) must advance into the square. If this will cause an overstacking situation, the attacker advances units of his choice up to the stacking limit. The other units who are not advanced are moved back into the square they began the assault from. The exception to this rule is if a DEBt result is achieved (Case 16.5.4).
16.7 Assault Combat Re-rolls
Depending on the presence of certain units, players may declare a re-roll for an assault combat, whether on attack or defense, immediately after the first roll's result is determined. If the player eligible to request this re-roll does not, the opportunity is lost. The original differential column, command resources, DRMs and column shifts are exactly the same. Only the dice are being re-rolled to produce a new result which must be applied. Only one re-roll is allowed per assault.
16.7.1 French Re-Rolls
The French Army has élan, an aggressive battlefield stance pushed by officers. Their infantry can continue the fight. Two different re-roll cases are possible.
a) Engagement Result On any Eng result for attack or defense, the French player may request a re-roll, provided at least one French command HQ is within four squares of the assault square and the HQ is in good order.
b) 5th Division Starting April 3 and onwards, the French player may request a re-roll on any result, attack or defense, where the 5th Division participates. The division can be at full or reduced strength to call for this re-roll. Once the actual Divisional unit is in the Replacement Pool, this re-roll cannot be requested until it reappears as a replacement onto the map. This is Mangin's Division and is marked with an "E" in the upper left corner of the counter for easy recognition.
16.7.2 German Re-Rolls
The German Army has pioniers (engineers). They are some of the war's best troops, who can assist in any assault combat if they are in good order and not engaged. Two different re-roll cases are available.
a) Fort Combat On any result for attack or defense, the German player may request a re-roll, provided an engineer battalion participated in the assault. The assault must have been against the fort itself, not the fort square.
b) Entrenched Combat When all the participating German infantry are in trench mode and an engineer unit is stacked with them or is adjacent to at least one of them, the German player may request a re-roll on any result for attack or defense.
[Diagram caption] In this example, entrenched German units A and B assault French unit F. German engineer unit E is adjacent to B and would allows a re-roll on any result. Entrenched unit C then attacks French unit G and the same engineers can support C.
Note: Engineer E can be in either mode. If units B or C were mobile mode, no German re-roll could occur in their assaults. If French unit F or G assaulted, German engineer unit E could assist entrenched unit B and C in their defense.
c) German engineers may assist in both primary and secondary attacks. They also can assist in any number of entrenched assault combats provided they are adjacent to the attacking or defending entrenched friendly units. Engineers participating in an assault themselves may still assist other assaults.
d) Interdiction has no effect on German engineer support.
16.7.4 Single Re-roll
Re-rolls are not cumulative. In the event both sides declare a re-roll, or only the defender declares one, the attacker always performs the new dice roll.
16.8 Secondary Assaults
After all primary assaults have concluded, the active player can declare and conduct Secondary Assaults when they are available in their Command Resources. Eligible, good order infantry units which are adjacent to enemy-held squares may perform a Secondary Assault. A unit may both primary assault and execute a secondary attack in the same Assault Phase. These assaults are conducted in the same manner as primary assaults as described above with the following exceptions.
16.8.1 Artillery and Corps Headquarters do not make secondary attacks.
16.8.2 Secondary Assault Combat Factors Infantry units performing a Secondary Assault use their smaller combat number. German mobile mode and French infantry use their middle (lower) number. German entrenched infantry use their first (lower) number.
Designer's Note: Entrenched infantry do not drop off in assault strength as do mobile infantry. Their staging is better.
16.8.3 Demoralized Defenders Whenever the defenders lose a Secondary Assault (through step loss and/or retreat), defending supply HQs, whether alone or stacked with friendly forces, surrender.
Surviving defending command HQs, artillery (any strength), battalions, or reduced French brigades (with red numbers) roll for possible surrender. The surrender check happens immediately after the defending player has taken all required step losses but before any retreat is carried out. The defending player consults the Demoralized Table on the PAC and rolls a die for each affected unit. A +1 DRM applies to defenders in a fort, to French chasseurs and to German engineers. The modifier is cumulative for engineers or chasseurs in a fort, which exempts them from surrender.
If the unit surrenders it is removed from the game. The attacker gains two victory points per surrendered step.
Defending units that do not surrender carry out their retreat if required.
Note: Surrendered units are permanently lost and never return to the game.
16.9 Interdiction Marker Removal
When the active player has concluded all the available Secondary Assaults he chooses to do or had none, both players remove all Interdiction markers on the board and the Assault Resolution Phase ends.
17.0 Mutual Reorganization
After the French player has finished his turn, both sides will simultaneously conduct reorganization. It is during this phase where players have an opportunity to replace some losses (at a VP cost) and to restore disrupted units to good order.
17.1 Combat Replacements
Each side has a Replacement Pool Box on the map edge. At the start of play, the Pools already contain units according to the set-up instructions for the scenario being played. Battalions and regiments deploy into the German Box. Divisions and brigades go in the French Box. As friendly units are lost in combat, the owning player adds them to the Replacement Pool Box designated for his side.
17.1.1 Track Markers
During a Game Turn, replacement points and enemy VPs will accumulate for losses. Players account for them by moving these markers on the Numbers Tracks. There is a track for each side. For every lost step, including air units, the owning player moves his replacement marker up one and the opponent moves his VP marker up one.
17.1.2 Qualifying Units
Units on the map and reinforcements may never receive replacements directly; they first have to be eliminated, or broken into subunits, and put in the Pool Box in order to come back into play. Lost fort garrisons are not replaceable.
17.2 Calculating Replacements
Each side calculates how many replacements will be available from the Pool. Players use a measuring device called a Working Total. To determine their current Working Totals, they must keep track of two statistics during each Game Turn.
a) Assault Tally Markers (blue for French, black for German) This marker starts each turn on the zero value of each player's Numbers Track and is moved up one for each primary, secondary or counter-attack assault they perform during the turn. Engaged assaults are not counted for this total.
b) Disruption Tally Markers (blue for French, black for German) show how many friendly units have become disrupted this turn (units still disrupted from earlier Game Turns do not count in the Working Total).
Add together the values of the German and French Assault markers. Then add the value of the owning player's Disruption Tally marker to get a total. Divide this total by two (rounding fractions down) to determine the player's Working Total. This value is used to determine the column on the Replacement Chart that will be used. If this value is less than 6 use the 6 column. If this value is greater than 18, use the 18 column.
Example: The German player is calculating his Working Total for a Game Turn. The German Assault marker shows that he performed 16 assaults and the French marker shows that he performed 8 assaults. Adding the two together indicates that 22 assaults combined were performed during the turn. The German's Disorders marker shows that three German units became disrupted from bombardment and/or assaults. This totals 25, which is then divided by two, resulting in a Working Total of 12.
17.3 Replacement Determination
Consult the Replacements Determination Table (see PAC) and find the column which matches the player's Working Total. Make a DR and modify the roll with the listed modifiers if applicable. Then cross reference the modified roll's result with the Working Total column to determine the result. The value listed is the number of replacement steps that the player can take. A roll of less than six means that no replacements are possible. Combat was too scattered and light to impress high command enough to commit replacements. Any Working Total over 18 still uses the 18 column.
17.3.1 Replacement Limits
Players can take as many replacement steps as the value rolled or the total replacement points on the numbers track, whichever is less.
Example: The Germans have accumulated 10 lost steps in the Game Turn, for 10 replacement points on the track. There were 20 assaults and 9 German disrupted units. The German player uses the working total "14" column and rolls a 9, to give him up to 7 steps he may replace. There are 10 replacement points on the track, but the Germans can only take a maximum of 7 replacement steps. The remaining 3 points are forfeited.
Any replacement steps not taken will be forfeited for that Game Turn. Unclaimed units remain in the Replacement Pool.
17.3.2 Unit Replacement Types
See Module 9.0 for the number of steps each unit is composed of. Players usually pay for German battalions or French brigades as replacements. If larger units are present in the replacement pool, the player can expend the replacement points equal to the number of steps of the larger unit and have that unit return into play. Air units are one step for replacement cost purposes.
17.3.3 Victory Points Concession
The total number of replacement steps taken will award the enemy an equal number of victory points.
Example: The French have rolled six replacement steps but they choose to take only take four. They award the Germans four VPs.
17.4 Operational Reserves
Right after the player has determined how many replacement steps he will take of the number available, the player will need to determine how many steps of these (if any) the High Command will take for reserves.
17.4.1 Reserve Mechanics
a) The owning player makes a DR on the Reserve Rate Chart on the PAC and applies all DRMs listed that apply.
b) Cross-index the modified roll with the column matching the number of replacement steps taken to determine the number of steps that will go into reserve.
c) Then choose units whose step total must be equal to the value determined above from the replacement unit mix and place them in the Operations Reserves Box.
d) The enemy VP marker is reduced by the number of steps going into reserve.
Example: The French take seven replacements. They roll a 9 on the Reserve Rate Chart which indicates that 3 of the 7 French replacement steps must go into reserve. By taking a reduced division (3 steps) and placing this into the Reserves Box, they have satisfied the Reserves requirement. They have 4 steps of replacements left which could bring back a full-strength division onto the map.
17.4.2 DRMs for Reserves
DRMs for this Reserves roll are time-sensitive for each side and will apply in the period indicated.
Example: Early French reserves are higher under Pétain (+1DRM). Later on, Nivelle reduces them (-1DRM). Finally, the Germans react to the Somme and increase their reserves (+1DRM).
Gameplay Note: If zero replacements are taken, then nothing can go to the Operations Reserves Box.
17.4.3 Lost air units always replace; they never go into the reserves.
17.4.4 Reserves Re-entry to the Map (Regular Game Turn)
At the start of the player's movement phase, the owning player rolls two dice.
- 2-4 = Make a dr, the result is the number of reserve units (not steps) released. The owner selects the units and places them on their friendly map edge, wherever replacements are allowed.
- 5-12 = No Reserves released. All reserves stay in the Box.
17.4.3 Reserve Release in a Lull Game Turn
After the Operational Reserves have been determined, one third of all of the reserves are automatically released and must be placed at their friendly map edge, similar to replacements (Case 17.6.1). They will enter onto the board the next non-lull game turn. German units enter in mobile mode.
17.5 Automatically Returning Units
Two unit types automatically return and do not count as replacements or reserves.
17.5.1 Surviving Air Units
Air units that survived earlier combat will return without having to be replaced. There is no VP cost for this (unlike returning eliminated air units that do cost both replacement points and VPs).
17.5.2 Supply HQs
A consumed supply HQ returns into play in command mode as described in Cases 8.4.2 (Bombardment Supply) and 13.25 (Assault Supply). There is no replacement cost or VP cost for this.
17.6 Deploying Replacements
17.6.1 Ground Units
The owning player deploys ground replacements during this phase on a friendly map edge (north for Germans, south for French) adjacent to a map square free of enemy units and behind friendly lines. Enemy ZOCs do not block their entry. Deployed replacements are able to move onto the mapboard in their next movement phase, paying the terrain cost for the square entered. Headquarters and German infantry always deploy in mobile mode.
17.6.2 Air Units
Air unit replacements become available at the beginning of the next German bombardment phase.
17.7 Rally
During combat, units may become disrupted or suppressed. In the Reorganization Phase, a player may try to rally disordered and suppressed units using the Rally Table.
17.7.1 Rally Procedure
Rally attempts proceed unit by unit.
a) Player chooses a disordered or suppressed unit he wants to rally.
b) Makes a dr and consults the Rally Table in the PAC.
c) If the unit is within 3 squares of an HQ in Command mode (even if the HQ is disrupted/suppressed), use that listed rally die roll range. The path restriction is the same as for Command range in an Assault.
d) Otherwise, consult the other options and use the least favorable.
Example: During snow, a disrupted artillery unit in an enemy ZOC requires a 1 to rally. If there was a Command Mode HQ within 3 squares, the artillery unit would rally on a roll of 1-4.
e) A friendly unit which began this phase in good order negates the effects of an enemy ZOC into a square, so that disrupted/suppressed unit will use the "Not in Enemy ZOC" row to rally.
[Diagram caption] In this example, A and B are disrupted, and C is in good order. Enemy unit H extends a ZOC into squares 1 and 2. When trying to rally, unit B lies outside H's ZOC because C negates it for rally. Unit A remains in H's ZOC, since C merely shares the ZOC into square 1.
e) Units that fail their rally remain disrupted/suppressed.
17.7.2 Multiple Attempts
After failing to rally the first time, a disrupted unit receives a favorable -1 DRM on all later attempts until rallied.
17.8 Adjusting Markers
At the end of the Reorganization Phase, players reset the Replacement, Assault Tally and Disrupted Tally Markers to zero on the Numbers Track.
18.0 Victory
At the end of the game, one side may win by taking objectives on the map and/or scoring more Victory Points than his opponent does. Points come from several general sources: territorial objectives, enemy losses, enemy surrenders, and enemy replacements. During play, Victory Points will be earned, and they are recorded on the Numbers Track printed on the map. Scenarios and Campaign Games may contain additional conditions for victory.
During the game, players move their markers along the Numbers Track to reflect enemy casualties and replacements taken. At the end of play, they adjust the markers upward to indicate any points earned for territorial objectives and Operations Options.
18.1 Territorial Objectives
Each non-campaign scenario lists geographical objectives for the Germans to capture. In the Campaign Game he rolls for them secretly before the game starts. By denying these random objectives to the Germans, the French player receives the VPs instead.
18.1.1 To earn the VPs for a territorial objective, at least one friendly unit must occupy, or have an uncontested ZOC on, the objective, or have been the last to pass through it, by the end of the game.
18.2 Campaign Game Random Objectives
The German player will need to determine 8 Random Objectives in the Campaign Game.
18.2.1 He does this by rolling 2D6 eight times. Designate one die as the first die. Record the result (1st die, 2nd die) for each roll and consult the Random Objectives Table at the back of this rulebook for each of the objectives. The first die's result is read on the first column and the second die's result is read on the second column to obtain an objective (to the right in that row) for that roll. Each objective can only be obtained once, so re-roll any result which has been already determined. Record the numbers rolled on a piece of paper and keep these hidden from the French player until the end of the game.
18.2.2 Each objective gives the name of a city/town or an area, the location of the square or some conditions that the German player is required to meet. Certain results give more than one location square as a point of reference. Bras Crossing, at K18-19, is an example. The river crossing actually has two squares, K18 and K19. All squares listed with an objective, in this case two squares, need to be taken for victory.
Example: The roll of first die "2," second die "3," has a territorial objective of "Ft. Souville, N23." Translating, the German player knows he has must capture Fort Souville at square N23 on the map.
18.2.3 Exiting the Map One of the Random Objectives requires the German player to exit units off the board for VPs. Units which exit may not return to the game.
18.3 Immediate VP Awards
18.3.1 Unit Losses When a player loses steps during combat (bombardment or assault), the opposing player is awarded 1 VP for every step lost and adjusts his VP markers along the Victory Point Track.
Example: the Germans assault and lose 2 steps in the attack. The French player moves his victory markers up 2 spaces.
18.3.2 Taking Replacements Each replacement step taken awards the opponent 1VP. The award may be reduced due to Operational Reserves (Section 17.4).
Example: The German player rolls 6 replacement steps on the Replacement Chart. He decides to take 4, which will yield four VPs to the French player. Neither side will benefit from the 2 unused steps.
18.3.3 Retreats Off-map Units forced to retreat off an unfriendly board edge award the opposing player 1 VP per step retreated.
19.0 Scenarios
There are six scenarios that detail portions of the 1916 Campaign along the Meuse River.
Set-up Notes: The unit designation is in bold. The deployment square(s) are listed in the parentheses. HQs appear according to their historical set-up square. Since HQs are identical units, players may disregard the exact deployment locations and place any HQ in the designated square.
German Division Setup: The divisions are listed and regiments of the division deploy in the squares listed. Start line units begin in entrenched mode facing south except as noted. Units not on the start line are in mobile mode. If a division's or unit's type listed squares has "Pool" shown, one of the division's regiments or unit (player's choice) must be placed in the German Replacement Pool. All HQs and divisions not listed are out of play. All battalions not listed are placed in the Replacement Pool.
Note: Some scenarios depict stages of the battle where large numbers of historical units have been rotated out with fresh troops. To print them all separately would exceed the counter mix available, so existing counter-mix units have been substituted and noted with a "*".
19.1 Firestorm on the Meuse
Historical Notes
In the first year and a half of the war, Germany held her own on the Western front. In late 1915, General Erich von Falkenhayn devises a scheme to pry open the lines. The German Army would go on the offensive and attack France where he believed she could die fighting—Verdun, an ancient provincial town on the Meuse River. In a remarkable effort Falkenhayn assembles over 1200 guns, many of them heavy pieces, and ten of the Army's best divisions, in just under two months and in secrecy. They will attack a front of eight miles, pulverizing and crushing resistance. Facing them are a mere three French divisions—neglected, poorly dug-in and undermanned. Two chasseurs battalions and just 270 guns share their fate. Reeling, the shocked French command summons and promotes General Henri Pétain, who rushes in to restore order and parcel out his reserves from Second Army.
Scenario Length: February 21 through March 27 (6 Game Turns).
19.1.1 German Set-up
Korps HQ (start in mobile mode): VIR (D10), VIIR (A15), XVIII (A22), III (B26), VR (C28), XV (E32)
Infantry Divisions
- 11R (L1, J3 east, F4)
- BATTALION (H3 east, D5, F9)
- 12R (E7, F11, E12)
- 14R (C13, D14, A15)
- 13R (B16, B18, A19, C20)
- 21 (A20, C21, C21)
- 25 (A22, C22, A23)
- 5 (C23, C24, C25)
- 6 (D25, D25, C26, D27)
- 10R (E26 west, F26, F27)
- 9R (F28, G29)
- 30 (G30, H31, H32)
- 39 (H33, I34 west, K34 west)
- ENGINEER (C25, D10)
West Bank Artillery (West Wing) Behind German Start Trenches in woods or ridge squares. 1 x 225 77, 1 x 325 77, 1 x 100, 1 x 10⁵H, 1 x 150H, 1s x 210H
East Bank Artillery (East Wing) Behind German Start Trenches in woods squares, rows 29-34. 1 x 225 77, 1 x 325 77, 1 x 100, 1 x 10⁵H, 1 x 150H, 1 x 210H
East Bank Artillery (Center Group) Behind German Start Trenches in woods or ridge squares, rows 13-28. 6 x 77 (remaining), 1 x 100, 1 x 10⁵H, 1 x 130, 6 x 150H, 1 x 150, 2 x 210H, 1 x 305H (B28, major road only), 1 x 380 (A29, rail only), 2 x 420 (A26, B27, major road only)
19.1.2 German Reinforcements
Enter on the northern map edge on the designated side of the Meuse (east or west).
- March 6 – West Bank: 11B, 22R, XXIIR HQ. East Bank: 113.
- March 13 – East Bank: 58, 121.
- March 20 – West Bank: 192 brigade (three regiments). Also place and detonate mines on West Bank (Case 19.1.5k).
19.1.3 French Set-up
Five divisions are placed in the Replacement Pool: 29, 67, 72R, 51, 14. Their brigades are in the front line trenches facing north except as noted. All corps and divisions not listed are out of play. All brigades not listed are placed in the Replacement Pool.
Corps HQs: VII (K11), XXX (N23), II (Q27)
Infantry Divisions (not broken down and facing north): 37 (P20), 132 (N33)
Infantry Brigades
- 13 x 216 reduced (L2, J4 west, H4 west, F5 west, F7, G9, G11, F12, C16, C18, G26, I32, J33 east)
- 1 x 436 full (M22)
- 5 x 326 full (E5, E14, D23, E25 east, H30)
- 3 x 326 reduced (G28, L34, Q18)
- 2 x 59C full (D20, D21)
- 8 x Fort Garrison Markers, inverted and randomly placed on eight forts, at least three must go on the West Bank.
Artillery
- 3 x 225 75 (K6, G18, H23)
- 2 x 325 75 (H13, L29)
- 1 x 335 155H (I16), 1 x 240H (K25)
19.1.4 French Reinforcements
Enter on designated roads on the southern mapboard edge. HQs appear in mobile mode.
- February 21 – Haudainville Road at V22: 3, 4, 16, 3 x 225 75. Voie Sacrèe at V13: 153, 39, 1 x 325 75, I Corps HQ, XX Corps HQ.
- February 28 – Voie Sacrèe at V13: 2, 106, 13, 48, 120, 25, 26, 27, 28, 2 x 225 75, 1 x 235 120, 1 x 435 155H, 1 x 421 305H, XIII Corps HQ, XIV Corps HQ, XXI Corps HQ. Haudainville Road at V22: 68.
- March 6 – Voie Sacrèe at V13: 43, XXXII Corps HQ, XXXIII Corps HQ, 1 x 225 90, 1 x 425 75.
- March 13 – Voie Sacrèe at V13: 1, 40, 59, 42, 77, 1 x 235 105, 1 x 335 155H.
- March 20 – Voie Sacrèe at V13: 70, 76.
- March 27 – Voie Sacrèe at V13: 22.
19.1.5 Special Rules
a) Weather Game Turn 1 has fair weather. Checking for weather occurs thereafter. Rain becomes snow when it is rolled on February 28, March 6, or March 13.
b) Lull Turns A Lull turn may not be declared on Turns 1-2.
c) French 75s All start and enter at full-strength.
d) Fort Souville The XXX Corps HQ temporarily over stacks in the fort. It must vacate in the first movement phase to observe fort stacking.
e) Artillery Supply Demands On February 21 all guns have supply. No supply HQ is expended solely for bombardment. Starting on February 28, one friendly supply HQ unit is expended per turn if bombardment takes place. Counter-battery alone expends no artillery supply.
f) West Bank Hold Both sides may fire artillery there, but all start line infantry can not move or assault until Game Turn 3, March 6. At that point all Western forces are freed and the west start line becomes active.
g) Before March 6, units starting or entering the map behind their West Bank trench line may move freely. If rear area infantry enter their West Bank start line, they must stop movement and wait until March 6 before they can move out of the line.
i) German Air Supremacy On Game Turn 1 only German air flies. Starting on Game Turn 2, French air enters and the skies are contested.
j) Artillery Bog Area Artillery slows down beginning on Game Turn 2 (Case 12.2.4).
k) German Mines A special Mines Phase concludes the German Bombardment Phase of Game Turn 5, March 20.
i) Before his turn begins, the German player inverts the three mine markers, leaving their Interdiction side face-up. He then randomly deploys the markers, one per square, on top of a French start-line infantry unit on the West Bank. The mine may not be deployed on Engaged units. If no eligible targets remain on the start line, the Mines Phase is done.
ii) The mines detonate following all German bombardment. Make a dr for each placed mine. A result of 1-3 blows the mine and he flips the marker to see what damage is inflicted. A roll of 4-6 is treated as no effect and the marker is removed.
iii) Mine Attack Damage The back of the mine counter indicates what type of damage it inflicts if it explodes.
- DST (disrupt and step loss): the French player step-reduces a division or full brigade, or he eliminates a reduced brigade. Then a disruption marker is placed on any survivors.
- D (disruption): The French player places a disruption marker on the targeted unit/s.
- NE (no effect): The targets are not harmed.
iv) At the end of these mine attacks, all mine markers are removed from the map.
19.1.6 Victory Conditions
German Tactical Victory The German player must satisfy all three of the following:
-
Clear the entire French at start trench line of French units.
-
German forces must control by occupation at least five of these seven:
- Samogneaux (G16)
- Bras Crossing (both squares K18-19)
- Fort Douaumont (J23)
- Fort Vaux (L25)
- Hill 304 (K6)
- Mort Homme Hill (J10)
- Fort Vacherauville (L16)
When an assault on Fort Douaumont reveals only a dummy garrison, it counts as two objectives.
- Earn 30 more VP than the French, from losses and replacements.
German Strategic Victory Occupy all five Verdun squares P19-20, Q18-20, or be the last to have passed through them.
French Victory The French win by doing one of the following:
-
Avoid all three German tactical victory conditions and occupy all of Verdun, or be the last to pass through it, with no German ZOC on any city square at the end.
-
Earn 20 more VP than the Germans from losses and replacements and occupy all of Verdun, or be the last to pass through it with no German ZOC into a city square at the end.
Draw Neither side achieves their victory conditions.
19.2 Crown Prince's Plan
Historical Notes: When General Falkenhayn won the Kaiser's approval to attack at Verdun, an intense debate followed at 5th Army Headquarters. Crown Prince Wilhelm, the Kaiser's son and ostensible commander of the 5th, wanted a broader frontal attack on both banks of the Meuse. His chief of staff, General Schmidt von Knobelsdorf, the real power in the command, readily agreed. But Falkenhayn, ever cautious about potential Entente counteroffensives everywhere, held back. He ordered the East Bank offensive only. In this what-if scenario, the Crown Prince gets his way and the whole front opens in fury, west and east. All German forces launch their attacks.
Scenario Length: Same as scenario 19.1.
19.2.1 German and French Set-up and Reinforcements
Use Scenario 19.1.
19.2.2 Special Rules
All special rules from Scenario 19.1 apply except one.
a) West Bank Free All German and French units may operate without limits.
b) Reserves Freed The portion of replacements held back lowers to one-third, rounded down. (At least four steps are required to take one reserve step).
19.2.3 Victory Conditions
The following conditions determine victory:
German Victory The German player must satisfy all three of the following:
-
Clear the entire French at-start trench line of French units.
-
German forces control by occupation at least seven of these nine:
- Samogneaux (G16)
- Bras Crossing (K18-19)
- Fort Douaumont (J23)
- Fort Vaux (L25)
- Fort Souville (N23)
- Mort Homme Hill (J10)
- Hill 304 (K6)
- Hill 310 (M7)
- Fort Vacherauville (L16)
If an assault on Fort Douaumont reveals only a dummy garrison, it counts as two objectives for this condition.
- Earn 30 more VP than the French, from surrender, losses and replacements.
French Victory Avoid the German victory conditions.
Draw There can be no draw in this scenario.
19.3 Operation May Cup
Historical Notes: By early April, the Germans realize that no quick, deadly blow would cave in the Verdun sector. They have chiseled on the East Bank, and then switched to the West Bank, without the dramatic success witnessed in the first week of the offensive. In mid-April, the Germans rush Dead Man's Hill and Hill 304 and take them. See-saw gains set in. So far, twenty-four German divisions, numbering half a million men, cover a front of 25 miles. The manpower measures 20,000 per mile. The French, under Pétain's careful stewardship, match the intensity. He proclaims, "We shall have them." But Joffre wants more. By May he replaces Pétain with General Robert Nivelle. Fort Douaumont beckons Nivelle to recapture it at a terrible cost. Regrouping, the Crown Prince launches Operation May Cup, designed to capture jumping-off locations for the assault on Verdun itself. Thiaumont with its field-works, Fleury, Fort Vaux and Fort Souville are targets. Let loose for the first time, phosgene gas staggers the defenders. The Alpendivision, one of the best units in the German Army, is sent to break through.
Scenario Length: April 3 through June 26 (13 Game Turns).
19.3.1 German Set-up
All corps and regiments not listed are out of play. All battalions not listed are placed in the Replacement Pool.
Korps HQs (start in mobile mode): VIR (E5), XXIIR (E11), VIIR (E18), XR (G25), XVIII (A20), III (A30), V (P33), XV (L29)
Infantry Units adjacent to start line units also begin entrenched facing south except as noted.
- 192 Brigade (L1, L2, K2)
- 11B (K3, J4, Pool)
- 11R (I6, H7, G8)
- 12R (G9, H11, Pool)
- 22R (H12 x 2, I12, I13)
- 14R (I14, I16, Pool)
- 13R (J18, J19, I19 x 2)
- 113 (J20, J21, I21)
- 58 (J22, I22, I23)
- 121 (J24, J25, I25)
- 10R (K26 west, L27 west, M27 west)
- 9R (N27 west, Pool)
- 30 (Q28 west, R29, S31 west)
- 39 (U32 west, V32 west, Pool)
- 6 (A31 x 2, A32 x 2)
- 5 (A29 x 2, A28)
- 25 (A21 x 2, A22)
- 21 (A19 x 2, A18)
Battalions Player's choice (T32 west, O28 west, J23 outside fort, I17, G10, I5).
Engineer Battalions (I12, J23 in fort, G25).
Artillery Germans set up their artillery units before the French. All thirty-four units set up behind the German line at least six squares away from the German front units. At least fourteen must start on West Bank.
Reserves Box 5 battalions (player's choice).
19.3.2 German Reinforcements
All forces enter on the north board edge, either east or west bank side as indicated.
- April 3 – West Bank: 5 x battalion
- April 17 – East Bank: 5 x battalion
- April 24 – East Bank: 4 x battalion
- May 1 – West Bank: 4
- May 8 – West Bank: 54
- May 15 – East Bank: 4 x battalion. West Bank: 38
- June 5 – Remove 192X brigade
- June 12 – East Bank: ALP KORPS HQ, AC
- June 19 – East Bank: 6B
19.3.3 French Set-up
All corps and divisions not listed are out of play. All brigades not listed are placed in the Replacement Pool.
Corps HQs: XXXIII (P20), III (M22), I (M19), XIII (T22), XX1 (S23), II (T28), XX (L10), XXXII (L7), VII (O7)
Full Strength Infantry Divisions Facing is north except as noted.
28 (V30 east), 68 (T31east), 43 (K24), 27 (M21)
Step Reduced Infantry Divisions Facing is north except as noted.
76 (M2), 29 (L3), 67 (K4), 42 (J6), 40 (I7), 120 (H8), 25 (H9), 26 (J12), 37 (K18), 77 (K20), 1 (K21), 70 (K22), 2 (K23), 14 (K25), 59 (L26 east), 22 (M26 east), 153 (N26 east), 48 (O27 east), 16 (P27 east), 132 (Q27 east), 39 (R28 east), 3 (S29), 4 (S30 east), 13 (U31 east), 72R (S26), 106 (Q20), 51 (P24)
Infantry Brigades One in each square listed and all are facing north.
- 326 full (M1, I10, I11, K14)
- 326 reduced (K15)
- 436 full (K5, I9, K19)
- 216 reduced (in forts N15, L16, Q19)
Fort Garrisons
- 010 face-up (N23, N25)
- 020 face-up (L25)
Artillery French set up their artillery units after the Germans have deployed theirs. Twenty units (not the three reinforcements on May 15 or the two rail guns) set up behind French line at least six squares away from the French front units. At least nine must start on West Bank. Units with a "1" movement allowance are restricted to major roads at all times.
Reserves Box 1 x 436 Brigade, 3 x reduced 326 Brigade, 2 x 59c.
19.3.4 French Reinforcements
All reinforcements enter on the Voie Sacrèe (V13).
- April 3 – 11, 5, 6, 34, 23
- April 10 – 1 x 421 305H, 69
- April 17 – 17, 18
- May 15 – 1 x 345 220, 1 x 321 280H, 1 x 321 370H, 56
- June 15 – 130
19.3.5 Special Rules
a) Alpen Brigade The three starting 192 Brigade regiments on the West Bank must permanently withdraw off north edge by June 5. Alpen Corps AC permanently replaces them and enters on East Bank June 12 as Alp Korps and four 756 regiments. With AC in, 192 Brigade is removed from the game permanently.
b) Phosgene Gas On June 19 and 26, German heavy artillery may fire the surprise phosgene gas (Case 14.2.6).
c) German Rear Units Two corps with their divisions rest on the north edge. The German player may release one corps on Turn 1 and the other on Turn 2.
d) German Reinforcements Listed battalions can "make change" and come in as regiments when available in the Replacement Pool:
- 2 battalions = 3 or 4 Primary CF regiment
- 3 battalions = 5 or 6 Primary CF regiment
- 4 battalions = 7 Primary CF regiment
Battalions making change then remain in the Replacement Pool; they do not enter play as reinforcements that turn.
19.3.4 Victory Conditions
The following conditions determine victory:
German Tactical Victory The German player must satisfy all three of the following:
- German forces control by occupation at least six of these seven:
- Thiaumont Defense Works (K20-21)
- Fleury (M22)
- Fort Vaux (L25)
- Fort Souville (N23)
- Mort Homme Hill (J10)
- Hill 304 (K6)
- Fort Vacherauville (L16)
-
German ZOC on one or more Verdun squares (P19-20, Q18-20). Presence of French forces does not negate this ZOC.
-
Earn 30 more VP than the French, from surrender, losses and replacements.
German Strategic Victory Occupy all five Verdun squares P19-20, Q18-20, or be the last to pass through them.
French Victory The French win by doing one of the following:
-
Prevent either German victory and occupy all of Verdun, or be the last to pass through it. No German unit may exert a zone of control into the city at the end.
-
Earn 20 more VP than the Germans from surrenders, losses and replacements and occupy all of Verdun, or be the last to pass through it. No German unit may exert an uncontested zone of control into the city at the end.
-
Retake and occupy Fort Douaumont at the end, with a supply line clear of German units and their ZOCs back to the south edge. French-occupied squares allow tracing the supply path through them.
Draw Neither side achieves their victory conditions.
19.4 Hell's Doorway
Historical Notes: By July, Nivelle has shortened the turnover time for units, resulting in higher casualties and greater fatigue. Germans increasingly turn their attention to the Somme; infantry and artillery start shipping out to aid defenses there. The drawdown is working; by mid-July German attacks taper off. In the interim, the Germans achieve their piece-meal gains and the French grind back. Verdun takes on a deadly life of its own. The ostensible goal, Verdun town, is blurred in attacks and counterattacks over a moonscape of destroyed ground. Fort Souville looms ahead and must be taken to secure the way. Elite Alpen Korps, backed with phosgene gas, press ahead through an endless inferno.
Scenario Length: July 3 through July 31 (5 Game Turns).
19.4.1 German Set-up
All corps and regiments not listed are out of play. All battalions not listed go to the Replacement Pool.
Historical Note: 12R and 121 divisions are not in play, because they have already gone to the Somme. Alpen Brigade 192 is not in play; Alpen Korps AC replaces it.
Korps HQs (start in mobile mode): VIR (I4), XIV (F8), XXIIR (E11), VIIR (G18), IB (H21), XVIII (I25), III (G25), XR (G28), XV (L29), V (P33)
Infantry Divisions Units adjacent to start line units also begin entrenched facing south except as noted.
- 21* (L1, L2, K3)
- 54 (K5, K6, J7)
- 113* (J8, J9, I9)
- 22R* (J10, I10, I11)
- 38 (I12, H12, J13)
- 14R (I16, I17, J18)
- 13R (J19, I19, I20, H20)
- 6B (L21, K21 x 2)
- 4 (M22, L22 x 2, K22)
- 11R (M23, L23 x 2)
- 5* (I23, J24, I24)
- 33R* (M24, L24, M25)
- 25 (E25, F26, E26)
- 30 (N27 west, O27 west, P28 west)
- 39 (R29 west, S31 west, U31 west)
Engineer Battalions (I11, J23 in fort, K25)
Infantry Battalions (K4, E5, I5, G13, I14, K20* x 2, J20*, L25 in fort, M26, Q28 west, R30, T32 west, V31 west, P32, H29)
Artillery Germans deploy their artillery units first. All thirty-four units set up behind German line at least six squares away from the German front units. At least fourteen must start on West Bank. Units with a "1" movement allowance are restricted to major roads at all times.
Reserves Box: 9R, 6, 58, 11B, 3 x battalion
19.4.2 German Reinforcements
Enter on the north board edge and on Bank side as indicated.
- July 3 – East Bank: Alp Korps HQ, 4 x Alp
- July 24 – East Bank: 10R*
19.4.3 French Set-up
All HQs and Divisions not listed are out of play. All brigades not listed are placed in the Replacement Pool.
Corps HQs: XX* (N4), XIV (O8), XXXII (O12), XIII* (M15), XII* (P20), VII (Q24), III (S23), XXI* (T22), II * (T26)
Full-strength Infantry Divisions Facing north except as noted: 120* (L6), 132* (K8), 5 (N24), 51* (R28 east), 27* (U30 east)
Step-reduced Infantry Divisions Facing north except as noted: 37 (M2), 39* (L4), 68 (K7), 17* (K10), 67* (J11), 69* (J12), 22* (K19), 29* (L20), 77* (M20), 59* (N21), 76* (N22), 13* (N26), 72R* (P27 east), 70* (S30 east)
Full strength Infantry Brigades Facing north except as noted: 5 x 436 (M1, L5, P24, O26 east, S29), 8 x 326 (L3, Q8, K9, L11, K13, Q20, T31 east, V30 east)
Step-reduced Infantry Brigades Facing north: 216 (K13, O14 in fort, K15, T27 in fort)
Fort Garrisons: 010 face-up (N15, O22, N25), 020 face-up (N23)
Artillery French artillery units set up after the Germans. Twenty-three units (not the two rail guns) set up behind the French front line at least five squares away from the French front units. At least nine must start on West Bank. Units with a "1" movement allowance are restricted to major roads at all times.
Reserves Box: 23, 25, 3 x 436 brigades, 3 x reduced 326 brigades, 2 x 59C
19.4.4 French Reinforcements
All enter on Voie Sacrèe (V13) except as noted.
- July 3 – 130
- July 10 – 6*, 56*, 16, 128
- July 17 – 28
- July 24 – 14*
- Enter on West Bank south edge: 153*
19.4.5 Special Rules
a) Limited Phosgene Gas In July, German heavy artillery may fire phosgene gas. Phosgene may fire once per every two gas resources allotted. It may not fire on just one gas resource allotted, due to limited shell stock.
b) Somme Withdrawals On July 1, the Entente attack on the Somme to relieve pressure at Verdun. Their strategy forces Falkenhayn to siphon off troops and heavy guns to meet the new threat.
i) At the end of the Weather Phase of every July Game Turn, the German player makes a dr on the Somme Withdrawal Table (See PAC) to permanently remove units from the game.
ii) A dr result can not be performed twice. If the same number has already been rolled, the German player re-rolls until a totally new die number results.
iii) Designated unit types may come from the Replacement Pool, the map, or both, at owner's choice. No withdrawals may come from the Reserves Box.
iv) Battalions do not substitute for regiments and vice versa.
v) Only heavy artillery is withdrawn; field artillery and the 380 rail unit stays.
vi) Regiments may come from different divisions.
vii) These units are not eliminated, so the Germans do not award VPs for these withdrawals.
19.4.6 Victory Conditions
The following conditions determine victory:
German Tactical Victory The German player must satisfy all of the following:
- German forces control by occupation at least five of these six:
- Thiaumont Defense Works (M20-21)
- Fleury (M22)
- Mort Homme Hill (J10)
- Hill 304 (K6)
- Fort Vacherauville (L16)
German zone of control on one or more Verdun squares: P19-20, Q18-20. (Presence of French forces does not prevent a zone.)
-
Occupy at game's end Fort Souville N23 and all eight surrounding squares: M22-24, N22, N24, O22-24
-
Earn 15 more VP than the French, from surrender, losses and replacements.
German Strategic Victory Occupy all five Verdun squares P19-20, Q18-20, or be the last to pass through them.
French Victory The French win by doing two of the following:
-
Avoid German tactical victory and occupy all of Verdun, or be the last to pass through it. No German unit may exert a zone of control into the city at the end.
-
Earn 20 more VP than the Germans from surrender, losses and replacements.
-
Retake and occupy Fort Douaumont (J23) at the end, with a supply line clear of German units and their ZOCs back to the south edge. French-occupied squares allow tracing the supply path through them.
Draw Both sides achieve their victory conditions.
19.5 They Shall Not Pass
Historical Notes: By August, fortunes turn against the Headquarters of both armies. Joffre, borrowing from Verdun to pay his favored project, the Somme, runs into disfavor. Parliament conducts a harsh inquiry. Falkenhayn, frittering away his reserves between Brusilov's offensive, the Somme and Verdun, and gaining little success anywhere, runs into his own political wall. The tandem of Von Hindenburg and Ludendorff replaces him in August, with the Kaiser's blessing. At Verdun, the Germans effectively call off the offensive after mid-July. Fighting goes on, since the French need more space, and the Germans do not wish to retreat from ground won at such cost. The whole Verdun front see-saws in yards gained and lost. French morale seems to improve, and German materiel and morale sinks. Throughout September, the French trio of Generals Pétain, Nivelle and Mangin lay plans for the fall offensive. The German Crown Prince can no longer rely on his aggressive chief of staff, General Schmidt von Knobelsdorf, who has left for the Russian Front.
Scenario Length: August 7 through September 25 (8 Game Turns).
19.5.1 German Set-up
Units adjacent to start line units also begin entrenched facing south except as noted.
Korps HQs: VIR (I4), XIV (F8), XXIIR (E11), VIIR (G18), IB (H21), ALP (G25), VR (H29), XV (L29), V (P33)
Infantry
- 4 (L1, L2, K4, Pool)
- 38 (K5, J6, J7)
- 14R* (J8, J9, J10)
- 54 (I11, I12, I13)
- 13R (J18, J19, J20, K20)
- 22R* (J21, J22, K22)
- 6B (K21, L21, L22)
- AC (M22, M23, Pool x 2)
- 11R* (I24 x 2, J24)
- 25* (M24, M25, M26)
- 30 (N27 east, O27 east, P28 east)
- 39 (Q29, S31 east, U31 east)
Battalions (K3, I5, E5, G13, I14, H23 x 2, H24, L25 in fort, F26, Q28 east, R30, T32 east, V31 east, P32)
Engineer Battalions (G10, J23 in fort, K25)
Artillery Germans set up their artillery units first. Before setting up, the German player needs to determine which artillery units have been withdrawn to the Somme and elsewhere.
Set aside the 380 rail artillery unit and all field artillery; they will be deployed. The remaining twenty-one heavy artillery units are placed in a cup. Randomly draw out eleven units; these units are out of play. The remainder will be deployed. A total of twenty-three available artillery units will be left. They are set up seven or more squares behind the German front line. At least nine must start on West Bank. Units with a "1" movement allowance are restricted to major roads at all times.
Reserves Box: 3 x battalion
19.5.2 German Reinforcements
All enter on East bank north edge.
- August 7 – 11B*
- August 28 – 10R*, 58*, 33R, 113*
- September 4 – 21*
19.5.3 French Set-up
All corps and divisions not listed are out of play. At owner's choice, one-half of the brigades not listed go to the Reserves Box, and one-half to the Replacement Pool.
Corps HQs: XX* (N4), XIV (O8), XXXII (O12), XIII* (M15), XII* (P20), VII (Q24), III (S23), XXI* (T22)
Infantry Divisions All are step-reduced. Facing is north except as noted: 37 (M2), 39* (L4), 120* (K6), 68 (K7), 132* (K8), 17* (K10), 67* (J11), 69* (J12), 22* (K19), 29* (L20), 77* (M20), 59* (M21), 76* (N22), 5 (N24), 13* (N26), 72R* (P27 east), 51* (R28 east), 70* (S30 east), 27* (U30 east)
Full strength Infantry Brigades Facing north except as noted: 436 (M1, L5, P24, O26 east, R29), 326 (L3, Q8, K9, L11, J13, Q20, T31 east, V30 east)
Step-reduced Infantry Brigades Facing north except as noted: 216 (J13, O14 in fort, K15, T27 in fort)
Fort Garrisons All face-up: 010 (N15, O22, N25), 020 (N23)
Artillery French artillery units set up after the Germans. Twenty-three units (not the two rail guns) set up behind French line at least five squares away from the French front units. At least nine must start on West Bank. Units with a "1" movement allowance are restricted to major roads at all times.
Reserves Box: 2 x 59C and all remaining brigades. No brigades are placed in the Replacement Pool.
19.5.4 French Reinforcements
Enter on Voie Sacrèe (V13) unless otherwise noted.
- August 7 – 18*
- August 21 – West Bank South Edge: 67*
- September 18 – 130*
- September 25 – 22*, 67*, 22*
19.5.5 Special Rules
a) Phosgene Gas None is available.
b) German Morale German assaults have a special -1 DRM due to poor morale. The modifier is cumulative to all others. Defense is normal.
c) Worn-Out German Guns Because guns have been overused, all German artillery bombardment and counter-battery fire has a special + 1 DRM. The modifier is cumulative to all others.
19.5.6 Victory Conditions
The following conditions determine victory:
German Victory The Germans win by doing both of these:
-
Occupy Fort Souville and all eight surrounding squares.
-
Occupy at least one square in or adjacent to Verdun.
French Victory The French win by doing all of these:
-
Occupy Fort Douaumont
-
Occupy Mort Homme Hill (J10)
-
Earn 20 more VP than the Germans from surrender, losses and replacements.
Draw If both sides achieve their victory conditions or neither side achieves their victory conditions.
19.6 Rampart's Revenge
Historical Notes: In September and October, the French trio of Pétain, Nivelle and Mangin lay the groundwork for a counter offensive to win back the Verdun front. General Pétain carefully marshals guns and troops for a determined set piece attack. After the big 400 mm rail guns arrive, the heaviest bombardments begin in mid-October.
In the meantime, German troop morale declines from constant barrages, loss of air control, and a sense of foreboding about a new French offensive. Their unit strengths are down from constant attrition. Verdun's front becomes a backwater.
Already, Hindenburg and Ludendorff have laid plans to pull back at the Somme. Privately, Crown Prince Wilhelm likes the idea for Verdun as well, yet the High Command chooses to stay, for the symbolic value of the ground taken.
The French intend to exploit German fears. Their aim is to exact revenge and take back territory. Before winter sets in, Army Group Centre Commander Pétain hopes to restore the former lines and give Verdun breathing room. Local commanders Nivelle and Mangin desire that and more; they focus on storming Douaumont and reclaiming national glory.
Scenario Length: October 2 through December 18 (12 Game Turns).
19.6.1 German Set-up
The number of regiments of a division present is indicated by the number of set-up squares (player's choice). The other regiments of the division are out of the game.
Korps HQs: VIR (I4), XIV (F8), XXIIR (E11), VIIR (G18), IB (H21), XV (L29), V (P33)
Infantry
- 4 (L1, K3)
- 38 (K5, J6, J7)
- 25 (J8, J9, J10)
- 30* (I11, I12)
- 22R* (I13)
- 13R (J19, K20)
- 14R (L21, L22)
- 192X* (M22, M23)
- 12R* (M24, M25, M26)
- 54 (J22, K22)
- 9R* (N27 west, P28 west)
- 39 (Q29, S31, U31)
- 113* (A22, A23, A24)
Battalions (L2, K4, E12, I14, J18, H23, H24, O27 west, Q2 west, R30 west, T32 west, V31 west, P32, 3 in Pool)
Engineer Battalions (I9, J23 in fort, Pool)
Artillery
Germans set up their artillery units first. Before setting up, the German player needs to determine which artillery units have been withdrawn to the Somme and elsewhere.
Set aside the 380 rail artillery unit, it stays in play. The remaining twenty-one heavy artillery units are placed in a cup. Randomly draw out thirteen units; these units are out of play. The remainder will be deployed. Next, place all twelve field artillery units into a cup and randomly draw five units, which are out of play. The remainder will be deployed. A total of sixteen available artillery units will be left. They are set up seven or more squares behind the German front line. At least six must start on West Bank. Units with a "1" movement allowance are restricted to major roads at all times.
Reserves Box: 3 x battalion
19.6.2 Reinforcements
All reinforcements enter on north board edge either East or West Bank side as indicated. The number of regiments that arrive with the Division is indicated in the parentheses.
- October 9 – West Bank: 10R* (2)
- October 23 – West Bank: 33R (all)
- November 6 – East Bank: 6B* (2), 2 x BATTALION. West Bank: 11B* (all)
- December 4 – East Bank: 3 x BATTALION, 5 (1)
- December 11 – East Bank: 11R* (all)
19.6.3 French Set-up
All corps not listed are out of play. Randomly draw one-half of the brigades not listed and place them in the Reserves Box; the remainder are placed in the Replacement Pool.
Corps HQs: XX* (N4), XIV (O8), XXXII (O12), XIII* (M15), XII* (T28), VII (Q24), III (S23), XXI* (T22)
Infantry Divisions At full strength and facing north except as noted: 56* (M2), 14* (L4), 28* (O5), 43* reduced (K6), 68* (K7), 34* (K8), 17* (K10), 2* (J11), 69* reduced (J12), 42* reduced (J13), 23* (K19), 39* (N19), 29* (L20), 1* (M20), 6 (M21), 48* (N21), 76* (N22), 5 (N24), 3* (R24), 25* (N26), 18* reduced (O26 east), 26* (P27 east), 40* (Q27 east), 51* (R28), 70* (S30 east), 27* (U30 east), 16* (V30 east)
Infantry Brigades At full strength and facing north except as noted: 436 (M1, P24, R29), 326 (L3, Q8, K9, K11, Q20, S29, T31 east), 216 (K13), 216 reduced in forts (O14, T27)
One-half of the remaining brigades in the Replacement Pool.
Fort Garrisons Face up: 010 (N15, O22, N25), 020 (N23)
Artillery French set up guns last. Twenty-three units (excluding the two rail guns) set up behind French line at least five squares away from the French front units. At least eight must start on the West Bank. Units with a "1" movement allowance are restricted to major roads at all times.
Reserves Box: 2 x 59c, one-half of the remaining brigades
19.6.4 Reinforcement
All enter at full-strength.
- October 2 – Enter on Voie Sacrèe (V13): 37, 130
- October 16 – Enter on rail (V13 or V20): 2 x 421 400
- October 23 – Enter on Voie Sacrèe (V13): 106*, 128
- October 30 – Enter on Voie Sacrèe (V13) or Haudainville Road (V22): 13*, 3 x 326*, 72R*, 120*, 132*
- November 6 – Enter on Voie Sacrèe (V13) or Haudainville Road (V22): 22*, 67*
- November 13 – Enter on Voie Sacrèe (V13): 59, 153
- December 4 – Enter on Voie Sacrèe (V13) or Haudainville Road (V22): 4*, 11*
- December 11 – Enter on Voie Sacrèe (V13): 77*
19.6.5 Special Rules
a) Weather Rain becomes snow when it is rolled on the last five Game Turns: November 20, November 27, December 4, December 11, or December 18.
b) French Initiative By this time, German 5th Army is in a holding pattern. Sequence of play reverses; French go first, followed by the Germans. The French player rolls for weather.
c) Phosgene Gas None is available.
d) German Morale German assaults have a special -1 DRM due to poor morale. The modifier relates to all German assaults, including engagements and counter-attacks, and it is cumulative with all other modifiers. Defense is normal.
e) Worn-Out German Guns Because guns have been overused, all German artillery bombardment, and counter-battery fire, has a special + 1 DRM. The modifier is cumulative with all others.
f) German North Edge Division Division 113 is in local reserve. The German player rolls once per friendly movement phase to see whether it may move. On a roll of 6, it will be free to move and fight. On all other rolls the division stays inactive. It always defends normally.
h) French Air By the end of the campaign, the tide turns and French air dominates. In this final scenario, the Germans employ only one air unit, and the French have two.
19.6.6 Victory Conditions
The following conditions determine victory:
French Victory The French win by doing at least five of these seven:
- Occupy Fort Douaumont (J23)
- Occupy Fort Vaux (L25)
- Occupy Bezonvaux (H25)
- Occupy Louvemont (H20)
- Occupy Mort Homme Hill (J10)
- Occupy Bethincourt (H8)
French occupation must be at the end of play. Earn 30 more VP than the Germans from surrender, losses and replacements.
German Victory The Germans win by doing both of these:
-
Earn 40 or more VPs than the French from surrender, losses and replacements.
-
Occupy Fort Douaumont (J23)
German occupation must be at the end of play.
Draw Both achieve their victory conditions or neither side achieves their victory conditions.
20.0 Verdun Campaign Game
The campaign game covers the German offensive against the French lines along the Meuse, followed by the French counter attack.
Game Length: From February 21 through December 18 (44 Game Turns).
20.1 Opening Set-Up
Initial units set-up and start as in Scenario 19.1.
20.2 Reinforcements
Reinforcements appear according to a distinct campaign schedule, due to the heavy turnover in units.
20.2.1 German Reinforcements
-
March 6 – Enter on West Bank north edge: 11B, 22R, XXIIR Korps HQ. Enter on East Bank north edge: 113.
-
March 13 – Enter on East Bank north edge: 58, 121.
-
March 20 – Enter on West Bank north edge: 192X brigade (three regiments). Place and detonate mines on West Bank (see Case 19.1.5k).
-
April 3 – Enter on West Bank north edge: 5 x battalion.
-
April 17 – Enter on East Bank north edge: 5 x battalion.
-
April 24 – Enter on East Bank north edge: 4 x battalion.
-
May 1 – Enter on West Bank north edge: 4.
-
May 8 – Enter on West Bank north edge: 54.
-
May 15 – Enter on East Bank north edge: 4 x battalion. Enter on West Bank north edge: 38.
-
June 5 – Remove 192X brigade.
Game Design Note: By this stage of the battle, large numbers of historical units have been rotating. To print them all separately would exceed the counter mix, so from now on their equivalents in strength and quality appear as regiment substitutes. The reinforcements come from mix-and-match regiments in the Replacement Pool. Like any reinforcements, they may be delayed. Smaller, but not larger, regiments can substitute. All enter in mobile mode.
- July 24 – Enter on East Bank north edge: 3 x 636.
- August 7 – Enter on East Bank north edge: 3 x 636.
The German player must withdraw more heavy artillery for the Somme and elsewhere than normally this turn. All field artillery and the 380 rail unit will stay in play. Remove all the German heavy artillery units that remain on the board, and put them in a cup. Randomly draw out units until ten are left in the cup. These ten he deploys back to the map behind German lines; at least three go on the West Bank. All units must be at least seven squares from German front lines. Twenty-three available units will be left.
- August 28 – Enter on East Bank north edge: 33R, 3 x 636, 6 x 536.
- September 4 – Enter on East Bank north edge: 3 x 636.
- October 2 – The German player withdraws artillery for the Somme and elsewhere. The 380 rail unit will stay in play. Whatever number of heavy artillery remain after the previous withdrawals, the German player puts them in a cup and randomly draws eight. These eight will stay. All twelve field artillery units go in a cup. The German player randomly draws seven units, which stay in the game. Sixteen available units will be left. The German player deploys them back to the map behind German lines; at least six go on west bank. All units must be at least seven squares from German front lines.
- October 9 – Enter on West Bank north edge: 2 x 636.
- October 23 – Enter on East Bank north edge: 3 x 326.
- November 6 – Enter on East Bank north edge: 2 x 636, 2 x battalion. Enter on West Bank north edge: 3 x 636.
- December 4 – Enter on East Bank north edge: 1 x 756, 3 x battalion.
- December 11 – Enter on East Bank north edge: 3 x 536.
20.2.2 French Reinforcements
Units that enter on Haudainville Road enter at Square V22. Units that enter at Voie Sacrèe enter at V13.
- February 21 – Enter on Haudainville Road: 3, 4, 16, 3 x 225 75. Enter on Voie Sacrèe: 153, 39, 1 x 325 75, I Corps HQ, XX Corps HQ.
- February 28 – Enter on Voie Sacrèe: 2, 106, 13, 48, 120, 25, 26, 27, 28, 2 x 225 75, 1 x 235 120, 1 x 435 155H, 1 x 421 305H, XIII Corps HQ, XIV Corps HQ, XXI Corps HQ. Enter on Haudainville Road: 68.
- March 6 – Enter on Voie Sacrèe: 43, XXXII Corps HQ, XXXIII Corps HQ, 1 x 225 90, 1 x 425 75.
- March 13 – Enter on Voie Sacrèe: 1, 40, 59, 42, 77, 1 x 235 105, 1 x 335 155H.
- March 20 – Enter on Voie Sacrèe: 70, 76.
- March 27 – Enter on Voie Sacrèe: 22.
- April 3 – Enter on Voie Sacrèe: 11, 5, 6, 34, 23.
- April 10 – Enter on Voie Sacrèe: 69, 1 x 421 305H.
- April 17 – Enter on Voie Sacrèe: 17, 18.
- May 15 – Enter on Voie Sacrèe: 56, 1 x 345 220, 1 x 321 280H, 1 x 321 370H.
- July 3 – Enter on Voie Sacrèe: 130.
Note: By this stage of the battle, large numbers of historical units have been rotating. To print them all separately would exceed the counter mix, so from now on their equivalents in strength and quality appear as division/brigade substitutes. The reinforcements come from mix-and-match divisions or brigades in the Replacement Pool. Like any reinforcements, they may be delayed if the player does not want to bring them on, or there is insufficient units in the replacement pool to choose the particular unit(s). Smaller, but not larger, divisions or total brigade factors can substitute. As an example, a 756 reinforcing division can come from a 756 in the Pool, or a 436 and a 326 in the Pool. A division and brigades may not combine for the same reinforcement division. Reduced divisions or brigades are useable to get the required strength of the incoming division.
- July 10 – Enter on Voie Sacrèe: 128, 966, 866, 756.
- July 17 – Enter on Voie Sacrèe: 756.
- July 24 – Enter on Voie Sacrèe: 756. Enter on West Bank south edge: 966.
- August 7 – Enter on Voie Sacrèe: 756.
- August 21 – Enter on West Bank south edge: 646.
- September 18 – Enter on Voie Sacrèe: 1076.
- September 25 – Enter on Voie Sacrèe: 2 x 866, 646.
- October 2 – Enter on Voie Sacrèe: 866, 1076.
- October 16 – Enter on rail V13 or V20: 2 x 421R 400.
- October 23 – Enter on Voie Sacrèe: 1076, 756.
- October 30 – Enter on Voie Sacrèe or Haudainville Road: 1076, 2 x 886, 2 x 756.
- November 6 – Enter on Voie Sacrèe or Haudainville Road: 866, 646.
- November 13 – Enter on Voie Sacrèe: 2 x 966.
- December 4 – Enter on Voie Sacrèe or Haudainville Road: 2 x 866.
20.3 Special Rules
20.3.1 Weather Game Turn 1 has fair weather. Checking for weather occurs thereafter. Rain becomes snow when it is rolled on February 28, March 6, March 13, November 20, November 27, December 4, December 11, or December 18.
20.3.2 Refits Following the Weather Phase, Refit is possible, except on Game Turns 1-2. Initially, these starting forces were more or less ready for operations.
20.3.3 Available German Battalions Whenever the counter mix cannot support the number of reinforcement battalions, they may be delayed and taken later as they become available. Delayed battalions still arrive in the movement phase.
20.3.4 German Reinforcements Listed battalions can "make change" and come in as regiments when regiments are in the Pool:
- 2 battalions = one 3 or 4 Primary CF regiment
- 3 battalions = one 5 or 6 Primary CF regiment
- 4 battalions = one 7 Primary CF regiment
Battalions making change then stay in the Pool; they do not enter play as reinforcements on that turn.
20.3.5 Alpen Brigade The three starting 192X regiments on the West Bank must permanently withdraw off the north edge by June 5. Alpen Korps permanently replaces them and enters on East Bank June 12 as Alp Korps HQ and four 756 regiments.
20.3.6 Phosgene Gas
a) On June 19 and 26, German heavy artillery may fire the surprise phosgene gas, giving an extra gas shift for a 2R in assaults. Phosgene may fire once per gas resource allotted.
b) Limited Phosgene Gas In July, German heavy artillery may fire phosgene gas, giving an extra gas shift for a 2R in assaults. Phosgene may fire once per every two gas resources allotted. It may not fire on just one gas resource allotted, due to limited shell stock. After July phosgene gas runs out.
20.3.7 Somme Withdrawals See Case 19.4.3 b.
20.3.8 Later Withdrawals More German guns withdraw in August and in October, according to the reinforcement schedule.
20.3.9 German Morale Starting August 7, German assaults have a special -1 DRM due to poor morale. The modifier relates to all German assaults, including engagements and counter-attacks. It is cumulative with all other modifiers. Defense is normal.
20.3.10 Worn-Out German Guns Starting August 7, because guns have been overused, all German artillery bombardment and counter battery fire, has a special +1 DRM. The modifier is cumulative with all others.
20.4 Operations
To enhance fighting ability, both sides may engage in operations before the offensive begins. Each player can choose from a range of options to help prepare for battle. Chosen options will cost victory points, as shown on their respective Operations Tables.
After the Campaign Game sets up, each player decides whether to conduct Operations, by writing yes or no on a piece of paper. They then reveal their choices. When one or both have written yes, they continue. If both write no, Operations are bypassed. When one side approves Operations, the player chooses one or more options from the Operations Table and concedes those Victory Points to the opponent.
In the event both sides approve Operations, each secretly writes down all the options they choose and adds up the conceded Victory Points. Then the players reveal the results and concede enemy VPs.
Both sides should not actually move the VP markers as yet; operations VPs will go on the Numbers Track at the end of the game.
20.4.1 Operations Table Results Each side uses their own Operations Table. The left column indicates the number of VPs to award the enemy for picking that option. To the right of the numbers appear the corresponding options. At the bottom are total VPs conceded if a player chooses all the options.
20.4.2 German Options
-
Plant Mines After March 20, the Germans continue to sap the lines. The German player may add a Mine Phase for each new Game Turn. He randomly chooses and deploys two inverted mine markers, one each on French-occupied squares in the front line adjacent to any German unit. Detonation proceeds as usual.
-
Increase Supply Nearby German rails bring in extra supply. The artillery supply HQ unit may stay to support assaults and then withdraw. Assault supply HQs return without replacement cost. They still pay French VPs and roll for time of return.
-
Change Objectives German High Command reviews the Verdun map and changes planning. After the German player determines all eight objectives, he may re-roll two of them (must accept these rolls). Before re-rolling, he must announce this intended switch.
-
Drum Fire Saturation bombardment hits the Verdun front. Drum fire may take place whenever three or more heavy artillery units join in a bombardment. First, the German player declares drum fire and rolls a preliminary die.
On 1-2 drum fire strikes a second square adjacent to the target. The German player decides which one. Both squares then undergo separate bombardments with the usual DRMs.
On 3-6 drum fire fails and only the target square is struck.
-
Best Replacements Verdun becomes a higher priority and the Crown Prince organizes units better. Rear staging areas bring in peak replacements. All regiments cost just two replacement points and two French VPs to return.
-
Storm Tactics Commanders give freer rein to their best units. Any attacking 756 may treat a vacated French defense square as a DEBt (breakthrough) and advance the usual one or two squares beyond. French elimination or retreat can trigger the advance.
Engineers who attacked with the 756 may also breakthrough.
Other smaller-strength attackers who joined the 756 must stop at the vacated square and observe stacking limits.
20.4.3 French Options
-
Off-Map Artillery French heavy artillery to the south synchronizes at Verdun. The French player may fire an extra six factors in a single bombardment from the south edge up to 11 squares inland. The first edge square starts the range. They may fire alone or combine with on-map artillery. They may also fire counter-battery, alone or with on-map artillery. German bombardment, counter-battery and assault do not reach them.
-
Stronger Command General Joffre heeds the warnings about German offensives. He begins to reinforce the Verdun sector, by assigning more command structure. The French player adds two more Corps HQ to the initial set-up on map. They stay for the duration, subject to HQ rules.
-
Fort Guns Some pieces remain after General Command strips away fort armament for other areas. Whenever real French units man forts, the guns help defense. German assaults sustain -1 DRM.
-
Higher Élan Field commanders do all they can to execute attacks. A good order French command HQ within four squares of a French secondary attack allows a re-roll. The limit is one re-roll per secondary attack. Distance runs from the HQ, exclusive, to an assaulting square, inclusive.
-
Open Reserves General Joffre eases control of reserves; the British have taken on a larger role at the Somme. In regular Game Turns, French reserves return on a die roll of 2-8, and stay in the Operations Reserves Box on a roll of 9-12.
-
Lafayette Escadrille Determined French squadrons, including American pilots, match the best Oswald Boelcke and the German Air Service send out. The French player flies both air units throughout and replaces them free of VP cost if they are lost in combat. He still pays VPs for their loss.
20.4.4 Solitaire Play and Operations
Die rolls decide whether Operations enter the game and which options apply.
Each side will make 3 drs. The roll result equals the option listed. If a roll repeats, roll again until a different result is achieved. Each side will have 3 options for comparison.
Example: A German 1 is Plant Mines; a French 6 is Lafayette Escadrille.
When all six opposing options are chosen, they are paired off in lowest, middle, and highest, German vs. French.
Example: Three pairs might look like this:
- 1 = Plant Mines vs 3 = Fort Guns
- 2 = Increase Supply vs 5 = Open Reserves
- 4 = Drum Fire vs 6 = Lafayette Escadrille
For each options pair, two dice are rolled, one die for each side. High die wins that option. Low die eliminates the other paired option from being used with it. A tie has both options being used in that pair.
When play ends, option victory points are conceded and totaled.
20.5 German Objectives
German generals differed over what strategic objectives Verdun had to offer. To reflect this command wavering, the German player must randomly draw markers to determine goals in the campaign. Each goal counts toward overall victory.
20.5.1 Determining Objectives
Roll 2D6 eight times. Designate one die as the first die. Record the result (1st die, 2nd die) for each roll and consult the Random Objectives Table on the PAC for each of the objectives. The first die's result is read on the first column and the second die's result is read on the second column's results to obtain to objective (to the right in that row) for that roll. Each objective can only be obtained once, so re-roll any result which has been already determined. Record the eight rolled numbers down for consultation at the end of the game. Record the numbers rolled on a piece of paper and keep these hidden from the French until the end of the game.
20.5.2 Territorial Objectives
Ten of the objectives relate to seizing places. They refer to forts, hills, towns and other strategic locations. Whoever controls these objectives at the end of play owns them and earns their VPs.
Control goes to the last side to occupy the square. When they contain more than one square, all squares must be controlled to qualify.
Territorial objectives carry locations on their face. Example: Mort Homme Hill shows J10.
Two territorial objectives are primary targets: Verdun and Fort Douaumont. They award greater VPs.
East Entry means good order German infantry prevents wider French repositioning along the East Bank. The Germans must occupy and block major roads at V22 and U34.
20.5.3 Functional Objectives
The remaining seven objectives concern combat achievements.
a) Circle Verdun Good order German units must completely surround Verdun in all directions. The ring can link with units and/or German ZOCs. Shared ZOCs with French units are allowed.
b) French Reserves There are two ways to meet this goal.
First, the French player has chosen Open Reserves in his Operations. Ten or more French divisions come back as replacements in the game.
Second, the French player does not choose Open Reserves in his Operations, but at least 15 divisions reappear as replacements.
In either case, step-reduced divisions will count. Brigade replacements are a way to avoid the count, although they present weaker firepower. The count excludes divisions who appear from combined brigades on the map; they must come directly from the Replacement Pool meet the goal.
c) French Strength Points The marker refers to French losses, a vital German objective. To win this goal, the German player must inflict at least 175 step losses on the French and earn more VPs than the French at the end of play.
d) Exit South Edge Exiting the south edge would cement the Verdun offensive and create havoc for French defenses. To meet the target, the German player must exit at least 10 raiding infantry units by the end of the game.
A minimum of 6 regiments must exit. The rest can be battalions.
The exit zone is confined to V9-V22. All other south edge squares are off-limits.
Every square exited has to be in exclusive German ZOC at the end of play.
Exited units do not return.
e) Destroy 75% French Artillery To win the artillerymen's war, German forces must eliminate or capture 20 French artillery units. For every four disordered artillery eliminated or captured, the German player earns one VP.
f) Cut Voie Sacrèe The road is the lifeline for the French. Good order German infantry must occupy at least one square along the road from V13 to Q19, at the end of play.
g) Take at Least 10 Forts German units must be the last to occupy a minimum of 10 forts at the end of the game. East and/or West Bank forts may freely mix into the quota. If a fort is left vacant, it must be free of French ZOCs to count.
Printed-text note: the Random Objectives Table (page 32) gives the Exit South Edge zone as I/9 – I/22 and the Destroy 75% French Artillery award as one point per four disordered artillery, while this section gives V9-V22 and eliminated or captured artillery. Both versions are transcribed as printed.
20.5.4 Solitaire Play and Objectives
Picking objectives in solitaire play differs in procedure. The player mixes all 17 objectives counters face-down on the table. Next he randomly chooses eight inverted German objectives, does not look at them, and sets them aside. Unpicked objectives also remain secret.
The chosen objectives remain secret for the entire game, including two substituted ones if the player has won the option Changed Objectives. The substituted and discarded objectives also are randomly drawn face-down and remain secret.
When play ends, all objectives are revealed and their points totaled.
Keeping objectives secret may seem severe, however it will make the Germans honest about pushing the battle, and keep the French guessing where things are going.
20.6 Campaign Victory Points Table
VPs arrange by type of objective, shown on the Campaign VP Table. Four main groups appear, from Verdun-Douaumont for the highest points, to individual forts for the lowest.
Note: The Campaign VP Table referred to here is one of the separate charts sheets and is not reproduced in this PDF.
20.6.1 Overlap in Points
Some objectives can figure in twice.
To illustrate, capturing Fort Douaumont may contribute one fort toward the goal of Take 10 Forts.
A German good order infantry in Q19 both occupies a Verdun square and cuts Voie Sacrèe.
Occupying all five squares of Verdun also achieves the Circle Verdun objective. The opposite however is not true: merely circling Verdun is not occupancy.
20.6.2 Retaking Objectives
Points are awarded once at the end of the game. They do not duplicate for taking and retaking an objective during play. Example: The Germans take Fort Vaux, lose it, and retake it by game's end. The Fort awards German points once, not twice.
20.7 Tallying Objectives VPs
The German player waits until the end of the game to determine the objectives he has currently achieved. At that time he may move his VP markers on the Numbers Track.
20.8 Victory Conditions
Players resolve victory by judging certain conditions at the end of the campaign. Each side has three defined alternate victories, each with its own set of conditions.
German Victory I The German player must satisfy all the following goals:
(1) Clear the entire original French start line of French units. French ZOCs into the line, coming from units off the line, do not matter.
(2) Earn more victory points than the French as totaled from all sources: losses, replacements, surrenders, operations, and objectives.
(3) Achieve all 8 campaign objectives as finally drawn and written down.
In the event the Germans fail at (1) or (3), the German player cannot win Victory I. If he has won only goal (2), the German player can still use the all-source victory points earned to help win Victory II or Victory III.
German Victory II Alternatively, the German player may win by occupying all of Verdun at the end of play, and earning more all-source victory points than the French.
German Victory III Alternatively, the German player may win by encircling Verdun, occupying Forts Douaumont and Vaux, occupying Mort Homme Hill, and earning more all-source victory points than the French. The encirclement and occupations must exist at the end of play.
French Victory I Prevent all three German victories, and earn more combat VPs (from losses, replacements and surrenders) than the Germans.
French Victory II Occupy all of Verdun, Forts Douaumont and Vaux at the end of play, and earn more combat VPs (from losses, replacements and surrenders) than the Germans.
French Victory III Occupy all of Verdun and at least 15 squares of the original French start line at the end of play, and earn more combat VPs (from losses, replacements and surrenders) than the Germans.
Note: Since every kind of French Victory relies on combat VPs, players may find it helpful to deploy VP markers only for combat VPs during the game. When play ends they can put in VPs for operations and objectives.
Draw Both players achieve one of their victory conditions or both fail to win any of their victory conditions.
Players Aid Card Charts
The charts below are transcribed from the Players Aid Card and the Random Objectives Table printed in this PDF. Charts the rules cite that are printed on the separate charts sheets, and not in this PDF, are listed at the end of this section.
Assault Table (16.0)
Strength differential across the top; DR(2) down the side.
| DR(2) | ≤ -3 | -2 | -1 | 0 | +1 | +2 | +3 | +4 | ≥ +5 |
|---|---|---|---|---|---|---|---|---|---|
| 0 | AE | AE | AE | AE | A2Sr | A2Sr | A2Sr | ASr | ASr |
| 1 | AE | AE | AE | A2Sr | A2Sr | A2Sr | ASr | ASr | AR |
| 2 | AE |
Results key: A = Attacker; R = Owner Retreats One Square; Sr = Step Loss(es) and Retreat; D = Defender; Eng = Engaged; Bt = Attacker Breakthrough; E = All units lost; Ca = Counterattack.
Column shifts
- Engineers vs. Fort: 2R
- Creeping Barrage: 2R
- French 75mm Attack: 1R
- Gas: 1R
- Phosgene Gas: 2R
- Night Attack: 1R
- Flame Thrower: 1R
- Town: 1L
- Woods: 1L
- Secondary Attack: 1L
- French 75mm Defense: 2L
- Start Trench: 2L
- Fort: 2L
- Ridge: 2L
- Hill: 3L
- Defense Works: 3L
Die roll modifiers
- Smokescreen +2
- Lifting Barrage +2
- Phosgene Gas Attack +2
- Flank Attack +1
- Each Closer over one +1
- Defender Disrupted +1
- Defender Suppressed +1 (Suppressed defender's combat value halved in addition to DRM.)
- Defender Interdicted +1
- Command Distance (13.1.4) +/-1
- Each Attacker square Interdicted -1
- Attacker Unsupplied -2
- Rain or Snow -2
Bombardment Table (8.0)
| Target terrain (factors firing) | 4 | 5 | 6 | 8 | 10 | 12 | 14 | 16 | ≥ 18 |
|---|---|---|---|---|---|---|---|---|---|
| Clear | 4 | 5 | 6 | 8 | 10 | 12 | 14 | 16 | ≥ 18 |
| Woods, Town, Defensive Works | 6 | 7 | 8 | 10 | 12 | 14 | 16 | 18 | ≥ 20 |
| Ridge, 2nd Trench |
The target-terrain rows give the minimum factors (the column heads) needed on each terrain; see Case 8.3. Only 400 and 420 calibers may bombard forts (8.2.2).
Die roll (1d6) result by column, in the same column order as the table above:
| Die Roll | 4 | 5 | 6 | 8 | 10 | 12 | 14 | 16 | ≥ 18 |
|---|---|---|---|---|---|---|---|---|---|
| 1 | S | S | D | D | St | St | St | 2St | 3St |
| 2 | Ne | I | S | D | D | D | St | St | 2St |
| 3 | Ne |
Any result other than No Effect is an Interdict result against a vacant square (8.3.3).
Air Bombardment DR (bottom row): 2, 3, 4, 5, 6, 7, 8, 9, 10, †. An Air Bombardment DR of 11 or 12 is an automatic miss (8.7.3d).
Key: I = Interdict; S = Suppress; D = Disrupt; St = Step Loss(es); Ne = No Effect.
Die roll modifiers
- Rain or Snow +2
- Fort Target +2
- Unsupplied +1
- Air Observation -1
- Each Stacked Target -1
- Every two Heavy Artillery (not vs. Forts) -1
Command Center Table (14.0)
DR(2) down the side; each column is one command resource (values are the number of assaults that may use it; L = Lifting Barrage, C = Creeping Barrage).
| DR(2) | Secondary Attack | Barrage Level | French 75mm | Flamethrower | Smoke Screen | Gas Attack | Night Attack | Consolidate |
|---|---|---|---|---|---|---|---|---|
| 0 | 0 | 0 | 0 | 0 | 0 | 0 | 0 | 0 |
| 1 | 0 | 0 | 0 | 0 | 0 | 0 | 0 | 0 |
| 2 | 1 | 0 | 0 |
Note: Up to four command resources can be applied to an assault (Case 14.3.1).
Objective die roll modifiers (printed beside the Command Center chart; the chart does not state the table to which they apply)
- German: +1 Two or More Objectives Reached; +2 Attack Planning; +1 No French on East Bank Start Line; +1 No French on West Bank Start Line.
- French: +1 Any French on Active Start Line; +1 No Fort Lost; +2 Fort Douaumont Held / Retaken.
Defensive Fire Table (15.0)
Factors firing across the top; DR(2) down the side.
| DR(2) | 1 | 2 | 3 | 4 | 5 | 6 | 7 | 8 | 9 | ≥ 10 |
|---|---|---|---|---|---|---|---|---|---|---|
| ≤ 1 | 1 | 1 | 1 | 2 | 2 | 2 | 3 | 3 | 3 | 4 |
| 2 | D | 1 | 1 | 1 | 2 | 2 | 2 | 3 | 3 | 3 |
Results: # = Attacker Steps Lost; R = Attacker Retreats; D = Attacker Retreats and Disrupted; ne = No Effect.
Die roll modifiers: ≥1 Closing In Attackers -1; ≥1 Interdicted Attackers -1; Rain or Snow +1; Interdicted Defender +1.
Rally Table (13.8)
| Situation | Rally | Fail |
|---|---|---|
| Within 3 squares of HQ | 1-4 | 5-6 |
| Not in Enemy ZOC | 1-3 | 4-6 |
| In Enemy ZoC | 1-2 | 3-6 |
| Artillery in Rain or Snow | 1 | 2-6 |
-1 DRM on any later try.
Demoralized Table (16.8)
| Die Roll | Artillery, Battalions, or Reduced Brigades |
|---|---|
| 1 | Surrenders |
| 2 | Surrenders |
| 3-6 | Survives |
Die roll modifiers: Unit Occupies Fort +1; German Engineer +1; French Chasseur +1.
Counter Battery Table (8.5)
Factors firing across the top; die roll shown is the success value.
| Factors firing | 1-3 | 4-6 | 9-11 | 12-14 | 15-17 | ≥ 18 |
|---|---|---|---|---|---|---|
| Die roll (success value) | 4 | 5 | 6 | 7 | 8 | 9 |
Note: the column headings are printed as shown; no 7-8 column appears on the chart.
Die roll modifiers: -1 DRM with Air Observation; 2L Column Shift if target is on Ridge.
Random Objectives Table (18.2)
Roll 2D6 eight times. Designate one die as the first die. Record the result (1st die, 2nd die) for each roll and consult the Random Objectives Table for each of the objectives. The first die's result is read on the first column and the second die's result is read on the second column to obtain an objective (to the right in that row) for that roll. Each objective can only be obtained once, so re-roll any result which has been already determined. Record the eight rolled numbers down for consultation at the end of the game. Record the numbers rolled on a piece of paper and keep these hidden from the French until the end of the game.
First D6 = 1-2
| Second D6 | Objective |
|---|---|
| 1-2 | French Reserves There are two ways to meet this goal. The French player has chosen Open Reserves in his Operations. Ten or more French divisions come back as replacements in the game. Second, the French player does not choose Open Reserves in his Operations, but at least 15 divisions reappear as replacements. In either case, step-reduced divisions will count. Brigade replacements are a way to avoid the count, although they present weaker firepower. The count excludes divisions who appear from combined brigades on the map; they must come directly from the Replacement Pool meet the goal. |
| 3 | Fort Souville Square N23 |
| 4 | Fort La Chaume Square R16 |
| 5 | Circle Verdun Good order German units must completely surround Verdun in all directions. The ring can link with units and/or German ZoCs. Shared ZoCs with French units are allowed. |
| 6 | Hill 304 Square K6 |
First D6 = 3-4
| Second D6 | Objective |
|---|---|
| 1 | Cut Voie Sacrèe The road is the lifeline for the French. Good order German infantry must occupy at least one square along the road from V13 to Q19, at the end of play. |
| 2 | Fort Vauz Square L25 |
| 3 | French Strength Points This refers to French losses, a vital German objective. To win this goal, the German player must inflict at least 175 step losses on the French and earn more VPs than the French at the end of play. |
| 4 | Verdun Squares Q18 to 20 and P19 to 20 |
| 5 | Mort Homme Hill Square J10 |
| 6 | Take at Least 10 Forts German units must be the last to occupy a minimum of 10 forts at the end of the game. East and/or West Bank forts may freely mix into the quota. If a fort is left vacant, it must be free of French ZoCs to count. |
First D6 = 5-6
| Second D6 | Objective |
|---|---|
| 1 | Fort Douaumont Square J23 |
| 2 | Exit South Edge The German player must exit at least 10 raiding infantry units (of which at least 6 must be regiments) by the end of the game only via squares I/9 – I/22 which are in exclusive German ZOC at the end of play. Exited units do not return to play. Historical Note: Exiting the south edge would cement the Verdun offensive and create havoc for French defenses. |
| 3 | Bras Crossing Squares K18-19 |
| 4 | Hill 298 Square M15 |
| 5 | Destroy 75% French Artillery To win the artillerymen's war, German forces must eliminate or capture 20 French artillery units. For every four disordered artillery, the German player earns one towards the score. |
| 6 | East Entries Squares V22 and U34 (This prevents wider French repositioning along the East Bank.) |
Charts Not Reproduced in This PDF
The rules cite the following charts, which are printed on the separate charts sheets rather than on the Players Aid Card pages of this PDF, and so are not transcribed here: the Weather Determination Table (5.1), the Terrain Effects Chart (12.2), the Replacements Determination Table and Replacement Chart (17.2–17.3), the Reserve Rate Chart (17.4.1), the Somme Withdrawal Table (19.4.5, 20.3.7), the Operations Tables (20.4), and the Campaign VP Table (20.6).