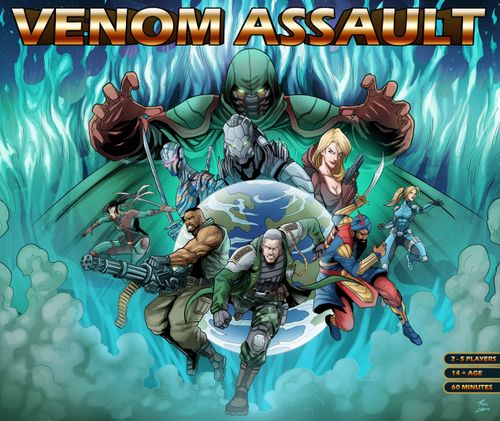
VENOM Assault
VENOM Assault Rulebook
Table of Contents
Table of Contents
Game Objective
Players must work together to defeat various VENOM Leaders at their strongholds. If they succeed, then VENOM is beaten once and for all, and the players win the game! However, if they are not quick enough, then VENOM will complete their nefarious plan and all hope is lost.
Each turn, players will recruit new assets which will allow them to have better chances of success when combating VENOM's Leaders. Defeating VENOM's Leaders can reveal part of the enemy plans, bringing Freedom Squadron closer to victory.
Game Components
- This Instruction Manual
- 1 Game Board
- 30 Recruits
- 20 Commandos
- 84 Freedom Squadron Cards
- 28 VENOM Leader Cards
- 1 Mission Specific VENOM Leader Card
- 56 VENOM Support Cards
- 37 Event Cards
- 20 Reward Cards
- 20 Mission Specific Reward Cards
- 10 Blue Combat Dice
- 12 Mission Cards
- 1 Commander Token
- 1 VENOM Defense Marker
- 1 VENOM Health Marker
- 1 Event Track Marker
- 1 Scientist Token
- 7 Ward Tokens
- 7 Robo-Tron Tokens
Unpacking
Unpack and separate the VENOM Assault cards into the following decks:
- Recruits
- Commandos
- Freedom Squadron Cards
- VENOM Leader Cards
- VENOM Support Cards
- Event Cards
- Reward Cards
- Mission Cards
- Mission Specific VENOM Leader and Reward Cards. These special cards are indicated by the Mission Specific icon.
Game Layout
Game Board
- A - Mission Card
- B - Event Track
- C - VENOM Leader Health Track
- D - VENOM Leader Defense Track
- E - VENOM Leader Deck
- F - Reward Deck
- G - Event Deck
- H - Event Discard Pile
- I - Active Event Card
- J - VENOM Support Area
- K - VENOM Support Deck
- L - VENOM Support Discard Pile
- M - Map Zone Locations (7 Zones)
- N - Zone Type (7 Zones)
- O - Training Ground
- P - Recruitment Deck
Card Layouts
Freedom Squadron Card
Card layout: Name, Card Type, Recruitment Points, Cost, Combat Value, Supporting Abilities.
Freedom Squadron Cards represent the U.N.'s resources available to the players in the battle against VENOM. These cards carry the following properties:
- Card Type designating the card as a Soldier, Vehicle, or Location.
- Cost to purchase cards from the Training Ground.
- Recruitment Points that Soldiers and Vehicles provide to recruit new cards.
- Combat Value for use in Combat, if they are selected as a Combat Leader. Vehicles always provide 0 Combat Value.
- Supporting Abilities are the card's special Abilities that can be used during the listed Phase(s). If a card's Abilities are used, all of the card's Abilities must be used, unless it specifies otherwise. Any card that uses its Supporting Abilities cannot be chosen as a Combat Leader, but may still provide support in Combat.
Locations are rare and unique. While they do not provide Recruitment Points or a Combat Value, these cards remain constantly available, providing a useful Supporting Ability every Round. For the purposes of other card's Abilities, Location Cards do not count as "in Play".
VENOM Leader Card
Card layout: Name, Defense Value, Health Value, Support Value, Abilities.
VENOM Leaders are the elite individuals that spearhead VENOM's evil plans. Each VENOM Leader has the following properties:
- Health for a starting Health Value.
- Defense for a starting Defense Value.
- Support Value which represents the number of VENOM Support they command. When a VENOM Leader is captured by a player, this becomes their Victory Point value.
- Abilities take effect in the listed phase, if the Leader is chosen for Combat.
Some Leaders may even have Global Effects that represent their terrible influences as they command VENOM around the world from their position. These Global Effects will occur during every player's Turn, so long as they remain face up in any Zone.
VENOM Support Card
Card layout: Name, Card Type, Supporting Abilities.
VENOM Support Cards represent the armies of VENOM's forces. Each VENOM Support has the following properties:
- Card Type designating the card as a Soldier or Vehicle.
- Supporting Abilities, which take effect in the listed phase, that they will use to tip the scales of battle in their Leader's favor.
Reward Card
Card layout: Name, Story, Abilities.
Reward Cards represent various items or intelligence gained by successfully liberating a Zone of VENOM threats.
- Non-Mission Specific Reward Cards have an Ability that can be used once during the game, during the player's Turn, after they are rewarded the card. These cards are represented by silver backgrounds.
- Mission Specific Rewards may offer a Global Effect that will benefit all players. These cards are represented by gold backgrounds, and the Mission Specific icon.
- Regardless of whether or not a Reward Card was used, it also offers a Victory Point value.
Event Card
Card layout: Name, Story, Abilities.
During the Commander's Turn, Event Cards must be resolved as per the Event Phase. These cards represent the current events during the battle against VENOM. There are 4 different versions of Event Cards:
- All Is Quiet (Grey) - These Events are minor events that are taking place, and do not affect play this Round.
- Freedom Squadron (Blue) - These Events have a beneficial outcome for Freedom Squadron, which will aid them in their battle.
- VENOM (Yellow) - These Events have a beneficial outcome for VENOM, and will hinder Freedom Squadron's advance this Round.
- VENOM Strikes! (Red) - When VENOM Strikes, a major plot within their plan has been carried out, drawing them one step closer to victory. Move the Event Track up by 1, and consult the Mission Card for the specific effects.
- Abilities from most Events stay in effect until the next Event Phase, unless otherwise stated.
- If multiple Events are put into play in one Round, all Abilities are active. If multiple Events conflict, then ALL Abilities remain active. (See the example.)
Example Event Ability Conflict: During a Turn, a player chooses to attack "Vipress" in the "VENOM Mountain Defense" Zone. When Vipress' Ability occurs, "Sink the Colorado!" and "Red Rockets of Doom!" are revealed. Because each of these events affect Zone types that do not cross over, they both take a combined effect. In this instance, until the next Event Phase, Combat may only occur in Sea and Air Zones. However, because "VENOM Mountain Defense" is an Arctic Zone, the combat instantly fails and the player must advance to their Retirement Phase.
Mission Card
Card layout: Name, Story, Setup Rules, Victory Conditions, Event Track Progression Effects.
For each game, a single Mission Card is selected during setup to represent the current VENOM plot Freedom Squadron is attempting to thwart.
- Unique Setup Rules are listed to aid in the setup for this Mission at the beginning of the game.
- The Mission's Victory Conditions state what must be accomplished in order to claim victory over VENOM's evil plot. There may also be additional loss conditions stated.
- On the Event Track Progression, each Mission lists VENOM's steps toward victory, should a "VENOM Strikes!" Event Card come into play. When a "VENOM Strikes!" Event Card is drawn, the Event Track will progress, and this section details the effects relating to that event.
- Missions with more complex or harder goals are annotated by a red line under the name.
Game Setup
Difficulty
VENOM Assault is adjustable to fit many play styles and levels:
- In a game of 2-3 players, utilize the full Event Deck.
- In a game of 4-5 players, remove all 9 "All is Quiet" Events from the Event Deck.
- Normally, all 10 "VENOM Strikes!" cards should be shuffled into the deck, but if the game is proving difficult, you may remove up to 4 of these "VENOM Strikes!" cards to slow VENOM's progression.
- Higher difficulty Missions are marked with a red line under the name of the Mission.
Starting Decks
Each player will begin play with a 10 card Draw Deck, comprised of the following cards:
- 6 Recruits
- 4 Commandos
Each player should shuffle these cards to form their Draw Deck. Draw the first five cards as your starting hand.
Any Recruits and Commandos remaining after all players gain a full Draw Deck are placed in the box, as they will not be used this game.
Scenario Selection
Choose a Mission Card:
- It is recommended that first-time players choose "World in Darkness".
- Players can choose a Mission randomly, or select a specific scenario.
Once a Mission is chosen, place the others in the box, as they will not be used this game. Place the chosen Mission on the Mission Card area on the board.
Read the Setup section of the chosen Mission to locate any Mission Specific Cards, VENOM Leader Cards, or tokens that should be set aside for this game.
Deck Shuffling and Placement
Recruitment Deck: Shuffle the Freedom Squadron Cards and place them on the Recruitment Deck area on the board. Do not shuffle any Recruits or Commandos into this deck. Place the top five cards from the deck, face up, in the Training Ground.
VENOM Support Deck: Shuffle the VENOM Support Cards and place them on the VENOM Support Deck area on the board.
Event Deck: Shuffle the Event Cards and place them on the Event Deck area on the board.
Reward Deck: First, see if the Mission Card selected has any special setup requirements, such as a randomly selected number of Reward Cards or the addition of Mission Specific Reward Cards. Follow the Mission Card's setup to generate the correct cards within the Reward Deck. Any non-Mission Specific cards used in the creation of the Reward Deck are always chosen at random.
Once you have the correct cards in the Reward Deck, including any Mission Specific Reward Cards, shuffle the deck and place it on the Reward Deck area on the board. Then place one Reward Card from the deck face down on each of the seven Zones of the board.
VENOM Leader Deck: Consult the Mission Card for special setup requirements, such as a randomly selected number of VENOM Leader Cards or the selection of specific Leaders. Follow the Mission Card's setup to generate the correct cards within the VENOM Leader Deck. Any non-specific Leaders used in the creation of the deck are always chosen at random.
Once you have the correct cards in the deck, shuffle it and place it on the VENOM Leader Deck area on the board. Then place one VENOM Leader from the deck face up on each of the seven Zones of the board, on top of the previously placed Reward Cards.
Marker Placement
- Place the red marker on the VENOM Leader Health Track in the starting position.
- Place the blue marker on the VENOM Leader Defense Track in the starting position.
- Place the yellow marker on the Event Track in the 0 position.
Commander Token
All players roll one die. The individual who rolls the highest is the Commander and will be the first player to take a Turn. The Commander will be the only player to reveal an Event Card during the Event Phase on their Turn. Any ties for the highest roll will re-roll until a Commander is chosen. Give that player the Commander Token.
The Commander position will never change players during a game. Play rotates clockwise around the board, starting with this player.
At this point, the board should be laid out as shown in the Complete Layout. You are now ready to begin!
How to Play
Players take Turns, working together to stop the threat of VENOM from overtaking the world. Play begins with the Commander, who uses his cards to recruit new, unique Soldiers and Vehicles. Then he selects a VENOM Leader to attack, if any. If Combat is chosen, both Freedom Squadron and VENOM plan, then execute their end of the battle, both hoping to be victorious. Finally, the Turn ends with him discarding his current cards, and re-drawing a new hand for the next Round, followed by replenishment of the board.
Card Abilities and Effects
- Many cards will alter the basic rules as stated in the rule book. When a card states something that clashes with the rules, the card's text will take precedence.
- If multiple cards have conflicting Abilities, please consult the order in which each card's Abilities occur to see which happens first. In the instance where multiple Event Cards clash, all Abilities occur together.
- Any Freedom Squadron card with multiple support Abilities must use all of its Abilities if it is being used for support, unless the card states otherwise.
- Some cards may display a Global Effect Ability when they are active. These Abilities will constantly take effect on each player's Turn in the listed phase.
- Freedom Squadron Cards with Teamwork Abilities can only be played on other players' Turns for their benefit, and are placed into your Discard Pile once used.
Turn Order
Every player's Turn is divided into phases, which occur in the following order:
- Event (Commander Only)
- Recruitment
- Tactical
- Combat
- Retirement
- End of Turn
Phase Descriptions
Event Phase
Only the Commander begins their Turn with the Event Phase, all other players skip this phase and begin with the Recruitment Phase. At the beginning of the Commander's Turn, complete the following, in order:
Check to see if any Global Effects take place during the Event Phase and resolve them.
- Only VENOM Leaders in Zones will have Global Effects that occur in the Event Phase, and these only occur if the VENOM Leader is face up.
Draw the top card from the Event Deck and resolve its text immediately.
- When this Event Card is played, place it in the Active Event Card area on the board, and move the previous Event Card(s) in play to the Event Discard Pile.
- The old Events no longer remain in effect.
- If multiple Event Cards need to be played, they will all take effect, in the order drawn, and all lingering effects will remain until the next Event Phase.
Recruitment Phase
In the Recruitment Phase, you may purchase new Soldiers, Vehicles, and even Locations to better aid your squadron in Combat against VENOM's forces. Follow these steps, in order:
Check to see if any Global Effects take place during the Recruitment Phase, and resolve them.
- Only some Event Cards and Rewards will have Global Effects in this phase.
Play each card from your Hand by placing it in front of you, face up, one at a time. As each card is played, you may resolve its Abilities before playing the next card.
- Any card with supporting Abilities that takes place in the Recruitment Phase may be used, but that card cannot be chosen as a Combat Leader during combat this Turn.
- You can choose not to use a card's supporting Abilities, which will allow that card to be available as a Combat Leader during the Tactical Phase.
- If you choose to use a card for its supporting Abilities, it can still enter into Combat, but only as Freedom Support.
- Unless a card states otherwise, if you use its supporting Abilities, you must use all of that card's Abilities, in the appropriate phases.
- Remember to carefully choose the order you play your cards for the best results.
Your Play Area consists of: Used Rewards, Unused Rewards, Discard Pile, Draw Deck, In Play, and Hand.
Once you have played your entire Hand, you may now recruit cards from the Training Ground.
- Add up the total Recruitment Points from all of your cards in play. Note that a card used for its Recruitment Points is still allowed to be a Combat Leader in the Tactical Phase.
- You may recruit any number of cards from the Training Ground that have a total Cost equal to or less than your total Recruitment Points. Any excess points cannot be carried over to the next Round.
- Place the recruited cards into your Discard Pile.
Proceed to the Tactical Phase.
Example Recruitment Phase: The Player holds a Hand of five cards.
- No Global Effects are in play that affect the Recruitment Phase at this time.
- First, the player chooses to play "Dropzone", but chooses not to use his supporting Ability, setting him up to be the Combat Leader later on.
- Playing the next three "Recruits" in any order allows him to rack up Recruitment Points.
- Finally, he plays "Hornet", and chooses to use its supporting Abilities.
- Adding up all of the Recruitment Points, he totals 1+1+2+2+2 = 8. He spends 5 on "Hornet's" Ability, and takes the top card from the Recruitment Deck into his Discard Pile.
- With only 3 Recruitment Points left, the player cannot purchase any of the face up cards from the Training Ground, which all have a Cost greater than 3, and ends his Recruitment Phase.
Tactical Phase
Now you can decide which VENOM Leader, if any, you would like to battle. If you choose not to attack VENOM this Turn or do not have a card able to be a Combat Leader, proceed directly to the Retirement Phase.
Begin by deciding which VENOM Leader you'd like to attack.
- VENOM Leaders' Health, Defense, and Support Value, as well as their Abilities, may play a large role in deciding which Leader to attack. Use these factors to determine which Leader will be best opposed by your current cards in play.
- Move the Health and Defense Markers on their respective tracks to their appropriate positions, matching the Health and Defense on the chosen Leader's card.
- If the chosen VENOM Leader has an Ability that takes place in the Tactical Phase, resolve it before any Global Effects.
- If any Ability shifts VENOM Leaders between Zones, Combat always follows the chosen VENOM Leader. Once the Zone shifting has taken place, resume Combat as normal against the originally chosen VENOM Leader.
- Check to see if any Global Effects take place during the Tactical Phase, and resolve them. Only Event Cards, VENOM Leaders, and Rewards will have Global Effects in this phase.
Once you have chosen which VENOM Leader you are facing, you must choose which of your Freedom Squadron Soldiers in play will be your Combat Leader.
- If you do not have a card in play able to be a Combat Leader, you may not initiate Combat this turn.
- The Combat Leader must be a Soldier, as Vehicles cannot be Leaders.
- The Combat Leader cannot have used a supporting Ability during your Recruitment Phase, and will not use their supporting Abilities during Combat.
- Using a card's Recruitment Points does not prevent it from being a Combat Leader, or participating in Combat in any way.
Display your Combat Leader separately and choose which other cards in play to have as support for your Combat, known as "Freedom Support". Cards not chosen to participate in Combat can be set aside until the End of Turn Phase.
- Any card in play can participate in Combat. If it has previously used its support Abilities, it is still allowed to be Freedom Support.
- If a card is not in Combat, no Abilities from Combat will affect that card and it is safe from VENOM's Abilities.
Now allocate Combat Dice to each of your cards by completing the following:
- Place Combat Dice equal to your Combat Leader's Combat Value on the card.
- Place any additional Combat Dice gained from Freedom Support cards on their card.
- Note that Freedom Support do not use their Combat Value, and only gain Combat Dice through their supporting Abilities, if any.
- You may generate more dice than the game has included. If you do, either locate additional dice, or simply re-roll the needed dice after the first initial roll and add their successes.
At this point, Freedom Squadron is ready to attack, but VENOM is also well prepared in their defense. VENOM Leaders keep armies at their strongholds with them, in the event of an attack.
- Draw a number of VENOM Support Cards equal to the VENOM Leader's Support Value and display them, in order from left to right, on the VENOM Support area on the board.
- Unless a VENOM Support Card specifically states otherwise, do not activate any of the Abilities on these cards at this time.
- If you are unable to draw the full amount of cards needed, shuffle the VENOM Support Discard Pile and place it back on the VENOM Support Deck area on the board, then continue drawing from the new deck. Do not shuffle the Discard Pile into the old deck until you have completely run through the existing cards and need an additional card.
After both sides have their armies prepared for battle, it is time for tactics to take effect. Freedom Squadron's supporting Abilities will happen first.
- All Freedom Support cards with Abilities that take place during the Tactical Phase may happen now, in any order the player chooses.
- A Freedom Support card may be brought into Combat and not have its supporting Abilities take effect. However if any supporting Abilities are used, all of the card's Abilities must occur in their appropriate Phases.
- The chosen Combat Leader's supporting Abilities do not occur, as they are too busy planning the Combat.
- Any Freedom Support card with a Zone specific Ability may only use that Ability if the chosen VENOM Leader is in the corresponding Zone type.
Lastly, the VENOM Support Abilities will take effect.
- From left to right, resolve the VENOM Support Cards' Abilities, one by one, that take place during the Tactical Phase.
- If a Freedom Support card that supplies Combat Value is somehow removed before the Combat Phase, any Combat Dice allocated to that card are removed with it. Any other Abilities that have already occurred are not undone by the removal of the supporting card.
- The VENOM Leader's Health or Defense Track can never be increased beyond the highest value of their respective track, nor can it be decreased lower than the track allows.
- Any VENOM Support Card with a Zone specific Ability must use that Ability if the chosen VENOM Leader is in the corresponding Zone type.
Once all of these steps have been accomplished, move on to the Combat Phase.
Example Tactical Phase:
- Because the Event Card, "Plot From the Past", is in play, the player gains an advantage attacking a VENOM Leader in an Arctic Zone, and chooses to go after "Vipress", who is in the "VENOM Mountain Defense" Zone.
- Based on "Vipress" values, the Health Track is set to 2, and the Defense Track is set to 4.
- Now, "Vipress" Ability takes effect. Two new Event Cards are drawn, "Twenty Questions" and "Pull Down the Heavens". Since "Twenty Questions" is a Freedom Squadron event, it is discarded by "Vipress" Ability. However, "Pull Down the Heavens" is a VENOM event, and is added to the Active Event Card area, along with "Plot From the Past". "Pull Down the Heavens" must now be taken into account as well, but as luck would have it, Combat is already in an Arctic Zone, so Combat can continue as normal.
- Because of the Event Card in play, and because Combat is taking place in an Arctic Zone, "Plot From the Past" reduces the VENOM Leader's Support Value by 1, reducing it to 1.
- With a bit of foresight, the player has prepared his cards for Combat by choosing previously not to use "Dropzone's" supporting Ability in the Recruitment Phase. With this, he chooses "Dropzone" as the Combat Leader and brings all his cards in play into Combat.
- "Dropzone" is allocated 2 Combat Dice in accordance with his Combat Value, and each "Recruit" is given 1 Combat Dice, in accordance with their supporting Abilities. "Hornet" is not allotted any dice, as its Ability only takes place in Air Zones.
- After the effects from the Event Card, "Plot From the Past", "Vipress" was left with only 1 VENOM Support. At this point, the VENOM Support Card, "Pythons", is drawn and placed in the VENOM Support area. VENOM Support Abilities do not take effect just yet though, as Freedom Squadron will act first.
- Freedom Squadron's support Abilities will occur now, but none of the supporting cards have an Ability that takes effect.
- The VENOM Support Cards finally get to act, and the "Pythons" increase the VENOM Leader's Health Track by 1, up to 3.
- Both Freedom Squadron and VENOM are set up for Combat, and the player moves on to the Combat Phase.
Combat Phase
Now that all intelligence and planning has been completed, both Freedom Squadron and VENOM have prepared for Combat.
- Gather up all Combat Dice that are on your Combat Leader and Freedom Support cards.
- If the number of Combat Dice you have is less than the VENOM Leader's Health Track position, or you are unable to gain successes against the Defense Track due to too high a Defense Value, the Combat is aborted. If Combat is aborted, automatically proceed to the Retirement Phase after resolving any Abilities that occur in the Combat Phase from the VENOM Leader or VENOM Support.
When it is determined that Freedom Squadron's assault has a chance of success, the battle begins.
Roll the Combat Dice.
- Set aside all Combat Dice that have a Rolled Value equal to or greater than the marked number on the VENOM Leader's Defense Track; these are successes.
Cards on both sides may modify the Combat Dice. Check all cards in the following order:
First, apply any of the VENOM Leader's Abilities that take place in the Combat Phase.
Then, resolve any supporting Abilities from Freedom Support cards that take effect in the Combat Phase, in any order the player chooses.
- Any Zone specific Abilities may only be used if the chosen VENOM Leader is in the corresponding Zone type.
- As the Combat Dice are adjusted, remember to keep track of which dice are still successes, and which dice no longer succeed, in accordance with the number currently marked on the VENOM Defense Track.
- If a Combat Die's Rolled Value is adjusted by any Ability, the die should be rotated to display the new value. Rolled Values can go above six or below one. Keep track of the final Rolled Value if it is outside those numbers.
- Any dice that are converted to Automatic Successes should still display their initial Rolled Value, and may no longer be successes if they are forced to be re-rolled, and do not succeed.
Finally, apply VENOM Support Abilities that take place in the Combat Phase, in order from left to right.
After you have rolled and modified your Combat Dice, compare the number of successes against the current number marked on the VENOM Leader Health Track.
If you do not have enough successes to overcome the VENOM Leader, proceed to the Retirement Phase after resolving any Abilities from the VENOM Leader or VENOM Support that occur in the Combat Phase at this time.
If you have successes equal to or greater than the current number of dice marked on the VENOM Leader Health Track, you have successfully captured that VENOM Leader! Follow the steps below:
- Resolve any remaining Abilities from the VENOM Leader or VENOM Support that take place at this time.
- Place the VENOM Leader Card and the Reward Card underneath it in your Victory Point pile.
- A Reward Card's Victory Point Value is displayed on the bottom of the card.
- Captured VENOM Leader's VENOM Support Value is considered their Victory Point Value.
- Do not shuffle these cards into your deck, but set them aside in a Victory Point pile for the end of the game.
- Any Reward Card with a Global Effect immediately comes in to play, and applies to all players.
Check to see if the Reward Card is needed to foil VENOM's ultimate plan, as listed on the Mission Card's Victory Conditions.
- If the Reward Card was not needed to thwart VENOM, it can be used in the future to accomplish some special Ability provided on the card during the game.
- If the Reward Card is needed for the Mission, determine if all of the players have collectively accomplished the conditions. If all players have collectively accomplished all of the conditions, then VENOM has been thwarted, and Freedom Squadron has won. See the Winning the Game section.
Proceed to the Retirement Phase.
Example Combat Phase:
- In Combat against "Vipress", the player's hand is used against her previously established Health and Defense Tracks.
- To begin, the 5 combat dice from all Freedom Squadron Cards are gathered up and rolled together.
- This initial roll is separated into successful and unsuccessful dice, when compared with the VENOM Defense Track, currently set at 4. This means that any die with a Rolled Value of 4 or higher will be a success.
- The first card type to act in the Combat Phase is the VENOM Leader. However, "Vipress" does not have any Abilities that take place in the Combat Phase.
- Action continues to the Freedom Support Cards. Again, neither the "Hornet", or the "Recruits" offer any Abilities that will affect the Combat Phase.
- Finally, the VENOM Support get to influence Combat. As was the case with the other cards in play, the "Pythons" drawn already had their effect in the Tactical Phase, and will not offer any Abilities to alter the Combat Dice after the roll.
- In this scenario, the Combat Dice are left as they were rolled, and are finally compared against the two Tracks. With 3 successful dice displaying at least the Defense Track's Value, Combat is considered a success.
- "Vipress" is captured, and added to the player's Victory Point pile, along with the Reward Card underneath her, "The Phantom Brigade".
- The Reward Card, while quite useful, is not specific to the Mission in play, and does not aid in winning the game.
- With a successful Combat under Freedom Squadron's belt, play continues to the Retirement Phase.
Retirement Phase
Once Combat has ended, and all Abilities have taken effect, you may choose to Retire one of your cards in play at this time. After you have decided if you wish to Retire a card, proceed to the End of Turn Phase.
- Choose 1 Freedom Squadron Card in play to Retire, if you want to, and place it in the Retirement Pile.
Example Retirement Phase:
- With the addition of a new card in the Recruitment Phase, the player decides to keep his deck lean, and chooses to Retire one of the "Recruits" from play. This card is immediately placed into the Retirement Pile.
- Play then continues to the End of Turn Phase.
End of Turn Phase
The last thing to do before the Round progresses to the next player is the final upkeep. Follow these steps, in this order:
- Check to see if any Global Effects take place during the End of Turn Phase, and resolve them. Only Event Cards and Rewards will have Global Effects in this phase.
- Resolve any VENOM Leader, Freedom Squadron, and VENOM Support Abilities that take place in the End of Turn Phase, in that order.
- Discard the VENOM Support Cards used in Combat, if any.
- Return the VENOM Leader Health Marker to the starting position, and the VENOM Leader Defense Marker to the starting position.
Refill any empty Zones by placing one Reward Card, face down, on the space from the Reward Deck, then place a new VENOM Leader Card from the VENOM Leader Deck, face up, on top of it.
- If there are no more VENOM Leaders or Reward Cards, then leave the Zone empty, as Freedom Squadron has liberated that Zone of all VENOM threats.
- If a VENOM Leader has no Reward Card to be placed with it, place the Leader without any Reward Card.
- If a Reward Card remains when there are no more VENOM Leaders to accompany it in a Zone, fill the empty Zone with just the Reward, face down. It may be acquired without Combat by any player willing to spend their Tactical and Combat Phases entering that Zone.
Refill the Training Ground to five cards by drawing from the Recruitment Deck.
- If there are no more cards in the Recruitment Deck, do not replenish this deck with the Retirement Pile. Instead, there are no more assets to be found.
- If any Ability added cards to the Training Ground in excess of five, do not discard down to five. Instead leave all cards for the next player.
Finally, prepare yourself for the next Round by completing the following:
- Discard all Freedom Squadron Cards from play into your Discard Pile.
- Draw five new cards from your Draw Deck.
- If you run out of cards in your Draw Deck, shuffle your Discard Pile and form a new Draw Deck.
- Do not shuffle your Discard Pile into your Draw Deck until you have completely run through your Draw Deck and require new cards.
- If you do not have a total of five cards between your Draw Deck and Discard Pile, you may only draw the cards you have.
Play then continues clockwise to the next player.
Example End of Turn Phase:
- No Global Effects or other Abilities are slated to take place in the End of Turn Phase.
- The VENOM Leader Tracks are reset to their lowest values.
- All VENOM Support in the VENOM Support area are cleared into the VENOM Support Discard Pile.
- The "VENOM Mountain Defense" Zone, previously occupied by "Vipress", was left empty this Turn. A new Reward Card from the Reward Deck is placed face down in the Zone, and a new VENOM Leader is placed face up on top of it from the VENOM Leader Deck.
- The Training Ground, which was not touched during this Turn, has no need to refill.
- Lastly, the player discards all remaining cards in play into his Discard Pile, and draws five new cards from his Draw Deck.
- Play then goes to the next player in clockwise order.
Winning the Game
Players must work together to defeat the various VENOM Leaders at their strongholds and gather the rewards they need to complete their Mission. If they do, VENOM is beaten once and for all, and all the players win the game!
The game ends when the players collectively complete Freedom Squadron's Victory Conditions, as listed on the Mission Card, and thwart VENOM, or when VENOM succeeds in their nefarious plans. In addition, defeating VENOM Leaders and capturing Reward Cards earns each player Victory Points. If players stop the threat, then the player with the most Victory Points is awarded the Medal of Honor.
Victory for Freedom Squadron
If all of the Mission's Victory Conditions have been met, then all the players win, for the good of humanity! Mission Objectives can be met in any order. At this point, the U.N. wishes to award the most dedicated tactician with their highest distinction, the Medal of Honor, for stopping VENOM's international threat. Determine which player is awarded the Medal of Honor by adding the following Victory Point values:
- The number of Victory Points listed on each Reward Card the player has earned. This includes Rewards used during the course of the game, as well as unused Rewards.
- The VENOM Support Values of all VENOM Leaders that the player has captured.
Compare the Victory Point totals of all players and declare the player with the highest total the winner of the Medal of Honor. If there is a tie, then whoever defeated the most VENOM Leaders wins. If there is still a tie, all tied players are awarded the Medal of Honor.
Victory for VENOM
If the Event Track reaches 5 there may be one more opportunity for Freedom Squadron to complete their Mission. The final effect on the Mission Card will detail what the players must do to still pull off a success, if there is any chance left. If the players are unable to meet the conditions, or fail in their task, VENOM succeeds in their plot and all the players lose.
Glossary of Terms
Ability: Abilities are the specific text of a card and how it interacts with the game in a unique way. Freedom Squadron Cards' Abilities are supporting Abilities which generally assist in Recruitment or Combat, and are optional to use when the card is played. Any Freedom Squadron Card that uses its supporting Ability in a Turn cannot be chosen as a Combat Leader during that Turn's Combat, but may still act as Freedom Support. VENOM Leaders and VENOM Support also have Abilities that generally assist the VENOM Leader in Combat. Global Effects are also considered Abilities. Many Abilities may override the general rules of the game in specific instances. If a card has multiple Abilities, they must all take effect, unless the card states otherwise.
Active Event Card: The Active Event Card area on the board is where all Active Event Cards are placed. During the Event Phase, all cards in this area are placed in the Event Discard Pile, and a new Event Card is placed here until the next Event Phase. Some Abilities will allow more than one active Event at a time.
Air Zone: There are two Air type Zones located on the board: VENOM Sky Temple and VENOM Air Dominator. Any Combat in these Zones will trigger Air Zone specific Abilities from corresponding cards.
All is Quiet: These Event Cards have neither a positive nor negative effect on the Round, but still replace older Event Cards.
Arctic Zone: There are two Arctic type Zones located on the board: VENOM Mountain Defense and Arctic VENOM Stronghold. Any Combat in these Zones will trigger Arctic Zone specific Abilities from corresponding cards.
Automatic Success: Some Abilities can declare Combat Dice as Automatic Successes. Any Automatic Successes are chosen by the player after Combat Dice are rolled, but before any card's Abilities take place. This does not change the Rolled Value of the Dice. Any Automatic Successes that are re-rolled due to an Ability no longer count as Automatic Successes and are subject to standard rules.
Combat: Combat refers to the portion of a Turn during the Tactical Phase after the decision to battle a VENOM Leader is made, until the end of the Combat Phase.
Combat Dice: Combat Dice are the dice provided with the game. These dice are used for a variety of purposes through the game, but are mainly used in Combat against VENOM.
Combat Leader: After a VENOM Leader is chosen for Combat, the player must choose which Freedom Squadron Soldier will lead the Combat. The chosen card must be a Soldier, and cannot have used their Supporting Abilities during this Turn. In Combat, the Combat Leader cannot use their supporting Abilities, but instead gains their Combat Value in Combat Dice.
Combat Phase: In the Combat Phase, the player rolls their Combat Dice and compares their results to the VENOM Leader's Health and Defense Track after applying all effects that take place in this phase. This is when a Combat is decided as a victory or a loss, and potentially when the game can be won if all Victory Conditions are met. If a player chooses not to enter into Combat this turn, this Phase is skipped.
Combat Value: The Combat Value on Freedom Squadron Cards shows the number of Combat Dice that card will generate if it is chosen as a Combat Leader. Vehicles are not given Combat Values, as they cannot be chosen as Combat Leaders. Many supporting Abilities will give additional Combat Value if it is chosen as Combat Support, which is allotted to the card itself, unless otherwise stated. Freedom Support cards do not gain their listed Combat Value as Combat Dice, only the Combat Leader.
Commander Token: The player with the Commander Token is the first player to take their Turn at the beginning of the game, and is considered the Commander. The Commander is the only player who will take an Event Phase. The Commander position does not change during the entire game.
Cost: The Cost of a Freedom Squadron Card is the total Recruitment Points a player must spend in order to recruit that card from the Training Ground. Recruits and Commandos have Costs for use with other cards' effects.
Defense Marker: This marker is used to note the current value on the VENOM Leader's Defense Track. During the End of Turn Phase, it is reset to its starting position.
Defense Track: The Defense Track is used to track the current VENOM Leader's Defense through the Tactical and Combat Phase, as it becomes adjusted by various Abilities and effects. No Ability can adjust this track over eight, or under one. Once the track reaches an end of its spectrum, any additional adjustments in that direction are ignored.
Defense Value: The Defense Value of a VENOM Leader represents how hard their defenses will be to overcome, and is represented in a dice value of 1-8 on the Defense Track. Regardless of any changes done to a VENOM Leader's Defense Value, it cannot exceed or go below the ends of the track. Any changes above or below these values are ignored. In the Combat Phase, the Defense Value must be met or exceeded by the Rolled Value of a Combat Die for that die to be considered a success.
Discard: Any cards that are discarded are placed in their respective discard piles. A Freedom Squadron Card owned by a player is discarded in that player's individual Discard Pile.
Discard Pile: A player's Discard Pile is where their cards are discarded during gameplay. Once a player needs an additional card from their Draw Deck, but has no cards left, their Discard Pile is shuffled and used to replenish the deck. A Discard Pile is never shuffled into a Draw Deck until it is empty and another draw is needed.
Draw Deck: The Draw Deck is the deck of cards a player uses to draw their Hand from. Once a Draw Deck is empty and another draw is needed, shuffle the Discard Pile and set it as the new Draw Deck.
End of Turn Phase: In the End of Turn Phase, the Game Board is replenished, the used VENOM Support Cards are discarded, and the Training Ground is refilled. Then, the player's play area is cleared and a new Hand is drawn.
Event Deck: The Event Deck is where Event Cards are drawn from on the Event Phase. The Event Cards can change the dynamic of the Round, and VENOM Strikes! Cards threaten Freedom Squadron's chances to win.
Event Discard: When an Event Card is drawn on the Event Phase, it is placed on the Active Event Card area. Any Events in the Active Event Card area from the previous Round are moved to the Event Discard Pile. These effects will impact the Round until the next Event Phase, when a new Event Card is drawn.
Event Phase: The Event Phase is only taken by the Commander. During this phase, an Event Card is played from the Event Deck. This usually ends all other Event Card effects as the new card comes into play.
Event Track: The Event Track corresponds to the advancement of VENOM's plot. Every time a VENOM Strikes! Event Card is drawn this track increases by one, and the corresponding Event on the Mission Card occurs. If the Event Track reaches 5, Freedom Squadron may not be able to stop VENOM!
Freedom Squadron Card: This refers to any Freedom Squadron Card regardless of whether it is a Soldier, Vehicle, or Location. Any Ability that does not specify a type can affect any Freedom Squadron Soldiers or Vehicles.
Global Effect: A Global Effect is an Ability that takes place on every player's Turn in the corresponding phase. Global Effects from Freedom Squadron Locations only affect the player who owns them. Any VENOM Leader's Global Effects affect all players, even if they did not choose to attack that VENOM Leader.
Hand: A player's Hand consists of the cards they drew during their End of Turn Phase. On a player's Recruitment Phase, they must play their entire Hand, even if they choose not to use a card's supporting Abilities.
Health Marker: This marker is used to note the current value on the VENOM Leader's Health Track. During the End of Turn Phase, it is reset to its starting position.
Health Track: The Health Track is used to track the current VENOM Leader's Health through the Tactical and Combat Phase, as it becomes adjusted by various Abilities and effects. No Ability can adjust this track over eight, or under one. Any additional adjustments in that direction are ignored.
Health Value: The VENOM Leader's Health Value shows how many successes a VENOM Leader requires to be defeated, and is represented on the Health Track by a number of 1-8. It cannot exceed or go below the ends of the track. After Combat Dice are rolled, the Combat is successful if the player has a number of successful Combat Dice equal to or greater than the number of Combat Dice indicated on the Health Track.
Land Zone: There is one Land type Zone located on the board: VENOM Island. Any Combat in this Zone will not trigger any Zone specific Abilities.
Locations: Only a few Freedom Squadron Cards are classified as Locations. When a Location Card is recruited from the Training Ground, it is placed directly in front of the player, not discarded. Location Cards do not count as being in play, and cannot be discarded or affected by any other card's Abilities. A Location Card is always active for the owning player.
Mission Cards: Mission Cards detail the specific VENOM plot that Freedom Squadron will be attempting to stop during the game. One Mission Card is chosen during setup, either randomly or by choice. A Mission Card details any specific setup rules or cards that must be used. It also informs the players about what they must do in order to win the game. Mission Cards specify what events each step of the Event Track will trigger as VENOM advances their plot. Unless specified, Event Track effects are cumulative and remain in effect until the end of the game.
Mission Specific Cards: Mission Specific Cards are unique to a specific Mission Card, and should not be used in any other Mission. These will only be Reward Cards or VENOM Leaders, and are annotated by the Mission Specific icon.
Play: On a player's turn, cards in play are any active, non-location cards that are in front of them. When a card is placed into play, you are given the option to use their Abilities in the appropriate phase. Players must play every card in their Hand each turn. Freedom Squadron Location Cards are placed immediately in front of a player, but do not count as "in play" for the purpose of other cards' Abilities.
Recruitment Deck: The Recruitment Deck is where the Training Ground fills from. This deck contains Freedom Squadron Cards. If the Recruitment Deck is depleted, do not replenish it, and there are no more Freedom Squadron assets to be had.
Recruitment Phase: In this phase, players play all of the cards from their Hand, add up their Recruitment Points, and recruit Freedom Squadron Cards from the Training Ground.
Recruitment Points: Freedom Squadron Cards' Recruitment Points are added together to determine a total Recruitment Point value. This total can be used to recruit new cards from the Training Ground, or with other supporting Abilities. Cards which used their Recruitment Points can still lead or support in Combat.
Remove from the Game: Occasionally, cards will be removed from the game. Instead of placing these cards in any corresponding discard or Retirement Pile, place these cards in the game box, as they cannot be reclaimed by any means for the rest of the game.
Retire: Any Freedom Squadron Card that is Retired is placed into the Retirement Pile, and is not cycled back into any player's Draw Deck or Discard Pile.
Retirement Pile: A number of Abilities and effects may cause Freedom Squadron Cards to be Retired. Do so by placing them in the Retirement Pile.
Retirement Phase: In this phase, the player may choose to Retire a card from play. This is an optional action.
Reward Card: Reward Cards represent the spoils of a victorious Combat against VENOM. In addition to generic Reward Cards, the Mission may include Mission specific Reward Cards. Reward Card Abilities can be used once per game and only during the owner's Turn, unless they offer a Global Effect. Whether or not a Reward Card's Ability is used, it can be saved for Victory Points at the end of the game.
Reward Deck: The Reward Deck is where excess Reward Cards not used in the setup are placed. As VENOM Leaders are captured and their rewards are claimed, this deck will be used to refill those Zones. Once the Reward Deck runs out, it is not refilled.
Rolled Value: The Rolled Value is the number displayed on a Combat Die. Any Abilities that affect a die's Rolled Value should physically turn the die to display the new Rolled Value, as though that were the face of the die that was rolled. Rolled Values can go above six or below one. Keep track of the final Rolled Value if it is outside those values. Combat Dice values are not limited, as the VENOM Tracks are. Any Dice declared Automatic Successes do not change the Rolled Value of a Combat Die.
Round: A Round concludes when every player has taken a Turn. Rounds begin and end when the Commander begins his Event Phase.
Sea Zone: There are two Sea type Zones located on the board: Captured Oil Rig and VENOM Underwater Station. Any Combat in these Zones will trigger Sea Zone specific Abilities from corresponding cards.
Soldier: Freedom Squadron and VENOM Support Cards classified as Soldiers are marked by the Soldier icon. Many Abilities only affect certain types of cards. Freedom Squadron Soldiers are the only Freedom Squadron Cards that can be used as Combat Leaders.
Support Value: A VENOM Leader's Support Value shows how many VENOM Support Cards will be drawn to aid the VENOM Leader in Combat.
Tactical Phase: In this phase, a player decides whether to enter into Combat with a VENOM Leader. If a player chooses to enter into Combat, any Tactical Phase Abilities take place before the Combat Phase.
Teamwork: Freedom Squadron Cards that have Teamwork Abilities may only be played during other player's Turns. These cards will refer to "the Active Player", which refers to the player who is currently taking their Turn. A card used for a Teamwork Ability is discarded after the Ability takes place.
Training Ground: The Training Ground is an area on the board where Freedom Squadron Cards are placed to be purchased during the Recruitment Phase. During the End of Turn Phase, the Training Ground will fill back up to five cards from the Recruitment Deck. Under special circumstances the Training Ground may contain more than five cards.
Turn: A Turn refers to a player going through all of the phases. Each player takes a Turn to make a full Round. Players only play cards on their Turn, unless the Ability is a Teamwork Ability.
Vehicle: Freedom Squadron and VENOM Support Cards classified as Vehicles are marked by the Vehicle icon. In addition, Freedom Squadron Vehicles cannot be used as Combat Leaders.
VENOM Leader Card: VENOM Leaders are the key players in VENOM's master plan. They have a listed Health, Defense, and Support Value, which determines their difficulty in Combat. VENOM Leaders can have a number of Abilities that take effect throughout a Turn. Any Global Effects take place even if that Leader is not chosen in Combat. All other Abilities will take effect only if you have chosen that Leader for Combat.
VENOM Leader Deck: The VENOM Leader Deck is composed of a number of VENOM Leaders, as designated by the setup portion of the chosen Mission Card. These Leaders are shuffled and distributed face up to the Zones, and refilled from this deck when necessary. VENOM Leaders may be placed even if there is not a Reward Card to go underneath it. Once the VENOM Leader Deck is depleted, it does not refill.
VENOM Support Area: This area on the board is where VENOM Support Cards are placed during the Tactical Phase when they support the VENOM Leader in Combat. VENOM Support Cards are always placed from left to right, and are always resolved in this order. In the End of Turn Phase, all cards in this area are placed in the VENOM Support Discard Pile.
VENOM Support Card: VENOM Support Cards are used in the Tactical and Combat Phases to assist the VENOM Leader in defending their fortress. VENOM Support can be Soldiers or Vehicles.
VENOM Support Deck: The VENOM Support Deck is composed of all VENOM Support Cards. Drawn cards are placed into the VENOM Support area when called for. Once the VENOM Support Deck runs out of cards and additional cards are needed, the VENOM Support Discard Pile is shuffled and used as the new VENOM Support Deck.
VENOM Support Discard: Once a VENOM Support Card is discarded, it is placed in the VENOM Support Discard Pile. If the VENOM Support Deck is depleted and a new VENOM Support Card is needed, the Discard Pile is shuffled to make the new VENOM Support Deck.
Victory Conditions: The Victory Conditions on a Mission Card state what the players need to accomplish in order to win the game. The last Event of the Event Track can often contain alternate Victory Conditions that may pull victory from the jaws of defeat.
Victory Points: All Reward Cards and VENOM Leaders captured in Combat have Victory Points. A VENOM Leader's Support Value is its Victory Point value. If Freedom Squadron is victorious, each player adds up their own Victory Point values, and the player with the most points is awarded the Medal of Honor for being the most effective U.N. Tactician. In the event of a tie, the player with the most VENOM Leaders captured wins, and if there is another tie, all tied players are awarded Medals of Honor.
Zone: There are seven Zones that VENOM uses as strongholds: VENOM Sky Temple, VENOM Air Dominator, VENOM Mountain Defense, Arctic VENOM Stronghold, VENOM Island, Captured Oil Rig, and VENOM Underwater Station. These seven Zones each have a Zone type, such as Land, Air, Arctic, or Sea. Each Zone should have a face down Reward Card on it with a face up VENOM Leader on top of that, unless there are no more cards in the Reward or VENOM Leader Decks to fill the Zone with. Any Zone that cannot be re-filled is considered liberated.
Quick Reference Page
Event Phase (Commander Only)
- Apply any Global Effects that take place during the Event Phase.
- Draw one card from the Event Deck and resolve its effects.
Recruitment Phase
- Apply any Global Effects that take place during the Recruitment Phase.
- One by one, play all cards in your Hand, using any Recruitment Phase Abilities, if you choose.
- Add up Recruitment Points and recruit cards from the Training Ground, placing recruited cards in your Discard Pile.
Tactical Phase
- Choose a VENOM Leader to attack. If you are not attacking, move to the Retirement Phase.
- Adjust the VENOM Leader Health and Defense Tracks to the Leader's base values.
- Apply any of the VENOM Leader's Abilities and then Global Effects that take place during the Tactical Phase.
- Choose a Combat Leader and Freedom Support cards, and allocate Combat Dice.
- Draw and place VENOM Support equal to the VENOM Leader's Support Value.
- Apply any Freedom Support Abilities that take place during the Tactical Phase, in any order.
- From left to right, apply any VENOM Support Abilities that take place during the Tactical Phase.
Combat Phase
- Roll the allocated Combat Dice.
- Apply any of the VENOM Leader's Abilities that take place during the Combat Phase.
- Apply any Freedom Support Abilities that take place during the Combat Phase, in any order.
- From left to right, apply any VENOM Support Abilities that take place during the Combat Phase.
- Compare all Combat Dice against the VENOM Leader's Health and Defense Tracks.
- Apply any VENOM Abilities that take place in the event of success or failure, and claim any rewards and VENOM Leaders earned.
Retirement Phase
- You may choose to Retire one card from your current cards in play.
End of Turn Phase
- Apply any Global Effects or other Abilities that take place during the End of Turn Phase.
- Discard all used VENOM Support Cards, and reset the VENOM Leader Tracks.
- Refill any empty Zones with a Reward Card and a VENOM Leader.
- Refill the Training Ground to five cards.
- Discard all cards you have in play, then draw five new cards.