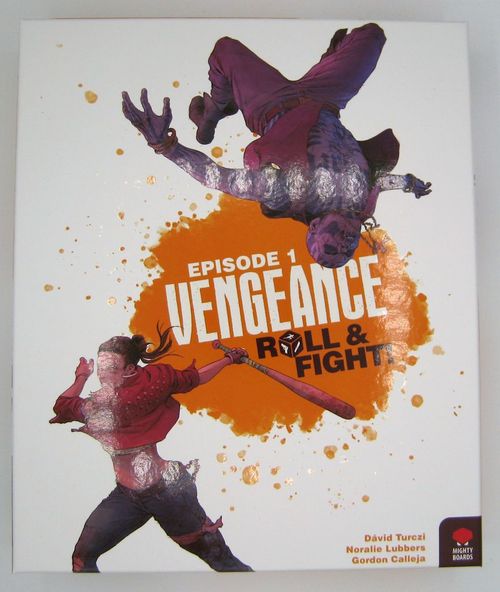
Vengeance: Roll & Fight – Episode 1
Vengeance: Roll & Fight – Episode 1 Rulebook
Table of Contents
Table of Contents
Components
- 4 Player boards
- 5 Dual-sided Den boards
- 3 Flashback dice
- 46 Fighting dice
- 9 Boss cards
- 1 Flashback tile
- 4 Hero trait cards
- 4 Hero pieces
- 32 Ability tiles
- 16 Item tiles
- 8 Player aid cards
- 4 Erasable markers
Overview
The goal of the game is to SCORE THE MOST POINTS. You score points by:
- Damaging the boss (skull-fist icon)
- Killing the boss (boss skull icon)
- Fulfilling objectives (target icon)
- Collecting loot (star icon)
- Gaining experience (lightning icon)
You will play as a Hero with their unique Trait (a negative ability) and a set of Ability and Item tiles, custom to their fighting style.
Your Player board shows your Basic Abilities, your Health Track, your Loot Track, and your Training Track (consisting of Experience spaces) and has slots for your Items and Abilities.
The Den board is composed of rooms and shows the Health of the Boss you're facing. Your Hero piece will always be in a Room to indicate your current position. Rooms are connected via doors, denoted by a red dashed line; any two rooms directly connected are considered adjacent. Each room has a Visited space (circle) to track whether you've been there or not. Rooms where this space is crossed out are referred to as "Visited". Some rooms have Objectives (target + number icon), which require you to fulfill additional challenges to score points. Rooms are populated by Enemies. Enemies fall into two categories: The Boss (boss skull icon) and their Minions. Minions come in five types: Grunts (grey), Tough Guys (green), Blockers (orange), Henchmen (red), and Gunmen (blue).
You will be using an erasable marker to indicate things on both the Player board and your Den board.
- Marking a space or an enemy (empty box / empty circle) means either to "draw the edge" of it or to "draw a circle around it", whichever is applicable.
- Crossing out a space or an enemy (crossed-out box) means "draw an X through it".
- Clear a space (circled X) means "erase any X from it". It does not remove a mark around it, if present.
Setup
- Place 24/35/46 Fighting dice (for 2/3/4 players) in the middle of the table within reach of all players.
- Each player takes an erasable marker, a Player board, and a random Den board.
- Each player picks a Hero to play, collecting the 8 Ability tiles, the 4 Item tiles, the Hero Trait card, and the matching Hero piece. They place the Trait card on the indicated space of their Player board and the Ability tiles, all arranged visible and face up, beside their board.
- Place an item tile on each item slot on your Player board (in any order).
- Shuffle the Boss cards, and deal one randomly to each player. They place it face up beside their Den board.
- Each player must pick one of the sides of their Den board. Next, they must mark a number of circles on the Boss Track equal to the health (heart icon) shown on the Boss card.
- Each player places their Hero piece into the Den's entrance, marked with the running-figure icon.
- Place the 3 Flashback dice and the Flashback tile to the side.
- The game is ready to begin.
A Round of Play
Each round is composed of 4 phases:
- Flashback Phase — Performed simultaneously by all players
- Rolling Phase — Performed in real time and simultaneously by all players
- Fighting Phase — Performed simultaneously by all players
- Resolution Phase — Performed simultaneously by all players, immediately following their Fighting Phase.
Once the last phase is completed by all players, proceed to the next round. After the 4TH ROUND, the game ends. Proceed to Final Scoring.
Your Hero's Trait or your Boss's Special Effect might affect either the Flashback Phase or the Fighting Phase, or it could add an extra step to setup. Observe this, and if a Trait or a Special Effect conflicts with a rule stated in this rulebook, the Trait or Special Effect takes precedence.
Flashback Phase
First, all players take exactly 4 Fighting dice from the pool and place them to the side.
Then, one of the players rolls the 3 Flashback dice and puts them on the indicated spaces of the Flashback card for all to see. Simultaneously, each player may perform the following Flashback actions and purchase Ability tiles, in any order. The Flashback actions available will depend on the icons shown on the rolled dice:
- Training: Mark two Experience spaces on your Training Track.
- Purchase: Mark one of the squares above an Item of your choice to acquire one "charge" of that Item.
- Healing: Mark an Additional Health space (droplet icon) OR Clear two Wounds (droplet icon) from your Health Track.
- Recon: Mark one Recon (binoculars icon) space on one of your Basic Abilities or Bought Ability tiles to make it available for use during the Fighting Phase without having to assign dice to it. Note that the "Charge" and all your Bought Ability tiles show a double-binoculars icon; this means you need two Recon actions (in the same Flashback Phase) to be able to mark them. Some Abilities require no dice to activate and thus cannot be recovered.
- Loot: Cross out the leftmost available space of the Loot Track, OR perform any other action.
Then, as indicated on the Flashback card, you may take one more Training, Purchase, Healing, or Recon action of your choice.
Whenever you cannot perform any of the above actions, you may take any other action of your choice except for Loot.
At any time during the Flashback Phase, you can also cross out any number of marked Experience spaces on the Training Track to purchase any number of Ability tiles. An Ability's cost is reflected on the top right of the Ability tile. You may not have more than four Abilities at a time. If you'd like, you may discard an Ability to replace it with a different (purchased) one; discarded Abilities are not permanently removed from the game — you may choose to replace an Ability on your Player board with a previously discarded Ability, so long as you have the Experience spaces to pay its cost.
Once every player finishes their four Flashback actions, put the Flashback dice aside, and proceed to the Rolling Phase.
Rolling Phase
All players start rolling the four Fighting dice in their personal pool simultaneously. You may choose to roll some or all of your dice in your personal pool, and you can do so as fast and as many times as you want. The only rule you need to remember is that YOU MAY NOT REROLL WOUND (droplet icon) FACES at this time.
You can assign dice to your Basic Abilities and to any Bought Abilities you've already placed on your board by taking all of the required dice from your personal pool (after rolling the required faces) and placing them near the edge of the Player board closest to the Ability. When you do, you may pick up to reroll one Wound (droplet icon) face from your pool (along with any other faces).
You may assign any number of sets of dice to your BASIC ABILITIES and most Bought Ability tiles, but some Ability tiles show a "1x" icon — these tiles can only be used once. These Abilities can only be assigned dice once per Rolling Phase, and you may not assign dice to them if you marked the Recon/double-Recon space during the Flashback Phase. Some tiles show an infinity icon. These tiles are never assigned dice: they have a passive ability instead. You may never assign dice to Ability tiles not currently on your Player board.
In addition to assigning dice to Abilities, you can assign one Fighting die showing a Wound (droplet icon) face on an available space of your Health Track — in the same way as when assigning to an Ability. When you do, you may pick up the (other) Wound (droplet icon) faces from your pool and reroll them. You would usually do this if you roll two or more Wound icons and otherwise have no way of rolling enough dice to activate more Abilities.
Dice assigned to (and around) your Player board cannot be rerolled, moved, or changed in any way for the rest of the round. Anytime you have fewer than 4 dice in your pool, you can take dice from the supply in the middle of the table until you have 4 dice again and then continue rolling. If the central supply has fewer dice than you need, take as many as you can. This will happen whenever you assign dice to Abilities or to your Health Track.
Once all players voluntarily stop rolling or their personal pool is too small to activate any more abilities after the shared pool has emptied, the Rolling Phase is over. Return any dice remaining in the players' personal pool to the shared pool. NOTE: leftover Wound (droplet icon) in your pool are NOT placed on your Health Track.
Placing Dice on Abilities
- DASH Basic Ability requires 2 Move-icon dice and will give you one Move action in the Fighting Phase.
- PUNCH Basic Ability requires 3 Hit-icon dice and will give you one Hit action in the Fighting Phase. If at least one of the dice used is a Hit-icon-plus die you will gain another Hit action (for a total of 2).
- FIRE Basic Ability requires 2 Shoot-icon dice and either 1 Move-icon or 1 Hit-icon-plus die, and will give you one Shoot action in the Fighting Phase.
- CHARGE Basic Ability requires 1 Move-icon, 2 Hit-icon dice, and either 1 Move-icon or 1 Shoot-icon die. In the Fighting Phase, it will give you a Move action then a Hit action (in this order).
- BOUGHT ABILITIES will require various combinations of dice and will give you varying combinations of actions: Move, Hit, Shoot, Heal, Wound, Evade, Jump, and Kill. These actions will be explained in the "Fighting Phase" section.
For all purposes, a Hit-icon-plus die can be used as a Hit-icon die but not vice versa.
Fighting Phase
First, return all dice showing Wound (droplet icon) from your Health Track to the shared pool, and cross out the spaces on the Health Track you took the dice from. In later Rolling Phases, you will be unable to assign a die showing Wound (droplet icon) on crossed-out spaces until that space is cleared (see the Healing action, pg. 4).
In the Fighting Phase, you perform actions, as allowed by:
- Abilities you assigned dice to in the Rolling Phase,
- Abilities where you marked their Recon or double-Recon space,
- Items you've purchased.
You may use your Abilities or Items in any order you choose, but you must entirely perform every effect generated by one Ability or Item before beginning to resolve effects of a different Ability or Item. Actions of a particular Ability or Item must be resolved in exactly the order indicated on the tile. If you cannot perform any effect of an Ability or Item, that Ability or Item immediately ends – you may not perform the rest of it.
Once you have resolved an Ability, return the dice assigned to that Ability to the shared pool OR clear its Recon/double-Recon space. Passive Abilities (with infinity icon) require no dice (and have no Recon space), and their effect can be applied whenever applicable.
Some Abilities or Items are marked START OF FIGHTING. Their effect must be resolved before anything else in the Fighting Phase (including removing dice assigned to your Health Track).
Some Abilities or Items are marked RESOLUTION. These Abilities do not resolve during the Fighting Phase, so ignore them for now.
All Abilities will generate some combination of these eight effects:
-
MOVE: Move your Hero piece into an adjacent room.
- You may not resolve this effect if there is an active Blocker in your current room.
- If you haven't before, cross out your new room's Visited space.
-
HIT: Deal one damage to an enemy in your current room.
Most Minions are crossed out immediately when damaged, whereas the Tough Guys require two damage – so, if you only deal one damage, mark it with a dot (or erase it if the Fighting Phase if you still haven't killed this Minion), and then cross out the Tough Guy when a later action deals another damage.
- You can only deal damage to a Boss if there are no Grunts in the same room as the Boss. When you damage a Boss, cross out the leftmost available space on the Boss Track. Ignore any damage that would require you to cross out a space that is not marked. When enough spaces on the Boss Track have been crossed out to equal the marked spaces on the Health Track, the Boss is dead. Cross out the Boss on the Den board.
- You can deal damage to a marked (evaded) Minion as normal.
- If you cross out through Hit (and/or mark through "Evade"; see later) all of the Minions in a room, the room is considered "Cleared".
-
SHOOT: Deal one damage to an enemy in an adjacent room. Note that this Ability may not be used to deal damage to an enemy in your current room.
- All rules of dealing damage described under "Hit" still apply.
- Multiple Shoot effects generated by the same Ability/Item can be split between different adjacent rooms.
Items will provide additional effects when you expend them. You expend them by crossing out the square you previously marked, when you purchased the Item in the Flashback Phase. You may not expend an Item you have not marked, and since each item can only be unlocked a maximum number of times, each of these effects can also only be used a limited number of times across the whole game. If you have unlocked multiple times, you may expend multiple instances of the same Item during the same Fighting Phase, even in succession if desired.
Some Items will generate effects like the Abilities do, while some will modify Abilities, effects, or actions immediately after you expend them.
Objectives
As mentioned earlier, some rooms show Objectives. As long as your Hero piece is in the room and you meet the requirement shown on the Objective, you may mark the Objective. Each Objective may only be marked once, and you have to be present to do so. Score the points you marked at the end of the game.
Example Objective requirements shown on Den boards include:
- Kill that many enemies of the shown type.
- Entirely clear this room in one round.
- Upgrade up to the sixth health spaces on your Health Track.
- Visit all adjacent rooms.
- Hit the Boss at least once.
- Visit this many rooms.
- Kill all enemies of the displayed type(s) in adjacent rooms.
Resolution Phase
Once all the players have resolved their Fighting Phases, proceed to Resolution.
- Clear any unused Recon or double-Recon marks. Their effects are lost.
- You may collect Loot (star icon) in each Visited and Cleared room. If you do:
- Take a Loot Flashback action per star. This means you can either cross off a space on your Loot Track or perform any other Flashback action.
- Cross out the star icons used to indicate you have collected them. You cannot collect them again in subsequent rounds.
- You do not have to be currently present in the Room to collect a star icon – it merely needs to be Visited and Cleared. Remember, marked (evaded) Minions make the room count as Cleared for any given round.
- Receive one Wound for each Henchman and/or the Boss located in your current room and one for each Gunman located in your current room or adjacent to your current one. If you would receive more than your available Health spaces, ignore the excess.
- If you have any available Items or Abilities specifically marked "Resolution", you may use them now. You may not use any other Items or Abilities.
- If your Health Track is full of Wounds (i.e., the initial 3 spaces and every extra marked Health space is crossed out), take a Beating: Clear every Wound from your Health Track, reset your Health Track back to 3 spaces long as well as also clearing any marked Health spaces, and cross out the leftmost available space on the Beating Track.
- After one Beating, the limit of dice in your personal pool is permanently reduced to 3. This means you can never activate Abilities requiring 4 dice. This is shown on the now leftmost available space of your Beating Track.
- After your second Beating, you're dead, and you've lost. In the extremely unlikely scenario of this happening before the 4th round, you will not be able to participate in the remaining rounds.
- Clear any marks around previously evaded Minions. They return to the fight next round.
Final Scoring
After the Fighting Phase of the 4th round, proceed to Final Scoring. In the game, everything you can score is marked with a scoring (gear) icon. Score points for the following:
- The value in the leftmost available (not crossed-out) space of your Loot Track (if any).
- The value in the leftmost unmarked (not circled) experience space of your Training Track (if any).
- The value listed below the rightmost marked and crossed-out space on the Boss Track.
- +5 Points if the Boss is crossed out.
- The value shown in each marked Objective on your Den board.
- -1 Point for each Room with an enemy (including your current Room) along your escape path from your current Room to the Den entrance. (You may draw any escape path you like – you are not obligated to use the path created by your Visited Rooms.)
Each player tallies up their own score, and the player with the most points wins. More available Health spaces break ties. If still tied, the tied players brawl for the victory (or share it).
Solo Challenge
- Select a difficulty level: Easy, Medium, or Hard. Put 20/16/12 dice into the pool depending on the difficulty level (easy/medium/hard).
- Play 4 complete rounds (Flashback Phase, Rolling Phase, Fighting Phase, Resolution Phase) as described with the multiplayer rules, but during the Rolling Phase, use a timer (on your smartphone or other device) to measure 45/30/25 seconds (easy/medium/hard), and start running it when you start rolling the dice. Once the timer beeps, you cannot take more dice from the supply, but you may continue rolling dice already in your personal pool.
- You win the challenge if you score 18/23/28 points (easy/medium/hard).
- You can mix and match difficulty levels. Feel free to take easy dice (20), medium time (30 seconds) and hard scoring (28 points) or any other variation.