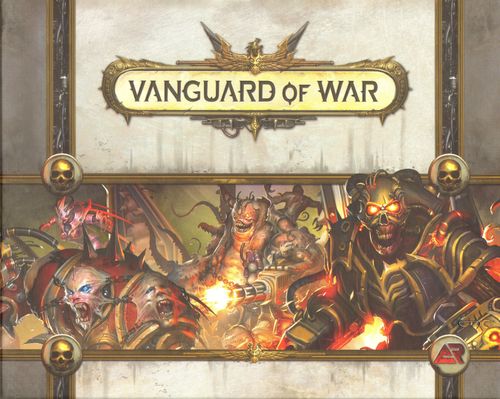
Vanguard of War
Vanguard of War Rulebook
Table of Contents
Table of Contents
Component List
Heroes: Lord Visserite, Sgt. Specks, Ashira, Lt. Xik'krik
Minions: Brutes, Artillery, Assault
Abominations: Felstrafers, Succubi, Harvesters
Overlord: 1 Taskmaster
Cards: Hero Cards, Exploration & Consumable Cards, Event Deck Cards, Demon Cards, Abomination Stat Cards
Other components: Dice, Game Board, Essence tokens, Damage tokens, Taunt token, Exploration tokens, Ascension tokens
Vanguard of War
Overview
Vanguard of War (VoW) is a 1-4 player game focused on the defense of a small church deep inside the decaying ruins of a once great city now known only as "the Whispers." Players will use their heroes to hold the line against seemingly endless waves of demons while their allies inside the church desperately attempt to learn how to use the fel army's own doomsday weapon against them.
Victory and Defeat
Winning in Vanguard of War is about sacrifice and survival. Victory is achieved when the last Overlord is slain, but accomplishing this goal will require players to accept that not every hero may make it out of the Whispers alive. The heroes' lives must always come second to the survival of the Church of the Everlasting Covenant, for if it falls, the game is lost. This does not mean the players should be reckless, however. If all four heroes fall, the church will be without defenders and the players still lose.
Tiers
Gameplay in VoW is divided into sections known as "Tiers." Players may choose during setup to play one, two, or all three Tiers to adjust both the length and difficulty of the game.
A Tier consists of eight rounds, each spawning demons, with the final round spawning a powerful Overlord. Demons spawn in small groupings known as "waves," which are placed on one of the four Spawn Points on the game board. Three waves spawn per round for the first seven rounds, while the Overlord's wave spawns by itself in the final round. The heroes will need to protect the church by destroying demon waves until the Overlord spawns, whose death will send the remaining demons fleeing in terror back toward their Spawn Points. Fleeing demons who reach their Spawn Point are removed from the board and once all demons are gone, the Tier is won. Slaying the Overlord in the final Tier players chose to play ends the game in victory; any remaining demons are slain instantly before they have a chance to flee.
The Whispers was the site of countless horrifying murders and sacrifices and those that died linger still. The reluctance of these lost souls to let go as well as the powerful residual magic in the area has created an opportunity for them to aid in the fight against the demons. While exploring the ruins of the Whispers, the heroes may come across a lingering spirit and earn its aid in the form of Essence or Ascension. Collecting these gifts may allow the heroes to increase their strength and will be instrumental in surviving the later Tiers. Seven Essence and one Ascension will allow a hero to flip one of their character cards over, improving their statistics or unlocking new skills.
Game Setup
Choose Your Heroes
Four heroes must join the fight to defend the church from the army of demons. Each player selects at least one hero, (or all four if you are playing by yourself), taking their corresponding hero cards and that hero's starting consumable. If you are playing with three players, we recommended the most experienced player be the one that controls two heroes. Once all heroes have been selected, place their miniatures inside the church on the center of the game board. When placing the hero cards in front of you, be sure the side without the gold symbol on the left of the hero's name is faceup.
Each hero starts the game with a class-specific consumable as seen above. A hero's starting consumable can be restored at the beginning of each Tier for free. If a hero already has two consumables equipped, the player can decide to discard one to equip their hero's starting consumable.
A hero's starting consumable is easily identified by the symbol on the top left of the card, corresponding with the symbol on the top left of the hero's card.
Shuffle the Event and Exploration Decks
Shuffle the two Event Decks and the Exploration Deck and place them facedown within reach of all players.
Assemble the Demons
Divide the Abomination and Minion miniatures into individual piles by type and place them along the side of the board with the Overlord miniature(s).
Shuffle the 21-card Abomination Deck and insert an Overlord stat card of the appropriate Tier at the bottom, placing the deck facedown next to the game board. Place the Abomination stat cards faceup next to the Abomination Deck for easy reference during the game.
Prepare the Game Board and Place Dice and Tokens
The game board for VoW has four Spawn Points the demon army will use in their assault on the church. Each Spawn Point has a narrow path leading to the church, called a "lane." The demons may not enter a field that is not part of their lane, nor can heroes ever enter the demons' lanes. Collect all of the Damage, Essence, Exploration, and Ascension tokens as well as the dice and Taunt token and place them around the game board.
The base set of Vanguard of War is just the beginning! Future expansions will add new Abominations and Overlords to provide unique challenges as well as additional heroes to answer the call and create countless defensive strategies.
Heroes
The heroes are the valiant men and women trying desperately to defend the church from certain destruction to buy enough time for their allies to turn the tide of the war before it truly begins. Each hero has two stat cards. The first card contains an illustration of the hero, their starting statistics such as Health Points and Speed, and two squares at the bottom for their main weapon and a Passive Ability. The other card has two slots at the top for the hero to equip consumables and a list of the hero's special skills at the bottom. Each hero begins the game with a class-specific starting consumable as seen below.
Each hero's starting consumable is easily identified by the symbol on the top left of the card, corresponding with the symbol on the top left of the hero's card.
A hero's activation is divided into two phases: Move and Action. During the Move phase, a hero may move up to one field per every point of their Speed. Performing any action other than movement ends the Move phase, forfeiting any remaining Speed. A hero may move after their Speed is depleted at the cost of 1 Action Point (AP) per field.
Aside from additional movement, a hero's other possible actions include using skills, consumables or Basic Attacks. Heroes can also trade consumables with other heroes regardless of whether or not they are adjacent. The receiving hero cannot be slain, nor can class-specific consumables be traded. Heroes can also revive a slain hero while inside the church for 1 Essence. All actions cost 1 AP except skills, which have their AP cost listed on the hero's card. Details about Basic Attacks, skills, and reviving heroes can be found below.
The order heroes activate is decided by the players by general agreement. Hero activation order can change from round to round, but no hero may activate more than once per round.
When a hero slays an Abomination or Overlord, they are rewarded with valuable Essence and Ascension. These tokens can also be found by exploring the ravaged city around the church.
Essence is always acquired by the hero who performed the action that created the Essence, while Ascension tokens are placed inside the church to be used by any hero.
A hero may use 7 Essence and 1 Ascension at any time during the "Defense" phase to remove all damage tokens and upgrade one of their two hero cards. The upgraded side of each hero card has a gold Rank symbol on the left of the hero's name to avoid confusion. If the player chooses to upgrade the hero's Skill card, the hero gains a new skill that costs Essence to use in addition to 1 AP. A fully upgraded hero is a force to be reckoned with and the importance of obtaining Essence and Ascension is second only to defending the church.
Hero Card Reference
CLASS: A hero's class alludes to their areas of combat expertise as well as tying them to a specific starting consumable.
NAME: The name of the hero.
HEALTH POINTS (HP): How much damage a hero can withstand before dying. If their HP reaches zero, they are slain and removed from the battlefield.
ACTION POINTS (AP): A numerical value representing how much a hero can accomplish in a single round.
SPEED (SP): How many fields the hero can travel during their Move phase.
BASIC ATTACK: The hero's default weapon or method of inflicting damage. Costing only 1 Action Point to perform, heroes may make as many Basic Attacks as they have available AP.
PASSIVE ABILITY: A special talent unique to the hero that is always active at no cost.
RANK: The Rank symbol signifies this card has been upgraded and the hero is more powerful.
CONSUMABLE SLOTS: Slots that can be used to equip items found during exploration. The hero's starting consumable is equipped in one of these slots at the start of the game.
SKILLS: Special abilities a hero can use only once per round. In order for a skill to be activated, the hero must have the required AP listed on the card.
NAME: The name of the skill.
DESCRIPTION: An explanation of the skill's effects that occur during or after its use.
RANGE: The number of fields the hero can be from their target and still activate the skill (or Basic Attack).
DICE: The number of dice rolled when the skill (or Basic Attack) is used.
ACCURACY: The minimum number that must be rolled to successfully hit the target.
AP/ES COST: The number of Action Points or Essence required to activate the skill. Skills that cost Essence tokens have an additional cost of 1 AP.
When a hero is slain, remove their miniature from play and place it by the hero's cards. Remove all damage tokens but keep any Essence and consumables the hero has accumulated. Any hero still on the game board may enter the church and revive a slain hero by spending 1 Essence and 1 AP. Place the revived hero's miniature inside the church; if they haven't activated this round, they may do so as normal.
Demons
The demon armies are relentless, spawning from their Spawn Points at the beginning of every round until the Overlord appears. There are four Spawn Points on the game board, but in most cases the demons will only spawn from three of them in any given round. To spawn the demons, players draw 3 cards from the Abomination Deck, resolving each demon wave's spawning before drawing the next card. Each card details which demons spawn, either an Abomination or Overlord, as well as any Minions that travel with them as part of their wave. Take the miniatures identified (details located below) and place them on the Spawn Point listed on the top left of the card.
After all demons are spawned, each lane of demons will activate, starting with the lane connected to Spawn Point 1. Each wave, beginning with the wave closest to the church, will move their full Speed and then attack. If another wave is occupying the field the demon wave needs to enter, that wave is pushed forward, starting a cascade effect of pushing demon waves forward until either the activating wave has used their full Speed value or a wave reaches the field adjacent to the church. Any unused Speed in that case is forfeited. Once the demon wave has finished moving, they will attack if a valid target is available.
Abominations
Greater demons in their own right, Abominations are the primary assault force of the demonic armies. Often accompanied by lesser demon Minions, they will bring the church crashing down on top of the heroes if they are not slain. When an Abomination Deck card is drawn, players roll two dice to determine what Minions are part of its wave, if any. The dice rolls are compared to the Minion Spawn section of the card and any Minions summoned are spawned along with the Abomination. There are 3 types of Abomination demons: Harvester, Succubus, Felstrafer.
The savage tanks of the demon armies, Harvesters have 2 Armor beginning at Tier 1, meaning a hero must inflict 3 damage or more to slay even the weakest of their ranks. A Harvester's Speed clocks in at a modest 2 while their meticulously sharpened claws allow them to roll 2 dice, hitting on 4+ at a Range of 1.
The Succubus represents the infiltration arm of the demon armies. She has no Armor at Tier 1, allowing heroes to instantly slay her if they are able to catch her. She moves swiftly with a Speed of 3 and has been known to dive upon unsuspecting prey from above, rolling 2 dice and hitting on 3+ with a Range of 2.
Of all the monstrosities that make up the demon armies, few can match the firepower of the Felstrafer. Felstrafers have only 1 Armor at Tier 1, making them slightly less durable than the Harvesters while sporting the same Speed of 2. Where the Felstrafer really shines is ranged combat, using his twin guns to devastating effect by rolling 3 dice and hitting on 4+ with a Range of 2.
When you create the Abomination Deck, be sure to place the correct Tier of Abomination stat cards in front of you to match the Tier you are currently playing. The skull symbols on the top left of the stat cards identify which Tier the Abominations belong to (1 skull for Tier 1, 2 skulls for Tier 2 and 3 skulls for Tier 3).
Abomination Stat Card Reference
TIER: Identifies the relative power of the Abomination and which Tier they spawn in.
TYPE: The type of Abomination.
ARMOR (AR): The demon's resistance to injury. The damage inflicted needs to exceed the Armor value to kill the Abomination.
SPEED (SP): How many fields the demon can travel when moving.
BASIC ATTACK: The Abomination's default weapon or method of inflicting damage. Its effectiveness is determined by these three statistics:
RANGE: The number of fields the demon can be from their target and still attack.
DICE: The number of dice rolled when the attack is used.
ACCURACY: The minimum number that must be rolled to successfully hit the target.
PASSIVE ABILITY: A special talent unique to the demon that is always active at no cost. If the Abomination does not have a Passive Ability, this section is filled with italicized flavor text.
SPAWN POINT: Which Spawn Point the Abomination's wave will spawn on. If the Spawn Point is already occupied, place the Abomination on the first available Spawn Point, counting clockwise.
MINION SPAWN: The type of Minions that may spawn with the Abomination as part of their wave. When the Abomination spawns, roll 2 dice and compare the results against the Minion Spawn possibilities on the deck card.
Minions
Minions are the lesser demons that serve the Abominations as part of their wave. Any incoming damage is first applied to Minions (unless otherwise noted) before being applied to their greater demonic masters. Minions are placed on the same field as their masters, and move with them as a single unit. There are three types of Minions, each providing a unique bonus to the entire wave. Minions cannot attack and each Minion has only 1 HP. If, for whatever reason, a demon wave consists of only Minions, the lesser demons flee the battlefield and their figures are removed from the board.
Artillery – A Minion that provides an additional die of support damage to its Abomination when they attack.
Assault – Quick Minions that grant 1 additional Speed to its Abomination.
Brute – A sturdy Minion able to take a beating. Brutes have 1 Armor and must be targeted first before any other demons.
Overlords
Overlords are greater demons who serve as the lieutenants and generals of the demon armies. Defeating an Overlord is an impressive feat and doing so heralds the impending conclusion of a Tier. Just like Abominations, each Overlord has a separate card for each Tier, increasing in power as the game progresses.
On the round after the last Abominations are spawned, the Overlord spawns on Spawn Point 1. Place its card next to the Abomination stat cards and its miniature on the board. Overlords spawn without minions; their power is more than enough to challenge the heroes. Killing a Tier 1 Overlord grants the slaying hero 1 Essence and 1 Ascension while killing a Tier 2 Overlord grants an additional Essence on top of the rewards for Tier 1.
Slaying an Overlord sends the remaining demons into a panic, causing them to flee back toward their Spawn Point. The Abominations and their minions may still be slain during this time, but any wave that reaches a Spawn Point is removed from the board, granting no Essence to the heroes. Once the last wave flees or falls, the Tier is won and the HP of the heroes and the church is restored.
Overlords can take more than one hit, so keep track of their current Health Points by placing damage tokens on their card. The tokens should also be used for tracking hero HP as well as the Health Points of the church (by placing the damage tokens inside the church in the center of the board).
Overlord Stat Card Reference
TIER: Identifies the relative power of the Overlord and which Tier they spawn in.
TYPE: The type of Overlord.
HEALTH POINTS (HP): How much damage an Overlord can withstand before dying. Once their HP reaches zero, they are slain.
ARMOR (AR): The demon's resistance to injury. The damage inflicted needs to exceed the Armor value to damage the Overlord.
SPEED (SP): How many fields the demon can travel when moving.
BASIC ATTACK: The Overlord's default weapon or method of inflicting damage. Its effectiveness is determined by these three statistics:
RANGE: The number of fields the demon can be from their target and still attack.
DICE: The number of dice rolled when the attack is used.
ACCURACY: The minimum number that must be rolled to successfully hit the target.
PASSIVE ABILITY: A special talent unique to the demon that is always active at no cost. If the Overlord does not have a Passive Ability, this section is filled with italicized flavor text.
Decks
Exploration
Heroes may spend 1 AP to explore a Ruin field they currently occupy. Doing so allows them to draw a card from the Exploration Deck which is fraught with both reward and peril. The Exploration Deck contains valuable consumables, Essence and Ascension, as well as traps and other undesirable encounters. When a hero explores a Ruin field, place an Exploration token on the field to identify it can no longer be explored. The ruins of the Whispers are always changing and when the heroes advance to a new Tier, all of the Exploration tokens should be removed so the Ruin fields can be explored once again. Also shuffle the Exploration Deck when advancing to a new Tier.
There are three types of cards in the Exploration Deck: Consumables, Empowerment, Encounters.
CONSUMABLES: Valuable items heroes may equip to provide special abilities or attacks. The exploring hero must have an empty slot available (or make one by discarding a card from a slot). Consumables are discarded after use and may only be used during the hero's activation.
EMPOWERMENT: While exploring, heroes may also find Essence and Ascension tokens they can use to upgrade their hero cards.
ENCOUNTERS: Potentially dangerous encounters that can affect the heroes, the demons and even the church in a variety of ways.
Events
Beginning with Tier 2, players will draw Event cards that can have a profound impact on both sides of the battle. There are two Event Decks in VoW: Darkness and Hope.
The Darkness Deck represents the ever-increasing peril the heroes face as the demon armies flood out from their citadel. The deck bolsters the demons in various ways, making their march to the Church of the Everlasting Covenant all the more ruthless and effective.
The Hope Deck represents the perseverance of the heroes and the rest of the Fateeran Militia. The deck provides reinforcements and other bonuses to the heroes to aid in their defense of the church.
Before spawning in Tier 2, draw one card each from the Hope and Darkness Decks. If the Hope Deck card has a special symbol, resolve the effects immediately and discard it. Otherwise the card's effects remain active for the entire round. The Darkness Deck card always persists until the beginning of the next round, when all Event cards are discarded and new ones drawn. Only one Event card is drawn in Tier 3, from the Darkness Deck, and it remains active for the entire Tier. No other Event cards will be drawn for the rest of the game.
Game Board
SPAWN POINTS: Numbered fields that Abominations, Overlords, and Minions use to enter the board. Heroes may not enter fields with a Spawn Point.
LANES: One of four paths leading from a Spawn Point to the church in the center of the game board. After leaving the Spawn Point, lanes are the only fields demons may occupy. Heroes may not enter a lane field but may have skills or abilities that allow them to bypass the field entirely.
CHURCH: The Church of the Everlasting Covenant is located in the center of the game board. Its entire 2x2 area is considered a single field and may be occupied by all heroes simultaneously. The church has 10 HP and, if destroyed, the game is lost. Any damage applied to the church in one Tier is removed before the beginning of the next.
Heroes may not attack or use skills within the church, only move. The church does not block line of sight but, unlike movement, you must use the fields around it to establish range. Players may use Leap and other skills and abilities to enter the church. A hero may also spend 1 Essence and 1 AP while inside the church to revive a slain hero. A revived hero may activate immediately if they have not already activated this round.
RUINS: The remaining fields on the board, Ruin fields are used by the heroes as they attempt to defend the church. There are a total of 40 Ruin fields in all, each of which may be explored by a hero to draw a card from the Exploration Deck to find Essence, consumables or hidden perils. Once a Ruin field is explored, place an Exploration token on it to show its secrets have been revealed.
There's always a chance something was missed, so at the end of each Tier remove the tokens so the Ruin fields may be searched once again. Exploring costs 1 AP and any consumables found may be immediately equipped or discarded. The hero may also discard an equipped consumable if both of their slots are already full.
Playing the Game
Attacking
Every offensive action, whether it is from a Basic Attack, skill, or consumable has three default statistics: Range, Dice, and Accuracy.
To make an attack, roll the number of Dice listed and count the number of dice rolled that met or exceeded the attack's Accuracy. Each of those successful rolls represents potential damage that is applied to the target field. Damage is applied to demons one by one in a specific order until the wave is wiped out or there is no damage left to assign. Generally, Minions must be attacked first, followed by Abominations and Overlords:
- Brute Minions
- Other Minions
- Abominations/Overlords
When demons attack, they must target the church, if it is in range. Barring that, they must target the hero within range with the highest Health Points. If more than one hero in range has the same HP, players may use dice to determine the demon's unlucky target.
Collateral Damage
Most attacks technically target the field itself before a specific miniature within it. A field without miniatures may still be the target of an attack as long as the attack would result in hitting an opposing miniature (such as with area of effect attacks). Heroes cannot damage the church nor can they, or demons, damage their allies unless otherwise noted.
Establishing Range
To determine if an attacker's target is in range, simply take the range value of the attack and count that many fields from the attacker to the intended target field not including the field the attacker occupies. If the number of fields exceeds the range of the attack, the attacker must move or select a different target. Range cannot be established with diagonals but is not obstructed by miniatures. The church cannot be used when counting fields to establish range.
For example: SGT. Specks is ready to do his part to defend the church against the demon onslaught. His Basic Attack has a Range of 2, allowing him to target either of the Abominations labeled with an "A." Wave "B" is 3 fields away, out of reach of his Basic Attack but in perfect range to be hit by Specks' Guided Missile skill as it has no required range. Guided Missile can attack any lane field on the map, so it could also be used to attack wave "C." Finally, SGT. Specks could chose to use his Rocket Barrage skill to target the field between the two "A" waves, thereby attacking both with its splash damage.
Inflicting Damage
Heroes, Overlords, and the church have Health Points to determine how much damage must be inflicted before they are slain or destroyed. Heroes and Overlords have their HP listed on their cards, while the church's Health Points are printed on the game board itself. All Abominations and Minions have 1 HP, so receiving any damage removes them from play. Rolls equal to or higher than the attack's Accuracy are applied to the defending miniature immediately unless they have Armor or some other relevant skill or ability. Each point of Armor reduces the incoming damage by one and if the damage from the attack does not exceed the target's Armor, it does no damage at all.
Any damage that is applied either slays the Minion or Abomination, or applies one damage token to the target. If an Overlord or hero has damage tokens equal to or greater than their HP, they are slain. If the church has 10 or more damage tokens, it is destroyed and the players lose. Keep the tokens on the injured miniature's card for easy reference (or on the center of the board in the case of the church). Slain miniatures should be removed from the board, either returned to their respective demon pile or placed on their character card in the case of heroes. Slaying an Abomination awards 1 Essence while slaying an Overlord awards either 1 Essence and an Ascension token (for Tier 1) or 2 Essence and an Ascension token (for Tier 2).
Tiers, Rounds, & Phases
Vanguard of War is played across one or more Tiers, each consisting of 8 rounds. Each round is split into three sections: Spawning, Onslaught, and Defense.
Spawning occurs at the beginning of each round. Players draw 3 cards from the Abomination Deck and spawn the demons as explained above.
Onslaught is performed after all demons have been spawned. Each demon wave will attempt to move and attack starting with the demon wave closest to the church in the same lane as Spawn Point 1. Each demon wave behind the first attempts to move and attack until there are no more demon waves to activate in the lane. The process is repeated for the lane connected to Spawn Point 2 and so on until all demon waves have activated. Demons always attack the church first, if they are able, followed by heroes with the highest HP. If there are multiple players, they should coordinate so that a player isn't rolling to attack their own hero. In Tier 2, Spawning begins every round with drawing an Event card from each of the two Event Decks (discarding any Event cards from the previous round). In Tier 3, you will draw one card in the first round from the Darkness Event Deck and use it for the rest of the game.
During Defense the heroes activate one by one, moving and then expending their AP. Heroes may use as much or as little of their Speed as they wish, but as soon as they use any Action Points, their Move phase is over. Heroes may still move by spending 1 AP for each field they wish to move. Heroes can also spend their Action Points to explore a Ruin field, attack, or use skills or consumables.
Victory is achieved by the heroes slaying the Overlord in the highest Tier the players have chosen to fight. Players lose the game if the church receives 10 damage in a single Tier or all heroes are slain, leaving none to revive.
Hard Mode
Looking for an even greater challenge? Try your hand at Vanguard of War's Hard Mode. Hard Mode only affects Tiers 2 and 3. Do not draw any Hope Deck cards in Tier 2 and draw a new Darkness Deck card every round in Tier 3. Discard the event card when you draw the new one each round. This is in addition to drawing one Darkness card that lasts the entirety of Tier 3.
Saving Your Game
If you're short on time, you can save your progress at the end of Tier 1 or 2 by using the save game sheets provided on our website. Simply record your heroes' items and progress and you'll be able to pick up where you left off at a later date. Be sure to leave one sheet blank so you can make additional copies as needed. The save game sheet is available in the Downloads section of www.archon-studio.com.
Gameplay Outline
VoW in One Page
This outline begins after initial setup and requires a basic understanding of the game. A game of VoW is played across three "Tiers" beginning with Tier 1 (T1). Follow the instructions below using only the steps for the current Tier you are playing. At the beginning of the game, players may decide to play fewer than three Tiers for a shorter gameplay session.
Spawning
T1-T2: If the Overlord for this Tier has been slain, all demon waves move their full Speed toward their lane's Spawn Point without attacking, beginning with the wave closest to Spawn Point 1. If a wave reaches its Spawn Point, remove it from the board. Skip the rest of the steps listed under Spawning until the next Tier.
T2: Discard any Event cards in play.
T2: Draw/Resolve 1 Hope and 1 Darkness Deck card. Hard Mode: Don't Draw/Resolve a Hope card.
T3: Draw 1 Darkness Deck card that remains for the entire Tier (do not repeat this step every round). Hard Mode: Perform the two Tier 2 steps above every round, including the Hard Mode addition, but do not discard the Darkness card you drew during this step.
T1-3: Draw 1 Abomination Deck card and spawn the demon and its Minions. If there was only one card remaining (the Overlord) or no cards to draw at all, skip the next step and move to Onslaught.
T1-3: Repeat the previous step two more times.
Each hero may only activate once per round. A hero must stop movement as soon as they use AP, sacrificing any unused Speed. AP cost for skills is listed on the hero's card. All other actions cost 1 AP (in the case of additional movement, 1 AP per field). Players may use 7 Essence and 1 Ascension to upgrade one of their hero's cards.
Onslaught
T1-3: Move then attack with each demon wave in Spawn Point 1's lane, beginning with the demon wave closest to the church.
T1-3: Repeat the previous step for the lanes belonging to Spawn Points 2, 3, and 4. Demons always attack if they are able, prioritizing the church first, then the hero with the highest HP. Demon waves that reach a field occupied by another wave will push that wave forward if the pushing wave still has Speed remaining. A wave adjacent to the church cannot be pushed.
T1-3: If the church sustains damage equal to or greater than its HP, the game ends immediately and the players lose.
Defense
T1-3: Activate each hero one at a time in any order. Heroes move first at the cost of one field per Speed. Heroes may then spend AP to move again, make Basic Attacks, explore, use skills, trade consumables (excluding class-specific) or revive a player at the church.
T1-3: Players may use 7 Essence and 1 Ascension to upgrade one of their hero's cards. This can be done at any time during Defense, regardless of whether or not the hero activated this round.
T1-3: If a hero slays an Overlord in Tier 3 or the last Tier players chose to play at the beginning of the game, the game immediately ends and the players win!
T1-2: If the Overlord for this Tier has been slain, and there are no demons left on the board, return all of the heroes to the church and give them their class-specific consumable (if desired). Remove all damage from the church and heroes as well as Exploration and other tokens from the board. Remove all Event cards and reshuffle all decks. Place the Overlord stat card for the next Tier underneath the shuffled Abomination Deck. Advance to the next Tier.
Demon Slaying Rewards:
- T1-T3 Abominations: 1 Essence
- T1 Overlord: 1 Essence & 1 Ascension
- T2 Overlord: 2 Essence & 1 Ascension
Hero Stories
Lord Visserite
Auric Visserite was but a boy when the demons invaded Fateera. He spent every day of the final siege at his window, eagerly watching the fires burn in the distance below. The Visserite estate rests on a plateau in the Edgefen, on the eastern side of the capital, far enough away that the young boy could only assume what carnage befell the gates. He imagined his father on the wall, wielding his mighty hammer, felling a dozen demons with every swing. He couldn't wait to hear the tales of the battle, his reward for helping polish his father's armor. The battle lasted for three days, and in the end, Lord Visserite never returned from the wall. Auric became a man, and lord, when his father's hammer returned to him, a weapon so heavy he could not lift it. He swore not an oath of vengeance that day, but of determination. His father had given his life to save the nation he loved and Auric would do no less. He trained relentlessly for the 20 years the demons remained silent and was the first to volunteer to aid the militia in their quest to steal the artifact. After the loss of Captain Makhaira, it was Lord Auric Visserite who led the survivors out of the demon's citadel and back into the Whispers.
Lt. Xik'krik
When the demons sacked Aurvelle, it was not long before they reached the tunnels that served as the Vicar's hive. At first, the Royal Guard used the unique structure of their home to engage the enemy on their terms. Sadly, the demon's numbers were too great. A small squad of the guard tried to lead the queen and whatever workers they could find to safety, but they were ambushed by Felstrafers. When the last of the Royal Guard fell, the workers did what they were bred to do; they took up arms and filled the void in their hive. Led by Xik'krik, one of the queen's attendants, they finished off the remaining demons and escaped the hive, collapsing the tunnels behind them. They journeyed east, to Fateera, but their respite was brief. The demons attacked the city in full force, and Xik'krik and the new Royal Guard manned the wall with the militia, their blades singing the song of their loss with every strike. After the battle, Xik'krik was given the honorary title of Lieutenant in the militia and he has led his people in building a new hive inside the plateau of Edgefen. When the council ordered the militia to invade the Whispers, Xik'krik joined them. For the survival of his queen and his people, he will see to it that the demon threat ends.
Sgt. Specks
SGT. Sebastian Specks has spent his entire life either serving in the Fateeran militia or simply trying to get in. When he first attempted to enlist, he was denied access to the militia's Mechanized branch due to his height. Undaunted, he declined a desk position and began working for Zavos Arms, the militia's primary supplier of Tactical Engagement Suits (TES). He manned the manufacturing line for two years before working his way up through management and eventually to design. His TES plans created some of the most impressive mechs Zavos had ever offered, but his heart yearned for military service. He spent his nights designing a custom ZX-42 suit he dubbed the "ZX-35," the numerical difference being a nod to the number of inches short he was to serve. When the demons invaded Fateera, Sebastian engaged them after the wall fell, decimating their frontline and giving the militia survivors a chance to retreat further into the city. He reenlisted after the battle, with men and women lining up to serve under him despite his initial rank. When news of the artifact spread, the militia was mobilized yet again, SGT. Specks among them. Captain Makhaira personally requested he be part of her platoon, ensuring he'd have a front seat to the end of the world. Though her loss, and the loss of so many others, weighs on Sebastian's mind, as his ionic cannons rain destruction down upon the demons, he couldn't be happier.
Ashira
Ashira was dropped on the doorstep of the Tower of Bel when she was three. Her parents took issue with lightning storms accompanying her temper tantrums and their fear eventually outweighed their love. Their loss was Bel's gain as the young girl quickly took to her training and eventually became an accomplished apprentice. On an excursion to the Lamori Mines she discovered an artifact long lost to the Sorcerers of Bel, the Eye of Vyr. The weapon immediately bonded with her and while it was a formidable staff, it also granted her the gift of sight. Ashira began to have visions of another tower from the one she called home. She dreamed of this black citadel that smelled of brimstone and was infested with demons. Inside she saw an object of immense power, phasing in and out of existence, changing shape and size as she watched it until it became so hot and bright it consumed the world. Ashira informed the high council of her visions and she learned she was not alone. Fateera was informed and soon Ashira and other Sorcerers of Bel were travelling with the militia to the ruins of Aurvelle. No matter how hard she tried, she could not see what awaited them in that city of the dead, only that the demon's weapon was there for the taking, for the salvation or doom of them all.