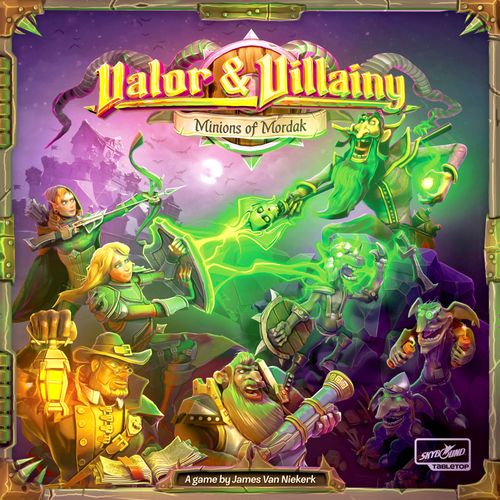
Valor & Villainy: Minions of Mordak
Valor & Villainy: Minions of Mordak Rulebook
Table of Contents
Table of Contents
- Choosing Characters
- Game Components
- Table Setup
- Character Setup
- Sequence of Play
- Hero & Villain Rounds
- Move Actions
- Action Rolls
- Melee Rolls
- Plus-One Tokens
- Ranged Rolls
- Corruption Rolls
- Magic Rolls
- Additional Actions
- Finishing a Round
- Minion Step (Villain Only)
- Level Up Step
- Gaining Level Ups
- The Final Battle
- Special Abilities
- Game Terms
- Additional Rules
- Clarifications & FAQ
- The Minion Factions
- Quick Reference
Choosing Characters
In Minions of Mordak, one Player will choose to play as Mordak. They alone make up the Villain Team, and will control the Evil Wizard Mordak and his Minions. The other Players will choose to play as one of the Heroes of 'The Order without Borders', who together make up the Hero Team.
Hero Objectives
The Heroes must balance exploration and damage control, searching the Map for Mordak's 3 Ancient Shrines of Power whilst keeping his Minions at bay. Should Mordak's Procession of Horrors reach the sixth day, the Villain shall return to face them in a Final Battle! Each Shrine will weaken the Villain, and finding all 3 will begin the Final Battle before the Villain can reach full strength. To win the game, the Heroes must Defeat the Villain in this Final Battle by reducing them to 0 Health.
Villain Objectives
The Villain must operate from within hiding, summoning, prodding and manipulating Minions and casting Spells to realize their evil vision! They must focus on Defeating Heroes by reducing them to 0 Health using any tool they can. For each Hero they Defeat, the Villain gains Health and Experience Points, which they will be able to use to significantly improve their powers! To win the Game, the Villain must be mighty enough to Defeat 3 of the Heroes during the Final Battle.
For First Time Players, the Player with the most familiarity with the rules should play as the Villain. If you are new, it will be the easiest to learn with a Character which has no Magic dice. (Such as the Rogue)
If you sleeve your game, sizes are as follows: 75 x (57.5mm x 89mm), 155 x (41mm x 63mm). For best fit, we recommend Mayday Games 100 packs.
Game Components
- A 9 Hero / Villain Character boards
- B 9 Hero / Villain standees
- 7 Standee bases
- C 1 Procession of Horrors board
- D 1 Initiative token
The Player to the left of the Villain starts the game with the Initiative token, indicating they'll act first in Turn order. At the end of each Round of play, it is passed clockwise to the next Hero Player.
- E 2 Defender markers
Spells
- F 32 Blue Arcane Spell cards (attacks & tricks)
- G 32 Gold Divine Spell cards (support & healing)
- H 46 Purple Void Spell cards (mayhem & ruin)
Minions
- I 35 Chump Minion cards + cover card (Size: 1)
- J 12 Elite Minion cards + cover card (Size: 2)
- K 9 Boss Minion cards + cover card (Size: 3)
Minions are enemies which have all of their stats included on their card. These cards are moved on the Map to keep track of each Minion's location. There are 3 Sizes of Minions, indicated by the size symbols on their card (I). Separate these into 3 piles, shuffle them and place their corresponding cover card atop each pile. (Note: These decks use double-sided cards, so Players must draw from the bottom of these decks.)
- L 45 Treasure cards
- M 1 Gust Van Sant card
Action Dice
- N 6 Novice Action dice (white)
- O 6 Adept Action dice (yellow)
- P 6 Master Action dice (red)
Map Region Tiles
- Q 5 Double-Sided Hawkemoor Region tiles
- R 10 Tier I Region tiles
- S 13 Tier II Region tiles
- T 7 Tier III Region tiles
The Map is comprised of Region tiles, which represent Regions of the kingdom. There are 3 Region Tiers, and 1 set of Hawkemoor Regions (which are the same on both sides, except for Hawkemoor Keep, which has ruins on the back).
- U 3 Loot Stash cards
Treasures, Minions, and Heroes that are Defeated by the active Player(s) are placed on their Loot Stash card. As the active Player(s) end their Round, they'll cash in the cards from their Loot Stash and gain Experience Points | XP to spend on Level Ups.
- V 12 Quick-Rules Aid cards
Each Player receives a Game Rules card for convenient use as rule references. Each Hero receives a Hero Round card, and the Villain receives the Villain Round card.
Tokens
- 14 Health (HP) / Action markers
- 54 Novice dice tokens (white)
- 84 Adept / Master dice tokens (yellow / red)
- 30 XP tokens
- 30 Plus-One tokens
- 3 Soul tokens
- 5 Dojo Crystal tokens
- 2 Labyrinth markers
- 5 Woeful Sheep tokens
Table Setup
For 3-5 Heroes + 1 Villain
- Collect the 5 double-sided Hawkemoor Region tiles
- Collect 8 random Tier I Regions
- Collect the Shrine of Bronco, Elven Dojo & 6 random Tier II Regions (Exclude the Shrine tiles marked 1-2 Hero)
- Collect the Shrine of Luna, Shrine of Asha & 2 random Tier III Regions
For 1-2 Heroes + 1 Villain
- Collect the 5 double-sided Hawkemoor Region tiles
- Collect 8 random Tier I Regions
- Collect the 1-2 Hero Shrine of Luna & Asha Regions, the Shrine of Bronco, Elven Dojo, & 4 random Tier II Regions
- Tier III will not be used
Setup Steps
- Shuffle the Region tiles & decks. Set up as shown in the rulebook diagram
- Place the chosen Hero's standees on Hawkemoor Keep
- Place Mordak's standee on the "Start" space of the Procession of Horrors board
- Spawn 1 Chump Minion (or 2, in a 4+ Hero game) on the Mountain above Hawkemoor Keep
- In a 1-2 Hero game: Set up the Map as shown (right)
- In a 1 Hero game: The Hero gains Clyde the Horse from the Treasure deck to start the game
Character Setup
Player Characters
Each Player's chosen Character has a Character board, where they manage their stats and Level Ups, and a Character standee to indicate their location on the Map.
- A Each Hero places a Health marker at the top of their Health bar.
- B The Villain places a Health marker on their starting Health according to the Hero Count Icon. (This refers to the number of Heroes in the game, not Players. See P.9)
- C Place a Plus-One token on your Power Action. (Which is the row on your board with a symbol on it)
- D Place an Action marker on bottom of the Action bar, showing the Hero's available Action Points each Turn.
- E Characters have Unique Abilities. If your Character starts with Spells in their Hand, draw those Spells.
Procession of Horrors
This is the 6 day timer the Heroes must race against to find the 3 Shrines. As the Villain finishes their Rounds, they will advance their standee 1 day along the track (F) and complete the steps outlined on the track row. (The icons on the right indicate that the Villain may Spawn additional Minions according to Hero count.)
Once they reach the track end, the Villain must flip the Procession of Horrors over at the start of their following Round. Then they must read aloud the instructions on its back in order to place themselves on the Map and commence the Final Battle against the Heroes to determine the winner!
**If Heroes locate all 3 Shrines, the Procession of Horrors skips to the end of the track. Nothing happens immediately, but this means that the Villain will enter the Map at the start of the upcoming Villain Round.
Sequence of Play
Gameplay goes in Rounds. Hero Round / Villain Round / Hero / Villain, and so on.
- The Hero Round is where all Heroes will take their Turns, starting with the Hero holding the Initiative token, and then proceeding clockwise around the table.
- The Villain Round is where the Villain will take their Turn, performing their Actions, and then proceed to act with every Minion that is currently on the Map in a Minion Step to follow.
As either Round ends, the Level Up Step occurs, where the acting Players may Equip Treasures and spend Experience Points / XP they earned during the Round on Level Ups for their Character!
Hero & Villain Rounds
As the Hero Round Begins, the Hero with the Initiative token will take the first Turn. As they complete their Turn, the next clockwise Hero at the table acts, until every Hero has acted. In the Villain's case, they will act alone. Since they do not have a Character standee on the Map, they will be more limited in their Actions.
Every Character has a number of Action Points listed on their board which they'll spend on their Turn to do a number of things in any order they wish.
Action Overview
- Move: 1 Action, Allows you to Move your Character around the Map. (See Below)
- Melee: 1 Action, Allows you to attack enemies in your Region. (P.6) — Each Once/Turn
- Ranged: 1 Action, Allows you to attack enemies in an adjacent Region. (P.7) — Each Once/Turn
- Magic: 1 Action, Allows you to cast any number of Spells from your Hand. (P.8) — Each Once/Turn
- Corruption: 1 Action, Allows the Villain to Spawn Minions onto the Map. (P.7) — Each Once/Turn
- Power Surge: 1 Action, Allows you to draw 2 new Spells. (P.10)
- Scout: Free Action. Allows Heroes to Turn all adjacent Regions face-up. (P.9)
- Looting: Free Action. Allows you to collect undefended Treasures in their Region. (P.10)
The first Player only can choose to pass their Turn clockwise by flipping the Initiative token to indicate they have instead opted to go last this Round.
Move Actions
Any Character can perform a Move Action by spending 1 of their available Action Points. Each Move Action allows them to make up to 3 orthogonal steps (not diagonal) onto adjacent non-Mountain Region tiles, OR 1 step onto a Mountain tile. A Character cannot enter a Region that has not first been revealed (See Scouting P.9), and they cannot leave a Region with enemies in it. The Villain cannot perform Move Actions at all, until the Final Battle. (See P.13)
Unlike most other Actions, Move Actions can be performed multiple times a Turn. Once it's begun, a Move must be ended before an Action can be spent to do anything else. Since Scouting and Looting are free, they can be done in the middle of a Move Action, without ending your Move, (Except if you are Ambushed, see P.9)
(Example: Gwen Spends 1 Move Action, steps 2 Regions over and must stop because she is now in a Region with an enemy and cannot leave it.)
Region Defenders
As Characters Move across the Map, Hero standees are placed on the left side of a Region tile, and Minions are placed in a stack on the right. The first time each Round that a Region with multiple Characters in it is attacked, a Defender must be chosen there to take the brunt of the attacks for that entire Round.
- For Heroes, this is denoted by placing the Defender marker beneath their figure.
- For Minions, the top Minion of the stack is automatically chosen as the Defender. (Cowardly Mordak is considered to be at the bottom of any Minion stack he's a part of)
Attacks targeting a Region must always damage the Defender there. If they're Defeated or somehow forced to leave the Region they are defending, a new Defender must be chosen immediately and will take any remaining damage. (For Minions, this is the next one down the stack) Every Level Up Step, Defender markers are cleared from the Heroes. During the subsequent Round, new Defender markers will be assigned as attacks occur.
As Minions move into a Region, the last one to enter will lay on top of the stack as Defender. During the Villain's Level Up Steps only, they may choose to re-order stacks of Minions as they see fit.
Action Rolls
In addition to Movement, there are 4 types of Action Rolls that Characters can perform. They are: Melee, Ranged, Magic, and Corruption.
A Character may make an Action Roll of each type once per Turn by spending one of their Action Points. Each row on their board represents their skill at each Action type, indicating the number of Novice, Adept and Master Action dice they get to roll when taking that type of Action.
Making an Action Roll begins with gathering all of your Action dice (and Bonus dice if applicable [P.11]), rolling them and totalling the Hits shown on their faces as a Hit Pool. After your roll is made, you may then decide how you wish to spend those generated Hits. You do not need to declare your intention before rolling the dice.
You will then spend the Hits you generated differently depending on the type of Action Roll...
(Example: Bjorn spends 1 Action to Move onto a Mountain with a Minion and his second Action to make a Roll. He scores 5 Hits, and spends 2 Hits to Defeat the Minion outright, 2 Hits to buy a Plus-One token and the remaining 1 Hit cannot be used.)
Melee Rolls
After generating your Hit Pool during a Melee Action, you can then target the enemy Defending Character in your Region and spend Hits from your pool to deal them damage. If your damage is enough to Defeat them, and there are other enemies in the Region, you may spend any remaining Hits to continue assigning damage down to other Characters until you run out or choose to stop (detailed below).
Damaging Minions
Minions have a Fresh and Wounded side. When first deployed, they are always laid Fresh side up.
In order to harm a Minion:
- You must deal them damage equal to their top Health to Defeat them outright
- Or their bottom Health to flip them over and Wound them
- Damage that does not meet either of these values will have no effect on the Minion and is never retained for future attacks.
(Note: Healing has no effect on Minions.)
Defeated Minions are placed on the Hero Loot Stash (even if the Villain Defeated them) to be cashed in during the Hero's ensuing Level Up Step.
Damaging Players
The Heroes track damage a little differently. Every point of damage dealt to them is recorded by moving a Health marker down their Health bar. The number the marker highlights indicates their current Health. When a Hero is reduced to 0 Health, they are knocked out and Defeated.
Defeated Heroes must place their standee on the Villain Loot Stash to be cashed in during the Villain's ensuing Level Up Step. If they were Defeated in their own Turn, their Turn ends. Once the Hero has been cashed in by the Villain, they are rushed to Hawkemoor Keep for aid. Place them in the Hawkemoor Keep Region (Or Ruins of the Throne, in the Final Battle) and restore them to max Health. Heroes don't lose anything for Defeat, however, the Villain gains a lot of power, so Heroes should avoid Defeat at all costs.
(Note: If a Hero's Turn begins while they are in the Loot Stash, the Villain replaces them with an unused standee to mark their reward, and the Hero is returned to the Map to take their Turn. While in a Loot Stash, Defeated Heroes can't use Spells, abilities, Plus-One tokens, or swap Treasures.)
The Villain tracks damage like Heroes, except their Health bar only retains damage in increments of 5. Therefore any damage dealt to them that is in increments less than 5 will have no effect. (Note: It is possible for the Villain to go above their starting Health, though they can never exceed 100 Health.)
Plus-One Tokens
During an Action Roll of any type, the roller may spend 2 of their generated Hits to gain a Plus-One token & place it on the slot of the Action type being rolled (IE Hits spent during a Melee roll, buy Plus-Ones for the Melee row). These are like stored up Hits. During future Action Rolls, the roller can spend Plus-One's from the row being rolled to add +1 to the Hits they generate per token spent! These can be spent after seeing the result of the roll.
A Player may spend as many Hits as they wish to gain Plus-One's, and can stack multiple tokens on a single row, though they cannot possess more than 4 Plus-One's collectively at one time. (If they would gain a fifth, they may choose to discard another to make space for it).
A Player can make an Action Roll for no other purpose but to gain Plus-One's! For example, they could roll their Melee dice with no enemy in their Region just to store some Plus-One's up for later.
(Note: Until the Final Battle, the Villain is not on the Map and not adjacent to their enemies. Though they can perform Melee & Ranged Actions, they can only use them to gain Plus-One's in order to assist Minions via their Schemy Meddling ability.)
(Minions can never gain Plus-One's.)
Ranged Rolls
Ranged Action Rolls work the same as Melee, with the exception being that you can choose one of the 4 Regions adjacent to your own as the target of your attack, and you may never target your own Region. After choosing your target tile, everything else proceeds exactly the same as a Melee Action.
(Example: Gwen makes a Ranged Roll and scores 6. She'd have just enough to Defeat the Swiftwing on her tile, but cannot target her own Region. She chooses a nearby Region as her target, and uses 2 Hits to Defeat the Gladestalker there and buys 2 Plus-One tokens with the remaining 4 Hits, since she cannot spread damage across multiple Regions.)
Corruption Rolls
Corruption is a Villain-only Action that can be used to manipulate the scattered factions of Hawkemoor to do their bidding! During a Corruption Action, the Villain may spend a number of Hits indicated at the top of each Minion deck to Spawn a Minion from that deck as follows:
- Draw a Minion from the bottom of the appropriate Minion deck.
- Place it in any revealed Region that is adjacent to a face-down Region or along the Map's edge. Put it atop its stack (if any) on that tile. (Note: Placing a Minion, is not considered moving it)
They may continue to spend their Hits to Spawn Minions in this way until either they run out or choose to stop.
(Example: Mordak makes a Corruption Roll and scores a 4. He really wants an Elite Minion, so he spends a Plus-One token, turning his 4 into a 5, and then spends all 5 Hits to Spawn a new Elite Minion. He chooses a Region along the Map edge, and places it there.)
Magic Rolls
After generating your Hit Pool during a Magic Action, you may choose to spend your Hits to cast any number of Spells from your Hand for their cost (on the top right of the card). Once a Spell is cast, resolve its effects, then place it face up beside its Spell deck in a discard pile. Then you may continue spending Hits from your generated Pool or choose to stop. Once you do anything other than cast Spells you must end your Magic Action. So for example, you couldn't Move in between Spells. There are two types of Spells:
General Spells
These Spells look like scrolls and can only be cast during the controlling Player's Magic Action. Their effects will each be explained on the Spell card itself. Here are some example Spells:
Lay on Hands has multiple costs listed. This means you can choose which cost to pay, and then you use the corresponding value in the text below to resolve it. (In this case, if a Player spent 4 Magic Hits to pay for the Spell, they would roll 2 yellow Adept dice and total the result, then could heal any Character for that amount +3.)
Enormous Fist instructs you to attack a Region tile. Just like a Melee or Ranged attack, damage first targets the Defender & if they're Defeated can carry down a stack to potentially affect multiple enemies in the Region!
(Note that each Spell is a new attack. Multiple Spells from 1 Magic Action cannot stack damage together to meet a Minion's Defeat or Wound values.)
Reaction Spells
These Spells look like potions and have a lightning bolt above their title. They can only be cast at the time the Spell's text describes. This is often in response to something during another Player's Turn such as when you take damage or somebody begins their Actions.
Many Reaction Spells are 0 cost, so they can be cast for free (even if you have no Magic dice)! Some have a Plus-One token /OR Discard Spell as their cost. This means you must either spend a Plus-One token or discard a different card from your Hand in order to cast the Spell.
(Note: Heroes are not allowed to secretly show their Spells to one another. If they do, they must also show Mordak!)
(Example: Wugner makes a Magic Roll and scores 6. He then looks at his Spells and decides to cast Enormous Fist at its mid-level, spending all 6 Hits. He uses the Spell to perform an 8 damage attack in a nearby Region, dealing 6 damage to the top Minion, and the remaining 2 to the bottom one, Defeating them both!)
(Example: Amos makes a Magic Roll and scores 6. He then looks at his Spells and decides to spend 3 Hits to cast Lion's Roar at its low-level [giving himself 2 Plus-One tokens] and he ALSO spends 3 Hits to cast Soul Beam at low-level [healing himself for 3 + 1 because of Amos' Healer's Boon ability])
Additional Actions
Scouting (Heroes Only)
At any point during their Turn, a Hero Player (not a Villain or Minion) can choose to Scout adjacent Regions. This is free and will cost none of their Action Points to do. They must then flip ALL of the Region tiles adjacent to their Character (They cannot only choose to flip some). They will then populate the flipped tiles according to the symbols on their bottom left.
First, draw a Treasure for each Treasure symbol. Place them face-down on the right side of the tile. Starting largest to smallest, draw Minions for each Minion symbol and place them also on the right side of the tile (on top of the Treasure if applicable). These are laid down in the order they are drawn and cannot be rearranged by the Villain until their Level Up Step. (See P.11)
Some Regions (Such as the above example) have special rules written on them, which apply as soon as the Region is revealed, even if the tile is covered by Minions.
Hero Tip: Scouting can find good things for the Heroes, but it can also find Minions for the Villain to use! Heroes should avoid Scouting if their Round is about to end, or if they are overwhelmed with Minions already.
(Example: Mari Scouts and she must reveal both unrevealed Regions adjacent to her, tiles A & B. Her game has 2 Heroes in it, so she ignores all of the icons on tile A, [which would only be used with 4 Heroes in play]. She places 2 Treasures on tile B, with an Elite Minion on top.)
Hero Count Icons
If a Region has a Hero Count Icon next to one of its instructions, that instruction ONLY applies to games with the listed number of Heroes playing. (For example, 4+ means this only applies if your game has 4 or more Heroes in it, excluding the Villain)
Ambush Icons
Some Regions show Ambush icons, meaning the Scouter has been Ambushed! If the Scouter was in the midst of a Move Action, that Action is ended. Set the Ambushing Minions aside while you place down any others on the tile.
After resolving all other icons, the Villain Spawns each Ambushing Minion one by one in the Scouted Region. Then the Villain immediately takes a bonus Turn with each Ambusher, enacting their Actions (interrupting the Scouter's Turn). When the Ambush is resolved, the Scouter resumes their Turn with any of their remaining Action Points.
(Example: Scrutt Scouts as a free Action and reveals an Ambush! He must pause his Turn while Mordak takes a bonus Turn with the Ambushing Minion. Mordak chooses to ignore Scrutt and move to Range attack Alyndra, who is at low Health! When the Ambush finishes, Scrutt resumes his Turn with his remaining 2 Actions)
Looting! (Players Only)
When Scouting, some Regions will place Treasures on the Map. These are powerful weapons, armor, and items that Players can Equip and use! During their Turn, a Player (not a Minion) can Loot as a free Action to pick up any Treasures in their Region provided there are not also enemies there. These are placed face-down in the acting Player's Loot Stash to be revealed and Equipped in their ensuing Level Up Step. (See P.11) Although the Villain can pick up Treasures, they must be on the Map to do so. (See Final Battle P.13)
(Note: While Minions can't Scout or Loot under the Villain's control, if a Hero is controlling them [IE with a Spell], they can Scout and Loot as a Hero would.)
(Example: Scrutt performs a Move Action, he steps 1 Region over and Loots a Treasure there as a free Action [placing it face-down in his Stash]. He then continues the same Move Action onto an Enemy. He cannot Loot again, because this second Treasure is being defended.)
Power Surge (Players Only)
Once per Turn, any Player may spend 1 of their Action Points on a Power Surge to draw 2 Spells in any combination from their allowed Spell decks. Heroes are allowed to draw Blue Arcane or Gold Divine Spells. The Villain can only draw Purple Void Spells until the Final Battle, at which point they can draw from any Spell deck.
The Player must draw these Spells at once and can't look at one before deciding on the next.
Finishing a Round
During the Hero Round, when a Hero finishes acting, they will pass the Turn clockwise to the next Hero around the table. Once there are no remaining Heroes in the queue, they have finished acting and will proceed to their Level Up Step.
In the case of the Villain Round, once they have completed their Actions, they will first enact a Minion Step before proceeding to their Level Up Step.
Minion Step (Villain Only)
In this Step, The Villain will act with every Minion currently on the Map in any order, until each one has acted or passed its Turn. Every Minion may act once, even if it is covered by another Minion. During its Turn a Minion is placed on the top of any Stack it is a part of. Like Heroes, Minions have Action Points, Action dice & Abilities, which they use to navigate the Map, except:
- Minions cannot Scout, Loot, or Power Surge
- Minions cannot receive healing or gain Plus-One's
ENOUGH RULES! You are ready to play your first Round! Continue reading once the Heroes have completed their first Round and are ready for their Level Up Step.
Level Up Step
Now that you have completed your first Round, it is time to start the Level Up Step. This is the moment where Players do some housekeeping and can cash in Treasures and Defeated enemies for Experience Points (XP) to spend on Level Ups! Each Player from the active Team (Hero or Villain) should:
- Draw Spells, if their Character's Unique Abilities (P.4) instruct them to do so.
- Discard down to 6 Spells (the default Hand size), if they have more than 6 in their Hand.
- Clear Defender markers (See Defenders P.5)
- For the Hero's Step, they pass the Initiative token clockwise.
- For the Villain's Step, advance the Procession of Horrors and enact any effects specified. The Villain may reorder Minion Stacks as they wish.
Lastly, the active Players reveal each Treasure in their Loot Stash, and can Equip, trade, and return Treasures to and from the Stash however they like.
Treasures
Players have 3 slots along the bottom of their Character board, which can each hold 1 Treasure of the indicated type. To Equip a Treasure, a Player slides it under the slot on their board. If that slot is full, they may return a Treasure to their Loot Stash in order to Equip the new one.
There are three types of Treasures:
Offense Treasures have an Action type indicated on their card and only apply their bonuses during Action Rolls of that type. Offense Treasures (and also certain Spells & Abilities) provide Bonus dice, indicated by the dice symbol with the "+" on it. During the specified Action, the Player may add these Bonus dice to their Action Roll for free, along with any other dice they would normally roll. Bonus dice cannot be Leveled Up. If you require more dice than you have, remember the Hit total, and roll again as needed.
Defense Treasures and Items apply their bonuses constantly or as specified on the card. Some Items have one-use effects and then are discarded to the Treasure deck's discard pile.
With the Treasures now revealed, Players can freely Equip them from the Loot Stash, trade amongst each other, or return Treasures they no longer want to the Stash. (If Players can't agree who takes a Treasure, the Player with the Initiative token may decide.)
(A Treasure like Fabulous Riches can be traded in the Level Up Step, it can't give bonuses to multiple Heroes per Round.)
Gaining Level Ups
Once they've finished distributing Treasures, every Unequipped Treasure & Defeated Character left in the Stash must be cashed in for Experience Points (XP) and placed in their appropriate discard piles (or on Hawkemoor Keep in the case of a Hero).
The active Players add up the Bounty icons on the cards in the Loot Stash, then consult their Loot Stash card to determine how many XP each of the active Players receive this Turn.
(A Defeated Hero is always worth 3 Bounty.)
- A This means the Hero with Initiative rolls and each Hero receives the result as XP.
- B This means the Villain gains Health.
Each Player then simultaneously spends their XP how they like on Level Ups, for the costs specified below:
| Cost | Level Up |
|---|---|
| 1 XP | Gain a new White dice |
| 1 XP | Turn a White dice to Yellow |
| 1 XP | Turn a Yellow dice to Red |
| 3 XP | +1 Gain an Action Point |
(Or save an XP Token for later)
Dice Level Ups are tracked by placing Dice tokens over top of the existing dice icons on your Character board. Action Level Ups are tracked by moving the Action marker along your Action Bar at the right side of your board. This permanently increases the number of Actions you can take every Turn.
Any XP you don't spend is stored by placing XP tokens on your Character board to be spent in later Level Up Steps.
(For speed, Players should allow their opponents to begin their Round while they spend XP, as their Level Up choices will not affect the opponent's Turn.)
(Note: Some of the Loot Stash cards still have rewards even when the Hero or Villain did not gain any Bounty.)
The Villain & Heroes each use different Loot Stashes depending on the number of Heroes playing. Use the correct ones and return the others to the box.
Progressing the Game
Play continues in this way, Hero Round / Villain Round, back and forth, as the Procession of Horrors progresses towards its end, until finally the track's end is reached and the Final Battle for victory begins!
The Final Battle
As the game progresses, the track on the Procession of Horrors board advances. If all 3 Ancient Shrine tiles are revealed before the track has reached Day 6, it immediately skips to Day 6. (Ignoring any bonuses listed.)
Whenever the track has reached its end (either by time, or by Shrines), the Villain will flip the board over at the beginning of the next Villain Round, read the back to every Player and begin the Final Battle for victory.
(Example 1: The Villain completes a Round and moves the track to Day 6, Heroes will play 1 more Round, then Villain will be revealed as the next Villain Round begins.)
(Example 2: The Heroes find all 3 Shrines, the track skips to Day 6, the Heroes finish the current Round, and the Villain is revealed as the next Villain Round begins.)
*In every scenario, the Villain will get to play the first Round of the Final Battle.
Then, as Outlined on back of the Procession Board:
- Villain & Hero Loot Stashes are cashed out for rewards (if they have anything in them). Then Heroes & Villains spend their final Experience.
- From now on, during both Hero & Villain Level Up Steps, Bounty will no longer yield any Loot Stash rewards, (No XP, no Health). Though the Step still does occur for purposes of drawing Spells, equipping, etc.
- The Villain draws 2 bonus Blue Arcane Spells.
- From now on, the Villain's Master of Magic ability will draw Blue spells (instead of Purple). Their Power Surges may now draw Spells of any color.
- Flip over the Hawkemoor Keep Region & place Mordak on the Ruins of the Throne.
- Each Hero is invigorated, and gains +5 Health.
- From now on, Players cannot use Scout Actions.
- The Villain must now Defeat 3 more Heroes to win.
- When a Hero is Defeated during the Final Battle, they move to the Villain Stash, and later respawn as normal, however the Villain places 1 of 3 Soul tokens on the Procession of Horrors. The moment the Villain gains 3 Soul Tokens, they win (even if they are at 0 Health!)
- Heroes must now bring the Villain to 0 Health to win.
- Remember: Cowardly Mordak is considered to be at the bottom of any Minion stack in his Region. As well, Minion Steps still occur in the Final Battle, and each Minion will Act. So it will be a very difficult battle indeed, if the board is already full of Minions when Mordak arrives.
The Villain has emerged to confront the Heroes in a Final Battle. Aside from what is mentioned, all other play continues normally until somebody emerges the victor!
Special Abilities
Characters, Minions, Treasures, & Spells can have Special Abilities on them. These provide the bearer with some unique skills which they can use as defined below. Multiple different abilities can be used together, however gaining the same ability twice adds no benefit, (Always use the best bonus available.)
Area of Effect (AOE): Rather than targeting the Defender of a Region, an AOE attack must target everyone there instead! The damage must be dealt in full to everyone in the Region, friend or foe, though the Character causing AOE damage never damages themselves.
Armor: If they would take damage, a Character with Armor may prevent 1 of that damage.
Longshot: After generating Hits during a Ranged Action, an attacker with Longshot may reduce their Hits by 1 in order to choose any Region on the Map (aside from their own) as the location for their attack, rather than just adjacent Regions.
Boost: Characters with Boost may place 1 of their Action dice down on any face before making their Action Roll. If this dice is later re-rolled by an effect, that Boost is lost.
Cursed: Cursed Characters treat every Action dice on their Character board or card as Novice dice! (Bonus dice from weapons or abilities are unaffected.) While they are the Defender in their Region, everyone else on the tile is also Cursed! (Useful Tip: Cursed Minions always lose Cursed when flipped to their Wounded side.)
Dodge (X): After becoming the target of an attack, a Character with Dodge may roll the indicated dice (X) on the ability. For this attack, they may prevent incoming damage equal to the Hits they roll. After this roll, an attacker can decide not to spend Hits to damage the Dodger, though they cannot choose a new target. (Dodge does work against AOE attacks, it does not work against "pay Health" effects, as this is not damage.)
Evade: During their Move Actions, a Character with Evade can leave Region tiles containing enemies.
Regenerate: A Wounded Minion with this rule may roll at the start of their Turn. On a Hit they are flipped to their Fresh side before Acting, then Act as normal.
Game Terms
- Adjacent: Refers to the 4 Region tiles next to your own (excluding your tile & diagonals).
- Nearby: Refers to your own Region tile as well as the 4 tiles next to it (excluding diagonals).
- Turn: When any Character starts taking their Actions and finishes.
- Round: Refers to all of the Hero Turns & their Level Up Step, or the Villain's Turn, their Minion's Turns, and their Level Up Step. (See P.4)
- Character, Someone, Anyone: Refers to any Minion, Hero, or Villain in the game.
- Minion: Refers to any Character drawn from the Chump, Elite, or Boss decks.
- Paying Health: Some Spells & Map effects cause Players to pay their Health. This is a cost, not "damage". It must be paid in full and cannot be prevented by items or abilities. Players can Defeat themselves by paying this cost, however they can never pay more Health than they have.
Additional Rules
Unique Ability Upgrades
Every Hero Character has Unique Abilities listed on their Character board (See P.4). For each Hero, this Ability can be upgraded by locating the Elven Dojo Region tile in Tier II of the Map. A Hero can upgrade their Unique Ability for free, if they are in this Region during the Hero Level Up Step, and no enemies are present. They mark this by placing a Dojo Crystal on the slot beside the power and gain the benefit listed. Prior to gaining this Crystal, the Unique Ability is not in effect.
Adding Players
If a new Player arrives and wants to join. No problem!
- The Player chooses an available Hero, then spends 3 XP for each day the Procession of Horrors has advanced.
- Exchange the Loot Stash cards with ones reflecting the adjusted Hero Count.
- As the next Hero Round begins, place the new Hero on Hawkemoor Keep and continue play as normal.
- Finally, the Villain consults their bar and adjusts their current Health to reflect the new Player count. (Accounting for any gains or losses their Health may have undertaken thus far in the game)
If this pushes the Player count from 2 to 3 Heroes, add the Tier III Shrine of Asha tile and 3 other non-Shrine Tier III tiles to the Map as depicted in 3+ Hero setup (P.3). In this unique case, Heroes must now find 4 Shrines (instead of 3) to force the Procession of Horrors to the end of the track.
Removing Players
In the case where a Hero Player has to leave:
- Remove their Character standee from the Map at the start of the next Level Up Step (Hero or Villain)
- Place their Treasures in the Hero Loot Stash & exchange the Loot Stash cards with ones reflecting the adjusted Hero Count.
- The Villain adjusts Health to reflect the new Player count (as above).
If this pushes the Player count from 3 to 2 Heroes, remove any face-down Tier III Regions from the Map. Finding all the Shrines will no longer force the Procession of Horrors to the end of the track (P.4). Instead, the track skips to its end if the Heroes fully reveal the Map.
Discard Piles
As cards from any deck are spent, they are placed face-up beside their deck to form a discard pile. Should any of these decks run out, they are shuffled and set up again as a draw pile.
Rerolls
Rerolls allow you to take dice from a roll and roll them again. The new result now stands. Sometimes, stacking effects can cause a dice to be rerolled multiple times. In such cases, the order of the rerolls occur as follows:
- Base Action Roll
- Treasure Rerolls
- Friendly Spell Rerolls
- Enemy Spell Rerolls
Reactions
Many Reaction Spells are cast as someone begins their Actions. This is done once a Player takes their Character and is about to act with it. Once the Reaction is played the Player must continue that Action, and cannot change their mind in response.
Sometimes multiple Players will react to the same thing happening. In this case the acting Player first reveals their Reactions, then friendly Players, then Opponents. It's best to declare "I want to react to this" without revealing your play in order to give the current Player's side an opportunity to react. After the acting Player has revealed their Reactions, Opponents may still choose to react or not (even if they'd previously declared they would).
If Opponents reveal a Reaction without giving the acting Player a chance to react, they forfeit their advantage, and acting Players may choose to react or not.
Shadow Mordak
Shadow Mordak is a Minion that can cast Spells! He can't gain or use Plus-One's or conduct Power Surges; however, any Spell in his Controller's Hand is at his disposal to Cast using the Magic Hits he generates.
Woeful Sheep tokens
Sheep tokens are Minions considered to be one size smaller than Chump Minions (Size: 0). They are created by specific spells, and have 1 Health, no dice, and are always the Defender of their Region. They are not worth any Bounty or XP and serve only as a nuisance to the Heroes by blocking Movement.
Deluxe Game Components
Miniatures were available to supporters who purchased the Kickstarter exclusive, "Deluxe" version of the game. Miniatures behave exactly like the standees. Chesty Laroo is a fun storage box to replace the Hero Loot Stash card. It adds stylish fun but no additional rules.
Clarifications & FAQ
Hero Abilities
Alyndra - Pyromaniac: When Alyndra casts a Spell which would deal damage, add +1 to that damage (or +2 if upgraded). In the case of Lightning Surge, for example, this could allow it to go above its normal max 12 damage.
Bjorn - Dwarven Ire: Whenever Bjorn's Health is below 11 (IE at 10 or less Health), he gets to add a bonus Yellow dice (or Red if upgraded) to all of his Action Rolls for free, in additional to any of his other dice.
Scrutt - Battle Rage: As Scrutt ends any of his Action Rolls (Melee / Ranged / Magic) and one or more Characters (Minions / Heroes / Villains) were Defeated during the Roll, he may gain 1 Plus-One on his Melee row for free (and also +2 Health if upgraded). He only gains 1 token per Roll, even if 5 Characters were Defeated.
Loxley - Cloak & Dagger: During any of her Action Rolls, Loxley may buy Plus-One tokens at the cost of 1 Hit per token (as opposed to the usual 2). If upgraded, she can carry up to 8 Plus-One tokens collectively across her board (as opposed to the usual 4).
Gwenavael - Utility Horse: As she ends each of her Turns, Gwen spawns the blue Minion; Gust in her Region, controls him (using the stats on his card) as though he were a Hero, and then removes him, returning Gust beside her Board. Gust is kept in the box, and never added to any Minion Decks. If Utility Horse is upgraded, Gwen should flip Gust over and use the improved Gust Van Sant back-side instead. Gust can Loot and Scout, however he cannot Power Surge or gain Plus-One's. If Gwen is Defeated during her own Turn this is when her Turn ends, and Gust can be spawned immediately in the Region where she was Defeated.
Amos - Healer's Boon: Each time one of Amos' Spells would heal anyone for an amount, add +1 to that amount (or +2 if upgraded). In the case of Blood Bound, each attack the target performs, would heal Amos for the attack damage +1 (or 2).
Mari - Vengeful Crusade: When a Purple Minion is Defeated on Mari's Turn, she may gain a Plus-One token for free on a row of her choosing. If upgraded, then she may gain the token anytime a Purple Minion is Defeated at all. (Every Minion is either Purple or Green, this is denoted by the color of the scroll behind the Minion's name)
Wugner - Inspirational Beats: After any Action Roll of any type (Melee / Ranged / Magic / Corruption), Wugner may spend Plus-One tokens from his Magic row to use Inspirational Beats on their Roll. Their Roll adds a bonus +1 (or +2 if upgraded) for each token that he Spends. He may use Inspirational Beats on himself, an ally, or even an enemy. (IE Wugner could spend Plus-One tokens to add +1 [or +2] to Gust's Roll)
Mordak - Schemy Meddling: Mordak may spend Plus-One's from his board to add +1 to anyone else's Action Rolls, as though they were his own. He may only spend Plus-One's which match the Action type which is being rolled. (IE, Mordak could not spend a Melee Plus-One to add to a Minion's Ranged roll)
For any additional questions, see: valorandvillainy.com/faq
The Minion Factions
The Dwarves
Strengths: Dwarves are as tough as nails. Taking them out in one hit is advised because every Wounded Dwarf regains 1 Health on their Wounded side. Not to mention a Wounded Dwarf is an angry Dwarf, and an angry Dwarf is not someone you want to meet!
Weaknesses: Dwarves deal damage a little more slowly than the other Minions and tend to have less Actions to move around the board.
Common Abilities: AOE, Longshot
The Goblins
Strengths: Goblins have powerful Special Abilities that grant them annoying Curses for the Heroes and a great ability to deal damage in blasts from a distance.
Weaknesses: Goblins are Wounded easily and tend to lose a lot of oomf and abilities once they have taken damage.
Common Abilities: AOE, Cursed
The Elves
Strengths: Elves are very threatening as they deal more damage outright than any of the other Minions. Not only that, but they also have plenty of mobility to get in a good position to deal it.
Weaknesses: Elves lose a huge amount of their potency when Wounded, and Wounding them will be easy to do as they have the lowest Health of all the Minions.
Common Abilities: Evade, Longshot
The Bonemen
Strengths: The Bonemen are tough, and they often take alternate forms on their Wounded sides. Take them out quickly, because every Boneman can Regenerate!
Weaknesses: The Bonemen have very few Ranged attacks.
Common Abilities: Dodge, Regenerate
Quick Reference
Hero Round (P.5)
- Move: 1 Action to Move across 3 Region tiles.
- Scout: Free Action to reveal all unexplored Halls in your Region.
- Loot: Free Action to collect undefended Treasures in your Region.
- Melee: 1 Action to roll dice. Spend Hits as damage in your Region. (Each Once/Turn)
- Ranged: 1 Action to roll dice. Spend Hits as damage in 1 adjacent Region. (Each Once/Turn)
- Magic: 1 Action to roll dice. Spend Hits to cast any number of Spells from your Hand. (Each Once/Turn)
- Power Surge: 1 Action to draw 2 new Spell / Feats.
- Plus-One's: Spend 2 Hits during any Action Roll to gain a Plus-One for that Action Type. Spend a Plus-One after any Action Roll to add +1 Hits to your Pool! (Max 4 Plus-One's across your board)
Villain Round (P.4)
As Above except the Villain cannot Move / Scout / Loot.
- Melee / Ranged: 1 Action. The Villain can use Melee / Ranged Hits to gain Plus-One's. These can be spent to add to their Minion's Action Rolls of that type. (Each Once/Turn)
- Corruption: 1 Action to roll dice. Spend the # of Hits shown on each Minion Deck to Spawn a Minion from that deck in a revealed Region along the edge of the Map. (Each Once/Turn)
Minion Step (P.11)
The Villain may act with every Minion on the Map, one by one, in an order of their choosing.
Level Up Steps (P.11)
- Each of the active Players should draw Spells.
- Each active Player must discard down to 6 Spells.
- Clear Defender markers (See Defenders P.5)
- (Hero Level Up) Pass the Initiative token clockwise.
- (Villain Level Up) Advance the Procession of Horrors. Rearrange Minion stacks as desired.
- Reveal Treasures in the active Player's Loot Stash.
Determine the XP each active Player gains as follows:
- Add up Bounty Values of cards left in Loot Stash
- Consult Loot Stash to determine XP gained this Turn
- Active Players spend XP on Level Ups as follows
Special Abilities (P.14)
- Ambush: Acts immediately and interrupts acting Hero. (If revealed during a Hero's Scout Action.)
- AOE: Damages each Character (except attacker) in the targeted Region.
- Armor: When you'd take damage, prevent 1 of it.
- Longshot: Spend 1 Hit during a Ranged Action to target any Region aside from yours (instead of just adjacent ones).
- Boost: Place one dice down on any face before a Boosted Action Roll.
- Cursed: All Action dice on your board / card become Novice dice. While atop their stack, anyone in their Region is Cursed too! (Minions lose Cursed when Wounded.)
- Dodge (X): After being targeted, roll X & prevent damage equal to the Hits you rolled.
- Evade: During Moves, a Character with Evade can leave Region tiles containing enemies.
- Regenerate: A Wounded Minion rolls at the start of their Turn. On a Hit they are flipped before acting.