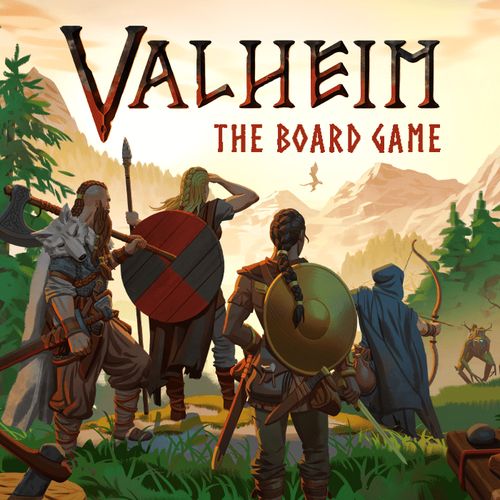
Valheim: The Board Game
Valheim: The Board Game Rulebook
Table of Contents
Table of Contents
- Components
- Goal of the Game
- Game Structure
- Setup
- Player Setup
- Skills
- Player Turn
- Actions
- Combat
- Dice
- Equipment
- Combat Details
- Consumables
- Losing All Health / Stamina
- Creatures
- Event Deck
- Forsaken Fight
- Game End
- Eikthyr
- The Elder
- Bonemass
- Moder
- Campaign Mode
- Meadows
- The Black Forest
- Swamps
- Mountains
- Token Overview
- Creature Overview
- Equipment Overview
- Food Overview
- Furniture Overview
- Skills Overview
- Icon Overview
- Turn Reminder
Components
- 1 food board
- 1 house board
- 1 equipment board
- 1 wooden house in 7 double-sided parts
- 1 ocean board
- 4 animal spirits
- 1 campaign board
- 1 double-sided enemy board
- 4 double-layered character boards
- 1 rulebook, 1 scenario book and 1 tutorial booklet
- 4 double-sided Forsaken altar boards
- 2 double-sided Forsaken boards
- 5 Meadows, 5 Black Forest, 5 Swamps, 4 Mountains and 1 house tile
- 32 equipment cards
- 12 Haldor cards
- 9 food cards
- 55 tutorial cards
- 12 creature and Forsaken cards
- 80 event cards: 20 Eikthyr, 20 The Elder, 20 Moder, and 20 Bonemass
- 2 double-sided overview sheets
- 4 player aid cards
- 25 arena cards: 7 Eikthyr, 6 The Elder, 6 Moder, and 6 Bonemass
- 8 chest tokens: 4 common and 4 rare
- 4 Forsaken power tokens
- 1 power marker
- 6 fire tokens
- 16 white experience cubes, 10 orange counter cubes, 12 red health cubes, 4 yellow stamina, 1 black Forsaken cube
Goal of the Game
In Valheim, you take on the role of 1 to 4 Viking warriors sent by Odin, God of War, on a quest to defeat one of the four Forsaken: Eikthyr, The Elder, Bonemass, or Moder.
Each scenario pits you against one of these formidable foes, who will attempt to stop you with devastating attacks and a personalized event deck.
You will start with simple clothing and a basic house. To progress you must venture into the wild. As you explore the land, you must gather resources, craft equipment, fortify your home and enhance your weapons and armor, all in preparation for the final, epic confrontation at the Forsaken's altar.
Success hinges on your ability to devise a strategy and strengthen yourself before facing the Forsaken in battle.
Valheim is a cooperative experience, where players join forces to achieve both group and individual goals. Players win or lose the game together and there are no individual victories or defeats. However, the game also offers a solo mode for those who prefer to take on the challenge alone.
Game Structure
In Valheim, you take 3 actions on your turn before drawing an event card. These events present various obstacles or opportunities that you must react to. Once the event has been resolved, the player to your left takes their turn.
Your actions are primarily used to explore the lands, improve the house, or boost your character.
Explore the lands
You must often leave the comforts of your house to explore the world around you. When you do, you flip unexplored tiles as you move onto them and deal with the dangers you encounter. You can also find various resources to harvest and bring home.
Growing stronger
Back at the house you can cook food to recover from your wounds. You can also spend your collected resources to construct furniture in order to gain more benefits from your home or craft powerful equipment to help you on your journey.
Fight against time
But don't get too comfortable. You must complete the objectives of the scenario in order before you run out of time. If the scenario's event deck runs out before you summon the Forsaken, you have lost the game.
Final challenge
Once the Forsaken is summoned, you are all taken to the final arena to fight to the death and beyond. If you manage to defeat the Forsaken in this battle, you win the game.
Setup
Single scenario or campaign mode
In a game of Valheim, you play one of many pre-made scenarios. You may pick and play any scenario you wish, but for first-time players, we recommend that you start with scenario 1. The scenarios, as well as their setup and objectives, can be found in the scenario book.
If you really want to prove your worth to Odin, you can also play 4 scenarios in a row as a campaign, where you get to challenge each Forsaken before you move on to the next. Every time you win a scenario in the campaign mode, you unlock powerful, new benefits for the next scenario. You can read more about campaign mode on page 40.
Game setup
Pick your scenario, read the scenario's description carefully to ensure that all necessary components are at hand, and complete the following steps:
I. Play area
Assemble the boards as seen on the next page.
II. Map layout
Add the tiles for the map layout based on the scenario instructions (A) (here we have shown a random example). The house tile (B) may be flipped to either side based on your aesthetic preference, but all biome tiles must be shuffled and placed face down (misty side up). The house tile and the biome tiles make up the world you will be moving around in.
Important note:
- The tiles have a white arrow at the top. These arrows must always point in the same direction for all tiles.
- You won't use all tiles from the biomes in each scenario, so make sure you randomly pick the amount you need, and place the others back in the box without looking at them.
- Some scenarios have landmasses that are separate from the one with your house. These are islands and cannot be moved to without sailing a ship to them.
III. Forsaken altar
The Forsaken altar board (C) depends on the scenario. We use Eikthyr's components in the following examples.
Prepare the event deck before each game as follows:
- Take the event cards from the chosen scenario and divide them into 2 decks: phase I cards and phase II cards (according to the markings on the back of the cards).
- Shuffle the 2 decks individually and place the phase I deck on top of the phase II deck to form a single combined deck.
- Place the event deck face down on the Forsaken altar board (C) and place the Forsaken miniature behind the deck.
- Place the tokens corresponding to the gifted item indicated in the scenario description on top of the event deck. Place 1 of each indicated token, in the order they are listed, but not more than the number of players. This may mean that you place fewer gifted item than the scenario lists.
IV. Cards
Prepare the different decks of cards as follows (remember to take note of their backsides):
- Shuffle the food deck and place it face down on its space (D).
- Shuffle the Haldor deck and place it face down on its space (E).
- Place the equipment cards on the 2 equipment slots face up (F). Keep weapons and tools together in 1 pile and armor in another pile.
- Place the creature cards on the enemy board (G), regular side face up (the veteran side with the star face down).
- Shuffle and place the arena cards next to the creature cards on the enemy board (G).
- Place the Forsaken card on the Forsaken board (H).
Note: the boards with the red outline depend on your chosen scenario. Make sure that they match the Forsaken you are up against. You might need to flip boards (H) and (G) and swap their places.
Player Setup
Character
Every player chooses a character by collecting a character board and its matching miniature. Also pick your player colors by choosing between 4 animal spirits. These animals indicate your player color to everyone: green dragon, blue bird, red ram, yellow wolf.
Attach the animal spirit to your character board underneath and the colored ring to your miniature's base.
Place all player miniatures on the house tile.
Skills
Each player personalizes their character board as follows:
- Draw 2 random trait skills.
- Draw 2 random occupation skills.
- Draw 2 random power of Odin skills.
- Look at the skills, choose 1 skill of each type to keep and discard the others.
- Add your chosen skills face up to the indicated slots on the character board.
The trait and occupation skills are abilities you can unlock with experience cubes during the game, while the power of Odin skill is available to use from the start. You can read more about these skills on the next page.
Health and stamina
By default, players start every game with a full 7 health and 4 stamina.
Set your health at 7 by placing a red cube on the top slot of the red health track (A). Set your stamina at 4 by placing a yellow cube on the fourth slot of the yellow stamina track (B). The bottom slot (marked with x) is counted as 0 (C).
Skills
Skills are aspects of your character that can outline your individual strengths and goals. Each game can be played with a new combination of skills to vary your playing experience. You can find an overview of all the power of Odin skills, trait skills, and occupation skills on page 51.
Power of Odin skills
Power of Odin skills are abilities that require stamina to use and do not require an action. Simply spend the stamina cost to activate the skill.
These skills may be used at any time (also during other players' turns), on any player (no distance limit), and take effect instantly (even during combat calculation).
Upgrade skills
Each player starts with 2 different upgrade skills: trait and occupation. These are skills that can be unlocked by performing certain tasks.
- Trait skill — Task: the task needs to be done once to unlock the skill. Skill effect once unlocked.
- Occupation skill — Task: the task needs to be done 3 times to unlock the skill. Skill effect once unlocked.
When a task is completed, players add a white experience cube to a slot under the skill. Once all slots under a skill are filled, the skill is unlocked and you can use its benefit until the end of the scenario. (Cards show both an "Unlocked" and a "Not unlocked" state.)
Important notes:
- Some skills require you to defeat a creature. If you get assistance, or assist in combat to do so, you still earn experience cubes as long as you damage the defeated creature at least once yourself.
- Upgrade skills are personal and cannot be used on other players, or during other players' turns.
- Activating an upgrade skill does not cost an action.
- You are allowed to earn multiple experience cubes in the same turn.
Player Turn
1. Take 3 actions
On your turn, you take 3 actions. Use these actions effectively to do all the things you want to do before summoning the Forsaken. Once you have taken 3 actions, your turn automatically ends.
Action notes:
- You may choose between any of the actions listed on the following pages.
- The same action may be taken multiple times in the same turn.
- The actions available during a fight against the Forsaken are explained later.
Certain actions may only be done while you are in the house (your character is on the house tile), while others may be done anywhere.
2. End of turn
Apply any end-of-turn furniture benefits. To learn more about those, see page 50.
3. Event deck
At the end of your turn, draw and resolve the next event card. In some cases you might need to take a gifted item or remove an orange counter cube placed on top of the event deck instead. To learn more about the events, see page 32.
4. Next player
Once the event has been resolved, it is time for the next player to start their turn.
Actions
Here's a list of the various actions you may take. Each action is also explained in detail on the next pages. Note: the house icon means this action can only be taken while you are in the house.
- Move: move up to 2 spaces — revealing unexplored tiles you move into.
- Collect resources: roll the collect die and collect resources from your current space.
- Craft furniture (house): pay resources to make a piece of furniture and add it to your house board.
- Craft equipment (house): pay resources to make equipment and place it on your character board.
- Exchange equipment: give and/or receive cards or consumable tokens to/from other players on your space.
- Build a ship: if adjacent to water, pay resources to place a ship on your space.
- Sail: use a ship on your space to move to another space adjacent to the same body of water.
- Cook food (house): reveal the top food card and place it next to the food deck.
- Eat prepared food (house): discard a revealed food card to gain the shown benefits (health, stamina, or reroll).
- Ignite a tool or a weapon (house, requires the fire table): pay 1 resin to permanently add a fire token to one of your tools or weapons.
- Brew mead (house, requires the fermenter): take a mead token of your choice and place it on your character board.
- Fabricate a bomb (house, requires the bomb table): take a bomb token of your choice and place it on your character board.
Free actions (does not count toward your 3 actions per turn)
- Use consumable: discard a mead or honeycomb token to gain its shown benefits.
- Interact with a token on your space: when sharing a space with a token, you may interact with it.
- Throw a bomb: during combat, discard a bomb token and roll the shown dice.
- Dismantle equipment: place an equipment card back in its deck and gain one of the resources indicated in its cost. This action may only be done once per turn.
- Use power of Odin skills: pay the indicated stamina cost, even during another player's turn.
- Use unlocked upgrade skill: pay the indicated cost, if any.
- Use effect from equipment: some equipment allows players to perform a free action once per turn.
- Assist in combat: spend 1 stamina to move to a space within movement distance, where combat is happening.
- Join sailing: spend 1 stamina to move onto a ship within movement distance that is about to move.
- Pick up items from tombstone: pick up dropped items from a player's tombstone. Return the tombstone to its owner.
- Loot a chest: pick up and reveal a chest on your space. Gain the revealed content shown on the back.
Move
The default movement distance per action is 2 spaces.
Spaces are separated by white lines. Crossing from 1 tile to another also counts as moving 1 space. Some spaces take up an entire tile.
If you move into a face-down tile (misty side up), you flip it immediately as you explore it: place it face up on the same area of the map, making sure the arrow points in the same direction as all other arrows. Then continue your movement onto an adjacent space on that tile, choosing which space to move to if you have multiple options.
When a tile is flipped, place any miniatures and tokens indicated onto the spaces.
If you enter a space containing 1 or more creatures, you must end your movement action, even if you could have moved another space.
If you want to do another action — like stop to collect resources — you must end your movement action even if you could have moved extra spaces.
You must always deal with any hazards indicated on a space, when you move into it.
Collect resources
If you are on a space with a resource icon, you may roll the collect die. Collect 1 resource per hand icon rolled and add the tokens to your shared stash in front of the house.
The collect die has 3 collect, 1 noisy collect, 1 noisy critical collect and 1 critical collect.
If the result has a noise icon, you also attract the attention of nearby creatures: all creatures within 2 spaces of you, move 1 space toward you.
Attracting the attention of nearby creatures may result in combat for you and/or other players (see "Combat" on page 22). Being on a space with any creatures automatically triggers combat.
Craft equipment or furniture
While in the house, you may construct a piece of equipment or furniture of your choice by discarding the required resources. Crafted equipment is placed on your character board (max. 3). And crafted furniture is placed inside the house.
You are allowed to browse through the equipment decks at any time to plan for any weapon, tool or armor you want to craft.
The cost of equipment cards is depicted in their bottom left-hand corner. The cost of pieces of furniture can be found on the overview sheet.
Exchange equipment
You may exchange any number of equipment cards or consumable tokens with another player on the same space as you. Exchanging does not have to be equal. You may give and/or take any number of cards/tokens – as long as the other player agrees to the exchange.
You may also use this action to drop off equipment at the house. If you are in the house, place the card(s) or consumable tokens next to the resources face up. Since you cannot carry more than 3 equipment cards, this could be a way to make room for more while leaving equipment for other players to pick up. Any other player in the house may pick up dropped equipment as a free action.
Build a ship
To build a ship you must be adjacent to a body of water. Pay the cost for a ship (1 hide and 2 wood) and place a ship token on the ocean board, touching your current space.
You may have a maximum of 2 ships in play at a time. If you build a 3rd ship, simply remove 1 already in play, and use that as the new ship you wish to place.
Sail
If you are on a space with a ship, you may sail to a new location.
To sail to another space:
- Place your character's miniature on the ship.
- Pick the edge of the tile you want to disembark on.
- If you're sailing to an unexplored tile, only reveal that tile after you've chosen an edge.
- If it is an unexplored tile, first reveal the tile, but remember to stick with your choice of tile edge to disembark on.
- Place your character on the chosen space.
- Whether or not combat occurs, your action ends with you (and any fellow travelers) placing your miniatures on your chosen spaces.
Cook food
Reveal the top food card and place it next to the deck. By default, you have a limit of 1 slot for prepared food.
If you have built a table, you unlock the second food slot. Taking the cooking action from now on will reveal food cards for each empty food slot. With the table you would fill both of these empty slots when you take the cooking action.
Eat prepared food
Discard 1 prepared food card and gain the benefits at the top of the card, which include recovering health, stamina, or adding a reroll token to your character board.
When gaining health or stamina, advance the cubes up the respective tracks on your character board. The cubes can never exceed the limits of the track.
If you have built the cauldron, you may instead gain the improved benefits at the bottom of food cards. (With the cauldron you would gain the benefits of the minced meat soup instead of the neck tail, for example.)
Ignite a tool or a weapon
You may spend 1 resin to permanently add a fire token to 1 of your tools or weapons. Igniting a tool or weapon requires that you have built the fire table.
Tools and weapons with a fire token deal 1 extra damage in combat against creatures not resistant to fire.
Brew mead
Add 1 mead of your choice to your character board (max. 2). Brewing mead requires that you have built the fermenter.
Fabricate a bomb
Add 1 bomb to your character board (max. 2). Fabricating a bomb requires that you have built the bomb table.
Check on the bees
Add a random honeycomb token to any vacant consumable slot on your character board. You may only resolve this action once per turn (giving the bees a break to make more honey). Getting honeycombs requires that you have built the beehive.
Honeycomb tokens can help you in different ways. Some will give you 1 extra action, some will give you more stamina, health or even a reroll token. Read more about the different benefits on page 28.
Note: you may have as many honeycombs as you have room for on your character board, but they take up slots of other consumables. You can always move a honeycomb to a different slot on your turn.
Trade with Haldor
Haldor's camp allows you to trade resources and rare equipment cards.
If you are on Haldor's space, you may spend 1 action to trade with him. When trading, you first reveal the top 3 cards from the Haldor deck to see what's in stock. You may now spend as many coins as you wish to buy resources or cards from Haldor. Once you are done trading, place any revealed cards you did not buy at the bottom of the deck, but do not reshuffle.
Important notes:
- Individual purchases do not count as actions, only starting the trade does.
- You may not buy more cards than the 3 that are revealed with a single trade action.
- If you don't like any of Haldor's trade offers, you are not obligated to buy anything.
Haldor also makes house calls, in case you cannot find him or simply do not have the patience. However, if you are at the house, performing a trade action with Haldor costs 1 extra coin. Haldor goes away again at the end of your turn.
Ambush
If you are adjacent to a space with 1 or more creatures, you may use a ranged weapon to attack that space.
Roll your attack dice as normal, but do not roll any damage dice yet.
If any creatures survive the attack, they move into your space and standard combat begins.
Free actions
Free actions do not count toward your 3 actions limit. Most of them have no limit for how many times they may be taken during your turn, but they might have other limitations. You cannot take actions, including free actions, if you are knocked out. Unless stated otherwise, free actions may only be resolved on your own turn.
Use consumable
Spend 1 of your consumable tokens and apply its effect. Discard the consumable token after use. Read more about consumables on page 28.
Dismantle equipment
Place an equipment card back in its deck and gain one of the resources indicated in its cost.
This may be done only once per turn and cannot be done with a piece of equipment you crafted in the same turn.
Note: you cannot dismantle equipment bought from Haldor.
Interact with a token on your space
By default, you can always interact with tokens on your space. Unless stated otherwise, flipping or picking up a token is a free action.
Throw a bomb
During combat, you may throw a bomb to attack a creature by discarding the bomb token and applying the damage (if any). Read more about the 2 different bombs on page 28.
Join sailing
When another player takes a sailing action, you may join them on the voyage as a free action, assuming you meet the conditions outlined below.
- You must spend 1 stamina to do so.
- You may only do so if the character's miniature you're joining is within your character's movement distance (default is 2 spaces).
- You must have a clear path with no creatures blocking your way.
- You must deal with any hazards on the way.
Example: player 1 is about to sail from their space. Player 2, who is 2 spaces away, joins in by spending 1 stamina and moving to the space.
Use power of Odin skills
This may also be done outside of your turn. Pay the indicated stamina cost to resolve the effect written on the token.
Use unlocked upgrade skill
This may not be used outside of your own turn. Unlocked skills have different effects. Some are passive, while others must be activated. Pay the indicated cost, if any, to activate it.
Assist in combat
When another player is involved in combat, you may join them to assist as a free action assuming you meet the conditions outlined below.
- You must spend 1 stamina to do so.
- You may only do so if the character's miniature you're joining is within your character's movement distance (default is 2 spaces).
- You must have a clear path with no creatures blocking your way.
- You must deal with any hazards or negative effects on the way.
Example: player 1 is in the middle of combat with the Troll. It doesn't look too good for them, so player 2 decides to help out before it gets worse. They spend 1 stamina to move 2 spaces and provide assistance.
Use effect from equipment
Some equipment allows players to perform a free action or gain extra resources. The free action of each equipment may usually only be done once on your own turn. (Example effects: "Receive 1 free cooking action each turn." / "When rolling for hides, receive 1 extra hide for each hand icon rolled on the collect die.")
Pick up items from a tombstone
Pick up dropped item by a player's tombstone. Return the tombstone to its owner.
Loot a chest
Reveal a chest on your space. Gain the revealed content shown on the back, then discard the chest token.
Combat
Combat is not an action in itself. Instead, when a creature and a player end up in the same space for any reason, combat occurs.
If the player was in the middle of executing a movement action, that action ends immediately.
Combat mechanics
Combat is resolved by rolling dice and is repeated over multiple combat rounds if necessary. Combat ends either when all creatures involved have been defeated or when all players involved are knocked out.
If a combat ends with the creatures being defeated, the active player continues their turn by taking their remaining actions as normal. If it ends with the active player being defeated, their turn ends and play resumes with the next player in turn order.
- To resolve combat, first gather the indicated damage dice for the creature based on its creature card.
- Gather the indicated player's attack/defense dice based on your equipment.
- Roll all dice together and then apply their results simultaneously. (Player dice results: 2 hits (critical hit), 1 hit, blank, 1 defense. Damage dice results: 2 hits (critical hit), 1 hit.)
- If both player and creature are still undefeated, return to step 1.
- Combat ends if either the creature or player has 0 health.
- A. If combat ends with the creature being defeated, collect any loot depicted on its card and add it to the shared stash.
- B. If combat ends with the player losing all their health, that player is knocked out (see "Zero health" on page 29).
Note: combat between multiple creatures and/or multiple players resolves a little differently and is described on page 26.
How to apply damage
To the creatures
As creatures are damaged during combat, place red cubes on the creature card or next to the creature miniature to keep track of how much damage they have taken.
To the players
When applying damage results, simply move your red health cube down the health track for each damage you take.
Important notes:
- You always roll all relevant player dice together with all relevant damage dice.
- A player's damage to a creature is calculated before the creature's damage to the player, but all damage is always calculated, even if either side is defeated during any given roll.
- You may never roll more dice than the amount of dice in the game (e.g., if your equipment gives you more than 2 defense dice, you can still roll only 2).
Dice
In order to play out a combat round, you use different types of dice: the red attack die, the yellow attack die, the blue defense die, and the black damage die.
Attack dice
The yellow and red attack dice are featured on your weapon and tool cards. If you have multiple weapons or tools, pick 1 and roll dice for that card.
Each hit icon rolled indicates 1 attack point you deal to the enemy's health.
The yellow attack dice have 3 hits, 1 critical hit and 2 blanks. The red attack dice have 4 hits, 1 critical hit and 1 blank.
Attack bonus: any attack bonus indicated on your equipment or skills is only applied if you roll at least 1 hit. If you only roll blanks, the attack misses entirely, regardless of attack bonuses.
Defense dice
The blue defense dice are featured on your armor cards. If you have multiple armor cards of different types, add together the defense dice on them (but never more than 2).
Each block rolled is a defense point and removes 1 point of damage against you.
The defense dice have 3 blocks, 1 critical block and 2 blanks.
Examples of armor types: head, torso, cape, shield.
Defense bonus: any defense bonus indicated on your armor card is only applied if you roll at least 1 block. If you only roll blanks, the defense is not effective, regardless of bonuses.
Damage dice
These are the enemy dice and represent the creatures' damage against you. Each hit indicates that you take 1 point of damage.
The damage dice have 2 hits, 1 critical hit, 1 special, and 2 blanks.
Special effects on damage dice
Special results might trigger various effects. If you roll any special results, check the creature card for its special effect, if any, and apply that effect with the rest of the results.
- Frozen — The player is now frozen and places a frozen token on their character portrait. This effect cannot be blocked by defense results. The effects of being frozen are described on page 27.
- Poison — The player is now poisoned and places a poison token on their character portrait. This effect cannot be blocked by defense results. The effects of being poisoned are described on page 27.
- Armor piercing — All damage dealt by the creature goes right through your armor. Ignore all defense results and any defense point bonuses this roll.
- Extra damage — The creature deals 1 extra damage, even if all other damage dice results are blank.
- Extra defense point — The creature cancels 1 attack point dealt to it during this roll.
Note: any extra defense point the creature already has on its creature card also cancels 1 attack point.
Equipment
Icons
Many pieces of equipment have icons that indicate an additional benefit or restriction.
Here's a list of the various icons you will find on your gear (keep in mind numbers might be different):
- Ranged: a ranged weapon may be used up to 1 space away from the target.
- Armor piercing: an armor piercing weapon ignores all of the opponent's defense points.
- Two-handed: because you need 2 hands to use this equipment, you cannot use any shield type armor cards.
- Area of effect: attacking with this affects all the creatures on the same space as the target.
- Extra move: this equipment allows you to move 1 additional space with your movement action.
- -1 Stamina: in order to use this equipment's ability, you must spend 1 stamina.
- +1 Attack: add 1 attack point to your roll. This does not apply if you only roll blank attack dice.
- +1 Defense: add 1 defense point to your roll. This does not apply if you only roll blank defense dice.
- Canceled critical hit: any critical hit with this weapon is instead counted as 1 hit.
- Frost resistant: with this equipment you cannot be frozen.
- Poison resistant: with this equipment you cannot be poisoned.
- Armor piercing resistant: with this equipment, your defense results cannot be ignored.
Combat Details
Combat is resolved in different ways, depending on the number of players and creatures involved.
Combat with multiple players
If multiple players are in the same space where a combat occurs, each player in that space must participate in the combat beginning with the active player.
A combat round works as described on page 22 with only the following change: if the creature remains undefeated after the active player's turn, the next involved player clockwise begins the next round of combat (rolling their own available attack dice, and defense dice if any, along with the creature's damage dice).
This cycle is repeated until either the creature is defeated or all players are defeated. Once the combat is over, the active player resumes their turn.
Outnumbered combat
If you are in combat with more creatures present than players, you are outnumbered.
If you are outnumbered, the player rolling the dice takes 1 extra damage on any roll where the creatures roll at least 1 hit. This outnumbered damage may be blocked by defense dice results.
Being unarmed
If you have no weapons, you are unarmed. When unarmed, you roll 1 yellow attack die, but treat the critical hit result as a single hit result.
Combat with multiple creatures
Players only fight 1 creature at a time. If there are multiple creatures on the same space where combat happens, you only roll damage dice for what's currently the strongest creature.
A creature's strength is determined by the printed health stat on their creature card (regardless of if the creature has suffered damage). If the strongest creature is defeated, you roll damage dice for the next strongest creature and so on.
Players may always choose which creature in the combat to deal their attack to, but they cannot choose which creature damages them — it is always the strongest creature.
Splitting damage
You cannot split a critical hit to attack multiple creatures but you may divide the hits from multiple dice results onto multiple creatures.
Negative effects
Frozen
Place a frozen token on your character illustration. For the rest of this combat, you lose 1 stamina at the end of each of your combat rounds. This includes the round in which you become frozen and the round in which combat ends (they might be the same round). Once combat is complete, remove the frozen token. If you ever become frozen outside of combat, you lose 1 stamina and then remove the effect.
Poison
Place a poison token on your character illustration. For the rest of this combat, you take 1 damage at the end of each of your combat rounds. This includes the round in which you become poisoned and the round in which combat ends (they might be the same round). Once combat is complete, remove the poison token. If you ever become poisoned outside of combat, you lose 1 health and then remove the effect.
Note: you may only have 1 negative effect token of each type at any time. If you already have a poison or frozen token, receiving that effect a second time does not cause you to take another token nor does it cause you to lose more stamina or health.
Consumables
With the right furniture in the house you can make consumables to aid you on your journey.
These consumable tokens are placed on your character board. They can be used at any time on your own turn, also after seeing the dice results during combat. Discard the consumable token after use.
Note: you may only carry 2 of the same type of consumable on your character board. This restriction does not apply to honeycombs, as you can carry as many of those as you have room for.
Mead
You get mead from the fermenter. When spending a mead token, apply the effects on the backside of the token to yourself or another player on the same space as you.
- Health mead — Provides +2 health instantly.
- Stamina mead — Provides +2 stamina instantly.
- Resistance mead — Removes frozen or poison effect instantly.
Bombs
You get bomb tokens from the bomb table. You may use a bomb during combat to attack any Forsaken or creature you are fighting. This is done at any time but separately from your normal attack rolls. Simply roll the dice indicated on the bomb token, and apply the results. You do not roll damage dice when you throw a bomb. A bomb may never be used on the house tile.
- Area effect bomb — Roll 2 yellow attack dice and apply the result to all creatures on your space.
- Armor piercing bomb — Roll 1 red attack die and ignore any defense points the creature might have.
Reroll tokens
Discard a reroll token to reroll any number of your player dice this roll. You cannot use a reroll token to reroll damage dice.
Reroll tokens may also be spent on rerolling a collect die result.
Honeycombs
You get honeycomb tokens from the beehive. Each honeycomb has slightly different effects but they mainly provide extra stamina and actions.
When spending a honeycomb token, apply the effects on the backside of the token to yourself (never to another player).
If a honeycomb provides +1 action, that extra action must be taken in the turn you spent the honeycomb.
Losing All Health / Stamina
Zero health
If your health cube reaches the "x" space on your health track, you are knocked out (no longer conscious). If you are the active player when that happens, your turn ends immediately.
- Move the character to the house. You do not gain the benefits of furniture like the rug, throne, or bed. Place your miniature on its side, to remind everyone that creatures ignore this character until they are back on their feet again.
- Reduce your stamina to 0.
- Place your tombstone token on the space where you were knocked out.
- If you have any equipment cards, temporarily remove 1 of them randomly by placing it near the tombstone token. Any player on that space may pick up the dropped equipment by removing the tombstone as a free action. If you were knocked out while in the house, you do not place a tombstone token nor place a card. If you already have a tombstone in play, simply move the tombstone to the new location. You then permanently lose the equipment card dropped at the previous location — place the card back in its deck.
- Draw from the event deck like normal, but any knocked out players ignore effects that have them fight or spend/gain health/stamina. On your next turn, you are revived and are no longer knocked out. Regain 1 health and then resolve your turn like normal.
Note: creatures always ignore knocked out players when moving or attacking.
Zero health during the Forsaken fight
If your health drops to zero during the Forsaken fight, you are out for the rest of the fight or until revived with a healing effect.
- Place your miniature on its side and leave it on its current space.
- Do not place a tombstone.
- Do not leave any equipment behind for others to pick up.
Zero stamina
The biggest downside to having 0 stamina is that you cannot resolve things that require stamina. You can never choose to spend stamina you do not have.
If, however, you are forced to lose stamina, but you have no stamina left to lose, you must lose the same amount of health instead.
Creatures
Creature cards
During your journey through Valheim, you cross paths with many dangerous creatures that you must defeat in order to complete your quest.
You can refer to the stats of a creature at any time, by looking at their creature card. The creature cards show you the health of a creature as well as its damage dice, any special effects and the loot you gain from defeating them. Each card shows: the icon and creature name, the amount of damage dice, any special effect, the loot, and the creature's health points.
Regular creatures
Many different creatures roam Valheim, ranging from the relatively harmless Greylings in the Meadows to the fierce Fenrings in the Mountains: Greyling, Greydwarf, Skeleton, Draugr, Fenring.
Large creatures
Large creatures behave and fight like regular creatures, but are stronger, and there will only ever be 1 of each. The Troll is found in the Black Forest, the Abomination in the Swamps, and the Stone Golem in the Mountains.
Veteran creatures
Scenarios and event cards sometimes have you face veteran creatures. These creatures are stronger and more dangerous versions of their normal form. All veteran creatures have increased health and some deal extra damage or have more resistances. The backside of all creature cards feature the veteran versions as indicated by the orange star under the name. Use the stats on this side when fighting the veteran versions of the creatures.
Running out of creatures
If you ever need to place more of a specific regular creature than you have in the box, simply place a slightly weaker creature instead. Choose a creature with an amount of health closest to the creature you were supposed to place.
Example: Greydwarves have 3 health. Greylings have 2 health. There are no Greydwarves left to place, so instead you place a Greyling.
Event Deck
Event cards
When you end your turn, you draw the next event card and immediately resolve it. The player who ended their turn is still considered the active player, until the event has been resolved.
Ongoing effects
Some event cards are resolved immediately while others have ongoing effects.
If the event card has an ongoing effect, place the card face up on top of the event deck as a temporary blocker. These cards also remind you to place a number of orange counter cubes on top of the card. These cubes act as a counter for how many turns the event remains active.
As long as there are cubes or gifted items on top of the event deck, players ending their turn remove 1 of these instead of drawing an event card.
Creatures are never affected by hazards on spaces like loss of stamina, slowed movement, etc.
If you cannot do what the event card says (e.g. because no spaces are available), then simply ignore the event.
If a player cannot draw an event card because the deck is empty, time has run out, and the Forsaken has overtaken the realm. All players lose the game immediately.
Moving creatures
Some cards instruct you to move creatures toward the nearest players. This specifically applies to revealed creatures on the same island as players. Creatures on islands where all players present are knocked out do not move. If a creature could take multiple paths, it takes the shortest path. If multiple paths are equally short, the active player decides.
Some event cards instruct you to "repopulate" a space: for all spaces with creature icons that do not currently have a creature on the space matching the icon, add 1 of those creatures.
Forsaken appearance
In most scenarios, the Forsaken can appear on a tile as a result of an effect of an event card. Such an event card might also ask you to add creatures to the tile with the Forsaken. In this case, both the Forsaken and all creatures along with it take up the whole tile and not just the individual spaces.
- You cannot attack or hurt any creature on the tile occupied by the Forsaken.
- You cannot move onto the tile occupied by the Forsaken.
- Creatures do not leave a tile with the Forsaken on it until the event card instructs them to (see "Raids" on page 33).
- Any player already on the tile where the Forsaken appears rolls 1 damage die, takes the damage rolled, and is then immediately moved to the house. If a special result is rolled, the player is knocked out before moving to the house.
- If a Forsaken moves into a space with players, unless stated otherwise, each player in that space rolls a damage die and takes damage as indicated above. Regardless of the result of the die, the players who occupied the space with the Forsaken are immediately moved to the house.
Raids
Some event cards are raids on your house. These events are the Forsaken's attempt at taking you down in your own territory. They bring along many creatures that gather in numbers and are sent in to attack your house after a few turns.
Raid event cards are placed on top of the event deck. Players do not draw new event cards until the raid is over. The cards have the word "raid" in their effect followed by instructions on where to place the Forsaken, the size of the raid, and which type of creature is in the raid.
Here's how a raid works:
- Place the Forsaken on a tile as per the raid instructions. Any creature already on the tile will be part of the raid.
- When a player ends their turn, they add 1 raid creature to the tile with the Forsaken, instead of drawing a new event card. The specific raid creature can be found on the event card.
- When the tile has as many creatures as the size of the raid, all the creatures move into the house. This includes any creatures that were already present on the tile but does not include the Forsaken. Combat starts with any players present in the house.
- Take note of any bonuses the creatures might have in the raid, such as veteran status or bonus damage.
- When the combat is resolved, the raid is over and the Forsaken moves back to their altar board.
Smaller raids can also happen outside of raid event cards, simply by creatures moving into your house for any reason. Any time creatures enter your house tile, it is also considered a raid.
Defeated by a raid
If there are no players in the house, or all players in the house are knocked out during a raid, the creatures destroy the place. When this happens do the following:
- Remove 1 piece of furniture of your choice for each creature remaining in the house. You do not gain the resources back from the destroyed furniture.
- If there are more raiding creatures than furniture, each of those creatures destroys 1 prepared food.
- Afterward, remove all raiding creatures from the board.
Forsaken Fight
Summoning the Forsaken
Once the requirements of the scenario have been met, any player on the same space as the altar may spend 1 action to summon the Forsaken. As soon as any player summons the Forsaken, the main game board is no longer used. Instead, all players begin a final battle against the Forsaken in the arena.
Setup for the arena battle is as follows:
- Place the black cube on the first space of the Forsaken health track, and move it down the track 1 space for every 2 unresolved event cards.
- Remove the event deck and the creature cards from the boards and flip the Forsaken altar board to reveal the Forsaken arena.
- Flip the Forsaken card with the combat reminders face up.
- Starting with the active player and continuing clockwise, each player picks their starting space in the arena. Players may pick the same space as other players. Ignore all hazards on spaces during this setup.
- Finally, place the Forsaken miniature on the altar space of the arena, facing the active player. The direction the Forsaken is facing in is determined by the arrow on its base.
Actions during the Forsaken fight
During the fight with the Forsaken, players still take turns clockwise, starting with the player who summoned the Forsaken. Each player's turn now consists of only 2 actions (move and fight), which can each be carried out once, in any order.
Move (optional)
Move to a space (not containing the Forsaken) within your character's movement distance. Observe any restrictions or hazards in the arena.
Any spaces adjacent to the Forsaken are considered close-combat spaces. All weapons may attack from these spaces. However, any space that is not directly adjacent to the Forsaken, is considered a ranged space, which requires ranged weapons to attack from.
Fight
Roll your attack/defense dice, as well as the 3 damage dice for the Forsaken. Fighting is not optional — you must always roll your attack dice every turn. If you are unable to attack because you are on a ranged space with no ranged weapons, you only roll the damage dice.
Always resolve and apply the dice in this order:
- Player attack dice (attack the Forsaken).
- Blank damage dice results (move/rotate the Forsaken according to its card).
- Black damage results and defense results, to cancel the black results.
- Black special results: draw an arena card. Blue defense results cannot be used to cancel damage from these cards.
Note: all Forsaken, except Moder, deal +1 damage to the active player for special results, if you are on an adjacent space directly in front of the Forsaken (indicated by the arrow).
Other actions
In addition to moving and fighting, you may resolve the following actions for free during your turn:
- Throw a bomb: roll the damage dice for throwing the bomb and apply the results.
- Pick up items: pick up any items dropped in a space (e.g. by an arena card).
- Revive another player: you may spend a health mead to bring another player back into the game — they start with just 2 health (from the mead).
- Activate a power of Odin skill.
- Use 1 or more unlocked upgrade skills.
Winning or losing the Forsaken fight
As you attack the Forsaken, move the black cube down its health track. If the black cube moves onto the final space with the defeated icon, you have defeated the Forsaken and won the scenario.
If all players are knocked out, and the black cube is not on the defeated icon, the Forsaken has defeated you in battle and you lose the scenario.
Important notes:
- You still resolve all damage dice results even if the black cube is on the defeated icon.
- Regardless of any effect or arena card effect, a Forsaken cannot regain health once the black cube reaches the defeated icon.
- Even if all players are also knocked out, it is considered a victory if the black cube is on the defeated icon.
Game End
Victory
Depending on the scenario, you win when you have completed all objectives. This usually includes defeating the Forsaken.
Defeat
You lose if all players end up knocked out in the arena battle against the Forsaken.
Do not forget, it is also possible to lose without ever making it to the final arena battle if you must draw an event card and there are no more left in the deck – so make sure that you are always working toward your scenario's goals!
Eikthyr
His antlers are branches of iron, they crack the rocks and bring down Mountains. His hooves are the sound of thunder. His voice a howling gale.
Beware
When fighting Eikthyr, he stays on the altar space in the middle of the arena and turns to face you for extra damage. Attacking from a distance or constantly moving around him is recommended.
Special rules
- Eikthyr's arena is made up of an inner ring of 4 spaces and an outer ring of 4 ranged spaces.
- Eikthyr deals 1 extra damage to the active player when attacking, if the player is adjacent and Eikthyr is facing them.
Arena mechanics
- Players deal 1 extra attack point to Eikthyr if they attack from the space directly behind it and roll any hits.
- The central altar space is for Eikthyr and may not be moved into by players.
- To attack Eikthyr from the outer ring, players must use a ranged weapon.
- Players must spend 1 stamina to move into the outer ring spaces.
The Elder
First of the forest, king-in-the-wood, lord over those who dwell at its feet. Its roots will grow where cities once stood, their blood its wine, their flesh its meat.
Beware
When fighting The Elder, it stays on the altar space in the middle of the arena and turns to face you for extra damage. Attacking it directly from behind is recommended.
Special rules
- The Elder's arena is made up of a single ring of 6 spaces.
- A player who attacks The Elder from the space directly behind it (opposite its arrow), deals 1 additional attack point.
- The Elder has 1 automatic defense.
- The Elder has 4 dangerous vines protruding from its upper body which are represented by the 4 vine spaces on its Forsaken board. If the players manage to destroy all of them, The Elder's attacks lose their armor piercing ability. Players must choose if they want to focus on destroying these vines, or on attacking The Elder instead. 1 attack point destroys 1 vine. Add a counter cube to a vine space when it is destroyed.
Arena mechanics
- The central altar space is for The Elder and may not be moved into by players.
- Players moving into the vine spaces must end their movement.
- Players must spend 1 stamina to move into certain spaces (as marked on the board).
Bonemass
Wanderer, look to your feet, that tread upon our tomb. One thousand bones without their meat, will drag you to your doom.
Beware
When fighting Bonemass, he stays on the altar space in the middle of the arena and turns to face you for extra damage. He will litter the arena with dangerous ooze. Do not stay on a space with ooze for too long.
Special rules
- Bonemass's arena is made up of 8 spaces, 2 of which are at a ranged distance.
- Bonemass deals 1 extra damage to the active player when attacking if the player is adjacent and Bonemass is facing them.
- Bonemass has 1 automatic defense.
- Leaving a space with an ooze token costs 1 extra movement.
Arena mechanics
- The central altar space is for Bonemass and may not be moved into by players.
- To attack Bonemass from the ranged spaces, players must use a ranged weapon.
- When moving into an ooze space, the active player rolls a damage die. Ignore any damage results, but if you roll a special result, the player becomes poisoned.
- The bonus damage from fire does not apply if a player is attacking from the ranged spaces.
Moder
Black wings across the moon and sun, down from the Mountain our mother comes. Her tears will fall like rain, her voice will call us home again.
Beware
When fighting Moder, she moves around the edge of the arena and tries to reach her nest to heal and spawn even stronger attacks. Using ranged weapons to move her away from her nest is essential.
Special rules
- Moder deals 1 extra damage to the active player when attacking if she is at the nest.
- If Moder is at the nest she heals 2 health for every blank on the damage dice result.
- Moder moves 1 space away from the nest and toward the altar, per critical hit from ranged weapons.
- Critical hits from bombs force her to retreat straight back to the altar.
- Moder also gains 1 automatic defense when she has low health. The defense only comes into effect on turns when her health tracker starts on a marked space.
Arena mechanics
- The altar space on the left is where Moder starts.
- Players stand on the frozen lake and cannot move onto any snow spaces.
- You may choose to climb onto the small peak during your turn by spending 1 stamina — this is the only movement players may resolve during the Forsaken fight against Moder. When you are here, any weapon you attack with is considered a ranged weapon. You slide back down to the frozen lake at the end of your turn. You may climb back on during your next turn, by spending 1 stamina again. Only 1 player may be on this space at any time.
- The nest space is where Moder moves toward.
Campaign Mode
Valheim is designed as a game that can be played as a one-shot with players choosing a single scenario or as a campaign game where you face each Forsaken back-to-back in 4 consecutive scenarios, in order to experience the true challenge of Valheim. Campaign mode introduces additional restrictions but also provides unique game elements such as unlocking potent Forsaken powers and carrying over certain items between scenarios.
To start a campaign, you simply select 4 scenarios in the scenario book (1 for each Forsaken), and play them in the following order: Eikthyr, The Elder, Bonemass, Moder.
Connect the campaign board to the altar board:
- Place an orange cube on each of the 4 square slots on the campaign board track.
- When you complete a scenario, remove the cube underneath the Forsaken you just defeated.
- You have now unlocked all benefits up to the next cube on the track, and can start the next scenario.
When playing a campaign, metals are blocked from being collected until you complete scenarios. You can still get lucky and find them in chests or as creature loot, but you cannot roll the collect die to collect them until they are unlocked. For the first scenario, you cannot mine any metals.
Defeating Eikthyr
Once you defeat Eikthyr, you may mine bronze in all subsequent campaign scenarios. Defeating Eikthyr also allows players to carry over 1 basic piece of furniture (throne, bed, or rug) for no cost. This is a permanent campaign bonus and as long as the chosen piece of furniture is not destroyed, it carries over to all subsequent campaign scenarios.
Defeating The Elder
Once you defeat The Elder in the second scenario, you may now also mine iron. Defeating The Elder allows each player to bring their current power of Odin skill from this scenario with them for subsequent campaign scenarios. Place it on your character portrait. This means that each player will have 2 power of Odin skills that may be activated in subsequent campaign scenarios.
Defeating Bonemass
Once you defeat Bonemass in the third scenario, you may now also mine silver. Defeating Bonemass allows each player to keep 1 fully unlocked upgrade skill. If you do not have any fully unlocked upgrade skills, you cannot carry any with you. Choose 1 unlocked upgrade skill and place it on your character portrait. For the last scenario, this chosen skill is unlocked by default. You still draw 2 new upgrade skills at the start of the fourth scenario, giving you a total of 3 upgrade skills.
Defeating Moder
Moder is the final challenge that stands between you and ultimate glory. When you defeat Moder, you win the campaign.
Forsaken powers
Each time you defeat a Forsaken, you also unlock its Forsaken power – a special power that players may activate twice during a scenario. If you have unlocked multiple Forsaken powers, you must decide which one to bring to the next scenario as you cannot have more than 1 available Forsaken power in a campaign scenario.
For each scenario in the campaign after the first one, complete the following during setup:
- Choose an unlocked Forsaken power.
- Place the corresponding Forsaken power token on the campaign board to remind you which one you chose.
- Add 2 orange counter cubes to it, to help keep track of how many times you may use it in this scenario. If the power does not have any cubes remaining, it cannot be activated.
The Forsaken powers are:
- Eikthyr – each player may move 2 extra spaces during movement actions on their turn.
- The Elder – each player may double the result of the green collect die once on their turn.
- Bonemass – each player may roll 1 extra defense die in a combat on their turn (max. 2 total).
- Moder – each player may take 1 extra action on their turn.
There is no campaign scenario after Moder so her Forsaken power is the final reward. You may use any Forsaken powers that you unlocked in campaign mode when you play single scenarios — just remember to only bring 1 to any given scenario.
Using Forsaken powers
- Any player may decide to freely activate a Forsaken power during their turn. It does not cost an action to do so. When activated, the active player removes a counter cube from the Forsaken power token.
- The active player takes the power marker as a reminder that they activated the power. The power is active for 1 full round of turns, meaning that each player may use the effect of that power during their turn.
- The player with the power marker discards it at the beginning of their next turn and the effect is no longer active.
Winning a scenario in campaign mode
Winning a scenario lets you keep your character and some of the stats, but not all. Complete the following steps, but keep in mind that you do not discard any of the specific campaign rewards.
- Start the next scenario with the health and stamina you ended the last scenario with.
- If you were knocked out by the end of a scenario, you start the next with just 1 health and 0 stamina.
- Discard all experience cubes from your upgrade skill slots.
- Discard all consumables from the character boards.
- Discard all crafted equipment and furniture.
- Discard all prepared food cards.
- You may replace your 2 upgrade skills and your power of Odin skill for the next scenario if you wish.
Losing a scenario in campaign mode
If you lose a scenario, you must replay it or another one with the same Forsaken before advancing to the next scenario in your campaign. Reset your character as if playing a normal, single scenario, but keep any unlocked campaign rewards from previous scenarios in the campaign.
Meadows
Realm of Eikthyr
The Meadows are the first type of landscape you encounter. Often the house is constructed in or adjacent to the relatively harmless Meadows.
Consisting of mostly grassy hills and patches of trees and shrubbery, the Meadows are a good biome to find basic resources.
The Meadows are also home to the Greylings—small, annoying creatures with malicious intent. Greylings are a good source of resin, as they seem to be partially made of wood.
Space icons: source of hide, source of wood, source of stone, source of health, common chest, Greyling space, Eikthyr's altar space.
The Black Forest
Realm of The Elder
If you wander into the Black Forest unprepared, the hideous Troll and Greydwarves will make short work of you. And then we haven't even mentioned the reanimated Skeletons! However, once you have created some basic weapons and protection, you should be prepared for venturing into the woods.
Only here can you find the metal sources needed to make bronze equipment and furniture.
The Black Forest is also the home of Haldor—the traveling merchant—from whom you can purchase rare items, if you have the coin.
Space icons: source of wood, source of bronze, Greydwarf space, Skeleton space, Troll space, Haldor's space, common chest, The Elder's altar space.
Swamps
Realm of Bonemass
Not only are the Swamps harsh and slow to travel through, they also emit poisonous fumes and are home to the undead. You will find the Draugr here: vicious enemies who are immune to fire and carry hard hitting weapons and a hatred of the living.
If that is not enough, Skeletons and the mysterious Abomination will occasionally rise from the murky waters to seek your destruction.
But it is worth taking them on, because deep inside the sunken crypts you can find and mine iron—a great source for more potent weapons.
Space icons:
- Source of iron.
- Hazard: costs 1 extra movement to enter this space.
- Hazard: roll 1 damage die when entering — a special result means you are poisoned.
- Draugr space.
- Abomination space.
- Rare chest.
- Bonemass' altar space.
Mountains
Realm of Moder
The frozen heights of the Mountains contain valuable silver veins, but also many forms of danger.
This is where the mighty Stone Golem resides, as well as the wolf-like Fenrings. But even traversing the cold Mountains with no creatures around is a harsh and exhausting experience.
The icy winds cool your body and drain your stamina, so you better prepare before entering this cold and hostile environment.
Space icons:
- Source of silver.
- Hazard: costs 1 stamina to enter this space.
- Skeleton space.
- Fenring space.
- Stone Golem space.
- Rare chest.
- Moder's altar space.
Token Overview
Tokens
- Area effect bomb: you may use it at any time during combat to roll 2x yellow attack dice and deal damage. The token may only be used once. There's a limit of 2 bomb tokens per character board.
- Armor piercing bomb: you may use it at any time during combat to roll 1x red attack die and deal damage. The token may only be used once. There's a limit of 2 bomb tokens per character board.
- Fire: adds +1 attack to each of your attack rolls with a tool or weapon that it is attached to. You may only have 1 fire token on each tool or weapon.
- Honeycomb: you may use it at any time to gain the benefits on the back. The token may only be used once. It may be placed on any consumable space on your character board.
- Health mead: you may use it at any time to heal 2 health. The token may only be used once. There's a limit of 2 mead tokens per character board. They may be of the same or different types.
- Stamina mead: you may use it at any time to gain 2 stamina. The token may only be used once. There's a limit of 2 mead tokens per character board. They may be of the same or different types.
- Resistance mead: you may use it at any time to remove 1 negative effect (frozen or poisoned). The token may only be used once. There's a limit of 2 mead tokens per character board. They may be of the same or different types.
- Reroll: you may use it at any time to reroll any number of your own dice, but not the damage dice. The token may only be used once. There's a limit of 2 reroll tokens per character board.
- Frozen: some enemies' special attacks can freeze your character. Being frozen causes you to lose 1 stamina at the end of each of your combat rounds. Remove the token after combat ends.
Forsaken tokens
- Stag: these tokens are used in some scenarios to summon Eikthyr. You may attempt to gather one by spending an action or 2 stamina to roll the collect die. If you roll a double, you may collect the token.
- Vines: these tokens are used by The Elder in events and arena combat. They usually slow your movement.
- Withered bones: these tokens are used in some scenarios to summon Bonemass. In these scenarios, you place 1 withered bone token on any revealed sunken crypt space. To collect the token from your space, you must flip it and defeat the creature on the backside of the token.
- Ooze: these tokens are used by Bonemass in arena combat. Depending on the situation, they might damage/poison players or heal Bonemass.
- Dragon egg: the dragon egg is used in some scenarios to summon Moder. It can be gained in various ways depending on the scenario.
Resources
- Wood: can be found in the Meadows and in the Black Forest.
- Hide: can be found in the Meadows, common chests or by defeating a Fenring.
- Resin: can be found by defeating a Greyling.
- Stone: can be found in the Meadows or by defeating Greydwarves or a Stone Golem.
- Bronze (mineral): can be found in the Black Forest, common chests or by defeating a Troll.
- Iron (mineral): can be found in the Swamps, common chests or by defeating an Abomination.
- Silver (mineral): can be found in the Mountains, rare chests or by defeating a Stone Golem.
- Coins: can be found in chests or by defeating a Fenring, Troll, Abomination, or a Stone Golem.
Creature Overview
These creatures are all aggressive and can spawn at various times throughout the biomes. They start on their basic side, but as scenarios unfold, you might be instructed to flip their cards to the stronger veteran side, showing a star at the top.
Greyling
These mossy, tree-like creatures are aggressive but small. They should be easy to handle with basic equipment. A normal Greyling does not have any special attacks, so special results are ignored. However, veteran Greylings deal damage with their special attack.
Greydwarf
A stronger cousin to the Greyling, these forest beings nest in the Black Forest. They have slightly more health than Greylings but are usually only a threat in greater numbers.
Skeleton
Cursed bonemen failing to find peace after death. They have modest health but roll 2 dice in combat. Their special attack is a block, reducing incoming damage by 1.
Draugr
Undead Vikings from a distant past, now bloated corpses wandering through the Swamps. They are stronger than Skeletons, resistant to fire, and their special attack is a poisonous strike. Stay clear of it or defeat them quickly. (Resistant to fire = ignore any fire bonuses from the attacker.)
Fenring
These wolfmen from the cold Mountains have a special frost attack and deal lots of damage. They roll three dice in combat, even in their basic form.
Troll
These humanoids are the first of the large creatures in the game. They reside in the Black Forest. They are strong and should be avoided until you are properly armed. Their special attack strikes right through any armor and deals damage at the same time.
Abomination
The second large creature, an impossible conglomeration of living branches and vines. The Abomination is naturally shielded, reducing incoming damage by 1 for every attack. Like the Draugr they have a poisonous strike as their special ability.
Stone Golem
The strongest of the large creatures, these stone monsters from the Mountains are shielded, very strong, and have a special frost attack. Their high health makes them a formidable foe.
Equipment Overview
A visual reference gallery of the tools, weapons, and armor cards; see the "Icons" and "Craft equipment or furniture" sections above for how to read and use them.
Food Overview
A visual reference gallery of the food cards and Haldor's trade cards; see "Cook food," "Eat prepared food," and "Trade with Haldor" above for the associated rules.
Furniture Overview
When a player in the house spends a crafting action to build furniture, they pay the resource cost indicated on the furniture sheet, and place the piece of furniture in the house. Some pieces of furniture grant benefits to players who end their turn in the house while others unlock new actions like fermenting, igniting, and fabricating.
- Rug: when you end your turn in the house, you may gain 1 stamina.
- Bed: when you end your turn in the house, you may gain 1 health.
- Throne: when you end your turn in the house, you may add a reroll token to 1 of your reroll slots on your character board (max. 2).
- Beehive: spend 1 action in the house to gain a honeycomb token. Honeycombs take up any consumable space on your character board.
- Fermenter: spend 1 action in the house to gain any mead token of your choice. Add the token to 1 of the mead slots on your character board (max. 2).
- Table: you may now reveal up to 2 food cards with 1 cooking action.
- Cauldron: the bottom benefits of all food cards may now be chosen instead of the top benefits.
- Fire table: you may spend 1 action in the house and 1 resin to add a fire token to your tool or weapon (remember: max. 1 fire token per tool/weapon).
- Bomb table: spend 1 action in the house to gain any bomb token. Add the token to 1 of the bomb slots on your character board (max. 2).
- Ship: if you are standing on a space adjacent to water, you can spend 1 action and the necessary resources to build a ship and place it on the water touching your space. It may be used to sail across bodies of water.
(Each piece of furniture has a resource cost shown on the furniture sheet.)
Skills Overview
A visual reference gallery of the power of Odin skills, trait skills, and occupation skills.
- Power of Odin skills — available to use from the start (see "Skills" above).
- Trait skills — the task needs to be done 1 time to unlock the skill.
- Occupation skills — the task needs to be done 3 times to unlock the skill.
Icon Overview
- Health
- Stamina
- Reroll
- Mead
- Bomb
- Equipment
- Two-handed equipment
- Ranged
- Defense
- Area of effect
- Armor piercing
- Frozen
- Poisoned
- Haldor
- Movement
- Crafting
- Collect resources
- Player's attack
- Table
- Fire
- Cauldron
- Food
- Event card
- Defeated
- Honeycomb
- Trait skill
- Occupation skill
- Altar
- Special effect
- Creature damage
- Abomination
- Draugr
Turn Reminder
- Actions: You are the active player. Once you have taken 3 actions, your turn ends automatically.
- End of turn: Apply any end-of-turn furniture benefits.
- Event: Draw the next event card and resolve it. If there are gifted items or counter cubes on the deck, remove 1 of those instead.
- Next player: The next player in clockwise order is now the active player.