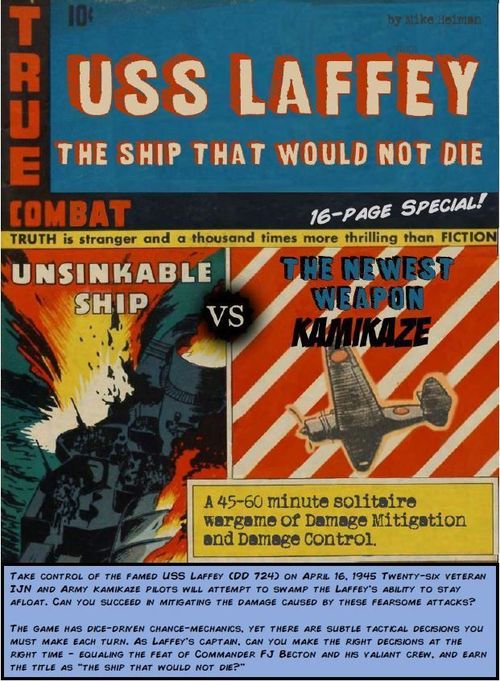
USS Laffey: The Ship That Would Not Die
USS Laffey: The Ship That Would Not Die Rulebook
Table of Contents
Table of Contents
- Object of the Game
- Component List
- Game Setup
- Reading your game Spread
- Turn Sequence
- Phase 1 – Assign Damage Control Teams
- Phase 2 – Aircraft Attack
- Phase 3 – Planning
- Phase 4 – Resolve
- Phase 5 – Leak Spreads
- Phase 6 – Fire Spreads
- End of Round
- Four Variations of Play
- 2-4 player Cooperative variation
- Marking up your sheet
Object of the Game
To Win: Complete a Round with no enemy aircraft left to act in next Round's Phase 2.
To Lose: Either take 8 damage to your Bridge, or 8 damage to any two other Compartments.
Component List
- 16-page Game Book
- 1 Red Pencil
- 1 Blue Pencil
- 1 Black Pencil
- 2 Blue Cubes
- 1 Green Cube
- 1 Red Cube
- 1 Red d10
- 6 d10s (not Red)
- 1 d6
- Pad of Aft Player Sheets
- Pad of Fore Player Sheets
Game Setup
Setup for a standard Game – at Commander level
1 – Set up your notepads with the Aft of the ship on the left and the Fore on the right. This is your Spread where you will allocate damage.
2 – Place the two Blue Cubes (which represent your Damage Control Teams) on the two Blue Cube spaces at the Battle Dressing Station (5) in the Aft of the Ship. Only one Blue Cube can be assigned to a blue/white rounded box. Two cubes cannot occupy the same box and the only Compartment with two boxes is the Battle Dressing Station.
3 – Place the Red Cube (which represents the enemy aircraft's Target Compartment) nearby for now.
4 – Place the d6 with the 4-pip up in the Storage Box in the Phase 1 space on the Fore page. This is your emergency Supply.
5 – Roll a d10 to determine the starting Aircraft in Phase 2. Count the number of aircraft after the upper left ICHI aircraft and circle it. That will be the starting attack. If you rolled a 1, it would be the ICHI fighter and the aircraft would attack you in historical accuracy.
6 – Place the d10s and pencils nearby.
Setup diagram callouts
- Set your d6 here showing a 4. You start with 4 Supplies.
- Place your Blue cubes in these Blue boxes to gain that Benefit Action. At the start of the game, place them in the Battle Dressing Station (Aft #5).
- A three was rolled during Setup so this Aft-facing Val will be the first to hit the ship, with a Leak, Fire, and Debris.
- Place the Red cube in these red boxes to ID the Target Compartment and suffer the Penalty Action.
- As you roll your d10s during Planning, you will arrange them over the corresponding numbers here. You will remove the dice as you Resolve them in the next phase.
- Place the Red d10 here only when you use Clear Skies.
- This purple-outlined Compartment is midship and can be hit from Aft or Fore.
- This red-outlined Bridge is vital because once it's destroyed, you lose the game.
- These Bridge Actions are used by marking off all of the Stars of a cell during Phase 4. You then immediately gain the action before continuing. After using the action, X out the cell.
Reading your game Spread
Your ship is made up of 19 areas called Compartments, each with 8 Health. 9 Compartments are Fore (right sheet) and 9 are Aft (left sheet). 1 Compartment—Fuel Tanks—is midship and occupies both Fore and Aft through a Target Compartment die roll of 10. If a Compartment loses all of its health, it's destroyed. Consider the area a void. No damage can be applied to the area and you cannot assign Damage Control Teams there. It also doesn't negate damage. If you roll the Compartment during Phase 2, reroll until you get a valid Compartment.
When applying damage to a Compartment, draw over or fill in the gray bubbles with the type of damage. If it's Fire, draw a red circle around the gray bubble. If it's a Leak, draw a blue square around a gray bubble. If it's Debris ⚫, fill in the bubble with black pencil. When it's an Explosion fill in a bubble with black pencil ⚫ and then fill in a bubble in each adjacent Compartment with black pencil as well.
When you repair Fire or Leak, you change it into Debris. Fill in the Circle or Square with black pencil.
If the Battle Dressing Station is destroyed, you might lose Damage Control Teams during the game.
Turn Sequence
Phase 1 – Assign Damage Control Teams Move your Blue Cubes to any two separate compartments. Activate the Compartment's abilities. Then you can use Supplies while at those locations to repair and absorb damage.
Phase 2 – Enemy Aircraft The next Aircraft with Damage pips still remaining attacks the ship. Place the Red Cube on the red box attached to the Target Compartment to remind you of the penalty. Transfer the damage from the pips to the Compartment, then perform the penalty.
Phase 3 – Planning Roll 6d10 (not the red one) and lock as many as you want. You can reroll unlocked dice two times.
Phase 4 – Resolve Results are resolved in ascending order (from 1-10). If there's ever a conflict of which to resolve, you choose the order.
Phase 5 – Leak Spreads A Leak in a Compartment spreads.
Phase 6 – Fire Spreads A Fire in a Compartment spreads.
End of Round If a Blue cube is in the same compartment as a Red cube, move the Blue cube to the Battle Dressing Station. It will stay at the Battle Dressing Station next round to heal. Move the Red cube off of the Spread.
Phase 1 – Assign Damage Control Teams
At the beginning of the Round, place your Damage Control Teams (DCTs) on two separate Compartments. Place the DCT cubes on the blue/white rounded icon box for the correct Compartment. The DCTs cannot occupy the same Compartment, except the Battle Dressing Station (which has two blue Icon boxes).
You may use one Supply immediately to repair all Fires and Leaks in the occupied Compartments. To repair, fill in the Fire Circle or Leak Square with black pencil. Damage is never removed, only downgraded to Debris.
Whenever you use Supplies, reduce the Supplies from the number on the d6 Supplies. You will also be able to use Supplies on Phases 5 and 6 to prevent and absorb damage.
After using Supplies, gain the Benefit Action of the Compartments' icons. You may choose the order in which you gain them.
Iconography for Benefit Actions
- Skip Phase 5.
- Fill any two Stars on the Clear Skies table.
- Lock one of your d10s to a 4 before rolling Phase 3.
- This Compartment is immune to all Damage (including spread) this round.
- Wounded DCTs go here. No Benefit Ability.
- Immediately repair one Leak anywhere.
- Immediately repair one Fire anywhere.
- Gain 1 Supply.
- Include the Red d10 to your pool during Phase 3. Ignore results of 9 – 10 on the Red D10.
- Reroll any die (even locked) once before Phase 4.
- The DCT may respond to all adjacent Compartments during Phases 4, 5, and 6.
- Lock one of your d10s to a 1 before rolling Phase 3.
When a compartment has taken 7 damage, you might not want to move your Damage Control Team away from there. One more damage of any type might end the game.
Example: The Forward Magazine and Ammunition compartment already has 7 damage. One more point of damage ends the game. The player decides to keep a Damage Control Team there. However, there's only one more Supply left. He can only fill in one Fire circle here changing it to Debris. Meanwhile, the Stern has a Fire and two Leaks that could be turned into Debris for the same cost.
Phase 2 – Aircraft Attack
Transfer pips of damage from the next aircraft with pips to the U.S.S. Laffey by drawing Circles, Squares, or filling in bubbles while marking out these from the attacking aircraft.
The next aircraft (clockwise) with at least one damage pip remaining will be resolved even if multiple planes were shot down on the previous turn.
The aircraft attack the side (Fore, Aft) of the ship they are facing. If the plane's silhouette is facing to the left, it will target an Aft Compartment. If the silhouette is facing to the right, it will target a Fore compartment. Then roll the red d10 to find the Target Compartment. Place the Red Cube on the red rounded icon box to remind you of the Compartment for the rest of this round.
You divide the damage pips on the aircraft between the Target Compartment and one adjacent compartment of your choice as equally as possible. Do this by filling in the gray bubbles on the Compartment with the correct damage types (Fire, Leak, or Debris ⚫). For Fire, use a red pen and draw a hollow circle over the bubble. For Leak, use the blue pen to draw a hollow square over the bubble. For Debris ⚫, use a black pen to fill in the bubble. If the damage is an Explosion, use a black pen to fill in a bubble on every adjacent Compartment. As you fill these in, put slashes through the pips on the aircraft, marking off the damage.
If there's an odd number of damage pips on the aircraft, the Target Compartment will have one more damage than the other. Explosions must be placed on the Target Compartment.
The Bridge can never have Leaks assigned to it.
After the damage is resolved, complete the Penalty Action for that Compartment according to the icon.
If the Red Die has been assigned to the flag through Clear Skies, remove the die and skip this phase.
Iconography for Penalty Actions
- Start a Leak in the Target Compartment or adjacent Compartment where no DCT exists.
- Start a Fire in the Target Compartment or adjacent Compartment where no DCT exists.
- Mark out any two Clear Skies cells as if they have been used.
- Ignore all 5s during Phase 4.
- Move one DCT to this Compartment next round.
- Roll one fewer die during Phase 3.
- Ignore all 3s during Phase 4.
- Lock one of your d10s to a 10 before rolling Phase 3.
- Lose 2 Supplies
- Mark out any FM-2 Wildcat cell as if it had been used.
- You may not use Bridge Actions to mark out Stars this round.
- All 6s are treated as 9s this round.
Know your enemy!
This Val's silhouette is facing left, so it will target an Aft Compartment.
Each aircraft type has a unique feature:
Aichi D3A2 "Val" — The outdated Aichi D3A2 Val was a cutting-edge dive bomber when used at Pearl Harbor. However, it was primarily used as a combat trainer by 1945. The first "divine wind" pilots flew this aircraft. These are the most common kamikaze aircraft used against your ship.
Yokosuka D4Y4 "Judy" — The Yokosuka D4Y4 Judy was a dedicated kamikaze version of the aircraft with a non-detachable 800-pound bomb. The tactic for this plane was to fly low to avoid radar, then climb sharply to dive bomb as close to midship as possible. These aircraft have an Explosion pip representing their welded bomb.
Nakajima Ki-43 "Oscar" — The Nakajima Ki-43 Oscar had drop-tanks, with 200 minutes of full throttle fuel time, which allowed it to strike from Nagasaki and Formosa. Their excellent maneuverability and veteran pilots made this aircraft quite difficult to hit. That is represented by having 4 damage pips.
Nakajima B5N "Kate" — The Nakajima B5N Kate heavy dive bomber carried a 1,760-pound bomb, making it one of the deadliest aircraft sent towards the Laffey. It's high ceiling and attack vector makes them difficult to target with 5-inch cannons. Lucky for the Laffey, the Kates were intercepted and destroyed by Wildcats and Corsairs from the USS Shamrock Bay before they ever reached its target.
If left undamaged, this Kate will do 2 Explosions worth of damage to a Fore Compartment.
When you do damage to an aircraft with AAA, you must always mark out damage from left to right. When the aircraft impacts, it only does damage for the pips remaining.
Compartment notes
- Subsequent attacks against Communications reduces the amount of air support available.
- An attack against the Magazine and Ammo compartments will knock your 5-inch Guns offline for the turn.
- If the Bridge is destroyed, you immediately lose the game.
- When the Engine Room is the Targeted Compartment, expect more Fires!
- The compartment nearest midship are the most vulnerable and have the greatest penalties. A roll of 10 for either Aft or Fore will hit the Fuel Tanks. Protect this Compartment at all costs. (The actual fuel tanks are located at the blue arrow.)
- You can refill your Supplies by sending a DCT to the Bosun's locker Storage Compartment.
- The Rudder Penalty reduces that chances of getting a breather, by rapidly removing your Clear Skies option.
Phase 3 – Planning
Roll the six d10s and use up to two rerolls.
After the first roll, set aside any dice you do not wish to reroll (these will likely be your lower numbers). If you set aside (or lock) all of your dice, go to the next phase.
Reroll any dice you haven't set aside and then choose to set aside any of those dice. If you set aside (or lock) all of your dice, go to the next phase.
Reroll any dice you did not set aside a second, and last time.
After this third roll, all dice are locked regardless of the results.
Phase 4 – Resolve
Resolve the dice rolled in Phase 3 in ascending order starting with 1 and ending with 10.
1 = Bridge These dice will be used as either WILDS, BRIDGE ACTIONS, or a little of both.
2 = Hose. You may extinguish a number of Fires anywhere in your ship equal to the number of 2s (and assigned 1s) rolled. You use a black pen to trace over the Red Mark and then fill in the bubble.
3 = Wrench. You may fix a number of Leaks anywhere in your ship equal to the number of 3s (and assigned 1s) rolled. You use a black pen to trace over the Blue Mark and then fill in the square.
4 = AAA. The 20mm and 40mm guns reduce the damage of the next enemy aircraft to hit you. Mark-out a number of damage pips on the enemy aircraft equal to the number of 4s (and assigned 1s). You must mark out the damage pips from left to right regardless of the facing of the aircraft). Extra damage continues over to the next aircraft in clockwise order.
5 = 5-inch Guns. The total number of hits must be divided between two adjacent aircraft anywhere. Kates are immune to these attacks.
4s and 5s will destroy enemy aircraft.
6 = Glancing Blow No damage. No positive or negative effect.
7 – 8 = A Leak Bursts Add a Leak to the Target Compartment or any of its adjacent Compartments by drawing a Blue square over the gray bubble.
9 = Fire Starts Add a Fire to the Target Compartment or any of its adjacent Compartments by drawing a Red circle over the gray bubble.
10 = Explosion Add Debris ⚫ to the Target Compartment and every adjacent compartment by filling in one bubble in each Compartment with black pencil.
Bridge Actions
Each 1 can be used to mark out any Star in the Bridge Action tables. When all Stars from a given cell have been marked out, the Action for the cell should be used immediately. Then put an X over the used cell.
SUPPLIES. These are the quickest actions to purchase. The first four Supplies only costs one Star each.
CLEAR SKIES. Gaining a Clear Skies allows you to skip the next Phase 2. Lock the Red Die on the Rising Sun flag in the middle of the Phase 2. Instead of attacking with the next aircraft, simply remove the Red Die from the board and put it aside -- ready to attack the following round. The first Clear Skies costs three Stars, and each Clear Skies is more expensive than the previous. Multiple strikes to your Rudder will quickly diminish your ability to get Clear Skies.
FM-2 WILDCAT: These fighters from the U.S.S. Shamrock will intercept and destroy any enemy Phase 2 Aircraft and apply one damage to an adjacent Japanese plane.
Phase 5 – Leak Spreads
One Leak in any Compartment spreads. If there are no Leaks anywhere on your ship, ignore this result.
The Bridge can never be assigned a Leak.
To spread a Leak, draw another blue square (Leak) around an adjacent Compartment below the current Leak. If there is no Compartment below, draw a Leak in the adjacent Compartments to the left and right.
If a Leak spreads into a Compartment where a DC Team is located, the DC Team can immediately use a Supply to cancel it.
Phase 6 – Fire Spreads
One Fire in any Compartment spreads. If there are no Fires anywhere on your ship, ignore this result.
To spread a Fire, draw another red circle (Fire) around a Compartment above the current Fire. If there is no Compartment above, then the Fire is an Explosion instead. In this case, draw Debris (by filling in gray bubbles) in each adjacent compartment.
If a Fire spreads into a Compartment where a DC Team is located, the DC Team can immediately use a Supply to cancel it. The Fire in the Target Compartment would still exist though.
If an Explosion happens and sends Debris to a Compartment with a DCT in it, a Supply can be used to cancel the Debris damage.
End of Round
Remove both Blue Cubes unless one is in the same Compartment as the Red Cube. If it is in the same Compartment, place that Blue Cube in the Battle Dressing Station for next Round.
If there are no more aircraft in Phase 2, you win the game! If there still are, you must start a new Round and repeat Phases 1-6.
Destroy a Shamrock marked aircraft if you're playing on the Ensign or Lieutenant level and have destroyed all aircraft before the first Shamrock.
Four Variations of Play
The rules explained in the previous pages are for a medium difficulty referred to as Commander Level.
If you would like a more historically accurate game, use the rule changes for Lieutenant Level.
Use Ensign Level for the easiest and fastest game.
Or if you're in for a real challenge, try to survive Captain Level.
Ensign level variation
Without the brave pilots of the USS Shamrock Bay, the USS Laffey surely would've been sunk.
Do not roll the die to determine the starting plane. You start the game at the Ichi Val plane attacking first. Once all enemy aircraft without the Shamrock clover icons are destroyed or resolved, the USS Shamrock will intervene by sending its F4U Corsairs to shoot down enemy fighters.
At the beginning of the turn (in which all non-Shamrock aircraft are already eliminated) place the green cube on any aircraft with a Shamrock Icon. That aircraft is destroyed if it still exists at the end of the turn.
Then move the cube to another aircraft.
Continue this action until the end of the game.
This "NO 5s" icon is a quick reminder that the 5-inch guns cannot affect the Kate torpedo bombers.
Lieutenant level variation
This is the most historically accurate. Use the same rules as Ensign Level except you start the game with only 1 Supply instead of 4.
Commander level
This is the base game as explained in the rules. The Corsairs from the USS Shamrock are not used.
Captain level variation
This is the base game but with only 1 Damage Control Team.
2-4 player Cooperative variation
You can play this with a few friends as you work together to shoot down aircraft, but you still must focus on keeping your ship afloat.
Each player will need their own copy of the game, or just the multiplayer Add-On consisting of the extra dice and cubes/minis.
Although not assigned the same Picket Duty, four other Sumner class destroyers were part of Task Force 54 with the Laffey at the Battle of Okinawa:
- USS Abele
- USS Zellars
- USS Barton
- USS O'Brien
Have your friends take command of one of those as you work together to survive an onslaught of Japanese Aircraft. Give each player a fore sheet and aft sheet as their own ship.
The goal of the cooperative game is for everybody to survive. If one ship is sunk, then everybody loses. However, the Cooperative Gameplay rules give the players an edge when working together as a squadron.
Before starting the game, you must choose what difficult everybody will play.
Gameplay is simultaneous, but with the added rules that your 5-inch guns can help cover other players' ships, and friendly aircraft can be against any enemy aircraft on anybody's sheet.
Cooperative Gameplay
Phase 1 - Each player simultaneously determines the placement of their Damage Control Teams on their own sheets. This decision may be different for each player.
Phase 2 - Each player rolls a Red Die and applies it to the target compartment on their own ship. Take turns with the game's included Red die if it's the only Red die available.
Phase 3 - The player with the highest rolled number during Phase 2 rolls the dice during Phase 3. If there's a tie for highest result, choose one of the players to roll for Phase 3.
Phase 4 - Each player simultaneously resolves the dice rolled in Phase 3 on their own sheets. This decision may be different for each player.
However, the 5-inch guns can hit any aircraft anywhere – including on another player's sheet. If you see that the USS Barton has a couple of explosions heading his way on the next aircraft, you can use your 5-inch results on those aircraft. Also, Wildcats gained by the Bridge action can be sent to other players' sheets. "Clear Skies" still only affects the player who chose it though.
Phase 5 - Each player simultaneously determines how Leaks spread on their own sheets. This decision may be different for each player.
Phase 6 - Each player simultaneously determines how Fires spread on their own sheets. This decision may be different for each player.
Cooperative play at Ensign and Lieutenant Levels: You can choose to assign your Wildcats and Corsairs to intercept aircraft on other players' sheets. Corsairs can still only attack Shamrock planes and still only come into the battle later in the game.
Marking up your sheet
You will make permanent marks on your Game Spread in pen or pencil. Those marks should look like this…
- The Circled Aircraft shows that it was the first plane to make an attack during this game. Since the first plane always hits, all three damage pips are marked off.
- This Val (brown silhouette) is facing left so it'll attack Aft and only do 1 pip of Debris damage. The Leak and Fire have already been marked off. You must always mark off pips from left to right regardless of the type of pips.
- Compartment 4 (Crew Quarters) has an active Fire in it. Since there is no Compartment above it, the Fire could cause an Explosion and do one Debris damage to itself and each of the adjacent Compartments.
- Compartment 5 (Battle Dressing Room) has an active Leak in it. If the Leak spreads, it can create another Leak in either Compartment 8 or 9.
- The first Wildcat cell has an X over it and has been used. The second Wildcat has two Stars marked off. It needs to mark off the remaining four Stars in the cell so it can be used.
- Compartment 8 (Engine Room) has one Debris in it. You can see that it used to be a Leak but has since been repaired.
- Compartment 9 (Aft Fire Room) has one Debris damage in it.
- The Japanese aircraft attack during Phase 2 targeted the Communications Compartment. The Penalty Action is to X out an unused Wildcat cell.