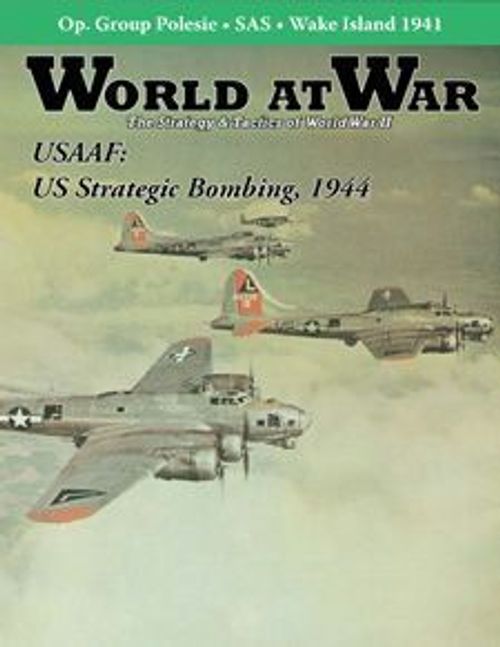
USAAF: US Strategic Bombing Operations Over the Third Reich, 1944
USAAF: US Strategic Bombing Operations Over the Third Reich, 1944 Rulebook
Table of Contents
Table of Contents
- 1.0 How to Read Aircraft Units
- 2.0 How To Win
- 3.0 Setting Up
- 4.0 US Mission Planning
- 5.0 US Free Escort Airfield Strafing Missions
- 6.0 US Free Escort FLAK Busting Missions
- 7.0 Stacking
- 8.0 Turn Sequence
- 9.0 German Aircraft Endurance & Other Movement Limits
- 10.0 German Aircraft Staging
- 11.0 Further Movement Rules
- 12.0 Luftwaffe Withdrawal
- 13.0 US Mission Abort
- 14.0 German Interceptions & Swarming
- 15.0 Air-to-Air Combat Resolution
- 16.0 Further Combat Strictures
- 17.0 US Tight Escorts in Combat
- 18.0 Fog of War
- 19.0 Bombing & FLAK
- 20.0 Bombing
- 21.0 US Aircraft Replacement & Reinforcement
- 22.0 German Aircraft Production & Fuel Index
- 23.0 Game Turn 3 Special Rules
- 24.0 FLAK Movement & Replacement
- 25.0 Charts & Tables
1.0 How to Read Aircraft Units
- 1.1 US Fighter Groups
- 1.2 US Bomber Wings
- 1.3 German Interceptor Groups
1.4 Note that some counters of different aircraft models have the same unit identifiers printed on them. That represents the fact several units went through equipment changeovers during the campaign while retaining their original designations. The simulation allows players as much freedom as realistically possible in constructing their force pool. Thus it’s possible to have two counters in play with the same designation on them (though they will always be of different aircraft types). Players needn’t worry about making the same “true unit designator” (TUD) changes as occurred historically; the overall counter-mix accurately represents the maximum deployment limits of each type and model of aircraft.
1.5 The uses and meanings of the other markers (“chits”) included in the counter-mix are explained at the appropriate places in the rules below.
2.0 How To Win
2.1 Historical Background
The best estimates today have it that the war in Europe most likely would have continued for about 24 months after February 1944 had it not been for the cumulative effects of the Allied strategic aerial offensive against the Germans. That means the war was most likely shortened somewhere between 13 and 15 months by the effects of the campaign. We say “most likely” and “somewhere between” because we can’t be more certain. That is, starting at the end of 1944, the Western Allied and Soviet ground advances began to blend their resource-denying effects with the successes being scored by the bombers. Where precisely the effects of the one effort picked up and the other left off is, and will likely always remain, a matter of debate.
2.2 History into Game
We can, however, use that December 1944 cut off date to our advantage. We know for certain that, prior to that time, any collapse of the German war effort would mostly certainly have been due to the bombings’ effects. If the “Bomber Barons” were to prove they could win a war with their planes alone, they had to do it by that date. Thus would-be Bomber Barons in today’s wargaming hobby must also bring their efforts to fruition by that time in the game.
2.3 How to Win
At the start of play, put the “24” number-chit in the blank space on “War Now Ends” Table on the mapsheet. That means the chart will read: “The War Now Ends ‘24’ Months After February 1944.” At the end of each game turn, adjust that number according to the results of the events just simulated on the game board. If, at the end of Game Turn 10 (December 1944), that number is 12 or less, the US player has won the game. If the number is 13 or 14, the game is reckoned a draw (the historic outcome). And if the number is 15 or more, the German player has won.
2.4 Game Turns
In general, each “game turn” represents the cumulative effects of one month of aerial operations. Note, though, Game Turn 3 by itself represents two calendar months. That’s because a large portion of US aircraft strength was drawn away from this campaign during that time in order to assist in the battlefield preparation for the D-Day landings. During Game Turn 3, all normal rules are followed, except for a few changes noted at particular places below.
2.5 Game Length
There are a maximum of 10 game turns to each overall campaign. It’s possible, however, one player or the other will realize victory is no longer possible prior to that absolute cut off date and capitulate.
3.0 Setting Up
3.1 FLAK Set Up
The German player should begin by setting up his initially available FLAK units in any combination of target city hexes he chooses. The only limitation is no more than four strength-points of FLAK may be set up in any one city hex, and no FLAK unit may be set up in any kind of non-city hex.
The initially available FLAK units are all those that have no number printed in their upper-left corners. Those units with numbers in their upper-left corners are reinforcements and will come into play during the game turn corresponding to that number (or maybe they won’t). For example, the 2nd FLAK Division has a “2” printed in its upper-left corner. That unit will therefore not enter play until the start of that game turn.
Note that FLAK divisions have printing on two sides, a “full-strength” side of “2” and “reduced” side of “1.” All FLAK divisions begin play with their full-strength side showing upward, and all FLAK division reinforcements also come into play in that way.
3.2 German Aircraft Set Up
Next the German player takes one Ju88, four Me109G, three Fw190A and two Me110 counters and deploys them, no more than three per airfield hex, on any combination of airfields printed on the map. Place them upside down, with only their text-sides showing, to indicate they’re presently on the ground. The German player should then temporarily set aside his other units; they may be brought into play later via the production rules.
3.3 Allied Set Up
Next the Allied player takes six B17, four B24, 10 P47, two P51 and three P38 units and puts them in an easily reached location just off the map near the “Allied Entry/Exit Hex.” He should temporarily set aside his other units; they’ll be brought into play later via the reinforcement rules.
3.4 Initial US Target System Selection
Next the US player should take the target system chit printed “Air,” indicating the aircraft production target system is available for attack by that side from the very start of play. He should then put the remaining target system counters into a large-mouth opaque container, such as a coffee mug, and then pull two more chits from without looking at them. After the second and third target system chits have been pulled, the US player may look to see what they are, but he should be careful not to let the German player see them (and see 20.4 for more details).
4.0 US Mission Planning
4.1 Once the steps described above have all been carried out, the German player should leave the room, or simply turn away from the map, in order to allow the US player to conduct his mission planning.
4.2 Plotting Bomber Missions
In general, the US player may direct his bombers against any cities he chooses, since they’re free to range over the entire map. Note, though, every US aircraft unit still on the map at the end of Mission Turn 18 thereby lengthens the war by one month. That allows time to get to, and return from, any target on the map, but there can’t be any aimless “zooming.” Further, the US player may strike only cities that are part of one or more of his three starting target systems (referring back to the three chits selected during set up). To indicate which bomber units are going where, on the USAAF Bombing Missions Chart (see section 25.0), draw lines from each bomber unit’s TUD to its target city, and then also circle (or otherwise highlight) the target system within each city that’s to be struck once there.
4.3 Fighter Escort Assignments
No target destinations are plotted for US fighter units. They’re free to roam the map at will, but keep in mind the maximum 18 mission turn limit also applies to them. More specifically, fighters may be assigned to “tight” or “free” escort. That first kind of escort duty (tight) is indicated by placing those fighter counters beneath the bomber counters they will escort. Such fighters remain with their assigned bombers all throughout the mission. During Game Turn 1, US fighters may be assigned only to tight escort.
4.4 No US bomber may have its target city, or target system within a city, changed once it’s been put on the planning sheet. Target switching occurs only during the planning portion of each new game turn, which is finished prior to any US aircraft entry onto the map.
5.0 US Free Escort Airfield Strafing Missions
5.1 The US player may begin conducting “free escort airfield strafing missions” during Game Turn 2. At that time, prior to any other US planes moving onto the map, the US player should total the combat strength of all the fighters to be sent on the strafing mission, then, using a German defense strength of 10, calculate and resolve (see below) one battle on the Air-to-Air & Air-to-Ground Combat Results Table printed on the mapsheet.
5.2 The US player selects his losses (if any) from among the fighters assigned to the strafing mission. The German player extracts his losses from any planes he has anywhere on the map. US fighters used for strafing are out of play until the start of the next game turn, when they may again be reassigned to that or another kind of mission at the choice of the US player.
5.3 On the CRT, the numbers to the left of the slash are the loss results, given in terms of units lost, for the strafing US units; those to the right are the loss results, again given in terms of units lost, for the Germans.
6.0 US Free Escort FLAK Busting Missions
6.1 The US player may also begin conducting “free escort FLAK busting missions” during Game Turn 2. At that time, prior to any other US planes moving onto the map, the US player should total the number of fighter groups to be sent on each FLAK busting mission, totaling one combat factor per unit assigned, then, using a German defense strength equal to the FLAK strength in the FLAK hex to be strafed, calculate and resolve (see below) one battle on the Air-to-Air & Air-to-Ground Combat Results Table printed on the mapsheet. The US player selects his losses (if any) from among any of the fighters assigned to each particular FLAK busting mission. The German player extracts his losses from each particular FLAK hex so attacked. Note: there is no “stacking limit” involved in FLAK busting; any number of available fighters may be sent on any one mission.
6.2 US fighters used for FLAK busting are out of play until the start of the next game turn, when they may be reassigned to that or another kind of mission at the choice of the US player.
6.3 The US player may choose to conduct both FLAK and airfield strafing missions during the same game turns, but no single unit may be assigned to more than one type of mission per game turn. Also note airfield strafing is conducted in one generalized battle each game turn, while FLAK busting is done on a hex-by-hex basis. The US player may try to bust more than one FLAK hex per game turn; the only limit is his willingness to use up fighters in that way. If both types of mission are to be flown during the same game turn, conduct airfield strafing first, followed by FLAK attack(s). All FLAK attacks for a given game turn must be declared before the first is resolved. No given fighter unit may participate in more than one FLAK attack per game turn.
6.4 On the CRT, the numbers to the left of the slash are the loss results, given in terms of units lost, for the strafing US units; those to the right are the loss results, given in terms of FLAK factors lost, for the Germans.
Note: The US player must designate his “Flak Busting” and “Airfield Strafing” fighter units at the same time, which is prior to resolving all those missions.
7.0 Stacking
7.1 Piling more than one aircraft unit into the same hex at the same time is called “stacking.” In general, both players may have up to six aircraft units in any hex at any one time. More particularly, on the US side there may never be more than six bombers in any one hex at any one time, while there may never be more than three fighter units assigned to tight escort with them. The American player may assign three fighters assigned to just one or two bombers, but there may never be than three fighters together with a maximum six bombers at the same time in one hex.
7.2 FLAK Stacking
The German player may have up to four strength points of FLAK in any hexes at any time. His FLAK stacking and aircraft stacking limits are mutually exclusive and don’t affect each other in any way.
7.3 Units of the opposing sides may occupy the same hexes at the same time. In such situations both sides’ stacking limits are mutually exclusive and don’t affect each other in any way.
7.4 When traveling together as a stack, all the units in a stack must use the movement factor of the slowest unit within it.
7.5 Both players are free to rearrange the composition of their stacks within the limits above during each mission turn. For more details, see rule 11.1.
8.0 Turn Sequence
8.1 After all of the above steps have been completed, the US player moves his aircraft counters onto the map. All US units enter play via the same entry/exit hex, paying one movement point for each hex entered, counting from the very first hex entered. No German movement is allowed during that process. Stacking, in effect, doesn’t count during US aircraft entry onto the map; all the planes are considered to enter at the same time, and need only be sorted out into properly stacked forces at the end of their movement onto the map. All US units that will participate in this game turn must enter the map during Mission Turn 1; any held back are considered unavailable until the next game turn.
8.2 After the US player has moved, the German player moves. When a German aircraft unit takes off, it’s flipped over so its iconic side shows upward. That turn its movement factor is reduced by one as it climbs to altitude. Not all German planes need take off during the same mission turn. They may be launched or held in place on the ground at their commander’s discretion.
8.3 The overall sequence of steps for each game turn is given below in outline. Go through it the same way each game turn. Note that, in each game turn, steps IV and V are repeated in that order, up to 18 times each, prior to going on to steps VI, VII and VIII. Each repeat of steps IV and V together constitute one “mission turn,” of which there may be a maximum of 18 per “game turn.” Steps I, II, III, VII and VIII are each performed only once per game turn. Keep track of the Mission Turn and Game Turn currently in progress using the chits provided in the counter-mix by placing them on the turn tracks printed on the mapsheet.
- I. US Mission Planning; German Production & Fuel Index Adjustment
- II. US Airfield Strafing
- III. US FLAK Busting
- IV. US Movement & Bombing
- V. German Movement & Interception Combat
- VI. US Aircraft Replacement & Reinforcement
- VII. German Aircraft Production & Fuel Index Adjustment
- VIII. German FLAK Movement & Replacement
Note: ignore the reference in the outline above to a step VII. Those operations are actually carried out during step I.
9.0 German Aircraft Endurance & Other Movement Limits
9.1 Since the campaign was being fought above German-held territory, Luftwaffe aircraft were designed to maximize combat survivability and firepower. Accordingly, their ability to remain uninterruptedly aloft was curtailed. Every German fighter unit therefore has an “endurance factor” on it. That number represents the number of mission turns it may remain in the air before having to return to an airfield to refuel and rearm.
9.2 Figuring Endurance
Count both the turn of take off and the turn of landing when calculating endurance limits. For example, if a German unit with an endurance factor of “4” takes off on Mission Turn 3, it must land again during Mission Turn 6. Further, no German unit may initiate air-to-air combat during a mission turn in which it must land.
9.3 Tracking Endurance
The German player should keep track of when each of his planes must land by using the “German Planes Due to Land this Mission Turn Chart” provided in section 25.0. Note that once a unit has landed, it’s again free to take off during the next mission turn, figuring its endurance afresh from that time, and that process is repeatable any number of times until all 18 mission turns have been flown or all US planes are off the map, whichever comes first. German planes in the air at that time are all considered to have landed safely at friendly bases.
9.4 Turn Around Limits
No single German airbase may process (“turn around”) a combined total of more than three launching and three landing units per mission turn. Again, there is no limit on the number of German units that may sit at any one German base, as long as the limit of three units taking off and three units landing per mission turn per base is not exceeded.
9.5 All-Sea Hexes
No German unit may ever end its movement in an all-sea hex. They may pass over such hexes, but may not end a move in them.
9.6 Landing Off-Base
German units due to land, but that find themselves without any airbase in range, must still land that mission turn. German units that can land in friendly German territory are out of play for the rest of that game turn, but are automatically returned to play at the start of the next game turn.
9.7 Allied Ground Advance Line
Note that at the start of play all land and coastal hexes on the map are German controlled. At the start of Game Turn 7 (September), however, the historic Allied ground advance comes into effect. From that time on, no German unit may end any move west or south of that line; they may fly over such hexes, but may not end their move there.
10.0 German Aircraft Staging
10.1 German planes that move directly from one airbase hex to another need not worry about endurance. Such moves are called “staging,” and they don’t require the planes doing it to lose a movement point by first climbing to altitude.
10.2 Staging German planes may never initiate combat during mission turns in which they make that kind of move.
11.0 Further Movement Rules
11.1 No Loitering
Planes in the air, of either side, are never allowed to simply “loiter” in place. That is, all aircraft of both sides must move at least one hex per mission turn when they’re aloft. Further, US bombers, and all tight escorts assigned to them, must move by the most direct route to their target city and bomb it as soon as possible. Once a US bomber unit has bombed its target, its movement factor is increased by one point per move (not cumulatively, just one point, total). Again, such units must fly off the map via the entry/exit hex, by the most direct route possible. “As soon as possible,” should always be calculated in terms of whole mission turns, not fractions thereof.
11.2 FLAK Limits
FLAK units that are simply flown over don’t get to take any shots at the passing Americans. US tight escorts are never effected by FLAK shots taken at their bombers. Bombers need pay attention to FLAK only in their target hex.
11.3 No Facing
Note that there are no “facing” rules. That is, planes move in any direction, paying one movement point per hex entered, no matter in what direction their iconic nose is pointing.
11.4 Enemy Fly Through
US bombers, and any tight escorts accompanying them, may fly into and through hexes containing airborne German aircraft units—as well as ones on the ground—without delay or hindrance. The same is true for German fighters flying through hexes containing airborne US units.
11.5 US bombers and their tight escorts never initiate attacks against German fighters; they only defend against German attacks initiated by the German player at the end of all German movement in each mission turn. At those times combat must take place between opposing airborne units in the same hex, with the German fighters always cast as the attackers (but also see section 17.0).
12.0 Luftwaffe Withdrawal
12.1 The German commander may, just prior to the start of any/all US Airfield Strafing Phase(s), decide to make a Luftwaffe withdrawal from the theater. In that case, all German units are considered to “hit the deck” and fly to bases east of the area shown on the map. In such situations, no more Luftwaffe plane losses will take place that game turn. Of course, neither will the US bombers have to contend with any more interceptions.
12.2 A Luftwaffe withdrawal, if one is to be called during a given game turn, is called by the German player just prior to the start of the US Airfield Strafing Phase . Once called, it may not be undone until the start of the next game turn. Within those strictures, only the number of game turns remaining puts any limit on the number of withdrawals the German player may call during each match.
13.0 US Mission Abort
13.1 The US player may call a “mission abort.” That call is, however, an all or nothing decision: either all currently planned bombing missions continue or all are aborted. If an abort is called, all bombers are considered to have jettisoned their bombs without effect, thereby gaining the one movement point increase (see 11.1).
13.2 A US mission abort, if one is to be called during a given game turn, is called by the US player at the end of the German move in the current mission turn. Once called, it may not be undone until the start of the next game turn. Within those strictures, only the number of game turns remaining puts any limit on the number of mission aborts the US player may call during each match.
14.0 German Interceptions & Swarming
14.1 Interception combat takes place after all German movement has ceased for each mission turn. The German player decides the sequence in which he will resolve his individual battles, one hex at a time. Interception combat must take place in all hexes containing both airborne German fighters and US bombers (and possibly also US tight escorts).
14.2 Swarming
If there are no US tight escorts in a combat hex, the German resolves the fight by summing the anti-bomber attack factors of his fighters located there. Then he announces if they will attack one, two, three or more of the bombers present. That is, if there are three US bombers in the hex, he may choose not to attack all three, going after two, or just one, instead. That tactic is called “swarming.” Only the defense factor of the bomber unit(s) actually being attacked will then come into play. Note, though, any bombers not attacked at this time will thereby escape interception unscathed until at least the next mission turn’s German interception combats. No hex may have more than one interception combat resolved in it per mission turn. (Note: if there were US tight escorts present in the hex at the start of the combat, but they were then all eliminated during their counter-interception fight, that does allow the attacking German force the ability to swarm the suddenly escortless bombers in that hex.)
15.0 Air-to-Air Combat Resolution
15.1 Normally the attacking player should strive to have more attack factors involved in a given battle than the defender has defense factors. Such attacks are called “high odds attacks.” To resolve them, the attacking player must first calculate his “odds.” Do that by adding together the combat factors of all the attacking units involved in a battle; then determine the combat factors of the enemy units defending in the battle. Divide the attacker total by the defender total and round down any remainder. For example, 26 attack factors versus 7 defense factors yield an odds ratio of 3:1. That is: 26÷7=3.71, which rounds down to 3. To turn that “3” into a ratio, you must set a “1” next to it on the right. Thus “3” becomes “3:1” (which is read “3-to-1”), which corresponds with a column on the Air-to-Air Combat Results Table.
15.2 Battles in which the attacking force has fewer combat factors than the defender are called “poor odds attacks.” Procedures are modified in that now you divide the defender’s total by the attacker’s; round up remainders, and set the “1” on the left side. For example, a force with 5 attack factors is attacking a force with 11 defense factors. Divide 11 by 5 (11÷5=2.2), and round up (2.2 becomes 3), then set the “1” on the left of that “3,” yielding odds of 1:3.
15.3 “High Odds” and “Low Odds” attacks are simply terms of convenience, good for nothing more than indicating which of the two odds calculating procedures you’ll use for a given battle. It’s possible to have successes with low odds attacks and fiascoes at high odds. In general, though, the higher your combat odds, the better the chances for success in any attack. That is, you want to be attacking on the right side of the CRT. And, of course, in situations where the two sides have precisely the same amount of combat factors involved, no mathematics are necessary; odds will be 1:1.
15.4 To resolve a battle, find the odds column of the CRT corresponding to its odds ratio and roll a die. Look down the proper odds column on the CRT until you cross-index with the number you just rolled. That is your “combat result” for that battle. For example, if you’re attacking at 3:1 and roll a “3,” your result is “1/3.”
15.5 Results to the left of the slash apply to the attacker; those to the right apply to the defender. All results are given in terms of aircraft unit losses to the forces involved. That is, each whole-number increment of the combat result means one aircraft of the affected side must be eliminated. Combat results are applied by the players among their own involved units as each sees fit, defender first. A zero (0) combat result means the involved forces of the side receiving that result are unscathed; there’s no step loss for that side.
16.0 Further Combat Strictures
16.1 No unit of either side may attack or be attacked more than once per mission turn.
16.2 No movement of either side’s units takes place while combat is being resolved.
16.3 No single unit’s attack factor may be split in any way. Each single unit’s combat factor is always unitary in its commitment in each combat in which it participates. When two or more units attack together, their combat factors must be totaled into one combined attack factor for that battle.
17.0 US Tight Escorts in Combat
17.1 If there are no US tight escorts in a hex of US bombers being attacked by German fighters, simply resolve that combat as described above. If, however, one or more US tight escorts are present, their part in the battle constitutes a kind of mini-battle within the larger fight in that hex.
17.2 Procedure
If tight escorts are present, the US player—prior to the German interceptors launching and resolving their attack against the US bombers present—launches his own counter-interception attack against the incoming German interceptors. Such combat is mandatory; tight escorts may never be held back if present. And this type of combat must be resolved prior to the German attack on the US bombers in the hex. Only German units surviving the counter-interception made by the US tight escorts may then attack the US bombers. Further, surviving German interceptors may not choose to break off before hitting the bombers due to a less than satisfactory result obtained during their incoming-combat with the US interceptors. If the German player launches an interception attack into a hex, he must press it to its completion, no matter what that means in terms of overall combat results.
17.3 Bomberless Escorts
If a US tight fighter escort force finds itself without bombers to escort, due to their having been eliminated by successful German interceptors or FLAK, that fighter force simply flies to the exit hex by the most direct route possible. If such US fighters are attacked by German interceptors, they defend themselves normally on the Air-to-Air & Air-to-Ground CRT. That is, in such cases the lone US fighters are immediately the defenders and the German interceptors the attackers. In such cases the German must attack all US fighters in a given hex en masse; he may not swarm against just a portion of them.
18.0 Fog of War
18.1 Both players are always free to examine all the airborne stacks of both sides deployed anywhere on the map.
18.2 The US player may not examine German aircraft stacks on the ground or that staged in their last move.
18.3 The German player may examine the US Bombing Missions Chart at the end of each complete game turn.
18.4 The US player may examine the German Planes Due to Land this Mission Turn Chart at the end of every complete game turn.
18.5 The US player may examine the German Aircraft Production Record at the start of every new game turn after the first.
19.0 Bombing & FLAK
19.1 US bombers strike their targets by ending a move in that target hex. During the mission turn of bombing, each involved bomber’s movement allowance is reduced by one point.
19.2 If FLAK is present in a target hex, its effects are resolved before the bombers determine the effectiveness of their own strikes. To resolve the effect of FLAK in each particular target hex, the US player must declare what his reaction will be to it on a target-hex by target-hex basis. That declaration is made prior to rolling the die and consulting the FLAK Table in each particular target hex. The US player may always choose between the following two options.
-
All involved bomber units will pass safely over the target, but the number of bomber units corresponding to the result obtained by the FLAK die roll are considered to have dropped their bombs without effect.
-
All involved bomber units will press their attack through the FLAK. That means all bomb factors are considered to have been successfully delivered on target; however, the number of bomber units equal to the result obtained from the die roll on the FLAK table are eliminated.
19.3 “What If?” Optional Rule: Double-Fused FLAK Shells
Historically, throughout the war the German FLAK shells aimed at Allied bombers only used fuses set to explode a certain amount of time after they were fired. The Germans had the capability, by the start of 1944, to have included a second—impact—fuse in all those shells; however, Armaments Minister Speer refused to do so. He made that decision on the simple grounds such double-fused munitions would’ve required much more care and security during their shipment from the munitions factories to the FLAK units. As it turned out, when a large-scale combat-trial of the double-fused shells was finally authorized—much too late—in the early spring of 1945, FLAK shoot-down rates tripled. To explore the possibilities inherent in a different decision by Speer early on, allow the German player, all through the game, to make three FLAK die rolls every time the regular rules would allow him one FLAK die roll.
20.0 Bombing
20.1 Destroying Target Systems
On the Target System Planning Table, printed on the mapsheet, there are two numbers next to each target city within each target system. For instance, the “Chemicals” (“Chm”) target system is made up of facilities located in the cities of Cologne, Dusseldorf, Essen, Leipzig and Mannheim. The first number listed for each of those cities represents the amount of “bomb factors” that must be dropped on that city during one game turn to obtain the number of points shown by the second number. For instance, if six bomb factors are dropped on Cologne’s “Chm” component, four destruction points are immediately yielded.
20.2 If, over the course of a given game turn, you successfully deliver enough cumulative bomb factors to cause that target system to be considered destroyed, note that fact and also look to see if there are any ancillary effects for having succeeded against that target system. To use the same example, if, say, prior to the end of 18 mission turns, the US player succeeded in delivering 10 bomb factors against Essen’s chemical component and 30 against Leipzig’s chemicals component, he thereby succeeded in scoring a total of 26 damage points against that entire target system. It is therefore considered destroyed for the rest of the game.
20.3 No Bomb Damage Carry Over
If a given system isn’t knocked out during one game turn, the damage that was inflicted doesn’t carry over to subsequent game turns. The US player must in effect start over against that system. Note, too, excess damage scored against one system within a city doesn’t spill over into any other system within the same city; it’s simply wasted effort.
20.4 Acquiring New Target Systems
Once a target system has been destroyed, allow the German player to see that chit was indeed in the US player’s possession and then set it aside. In such cases the US player will, again without first looking, draw an appropriate number of system chits at the start of the next game turn to bring the total in his possession back up to three. No target system chit may be abandoned (set aside) by the US player prior to its destruction.
20.5 Specific Targets
Note that many target cities have components from different target systems within them. When bombing such places, the US player need not announce which specific system he’s going after until he arrives over the target and makes his strike.
20.6 Sometimes fewer US bomb points will be dropped on a city than the minimum needed to guarantee successful results. In each such situation, consult the “Less Than Minimum Bomb Factors on Target Table” printed on the mapsheet and apply the results obtained there on a case-by-case basis.
20.7 Shortening the War
When a target system has been knocked out as described above in 20.2, the US player should immediately consult the “War Shortened Table,” printed on the mapsheet, and roll a die under the column heading corresponding to that destroyed target system. He should cross index that die roll beneath the proper column heading, and then make any called for number-chit change indicated on the “War Now Ends Table.”
21.0 US Aircraft Replacement & Reinforcement
21.1 This process remains uniform throughout every game turn. That is, at the end of each game turn, the following units are received by the US player, and it makes no difference if they’re drawn from the not-yet-arrived pile or the pile of previously eliminated units: eight P51 units; three P47 units; one P38 unit; four B17 units and two B24 units.
21.2 The counter mix represents the overall availability of units. For instance, if the US player finds he has only seven eliminated or previously unentered P51 units, he may not “carry over,” or in anyway change, that eighth unit into another aircraft type. New and recycled units are brought in, by type, as described above, on a game turn by game turn basis, within the limits of the overall counter-mix. No substitutions are allowed.
22.0 German Aircraft Production & Fuel Index
22.1 The following steps are conducted by the German player at the start of each game turn while the US player is planning his targeting for that turn. These decisions must be made by the German player in the sequence given, and the results are not revealed to the US player until new German aircraft are received at the beginning of the next game turn.
22.2 Normal Production Increases
The German player increases the production of the various German interceptor models already in production by one-third (all remainders are rounded down). For example, if six Me190G units were being produced, that number would be increased by two, to eight. If 10 Fw190As were being produced, that number would be increased by three, to 13 (again, the remainder is lost).
22.3 Halving Aircraft Production
If the US player has destroyed a target system that brings about the “halving” of aircraft production, such reductions are figured by individual aircraft types after the normal increase is first put in place. So, to use the Fw190A example again, after increasing the production number to 13, it would then instantly be halved back down to six.
22.4 It’s possible for German aircraft production to be halved up to four times, by the US destruction of the Abrasives, Aircraft, Ball Bearing and Electrical Power target systems. Continue halving as many times as is appropriate given the current situation. Also note, if a given model production line is (or was) producing at least three units per turn at the time of the first halving, that line may never be reduced below a production level of one, no matter how many times production is otherwise “halved.” See the “Other Effects of Target System Destruction Table” printed on the mapsheet.
22.5 Switching Production
The German player may next modify his production lines if he wishes to do so. In general, to do that he must take two production units, each from the same model already in production, and use them to start or increase one production unit of whatever new type of plane he wishes. For example, if the Germans were already producing eight units of Me109Gs per month, that player could take two of those production units and use them to establish one production unit of TA152s (leaving a production of six Me109Gs). Those new production figures for both models would go into effect at the start of the next game turn.
22.6 The German player should be careful to keep an open written record of all such production changes, which the US player may examine at the start of each new game turn after the first.
22.7 Three for Two
In general, any aircraft type may have its production curtailed in order to initiate or increase that of another type(s), decided by the German player on a type-by-type and turn-by-turn basis. There are, though, some exceptions to the general rule of “two old for one new.” They are as follows.
- Going from Me109G to Me109K units is done at a ratio of three “G” to two “K.”
- Going from Fw190A to Fw190D units is done at a ratio of three “A” to two “D.”
- Going from Fw190D to TA152 units is done at a ratio of three “Fw” to two “TA.”
22.8 Me262 Production
Converting from any aircraft type(s) into Me262 production is done at a ratio of three old production units to one Me262 production unit. Further, no Me262 production may be started until the beginning of Game Turn 4 (June), because the Germans didn’t have a suitable jet engine for mass production until then. Also note extra Me262 counters (those identified with single letters of the alphabet) are provided so players can experiment to find out just how many of those jets would’ve been necessary for the Germans to field in order to fully defeat the Allied bombing campaign.
22.9 German Fuel Index
The German player next decreases his Fuel Index by one. The fuel index starts at 11 and never goes higher than that, only lower. If the US player destroys the Chemicals (Chm) target system or the Electric Power (EP) target system, the fuel index goes down by two points per game turn, rather than one, each game turn for the rest of the game. If the US player destroys both the Chm and EP systems, the fuel index goes down by three points per game turn, rather than two or one, each game turn for the rest of the game.
If the Fuel Index once hits zero, the number-chit in the “War Now Ends Table” is thereafter decreased by one at the start of each game turn. Once the Fuel Index hits zero, no further tracking of it is made; simply remember to decrease the number-chit in the “War Now Ends Table” by one each game turn.
The amount in the fuel index is always known by both players. The amount in the Fuel Index should be kept track of, openly by the German player, on a piece of paper.
23.0 Game Turn 3 Special Rules
23.1 The March/April (Game Turn 3) is a combined game turn. That is, the normal tempo of US operations against the Reich economic infrastructure is curtailed during that period as a result of committing large numbers of bombers to “battlefield preparation missions” in France.
23.2 During that game turn the German player should twice work through the production and fuel index process described above, while the US player gets two replacement/reinforcement cycles (again, staying within overall counter-mix limits).
24.0 FLAK Movement & Replacement
24.1 Prior to the destruction of his Transport Net target system, the German player is free to redeploy his FLAK units, as he sees fit, within any target cities, at the very start of each new game turn (do it just once at the start of Game Turn 3).
24.2 Similarly, prior to the destruction of the AFV & Heavy Weapons target system, he’s free to replace every strength point of previously eliminated FLAK at that time, by flipping reduced FLAK divisions back to their full strength side and by reclaiming eliminated FLAK brigades and FLAK divisions from the dead pile. In the latter case, a reclaimed FLAK division would return at two-step strength.
25.0 Charts & Tables
Players may photocopy or otherwise duplicate the charts and tables on the following pages in order to facilitate their play of the game.
Corrected Target Systems Planning Table (With Berlin)
The Target Systems Planning Table printed on the mapsheet is missing the entries for Berlin. The corrected table, with Berlin, is reproduced below. The Berlin row is the added entry.
| City | Abr | Air | AFV | BB | Chm | EE | EP | GM | Mtl | MV | Sub | SF | SR | Ter | TN |
|---|---|---|---|---|---|---|---|---|---|---|---|---|---|---|---|
| Berlin | 6/3 | 18/18 | 10/6 | - | - | 48/22 | - | - | - | - | - | - | - | 18/17 | 12/11 |